1 C# Resource Helper User Manual V 1.0.0.1 1. The Resource Helper application is a Windows Metro 8.1/10 application used to generate C# resource files and source code to support multiple languages for a Windows Metro application. The application allows a developer to import an existing resource file and use it as a basis for generating files that support another language. The C# code is specifically generated to use with Windows Metro/Phone (8.1 and above) applications. See paragraph 14 to see how to set up your solution to work with the generated code and resource files. The application organizes the resource files by Visual Studio project and, within that project, languages. A project is created by importing an existing language resource (.resw) file, and then cloning the file for each language the project will support. The user can edit the values in each new file to reflect the new language values. The developer can also add new resource items, edit existing items, and delete the items. The application also generates an easily used code interface for the resource elements, allowing access to these elements with one simple method call. 2. Suggested development process. The development process is: a. Create a resource file (.resw) in Visual Studio. b. Start the Resource Helper application. c. Import the resource file using the Add Project function. d. Using the Add Language function, add as many languages as you need. e. Fill in the resource values for the languages. f. When finished i. Generate the code file (once) and add it to your C# project. ii. Generate a resource file for each language and add it to your project.
Transcript
1
C# Resource Helper User Manual
V 1.0.0.1
1. The Resource Helper application is a Windows Metro 8.1/10 application used to generate C#
resource files and source code to support multiple languages for a Windows Metro application.
The application allows a developer to import an existing resource file and use it as a basis for
generating files that support another language. The C# code is specifically generated to use with
Windows Metro/Phone (8.1 and above) applications. See paragraph 14 to see how to set up
your solution to work with the generated code and resource files.
The application organizes the resource files by Visual Studio project and, within that project,
languages. A project is created by importing an existing language resource (.resw) file, and then
cloning the file for each language the project will support. The user can edit the values in each
new file to reflect the new language values. The developer can also add new resource items,
edit existing items, and delete the items.
The application also generates an easily used code interface for the resource elements, allowing
access to these elements with one simple method call.
2. Suggested development process. The development process is:
a. Create a resource file (.resw) in Visual Studio.
b. Start the Resource Helper application.
c. Import the resource file using the Add Project function.
d. Using the Add Language function, add as many languages as you need.
e. Fill in the resource values for the languages.
f. When finished
i. Generate the code file (once) and add it to your C# project.
ii. Generate a resource file for each language and add it to your project.
2
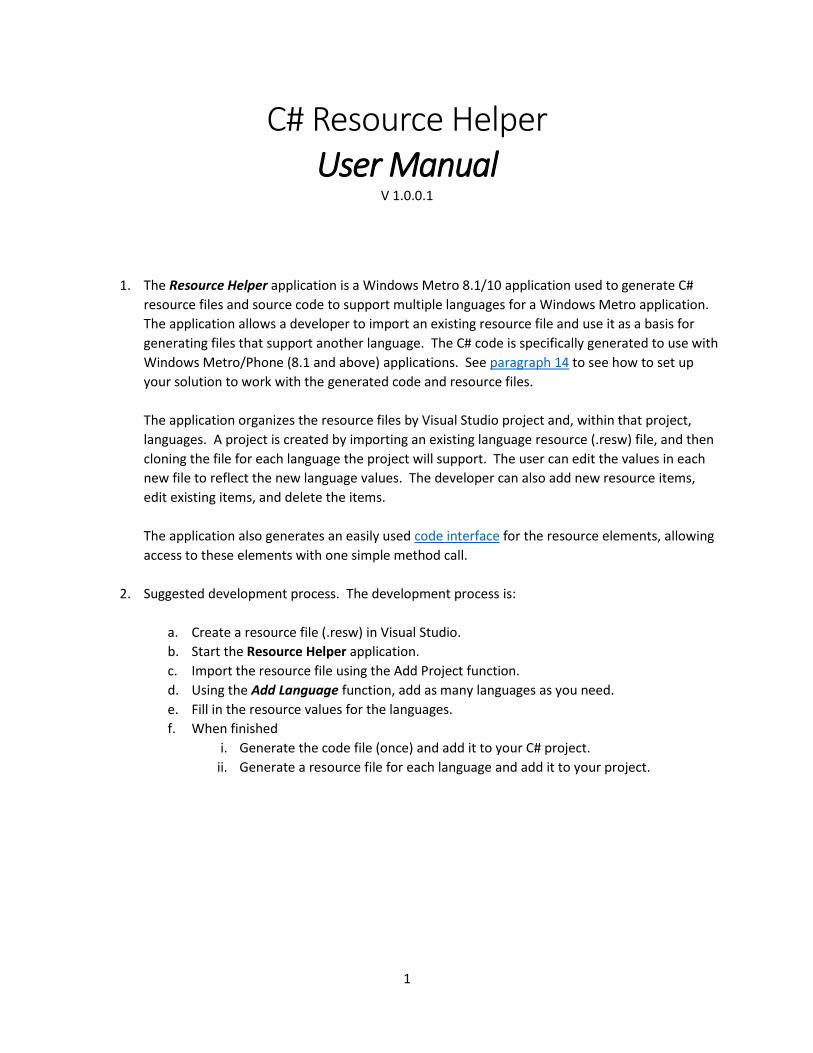
Figure 1– Main Screen
3. Startup. When the application is invoked, a splash screen will show up for approximately two
seconds; then, the main screen will appear (Figure 1).
4. Adding a project. To load a database file:
a. Click on the project Add button. The file load screen will show (Figure 2).
b. Select a resource file to load, then click on the Open button.
c. A popup will appear (Figure 3). Type in a project name and select the language, then
click on the OK button.
3
Figure 2- Loading a Project
Figure 3– Specifying the Project Name and Language
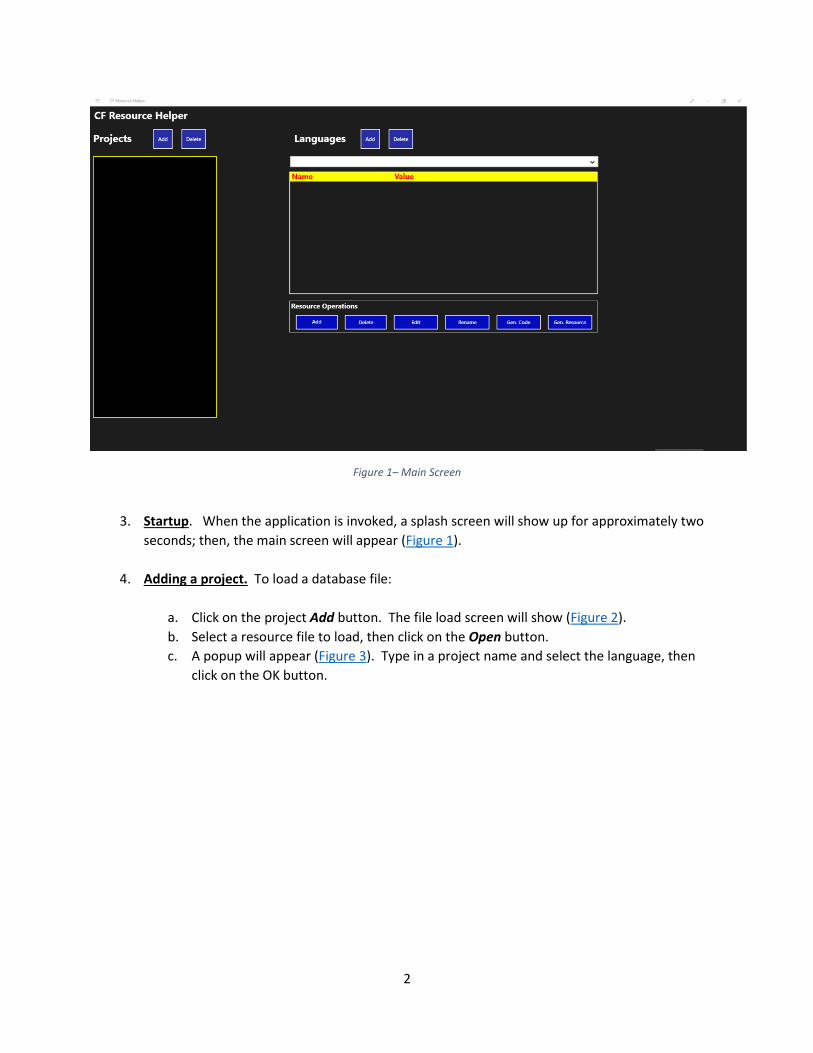
5. Deleting a project.
a. Select the project to be deleted from the list of projects.
b. Click on the project Delete button. A confirmation popup will show (Figure 4).
c. Click OK to confirm the deletion.
4
Figure 4 - Delete a Project
6. Adding a Language.
a. Select the project to which you want to add another language.
b. Click on the language Add button.
c. A popup will appear (Figure 5). Select the language to add, then click on the OK button.
d. A confirmation popup will appear.
5
Figure 5- Add a Language
7. Deleting a Language.
a. Select the project from which you want to delete the language.
b. Select the language you want to delete from the drop down list.
c. Click on the language Delete button.
d. A popup will appear (Figure 6). Click on the OK button to delete the language.
e. A confirmation popup will appear.
Figure 6 - Deleting a Language
6
8. Add a Resource Item.
a. Click on the resource Add button. A popup will appear (Figure 7).
b. Type in the name of the new resource, then click on the OK button.
c. A confirmation dialog will appear.
Figure 7 - Add a Resource Item
9. Edit a Resource Item.
a. Click on the resource Edit button. An input popup will appear (Figure 8).
b. Type in the new value for the resource item, and click the OK button.
7
Figure 8 - Edit a Resource Item
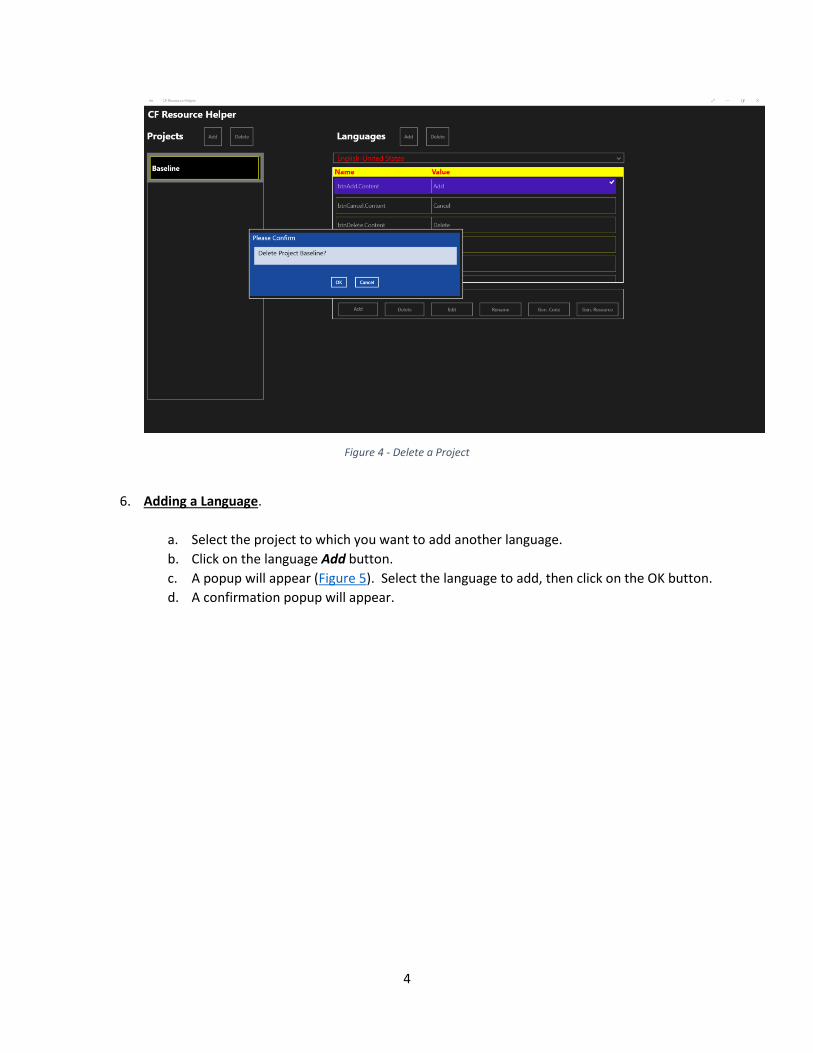
10. Change a Resource Item Name.
a. Click on the resource Rename button. An input popup will appear (Figure 9).
b. Type in the new name for the Resource item, and click on the OK button
c. A confirmation popup will appear.
8
Figure 9 - Change a Resource Item Name
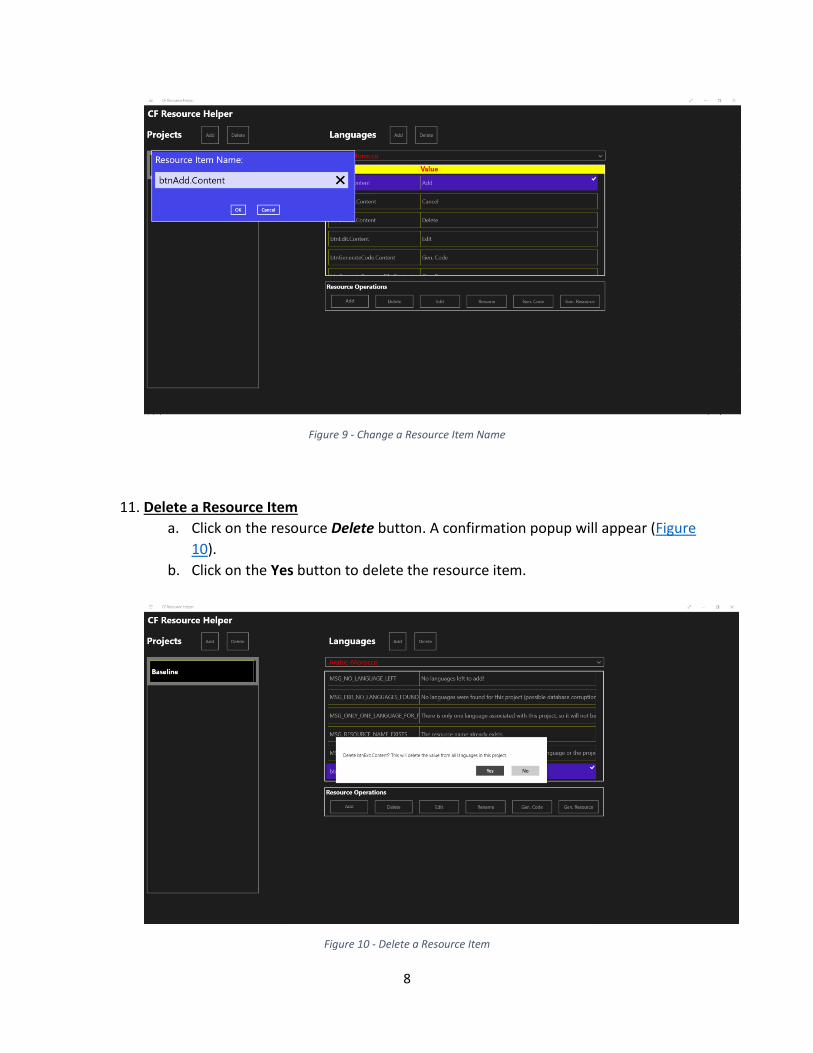
11. Delete a Resource Item
a. Click on the resource Delete button. A confirmation popup will appear (Figure
10).
b. Click on the Yes button to delete the resource item.
Figure 10 - Delete a Resource Item
9
12. Generate Code
a. Select the project for which you want to generate the code file.
b. Click on the resource Gen. Code button. A popup file selector will appear (Figure
11).
c. Select the folder and filename for the code file. The default file name is
ResourceHelper.cs.
d. Click on the Save button to save the file.
Figure 11- Generate Code
13. Generate a Resource File.
a. Select the project for which you want to generate the resource file.
b. Select the language for the resource file.
c. Click on the resource Gen. Resource button. A popup file selector will appear
(Figure 12).
d. Select (or create) the folder for the code file. Normally, the folder will be named
the same as the language identifier (e.g., en-US for United States English).
e. Click on the Save button.
10
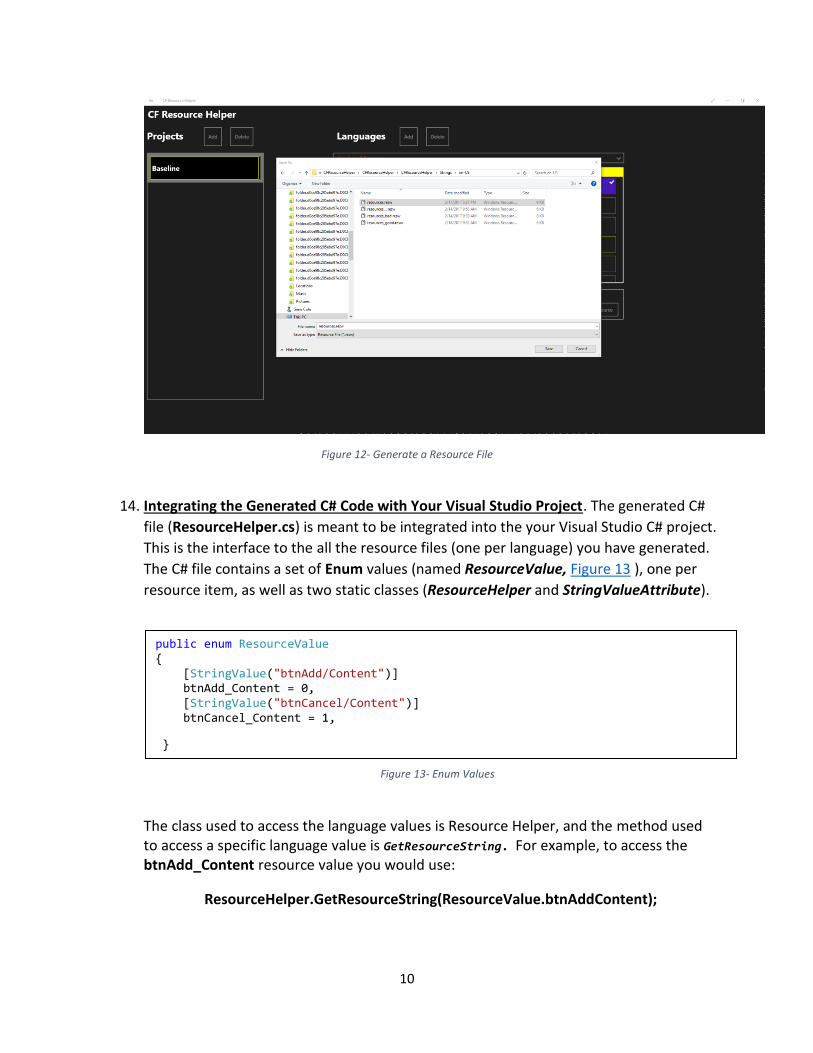
Figure 12- Generate a Resource File
14. Integrating the Generated C# Code with Your Visual Studio Project. The generated C#
file (ResourceHelper.cs) is meant to be integrated into the your Visual Studio C# project.
This is the interface to the all the resource files (one per language) you have generated.
The C# file contains a set of Enum values (named ResourceValue, Figure 13 ), one per
resource item, as well as two static classes (ResourceHelper and StringValueAttribute).
The class used to access the language values is Resource Helper, and the method used to access a specific language value is GetResourceString. For example, to access the btnAdd_Content resource value you would use:


![SPRED Special Religious Development HELPER CATECHIST …€¦ · SPRED Helper Catechist Training [2] SPRED Family Masses and Sacramental Celebrations The SPRED Resource Center began](https://static.documents.pub/doc/80x56/5f952c721e41ad6db328797f/spred-special-religious-development-helper-catechist-spred-helper-catechist-training.jpg)


