Case Study: McKesson Outlines Five Steps for Managing CA Application Performance Management for Speed and Focus on Customer Experience Steve Stewart DevOps: Agile Ops McKesson Program Architect for Operations Engineering Group DO5X195S
Transcript
Case Study: McKesson Outlines Five Steps for Managing CA Application Performance Management for Speed and Focus on Customer Experience
Steve Stewart
DevOps: Agile Ops
McKesson
Program Architect for Operations Engineering Group
DO5X195S
Do You Have Time To…
• …Install each CA APM Agent individually?
• …Configure each Application Server individually to set parameters for starting Agents?
• …Create metric groupings, alerts, calculators, actions and dashboards individually for each Agent?
• …Update metric groupings, alerts, calculators actions and dashboards individually every time a new metric display is required?
Your time is better spent!
Five Steps For Managing CA APMDesigning a truly Effective, Maintainable and User-Friendly APM
1
2
5
3
4
Easy, Quick, Consistent
“Automate” install of APM Agents
“Automate” App Configuration to start APM Agents
Create a Main Dashboard as a Central Point
Design Dashboards that are maintainable and intuitive
“Clone” Dashboards
Step 1: “Automate” Install Of APM Agents
Create a Template APM Agent installation that can be
customized based on just a few parameters
• Install one “Master” APM Introscope Agent.
• Package “Master Agent” into a single compressed file.
• Create a script to deploy new agents passing in the few
parameters that change from installation to installation.
Install One “Master” APM Agent
• Must include all .PBD and .PBL files required for the application
• Ensure that the IntroscopeAgent.profile file has all parameters that
will be the same for all installations set correctly
• Identify all parameters in the IntroscopeAgent.profile file that will be
different from one installation to another. You can either omit setting
these parameters or set them to place holder values
• This will be your “Master” APM Agent
Package “Master Agent” Into Single Compressed File
• Compress the entire agent installation including the
<AGENT_HOME_> directory and everything under that directory
into a single .zip, .tar or similar compressed file
• This is you “Master” Agent file.
Create A Script To Deploy New Agents
Using any scripting language write a script that will…
1. Take command line parameters or parameters from a
configuration file (agent name, number of agents to install,
environment type, etc.)
2. Extract files from the “Master” Agent file to create a new agent
installation
3. Change all installation specific items (agent name, custom
process name, <AGENT_HOME> name, etc)
4. Write a data file that contains all parameters needed to configure
the application start-up script or application server start
parameters
The script has created a file containing parameters for starting the agent when the application is started
Step 2: Automate Configuration To Start APM Agents
• Write a “Start-up Configuration” script
• Then write the parameters to the proper
location in your application start-up
script (Apache Tomcat or Pure Java
applications)
• If using WebLogic or WebSphere, you
need to use the specific
Weblogic/WebSphere “Start-up
Configuration” tools
Tip: daisy-chain the “APM Agent Installation” script and the “Start-up Config” script or combine into one
Step 3: Create a Main Dashboard
• “Be more like a Cloud Provider” – customer based views
• One button for each customer/environment with summary alert
• Clicking on a single button then takes the user to the dashboard set
for the environment of concern
• Launching point to the metric display of interest
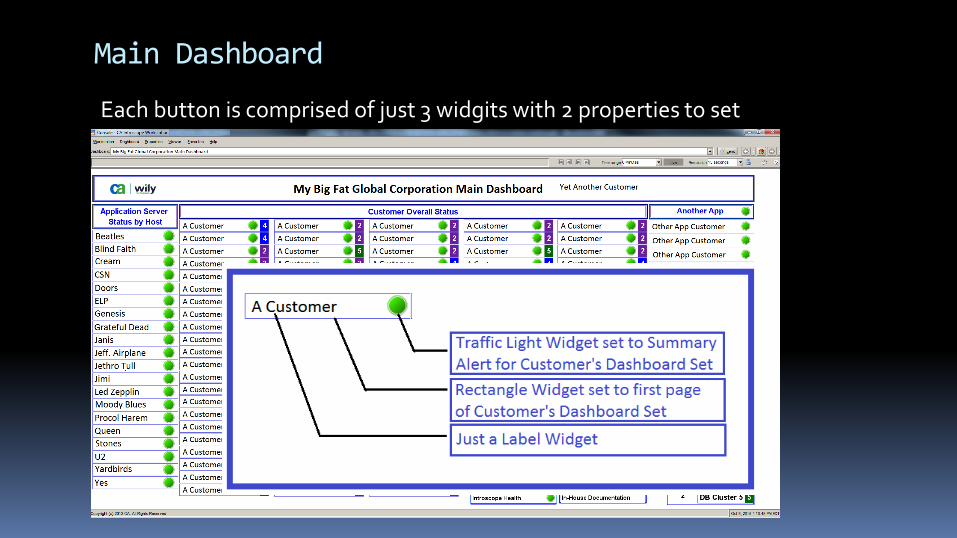
Main Dashboard Example
Main Dashboard
Each button is comprised of just 3 widgits with 2 properties to set
TIP: Develop A Naming Convention
• Uniquely identifies the APM Agent
• Use this unique identifier as a prefix to ALL metric groupings,
alerts, calculators, actions and dashboards in the management
module
• Use a place-holder in your Template for all titles or headings
unique to the agent to be displayed on dashboards
Eases ‘search and replace’ operations
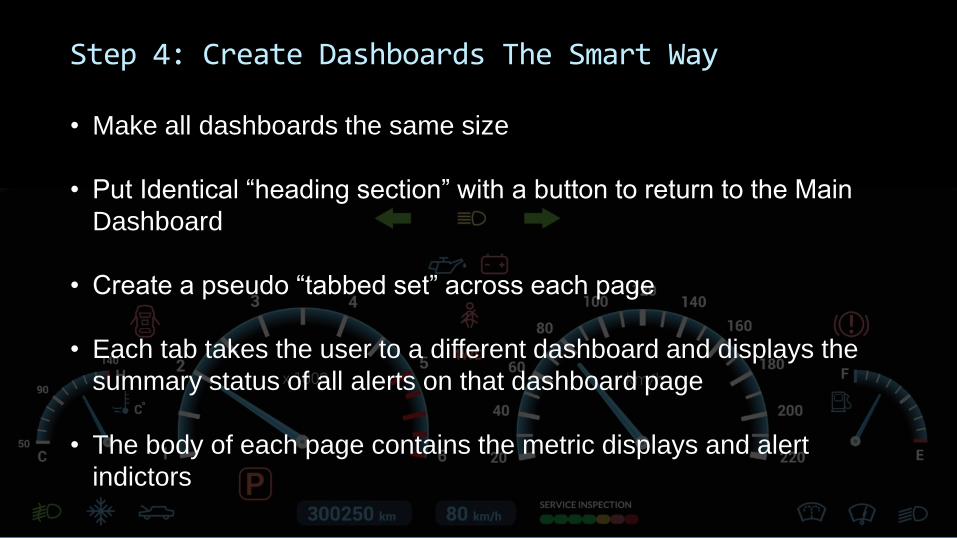
Step 4: Create Dashboards The Smart Way
• Make all dashboards the same size
• Put Identical “heading section” with a button to return to the Main
Dashboard
• Create a pseudo “tabbed set” across each page
• Each tab takes the user to a different dashboard and displays the
summary status of all alerts on that dashboard page
• The body of each page contains the metric displays and alert
indictors
Custom Dashboard
Example Before adding metric widgets
What Is A “Summary Alert”?
• Shows the worst case status of all simple alerts (or other summary alerts) that are assigned to its “Included Alerts” property
• Any alert that turns yellow (warning) or red (danger) will turn the summary alert that same color.
Custom Dashboard
Example after adding metric widgets
Step 5: Clone Dashboards
• Create Template - one dashboard set (MM_Template.jar)
• Create a script - to copy and update your “Template Management Module Jar” file by performing a search and replace on the ManagementModule.xml file in the jar.
• Rejar the file – place in <EM_HOME>/deploy/ directory
Create new dashboards in minutes instead of hours
TIPS: Update All Management Modules In One Shot!
• Use as a template for other environments
• Feed in customer parameters to create new template from master
• Make any changes needed to all Management Modules in your Template Management Module
• All Management Modules are identical except for the customer specifics which are customized automatically!
Your dashboards and metrics are consistent across all customer
environments!
Benefits
• Saves weeks per year over the previous way
• Takes minutes instead of days for changes to be made to all management modules
• We act like a cloud provider - main dashboard allows customers to view status
Easy, Quick, Consistent
Customer Experience
• User Centric - Users love the new dashboard design and intuitive navigation.
• Proactive - When an incident occurs, our support team often has found the cause before the customer knows that there was a problem.
• Improved availability - 100% up-time for all customers for more than 5 months in a row!