Electrophoresis 1 Cloning and Sequencing Explorer Series CHAPTER 3: ELECTROPHORESIS Background Agarose Gel Electrophoresis Agarose gel electrophoresis separates DNA fragments by size. PCR products or other DNA fragments are loaded into an agarose gel slab, which is in a chamber filled with a conductive buffer solution. A direct current is passed between wire electrodes at each end of the chamber. Since DNA fragments are negatively charged, they will be drawn toward the positive pole (anode) when placed in an electric field. he matrix of the agarose gel acts as a molecular sieve through which smaller DNA fragments can move more easily than larger ones. Therefore, the rate at which a DNA fragment migrates through the gel is inversely proportional to its size in base pairs (bp). Over a period of time, smaller DNA fragments will travel farther than larger ones. Fragments of the same size stay together and migrate as single bands of DNA. The sizes of DNA fragments are determined through comparison with a molecular weight standard - in the case of this lab, a molecular weight ruler that has a series of bands differing in size by 500 bp increments from 500 bp up to 5,000 bp. The expected sizes of the target GAPDH PCR products range from 500 bp to 2,500 bp, depending on the plant species chosen. Agarose gel electrophoresis is a useful tool since it allows determination of the number of PCR products (useful since multiple GAPDH genes may be amplified using this protocol), the size of these PCR products, the success of the PCR (the presence and intensity of the DNA bands), whether there has been contamination of the sample based on examination of the negative control, and whether primer dimers have been amplified. (–) (+) CHAPTER 3 BACKGROUND
Transcript
Electrophoresis 1
Cloning and Sequencing Explorer Series
CHAPTER 3: ELECTROPHORESIS
Background
Agarose Gel Electrophoresis
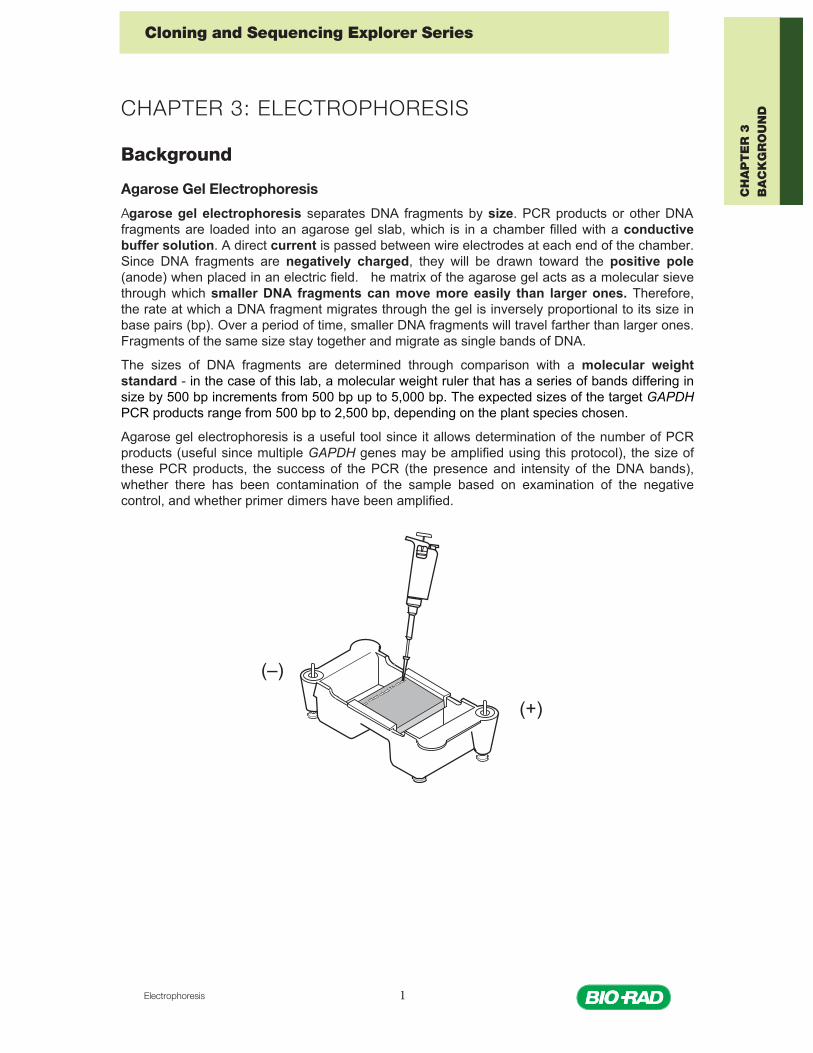
Agarose gel electrophoresis separates DNA fragments by size. PCR products or other DNA fragments are loaded into an agarose gel slab, which is in a chamber filled with a conductive buffer solution. A direct current is passed between wire electrodes at each end of the chamber. Since DNA fragments are negatively charged, they will be drawn toward the positive pole (anode) when placed in an electric field. The matrix of the agarose gel acts as a molecular sieve through which smaller DNA fragments can move more easily than larger ones. Therefore, the rate at which a DNA fragment migrates through the gel is inversely proportional to its size in base pairs (bp). Over a period of time, smaller DNA fragments will travel farther than larger ones. Fragments of the same size stay together and migrate as single bands of DNA.
The sizes of DNA fragments are determined through comparison with a molecular weight standard - in the case of this lab, a molecular weight ruler that has a series of bands differing in size by 500 bp increments from 500 bp up to 5,000 bp. The expected sizes of the target GAPDH PCR products range from 500 bp to 2,500 bp, depending on the plant species chosen.
Agarose gel electrophoresis is a useful tool since it allows determination of the number of PCR products (useful since multiple GAPDH genes may be amplified using this protocol), the size of these PCR products, the success of the PCR (the presence and intensity of the DNA bands), whether there has been contamination of the sample based on examination of the negative control, and whether primer-dimers have been amplified.
(–)
(+)
CH
AP
TE
R 3
BA
CK
GR
OU
ND
Electrophoresis2
Cloning and Sequencing Explorer Series
Protocol
Overview
The products of both the initial and nested PCR reactions will be analyzed by agarose gel electrophoresis to assess PCR success; the number of amplifi ed bands and their sizes will be examined to evaluate the success of each round of PCR.
Safety Note: UV light is used to visualize UView-stained DNA. UV light can cause eye damage and burns. Wear UV-protective eye googles, do not look directly at the light, and avoid skin exposure.
Student Workstations
Each student team will require the following items to electrophorese their PCR samples:
Material Needed for Each Workstation Quantity
Horizontal electrophoresis chamber 1
Power supply 1
20 µl adjustable-volume micropipets and fi lter tips 1
Microcentrifuge tubes for preparing samples and aliquoting 10
500 bp molecular weight ruler 12 µl
UView 6x loading dye and stain 25 µl
Common Workstation
Material Required
Materials to cast agarose gels
Gel visualization and documentation system
Cloning the GAPC gene
• Identify and extract gDNA from plants
• Amplify region of GAPC gene using PCR
• Assess the results of PCR
• Purify the PCR product
• Ligate PCR product into a plasmid vector
• Transform bacteria with the plasmid
• Isolate plasmid from the bacteria
• Sequence DNA
• Perform bioinformatics analysis of the cloned gene
CH
AP
TE
R 3
PR
OT
OC
OL
Electrophoresis 3
Cloning and Sequencing Explorer Series
Preparation for Electrophoresis
11. Below is the layout for the order in which we will pipette our PCR products into our gel.
1. Label a microcentrifuge tube for each PCR sample.
2. Transfer 20 µl of each intial PCR reaction into a clean labeled microcentrifuge tube. Add 4 µl of loading dye and stain into the tube. Mix up and down to mix.Note: Do not add loading dye and stain directly to the blue initial PCR tubes — the loading dye can inhibit the next round of PCR. Loading dye and stain is supplied as a 6x concentrate.
3. To assess the success of the nested PCR round, pipet 5 µl of each yellow nested PCR into a microcentrifuge tube and mix it with 1 µl of 6x loading dye and stain. A smaller volume of the nested PCR is loaded because nested PCR is usually more effi cient and produces very intense bands that can obscure bands in adjacent wells if samples are overloaded.
4. Place a 1% agarose gel in the electrophoresis chamber. Pour electrophoresis running buffer into the chamber until it just covers the gel by 1–2 mm.
CH
AP
TE
R 3
PR
OT
OC
OL
2 20 µLPCR of Plant 1 gDNA with initial primers
3 5 µLPCR of product from lane 2 with nested primers
4 20 µLPCR of Plant 2 gDNA with initial primers
5 5 µLPCR of product from lane 4 with nested primers
6 20 µLPCR of control Arabidopsis gDNA with initial primers
7 5 µLPCR of product from lane 6 with nested primers
8 20 µLPCR of pGAP plasmid control with initial primers
9 5 µLPCR of pGAP plasmid control with nested primers
10 20 µLNegative control from nested PCR
Procedure for Making 1% Agarose Gels
1. Set up an agarose pour system, including a cassette and a comb as descibed in class.
2. Measure 0.6 grams of agarose powder and add it to a 100 mL or 200 mL Erlenmeyer flask. Add 60 mL of 1X TAE buffer to the flask, creating a 1% agarose solution.
3. Microwave the flask in 30s intervals until the agarose is completely dissolved.
4. Gently pour the melted agarose solution into the cassette containing a comb.
5. Wait for the agarose gel to solidify.
Electrophoresis44
Cloning and Sequencing Explorer Series
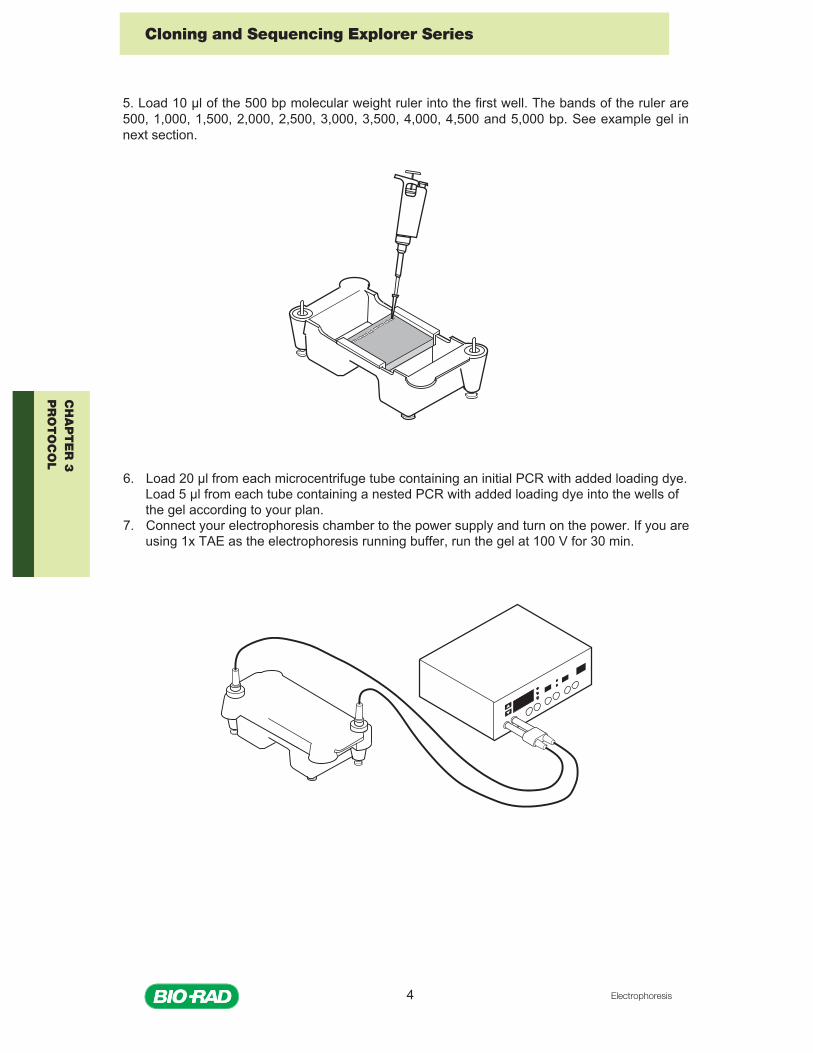
5. Load 10 µl of the 500 bp molecular weight ruler into the first well. The bands of the ruler are500, 1,000, 1,500, 2,000, 2,500, 3,000, 3,500, 4,000, 4,500 and 5,000 bp. See example gel innext section.
6. Load 20 µl from each microcentrifuge tube containing an initial PCR with added loading dye.Load 5 µl from each tube containing a nested PCR with added loading dye into the wells ofthe gel according to your plan.
7. Connect your electrophoresis chamber to the power supply and turn on the power. If you areusing 1x TAE as the electrophoresis running buffer, run the gel at 100 V for 30 min.
CH
AP
TE
R 3
PR
OT
OC
OL
Electrophoresis 5
Cloning and Sequencing Explorer Series
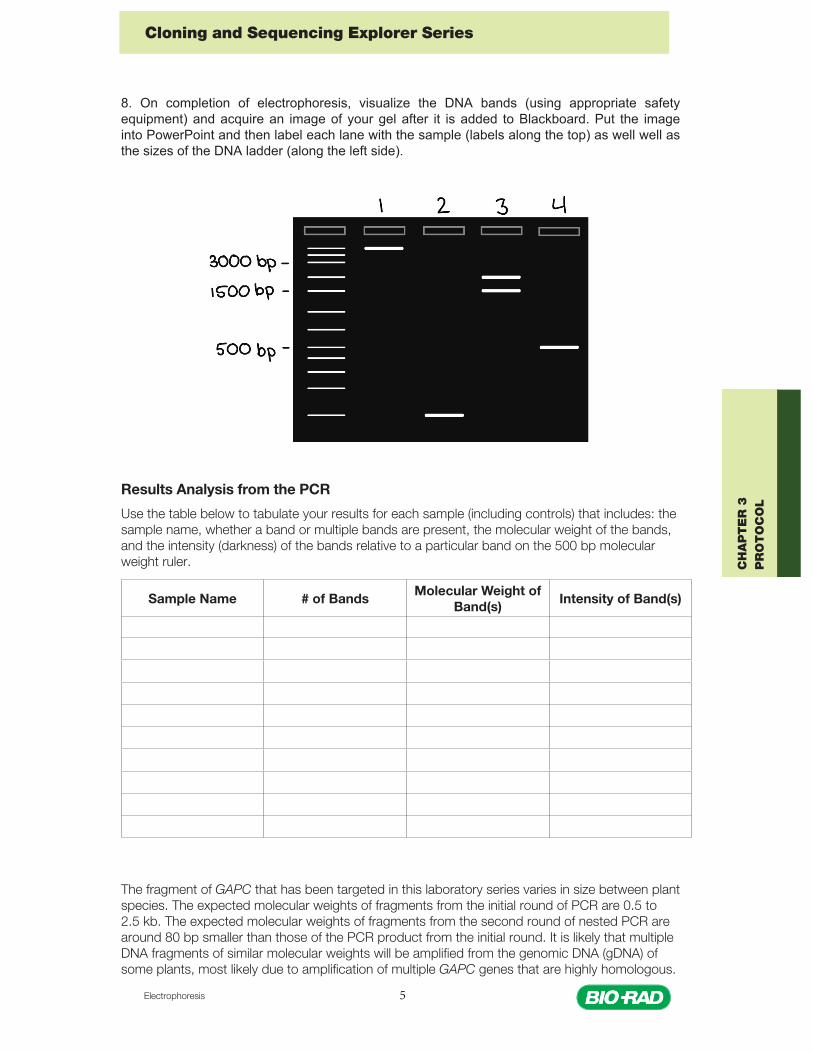
8. On completion of electrophoresis, visualize the DNA bands (using appropriate safetyequipment) and acquire an image of your gel after it is added to Blackboard. Put the imageinto PowerPoint and then label each lane with the sample (labels along the top) as well well asthe sizes of the DNA ladder (along the left side).
Results Analysis from the PCR
Use the table below to tabulate your results for each sample (including controls) that includes: the sample name, whether a band or multiple bands are present, the molecular weight of the bands, and the intensity (darkness) of the bands relative to a particular band on the 500 bp molecular weight ruler.
Sample Name # of BandsMolecular Weight of
Band(s)Intensity of Band(s)
The fragment of GAPC that has been targeted in this laboratory series varies in size between plant species. The expected molecular weights of fragments from the initial round of PCR are 0.5 to 2.5 kb. The expected molecular weights of fragments from the second round of nested PCR are around 80 bp smaller than those of the PCR product from the initial round. It is likely that multiple DNA fragments of similar molecular weights will be amplifi ed from the genomic DNA (gDNA) of some plants, most likely due to amplifi cation of multiple GAPC genes that are highly homologous.
Cloning and Sequencing Explorer Series
CH
AP
TE
R 3
PR
OT
OC
OL
Electrophoresis6
Cloning and Sequencing Explorer Series
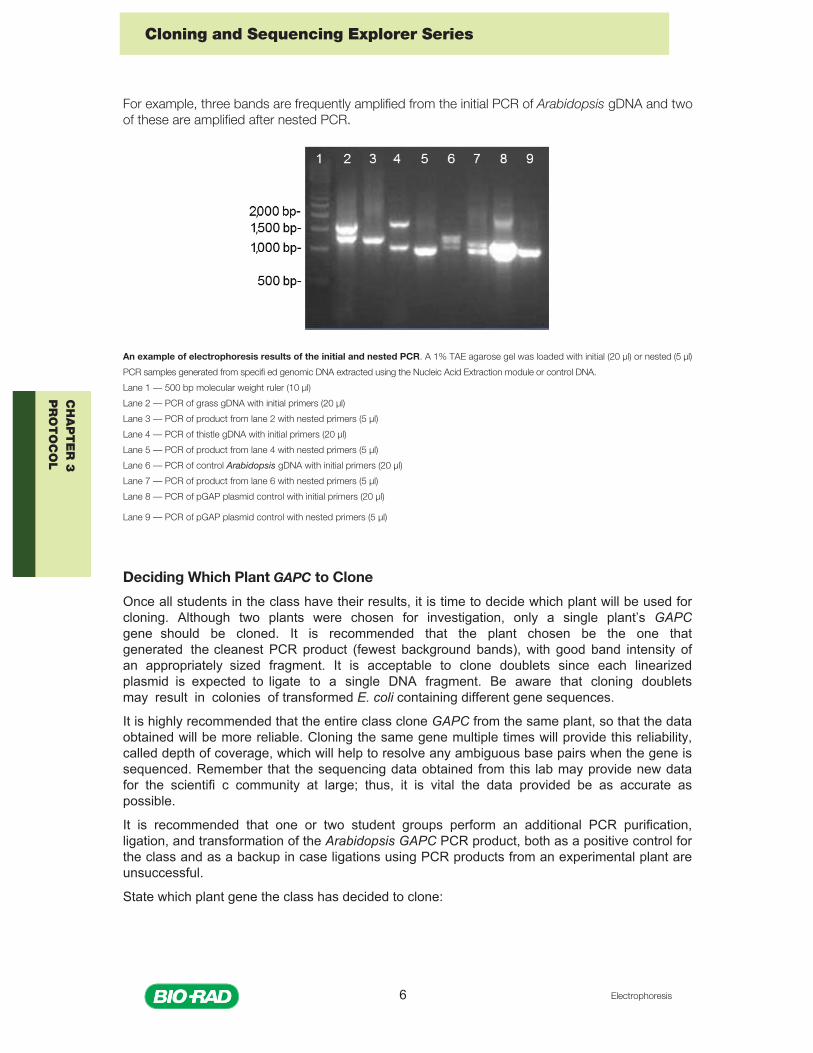
For example, three bands are frequently amplifi ed from the initial PCR of Arabidopsis gDNA and two of these are amplifi ed after nested PCR.
An example of electrophoresis results of the initial and nested PCR. A 1% TAE agarose gel was loaded with initial (20 µl) or nested (5 µl)
PCR samples generated from specifi ed genomic DNA extracted using the Nucleic Acid Extraction module or control DNA.
Lane 1 — 500 bp molecular weight ruler (10 µl)
Lane 2 — PCR of grass gDNA with initial primers (20 µl)
Lane 3 — PCR of product from lane 2 with nested primers (5 µl)
Lane 4 — PCR of thistle gDNA with initial primers (20 µl)
Lane 5 — PCR of product from lane 4 with nested primers (5 µl)
Lane 6 — PCR of control Arabidopsis gDNA with initial primers (20 µl)
Lane 7 — PCR of product from lane 6 with nested primers (5 µl)
Lane 8 — PCR of pGAP plasmid control with initial primers (20 µl)
Lane 9 — PCR of pGAP plasmid control with nested primers (5 µl)
,,
,
CH
AP
TE
R 3
PR
OT
OC
OL
Deciding Which Plant GAPC to Clone
Once all students in the class have their results, it is time to decide which plant will be used for cloning. Although two plants were chosen for investigation, only a single plant’s GAPC gene should be cloned. It is recommended that the plant chosen be the one that generated the cleanest PCR product (fewest background bands), with good band intensity of an appropriately sized fragment. It is acceptable to clone doublets since each linearized plasmid is expected to ligate to a single DNA fragment. Be aware that cloning doublets may result in colonies of transformed E. coli containing different gene sequences.
It is highly recommended that the entire class clone GAPC from the same plant, so that the data obtained will be more reliable. Cloning the same gene multiple times will provide this reliability, called depth of coverage, which will help to resolve any ambiguous base pairs when the gene is sequenced. Remember that the sequencing data obtained from this lab may provide new data for the scientifi c community at large; thus, it is vital the data provided be as accurate as possible.
It is recommended that one or two student groups perform an additional PCR purification, ligation, and transformation of the Arabidopsis GAPC PCR product, both as a positive control for the class and as a backup in case ligations using PCR products from an experimental plant are unsuccessful.
State which plant gene the class has decided to clone:
Electrophoresis
Cloning and Sequencing Explorer Series
(–)(+)
CH
AP
TE
R 3
QU
ICK
GU
IDE
Electrophoresis — Quick Guide
1. Label a microcentrifuge tube for each PCR.
2. DO NOT add loading dye directly to blue initialPCR reactions. In a separate tube add 4 µlof 6x loading dye and stain and add 20 µl of initialPCR reaction and pipet up and down to mix.
3. Add 1 µl of 6x loading dye and 5 µl of yellownested PCR reaction to a separate tube andpipet up and down to mix.
4. Place a 1% agarose gel in the electrophoresischamber. Pour electrophoresis buffer into the chamberuntil it just covers the gel by 1–2 mm.
5. Load 10 µl of the 500 bp molecular weightruler into lane one of the gel.
6. Referring to your electrophoresis plan, load 20 µl ofblue initial PCR reactions with loading dye and 5 µl ofthe corrresponding yellow nested PCR reactions withloading dye into the wells of a 1% gel.
7. Connect the electrophoresis chamber to the powersupply and turn on the power. Run the gel at 100 Vfor 30 min unless otherwise instructed.
8. Upon completion of electrophoresis, visualizeyour DNA fragments according to your instructor’sdirections.