Chapter 4 Contrast Tool Advanced with Locate Synopsis This chapter will guide you through how to setup a VPM program to inspect print on an oil cap. The cap is positioned poorly within the Field Of View (FOV) so the PPT’s PinPoint Pattern Find Tool will be used to accurately locate the print. The Contrast Tool will then be used to detect the defects.
Transcript
Chapter 4
Contrast Tool Advanced with Locate
Synopsis
This chapter will guide you through how to setup a VPM program to inspect print on an oil cap. The cap is positioned poorly within the
Field Of View (FOV) so the PPT’s PinPoint Pattern Find Tool will be used to accurately locate the print. The Contrast Tool will then be
used to detect the defects.
1-Launch VPM
2-Connect to the emulator or live camera (Refer to chapter 1--A)
3-Load the bearing images into the File Camera (Refer to chapter 1--B) The file names are 01_Oil_pass, 02_Oil_pass, etc.
4-Click on the orange IMPACT icon.
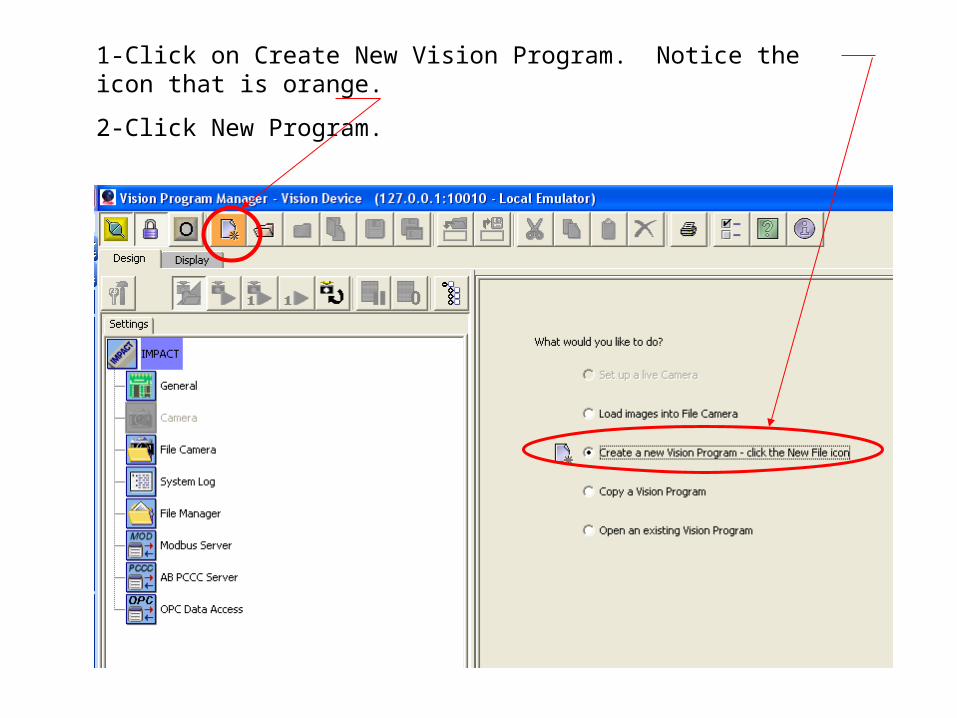
1-Click on Create New Vision Program. Notice the icon that is orange.
2-Click New Program.
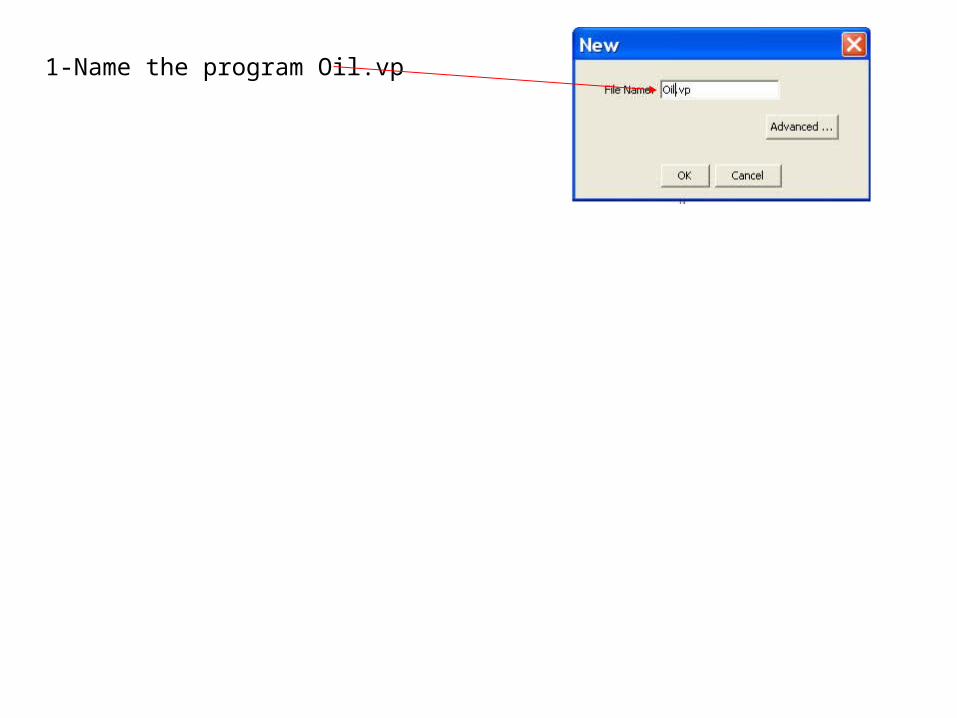
1-Name the program Oil.vp
1-Open the Locating tool drawer by clicking on it.
2-Drag and drop the Pinpoint Pattern Find Tool into the program tree. Choose 2 Train ROI.
3-Be sure to start with the best Image (01_Oil_good)
4-Position Train ROI around the oil can
5-Sellect 360 degree rotation
6-Click Train
1-Click step 3
2-The oil can pattern must be within the search ROI
3-Trigger through images to be sure the oil can pattern is found every time
1-Drag and drop Contrast Tool into Task tree
2-Click on step 2
3-Highlight ROI then click delete
1-Click on circle here
2-Click anywhere in image
3-Size circle by clicking and holding dot on circle
4-Move circle by clicking and holding edge of circle
1-Adjust circle ROI as shown here
2-Create, size and position a second circle ROI
NOTE: be sure to click within the first circle ROI


![Nilan VPM 600-3200 Nilan VPM 600-3200 Active heat recovery and cooling ... nilan’s VPM series is an all-in-one solution, ... h`Z b a^c\Zg [dg YZi ad`Vadbg YZ! ] ...](https://static.documents.pub/doc/80x56/5b0c61817f8b9a02508c1701/nilan-vpm-600-vpm-600-3200-active-heat-recovery-and-cooling-nilans-vpm-series.jpg)


