Date printed: 12/1/2015 CSM Server Installation Guide Copyright 2015 Cisco Systems 1 Cisco Software Manager Server Installation Guide This installation guide provides instructions on installing CSM Server and other components on your Linux distribution. CSM Server is written in Python. Almost all Linux distributions come with a Python interpreter. The required Python version is Python 2.7 or above. CSM Server also uses other Python libraries and tools such as Flask (a Python micro framework) and Gunicorn (a Python WSGI HTTP Server), as well as MySQL database for data storage. If your system has Python 2.7.x (x represents a minor release number), you may skip the Python installation section. If your system has MySQL installed, you may skip the MySQL installation section. At some point, you will be asked to give a username and password for CSM Server to connect to MySQL. You may want to create a new database user instead of using the root user. You will need root access to install all the components. If you are a trusted user with administrative access to a system, you can add sudo to the beginning of an administrative command to execute it as if it were run by the root user. The server that hosts CSM Server will need to have Internet connectivity so it can download and install the necessary components. If a proxy is required to reach secure sites (e.g. HTTPS), include the following statements in your ~/.bashrc in your user directory. Here is an example, export http_proxy=http://proxy-wsa.esl.cisco.com:80 export https_proxy=$http_proxy
Transcript
Date printed: 12/1/2015 CSM Server Installation Guide
Copyright 2015 Cisco Systems 1
Cisco Software Manager Server
Installation Guide
This installation guide provides instructions on installing CSM Server and other components on your Linux distribution. CSM Server is written in Python. Almost all Linux distributions come with a Python interpreter. The required Python version is Python 2.7 or above. CSM Server also uses other Python libraries and tools such as Flask (a Python micro framework) and Gunicorn (a Python WSGI HTTP Server), as well as MySQL database for data storage. If your system has Python 2.7.x (x represents a minor release number), you may skip the Python installation section. If your system has MySQL installed, you may skip the MySQL installation section. At some point, you will be asked to give a username and password for CSM Server to connect to MySQL. You may want to create a new database user instead of using the root user. You will need root access to install all the components. If you are a trusted user with administrative access to a system, you can add sudo to the beginning of an administrative command to execute it as if it were run by the root user. The server that hosts CSM Server will need to have Internet connectivity so it can download and install the necessary components. If a proxy is required to reach secure sites (e.g. HTTPS), include the following statements in your ~/.bashrc in your user directory. Here is an example, export http_proxy=http://proxy-wsa.esl.cisco.com:80 export https_proxy=$http_proxy
Date printed: 12/1/2015 CSM Server Installation Guide
Copyright 2015 Cisco Systems 2
Table of Contents 1 Identify Your Linux Distribution .............................................................................................. 3
2 Install Python ............................................................................................................................ 3 3 Install MySQL .......................................................................................................................... 3
3.1 On CentOS/RedHat ............................................................................................................ 3 3.2 On Ubuntu/Debian .............................................................................................................. 4 3.3 Build from Source (Other Linux) ....................................................................................... 4
4 Create a Database User ............................................................................................................. 5
6.1 On Ubuntu/Debian .............................................................................................................. 6 6.2 On Others ............................................................................................................................ 6
7 Use Virtual Environment .......................................................................................................... 7 8 Install Other Libraries ............................................................................................................... 7
8.1 Install Libraries using requirement.txt ................................................................................ 8 8.2 Install Libraries One by One .............................................................................................. 8
9 Launch CSM Server .................................................................................................................. 8 10 Connect to CSM Server ............................................................................................................ 9
11 LDAP for User Authentication ............................................................................................... 10 11.1 On CentOS/RedHat ........................................................................................................ 10 11.2 On Ubuntu/Debian .......................................................................................................... 10
12 SSL Support for CSM Server ................................................................................................. 11
13 Known Issues .......................................................................................................................... 12 13.1 pip failed on certain Ubuntu versions ............................................................................. 12
Date printed: 12/1/2015 CSM Server Installation Guide
Copyright 2015 Cisco Systems 3
1 Identify Your Linux Distribution Run the commands below to identify your Linux distribution. Once your Linux distribution is identified, follow only the instructions specific for your distribution (RedHat / CentOS / Debian / Ubuntu), or follow the Build from Source instructions (i.e. directly building the component from the source code). If the command below returns information, you are likely on RedHat or CentOS. cat /etc/redhat-release Ubuntu or Debian will respond to the command below. lsb_release –a
2 Install Python If your system python version is not 2.7or above, follow these steps to build python from the source code. CSM Server is tested on python 2.7.6. However, any 2.7.x should work. Change directory to /usr/local (you may use a different directory if so desired), and use ‘wget’ to download the Python Gzipped source tar ball. This command requires root user privilege. sudo wget https://www.python.org/ftp/python/2.7.6/Python-2.7.6.tgz Or download Python 2.7.6 from https://www.python.org/download/releases/2.7.6 (select the Gzipped source tar ball) and copy it to /usr/local. Then, extract the contents using ‘tar’ and build it as shown below. tar xvzf Python-2.7.6.tgz cd Python-2.7.6 ./configure make make install
3 Install MySQL Select the section that applies to your Linux distribution to install MySQL
3.1 On CentOS/RedHat If you have CentOS6, skip this step. For CentOS7, use the instruction below to add mysql-community to your repository.
Date printed: 12/1/2015 CSM Server Installation Guide
Install the MySQL server through the CentOS package manager by running the following commands at a command prompt: sudo yum install mysql-server sudo /sbin/service mysqld start
Then, run the following command: sudo /usr/bin/mysql_secure_installation
Press enter to give no password for root. However, when asked to set the root password, answer ‘Y’ and enter the password. To apply some reasonable security to your new MySQL server, answer "yes" to all the questions that the program asks. In order, those questions enable you to set the root password, remove anonymous users, disable remote root logins, delete the test database that the installer included, and then reload the privileges so that your changes will take effect.
3.2 On Ubuntu/Debian Install the MySQL by running the following command. sudo apt-get update sudo apt-get install mysql-server
During the installation, you will be asked to assign a password to the root user. mysqld will be started automatically.
3.3 Build from Source (Other Linux) Download MySQL from http://dev.mysql.com/downloads/mysql.
1. Select the correct Linux platform 2. Use ‘uname –a’ to identify if your platform is 32 or 64-bit system. 3. Based on your platform, download either the 32 or 64-bit tar file
The example below show a 64-bit Linux – Generic distribution rpm –ivh MySQL-server-5.6.16-1.linux_glibc2.5.x86_64.rpm rpm –ivh MySQL-client-5.6.16-1.linux_glibc2.5.x86_64.rpm Start/Stop MySQL Server You will need to start the MySQL daemon so CSM server can connect to it later.
Date printed: 12/1/2015 CSM Server Installation Guide
Copyright 2015 Cisco Systems 5
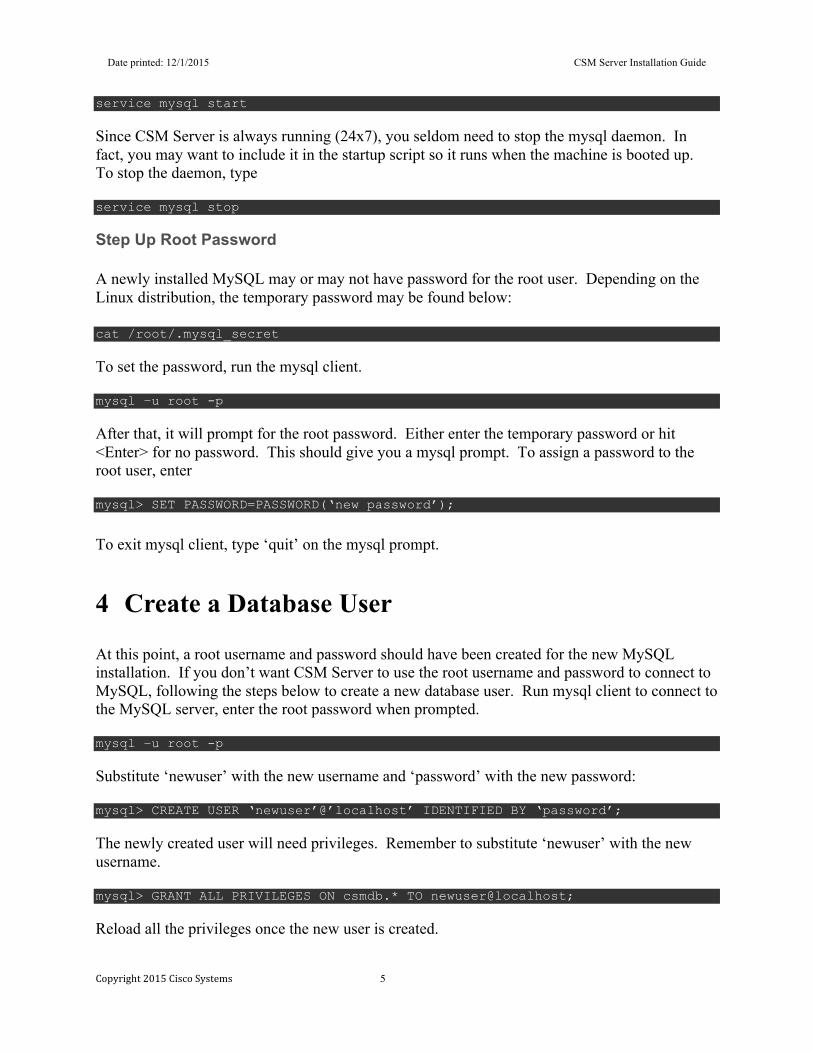
service mysql start Since CSM Server is always running (24x7), you seldom need to stop the mysql daemon. In fact, you may want to include it in the startup script so it runs when the machine is booted up. To stop the daemon, type service mysql stop Step Up Root Password A newly installed MySQL may or may not have password for the root user. Depending on the Linux distribution, the temporary password may be found below: cat /root/.mysql_secret To set the password, run the mysql client. mysql –u root -p After that, it will prompt for the root password. Either enter the temporary password or hit <Enter> for no password. This should give you a mysql prompt. To assign a password to the root user, enter mysql> SET PASSWORD=PASSWORD(‘new password’); To exit mysql client, type ‘quit’ on the mysql prompt.
4 Create a Database User At this point, a root username and password should have been created for the new MySQL installation. If you don’t want CSM Server to use the root username and password to connect to MySQL, following the steps below to create a new database user. Run mysql client to connect to the MySQL server, enter the root password when prompted. mysql –u root -p Substitute ‘newuser’ with the new username and ‘password’ with the new password: mysql> CREATE USER ‘newuser’@’localhost’ IDENTIFIED BY ‘password’; The newly created user will need privileges. Remember to substitute ‘newuser’ with the new username. mysql> GRANT ALL PRIVILEGES ON csmdb.* TO newuser@localhost; Reload all the privileges once the new user is created.
Date printed: 12/1/2015 CSM Server Installation Guide
Copyright 2015 Cisco Systems 6
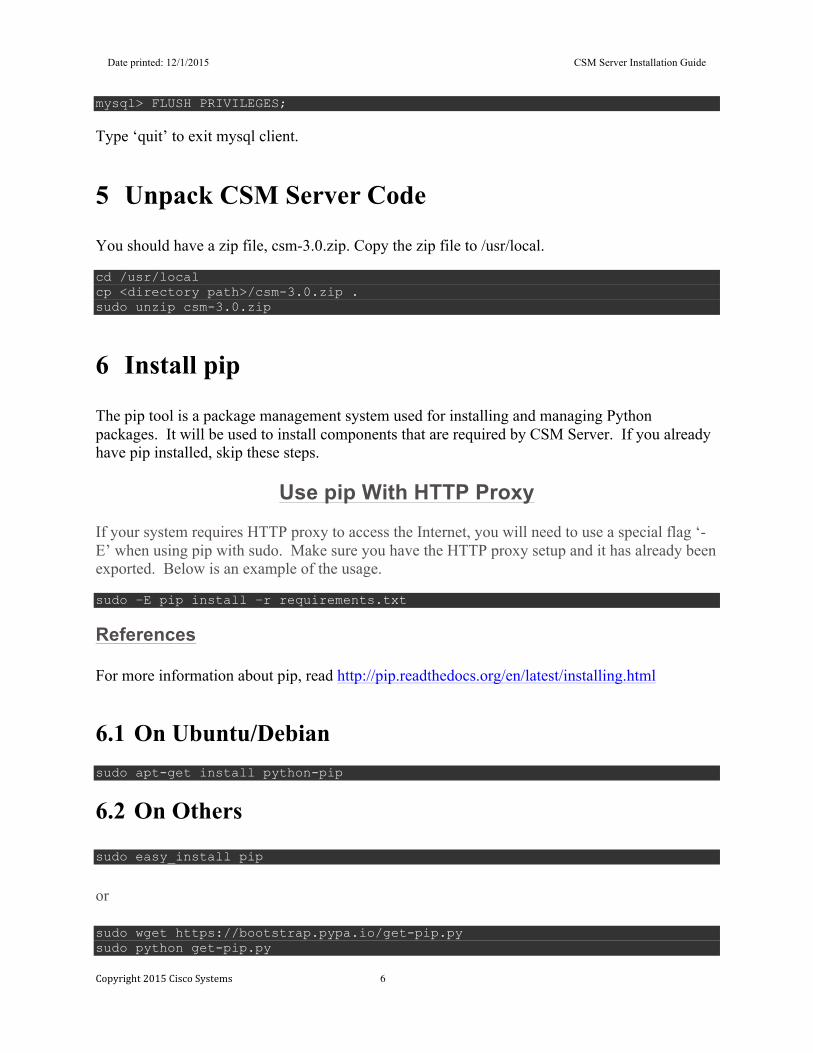
mysql> FLUSH PRIVILEGES; Type ‘quit’ to exit mysql client.
5 Unpack CSM Server Code You should have a zip file, csm-3.0.zip. Copy the zip file to /usr/local. cd /usr/local cp <directory path>/csm-3.0.zip . sudo unzip csm-3.0.zip
6 Install pip The pip tool is a package management system used for installing and managing Python packages. It will be used to install components that are required by CSM Server. If you already have pip installed, skip these steps.
Use pip With HTTP Proxy
If your system requires HTTP proxy to access the Internet, you will need to use a special flag ‘-E’ when using pip with sudo. Make sure you have the HTTP proxy setup and it has already been exported. Below is an example of the usage. sudo –E pip install –r requirements.txt References For more information about pip, read http://pip.readthedocs.org/en/latest/installing.html
6.1 On Ubuntu/Debian sudo apt-get install python-pip
6.2 On Others sudo easy_install pip
or sudo wget https://bootstrap.pypa.io/get-pip.py sudo python get-pip.py
Date printed: 12/1/2015 CSM Server Installation Guide
Copyright 2015 Cisco Systems 7
7 Use Virtual Environment This section is optional. virtualenv is a tool to create an isolated Python virtual environment. It creates an environment that has its own installation directories and doesn’t share libraries with other virtual environments (and optionally doesn’t access the globally installed libraries either). If your system has several python applications, using virtualenv will ensure that the installed libraries won’t conflict with your existing applications. All python components used by CSM Server will be installed inside the virtual environment. When launching CSM Server, it must be done inside the virtual environment. To remove CSM Server and related python libraries, simply remove the virtual environment directory (i.e. ‘env’ as used below) sudo pip install virtualenv Create a Virtual Environment To create a virtual environment and copy the correct version of the python interpreter inside it, use the ‘-p’ flag along with the python interpreter path (use ‘which python’ or ‘which python2.7’ to identify the path). The word ‘env’ is the virtual environment name. cd /usr/local/csm/csmserver sudo virtualenv –p /usr/bin/python2.7 env Enter the Virtual Environment To enter the virtual environment, from /usr/local/csm/csmserver, type source env/bin/activate You should see a new shell prompt with ‘(env)’ as the prefix. This indicates that you are inside the virtual environment. Exit the Virtual Environment Type ‘deactivate’ and the normal shell prompt will re-appear (i.e. without ‘(env)’). deactivate
8 Install Other Libraries If you are using a virtual environment, make sure you are inside the virtual environment before proceeding. Refer to Enter the Virtual Environment. One of the libraries, pysftp (SFTP support), requires Python Development Tool. Follow the steps below to install it.
Date printed: 12/1/2015 CSM Server Installation Guide
Copyright 2015 Cisco Systems 8
On CentOS/RedHat sudo yum install python-devel
On Ubuntu/Debian sudo apt-get install python-dev
8.1 Install Libraries using requirement.txt This file contains a list of libraries that are used by CSM Server. Using this method to install libraries saves time and typing. cd /usr/local/csm/csmserver sudo pip install –r requirements.txt
8.2 Install Libraries One by One If using the requirements.txt method above fails, follow these steps to install libraries one at a time to identify the issue. cd /usr/local/csm/csmserver sudo pip install Flask==0.10.1 sudo pip install Flask-Login==0.2.11 sudo pip install Flask-HTTPAuth==2.5.0 sudo pip install SQLAlchemy==0.9.8 sudo pip install WTForms==2.0.2 sudo pip install PyMySQL==0.6.3 sudo pip install condoor sudo pip install requests==2.5.1 sudo pip install ordereddict==1.1 sudo pip install gunicorn==19.2.1 sudo pip install xlutils==1.7.1 sudo pip install pysftp==0.2.8
9 Launch CSM Server A launch script called csmserver is provided in the csm/csmserver directory to start or stop CSM Server. If your system’s python 2.7.x interpreter is not callable by the name “python”, edit the csmserver launch script and update the following line. PYTHON=”python” to PYTHON=”python2.7” cd /usr/local/csm/csmserver sudo vi csmserver
Date printed: 12/1/2015 CSM Server Installation Guide
Copyright 2015 Cisco Systems 9
Configure Database Parameters In the csmserver directory, a file called database.ini contains the database connection information. This information enables CSM Server to connect to MySQL. Edit this file and replace ‘root’ with the preferred database user’s username and password. Once the file is read, the username and password will be encrypted. sudo vi database.ini [Database] drivername = mysql+pymysql host = localhost port = 3306 username = root password = root database = csmdb
To Start CSM Server If you are using a virtual environment, make sure you are inside the virtual environment before proceeding. Refer to Enter the Virtual Environment. Use the command below to start CSM Server. sudo ./csmserver start If the following error messages are observed when you attempt to start CSM Server, it means CSM Server is already running. [4596] [INFO] Starting gunicorn 19.1.1 [2015-02-11 12:36:46 +0000] [4596] [ERROR] Connection in use: ('0.0.0.0', 5000) [2015-02-11 12:36:46 +0000] [4596] [ERROR] Retrying in 1 second. To Stop CSM Server sudo ./csmserver stop
10 Connect to CSM Server Once the CSM Server is running, type the following into a browser: http://<IPAddress or Domain Name>:5000 You should see the Login dialog. The default username and password is ‘root/root’. Once logged in, change the password by clicking Tools – Edit My Profile.
Date printed: 12/1/2015 CSM Server Installation Guide
Copyright 2015 Cisco Systems 10
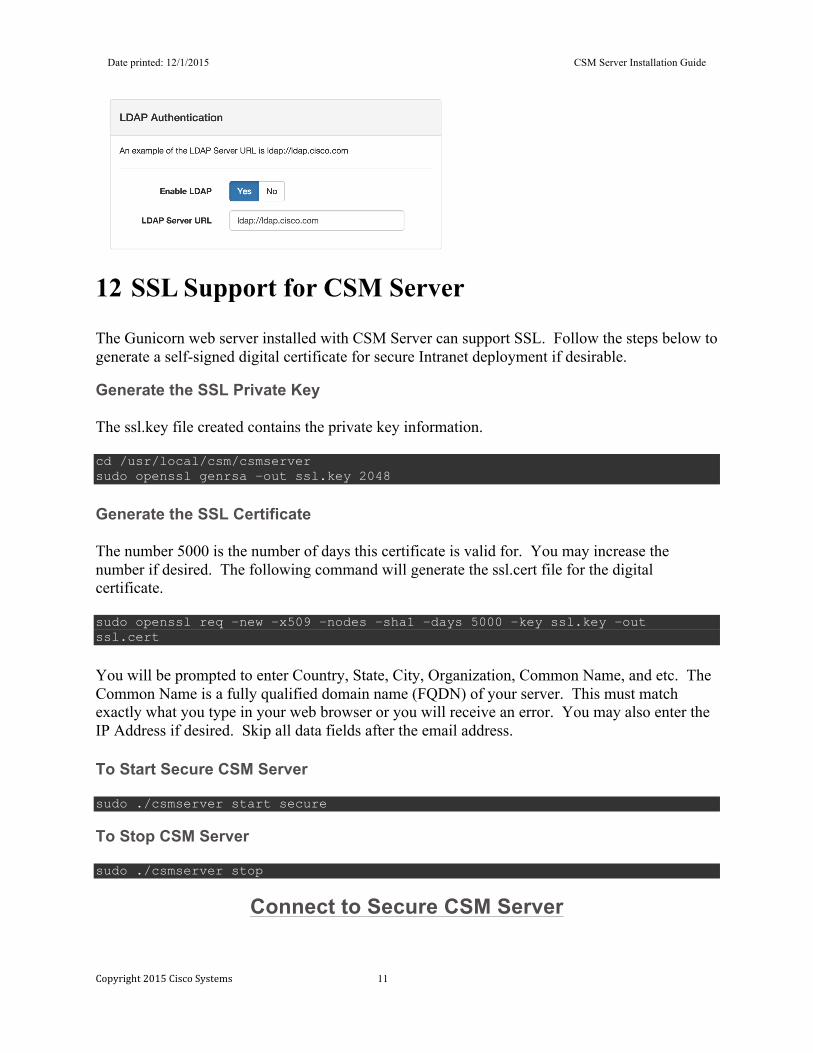
11 LDAP for User Authentication LDAP (Lightweight Directory Access Protocol) is a software protocol for accessing and maintaining distributed directory information services over an IP network. One common usage of LDAP is for user authentication across many organizational services. Instead of creating each user for CSM Server, CSM Server can connect to your LDAP server to authenticate users. Authenticated users will have network administrator privilege. If you are not planning to use LDAP, you can skip this section. CSM Server uses python-ldap which is an object-oriented API to access LDAP directory servers. It requires OpenLDAP libraries on your Linux distribution. Follow the instruction below to install required libraries.
11.2 On Ubuntu/Debian sudo apt-get update sudo apt-get install python-dev libldap2-dev libsasl2-dev sudo apt-get install python-ldap Configure LDAP If LDAP and its required libraries are not installed successfully, a message “LDAP authentication is not supported because it has not been installed” will be printed on the terminal when CSM Server is started and the GUI below will not be available on Tools – Admin Dashboard. If LDAP is installed successfully, follow the steps below to configure it. To configure LDAP, click Tools – Admin Dashboard on CSM Server and enter the relevant information. Be sure to click the Save button.
Date printed: 12/1/2015 CSM Server Installation Guide
Copyright 2015 Cisco Systems 11
12 SSL Support for CSM Server The Gunicorn web server installed with CSM Server can support SSL. Follow the steps below to generate a self-signed digital certificate for secure Intranet deployment if desirable. Generate the SSL Private Key The ssl.key file created contains the private key information. cd /usr/local/csm/csmserver sudo openssl genrsa –out ssl.key 2048
Generate the SSL Certificate The number 5000 is the number of days this certificate is valid for. You may increase the number if desired. The following command will generate the ssl.cert file for the digital certificate. sudo openssl req –new –x509 –nodes –sha1 –days 5000 –key ssl.key –out ssl.cert
You will be prompted to enter Country, State, City, Organization, Common Name, and etc. The Common Name is a fully qualified domain name (FQDN) of your server. This must match exactly what you type in your web browser or you will receive an error. You may also enter the IP Address if desired. Skip all data fields after the email address. To Start Secure CSM Server sudo ./csmserver start secure To Stop CSM Server sudo ./csmserver stop
Connect to Secure CSM Server
Date printed: 12/1/2015 CSM Server Installation Guide
Copyright 2015 Cisco Systems 12
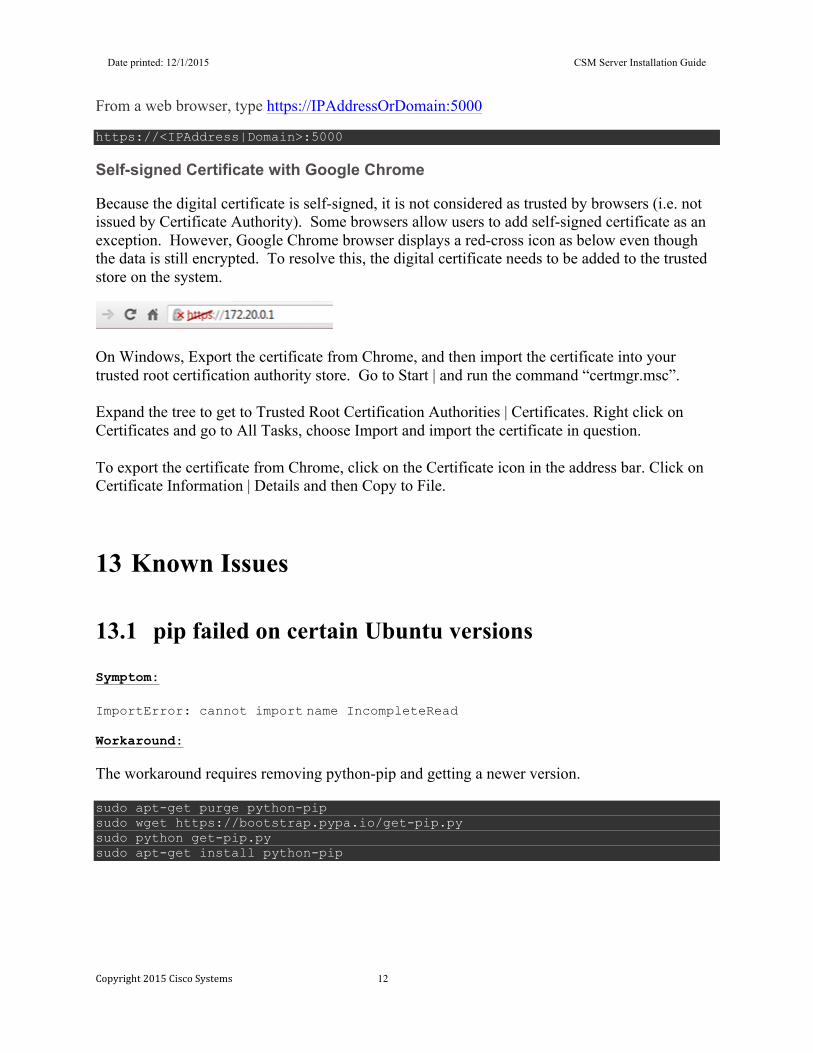
From a web browser, type https://IPAddressOrDomain:5000 https://<IPAddress|Domain>:5000 Self-signed Certificate with Google Chrome Because the digital certificate is self-signed, it is not considered as trusted by browsers (i.e. not issued by Certificate Authority). Some browsers allow users to add self-signed certificate as an exception. However, Google Chrome browser displays a red-cross icon as below even though the data is still encrypted. To resolve this, the digital certificate needs to be added to the trusted store on the system.
On Windows, Export the certificate from Chrome, and then import the certificate into your trusted root certification authority store. Go to Start | and run the command “certmgr.msc”.
Expand the tree to get to Trusted Root Certification Authorities | Certificates. Right click on Certificates and go to All Tasks, choose Import and import the certificate in question.
To export the certificate from Chrome, click on the Certificate icon in the address bar. Click on Certificate Information | Details and then Copy to File.
13 Known Issues
13.1 pip failed on certain Ubuntu versions Symptom: ImportError: cannot import name IncompleteRead Workaround:
The workaround requires removing python-pip and getting a newer version. sudo apt-get purge python-pip sudo wget https://bootstrap.pypa.io/get-pip.py sudo python get-pip.py sudo apt-get install python-pip
Date printed: 12/1/2015 CSM Server Installation Guide