SEMINAR TOPIC - “ Class – II cavity preparation for [amalgam restoration and cast metal inlay] ” by, A . Arif Bhasha, 3 rd year junior batch,, Department Of Conservative Dentistry & Endodontics.. Dept.Conservative dentistry & Endodontics
Transcript
Dept.Conservative dentistry & Endodontics
SEMINAR TOPIC - “ Class – II cavity preparation for [amalgam restoration and cast metal inlay] ”
by, A . Arif Bhasha,
3rd year junior batch,, Department Of Conservative Dentistry &
Endodontics..
Dept.Conservative dentistry & Endodontics
Tooth preparation is defined as the mechanical alteration of a defective, injured, or diseased tooth to best receive a restorative material that will reestablish a healthy state for the tooth, including esthetic corrections where indicated, along with normal form and function.
What is TOOTH PREPARATION?????????
Dept.Conservative dentistry & Endodontics
is to-------(1) remove all defects and provide necessary protectionto the pulp, (2) extend the restoration as conservativelyas possible, (3) form the tooth preparation so thatunder the force of mastication the tooth or the
restorationor both will not fracture and the restoration will not
CLASS II AMALGAM RESTORATIONS……...........................
Dept.Conservative dentistry & Endodontics
Amalgam restorations that restore one or both of the proximal surfaces of the tooth may provide years of service to the patient when the:
(1) matrix is suitable,(2) tooth preparation is correct,(3) operating field is isolated, and (4) restorative material is manipulate properly.
Dept.Conservative dentistry & Endodontics
I NITIAL CLINICAL PROCEDURES…………………………..
Dept.Conservative dentistry & Endodontics
Occlusal contacts should be marked with
articulating paper before tooth preparation.
The operator should make a mental
image of these contacts to serve as guide in tooth preparation and restoration.
Dept.Conservative dentistry & Endodontics
Any opposing "plunging cusp" or other
pointed cusp may need to be recontoured to reduce the risk of fracture of the new restoration or the cusp from occlusal forces.
Dept.Conservative dentistry & Endodontics
Initial Tooth
Preparation………………………………
Dept.Conservative dentistry & Endodontics
Occlusal outline form (occlusal step).
The occlusal outline form of a
Class II tooth preparation for amalgam is similar to that for the Class I tooth preparation.
Using high speed with air-water spray, enter the pit nearest the involved proximal surface with a punch cut using a No. 245 bur.
Dept.Conservative dentistry & Endodontics
The long axis of the bur and the long axis of
the crown should remain parallel during
cutting procedures.
Proper depth of the initial entry cut is
1.5 to 2 mm
(i.e., one half to two thirds the length of the
cutting portion of a No. 245 bur).
This pulpal depth is usually 0.1 to 0.2mm into the dentin.
Dept.Conservative dentistry & Endodontics
Ideally width of isthmus should be the width of the No. 245 bur.
Narrow restorations provide a greater length of clinical service.
Generally the amount of remaining tooth structure is more important to restoration longevity than the restorative material used.
The pulpal floor should be prepared to a uniform depth
and is usually flat.
Dept.Conservative dentistry & Endodontics
Reverse curve is usually created in mesio-facial aspect , parallel to enamel rod direction . Lingually, reverse curve is very slight, often unnecessary.
Dept.Conservative dentistry & Endodontics
Proximal outline form (proximal box)..........
Dept.Conservative dentistry & Endodontics
The objectives for extension of proximal margins are to:
Include all caries, faults, or existing restorative material.
Establish (ideally) not more than 0.5 mm clearancewith the adjacent proximal surface facially, lingually,and gingivally.
Dept.Conservative dentistry & Endodontics
Isolation of proximal enamel.
A, Bur position to begin proximal ditch cut.
B, Proximal ditch is extended gingivally to desired level of gingival wall (i.e., floor).
C, Variance in pulpal depth of axiogingival line angle as extension of gingival wall varies: a, at minimal gingival extension; b, at moderate extension; c, at extension in cementum,.
Dept.Conservative dentistry & Endodontics
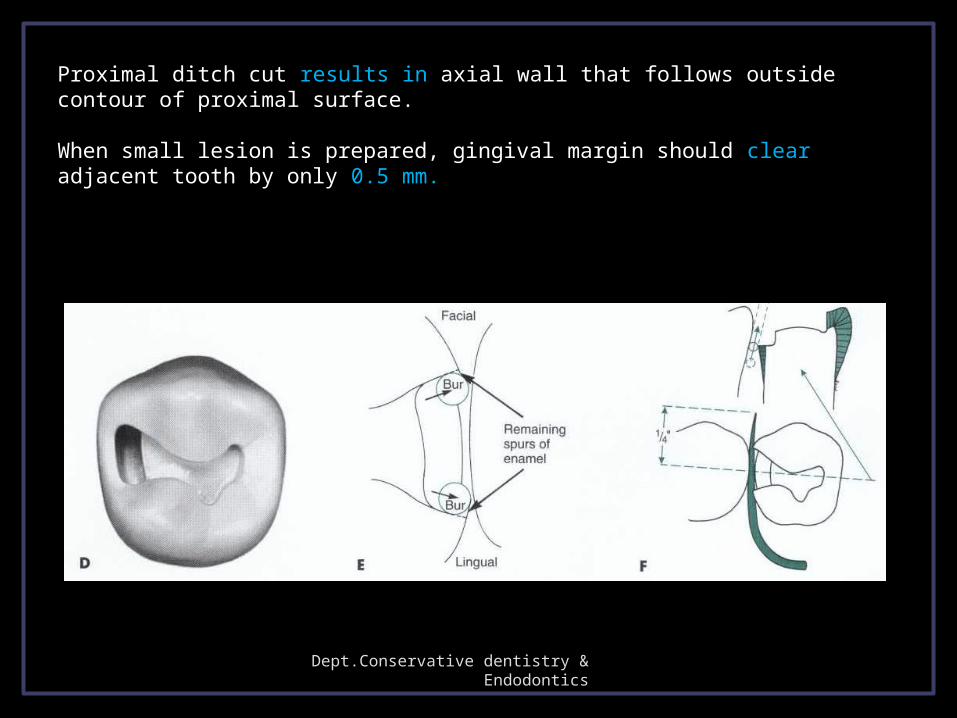
Proximal ditch cut results in axial wall that follows outside contour of proximal surface. When small lesion is prepared, gingival margin should clear adjacent tooth by only 0.5 mm.
Dept.Conservative dentistry & Endodontics
Faciolingual dimension of proximal ditch is greater at gingival than at occlusal level.
To further isolate and weaken proximal enamel, bur is moved toward and perpendicular to proximal surface .
Dept.Conservative dentistry & Endodontics
When a rotary instrument is used in a proximal box
after the proximal enamel is removed, there is a danger
of the instrument either marring the adjacent proximal surface ………………
Dept.Conservative dentistry & Endodontics
Removing isolated
enamel………………………
Dept.Conservative dentistry & Endodontics
Using spoon excavator to fracture out weakened proximal enamel………
Occlusal view with proximal enamel removed……….
Proximal view with proximalenamel removed..
Dept.Conservative dentistry & Endodontics
Removing remaining undermined proximal enamel with enamel hatchet…………………
Dept.Conservative dentistry & Endodontics
On lingual proximal wall
On facial proximal wall
On gingival wall
Dept.Conservative dentistry & Endodontics
Primary resistance form is provided by:
The pulpal and gingival walls being relatively flat and perpendicular to forces directed with the long axis of the tooth;
Restricting the occlusal outline form (where possible) to areas receiving minimal occlusal contact.
Dept.Conservative dentistry & Endodontics
The reverse curve optimizing the strength of both the amalgam and tooth structure at the junction of the occlusal step and proximal box;
Slightly rounding the internal line angles to reduce stress concentration in tooth structure (automatically created by bur design, except for the axiopulpal line angle); and
Providing enough thickness of restorative material to prevent its fracture under mastication
Simple box preparation-only proximal boxSlot preparation-similar to cl V but done at
proximal sideConservative design-preserves tranverse or
oblique ridgeModification to preserve esthetics-45 d rotation of
the box.Adjoining restoration-joining MO with existing DOModifications for abutment teeth for removal
partial denturesCusp capping.
modifications
Dept.Conservative dentistry & Endodontics
Removal of remaining defective enamel and infected carious dentin
Pulp protectionSecondary retention and resistance formsFinishing the external wallsCleaning the cavity preparation.
Final cavity preparation
Dept.Conservative dentistry & Endodontics
A, Failure caused by weak enamelmargin.
B, Failure caused by weak-amalgammargin.
C, Proper direction to proximal walls resultsin full-length enamel rods and 90-degreeamalgam at preparation margin. Note also thatretention locks have been cut 0.2 mm inside DEJ,and their direction of depth is parallel to DEJ.
TOOTH PREPARATION FOR CAST METAL INLAY
Inlay is defined as a fixed intracoronal restoration, a dental restoration made outside of a tooth to correspond to the form of prepared cavity, which is then luted into the tooth (Rosensteil)
Class II inlay involves occlusal surfaces and proximal surfaces of a posterior tooth and may cap one or more but not all of the cusps (John R.Sturdevant, Clifford M. Sturdevant)
DEFINITION OF INLAY
Indications
It is an alternative to amalgam and composite when higher strength and superior control of contours & contacts is desired.
Used instead of amalgam in patients with low caries rate who require class II with ample supporting dentin
High caries rate Young patients Esthetic concernsSmall restorations Unless sufficient bulk of tooth is there to
provide retention and resistance, it is contraindicated
Contraindications
Strength Biocompatibility Low wearControl of contours & contacts
Advantages
Higher chair side time & increased appointments
Temporary required between preparation & delivery appointments
Cost factor Technique sensitive
Disadvantages
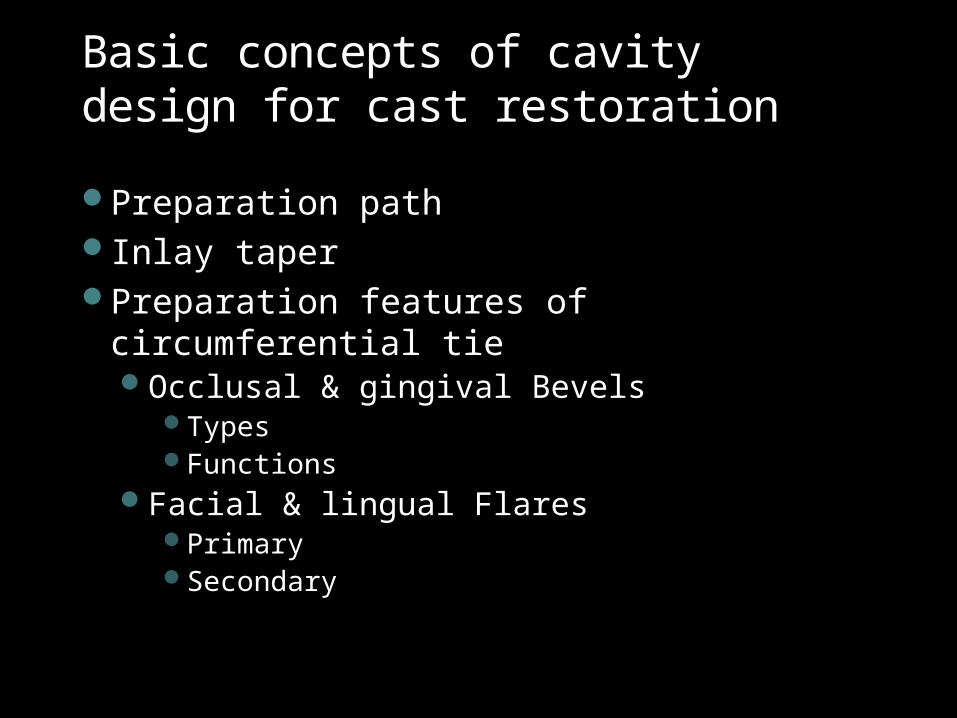
Preparation path Inlay taperPreparation features of circumferential tie
Occlusal & gingival Bevels Types Functions
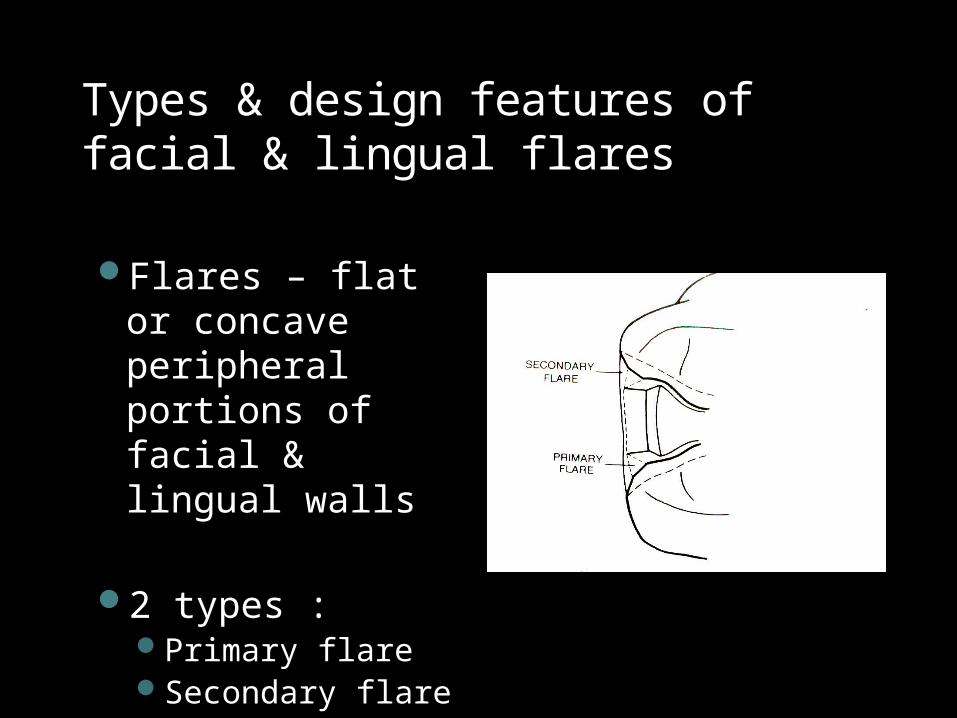
Facial & lingual FlaresPrimarySecondary
Basic concepts of cavity design for cast restoration
Preparation path
Single insertion pathAll reductions
oriented towards one path
The “line of draw” – path of removal & re-insertion should be perpendicular to plane across cusp tips or parallel to long axis of tooth crown
Inlay taper
Apico-occlusal taper
Cavity walls must diverge from floor outwards
To permit unobstructed removal & placement of wax pattern & casting
According to Sturdevant : 2 ° – 5 ° from line of
draw Short vertical walls : 2
° Long vertical walls : >
2 °
According to Charbeneau :10 ° – 16 ° of
convergent angle 5 ° – 8 ° on each wall
According to Marzouk :2 ° – 5 ° from path of
preparation
Taper may be increased or decreased according to following factors :
Wall length Taper required (< 10°)
Surface involvement in preparation
Taper required (< 10°)
Need for retention Taper
Circumferential tie – peripheral marginal anatomy
Features : Margins terminating on enamel should fulfill
requirements advocated by Noy In an intracoronal cavity, the circumferential tie is in the
form of a bevel, which is a plane of a cavity wall or floor directed away from cavity preparation
Occlusal & gingival Bevels Types Functions
Facial & lingual FlaresPrimarySecondary
PREPARATION FEATURES OF CIRCUMFERENTIAL TIE
BEVELS
“Flexible extentions” of a cavity preparation, allowing the inclusion of surface defects, supplementary grooves, or other areas on tooth surface.
To provide “lap joint”
According to their shapes & types of tissue involvement there are 6 types of bevels :Partial bevel Short bevel Long bevel Full bevel Counter bevelHollow ground (concave) bevel
Types & design features of occlusal & gingival bevels
Partial bevel
Involves : part of enamel wall ; not exceeding 2/3 of its dimension
Use : to trim weak enamel rods from margin peripheries
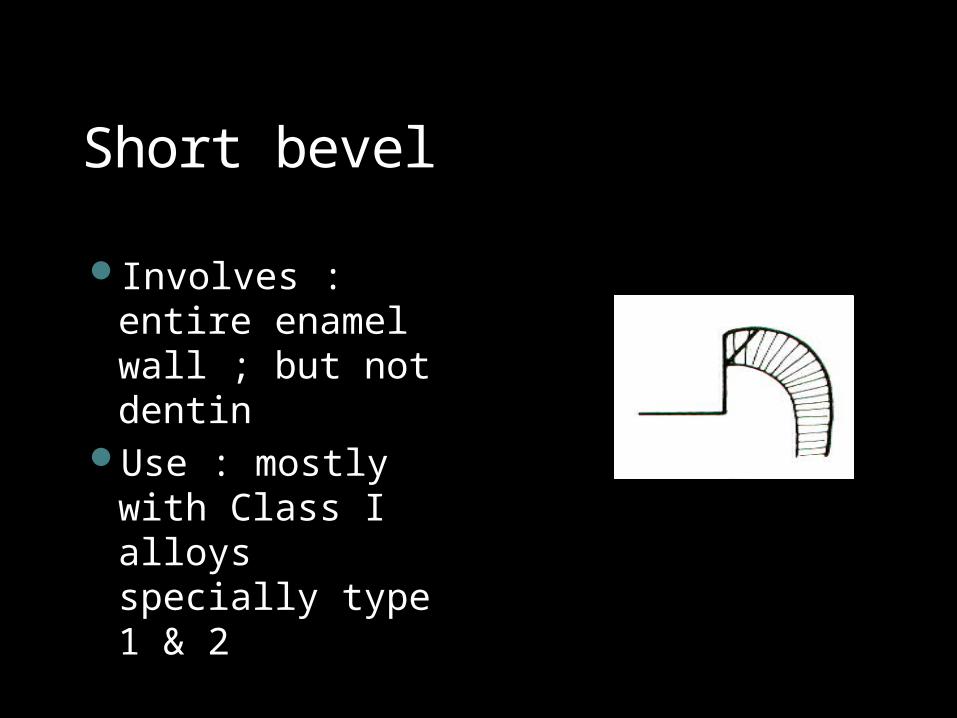
Short bevel
Involves : entire enamel wall ; but not dentin
Use : mostly with Class I alloys specially type 1 & 2
Long bevel
Involves : all enamel wall & up to ½ of dentinal wall
Use : most frequently used for Class I,II & III alloys
Advantage : preserves internal “boxed-up” resistance & retention features of the preparation
Full bevel Involves : all the
dentinal & enamel walls of cavity wall or floor
Use : only if impossible to use other bevels
Disadvantage : deprives the preparation of its internal resistance & retention features
Counter bevel
Use : when capping cusps ; to protect & support them
Used opposite to an axial cavity wall on facial or lingual surface of tooth
It will have gingival inclination facially & lingually
Hollow ground (concave) bevelAny bevel
prepared in concave form
Allows space for cast material bulk ; improves retention & resistance