6
Classic Vinyl Stair Railing Installation Guide

Classic Vinyl Stair Railing Installation Guide
We’re happy to help. Call 1-866-719-5782. 1
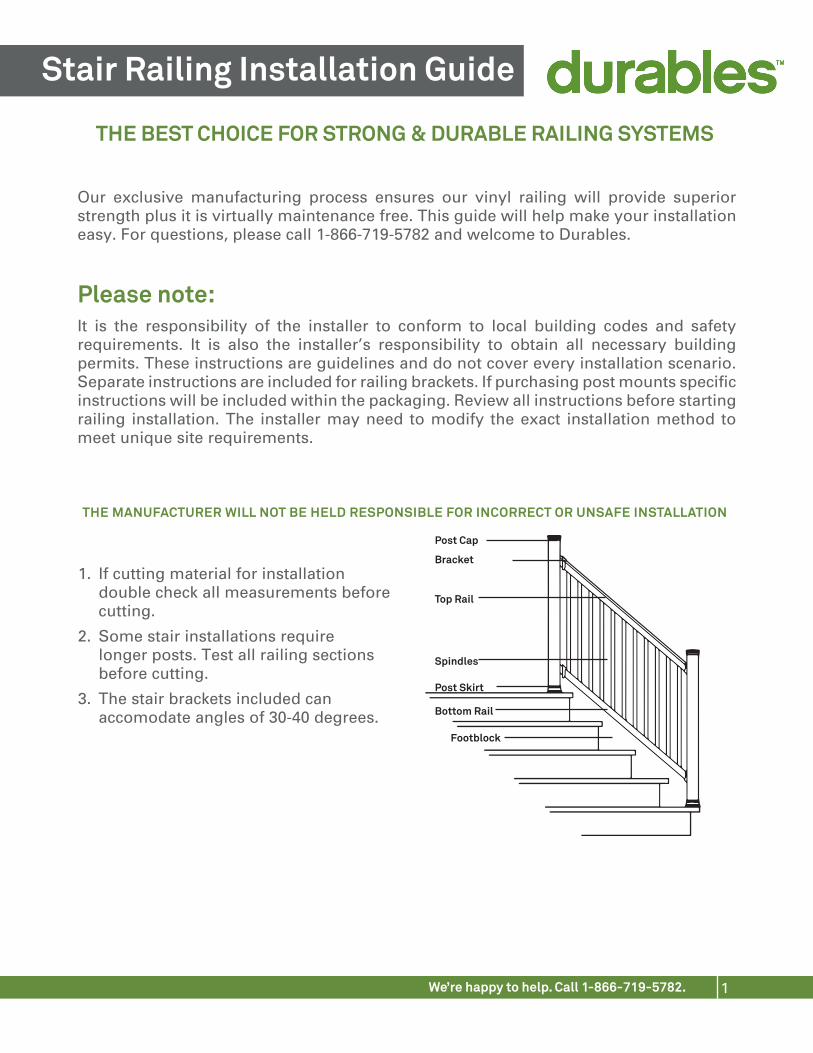
THE MANUFACTURER WILL NOT BE HELD RESPONSIBLE FOR INCORRECT OR UNSAFE INSTALLATION
THE BEST CHOICE FOR STRONG & DURABLE RAILING SYSTEMS
Stair Railing Installation Guide
It is the responsibility of the installer to conform to local building codes and safety requirements. It is also the installer’s responsibility to obtain all necessary building permits. These instructions are guidelines and do not cover every installation scenario.
instructions will be included within the packaging. Review all instructions before starting railing installation. The installer may need to modify the exact installation method to meet unique site requirements.
Our exclusive manufacturing process ensures our vinyl railing will provide superior strength plus it is virtually maintenance free. This guide will help make your installation easy. For questions, please call 1-866-719-5782 and welcome to Durables.
Please note:
1. If cutting material for installationdouble check all measurements beforecutting.
2. Some stair installations requirelonger posts. Test all railing sectionsbefore cutting.
3. The stair brackets included canaccomodate angles of 30-40 degrees.
Top Rail
Bracket
Post Cap
Post Skirt
Bottom Rail
Footblock

We’re happy to help. Call 1-866-719-5782.
Stair Railing Installation Guide
2
1. The bracket kits include two differentsize screws. The 1-1/2” screws are usedto install the mounting bracket to thepost. The 1” screws are used to attachthe rail to the mounting bracket.
2. If you are using an optional post mount,use the 1” screws that come with thepost mounting hardware to install themounting brackets.
3. While marking the angle on the bottomrail, ensure the pickets are equallyspaced from each post.
4. A non-ferrous metal blade can be usedto cut the vinyl and aluminum at thesame time. Cut slowly and use all safetyprecautions.
5. Before installing the rails, ensure thealuminum is seated into the vinylrail properly. The large opening ofthe H-channel should be towards thepickets.
6. If the posts are plumb, the angle shouldbe the same for both rails. Alwaysdouble check before cutting the rails.
Installation Tips:
Picket
AluminumH-Channel
Top Rail

We’re happy to help. Call 1-866-719-5782.
Stair Railing Installation Guide
3
Section 1These instructions are designed to be supplemental; review all instructions with the brackets before starting installation.
1. Plumb posts and install optional post skirt before installing rail mounting brackets.
2. Determine the distance between the deck and the bottom rail based on local code(generally 2”).
3. Stair installation requires the rail ends to be cut at the same angle as the stairs.
4. Lay the bottom rail along the stairs, but raised so that there is a space between therail and the stairs (typically 2”). Assure that the holes for the spindles are on the topof the rail and the single hole for the foot block faces down.
5. Ensure the pickets are centered between the posts and mark the rail angle. Clamp thebottom rail to the post then measure the length of the footblock.
6. To determine the length of the footblock,place the footblock next to the rail on thestep that the footblock falls on.
7. Mark the footblock along the top of therailing then cut the footblock 1/8” shorterthan the line, following the angle of thebottom rail.
8. Using a pencil, strike a line on the bottomrail against the post to determine theangle.
9. Mark the bottom and top rail to the samelength, ensuring the picket holes line upbefore cutting the rail.
10. Cut the vinyl rail and the aluminuminsert to the same length.
We’re happy to help. Call 1-866-719-5782.
Stair Railing Installation Guide
4
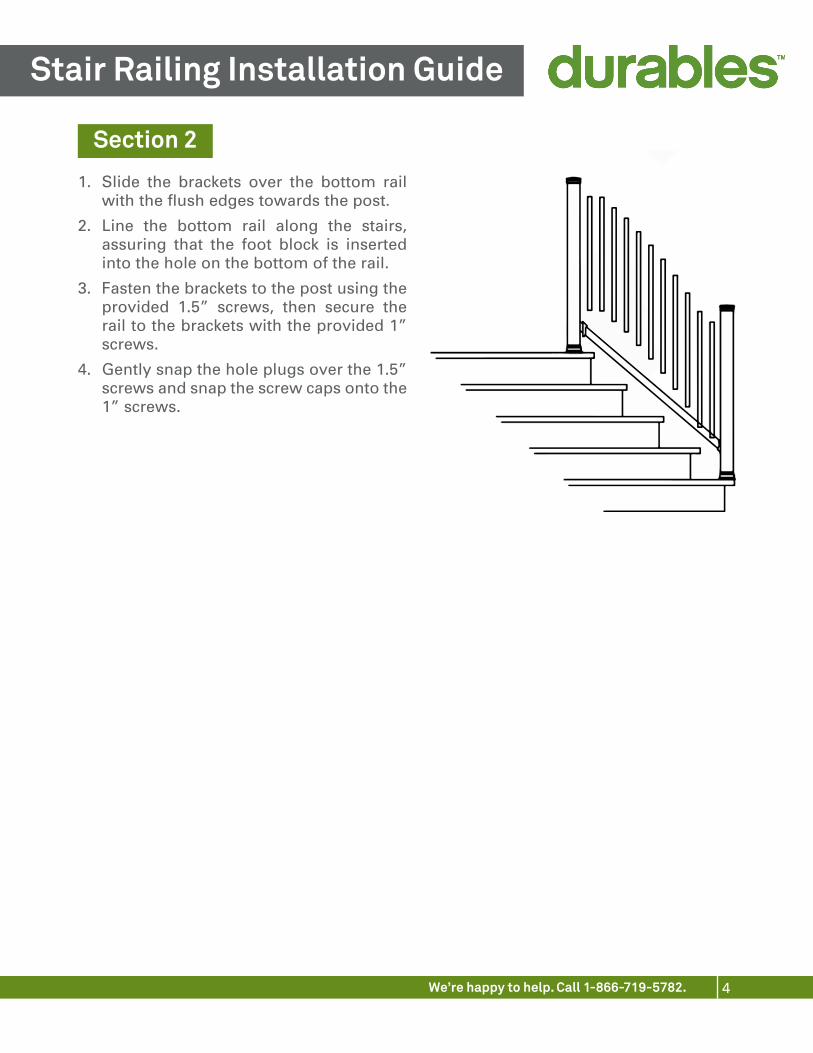
1. Slide the brackets over the bottom rail
2. Line the bottom rail along the stairs,assuring that the foot block is insertedinto the hole on the bottom of the rail.
3. Fasten the brackets to the post using theprovided 1.5” screws, then secure therail to the brackets with the provided 1”screws.
4. Gently snap the hole plugs over the 1.5”screws and snap the screw caps onto the1” screws.
Section 2

We’re happy to help. Call 1-866-719-5782.
Stair Railing Installation Guide
5
1. Assure that the
brackets are placed onto the ends of the rails before installing the top rail.
2. Fasten the brackets to the post with the provided 1.5” screws. Then secure the rail tothe bracket with the 1” screws.
3. Gently snap the hole plugs over the 1.5” screws and snap the screw caps onto the1” screws.
If needed, alter the post height and install the post caps.
Section 3


