Page 1
Clinical Guidance
Neonatal Manual Chapter 15: Practical procedures
Summary This manual contains clinical guidelines developed by the Neonatal Unit multidisciplinary team over recent years. This chapter contains guidelines on various aspects of medical management, particularly to do with practical procedures, on the Neonatal Unit. It is linked to and should be used in conjunction with the completed neonatal manual details of which are contained in the introductory chapters.
Document Detail Document Type Clinical Guideline Document name Neonatal Manual Chapter 15: Practical procedures Document location GTi Clinical Guidance Database Version 2.0 Effective from February 2012 Review date February 2015 Owner Timothy Watts, Clinical Lead, Neonatal Unit Author Karen Turnock, Consultant Neonatologist Approved by, date Neonatal Clinical Governance Group, February 2012 Superseded documents Neonatal Manual Chapter 15: Practical procedures v1.0 Related documents Neonatal Manual Chapters 1-15; Initial management of the
preterm newborn <30 weeks gestation; Neonatal nursing guidelines
Keywords Neonatal, Neonatology, Neonatal Unit, Newborn, NNU, NICU, SCBU, peripheral line, arterial line, umbilical line, PICC, exchange transfusion, intubation, chest drain, tracheostomy, broncho-alveolar lavage, supra-pubic aspirate, naso-jejunal tube, lumbar puncture, ventricular tap
Relevant external law, regulation, standards
Change History Date Change details, since approval Approved by
Page 2
Neonatal Manual Chapter 15 – Practical Procedures v2.0 Effective from February 2012 to February 2015 Page 2 of 26
15 Practical Procedure Page
15.1 Insertion of peripheral venous lines 3 15.2 Sampling from arterial lines 4 15.3 Arterial stab (Radial arterial stab) 5 15.4 Insertion and maintenance of peripheral arterial lines 6 15.5 Insertion and maintenance of umbilical arterial lines 7 15.6 Insertion and maintenance of peripheral venous lines 9 15.7 Insertion and maintenance of percutaneous central lines (long
lines) and surgical placed central lines 11
15.8 Best practice for central line insertion 14 15.9 Exchange transfusion 15 15.10 Endotracheal intubation 17 15.11 Insertion and care of chest drains 18 15.12 Tracheostomy care guidelines for the neonatal unit 20 15.13 Non-directional brocho-alveolar lavage (BAL) 22 15.14 Suprapubic aspiration of urine (SPA) 22 15.15 Insertion of naso-jejunal feeding tube 23 15.16 Lumbar puncture 23 15.17 Ventricular tap and removal of cerebrospinal fluid (CSF) from
reservoirs 24
Page 3
15 PRACTICAL PROCEDURES
These guidelines do not take the place of supervised experience, always ask a more senior
colleague to teach and supervise if you are inexperienced.
Care should be taken when performing practical procedures in neonates:
• Aseptic precautions and awareness of best practice to avoid nosocomial infection are
crucial
• The skin of preterm babies is particularly fragile in the first week of life
• The bones of chronically ill preterm babies may develop rickets and are vulnerable to
fractures 15.1 INSERTION OF PERIPHERAL VENOUS LINES
Cannulation of the peripheral veins provides access for infusion of crystalloid and colloid
solutions, medications and short term access for infusion of total parenteral nutrition (TPN)
where no central access is available.
Equipment needed
• Red tray
• Gloves
• 24G yellow cannula (26G cannula available for very small difficult to cannulate babies)
• 2mL syringe
• Luer-lock extension set or T piece
• Alcohol swabs
• 0.9% sodium chloride
• Steri-strips
• Tegaderm or similar bio-occlusive dressing
• Splint
Procedure
1. Before starting, choose a suitable vein. Avoid using potential “long line sites” initially
such as the antecubital fossa and long saphenous veins. If a scalp vein is to be used,
you may want to remove hair from the area first.
2. Clean procedure: wash hands
3. Clean red tray with Clinell wipes and place all equipment into tray as it is opened.
4. Before starting the procedure – adjust the height of the incubator and ensure you have
adequate lighting.
5. Consider sucrose analgesia and swaddling where appropriate.
Neonatal Manual Chapter 15 – Practical Procedures v2.0 Effective from February 2012 to February 2015 Page 3 of 26
Page 4
6. Wash hands and wear gloves
7. Prepare equipment. Draw up 0.9% sodium chloride to flush and prime extension T-
piece. Clean site with an alcohol swab and leave to dry for approximately 30 seconds.
8. Firmly grip the limb using your fingers as a tourniquet whilst stretching the skin to
stabilise the vein. Cleaning the skin again with the alcohol swab can help make the vein
easier to see. It may be helpful if an assistant holds the limb.
9. With the cannula bevel facing upwards, puncture the skin and vein together at an angle
of approximately 35º. Carefully advance the cannula until blood appears in the hub.
10. Withdraw the needle holding it with your thumb and middle finger, while simultaneously
advancing the cannula into the vein with your forefinger.
11. Attach the T-piece and tighten the luer lock. Flush the cannula through with 0.9%
sodium chloride to check patency.
12. Secure the cannula using steri-strips then cover with Tegaderm. Avoid dressings and
strapping that obscure the entry site of the line as this can make detection of
extravasation difficult. Ensure dressing is not circumferential to the limb.
13. If necessary secure the limb with a splint making sure it is placed correctly, the tapes
are not too tight and joints are well supported.
14. Document site date and time of insertion –use a peripheral vascular access sticker in
the continuation notes.
Remember the rule: Three strikes and you’re out! Ask for help after your third attempt. 15.2 SAMPLING FROM ARTERIAL LINES
Equipment needed:
• Red tray
• Gloves
• 3 syringes, one containing 2mL 0.9% sodium chloride
• Large Clinell wipe (2% chlorhexidine 70% alcohol)
Procedure
1. Clean red tray with Clinell wipes and drop rest of equipment in tray.
2. Before starting the procedure – adjust the height of the incubator and ensure you have
adequate lighting.
3. Clean procedure: wash hands and wear gloves; use ‘aseptic non-touch technique’
(ANTT)
4. Clean Bionector hub with Clinell wipe and allow to dry (ANTT)
5. Attach syringe to Bionector and close line to transducer.
Neonatal Manual Chapter 15 – Practical Procedures v2.0 Effective from February 2012 to February 2015 Page 4 of 26
Page 5
6. Slowly withdraw 2mL blood to clear dead space. Keep this.
7. Slowly withdraw sample using 1mL syringe (for blood gas only 0.1mL is sufficient)
8. Slowly re-transfuse previously withdrawn dead space fluid.
9. Flush with 1mL 0.9% sodium chloride, ensuring catheter is clear of blood.
10. Turn 3-way tap to reopen line to transducer.
15.3 ARTERIAL STAB (RADIAL ARTERIAL STAB)
Arterial puncture is usually performed to obtain blood for blood gas analysis or other
haematological investigations when venepuncture or capillary sampling is unsuitable.
Equipment needed
• Red Tray
• 26G needle or butterfly
• Syringe
• Alcohol swab
• Gloves
• Cotton wool
• Capillary tube or relevant blood bottles
Procedure
1. Clean red tray with Clinell wipes and drop rest of equipment in tray.
2. Before starting the procedure – adjust the height of the incubator and ensure you have
adequate lighting.
3. Consider sucrose analgesia and swaddling where appropriate.
4. Clean procedure: wash hands and wear gloves
5. First locate the radial artery. A cold light to transilluminate the wrist may be useful in
preterm babies.
6. Confirm the presence of collateral circulation by performing an Allen’s test as described
in peripheral arterial line guideline.
7. Extend the wrist. Palpate the artery. Marking the site with a gentle fingernail imprint
may be helpful.
8. Clean the site with the alcohol swab.
9. With the wrist extended slightly, puncture the skin with the needle at an angle of
approximately 30º. The bevel should be facing upwards.
10. Advance the needle until blood appears in the hub.
11. Either gently aspirate the sample with a syringe or drip the blood into the specimen
bottle. Collect the least amount of blood needed.
12. Withdraw the needle and apply firm pressure until bleeding has stopped.
Neonatal Manual Chapter 15 – Practical Procedures v2.0 Effective from February 2012 to February 2015 Page 5 of 26
Page 6
15.4 INSERTION AND MAINTENANCE OF PERIPHERAL ARTERIAL LINES
Cannulation of the peripheral arteries may be necessary for infants receiving intensive care for
invasive blood pressure monitoring and frequent blood sampling when an umbilical line cannot
be placed, there are clinical reasons to avoid using the umbilical vessels, or when it is no
longer possible to access the umbilical vessels.
Equipment needed
• Red tray
• 24G cannula
• 2ml syringe
• Luer lock extension set
• 0.9% sodium chloride
• Alcohol swab
• Steri-strips
• Tegaderm or similar bio-occlusive dressing
• Splint
• Gloves
• Cotton wool
Procedure
1. Clean red tray with Clinell wipes and drop rest of equipment in tray.
2. Before starting the procedure – adjust the height of the incubator and ensure you have
adequate lighting.
3. Consider sucrose analgesia and swaddling where appropriate.
4. Clean procedure: wash hands and wear gloves
5. Find an artery. A cold light to transilluminate the artery may be useful in preterm babies.
The radial artery (a third in from the radial side of the wrist) is most commonly used.
Alternatively the posterior tibial artery may be used (just behind the medial malleolus).
6. Confirm the presence of collateral circulation in the hand by performing an Allen’s test.
To do this, elevate the arm and simultaneously occlude the radial and ulnar arteries at
the wrist to drain blood from the hand. Release pressure on the ulnar artery. If normal
colour returns to the hand within 10 seconds adequate collateral circulation from the
ulnar artery is present. If normal colour does not return for 15 seconds or more,
collateral circulation is poor and it is best not to use the radial artery in that arm.
7. Hyperextend the wrist. Palpate the artery. Marking the site with a gentle fingernail
imprint may be helpful.
8. Clean site with an alcohol swab and leave to dry for approximately 30 seconds.
Neonatal Manual Chapter 15 – Practical Procedures v2.0 Effective from February 2012 to February 2015 Page 6 of 26
Page 7
9. With the wrist extended slightly, the cannula bevel upwards, insert the needle at an
angle of 20-30º through the anterior wall and into the lumen of the artery until blood is
seen.
10. Advance the cannula while simultaneously withdrawing the needle. Blood should flow
back freely.
11. Attach the syringe with primed T piece and flush the cannula
12. Secure the line as in venous cannulation. Do not attempt to do it single handed.
13. Attach heparinised sodium chloride infusion with pressure transducer. Infusion rate
generally 0.5mL/hr, can run at 1mL/hr in larger babies (see UAC guideline for making
up infusions).
14. Label the line as ‘arterial’.
15. Document insertion of the line on a peripheral vascular access sticker in the notes; in
addition document performance of Allen’s test and comment on perfusion distal to the
site of insertion.
16. Other more central arteries can be cannulated: the axillary and femoral arteries are less
likely to cause problems than the brachial. Always discuss insertion of arterial lines into
vessels other than those around the wrist and ankle with the consultant responsible.
17. For all arterial lines, have a low threshold for removing the line if local circulation
appears compromised. If there is any evidence of ischaemic injury, complete an
incident form.
18. A GTN patch can help maintain circulation if there is evidence of compromise: it needs
to be applied immediately proximal to the point of insertion plus over the compromised
area.
19. If the decision is taken to apply a GTN patch without removing the arterial line,
accepting the risk of ischaemia and loss of digits, this needs to be clearly documented
in the notes along with documentation that this risk has been discussed with the
parents. 15.5 INSERTION AND MAINTENANCE OF UMBILICAL ARTERIAL LINES
Cannulation of the umbilical artery provides secure long-term access for invasive monitoring of
blood pressure, arterial oxygenation, blood sampling and exchange transfusion.
Equipment needed (prepacked UAC/UVC sets are available on NICU)
• Cut down set
• Umbilical catheter size 3.5 or 4 depending on the size of the baby
• Cleaning solutions (0.5% chlorhexidine and sterile 0.9% sodium chloride)
• 0.9% sodium chloride
• Umbilical cord tie
Neonatal Manual Chapter 15 – Practical Procedures v2.0 Effective from February 2012 to February 2015 Page 7 of 26
Page 8
• Three way tap
• Sterile gloves
• Gown and mask
• 2mL syringe
• Needle to draw up 0.9% sodium chloride flush
• Suture
• Steri-strips
Procedure
1. Inspect toes and feet for bruising and cyanosis
2. Before starting establish length of insertion using the following formula for a high
position line:
3. (Birth weight in kg x 3 + 9 + stump) = length in cm
4. Observe best practice for central line insertion (see 15.8)
5. Sterile procedure: wash hands with Hibiscrub, wear sterile gown and gloves; wear
mask if baby in open cot, observe strict sterile technique
6. Prepare equipment and prime catheter and 3-way tap with 0.9% saline. Clean stump
and abdomen with chlorhexidine, allow 30 seconds to dry. Avoid using excessive
amounts of chlorhexidine and ensure there is no pooling behind the baby. For
extremely preterm infants (less than 27 weeks) wash off chlorhexidine with 0.9% saline
(assistant holds cord by clamp). Drape with sterile towels, securing with artery forceps if
necessary.
7. Loosely fix cord tie around base of stump (can be tightened if bleeding occurs), cut off
and discard “dirty” end of stump. (A clean cut is essential if the end is to be used for
insertion of catheter.) The catheter can be inserted into either the cut end or the side of
one of the two umbilical arteries. If using the cut end, stabilise the cord with artery
forceps, then proceed to step 9.
8. If using the ‘side on’ method, clamp the cord with artery forceps. Apply traction. Identify
artery. With scalpel, cut half way through leaving posterior wall of artery intact.
Approach the artery at a right angle.
9. The artery can be gently dilated with an umbilical dilator, non-toothed forceps or the
catheter itself.
10. Advance the catheter gently but firmly to desired length. Pulling the catheter towards
the head will help the catheter negotiate the initial caudal curve. If the catheter cannot
easily be advanced catheterisation of the other artery should not be attempted, get
help.
11. Secure the suture to the Wharton’s jelly, tie firmly round the catheter several times and
fix with Steri-strips.
Neonatal Manual Chapter 15 – Practical Procedures v2.0 Effective from February 2012 to February 2015 Page 8 of 26
Page 9
12. Attach heparinised saline infusion with pressure transducer. Infusion rate 0.5mL/hr in
small baby or 1mL/hr in larger babies. Remove the sterile field and cord tie and check
perfusion of the lower limbs.
13. Document the procedure on the Neonatal Unit central vascular device record, including
the size of line, length of insertion, and comment on peripheral perfusion.
14. X-ray chest and abdomen. For high position, catheter tip should be between T6 -T10. If
catheter below T10 withdraw to L3/4 for low position. Do not advance the catheter once
it has been sutured in position due to infection risk. Document the X ray appearances
on the central vascular device record, include details of any adjustment to line position.
15. For all arterial lines, have a low threshold for removing the line if peripheral circulation is
compromised. If there is any evidence of ischaemic injury, complete an incident form.
Arterial line infusions:
Arterial lines are maintained with heparinised solutions, 1 unit of heparin per mL, run at 0.5 or
1.0 mL/hr.
50 mls 0.45% saline with 50 units of heparin is most commonly used to minimise sodium load
in the first few days, older infants can have 50mls 0.9% saline with 50 units of heparin.
The only other solution that can be run through arterial lines is dilute bicarbonate: 1.5mls 8.4%
sodium bicarbonate made up to 20 mls with water for injections, with 20 units of heparin. This
can be used for infants with persistent metabolic acidosis, and the bicarbonate concentration
can be titrated against the pH response.
15.6 INSERTION AND MAINTENANCE OF UMBILICAL VENOUS LINES
Cannulation of the umbilical vein provides secure access for administration of drugs and IV
fluids including TPN. This procedure can be carried out during an emergency resuscitation at
birth but is usually performed at the same time as insertion of the umbilical arterial line.
Equipment needed (pre-packed UAC/UVC sets are available on NICU)
• Cut down set
• Umbilical catheter 4 or 5 depending on size of baby, double lumen for extreme preterm
infants
• Cleaning solutions (0.5% chlorhexidine and sterile 0.9% sodium chloride)
• 0.9% sodium chloride flush
• Needle to aspirate flush
• 2mL syringe
• Umbilical cord tie
• 3-way tap
• Sterile gloves
Neonatal Manual Chapter 15 – Practical Procedures v2.0 Effective from February 2012 to February 2015 Page 9 of 26
Page 10
• Gown and mask
• Suture
• Steri-strips
Procedure
1. Before starting establish length of insertion using the following formula:
(Birth weight in kg x 3 + 9 + stump)/2 + 1 = length in cm
2. Observe best practice for central line insertion (see 15.8)
3. Sterile procedure: wash hands with Hibiscrub, wear sterile gown and sterile gloves,
mask if baby in an open cot; observe strict sterile technique
4. Prepare equipment and prime catheter and 3-way tap with 0.9% saline. Clean stump
and abdomen with chlorhexidine, allow 30 seconds to dry. Avoid using excessive
amounts of chlorhexidine and ensure there is no pooling behind the baby. For
extremely preterm infants (less than 27 weeks) wash off chlorhexidine with 0.9% saline
(assistant holds cord by clamp). Drape with sterile towels, securing with artery forceps if
necessary.
5. Loosely tie cord tie around base of stump (can be tightened if bleeding occurs), cut off
and discard “dirty” end of stump. (A clean cut is essential if the end is to be used for
insertion of catheter). The catheter can be inserted into either the cut end or the side of
the umbilical vein. If using the cut end, stabilise the cord with artery forceps, then
proceed to step 87.
6. If using the ‘side on’ method, clamp the cord with artery forceps. Apply traction. Identify
vein. With scalpel, cut half way through leaving posterior wall of vein intact. Approach
the vein at a right angle.
7. The vein can be gently dilated if necessary with an umbilical dilator, non-toothed
forceps or the catheter itself.
8. Advance the catheter gently but firmly to desired length. Pulling the catheter caudally
may help insertion. If you cannot withdraw blood from the line it is probably in the liver.
Withdraw the catheter slightly until blood can be withdrawn.
9. Secure the suture to the Wharton’s jelly, tie round the catheter several times and place
Steri-strips around catheter and suture.
10. Commence infusion of 10% dextrose, remove the sterile field and the cord tie.
11. Document the procedure on a Neonatal Unit central vascular device record, including
size of line, length of insertion, and if it is possible to aspirate blood.
12. X-ray chest and abdomen. The tip of the catheter should be just above the level of the
diaphragm. If the catheter is inadvertently placed in the liver it should be removed and
replaced: it can be helpful to insert a second line over the first before removing it. Do
Neonatal Manual Chapter 15 – Practical Procedures v2.0 Effective from February 2012 to February 2015 Page 10 of 26
Page 11
not attempt to advance the catheter once it has been sutured in position due to infection
risk.
13. Once position has been confirmed, it is safe to infuse concentrated dextrose solutions,
TPN and drugs, including inotropes.
14. Document X ray findings on the central vascular device record, including details of any
adjustments to line position.
15. The site of insertion should be visible at all times and the security of attachment
checked frequently.
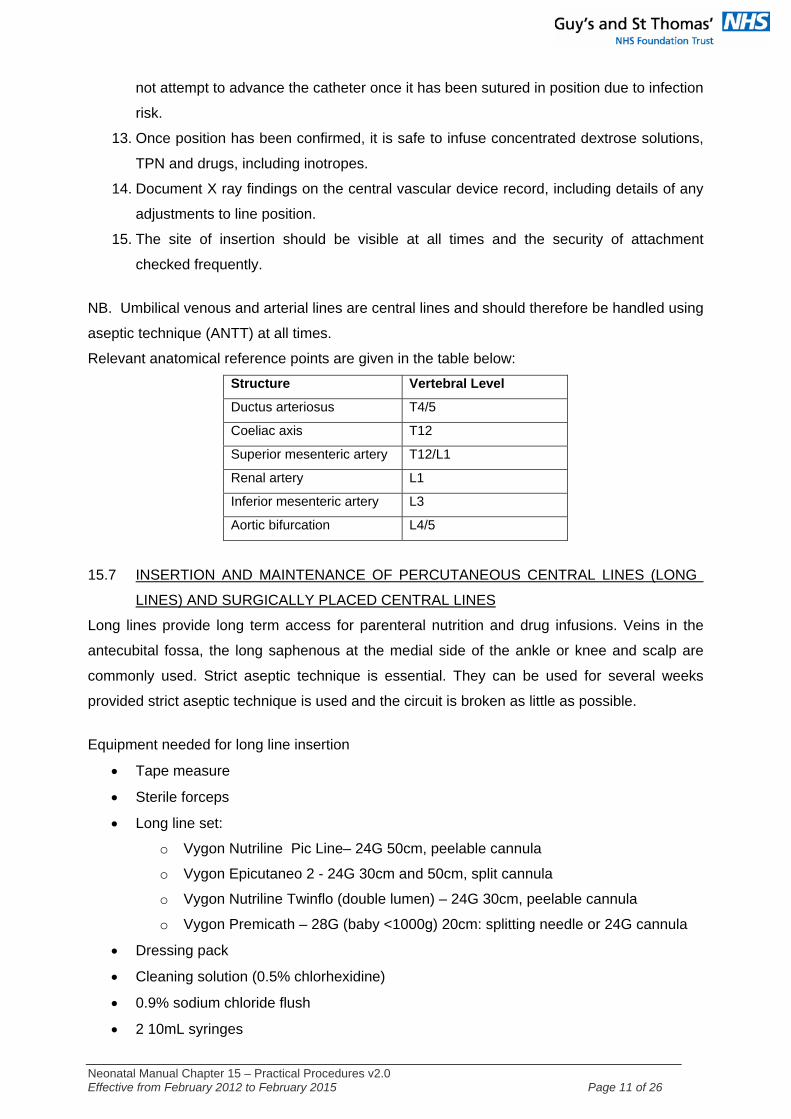
NB. Umbilical venous and arterial lines are central lines and should therefore be handled using
aseptic technique (ANTT) at all times.
Relevant anatomical reference points are given in the table below:
Structure Vertebral Level
Ductus arteriosus T4/5
Coeliac axis T12
Superior mesenteric artery T12/L1
Renal artery L1
Inferior mesenteric artery L3
Aortic bifurcation L4/5
15.7 INSERTION AND MAINTENANCE OF PERCUTANEOUS CENTRAL LINES (LONG
LINES) AND SURGICALLY PLACED CENTRAL LINES
Long lines provide long term access for parenteral nutrition and drug infusions. Veins in the
antecubital fossa, the long saphenous at the medial side of the ankle or knee and scalp are
commonly used. Strict aseptic technique is essential. They can be used for several weeks
provided strict aseptic technique is used and the circuit is broken as little as possible.
Equipment needed for long line insertion
• Tape measure
• Sterile forceps
• Long line set:
o Vygon Nutriline Pic Line– 24G 50cm, peelable cannula
o Vygon Epicutaneo 2 - 24G 30cm and 50cm, split cannula
o Vygon Nutriline Twinflo (double lumen) – 24G 30cm, peelable cannula
o Vygon Premicath – 28G (baby <1000g) 20cm: splitting needle or 24G cannula
• Dressing pack
• Cleaning solution (0.5% chlorhexidine)
• 0.9% sodium chloride flush
• 2 10mL syringes
Neonatal Manual Chapter 15 – Practical Procedures v2.0 Effective from February 2012 to February 2015 Page 11 of 26
Page 12
• 2 needles to draw up flush and omnipaque
• Sterile gloves
• Gown and mask
• Sterile drapes
• Steri-strips
• New pack of Duoderm
• Sterile scissors
• Tegaderm or similar bio-occlusive dressing
• 20mL syringe containing 0.9% sodium chloride, giving set and two way octopus
• Omnipaque
Procedure for long line insertion
1. Choose a suitable vein and carefully measure the length of catheter to be inserted. The
line tip should end in the superior vena cava (SVC) or inferior vena cava (IVC), just
adjacent to the right atrium.
2. If the procedure is routine (not in an emergency) agree with the nurse looking after the
baby a suitable time for the procedure to take place.
3. Set up equipment on trolley and identify assistant
4. Observe best practice for central line insertion (see 15.8)
5. Sterile procedure: wash hands with Hibiscrub, wear gown and sterile gloves plus a
mask if the baby is in an open cot; observe strict sterile technique.
6. Prepare equipment and prime the line with 0.9% sodium chloride flush from 10mL
syringe.
7. Clean skin and adjacent area with 0.5% chlorhexidine, allow to dry for 30 seconds.
(Assistant holds limb until cleaned). Drape with sterile towels and secure with artery
forceps if necessary.
8. Place the sterile non-toothed forceps, the long line and some spare gauze on the sterile
field.
9. To enter the vein, use the needle provided or, for 28G lines, a yellow 24G cannula can
be used.
10. Apply tourniquet if necessary. Insert the needle or cannula into the vein. A good blood
flow should appear. Release the tourniquet.
11. Using the forceps, advance the long line through the needle/cannula and thread it to the
desired length. Be patient. If threading the catheter is difficult, abducting or gently
massaging the limb may help. It should be possible to aspirate blood from the line: if the
line is ‘wedged’ at a shorter length than that measured, withdraw the line a short
distance until it is possible to aspirate blood.
Neonatal Manual Chapter 15 – Practical Procedures v2.0 Effective from February 2012 to February 2015 Page 12 of 26
Page 13
12. Remove the introducer without dislodging the long line. As bleeding often occurs at this
stage, apply gentle pressure to stem the flow of blood.
13. It is not possible to remove the yellow cannula from the line when used to insert a
Premicath. It needs to be removed from the skin and secured with the line; pad under
the cannula with Duoderm to avoid pressure sores.
14. Curl the excess line without kinking and secure with Steri-strips. Use Duoderm under
the connector to avoid pressure sores.
15. Cover with Tegaderm.
16. Never allow the dressing Tegaderm to wrap all the way around the limb, this can
impede venous return.
17. Commence an infusion of 0.9% sodium chloride at 0.5mL/hr to avoid the line clotting
whilst waiting for X-ray. The infusion pump needs to have been purged before it is
connected and a bolus of 0.5ml should be given once connected to avoid the line
occluding.
18. Draw up 0.5mL Omnipaque into the second 10ml syringe and attach to the second arm
of the octopus. Leave this sidearm clamped off ready for the X ray to be taken.
19. Take down the sterile field.
20. Document the procedure on the Neonatal Unit central vascular device record, including
details of the line used (use the sticker supplied with the long line), length of insertion,
desired length of insertion, and if it possible to aspirate blood.
21. X-ray: contrast medium should be used to pin point the line tip:
o stop the infusion
o inject 0.3-0.5mls of contrast, dependent on size of line
o wait 15 seconds before taking x-ray
o flush well with 0.9% saline afterwards and restart the infusion with a bolus of
0.5mls
22. When the line position is confirmed, it must be withdrawn if it has curled up or is in the
right atrium. Follow dressing change guidance and strict aseptic technique; apply a
second dressing to cover any remaining exposed areas. A further x-ray may be
necessary if the line position has been altered significantly.
23. Always document X-ray findings and any adjustments made to the line on the central
vascular device record: if there is any uncertainty about line position discuss with the
consultant.
Potential complications
Line occlusion: should be preventable by ensuring line is well flushed on insertion; pump is
purged and primed before connecting; bolus of 0.5mL is given as soon as line connected to
pump; and line has at least 0.5mL/hr infusion running at all times; using pulsing action whilst
Neonatal Manual Chapter 15 – Practical Procedures v2.0 Effective from February 2012 to February 2015 Page 13 of 26
Page 14
flushing. Before considering line removal: flush with 0.9% saline sodium chloride using 10mL
syringe ; and redress the line (following dressing change guidance and full aseptic technique)
to ensure it is not kinked.
Withdrawal occlusion: occurs when line flushes, but blood cannot be withdrawn. May be
caused by catheter tip position, fibrin clot.
Infection at insertion site (see ‘Infection’ guidelines)
Infection from line colonisation (see ‘Infection’ guidelines)
Extravasation: may be caused by thrombosis, catheter tip displacement, damage to catheter.
Refer to separate guideline for advice on how to manage.
Catheter rupture: prevention is by never flushing with excessive force, always use 10mL
syringe for flushing
Thrombosis: may cause significant vena cava obstruction; may need anticoagulation
Line complications must always be reported on an incident form.
Surgical central venous lines
When securing lines it is essential that the insertion site is visible through the occlusive
dressing.
Broviac line dressings need to be changed weekly, more often if dirty or oozing from insertion
site.
Broviac lines must be curled around and taped to the skin with steri-strips before applying the
occlusive dressing.
Flush at least once daily with 0.9% sodium chloride 1-2ml if continuous IV infusion not attached
to line.
15.8 BEST PRACTICE FOR CENTRAL LINE INSERTION
Strict aseptic technique is essential and requires an assistant
All involved should be familiar with this best practice guidance
Timing of insertion should be agreed between practitioner and assistant
Personnel
Practitioner:
• For unstable babies, especially <30 weeks gestation, the practitioner needs to be
independently competent in insertion.
• In stable babies a less skilled individual can perform the procedure with direct
supervision by an independently competent practitioner. This level of supervision
should be tailored; the learning practitioner and supervisor need to define time limits
and numbers of attempts.
Assistant:
• Helps provides practical help with equipment, sterile preparation and insertion
Neonatal Manual Chapter 15 – Practical Procedures v2.0 Effective from February 2012 to February 2015 Page 14 of 26
Page 15
• Assists in ensuring the sterile field is maintained, including making practitioner aware of
any breach in sterile technique
• Monitors time and attempts: 1 hour or 3 attempts in one limb during any attempt (unless
emergency procedure)
Process
• Hand decontamination with Hibiscrub NOT simple hand soap.
- Remove jewellery, wash hands and forearms for 15 seconds with soap under
running water
- Clean under nails
- Use Hibiscrub to hands and forearms, rub vigorously for at least 2 minutes ensuring
friction to all areas of hands, fingers and forearms
- Rinse thoroughly keeping hands held higher than elbows and away from scrubs
• Dry hands with sterile towel
• Sterile gown and gloves should always be worn, plus mask when baby is on open cot
• The assistant should hold the limb or cord until the area is cleaned and draped
• Skin preparation
• 0.5% chlorhexidine (aqueous)
• Site of insertion and adjacent skin should be cleaned thoroughly and chlorhexidine
solution left to air dry
• Wash chlorhexidine solution off the skin with sterile 0.9% sodium chloride
• Use sterile drapes to ensure only the sterilised area is accessible to the practitioner:
• Take to care to avoid the drapes touching non-sterile areas.
• Secure drapes to avoid the sterile field becoming compromised.
• If sterile field compromised in any way re-establish before continuing e.g. re-clean the
area, put on new sterile gloves
• Sterile field should be removed as soon as procedure complete. Use new sterile
dressing pack and gloves for any manipulation.
Documentation
Always complete the Neonatal Unit Central Vascular Device Record immediately after
successful insertion and after any manipulation.
All boxes should be completed.
15.9 EXCHANGE TRANSFUSION
Indications
Neonatal Manual Chapter 15 – Practical Procedures v2.0 Effective from February 2012 to February 2015 Page 15 of 26
Page 16
Unconjugated hyperbilirubinaemia (e.g. Rhesus haemolytic disease): intravenous
immunoglobulin may be considered to reduce the likelihood of exchange transfusion in
haemolytic disease of the newborn (see ‘Management of hyperbilirubinaemia’ guidelines)
Severe anaemia complicated by cardiac failure
Sepsis or disseminated intravascular coagulation (DIC) – only rarely indicated
Inborn errors of metabolism
Equipment
• Either a venous line for replacement and a central venous or arterial line for withdrawal
of blood or an umbilical venous catheter for both withdrawal and replacement of blood:
umbilical line positions must be confirmed on X-ray
• Blood giving set with a warming coil
• High flow infusion pump
• 3-way tap or 4-way tap
• Gloves
• Gown and mask
• Several empty syringes
• Container to discard blood.
Preparation
• Contact Blood Bank and request “blood for exchange transfusion” - not packed cells.
Inform them of the volume needed.
• Calculate the total volume for a double volume exchange:
• 2 x 85 x weight (kg) = volume in mL
• If the indication is severe anaemia a single volume exchange is sufficient
• **Order blood early as it can take several hours to be issued**
• The blood is ordered from National Blood Service (NBS) in Tooting. It is ‘partially
packed’ with a haematocrit of 0.50-0.55 and should be O RhD negative, Kell negative,
CMV-negative, leuco-depleted and 5 days old or less. It is not appropriate to use whole
blood as this may have a haematocrit as low as 0.35. It is also very important to inform
Blood Bank of a history of intra-uterine transfusions, as this leads to a risk of associated
graft-versus-host disease in the baby, which persists postnatally. The blood will then
also need to be irradiated (as will all red cell and platelet transfusions).
• NBS have a number of routine transports per day, but if the blood is required outside of
those times, a ‘blue light’ transport should be requested
• As only nursing staff are trained to administer blood transfusions, ensure close nurse
involvement before and during the procedure
Neonatal Manual Chapter 15 – Practical Procedures v2.0 Effective from February 2012 to February 2015 Page 16 of 26
Page 17
Procedure
1. If the indication for exchange transfusion is jaundice, continue maximum phototherapy
and ensure adequate hydration whilst setting up exchange transfusion
2. The exchange should take place over 2 hours (no less) – calculate how frequently the
aliquots of blood need to be removed – blood is withdrawn in 5-20ml aliquots
depending on the size of the baby
3. Check a blood gas, SBR and glucose prior to the exchange and at least once during
the procedure
4. Sterile procedure: wash hands with Hibiscrub, wear sterile gown and gloves (and mask
if baby in an open cot); observe strict sterile technique
5. If using two separate lines, place the 3-way tap in the arterial line or UVC and begin
removing aliquots of blood. Start the transfusion blood at the calculated rate of infusion.
It is important to keep checking with the assistant that the volume of blood going in and
the volume coming out are the same. Slow down the rate of removal and infusion if the
infant is unstable.
6. For a single UVC exchange, a 4-way tap is required. Remove an aliquot of blood,
discard, and then infuse an identical size aliquot of transfusion blood.
7. It is important for an assistant to record the volumes of blood that have gone in and out,
and also to monitor the heart rate, blood pressure and blood glucose as significant
morbidity (apnoea, bradycardia, vasospasm and thrombosis) has been reported in 6%
of exchange transfusions in sick preterm infants
8. Check serum electrolytes, including Ca, glucose, FBC, blood gas and SBR after the
exchange
9. Leave all the catheters in situ – a second exchange is often required
15.10 ENDOTRACHEAL INTUBATION
Equipment
• suitable laryngoscope and blade - check the light source
• appropriate size ET tubes according to baby’s weight
o < 1000g 2.5 mm
o 1000 to 2500g 3.0 mm
o > 2500g 3.5 mm
• Keep a range of tubes available, including a size above and below the estimated size
• introducer
• Neopuff system connected to the air / oxygen source with appropriate face mask
attached
• ventilator set up appropriately
Neonatal Manual Chapter 15 – Practical Procedures v2.0 Effective from February 2012 to February 2015 Page 17 of 26
Page 18
• range of suction catheters and working suction equipment
Procedure
1. Ensure that the baby has secure intravenous access
2. Ensure heart rate, respiration and oxygen saturation are continuously monitored
3. Clean procedure: wash hands and wear gloves
4. Position the baby with neck slightly extended (i.e. neutral position) and ventilate the
baby with Neopuff and mask until vital signs are stable
5. Unless there are specific contraindications or intubation is being performed as part of
cardiopulmonary resuscitation, administer the pre-medications intravenously in the
following order:
a. Fentanyl 5 micrograms per kg
b. Atropine 20 micrograms per kg
c. Suxamethonium 2mg per kg
6. Continue to ventilate the baby while drugs are being administered ensuring vital signs
are satisfactory
7. Intubate the baby inserting ET tube approximately 1-2cm beyond vocal cords
(depending on size of baby)
8. Attach the Neopuff system to ET tube and ventilate using PIP which produces adequate
chest wall expansion
9. Confirm correct placement by observing chest movement and listening for equal air
entry on both sides of the chest. A rule of thumb for length of ET tube at lips (in cm) =
weight of the baby in kg + 6; but always confirm correct placement by clinical
examination
10. Secure the ET tube and record the length at lips
11. Commence appropriate mechanical ventilation after reconnecting ETT to ventilator
12. Confirm correct placement by CXR
13. Document the procedure in baby’s notes giving details - size of ET tube, length at lips,
any adjustments made after CXR and any problems encountered during the procedure
15.11 INSERTION AND CARE OF CHEST DRAINS
Emergency Needling of Chest for Tension Pneumothorax
Equipment
• Alcowipe and gloves
• Blue/green butterfly with 3 way tap and 10mL syringe attached
• Jar of sterile water
Procedure
Neonatal Manual Chapter 15 – Practical Procedures v2.0 Effective from February 2012 to February 2015 Page 18 of 26
Page 19
1. Clean procedure: wash hands and wear gloves
2. Clean area with an alcowipe
3. Insert butterfly in to 2nd intercostal space midclavicular line of affected side, moving
needle slightly laterally once through the skin to reduce the likelihood of an open track
once it is removed.
4. Place 3-way tap under water, below level of baby and open, or remove air slowly by
aspirating syringe.
5. Prepare for chest drain insertion.
Chest Drain Insertion
Equipment
• Tape measure
• Cut-down pack
• Gown, mask and gloves
• Cleaning solution (0.5% chlorhexidine )
• Scalpel with straight blade, artery forceps, suture
• Intercostal drain (8-10F for small babies 12-14F for large)
• Underwater seal and suction (5-10cmH2O)
• Steri-strips
• Tegaderm or similar bio-occlusive dressing
• 1% lignocaine, syringe, needle
Procedure
1. Measure insertion length as distance from incision site to mid clavicular line
2. Position baby affected side up 30-45° for pneumothorax (use a towel) or supine for
effusions.
3. Sterile procedure: wash hands with Hibiscrub, wear sterile gown and gloves, mask if
baby is in an open cot; observe strict sterile technique
4. Clean skin with Chlorhexidine, allow at least 30 seconds to air dry.
5. Infiltrate insertion site with 1% lignocaine: maximum 0.3ml/kg of 1% solution
6. Make small incision just above the rib in the 4th or 5th intercostal space mid axillary line
(only large enough to admit drain), making sure you are well clear of the breast bud.
7. Use forceps for blunt dissection down to the pleura
8. Remove trochar from drain and apply forceps to clamp drain
9. Advance drain 2-3cm or premeasured length into the pleural space aiming:
• anteriorly and upwards for pneumothorax
• posteriorly and downwards for effusions
Neonatal Manual Chapter 15 – Practical Procedures v2.0 Effective from February 2012 to February 2015 Page 19 of 26
Page 20
10. Connect drain to underwater seal and apply suction (Heimlich valves are available for
retrievals). Check that the drain is bubbling / swinging.
11. Anchor the drain. Do not use purse string sutures (unsightly scar). Instead, insert suture
through edge of incision, using each end to wrap and tie around the drain. Cover this
with a Steri-strip and apply a dressing over entire drain site.
12. Repeat CXR (AP +/- lateral) to check drain position and lung inflation. Tip should not be
in as deep as the paravertebral gutter.
NB: When repositioning a drain, ensure the side port proximal to the tip remains in the
pleural cavity
Removal of chest drain
1. Leave drain in situ until 24 hours after bubbling has stopped
2. Clamp the drain for 6 hours and then re-x-ray. If there is no reaccumulation then
remove.
3. Use a sterile pack, gloves, Steri-strips, Tegaderm, Zoff
4. Clean the area, gently removing the Tegaderm with a Zoff square
5. Remove the stitch and drain, immediately occluding the incision site (send tip for M,C
and S)
6. Close incision site with Steri-strips, applying Tegaderm over this.
7. Re-X-ray after 2 hours unless clinical deterioration before
Complications of chest drains
• Haemorrhage from vascular bundle in groove below each rib
• Tip can damage pericardium, thoracic duct and phrenic nerve(s)
• Scarring particularly around breast bud
15.12 TRACHEOSTOMY CARE GUIDELINES FOR THE NEONATAL UNIT
Questions regarding tracheostomy care can be directed to Paediatric ENT Nurse Specialists,
bleep 2348
Equipment required for care of babies with tracheostomy
Keep equipment at baby’s cot side
• tracheostomy tubes and introducers x2 of correct size and size below (sizes available -
3.0 NEO, 3.0 PAED, 3.5 NEO, 3.5 PAED)
• tracheal dilators
• airway filters
• scissors
• tracheostomy tape
Neonatal Manual Chapter 15 – Practical Procedures v2.0 Effective from February 2012 to February 2015 Page 20 of 26
Page 21
• 1 mL syringe and a vial of saline for clearance of difficult secretions
• box of appropriate sized catheters
Post-op care
First week
• Check tapes twice daily, observing for swelling of neck, tightness of tapes, security of
tapes. Clean under tapes and loosen if necessary but do not change. Suction as
necessary; see below for procedure for suctioning. Ensure sutures are kept secured to
tape on chest. Do not cut or disturb.
• For emergency recannulation, pull sutures forward and down to open stoma and re-
insert new tracheostomy tube.
• The first routine tracheostomy change is usually done one week post-op under the
supervision of the ENT team. Subsequent tracheostomy tube changes are usually once
weekly (see below)
General tracheostomy care
• Suctioning of the tracheostomy tube should be carried out only as necessary
• For the correct suction catheter size, use tracheostomy size x 2. e.g. 3.5 TT would
require size 7 suction catheter
• Measure the length of the tracheostomy tube and record. Only suction to a depth equal
to the length of the tracheostomy tube
• Use suction pressure of 8-10cmH2O
• Change air filter/humidifier as necessary
• Change tapes daily as a two-person procedure - one person holding the tracheostomy
tube and a second changing the tapes. Observe the neck for redness etc. Ensure new
tapes are tight - i.e. one finger only can be placed under tape.
• Tracheostomy tube changes (after the first – see above) are usually done once weekly.
o this is a two-person procedure
o ensure all equipment needed is available at the baby’s cotside
o ensure infant wrapped in a sheet to swaddle, leaving neck exposed
o place a roll under the shoulders to extend the neck.
o prepare new tracheostomy tube with introducer. Use aqua gel as necessary
o suction prior to tube change.
o remove old tapes
o remove old tube and immediately replace new tube with introducer.
o remove introducer immediately.
o secure with new tapes
o re-attach to ventilator or oxygen supply as necessary
Neonatal Manual Chapter 15 – Practical Procedures v2.0 Effective from February 2012 to February 2015 Page 21 of 26
Page 22
15.13 NON-DIRECTIONAL BRONCHO-ALVEOLAR LAVAGE (BAL)
Indication:
Persistent atelectasis on CXR despite routine suction and positioning.
Equipment
• Nasogastric (NG) tube - appropriate size for endotracheal tube length
• Syringes (5 & 10ml)
• 0.9% Sodium chloride - 1 ml/kg
• Sterile gloves
• Universal specimen container
Technique:
1. This should only be performed in the presence of a paediatric physiotherapist or a
senior doctor.
2. Carefully monitor heart rate and oxygen saturation throughout the procedure.
3. Very clean procedure: wash hands and wear sterile gloves
4. Clear large airway secretions by pre-oxygenation (via ventilator or Neopuff) and
suction.
5. Pre-oxygenate with FiO2 1.0, using ventilator or Neopuff, avoiding prolonged hyperoxia
if <32 weeks gestation.
6. Fill syringe with calculated amount of normal saline and prime appropriate size NG tube
(see above).
7. Using sterile gloves attach syringe of normal saline to NG tube.
8. Disconnect patient from ventilator and advance the NG tube until resistance is felt (the
tube is now in the wedged position).
9. Instil the saline slowly to limit the amount of reflux up the airway and immediately
aspirate the saline back up using the syringe, withdraw the NG tube and reconnect the
patient to the ventilator.
10. Place the contents of the syringe into the specimen pot labelled BAL and send for
analysis.
11. The patient may need further suctioning to remove any saline left after the BAL.
12. Return the FiO2 to its original level as tolerated.
15.14 SUPRAPUBIC ASPIRATION OF URINE (SPA)
This is a definitive method of diagnosing or excluding UTI
1. Check with ultrasound that urinary bladder is full (about 1 hour after a feed) to avoid a
dry tap
Neonatal Manual Chapter 15 – Practical Procedures v2.0 Effective from February 2012 to February 2015 Page 22 of 26
Page 23
2. Consider sucrose analgesia and swaddling where appropriate.
3. Keep a container ready for clean catch if baby passes urine during the procedure
4. Ask an assistant to hold the baby steady
5. Very clean procedure: wash hands and wear sterile gloves
6. Use 2 or 5mL syringe with size 23G (blue) needle
7. Puncture the skin in mid abdominal line 0.5-1cm above the pubic symphysis
8. Push the needle down slowly with continuous suction with the syringe
9. Keep needle vertical. N.B. Urinary bladder is an abdominal organ as opposed to pelvic
in older children and adults
10. Take as large a urine sample as possible
11. Do stick urinanalysis (record results in notes / chart) and send sample for M, C & S
12. Keep the sample in the fridge while awaiting transport
15.15 INSERTION OF NASO-JEJUNAL FEEDING TUBE
If naso-jejunal feeds are indicated, the NJ tube should be passed as follows:
1. With infant supine, measure from the nasal bridge to the ankle. (This is the length of the
tube to be inserted. Nasal bridge to umbilicus shows the length of the tube to reach the
stomach). Mark these positions.
2. Lie the baby on the right side and advance the tube to the first marked position so that
the tube is in the stomach.
3. Inject 2ml of sterile water through the tube then advance it. Peristaltic activity should
carry the tube through the pylorus. When the marker reaches the nostril the tube should
be in the jejunum. The tube should be secured to the cheek. Insert orogastric tube and
then check position of both tubes with an x-ray.
4. Once NJ feeding has been started, if milk is aspirated from the orogastric tube it
indicates that the NJ tube has slipped back into the stomach. Fluid can rarely be
aspirated from the NJ tube.
15.16 LUMBAR PUNCTURE
Indications
To screen for central nervous system infection
To drain cerebrospinal fluid (CSF) in communicating hydrocephalus
To screen for inborn errors of metabolism
Contraindications
Cardiorespiratory instability when the procedure may cause added compromise
Bleeding diathesis – coagulopathy should be corrected before doing LP
Neonatal Manual Chapter 15 – Practical Procedures v2.0 Effective from February 2012 to February 2015 Page 23 of 26
Page 24
Skin infection over lower back
Very high intra-cranial pressure (non-communicating) – although coning is very rare in
neonates
Equipment
• Dressing pack, sterile gown and sterile gloves
• 0.5% chlorhexidine and sterile saline
• spinal needle: 25G (0.5mm) for preterm, 22G (0.7mm) for term
• 3 sterile containers and one glucose bottle
• adhesive plaster or permeable spray dressing
Procedure
1. Sterile procedure: wash hands with Hibiscrub, wear sterile gown and gloves; observe
strict sterile technique
2. Ask an assistant to hold the baby in a lateral decubitus position
3. Identify the correct interspace i.e. L3-L4 – the space that falls immediately above or
below a line drawn between the iliac crests
4. Clean the lumbar area with chlorhexidine, allow at least 30 seconds to air dry. and
wash it off with saline
5. Drape with sterile towels
6. Ask the assistant to curl the baby up so that the interspinous spaces open up, keeping
the spine horizontal and the shoulders and iliac crests in a vertical line
7. Insert the needle perpendicular to the skin in the midline and point it towards the
umbilicus
8. Advance the needle carefully – usually about 1cm in a term baby and 5-7mm in a
preterm baby
9. You may feel it “give” as the needle enters the subarachnoid space
10. Remove the stylet and collect the CSF – usually 5-10 drops in each bottle
11. If no CSF is obtained, try one interspace above or below L3-L4
12. Remove the needle and apply an adhesive plaster or spray
13. Document the procedure in the notes
15.17 VENTRICULAR TAP AND REMOVAL OF CEREBROSPINAL FLUID (CSF) FROM
RESERVOIRS
Indications
To screen for CSF infection in babies with a reservoir
Removal of CSF in non-communicating hydrocephalus (see separate protocol)
Neonatal Manual Chapter 15 – Practical Procedures v2.0 Effective from February 2012 to February 2015 Page 24 of 26
Page 25
Equipment
• as for lumbar puncture
• electronic transducer for pressure measurement, 3-way tap and t-piece primed with
0.9% saline.
• for reservoir tap, 21G (green) butterfly and syringe
Procedure
Ventricular tap
1. Perform cranial u/s scan to determine size of ventricles – do tap on side worse affected
by ventricular dilatation or parenchymal damage if present. In symmetrical cases tap
right side (usually the non-dominant side)
2. Sterile procedure: wash hands with Hibiscrub, wear sterile gown and gloves; observe
strict sterile technique
3. Position the baby on his/her back, facing up to the ceiling
4. Place yourself at the head of the baby ie facing towards his/her toes. An assistant must
hold the head absolutely still. Sedate if necessary
5. Prepare a sterile area over the lateral aspect of the anterior fontanelle on the chosen
side (shave any hair). Clean the area with chlorhexidine, allow at least 30 seconds to
air dry and wash it off with saline.
6. Insert the spinal needle approximately 1cm lateral to the midline, level with the widest
point of the fontanelle, perpendicular to the scalp
7. Advance the needle until you are in the ventricle (usually feel a “give”). Usually this is 4-
5cm in term babies. Withdraw the trochar to establish CSF flow. In most cases this is
easy as the underlying pathology is massive ventriculomegaly related to obstruction of
CSF flow.
8. If the first attempt is unsuccessful, reinsert the trochar and advance the needle by 1cm
more.
9. If the first attempt is unsuccessful, reinsert the trochar and advance the needle by 1cm
more.
10. Connect the needle to one port of the 3-way tap and the t-piece to another port. The
other end of the t-piece is then connected to the pressure transducer. Allow CSF to flow
to end of t-piece and and then depress blue switch at end distal to patient. Zero the
transducer while it is held level with the baby’s right atrium and then read pressure on
monitor. The baby should be completely still and settled whilst measuring the pressure
and the head should not be held. The 3rd port of the 3-way tap is opened to allow CSF
to drip out as below.
11. Collect samples for investigation by dripping 5-10 drops of CSF into each bottle – 3 for
microscopy and culture, 1 for protein and 1 for glucose
Neonatal Manual Chapter 15 – Practical Procedures v2.0 Effective from February 2012 to February 2015 Page 25 of 26
Page 26
12. Always measure the CSF pressure (upper limit of normal 6mmHg � 8cmH20) and then
remove 10-15ml/kg CSF if raised, preferably letting it drip, but slow aspiration is
permissible if ventricles huge. Recheck CSF pressure after removal of CSF.
13. Skin dressing as for LP
Removal of CSF from a reservoir
The reservoir has a metal base plate therefore there is no risk of inserting the needle too far
1. Sterile procedure: wash hands with Hibiscrub, wear sterile gown and gloves
2. Clean the area overlying the reservoir as described before
3. Stabilise the reservoir with one hand
4. Insert the butterfly needle into the middle of the reservoir – initially it feels a bit stiff and
then it “gives” as the tip of the needle enters the cavity of the reservoir
5. Draw off the desired amount of CSF, as above.
Neonatal Manual Chapter 15 – Practical Procedures v2.0 Effective from February 2012 to February 2015 Page 26 of 26