200
CodeVisionAVR VERSION 1.23.8b User Manual
| Date post: | 10-Feb-2018 |
| Category: |
Documents |
| Upload: | tham-giai-di |
| View: | 235 times |
| Download: | 0 times |
7/22/2019 CodevisionAVR Manual Full
http://slidepdf.com/reader/full/codevisionavr-manual-full 1/200
CodeVisionAVRVERSION 1.23.8b
User Manual

7/22/2019 CodevisionAVR Manual Full
http://slidepdf.com/reader/full/codevisionavr-manual-full 2/200
CodeVisionAVR
CodeVisionAVR V1.23.8a User ManualRevision 15/02.2003Copyright © 1998-2003 Pavel Haiduc and HP InfoTech S.R.L. All rights reserved.No part of this document may be reproduced in any form except by written permission of the
author. All rights of translation reserved.
© 1998-2003 HP InfoTech S.R.L. Page 1

7/22/2019 CodevisionAVR Manual Full
http://slidepdf.com/reader/full/codevisionavr-manual-full 3/200
CodeVisionAVR
Table of Contents
Table of Contents .................................................................................................................................. 2 1. Introduction........................................................................................................................................ 7 2. CodeVisionAVR Integrated Development Environment................................................................ 8
2.1 Working with Files ........................................................................................................................ 8 2.1.1 Creating a New File .............................................................................................................. 8 2.1.2 Opening an Existing File....................................................................................................... 9 2.1.3 Files History .......................................................................................................................... 9 2.1.4 Editing a File....................................................................................................................... 10 2.1.5 Saving a File....................................................................................................................... 11 2.1.6 Renaming a File.................................................................................................................. 11 2.1.7 Printing a File...................................................................................................................... 12 2.1.8 Closing a File...................................................................................................................... 13 2.1.9 Using the Navigator ............................................................................................................ 14
2.2 Working with Projects................................................................................................................. 15 2.2.1 Creating a New Project....................................................................................................... 15 2.2.2 Opening an Existing Project ............................................................................................... 17 2.2.3 Adding Notes or Comments to the Project ......................................................................... 18 2.2.4 Configuring the Project ....................................................................................................... 19
2.2.4.1 Adding or removing a File from the Project ................................................................ 19 2.2.4.2 Setting the C Compiler Options .................................................................................. 21 2.2.4.3 Transferring the Compiled Program to the AVR Chip after Make .............................. 27 2.2.4.4 Running an User Specified Program after Make........................................................ 29
2.2.5 Obtaining an Executable Program...................................................................................... 31 2.2.5.1 Compiling the Project.................................................................................................. 31 2.2.5.2 Making the Project ...................................................................................................... 33
2.2.6 Closing a Project................................................................................................................. 37 2.3 Tools........................................................................................................................................... 38
2.3.1 The AVR Studio Debugger ................................................................................................. 38 2.3.2 The AVR Chip Programmer................................................................................................ 39 2.3.3 The Serial Communication Terminal .................................................................................. 43 2.3.4 Executing User Programs................................................................................................... 44
© 1998-2003 HP InfoTech S.R.L. Page 2

7/22/2019 CodevisionAVR Manual Full
http://slidepdf.com/reader/full/codevisionavr-manual-full 4/200
CodeVisionAVR
2.3.4.1 Configuring the Tools Menu........................................................................................ 44 2.4 IDE Settings................................................................................................................................ 46
2.4.1 General Settings................................................................................................................. 46 2.4.2 Configuring the Editor......................................................................................................... 47 2.4.3 Configuring the Assembler ................................................................................................. 48 2.4.4 Setting the Debugger Path ................................................................................................. 49 2.4.5 AVR Chip Programmer Setup ............................................................................................ 50 2.4.6 Serial Communication Terminal Setup............................................................................... 52
2.5 Accessing the Help..................................................................................................................... 53 2.6 Transferring the License to another computer ........................................................................... 53 2.7 Connecting to HP InfoTech's Web Site ...................................................................................... 56
2.8 Contacting HP InfoTech by E-Mail ............................................................................................. 56 2.9 Quitting the CodeVisionAVR IDE ............................................................................................... 56
3. CodeVisionAVR C Compiler Reference ........................................................................................ 57 3.1 The Preprocessor....................................................................................................................... 57 3.2 Comments .................................................................................................................................. 62 3.3 Reserved Keywords ................................................................................................................... 63 3.4 Identifiers .................................................................................................................................... 64
3.5 Data Types ................................................................................................................................. 64 3.6 Constants.................................................................................................................................... 65 3.7 Variables..................................................................................................................................... 66
3.7.1 Specifying the SRAM Storage Address for Global Variables............................................. 68 3.7.2 Bit Variables........................................................................................................................ 68 3.7.3 Allocation of Variables to Registers.................................................................................... 69 3.7.4 Structures ........................................................................................................................... 70 3.7.5 Unions................................................................................................................................. 73 3.7.6 Enumerations...................................................................................................................... 75 3.7.7 Global Variables Memory Map File .................................................................................... 76
3.8 Defining Data Types ................................................................................................................... 76 3.9 Type Conversions....................................................................................................................... 77 3.10 Operators.................................................................................................................................. 78 3.11 Functions.................................................................................................................................. 79 3.12 Pointers..................................................................................................................................... 80
© 1998-2003 HP InfoTech S.R.L. Page 3

7/22/2019 CodevisionAVR Manual Full
http://slidepdf.com/reader/full/codevisionavr-manual-full 5/200
CodeVisionAVR
3.13 Accessing the I/O Registers ..................................................................................................... 82 3.13.1 Bit level access to the I/O Registers................................................................................. 83
3.14 Accessing the EEPROM........................................................................................................... 84 3.15 Using Interrupts ........................................................................................................................ 85 3.16 SRAM Memory Organization.................................................................................................... 86 3.17 Using an External Startup File.................................................................................................. 88 3.18 Including Assembly Language in Your Program...................................................................... 90
3.18.1 Calling Assembly Functions from C.................................................................................. 91 3.19 Creating Libraries ..................................................................................................................... 92 3.20 Using the AVR Studio Debugger.............................................................................................. 95 3.21 Hints.......................................................................................................................................... 96
3.22 Limitations................................................................................................................................. 96
4. Library Functions Reference.......................................................................................................... 97 4.1 Character Type Functions .......................................................................................................... 98 4.2 Standard C Input/Output Functions............................................................................................ 99 4.3 Standard Library Functions ...................................................................................................... 103 4.4 Mathematical Functions............................................................................................................ 104 4.5 String Functions........................................................................................................................ 107
4.6 Variable Length Argument Lists Macros .................................................................................. 112 4.7 Non-local Jump Functions........................................................................................................ 113 4.8 BCD Conversion Functions...................................................................................................... 114 4.9 Gray Code Conversion Functions ............................................................................................ 114 4.10 Memory Access Functions ..................................................................................................... 115 4.11 LCD Functions........................................................................................................................ 116
4.11.1 LCD Functions for displays with up to 2x40 characters ................................................. 116 4.11.2 LCD Functions for displays with 4x40 characters .......................................................... 119 4.11.3 LCD Functions for displays connected in 8 bit memory mapped mode......................... 121
4.12 I2C Bus Functions................................................................................................................... 123
4.12.1 National Semiconductor LM75 Temperature Sensor Functions .................................... 125 4.12.2 Dallas Semiconductor DS1621 Thermometer/Thermostat Functions............................ 127 4.12.3 Philips PCF8563 Real Time Clock Functions................................................................. 130 4.12.4 Philips PCF8583 Real Time Clock Functions................................................................. 133 4.12.5 Dallas Semiconductor DS1307 Real Time Clock Functions .......................................... 136
© 1998-2003 HP InfoTech S.R.L. Page 4

7/22/2019 CodevisionAVR Manual Full
http://slidepdf.com/reader/full/codevisionavr-manual-full 6/200
CodeVisionAVR
4.13 Dallas Semiconductor DS1302 Real Time Clock Functions .................................................. 138 4.14 1 Wire Protocol Functions ...................................................................................................... 140
4.14.1 Dallas Semiconductor DS1820/DS18S20 Temperature Sensors Functions ................. 142 4.14.2 Dallas Semiconductor DS2430 EEPROM Functions ..................................................... 146 4.14.3 Dallas Semiconductor DS2433 EEPROM Functions ..................................................... 149
4.15 SPI Functions ......................................................................................................................... 152 4.16 Power Management Functions............................................................................................... 155 4.17 Delay Functions...................................................................................................................... 156
5. CodeWizardAVR Automatic Program Generator ....................................................................... 157 5.1 Setting the AVR Chip Options .................................................................................................. 160 5.2 Setting the External SRAM....................................................................................................... 162
5.3 Setting the Input/Output Ports .................................................................................................. 164 5.4 Setting the External Interrupts.................................................................................................. 165 5.5 Setting the Timers/Counters..................................................................................................... 167 5.6 Setting the UART or USART.................................................................................................... 172 5.7 Setting the Analog Comparator ................................................................................................ 175 5.8 Setting the Analog-Digital Converter ........................................................................................ 176 5.9 Setting the SPI Interface........................................................................................................... 179
5.10 Setting the Universal Serial Interface - USI............................................................................ 180 5.11 Setting the I
2C Bus ................................................................................................................. 182
5.11.1 Setting the LM75 devices ............................................................................................... 183 5.11.2 Setting the DS1621 devices ........................................................................................... 184 5.11.3 Setting the PCF8563 devices......................................................................................... 185 5.11.4 Setting the PCF8583 devices......................................................................................... 186 5.11.5 Setting the DS1307 devices ........................................................................................... 187
5.12 Setting the 1 Wire Bus............................................................................................................ 189 5.13 Setting the 2 Wire Bus............................................................................................................ 191 5.14 Setting the ATmega169 LCD Controller................................................................................. 192 5.15 Setting the LCD ...................................................................................................................... 193 5.16 Setting Bit-Banged Peripherals .............................................................................................. 194 5.17 Specifying the Project Information.......................................................................................... 195
6. License Agreement ....................................................................................................................... 196 6.1 Software License...................................................................................................................... 196
© 1998-2003 HP InfoTech S.R.L. Page 5
7/22/2019 CodevisionAVR Manual Full
http://slidepdf.com/reader/full/codevisionavr-manual-full 7/200
CodeVisionAVR
6.2 Liability Disclaimer.................................................................................................................... 196 6.3 Restrictions............................................................................................................................... 196 6.4 Operating License .................................................................................................................... 196 6.5 Back-up and Transfer ............................................................................................................... 196 6.6 Terms........................................................................................................................................ 197 6.7 Other Rights and Restrictions................................................................................................... 197
7. Technical Support ......................................................................................................................... 198 8. Contact Information ...................................................................................................................... 199
© 1998-2003 HP InfoTech S.R.L. Page 6

7/22/2019 CodevisionAVR Manual Full
http://slidepdf.com/reader/full/codevisionavr-manual-full 8/200
CodeVisionAVR
1. Introduction
CodeVisionAVR is a C cross-compiler, Integrated Development Environment and Automatic ProgramGenerator designed for the Atmel AVR family of microcontrollers.The program is a native 32bit application that runs under the Windows 95, 98, NT 4, 2000 and XP
operating systems.The C cross-compiler implements nearly all the elements of the ANSI C language, as allowed by the AVR architecture, with some features added to take advantage of specificity of the AVR architectureand the embedded system needs.The compiled COFF object files can be C source level debugged, with variable watching, using the Atmel AVR Studio debugger.The Integrated Development Environment (IDE) has built-in AVR Chip In-System Programmersoftware that enables the automatical transfer of the program to the microcontroller chip aftersuccessful compilation/assembly. The In-System Programmer software is designed to work inconjunction with the Atmel STK500, Kanda Systems STK200+/300, Dontronics DT006, VogelElektronik VTEC-ISP, Futurlec JRAVR and MicroTronics' ATCPU/Mega2000 development boards.For debugging embedded systems, which employ serial communication, the IDE has a built-inTerminal.
Besides the standard C libraries, the CodeVisionAVR C compiler has dedicated libraries for:• Alphanumeric LCD modules
• Philips I2C bus
• National Semiconductor LM75 Temperature Sensor
• Philips PCF8563, PCF8583, Dallas Semiconductor DS1302 and DS1307 Real Time Clocks
• Dallas Semiconductor 1 Wire protocol
• Dallas Semiconductor DS1820/DS18S20 Temperature Sensors
• Dallas Semiconductor DS1621 Thermometer/Thermostat
• Dallas Semiconductor DS2430 and DS2433 EEPROMs
• SPI
• Power management
• Delays
• Gray code conversion.
CodeVisionAVR also contains the CodeWizardAVR Automatic Program Generator, that allows you towrite, in a matter of minutes, all the code needed for implementing the following functions:
• External memory access setup
• Chip reset source identification
• Input/Output Port initialization
• External Interrupts initialization
• Timers/Counters initialization
• Watchdog Timer initialization
• UART initialization and interrupt driven buffered serial communication
• Analog Comparator initialization
• ADC initialization• SPI Interface initialization
• I2C Bus, LM75 Temperature Sensor, DS1621 Thermometer/Thermostat and PCF8563, PCF8583,
DS1302, DS1307 Real Time Clocks initialization
• 1 Wire Bus and DS1820/DS18S20 Temperature Sensors initialization
• LCD module initialization.
This product is © Copyright 1998-2003 Pavel Haiduc and HP InfoTech S.R.L., all rights reserved.The author of the program wishes to thank Mr. Jack Tidwell for his great help in the implementation offloating point routines and to Mr. Yuri G. Salov for his excellent work in improving the MathematicalFunctions Library and beta testing CodeVisionAVR.
© 1998-2003 HP InfoTech S.R.L. Page 7
7/22/2019 CodevisionAVR Manual Full
http://slidepdf.com/reader/full/codevisionavr-manual-full 9/200
CodeVisionAVR
2. CodeVisionAVR Integrated Development Environment
2.1 Working with Files
Using the CodeVisionAVR IDE you can view and edit any text file used or produced by the C compileror assembler.
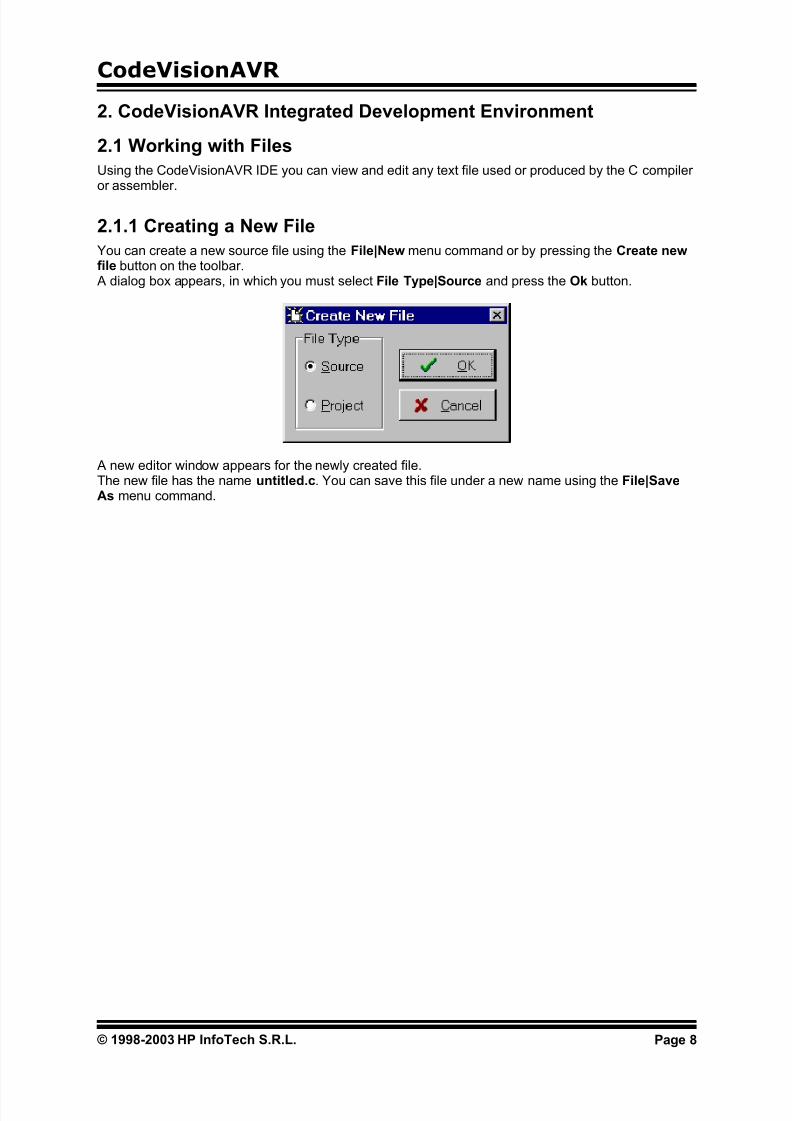
2.1.1 Creating a New File
You can create a new source file using the File|New menu command or by pressing the Create newfile button on the toolbar. A dialog box appears, in which you must select File Type|Source and press the Ok button.
A new editor window appears for the newly created file.The new file has the name untitled.c. You can save this file under a new name using the File|SaveAs menu command.
© 1998-2003 HP InfoTech S.R.L. Page 8

7/22/2019 CodevisionAVR Manual Full
http://slidepdf.com/reader/full/codevisionavr-manual-full 10/200
CodeVisionAVR
2.1.2 Opening an Existing File
You can open an existing file using the File|Open menu command or by pressing the Open file buttonon the toolbar. An Open dialog window appears.
You must select the name and type of file you wish to open.By pressing the Open button you will open the file in a new editor window.
2.1.3 Files HistoryThe CodeVisionAVR IDE keeps a history of the opened files.The most recent eight files that where used can be reopened using the File|Reopen menu command.
© 1998-2003 HP InfoTech S.R.L. Page 9
7/22/2019 CodevisionAVR Manual Full
http://slidepdf.com/reader/full/codevisionavr-manual-full 11/200
CodeVisionAVR
2.1.4 Editing a File
A previously opened or a newly created file can be edited in the editor window by using the Tab,Arrows, Backspace and Delete keys.Pressing the Home key moves the cursor to the start of the current text line.Pressing the End key moves the cursor to the end of the current text line.
Pressing the Ctrl+Home keys moves the cursor to the start of the file.Pressing the Ctrl+End keys moves the cursor to the end of the file.
Portions of text can be selected by dragging with the mouse.You can copy the selected text to the clipboard by using the Edit|Copy menu command, by pressingthe Ctrl+C keys or by pressing the Copy button on the toolbar.By using the Edit|Cut menu command, by pressing the Ctrl+X keys or by pressing the Cut button onthe toolbar, you can copy the selected text to the clipboard and then delete it from the file.Text previously saved in the clipboard can be placed at the current cursor position by using theEdit|Paste menu command, by pressing the Ctrl+V keys or pressing the Paste button on the toolbar.
Clicking in the right margin of the editor window allows selection of a whole line of text.Selected text can be deleted using the Edit|Delete menu command or pressing the Ctrl+Delete keys.
The Edit|Print Selection menu command allows the printing of the selected text.Dragging and dropping with the mouse can move portions of text.
Pressing the Ctrl+Y keys deletes the text line where the caret is currently positioned.
Selected portions of text can be indented, respectively unindented, using the Edit|Indent Block,respectively Edit|Unindent Block, menu commands or by pressing the Ctrl+I, respectively Ctrl+U keys.
You can find, respectively replace, portions of text in the edited file by using the Edit|Find,respectively Edit|Replace, menu commands, by pressing the Ctrl+F, respectively Ctrl+R keys, or bypressing the Find, respectively Replace buttons on the toolbar.
Changes in the edited text can be undone, respectively redone, by using the Edit|Undo, respectivelyEdit|Redo, menu commands, by pressing the Ctrl+Z, respectively Shift+Ctrl+Z keys, or by pressingthe Undo, respectively Redo buttons on the toolbar.
You can go to a specific line number in the edited file, by using the Edit|Goto Line menu command orby pressing the Alt+G keys.
Bookmarks can be inserted or removed, at the line where the cursor is positioned, by using theEdit|Toggle Bookmark menu command or by pressing the Shift+Ctrl+0...9 keys.The Edit|Jump to Bookmark menu command or the Ctrl+0...9 keys will position the cursor at thestart of the corresponding bookmarked text line.
If the cursor is positioned on an opening, respectively closing, brace then the Edit|Match Braces
menu command or the Ctrl+M key will highlight, the portion of text until the corresponding matchingclosing, respectively opening brace. Pressing any key or clicking the mouse will hide the highlighting.
Clicking with the mouse right button opens a pop-up menu that also gives the user access to theabove mentioned functions.
© 1998-2003 HP InfoTech S.R.L. Page 10

7/22/2019 CodevisionAVR Manual Full
http://slidepdf.com/reader/full/codevisionavr-manual-full 12/200
CodeVisionAVR
2.1.5 Saving a File
The currently edited file can be saved by using the File|Save menu command, by pressing the Ctrl+S keys or by pressing the Save button on the toolbar.When saving, the Editor will create a backup file with an ~ character appended to the extension.
All currently opened files can be saved using the File|Save All menu command.
2.1.6 Renaming a File
The currently edited file can be saved under a new name by using the File|Save As menu command. A Save dialog window will open.
You will have the possibility to specify the new name and type of the file, and eventually its newlocation.
© 1998-2003 HP InfoTech S.R.L. Page 11

7/22/2019 CodevisionAVR Manual Full
http://slidepdf.com/reader/full/codevisionavr-manual-full 13/200
CodeVisionAVR
2.1.7 Printing a File
You can print the current file using the File|Print menu command or by pressing the Print button onthe toolbar.The contents of the file will be printed to the Windows default printer.
The paper margins used when printing can be set using the File|Page Setup menu command, whichopens the Page Setup dialog window.
The units used when setting the paper margins are specified using the Units list box.The printer can be configured by pressing the Printer button in this dialog window.Changes can be saved, respectively canceled, using the OK, respectively Cancel buttons.
© 1998-2003 HP InfoTech S.R.L. Page 12

7/22/2019 CodevisionAVR Manual Full
http://slidepdf.com/reader/full/codevisionavr-manual-full 14/200
CodeVisionAVR
2.1.8 Closing a File
You can quit editing the current file by using the File|Close menu command.If the file was modified, and wasn’t saved yet, you will be prompted if you want to do that.
Pressing Yes will save changes and close the file.Pressing No will close the file without saving the changes.Pressing Cancel will disable the file closing process.
All currently opened files can be closed using the File|Close All menu command.
© 1998-2003 HP InfoTech S.R.L. Page 13

7/22/2019 CodevisionAVR Manual Full
http://slidepdf.com/reader/full/codevisionavr-manual-full 15/200
CodeVisionAVR
2.1.9 Using the Navigator
The Navigator window allows easy displaying or opening of source files.By clicking on the file name the appropriate file is maximized or opened.
After a Compile or Make process there is also displayed a list of #include –ed files, global variablesand functions declared in each compiled C source file.By clicking on the variable’s, respective function’s, name the variable, respective function, declarationis highlighted in the appropriate C source file.
If during compilation there are errors or warnings, these are also displayed in the Navigator window.By clicking on the error or warning, the corresponding source line is highlighted in the appropriate file.
The Navigator tree branches can be expanded, respectively collapsed, by clicking on the +,respectively -, buttons.
By right clicking in the Navigator window you can open a pop-up menu with the following choices:
• Open a file
• Save the currently edited file
• Save All opened files
• Close Current File
• Close Project
• Close All opened files• Toggle on or off expanding the file branches
• Toggle on or off expanding the Errors and Warnings branches for the file whose Editor windowhas focus
© 1998-2003 HP InfoTech S.R.L. Page 14
7/22/2019 CodevisionAVR Manual Full
http://slidepdf.com/reader/full/codevisionavr-manual-full 16/200
CodeVisionAVR
2.2 Working with Projects
The Project groups the source file(s) and compiler settings that you use for building a particularprogram.
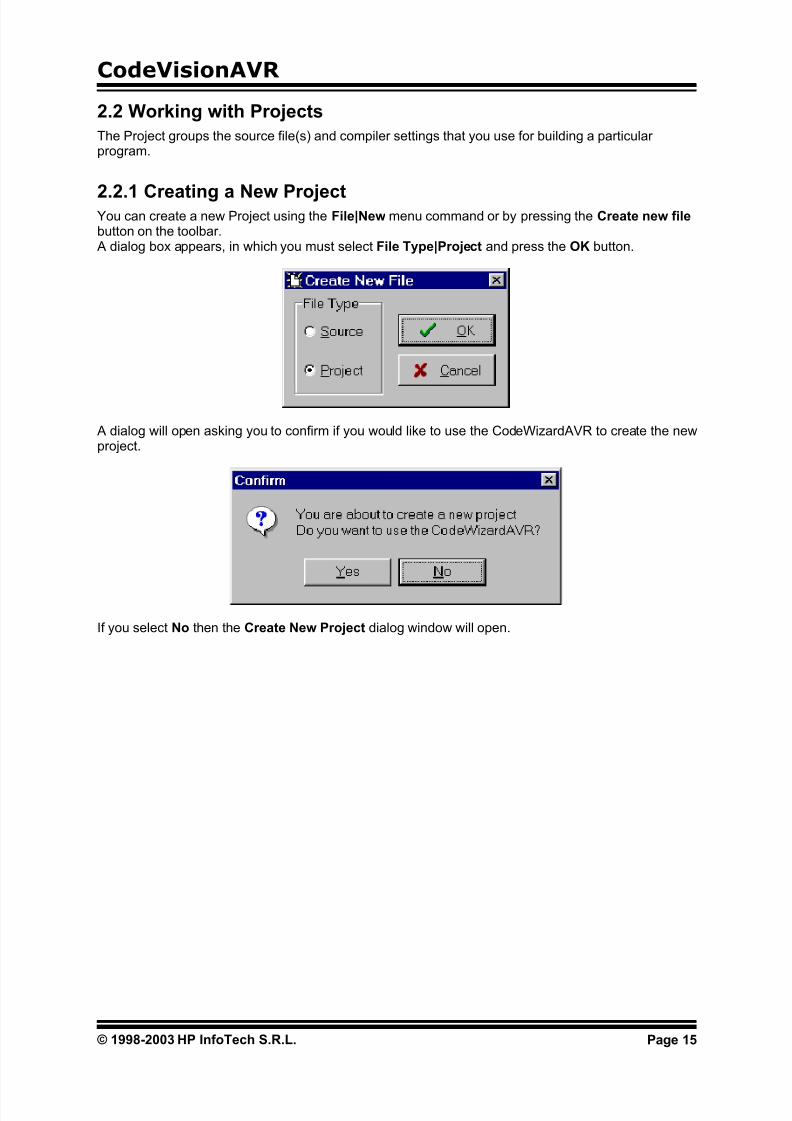
2.2.1 Creating a New ProjectYou can create a new Project using the File|New menu command or by pressing the Create new file button on the toolbar. A dialog box appears, in which you must select File Type|Project and press the OK button.
A dialog will open asking you to confirm if you would like to use the CodeWizardAVR to create the newproject.
If you select No then the Create New Project dialog window will open.
© 1998-2003 HP InfoTech S.R.L. Page 15

7/22/2019 CodevisionAVR Manual Full
http://slidepdf.com/reader/full/codevisionavr-manual-full 17/200
CodeVisionAVR
You must specify the new Project file name and its location.
The Project file will have the .prj extension.You can configure the Project by using the Project|Configure menu command.
© 1998-2003 HP InfoTech S.R.L. Page 16
7/22/2019 CodevisionAVR Manual Full
http://slidepdf.com/reader/full/codevisionavr-manual-full 18/200
CodeVisionAVR
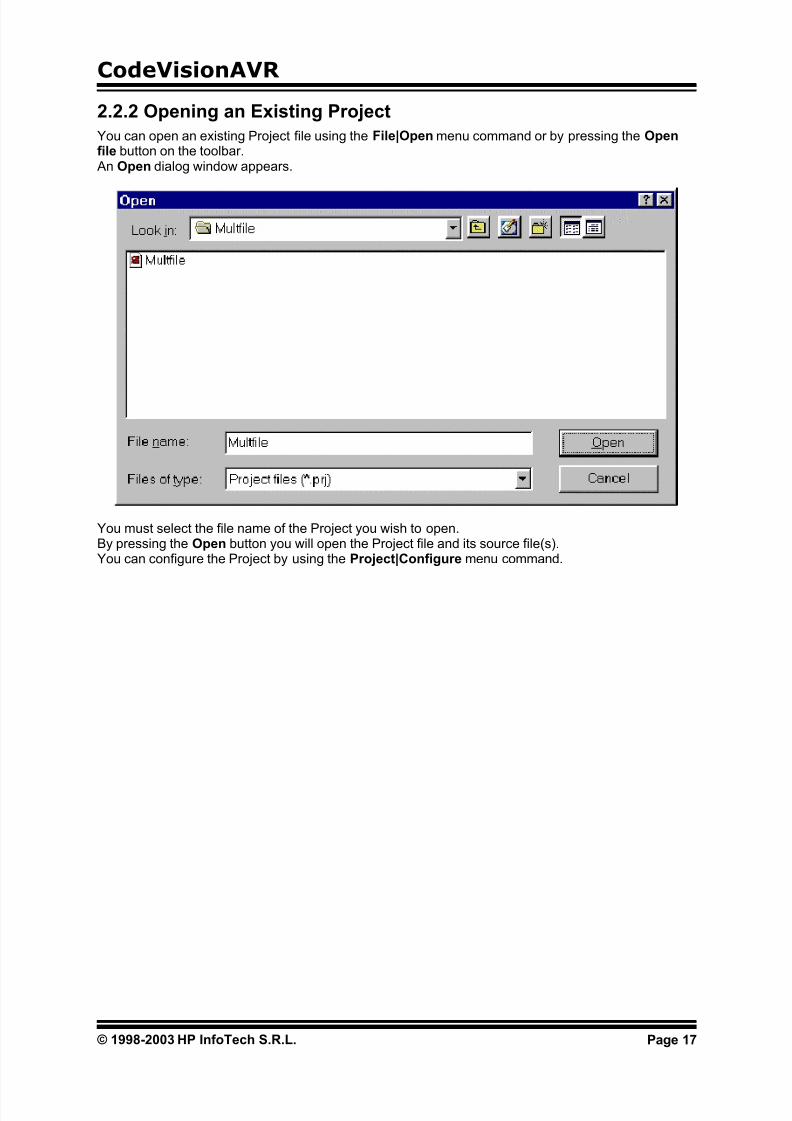
2.2.2 Opening an Existing Project
You can open an existing Project file using the File|Open menu command or by pressing the Openfile button on the toolbar. An Open dialog window appears.
You must select the file name of the Project you wish to open.By pressing the Open button you will open the Project file and its source file(s).You can configure the Project by using the Project|Configure menu command.
© 1998-2003 HP InfoTech S.R.L. Page 17

7/22/2019 CodevisionAVR Manual Full
http://slidepdf.com/reader/full/codevisionavr-manual-full 19/200
CodeVisionAVR
2.2.3 Adding Notes or Comments to the Project
With every Project the CodeVisionAVR IDE creates a text file where you can place notes andcomments.You can access this file using the Project|Notes or Windows menu commands.
This file can be edited using the standard Editor commands.The file is automatically saved when you Close the Project or Quit the CodeVisionAVR program.
© 1998-2003 HP InfoTech S.R.L. Page 18

7/22/2019 CodevisionAVR Manual Full
http://slidepdf.com/reader/full/codevisionavr-manual-full 20/200
CodeVisionAVR
2.2.4 Configuring the Project
The Project can be configured using the Project|Configure menu command or the Project Configure toolbar button.
2.2.4.1 Adding or removing a File from the ProjectTo add or remove a file from the currently opened project you must use the Project|Configure menucommand. A Configure Project tabbed dialog window will open. You must select the Files tab.
By pressing the Add button you can add a source file to the project.The first file added to the project is the main project file.This file will always be Make -ed.The rest of the files added to the project will be automatically linked to the main project file on Make.
© 1998-2003 HP InfoTech S.R.L. Page 19

7/22/2019 CodevisionAVR Manual Full
http://slidepdf.com/reader/full/codevisionavr-manual-full 21/200
CodeVisionAVR
Multiple files can be added by holding the Ctrl key when selecting in the Add File to Project dialog.
When the project is Open-ed all project files will be opened in the editor.By clicking on a file, and then pressing the Remove button, you will remove this file from the project.
Changes can be saved, respectively canceled, using the OK, respectively Cancel buttons.
When creating a project with multiple files the following rules must be preserved:
• only .C files must be added to the project's Files list
• there's no need to #include the .C files from the Files list as they will be automatically linked• data type definitions and function declarations must be placed in header .H files, that will be
#include -ed as necessary in the .C files
• global variables declarations must be placed in the .C files where necessary
• there's no need to declare global variables, that are not static, in header .H files, because if thesefiles will be #include -ed more than once, the compiler will issue errors about variable redeclarations.
© 1998-2003 HP InfoTech S.R.L. Page 20

7/22/2019 CodevisionAVR Manual Full
http://slidepdf.com/reader/full/codevisionavr-manual-full 22/200
CodeVisionAVR
2.2.4.2 Setting the C Compiler Options
To set the C compiler options for the currently opened project you must use the Project|Configure menu command. A Configure Project tabbed dialog window will open. You must select the C Compiler and CodeGeneration tabs.
You can select the target AVR microcontroller chip by using the Chip combo box.You must also specify the CPU Clock Frequency in MHz, which is needed by the Delay Functions, 1Wire Protocol Functions and Dallas Semiconductor DS1820/DS18S20 Temperature SensorsFunctions.
The required memory model can be selected by using the Memory Model radio group box.
The compiled program can be optimized for minimum size, respectively maximum execution speed,using the Optimize for|Size, respectively Optimize for|Speed, settings.
© 1998-2003 HP InfoTech S.R.L. Page 21

7/22/2019 CodevisionAVR Manual Full
http://slidepdf.com/reader/full/codevisionavr-manual-full 23/200
CodeVisionAVR
For devices that allow self-programming the Program Type can be selected as:
• Application
• Boot Loader
If the Boot Loader program type was selected, a supplementary Boot Loader Debugging in AVR
Studio option is available.
If this option is enabled, the compiler will generate supplementary code that allows the Boot Loader tobe source level debugged in the AVR Studio simulator/emulator.When programming the chip with the final Boot Loader code, the Boot Loader Debugging option mustbe disabled.
The (s)printf features option allows to select which versions of the printf and sprintf Standard CInput/Oputput Functions will be linked in your project:
• int - the following conversion type characters are supported: 'c', 's', 'p', 'i', 'd', 'u', 'x', 'X', '%', nowidth or precision specifiers are supported, only the '+' and ' ' flags are supported, no input sizemodifiers are supported
• int, width - the following conversion type characters are supported: 'c', 's', 'p', 'i', 'd', 'u', 'x', 'X', '%',
the width specifier is supported, the precision specifier is not supported, only the '+', '-', '0' and ' ' flagsare supported, no input size modifiers are supported
© 1998-2003 HP InfoTech S.R.L. Page 22

7/22/2019 CodevisionAVR Manual Full
http://slidepdf.com/reader/full/codevisionavr-manual-full 24/200
CodeVisionAVR
• long, width - the following conversion type characters are supported: 'c', 's', 'p', 'i', 'd', 'u', 'x', 'X','%' the width specifier is supported, the precision specifier is not supported, only the '+', '-', '0' and ' 'flags are supported, only the 'l' input size modifier is supported
• long, width, precision - the following conversion type characters are supported: 'c', 's', 'p', 'i', 'd','u', 'x', 'X', '%', the width and precision specifiers are supported, only the '+', '-', '0' and ' ' flags are
supported, only the 'l' input size modifier is supported• float, width, precision - the following conversion type characters are supported: 'c', 's', 'p', 'i', 'd','u', 'e', 'E', 'f', 'x', 'X', '%', the width and precision specifiers are supported, only the '+', '-', '0' and ' ' flagsare supported, only the 'l' input size modifier is supported.The more features are selected, the larger is the code size generated for the printf and sprintffunctions.
The Data Stack Size must be also specified.Eventually you may also specify the External SRAM Size (in case the microcontroller have externalSRAM memory connected).The External SRAM Wait State option enables the insertion of wait states during access to theexternal SRAM. This is useful when using slow memory devices.
If an Atmel AT94K05, AT94K10, AT94K20 or AT94K40 FPSLIC device will be used, than there will bethe possibility to specify the Program SRAM size in Kwords.
© 1998-2003 HP InfoTech S.R.L. Page 23
7/22/2019 CodevisionAVR Manual Full
http://slidepdf.com/reader/full/codevisionavr-manual-full 25/200
CodeVisionAVR
The size of the bit variables, which are placed in registers R2 to R14, can be specified using the BitVariables size list box.
Checking the Promote char to int check box enables the ANSI promotion of char operands to int.This option can also be specified using the #pragma promotechar compiler directive.
Promoting char to int leads to increased code size and lower speed for an 8 bit chip microcontrollerlike the AVR.
If the char is unsigned check box is checked, the compiler treats by default the char data type as anunsigned 8 bit in the range 0…255.If the check box is not checked the char data type is by default a signed 8 bit in the range –128…127.This option can also be specified using the #pragma uchar compiler directive.Treating char as unsigned leads to better code size and speed.
If the 8 bit enums check box is checked, the compiler treats the enumerations as being of 8 bit char data type, leading to improved code size and execution speed of the compiled program. If the checkbox is not checked the enumerations are considered as 16 bit int data type as required by ANSI.
The Enhanced Instructions check box allows enabling or disabling the generation of Enhanced Coreinstructions for the ATmega128, ATmega16, ATmega161, ATmega162, ATmega163, ATmega32, ATmega323, ATmega64, ATmega8 and AT94K FPSLIC devices.
The rest of the registers in the range R2 to R14, not used for bit variables, can be automaticallyallocated to char and int global variables by checking the Compilation|Automatic RegisterAllocation check box.
An external startup file can be used by checking the Compilation|Use an External Startup File check box.
The generation of warning messages during compilation can be enabled or disabled by using theCompilation|Enable Warnings check box.
For debugging purposes you have the option Stack End Markers. If you select it, the compiler willplace the strings DSTACKEND, respectively HSTACKEND, at the end of the Data Stack, respectively Hardware Stack areas.When you debug the program with the AVR Studio debugger you may see if these strings areoverwritten, and consequently modify the Data Stack Size.When your program runs correctly you may disable the placement of the strings in order to reducecode size.
Using the File Output Format(s) list box you can select one of the following formats for the filesgenerated by the compiler:
• Intel HEX;
• COFF (required by the Atmel AVR Studio debugger), ROM and EEP (required by the In-System
Programmer) ;• Atmel generic OBJ, ROM and EEP (required by the In-System Programmer).
If the COFF file format is selected and the Use the Terminal I/O in AVR Studio check box ischecked, special debugging information is generated in order to use the AVR Studio Terminal I/Owindow for communication with the simulated AVR chip’s UART.If the Use the Terminal I/O in AVR Studio option is enabled, the UART or USART code will not runcorrectly on the real AVR chip. This option is only for debugging purposes.
© 1998-2003 HP InfoTech S.R.L. Page 24

7/22/2019 CodevisionAVR Manual Full
http://slidepdf.com/reader/full/codevisionavr-manual-full 26/200
CodeVisionAVR
The Globally #define tab allows to #define macros that will be visible in all the project files.For example:
will be equivalent with placing the definition:
#define ABC 1234
in each project file.
© 1998-2003 HP InfoTech S.R.L. Page 25
7/22/2019 CodevisionAVR Manual Full
http://slidepdf.com/reader/full/codevisionavr-manual-full 27/200
CodeVisionAVR
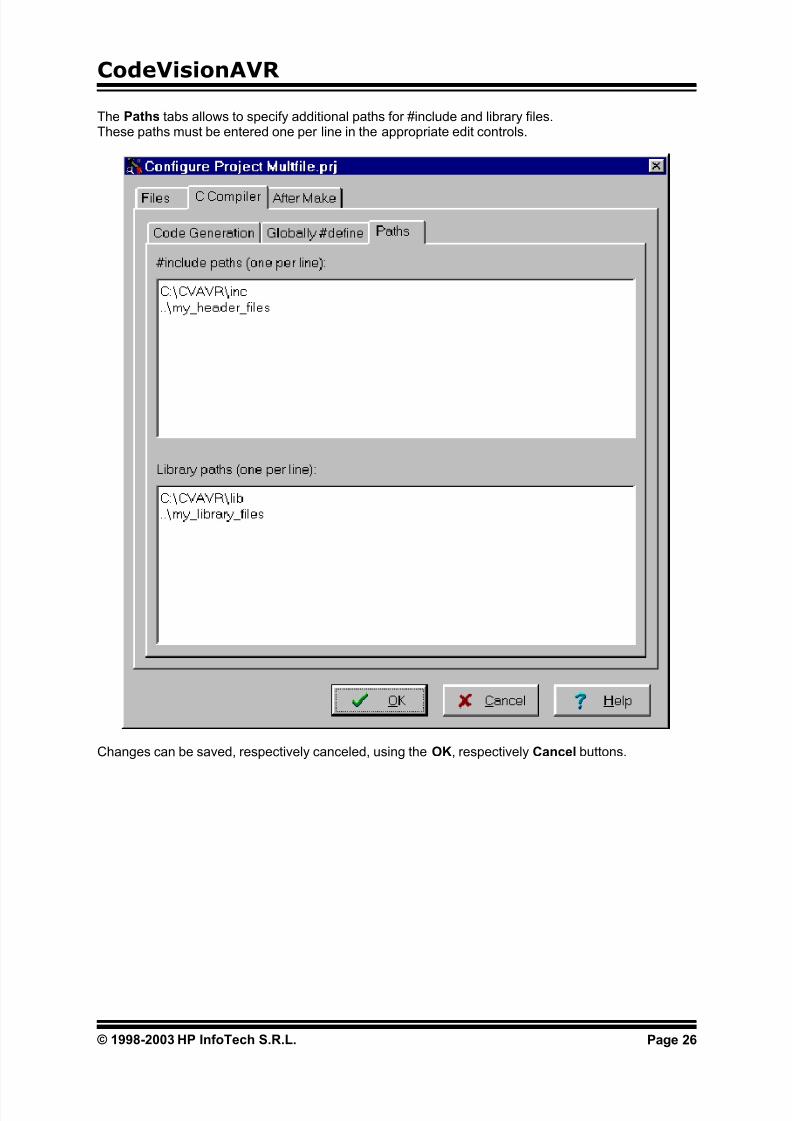
The Paths tabs allows to specify additional paths for #include and library files.These paths must be entered one per line in the appropriate edit controls.
Changes can be saved, respectively canceled, using the OK, respectively Cancel buttons.
© 1998-2003 HP InfoTech S.R.L. Page 26

7/22/2019 CodevisionAVR Manual Full
http://slidepdf.com/reader/full/codevisionavr-manual-full 28/200
CodeVisionAVR
2.2.4.3 Transferring the Compiled Program to the AVR Chip afterMake
This option is available if you select the After Make tab in the Project Configure window.
If you check the Program the Chip option, then after successful compilation/assembly your programwill be automatically transferred to the AVR chip using the built-in Programmer software.
The following steps are executed automatically:
• Chip erasure
• FLASH and EEPROM blank check
• FLASH programming and verification
• EEPROM programming and verification
• Fuse and Lock Bits programming
The Merge data from a .ROM File for FLASH Programming option, if checked, will merge in theFLASH programming buffer the contents of the .ROM file, created by the compiler after Make, with thedata from the .ROM file specified in .ROM File Path.
This is useful, for example, when adding a boot loader executable compiled in another project, to anapplication program that will be programmed in the FLASH memory.
© 1998-2003 HP InfoTech S.R.L. Page 27
7/22/2019 CodevisionAVR Manual Full
http://slidepdf.com/reader/full/codevisionavr-manual-full 29/200
CodeVisionAVR
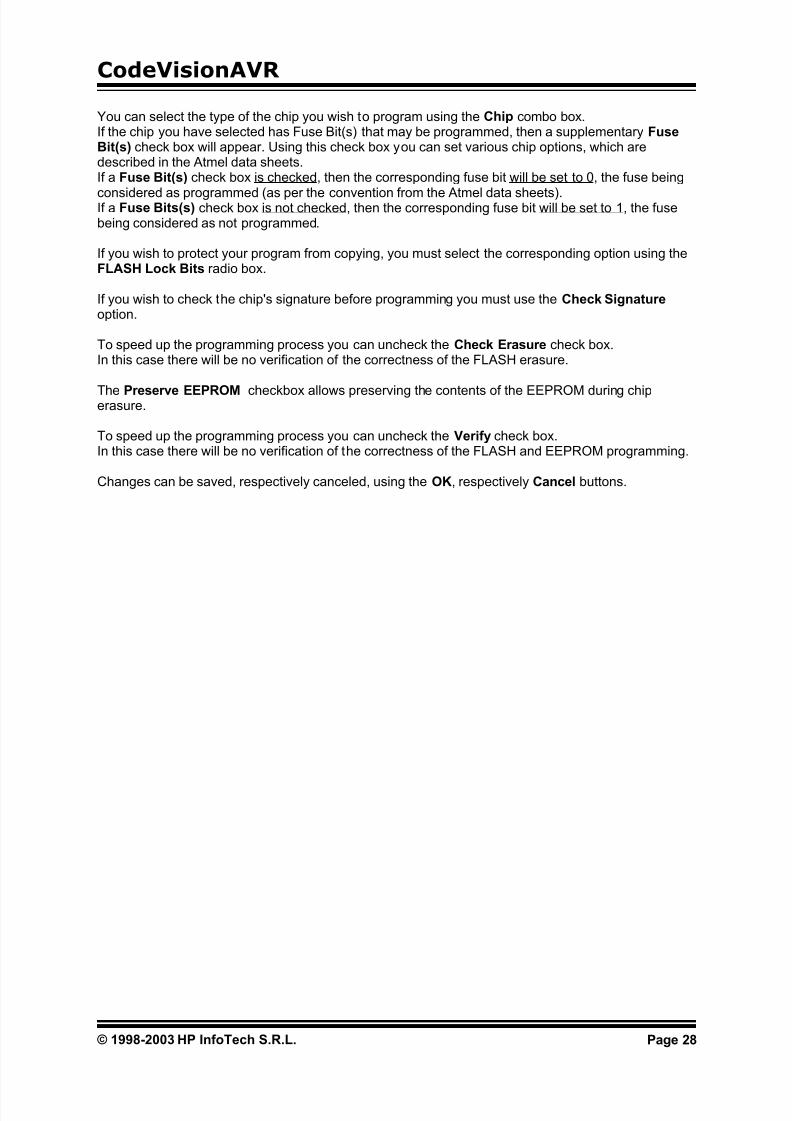
You can select the type of the chip you wish to program using the Chip combo box.If the chip you have selected has Fuse Bit(s) that may be programmed, then a supplementary FuseBit(s) check box will appear. Using this check box you can set various chip options, which aredescribed in the Atmel data sheets.If a Fuse Bit(s) check box is checked, then the corresponding fuse bit will be set to 0, the fuse being
considered as programmed (as per the convention from the Atmel data sheets).If a Fuse Bits(s) check box is not checked, then the corresponding fuse bit will be set to 1, the fusebeing considered as not programmed.
If you wish to protect your program from copying, you must select the corresponding option using theFLASH Lock Bits radio box.
If you wish to check the chip's signature before programming you must use the Check Signature option.
To speed up the programming process you can uncheck the Check Erasure check box.In this case there will be no verification of the correctness of the FLASH erasure.
The Preserve EEPROM checkbox allows preserving the contents of the EEPROM during chiperasure.
To speed up the programming process you can uncheck the Verify check box.In this case there will be no verification of the correctness of the FLASH and EEPROM programming.
Changes can be saved, respectively canceled, using the OK, respectively Cancel buttons.
© 1998-2003 HP InfoTech S.R.L. Page 28

7/22/2019 CodevisionAVR Manual Full
http://slidepdf.com/reader/full/codevisionavr-manual-full 30/200
CodeVisionAVR
2.2.4.4 Running an User Specified Program after Make
This option is available if you select the After Make tab in the Project Configure window.If you check the Execute User’s Program option, then a program, that you have previously specified,will be executed after the compilation/assembly process.
© 1998-2003 HP InfoTech S.R.L. Page 29

7/22/2019 CodevisionAVR Manual Full
http://slidepdf.com/reader/full/codevisionavr-manual-full 31/200
CodeVisionAVR
Using the Program Settings button you can modify the:
• Program Directory and File Name
• Program Command Line Parameters
• Program Working Directory
Changes can be saved, respectively canceled, using the OK, respectively Cancel buttons.
© 1998-2003 HP InfoTech S.R.L. Page 30

7/22/2019 CodevisionAVR Manual Full
http://slidepdf.com/reader/full/codevisionavr-manual-full 32/200
CodeVisionAVR
2.2.5 Obtaining an Executable Program
Obtaining an executable program requires the following steps:1. Compiling the Project’s C source file, using the CodeVisionAVR C Compiler, and obtaining an
assembler source file2. Assembling the assembler source file, using the Atmel AVR assembler AVRASM32.
Compiling a File, executes step 1.Making, executes step 1 and 2 for the main project file
2.2.5.1 Compiling the Project
To compile the Project you must use the Project|Compile File menu command, press the F9 key orpress the Compile button of the toolbar. The CodeVisionAVR C Compiler will be executed, producingan assembler source file with the .asm extension.The assembly source file can be examined and modified by opening it with the Editor .
After the compilation an Information window will open showing the compilation results.
© 1998-2003 HP InfoTech S.R.L. Page 31

7/22/2019 CodevisionAVR Manual Full
http://slidepdf.com/reader/full/codevisionavr-manual-full 33/200
CodeVisionAVR
Eventual compilation errors and/or warnings will be listed in the Message window located under theEditor window, or in the Navigator window.
By double clicking on the error or warning message, the line with the problem will be highlighted.The size of the Message window can be modified using the horizontal slider bar placed between itand the Editor window.
© 1998-2003 HP InfoTech S.R.L. Page 32

7/22/2019 CodevisionAVR Manual Full
http://slidepdf.com/reader/full/codevisionavr-manual-full 34/200
CodeVisionAVR
2.2.5.2 Making the Project
To make the Project you must use the Project|Make menu command, press the Shift+F9 keys orpress the Make button of the toolbar. The CodeVisionAVR C Compiler will be executed, producing anassembler source file with the .asm extension.The rest of the files added to the project will be automatically linked to the main project file.
Eventual compilation errors and/or warnings will be listed in the Message window located under theEditor window, or in the Navigator window.
By double clicking on the error or warning message, the line with the problem will be highlighted.If no errors were encountered, then the Atmel AVR assembler AVRASM32 will be executed, obtainingthe output file type specified in Project|Configure|C Compiler|Code Generation.
© 1998-2003 HP InfoTech S.R.L. Page 33

7/22/2019 CodevisionAVR Manual Full
http://slidepdf.com/reader/full/codevisionavr-manual-full 35/200
CodeVisionAVR
After the make process is completed an Information window will open showing the compilationresults.
Pressing the Compiler tab will display compilation results.
© 1998-2003 HP InfoTech S.R.L. Page 34

7/22/2019 CodevisionAVR Manual Full
http://slidepdf.com/reader/full/codevisionavr-manual-full 36/200
CodeVisionAVR
Pressing the Assembler tab will display assembly results.
© 1998-2003 HP InfoTech S.R.L. Page 35

7/22/2019 CodevisionAVR Manual Full
http://slidepdf.com/reader/full/codevisionavr-manual-full 37/200
CodeVisionAVR
Pressing the Programmer tab will display the Chip Programming Counter , which shows how manytimes was the AVR chip programmed so far.
Pressing the Set Counter button will open the Set Programming Counter window:
This dialog window allows setting the new Chip Programming Counter value.Pressing the Program button allows automatic programming of the AVR chip after successfulcompilation. Pressing Cancel will disable automatic programming.
© 1998-2003 HP InfoTech S.R.L. Page 36

7/22/2019 CodevisionAVR Manual Full
http://slidepdf.com/reader/full/codevisionavr-manual-full 38/200
CodeVisionAVR
2.2.6 Closing a Project
You can quit working with the current Project by using the File|Close Project menu command.
If the Project files were modified, and weren’t saved yet, you will be prompted if you want to do that.
Pressing Yes will save changes and close the project.Pressing No will close the project without saving the changes.
Pressing Cancel will disable the project closing process.
When saving, the IDE will create a backup file with a .pr~ extension.
© 1998-2003 HP InfoTech S.R.L. Page 37

7/22/2019 CodevisionAVR Manual Full
http://slidepdf.com/reader/full/codevisionavr-manual-full 39/200
CodeVisionAVR
2.3 Tools
Using the Tools menu you can execute other programs without exiting the CodeVisionAVR IDE.
2.3.1 The AVR Studio Debugger
The CodeVisionAVR C Compiler is designed to work in conjunction with the Atmel AVR Studiodebugger version 3 or 4.
Before you can invoke the debugger, you must first specify its location and file name using theSettings|Debugger menu command.
The AVR Studio version must be specified in the Debugger list box.
Changes can be saved, respectively canceled, using the OK, respectively Cancel buttons.
The debugger is executed by selecting the Tools|Debugger menu command or by pressing theDebugger button on the toolbar.
© 1998-2003 HP InfoTech S.R.L. Page 38

7/22/2019 CodevisionAVR Manual Full
http://slidepdf.com/reader/full/codevisionavr-manual-full 40/200
CodeVisionAVR
2.3.2 The AVR Chip Programmer
The CodeVisionAVR IDE has a built-in In-System AVR Chip Programmer that lets you easilytransfer your compiled program to the microcontroller for testing.The Programmer is designed to work with the Atmel STK500/AVRISP, Kanda Systems STK200+/300,Dontronics DT006, Vogel Elektronik VTEC-ISP, Futurlec JRAVR or the MicroTronics
ATCPU/Mega2000 development boards.The type of the used programmer and the printer port can be selected by using theSettings|Programmer menu command.
The Programmer is executed by selecting the Tools|Chip Programmer menu command or bypressing the Chip Programmer button on the toolbar.
You can select the type of the chip you wish to program using the Chip combo box.If the chip you have selected has Fuse Bit(s) that may be programmed, then a supplementary FuseBit(s) check box will appear. Using this check box you can set various chip options, which aredescribed in the Atmel data sheets.If a Fuse Bit(s) check box is checked, then the corresponding fuse bit will be set to 0, the fuse beingconsidered as programmed (as per the convention from the Atmel data sheets).If a Fuse Bits(s) check box is not checked, then the corresponding fuse bit will be set to 1, the fuse
being considered as not programmed.
© 1998-2003 HP InfoTech S.R.L. Page 39

7/22/2019 CodevisionAVR Manual Full
http://slidepdf.com/reader/full/codevisionavr-manual-full 41/200
CodeVisionAVR
If you wish to protect your program from copying, you must select the corresponding option using theFLASH Lock Bits radio box.The Programmer has two memory buffers:
• The FLASH memory buffer
• The EEPROM memory buffer.
You can Load or Save the contents of these buffers using the File menu.Supported file formats are:
• Atmel .rom and .eep
• Intel HEX
• Binary .bin
After loading a file in the corresponding buffer, the Start and End addresses are updated accordingly.You may also edit these addresses if you wish.
The contents of the FLASH, respectively EEPROM, buffers can be displayed and edited using theEdit|FLASH , respectively Edit|EEPROM menu commands.When one of these commands is invoked, an Edit window displaying the corresponding buffer
contents will open:
The buffer's contents, at the highlighted address, can be modified by typing in the new value.The highlighted address can be modified using the arrow, Tab, Shift+Tab, PageUp or PageDown keys.
© 1998-2003 HP InfoTech S.R.L. Page 40

7/22/2019 CodevisionAVR Manual Full
http://slidepdf.com/reader/full/codevisionavr-manual-full 42/200
CodeVisionAVR
The Fill Memory Block window can be opened by right clicking in the Edit window:
This window lets you specify the Start Address, End Address and Fill Value of the memory area to
be filled.
If you wish to check the chip's signature before any operation you must use the Check Signature option.
To speed up the programming process you can uncheck the Check Erasure check box.In this case there will be no verification of the correctness of the FLASH erasure.
The Preserve EEPROM checkbox allows preserving the contents of the EEPROM during chiperasure.
To speed up the programming process you also can uncheck the Verify check box.In this case there will be no verification of the correctness of the FLASH and EEPROM programming.
For erasing a chip's FLASH and EEPROM you must select the Program|Erase menu command. After erasure the chip's FLASH and EEPROM are automatically blank checked.For simple blank checking you must use the Program|Blank Check menu command.If you wish to program the FLASH with the contents of the FLASH buffer you must use theProgram|FLASH menu command.For programming the EEPROM you must use the Program|EEPROM menu command. After programming the FLASH and EEPROM are automatically verified.
To program the Lock, respectively the Fuse Bit(s) you must use the Program|Fuse Bit(s),respectively Program|Lock Bits menu commands.
The Program|All menu command allows to automatically:
• Erase the chip• FLASH and EEPROM blank check
• Program and verify the FLASH
• Program and verify the EEPROM
• Program the Fuse and Lock Bits.
If you wish to read the contents of the chip's FLASH, respectively EEPROM, you must use theRead|FLASH, respectively Read|EEPROM menu commands.For reading the chip's signature you must use the Read|Chip Signature menu command.To read the Lock, respectively the Fuse Bits you must use the Read|Lock Bits,respectively Read|Fuse Bits menu commands.
For some devices there's also the Read|Calibration Byte(s) option available.
It allows reading the value of the calibration bytes of the chip's internal RC oscillator.
© 1998-2003 HP InfoTech S.R.L. Page 41
7/22/2019 CodevisionAVR Manual Full
http://slidepdf.com/reader/full/codevisionavr-manual-full 43/200
CodeVisionAVR
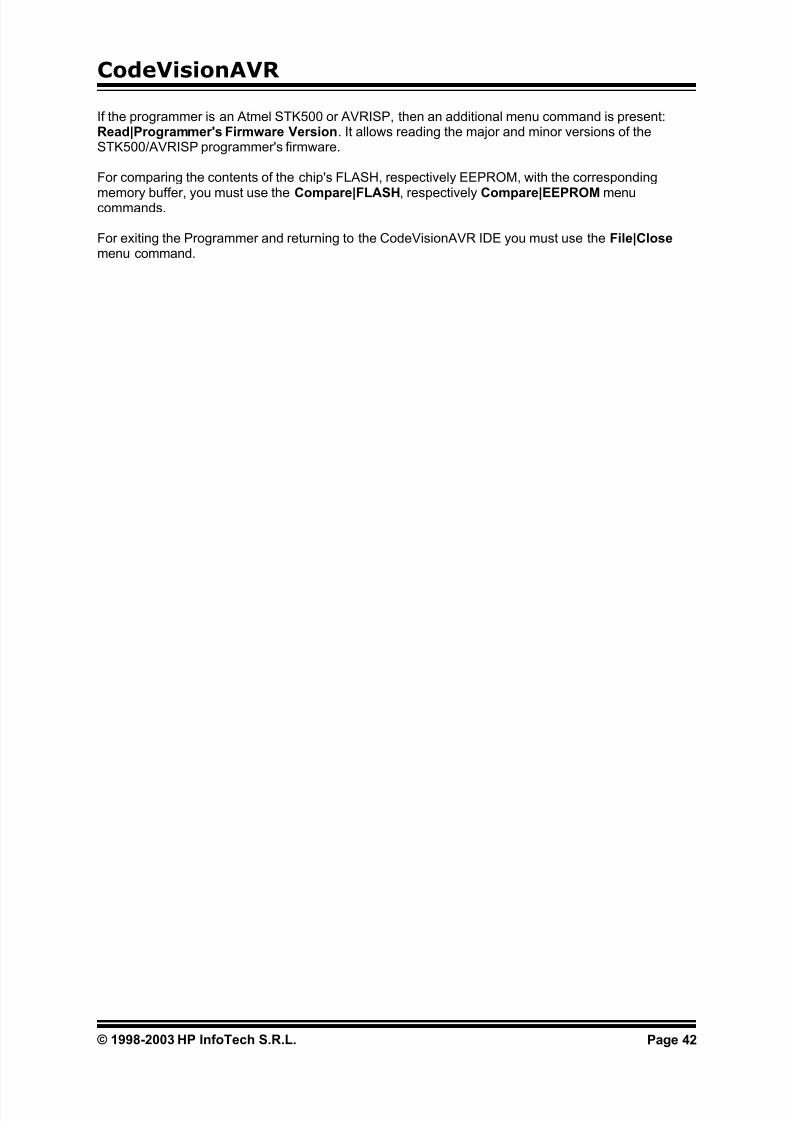
If the programmer is an Atmel STK500 or AVRISP, then an additional menu command is present:Read|Programmer's Firmware Version. It allows reading the major and minor versions of theSTK500/AVRISP programmer's firmware.
For comparing the contents of the chip's FLASH, respectively EEPROM, with the corresponding
memory buffer, you must use the Compare|FLASH, respectively Compare|EEPROM menucommands.
For exiting the Programmer and returning to the CodeVisionAVR IDE you must use the File|Close menu command.
© 1998-2003 HP InfoTech S.R.L. Page 42
7/22/2019 CodevisionAVR Manual Full
http://slidepdf.com/reader/full/codevisionavr-manual-full 44/200
CodeVisionAVR
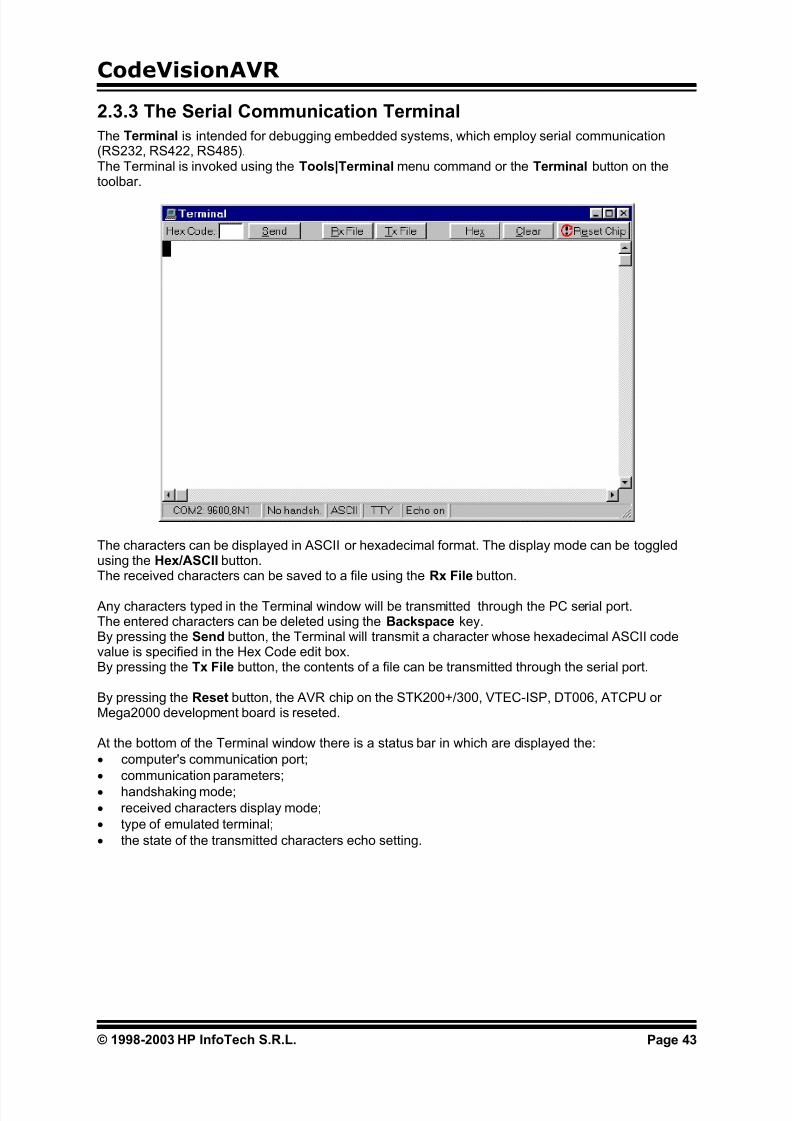
2.3.3 The Serial Communication Terminal
The Terminal is intended for debugging embedded systems, which employ serial communication(RS232, RS422, RS485).The Terminal is invoked using the Tools|Terminal menu command or the Terminal button on thetoolbar.
The characters can be displayed in ASCII or hexadecimal format. The display mode can be toggledusing the Hex/ASCII button.The received characters can be saved to a file using the Rx File button.
Any characters typed in the Terminal window will be transmitted through the PC serial port.The entered characters can be deleted using the Backspace key.By pressing the Send button, the Terminal will transmit a character whose hexadecimal ASCII codevalue is specified in the Hex Code edit box.By pressing the Tx File button, the contents of a file can be transmitted through the serial port.
By pressing the Reset button, the AVR chip on the STK200+/300, VTEC-ISP, DT006, ATCPU orMega2000 development board is reseted.
At the bottom of the Terminal window there is a status bar in which are displayed the:
• computer's communication port;
• communication parameters;
• handshaking mode;
• received characters display mode;
• type of emulated terminal;
• the state of the transmitted characters echo setting.
© 1998-2003 HP InfoTech S.R.L. Page 43

7/22/2019 CodevisionAVR Manual Full
http://slidepdf.com/reader/full/codevisionavr-manual-full 45/200
CodeVisionAVR
2.3.4 Executing User Programs
User programs are executed by selecting the corresponding command from the Tools menu.You must previously add the Program’s name to the menu.
2.3.4.1 Configuring the Tools MenuYou can add or remove User Programs from the Tools menu by using the Tools|Configure menucommand. A Configure Tools dialog window, with a list of User Programs, will open.
Using the Add button you can add a Program to the Tools menu.Using the Remove button you can remove a Program from the Tools menu.
© 1998-2003 HP InfoTech S.R.L. Page 44

7/22/2019 CodevisionAVR Manual Full
http://slidepdf.com/reader/full/codevisionavr-manual-full 46/200
CodeVisionAVR
Using the Settings button you can modify the:
• Tool Menu Name
• Tool Directory and File Name
• Command Line Parameters
• Working Directory of a selected Program from the list.
Changes can be saved, respectively canceled, using the OK, respectively Cancel buttons.
© 1998-2003 HP InfoTech S.R.L. Page 45
7/22/2019 CodevisionAVR Manual Full
http://slidepdf.com/reader/full/codevisionavr-manual-full 47/200
CodeVisionAVR
2.4 IDE Settings
The CodeVisionAVR IDE is configured using the Settings menu.
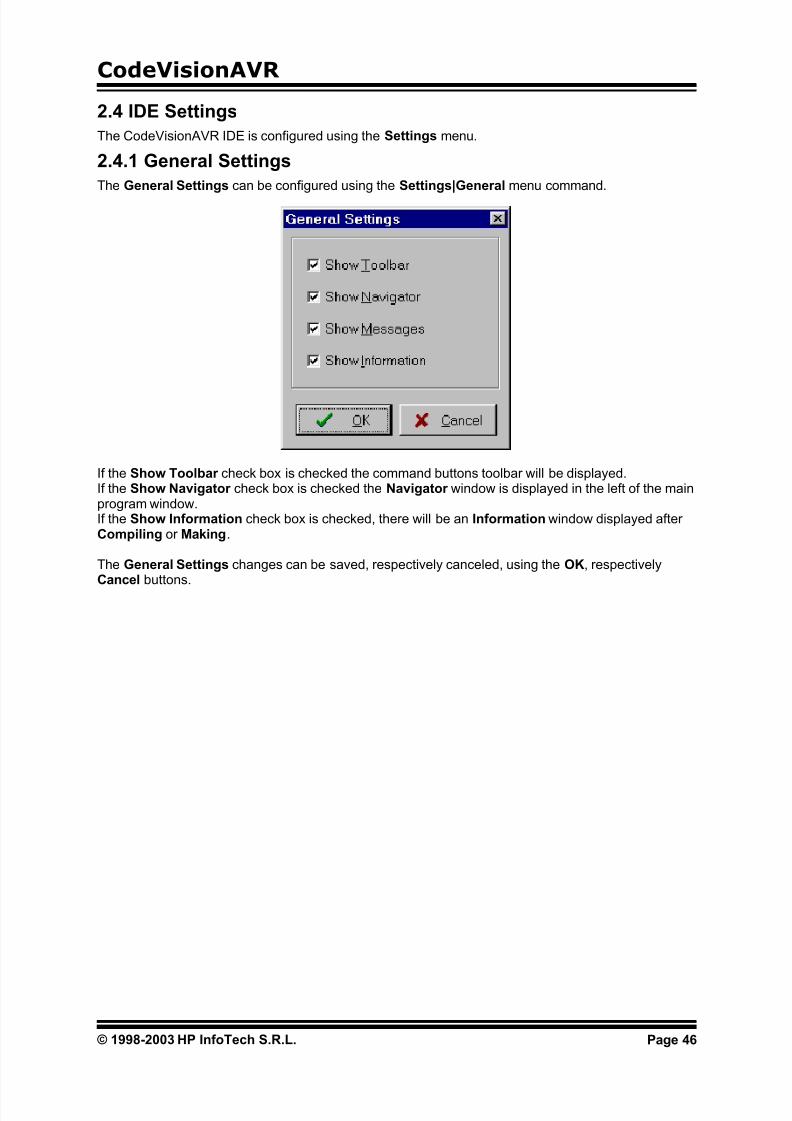
2.4.1 General Settings
The General Settings can be configured using the Settings|General menu command.
If the Show Toolbar check box is checked the command buttons toolbar will be displayed.If the Show Navigator check box is checked the Navigator window is displayed in the left of the mainprogram window.If the Show Information check box is checked, there will be an Information window displayed afterCompiling or Making.
The General Settings changes can be saved, respectively canceled, using the OK, respectivelyCancel buttons.
© 1998-2003 HP InfoTech S.R.L. Page 46

7/22/2019 CodevisionAVR Manual Full
http://slidepdf.com/reader/full/codevisionavr-manual-full 48/200
CodeVisionAVR
2.4.2 Configuring the Editor
The Editor can be configured using the Settings|Editor menu command.
By checking or unchecking the Syntax Highlighting check box, you can enable or disable the Csyntax color highlighting of the files displayed in the Editor windows.By checking or unchecking the Show Line Numbers check box, you can enable or disable thedisplaying of the line numbers in the Editor windows.By checking or unchecking the Autoindent check box, you can enable or disable the autoindentingduring file editing.
The number of blank spaces, inserted when pressing the Tab key, can be specified using the TabSize spin edit.
The font, used by the text Editor and the Terminal, can be specified using the Font button.
The different colors, used for displaying the text in the Editor windows and for C syntax highlighting,can be specified by clicking on the appropriate panels in the Colors group.The Background and Text color settings are the same for both the EditorEdit File and theTerminalTerminal.
The Editor configuration changes can be saved, respectively canceled, using the OK, respectivelyCancel buttons.
By pressing the Default button the default Editor settings are restored.
© 1998-2003 HP InfoTech S.R.L. Page 47

7/22/2019 CodevisionAVR Manual Full
http://slidepdf.com/reader/full/codevisionavr-manual-full 49/200
CodeVisionAVR
2.4.3 Configuring the Assembler
The Assembler can be configured using the Settings|Assembler menu command.
The On Assembler Error options allow to select which file will be automatically opened by the Editor in the case of an assembly error.
The Assembler configuration changes can be saved, respectively canceled, using the OK,respectively Cancel buttons.
© 1998-2003 HP InfoTech S.R.L. Page 48

7/22/2019 CodevisionAVR Manual Full
http://slidepdf.com/reader/full/codevisionavr-manual-full 50/200
CodeVisionAVR
2.4.4 Setting the Debugger Path
The CodeVisionAVR C Compiler is designed to work in conjunction with the Atmel AVR Studiodebugger version 3 or 4.
Before you can invoke the debugger, you must first specify its location and file name using the
Settings|Debugger menu command.
The AVR Studio version must be specified in the Debugger list box.
Changes can be saved, respectively canceled, using the OK, respectively Cancel buttons.
Pressing the Browse button opens a dialog window that allows selecting the debugger's directory andfilename.
© 1998-2003 HP InfoTech S.R.L. Page 49

7/22/2019 CodevisionAVR Manual Full
http://slidepdf.com/reader/full/codevisionavr-manual-full 51/200
CodeVisionAVR
2.4.5 AVR Chip Programmer Setup
Using the Settings|Programmer menu command, you can select the type of the in-systemprogrammer that is used, and the computer's port to which the programmer is connected.The current version of CodeVisionAVR supports the following in-system programmers:
• Kanda Systems STK200+ and STK300
• Atmel STK500
• Dontronics DT006
• Vogel Elektronik VTEC-ISP
• Futurlec JRAVR
• MicroTronics ATCPU and Mega2000
The STK200+, STK300, DT006, VTEC-ISP, JRAVR, ATCPU and Mega2000 in-system programmersuse the parallel printer port.The following choices are available through the Printer Port radio group box:
• LPT1, at base address 378h;• LPT2, at base address 278h;
• LPT3, at base address 3BCh.
The Delay Multiplier value can be increased in case of programming problems on very fast machines.Of course this will increase overall programming time.
The Atmega169 CKDIV8 Fuse Warning check box, if checked, will enable the generation of awarning that further low voltage serial programming will be impossible for the Atmega169 EngineeringSamples, if the CKDIV8 fuse will be programmed to 0.For usual Atmega169 chips this check box must be left unchecked.
© 1998-2003 HP InfoTech S.R.L. Page 50
7/22/2019 CodevisionAVR Manual Full
http://slidepdf.com/reader/full/codevisionavr-manual-full 52/200
CodeVisionAVR
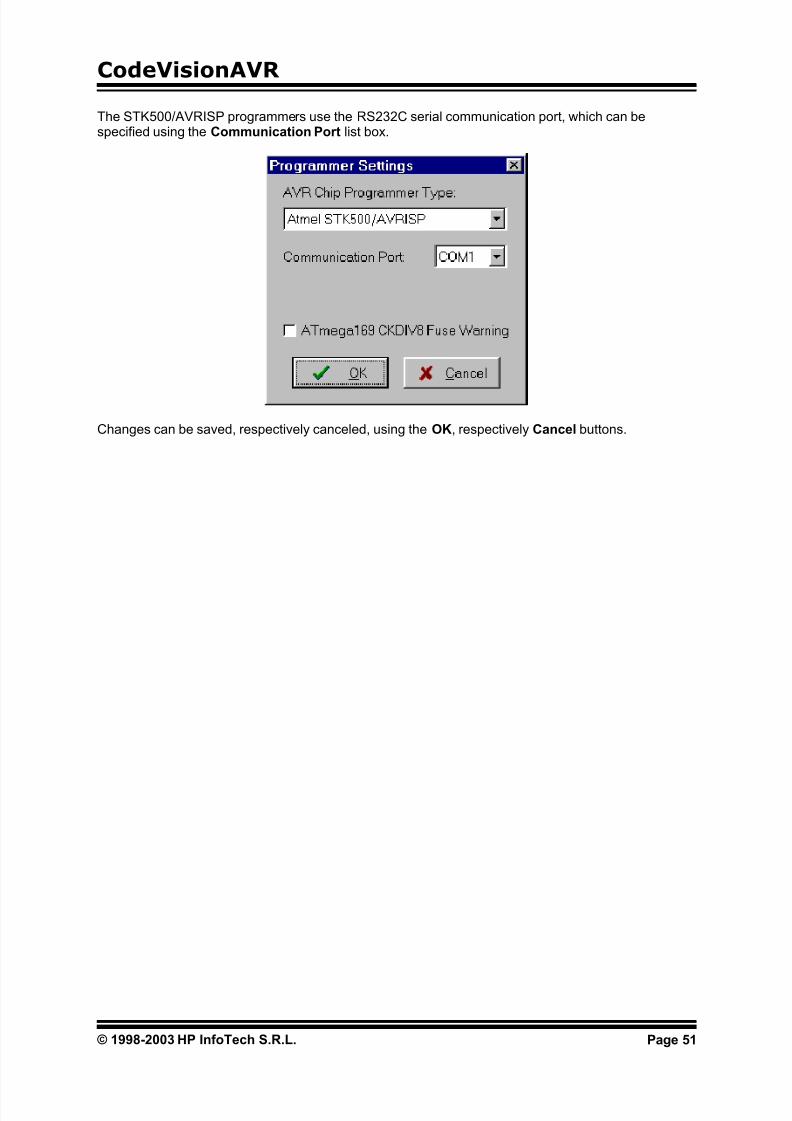
The STK500/AVRISP programmers use the RS232C serial communication port, which can bespecified using the Communication Port list box.
Changes can be saved, respectively canceled, using the OK, respectively Cancel buttons.
© 1998-2003 HP InfoTech S.R.L. Page 51
7/22/2019 CodevisionAVR Manual Full
http://slidepdf.com/reader/full/codevisionavr-manual-full 53/200
CodeVisionAVR
2.4.6 Serial Communication Terminal Setup
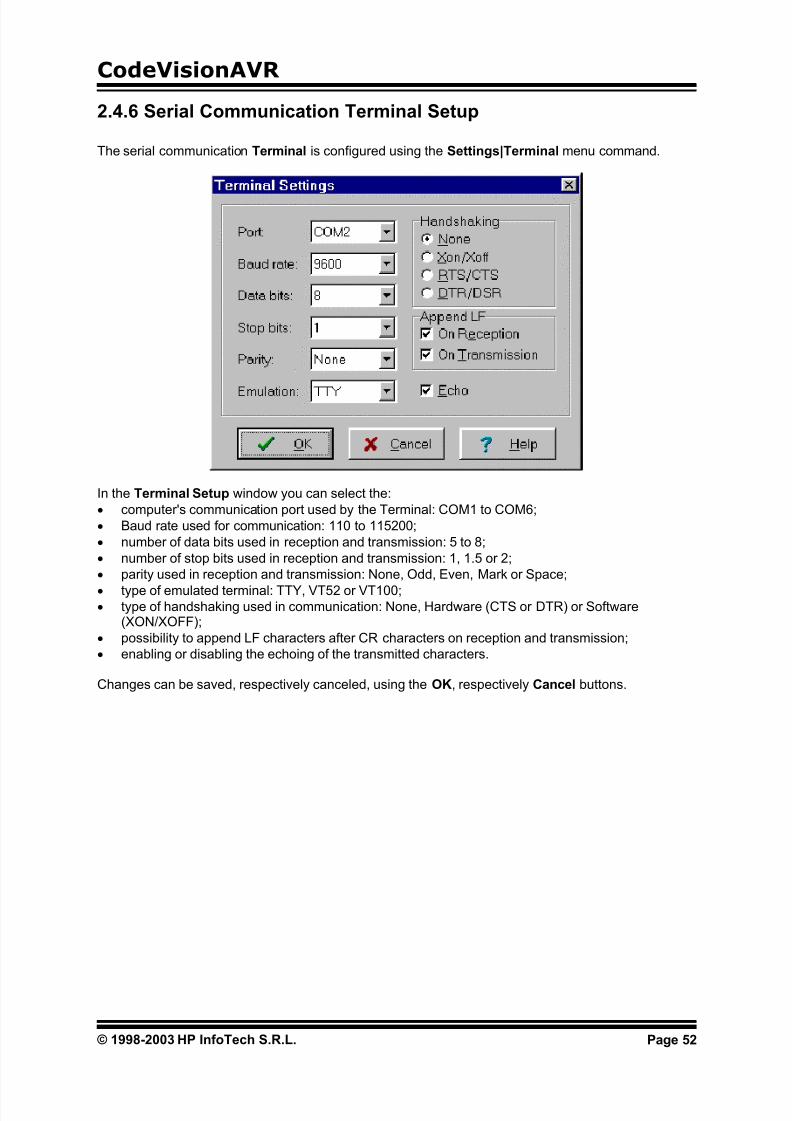
The serial communication Terminal is configured using the Settings|Terminal menu command.
In the Terminal Setup window you can select the:
• computer's communication port used by the Terminal: COM1 to COM6;
• Baud rate used for communication: 110 to 115200;
• number of data bits used in reception and transmission: 5 to 8;
• number of stop bits used in reception and transmission: 1, 1.5 or 2;
• parity used in reception and transmission: None, Odd, Even, Mark or Space;
• type of emulated terminal: TTY, VT52 or VT100;type of handshaking used in communication: None, Hardware (CTS or DTR) or Software(XON/XOFF);
•
•
•
possibility to append LF characters after CR characters on reception and transmission;
enabling or disabling the echoing of the transmitted characters.
Changes can be saved, respectively canceled, using the OK, respectively Cancel buttons.
© 1998-2003 HP InfoTech S.R.L. Page 52

7/22/2019 CodevisionAVR Manual Full
http://slidepdf.com/reader/full/codevisionavr-manual-full 54/200
CodeVisionAVR
2.5 Accessing the Help
CodeVisionAVR help system is accessed by invoking the Help|Help menu command or by pressingthe Help toolbar button.
2.6 Transferring the License to another computerThe CodeVisionAVR C compiler features a computer locked licensing system.This means that, the first time after purchase, you will receive from the author a license file that isspecific to your particular computer.This prevents you from using the software on another computer, until you will Export the license tothis computer. After the license Export, the compiler on the first computer will be disabled and you will only be ableto run the compiler on the second one.You can always Export the license back to the first computer, but the license on the second one willbe disabled after that.By this procedure only one person can use the compiler at a time.
To Export the license from the computer #1 to the computer #2 you must proceed like this:
• install the CodeVisionAVR C compiler on the computer #2
• execute the compiler on computer #2, it will display a specific serial number
© 1998-2003 HP InfoTech S.R.L. Page 53

7/22/2019 CodevisionAVR Manual Full
http://slidepdf.com/reader/full/codevisionavr-manual-full 55/200
CodeVisionAVR
• execute the compiler on computer #1 and select the Help|Export menu command, an ExportCodeVisionAVR License dialog window will open
• enter the serial number from computer #2 in the Destination Serial Number edit box
• press the Export button, if you press the Cancel button the Export will be canceled
• you will be prompted where to place the new license file for the computer #2, usually you canchose a diskette in drive A:
• press Save. After the new license file is successfully copied to the diskette, the compiler on
computer #1 will cease running
© 1998-2003 HP InfoTech S.R.L. Page 54
7/22/2019 CodevisionAVR Manual Full
http://slidepdf.com/reader/full/codevisionavr-manual-full 56/200
CodeVisionAVR
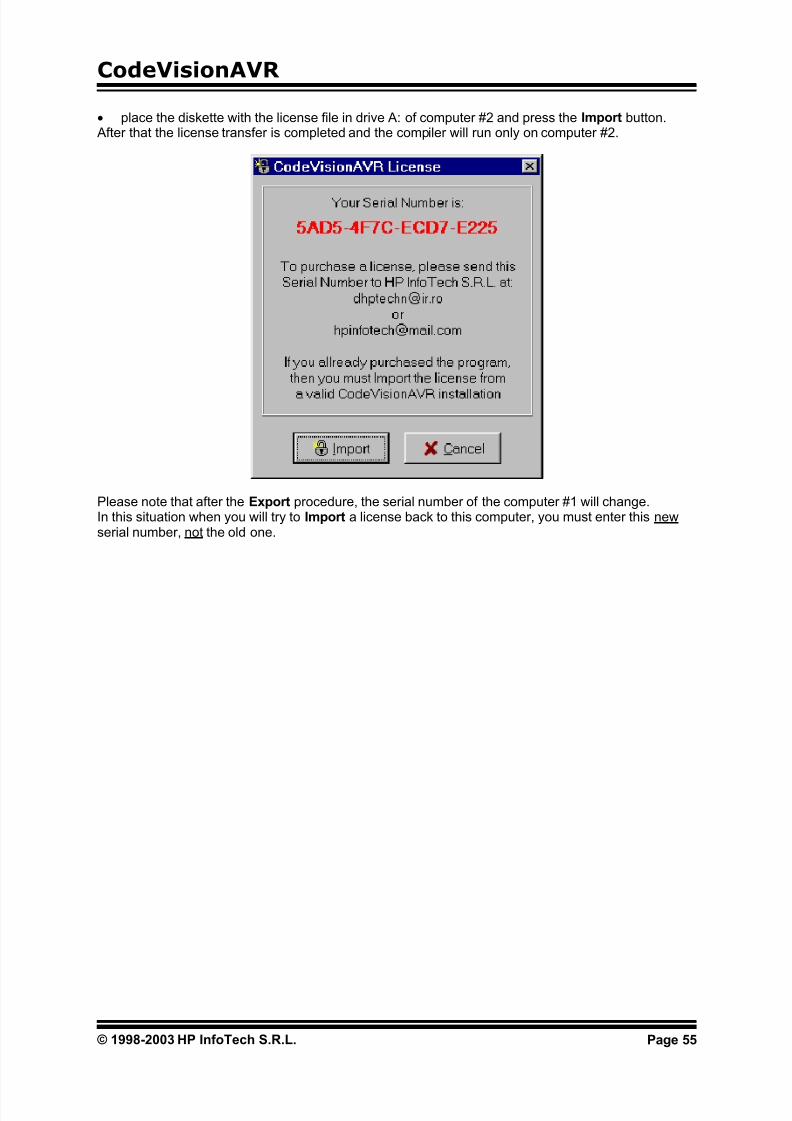
• place the diskette with the license file in drive A: of computer #2 and press the Import button. After that the license transfer is completed and the compiler will run only on computer #2.
Please note that after the Export procedure, the serial number of the computer #1 will change.In this situation when you will try to Import a license back to this computer, you must enter this newserial number, not the old one.
© 1998-2003 HP InfoTech S.R.L. Page 55

7/22/2019 CodevisionAVR Manual Full
http://slidepdf.com/reader/full/codevisionavr-manual-full 57/200
CodeVisionAVR
2.7 Connecting to HP InfoTech's Web Site
The Help|HP InfoTech on the Web menu command opens the default web browser and connects toHP InfoTech's web site http://www.hpinfotech.roHere you can check for the latest HP InfoTech's products and updates to CodeVisionAVR.
2.8 Contacting HP InfoTech by E-Mail
The Help|E-Mail HP InfoTech menu command opens the default e-mail program and allows you tosend an e-mail to: [email protected]
2.9 Quitting the CodeVisionAVR IDE
To quit working with the CodeVisionAVR IDE you must select the File|Exit menu command.If some source files were modified and were not saved yet, you will be prompted if you want to do that.
© 1998-2003 HP InfoTech S.R.L. Page 56

7/22/2019 CodevisionAVR Manual Full
http://slidepdf.com/reader/full/codevisionavr-manual-full 58/200
CodeVisionAVR
3. CodeVisionAVR C Compiler Reference
This section describes the general syntax rules for the CodeVisionAVR C compiler.Only specific aspects regarding the implementation of the C language by this compiler are exposed.This help is not intended to teach you the C language; you can use any good programming book to dothat.
You must also consult the appropriate AVR data sheets from Atmel.
3.1 The Preprocessor
The Preprocessor directives allows you to:
• include text from other files, such as header files containing library and user function prototypes
• define macros that reduce programming effort and improve the legibility of the source code
• set up conditional compilation for debugging purposes and to improve program portability
• issue compiler specific directives
The #include directive may be used to include another file in your source.You may nest as many as 16 #include files.Example:
/* File will be looked for in the /inc directory of the compiler. */ #include <file_name>
or
/* File will be looked for in the current project directory.If it's not located there, then it will be included fromthe /inc directory of the compiler. */
#include "file_name"
The #define directive may be used to define a macro.Example:
#define ALFA 0xff
This statement defines the symbol ‘ALFA’ to the value 0xff.The C preprocessor will replace 'ALFA' with 0xff in the source text before compiling.
Macros can also have parameters. The preprocessor will replace the macro with it's expansion andthe formal parameters with the real ones.Example:
#define SUM(a,b) a+b
/* the following code sequence will be replaced with int i=2+3; */int i=SUM(2,3);
When defining macros you can use the # operator to convert the macro parameter to a characterstring.Example:
#define PRINT_MESSAGE(t) printf(#t)
/* ...... *//* the following code sequence will be replaced with printf("Hello"); */PRINT_MESSAGE(Hello);
© 1998-2003 HP InfoTech S.R.L. Page 57

7/22/2019 CodevisionAVR Manual Full
http://slidepdf.com/reader/full/codevisionavr-manual-full 59/200
CodeVisionAVR
Two parameters can be concatenated using the ## operator.Example:
#define ALFA(a,b) a ## b
/* the following code sequence will be replaced with char xy=1; */char ALFA(x,y)=1;
A macro definition can be extended to a new line by using \ .Example:
#define MESSAGE "This is a very \long text..."
A macro can be undefined using the #undef directive.Example:
#undef ALFA
The #ifdef , #ifndef , #else and #endif directives may be used for conditional compilation.The syntax is:
#ifdef macro_name [set of statements 1] #else [set of statements 2] #endif
If 'alfa' is a defined macro name, then the #ifdef expression evaluates to true and the set ofstatements 1 will be compiled.Otherwise the set of statements 2 will be compiled.
The #else and set of statements 2 are optional.If 'alfa' is not defined, the #ifndef expression evaluates to true.The rest of the syntax is the same as that for #ifdef .
The #if , #elif , #else and #endif directives may be also used for conditional compilation.
#if expression1[set of statements 1] #elif expression2 [set of statements 2]#else [set of statements 3] #endif
If expression1 evaluates to true, the set of statements 1 will be compiled.If expression2 evaluates to true, the set of statements 2 will be compiled.Otherwise the set of statements 3 will be compiled.The #else and set of statements 3 are optional.
© 1998-2003 HP InfoTech S.R.L. Page 58
7/22/2019 CodevisionAVR Manual Full
http://slidepdf.com/reader/full/codevisionavr-manual-full 60/200
CodeVisionAVR
There are the following predefined macros:
__CODEVISIONAVR__ the version and revision of the compiler represented as an integer,example for V1.23.8 this will be 1238
__LINE__ the current line number of the compiled file
__FILE__ the current compiled file __TIME__ the current time in hh:mm:ss format __DATE__ the current date in mmm dd yyyy format _CHIP_ATXXXXX_ where ATXXXXX is the chip type, in uppercase letters, specified in the
Project|Configure|C Compiler|Code Generation|Chip option _MCU_CLOCK_FREQUENCY_ the AVR clock frequency specified in the Project|Configure|C
Compiler|Code Generation|Clock option, expressed as an integer in Hz _MODEL_TINY_ if the program is compiled using the TINY memory model _MODEL_SMALL_ if the program is compiled using the SMALL memory model _OPTIMIZE_SIZE_ if the program is compiled with optimization for size _OPTIMIZE_SPEED_ if the program is compiled with optimization for speed _UNSIGNED_CHAR_ if the Project|Configure|C Compiler|Code Generation|char is unsigned
compiler option is enabled or #pragma uchar+ is used
_8BIT_ENUMS_ if the Project|Configure|C Compiler|Code Generation|8 bit enums compileroption is enabled or #pragma 8bit_enums+ is used.
The #line directive can be used to modify the predefined __LINE__ and __FILE__ macros.The syntax is:
#line integer_constant ["file_name"]
Example:
/* This will set __LINE__ to 50 and__FILE__ to "file2.c" */
#line 50 "file2.c"
/* This will set __LINE__ to 100 */#line 100
There #error directive can be used to stop compilation and display an error message.The syntax is:
#error error_message
Example:
#error This is an error!
The #pragma directive allows compiler specific directives.You can use the #pragma warn directive to enable or disable compiler warnings.Example:
/* Warnings are disabled */ #pragma warn-
/* Write some code here */
/* Warnings are enabled */ #pragma warn+
© 1998-2003 HP InfoTech S.R.L. Page 59

7/22/2019 CodevisionAVR Manual Full
http://slidepdf.com/reader/full/codevisionavr-manual-full 61/200
CodeVisionAVR
The compiler’s code optimizer can be turned on or off using the #pragma opt directive. This directivemust be placed at the start of the source file.The default is optimization turned on.Example:
/* Turn optimization off, for testing purposes */ #pragma opt-
or
/* Turn optimization on */ #pragma opt+
If the code optimization is enabled, you can optimize some portions or all the program for size orspeed using the #pragma optsize directive.The default state is determined by the Project|Configure|C Compiler|CodeGeneration|Optimization menu setting. Example:
/* The program will be optimized for minimum size */#pragma optsize+
/* Place your program functions here */
/* Now the program will be optimized for maximum execution speed */#pragma optsize-
/* Place your program functions here */
The automatic saving and restoring of registers R0, R1, R15, R22, R23, R24, R25, R26, R27, R30,R31 and SREG, during interrupts can be turned on or off using the #pragma savereg directive.Example:
/* Turn registers saving off */#pragma savereg-
/* interrupt handler */interrupt [1] void my_irq(void) /* now save only the registers that are affected by the routines in the
handler, for example R30, R31 and SREG */#asm
push r30push r31in r30,SREGpush r30
#endasm
/* place the C code here */
/* now restore SREG, R31 and R30 */#asm
pop r30out SREG,r30pop r31pop r30
#endasm/* re-enable register saving for the other interrupts */#pragma savereg+
The default state is automatic saving of registers during interrupts.
© 1998-2003 HP InfoTech S.R.L. Page 60

7/22/2019 CodevisionAVR Manual Full
http://slidepdf.com/reader/full/codevisionavr-manual-full 62/200
CodeVisionAVR
The automatic allocation of global variables to registers can be turned on or off using the #pragmaregalloc directive.The default state is determined by the Project|Configure|C Compiler|Code Generation|AutomaticRegister Allocation check box.Example:
/* the following global variable will be automaticallyallocated to a register */#pragma regalloc+unsigned char alfa;
/* the following global variable will not be automaticallyallocated to a register and will be placed in normal SRAM */#pragma regalloc-unsigned char beta;
The ANSI char to int operands promotion can be turned on or off using the #pragma promotechar directive.
Example:
/* turn on the ANSI char to int promotion */#pragma promotechar+
/* turn off the ANSI char to int promotion */#pragma promotechar-
This option can also be specified in the Project|Configure|C Compiler|Code Generation|Promotechar to int menu.
Treating char by default as an unsigned 8 bit can be turned on or off using the #pragma uchar directive.
Example:
/* char will be unsigned by default */#pragma uchar+
/* char will be signed by default */#pragma uchar-
This option can also be specified in the Project|Configure|C Compiler|Code Generation|char isunsigned menu.
The #pragma library directive is used for specifying the necessity to compile/link a specific library file.Example:
#pragma library mylib.lib
The #pragma glbdef+ directive is used for compatibility with projects, created with versions ofCodeVisionAVR prior to V1.0.2.2, where the Project|Configure|C Compiler|Global #define optionwas enabled.It signals the compiler that macros are globally visible in all the program modules of a project.This directive must be placed in beginning of the first source file of the project.By default this directive is not active, so macros are visible only in the program module where they aredefined.
© 1998-2003 HP InfoTech S.R.L. Page 61

7/22/2019 CodevisionAVR Manual Full
http://slidepdf.com/reader/full/codevisionavr-manual-full 63/200
CodeVisionAVR
3.2 Comments
The character string "/*" marks the beginning of a comment.The end of the comment is marked with "*/".Example:
/* This is a comment */ /* This is a
multiple line comment */
One-line comments may be also defined by using the string "//".Example:
// This is also a comment Nested comments are not allowed.
© 1998-2003 HP InfoTech S.R.L. Page 62

7/22/2019 CodevisionAVR Manual Full
http://slidepdf.com/reader/full/codevisionavr-manual-full 64/200
CodeVisionAVR
3.3 Reserved Keywords
Following is a list of keywords reserved by the compiler.These can not be used as identifier names.
break
bit case charconst continue defaultdefined dodouble eeprom else enumextern
flash floatforfuncusedgoto ifinline intinterrupt long registerreturn short
signedsizeof sfrb sfrwstatic structswitch typedef unionunsignedvoidvolatile while
© 1998-2003 HP InfoTech S.R.L. Page 63

7/22/2019 CodevisionAVR Manual Full
http://slidepdf.com/reader/full/codevisionavr-manual-full 65/200
CodeVisionAVR
3.4 Identifiers
An identifier is the name you give to a variable, function, label or other object. An identifier can contain letters (A...Z, a...z) and digits (0...9), as well as the underscore character (_).However an identifier can only start with a letter or an underscore.Case is significant; i.e. variable1 is not the same as Variable1.
Identifiers can have up to 32 characters.
3.5 Data Types
The following table lists all the data types supported by the CodeVisionAVR C compiler, their range ofpossible values and their size:
Type Size (Bits) Range
bit 1 0 , 1
char 8 -128 to 127
unsigned char 8 0 to 255
signed char 8 -128 to 127
int 16 -32768 to 32767
short int 16 -32768 to 32767
unsigned int 16 0 to 65535
signed int 16 -32768 to 32767
long int 32 -2147483648 to 2147483647
unsigned long int 32 0 to 4294967295
signed long int 32 -2147483648 to 2147483647
float 32 ±1.175e-38 to ±3.402e38
double 32 ±1.175e-38 to ±3.402e38
The bit data type is supported only for global variables.If the Project|Configure|C Compiler|Code Generation|char is unsigned option is checked or
#pragma uchar+ is used, then char has by default the range 0..255.
© 1998-2003 HP InfoTech S.R.L. Page 64

7/22/2019 CodevisionAVR Manual Full
http://slidepdf.com/reader/full/codevisionavr-manual-full 66/200
CodeVisionAVR
3.6 Constants
Integer or long integer constants may be written in decimal form (e.g. 1234), in binary form with 0b prefix (e.g. 0b101001), in hexadecimal form with 0x prefix (e.g. 0xff) or in octal form with 0-prefix (e.g.0777).Unsigned integer constants may have the suffix U (e.g. 10000U).
Long integer constants may have the suffix L (e.g. 99L).Unsigned long integer constants may have the suffix UL (e.g. 99UL).Floating point constants may have the suffix F (e.g. 1.234F).Character constants must be enclosed in single quotation marks. E.g. 'a'.
String constants must be enclosed in double quotation marks. E.g. "Hello world".If you place a string between quotes as a function parameter, this string will automatically beconsidered as constant and will be placed in FLASH memory.Example:
/ * this function displays a string located in SRAM */void display_ram(char *s)
/* ....... */
/ * this function displays a string located in FLASH */void display_flash(char flash *s)
/* ....... */
void main(void) /* this will not work !!! */
/* because the function addresses the string as *//* it is located in SRAM, but the string "Hello world" *//* is constant and is placed in FLASH */display_ram("Hello world");
/* this will work !!! *//* the function addresses the string as it is located in FLASH */display_flash("Hello world");
Constant can be grouped in arrays, which can have up to 8 dimensions.Constants are stored in FLASH memory, to specify this you must use the flash or const keywords.Constant expressions are automatically evaluated during compilation.
Example:
flash int integer_constant=1234+5; flash char char_constant=’a’;flash long long_int_constant1=99L;flash long long_int_constant2=0x10000000; flash int integer_array1[]=1,2,3;/* The first two elements will be 1 and 2,
the rest will be 0 */ flash int integer_array2[10]=1,2; flash int multidim_array[2,3]=1,2,3,4,5,6; flash char string_constant1[]=”This is a string constant”; const char string_constant2[]=”This is also a string constant”;
Constants can’t be declared inside functions.
© 1998-2003 HP InfoTech S.R.L. Page 65

7/22/2019 CodevisionAVR Manual Full
http://slidepdf.com/reader/full/codevisionavr-manual-full 67/200
CodeVisionAVR
3.7 Variables
Program variables can be global (accessible to all the functions in the program) or local (accessibleonly inside the function they are declared).If not specifically initialized, the global variables are automatically set to 0 at program startup.The local variables are not automatically initialized on function call.
The syntax is:
[<storage modifier>] <type definition> <identifier>;
Example:
/* Global variables declaration */ char a; int b; /* and initialization */ long c=1111111;
void main(void)
/* Local variables declaration */ char d; int e; /* and initialization */ long f=22222222;
Variables can be grouped in arrays, which can have up to 8 dimensions.The first element of the array has always the index 0.If not specifically initialized, the elements of global variable arrays are automatically set to 0 atprogram startup.Example:
/* All the elements of the array will be 0 */ int global_array1[32];
/* Array is automatically initialized */ int global_array2[]=1,2,3; int global_array3[4]=1,2,3,4; char global_array4[]=”This is a string”;
/* Only the first 3 elements of the array areinitialized, the rest 29 will be 0 */
int global_array5[32]=1,2,3;
/* Multidimensional array */
int multidim_array[2][3]=1,2,3,4,5,6;
void main(void) /* local array declaration */int local_array1[10];
/* local array declaration and initialization */ int local_array2[3]=11,22,33; char local_array3[7]="Hello";
© 1998-2003 HP InfoTech S.R.L. Page 66

7/22/2019 CodevisionAVR Manual Full
http://slidepdf.com/reader/full/codevisionavr-manual-full 68/200
CodeVisionAVR
Local variables that must conserve their values during different calls to a function must be declared asstatic. Example:
int alfa(void) /* declare and initialize the static variable */
static int n=1;return n++;
void main(void) int i;
/* the function will return the value 1 */i=alfa();
/* the function will return the value 2 */i=alfa();
If not specifically initialized, static variables are automatically set to 0 at program startup.
Variables that are declared in other files must be preceded by the extern keyword.Example:
extern int xyz;
/* now include the file which containsthe variable xyz definition */
#include <file_xyz.h>
To instruct the compiler to allocate a variable to registers, the register modifier must be used.
Example:
register int abc;
The compiler may automatically allocate a variable to registers, even if this modifier is not used.
The volatile modifier must be used in order to prevent a variable to be allocated to registers and towarn the compiler that it may be subject to outside change during evaluation.Example:
volatile int abc;
All the global variables, not allocated to registers, are stored in the Global Variables area of SRAM.
All the local variables, not allocated to registers, are stored in dynamically allocated space in the DataStack area of SRAM.
© 1998-2003 HP InfoTech S.R.L. Page 67
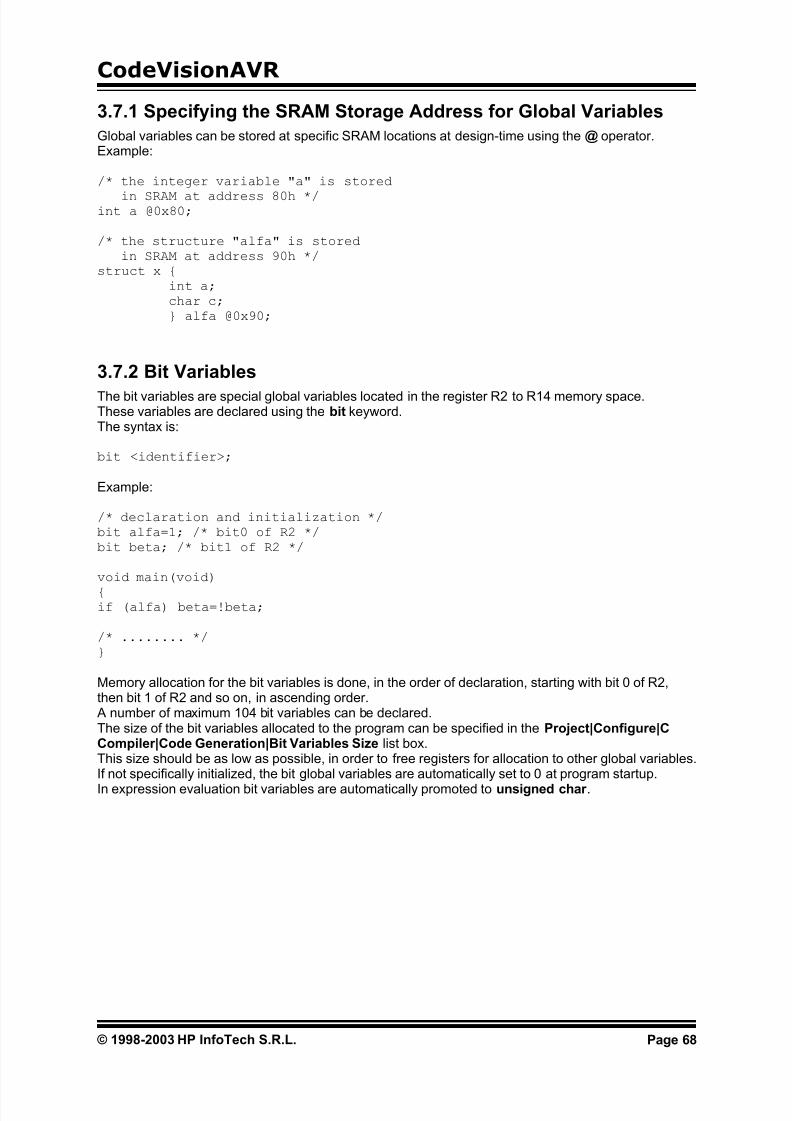
7/22/2019 CodevisionAVR Manual Full
http://slidepdf.com/reader/full/codevisionavr-manual-full 69/200
CodeVisionAVR
3.7.1 Specifying the SRAM Storage Address for Global Variables
Global variables can be stored at specific SRAM locations at design-time using the @ operator.Example:
/* the integer variable "a" is stored
in SRAM at address 80h */int a @0x80;
/* the structure "alfa" is storedin SRAM at address 90h */
struct x int a;char c; alfa @0x90;
3.7.2 Bit Variables
The bit variables are special global variables located in the register R2 to R14 memory space.These variables are declared using the bit keyword.The syntax is:
bit <identifier>;
Example:
/* declaration and initialization */ bit alfa=1; /* bit0 of R2 */bit beta; /* bit1 of R2 */
void main(void)
if (alfa) beta=!beta;
/* ........ */
Memory allocation for the bit variables is done, in the order of declaration, starting with bit 0 of R2,then bit 1 of R2 and so on, in ascending order. A number of maximum 104 bit variables can be declared.The size of the bit variables allocated to the program can be specified in the Project|Configure|CCompiler|Code Generation|Bit Variables Size list box.This size should be as low as possible, in order to free registers for allocation to other global variables.If not specifically initialized, the bit global variables are automatically set to 0 at program startup.
In expression evaluation bit variables are automatically promoted to unsigned char .
© 1998-2003 HP InfoTech S.R.L. Page 68
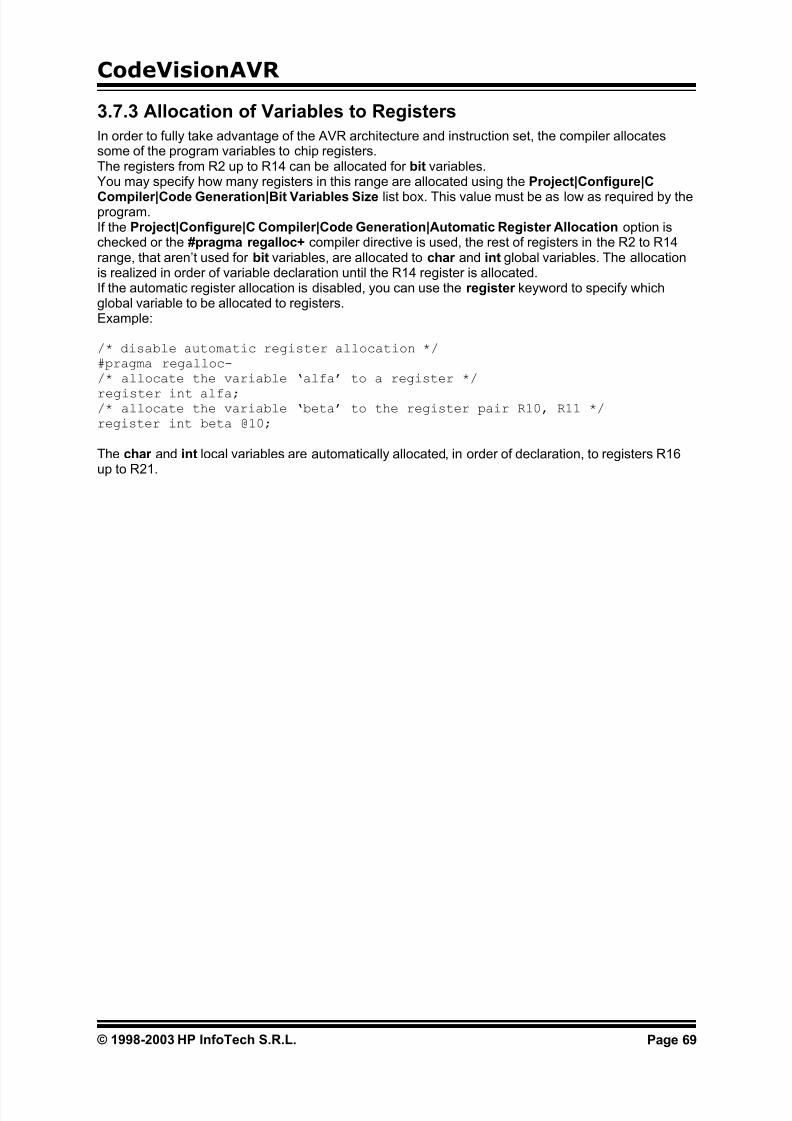
7/22/2019 CodevisionAVR Manual Full
http://slidepdf.com/reader/full/codevisionavr-manual-full 70/200
CodeVisionAVR
3.7.3 Allocation of Variables to Registers
In order to fully take advantage of the AVR architecture and instruction set, the compiler allocatessome of the program variables to chip registers.The registers from R2 up to R14 can be allocated for bit variables.You may specify how many registers in this range are allocated using the Project|Configure|C
Compiler|Code Generation|Bit Variables Size list box. This value must be as low as required by theprogram.If the Project|Configure|C Compiler|Code Generation|Automatic Register Allocation option ischecked or the #pragma regalloc+ compiler directive is used, the rest of registers in the R2 to R14range, that aren’t used for bit variables, are allocated to char and int global variables. The allocationis realized in order of variable declaration until the R14 register is allocated.If the automatic register allocation is disabled, you can use the register keyword to specify whichglobal variable to be allocated to registers.Example:
/* disable automatic register allocation */#pragma regalloc-/* allocate the variable ‘alfa’ to a register */
register int alfa;/* allocate the variable ‘beta’ to the register pair R10, R11 */register int beta @10;
The char and int local variables are automatically allocated, in order of declaration, to registers R16up to R21.
© 1998-2003 HP InfoTech S.R.L. Page 69

7/22/2019 CodevisionAVR Manual Full
http://slidepdf.com/reader/full/codevisionavr-manual-full 71/200
CodeVisionAVR
3.7.4 Structures
Structures are user-defined collections of named members.The structure members can be any of the supported data types, arrays of these data types or pointersto them.Structures are defined using the struct reserved keyword.
The syntax is:
[<storage modifier>] struct [<structure tag-name>] [<type> <variable-name>[,<variable-name>, ...]];[<type> [<bitfield-id>]:<width>[,[<bitfield-id>]:<width>, ...]];... [<structure variables>];
Example:
/* Global structure located in SRAM */struct ram_structure
char a,b;
int c;char d[30],e[10];char *pp; sr;
/* Global constant structure located in FLASH */flash struct flash_structure
int a;char b[30], c[10]; sf;
/* Global structure located in EEPROM */eeprom struct eeprom_structure
char a;int b;char c[15]; se;
void main(void) /* Local structure */struct local_structure
char a;int b;long c; sl;
/* ............. */
The space allocated to the structure in memory is equal to sum of the sizes of all the members.
There are some restrictions that apply to the structures stored in FLASH and EEPROM.Due to the fact that pointers must be always located in SRAM, they can't be used in these structures.
Because with the Atmel AVRASM32 Assembler single bytes defined with .DB in FLASH occupy inreality 2 bytes, the CodeVisionAVR C compiler will replace the char members of structures stored inFLASH with int. Also it will extend the size of the char arrays, members of such structures, to an even value.
© 1998-2003 HP InfoTech S.R.L. Page 70

7/22/2019 CodevisionAVR Manual Full
http://slidepdf.com/reader/full/codevisionavr-manual-full 72/200
CodeVisionAVR
Structures can be grouped in unidimensional arrays.Example how to initialize and access an global structure array stored in EEPROM:
/* Global structure array located in EEPROM */eeprom struct eeprom_structure
char a;int b;char c[15]; se[2]='a',25,"Hello",
'b',50,"world";
void main(void) char k1,k2,k3,k4;int i1, i2;
/* define a pointer to the structure */struct eeprom_structure eeprom *ep;
/* direct access to structure members */k1=se[0].a;i1=se[0].b;k2=se[0].c[2];k3=se[1].a;i2=se[1].b;k4=se[1].c[2];
/* same access to structure members using a pointer */ep=&se; /* initialize the pointer with the structure address */k1=ep->a;i1=ep->b;k2=ep->c[2];++ep; /* increment the pointer */k3=ep->a;i2=ep->b;k4=ep->c[2];
Because some AVR devices have a small amount of SRAM, in order to keep the size of the DataStack small, it is recommended not to pass structures as function parameters and use pointers for thispurpose.Example:
struct alpha int a,b, c; s=2,3;
/* define the function */struct alpha *sum_struct(struct alpha *sp) /* member c=member a + member b */sp->c=sp->a + sp->b;/* return a pointer to the structure */return sp;void main(void) int i;/* s->c=s->a + s->b *//* i=s->c */i=sum_struct(&s)->c;
© 1998-2003 HP InfoTech S.R.L. Page 71
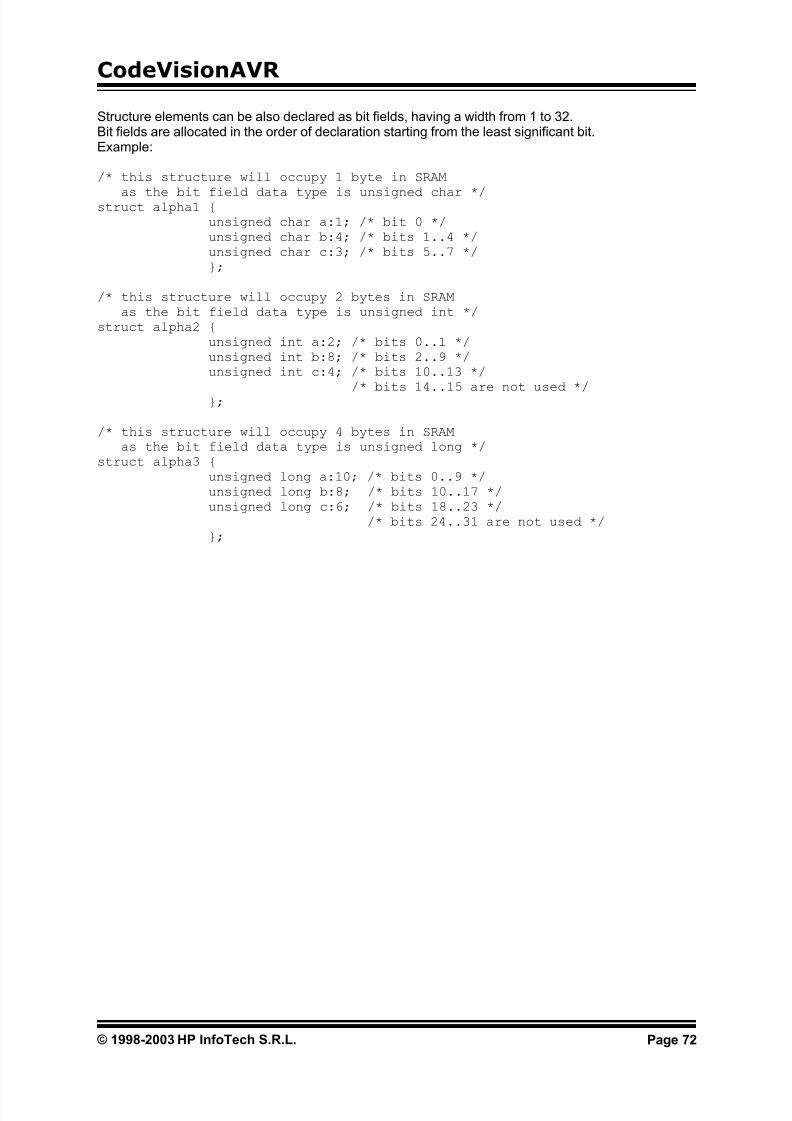
7/22/2019 CodevisionAVR Manual Full
http://slidepdf.com/reader/full/codevisionavr-manual-full 73/200
CodeVisionAVR
Structure elements can be also declared as bit fields, having a width from 1 to 32.Bit fields are allocated in the order of declaration starting from the least significant bit.Example:
/* this structure will occupy 1 byte in SRAM
as the bit field data type is unsigned char */struct alpha1 unsigned char a:1; /* bit 0 */unsigned char b:4; /* bits 1..4 */unsigned char c:3; /* bits 5..7 */;
/* this structure will occupy 2 bytes in SRAMas the bit field data type is unsigned int */
struct alpha2 unsigned int a:2; /* bits 0..1 */unsigned int b:8; /* bits 2..9 */unsigned int c:4; /* bits 10..13 */
/* bits 14..15 are not used */;
/* this structure will occupy 4 bytes in SRAMas the bit field data type is unsigned long */
struct alpha3 unsigned long a:10; /* bits 0..9 */unsigned long b:8; /* bits 10..17 */unsigned long c:6; /* bits 18..23 */
/* bits 24..31 are not used */;
© 1998-2003 HP InfoTech S.R.L. Page 72

7/22/2019 CodevisionAVR Manual Full
http://slidepdf.com/reader/full/codevisionavr-manual-full 74/200
CodeVisionAVR
3.7.5 Unions
Unions are user-defined collections of named members that share the same memory space.The union members can be any of the supported data types, arrays of these data types or pointers tothem.Unions are defined using the union reserved keyword.
The syntax is:
[<storage modifier>] union [<union tag-name>] [<type> <variable-name>[,<variable-name>, ...]];[<type> <bitfield-id>:<width>[,<bitfield-id>:<width>, ...]];... [<union variables>];
Unions are always stored in SRAM.The space allocated to the union in memory is equal to the size of the largest member.Union members can be accessed in the same way as structure members. Example:
/* union declaration */
union alpha unsigned char lsb;unsigned int word; data;
void main(void) unsigned char k;
/* define a pointer to the union */union alpha *dp;
/* direct access to union members */
data.word=0x1234;k=data.lsb; /* get the LSB of 0x1234 */
/* same access to union members using a pointer */dp=&data; /* initialize the pointer with the union address */dp->word=0x1234;k=dp->lsb; /* get the LSB of 0x1234 */
Because some AVR devices have a small amount of SRAM, in order to keep the size of the DataStack small, it is recommended not to pass unions as function parameters and use pointers for thispurpose.Example:
#include <stdio.h> /* printf */union alpha
unsigned char lsb;unsigned int word; data;
/* define the function */unsigned char low(union alpha *up) /* return the LSB of word */return up->lsb;void main(void) data.word=0x1234;
printf("the LSB of %x is %2x",data.word,low(&data));
© 1998-2003 HP InfoTech S.R.L. Page 73

7/22/2019 CodevisionAVR Manual Full
http://slidepdf.com/reader/full/codevisionavr-manual-full 75/200
CodeVisionAVR
Union elements can be also declared as bit fields, having a width from 1 to 32.Bit fields are allocated in the order of declaration starting from the least significant bit.Example:
/* this union will occupy 1 byte in SRAM
as the bit field data type is unsigned char */union alpha1 unsigned char a:1; /* bit 0 */unsigned char b:4; /* bits 0..3 */unsigned char c:3; /* bits 0..2 */;
/* this union will occupy 2 bytes in SRAMas the bit field data type is unsigned int */
union alpha2 unsigned int a:2; /* bits 0..1 */unsigned int b:8; /* bits 0..7 */unsigned int c:4; /* bits 0..3 */
/* bits 8..15 are not used */;
/* this union will occupy 4 bytes in SRAMas the bit field data type is unsigned long */
union alpha3 unsigned long a:10; /* bits 0..9 */unsigned long b:8; /* bits 0..7 */unsigned long c:6; /* bits 0..5 */
/* bits 10..31 are not used */;
© 1998-2003 HP InfoTech S.R.L. Page 74

7/22/2019 CodevisionAVR Manual Full
http://slidepdf.com/reader/full/codevisionavr-manual-full 76/200
CodeVisionAVR
3.7.6 Enumerations The enumeration data type can be used in order to provide mnemonic identifiers for a set of char orint values.The enum keyword is used for this purpose.The syntax is:
[<storage modifier>] enum [<enum tag-name>] [<constant-name[[=constant-initializer], constant-name, ...]>][<enum variables>];
Example:
/* The enumeration constants will be initialized as follows:sunday=0 , monday=1 , tuesday=2 ,..., saturday=6 */
enum days sunday, monday, tuesday, wednesday,thursday, friday, saturday days_of_week;
/* The enumeration constants will be initialized as follows:january=1 , february=2 , march=3 ,..., december=12 */
enum months january=1, february, march, april, may, june,july, august, september, october, november, decembermonths_of_year;
void main /* the variable days_of_week is initialized with
the integer value 6 */days_of_week=saturday;
Enumerations can be stored in SRAM or EEPROM.To specify the storage in EEPROM, the eeprom keyword must be used.Example:
eeprom enum days sunday, monday, tuesday, wednesday,thursday, friday, saturday days_of_week;
It is recommended to treat enumerations as having 8 bit char data type, by checking the 8 bit enums check box in Project|Configure|CompilerCode Generation. This will improve the size and executionspeed of the compiled program.
© 1998-2003 HP InfoTech S.R.L. Page 75

7/22/2019 CodevisionAVR Manual Full
http://slidepdf.com/reader/full/codevisionavr-manual-full 77/200
CodeVisionAVR
3.7.7 Global Variables Memory Map File
During compilation the C compiler generates a Global Variables Memory Map File, in which arespecified the SRAM address location, register allocation and size of the global variables used by theprogram.This file has the .map extension and can be viewed using the menu File|Open command or by
pressing the Open button on the toolbar.Structure and union members are listed individually along with their corresponding address and size.This file is useful during program debugging using the AVR Studio debugger.
3.8 Defining Data Types
User defined data types are declared using the typedef reserved keyword.The syntax is:
typedef [<storage modifier>] <type definition> <identifier>;
The symbol name <identifier> is assigned to <type definition>.Examples:
/* type definitions */typedef unsigned char byte;typedef eeprom struct
int a;char b[5]; eeprom_struct_type;
/* variable declaration */byte alfa;eeprom eeprom_struct_type struct1;
© 1998-2003 HP InfoTech S.R.L. Page 76

7/22/2019 CodevisionAVR Manual Full
http://slidepdf.com/reader/full/codevisionavr-manual-full 78/200
CodeVisionAVR
3.9 Type Conversions
In an expression, if the two operands of a binary operator are of different types, then the compiler willconvert one of the operands into the type of the other.The compiler uses the following rules:
If either of the operands is of type float then the other operand is converted to the same type.
If either of the operands is of type long int or unsigned long int then the other operand is convertedto the same type.
Otherwise, if either of the operands is of type int or unsigned int then the other operand is convertedto the same type.
Thus char type or unsigned char type gets the lowest priority.
Using casting you can change these rules.Example:
void main(void) int a, c; long b; /* The long integer variable b will be treated here as an integer */ c=a+(int) b;
It is important to note that if the Project|Configure|C Compiler|Code Generation|Promote char toint option isn't checked or the #pragma promotechar+ isn't used, the char , respectively unsignedchar , type operands are not automatically promoted to int , respectively unsigned int, as in compilerstargeted for 16 or 32 bit CPUs.This helps writing more size and speed efficient code for an 8 bit CPU like the AVR.To prevent overflow on 8 bit addition or multiplication, casting may be required.
The compiler issues warnings in these situations.Example:
void main(void) unsigned char a=30;unsigned char b=128;unsigned int c;
/* This will generate an incorrect result, because the multiplicationis done on 8 bits producing an 8 bit result, which overflows.Only after the multiplication, the 8 bit result is promoted tounsigned int */
c=a*b;
/* Here casting forces the multiplication to be done on 16 bits,producing an 16 bit result, without overflow */
c=(unsigned int) a*b;
© 1998-2003 HP InfoTech S.R.L. Page 77

7/22/2019 CodevisionAVR Manual Full
http://slidepdf.com/reader/full/codevisionavr-manual-full 79/200
CodeVisionAVR
The compiler behaves differently for the following operators:+= -= *= /=
%= &= |= ^= <<= >>=
For these operators, the result is to be written back onto the left-hand side operand (which must be avariable). So the compiler will always convert the right hand side operand into the type of left-handside operand.
3.10 Operators
The compiler supports the following operators:
+ -* /% ++-- === ~! !=< ><= >=& &&| ||^ ?
<< >>-= +=/= %=&= *=^= |=>>= <<=
© 1998-2003 HP InfoTech S.R.L. Page 78

7/22/2019 CodevisionAVR Manual Full
http://slidepdf.com/reader/full/codevisionavr-manual-full 80/200
CodeVisionAVR
3.11 Functions
You may use function prototypes to declare a function.These declarations include information about the function parameters.Example:
int alfa(char par1, int par2, long par3);
The actual function definition may be written somewhere else as:
int alfa(char par1, int par2, long par3) /* Write some statements here */
The old Kernighan & Ritchie style of writing function definitions is not supported.Function parameters are passed through the Data Stack.Function values are returned in registers R30, R31, R22 and R23 (from LSB to MSB).
© 1998-2003 HP InfoTech S.R.L. Page 79

7/22/2019 CodevisionAVR Manual Full
http://slidepdf.com/reader/full/codevisionavr-manual-full 81/200
CodeVisionAVR
3.12 Pointers
Due to the Harvard architecture of the AVR microcontroller, with separate address spaces for data(SRAM), program (FLASH) and EEPROM memory, the compiler implements three types of pointers.The syntax for pointer declaration is:
[<type storage modifier>] type * [<pointer storage modifier>] pointer_name;
or
type [<type storage modifier>] * [<pointer storage modifier>] pointer_name;
where type can be any data type.Variables placed in SRAM are accessed using normal pointers.For accessing constants placed in FLASH memory, the flash type storage modifier is used.For accessing variables placed in EEPROM, the eeprom type storage modifier is used. Although the pointers may point to different memory areas, they are by default stored in SRAM.Example:
/* Pointer to a char string placed in SRAM */ char *ptr_to_ram=”This string is placed in SRAM”;
/* Pointer to a char string placed in FLASH */ flash char *ptr_to_flash1=”This string is placed in FLASH”; char flash *ptr_to_flash2=”This string is also placed in FLASH”;
/* Pointer to a char string placed in EEPROM */ eeprom char *ptr_to_eeprom1="This string is placed in EEPROM"; char eeprom *ptr_to_eeprom2="This string is also placed in EEPROM";
In order to store the pointer itself in other memory areas, like FLASH or EEPROM, the flash oreeprom pointer storage modifiers must be used as in the examples below:
/* Pointer stored in FLASH to a char string placed in SRAM */ char * flash flash_ptr_to_ram=”This string is placed in SRAM”;
/* Pointer stored in FLASH to a char string placed in FLASH */ flash char * flash flash_ptr_to_flash=”This string is placed in FLASH”;
/* Pointer stored in FLASH to a char string placed in EEPROM */ eeprom char * flash eeprom_ptr_to_eeprom="This string is placed in EEPROM";
/* Pointer stored in EEPROM to a char string placed in SRAM */ char * eeprom eeprom_ptr_to_ram=”This string is placed in SRAM”;
/* Pointer stored in EEPROM to a char string placed in FLASH */ flash char * eeprom eeprom_ptr_to_flash=”This string is placed in FLASH”;
/* Pointer stored in EEPROM to a char string placed in EEPROM */ eeprom char * eeprom eeprom_ptr_to_eeprom="This string is placed inEEPROM";
For improving the code efficiency two memory models are implemented.The TINY memory model uses 8 bits for storing pointers to the variables placed in SRAM. In thismemory model you can only have access to the first 256 bytes of SRAM.The SMALL memory model uses 16 bits for storing pointers the variables placed in SRAM. In thismemory model you can have access to 65536 bytes of SRAM.For improving program speed and size, you must always try to use the TINY memory model.
Pointers to the FLASH and EEPROM memory areas always use 16 bits.
© 1998-2003 HP InfoTech S.R.L. Page 80
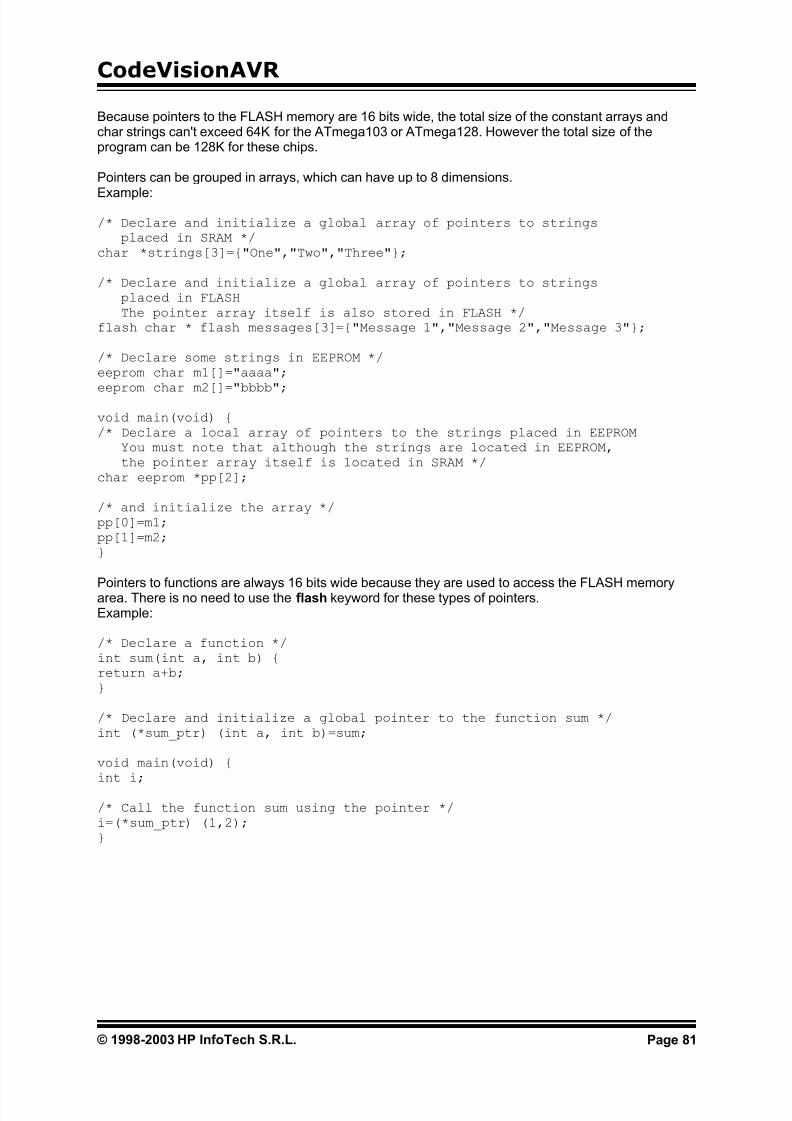
7/22/2019 CodevisionAVR Manual Full
http://slidepdf.com/reader/full/codevisionavr-manual-full 82/200
CodeVisionAVR
Because pointers to the FLASH memory are 16 bits wide, the total size of the constant arrays andchar strings can't exceed 64K for the ATmega103 or ATmega128. However the total size of theprogram can be 128K for these chips.
Pointers can be grouped in arrays, which can have up to 8 dimensions.
Example:
/* Declare and initialize a global array of pointers to stringsplaced in SRAM */
char *strings[3]="One","Two","Three";
/* Declare and initialize a global array of pointers to stringsplaced in FLASHThe pointer array itself is also stored in FLASH */
flash char * flash messages[3]="Message 1","Message 2","Message 3";
/* Declare some strings in EEPROM */eeprom char m1[]="aaaa";
eeprom char m2[]="bbbb";
void main(void) /* Declare a local array of pointers to the strings placed in EEPROM
You must note that although the strings are located in EEPROM,the pointer array itself is located in SRAM */
char eeprom *pp[2];
/* and initialize the array */pp[0]=m1;pp[1]=m2;
Pointers to functions are always 16 bits wide because they are used to access the FLASH memoryarea. There is no need to use the flash keyword for these types of pointers. Example:
/* Declare a function */int sum(int a, int b) return a+b;
/* Declare and initialize a global pointer to the function sum */int (*sum_ptr) (int a, int b)=sum;
void main(void) int i;
/* Call the function sum using the pointer */i=(*sum_ptr) (1,2);
© 1998-2003 HP InfoTech S.R.L. Page 81

7/22/2019 CodevisionAVR Manual Full
http://slidepdf.com/reader/full/codevisionavr-manual-full 83/200
CodeVisionAVR
3.13 Accessing the I/O Registers
The compiler uses the sfrb and sfrw keywords to access the AVR microcontroller’s I/O Registers,using the IN and OUT assembly instructions.Example:
/* Define the SFRs */ sfrb PINA=0x19; /* 8 bit access to the SFR */ sfrw TCNT1=0x2c; /* 16 bit access to the SFR */
void main(void) unsigned char a; a=PINA; /* Read PORTA input pins */ TCNT1=0x1111; /* Write to TCNT1L & TCNT1H registers */
The addresses of I/O registers are predefined in the following header files, located in the ..\INCsubdirectory:
tiny22.htiny26.h 90s2313.h90s2323.h90s2333.h90s2343.h90s4414.h90s4433.h90s4434.h90s8515.h90s8534.h90s8535.hmega103.h
mega128.hmega16.hmega161.hmega162.hmega163.hmega169.hmega32.hmega323.hmega603.hmega64.hmega8.hmega8515.hmega8535.h
43usb355.h76c711.h86rf401.h94k.h
You may #include the corresponding file, for the processor that you use, at the beginning of yourprogram.
© 1998-2003 HP InfoTech S.R.L. Page 82
7/22/2019 CodevisionAVR Manual Full
http://slidepdf.com/reader/full/codevisionavr-manual-full 84/200
CodeVisionAVR
3.13.1 Bit level access to the I/O Registers
The bit level access to the I/O registers is accomplished using bit selectors appended after the nameof the I/O register.Because bit level access to I/O registers is done using the CBI, SBI, SBIC and SBIS instructions, theregister address must be in the 0 to 1Fh range for sfrb and in the 0 to 1Eh range for sfrw.
Example:
sfrb PORTA=0x1b;sfrb DDRA=0x18;sfrb PINA=0x19;
void main(void) /* set bit 0 of Port A as output */DDRA.0=1;
/* set bit 1 of Port A as input */DDRA.1=0;
/* set bit 0 of Port A output */PORTA.0=1;
/* test bit 1 input of Port A */if (PINA.1) /* place some code here */ ;
/* ....... */
To improve the readability of the program you may wish to #define symbolic names to the bits in I/Oregisters:
sfrb PINA=0x19;#define alarm_input PINA.2
void main(void)/* test bit 2 input of Port A */if (alarm_input) /* place some code here */ ;
/* ....... */
It is important to note that bit selector access to I/O registers located in internal SRAM above address5Fh (like PORTF for the ATmega128 for example) will not work, because the CBI, SBI, SBIC and
SBIS instructions can’t be used for SRAM access.
© 1998-2003 HP InfoTech S.R.L. Page 83

7/22/2019 CodevisionAVR Manual Full
http://slidepdf.com/reader/full/codevisionavr-manual-full 85/200
CodeVisionAVR
3.14 Accessing the EEPROM
Accessing the AVR internal EEPROM is accomplished using global variables, preceded by thekeyword eeprom.Example:
/* The value 1 is stored in the EEPROM during chip programming */eeprom int alfa=1;
eeprom char beta;eeprom long array1[5];
/* The string is stored in the EEPROM during chip programming */eeprom char string[]=”Hello”;
void main(void) int i;
/* Pointer to EEPROM */
int eeprom *ptr_to_eeprom;
/* Write directly the value 0x55 to the EEPROM */ alfa=0x55; /* or indirectly by using a pointer */ptr_to_eeprom=&alfa;*ptr_to_eeprom=0x55;
/* Read directly the value from the EEPROM */ i=alfa;/* or indirectly by using a pointer */i=*ptr_to_eeprom;
Pointers to the EEPROM always use 16 bits.
© 1998-2003 HP InfoTech S.R.L. Page 84

7/22/2019 CodevisionAVR Manual Full
http://slidepdf.com/reader/full/codevisionavr-manual-full 86/200
CodeVisionAVR
3.15 Using Interrupts
The access to the AVR interrupt system is implemented with the interrupt keyword.Example:
/* Vector numbers are for the AT90S8515 */
/* Called automatically on external interrupt */ interrupt [2] void external_int0(void) /* Place your code here */
/* Called automatically on TIMER0 overflow */ interrupt [8] void timer0_overflow(void) /* Place your code here */
Interrupt vector numbers start with 1.The compiler will automatically save all the used registers when calling the interrupt functions andrestore them back on exit. A RETI assembly instruction is placed at the end of the interrupt function.Interrupt functions can’t return a value nor have parameters.You must also set the corresponding bits in the peripheral control registers to configure the interruptsystem and enable the interrupts.
The automatic saving and restoring of registers R0, R1, R15, R22, R23, R24, R25, R26, R27, R30,R31 and SREG, during interrupts can be turned on or off using the #pragma savereg directive.Example:
/* Turn registers saving off */
#pragma savereg-
/* interrupt handler */interrupt [1] void my_irq(void) /* now save only the registers that are
affected by the routines in the handler,for example R30, R31 and SREG */
#asmpush r30push r31in r30,SREGpush r30
#endasm
/* place the C code here *//* .... *//* now restore SREG, R31 and R30 */#asm
pop r30out SREG,r30pop r31pop r30
#endasm/* re-enable register saving for the other interrupts */#pragma savereg+
The default state is automatic saving of registers during interrupts.
© 1998-2003 HP InfoTech S.R.L. Page 85

7/22/2019 CodevisionAVR Manual Full
http://slidepdf.com/reader/full/codevisionavr-manual-full 87/200
CodeVisionAVR
3.16 SRAM Memory Organization
A compiled program has the following memory map:
0
20h
60h
60h+Data Stack Size
60h+Data Stack Size+Global Var. Size
SRAM End
Working Registers
I/O Registers
DSTACKEND
Data Stack
Global Variables
HSTACKEND
Hardware Stack
The Working Registers area contains 32x8 bit general purpose working registers.The compiler uses the following registers: R0, R1, R15, R22, R23, R24, R25, R26, R27, R28, R29,R30 and R31. Also some of the registers from R2 to R14 may be allocated by the compiler for global bit variables.The rest of unused registers, in this range, are allocated for global char and int variables.Registers R16 to R21 are allocated for local char and int variables.
The I/O Registers area contains 64 addresses for the CPU peripheral functions as Port ControlRegisters, Timer/Counters and other I/O functions. You may freely use these registers in yourassembly programs.
© 1998-2003 HP InfoTech S.R.L. Page 86

7/22/2019 CodevisionAVR Manual Full
http://slidepdf.com/reader/full/codevisionavr-manual-full 88/200
CodeVisionAVR
The Data Stack area is used to dynamically store local variables, passing function parameters andsaving registers R0, R1, R15, R22, R23, R24, R25, R26, R27, R30, R31 and SREG during interruptroutine servicing.The Data Stack Pointer is implemented using the Y register. At start-up the Data Stack Pointer is initialized with the value 5Fh+Data Stack Size.
When saving a value in the Data Stack, the Data Stack Pointer decrements.When the value is retrieved, the Data Stack Pointer in incremented back.When configuring the compiler, in the Project|Configure|C Compiler|Code Generation menu, youmust specify a sufficient Data Stack Size, so it will not overlap the I/O Register area during programexecution.
The Global Variables area is used to statically store the global variables during program execution.The size of this area can be computed by summing the size of all the declared global variables.
The Hardware Stack area is used for storing the functions return addresses.The SP register is used as a stack pointer and is initialized at start-up with value of last SRAMaddress.During the program execution the Hardware Stack grows downwards to the Global Variables area.
When configuring the compiler you have the option to place the strings DSTACKEND, respectively HSTACKEND, at the end of the Data Stack, respectively Hardware Stack areas.
When you debug the program with AVR Studio you may see if these strings are overwritten, andconsequently modify the Data Stack Size using the Project|Configure|C Compiler|CodeGeneration menu command.When your program runs correctly, you may disable the placement of the strings in order to reducecode size.
© 1998-2003 HP InfoTech S.R.L. Page 87

7/22/2019 CodevisionAVR Manual Full
http://slidepdf.com/reader/full/codevisionavr-manual-full 89/200
CodeVisionAVR
3.17 Using an External Startup File
In every program the CodeVisionAVR C compiler automatically generates a code sequence to makethe following initializations immediately after the AVR chip reset:1. interrupt vector jump table2. global interrupt disable
3. EEPROM access disable4. Watchdog Timer disable5. external SRAM access and wait state enable if necessary6. clear registers R2 … R147. clear the SRAM8. initialize the global variables located in SRAM9. initialize the Data Stack Pointer register Y10. initialize the Stack Pointer register SP11. initialize the UBRR register if necessary
The automatic generation of code sequences 2 to 8 can be disabled by checking the CodeGeneration|Use an External Startup Initialization File check box in the Project|Configure|CCompiler|Code Generation dialog window. The C compiler will then include, in the generated .asm
file, the code sequences from an external file that must be named STARTUP.ASM . This file must belocated in the directory where your main C source file resides.You can write your own STARTUP.ASM file to customize or add some features to your program. Thecode sequences from this file will be immediately executed after the chip reset. A basic STARTUP.ASM file is supplied with the compiler distribution and is located in the ..\BINdirectory.Here's the content of this file:
;CodeVisionAVR C Compiler;(C) 1998-2003 Pavel Haiduc, HP InfoTech S.R.L.;EXAMPLE STARTUP FILE
.EQU __CLEAR_START=0X60 ;START ADDRESS OF SRAM AREA TO CLEAR
;SET THIS ADDRESS TO 0X100 FOR THE ;ATmega128OR ATmega64 CHIPS
.EQU __CLEAR_SIZE=256 ;SIZE OF SRAM AREA TO CLEAR IN BYTES
CLI ;DISABLE INTERRUPTSCLR R30OUT EECR,R30 ;DISABLE EEPROM ACCESSOUT MCUCR,R30 ;MCUCR=0, NO EXTERNAL SRAM ACCESS
;DISABLE THE WATCHDOGLDI R31,0x18OUT WDTCR,R31LDI R31,0x10
OUT WDTCR,R31
;CLEAR R2-R14LDI R24,13LDI R26,2 CLR R27
__CLEAR_REG:ST X+,R30DEC R24BRNE __CLEAR_REG
© 1998-2003 HP InfoTech S.R.L. Page 88
7/22/2019 CodevisionAVR Manual Full
http://slidepdf.com/reader/full/codevisionavr-manual-full 90/200
CodeVisionAVR
;CLEAR SRAMLDI R24,LOW(__CLEAR_SIZE)LDI R25,HIGH(__CLEAR_SIZE)LDI R26,LOW(__CLEAR_START) LDI R27,HIGH(__CLEAR_START)
__CLEAR_SRAM:ST X+,R30SBIW R24,1BRNE __CLEAR_SRAM
;GLOBAL VARIABLES INITIALIZATIONLDI R30,LOW(__GLOBAL_INI_TBL*2)LDI R31,HIGH(__GLOBAL_INI_TBL*2)
__GLOBAL_INI_NEXT:LPMMOV R1,R0ADIW R30,1LPM
ADIW R30,1MOV R22,R30MOV R23,R31MOV R31,R0MOV R30,R1 SBIW R30,0BREQ __GLOBAL_INI_ENDLPMMOV R26,R0ADIW R30,1LPMMOV R27,R0ADIW R30,1LPMMOV R24,R0ADIW R30,1LPMMOV R25,R0ADIW R30,1
__GLOBAL_INI_LOOP:LPMST X+,R0ADIW R30,1SBIW R24,1BRNE __GLOBAL_INI_LOOPMOV R30,R22MOV R31,R23RJMP __GLOBAL_INI_NEXT
__GLOBAL_INI_END:
The __CLEAR_START and __CLEAR_SIZE constants can be changed to specify which area ofSRAM to clear at program initialization.The __GLOBAL_INI_TBL label must be located at the start of a table containing the informationnecessary to initialize the global variables located in SRAM. This table is automatically generated bythe compiler.
© 1998-2003 HP InfoTech S.R.L. Page 89

7/22/2019 CodevisionAVR Manual Full
http://slidepdf.com/reader/full/codevisionavr-manual-full 91/200
CodeVisionAVR
3.18 Including Assembly Language in Your Program
You can include assembly language anywhere in your program using the #asm and #endasm directives.Example:
void delay(unsigned char i) while (i--)
/* Assembly language code sequence */#asm
nopnop
#endasm;
Inline assembly may also be used.Example:
#asm("sei") /* enable interrupts */
The registers R0, R1, R22, R23, R24, R25, R26, R27, R30 and R31 can be freely used in assemblyroutines.However when using them in an interrupt service routine the programmer must save, respectivelyrestore, them on entry, respectively on exit, of this routine.
© 1998-2003 HP InfoTech S.R.L. Page 90

7/22/2019 CodevisionAVR Manual Full
http://slidepdf.com/reader/full/codevisionavr-manual-full 92/200
CodeVisionAVR
3.18.1 Calling Assembly Functions from C
The following example shows how to access functions written in assembly language from a Cprogram:
// function in assembler declaration
// this function will return a+b+c#pragma warn- // this will prevent warningsint sum_abc(int a, int b, unsigned char c) #asm
ldd r30,y+3 ;R30=LSB aldd r31,y+4 ;R31=MSB aldd r26,y+1 ;R26=LSB bldd r27,y+2 ;R27=MSB badd r30,r26 ;(R31,R30)=a+badc r31,r27ld r26,y ;R26=cclr r27 ;promote unsigned char c to intadd r30,r26 ;(R31,R30)=(R31,R30)+c
adc r31,r27#endasm#pragma warn+ // enable warnings
void main(void) int r;// now we call the function and store the result in rr=sum_abc(2,4,6);
The compiler passes function parameters using the Data Stack.First it pushes the integer parameter a, then b, and finally the unsigned char parameter c.
On every push the Y register pair decrements by the size of the parameter (4 for long int, 2 for int, 1for char).For multiple byte parameters the MSB is pushed first. As it is seen the Data Stack grows downward. After all the functions parameters were pushed on the Data Stack, the Y register points to the lastparameter c, so the function can read its value in R26 using the instruction: ld r26,y.The b parameter was pushed before c, so it is at a higher address in the Data Stack.The function will read it using: ldd r27,y+2 (MSB) and ldd r26,y+1 (LSB).The MSB was pushed first, so it is at a higher address.The a parameter was pushed before b, so it is at a higher address in the Data Stack.The function will read it using: ldd r31,y+4 (MSB) and ldd r30,y+3 (LSB).
The functions return their values in the registers (from LSB to MSB):
• R30 for char and unsigned char• R30, R31 for int and unsigned int
• R30, R31, R22, R23 for long and unsigned long.
So our function must return its result in the R30, R31 registers.
After the return from the function the compiler automatically generates code to reclaim the Data Stack space used by the function parameters.
The #pragma warn- compiler directive will prevent the compiler from generating a warning that thefunction does not return a value.This is needed because the compiler does not know what it is done in the assembler portion of thefunction.
© 1998-2003 HP InfoTech S.R.L. Page 91

7/22/2019 CodevisionAVR Manual Full
http://slidepdf.com/reader/full/codevisionavr-manual-full 93/200
CodeVisionAVR
3.19 Creating Libraries
In order to create your own libraries, the following steps must be followed:
1. Create a header .h file with the prototypes of the library functions.Select the File|New menu command or press the New toolbar button.
The following dialog window will open:
Select Source and press the OK button.
A new editor window will be opened for the untitled.c source file.Type in the prototype for your function. Example:
// this #pragma directive will prevent the compiler// from generating a warning that the function was// declared, but not used in the program#pragma used+
// library function prototypesint sum(int a, int b);int mul(int a, int b);#pragma used-
// this #pragma directive will tell the compiler to// compile/link the functions from the mylib.lib library#pragma library mylib.lib
Save the file, under a new name, in the ..\INC directory using the File|Save As menu command, forexample mylib.h :
© 1998-2003 HP InfoTech S.R.L. Page 92

7/22/2019 CodevisionAVR Manual Full
http://slidepdf.com/reader/full/codevisionavr-manual-full 94/200
CodeVisionAVR
2. Create the library file.Select the File|New menu command or press the New toolbar button.The following dialog window will open:
Select Source and press the OK button. A new editor window will be opened for the untitled.c source file.Type in the definitions for your functions.Example:
int sum(int a, int b) return a+b;
int mul(int a, int b) return a*b;
Save the file, under a new name, for example mylib.c , in any directory using the File|Save As menucommand:
© 1998-2003 HP InfoTech S.R.L. Page 93
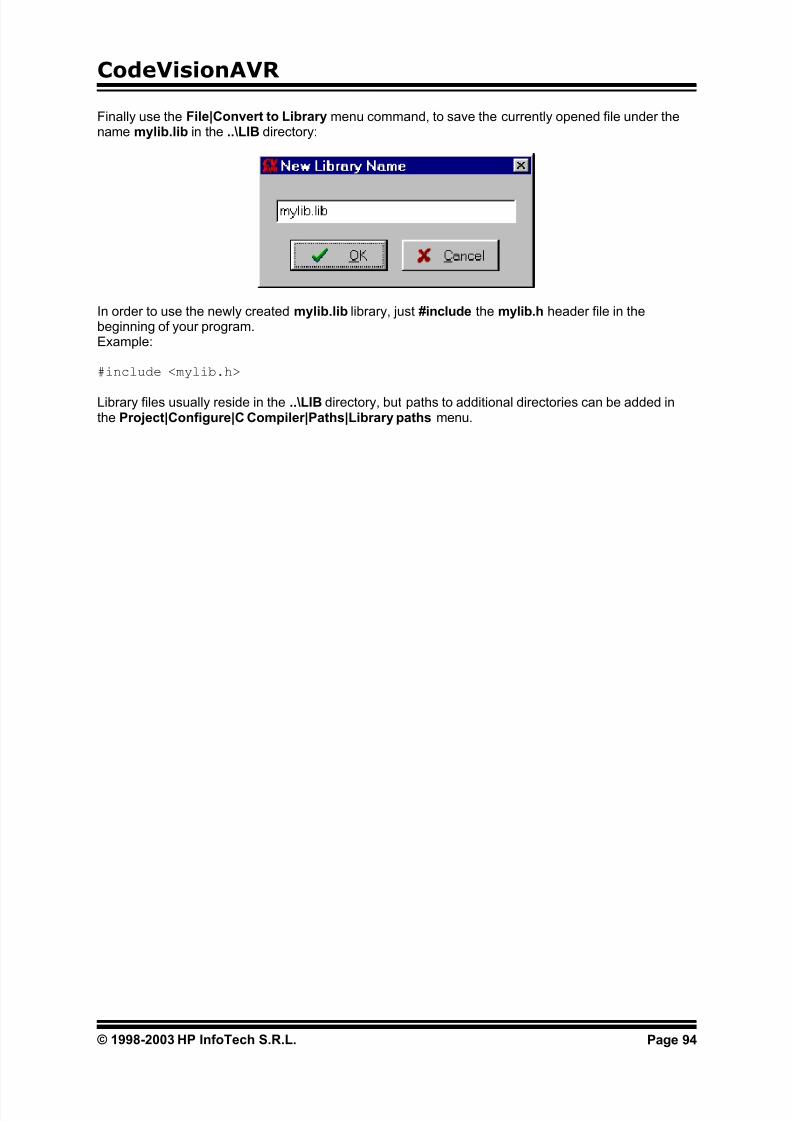
7/22/2019 CodevisionAVR Manual Full
http://slidepdf.com/reader/full/codevisionavr-manual-full 95/200
CodeVisionAVR
Finally use the File|Convert to Library menu command, to save the currently opened file under thename mylib.lib in the ..\LIB directory:
In order to use the newly created mylib.lib library, just #include the mylib.h header file in thebeginning of your program.Example:
#include <mylib.h>
Library files usually reside in the ..\LIB directory, but paths to additional directories can be added inthe Project|Configure|C Compiler|Paths|Library paths menu.
© 1998-2003 HP InfoTech S.R.L. Page 94

7/22/2019 CodevisionAVR Manual Full
http://slidepdf.com/reader/full/codevisionavr-manual-full 96/200
CodeVisionAVR
3.20 Using the AVR Studio Debugger
CodeVisionAVR is designed to work in conjunction with Atmel AVR Studio debugger version 3 or 4.
In order to be able to do C source level debugging using AVR Studio, you must select the COFFoutput file format in the Project|Configure|Assembler menu option.
The AVR Studio Debugger is invoked using the Tools|Debugger menu command or the Debugger toolbar button. After AVR Studio is executed, the user must select File|Open in order to load the COFF file to bedebugged.
Below are some commands that can be used with AVR Studio 3.Once the program is loaded, it can be launched in execution using the Debug|Go menu command, bypressing the F5 key or by pressing the Execute program toolbar button.Program execution can be stopped at any time using the Debug|Break menu command, by pressingCtrl+F5 keys or by pressing the Break toolbar button.
To single step the program, the Debug|Trace Into (F11 key), Debug|Step (F10 key), Debug|Step
Out menu commands or the corresponding toolbar buttons should be used.
In order to stop the program execution at a specific source line, the Breakpoints|Toggle Breakpoint menu command, the F9 key or the corresponding toolbar button should be used.
In order to watch program variables, the user must select Watch|Add Watch menu command or pressthe Add Watch toolbar button, and specify the name of the variable in the Watch column.
The AVR chip registers can be viewed using the View|Registers menu command or by pressing theAlt+0 keys.The AVR chip PC, SP, X, Y, Z registers and status flags can be viewed using the View|Processor menu command or by pressing the Alt+3 keys.The contents of the FLASH, SRAM and EEPROM memories can be viewed using the View|New
Memory View menu command or by pressing the Alt+4 keys.The I/O registers can be viewed using the View|New IO View menu command or by pressing theAlt+5 keys.
In order to use the Terminal I/O window, invoked with the View|Terminal I/O menu command, forcommunication with the simulated AVR chip’s UART, the COFF file format must be selected and theUse the Terminal I/O in AVR Studio check box must be checked in the Project|Configure|CCompiler|Code Generation dialog.
To obtain more information about using AVR Studio please consult it’s Help system.
© 1998-2003 HP InfoTech S.R.L. Page 95

7/22/2019 CodevisionAVR Manual Full
http://slidepdf.com/reader/full/codevisionavr-manual-full 97/200
CodeVisionAVR
3.21 Hints
In order to decrease code size and improve the execution speed, you must apply the following rules:
• If possible use unsigned variables;
• Use the smallest data type possible, i.e. bit and unsigned char ;
• The size of the bit variables, allocated to the program in the Project|Configure|C Compiler|Code
Generation|Bit Variables Size list box, should be as low as possible, in order to free registers forallocation to other global variables;
• If possible use the TINY memory model;
• Always store constant strings in FLASH by using the flash keyword;
• After finishing debugging your program, compile it again with the Stack End Markers optiondisabled.
3.22 Limitations
This version of the CodeVisionAVR C compiler has the following limitations:
• pointers to pointers are not supported yet;
• arrays of structures or unions can have only one dimension
• for the EVALUATION version the size of the compiled code is limited;• the Philips PCF8563, Philips PCF8583, Dallas Semiconductor DS1302, DS1307, 4x40 character
LCD functions are not available in the EVALUATION version.
© 1998-2003 HP InfoTech S.R.L. Page 96

7/22/2019 CodevisionAVR Manual Full
http://slidepdf.com/reader/full/codevisionavr-manual-full 98/200
CodeVisionAVR
4. Library Functions Reference
You must #include the appropriate header files for the library functions that you use in your program.Example:
/* Header files are included before using the functions */ #include <math.h> // for abs #include <stdio.h> // for putsf
void main(void) int a,b; a=-99; /* Here you actually use the functions */ b=abs(a); putsf(“Hello world”);
© 1998-2003 HP InfoTech S.R.L. Page 97

7/22/2019 CodevisionAVR Manual Full
http://slidepdf.com/reader/full/codevisionavr-manual-full 99/200
CodeVisionAVR
4.1 Character Type Functions
The prototypes for these functions are placed in the file ctype.h, located in the ..\INC subdirectory.This file must be #include -ed before using the functions.
unsigned char isalnum(char c)
returns 1 if c is alphanumeric.
unsigned char isalpha(char c)
returns 1 if c is alphabetic.
unsigned char isascii(char c)
returns 1 if c is an ASCII character (0..127).
unsigned char iscntrl(char c)
returns 1 if c is a control character (0..31 or 127).
unsigned char isdigit(char c)
returns 1 if c is a decimal digit.
unsigned char islower(char c)
returns 1 if c is a lower case alphabetic character.
unsigned char isprint(char c)
returns 1 if c is a printable character (32..127).
unsigned char ispunct(char c)
returns 1 if c is a punctuation character (all but control and alphanumeric).
unsigned char isspace(char c)
returns 1 c is a white-space character (space, CR, HT).
unsigned char isupper(char c)
returns 1 if c is an upper-case alphabetic character.
unsigned char isxdigit(char c)
returns 1 if c is a hexadecimal digit.
char toascii(char c)
returns the ASCII equivalent of character c.
unsigned char toint(char c)
interprets c as a hexadecimal digit and returns an usigned char from 0 to 15.
char tolower(char c)
returns the lower case of c if c is an upper case character, else c.
© 1998-2003 HP InfoTech S.R.L. Page 98
7/22/2019 CodevisionAVR Manual Full
http://slidepdf.com/reader/full/codevisionavr-manual-full 100/200
CodeVisionAVR
char toupper(char c)
returns the upper case of c if c is a lower case character, else c.
4.2 Standard C Input/Output FunctionsThe prototypes for these functions are placed in the file stdio.h, located in the ..\INC subdirectory.This file must be #include -ed before using the functions.
The standard C language I/O functions were adapted to work on embedded microcontrollers withlimited resources.
The lowest level Input/Output functions are:
char getchar(void)
returns a character received by the UART, using polling.
void putchar(char c)
transmits the character c using the UART, using polling.
Prior to using these functions you must:
• initialize the UART's Baud rate
• enable the UART transmitter
• enable the UART receiver.Example:
#include <90s8515.h>#include <stdio.h>
/* quartz crystal frequency [Hz] */#define xtal 4000000L
/* Baud rate */#define baud 9600
void main(void) char k;
/* initialize the UART's baud rate */UBRR=xtal/16/baud-1;
/* initialize the UART control register
RX & TX enabled, no interrupts, 8 data bits */UCR=0x18;
while (1) /* receive the character */k=getchar();/* and echo it back */putchar(k);;
If you intend to use other peripherals for Input/Output, you must modify accordingly the getchar andputchar functions. The source code for these functions is available in the
file stdio.h.
© 1998-2003 HP InfoTech S.R.L. Page 99

7/22/2019 CodevisionAVR Manual Full
http://slidepdf.com/reader/full/codevisionavr-manual-full 101/200
CodeVisionAVR
All the high level Input/Output functions use getchar and putchar .
void puts(char *str)
outputs, using putchar , the null terminated character string str , located in SRAM, followed by a
new line character.
void putsf(char flash *str)
outputs, using putchar , the null terminated character string str , located in FLASH, followed by anew line character.
void printf(char flash *fmtstr [ , arg1, arg2, ...])
outputs formatted text, using putchar , according to the format specifiers in the fmtstr string.The format specifier string fmtstr is constant and must be located in FLASH memory.The implementation of printf is a reduced version of the standard C function.This was necessary due to the specific needs of an embedded system and because the full
implementation would require a large amount of FLASH memory space.The format specifier string has the following structure:
%[flags][width][.precision][l]type_char
The optional flags characters are:'-' left-justifies the result, padding on the right with spaces. If it's not present, the result will be right-
justified, padded on the left with zeros or spaces;'+' signed conversion results will always begin with a '+' or '-' sign;' ' if the value isn't negative, the conversion result will begin with a space. If the value is negative
then it will begin with a '-' sign.
The optional width specifier sets the minimal width of an output value. If the result of the conversion is
wider than the field width, the field will be expanded to accommodate the result, so not to cause fieldtruncation.The following width specifiers are supported:
n - at least n characters are outputted. If the result has less than n characters, then it's field will bepadded with spaces. If the '-' flag is used, the result field will be padded on the right, otherwise it will bepadded on the left;
0n - at least n characters are outputted. If the result has less than n characters, it is padded on theleft with zeros.
The optional precision specifier sets the maximal number of characters or minimal number of integerdigits that may be outputted.For the 'e', 'E' and 'f' conversion type characters the precision specifier sets the number of digits thatwill be outputted to the right of the decimal point.
The precision specifier always begins with a '.' character in order to separate it from the widthspecifier.The following precision specifiers are supported:
none - the precision is set to 1 for the 'i', 'd', 'u', 'x', 'X' conversion type characters. For the 's' and'p' conversion type characters, the char string will be outputted up to the first null character;
.0 - the precision is set to 1 for the 'i', 'd', 'u', 'x', 'X' type characters;
.n - n characters or n decimal places are outputted.For the 'i', 'd', 'u', 'x', 'X' conversion type characters, if the value has less than n digits, then it will bepadded on the left with zeros. If it has more than n digits then it will not be truncated.For the 's' and 'p' conversion type characters, no more than n characters from the char string will beoutputted.For the 'e', 'E' and 'f' conversion type characters, n digits will be outputted to the right of the decimalpoint.
The precision specifier has no effect on the 'c' conversion type character.
© 1998-2003 HP InfoTech S.R.L. Page 100

7/22/2019 CodevisionAVR Manual Full
http://slidepdf.com/reader/full/codevisionavr-manual-full 102/200
CodeVisionAVR
The optional 'l' input size modifier specifies that the function argument must be treated as a long int forthe 'i', 'd', 'u', 'x', 'X' conversion type characters.
The type_char conversion type character is used to specify the way the function argument will betreated.
The following conversion type characters are supported:'i' - the function argument is a signed decimal integer;'d' - the function argument is a signed decimal integer;'u' - the function argument is an unsigned decimal integer;'e' - the function argument is a float, that will be outputted using the [-]d.ddddd e[-]dd format'E' - the function argument is a float, that will be outputted using the [-]d.ddddd E[-]dd format'f' - the function argument is a float, that will be outputted using the [-]ddd.ddddd format'x' - the function argument is an unsigned hexadecimal integer, that will be outputted with
lowercase characters;'X' - the function argument is an unsigned hexadecimal integer, that will be outputted with with
uppercase characters;'c' - the function argument is a single character;'s' - the function argument is a pointer to a null terminated char string located in SRAM;
'p' - the function argument is a pointer to a null terminated char string located in FLASH;'%' - the '%' character will be outputted.
void sprintf(char *str, char flash *fmtstr [ , arg1, arg2, ...])
this function is identical to printf except that the formatted text is placed in the null terminatedcharacter string str .
In order to reduce program code size, there is the Project|Configure|C Compiler|CodeGeneration|(s)printf features option.It allows linking different versions of the printf and sprintf functions, with only the features that arereally required by the program.The following (s)printf features are available:
• int - the following conversion type characters are supported: 'c', 's', 'p', 'i', 'd', 'u', 'x', 'X', '%', nowidth or precision specifiers are supported, only the '+' and ' ' flags are supported, no input sizemodifiers are supported
• int, width - the following conversion type characters are supported: 'c', 's', 'p', 'i', 'd', 'u', 'x', 'X', '%',the width specifier is supported, the precision specifier is not supported, only the '+', '-', '0' and ' ' flagsare supported, no input size modifiers are supported
• long, width - the following conversion type characters are supported: 'c', 's', 'p', 'i', 'd', 'u', 'x', 'X','%' the width specifier is supported, the precision specifier is not supported, only the '+', '-', '0' and ' 'flags are supported, only the 'l' input size modifier is supported
• long, width, precision - the following conversion type characters are supported: 'c', 's', 'p', 'i', 'd','u', 'x', 'X', '%', the width and precision specifiers are supported, only the '+', '-', '0' and ' ' flags aresupported, only the 'l' input size modifier is supported
• float, width, precision - the following conversion type characters are supported: 'c', 's', 'p', 'i', 'd','u', 'e', 'E', 'f', 'x', 'X', '%', the width and precision specifiers are supported, only the '+', '-', '0' and ' ' flagsare supported, only the 'l' input size modifier is supported.
The more features are selected, the larger is the code size generated for the printf and sprintffunctions.
char *gets(char *str, unsigned char len)
inputs, using getchar , the character string str terminated by the new line character.The new line character will be replaced with 0.The maximum length of the string is len. If len characters were read without encountering the new linecharacter, then the string is terminated with 0 and the function ends.The function returns a pointer to str .
© 1998-2003 HP InfoTech S.R.L. Page 101

7/22/2019 CodevisionAVR Manual Full
http://slidepdf.com/reader/full/codevisionavr-manual-full 103/200
CodeVisionAVR
signed char scanf(char flash *fmtstr [ , arg1 address, arg2 address, ...])
formatted text input by scanning, using getchar , a series of input fields according to the formatspecifiers in the fmtstr string.The format specifier string fmtstr is constant and must be located in FLASH memory.
The implementation of scanf is a reduced version of the standard C function.This was necessary due to the specific needs of an embedded system and because the fullimplementation would require a large amount of FLASH memory space.The format specifier string has the following structure:
%[width]type_char
The optional width specifier sets the maximal number of characters to read. If the function encountersa whitespace character or one that cannot be converted, then it will continue with the next input field, ifpresent.The type_char conversion type character is used to specify the way the input field will be processed.The following conversion type characters are supported:
'd' - inputs a signed decimal integer in a pointer to int argument;
'i' - inputs a signed decimal integer in a pointer to int argument;'u' - inputs an unsigned decimal integer in a pointer to unsigned int argument;'x' - inputs an unsigned hexadecimal integer in a pointer to unsigned int argument;'c' - inputs an ASCII character in a pointer to char argument;'s' - inputs an ASCII character string in a pointer to char argument;'%' - no input is done, a '%' is stored.
The function returns the number of successful entries, or -1 on error.
signed char sscanf(char *str, char flash *fmtstr [ , arg1 address, arg2 address, ...])
this function is identical to scanf except that the formatted text is inputted from the null terminatedcharacter string str , located in SRAM.
© 1998-2003 HP InfoTech S.R.L. Page 102

7/22/2019 CodevisionAVR Manual Full
http://slidepdf.com/reader/full/codevisionavr-manual-full 104/200
CodeVisionAVR
4.3 Standard Library Functions
The prototypes for these functions are placed in the file stdlib.h, located in the ..\INC subdirectory.This file must be #include -ed before using the functions.
int atoi(char *str)
converts the string str to integer.
long int atol(char *str)
converts the string str to long integer.
void itoa(int n, char *str)
converts the integer n to characters in string str.
void ltoa(long int n, char *str)
converts the long integer n to characters in string str.
void ftoa(float n, unsigned char decimals, char *str)
converts the floating point number n to characters in string str.The number is represented with a specified number of decimals.
void ftoe(float n, unsigned char decimals, char *str)
converts the floating point number n to characters in string str.The number is represented as a mantissa with a specified number of decimals and an integer powerof 10 exponent (e.g. 12.35e-5).
float atof(char *str)
converts the characters from string str to floating point.
int rand (void)
generates a pseudo-random number between 0 and 32767.
void srand(int seed)
sets the starting value seed used by the pseudo-random number generator in the rand function.
© 1998-2003 HP InfoTech S.R.L. Page 103

7/22/2019 CodevisionAVR Manual Full
http://slidepdf.com/reader/full/codevisionavr-manual-full 105/200
CodeVisionAVR
4.4 Mathematical Functions
The prototypes for these functions are placed in the file math.h, located in the ..\INC subdirectory.This file must be #include -ed before using the functions.
unsigned char cabs(signed char x)
returns the absolute value of the byte x.
unsigned int abs(int x)
returns the absolute value of the integer x.
unsigned long labs(long int x)
returns the absolute value of the long integer x.
float fabs(float x)
returns the absolute value of the floating point number x.
signed char cmax(signed char a, signed char b)
returns the maximum value of bytes a and b.
int max(int a, int b)
returns the maximum value of integers a and b.
long int lmax(long int a, long int b)
returns the maximum value of long integers a and b.
float fmax(float a, float b)
returns the maximum value of floating point numbers a and b.
signed char cmin(signed char a, signed char b)
returns the minimum value of bytes a and b.
int min(int a, int b)
returns the minimum value of integers a and b.
long int lmin(long int a, long int b)
returns the minimum value of long integers a and b.
float fmin(float a, float b)
returns the minimum value of floating point numbers a and b.
signed char csign(signed char x)
returns -1, 0 or 1 if the byte x is negative, zero or positive.
signed char sign(int x)
returns -1, 0 or 1 if the integer x is negative, zero or positive
© 1998-2003 HP InfoTech S.R.L. Page 104
7/22/2019 CodevisionAVR Manual Full
http://slidepdf.com/reader/full/codevisionavr-manual-full 106/200
CodeVisionAVR
signed char lsign(long int x)
returns -1, 0 or 1 if the long integer x is negative, zero or positive.
signed char fsign(float x)
returns -1, 0 or 1 if the floating point number x is negative, zero or positive.
unsigned char isqrt(unsigned int x)
returns the square root of the unsigned integer x.
unsigned int lsqrt(unsigned long x)
returns the square root of the unsigned long integer x.
float sqrt(float x)
returns the square root of the positive floating point number x.
float floor(float x)
returns the smallest integer value of the floating point number x.
float ceil(float x)
returns the largest integer value of the floating point number x.
float fmod(float x, float y)
returns the remainder of x divided by y.
float modf(float x, float *ipart)
splits the floating point number x into integer and fractional components.The fractional part of x is returned as a signed floating point number.The integer part is stored as floating point number at ipart.
float ldexp(float x, int expn)
returns x * 2expn
.
float frexp(float x, int *expn)
returns the mantisa and exponent of the floating point number x.
float exp(float x)
returns ex .
float log(float x)
returns the natural logarithm of the floating point number x.
float log10(float x)
returns the base 10 logarithm of the floating point number x.
© 1998-2003 HP InfoTech S.R.L. Page 105

7/22/2019 CodevisionAVR Manual Full
http://slidepdf.com/reader/full/codevisionavr-manual-full 107/200
CodeVisionAVR
float pow(float x, float y)
returns xy .
float sin(float x)
returns the sine of the floating point number x, where the angle is expressed in radians.
float cos(float x)
returns the cosine of the floating point number x, where the angle is expressed in radians.
float tan(float x)
returns the tangent of the floating point number x, where the angle is expressed in radians.
float sinh(float x)
returns the hyperbolic sine of the floating point number x, where the angle is expressed in radians.
float cosh(float x)
returns the hyperbolic cosine of the floating point number x, where the angle is expressed inradians.
float tanh(float x)
returns the hyperbolic tangent of the floating point number x, where the angle is expressed inradians.
float asin(float x)
returns the arc sine of the floating point number x (in the range -PI/2 to PI/2).x must be in the range -1 to 1.
float acos(float x)
returns the arc cosine of the floating point number x (in the range 0 to PI).x must be in the range -1 to 1.
float atan(float x)
returns the arc tangent of the floating point number x (in the range -PI/2 to PI/2).
float atan2(float y, float x)
returns the arc tangent of the floating point numbers y/x (in the range -PI to PI).
© 1998-2003 HP InfoTech S.R.L. Page 106

7/22/2019 CodevisionAVR Manual Full
http://slidepdf.com/reader/full/codevisionavr-manual-full 108/200
CodeVisionAVR
4.5 String Functions
The prototypes for these functions are placed in the file string.h, located in the ..\INC subdirectory.This file must be #include -ed before using the functions.
The string manipulation functions were extended to handle strings located both in SRAM and FLASH
memories.
char *strcat(char *str1, char *str2)
concatenate the string str2 to the end of the string str1.
char *strcatf(char *str1, char flash *str2)
concatenate the string str2, located in FLASH, to the end of the string str1.
char *strncat(char *str1, char *str2, unsigned char n)
concatenate maximum n characters of the string str2 to the end of the string str1.
Returns a pointer to the string str1.
char *strncatf(char *str1, char flash *str2, unsigned char n)
concatenate maximum n characters of the string str2, located in FLASH, to the end of the stringstr1.Returns a pointer to the string str1.
char *strchr(char *str, char c)
returns a pointer to the first occurrence of the character c in the string str, else a NULL pointer.
char *strrchr(char *str, char c)
returns a pointer to the last occurrence of the character c in the string str, else a NULL pointer.
signed char strpos(char *str, char c)
returns the index to first occurrence of the character c in the string str, else -1.
signed char strrpos(char *str, char c)
returns the index to the last occurrence of the character c in the string str, else -1.
signed char strcmp(char *str1, char *str2)
compares the string str1 with the string str2.Returns <0, 0, >0 according to str1<str2, str1=str2, str1>str2.
signed char strcmpf(char *str1, char flash *str2)
compares the string str1, located in SRAM, with the string str2, located in FLASH.Returns <0, 0, >0 according to str1<str2, str1=str2, str1>str2.
signed char strncmp(char *str1, char *str2, unsigned char n)
compares at most n characters of the string str1 with the string str2.Returns <0, 0, >0 according to str1<str2, str1=str2, str1>str2.
© 1998-2003 HP InfoTech S.R.L. Page 107

7/22/2019 CodevisionAVR Manual Full
http://slidepdf.com/reader/full/codevisionavr-manual-full 109/200
CodeVisionAVR
signed char strncmpf(char *str1, char flash *str2, unsigned char n)
compares at most n characters of the string str1, located in SRAM, with the string str2, located inFLASH.Returns <0, 0, >0 according to str1<str2, str1=str2, str1>str2.
char *strcpy(char *dest, char *src)
copies the string src to the string dest.
char *strcpyf(char *dest, char flash *src)
copies the string src, located in FLASH, to the string dest, located in SRAM.Returns a pointer to the string dest.
char *strncpy(char *dest, char *src, unsigned char n)
copies at most n characters from the string src to the string dest (null padding).
Returns a pointer to the string dest.
char *strncpyf(char *dest, char flash *src, unsigned char n)
copies at most n characters from the string src, located in FLASH, to the string dest, located inSRAM (null padding).Returns a pointer to the string dest.
unsigned char strspn(char *str, char *set)
returns the index of the first character, from the string str, that doesn't match a character from thestring set.If all characters from set are in str returns the length of str.
unsigned char strspnf(char *str, char flash *set)
returns the index of the first character, from the string str, located in SRAM, that doesn't match acharacter from the string set, located in FLASH.If all characters from set are in str returns the length of str.
unsigned char strcspn(char *str, char *set)
searches the string str for the first occurrence of a character from the string set.If there is a match returns, the index of the character in str.If there are no matching characters, returns the length of str.
unsigned char strcspnf(char *str, char flash *set)
searches the string str for the first occurrence of a character from the string set, located in FLASH.If there is a match, returns the index of the character in str.If there are no matching characters, returns the length of str.
char *strpbrk(char *str, char *set)
searches the string str for the first occurrence of a char from the string set.If there is a match, returns a pointer to the character in str.If there are no matching characters, returns a NULL pointer.
© 1998-2003 HP InfoTech S.R.L. Page 108

7/22/2019 CodevisionAVR Manual Full
http://slidepdf.com/reader/full/codevisionavr-manual-full 110/200
CodeVisionAVR
char *strpbrkf(char *str, char flash *set)
searches the string str, located in SRAM, for the first occurrence of a char from the string set,located in FLASH.If there is a match, returns a pointer to the character in str.
If there are no matching characters, returns a NULL pointer.
char *strrpbrk(char *str, char *set)
searches the string str for the last occurrence of a character from the string set.If there is a match, returns a pointer to the character in str.If there are no matching characters, returns a NULL pointer.
char *strrpbrkf(char *str, char flash *set)
searches the string str, located in SRAM, for the last occurrence of a character from the string set,located in FLASH.If there is a match, returns a pointer to the character in str.
If there are no matching characters, returns a NULL pointer.
char *strstr(char *str1, char *str2)
searches the string str1 for the first occurrence of the string str2.If there is a match, returns a pointer to the character in str1 where str2 begins.If there is no match, returns a NULL pointer.
char *strstrf(char *str1, char flash *str2)
searches the string str1, located in SRAM, for the first occurrence of the string str2, located inFLASH.If there is a match, returns a pointer to the character in str1 where str2 begins.
If there is no match, returns a NULL pointer.
char *strtok(char *str1, char flash *str2)
scans the string str1, located in SRAM, for the first token not contained in the string str2, located inFLASH.The function considers the string str1 as consisting of a sequence of text tokens, separated by spansof one or more characters from the string str2.The first call to strtok, with the pointer to str1 being different from NULL, returns a pointer to the firstcharacter of the first token in str1. Also a NULL character will be written in str1, immediately after thereturned token.Subsequent calls to strtok, with NULL as the first parameter, will work through the string str1 until nomore tokens remain. When there are no more tokens, strtok will return a NULL pointer.
unsigned char strlen(char *str)
for the TINY memory model. returns the length of the string str (in the range 0..255).
unsigned int strlen(char *str)
for the SMALL memory model. returns the length of the string str (in the range 0..65535).
unsigned int strlenf(char flash *str)
returns the length of the string str located in FLASH.
© 1998-2003 HP InfoTech S.R.L. Page 109

7/22/2019 CodevisionAVR Manual Full
http://slidepdf.com/reader/full/codevisionavr-manual-full 111/200
CodeVisionAVR
void *memcpy(void *dest,void *src, unsigned char n)
for the TINY memory model.
void *memcpy(void *dest,void *src, unsigned int n)
for the SMALL memory model.
Copies n bytes from src to dest. dest must not overlap src, else use memmove.Returns a pointer to dest.
void *memcpyf(void *dest,void flash *src, unsigned char n)
for the TINY memory model.
void *memcpyf(void *dest,void flash *src, unsigned int n)
for the SMALL memory model.
Copies n bytes from src, located in FLASH, to dest. Returns a pointer to dest.
void *memccpy(void *dest,void *src, char c, unsigned char n)
for the TINY memory model.
void *memccpy(void *dest,void *src, char c, unsigned int n)
for the SMALL memory model.
Copies at most n bytes from src to dest, until the character c is copied.dest must not overlap src.
Returns a NULL pointer if the last copied character was c or a pointer to dest+n+1.
void *memmove(void *dest,void *src, unsigned char n)
for the TINY memory model.
void *memmove(void *dest,void *src, unsigned int n)
for the SMALL memory model.
Copies n bytes from src to dest. dest may overlap src.Returns a pointer to dest.
void *memchr(void *buf, unsigned char c, unsigned char n)
for the TINY memory model.
void *memchr(void *buf, unsigned char c, unsigned int n)
for the SMALL memory model.
Scans n bytes from buf for byte c.Returns a pointer to c if found or a NULL pointer if not found.
signed char memcmp(void *buf1,void *buf2, unsigned char n)
for the TINY memory model.
© 1998-2003 HP InfoTech S.R.L. Page 110

7/22/2019 CodevisionAVR Manual Full
http://slidepdf.com/reader/full/codevisionavr-manual-full 112/200
CodeVisionAVR
signed char memcmp(void *buf1,void *buf2, unsigned int n)
for the SMALL memory model.
Compares at most n bytes of buf1 with buf2.
Returns <0, 0, >0 according to buf1<buf2, buf1=buf2, buf1>buf2.
signed char memcmpf(void *buf1,void flash *buf2, unsigned char n)
for the TINY memory model.
signed char memcmpf(void *buf1,void flash *buf2, unsigned int n)
for the SMALL memory model.
Compares at most n bytes of buf1, located in SRAM, with buf2, located in FLASH.Returns <0, 0, >0 according to buf1<buf2, buf1=buf2, buf1>buf2.
void *memset(void *buf, unsigned char c, unsigned char n)
for the TINY memory model.
void *memset(void *buf, unsigned char c, unsigned int n)
for the SMALL memory model.
Sets n bytes from buf with byte c. Returns a pointer to buf.
© 1998-2003 HP InfoTech S.R.L. Page 111

7/22/2019 CodevisionAVR Manual Full
http://slidepdf.com/reader/full/codevisionavr-manual-full 113/200
CodeVisionAVR
4.6 Variable Length Argument Lists Macros
These macros are defined in the file stdarg.h, located in the ..\INC subdirectory. This file must be#include -ed before using the macros.
void va_start(argptr, previous_par)
This macro, when used in a function with a variable length argument list, initializes the argptr pointerof va_list type, for subsequent use by the va_arg and va_end macros.The previous_par argument must be the name of the function argument immediately preceding theoptional arguments.The va_start macro must be called prior to any access using the va_arg macro.
type va_arg(argptr, type)
This macro is used to extract successive arguments from the variable length argument list referencedby argptr .type specifies the data type of the argument to extract.The va_arg macro can be called only once for each argument. The order of the parameters in the
argument list must be observed.On the first call va_arg returns the first argument after the previous_par argument specified in theva_start macro. Subsequent calls to va_arg return the remaining arguments in succession.
void va_end(argptr)
This macro is used to terminate use of the variable length argument list pointer argptr , initialized usingthe va_start macro.
Example:
#include <stdarg.h>
/* declare a function with a variable number of arguments */int sum_all(int nsum, ...)va_list argptr;int i, result=0;
/* initialize argptr */va_start(argptr,nsum);
/* add all the function arguments after nsum */for (i=1; i <= nsum; i++)
/* add each argument */result+=va_arg(argptr,int);
/* terminate the use of argptr */va_end(argptr);
return result;
void main(void)int s;/* calculate the sum of 5 arguments */s=sum_all(5,10,20,30,40,50);
© 1998-2003 HP InfoTech S.R.L. Page 112

7/22/2019 CodevisionAVR Manual Full
http://slidepdf.com/reader/full/codevisionavr-manual-full 114/200
CodeVisionAVR
4.7 Non-local Jump Functions
These functions can execute a non-local goto.They are usually used to pass control to an error recovery routine.The prototypes for the non-local jump functions are placed in the file setjmp.h, located in the ..\INCsubdirectory. This file must be #include -ed before using the functions.
int setjmp(char *env)
This function saves the current CPU state (Y, SP, SREG registers and the current instruction address)in the env variable.The CPU state can then be restored by subsequently calling the longjmp function.Execution is then resumed immediately after the setjmp function call.The setjmp function will return 0 when the current CPU state is saved in the env variable.If the function returns a value different from 0, it signals that a longjmp function was executed.In this situation the returned value is the one that was passed as the retval argument to the longjmp function.In order to preserve the local variables in the function where setjmp is used, these must be declaredwith the volatile attribute.
void longjmp(char *env, int retval)
This function restores the CPU state that was previously saved in the env variable by a call to setjmp.The retval argument holds the integer non-zero value that will be returned by setjmp after the call tolongjmp. If a 0 value is passed as the retval argument then it will be substituted with 1.
In order to facilitate the usage of these functions, the setjmp.h header file also contains the definitionof the jmp_buf data type, which is used when declaring the env variables.
Example:
#include <90s8515.h>
#include <stdio.h>#include <setjmp.h>
/* declare the variable used to hold the CPU state */jmp_buf cpu_state;
void foo(void)printf("Now we will make a long jump to main()\n\r");longjmp(cpu_state,1);
void main(void)
/* this local variable will be preserved after a longjmp */volatile int i;/* this local variable will not be preserved after a longjmp */int j;
/* init the AT90S8515 UART */UCR=8;/* Baud=9600 @ 4MHz */UBRR=25;
© 1998-2003 HP InfoTech S.R.L. Page 113
7/22/2019 CodevisionAVR Manual Full
http://slidepdf.com/reader/full/codevisionavr-manual-full 115/200
CodeVisionAVR
if (setjmp(cpu_state)==0)printf("First call to setjmp\n\r");foo();
elseprintf("We jumped here from foo()\n\r");
4.8 BCD Conversion Functions
The prototypes for these functions are placed in the file bcd.h, located in the ..\INC subdirectory. Thisfile must be #include -ed before using the functions.
unsigned char bcd2bin(unsigned char n)
Converts the number n from BCD representation to it's binary equivalent.
unsigned char bin2bcd(unsigned char n)
Converts the number n from binary representation to it's BCD equivalent.The number n values must be from 0 to 99.
4.9 Gray Code Conversion Functions
The prototypes for these functions are placed in the file gray.h, located in the ..\INC subdirectory. Thisfile must be #include -ed before using the functions.
unsigned char gray2binc(unsigned char n) unsigned char gray2bin(unsigned int n) unsigned char gray2binl(unsigned long n)
Convert the number n from Gray code representation to it's binary equivalent.
unsigned char bin2grayc(unsigned char n) unsigned char bin2gray(unsigned int n) unsigned char bin2grayl(unsigned long n)
Convert the number n from binary representation to it's Gray code equivalent.
© 1998-2003 HP InfoTech S.R.L. Page 114

7/22/2019 CodevisionAVR Manual Full
http://slidepdf.com/reader/full/codevisionavr-manual-full 116/200
CodeVisionAVR
4.10 Memory Access Functions
The prototypes for these functions are placed in the file mem.h, located in the ..\INC subdirectory.This file must be #include -ed before using the functions.
void pokeb(unsigned int addr, unsigned char data)
this function writes the byte data to SRAM at address addr.
void pokew(unsigned int addr, unsigned int data)
this function writes the word data to SRAM at address addr.The LSB is written at address addr and the MSB is written at address addr+1.
unsigned char peekb(unsigned int addr)
this function reads a byte located in SRAM at address addr.
unsigned int peekw (unsigned int addr)
this function reads a word located in SRAM at address addr.The LSB is read from address addr and the MSB is read from address addr+1.
© 1998-2003 HP InfoTech S.R.L. Page 115

7/22/2019 CodevisionAVR Manual Full
http://slidepdf.com/reader/full/codevisionavr-manual-full 117/200
CodeVisionAVR
4.11 LCD Functions
4.11.1 LCD Functions for displays with up to 2x40 characters
The LCD Functions are intended for easy interfacing between C programs and alphanumeric LCDmodules built with the Hitachi HD44780 chip or equivalent.
The prototypes for these functions are placed in the file lcd.h, located in the ..\INC subdirectory. Thisfile must be #include -ed before using the functions.
Prior to #include -ing the lcd.h file, you must declare which microcontroller port is used forcommunication with the LCD module.The following LCD formats are supported in lcd.h: 1x8, 2x12, 3x12, 1x16, 2x16, 2x20, 4x20, 2x24 and2x40 characters.Example:
/* the LCD module is connected to PORTC */#asm
.equ __lcd_port=0x15#endasm
/* now you can include the LCD Functions */#include <lcd.h>
The LCD module must be connected to the port bits as follows:
[LCD] [AVR Port] RS (pin4) ------ bit 0RD (pin 5) ------ bit 1EN (pin 6) ------ bit 2DB4 (pin 11) --- bit 4DB5 (pin 12) --- bit 5DB6 (pin 13) --- bit 6DB7 (pin 14) --- bit 7
You must also connect the LCD power supply and contrast control voltage, according to the datasheet.
The low level LCD Functions are:
void _lcd_ready(void)
waits until the LCD module is ready to receive data.This function must be called prior to writing data to the LCD with the _lcd_write_data function.
void _lcd_write_data(unsigned char data)
writes the byte data to the LCD instruction register.This function may be used for modifying the LCD configuration.Example:
/* enables the displaying of the cursor */_lcd_ready();_lcd_write_data(0xe);
© 1998-2003 HP InfoTech S.R.L. Page 116
7/22/2019 CodevisionAVR Manual Full
http://slidepdf.com/reader/full/codevisionavr-manual-full 118/200
CodeVisionAVR
void lcd_write_byte(unsigned char addr, unsigned char data);
writes a byte to the LCD character generator or display RAM.
Example:
/* LCD user defined charactersChip: AT90S8515Memory Model: SMALLData Stack Size: 128 bytes
Use an 2x16 alphanumeric LCD connectedto the STK200+ PORTC header as follows:
[LCD] [STK200+ PORTC HEADER]1 GND- 9 GND2 +5V- 10 VCC3 VLC- LCD HEADER Vo4 RS - 1 PC05 RD - 2 PC16 EN - 3 PC211 D4 - 5 PC412 D5 - 6 PC513 D6 - 7 PC614 D7 - 8 PC7 */
/* the LCD is connected to PORTC outputs */#asm.equ __lcd_port=0x15 ;PORTC#endasm
/* include the LCD driver routines */#include <lcd.h>
typedef unsigned char byte;
/* table for the user defined characterarrow that points to the top right corner */
flash byte char0[8]=0b0000000,0b0001111,0b0000011,0b0000101,0b0001001,0b0010000,
0b0100000,0b1000000;
/* function used to define user characters */void define_char(byte flash *pc,byte char_code)byte i,a;a=(char_code<<3) | 0x40;for (i=0; i<8; i++) lcd_write_byte(a++,*pc++);
© 1998-2003 HP InfoTech S.R.L. Page 117

7/22/2019 CodevisionAVR Manual Full
http://slidepdf.com/reader/full/codevisionavr-manual-full 119/200
CodeVisionAVR
void main(void)/* initialize the LCD for 2 lines & 16 columns */lcd_init(16);
/* define user character 0 */define_char(char0,0);
/* switch to writing in Display RAM */lcd_gotoxy(0,0);lcd_putsf("User char 0:");
/* display used defined char 0 */lcd_putchar(0);
while (1); /* loop forever */
unsigned char lcd_read_byte(unsigned char addr);
reads a byte from the LCD character generator or display RAM.
The high level LCD Functions are:
void lcd_init(unsigned char lcd_columns)
initializes the LCD module, clears the display and sets the printing character position at row 0 andcolumn 0. The numbers of columns of the LCD must be specified (e.g. 16).No cursor is displayed.This is the first function that must be called before using the other high level LCD Functions.
void lcd_clear(void)
clears the LCD and sets the printing character position at row 0 and column 0.
void lcd_gotoxy(unsigned char x, unsigned char y)
sets the current display position at column x and row y. The row and column numbering startsfrom 0.
void lcd_putchar(char c)
displays the character c at the current display position.
void lcd_puts(char *str)
displays at the current display position the string str, located in SRAM.
void lcd_putsf(char flash *str)
displays at the current display position the string str, located in FLASH.
© 1998-2003 HP InfoTech S.R.L. Page 118

7/22/2019 CodevisionAVR Manual Full
http://slidepdf.com/reader/full/codevisionavr-manual-full 120/200
CodeVisionAVR
4.11.2 LCD Functions for displays with 4x40 characters
The LCD Functions are intended for easy interfacing between C programs and alphanumeric LCDmodules with 4x40 characters, built with the Hitachi HD44780 chip or equivalent.The prototypes for these functions are placed in the file lcd4x40.h, located in the ..\INC subdirectory.This file must be #include -ed before using the functions.
Prior to #include -ing the lcd4x40.h file, you must declare which microcontroller port is used forcommunication with the LCD module.Example:
/* the LCD module is connected to PORTC */#asm
.equ __lcd_port=0x15#endasm
/* now you can include the LCD Functions */#include <lcd4x40.h>
The LCD module must be connected to the port bits as follows:
[LCD] [AVR Port] RS (pin 11) --- bit 0RD (pin 10) --- bit 1EN1 (pin 9) ---- bit 2EN2 (pin 15) -- bit 3DB4 (pin 4) ---- bit 4DB5 (pin 3) ---- bit 5DB6 (pin 2) ---- bit 6DB7 (pin 1) ---- bit 7
You must also connect the LCD power supply and contrast control voltage, according to the data
sheet.
The low level LCD Functions are:
void _lcd_ready(void)
waits until the LCD module is ready to receive data.This function must be called prior to writing data to the LCD with the _lcd_write_data function.
void _lcd_write_data(unsigned char data)
writes the byte data to the LCD instruction register.This function may be used for modifying the LCD configuration.
Prior calling the low level functions _lcd_ready and _lcd_write_data, the global variable _en1_msk must be set to LCD_EN1, respectively LCD_EN2, to select the upper, respectively lower half, LCDcontroller.
Example:
/* enables the displaying of the cursor on the upper halfof the LCD */
_en1_msk=LCD_EN1;_lcd_ready();_lcd_write_data(0xe);
© 1998-2003 HP InfoTech S.R.L. Page 119

7/22/2019 CodevisionAVR Manual Full
http://slidepdf.com/reader/full/codevisionavr-manual-full 121/200
CodeVisionAVR
void lcd_write_byte(unsigned char addr, unsigned char data);
writes a byte to the LCD character generator or display RAM.
unsigned char lcd_read_byte(unsigned char addr);
reads a byte from the LCD character generator or display RAM.
The high level LCD Functions are:
void lcd_init(void)
initializes the LCD module, clears the display and sets the printing character position at row 0 andcolumn 0.No cursor is displayed.This is the first function that must be called before using the other high level LCD Functions.
void lcd_clear(void)
clears the LCD and sets the printing character position at row 0 and column 0.
void lcd_gotoxy(unsigned char x, unsigned char y)
sets the current display position at column x and row y. The row and column numbering startsfrom 0.
void lcd_putchar(char c)
displays the character c at the current display position.
void lcd_puts(char *str)
displays at the current display position the string str, located in SRAM.
void lcd_putsf(char flash *str)
displays at the current display position the string str, located in FLASH.
© 1998-2003 HP InfoTech S.R.L. Page 120

7/22/2019 CodevisionAVR Manual Full
http://slidepdf.com/reader/full/codevisionavr-manual-full 122/200
CodeVisionAVR
4.11.3 LCD Functions for displays connected in 8 bit memorymapped mode
These LCD Functions are intended for easy interfacing between C programs and alphanumeric LCDmodules built with the Hitachi HD44780 chip or equivalent.The LCD is connected to the AVR external data and address buses as an 8 bit peripheral.This type of connection is used in the Kanda Systems STK200+ and STK300 development boards.For the LCD connection, please consult the documentation that came with your development board.These functions can be used only with AVR chips that allow using external memory devices:AT90S4414, AT90S8515, ATmega603, ATmega103, ATmega128, ATmega161 and ATmega162.
The prototypes for these functions are placed in the file lcdstk.h, located in the ..\INC subdirectory.This file must be #include -ed before using the functions.The following LCD formats are supported in lcdstk.h: 1x8, 2x12, 3x12, 1x16, 2x16, 2x20, 4x20, 2x24and 2x40 characters.
The LCD Functions are:
void _lcd_ready(void)
waits until the LCD module is ready to receive data.This function must be called prior to writing data to the LCD with the _LCD_RS0 and _LCD_RS1macros.Example:
/* enables the displaying of the cursor */_lcd_ready();_LCD_RS0=0xe;
The _LCD_RS0, respectively _LCD_RS1, macros are used for accessing the LCD Instruction Registerwith RS=0, respectively RS=1.
void lcd_write_byte(unsigned char addr, unsigned char data);
writes a byte to the LCD character generator or display RAM.
Example:
/* LCD user defined characters
Chip: AT90S8515Memory Model: SMALLData Stack Size: 128 bytes
Use an 2x16 alphanumeric LCD connectedto the STK200+ LCD connector */
/* include the LCD driver routines */#include <lcdstk.h>
typedef unsigned char byte;
© 1998-2003 HP InfoTech S.R.L. Page 121

7/22/2019 CodevisionAVR Manual Full
http://slidepdf.com/reader/full/codevisionavr-manual-full 123/200
CodeVisionAVR
/* table for the user defined characterarrow that points to the top right corner */
flash byte char0[8]=0b0000000,0b0001111,
0b0000011,0b0000101,0b0001001,0b0010000,0b0100000,0b1000000;
/* function used to define user characters */void define_char(byte flash *pc,byte char_code)byte i,a;a=(char_code<<3) | 0x40;for (i=0; i<8; i++) lcd_write_byte(a++,*pc++);
void main(void)/* initialize the LCD for 2 lines & 16 columns */lcd_init(16);
/* define user character 0 */define_char(char0,0);
/* switch to writing in Display RAM */lcd_gotoxy(0,0);lcd_putsf("User char 0:");
/* display used defined char 0 */lcd_putchar(0);
while (1); /* loop forever */
unsigned char lcd_read_byte(unsigned char addr);
reads a byte from the LCD character generator or display RAM.
void lcd_init(unsigned char lcd_columns)
initializes the LCD module, clears the display and sets the printing character position at row 0 andcolumn 0. The numbers of columns of the LCD must be specified (e.g. 16).No cursor is displayed.This is the first function that must be called before using the other high level LCD Functions.
void lcd_clear(void)
clears the LCD and sets the printing character position at row 0 and column 0.
void lcd_gotoxy(unsigned char x, unsigned char y)
sets the current display position at column x and row y. The row and column numbering startsfrom 0.
© 1998-2003 HP InfoTech S.R.L. Page 122

7/22/2019 CodevisionAVR Manual Full
http://slidepdf.com/reader/full/codevisionavr-manual-full 124/200
CodeVisionAVR
void lcd_putchar(char c)
displays the character c at the current display position.
void lcd_puts(char *str)
displays at the current display position the string str, located in SRAM.
void lcd_putsf(char flash *str)
displays at the current display position the string str, located in FLASH.
4.12 I2C Bus Functions
The I2C Functions are intended for easy interfacing between C programs and various peripherals
using the Philips I2C bus.
These functions treat the microcontroller as a bus master and the peripherals as slaves.The prototypes for these functions are placed in the file i2c.h, located in the ..\INC subdirectory. This
file must be #include -ed before using the functions.
Prior to #include -ing the i2c.h file, you must declare which microcontroller port and port bits are usedfor communication through the I
2C bus.
Example:
/* the I2C bus is connected to PORTB *//* the SDA signal is bit 3 *//* the SCL signal is bit 4 */#asm
.equ __i2c_port=0x18
.equ __sda_bit=3
.equ __scl_bit=4
#endasm
/* now you can include the I2C Functions */#include <i2c.h>
The I2C Functions are:
void i2c_init(void)
this function initializes the I2C bus.
This is the first function that must be called prior to using the other I2C Functions.
unsigned char i2c_start(void)
issues a START condition.Returns 1 if bus is free or 0 if the I
2C bus is busy.
void i2c_stop(void)
issues a STOP condition.
unsigned char i2c_read(unsigned char ack)
reads a byte from the bus.The ack parameter specifies if an acknowledgement is to be issued after the byte was read.Set ack to 0 for no acknowledgement or 1 for acknowledgement.
© 1998-2003 HP InfoTech S.R.L. Page 123
7/22/2019 CodevisionAVR Manual Full
http://slidepdf.com/reader/full/codevisionavr-manual-full 125/200
CodeVisionAVR
unsigned char i2c_write(unsigned char data)
writes the byte data to the bus.Returns 1 if the slave acknowledges or 0 if not.
Example how to access an Atmel 24C02 256 byte I2
C EEPROM:
/* the I2C bus is connected to PORTB *//* the SDA signal is bit 3 *//* the SCL signal is bit 4 */#asm
.equ __i2c_port=0x18
.equ __sda_bit=3
.equ __scl_bit=4#endasm
/* now you can include the I2C Functions */#include <i2c.h>
/* function declaration for delay_ms */#include <delay.h>
#define EEPROM_BUS_ADDRESS 0xa0
/* read a byte from the EEPROM */unsigned char eeprom_read(unsigned char address) unsigned char data;i2c_start();i2c_write(EEPROM_BUS_ADDRESS);i2c_write(address);i2c_start();
i2c_write(EEPROM_BUS_ADDRESS | 1);data=i2c_read(0);i2c_stop();return data;
/* write a byte to the EEPROM */void eeprom_write(unsigned char address, unsigned char data) i2c_start();i2c_write(EEPROM_BUS_ADDRESS);i2c_write(address);i2c_write(data);i2c_stop();/* 10ms delay to complete the write operation */delay_ms(10);
void main(void) unsigned char i;/* initialize the I2C bus */i2c_init();/* write the byte 55h at address AAh */eeprom_write(0xaa,0x55);/* read the byte from address AAh */i=eeprom_read(0xaa);while (1); /* loop forever */
© 1998-2003 HP InfoTech S.R.L. Page 124

7/22/2019 CodevisionAVR Manual Full
http://slidepdf.com/reader/full/codevisionavr-manual-full 126/200
CodeVisionAVR
4.12.1 National Semiconductor LM75 Temperature SensorFunctions
These functions are intended for easy interfacing between C programs and the LM75 I2C bus
temperature sensor.The prototypes for these functions are placed in the file lm75.h, located in the ..\INC subdirectory. Thisfile must be #include -ed before using the functions.The I
2C bus functions prototypes are automatically #include -ed with the lm75.h.
Prior to #include -ing the lm75.h file, you must declare which microcontroller port and port bits areused for communication with the LM75 through the I
2C bus.
Example:
/* the I2C bus is connected to PORTB *//* the SDA signal is bit 3 *//* the SCL signal is bit 4 */#asm
.equ __i2c_port=0x18
.equ __sda_bit=3
.equ __scl_bit=4#endasm
/* now you can include the LM75 Functions */#include <lm75.h>
The LM75 Functions are:
void lm75_init(unsigned char chip,signed char thyst,signed char tos, unsigned char pol)
this function initializes the LM75 sensor chip.Before calling this function the I
2C bus must be initialized by calling the i2c_init function.
This is the first function that must be called prior to using the other LM75 Functions.If more then one chip is connected to the I
2C bus, then the function must be called for each one,
specifying accordingly the function parameter chip.Maximum 8 LM75 chips can be connected to the I
2C bus, their chip address can be from 0 to 7.
The LM75 is configured in comparator mode, where it functions like a thermostat.The O.S. output becomes active when the temperature exceeds the tos limit, and leaves the activestate when the temperature drops below the thyst limit.Both thyst and tos are expressed in °C.pol represents the polarity of the LM75 O.S. output in active state.If pol is 0, the output is active low and if pol is 1, the output is active high.Refer to the LM75 data sheet for more information.
int lm75_temperature_10(unsigned char chip)
this function returns the temperature of the LM75 sensor with the address chip.The temperature is in °C and is multiplied by 10.
Example how to display the temperature of two LM75 sensors with addresses 0 and 1:
/* the LM75 I2C bus is connected to PORTB *//* the SDA signal is bit 3 *//* the SCL signal is bit 4 */#asm
.equ __i2c_port=0x18
.equ __sda_bit=3
.equ __scl_bit=4#endasm
© 1998-2003 HP InfoTech S.R.L. Page 125

7/22/2019 CodevisionAVR Manual Full
http://slidepdf.com/reader/full/codevisionavr-manual-full 127/200
CodeVisionAVR
/* include the LM75 Functions */#include <lm75.h>
/* the LCD module is connected to PORTC */#asm
.equ __lcd_port=0x15#endasm
/* include the LCD Functions */#include <lcd.h>
/* include the prototype for sprintf */#include <stdio.h>
/* include the prototype for abs */#include <math.h>
char display_buffer[33];
void main(void) int t0,t1;
/* initialize the LCD, 2 rows by 16 columns */lcd_init(16);
/* initialize the I2C bus */i2c_init();
/* initialize the LM75 sensor with address 0 *//* thyst=20°C tos=25°C */lm75_init(0,20,25,0);
/* initialize the LM75 sensor with address 1 *//* thyst=30°C tos=35°C */lm75_init(1,30,35,0);
/* temperature display loop */while (1)
/* read the temperature of sensor #0 *10°C */t0=lm75_temperature_10(0);
/* read the temperature of sensor #1 *10°C */t1=lm75_temperature_10(1);
/* prepare the displayed temperatures *//* in the display_buffer */sprintf(display_buffer,"t0=%-i.%-u%cC\nt1=%-i.%-u%cC",t0/10,abs(t0%10),0xdf,t1/10,abs(t1%10),0xdf);
/* display the temperatures */lcd_clear();lcd_puts(display_buffer);;
© 1998-2003 HP InfoTech S.R.L. Page 126
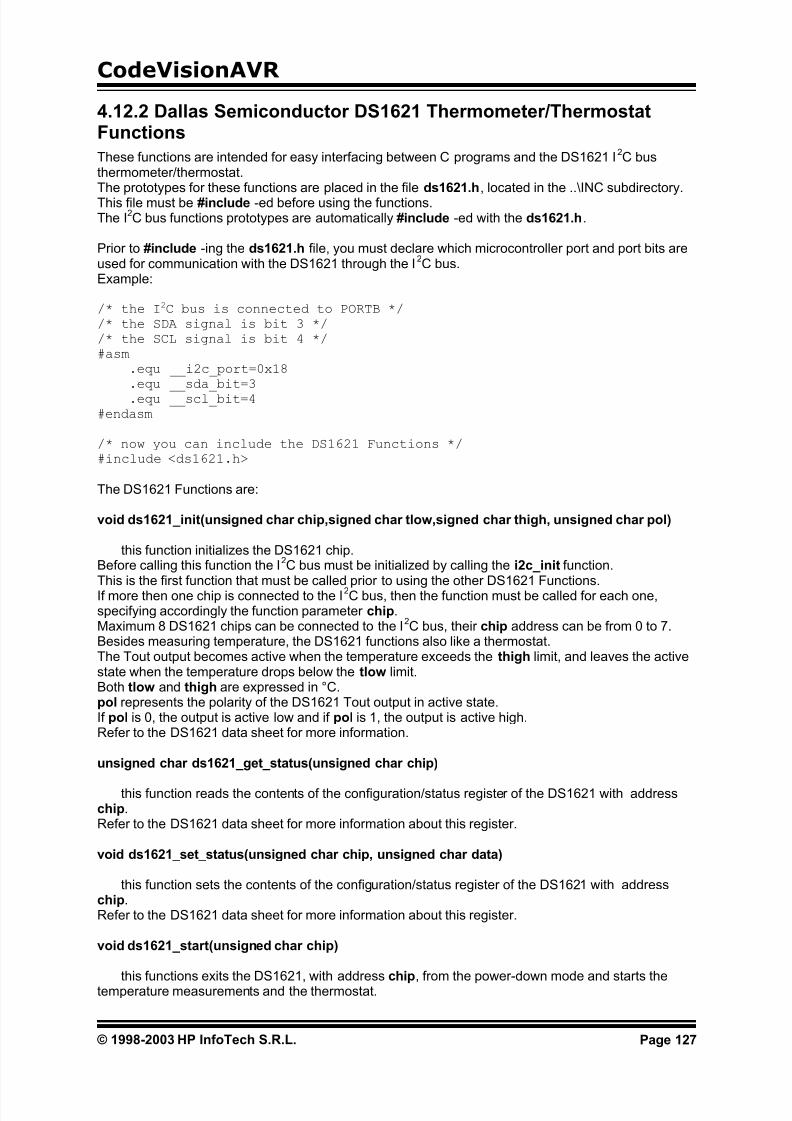
7/22/2019 CodevisionAVR Manual Full
http://slidepdf.com/reader/full/codevisionavr-manual-full 128/200
CodeVisionAVR
4.12.2 Dallas Semiconductor DS1621 Thermometer/ThermostatFunctions
These functions are intended for easy interfacing between C programs and the DS1621 I2C bus
thermometer/thermostat.The prototypes for these functions are placed in the file ds1621.h, located in the ..\INC subdirectory.This file must be #include -ed before using the functions.The I
2C bus functions prototypes are automatically #include -ed with the ds1621.h.
Prior to #include -ing the ds1621.h file, you must declare which microcontroller port and port bits areused for communication with the DS1621 through the I
2C bus.
Example:
/* the I2C bus is connected to PORTB *//* the SDA signal is bit 3 *//* the SCL signal is bit 4 */#asm
.equ __i2c_port=0x18
.equ __sda_bit=3
.equ __scl_bit=4#endasm
/* now you can include the DS1621 Functions */#include <ds1621.h>
The DS1621 Functions are:
void ds1621_init(unsigned char chip,signed char tlow,signed char thigh, unsigned char pol)
this function initializes the DS1621 chip.Before calling this function the I
2C bus must be initialized by calling the i2c_init function.
This is the first function that must be called prior to using the other DS1621 Functions.If more then one chip is connected to the I2C bus, then the function must be called for each one,specifying accordingly the function parameter chip.Maximum 8 DS1621 chips can be connected to the I
2C bus, their chip address can be from 0 to 7.
Besides measuring temperature, the DS1621 functions also like a thermostat.The Tout output becomes active when the temperature exceeds the thigh limit, and leaves the activestate when the temperature drops below the tlow limit.Both tlow and thigh are expressed in °C.pol represents the polarity of the DS1621 Tout output in active state.If pol is 0, the output is active low and if pol is 1, the output is active high.Refer to the DS1621 data sheet for more information.
unsigned char ds1621_get_status(unsigned char chip)
this function reads the contents of the configuration/status register of the DS1621 with addresschip.Refer to the DS1621 data sheet for more information about this register.
void ds1621_set_status(unsigned char chip, unsigned char data)
this function sets the contents of the configuration/status register of the DS1621 with addresschip.Refer to the DS1621 data sheet for more information about this register.
void ds1621_start(unsigned char chip)
this functions exits the DS1621, with address chip, from the power-down mode and starts thetemperature measurements and the thermostat.
© 1998-2003 HP InfoTech S.R.L. Page 127
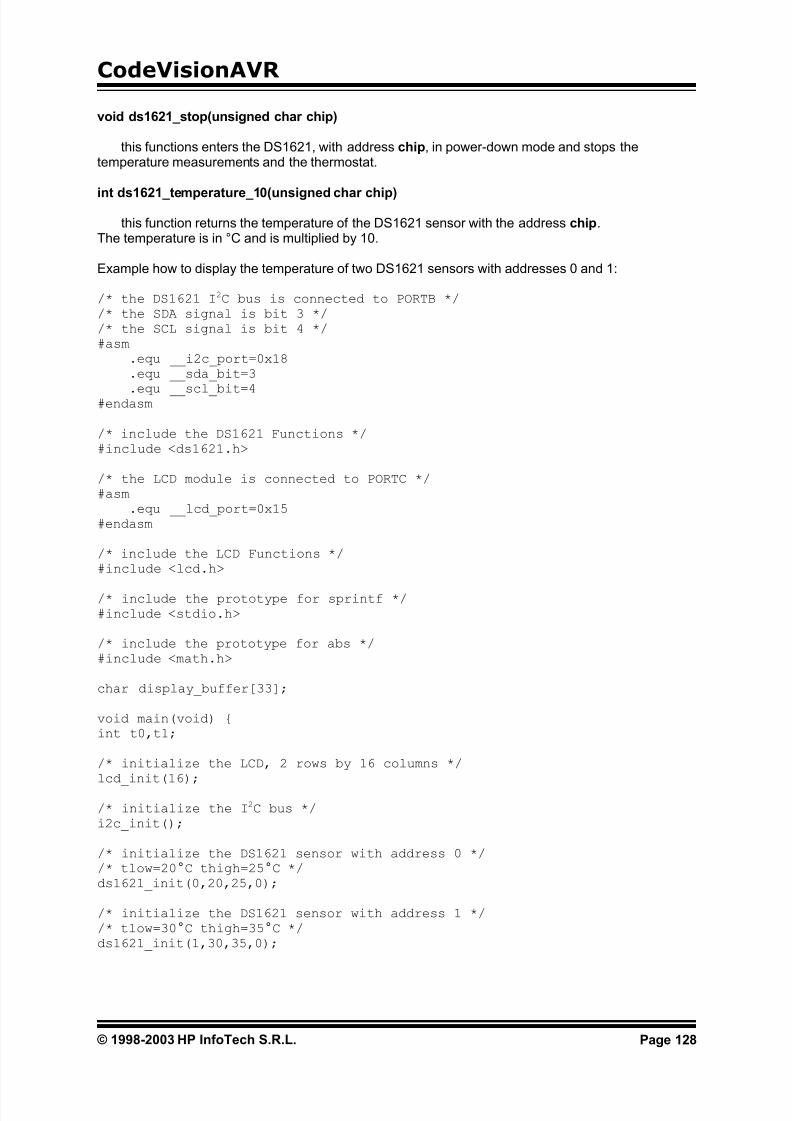
7/22/2019 CodevisionAVR Manual Full
http://slidepdf.com/reader/full/codevisionavr-manual-full 129/200
CodeVisionAVR
void ds1621_stop(unsigned char chip)
this functions enters the DS1621, with address chip, in power-down mode and stops thetemperature measurements and the thermostat.
int ds1621_temperature_10(unsigned char chip)
this function returns the temperature of the DS1621 sensor with the address chip.The temperature is in °C and is multiplied by 10.
Example how to display the temperature of two DS1621 sensors with addresses 0 and 1:
/* the DS1621 I2C bus is connected to PORTB *//* the SDA signal is bit 3 *//* the SCL signal is bit 4 */#asm
.equ __i2c_port=0x18
.equ __sda_bit=3
.equ __scl_bit=4#endasm
/* include the DS1621 Functions */#include <ds1621.h>
/* the LCD module is connected to PORTC */#asm
.equ __lcd_port=0x15#endasm
/* include the LCD Functions */#include <lcd.h>
/* include the prototype for sprintf */#include <stdio.h>
/* include the prototype for abs */#include <math.h>
char display_buffer[33];
void main(void) int t0,t1;
/* initialize the LCD, 2 rows by 16 columns */
lcd_init(16);/* initialize the I2C bus */i2c_init();
/* initialize the DS1621 sensor with address 0 *//* tlow=20°C thigh=25°C */ds1621_init(0,20,25,0);
/* initialize the DS1621 sensor with address 1 *//* tlow=30°C thigh=35°C */ds1621_init(1,30,35,0);
© 1998-2003 HP InfoTech S.R.L. Page 128

7/22/2019 CodevisionAVR Manual Full
http://slidepdf.com/reader/full/codevisionavr-manual-full 130/200
CodeVisionAVR
/* temperature display loop */while (1)
/* read the temperature of DS1621 #0 *10°C */t0=ds1621_temperature_10(0);
/* read the temperature of DS1621 #1 *10°C */t1=ds1621_temperature_10(1);
/* prepare the displayed temperatures *//* in the display_buffer */sprintf(display_buffer,"t0=%-i.%-u%cC\nt1=%-i.%-u%cC",t0/10,abs(t0%10),0xdf,t1/10,abs(t1%10),0xdf);
/* display the temperatures */lcd_clear();lcd_puts(display_buffer);
;
© 1998-2003 HP InfoTech S.R.L. Page 129
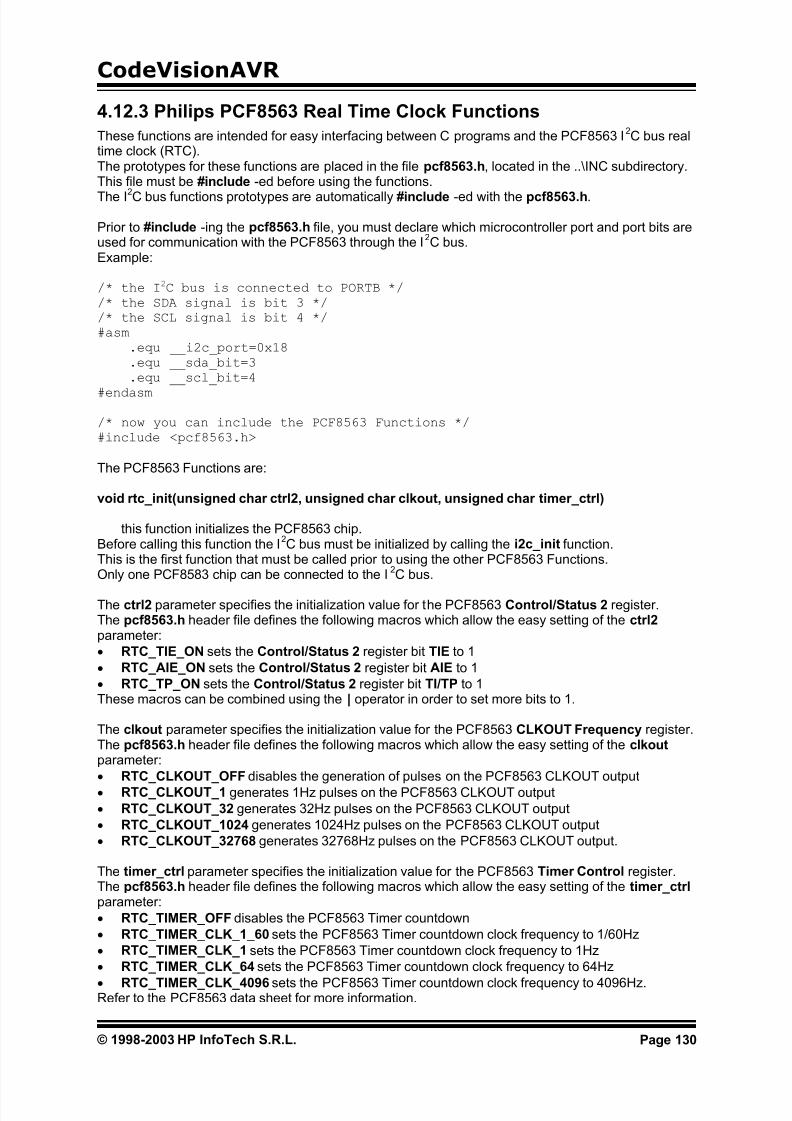
7/22/2019 CodevisionAVR Manual Full
http://slidepdf.com/reader/full/codevisionavr-manual-full 131/200
CodeVisionAVR
4.12.3 Philips PCF8563 Real Time Clock Functions
These functions are intended for easy interfacing between C programs and the PCF8563 I2C bus real
time clock (RTC).The prototypes for these functions are placed in the file pcf8563.h, located in the ..\INC subdirectory.This file must be #include -ed before using the functions.
The I2C bus functions prototypes are automatically #include -ed with the pcf8563.h.
Prior to #include -ing the pcf8563.h file, you must declare which microcontroller port and port bits areused for communication with the PCF8563 through the I
2C bus.
Example:
/* the I2C bus is connected to PORTB *//* the SDA signal is bit 3 *//* the SCL signal is bit 4 */#asm
.equ __i2c_port=0x18
.equ __sda_bit=3
.equ __scl_bit=4
#endasm
/* now you can include the PCF8563 Functions */#include <pcf8563.h>
The PCF8563 Functions are:
void rtc_init(unsigned char ctrl2, unsigned char clkout, unsigned char timer_ctrl)
this function initializes the PCF8563 chip.Before calling this function the I
2C bus must be initialized by calling the i2c_init function.
This is the first function that must be called prior to using the other PCF8563 Functions.Only one PCF8583 chip can be connected to the I
2C bus.
The ctrl2 parameter specifies the initialization value for the PCF8563 Control/Status 2 register.The pcf8563.h header file defines the following macros which allow the easy setting of the ctrl2 parameter:
• RTC_TIE_ON sets the Control/Status 2 register bit TIE to 1
• RTC_AIE_ON sets the Control/Status 2 register bit AIE to 1
• RTC_TP_ON sets the Control/Status 2 register bit TI/TP to 1These macros can be combined using the | operator in order to set more bits to 1.
The clkout parameter specifies the initialization value for the PCF8563 CLKOUT Frequency register.The pcf8563.h header file defines the following macros which allow the easy setting of the clkout parameter:
• RTC_CLKOUT_OFF disables the generation of pulses on the PCF8563 CLKOUT output
• RTC_CLKOUT_1 generates 1Hz pulses on the PCF8563 CLKOUT output
• RTC_CLKOUT_32 generates 32Hz pulses on the PCF8563 CLKOUT output
• RTC_CLKOUT_1024 generates 1024Hz pulses on the PCF8563 CLKOUT output
• RTC_CLKOUT_32768 generates 32768Hz pulses on the PCF8563 CLKOUT output.
The timer_ctrl parameter specifies the initialization value for the PCF8563 Timer Control register.The pcf8563.h header file defines the following macros which allow the easy setting of the timer_ctrl parameter:
• RTC_TIMER_OFF disables the PCF8563 Timer countdown
• RTC_TIMER_CLK_1_60 sets the PCF8563 Timer countdown clock frequency to 1/60Hz
• RTC_TIMER_CLK_1 sets the PCF8563 Timer countdown clock frequency to 1Hz
• RTC_TIMER_CLK_64 sets the PCF8563 Timer countdown clock frequency to 64Hz
• RTC_TIMER_CLK_4096 sets the PCF8563 Timer countdown clock frequency to 4096Hz.Refer to the PCF8563 data sheet for more information.
© 1998-2003 HP InfoTech S.R.L. Page 130

7/22/2019 CodevisionAVR Manual Full
http://slidepdf.com/reader/full/codevisionavr-manual-full 132/200
CodeVisionAVR
unsigned char rtc_read(unsigned char address)
this function reads the byte stored in a PCF8563 register at address.
void rtc_write(unsigned char address, unsigned char data)
this function stores the byte data in the PCF8583 register at address.
unsigned char rtc_get_time(unsigned char *hour, unsigned char *min, unsigned char *sec)
this function returns the current time measured by the RTC .The *hour , *min and *sec pointers must point to the variables that must receive the values of hour,minutes and seconds.The function return the value 1 if the read values are correct.If the function returns 0 then the chip supply voltage has dropped below the Vlow value and the timevalues are incorrect.Example:
#asm.equ __i2c_port=0x18.equ __sda_bit=3.equ __scl_bit=4
#endasm
#include <pcf8563.h>
void main(void) unsigned char ok,h,m,s;
/* initialize the I2C bus */i2c_init();
/* initialize the RTC,Timer interrupt enabled,Alarm interrupt enabled,CLKOUT frequency=1HzTimer clock frequency=1Hz */
rtc_init(RTC_TIE_ON | RTC_AIE_ON,RTC_CLKOUT_1,RTC_TIMER_CLK_1);
/* read time from the RTC */ok=rtc_get_time(&h,&m,&s);
/* ........ */
void rtc_set_time(unsigned char hour, unsigned char min, unsigned char sec)
this function sets the current time of the RTC .The hour , min and sec parameters represent the values of hour, minutes and seconds.
void rtc_get_date(unsigned char *date, unsigned char *month, unsigned *year)
this function returns the current date measured by the RTC .The *date, *month and *year pointers must point to the variables that must receive the values of day,month and year.
void rtc_set_date(unsigned char date, unsigned char month, unsigned year)
this function sets the current date of the RTC .
© 1998-2003 HP InfoTech S.R.L. Page 131
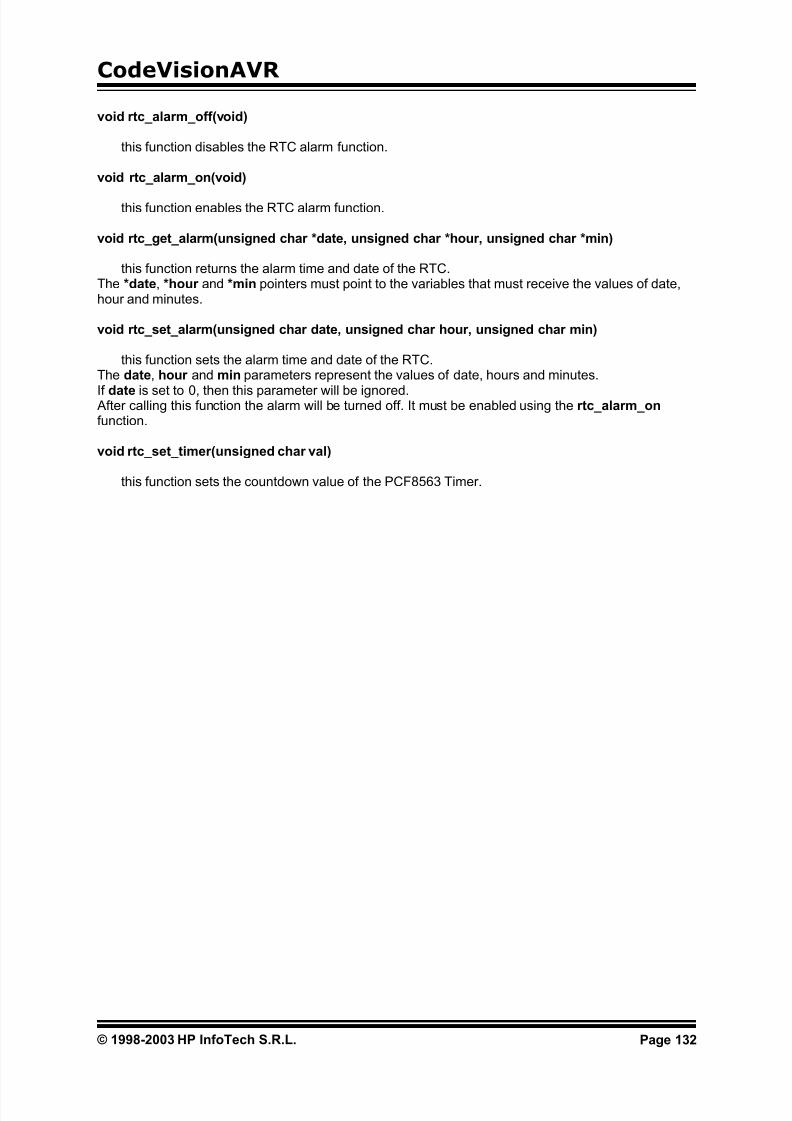
7/22/2019 CodevisionAVR Manual Full
http://slidepdf.com/reader/full/codevisionavr-manual-full 133/200
CodeVisionAVR
void rtc_alarm_off(void)
this function disables the RTC alarm function.
void rtc_alarm_on(void)
this function enables the RTC alarm function.
void rtc_get_alarm(unsigned char *date, unsigned char *hour, unsigned char *min)
this function returns the alarm time and date of the RTC.The *date, *hour and *min pointers must point to the variables that must receive the values of date,hour and minutes.
void rtc_set_alarm(unsigned char date, unsigned char hour, unsigned char min)
this function sets the alarm time and date of the RTC.The date, hour and min parameters represent the values of date, hours and minutes.
If date is set to 0, then this parameter will be ignored. After calling this function the alarm will be turned off. It must be enabled using the rtc_alarm_on function.
void rtc_set_timer(unsigned char val)
this function sets the countdown value of the PCF8563 Timer.
© 1998-2003 HP InfoTech S.R.L. Page 132

7/22/2019 CodevisionAVR Manual Full
http://slidepdf.com/reader/full/codevisionavr-manual-full 134/200
CodeVisionAVR
4.12.4 Philips PCF8583 Real Time Clock Functions
These functions are intended for easy interfacing between C programs and the PCF8583 I2C bus real
time clock (RTC).The prototypes for these functions are placed in the file pcf8583.h, located in the ..\INC subdirectory.This file must be #include -ed before using the functions.
The I2C bus functions prototypes are automatically #include -ed with the pcf8583.h.
Prior to #include -ing the pcf8583.h file, you must declare which microcontroller port and port bits areused for communication with the PCF8583 through the I
2C bus.
Example:
/* the I2C bus is connected to PORTB *//* the SDA signal is bit 3 *//* the SCL signal is bit 4 */#asm
.equ __i2c_port=0x18
.equ __sda_bit=3
.equ __scl_bit=4#endasm
/* now you can include the PCF8583 Functions */#include <pcf8583.h>
The PCF8583 Functions are:
void rtc_init(unsigned char chip, unsigned char dated_alarm)
this function initializes the PCF8583 chip.Before calling this function the I
2C bus must be initialized by calling the i2c_init function.
This is the first function that must be called prior to using the other PCF8583 Functions.
If more then one chip is connected to the I2
C bus, then the function must be called for each one,specifying accordingly the function parameter chip.Maximum 2 PCF8583 chips can be connected to the I
2C bus, their chip address can be 0 or 1.
The dated_alarm parameter specifies if the RTC alarm takes in account both the time and date(dated_alarm=1), or only the time (dated_alarm=0).Refer to the PCF8583 data sheet for more information. After calling this function the RTC alarm is disabled.
unsigned char rtc_read(unsigned char chip, unsigned char address)
this function reads the byte stored in the PCF8583 SRAM.
void rtc_write(unsigned char chip, unsigned char address, unsigned char data)
this function stores the byte data in the PCF8583 SRAM.When writing to the SRAM the user must take in account that locations at addresses 10h and 11h areused for storing the current year value.
unsigned char rtc_get_status(unsigned char chip)
this function returns the value of the PCF8583 control/status register.By calling this function the global variables __rtc_status and __rtc_alarm are automatically updated.The __rtc_status variable holds the value of the PCF8583 control/status register.The __rtc_alarm variable takes the value 1 if an RTC alarm occurred.
© 1998-2003 HP InfoTech S.R.L. Page 133

7/22/2019 CodevisionAVR Manual Full
http://slidepdf.com/reader/full/codevisionavr-manual-full 135/200
CodeVisionAVR
void rtc_get_time(unsigned char chip, unsigned char *hour, unsigned char *min,unsigned char *sec, unsigned char *hsec)
this function returns the current time measured by the RTC.The *hour , *min, *sec and *hsec pointers must point to the variables that must receive the values of
hour, minutes, seconds and hundreds of a second.Example:
#asm.equ __i2c_port=0x18.equ __sda_bit=3.equ __scl_bit=4
#endasm
#include <pcf8583.h>
void main(void) unsigned char h,m,s,hs;
/* initialize the I2C bus */i2c_init();
/* initialize the RTC 0,no dated alarm */
rtc_init(0,0);
/* read time from RTC 0*/rtc_get_time(0,&h,&m,&s,&hs);
/* ........ */
void rtc_set_time(unsigned char chip, unsigned char hour, unsigned char min, unsigned charsec, unsigned char hsec)
this function sets the current time of the RTC.The hour , min, sec and hsec parameters represent the values of hour, minutes, seconds andhundreds of a second.
void rtc_get_date(unsigned char chip, unsigned char *date, unsigned char *month, unsigned*year)
this function returns the current date measured by the RTC.The *date, *month and *year pointers must point to the variables that must receive the values of day,
month and year.
void rtc_set_date(unsigned char chip, unsigned char date, unsigned char month,unsigned year)
this function sets the current date of the RTC.
void rtc_alarm_off(unsigned char chip)
this function disables the RTC alarm function.
void rtc_alarm_on(unsigned char chip)
this function enables the RTC alarm function.
© 1998-2003 HP InfoTech S.R.L. Page 134

7/22/2019 CodevisionAVR Manual Full
http://slidepdf.com/reader/full/codevisionavr-manual-full 136/200
CodeVisionAVR
void rtc_get_alarm_time(unsigned char chip, unsigned char *hour, unsigned char *min,unsigned char *sec, unsigned char *hsec)
this function returns the alarm time of the RTC.The *hour , *min, *sec and *hsec pointers must point to the variables that must receive the values of
hours, minutes, seconds and hundreds of a second.
void rtc_set_alarm_time(unsigned char chip, unsigned char hour, unsigned char min, unsignedchar sec, unsigned char hsec)
this function sets the alarm time of the RTC.The hour , min, sec and hsec parameters represent the values of hours, minutes, seconds andhundreds of a second.
void rtc_get_alarm_date(unsigned char chip, unsigned char *date, unsigned char *month)
this function returns the alarm date of the RTC.The *day and *month pointers must point to the variables that must receive the values of date and
month.
void rtc_set_alarm_date(unsigned char chip, unsigned char date, unsigned char month)
this function sets the alarm date of the RTC.
© 1998-2003 HP InfoTech S.R.L. Page 135
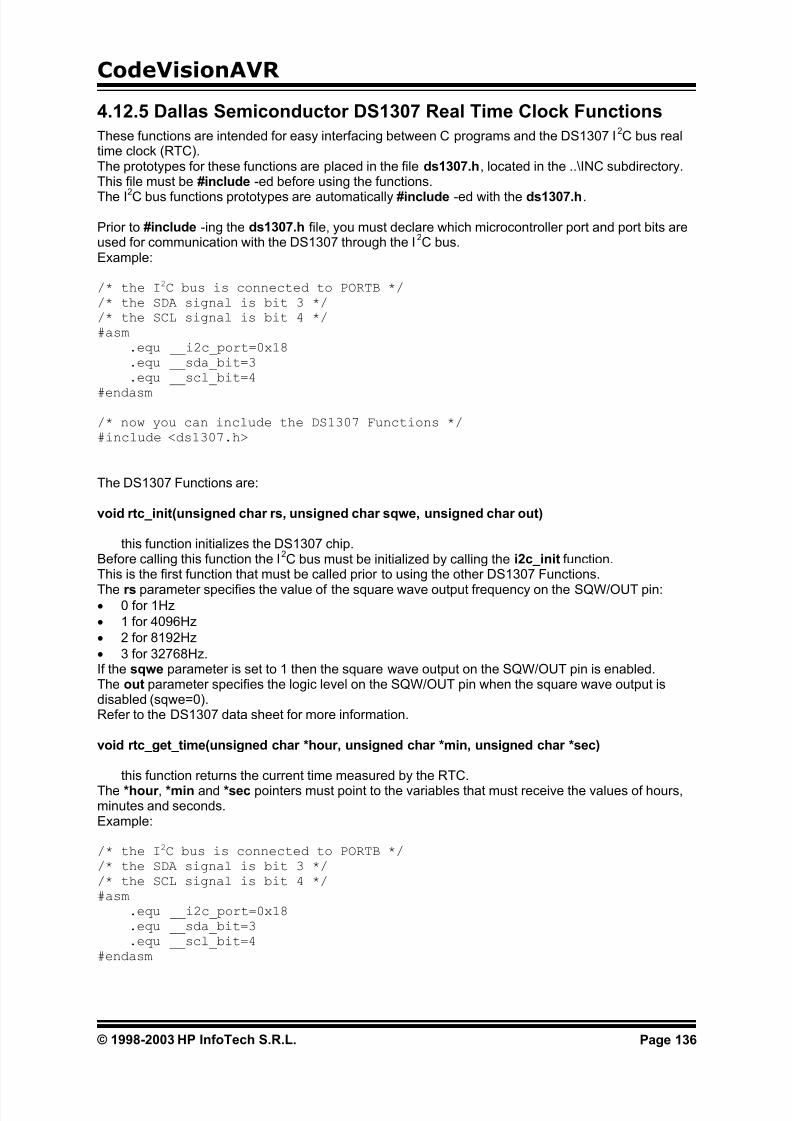
7/22/2019 CodevisionAVR Manual Full
http://slidepdf.com/reader/full/codevisionavr-manual-full 137/200
CodeVisionAVR
4.12.5 Dallas Semiconductor DS1307 Real Time Clock Functions
These functions are intended for easy interfacing between C programs and the DS1307 I2C bus real
time clock (RTC).The prototypes for these functions are placed in the file ds1307.h, located in the ..\INC subdirectory.This file must be #include -ed before using the functions.
The I2C bus functions prototypes are automatically #include -ed with the ds1307.h.
Prior to #include -ing the ds1307.h file, you must declare which microcontroller port and port bits areused for communication with the DS1307 through the I
2C bus.
Example:
/* the I2C bus is connected to PORTB *//* the SDA signal is bit 3 *//* the SCL signal is bit 4 */#asm
.equ __i2c_port=0x18
.equ __sda_bit=3
.equ __scl_bit=4
#endasm
/* now you can include the DS1307 Functions */#include <ds1307.h>
The DS1307 Functions are:
void rtc_init(unsigned char rs, unsigned char sqwe, unsigned char out)
•
•
•
•
this function initializes the DS1307 chip.Before calling this function the I
2C bus must be initialized by calling the i2c_init function.
This is the first function that must be called prior to using the other DS1307 Functions.
The rs parameter specifies the value of the square wave output frequency on the SQW/OUT pin:0 for 1Hz
1 for 4096Hz
2 for 8192Hz
3 for 32768Hz.If the sqwe parameter is set to 1 then the square wave output on the SQW/OUT pin is enabled.The out parameter specifies the logic level on the SQW/OUT pin when the square wave output isdisabled (sqwe=0).Refer to the DS1307 data sheet for more information.
void rtc_get_time(unsigned char *hour, unsigned char *min, unsigned char *sec)
this function returns the current time measured by the RTC.The *hour , *min and *sec pointers must point to the variables that must receive the values of hours,minutes and seconds.Example:
/* the I2C bus is connected to PORTB *//* the SDA signal is bit 3 *//* the SCL signal is bit 4 */#asm
.equ __i2c_port=0x18
.equ __sda_bit=3
.equ __scl_bit=4#endasm
© 1998-2003 HP InfoTech S.R.L. Page 136

7/22/2019 CodevisionAVR Manual Full
http://slidepdf.com/reader/full/codevisionavr-manual-full 138/200
CodeVisionAVR
#include <ds1307.h>
void main(void) unsigned char h,m,s;
/* initialize the I2
C bus */i2c_init();
/* initialize the DS1307 RTC */rtc_init(0,0,0);
/* read time from the DS1307 RTC */rtc_get_time(&h,&m,&s);
/* ........ */
void rtc_set_time(unsigned char hour, unsigned char min, unsigned char sec)
this function sets the current time of the RTC.The hour , min and sec parameters represent the values of hour, minutes and seconds.
void rtc_get_date(unsigned char *date, unsigned char *month, unsigned char *year)
this function returns the current date measured by the RTC.The *date, *month and *year pointers must point to the variables that must receive the values of date,month and year.
void rtc_set_date(unsigned char date, unsigned char month, unsigned char year)
this function sets the current date of the RTC.
© 1998-2003 HP InfoTech S.R.L. Page 137
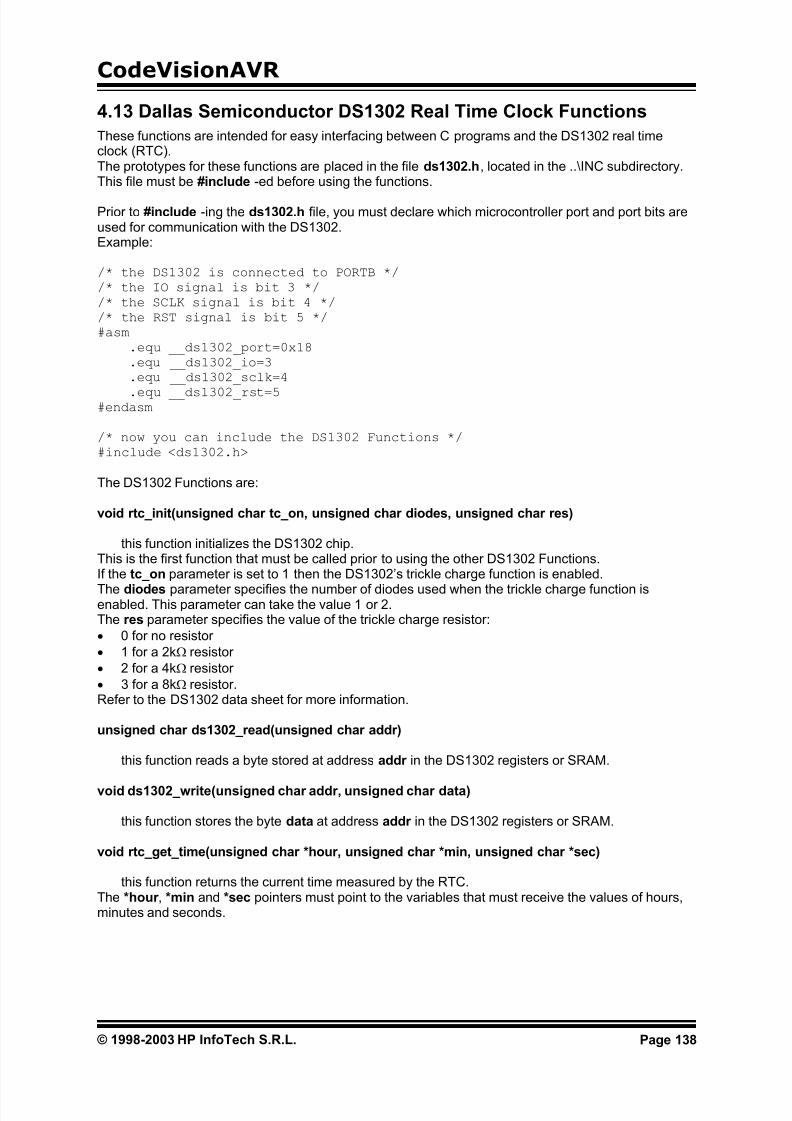
7/22/2019 CodevisionAVR Manual Full
http://slidepdf.com/reader/full/codevisionavr-manual-full 139/200
CodeVisionAVR
4.13 Dallas Semiconductor DS1302 Real Time Clock Functions
These functions are intended for easy interfacing between C programs and the DS1302 real timeclock (RTC).The prototypes for these functions are placed in the file ds1302.h, located in the ..\INC subdirectory.This file must be #include -ed before using the functions.
Prior to #include -ing the ds1302.h file, you must declare which microcontroller port and port bits areused for communication with the DS1302.Example:
/* the DS1302 is connected to PORTB *//* the IO signal is bit 3 *//* the SCLK signal is bit 4 *//* the RST signal is bit 5 */#asm
.equ __ds1302_port=0x18
.equ __ds1302_io=3
.equ __ds1302_sclk=4
.equ __ds1302_rst=5#endasm
/* now you can include the DS1302 Functions */#include <ds1302.h>
The DS1302 Functions are:
void rtc_init(unsigned char tc_on, unsigned char diodes, unsigned char res)
•
•
•
•
this function initializes the DS1302 chip.This is the first function that must be called prior to using the other DS1302 Functions.If the tc_on parameter is set to 1 then the DS1302’s trickle charge function is enabled.
The diodes parameter specifies the number of diodes used when the trickle charge function isenabled. This parameter can take the value 1 or 2.The res parameter specifies the value of the trickle charge resistor:
0 for no resistor
1 for a 2kΩ resistor
2 for a 4kΩ resistor
3 for a 8kΩ resistor.Refer to the DS1302 data sheet for more information.
unsigned char ds1302_read(unsigned char addr)
this function reads a byte stored at address addr in the DS1302 registers or SRAM.
void ds1302_write(unsigned char addr, unsigned char data)
this function stores the byte data at address addr in the DS1302 registers or SRAM.
void rtc_get_time(unsigned char *hour, unsigned char *min, unsigned char *sec)
this function returns the current time measured by the RTC.The *hour , *min and *sec pointers must point to the variables that must receive the values of hours,minutes and seconds.
© 1998-2003 HP InfoTech S.R.L. Page 138

7/22/2019 CodevisionAVR Manual Full
http://slidepdf.com/reader/full/codevisionavr-manual-full 140/200
CodeVisionAVR
Example:
#asm.equ __ds1302_port=0x18.equ __ds1302_io=3
.equ __ds1302_sclk=4.equ __ds1302_rst=5#endasm
#include <ds1302.h>
void main(void) unsigned char h,m,s;
/* initialize the DS1302 RTC:use trickle charge,with 1 diode and 8K resistor */
rtc_init(1,1,3);
/* read time from the DS1302 RTC */rtc_get_time(&h,&m,&s);
/* ........ */
void rtc_set_time(unsigned char hour, unsigned char min, unsigned char sec)
this function sets the current time of the RTC.The hour , min and sec parameters represent the values of hour, minutes and seconds.
void rtc_get_date(unsigned char *date, unsigned char *month, unsigned char *year)
this function returns the current date measured by the RTC.The *date, *month and *year pointers must point to the variables that must receive the values of date,month and year.
void rtc_set_date(unsigned char date, unsigned char month, unsigned char year)
this function sets the current date of the RTC.
© 1998-2003 HP InfoTech S.R.L. Page 139
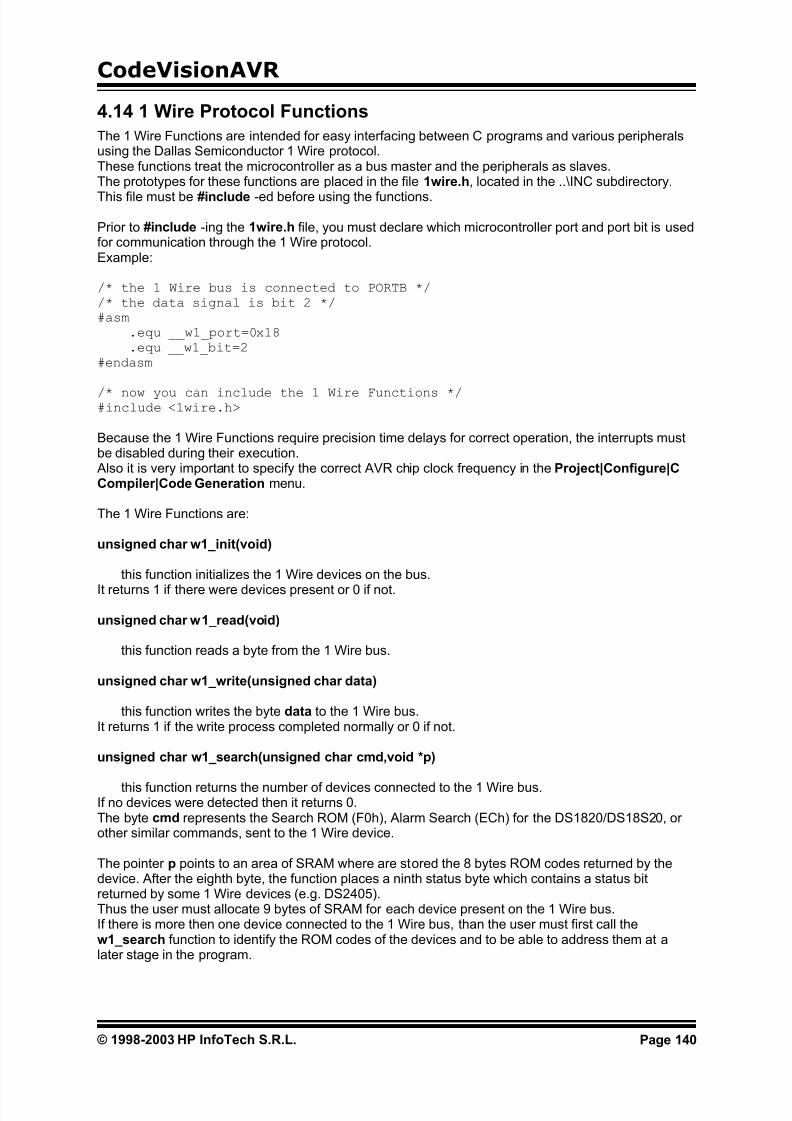
7/22/2019 CodevisionAVR Manual Full
http://slidepdf.com/reader/full/codevisionavr-manual-full 141/200
CodeVisionAVR
4.14 1 Wire Protocol Functions
The 1 Wire Functions are intended for easy interfacing between C programs and various peripheralsusing the Dallas Semiconductor 1 Wire protocol.These functions treat the microcontroller as a bus master and the peripherals as slaves.The prototypes for these functions are placed in the file 1wire.h, located in the ..\INC subdirectory.
This file must be #include -ed before using the functions.
Prior to #include -ing the 1wire.h file, you must declare which microcontroller port and port bit is usedfor communication through the 1 Wire protocol.Example:
/* the 1 Wire bus is connected to PORTB *//* the data signal is bit 2 */#asm
.equ __w1_port=0x18
.equ __w1_bit=2#endasm
/* now you can include the 1 Wire Functions */#include <1wire.h>
Because the 1 Wire Functions require precision time delays for correct operation, the interrupts mustbe disabled during their execution. Also it is very important to specify the correct AVR chip clock frequency in the Project|Configure|CCompiler|Code Generation menu.
The 1 Wire Functions are:
unsigned char w1_init(void)
this function initializes the 1 Wire devices on the bus.
It returns 1 if there were devices present or 0 if not.
unsigned char w1_read(void)
this function reads a byte from the 1 Wire bus.
unsigned char w1_write(unsigned char data)
this function writes the byte data to the 1 Wire bus.It returns 1 if the write process completed normally or 0 if not.
unsigned char w1_search(unsigned char cmd,void *p)
this function returns the number of devices connected to the 1 Wire bus.If no devices were detected then it returns 0.The byte cmd represents the Search ROM (F0h), Alarm Search (ECh) for the DS1820/DS18S20, orother similar commands, sent to the 1 Wire device.
The pointer p points to an area of SRAM where are stored the 8 bytes ROM codes returned by thedevice. After the eighth byte, the function places a ninth status byte which contains a status bitreturned by some 1 Wire devices (e.g. DS2405).Thus the user must allocate 9 bytes of SRAM for each device present on the 1 Wire bus.If there is more then one device connected to the 1 Wire bus, than the user must first call thew1_search function to identify the ROM codes of the devices and to be able to address them at alater stage in the program.
© 1998-2003 HP InfoTech S.R.L. Page 140

7/22/2019 CodevisionAVR Manual Full
http://slidepdf.com/reader/full/codevisionavr-manual-full 142/200
CodeVisionAVR
Example:
#include <90s8515.h>
/* specify the port and bit used for the 1 Wire bus */
#asm.equ __w1_port=0x18 ;PORTB.equ __w1_bit=2
#endasm
/* include the 1 Wire bus functions prototypes */#include <1wire.h>
/* include the printf function prototype */#include <stdio.h>
/* specify the maximum number of devices connectedto the 1 Wire bus */
#define MAX_DEVICES 8
/* allocate SRAM space for the ROM codes & status bit */unsigned char rom_codes[MAX_DEVICES,9];
/* quartz crystal frequency [Hz] */#define xtal 4000000L
/* Baud rate */#define baud 9600
void main(void) unsigned char i,j,devices;
/* initialize the UART's baud rate */UBRR=xtal/16/baud-1;
/* initialize the UART control registerTX enabled, no interrupts, 8 data bits */
UCR=8;
/* detect how many DS1820/DS18S20 devicesare connected to the bus andstore their ROM codes in the rom_codes array */
devices=w1_search(0xf0,rom_codes);
/* display the ROM codes for each detected device */printf("%-u DEVICE(S) DETECTED\n\r",devices);if (devices)
for (i=0;i<devices;i++) printf("DEVICE #%-u ROM CODE IS:", i+1);for (j=0;j<8;j++) printf("%-X ",rom_codes[i,j]);printf("\n\r");;
;
while (1); /* loop forever */
© 1998-2003 HP InfoTech S.R.L. Page 141
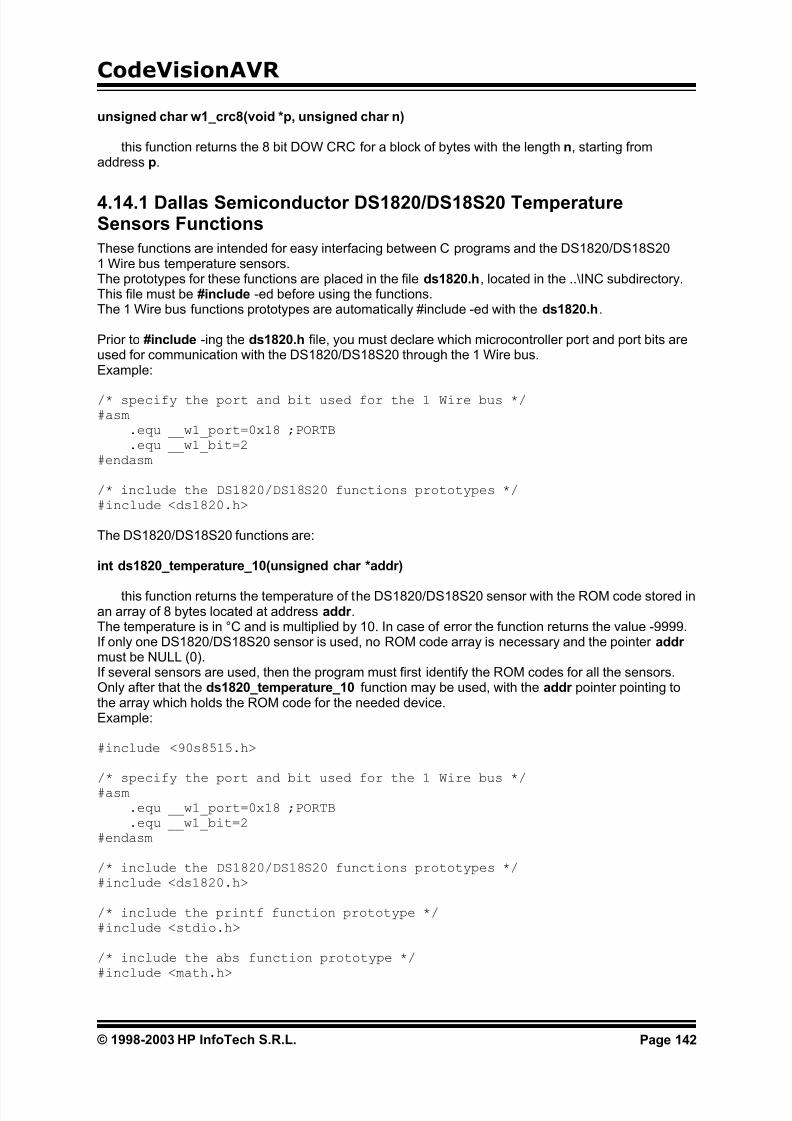
7/22/2019 CodevisionAVR Manual Full
http://slidepdf.com/reader/full/codevisionavr-manual-full 143/200
CodeVisionAVR
unsigned char w1_crc8(void *p, unsigned char n)
this function returns the 8 bit DOW CRC for a block of bytes with the length n, starting fromaddress p.
4.14.1 Dallas Semiconductor DS1820/DS18S20 TemperatureSensors Functions
These functions are intended for easy interfacing between C programs and the DS1820/DS18S201 Wire bus temperature sensors.The prototypes for these functions are placed in the file ds1820.h, located in the ..\INC subdirectory.This file must be #include -ed before using the functions.The 1 Wire bus functions prototypes are automatically #include -ed with the ds1820.h.
Prior to #include -ing the ds1820.h file, you must declare which microcontroller port and port bits areused for communication with the DS1820/DS18S20 through the 1 Wire bus.Example:
/* specify the port and bit used for the 1 Wire bus */ #asm
.equ __w1_port=0x18 ;PORTB
.equ __w1_bit=2#endasm
/* include the DS1820/DS18S20 functions prototypes */#include <ds1820.h>
The DS1820/DS18S20 functions are:
int ds1820_temperature_10(unsigned char *addr)
this function returns the temperature of the DS1820/DS18S20 sensor with the ROM code stored inan array of 8 bytes located at address addr .The temperature is in °C and is multiplied by 10. In case of error the function returns the value -9999.If only one DS1820/DS18S20 sensor is used, no ROM code array is necessary and the pointer addr must be NULL (0).If several sensors are used, then the program must first identify the ROM codes for all the sensors.Only after that the ds1820_temperature_10 function may be used, with the addr pointer pointing tothe array which holds the ROM code for the needed device.Example:
#include <90s8515.h>
/* specify the port and bit used for the 1 Wire bus */ #asm
.equ __w1_port=0x18 ;PORTB
.equ __w1_bit=2#endasm
/* include the DS1820/DS18S20 functions prototypes */#include <ds1820.h>
/* include the printf function prototype */#include <stdio.h>
/* include the abs function prototype */#include <math.h>
© 1998-2003 HP InfoTech S.R.L. Page 142

7/22/2019 CodevisionAVR Manual Full
http://slidepdf.com/reader/full/codevisionavr-manual-full 144/200
CodeVisionAVR
/* maximum number of DS1820/DS18S20 connected to the bus */#define MAX_DEVICES 8
/* DS1820/DS18S20 devices ROM code storage area,9 bytes are used for each device
(see the w1_search function description),but only the first 8 bytes contain the ROM codeand CRC */
unsigned char rom_codes[MAX_DEVICES][9];
main()unsigned char i,j,devices;int temp;
/* initialize the UART's baud rate */UBRR=xtal/16/baud-1;
/* initialize the UART control registerTX enabled, no interrupts, 8 data bits */UCR=8;
/* detect how many DS1820/DS18S20 devicesare connected to the bus andstore their ROM codes in the rom_codes array */
devices=w1_search(0xf0,rom_codes);
/* display the number */printf("%-u DEVICE(S) DETECTED\n\r",devices);
/* if no devices were detected then halt */if (devices==0) while (1); /* loop forever */
/* measure and display the temperature(s) */while (1)
for (i=0;i<devices;)
temp=ds1820_temperature_10(&rom_codes[i][0]);printf("t%-u=%-i.%-u\xf8C\n\r",++i,temp/10,abs(temp%10));;
;
unsigned char ds1820_set_alarm(unsigned char *addr,signed char temp_low,signed char temp_high)
this function sets the low (temp_low) and high (temp_high) temperature alarms of theDS1820/DS18S20.In case of success the function returns the value 1, else it returns 0.The alarm temperatures are stored in both the DS1820/DS18S20's scratchpad SRAM and itsEEPROM.The ROM code needed to address the device is stored in an array of 8 bytes located at address addr .If only one DS1820/DS18S20 sensor is used, no ROM code array is necessary and the pointer addr must be NULL (0).
© 1998-2003 HP InfoTech S.R.L. Page 143

7/22/2019 CodevisionAVR Manual Full
http://slidepdf.com/reader/full/codevisionavr-manual-full 145/200
CodeVisionAVR
The alarm status for all the DS1820/DS18S20 devices on the 1 Wire bus can be determined by callingthe w1_search function with the Alarm Search (ECh) command.Example:
#include <90s8515.h>
/* specify the port and bit used for the 1 Wire bus */ #asm
.equ __w1_port=0x18 ;PORTB
.equ __w1_bit=2#endasm
/* include the DS1820/DS18S20 functions prototypes */#include <ds1820.h>
/* include the printf function prototype */#include <stdio.h>
/* include the abs function prototype */#include <math.h>
/* maximum number of DS1820/DS18S20 connected to the bus */#define MAX_DEVICES 8
/* DS1820/DS18S20 devices ROM code storage area,9 bytes are used for each device(see the w1_search function description),but only the first 8 bytes contain the ROM codeand CRC */
unsigned char rom_codes[MAX_DEVICES][9];
/* allocate space for ROM codes of the deviceswhich generate an alarm */
unsigned char alarm_rom_codes[MAX_DEVICES][9];
main()unsigned char i,j,devices;int temp;
/* initialize the UART's baud rate */UBRR=xtal/16/baud-1;
/* initialize the UART control registerTX enabled, no interrupts, 8 data bits */
UCR=8;
/* detect how many DS1820/DS18S20 devicesare connected to the bus andstore their ROM codes in the rom_codes array */
devices=w1_search(0xf0,rom_codes);
/* display the number */printf("%-u DEVICE(S) DETECTED\n\r",devices);
/* if no devices were detected then halt */if (devices==0) while (1); /* loop forever */
© 1998-2003 HP InfoTech S.R.L. Page 144

7/22/2019 CodevisionAVR Manual Full
http://slidepdf.com/reader/full/codevisionavr-manual-full 146/200
CodeVisionAVR
/* set the temperature alarms for all the devicestemp_low=25°C temp_high=35°C */
for (i=0;i<devices;i++)printf("INITIALIZING DEVICE #%-u ", i+1);
if (ds1820_set_alarm(&rom_codes[i][0],25,35))putsf("OK"); else putsf("ERROR");;
while (1)/* measure and display the temperature */for (i=0;i<devices;)
temp=ds1820_temperature_10(&rom_codes[i][0]);printf("t%-u=%-i.%-u\xf8C\n\r",++i,temp/10,abs(temp%10));;
/* display the number of devices whichgenerated an alarm */
printf("ALARM GENERATED BY %-u DEVICE(S)\n\r",w1_search(0xec,alarm_rom_codes));;
Refer to the DS1820/DS18S20 data sheet for more information.
© 1998-2003 HP InfoTech S.R.L. Page 145

7/22/2019 CodevisionAVR Manual Full
http://slidepdf.com/reader/full/codevisionavr-manual-full 147/200
CodeVisionAVR
4.14.2 Dallas Semiconductor DS2430 EEPROM Functions
These functions are intended for easy interfacing between C programs and the DS2430 1 Wire busEEPROM.The prototypes for these functions are placed in the file ds2430.h, located in the ..\INC subdirectory.
This file must be #include -ed before using the functions.The 1 Wire bus functions prototypes are automatically #include -ed with the ds2430.h.
Prior to #include -ing the ds2430.h file, you must declare which microcontroller port and port bits areused for communication with the DS2430 through the 1 Wire bus.Example:
/* specify the port and bit used for the 1 Wire bus */ #asm
.equ __w1_port=0x18 ;PORTB
.equ __w1_bit=2#endasm
/* include the DS2430 functions prototypes */#include <ds2430.h>
The DS2430 functions are:
unsigned char ds2430_read_block(unsigned char *romcode,unsigned char *dest,unsigned char addr,unsigned char size);
this function reads a block of size bytes starting from the DS2430 EEPROM memory addressaddr and stores it in the string dest located in SRAM.It returns 1 if successful, 0 if not.The DS2430 device is selected using it's ROM code stored in an array of 8 bytes located at addressromcode.
unsigned char ds2430_read(unsigned char *romcode,unsigned char addr,unsigned char *data);
this function reads a byte from the DS2430 EEPROM memory address addr and stores it in theSRAM memory location pointed by data.It returns 1 if successful, 0 if not.The DS2430 device is selected using it's ROM code stored in an array of 8 bytes located at addressromcode.
unsigned char ds2430_write_block(unsigned char *romcode,unsigned char *source,unsigned char addr,unsigned char size);
this function writes a block of size bytes, from the string source, located in SRAM, in the DS2430EEPROM starting from memory address addr .It returns 1 if successful, 0 if not.The DS2430 device is selected using it's ROM code stored in an array of 8 bytes located at addressromcode.
unsigned char ds2430_write(unsigned char *romcode,unsigned char addr,unsigned char data);
this function writes the byte data at DS2430 EEPROM memory address addr .It returns 1 if successful, 0 if not.The DS2430 device is selected using it's ROM code stored in an array of 8 bytes located at addressromcode.
© 1998-2003 HP InfoTech S.R.L. Page 146

7/22/2019 CodevisionAVR Manual Full
http://slidepdf.com/reader/full/codevisionavr-manual-full 148/200
CodeVisionAVR
unsigned char ds2430_read_appreg_block(unsigned char *romcode,unsigned char *dest,unsigned char addr,unsigned char size);
this function reads a block of size bytes starting from the DS2430 application register addressaddr and stores it in the string dest located in SRAM.
It returns 1 if successful, 0 if not.The DS2430 device is selected using it's ROM code stored in an array of 8 bytes located at addressromcode.
unsigned char ds2430_write_appreg_block(unsigned char *romcode,unsigned char *source,unsigned char addr,unsigned char size);
this function reads a block of size bytes starting from the DS2430 application register addressaddr and stores it in the string dest located in SRAM.It returns 1 if successful, 0 if not.The DS2430 device is selected using it's ROM code stored in an array of 8 bytes located at addressromcode.
If only one DS2430 EEPROM is used, no ROM code array is necessary and the pointer romcode must be NULL (0).If several 1 Wire device are used, then the program must first identify the ROM codes for all thedevices. Only after that the DS2430 functions may be used, with the romcode pointer pointing to thearray which holds the ROM code for the needed device.Example:
/* specify the port and bit used for the 1 Wire bus
The DS2430 devices are connected tobit 6 of PORTA of the AT90S8515 as follows:
[DS2430] [STK200 PORTA HEADER]
1 GND - 9 GND2 DATA - 7 PA6
All the devices must be connected in parallel
AN 4.7k PULLUP RESISTOR MUST BE CONNECTEDBETWEEN DATA (PA6) AND +5V !
*/#asm
.equ __w1_port=0x1b
.equ __w1_bit=6#endasm
// test the DS2430 functions#include <ds2430.h>#include <90s8515.h>#include <stdio.h>
/* DS2430 devices ROM code storage area,9 bytes are used for each device(see the w1_search function description),but only the first 8 bytes contain the ROM codeand CRC */
#define MAX_DEVICES 8unsigned char rom_code[MAX_DEVICES][9];
© 1998-2003 HP InfoTech S.R.L. Page 147

7/22/2019 CodevisionAVR Manual Full
http://slidepdf.com/reader/full/codevisionavr-manual-full 149/200
CodeVisionAVR
char text[]="Hello world!";char buffer[32];#define START_ADDR 2
main()
unsigned char i,devices;// init UARTUCR=8;UBRR=25; // Baud=9600 @ 4MHz
// detect how many 1 Wire devices are present on the busdevices=w1_search(0xF0,&rom_code[0][0]);printf("%-u 1 Wire devices found\n\r",devices);for (i=0;i<devices;i++)
// make sure to select only the DS2430 types// 0x14 is the DS2430 family codeif (rom_code[i][0]==DS2430_FAMILY_CODE)
printf("\n\r");// write text in each DS2430 at START_ADDRif (ds2430_write_block(&rom_code[i][0],
text,START_ADDR,sizeof(text)))printf("Data written OK in DS2430 #%-u!\n\r",i+1);// display the text written in each DS2430if (ds2430_read_block(&rom_code[i][0],buffer,START_ADDR,
sizeof(text)))printf("Data read OK!\n\rDS2430 #%-u text: %s\n\r",i+1,buffer);
else printf("Error reading data from DS2430 #%-u!\n\r",i+1);
else printf("Error writing data to DS2430 #%-u!\n\r",i+1);;// stop
while (1);
Refer to the DS2430 data sheet for more information.
© 1998-2003 HP InfoTech S.R.L. Page 148

7/22/2019 CodevisionAVR Manual Full
http://slidepdf.com/reader/full/codevisionavr-manual-full 150/200
CodeVisionAVR
4.14.3 Dallas Semiconductor DS2433 EEPROM Functions
These functions are intended for easy interfacing between C programs and the DS2433 1 Wire busEEPROM.The prototypes for these functions are placed in the file ds2433.h, located in the ..\INC subdirectory.
This file must be #include -ed before using the functions.The 1 Wire bus functions prototypes are automatically #include -ed with the ds2433.h.
Prior to #include -ing the ds2433.h file, you must declare which microcontroller port and port bits areused for communication with the DS2433 through the 1 Wire bus.Example:
/* specify the port and bit used for the 1 Wire bus */ #asm
.equ __w1_port=0x18 ;PORTB
.equ __w1_bit=2#endasm
/* include the DS2433 functions prototypes */#include <ds2433.h>
The DS2433 functions are:
unsigned char ds2433_read_block(unsigned char *romcode,unsigned char *dest,unsigned int addr,unsigned int size);
this function reads a block of size bytes starting from the DS2433 EEPROM memory addressaddr and stores it in the string dest located in SRAM.It returns 1 if successful, 0 if not.The DS2433 device is selected using it's ROM code stored in an array of 8 bytes located at addressromcode.
unsigned char ds2433_read(unsigned char *romcode,unsigned int addr,unsigned char *data);
this function reads a byte from the DS2433 EEPROM memory address addr and stores it in theSRAM memory location pointed by data.It returns 1 if successful, 0 if not.The DS2433 device is selected using it's ROM code stored in an array of 8 bytes located at addressromcode.
unsigned char ds2433_write_block(unsigned char *romcode,unsigned char *source,unsigned int addr,unsigned int size);
this function writes a block of size bytes, from the string source, located in SRAM, in the DS2433EEPROM starting from memory address addr .It returns 1 if successful, 0 if not.The DS2433 device is selected using it's ROM code stored in an array of 8 bytes located at addressromcode.
unsigned char ds2433_write(unsigned char *romcode,unsigned int addr,unsigned char data);
this function writes the byte data at DS2433 EEPROM memory address addr .It returns 1 if successful, 0 if not.The DS2433 device is selected using it's ROM code stored in an array of 8 bytes located at addressromcode.
© 1998-2003 HP InfoTech S.R.L. Page 149

7/22/2019 CodevisionAVR Manual Full
http://slidepdf.com/reader/full/codevisionavr-manual-full 151/200
CodeVisionAVR
If only one DS2433 EEPROM is used, no ROM code array is necessary and the pointer romcode must be NULL (0).If several 1 Wire device are used, then the program must first identify the ROM codes for all thedevices. Only after that the DS2433 functions may be used, with the romcode pointer pointing to thearray which holds the ROM code for the needed device.
Example:
/* specify the port and bit used for the 1 Wire bus
The DS2433 devices are connected tobit 6 of PORTA of the AT90S8515 as follows:
[DS2433] [STK200 PORTA HEADER]1 GND - 9 GND2 DATA - 7 PA6
All the devices must be connected in parallel
AN 4.7k PULLUP RESISTOR MUST BE CONNECTEDBETWEEN DATA (PA6) AND +5V !*/#asm
.equ __w1_port=0x1b
.equ __w1_bit=6#endasm
// test the DS2433 functions#include <ds2433.h>#include <90s8515.h>#include <stdio.h>
/* DS2433 devices ROM code storage area,9 bytes are used for each device(see the w1_search function description),but only the first 8 bytes contain the ROM codeand CRC */
#define MAX_DEVICES 8unsigned char rom_code[MAX_DEVICES][9];
char text[]="This is a long text to \be able to test writing across the \scratchpad boundary";char buffer[100];#define START_ADDR 2
main() unsigned char i,devices;// init UARTUCR=8;UBRR=25; // Baud=9600 @ 4MHz
// detect how many 1 Wire devices are present on the busdevices=w1_search(0xF0,&rom_code[0][0]);printf("%-u 1 Wire devices found\n\r",devices);
© 1998-2003 HP InfoTech S.R.L. Page 150

7/22/2019 CodevisionAVR Manual Full
http://slidepdf.com/reader/full/codevisionavr-manual-full 152/200
CodeVisionAVR
for (i=0;i<devices;i++)// make sure to select only the DS2433 types// 0x23 is the DS2433 family codeif (rom_code[i][0]==DS2433_FAMILY_CODE)
printf("\n\r");// write text in each DS2433 at START_ADDRif (ds2433_write_block(&rom_code[i][0],
text,START_ADDR,sizeof(text)))printf("Data written OK in DS2433 #%-u!\n\r",i+1);// display the text written in each DS2433if (ds2433_read_block(&rom_code[i][0],buffer,START_ADDR,
sizeof(text)))printf("Data read OK!\n\rDS2433 #%-u text: %s\n\r",i+1,buffer);
else printf("Error reading data from DS2433 #%-u!\n\r",i+1);
else printf("Error writing data to DS2433 #%-u!\n\r",i+1);;// stopwhile (1);
Refer to the DS2433 data sheet for more information.
© 1998-2003 HP InfoTech S.R.L. Page 151

7/22/2019 CodevisionAVR Manual Full
http://slidepdf.com/reader/full/codevisionavr-manual-full 153/200
CodeVisionAVR
4.15 SPI Functions
The SPI Functions are intended for easy interfacing between C programs and various peripheralsusing the SPI bus.The prototypes for these functions are placed in the file spi.h, located in the ..\INC subdirectory. Thisfile must be #include -ed before using the functions.
The SPI functions are:
unsigned char spi(unsigned char data)
this function sends the byte data, simultaneously receiving a byte.
Prior to using the spi function, you must configure the SPI Control Register SPCR according to the Atmel Data Sheets.Because the spi function uses polling for SPI communication, there is no need to set the SPI InterruptEnable Bit SPIE.
Example of using the spi function for interfacing to an AD7896 ADC:
/*Digital voltmeter using anAnalog Devices AD7896 ADCconnected to an AT90S8515using the SPI bus
Chip: AT90S8515Memory Model: SMALLData Stack Size: 128 bytesClock frequency: 4MHz
AD7896 connections to the AT90S8515
[AD7896] [AT9S8515 DIP40]1 Vin2 Vref=5V3 AGND - 20 GND4 SCLK - 8 SCK5 SDATA - 7 MISO6 DGND - 20 GND7 CONVST- 2 PB18 BUSY - 1 PB0
Use an 2x16 alphanumeric LCD connectedto PORTC as follows:
[LCD] [AT90S8515 DIP40]1 GND- 20 GND2 +5V- 40 VCC3 VLC4 RS - 21 PC05 RD - 22 PC16 EN - 23 PC211 D4 - 25 PC412 D5 - 26 PC513 D6 - 27 PC614 D7 - 28 PC7 */
© 1998-2003 HP InfoTech S.R.L. Page 152

7/22/2019 CodevisionAVR Manual Full
http://slidepdf.com/reader/full/codevisionavr-manual-full 154/200
CodeVisionAVR
#asm.equ __lcd_port=0x15
#endasm
#include <lcd.h> // LCD driver routines
#include <spi.h> // SPI driver routine#include <90s8515.h>#include <stdio.h>#include <delay.h>
// AD7896 reference voltage [mV]#define VREF 5000L
// AD7896 control signals PORTB bit allocation#define ADC_BUSY PINB.0#define NCONVST PORTB.1
// LCD display buffer
char lcd_buffer[33];
unsigned read_adc(void)unsigned result;// start conversion in mode 1// (high sampling performance)NCONVST=0;NCONVST=1;// wait for the conversion to completewhile (ADC_BUSY);// read the MSB using SPIresult=(unsigned) spi(0)<<8;// read the LSB using SPI and combine with MSBresult|=spi(0);// calculate the voltage in [mV]result=(unsigned) (((unsigned long) result*VREF)/4096L);// return the measured voltagereturn result; void main(void)// initialize PORTB// PB.0 input from AD7896 BUSY// PB.1 output to AD7896 /CONVST// PB.2 & PB.3 inputs
// PB.4 output (SPI /SS pin)// PB.5 input// PB.6 input (SPI MISO)// PB.7 output to AD7896 SCLKDDRB=0x92;// initialize the SPI in master mode// no interrupts, MSB first, clock phase negative// SCK low when idle, clock phase=0// SCK=fxtal/4SPCR=0x54;// the AD7896 will work in mode 1// (high sampling performance)// /CONVST=1, SCLK=0
© 1998-2003 HP InfoTech S.R.L. Page 153

7/22/2019 CodevisionAVR Manual Full
http://slidepdf.com/reader/full/codevisionavr-manual-full 155/200
CodeVisionAVR
PORTB=2;// initialize the LCDlcd_init(16);
lcd_putsf("AD7896 SPI bus\nVoltmeter");
delay_ms(2000);lcd_clear();
// read and display the ADC input voltagewhile (1)
sprintf(lcd_buffer,"Uadc=%4umV",read_adc());lcd_clear();lcd_puts(lcd_buffer);delay_ms(100);;
© 1998-2003 HP InfoTech S.R.L. Page 154

7/22/2019 CodevisionAVR Manual Full
http://slidepdf.com/reader/full/codevisionavr-manual-full 156/200
CodeVisionAVR
4.16 Power Management Functions
The Power Management Functions are intended for putting the AVR chip in one of its low powerconsumption modes.The prototypes for these functions are placed in the file sleep.h, located in the ..\INC subdirectory.This file must be #include -ed before using the functions.
The Power Management Functions are:
void sleep_enable(void)
this function enables entering the low power consumption modes.
void sleep_disable(void)
this function disables entering the low power consumption modes.It is used to disable accidental entering the low power consumption modes.
void idle(void)
this function puts the AVR chip in the idle mode.Prior to using this function, the sleep_enable function must be invoked to allow entering the lowpower consumption modes.In this mode the CPU is stopped, but the Timers/Counters, Watchdog and interrupt system continueoperating.The CPU can wake up from external triggered interrupts as well as internal ones.
void powerdown(void)
this function puts the AVR chip in the powerdown mode.Prior to using this function, the sleep_enable function must be invoked to allow entering the lowpower consumption modes.In this mode the external oscillator is stopped.
The AVR can wake up only from an external reset, Watchdog time-out or external level triggeredinterrupt.
void powersave(void)
this function puts the AVR chip in the powersave mode.Prior to using this function, the sleep_enable function must be invoked to allow entering the lowpower consumption modes.This mode is similar to the powerdown mode with some differences, please consult the Atmel DataSheet for the particular chip that you use.
void standby(void)
this function puts the AVR chip in the standby mode.Prior to using this function, the sleep_enable function must be invoked to allow entering the lowpower consumption modes.This mode is similar to the powerdown mode with the exception that the external clock oscillator keepson running.Consult the Atmel Data Sheet for the particular chip that you use, in order to see if the standby modeis available for it.
© 1998-2003 HP InfoTech S.R.L. Page 155

7/22/2019 CodevisionAVR Manual Full
http://slidepdf.com/reader/full/codevisionavr-manual-full 157/200
CodeVisionAVR
void extended_standby(void)
this function puts the AVR chip in the extended standby mode.Prior to using this function, the sleep_enable function must be invoked to allow entering the lowpower consumption modes.
This mode is similar to the powersave mode with the exception that the external clock oscillator keepson running.Consult the Atmel Data Sheet for the particular chip that you use, in order to see if the standby modeis available for it.
4.17 Delay Functions
These functions are intended for generating delays in C programs.The prototypes for these functions are placed in the file delay.h, located in the ..\INC subdirectory.This file must be #include -ed before using the functions.Before calling the functions the interrupts must be disabled, otherwise the delays will be much longerthen expected. Also it is very important to specify the correct AVR chip clock frequency in the Project|Configure|C
Compiler|Code Generation menu.
The functions are:
void delay_us(unsigned int n)
generates a delay of n µseconds. n must be a constant expression.
void delay_ms(unsigned int n)
generates a delay of n milliseconds.This function automatically resets the wtachdog timer every 1ms by generating the wdr instruction.
Example:
void main(void) /* disable interrupts */#asm("cli")
/* 100µs delay */delay_us(100);
/* ............. */
/* 10ms delay */delay_ms(10);
/* enable interrupts */#asm("sei")
/* ............. */
© 1998-2003 HP InfoTech S.R.L. Page 156
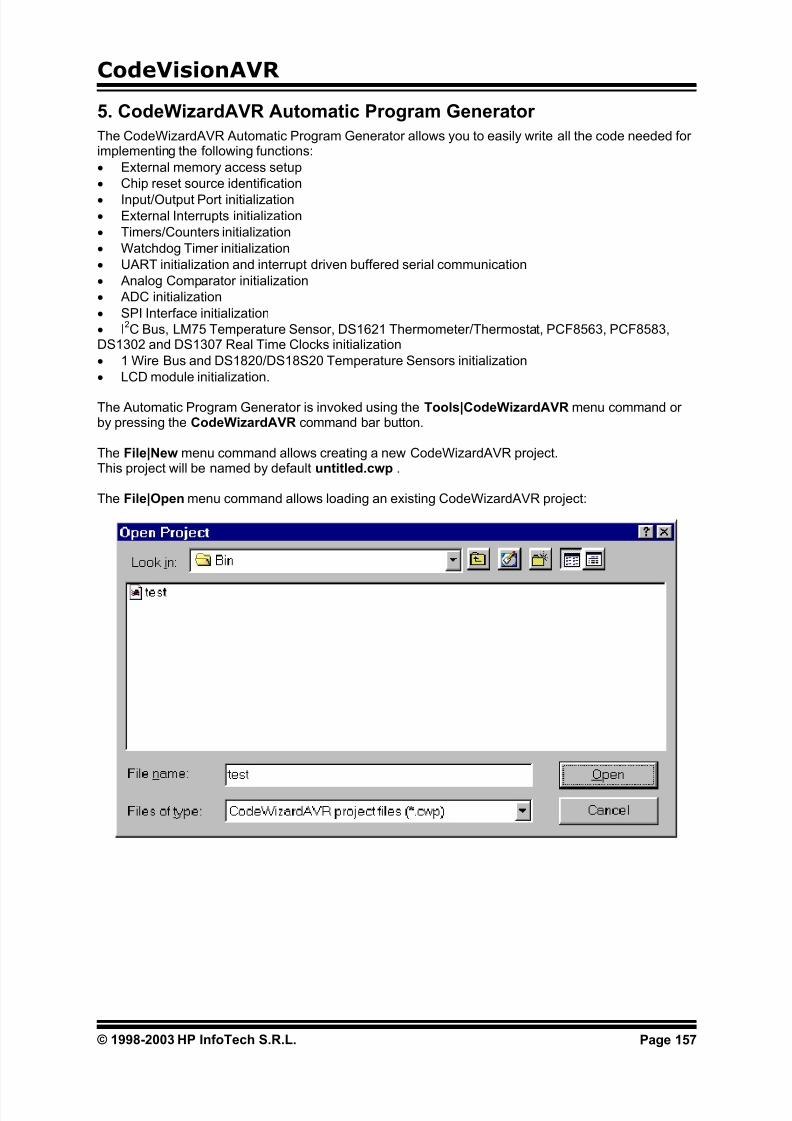
7/22/2019 CodevisionAVR Manual Full
http://slidepdf.com/reader/full/codevisionavr-manual-full 158/200
CodeVisionAVR
5. CodeWizardAVR Automatic Program Generator
The CodeWizardAVR Automatic Program Generator allows you to easily write all the code needed forimplementing the following functions:
• External memory access setup
• Chip reset source identification
• Input/Output Port initialization• External Interrupts initialization
• Timers/Counters initialization
• Watchdog Timer initialization
• UART initialization and interrupt driven buffered serial communication
• Analog Comparator initialization
• ADC initialization
• SPI Interface initialization
• I2C Bus, LM75 Temperature Sensor, DS1621 Thermometer/Thermostat, PCF8563, PCF8583,
DS1302 and DS1307 Real Time Clocks initialization
• 1 Wire Bus and DS1820/DS18S20 Temperature Sensors initialization
• LCD module initialization.
The Automatic Program Generator is invoked using the Tools|CodeWizardAVR menu command orby pressing the CodeWizardAVR command bar button.
The File|New menu command allows creating a new CodeWizardAVR project.This project will be named by default untitled.cwp .
The File|Open menu command allows loading an existing CodeWizardAVR project:
© 1998-2003 HP InfoTech S.R.L. Page 157
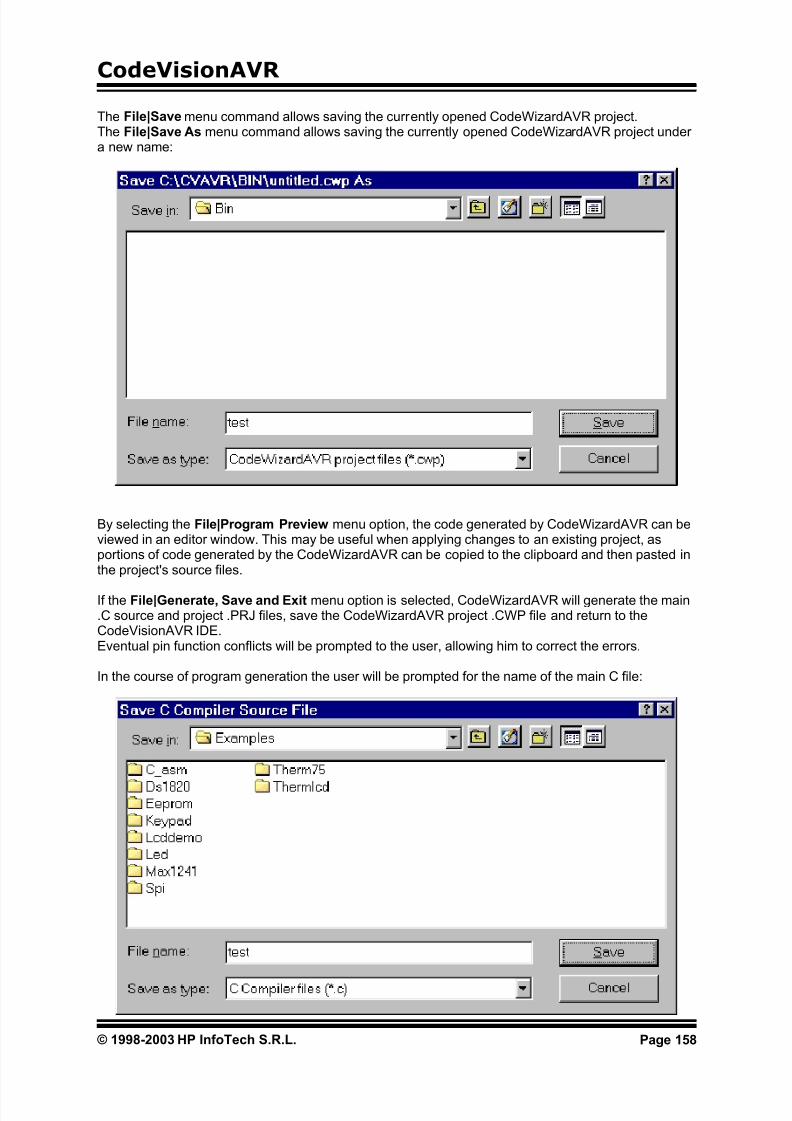
7/22/2019 CodevisionAVR Manual Full
http://slidepdf.com/reader/full/codevisionavr-manual-full 159/200
CodeVisionAVR
The File|Save menu command allows saving the currently opened CodeWizardAVR project.The File|Save As menu command allows saving the currently opened CodeWizardAVR project undera new name:
By selecting the File|Program Preview menu option, the code generated by CodeWizardAVR can beviewed in an editor window. This may be useful when applying changes to an existing project, asportions of code generated by the CodeWizardAVR can be copied to the clipboard and then pasted inthe project's source files.
If the File|Generate, Save and Exit menu option is selected, CodeWizardAVR will generate the main.C source and project .PRJ files, save the CodeWizardAVR project .CWP file and return to theCodeVisionAVR IDE.Eventual pin function conflicts will be prompted to the user, allowing him to correct the errors.
In the course of program generation the user will be prompted for the name of the main C file:
© 1998-2003 HP InfoTech S.R.L. Page 158

7/22/2019 CodevisionAVR Manual Full
http://slidepdf.com/reader/full/codevisionavr-manual-full 160/200
CodeVisionAVR
and for the name of the project file:
Selecting the File|Exit menu option allows you to exit the CodeWizardAVR without generating anyprogram files.
By selecting the Help menu option you can see the help topic that corresponds to the currentCodeWizardAVR configuration menu.
© 1998-2003 HP InfoTech S.R.L. Page 159

7/22/2019 CodevisionAVR Manual Full
http://slidepdf.com/reader/full/codevisionavr-manual-full 161/200
CodeVisionAVR
5.1 Setting the AVR Chip Options
By selecting the Chip tab of the CodeWizardAVR, you can set the AVR chip options.
The chip type can be specified using the Chip list box.The chip clock frequency in MHz can be specified using the Clock spinedit box.
For the AVR chips that contain a crystal oscillator divider, a supplementary Crystal Oscillator DividerEnabled check box is visible.This check box allows you to enable or disable the crystal oscillator divider.
If the crystal oscillator is enabled, you can specify the division ratio using the Crystal OscillatorDivider spinedit box.
For the AVR chips that allow the identification of the reset source, a supplementary Check ResetSource check box is visible. If it's checked then the CodeWizardAVR will generate code that allowsidentification of the conditions that caused the chip reset.
© 1998-2003 HP InfoTech S.R.L. Page 160

7/22/2019 CodevisionAVR Manual Full
http://slidepdf.com/reader/full/codevisionavr-manual-full 162/200
CodeVisionAVR
For the AVR chips that allow self-programming, a supplementary Program Type list box is visible.It allows to select the type of the generated code:
• Application
• Boot Loader
© 1998-2003 HP InfoTech S.R.L. Page 161

7/22/2019 CodevisionAVR Manual Full
http://slidepdf.com/reader/full/codevisionavr-manual-full 163/200
CodeVisionAVR
5.2 Setting the External SRAM
For the AVR chips that allow connection of external SRAM, you can specify the size of this memoryand wait state insertion by selecting the External SRAM tab.
The size of external SRAM can be specified using the External SRAM Size list box. Additional wait states in accessing the external SRAM can be inserted by checking the ExternalSRAM Wait State check box.The MCUCR register in the startup initialization code is configured automatically according to thesesettings.
© 1998-2003 HP InfoTech S.R.L. Page 162

7/22/2019 CodevisionAVR Manual Full
http://slidepdf.com/reader/full/codevisionavr-manual-full 164/200
CodeVisionAVR
For devices, like the ATmega161, that allow splitting the external SRAM in two pages, the ExternalSRAM configuration window will look like this:
The External SRAM page configuration list box allows selection of the splitting address for the twoexternal SRAM pages .The wait states that are inserted during external SRAM access, can be specified for the lower,respectively upper, memory pages using the Lower wait states, respectively Upper wait states listboxes.The MCUCR and EMCUCR registers in the startup initialization code are configured automatically
according to these settings.
© 1998-2003 HP InfoTech S.R.L. Page 163

7/22/2019 CodevisionAVR Manual Full
http://slidepdf.com/reader/full/codevisionavr-manual-full 165/200
CodeVisionAVR
5.3 Setting the Input/Output Ports
By selecting the Ports tab of the CodeWizardAVR, you can specify the input/output Portsconfiguration.
You can chose which port you want to configure by selecting the appropriate PORT x tab.By clicking on the corresponding Data Direction bit you can set the chip pin to be output (Out) or input(In).The DDRx register will be initialized according to these settings.
By clicking on the corresponding Pullup/Output Value bit you can set the following options:• if the pin is an input, it can be tri-stated (T) or have an internal pull-up (P) resistor connected to thepositive power supply.
• if the pin is an output, it's value can be initially set to 0 or 1.The PORTx register will be initialized according to these settings.
© 1998-2003 HP InfoTech S.R.L. Page 164

7/22/2019 CodevisionAVR Manual Full
http://slidepdf.com/reader/full/codevisionavr-manual-full 166/200
CodeVisionAVR
5.4 Setting the External Interrupts
By selecting the External IRQ tab of the CodeWizardAVR, you can specify the external interruptconfiguration.
Checking the appropriate INTx Enabled check box enables the corresponding external interrupt.If the AVR chip supports this feature, you can select if the interrupt will be edge or level triggered usingthe corresponding Mode list box.
For each enabled external interrupt the CodeWizardAVR will define an ext_intx_isr interrupt service
routine, where x is the number of the external interrupt.
© 1998-2003 HP InfoTech S.R.L. Page 165

7/22/2019 CodevisionAVR Manual Full
http://slidepdf.com/reader/full/codevisionavr-manual-full 167/200
CodeVisionAVR
For some devices, like the Atmega169V/L, the External IRQ tab may present the following options:
The Pin Change Interrupt Enable check boxes, if checked, will specify which of the PCINT I/O pinswill trigger an external interrupt.The interrupt service routines for these interrupts will be pin_change_isr0 for PCINT0-7 andpin_change_isr1 for PCINT8-15.
© 1998-2003 HP InfoTech S.R.L. Page 166

7/22/2019 CodevisionAVR Manual Full
http://slidepdf.com/reader/full/codevisionavr-manual-full 168/200
CodeVisionAVR
5.5 Setting the Timers/Counters
By selecting the Timers tab of the CodeWizardAVR, you can specify the timers/countersconfiguration. A number of Timer tabs will be displayed according to the AVR chip type.
By selecting the Timer 0 tab you can have the following options:
• Clock Source specifies the timer/counter 0 clock pulse source
• Clock Value specifies the timer/counter 0 clock frequency
• Mode specifies if the timer/counter 0 functioning mode
• Output specifies the function of the timer/counter 0 output and depends of the functioning mode
• Overflow IRQ specifies if an interrupt is to be generated on timer/counter 0 overflow
• Compare Match IRQ specifies if an interrupt is to be generated on timer/counter 0 comparematch
• Timer Value specifies the initial value of timer/counter 0 at startup
Compare specifies the initial value of timer/counter 0 output compare register.•
If timer/counter 0 interrupts are used the following interrupt service routines may be defined by theCodeWizardAVR:
• timer0_ovf_isr for timer/counter overflow
• timer0_comp_isr for timer/counter output compare match.
You must note that depending of the used AVR chip some of these options may not be present. For
more information you must consult the corresponding Atmel data sheet.
© 1998-2003 HP InfoTech S.R.L. Page 167

7/22/2019 CodevisionAVR Manual Full
http://slidepdf.com/reader/full/codevisionavr-manual-full 169/200
CodeVisionAVR
By selecting the Timer 1 tab you can have the following options:
• Clock Source specifies the timer/counter 1 clock pulse source
• Clock Value specifies the timer/counter 1 clock frequency
• Mode specifies if the timer/counter 1 functioning mode
• Out. A specifies the function of the timer/counter 1 output A and depends of the functioning mode
• Out. B specifies the function of the timer/counter 1 output B and depends of the functioning mode
Out. C specifies the function of the timer/counter 3 output C and depends of the functioning mode •
• Inp Capt. specifies the timer/counter 1 capture trigger edge and if the noise canceler is to be used
• Interrupt on specifies if an interrupt is to be generated on timer/counter 1 overflow, input captureand compare match
• Timer Value specifies the initial value of timer/counter 1 at startup
• Comp. A, B and C specifies the initial value of timer/counter 1 output compare registers A, B andC.
If timer/counter 1 interrupts are used the following interrupt service routines may be defined by theCodeWizardAVR:
• timer1_ovf_isr for timer/counter overflow
• timer1_comp_isr or timer1_compa_isr , timer1_compb_isr and timer1_copmc_isr fortimer/counter output compare match
• timer1_capt_isr for timer/counter input capture
You must note that depending of the used AVR chip some of these options may not be present. For
more information you must consult the corresponding Atmel data sheet.
© 1998-2003 HP InfoTech S.R.L. Page 168

7/22/2019 CodevisionAVR Manual Full
http://slidepdf.com/reader/full/codevisionavr-manual-full 170/200
CodeVisionAVR
By selecting the Timer 2 tab you can have the following options:
• Clock Value specifies the timer/counter 2 clock frequency
• Clock Source specifies the timer/counter 2 clock pulse source
• Mode specifies if the timer/counter 2 functioning mode
• Output specifies the function of the timer/counter 2 output and depends of the functioning mode
• Overflow IRQ specifies if an interrupt is to be generated on timer/counter 2 overflow
• Compare Match IRQ specifies if an interrupt is to be generated on timer/counter 2 comparematch
• Timer Value specifies the initial value of timer/counter 2 at startup
• Compare specifies the initial value of timer/counter 2 output compare register.
If timer/counter 2 interrupts are used the following interrupt service routines may be defined by theCodeWizardAVR:
• timer2_ovf_isr for timer/counter overflow
• timer2_comp_isr for timer/counter output compare match.
You must note that depending of the used AVR chip some of these options may not be present. Formore information you must consult the corresponding Atmel data sheet.
© 1998-2003 HP InfoTech S.R.L. Page 169
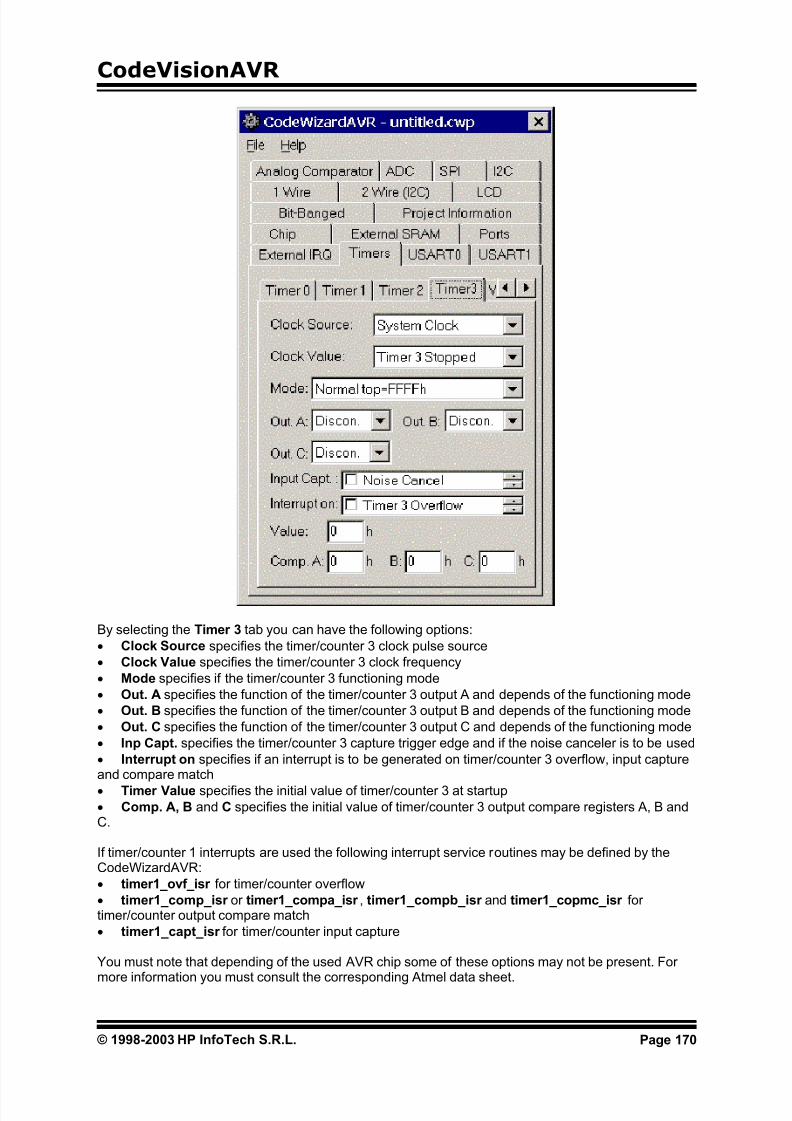
7/22/2019 CodevisionAVR Manual Full
http://slidepdf.com/reader/full/codevisionavr-manual-full 171/200
CodeVisionAVR
By selecting the Timer 3 tab you can have the following options:
• Clock Source specifies the timer/counter 3 clock pulse source
• Clock Value specifies the timer/counter 3 clock frequency
• Mode specifies if the timer/counter 3 functioning mode
• Out. A specifies the function of the timer/counter 3 output A and depends of the functioning mode
•
• Comp. A, B and C specifies the initial value of timer/counter 3 output compare registers A, B andC.
If timer/counter 1 interrupts are used the following interrupt service routines may be defined by theCodeWizardAVR:
• timer1_comp_isr or timer1_compa_isr , timer1_compb_isr and timer1_copmc_isr fortimer/counter output compare match
Out. B specifies the function of the timer/counter 3 output B and depends of the functioning mode
• Out. C specifies the function of the timer/counter 3 output C and depends of the functioning mode
• Inp Capt. specifies the timer/counter 3 capture trigger edge and if the noise canceler is to be used
• Interrupt on specifies if an interrupt is to be generated on timer/counter 3 overflow, input captureand compare match
• Timer Value specifies the initial value of timer/counter 3 at startup
• timer1_ovf_isr for timer/counter overflow
• timer1_capt_isr for timer/counter input capture
You must note that depending of the used AVR chip some of these options may not be present. For
more information you must consult the corresponding Atmel data sheet.
© 1998-2003 HP InfoTech S.R.L. Page 170

7/22/2019 CodevisionAVR Manual Full
http://slidepdf.com/reader/full/codevisionavr-manual-full 172/200
CodeVisionAVR
By selecting the Watchdog tab you can configure the watchdog timer.
Checking the Watchdog Timer Enabled check box activates the watchdog timer.You will have then the possibility to set the watchdog timer's Oscillator Prescaller .In case the watchdog timer is enabled, you must include yourself the appropriate code sequences toreset it periodically.Example:
#asm("wdr")
For more information about the watchdog timer you must consult the Atmel data sheet for the chip thatyou use.
© 1998-2003 HP InfoTech S.R.L. Page 171

7/22/2019 CodevisionAVR Manual Full
http://slidepdf.com/reader/full/codevisionavr-manual-full 173/200
CodeVisionAVR
5.6 Setting the UART or USART
By selecting the UART tab of the CodeWizardAVR, you can specify the UART configuration.
Checking the Receiver check box activates the UART receiver.The receiver can function in the following modes:
• polled, the Rx Interrupt check box isn't checked
• interrupt driven circular buffer, the Rx Interrupt check box is checked.In the interrupt driven mode you can specify the size of the circular buffer using the Receiver Buffer spinedit box.
Checking the Transmitter check box activates the UART transmitter.The transmitter can function in the following modes:
• polled, the Tx Interrupt check box isn't checked
• interrupt driven circular buffer, the Tx Interrupt check box is checked.In the interrupt driven mode you can specify the size of the circular buffer using the TransmitterBuffer spinedit box.
The communication Baud rate can be specified using the UART Baud Rate list box.CodeWizardAVR will automatically set the UBRR according to the Baud rate and AVR chip clockfrequency. The Baud rate error for these parameters will be calculated and displayed.
The Communications Parameters list box allows you to specify the number of data bits, stop bitsand parity used for serial communication.
© 1998-2003 HP InfoTech S.R.L. Page 172
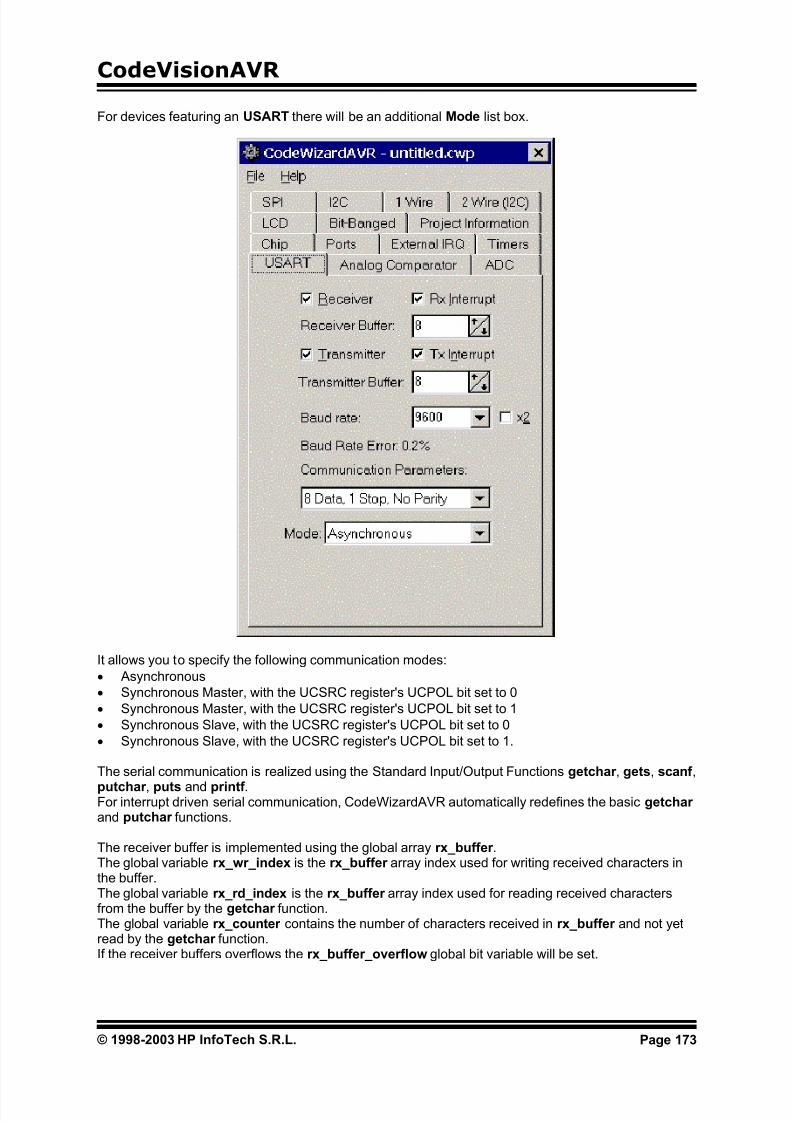
7/22/2019 CodevisionAVR Manual Full
http://slidepdf.com/reader/full/codevisionavr-manual-full 174/200
CodeVisionAVR
For devices featuring an USART there will be an additional Mode list box.
It allows you to specify the following communication modes:
• Asynchronous
• Synchronous Master, with the UCSRC register's UCPOL bit set to 0
• Synchronous Master, with the UCSRC register's UCPOL bit set to 1
• Synchronous Slave, with the UCSRC register's UCPOL bit set to 0
• Synchronous Slave, with the UCSRC register's UCPOL bit set to 1.
The serial communication is realized using the Standard Input/Output Functions getchar , gets, scanf ,
putchar , puts and printf .For interrupt driven serial communication, CodeWizardAVR automatically redefines the basic getchar and putchar functions.
The global variable rx_counter contains the number of characters received in rx_buffer and not yetread by the getchar function.
The receiver buffer is implemented using the global array rx_buffer .The global variable rx_wr_index is the rx_buffer array index used for writing received characters inthe buffer.The global variable rx_rd_index is the rx_buffer array index used for reading received charactersfrom the buffer by the getchar function.
If the receiver buffers overflows the rx_buffer_overflow global bit variable will be set.
© 1998-2003 HP InfoTech S.R.L. Page 173

7/22/2019 CodevisionAVR Manual Full
http://slidepdf.com/reader/full/codevisionavr-manual-full 175/200
CodeVisionAVR
The transmitter buffer is implemented using the global array tx_buffer .The global variable tx_wr_index is the tx_buffer array index used for writing in the buffer thecharacters to be transmitted.The global variable tx_rd_index is the tx_buffer array index used for reading from the buffer thecharacters to be transmitted by the putchar function.
The global variable tx_counter contains the number of characters from tx_buffer not yet transmittedby the interrupt system.
For devices with 2 UARTs, respectively 2 USARTs, there will be two tabs present: UART0 andUART1, respectively USART0 and USART1.The functions of configuration check and list boxes will be the same as described above.
The UART0 (USART0) will use the normal putchar and getchar functions.In case of interrupt driven buffered communication, UART0 (USART0) will use the following variables:rx_buffer0, rx_wr_index0, rx_rd_index0, rx_counter0, rx_buffer_overflow0,tx_buffer0, tx_wr_index0, tx_rd_index0, tx_counter0.
The UART1 (USART1) will use the putchar1 and getchar1 functions.
In case of interrupt driven buffered communication, UART1 (USART1) will use the following variables:rx_buffer1, rx_wr_index1, rx_rd_index1, rx_counter1, rx_buffer_overflow1,tx_buffer1, tx_wr_index1, tx_rd_index1, tx_counter1.
All serial I/O using functions declared in stdio.h, will be done using UART0 (USART0).
© 1998-2003 HP InfoTech S.R.L. Page 174
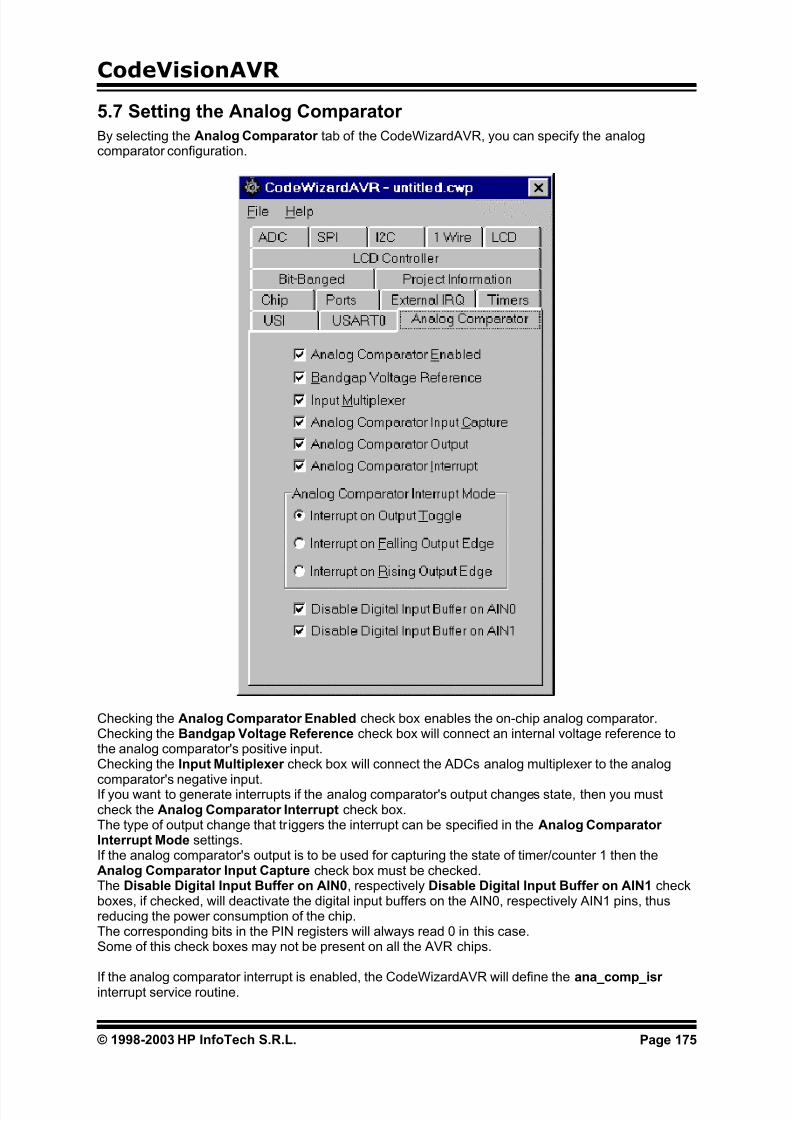
7/22/2019 CodevisionAVR Manual Full
http://slidepdf.com/reader/full/codevisionavr-manual-full 176/200
CodeVisionAVR
5.7 Setting the Analog Comparator
By selecting the Analog Comparator tab of the CodeWizardAVR, you can specify the analogcomparator configuration.
Checking the Analog Comparator Enabled check box enables the on-chip analog comparator.
The type of output change that triggers the interrupt can be specified in the Analog ComparatorInterrupt Mode settings.
Checking the Bandgap Voltage Reference check box will connect an internal voltage reference tothe analog comparator's positive input.Checking the Input Multiplexer check box will connect the ADCs analog multiplexer to the analog
comparator's negative input.If you want to generate interrupts if the analog comparator's output changes state, then you mustcheck the Analog Comparator Interrupt check box.
If the analog comparator's output is to be used for capturing the state of timer/counter 1 then theAnalog Comparator Input Capture check box must be checked.The Disable Digital Input Buffer on AIN0, respectively Disable Digital Input Buffer on AIN1 checkboxes, if checked, will deactivate the digital input buffers on the AIN0, respectively AIN1 pins, thusreducing the power consumption of the chip.The corresponding bits in the PIN registers will always read 0 in this case.Some of this check boxes may not be present on all the AVR chips.
If the analog comparator interrupt is enabled, the CodeWizardAVR will define the ana_comp_isr interrupt service routine.
© 1998-2003 HP InfoTech S.R.L. Page 175

7/22/2019 CodevisionAVR Manual Full
http://slidepdf.com/reader/full/codevisionavr-manual-full 177/200
CodeVisionAVR
5.8 Setting the Analog-Digital Converter
Some AVR chips contain an analog-digital converter (ADC).By selecting the ADC tab of the CodeWizardAVR, you can specify the ADC configuration.
Checking the ADC Enabled check box enables the on-chip ADC.On some AVR devices only the 8 most significant bits of the AD conversion result can be used. Thisfeature is enabled by checking the Use 8 bits check box.Some AVR devices allow the ADC to use a high speed conversion mode, but with lower precision.
This feature is enabled by checking the High Speed check box.If the ADC has an internal reference voltage source, than it can be selected using the Volt. Ref. listbox or activated by checking the ADC Bandgap check box.
© 1998-2003 HP InfoTech S.R.L. Page 176

7/22/2019 CodevisionAVR Manual Full
http://slidepdf.com/reader/full/codevisionavr-manual-full 178/200
CodeVisionAVR
If you want to generate interrupts when the ADC finishes the conversion, then you must check theADC Interrupt check box.
Some AVR devices allow the AD conversion to be triggered by an event which can be selected usingthe Auto Trigger Source list box.
If ADC interrupts are used you have the possibility to enable the following functions:
• by checking the ADC Noise Canceler check box, the chip is placed in idle mode during theconversion process, thus reducing the noise induced on the ADC by the chip's digital circuitry
• by checking the Automatically Scan Inputs Enabled check box, the CodeWizardAVR willgenerate code to scan an ADC input domain and put the results in an array. The start, respectively theend, of the domain are specified using the First Input, respectively the Last Input, spinedit boxes.
If the automatic inputs scanning is disabled, then a single analog-digital conversion can be executedusing the function:
unsigned int read_adc(unsigned char adc_input)
This function will return the analog-digital conversion result for the input adc_input. The inputnumbering starts from 0.If interrupts are enabled the above function will use an additional interrupt service routine adc_isr .This routine will store the conversion result in the adc_data global variable.
If the automatic inputs scanning is enabled, the adc_isr service routine will store the conversionresults in the adc_data global array. The user program must read the conversion results from thisarray.
© 1998-2003 HP InfoTech S.R.L. Page 177
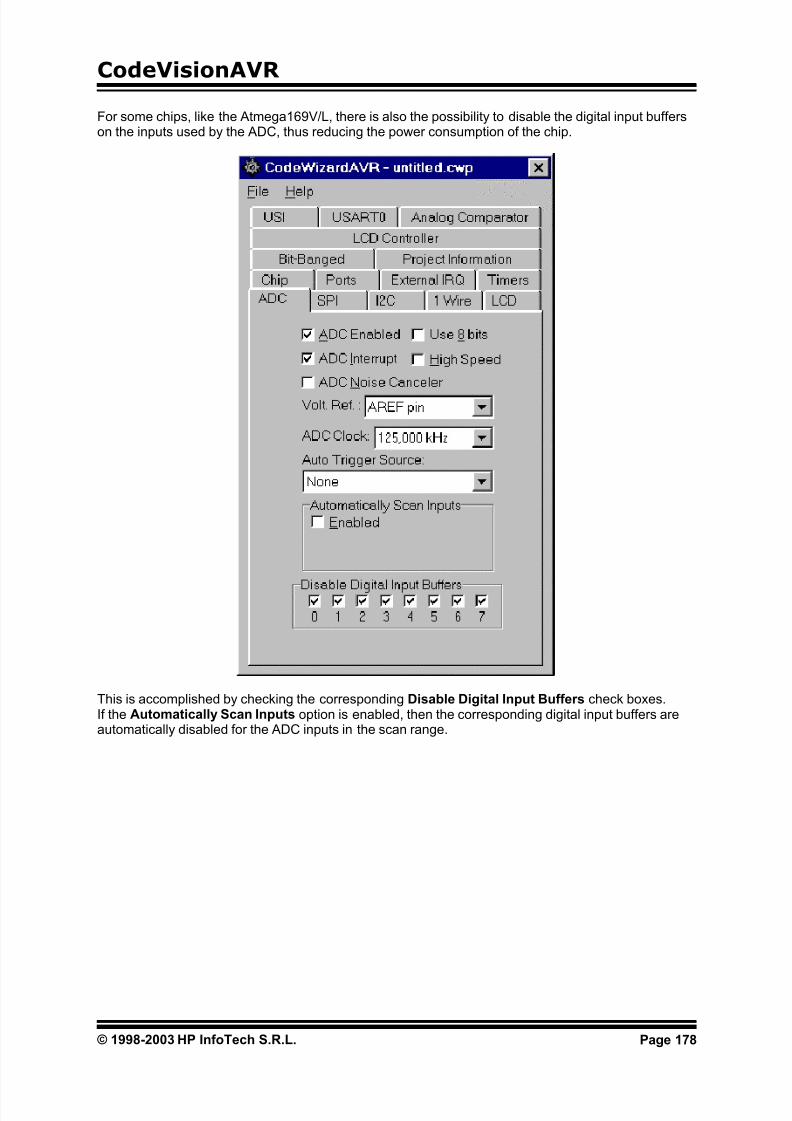
7/22/2019 CodevisionAVR Manual Full
http://slidepdf.com/reader/full/codevisionavr-manual-full 179/200
CodeVisionAVR
For some chips, like the Atmega169V/L, there is also the possibility to disable the digital input bufferson the inputs used by the ADC, thus reducing the power consumption of the chip.
This is accomplished by checking the corresponding Disable Digital Input Buffers check boxes.If the Automatically Scan Inputs option is enabled, then the corresponding digital input buffers areautomatically disabled for the ADC inputs in the scan range.
© 1998-2003 HP InfoTech S.R.L. Page 178

7/22/2019 CodevisionAVR Manual Full
http://slidepdf.com/reader/full/codevisionavr-manual-full 180/200
CodeVisionAVR
5.9 Setting the SPI Interface
By selecting the SPI tab of the CodeWizardAVR, you can specify the SPI interface configuration.
Checking the SPI Enabled check box enables the on-chip SPI interface.If you want to generate interrupts upon completion of a SPI transfer, then you must check the SPIInterrupt check box.You have the possibility to specify the following parameters:
• SPI Clock Rate used for the serial transfer
• Clock Phase: the position of the SCK strobe signal edge relative to the data bit
• Clock Polarity: low or high in idle state
• SPI Type: the AVR chip is master or slave• Data Order in the serial transfer.
Checking the Clock Rate x2 check box, available for some AVR chips, will double the SPI ClockRate.
For communicating through the SPI interface, with disabled SPI interrupt, you must use the SPIFunctions.If the SPI interrupt is enabled, you must use the spi_isr interrupt service routine, declared by theCodeWizardAVR.
© 1998-2003 HP InfoTech S.R.L. Page 179

7/22/2019 CodevisionAVR Manual Full
http://slidepdf.com/reader/full/codevisionavr-manual-full 181/200
CodeVisionAVR
5.10 Setting the Universal Serial Interface - USI
By selecting the USI tab of the CodeWizardAVR, you can specify the USI configuration.The USI operatinging mode can be selected using the Mode list box.One of the USI operating modes is the Three Wire (SPI) mode:
© 1998-2003 HP InfoTech S.R.L. Page 180

7/22/2019 CodevisionAVR Manual Full
http://slidepdf.com/reader/full/codevisionavr-manual-full 182/200
CodeVisionAVR
The USI can also operate in the Two Wire (I2C) mode:
The Shift Reg. Clock list box sets the clock source for the USI Shift Register and Counter.
As both the USI Shift Register and Counter are clocked from the same clock source, the USI Countermay be used to count the number of received or transmitted bits and generate an overflow interruptwhen the data transfer is complete.Checking the USI Counter Overflow Interrupt check box will generate code for an interrupt serviceroutine that will be executed upon the overflow of the USI Counter.
If the USI Start Condition Interrupt check box is checked then the CodeWizardAVR will generatecode for an interrupt service routine that will be executed when a Start Condition is detected on theI2C bus in USI Two Wire operating mode.
© 1998-2003 HP InfoTech S.R.L. Page 181
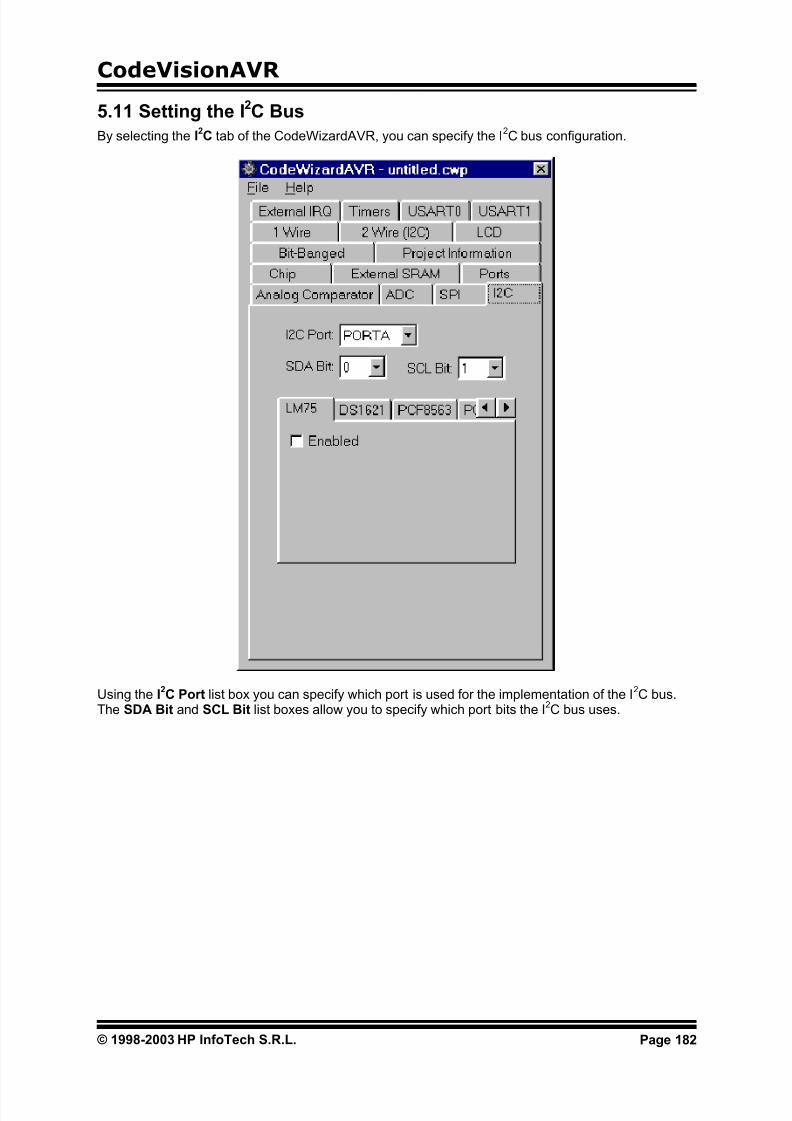
7/22/2019 CodevisionAVR Manual Full
http://slidepdf.com/reader/full/codevisionavr-manual-full 183/200
CodeVisionAVR
5.11 Setting the I2C Bus
By selecting the I2C tab of the CodeWizardAVR, you can specify the I
2C bus configuration.
Using the I2C Port list box you can specify which port is used for the implementation of the I
2C bus.
The SDA Bit and SCL Bit list boxes allow you to specify which port bits the I2C bus uses.
© 1998-2003 HP InfoTech S.R.L. Page 182

7/22/2019 CodevisionAVR Manual Full
http://slidepdf.com/reader/full/codevisionavr-manual-full 184/200
CodeVisionAVR
5.11.1 Setting the LM75 devices
If you use the LM75 temperature sensor, you must select the LM75 tab and check the LM75 Enabled check box.
The LM75 Address list box allows you to specify the 3 lower bits of the Idevices connected to the bus. Maximum 8 LM75 devices can be used.
The LM75 devices are accessed through the National Semiconductor LM75 Temperature Sensor
Functions.
2C addresses of the LM75
The Output Active High check box specifies the active state of the LM75 O.S. output.The Hyst., respectively O.S. , spinedit boxes specify the hysterezis, respectively O.S. temperatures.
© 1998-2003 HP InfoTech S.R.L. Page 183

7/22/2019 CodevisionAVR Manual Full
http://slidepdf.com/reader/full/codevisionavr-manual-full 185/200
CodeVisionAVR
5.11.2 Setting the DS1621 devices
If you use the DS1621 thermometer/thermostat, you must select the DS1621 tab and check theDS1621 Enabled check box.
The Output Active High check box specifies the active state of the DS1621 Tout output.The Low, respectively High, spinedit boxes specify the low, respectively high temperatures triggertemperatures for the Tout output.
The DS1621 devices are accessed through the Dallas Semiconductor DS1621Thermometer/Thermostat functions.
© 1998-2003 HP InfoTech S.R.L. Page 184

7/22/2019 CodevisionAVR Manual Full
http://slidepdf.com/reader/full/codevisionavr-manual-full 186/200
CodeVisionAVR
5.11.3 Setting the PCF8563 devices
If you use the PCF8563 RTC, you must select the PCF8563 tab and check the PCF8563 Enabledcheck box.
The Alarm Interrupt check box enables the generation of interrupts, on the INT pin, when the alarmconditions are met.
The CLKOUT list box specifies the frequency of the pulses on the CLKOUT output.
The Timer|Clock list box specifies the countdown frequency of the PCF8563 Timer.If the Int. Enabled check box is checked, an interrupt will be generated when the Timer countdownvalue will be 0.If the INT Pulses check box is checked, the INT pin will issue short pulses when the Timer countdown
value reaches 0.The Timer|Value spinedit box specifies the Timer reload value when the countdown reaches 0.
The PCF8563 devices are accessed through the Philips PCF8563 Real Time Clock Functions.
© 1998-2003 HP InfoTech S.R.L. Page 185

7/22/2019 CodevisionAVR Manual Full
http://slidepdf.com/reader/full/codevisionavr-manual-full 187/200
CodeVisionAVR
5.11.4 Setting the PCF8583 devices
If you use the PCF8583 RTC, you must select the PCF8583 tab and check the PCF8583 Enabled check box.
The PCF8583 Address list box allows you to specify the low bit of the I2C addresses of the PCF8583
devices connected to the bus. Maximum 2 PCF8583 devices can be used.
The PCF8583 devices are accessed through the Philips PCF8583 Real Time Clock Functions.
© 1998-2003 HP InfoTech S.R.L. Page 186

7/22/2019 CodevisionAVR Manual Full
http://slidepdf.com/reader/full/codevisionavr-manual-full 188/200
CodeVisionAVR
5.11.5 Setting the DS1307 devices
If you use the DS1307 RTC, you must select the DS1307 tab and check the DS1307 Enabled checkbox.
The DS1307 device is accessed through the Dallas Semiconductor DS1307 Real Time ClockFunctions.
In case the square wave signal output is disabled, the state of the SQW/OUT pin can be specifiedusing the OUT list box.
© 1998-2003 HP InfoTech S.R.L. Page 187
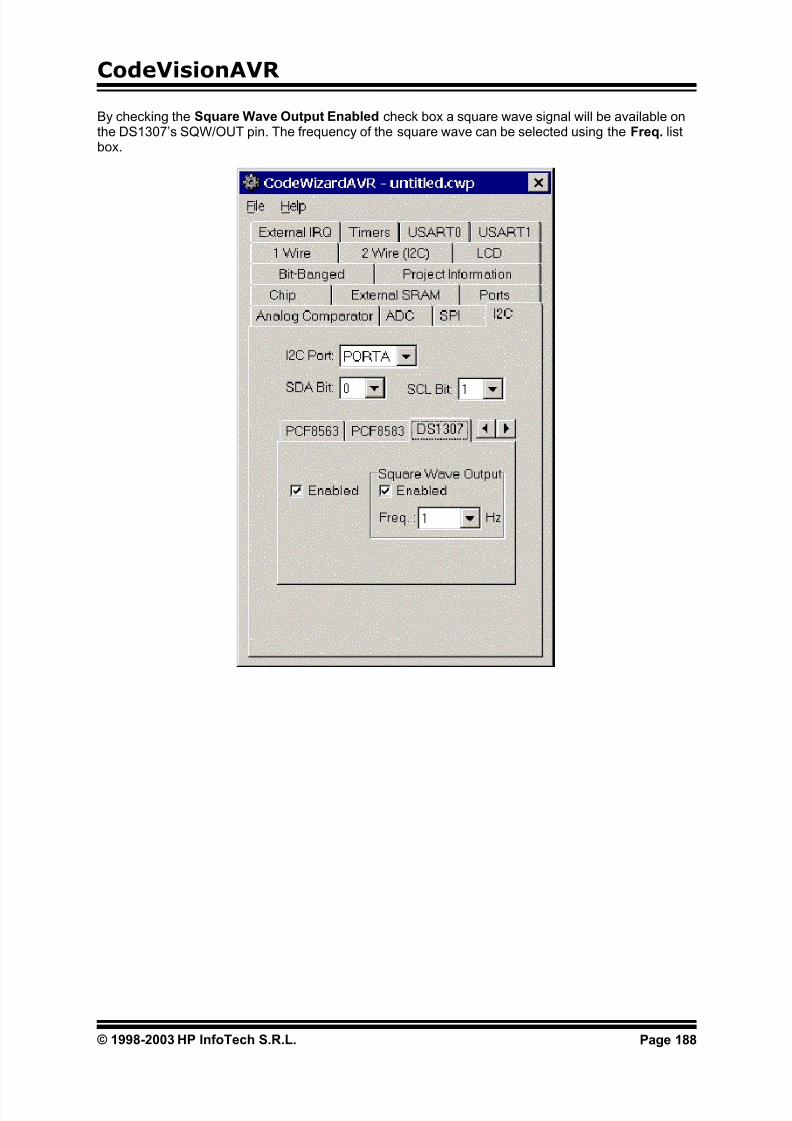
7/22/2019 CodevisionAVR Manual Full
http://slidepdf.com/reader/full/codevisionavr-manual-full 189/200
CodeVisionAVR
By checking the Square Wave Output Enabled check box a square wave signal will be available onthe DS1307’s SQW/OUT pin. The frequency of the square wave can be selected using the Freq. listbox.
© 1998-2003 HP InfoTech S.R.L. Page 188

7/22/2019 CodevisionAVR Manual Full
http://slidepdf.com/reader/full/codevisionavr-manual-full 190/200
CodeVisionAVR
5.12 Setting the 1 Wire Bus
By selecting the 1 Wire tab of the CodeWizardAVR, you can specify the 1 Wire bus configuration.
Using the 1 Wire Port list box you can specify which port is used for the implementation of the 1 Wirebus.The Data Bit list box allows you to specify which port bit the 1 Wire bus uses.
© 1998-2003 HP InfoTech S.R.L. Page 189

7/22/2019 CodevisionAVR Manual Full
http://slidepdf.com/reader/full/codevisionavr-manual-full 191/200
CodeVisionAVR
If you use the DS1820/DS18S20 temperature sensors, you must check the DS1820/DS18S20Enabled check box.
If you use several DS1820/DS18S20 devices connected to the 1 Wire bus, you must check theMultiple Devices check box. Maximum 8 DS1820/DS18S20 devices can be connected to the bus.The ROM codes for these devices will be stored in the ds1820_rom_codes array.
The DS1820/DS18S20 devices can be accessed using the Dallas Semiconductor DS1820/DS18S20Temperature Sensors Functions.
© 1998-2003 HP InfoTech S.R.L. Page 190

7/22/2019 CodevisionAVR Manual Full
http://slidepdf.com/reader/full/codevisionavr-manual-full 192/200
CodeVisionAVR
5.13 Setting the 2 Wire Bus
By selecting the 2 Wire (I2C) tab of the CodeWizardAVR, you can specify the 2 Wire bus interface
configuration.
The AVR chip’s 2 Wire interface can be enabled by checking the 2 Wire Enabled check box.If the Generate Acknowledge Pulse check box is checked the ACK pulse on the 2 Wire bus isgenerated if one of the following conditions is met:
• the device’s own slave address has been received;
• a General Call has been received and the General Call Recognition check box is checked;
• a data byte has been received in master receiver or slave receiver mode.
These interrupts will be serviced by the twi_isr function.
If the Generate Acknowledge Pulse check box is not checked, the chip’s 2 Wire interface is virtuallydisconnected from the 2 Wire bus. This check box will set the state of the TWEA bit of the TWCRregister.The Slave Address edit box sets the slave address of the 2 Wire serial bus unit. This address mustbe specified in hexadecimal and will be used to initialize the bits 1..7 of the TWAR register.Checking the General Call Recognition check box, enables the recognition of the General Call givenover the 2 Wire bus. This check box will set the state of the TWGCE bit of the TWAR register.The Bit Rate list box allows you to specify maximum frequency of the pulses on the SCL 2 Wire busline. It will affect the value of the TWBR register. As both the receiver and transmitter may stretch the duration of the low period of the SCL line, whenwaiting for response, the frequency of the pulses may be lower than specified.
If the 2 Wire Interrupt check box is checked, the 2 Wire interface will generate interrupts.
© 1998-2003 HP InfoTech S.R.L. Page 191

7/22/2019 CodevisionAVR Manual Full
http://slidepdf.com/reader/full/codevisionavr-manual-full 193/200
CodeVisionAVR
5.14 Setting the ATmega169 LCD Controller
By selecting the LCD Controller tab of the CodeWizardAVR, you can specify the configuration of theLCD controller built in the ATmega169V/L chips.
The ATmega169V/L on chip LCD controller can be enabled by checking the LCD Enabled check box.By checking the LCD Low Power Waveform check box, the low power waveform will be outputted onthe LCD pins. This allows reducing the power consumption of the LCD.If the LCD Frame Complete Interrupt check box is checked, the LCD controller will generate an
interrupt at the beginning of a new frame. In low power waveform mode this interrupt will be generatedevery second frame. The frame complete interrupt will be serviced by the lcd_sof_isr function.The LCD Duty Cycle list box selects one of the following duty cycles: Static, 1/2, 1/3 or 1/4.
The LCD Frame Rate Register (LCDFRR) is initialized based on the frequency of the clock source andthe obtainable frame rate, that is as close as possible to the one that was specified. The Frame RateError is calculated based on the specified Frame Rate and the real one obtained from LCDFRR.
The LCD Bias list box selects the 1/3 or 1/2 bias. Please refer to the documentation of the LCDmanufacturer for bias selection.The Clock Source list box selects the system clock or an external asynchronous clock as the LCDcontroller clock source.The Frame Rate spin edit allows specifying the LCD frame rate.
The Used Segments list box setting determine the number of port pins used as LCD segment drivers.The Contrast Control list box specifies the maximum voltage on LCD segment and common pins
VLCD. The VLCD range is between 2.60 and 3.35 Vcc.
© 1998-2003 HP InfoTech S.R.L. Page 192

7/22/2019 CodevisionAVR Manual Full
http://slidepdf.com/reader/full/codevisionavr-manual-full 194/200
CodeVisionAVR
5.15 Setting the LCD
By selecting the LCD tab of the CodeWizardAVR, you can specify the LCD configuration.
Using the LCD Port list box you can specify which port is used for connecting the alphanumeric LCD.The Chars./Line list box allows you to specify the number of characters per display line.This value is used by the lcd_init function.
The LCD can be accessed using the standard LCD Functions.
© 1998-2003 HP InfoTech S.R.L. Page 193

7/22/2019 CodevisionAVR Manual Full
http://slidepdf.com/reader/full/codevisionavr-manual-full 195/200
CodeVisionAVR
5.16 Setting Bit-Banged Peripherals
By selecting the Bit-Banged tab of the CodeWizardAVR, you can specify the configuration of theperipherals connected using the bit-banging method.If you use the DS1302 RTC, you must select the DS1302 tab.
Using the Port list box you can specify which port is used for connecting with the DS1302.The I/O Bit, SCLK Bit and /RST Bit list boxes allow you to specify which port bits are used for this.The DS1302’s trickle charge function can be activated by checking the Trickle Charge|Enabled check box.The number of diodes, respectively the charge resistor value, can be specified using the Trickle
Charge|Diodes, respectively Trickle Charge|Resistors, list boxes.
The DS1302 device is accessed through the Dallas Semiconductor DS1302 Real Time ClockFunctions.
© 1998-2003 HP InfoTech S.R.L. Page 194

7/22/2019 CodevisionAVR Manual Full
http://slidepdf.com/reader/full/codevisionavr-manual-full 196/200
CodeVisionAVR
5.17 Specifying the Project Information
By selecting the Project Information tab, you can specify the information placed in the commentheader, located at the beginning of the C source file produced by CodeWizardAVR.
You can specify the Project Name, Date, Author , Company and Comments.
© 1998-2003 HP InfoTech S.R.L. Page 195
7/22/2019 CodevisionAVR Manual Full
http://slidepdf.com/reader/full/codevisionavr-manual-full 197/200
CodeVisionAVR
6. License Agreement
6.1 Software License
The use of CodeVisionAVR indicates your understanding and acceptance of the following terms andconditions. This license shall supersede any verbal or prior verbal or written, statement or agreement
to the contrary. If you do not understand or accept these terms, or your local regulations prohibit "aftersale" license agreements or limited disclaimers, you must cease and desist using this productimmediately.
This product is © Copyright 1998-2003 by Pavel Haiduc and HP InfoTech S.R.L., all rights reserved.International copyright laws, international treaties and all other applicable national or international lawsprotect this product. This software product and documentation may not, in whole or in part, be copied,photocopied, translated, or reduced to any electronic medium or machine readable form, without priorconsent in writing, from HP InfoTech S.R.L. and according to all applicable laws.The sole owners of this product are Pavel Haiduc and HP InfoTech S.R.L.
6.2 Liability Disclaimer
This product and/or license is provided as is, without any representation or warranty of any kind, eitherexpress or implied, including without limitation any representations or endorsements regarding the useof, the results of, or performance of the product, its appropriateness, accuracy, reliability, orcorrectness.The user and/or licensee assume the entire risk as to the use of this product.Pavel Haiduc and HP InfoTech S.R.L. do not assume liability for the use of this program beyond theoriginal purchase price of the software. In no event will Pavel Haiduc or HP InfoTech S.R.L. be liablefor additional direct or indirect damages including any lost profits, lost savings, or other incidental orconsequential damages arising from any defects, or the use or inability to use these programs, even ifPavel Haiduc or HP InfoTech S.R.L. have been advised of the possibility of such damages.
6.5 Back-up and Transfer
registration information (name, address, etc.) to Pavel Haiduc and HP InfoTech S.R.L. within 30 daysof the transfer. If you transfer the program you must at the same time transfer the documentation and
back-up copy, or transfer the documentation and destroy the back-up copy. You may not retain anyportion of the program, in any form, under any circumstance.
6.3 RestrictionsYou may not use, copy, modify, translate, or transfer the programs, documentation, or any copyexcept as expressly defined in this agreement. You may not attempt to unlock or bypass any "copy-protection" or authentication algorithm utilized by the program. You may not remove or modify anycopyright notice or the method by which it may be invoked.
6.4 Operating License
You have the non-exclusive right to use any enclosed program only by a single person, on a singlecomputer at a time. You may physically transfer the program from one computer to another, providedthat the program is used only by a single person, on a single computer at atime. In-group projects where multiple persons will use the program, you must purchase an individuallicense for each member of the group.Use over a "local area network" (within the same locale) is permitted provided that only a singleperson, on a single computer uses the program at a time. Use over a "wide area network" (outside thesame locale) is strictly prohibited under any and all circumstances.
You may make one copy of the program solely for "back-up" purposes, as prescribed by internationalcopyright laws. You must reproduce and include the copyright notice on the back-up copy. You maytransfer the product to another party only if the other party agrees to the terms and conditions of thisagreement, and completes and returns
© 1998-2003 HP InfoTech S.R.L. Page 196
7/22/2019 CodevisionAVR Manual Full
http://slidepdf.com/reader/full/codevisionavr-manual-full 198/200
CodeVisionAVR
6.6 Terms
This license is effective until terminated. You may terminate it by destroying the program, thedocumentation and copies thereof. This license will also terminate if you fail to comply with any termsor conditions of this agreement. You agree upon such termination to destroy all copies of the programand of the documentation, or return them to Pavel Haiduc or HP InfoTech S.R.L. for disposal. Note
that by registering this product you give Pavel Haiduc and HP InfoTech S.R.L. permission to referenceyour name in product advertisements.
6.7 Other Rights and Restrictions
All other rights and restrictions not specifically granted in this license are reserved by Pavel Haiducand HP InfoTech S.R.L.
© 1998-2003 HP InfoTech S.R.L. Page 197
7/22/2019 CodevisionAVR Manual Full
http://slidepdf.com/reader/full/codevisionavr-manual-full 199/200
CodeVisionAVR
7. Technical Support
Registered users of the commercial version of CodeVisionAVR Standard get one-year free technicalsupport by e-mail.The free technical support period for the commercial version of CodeVisionAVR Light is six months.
The e-mail support address is: [email protected]
© 1998-2003 HP InfoTech S.R.L. Page 198

7/22/2019 CodevisionAVR Manual Full
http://slidepdf.com/reader/full/codevisionavr-manual-full 200/200
CodeVisionAVR
8. Contact Information
HP InfoTech S.R.L. can be contacted at:
HP INFOTECH S.R.L.STR. LIVIU REBREANU 13A
BL. N20, SC. B, AP. 58SECTOR 3BUCHAREST 746311ROMANIA
phone: +(40)-213261875fax: +(40)-213261876GSM: +(40)-723469754
e-mail: [email protected]: http://www.hpinfotech.ro


