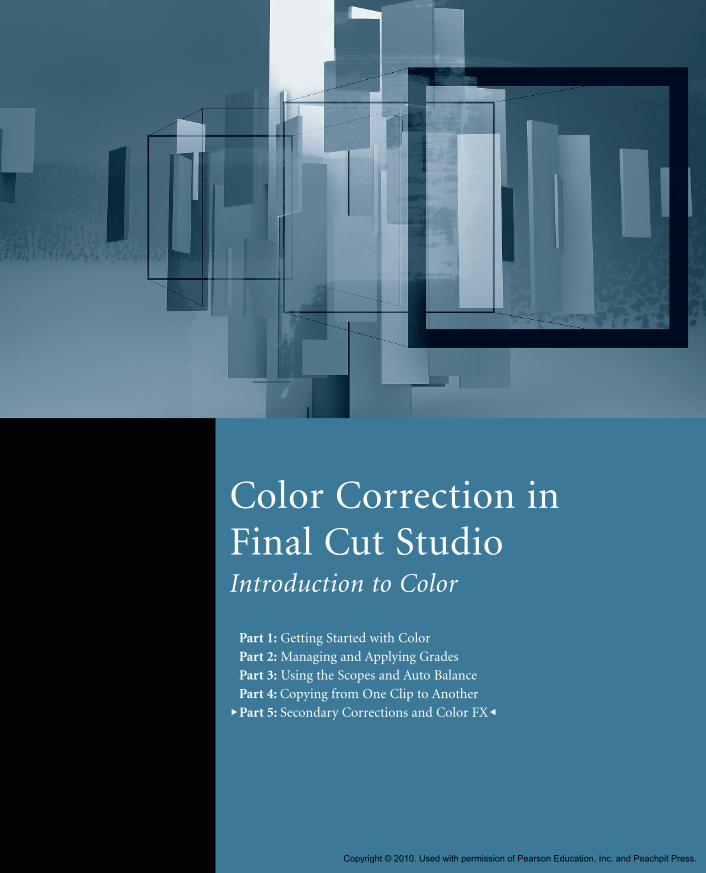
Color Correction in Final Cut StudioIntroduction to Color
Part 1: Getting Started with Color
Part 2: Managing and Applying Grades
Part 3: Using the Scopes and Auto Balance
Part 4: Copying from One Clip to Another
uPart 5: Secondary Corrections and Color FXo
Copyright © 2010. Used with permission of Pearson Education, Inc. and Peachpit Press.
2
NOTE P This is the final part in a series of tutorials that build upon each other. Before
beginning this part, make sure you’ve completed the exercises in Parts 1–4.
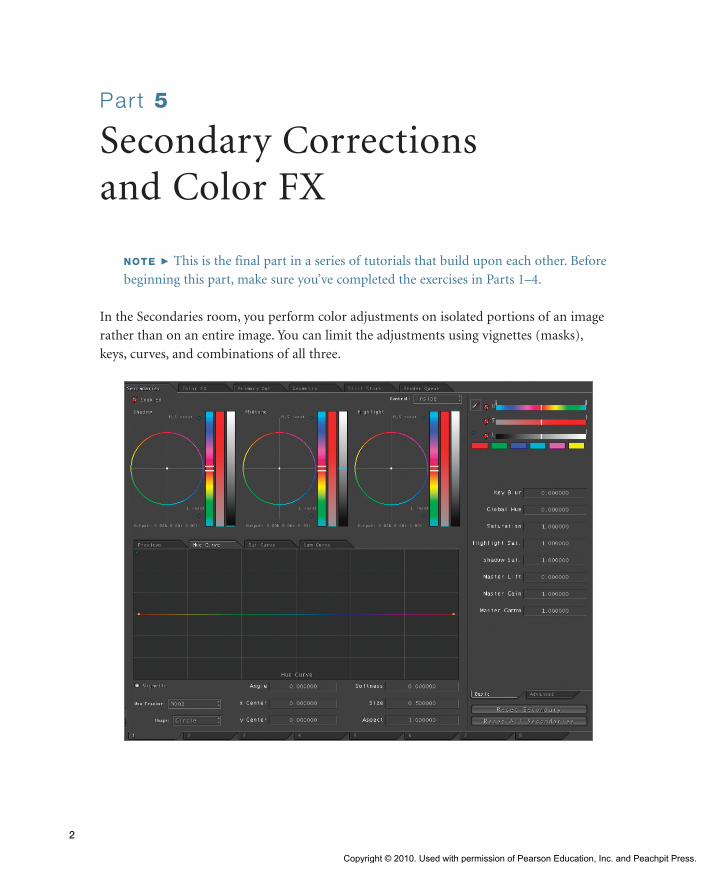
In the Secondaries room, you perform color adjustments on isolated portions of an image
rather than on an entire image. You can limit the adjustments using vignettes (masks),
keys, curves, and combinations of all three.
Secondary Corrections and Color FX
Part 5
Copyright © 2010. Used with permission of Pearson Education, Inc. and Peachpit Press.
Part 5: Secondary Corrections and Color FX 3
In this example, you’ll create a simple vignette and limit a color adjustment to that
masked area.
1 In the Timeline, position the playhead over the last clip in the sequence (07-33D-1(A)).
NOTE P If you click a clip instead of moving the playhead, the clip will be selected,
but corrections will still be applied to the clip under the playhead. Make sure the play-
head is parked over the last clip.
If you examine the shot, you’ll notice that the dark-skinned man on the left of the
frame is very hard to see, so you’ll create a vignette around that part of the image and
brighten it without modifying the rest of the shot.
2 At the top of the Composer window, click the Secondaries tab.
The Secondaries room has color balance controls similar to the Primary In room,
but the difference is that their effect will be limited to the portion of the image
selected using the other controls in this room. In the book from which this tutorial is
excerpted, you learn how to utilize all the different controls in the room, but for now,
you’ll just learn the ones necessary to perform this effect.
Copyright © 2010. Used with permission of Pearson Education, Inc. and Peachpit Press.
4 Color Correction in Final Cut Studio
3 Click the Enabled checkbox at the top of the window to turn on the Secondary
correction.
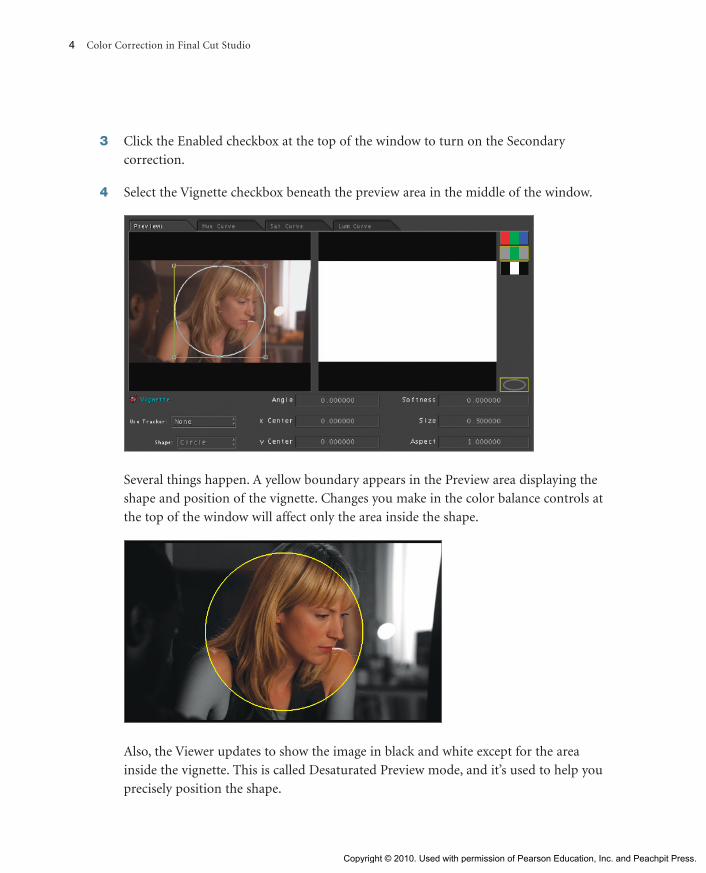
4 Select the Vignette checkbox beneath the preview area in the middle of the window.
Several things happen. A yellow boundary appears in the Preview area displaying the
shape and position of the vignette. Changes you make in the color balance controls at
the top of the window will affect only the area inside the shape.
Also, the Viewer updates to show the image in black and white except for the area
inside the vignette. This is called Desaturated Preview mode, and it’s used to help you
precisely position the shape.
Copyright © 2010. Used with permission of Pearson Education, Inc. and Peachpit Press.
Part 5: Secondary Corrections and Color FX 5
You cannot drag the shape in the Viewer; you must do it in the preview area
in the center of the Secondaries room.
5 Click anywhere in the circle shape and drag it to the left edge until it encloses the man
but not much more.
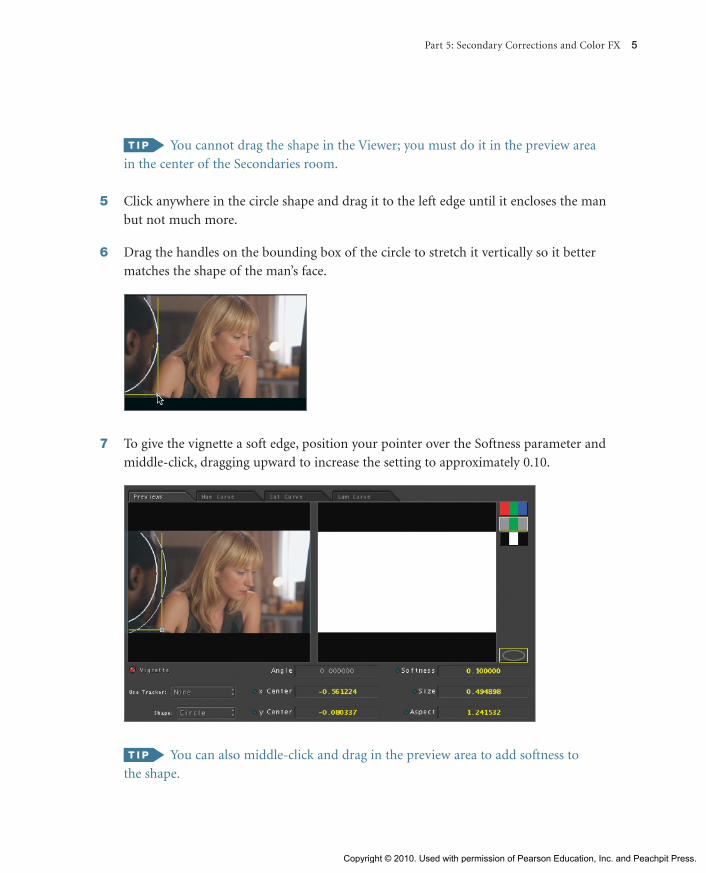
6 Drag the handles on the bounding box of the circle to stretch it vertically so it better
matches the shape of the man’s face.
7 To give the vignette a soft edge, position your pointer over the Softness parameter and
middle-click, dragging upward to increase the setting to approximately 0.10.
You can also middle-click and drag in the preview area to add softness to
the shape.
Copyright © 2010. Used with permission of Pearson Education, Inc. and Peachpit Press.
6 Color Correction in Final Cut Studio
The shape now has an inner and an outer circle to show the range of softness.
8 Drag the vignette so the outer edge aligns with the edge of the man’s face.
On the right side of the preview area, three Matte Preview Mode buttons determine
what is displayed in the Viewer window.
Display Vignette
Final ImageDesaturated PreviewMatte Only
By default, the Desaturated Preview button is enabled.
9 Click the bottom button, Matte Only, to display your selected pixels as white in
the Viewer.
10 Click the top button, Final Image, to see the final result of your correction.
Because you haven’t made any changes yet, the image in the Viewer looks just like
the original.
11 Click the Display Vignette button to turn off display of the vignette in the Viewer.
Now you’re ready to make adjustments to the man’s face using the color balance controls.
12 Drag the Highlight contrast slider upward to add illumination to the man’s face.
The change is limited to the area inside the vignette.
13 Select and deselect the Enabled checkbox at the top of the Secondaries room to see
the results of the effect.
Copyright © 2010. Used with permission of Pearson Education, Inc. and Peachpit Press.
Part 5: Secondary Corrections and Color FX 7
Original Graded
The Secondaries room offers a multitude of additional controls, both for controlling the
selection, and for modifying that selection to create different effects. Color allows for eight
different secondaries on any single clip.
Employing Color FXIn the Color FX room, you stylize shots using filters and effect presets. This room con-
tains three panels. On the left is the Node List, which contains a wide variety of filters and
preset effects. The open area in the middle of the Color FX room is the Node View, where
you can string together filters to create complex and unique effects. The right section
contains two tabs: Parameters, where you adjust selected filters, and Color FX Bin, which
stores preset collections of nodes.
Copyright © 2010. Used with permission of Pearson Education, Inc. and Peachpit Press.
8 Color Correction in Final Cut Studio
NOTE P By default, your project will not have any nodes or presets showing.
1 If it’s not already active, in the Timeline, double-click the last clip in the sequence
(07-33D-1(A)).
2 At the top of the Composer window, click the Color FX tab.
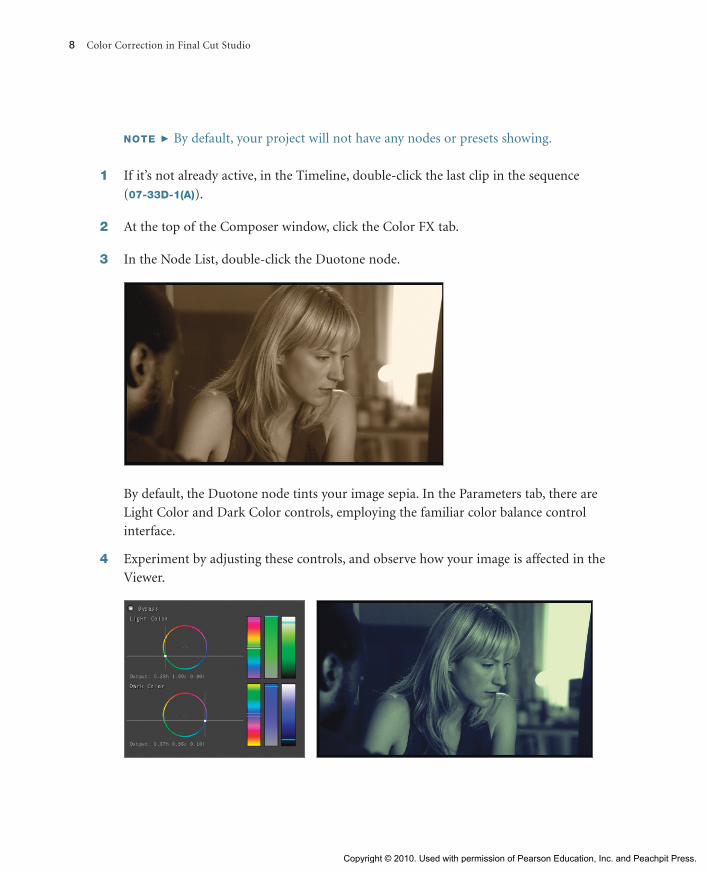
3 In the Node List, double-click the Duotone node.
By default, the Duotone node tints your image sepia. In the Parameters tab, there are
Light Color and Dark Color controls, employing the familiar color balance control
interface.
4 Experiment by adjusting these controls, and observe how your image is affected in the
Viewer.
Copyright © 2010. Used with permission of Pearson Education, Inc. and Peachpit Press.
Part 5: Secondary Corrections and Color FX 9
5 At the top of the Parameters tab, click the Bypass button to disable the node’s effect.
6 Click the Color FX Bin tab.
In this bin, you can find a variety of effects presets to perform common effects, such
as bleach bypass, day for night, and myriad dream looks.
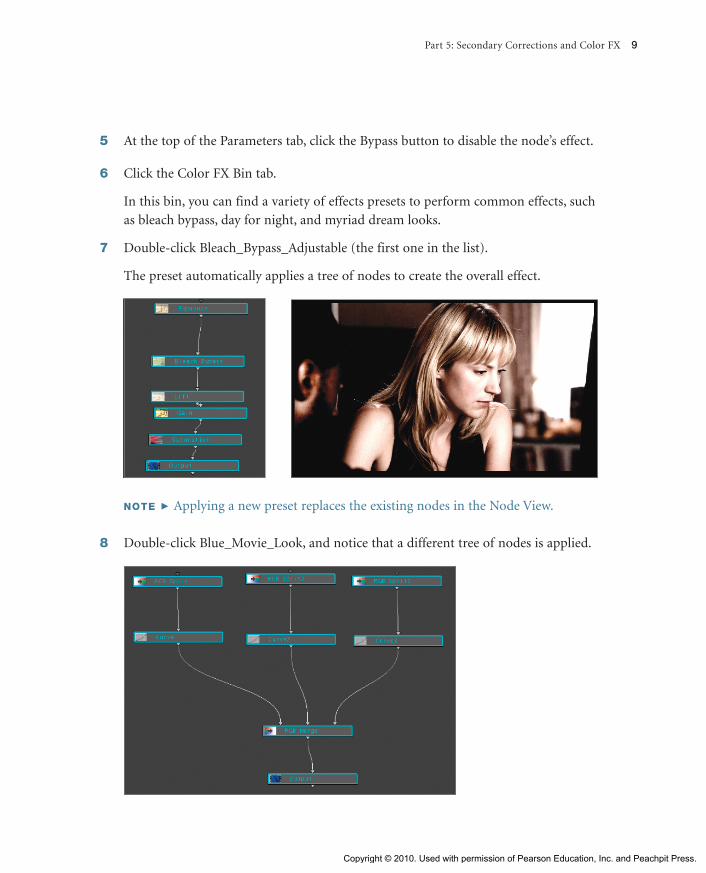
7 Double-click Bleach_Bypass_Adjustable (the first one in the list).
The preset automatically applies a tree of nodes to create the overall effect.
NOTE P Applying a new preset replaces the existing nodes in the Node View.
8 Double-click Blue_Movie_Look, and notice that a different tree of nodes is applied.
Copyright © 2010. Used with permission of Pearson Education, Inc. and Peachpit Press.
10 Color Correction in Final Cut Studio
9 In the Node View, drag to select all the nodes in the tree, and press Delete to
remove them.
Applying Final TouchesThe fifth tab activates the Primary Out room. The controls there are nearly identical to
those of the Primary In room; however, the effects are applied after the effects in the other
rooms are applied. For example, if you wanted to apply several secondary corrections to
parts of your image and then make a single global change to the results, you would make
that global change in the Primary Out room.
One of the most common uses for the Primary Out room is to make adjustments that
address possible violations of broadcast signal requirements. Although the Broadcast Safe
setting in the Project Settings tab of the Setup room clips any signals that exceed the legal
limit, for the best results you’ll want to rein in such excesses gradually to eliminate pos-
sible artifacts or strange color shifts generated by the automatic clipping.
Because changes you make in the Primary In, Secondaries, and Color FX rooms can
combine and affect each other, limiting and correcting for broadcast requirements is
best done after those other adjustments have been completed. The Primary Out room
is the last image processing stop prior to rendering, making it the ideal room for such
work.
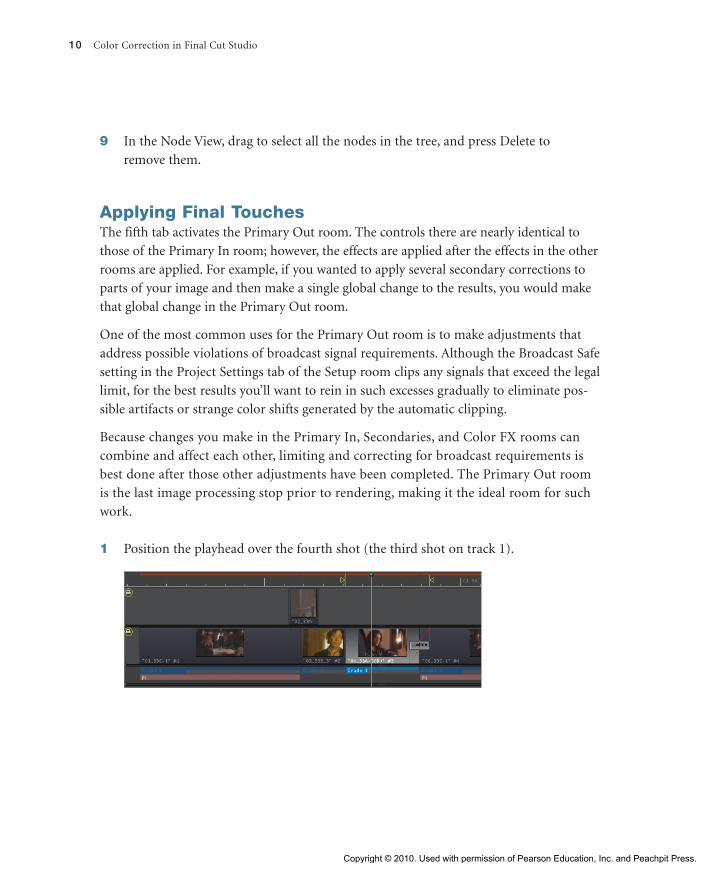
1 Position the playhead over the fourth shot (the third shot on track 1).
Copyright © 2010. Used with permission of Pearson Education, Inc. and Peachpit Press.
Part 5: Secondary Corrections and Color FX 11
Lamp is beingclipped at 100 IRE
If you examine the Waveform Monitor, you’ll see that the bright lamp is being
clipped, removing all detail from that bright spot. The clipping occurs because
the Broadcast Safe checkbox is selected in the Project Settings tab.
2 Press Command-0 to switch to the Project Settings tab.
3 Click the Broadcast Safe checkbox in the upper right to deselect it.
Copyright © 2010. Used with permission of Pearson Education, Inc. and Peachpit Press.
12 Color Correction in Final Cut Studio
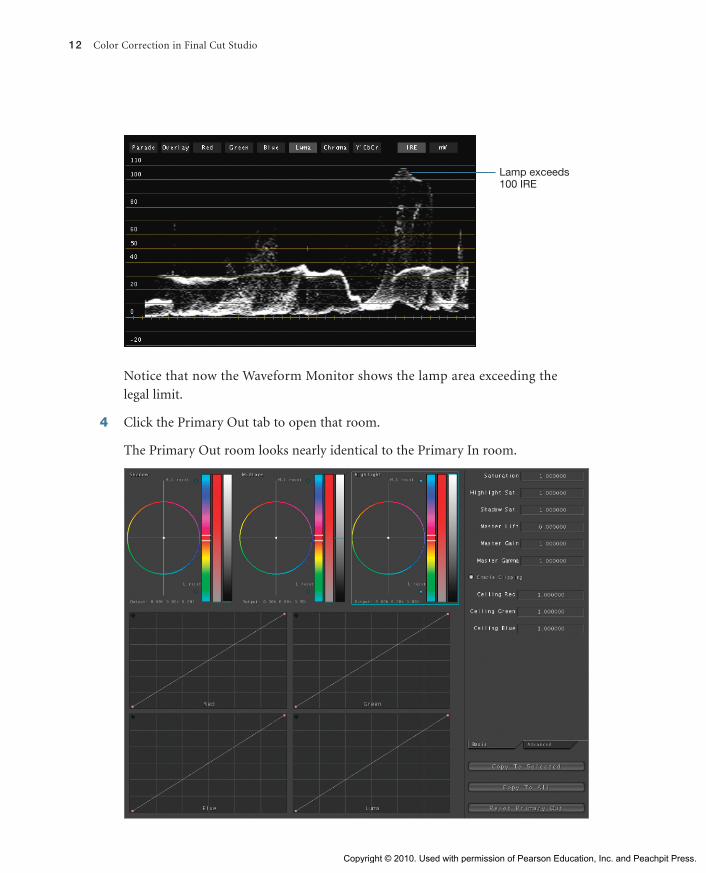
Lamp exceeds100 IRE
Notice that now the Waveform Monitor shows the lamp area exceeding the
legal limit.
4 Click the Primary Out tab to open that room.
The Primary Out room looks nearly identical to the Primary In room.
Copyright © 2010. Used with permission of Pearson Education, Inc. and Peachpit Press.
Part 5: Secondary Corrections and Color FX 13
5 Drag the Highlight contrast slider down until the Waveform Monitor shows the
lamplight safely below 100.
You may also adjust the Midtone and Shadow contrast sliders slightly to keep
the overall luma the same, just be sure to keep the brightest spots under 100.
This allows the subtle shading within the lamp to remain visible so that the bulb
in the center is brighter than the edges, while still ensuring that the whole image is
broadcast safe.
NOTE P Depending on your monitor type and configuration, you may not see a vis-
ible change in the Viewer window. Trust the Waveform Monitor as an indicator of the
relative white values in the image.
Panning and ScanningIn the Geometry room, an image can be resized and repositioned for a pan and scan
effect. Also, custom shapes can be drawn here to isolate areas in the image prior to per-
forming secondary corrections in the Secondaries room.
1 At the top of the Composer window, click the Geometry tab.
Copyright © 2010. Used with permission of Pearson Education, Inc. and Peachpit Press.
14 Color Correction in Final Cut Studio
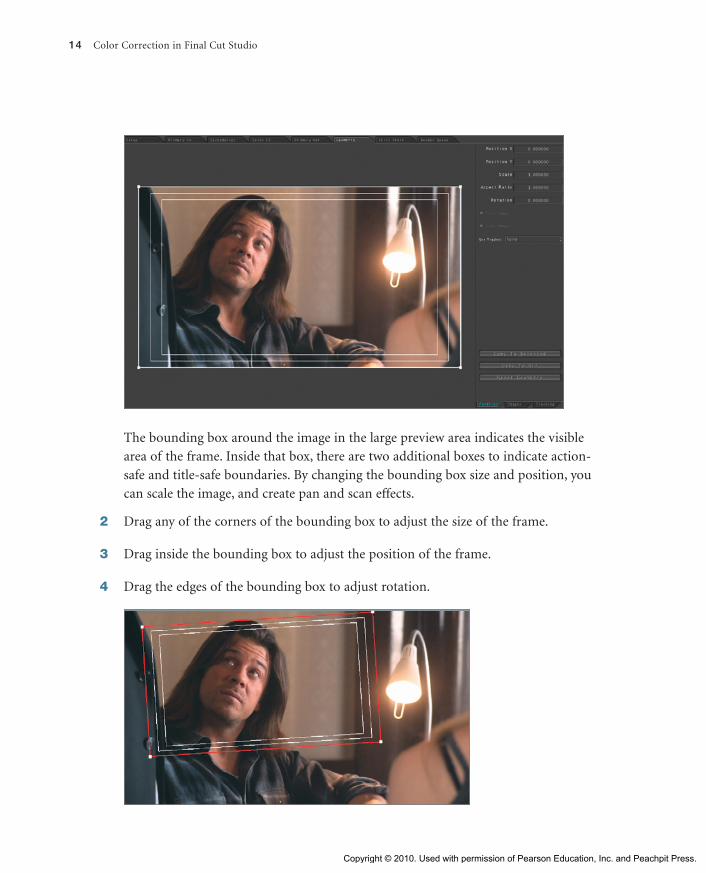
The bounding box around the image in the large preview area indicates the visible
area of the frame. Inside that box, there are two additional boxes to indicate action-
safe and title-safe boundaries. By changing the bounding box size and position, you
can scale the image, and create pan and scan effects.
2 Drag any of the corners of the bounding box to adjust the size of the frame.
3 Drag inside the bounding box to adjust the position of the frame.
4 Drag the edges of the bounding box to adjust rotation.
Copyright © 2010. Used with permission of Pearson Education, Inc. and Peachpit Press.
Part 5: Secondary Corrections and Color FX 15
The Viewer shows the image following your adjustments. In this example the shot
has been resized from an MCU to a CU, also the bright lamp has been cropped out
of the frame.
The Pan&Scan tab on the right displays the settings numerically, allowing you to enter
specific values.
The Geometry room is also where you create custom shapes for limiting corrections in the
Secondaries room, and where you control trackers so Color can move masks and correc-
tions along with an object as it moves within the frame.
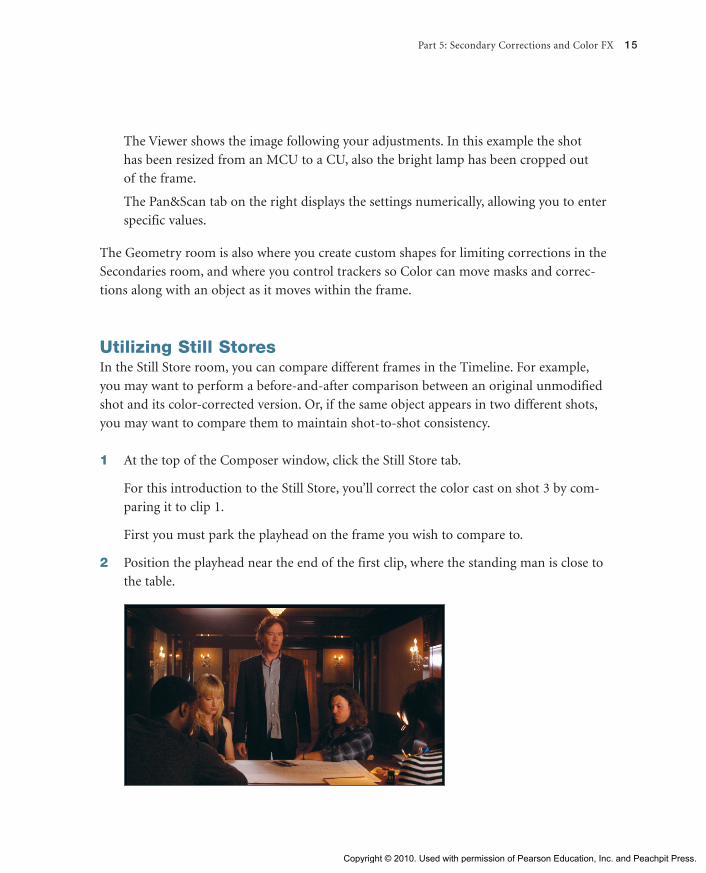
Utilizing Still StoresIn the Still Store room, you can compare different frames in the Timeline. For example,
you may want to perform a before-and-after comparison between an original unmodified
shot and its color-corrected version. Or, if the same object appears in two different shots,
you may want to compare them to maintain shot-to-shot consistency.
1 At the top of the Composer window, click the Still Store tab.
For this introduction to the Still Store, you’ll correct the color cast on shot 3 by com-
paring it to clip 1.
First you must park the playhead on the frame you wish to compare to.
2 Position the playhead near the end of the first clip, where the standing man is close to
the table.
Copyright © 2010. Used with permission of Pearson Education, Inc. and Peachpit Press.
16 Color Correction in Final Cut Studio
3 Choose Still Store > Store (or press Control-I).
The frame is saved as a freeze frame, and a thumbnail appears in the Still Store room.
4 Click the Still Store tab at the top of the Composer window, or press Command-7.
5 At the top of the Still Store, drag the Icon Size slider to adjust the size of the thumbnail.
6 Move the playhead to the third clip (the second clip on track 1).
The right side of the viewer updates to show the new frame, while the left side shows
the stored still. You can see the actor’s face clearly in both frames.
It’s very obvious that the colors don’t match, but it may be less obvious how to fix
them. First you must identify the nature of the color cast. This is most easily identi-
fied in the Vectorscope.
Copyright © 2010. Used with permission of Pearson Education, Inc. and Peachpit Press.
Part 5: Secondary Corrections and Color FX 17
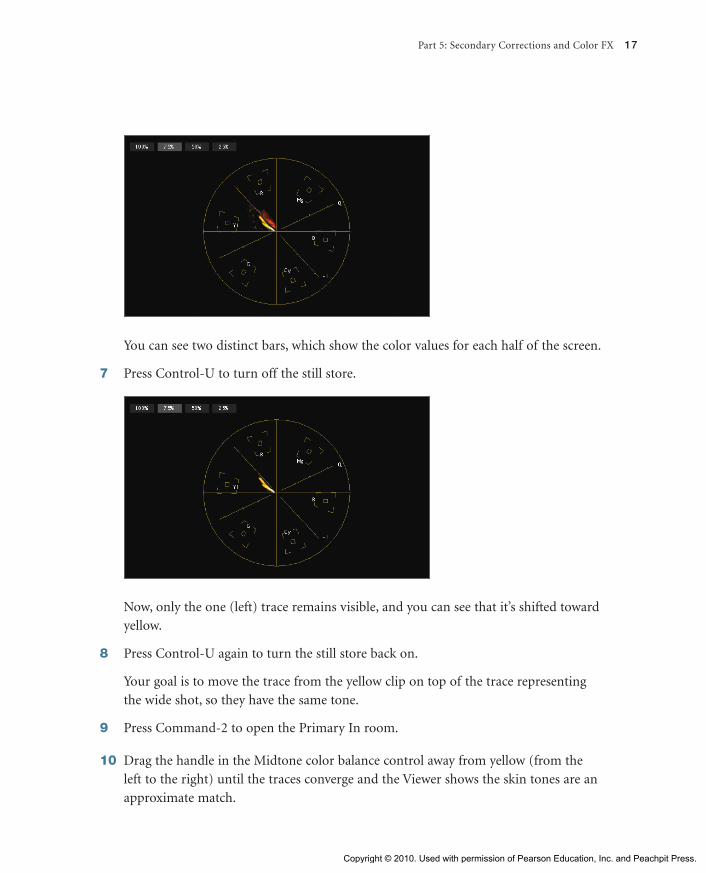
You can see two distinct bars, which show the color values for each half of the screen.
7 Press Control-U to turn off the still store.
Now, only the one (left) trace remains visible, and you can see that it’s shifted toward
yellow.
8 Press Control-U again to turn the still store back on.
Your goal is to move the trace from the yellow clip on top of the trace representing
the wide shot, so they have the same tone.
9 Press Command-2 to open the Primary In room.
10 Drag the handle in the Midtone color balance control away from yellow (from the
left to the right) until the traces converge and the Viewer shows the skin tones are an
approximate match.
Copyright © 2010. Used with permission of Pearson Education, Inc. and Peachpit Press.
18 Color Correction in Final Cut Studio
Do not make the mistake of dragging the Midtone color balance handle
toward red or magenta. Even though the wide shot appears to have more red and
magenta than the close-up, the Vectorscope shows you that the close-up has a range
of colors, but that they’re all skewed uniformly toward yellow. When fixing a cast,
think in terms of removing the color you don’t want rather than adding the color
you do want.
In the Still Store, you can control the position and direction of the split.
11 Click the Still Store tab.
12 Experiment with the settings in the right side of the window to modify the way that
the split screen is drawn.
You can also control the shape and position of the split screen by manually
adjusting the Transition and Angle settings.
13 Deselect the Display Loaded Still checkbox (or press Control-U) to disable the split-
screen effect in the Viewer.
Copyright © 2010. Used with permission of Pearson Education, Inc. and Peachpit Press.
Part 5: Secondary Corrections and Color FX 19
Introducing the Render Queue RoomIn the Render Queue room, you decide which shots you want to render before returning
your sequence to Final Cut Pro.
1 At the top of the Composer window, click the Render Queue tab.
In this case, you want to render all three of the car shots but not the green door shot.
2 In the Timeline, Shift-click the three car shots to select them.
3 At the bottom of the Render Queue room, click the Add All button.
Each shot is added to the queue.
4 Click the Start Render button.
As Color renders, it creates new media files on your disk with your rendered correc-
tions. These files are saved in the format and to the destination that you specify in the
Project Settings tab of the Setup Room.
5 Once rendering is complete, choose File > Send to > Final Cut Pro.
Final Cut Pro comes to the foreground, and a new sequence is created with the addi-
tional label “from Color.”
Copyright © 2010. Used with permission of Pearson Education, Inc. and Peachpit Press.
20 Color Correction in Final Cut Studio
6 Double-click this sequence to open it.
The sequence looks identical to the original. Even though the clips retain their original
names, they now point to the new files created in Color.
7 Right-click the first clip in the sequence and choose Reveal in Finder.
Color always names files by the order in which they appear in the sequence. In Lesson 13,
you’ll learn more about how to manage Color’s output files as well as how to make
additional changes in Color and have them propagate back to Final Cut Pro.
8 Switch back to Final Cut Pro.
In the new sequence, the color correction filter that was applied to the first two clips
is no longer applied, but the timecode filter on the fifth clip is still there.
9 Double-click the fourth clip and click the Motion tab.
You applied changes to the Pan and Scan settings for this clip in Color. Rather than
rendering those modifications into the file, Color rendered the file at its original size,
and the scale settings were applied in Final Cut Pro.
Your show is ready to output to tape, to Compressor, or the output method of your
choice. The round trip between Final Cut Pro and Color is complete.
Copyright © 2010. Used with permission of Pearson Education, Inc. and Peachpit Press.
Part 5: Secondary Corrections and Color FX 21
NOTE P This tutorial is excerpted from Apple Pro Training Series: Color Correction in
Final Cut Studio, by Michael Wohl and David Gross, ISBN 0-321-63528-0. For more
information or to buy the book, see www.peachpit.com/apts.
Copyright © 2010. Used with permission of Pearson Education, Inc. and Peachpit Press.