57
CONCUR 101 TRAINING

CONCUR 101TRAINING

WELCOME EAGLES!!!
Travel Contacts
K’Leeh Holt at 903-223-3112
Please only call after-hours for hotel and/or rental car travel card declines. All other declines will be addressed the following business day.

How to Order a Travel Credit Card
Fill out the CBT Travel Card Application found on our website…
http://tamut.edu/About/Administration/travel/index.html
Please ensure your supervisor signs the application
Complete the Acknowledgement form at the end of the Travel Guidelines PowerPoint
Send original application and Acknowledgement Form to the Travel Office

What is CONCUR?Concur integrates pre-trip approval and expense reporting with a complete travel booking solution.
This comprehensive Web-based service provides all of the tools users need to book travel as well as create and submit expense reports.
Managers use the service to review and approve expense reports.
Back-office employees use the service to produce audit reports, ensure compliance, and deliver business intelligence to help your company reduce its costs.

How to log on to Concur:
https://sso.tamus.edu
Login to HR Connect (Single Sign On) using UIN and current password
Select Concur


First Things First. . . . . . . . . . . . . .………Setting Up a Traveler‘s Profile
Select Profile Tab
Select "Personal Information"
Verify pre-loaded content
Complete remaining requirements and preferences
Designate Assistants and Travel Arrangers, if applicable
Designate Expense Delegates, if applicable
Add credit card information
Note: Required fields are denoted in red.

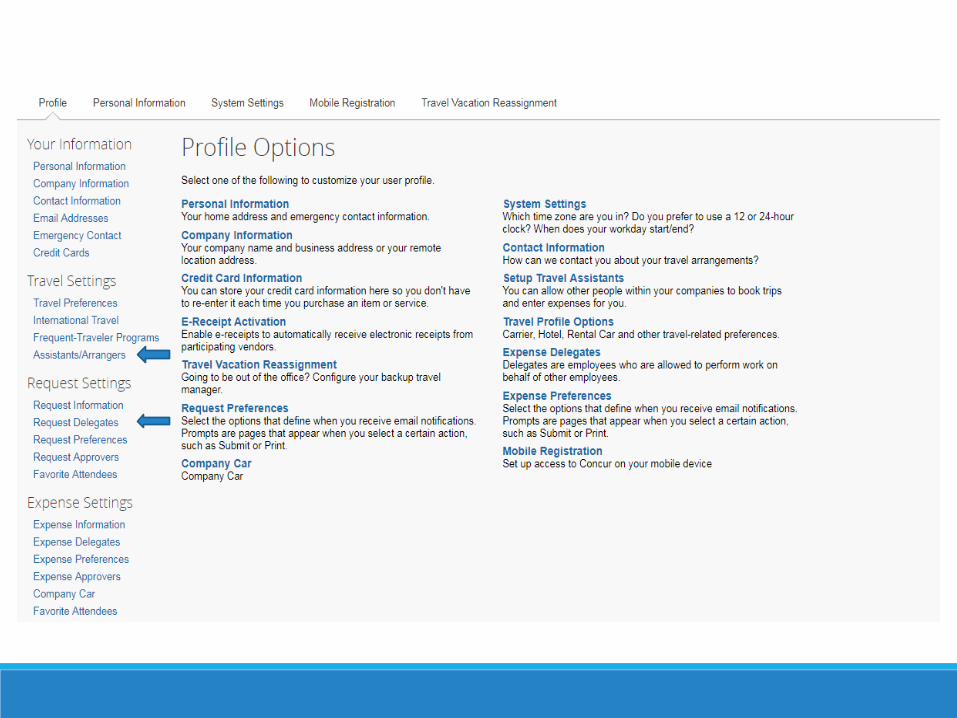
Adding Assistants/Travel Arrangers and Expense Delegates
TO SETUP ASSISTANT/TRAVEL ARRANGERS:
Select Profile Tab.
Select “Assistant/Travel Arrangers" under the “Travel Settings" header on the left-hand column.
Click on “Add an Assistant”
Type in the delegates UIN #
Select “Can book travel for me” and “Is my primary travel assistant” if applicable
TO SETUP EXPENSE DELEGATES:
Select Profile Tab
Select "Expense Delegates" under the "Expense Settings" header on the left-hand column.
Click on “Add”
Type in the delegates UIN #
Check mark “can prepare” and “receive emails”
Select “Save”

Customizing Home Page
To customize additional user settings, select "System Settings”
Select “Other Preferences”
Click on Home Page down arrow
Select “My Concur”
Home page allows you to see all your Concur activities on one page
You may move these windows and place them in any order you prefer
To add mobile access via apps for iPhones, Blackberries, and Android devices, select "Mobile Registration" under the "Other Settings" header on the left-hand column.

Creating the Travel Request (TR):
Under the “Request" tab, select "New Request," complete the request details, and then select "Save."

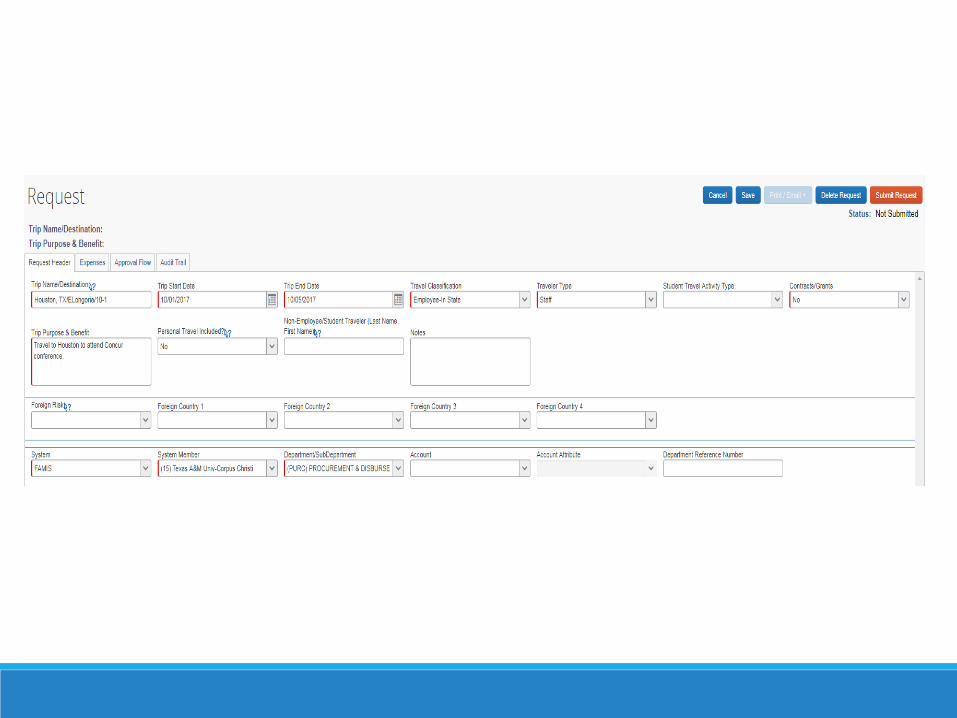
Travel Request Screen

Entering Trip InformationAdd Trip/Destination field should include the City & State
Fill in trip start and end date (manual or calendar)
Fill in purpose and benefit to the University
Select the travel classification
Select the traveler type
Denote personal travel – “Yes or No”
Add notes to supervisor or auditors
System Member is “22”
Department/SubDepartment
Account & Account Attributes

Selecting an Account Number
Do not change the System Member number. It will always default to our system number “22”.
When selecting an account number click in the box labeled account and a drop down box will appear. Type the department for the account being used, list of account numbers will appear where you can pick your account number here.
If you are not sure of your department number, you may ask your Admin.

Traveler Classification and TypeWhen adding traveler classification and type, make sure the correct options are being used.
Commonly Used Classifications/Types:◦ Employee-In State/Faculty or Staff
◦ Employee-Out of State/Faculty or Staff
◦ Student-Domestic Travel/Faculty with students or Staff with students (used when traveling w/students)
◦ Prospective Employee-Domestic/Non-employee
◦ Prospective Student/Staff (used for Recruiting trips)
If you are creating a TR for a traveler who is a prospective employee or guest traveler, a W-9 form needs to be filled out and sent to Accounts Payable. Please note on the W-9 that the traveler needs to be added in Concur.

Personal Travel: Please denote if the traveler is going to have any personal travel while on their trip. Select “Yes” or “No”.
Notes: This section is reserved for any extra information you will need to explain about the trip. Here is where you can add notes regarding students and/or for multiple traveler approval. Any notes that will help put trips together or offer any type of explanations.
Department Reference Number: This field may be used by department. It is not mandatory.
Contracts: This field will be defaulted as “No” even if you do have a contract or grant. You will need to change to “Yes” if using grant funds (4xxxxx accounts).
Foreign Risk Acknowledgment and Foreign Country 1, 2, 3, 4
Click “Foreign Risk Acknowledgment” box and select “Country(s) not under a warning” or “Country(s) under US State Dept warning”.
Foreign Country 1,2,3 and 4: “Foreign 1” – select the first country; “Foreign 2, 3, 4” – select the second, third or fourth countries (if applicable) where traveler will visit.


Once you have filled out all the required fields hit Save
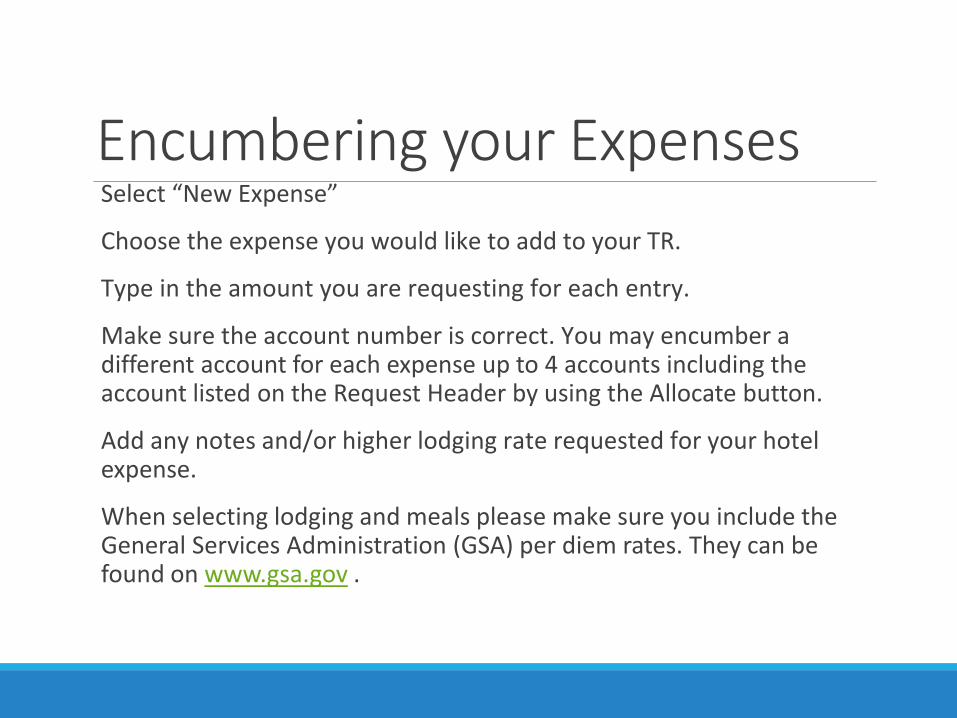
Encumbering your ExpensesSelect “New Expense”
Choose the expense you would like to add to your TR.
Type in the amount you are requesting for each entry.
Make sure the account number is correct. You may encumber a different account for each expense up to 4 accounts including the account listed on the Request Header by using the Allocate button.
Add any notes and/or higher lodging rate requested for your hotel expense.
When selecting lodging and meals please make sure you include the General Services Administration (GSA) per diem rates. They can be found on www.gsa.gov .

Encumber your Expenses
Higher Lodging If requesting a higher lodging rate, please choose Yes or No in the Higher Lodging Rate Requested box.
A higher lodging rate is sometimes needed if the GSA per diem rate is not available, or the hotel of the conference site has a specific rate that is higher than the standard rate.

Higher Lodging Requested Here

Attach Documents to your Request

Submitting the request…Once you have requested all your expenses for the trip, they will appear on the left side of you TR.
You will then click on the “Submit Request” tab. This will send the request to your supervisor to approve.


How to read your TR… There are different ways to read your Travel request:
Click on the “Requests” tab and all “Active Requests” will come up. Choose the one you want to look at.◦ This will show you the basic information of your TR. It will also show you
the “Request ID” assigned to your request.
Click on “Audit Trail”,◦ This will tell you who has touched your document.
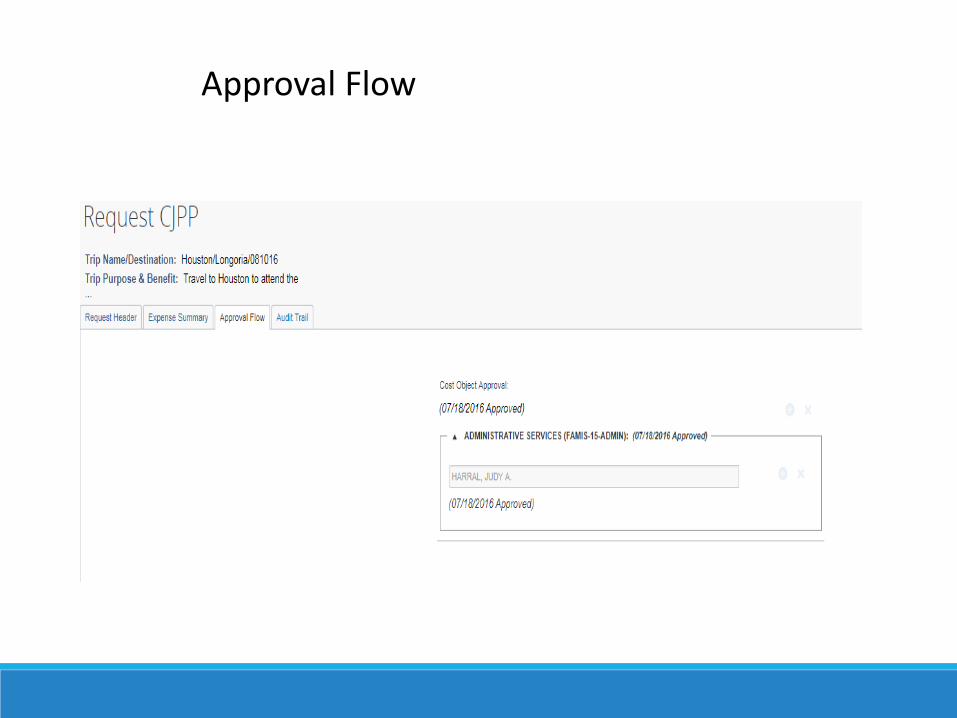
Click “Approval Flow”◦ This will show the status of your TR and who’s box it is sitting in.

Travel Request ID

Audit Trail View
Approval Flow

Booking Hotels, Flights and Car Rentals
Once trip is approved in Concur, traveler may:
Book local and international flights
Make car rental reservations
Reserve hotels
Using our contracted Concur travel agent, Corporate Travel Planners is recommended. Once all reservations are complete, traveler is ready to go on trip.
Using Expedia, Travelocity, and other online booking agents is highly discouraged.

Corporate Travel Planners
Will provide and deliver comprehensive, client specific travel management services faster and cheaper
Online booking fees will be included with total amount charged to credit card
For Group travel it is recommended you utilize Corporate Travel Planners, fees will apply.
Corporate Travel Planners is the only State Contract travel agency we can use.

Now you have come back from your trip……What to do next?Once you have returned from your trip you will create an expense report to reconcile your charges and be reimbursed for any out-of-pocket expenses.
Log on to SSO, select Concur, and select the Request tab
Locate approved request then click “Expense” under the “Action” column.
The Expense Report Header is displayed with the Travel Request attached.
Type in the correct account number.
Once you verify the information on the header, click “Next”.
The Expense Report Summary is displayed. Click “Import” add Citibank charges. Click “New Expense” to add out-of-pocket expenses.


Credit Card Charges and ExpensesOnce your charges and expenses appear on report you will need to assign the expense type to each expense. If “undefined” is showing, that indicates Concur does not know what the expense type is, so you need to tell it.
Click on the line item to complete transaction details and make sure that the orange circle with a credit card in the middle is showing. This indicates you used your travel card. It looks like this:
Line items can also be itemized and/or allocated to a different account
Attach receipt if required
Save (you may also save as you enter data)

Allocating Charges & ExpensesIf line item needs to be expensed to a different account number…
Click on line item
Select allocate (located on lower right side of screen)
New window appears
Select account number
Allocate by amount or percentage
Click Save and Done

Claiming your Out-of-Pocket Expenses…Click on New ExpenseSelect the expense you are claiming
Fill out all required fields denoted in red
If claiming hotel, you need to itemize your expenses Click on hotel; select itemize.
On Payment Type choose “Out of Pocket”
Choose your expense type; Fill in the required fields; and select “Save Itemizations”.The expense will populate to the left of the screen with the expense type and itemized amount(s).
The total itemization must balance to the amount being claimed.

If claiming mileage…
The maximum state mileage reimbursement rate for travel by state employees in a personal vehicle is adjusted each calendar year.
This rate is consistent with the Internal Revenue Service’s standard mileage rate. For more information, see State Mileage Reimbursement Rate (FPP S.005) ,Transportation: Mileage in a Personal Vehicle in Textravel.

How to upload a receipt..ATTACHING A RECEIPT TO THE EXPENSE LINE.
Scan receipt(s) Save receipt(s) to desktop
Select “Attach Receipt”
Box pops upSelect “Browse”
Find receipt on desktop
Click “Attach”Receipt is attached
ATTACHING A DOCUMENT(S) AND/OR RECEIPT(S) TO EXPENSE REPORT.
Scan receipt(s)
Save document(s)/receipt(s) to desktop
Select “Receipts” tab
Select “Attach Receipt Images”
Box pops up
Select “Browse”
Find receipt(s) on desktop
Click on “Upload”
Verify box shows “Attached”
Select “Close”

Missing a receipt!
The red circle with the exclamation mark indicates a hard warning and will not allow you to submit this report until the error has been corrected.


Click on “Browse”, search for receipt(s)
select “Attach”, “Upload” and then
“Close”

How to view your receipts…..
Select the “Receipts Tab”
Click on “View Receipts in New Window”.
Your receipts will pop up in a PDF screen.

Printing Detailed ReportThe detailed report shows object codes, amount due to traveler and/or company
Open Report
Select the “Print/Email” tab
Click on “Texas A&M Detailed Report”
Report will populate
Able to print, email, or get PDF copy of report


Now you are ready to Submit…Once you have completed your Expense Report for you trip you will now Submit the Report.
Click on the “Submit Report” button on the top right
You will be prompted to a “Final Review”
Select “Accept and Submit”


Questions????
CONGRATULATIONS!!!!!You have successfully completed the Concur 101 Training
THANK YOU…


