1 CONSOLIDATED AND ANNOTATED RULES Including additional rules from the following sets: Appendixes from the Multiple-Dial Warriors, Titans, and Castle Rules, as well as Conquest Rules and Apocalypse Dragon Rules.
Transcript
1
CONSOLIDATED AND ANNOTATED RULES
Including additional rules from the following sets:
Appendixes from the Multiple-Dial Warriors, Titans, and Castle Rules, as well as Conquest Rules and Apocalypse Dragon Rules.
Table of Contents THIS IS MAGE KNIGHT! .......................................................................... 3
FACTIONS AND SUBFACTIONS ........................................................ 3MAGE KNIGHT WARRIORS.................................................................... 3
THE BASE ................................................................................................ 3THE COMBAT DIAL .............................................................................. 3CHAMPIONS (from the Omens expansion set) ..................................... 4
WHAT YOU NEED TO PLAY................................................................... 4GETTING STARTED .................................................................................. 4
BUILDING YOUR ARMY...................................................................... 4SETUP ....................................................................................................... 4DEPLOYING YOUR ARMY.................................................................. 5
HOW TO PLAY............................................................................................ 5TURNS, ACTIONS, AND PHASES....................................................... 5CONTROLLING OBJECTIVES............................................................. 6IMPORTANT GAME CONCEPTS ........................................................ 6RULE OF 3................................................................................................ 7MOVEMENT ............................................................................................ 7COMBAT .................................................................................................. 9FORMATIONS....................................................................................... 12SPECIAL ACTION ................................................................................ 13TURN EXAMPLE .................................................................................. 13
DOMAINS ...................................................................................................20ITEMS ..........................................................................................................20ELIMINATING A PLAYER......................................................................20ENDING THE GAME ................................................................................21
THE STANDARD GAME..........................................................................21TOURNAMENT PLAY .........................................................................21
POINT VALUE .......................................................................................25GENERAL RULES.................................................................................25CHARIOTS..............................................................................................27
TITANS RULES..........................................................................................28POINT VALUE .......................................................................................28GENERAL RULES.................................................................................28
CASTLE RULES.........................................................................................29POINT VALUE .......................................................................................29GENERAL RULES.................................................................................29ACTIONS.................................................................................................31ATTACKING THE CASTLE ................................................................31CASTLE SECTION RULES..................................................................32
Mage Knight Conquest................................................................................33Getting Started .........................................................................................33How to Play..............................................................................................33
Apocalypse Dragon Rules...........................................................................35The Apocalypse Dragon..........................................................................35Powers of the Apocalypse.......................................................................36
SPECIAL ABILITY CARD .......................................................................37SPEED SPECIAL ABILITIES...............................................................37SWORD ATTACK SPECIAL ABILITIES...........................................38BOW ATTACK SPECIAL ABILITIES ................................................39WAND ATTACK SPECIAL ABILITIES.............................................39DEFENSE SPECIAL ABILITIES .........................................................40DAMAGE SPECIAL ABILITIES .........................................................41SUBFACTION ABILITIES ...................................................................42
Introduction Multiple Dial Warriors and Titans rules are not included in this document, but may be included in future versions.
Note: This document was created as a helpful reference for Envoys and Players. While efforts have been made to ensure that the text in this document is accurate, but is a legacy document. The printed rulebooks and current FAQ are the ultimatesource if any inaccuracies exist in this document. Note that while the text itself has remained unchanged (except where officially changed via the FAQ), some formatting differences may be found in this version of the document for clarity.
Throughout the text, you will find the following styles of notes and comments:
Blue text represents rule text changes that can be found in the FAQ. All changes are based on those found in Mage Knight Questions and Answers, June 2005.
Text in a yellow box are clarifications derived directly from FAQ entries. The page number where the entry may be found is shown. Entries are derived from those in Mage Knight Questions and Answers, June 2005.
Text in a green box are notes not found in the FAQ, but are included to help clarify some of the potentially confusing rules situations.
Text in a blue box are notes referring to extra rules that apply when playing in a Mage Knight tournament, with section number from the Mage Knight Consolidated Tournament Rules, last updated on May 3, 2005.
JohnC
Sticky Note
changed from "the text in this document is accurate, this document is not an official resource."
THIS IS MAGE KNIGHT! In the Mage Knight game, you take on the role of a powerful warlord: a king, baron, or high wizard who sends his or her troops out to do battle with opposing armies. Races of fantastic beings populate your army, which is fortified with arcane magic and powerful technology. If you are up to the task of carving a kingdom out of chaos, then read on!
Mage Knight is a fast-playing game of tabletop combat using collectable Mage Knight miniatures. Each miniature is called a warrior, or figure, and most are members of one of several different factions. In addition to belonging to factions, warriors can also belong to subfactions. The object of the game is to control the most battlefield objectives when the game ends.
FACTIONS AND SUBFACTIONS
Apocalypse
Dark Riders
Minions of Apocalypse
Atlantean Empire
Delphana
Golemkore
Imperial Legion
Black Powder Revolutionaries
Bloody Thorns
Forgemasters
Northlanders
Dark Crusaders
Blood Cultists
Deathspeakers
Order of Vladd
Draconum
Dragon Mystics
Elemental Freeholds
Storm Druids
Wylden Host
Elven Lords
Free Armies
Order of Sorcery
Temple Masters
Hero
Mage Spawn
Order of the Ninth Circle
Orc Khans
Broken Tusk
Chaos Shamans
Shadow Khans
Shyft
Darkmarch
Solonavi
Oracles of Rokos
You build an army from your collection of warriors. You can build your army hundreds of different ways, using warriors from one faction or multiple factions.
You can play the game with as many players as you like, but the game plays best with from between two and four players, each with his or her own army. You can also play team games, with two or more teammates allied on each side.
MAGE KNIGHT WARRIORS A Mage Knight warrior is composed of three main parts: the figure (the three-dimensional representation of the warrior), the base, and the combat dial. The base and combat dial are described below.
THE BASE Each warrior’s base contains important game information. Hint: There are nine different Mage Knight warriors in the Starter Set. Some warriors look the same, but have different ranks, paint schemes, and combat dials to identify them. Each warrior’s base has a collector’s number printed on it so that you can keep track of your collection.
THE COMBAT DIAL The combat dial is the unique feature that sets Mage Knight apart from other miniatures games. The combat dial is the rotating disk found under each warrior’s base, and is viewed through the stat slot on the rear of each warrior’s base. Each warrior’s combat dial shows sets of numbers that tell you how well the warrior does certain things. Each time one of your warriors is dealt damage during the game, you turn its combat dial clockwise to the next set of numbers. When one of your warriors is healed of damage during the game, turn its combat dial counterclockwise.
The bases on some warriors turn from underneath the dial. To make turning these dials easy, there is a flight stand in each Starter Set that doubles as a turning “key ring.” Simply match up the grooves on the flight stand with the grooves on the bottom of the base and turn the dial.
Combat Values Each warrior has seven combat values, all of which can change during the game. The seven combat values are speed, attack, defense, damage, attack bonus, ranged damage, and range. Some appear on the combat dial and can be seen through the stat slot, and some appear on the base.
CHAMPIONS (from the Omens expansion set) Champions are Unique figures that have multiple combat dials, each representing a different version of the warrior. The icon appears on the bottom of a champion’s combat dial and can be seen through the bottom of its clear base. Each version’s combat dial has a special ID click before the click printed with its starting marker. The ID click is printed with the point value of that version, as well as the champion’s collector’s number followed by a letter that identifies that version. Only combat dials and bases whose collector’s numbers and set symbols match may be played as champions.
Before bringing a champion into play, a player selects which combat dial will be used with the warrior’s base. The point value on that version’s ID click applies to the player’s build total. Place the combat dial into the champion’s base, and then turn it to its starting marker before deploying the champion. A champion’s combat dial may not be removed from its base during a game.
WHAT YOU NEED TO PLAY In addition to your Mage Knight warriors and this rulebook, two players will need the following items to play: one 28” flexible ruler marked in 1” increments, three objective tokens, three double-sided control markers, six Hex/Overwatch tokens, two six-sided dice, and one Special Abilities Card—all of which are supplied in the Mage Knight Starter Set. In addition, you will need a few coins or beads to use as action tokens during the game and some simple items to use as terrain.
There are also round, blank stickers provided with each pack of Mage Knight warriors. Attach one to the bottom of each warrior’s base and write your initials on the sticker to help you sort out which warriors are yours at the end of a game. If a base requires the flight stand in order to be turned, simply trim a sticker to fit on the bottom of the base so that it doesn’t cover the turning grooves.
GETTING STARTED There are two things players must do before beginning a Mage Knight game: build armies and set up the battlefield.
BUILDING YOUR ARMY Everyone in the game should agree on the build total of each player’s army. Build totals must be in multiples of 100 points. While you are learning the game, use armies with build totals of 100 points. Once you feel comfortable with the basics, you can increase the build total of your armies to 200 or 300 or more points.
Each Mage Knight warrior has a point value printed on its base. Choose warriors for your army whose point values add up to, but do not exceed, the build total.
Example: Christine is creating an army with a build total of 100 points. For some close combat ability, she takes one Tough Orc Marauder (19 pts.). For ranged combat ability, she chooses one Weak Orc Hunter (21 pts.) and a Standard Gulthak Orc (25 pts.). Finally, she chooses a Weak Blood Shaman (34 pts.) for its healing ability. Christine adds up the point values of her warriors. The total is 99 points (19 + 21 + 25 + 34 = 99), less than the 100-point build total, which is fine. She could not have exceeded 100 points.
Your army can contain two or more of the same warrior, unless that warrior is Unique. A Unique warrior has no rank stars on its base, and is identified by its name and collector’s number. It’s okay if the same Unique warrior appears in opposing armies on the same battlefield.
Once you feel comfortable playing Mage Knight, you can also equip your warriors with items. These items also have point values that contribute to the build total. See “Items” for more information.
Hint: When building your army, mix and match warriors that work well together and help achieve your strategic goals. Armies can be created to keep opponents at a distance with ranged attacks, reanimate eliminated warriors, or capture and eliminate opposing warriors. Of course, there is a counterstrategy for every strategy, so be sure that your warriors are diverse enough to handle threats your opponents might bring to the table. Visit www.mageknight.com to join a community of players who discuss army-building strategies and game rules.
SETUP Now it’s time to create the battlefield for your game. Mage Knight can be played just about anywhere, but a flat tabletop about 3´ long on each side is best. Each player selects one edge of the battlefield to be his or her starting edge. If there are only two players, the starting edges must be directly opposite each other.
Along your starting edge, you have an imaginary rectangular box called your deployment area. Your deployment area begins at your edge and extends 3” into the battlefield. Your deployment area must also be at least 8” away from any other battlefield edge. Your deployment area has two short edges and two long edges. The long edge farthest from you is called the far edge. The long edge nearest you is called the near edge.
A figure from the Hero faction may be deployed at any level by paying the appropriate point cost, but cannot change levels during the game, nor be healed past its starting level. (p.13)
A player may never have more than one of the same Unique in his army at the same time. (p.11)
Placing Terrain and Objective Tokens Each player then places from zero to four terrain features in a pile off to the side of the battlefield. Terrain is fully described later. Many everyday items can act as terrain: a book, a sheet of paper, or even a salt shaker.
Now it’s time to place the objective tokens. Objective tokens are included in the Starter Set and represent strategic battlefield locations—called objectives—that each player is trying to control. For each game, use one objective token plus one objective token per player.
Place one objective token in the center of the battlefield and give each player one of the remaining objective tokens. Next, each player rolls two six-sided dice. Reroll ties. The player with the highest result is the first player. The first player places his or her objective token on the battlefield. Players’ dice roll results also indicate how far away in inches they must place their objective tokens from the far edge of their deployment areas. Measure from the far edge of your deployment area to the center of the objective token when placing that objective token. Each player must place objective tokens entirely on the battlefield at least 3” away from any battlefield edge, and perpendicular to the far edge of their deployment area. Also, each player should choose a differently colored control marker that he or she will use during the game. Control markers identify which players control objective tokens. Objective tokens are clear terrain.
After objective tokens have been placed, the player to the left of the first player takes a terrain feature out of the pile and places it on the battlefield. Each terrain feature must be placed at least 3” away from any of the following elements: � Any other terrain feature on the battlefield � Any objective token on the battlefield � Any battlefield edge � The far edge of any deployment area
Then the next player to the left chooses a terrain feature and places it using the same rules. This process continues clockwise around the battlefield until four terrain features or all the terrain features have been placed, whichever comes first.
You can also play with constructed terrain and domains, which also affect the battlefield.
DEPLOYING YOUR ARMY After terrain features and objective tokens have been placed, players turn their warriors’ combat dials so that the green starting marker shows in each stat slot. Now it’s time to deploy your army.
The first player deploys his or her army first. Each of the first player’s warriors must be placed with its center dot, or the center of its base if you cannot see the center dot, within his or her deployment area. After the first player has deployed all of his or her warriors, the player to the left of the first player deploys his or her warriors in his or her deployment area. If there are more than two players, continue this process clockwise around the battlefield.
Once all warriors have been deployed, you are ready to play. Let the battle begin!
HOW TO PLAY Players alternate moving their warriors and having them attack opposing warriors in order to gain control of objectives and win the game.
TURNS, ACTIONS, AND PHASES Mage Knight is played in a series of turns. The first player takes the first turn. The player to his or her left takes the next turn, and so on, clockwise around the table. If a player is eliminated from the game, the remaining players continue taking turns in the same clockwise order.
You begin each turn with a certain number of actions known as your action total. The number of actions you get depends on the build total of your army: You get one action for every 100 points of your army’s build total. An army with a build total of 100 points gives you one action each turn, a build total of 200 points gives you two actions each turn, and so on. Your action total remains the same even if some of your warriors are eliminated or captured. Your warriors use these actions to attack, move, and use special abilities.
Each turn is divided into three phases: the command phase, the action phase, and the end phase. You must declare the end of one phase before moving on to the next.
At the beginning of your command phase, you can give actions to your warriors that are specific to the command phase. Some special abilities or actions given on previous turns resolve during your command phase. You choose the order in which these actions or special abilities resolve. After resolving the first action or special ability, choose another to resolve, as appropriate. Continue until all such actions and special abilities have been resolved.
During your action phase, you give actions to your warriors. You are allowed to see the result of one action before choosing the next action (if you have more than one action available). No warrior can ever be given more than one action per turn. You cannot save or accumulate actions from turn to turn; if a player has any unused actions at the beginning of his or her end phase, those actions are lost.
Each action must be chosen from the following four options: 1. Move action 2. Close combat action 3. Ranged combat action 4. Special action
During gameplay, figure bases cannot overhang the edge of the battlefield, and cannot exit the battlefield unless a rule allows otherwise. (p.11)
This diagram shows where you could place your objective token if you roll an “8”.
At the beginning of your end phase, you check for control of objective tokens and remove any action tokens from your warriors that were not given an action token during your current turn’s action phase. Action tokens will be described later in these rules. Once you declare that your end phase is complete, it is the next player’s turn.
Example: Scott is playing with a 200-point build total, which gives him two actions during each of his action phases. This turn, he wants to take a shot at one enemy warrior and move closer to another one. Scott gives a ranged combat action to one of his warriors, and after resolving this attack, he gives a move action to a different warrior. Scott has now given his two actions to two different warriors and announces the end of his action phase. Note, for example, that he could have given two warriors move actions, or two warriors close or ranged combat actions.
Hint: As you can see, turns go by very quickly. Don’t worry if you don’t accomplish everything you want to do in a single turn, because your opponent is playing under the same restriction.
CONTROLLING OBJECTIVES A Mage Knight game is won by gaining control of strategic battlefield locations called objectives, which are represented by objective tokens. The player who controls the most objectives at the end of the game wins the game. Each player selects a control marker color during setup to identify objectives he or she controls during the game. Control of objectives can change during the game.
Objectives can be neutral, contested, or controlled; the status of each objective is checked at the beginning of each player’s end phase. All objectives begin the game neutral; no player has control of a neutral objective.
At the beginning of any player’s end phase, if opposing players have an able warrior in base contact with the same objective token, that objective is contested. Remove any control marker from a contested objective; no player controls a contested objective.
At the beginning of any player’s end phase, if a player has a warrior in base contact with an objective token, and no opposing warriors are in base contact with the token, that player gains control of that objective. That player removes any control marker from the objective and places his or her control marker on top of the objective token. Once a player has control of an objective, he or she is not required to leave a warrior in base contact with the objective token to maintain control of that objective.
Warriors with item slots in their bases can completely overlap an objective token so that no other figure can contest it.
IMPORTANT GAME CONCEPTS Here are some game concepts important to the Mage Knight rules.
Able Warriors An able warrior is one that is not a captive and does not have the Demoralized special ability.
Action Tokens If you give an action to one of your warriors, mark it with an action token (a coin, bead, or other tiny object). If a warrior has two action tokens, it cannot be given another action until the tokens are removed. At the beginning of your end phase, remove all action tokens from any of your warriors not given an action token that turn.
Base Contact A warrior is in base contact with another warrior if their bases are touching. A warrior can also be in base contact with a token, terrain feature, or an item.
Facing The position of a warrior’s front arc relative to the battlefield indicates its facing. When you move a warrior, you determine its facing at the end of the movement.
Friendly and Opposing Warriors Friendly warriors are those that you or an allied teammate controls in the game. Opposing warriors are those controlled by an opponent. Friendly and opposing status is determined at the beginning of the game, but can change during the game.
Measuring When measuring distances during setup and during the game, always measure to and from the center of a warrior’s base. Most bases have a center dot that can be used as a measurement guide. You can measure anything on the battlefield at any time. When measuring, ignore all vertical distances; use only the flat, horizontal distance on the battlefield between the two points.
If multiple effects occur during the beginning of the end phase, the active player chooses which order to resolve them in. For example, if a figure reanimated by Revenant is in base contact with an objective token, the active player may choose to check control of objective tokens before removing that figure from the game. (p.12)
If an effect causes something to be measured from a warrior’s front arc, it means that you measure from the warrior’s center dot as normal, but the measurement must pass through the warrior’s front arc. (p.17)
Although Demoralized warriors cannot contest or take control of an objective, if a Demoralized warrior completely covers an objective token, opposing warriors cannot be in base contact with it to take control of it. Basing a figure does not necessarily cause a figure to be in base contact with a token.
Note that any warrior that is larger than an objective token may completely cover an objective token, preventing it from being contested. This includes mounts, Titans, and Multiple-Dial Warriors. The rule regarding warriors with item slots is to simply emphasize that such warriors are big enough to do so.
If a soaring warrior (or its flight stand) is in base contact with another soaring warrior’s base or flight stand, those warriors are in base contact with each other.
Unless an effect specifically says otherwise, a figure should never have more than 2 tokens. If an effect would cause a figure with 2 tokens to be given another token, do not put a third token on the figure. However, the figure is still treated as if it was just given its second token, and will not clear its tokens that turn. (p.11)
Modifiers Combat values can be altered during the game. Numbers that alter combat values are called modifiers. A modifier can be either positive or negative, adding to or subtracting from that value. Special abilities, domains, items, and terrain can modify combat values. Attack bonuses are not modifiers.
A combat value cannot be negative. If a modifier would cause a value to be negative, the value is 0 instead.
Always use a warrior’s modified (if applicable) combat values unless a rule or special power specifically states that the warrior’s unmodified combat value should be used. If an effect says to double or halve an unmodified combat value, modifiers can be applied only after the increase or decrease is made.
A single attack affecting multiple targets can have separate modifiers specific to each target.
Proficiencies Proficiencies are additional abilities a warrior possesses. The proficiencies available to a warrior are determined by its combat value types or its unit type. A warrior is never forced to use any of the proficiencies it has; they are merely choices available to it. Announce the use of a proficiency when the appropriate action is given to a warrior.
Pushing If you give an action to a warrior that causes it to be given a second action token, that warrior is dealt 1 pushing damage after it resolves the action. This is called pushing. Pushing damage represents the warrior’s fatigue; it cannot be reduced in any way, even by special abilities.
Replacement Values Some special abilities, domains, items, and terrain allow the substitution of one combat value for another. These substitute values are called replacement values. For example, when one value “becomes” or is used “instead of ” another value, it is a replacement value. Replacement values are not modifiers.
Special Abilities There are colored squares or circles on each warrior’s combat dial representing special abilities that warrior possesses. Special abilities come and go as your warrior is dealt or healed of damage. Special abilities are described on the Mage Knight Special Abilities Card. Effects described on the Special Abilities Card take precedence over game rules, except where noted.
A warrior’s special abilities are in effect as long as they appear in that warrior’s stat slot. If a special ability is described as optional, it is assumed to be in effect unless it is canceled. A warrior’s controller can cancel any of its optional special abilities at any time. This “turns off ” that special ability until the end of the turn during which it was canceled, after which time it is assumed to be in effect again.
Warriors also have an ability nexus. An ability nexus is a stat slot location in which a special ability might appear. A special ability in an ability nexus appears as a colored square or circle with an arrow that points to the specific combat value that it applies to.
RULE OF 3 Many modifiers can affect combat values during the game. Because all modifiers are cumulative, there is a special rule called the rule of 3. The rule of 3 states that once all modifiers have been calculated, no value can be modified by more than 3. It is important to note that the effects of special abilities and items override standard Mage Knight rules. The rule of 3, however, takes precedence over any special abilities or items.
Example: Scott gives his Atlantean Sorcerer a ranged combat action to make a wand ranged attack against a Black Powder Rifleman. Scott decides to create a ranged combat formation using the Atlantean Sorcerer and three Apprentice Sorcerers to add to the Atlantean Sorcerer’s attack value. The Atlantean Sorcerer gets +2 to its attack value for each Apprentice (for a total of +6). In addition, the line of fire passes through the Black Powder Rifleman’s rear arc, giving the Atlantean Sorcerer +1 to its attack value (now for a total modifier of +7). The Black Powder Rifleman has the Spell Resistance special ability, which gives the Atlantean Sorcerer –3 to its attack value. In total, the Atlantean Sorcerer gets +4 to its attack value. Because of the rule of 3, however, the modifier to the attack value becomes +3.
MOVEMENT A warrior’s current speed value and speed type appear on its combat dial.
A warrior’s speed value is the maximum number of inches it can move when given a move action. The speed type tells you how the warrior moves. A particular speed type can allow a warrior to ignore certain types of terrain or use a particular proficiency. When you move a warrior, place the Mage Knight flexible ruler on the battlefield. Measure from the center of your warrior’s base to the desired destination, curving the ruler as necessary to show the warrior’s exact movement path.
Attack special abilities printed on a warriors combat dial are determined by that warrior’s printed attack type. Even if the warrior’s attack type changes, the printed special abilities do not change. (p.17) However, an effect may give a warrior a new special ability for a different attack type. For example, the Wand of Fencing gives the Parry sword special ability to a figure with the wand attack type.
A warrior may have more than one instance of the same special ability. If so, both instances may be used simultaneously as long as the ability does not require you to give the warrior an action to activate. For example, a warrior with two instances of Venom will deal damage twice, but a warrior with two instances of Charge can only use one. (p.18)
If a combat value is doubled or halved, this is a replacement value. (p.20-21)
Note that proficiencies must be explicitly declared to be used, unlike Special Abilities, which are always on unless “turned off.”
The above diagram illustrates the example at right. Because the final modifier lies outside the rule of 3 “bounds,” the modifier will be reduced to +3. This final result is the modifier added to the attack value (with attack bonus, if applicable.)
The movement path shown by the flexible ruler cannot cross any warrior bases and cannot pass between two warriors in base contact. There must be room for the moving warrior’s base to rest completely on the battlefield at the end of its movement path.
When all players are satisfied with the movement path, pick up your warrior and place it at its new position on the battlefield. You determine the warrior’s facing. The warrior’s facing is important because it can attack (using close and ranged combat actions) only through its front arc. A warrior is considered to have moved if its center dot changes position on the battlefield at any time during the game, or if it changes its facing at any time other than during a free spin.
Breaking Away If you give a move action to a warrior in base contact with one or more opposing warriors, that warrior must attempt to break away. Roll one six-sided die. On a result of 1–3, the warrior fails to break away and cannot move, though you can change its facing. On a result of 4–6, the warrior succeeds in breaking away from all opposing warriors in base contact, and can move.
Free Spin If a warrior ends its movement in base contact with one or more opposing warriors, those opposing warriors can immediately change their facing to bring any portion of their front arcs into base contact with the warrior that moved. These free spins do not cost an action.
Speed Types
BOOT A warrior with the boot speed type exists at ground level. Ground level is any point on the battlefield that is not elevated (an elevated terrain feature or a warrior using the soaring proficiency). It interacts with all terrain types per the rules for those types. It has the double-time proficiency, described below.
HORSESHOE A warrior with the horseshoe speed type exists at ground level, and interacts with all terrain types per the rules for those types. It has the double-time proficiency, described below, except this warrior is not dealt pushing damage for using double-time. This warrior fails to break away only on a die roll result of 1. This warrior cannot change its facing if it fails to break away. If this warrior successfully breaks away, it deals 1 shake off damage to all opposing warriors in base contact with it outside of its front arc at the time it broke away. This warrior does not get a free spin when an opposing warrior ends its movement in base contact with it.
WAVE A warrior with the wave speed type exists at ground level. It interacts with all terrain types per the rules for those types, except that it treats any type of water terrain as clear terrain. It gets +2 to its defense value when it is in any type of water terrain.
WING A warrior with the wing speed type exists at ground level. It interacts with all terrain types per the rules for those types, except that it is unaffected by warrior bases and terrain during movement. It cannot, however, end its movement with its base overlapping another warrior’s base or blocking terrain. It fails to break away only on a die roll result of 1. It has the soaring proficiency, described below.
Speed Proficiencies
DOUBLE-TIME Only warriors with the boot or horseshoe speed type can use double-time. To use double-time, a warrior cannot be in base contact with an opposing warrior. Give the warrior a move action and double its unmodified speed value. If the warrior has the boot speed type, at the end of the movement, deal 1 pushing damage to the warrior. A warrior cannot use speed special abilities or subfaction abilities when using double-time. Double-time can be used in a movement formation (see “Movement Formations”) as long as all members have either the boot or horseshoe speed type. When using double-time in a movement formation, each member with the boot speed type is dealt 1 pushing damage at the end of the movement.
SOARING A warrior with the wing speed type can use the soaring proficiency, which allows it to exist at soaring level. Soaring level is the level of the battlefield that is above elevated terrain. A warrior at soaring level does not interact with any terrain type. A warrior with the wing speed type can be deployed at either ground or soaring level.
To move a warrior from ground level to soaring level (or vice versa), give the warrior a move action. Reduce its unmodified speed value by half (round up) for the action. Place a warrior on a flight stand to indicate it is at soaring level.
A warrior at soaring level cannot end its movement with its flight stand in base contact with or completely covering an objective token; that is, it cannot control an objective. A warrior at soaring level cannot end its movement with its flight stand overlapping the base of a warrior at ground level, and a warrior at ground level cannot end its movement with any part of its base beneath the flight stand of a warrior at soaring level. Warriors at soaring level cannot be members of formations. No warrior is affected by a soaring warrior’s base for movement and
When using double-time in formation, all members must use the double-time proficiency. Thus, all members with the boot speed type will take 1 click pushing damage after moving. (p.13)
If an effect causes a warrior at soaring level to lose the soaring proficiency or otherwise be forced to ground level, place it at ground level without moving its center dot or changing its facing – the warrior is not considered to have moved. If the warrior cannot legally be placed in doing this, the warrior is eliminated instead. (p.14)
To use a cavalry unit, mount, or titan at soaring level, use only one flight stand placed under the figure’s center dot. The part of the figure that hangs over the flight stand may overlap with figures and token on the ground, as long as the flight stand itself does not overlap them. (p.14)
Eliminated warriors that are reanimated and returned to play are not considered to have “moved” when placed on the battlefield. (p.15)
Mounts and cavalry units may spin on a failed break away, unless their speed type forbids it. This may result in the warrior no longer being in base contact with the opposing warrior. Note that a spin on a failed break away is not a “free spin.”
If you give a move action to change levels, the warrior must change levels if possible, even if any applicable breakaway rolls fail.
line of fire purposes. A warrior at soaring level can only be in base contact with another warrior at soaring level. Soaring warriors are in base contact when their flight stands are touching each other. A warrior at soaring level gets +1 to its defense value; this is the height advantage modifier.
Warriors at ground level can target warriors at soaring level only with ranged combat attacks. Warriors at soaring level can target each other with close or ranged combat attacks. When targeting a warrior at soaring level, no terrain modifiers apply and warrior bases do not block line of fire. When a soaring warrior targets a figure at ground level, warrior bases do not block line of fire. The line of fire drawn from warriors at soaring level is not blocked or hindered by terrain unless the target occupies the terrain feature.
COMBAT Warriors can be given two kinds of combat actions: close combat and ranged combat. Both types of combat actions are described below. A warrior given a close or ranged combat action is the attacker. The warrior against which the attack is made is the target.
Important Combat Concepts The following general rules apply to both close and ranged combat.
ATTACK TYPES
There is one close combat attack type—the sword () attack type—and two ranged combat attack types—the bow () and wand ( ) attack types. An attack type indicates that a warrior excels at a certain kind of attack. It gives the warrior access to certain combat proficiencies and attack bonuses, and might allow the warrior to wield certain items.
If a warrior makes a close combat attack, and it has the sword attack type, the close combat attack is an attack of that type. If a warrior makes a close combat attack, and it does not have the sword attack type, the close combat attack has no attack type.
If a warrior makes a ranged combat attack, and it has the bow or wand attack type, the ranged attack is an attack of that type. If a warrior makes a ranged combat attack, and it does not have one of those attack types, the ranged attack has no attack type.
CRITICAL HITS AND MISSES When you give an action to a warrior that requires an attack roll, and the result is 2 (two 1s showing on the dice), the attack automatically misses, even if the attack result is high enough to hit the target. This is called a critical miss. It represents a weapon backfire or the attacker straining or wounded itself during the action. The attacker is dealt 1 pushing damage after a critical miss.
If the result is 12 (two 6s showing on the dice), the attack automatically succeeds, regardless of what is needed to hit. This is called a critical hit. If the attack was meant to deal damage, the critical hit deals +1 damage. If the attack was a ranged combat attack against multiple targets, this +1 damage is dealt to each target.
If the attack was meant to heal a warrior of damage, the attack automatically succeeds, and the target is healed of +1 damage.
DAMAGE When your warrior succeeds at an attack, the damage dealt to the target is equal to the warrior’s damage value, affected by any modifiers. Your opponent must turn the target’s combat dial clockwise a number of times equal to the damage dealt. All damage from the same attack is dealt at the same time.
ELIMINATING WARRIORS As soon as three skulls appear in a warrior’s stat slot, it is eliminated and must be removed from the battlefield.
HEALING WARRIORS Some special abilities make it possible to heal a warrior of damage. When a warrior is healed of damage, turn its combat dial counterclockwise; never turn past a warrior’s starting marker.
A warrior with the golem ( ) damage type has repair markers ( ) on its dial. Whenever a warrior with the golem damage type is healed of damage, turn its combat dial counterclockwise until either the starting marker or a repair marker appears in the stat slot. A warrior cannot be healed while a repair marker appears in its stat slot.
MAGIC IMMUNITY
Warriors with the magic immunity ( ) defense type cannot be affected by magic attacks. This means that they cannot be affected by any special ability with the word “magic” in its name or targeted by a ranged attack that uses the wand attack type.
RESOLVING AN ATTACK To resolve an attack, roll two six-sided dice (called the attack roll) and add the attacker’s attack value; this total is the attack result. If the attack result is equal to or greater than the target’s defense value, the attack succeeds and your warrior deals damage to the target.
TARGETING FRIENDLY WARRIORS Warriors friendly to each other cannot target each other with damaging attacks. Additionally, a warrior can never target itself with any attack or special ability.
The +1 to defense value only applies if the soaring warrior is the
target of a ranged combat attack made by a non-soaring figure. (p.13)
A warrior at soaring level cannot use surge or Charge to attack a warrior at ground level (or vice versa). (p.15)
Magic Immunity does not prevent a figure from being targeted by a spell unless that spell would target the Magic Immune figure with a ranged combat attack. (p.22)
Do not remove an eliminated warrior from the battlefield until all measurements that must be made from that warrior are made, and until all effects that are triggered upon the warrior being eliminated are resolved. (p.23)
Critical Hit damage is not a modifier, but is dealt in addition to any other damage dealt during the attack.
If an effect is triggered when a figure is eliminated by an opposing warrior, the effect will trigger if the opposing warrior eliminats the figure with an attack or special ability, is wielding an item which eliminates the figure, is the caster of a Sorcery, Glyph, or Illusion which eliminates the figure, is the target of an Enchantment when that Enchantment eliminates the figure, or is a member of an Adventuring Company, and uses an ability of that Adventuring Company which eliminates the figure. (p.12)
Close Combat Close combat represents hand-to-hand and melee weapon attacks; any warrior can make a close combat attack. In order for a warrior to make a close combat attack, its controller must first give it a close combat action. In addition, the front arc of the attacker must be in base contact with the target of the attack. Close combat attacks deal damage equal to the attacker’s damage value.
If a warrior making a close combat attack is in base contact with a target’s rear arc, it gets +1 to its attack value.
A warrior with the sword attack type might have an attack bonus that adds to its attack value when it is given close combat actions. This attack bonus is not subject to the rule of 3.
CLOSE COMBAT PROFICIENCIES Warriors with the sword attack type can use the gang up and surge proficiencies.
Gang Up
Gang up is used by friendly figures to assist a warrior making a close combat attack. The warrior given the close combat action is called the primary attacker. The primary attacker gets +1 to its attack value for each friendly warrior using gang up. To use gang up, a friendly figure must have its front arc in base contact with the target, must have the sword attack type, and must not have an action token. Warriors using gang up do not receive an action token.
Example: Jim’s Harka Orc, Cloud Warrior, and Ub-Khan are hoping to eliminate an opposing Orc Warbeast. Jim gives his Harka Orc a close combat action targeting the Warbeast. Because the Harka Orc is attacking through the Warbeast’s rear arc, it gets +1 to its attack value. The Cloud Warrior can use its gang up proficiency to enhance the Harka Orc’s attack because the Cloud Warrior is a friendly warrior, has the sword attack type, and its front arc is in base contact with the Warbeast. This modifies the Harka Orc’s attack value by an additional +1, for a total modifier of +2. Though the Ub-Khan is also friendly to the Harka Orc, has the sword attack type, and has its front arc in base contact with the Warbeast, because it has an action token it cannot use its gang up proficiency. Once the attack is resolved, the Harka Orc will be given an action token, but the Cloud Warrior will not. Note that Jim could have given the Ub-Khan the close combat action and instead had both the Cloud Warrior and the Harka Orc use their gang up proficiencies. The total modifier to the Ub-Khan’s attack would also have been +2, but after resolving the attack only the Ub-Khan would have been given an action token. This would have pushed the Ub-Khan, but would have then allowed Jim to give a close combat action to his Harka Orc and have the Cloud Warrior again use its gang up proficiency.
Surge
Surge allows a warrior given a close combat action to both move and make a close combat attack, though the warrior is dealt pushing damage. To use surge, a warrior cannot be in base contact with any opposing warriors. Move the warrior up to its speed value. At the end of the movement, the warrior’s front arc must be in base contact with an opposing warrior. Deal 1 pushing damage to the warrior using surge, and then resolve the close combat attack.
CAPTURING Warriors with the sword attack type can capture opposing warriors. To capture an opposing warrior, give the attacker a close combat action targeting a single opposing warrior; the attacker gets –3 to its attack value. If the attack succeeds, the target takes no damage but becomes the attacker’s captive. A warrior with a captive is called a captor. Captors cannot make free spins.
The captor and captive gain the boot speed type instead of their speed type and they must use the lower of the captor and captive’s speed values. The captor can be given only move actions, unless it tries to eliminate the captive (see below). When moving with its captive, a captor must be in base contact with the captive both before and after the move.
Remove any action tokens from a warrior when it becomes a captive. Only a captive’s captor can target it with an attack, and then only to eliminate it. A captive never takes damage. A captive is neither a friendly nor an opposing warrior to any other warrior. A captive cannot be given actions, and its special abilities, speed types, and items are ignored. A captive is freed if its captor is eliminated. Freed captives immediately cease being captives, and all captive traits no longer apply. Other than eliminating its captive, a captor cannot get rid of its captive and cease being a captor.
A captor can eliminate its captive. To eliminate its captive, give the captor a close combat action targeting its captive. The captor gets –3 to its attack value for that attack. If the attack succeeds, eliminate the captive. If the attack is unsuccessful, the captive takes no damage. The gang up proficiency cannot be used when a captor attempts to eliminate its captive.
Ranged Combat Ranged combat represents long-distance attacks, such as those using bows, guns, or magical spells.
Each warrior has a range value on its base. This value is the maximum number of inches that its ranged combat attack can reach. If your warrior’s combat attack can reach. If your warrior’s range value is greater than 0 and it is not in base contact with an opposing unit, you can give it a ranged combat action. Place one end of the ruler at the center of the attacker’s base and draw a straight line to the center of the target’s base. This line is called the line of fire.
A line of fire must pass through the attacker’s front arc, and can be no longer than the attacker’s range value. The line of fire is blocked if it crosses a warrior’s base (friendly or opposing) other than the attacker’s and the target’s. If the line of fire is blocked, the attacker cannot make a ranged combat attack against the target. You can check a potential line of fire at any time during the game. A successful ranged combat attack deals damage to the target equal to the attacker’s ranged damage value. Unless precision is used, a warrior cannot be given a ranged combat action to make a ranged combat attack against any target opposing warriors in base contact with warriors friendly to the attacker.
If the captor was using the soaring proficiency, place the captor and captive at ground level. Move the captive the smallest distance needed to maintain base contact. If doing this would cause either figure to be placed illegally, that figure is eliminated. (p.14)
Surge can be used with special abilities that say “Give this warrior a close combat action” or “When this warrior is given a close combat action”, but only if the special ability appears on the dial after the click of pushing damage. The pushing damage is applied after the movement. If multiple effects happen at the end of the movement, the active player chooses in which order to resolve them. (p.14-15)
A captive may block a line of fire as normal. (p.15)
Some effects ignore line of fire requirements. This means that such effects ignore the figure’s range value and front arc, and ignore whether or not the line of fire is blocked. However, the legality of targeting another figure with a ranged combat attack is not a line of fire requirement; such effects will not ignore these targeting restrictions. (p.17)
If a line of fire passes through the target’s rear arc, the attacker gets +1 to its attack value.
A warrior with the bow or wand attack type might have an attack bonus that adds to its attack value when it is given a ranged combat action. This attack bonus is not subject to the rule of 3.
RANGED COMBAT AGAINST MULTIPLE TARGETS A warrior might be able to affect two or more targets with a single ranged combat action. No warrior, however, can target a single warrior more than once with any one ranged combat action.
Each warrior has one or more arrow symbols next to its range value. The number of arrow symbols is the maximum number of different targets that warrior can target with a single ranged combat action. To affect multiple targets with a ranged combat attack, the attacker must be able to draw an unblocked line of fire to each target.
Hint: Certain special abilities, such as Stormfire, also allow ranged combat actions to be resolved against multiple targets, but an unblocked line of fire need be drawn only to the target of the special ability.
When your warrior is attempting to target multiple targets with a ranged combat attack, you make only one attack roll. Compare the attack result to every target’s defense value. Some targets with low defense values might be affected by the attack, while others with high defense values might be unaffected. After determining against which targets the attack succeeds, divide the attacker’s ranged damage value among the targets. The attacker can deal 0 damage to a target.
Example: Pat gives his Master Archer a ranged combat action. The Archer has two arrow symbols next to its range value, so Pat chooses two opposing warriors as targets: Scott’s Gulthak Orc and Blood Shaman. The lines of fire to the two targets are not blocked, neither target is in base contact with any warrior friendly to Pat, and both targets are within the Archer’s 12” range. The Archer’s attack value is 9 and Pat’s attack roll is 6, making the attack result 15 (9 + 6 = 15). Pat compares the 15 to the defense values of the two targets: the Gulthac Orc has a defense value of 15 and the Blood Shaman has a defense value of 16. The Archer’s attack is unsuccessful against the Blood Shaman, but successful against the Gulthac Orc. The Archer’s ranged damage value is 2, so the Archer deals 2 damage to the Gulthak Orc. If Pat’s attack roll had been 7, the attack result would have been 16 (9 + 7 = 16), and the attack would have been successful against both targets. Pat then could have chosen to deal 1 damage to each target, or he might have chosen to deal 2 damage to one target and 0 damage to the other.
RANGED COMBAT PROFICIENCIES Warriors with the bow attack type can use the point blank and precision proficiencies.
Point Blank
Point blank gives a warrior given a ranged combat action +1 to either its attack or damage value as long as the target or targets are within one-half the distance of the warrior’s range value (rounded up).
Precision
Precision allows a warrior given a ranged combat action to make a ranged combat attack against a single target opposing warrior in base contact with warriors friendly to the attacker. The attacker gets –2 to its attack value when using precision.
BOMBARDMENT ATTACKS A warrior with the Bombardment special ability can make Bombardment attacks. Each warrior with the Bombardment special ability comes with Bombardment tokens specific to that warrior. A Bombardment attack is resolved in two stages: 1) determining the location of the Bombardment tokens, and 2) determining if figures in the area of effect of each token are affected by the attack.
To make a Bombardment attack, give the warrior a ranged combat action, with its Bombardment token or tokens as the target(s) of the attack instead of an opposing figure or figures. An attack targeting a Bombardment token can be made even if line of fire to that token is blocked, though this will affect the chance of success for the Bombardment attack for that token. Double the warrior’s range value and place its Bombardment token or tokens face up anywhere on the battlefield within the warrior’s line of fire and doubled range. The arrow on the Bombardment token must point in the direction of the line of fire.
At the beginning of your next command phase, resolve the Bombardment attack against the Bombardment token(s). If the line of fire to a token is blocked at this time, this warrior gets –2 to its attack value against that token. Make only one attack roll, even if there are multiple Bombardment tokens, and compare the attack result against each Bombardment token. If an attack succeeds against a Bombardment token, all figures (friendly and opposing) within that token’s area of effect become targets of the Bombardment attack. Make one more attack roll, and compare the attack result against each target’s defense value. Deal damage equal to the attacker’s ranged damage value to each figure against which the attack succeeds.
If an attack is unsuccessful against a Bombardment token, the Bombardment attack has drifted. Roll a six-sided die; the result is the drift direction noted on that Bombardment token. Reference the unsuccessful attack result on the Bombardment token to determine the distance of the drift, and move that Bombardment token that distance in the drift direction. All figures (friendly and opposing) within the token’s new area of effect are targets. Resolve the attack against these targets as described above. If an attack result is less than the lowest value shown on the Bombardment token, use the lowest value to determine the drift distance instead.
If a warrior with an unresolved Bombardment attack is eliminated or gains Demoralized, use the attack and damage values on its Bombardment token(s) to resolve the Bombardment attack.
Attack Sequence Use the following sequence of events to make a close or ranged combat attack:
Figures with Ghostform or Limited Invisibility are not targeted by Bombardment attacks. If a warrior is in the area of effect for two tokens being used for the same attack, the warrior will not take damage twice. (p.19)
If a critical miss is rolled for either attack roll while resolving a Bombardment attack, the attacker will take a click for each critical miss. A critical hit will only deal an extra click of damage on the second attack roll. (p.19)
A warrior may only use its own Bombardment tokens to resolve a Bombardment attack. If a warrior has no Bombardment tokens, then no Bombardment attack may be made by that warrior. (p.24)
1. Give a close or ranged combat action to your attacking warrior (or primary attacker of an attack formation).
2. Declare the target(s) of the attack. 3. Declare a capture attempt, if applicable. 4. The attacker chooses which of its optional special abilities to cancel and determines any
modifiers to its attack value. 5. The target chooses which of its optional special abilities to cancel and determines any
modifiers to its defense value. 6. Apply the rule of 3 to the attacker’s attack value modifiers and the defender’s defense
value modifiers, if applicable. 7. Make an attack roll and determine if the attack succeeds. 8. If the attack succeeds, calculate the damage dealt:
a. Modify the attacker’s damage value or ranged damage value, as appropriate.b. Apply the rule of 3 to the total damage value modifiers, if applicable. c. If capturing the target, deal no damage. Otherwise, deal damage to the target(s)
equal to the attacker’s close or ranged damage value, as appropriate. If the attackroll was a critical hit, increase the damage dealt to each affected warrior by 1.
9. Apply effects generated by the damage dealt and/or the attack (for example, the Vampirism or Smite special abilities). 10. Give an action token to each warrior contributing to the attack. 11. Apply pushing damage to any warrior that received a second action token as a result of the action.
FORMATIONS By using a formation, an action that you give to one of your warriors can be shared by other friendly warriors. Formations are optional, and exist only for the duration of the actions for which they occur. In order to create a formation, three to five of your warriors must be grouped so that each is in base contact with at least one other of those warriors. Each warrior in a formation is called a member.
All members of a formation must be from the same faction, though they can be from different subfactions. Look at the faction symbol on each warrior’s base to determine if the warrior can be a member of the formation. Mage Spawn warriors don’t have faction symbols, so they cannot normally be members of formations. Shyft warriors are the exception to creating formations with Mage Spawn (see “Shyft Formations”).
Movement Formations In addition to the general formation requirements described above, only a warrior eligible to receive a move action can be a member of a movement formation.
When you give a move action to just one member, all members of the movement formation can move using that one action. The speed value of each member becomes that of the member with the lowest speed value. Move all members of the formation one at a time. The action is resolved when each member has moved. At the end of the movement, each member must once again be in base contact with at least one other member—the formation cannot be split into two or more groups at the end of the action.
Each member is given an action token, and all are considered to have been given an action for that turn. This can push some members but not others.
Make all break away rolls for members of a movement formation before any member moves. If any member fails a break away roll, that warrior cannot move, though it can still change its facing. Other members can still move according to the movement formation rules.
Ranged Combat Formations A ranged combat formation can be used only for a damaging (not healing) ranged combat attack against a single warrior. In addition to the general formation requirements described above, the following additional criteria must be met in order to create a ranged combat formation: � Only a warrior eligible to receive a ranged combat action can be a member of a ranged combat formation. � Each member must be able to draw an unblocked line of fire to the target.
When you give a ranged combat action to just one member, all members contribute to the attack. The member given the ranged combat action is called the primary attacker. Only the primary attacker can use special abilities or items in the attack. Each member modifies either the primary attacker’s attack or damage value.
If a member has the bow attack type, it can modify either the primary attacker’s attack value by +2 or damage value by +1. If a member does not have the bow attack type, it can modify the primary attacker’s attack value (only) by +2.
Example: The Orc Khan warriors create a ranged combat formation. Lines of fire are drawn; all are clear and within the range values of each member. The Ub-Khan is chosen as the primary attacker. It gets +2 to its attack value from the Orc Hunter and +1 to its damage value from the Gulthak Orc.
Each member is given an action token, and all are considered to have been given an action for that turn. This can push some members but not others.
Only the primary attacker’s line of fire might be subject to the height advantage modifier and/or hindering terrain modifier.
If you roll a critical miss for a ranged combat formation attack, the attack automatically misses, and only the primary attacker is dealt 1 pushing damage.
Shyft Formations
Warriors with the Shyft faction symbol ()—Shyfts—can create formations with friendly Mage Spawn warriors. If a Shyft warrior is on the battlefield, all Mage Spawn on the battlefield friendly to that Shyft gain the Shyft faction symbol.
The choice to use either the +2 to attack value or +1 to damage value must be made before the attack roll. (p.15)
If an effect describes how damage is dealt upon a successful attack, and does not specifically say the damage dealt is in addition to the regular damage or ranged damage value, the effect’s damage is dealt instead of the value. (p 17) Note that while damage dealt is often derived from a damage value, damage dealt is not itself a combat value and thus not subject to the rule of 3. (p.18)
If multiple effects can be resolved simultaneously, the active player chooses the order to resolve them in. If resolving one effect causes another to end that other effect will not be resolved. (p.17)
SPECIAL ACTION A special action is a requirement for some special abilities and actions (noted in the text of the special ability or action). Give an action token to any warrior given a special action.
TURN EXAMPLE Matt has nine warriors in his 200-point army, which gives him two actions to use on his turn. At the beginning of his command phase, he notes that he has a warrior with the Venom special ability, which deals 1 damage to each figure in base contact with its front arc. He also has a Bombardment attack that must be resolved. Matt chooses to resolve the Venom special ability first, then resolves his Bombardment attack. He can do nothing else during his command phase, so he announces the end of his command phase and moves on to his action phase.
He still has two actions remaining (the Venom special ability doesn’t cost an action). He uses the first action to have one of his warriors make a ranged combat attack. Matt gives his warrior a ranged combat action and resolves the attack. He uses the second action to move another one of his warriors. He gives this warrior a move action and resolves the movement. Matt has now used his two actions on two different warriors. He can do nothing else during his action phase, so he announces the end of his action phase and moves on to his end phase.
At the beginning of his end phase, Matt checks to see if he controls any objectives. He also removes any action tokens from any of his warriors that were not given actions this turn.
CAVALRY RULES (from the Dark Riders expansion set)
MOUNTS Some warriors, called mounts, have elongated bases. Each of these bases has a base slot that can accommodate another warrior’s base, and a saddle that can physically accommodate a rider. Each mount is of a certain mount type and has a mount symbol (printed next to its speed value) associated with it. Mounts cannot make free spins or capture attempts.
Mount Types
Battle Horse Desert Warbird Pegasus Sky Dragon
Cloud Griffon Horned Stag Salamander Technocat
RIDERS Some warriors have an attack bonus printed within a square (for example, ). Only these warriors, which have one or more mount symbols printed on their bases, can become riders. These mount symbols indicate which mount type or types that warrior can ride. A warrior on a mount becomes a rider. A warrior that can become a rider can use its attack bonus only when it is on a mount; this bonus applies to all attacks that this warrior makes, regardless of what the warrior’s attack type is.
CAVALRY UNITS Together, a mount and rider are called a cavalry unit. To form a cavalry unit, follow these steps: � Remove the warrior from its base. This will reveal a plastic peg that
you can insert into a hole on the mount’s saddle. This secures the rider to its mount. Warriors eligible to become riders are the only warriors that can be removed from their bases in this way. � Place the rider’s base into its mount’s base slot.
All mounts must be deployed as cavalry units; that is, they cannot be deployed without riders. Both the mount’s and the rider’s point values count toward the build total.
Cavalry units cannot � make free spins, � capture or be captured, � use the surge proficiency, � be affected by the Strong Flyer or Magic Levitation special abilities, or � use subfaction abilities. � be affected by any game effect that causes either the mount’s or the rider’s friendly or opposing status to change.
A mount and its rider are in base contact with each other. For purposes of their front arc facing, their front arcs are in base contact. A figure in base contact with a cavalry unit is in base contact with both the mount and the rider. When a cavalry unit occupies a terrain feature, both the mount and the rider occupy that terrain feature. While part of a cavalry unit, a rider gains the speed type of its mount instead of the rider’s speed type.
A rider can only use its rider bonus while part of a cavalry unit. This includes using the bonus for effects other than attacks. The bonus still exists, but simply cannot be used. If the War domain (D-029) is in play, an unmounted rider cannot use its bonus, and does not get a bonus of 1. (p.12)
A rider may target its mount with effects that require base contact with the rider’s front arc, such as Healing. The mount may also target its rider with such effects. (p.13)
Cavalry units cannot be reanimated as a “unit” since mount and rider are separate figures. To reanimate a cavalry unit, you must reanimate the mount and rider separately. However, if the mount is already in play, you may reanimate a legal rider directly onto it. (p.15)
If a mount or rider is being affected by a game effect that causes its friendly or opposing status to change for a limited, predetermined duration, that mount or rider cannot be part of a cavalry unit during that period. (p.17)
Special abilities of a rider or items that a rider wields that refer to the rider’s front arc, such as Venom or Sweep, use the mount’s front arc while the rider is part of a cavalry unit.
If an action token is given to a rider or a mount that is part of a cavalry unit, give the token to the cavalry unit instead. If a rule or effect refers to the action tokens of either rider or mount, use the action tokens of the cavalry unit instead.
Effects that target a single figure can target a cavalry unit instead. Choose either the mount or the rider to be the target of the effect. If an effect causes the center dot of either the mount or the rider to change its position on the battlefield, both mount and rider are moved together.
Giving Actions to a Cavalry Unit You can give a cavalry unit only one action per turn.
If you give an action to a cavalry unit that causes it to be given a second action token, it is not dealt 1 pushing damage after the action resolves.
When a cavalry unit is given a move action, only the mount’s speed value and proficiencies can be used to resolve the action. Both the rider’s and the mount’s special abilities can be used to resolve the action.
When a cavalry unit is given a close or ranged combat action or a special action, you must choose to use either the rider’s combat dial or the mount’s combat dial to resolve the action. When using the mount’s combat dial, only the mount’s special abilities can be used. When using the rider’s combat dial, only the rider’s special abilities and items the rider is wielding can be used. A rider that can wield items can drop and pick up items while part of a cavalry unit. When dropping or picking up items as part of a cavalry unit, the item token must be in base contact with the mount. A cavalry unit given a close or ranged combat action uses the mount’s front arc and center dot.
Attacking and Damaging a Cavalry Unit When targeting a cavalry unit, the attacker chooses the dial against which to resolve the attack. Use the mount’s center dot to determine line of fire and any area of effect, such as with the Bombardment special ability. If a cavalry unit is affected by the Bombardment special ability or other area-of-effect attack, apply damage to both the mount’s and the rider’s combat dial, as applicable.
Use the mount’s rear arc to determine if any rear arc modifiers apply to the attack.
If a cavalry unit is dealt pushing damage, you must choose to apply the damage to either the mount’s or rider’s combat dial.
Cavalry Units and Formations Cavalry units can create formations only with other cavalry units. All riders in a formation of cavalry units must have the same faction symbol; ignore mount factions for formation purposes.
Eliminating Cavalry Units If a mount is eliminated before its rider, return the rider to its base. Place it on the battlefield in base contact with the mount and eliminate the mount from the game. If the rider cannot be placed in base contact with the mount, eliminate both the mount and the rider. When a mount or rider is eliminated, remove any action tokens that were on the cavalry unit.
If a mount is without a rider, the mount’s intelligence level determines how the mount reacts. Each mount’s mount type is printed inside one of three shapes: a circle, a pentagon, or a square. This shape indicates the mount’s intelligence level, as described below.
INTELLIGENCE LEVELS Skittish: If this mount does not have a rider at the beginning of any player’s end phase, remove it from the game.
Independent: If this mount does not have a rider, it can be given actions as normal.
Mean-Spirited: If this mount does not have a rider at the beginning of any player’s command phase, it is a friendly warrior to the player whose turn it is, and an opposing warrior to all other players for that turn.
DISMOUNTED RIDERS A rider can dismount during the game; this warrior is both a dismounted rider and a warrior until it gains another mount, and all rules that apply to dismounted riders and warriors apply to this warrior, as appropriate.
To dismount a rider, give the cavalry unit a special action. Do not give the mount or rider an action token, and remove any action tokens from the cavalry unit. Remove the rider from its mount, return it to its base, and place it on the battlefield in base contact with the mount. Both the rider and its mount can be given actions on the same turn the rider dismounts. If there is no room on the battlefield for the rider to be placed in base contact with its mount, the rider cannot dismount.
A dismounted rider can gain another mount during a game. To do so, the dismounted rider must be in base contact with a friendly mount without a rider, and the mount’s and dismounted rider’s mount symbols must match. Give the dismounted rider a special action, remove it from its base, and place it in the mount’s saddle. Then place the rider’s base in the mount’s base slot. Give the newly formed cavalry unit an action token. The cavalry unit can be given an action on the same turn it was formed.
This choice only applies if the pushing damage is deal to the cavalry unit, but not specifically to either mount or rider. For example, if the mount has the boot speed type, and the cavalry unit uses the double-time proficiency, you may choose to deal the 1 pushing damage to either the mount or the rider. (p.11)
A formation of cavalry units consists of 3, 4, or 5 cavalry units. (p.12)
If an effect causes a rider’s front arc or speed type to be replaced, that replacement is ignored while the rider is part of a cavalry unit – the rider always uses the mounts front arc and speed type. (p.18)
Note that using the Mounted Charge or Mounted Bound proficiencies to activate an ability which requires an action only requires one action.
CAVALRY PROFICIENCIES Some proficiencies allow a cavalry unit to both move and attack using only one action. In these cases, the mount or the rider can use any single special ability they possess that requires the kind of action given when they resolve the action. Cavalry unit proficiencies are listed below.
Horsemanship When this unit is the target of a ranged combat attack that is resolved against the rider’s combat dial, the attacker gets –2 to its attack value.
Impale This unit’s rider cannot use the Weapon Master special ability. When this unit’s rider succeeds at a close combat attack against a single target, the rider gets +2 to its damage value.
Mounted Bound Give this unit a ranged combat action when it is not in base contact with an opposing figure. This unit can move up to its full speed value and then make a ranged combat attack. Use the mount’s combat dial to resolve the movement and the rider’s combat dial to resolve the ranged combat attack. Only the rider may use special abilities which require a ranged combat action during the resolution of mounted bound.
Mounted Charge Give this unit a close combat action when it is not in base contact with an opposing figure. This unit can move up to its full speed value and then make a close combat attack. Use the mount’s combat dial to resolve the movement. You choose whether to use the mount’s or the rider’s combat dial to resolve the close combat attack.
Overwhelm Give this unit a move action when it is not in base contact with an opposing figure; this unit cannot use any speed special abilities. At the end of the movement, it must be in base contact with a single opposing cavalry unit. Roll one six-sided die and add the rider’s attack bonus to the result. If the result is 6 or more, the rider of the opposing cavalry unit is dismounted. If there is not enough room for the dismounted rider’s base to be placed on the battlefield in base contact with the mount, eliminate the dismounted rider.
Trample Give this unit a move action when it is at ground level; it cannot use the double-time proficiency. Measure a movement path in a straight line through the mount’s front arc. This movement path can cross other figure bases. Resolve the movement. Any figure at ground level whose base is crossed by the movement path is dealt 1 damage.
DARK RIDERS SUBFACTION Cavalry units from the Dark Riders () subfaction follow the same rules as other cavalry units, with the following exceptions: � Riders and mounts are matched by their collector’s numbers, not their mount symbols. For example, warrior #121a can ride only mount #121b. � Riders from the Dark Riders subfaction cannot dismount or be dismounted. � A Dark Riders mount cannot be eliminated before its rider is eliminated. If three skulls show in the stat slot of a Dark Riders mount that still has a
rider, instead of eliminating the mount, turn its combat dial to the starting marker. � When a rider from the Dark Riders subfaction is eliminated or removed from the game, remove the rider’s base from the mount’s base slot. The rider remains in the mount’s saddle. � Riders from the Dark Riders subfaction can use their subfaction abilities while they are part of a cavalry unit.
SPELLBOOKS AND SPELLS (from the Sorcery expansion set) A spellbook is an item that allows its wielder to play—or cast—spells. A spellbook is represented by a styrene card. When a warrior equips a spellbook, remove the spellbook from its card and insert it into the warrior’s base. A warrior wielding a spellbook becomes a sorcerer (it is still also a warrior). The sorcerer that casts a spell is that spell’s caster. See the Items section for more information on wielding and using items.
Spells give warriors a customizable catalog of additional abilities. Each spell has a page count, a browse cost, possible faction requirements, and spell text describing the spell’s effect. Some spells also have spell elements (which are like item tokens) that signify the spells’ targets or areas of effect. Spells are represented by styrene cards.
Each spellbook has a capacity. This is the number of spell pages it can contain, and each spell takes up a certain number of pages in a spellbook. The total page count of spells in a spellbook may never exceed the spellbook’s capacity.
To use Overwatch with Mounted Bound, move the cavalry unit using the mount’s speed value, give the unit an action token, but do not make an attack; resolve the rider’s attack at the beginning of your next command phase. (p.14)
When a cavalry unit uses mounted charge, it may activate the Charge special ability. The above diagram illustrates how this might be resolved if the mount’s Charge is activated. Alternately, you could resolve the Charge portion first, followed by the mounted charge portion. If you activate the rider’s Charge instead, the Charge portion would require you to attack with the rider after moving the rider’s speed value. No breakaway roll is required after the first attack. Mounted Bound used to activate Bound would be resolved in a similar fashion. (p.14)
Trample affects both friendly and opposing warriors. Trample will only affect a rider that is part of a cavalry unit if the line crosses the rider’s actual base. Trample is not affected by Pole Arm. (p.15)
Some spells have alternative page counts (printed after the symbol) called affinity page counts. If a sorcerer’s faction or subfaction symbol matches the symbol associated with the affinity page count, the affinity page count is used when determining how many pages the spell takes up in that sorcerer’s spellbook.
If using a spellbook, you must assign that spellbook to a warrior and spells to that spellbook before deploying your army. This will allow you to take into consideration any affinity page counts. When you deploy your army, place each spell face up in a stack beneath the spellbook that contains them, and then place that stack beside the battlefield. The top spell on the stack is called the bookmarked spell.
Only the controller of the spellbook’s wielder can view the spells in that wielder’s spellbook stack. If a spellbook has no wielder, its contents may not be viewed by anyone. Neither the order nor the orientation (face up or face down) of spells in a spellbook may be changed unless a rule allows the order or orientation to be changed.
RULE OF SPELLS Similar to special abilities text, when a spell’s text contradicts the rules, the spell text takes precedence.
CASTING SPELLS Only a face-up bookmarked spell containing its spell element can be cast. Most spells require an action to be cast, and they use the wielder’s combat values, as appropriate.
When casting a spell, make all opponents aware of the spell text. Resolve it in the following order: 1. Choose targets and make any choices, as appropriate. 2. Place the spell element or card on the battlefield, as appropriate. 3. Execute the spell text. 4. Put the spell face up on the bottom of the spellbook stack, if appropriate 5. Choose a new bookmarked spell.
When a spell ends, its effect ends. Put its spell element (if any) back into its spell card and put the card face up on the bottom of the caster’s stack.
A spell may be modal, allowing it to have one of multiple effects. A modal spell says “Choose one” before its choices are presented. A spell’s mode must be chosen when it is cast, and it resolves with the chosen mode.
Some spells are not actually cast in the game. Rather, they have effects that come into play simply by being in a sorcerer’s spellbook. Such spells say “Do not cast….” Follow their spell text just like you would any other spell.
Some powerful spells indicate that you must put them face down on the top of the stack instead of putting them face up on the bottom of the stack. A face-down spell cannot be cast.
BROWSING Changing one bookmarked spell for another is called browsing. In this way, a controller can choose which spell his or her sorcerer has available to cast. You may browse only on your turn.
To browse, pay a spell’s browse cost; costs are described in the “Browse Costs” table, below. There are two ways to browse: 1. Pay a face-up bookmarked spell’s browse cost and then choose any face-up spell in the stack to be the bookmarked spell. 2. Pay a face-down bookmarked spell’s browse cost. Turn that spell face up and then choose any face-up spell in the stack to be the bookmarked spell.
Browse Costs
At the beginning of your end phase, browse. No action is required.
If the sorcerer has one or two action tokens, remove one. Give the sorcerer a special action to browse.
Give the sorcerer a special action to browse.
Example: Ben’s bookmarked spell is not the spell he wants to use. Ben chooses to browse the spell so that he can bookmark a more useful spell. The browse
cost is . Ben’s sorcerer has no action tokens, so he foregoes removing an action token from his sorcerer and gives the sorcerer a special action to browse. He selects a new spell and places it on the top of the spellbook stack. Ben completes the action by giving the sorcerer an action token.
SPELL TYPES There are four main spell types. A spell’s type is printed on the spell card beneath its name.
When browsing, reveal the browse cost by showing the edge of the spell card to your opponent. You need not reveal the entire spell. (p.11)
Affinity page counts are only important when building a spellbook. If a spellbook is picked up by another warrior during a game, the page counts of the various spells no longer matter. (p.22)
A warrior may only cast a spell if it meets a faction requirement for the spell. (p.22)
A spell cannot be included in a spellbook unless the initial wielder meets any faction requirements for the spell when the spellbook is built. (p.22)
After casting a spell, the new bookmarked spell may be any face up spell in the spell stack, including the spell just cast. If the spell says to place it face down, you do not select a new bookmarked spell until the cast spell has been browsed. (p.22)
A spell does not end except as specified by the spell type rules, or by the spell’s text, or in cases where the spell cannot be resolved. Even if the caster ceases to wield the spellbook, the spell’s effects stay in play until the specified end conditions are met. (p.22)
If a spell cannot be legally resolved, the spell’s effects end immediately. (p.22)
Spells are recorded on the Warlord copy of the Army sheet. Players are not required to show their opponent what spells they have until the spell is used. However, spells cannot be changed or reassigned between rounds. (1.16.3)
Sorceries Spells of this type create an enormous variety of immediate effects. Some are accessible and mundane, while others are rare and mighty. Sorceries that require a ranged combat action cannot be cast when the caster is in base contact with an opposing warrior. When a sorcery is cast, follow the sorcery’s spell text.
Casting sorceries: Give the sorcerer a ranged combat action to cast a sorcery. A sorcery’s spell text will indicate if a different type of action is required. Sorceries do not have spell elements.
Enchantments Spells of this type allow a sorcerer to enchant a single target figure, imbuing it with an effect. As part of resolving an enchantment, remove the spell element from its spell card and hang the element on the target. Put the spell card in play face up next to the battlefield and follow the spell text. The target is enchanted (affected) by the spell per the spell’s text. The spell ends as indicated by its spell text or when its target is eliminated or removed from the game.
Casting enchantments: Give the sorcerer a special action to cast an enchantment. An enchantment’s spell text will indicate if a different type of action is required.
Glyphs Spells of this type are centered on a point on the battlefield and may create any number of effects. As part of resolving a glyph, remove its spell element from its spell card and place the element face up on the battlefield in base contact with the caster. Put the spell card in play face up next to the battlefield and follow the spell text. A glyph ends at the beginning of any end phase in which the caster is not in base contact with the glyph, or as indicated by its spell text.
Glyph spell elements cannot be placed in base contact with each other.
Glyph spell elements do not prevent base contact with objective tokens or terrain features.
Casting glyphs: Give the sorcerer a special action to cast a glyph. A glyph’s spell text will indicate if a different type of action is required.
Illusions Spells of this type alter the battlefield like domains, but for a limited time. Illusions may cancel or be canceled by domains in play. As part of resolving an illusion, remove it from the spellbook and put it in play face up next to the battlefield. The spell ends as indicated by its spell text; when it ends, remove it from the game.
Casting illusions: Give the sorcerer a special action to cast an illusion.
PROFICIENCY: COUNTER SPELL Warriors with the wand attack type can use the counter spell proficiency to cause an opposing sorcerer’s spell to fail. To use counter spell, a warrior cannot be in base contact with any opposing able warriors, and it cannot have any action tokens.
Counter spell is used during an opponent’s turn; it does not require an action. Announce that you are using counter spell after a target spell’s element or card has been placed on the battlefield, but before the target’s spell text is executed. Only one warrior may attempt to counter a given spell.
The controllers of the casting and countering sorcerers each make a counterspell roll. The casting sorcerer rolls two six-sided dice and adds its unmodified attack value (including attack bonus, if any) to the result. The countering sorcerer rolls one six-sided die and adds its unmodified attack value (including attack bonus, if any) +1 to the result. If the countering sorcerer’s result is greater than the casting sorcerer’s result, the counterspell succeeds and the target spell fails. Return the target spell’s element (if any) to its spell card and put the spell card face down on top of its stack. If the counter spell attempt fails, the target spell resolves normally.
Spells called counterspells enhance a sorcerer’s use of counter spell. Only bookmarked, face-up counterspells may be used. Announce and reveal a counterspell as part of using the counter spell proficiency.
ADVENTURING COMPANIES (from the Omens expansion set) Adventuring companies are cards that allow players to unite warriors from different factions. When a player has an adventuring company in play, all warriors in the player’s army are members of the adventuring company. Members gain the ability listed on the adventuring company card, and they may create formations with each other as if they were from the same faction.
A player may play only one adventuring company in a game, and he or she puts it into play next to the battlefield before deploying his or her first warrior. The point value of an adventuring company applies to the build total of the player who puts it into play.
If multiple players declare they want to counter the same spell, the active player chooses which of those players will resolve the counter spell. (p.13)
Note that the modifiers here are applied to the counterspell roll, and not to the attack value. The rule of 3 does not apply to counterspell rolls. (p.13)
If a Glyph or Illusion says to place it face down on top of the spell stack when cast, place it on top of the spellbook instead. When the spell is browsed, put it on the battlefield as normal. This will remind you that the spell is in play, but must be browsed before casting another spell. (p.22)
Magic Immunity does not prevent a figure from being the target of an enchantment unless the enchantment requires a ranged combat attack by a wand figure to cast. Also, Magic Immunity does not protect a figure from glyphs or illusions, nor from sorceries that do not use a ranged combat attack to target the warrior with Magic Immunity.
Glyphs cannot exist at soaring level, and thus cannot be cast by sorcerers at soaring level. (p.22)
Riders cannot use their rider bonus during counterspell rolls unless the rider is part of a cavalry unit.
Adventuring Companies may be used during tournaments. If a player uses an Adventuring Company, the same Company must be used for the entire tournament.
Certain warriors are considered leaders or signature members of an adventuring company. The names of these warriors, called cohorts, are printed on the adventuring company card. Playing cohorts decreases the point value of an adventuring company; this is the cohort discount. If you play an adventuring company, and have one or more of that company’s cohorts in your army, you subtract the cohort discount of each cohort used in your army from the adventuring company’s point value, to a minimum point value of 0. If a cohort is not Unique, the cohort discount is applied for each instance of the cohort in your army. This final, modified point value of the adventuring company counts toward the build total.
TERRAIN You do not have to use terrain in a Mage Knight game, but adding terrain to the battlefield will make your game more challenging and interesting.
There are three main types of terrain features: clear, hindering, and blocking. These terrain types can exist at ground level or they can be elevated. In addition, there are several types of special terrain features described throughout this section. A warrior occupies a terrain feature if its center dot is in the terrain.
CLEAR TERRAIN Clear terrain can represent features such as grassy plains or a city square. The entire battlefield is clear terrain, except those areas where hindering, blocking, or special terrain features are placed. Clear terrain has no effect on game play.
HINDERING TERRAIN Hindering terrain can represent features such as brush, light woods, and debris. You can represent hindering terrain using shapes cut out of construction paper or cloth. The outer edges of these shapes are the boundaries of the hindering terrain. Hindering terrain should lie flat on the table so that it will not interfere with the placement of warrior bases.
Warriors can move into and through hindering terrain, but with some restrictions. If a warrior begins a movement with any part of its base overlapping clear terrain, its movement must end immediately when its base crosses completely into hindering terrain. It does not have to stop if its base does not cross completely into hindering terrain. If a warrior begins a move with any part of its base overlapping hindering terrain, its unmodified speed value is halved (round up) for that movement.
Hindering Terrain Modifier Close combat attacks are not affected by hindering terrain. If a line of fire passes through any amount of hindering terrain, or targets a warrior occupying hindering terrain, the target gets +1 to its defense value. This is called the hindering terrain modifier.
If a warrior that occupies hindering terrain makes a ranged combat attack, it might not be penalized by the hindering terrain modifier. If the line of fire does not cross any hindering terrain except beneath the attacker’s base, no hindering terrain modifier applies to that attack. This represents the attacker’s ability to fire from the edge of hindering terrain, protected but not penalized by it.
Concealing Terrain Concealing terrain represents tall grass or other light cover. Concealing terrain is clear terrain for movement purposes and hindering terrain for line of fire purposes.
BLOCKING TERRAIN Blocking terrain represents features such as large boulders, high walls, and buildings. You can represent blocking terrain using common items such as decks of cards, small cartons, and scale models. Warriors cannot occupy, or have their movement paths cross, blocking terrain. Warriors cannot have any part of their bases overlapping blocking terrain. Blocking terrain blocks any line of fire crossing it.
Chasms A chasm represents a canyon or gorge. Chasms are blocking terrain for movement purposes and clear terrain for line of fire purposes.
ELEVATED TERRAIN Clear, hindering, and blocking terrain can be elevated to form hills and low plateaus. Elevated terrain features have gradual slopes up to an elevated point. All elevated terrain features represent the same level of height above the battlefield, and all points of a single elevated terrain feature are at the same level.
You can represent elevated terrain using stacks of books and magazines or by using scale models. If you use models for hills, use models with a distinct elevation change and flat upper surface.
A warrior must end its movement as soon as it occupies clear or hindering elevated terrain. After that, the warrior’s movement is subject to clear or hindering terrain movement rules while occupying the terrain, depending on the elevated terrain’s type. A warrior cannot occupy elevated blocking terrain. When measuring warrior’s move onto or off of elevated terrain, don’t measure any vertical distance traveled, only the horizontal distance traveled.
Line of Fire and Elevated Terrain An elevated terrain feature blocks line of fire if neither the attacker nor the target occupies that elevated terrain feature.
If the attacker and target both occupy one elevated clear terrain feature, line of fire is affected by elevated hindering terrain on that same elevated terrain feature or blocked by elevated blocking terrain and the bases of other warriors on that same elevated terrain feature.
Terrain features are pieces of terrain (including constructed terrain) that is placed on the battlefield during setup. The battlefield itself is not a terrain feature, even if a domain affects the entire battlefield. (p.24)
If the attacker or target is on an elevated terrain feature, but the other is not, line of fire is blocked under the following circumstances: � The line of fire crosses a warrior base on the elevated terrain feature. � The line of fire crosses a different elevated terrain feature. � The line of fire crosses a blocking terrain feature, elevated or nonelevated.
Hindering terrain affects line of fire only if either the attacker or target is in hindering terrain or the hindering terrain is elevated; otherwise it has no effect.
This line of fire crosses hindering terrain and a warrior’s base, but because the attacker is elevated, the intervening features do not block line of fire.
Height Advantage Modifier When an attacker not on elevated terrain makes a ranged combat attack against an elevated target, the target gets +1 to its defense value. This is called the height advantage modifier. A target might get the benefit of the height advantage modifier and the hindering terrain modifier at the same time. In this case, the target gets +2 to its defense value. A warrior on elevated terrain attacked by a warrior at soaring level does not get the height advantage modifier.
Abrupt Elevated Terrain Raised parapets, flat rooftops, and plateaus flanked by cliffs are examples of abrupt elevated terrain. Abrupt elevated terrain is treated like elevated terrain except that warriors can move onto or off of such terrain only at an access point, such as a stairwell or ladder. Each abrupt elevated terrain feature must have at least one access point designated when it is placed on the battlefield. A warrior’s movement path must be measured to and from such access points.
CONSTRUCTED TERRAIN Constructed terrain is terrain made from constructed terrain cards. Using constructed terrain is optional; if it is to be used, all players must agree to its use. Constructed terrain cards display the terrain’s name and describe all the terrain’s game play information, including its terrain type, defense value, fortification value, and structural point value, all described below. The pieces with which to build the constructed terrain feature are removed from their card or cards and assembled. After a game, a constructed terrain feature can be disassembled and snapped back into its card or cards for convenient storage.
A constructed terrain feature can be built from one or more constructed terrain cards and can represent many different terrain types.
The terrain type indicates what type of terrain the constructed terrain represents: is abrupt elevated, is blocking, is concealing, is elevated, and
is hindering. The defense value is the value a close or ranged combat attack result must meet or exceed in order to hit and damage the constructed terrain.
A warrior on top of a constructed terrain feature with an access point (for example, a Wooden Watchtower) is always in base contact with the access point. Warriors in base contact with the same access point are in base contact with each other.
Placing Constructed Terrain When creating the terrain pile during setup, each player can add two constructed terrain features in addition to their other terrain features. When placing terrain, a player can place two pieces of constructed terrain on the battlefield instead of one nonconstructed terrain feature. Constructed terrain is placed following all the rules of terrain placement, except that constructed terrain can be placed within 3” of another constructed terrain piece. A constructed terrain piece must be placed with its entire base (indicated by a bold black line) in contact with the battlefield.
Constructed Terrain in Game Play A warrior can occupy constructed terrain. Constructed terrain that allows a warrior to occupy it will have a center dot printed on it. When targeting a warrior occupying a constructed terrain feature, instead of drawing the line of fire to the warrior, draw the line of fire to the constructed terrain feature’s center dot instead. Note that with constructed terrain, you should look down from above to see if a warrior’s center dot is within it. The flight stand of a warrior at soaring level cannot be placed on constructed terrain features.
Whenever a line of fire crosses constructed terrain, refer to the terrain type to see what modifiers might apply or if the line of fire is blocked.
In addition to any modifiers the terrain type might grant, some constructed terrain also has a fortification value. When a ranged combat attack targets a warrior in base contact with the constructed terrain, and the line of fire crosses the terrain feature, the target adds the fortification value to its defense value.
A warrior cannot be given a close combat action targeting another warrior if constructed terrain prevents base contact between the attacker and target at the time the attack roll is made.
Some constructed terrain cards have additional rules printed on them. Follow these rules to determine any additional effect the constructed terrain might have on game play.
Attacking and Eliminating Constructed Terrain Constructed terrain, unlike other terrain, can be eliminated. The structural point value of a constructed terrain feature is the amount of damage that must be dealt to the constructed terrain during one player’s turn in order to eliminate it. A constructed terrain feature can be the target of ranged combat attacks as long as the attacker’s line of fire can be drawn to an edge of the terrain feature. A successful ranged combat attack deals damage equal to the attacker’s ranged damage value. Close combat attacks can target a constructed terrain feature if the attacker’s front arc is in base contact with the terrain feature. A successful close combat attack deals damage equal to the attacker’s damage value.
Warriors on top of an abrupt elevated constructed terrain feature that is eliminated are also eliminated.
Multiple-Dial Warriors, Titans, and Mounts may occupy the top of abrupt elevated constructed terrain, as long as the figure’s center dot is within the terrain. You may prop the figure up, as long as such supports do not interfere with other figures at ground level.
Constructed Terrain is only legal for Unrestricted tournaments (1.5.2)
Lines of fire drawn to or from titans and multiple-dial warriors are not affected by constructed terrain.
SPECIAL TERRAIN
Shallow Water Shallow water terrain, such as streams, fords, and ponds, is hindering terrain for movement purposes and clear terrain for line of fire purposes.
Deep Water Deep water terrain, such as rivers and lakes, is blocking terrain for movement purposes and clear terrain for line of fire purposes.
DOMAINS In addition to terrain features, a Mage Knight battlefield can also be affected by domains, which are represented by domain cards. Domains can alter terrain, weather, or other conditions on the battlefield. Using domains is optional, though if players agree to use them, then all players must use them.
If using domains in a game, each player secretly chooses one domain card to play. After terrain is placed but before players deploy their armies, each player reveals the domain he or she chose and puts it into play next to the battlefield. Some domains cancel other domains. Canceled domains are removed from the game. If two domains cancel each other, both cards are removed from the game. Otherwise, follow the rules text on each domain card in play.
ITEMS Some warriors in Mage Knight have slots for items in their base. These slots allow them to wield weapons, armor, and other magical devices called items. Each item comes with a corresponding item token.
An item of exceptional power is called a relic. If an item is a relic, its collector’s number begins with “R.”
A warrior can wield multiple items, with the following restrictions: � A warrior cannot wield more than one relic. � No more than one item with the same requirement can be wielded by the same warrior. � A relic cannot appear in one player’s army more than once. � A warrior must have one item slot for every item it wishes to wield.
Each item is removed from its card so that it can be placed in a warrior’s item slot. Besides showing the item’s name, the card describes all the item’s game play information and storyline text, including its collector’s number, point value, wielder requirements, and the modifiers and special abilities it provides to the wielder. After a game, an item can be snapped back into its card for convenient storage.
The point value of an item counts toward the build total, just as the point value of a warrior does. During deployment, an item must be placed in a warrior’s item slot. This warrior becomes the wielder of the item. An item’s wielder requirements describe the specific traits a warrior must have in order to wield it. For example, to wield Dragonstar, a warrior must have the bow attack type. Other requirements, such as faction or minimum attack value, are also possible.
An item can be dropped by its wielder at the beginning of the controlling player’s command phase. This does not require an action. If a wielder drops an item, remove the item from the wielder’s item slot and place the item’s corresponding item token in base contact with the warrior that dropped the item. A warrior can be given a special action to pick up and wield an item provided the warrior meets the item’s wielder requirements and is in base contact with the item token when the special action is given to the warrior. Place the item token of an item dropped by a warrior at soaring level in base contact with the outside of the warrior’s flight stand. An item dropped in blocking terrain (but not terrain that is blocking for movement purposes) is removed from the game.
If a warrior that is wielding items is eliminated, before removing the warrior from the battlefield, remove the items from its base and place the corresponding item tokens in base contact with the eliminated warrior. Then remove the warrior from the battlefield. These items can be picked up by a warrior in base contact with the item token and wielded as described above. It is possible that picking up items in this way can cause your army to exceed its build total.
If a player’s warrior equips an item originally owned by another player, the item must be returned to its owner after the game is completed.
ELIMINATING A PLAYER At the end of any action phase, if a player has no able warriors on the battlefield, all that player’s remaining warriors are removed from the game; they do not count as eliminated warriors. Remove the control markers from any objectives controlled by that player. These objectives become neutral, and the action phase ends. At the beginning of the next end phase, if only one player has able warriors on the battlefield, that player gains control of all objectives.
Item requirements are only checked when a warrior first wields an item. (p.13)
Dropping an item causes its effects to end immediately, unless specified otherwise. (p.17-18) If a soaring warrior drops an item, place the item token in base contact with the flight stand. Such items may be dropped so they are unrecoverable. (p.12)
Note that all relics and spellbooks are also items. Currently, all non-relic items have a collector’s number starting with “I.” (p.16)
If a modifier granted by an item does not have a symbol next to it, the modifier applies to all applications of the described combat value. If there is a symbol next to it, the modifier only applies to warriors with that symbol. If it is an attack value modifier with an attack type symbol, it only applies to attacks of that type. (p.17)
Deep water is not legal during tournaments unless specifically stated otherwise. (1.5.2)
In Constructed or Storyline tournament play, no figure may wield a relic that has a higher point value than that figure, unless the relic has a faction or subfaction requirement. (1.5.3)
Domains are allowed during tournament play See the Tournament Rules for details regarding each tournament format. (1.5.3)
If a domain refers to an opposing player, or says “you”, without specifically stating which player it is relative to, such references are relative to the player who played the domain. (p.12)
ENDING THE GAME The game ends at the end of any turn in which any one of the following conditions is met: � Only one player still has an able warrior on the battlefield; OR � A predetermined time limit for the game is reached; OR � All remaining players agree to end the game.
Example: Kelly and Will are playing a two-player game. During Kelly’s action phase, a successful attack eliminates one of Will’s warriors. All of Will’s remaining warriors are Demoralized or captured, so Will is eliminated. Because Kelly is the only player with an able warrior on the battlefield, the game will end at the end of her turn. At the end of Kelly’s action phase, Will removes his remaining warriors from the game and removes his control markers from the objectives he controls. At the beginning of Kelly’s end phase, she is the only player with an able warrior on the battlefield, so she gains control of all objectives. Next, Kelly checks control of objectives and notes that she controls all three objectives. Kelly removes action tokens from her warriors that were not given actions this turn and ends her turn. At the end of her turn, the game ends.
VICTORY! When the game ends, all players count how many objectives they control. The player who controls the most objectives wins the game.
TIES If no player controls a majority of objectives, total the point values of the warriors that each player eliminated during the game. The winner is the player who eliminated the most points’ worth of warriors. If players are still tied, the winner is the player whose army was built with the fewest number of points.
THE STANDARD GAME Players are free to make their own choices about build totals, battlefield size, and other game conditions when playing Mage Knight. The standard game is a suggested set of conditions under which to play the game, and is described below: � The battlefield is 3´ by 3´ square. � The build total is 300 points, giving each player three actions per turn. � The time limit for the game is 50 minutes. � Each player contributes from zero to four standard terrain features to the terrain pile. � Elevated terrain is not used. � Follow Mage Knight etiquette and have fun!
TOURNAMENT PLAY For guidelines on how to play a Mage Knight game at the tournament level, visit www.wizkidsgames.com.
MAGE KNIGHT ETIQUETTE Miniatures games lack the restricted environments of board games and card games. This is good, because you can use your imagination to develop all sorts of unique scenarios and terrain ideas. The butter dish is a sacred stone altar. The key chain in the center of the table is a treasure chest, and the first warrior to drag it back to its table edge is the winner!
On the other hand, situations can arise that are not covered by these rules. While we have attempted to write explicit rules, players might eventually disagree over who can do what. To both avoid and help resolve such situations, we suggest the following points of etiquette: � A player should never turn the combat dial of any of his or her warriors unless the warrior is dealt damage or healed of damage. Then, the player
should turn the dial only the required number of times in the proper direction. In other words, don’t turn through a combat dial just to see what’s coming up. � You will constantly pick up your warriors during a game to adjust their combat dials. Mark the locations and facings of your warriors with markers on the table whenever you do this. � Because weapons, limbs, and other bits of warriors stick out from their bases, it is sometimes difficult to cleanly position two warriors in base contact. If you cannot achieve clean base contact, players should agree that the two warriors are in base contact until one of them moves away or is eliminated. � Ambiguous situations will arise. For example, a line of fire might or might not be nicking a warrior’s base. There might or might not be enough room between two warriors to allow a third to stand between them. Players will reasonably disagree in these situations. In all such instances, roll one six-sided die: On a result of 1–3, the action is not allowed; on a result of 4–6, the action is allowed.
GLOSSARY ability nexus: A location on the combat dial in which a special ability might appear. This special ability can apply to a warrior’s speed, attack, defense, or damage combat value. able: A warrior on the battlefield that is not a captive and does not have the Demoralized special ability. access point: The point at which a warrior can move onto or off of a piece of abrupt elevated terrain.
action: There are four types of actions: move, close combat, ranged combat, and special. The number of actions you get each turn depends on the battle’s build total: one action for every full 100 points of the build total. You give these actions to your warriors during each of your turns.
If a warrior is eliminated, but not by an opposing figure, the points for that warrior are divided among all opponents (round down.) (p.12)
You may choose to end your action phase before using all your actions.
Note that if a player no longer has able warriors, the game does not end until the end of the current turn.
When time expires during a tournament, the current player may finish his or her turn. If that player was the first player, play continues until the player to the first player’s right has finished his or her turn or until only one player has able warriors remaining, whichever comes first. (1.9)
action phase: The period of a player’s turn during which he or she gives actions to his or her warriors. action token: A coin or bead used to mark a warrior that has been given an action. action total: The number of actions you get on each of your turns. adventuring company card: A card that allows all warriors in a player’s army to create formations with each other as if they were from the same faction; such warriors are members of the adventuring company. Some adventuring company cards also grant special abilities to their members. affinity page count: An alternative page count for a spell that members of a certain faction may use when constructing a spellbook. Affinity page counts are preceded by the OR symbol. arc extensions: Lines on a warrior’s base that help to define its front arc in relation to its center dot. area of effect: An area measured from a warrior’s or token’s center outward in all directions. army: A group of warriors you control during the game. attack bonus: A number, associated with a specific attack type, added to a warrior’s attack value when it makes an attack using that specific attack type. An attack bonus is not a modifier. attack result: An attack roll plus the attacker’s attack value and any modifiers that apply to the attacker’s attack value. attack roll: The result of rolling two dice when a warrior makes a close or ranged combat attack. attack type: Indicates that a warrior is good at a certain kind of attack, and gives the warrior access to certain combat proficiencies and attack bonuses, and might allow it to wield certain items. attack value: A number a warrior adds to the attack roll when it makes a close or ranged combat attack. attacker: The warrior to which a close or ranged combat action is given. base: The plastic disc to which a warrior is glued. base contact: One warrior is in base contact with another warrior when their bases are touching. A warrior can also be in base contact with a token, marker, or terrain feature. base slot: The space on a mount’s base where a warrior’s base is placed when the warrior becomes a rider of that mount. boarding: Becoming a passenger of a chariot. bookmarked spell: The top spell of a spellbook stack. break away: Attempting to move a warrior that is in base contact with one or more opposing warriors. browse: To change the bookmarked spell in a spellbook stack. build total: A point total that limits how many combined points a player’s army can be; the combined point value of a player’s army cannot exceed the build total. The build total determines how many actions a player gets on each of his or her turns. canceled: When a domain or special ability temporarily has no effect. A canceled domain is removed from the game. If a warrior’s controller cancels one of that warrior’s special abilities, this canceled special ability ceases to be canceled at the beginning of the next player’s turn, unless the controller cancels it again. capacity: The number of spell pages a spellbook can hold. captive: A captured warrior. captor: A warrior that controls a captive. capturing: Using a close combat action to turn a warrior into a captive instead of damaging it. cast: To play a spell. caster: The caster of a spell is the sorcerer that cast that spell. casting sorcerer: The sorcerer against whom the counter spell proficiency is used. cavalry unit: A unit composed of both a mount and a rider. center dot: The point designated on a warrior’s base as its center point. The center dot might not be visible on some bases; in these cases, use the front arc extensions as guides to find the center of the base. champion: A Unique warrior that has the option of being played using one of several different combat dials. close combat action: An action given to a warrior that allows it to make a close combat attack. close combat attack: A hand-to-hand attack. cohort: Leaders or signature members of an adventuring company. A cohort reduces the point value of its adventuring company when both appear in the same army. cohort discount: The number of points subtracted from an adventuring company’s point value when both an adventuring company and its cohort appear in the same army.
collector’s number: An identifying number for some Mage Knight game pieces. combat dial: The rotating disc under a warrior’s base. command phase: The period of a player’s turn during which he or she gives orders specific to the command phase to his or her warriors. Some warriors have special abilities that resolve during the command phase, and some actions given on a previous turn might resolve during the command phase. constructed terrain feature: A terrain feature built from one or more constructed terrain cards. Some constructed terrain features can be built from one card, and others require multiple cards. contested: The state of an objective when opposing players have able warriors in base contact with the objective token. control marker: The marker a player places on top of an objective token to show that he or she controls it. Each control marker has two sides, each a different color. At the beginning of a game, each player choose the control marker color he or she will use during the game. controller: The player able to give actions to a warrior is its controller. Also, the player who controls an objective is that objective’s controller. countering sorcerer: The sorcerer using the counter spell proficiency to attempt to counter a target spell cast by an opposing sorcerer. counterspell roll: One of two rolls made to determine the success or failure of a counter spell attempt. critical hit: An attack roll of 12 (two 6s). critical miss: An attack roll of 2 (two 1s). damage dealt: An attacker’s damage value, affected by any modifiers. A target’s controller turns the target’s combat dial clockwise once for each point of damage dealt. damage type: Indicates what type of damage a warrior deals when it makes a close combat attack, and can affect game play, such as in regard to healing. damage value: A number that indicates how much damage a warrior deals when making a close combat attack. defense type: Indicates what type of defense a warrior uses. This can alter how a warrior is affected by attacks, such as wand ranged combat attacks made against a warrior with the magic immunity defense type. defense value: A number that an attack result must meet or exceed in order to damage a warrior. deploy: Placing your warriors on the battlefield before the game begins. deployment area: A player must deploy his or her warriors in his or her deployment area. It is an imaginary rectangle that extends 3” from the edge of the battlefield and 8” away from any other edge of the battlefield. It has two short edges and two long edges; the edge closest to the player is called the near edge, and the edge farthest from the player is called the far edge. disembarking: A passenger leaving a chariot. dismount: To remove a rider from its mount. dismounted rider: A warrior that has been removed from its mount. It is both a dismounted rider and a warrior for game purposes. domains: Conditions, such as weather and terrain—represented by domain cards—that can alter game and battlefield conditions. elevated: The level, above ground level but below soaring level, where elevated terrain exists. eliminated: A warrior or constructed terrain feature that is removed from the battlefield, or when a player is no longer part of the game. enchant: To affect a warrior with an enchantment. end phase: The period of a player’s turn during which he or she checks for control of objectives and removes all action tokens from his or her warriors not given an action that turn. ends: When a spell’s effect no longer applies to the game. explosive damage: The damage dealt by a successful ranged combat attack from a warrior with the explosive damage type to figures within a 3” area of effect of the target of the attack. facing: The way a warrior’s front arc is oriented on the battlefield. faction: The main group to which a warrior belongs. All warriors belong to a faction, except for Mage Spawn warriors. first player: This player (determined by dice roll) places the first objective token (besides the one placed in the center of the battlefield), deploys his or her warriors first, and takes the first turn. flight stand: An indicator that you place under a warrior to show that it is using the soaring proficiency. It also doubles as a key ring. fortification value: A number indicating the defense bonus that a constructed terrain feature provides to warriors. free spin: Rotating a warrior so that its front arc touches an opposing warrior that moved into base contact with it. It does not require an action.
freed: When a captive is released from its captor because the captor was eliminated. A freed captive is no longer a captive. friendly warrior: A warrior you control or one that is controlled by an ally. front arc: The only portion of a warrior’s base through which it can make attacks. A warrior’s front arc must be in base contact with an opposing warrior in order for it to make a close combat attack, and line of fire must pass through a warrior’s front arc in order for it to make a ranged combat attack. ground level: Ground level is any point on the battlefield that is not at the elevated or soaring levels. healing: A counterclockwise spin of the combat dial that indicates the removal of damage. height advantage modifier: If a ranged attack originates on nonelevated terrain against a target on elevated terrain or at soaring level, the target gets +1 to its defense value. hindering terrain modifier: If a line of fire passes through any hindering terrain, the target gets +1 to its defense value. ID click: The special click preceding a champion’s starting marker click on one of its combat dials. This click is printed with the champion’s set symbol as well as the point value and collector’s number for that combat dial. independent: If it is without a rider, a mount with this intelligence level can be given actions as normal. indirect-fire attack : A type of ranged combat attack made by figures with minimum and maximum range values that ignores terrain and other warriors but that must still pass through the attacker’s front arc. intelligence level: A mount’s intelligence level dictates how it reacts to not having a rider. item: Weapons, armor, and other magical devices that a warrior can wield. An item can bestow special abilities, combat value modifiers, and so on. item slot: The part of a warrior’s base into which an item is inserted when the warrior wields it. key ring: The flight stand doubles as a key ring, which can be used to turn the combat dials of some warriors. line of fire: An imaginary line drawn from the center of an attacker’s base to the center of the target’s base. If this line is blocked, the attack cannot be made. long-range attack: A ranged combat attack made at up to double range by a titan, multiple-dial warrior, or castle section against another titan, multiple-dial warrior, or castle section. maximum range: The longest distance at which a warrior can make an indirect-fire attack. mean-spirited: If it is without a rider at the beginning of a player’s command phase, a mount with this intelligence level is friendly to that player and opposing to all other players for that turn. member: A warrior in an army using an adventuring company card is a member of that adventuring company. A warrior taking part in a movement or close or ranged combat formation is also a member of that formation. minimum range: The shortest distance at which a warrior can make an indirect-fire attack. modal: A spell with different effects, one of which must be chosen when the spell is cast. A modal spell is printed with “Choose one.” mode: The chosen effect of a modal spell. modifier: A number that is added to or subtracted from a warrior’s combat value. Attack bonuses and replacement values are not modifiers. mount: A warrior with an elongated base that can carry other warriors, called riders. mount symbol: A mount symbol on a mount’s base indicates the mount’s type. A mount symbol on a warrior’s base indicates that the warrior can ride a mount of that type. mount type: The type of warrior a mount is. A mount’s mount type must match a rider’s mount symbol for the two to form a cavalry unit. move action: An action given to a warrior that allows it to change its position on the battlefield. moved: A warrior is moved when its center dot changes position at any time, or its facing changes during its controller’s turn. movement formation: Three to five friendly warriors in base contact with each other that are able to move as a unit.
movement path: The path shown by the flexible ruler that indicates where a warrior will move. neutral: The state of an objective when it is neither contested nor controlled. All objectives begin a game neutral. objective: One of several strategic battlefield locations that players vie to control in order to win a game. objective token: A token placed on the battlefield to indicate the location of an objective. Objective tokens are clear terrain. occupy: A warrior occupies terrain when its center dot is within the terrain. Its base does not have to be entirely in the terrain for it to occupy that terrain. opposing warrior: A warrior controlled by an opponent. order: Where a spell is located in a spellbook stack. orientation: The facing of a spell in a spellbook stack—face up or face down owner: The player to whom a warrior or item belongs. Control of a warrior can change during a game; ownership cannot. page count: The number of pages a spell occupies in a spellbook. passenger: A warrior that is riding in a chariot. phase: One of three segments of a turn: the command phase, the action phase, and the end phase. point value: A number that indicates how much it costs to add a warrior or item to an army. Also the number of victory points gained by a player when he or she eliminates a particular warrior. primary attacker: The warrior that is aided by other warriors when they create a ranged combat formation or use the gang up proficiency. The primary attacker is the only warrior given an action in such cases, though all warriors who aid the action are given action tokens. proficiency: An ability granted to a warrior because of its attack or speed type. pushing: Giving a warrior an action so that it is given a second action token. This deals 1 pushing damage to the warrior. pushing damage: Pushing a warrior deals it 1 pushing damage, usually after the action that pushes the warrior is resolved. This damage cannot be reduced. range value: A number that indicates the maximum number of inches that a warrior’s ranged attack can reach. ranged combat action: An action given to a warrior that allows to it make a ranged combat attack. ranged combat attack: An attack made from a distance. This attack can include missile weapons, magic, mind power, and so on. ranged combat formation: Three to five friendly warriors in base contact that can make a more effective ranged attack. ranged damage value: A number that indicates how much damage a warrior deals when making a ranged combat attack. reanimated: A reanimated warrior is an eliminated warrior that is returned to play, usually because of a special ability. rear arc: The portion of a warrior’s base through which it is especially vulnerable to close and ranged combat attacks. If a warrior makes a close combat attack against a target while it is in base contact with the target’s rear arc, the warrior gets +1 to its attack value. If a warrior makes a ranged combat attack against a target, and the line of fire passes through the target’s rear arc, the warrior gets +1 to its attack value. rear compartment: The area on a multiple-dial warrior where a warrior sits when it becomes a passenger. relic: A rare and powerful item whose collector’s number begins with “R.” removed from the battlefield: Something removed from the battlefield is still eligible to return to the game. removed from the game: Something that is removed from the game cannot be used again in the current game. repair marker: An indicator that might appear on the combat dials of warriors with the golem damage type. When healing one of these warriors of damage, the warrior’s controller must stop applying healing when a repair marker appears on its combat dial. A warrior cannot be healed while a repair marker appears on its combat dial. replacement value: A value, deriving from special abilities, domains, items, or terrain that becomes a substitute for one of a warrior’s combat values. A replacement value is not a modifier. resolve: To complete a move, close combat, ranged combat, or special action. rider: A warrior that can ride a mount.
Note that some items may also have modal effects.
Relics (includingspellbooks) are items.
Eliminated warriors are removed from the battlefield.
rider attack bonus: A special attack bonus indicating that a warrior is a rider. A warrior can use this attack bonus only while on a mount. rule of 3: No modifier can increase or decrease any combat value by more than 3. rule of spells: When a spell’s text contradicts the rules, the spell text takes precedence. saddle: The area on a mount where its rider is placed when they become a cavalry unit. setup: The period of the game during which objective tokens and terrain are placed. shake off damage: Damage dealt by a warrior (with the horseshoe speed type) that successfully breaks away from opposing warriors in base contact with it outside of its front arc at the time it broke away. skittish: If it is without a rider at the end of any player’s end phase, a mount with this intelligence level is removed from the game. soaring level: Soaring level is the level of the battlefield that is above elevated terrain. Only warriors using the soaring proficiency exist at the soaring level. sorcerer: The wielder of a spellbook. special action: A requirement for some special abilities and miscellaneous actions. A warrior given a special action is given an action token. speed type: Indicates the specific way a warrior moves. A speed type gives a warrior access to certain speed proficiencies and might allow it to interact with certain terrain types differently than other warriors do. speed value: A number that indicates how far a warrior can move in inches. spell card: A card in a spellbook, printed with a spell that can be cast by sorcerers. spell element: A punch-out component of a spell card used to indicate spell targets or areas of effect.
spellbook: An item or relic that contains spell cards that can be cast by sorcerers. stack: The pile of spell cards beneath a spellbook card. starting marker: An indicator that shows the beginning of a warrior’s dial. The combat dials of all warriors must be turned to their starting markers before they are deployed. In addition, a warrior cannot be healed beyond its starting marker. stat slot: The visible area of a warrior’s combat dial, represented by a pie slice–shaped “window.” structural point value: A number that indicates the amount of damage that must be dealt to a constructed terrain feature in one turn to eliminate it. subfaction: A division of a faction. Warriors of a subfaction all possess the same subfaction abilities. successful attack: An attack result that meets or exceeds a target’s defense value. target: The warrior against which an attack or special ability is directed. titan : A huge and powerful warrior identified by the titan damage type on its base. turn: In general, the period in the game during which one player gives his or her actions to his or her warriors. Each turn has three phases: the command phase, the action phase, and the end phase. Unique: A warrior without rank stars. You can have only one of any Unique warrior (of the same collector’s number) in your army. unmodified: A warrior’s base combat value that is not affected by any modifiers, such as from items, terrain, and so on. unsuccessful attack: An attack result that does not meet or exceed a target’s defense value. warrior: A Mage Knight miniature. wielder: A warrior that is equipped with an item is a wielder in regard to that item.
A Mage Knight™ multiple-dial warrior represents a special creature or vehicle. It has four combat dials, each representing a separate section of the creature or vehicle.
All Mage Knight rules apply to multiple-dial warriors, except as noted below.
POINT VALUE Each multiple-dial warrior has several point values, which are printed on a sticker on the bottom of its base. You can play a multiple-dial warrior in games of various build totals by choosing from among its point values; this adjusts its strength in the game—the higher the point value, the more powerful the multiple-dial warrior. The sticker also indicates how many times each combat dial must be turned in order for the multiple-dial warrior to begin the game at a particular point value. Before the game begins, choose a point value for the multiple-dial warrior and turn each of its combat dials clockwise the indicated number of times from the starting marker.
GENERAL RULES Because of its enormous size and power level, a multiple-dial warrior
• cannot be a captive or a captor; • cannot be part of any formation; • cannot use the double-time or surge proficiencies; • cannot be reanimated by the Necromancy or Summon special abilities or the Revenant subfaction ability; • ignores other warriors’ Healing, Immobilize, Magic Confusion, Magic Freeze, Magic Healing, Magic Levitation, Strong Flier, Terrify, Tinker, and
Venom special abilities; • has no rear arc; • fails to break away only on a die roll result of 1. If the attempt fails, the multiple-dial warrior cannot change its facing; • cannot be affected by the trample proficiency; • cannot be affected by domains, items, or spells which would cause the multiple-dial warrior’s friendly and opposing status to change; and • cannot be the target of an enchantment.
Combat Dials A multiple-dial warrior’s base is divided into four sections, each with its own combat dial. A section’s front arc is equal to that section’s entire outside edge. The combat values shown in each section’s stat slot represent the capabilities of that section.
If the stat slot of a section’s combat dial shows numbers or a combination of numbers and symbols, it is an active section. If a symbol appears in the stat slot of an active section, the value in that position is 0.
If the stat slot of a section’s combat dial shows three symbols, that section is an inactive section; no more damage can be dealt to it.
A multiple-dial warrior is eliminated when a total of six symbols appear in the stat slots of its combat dials, even if all of its sections are active.
Actions A multiple-dial warrior can be given one or more of its controller’s actions during a turn.
An active section of a multiple-dial warrior can be given only one action per turn. An inactive section cannot be given an action.
If a multiple-dial warrior is given an action or actions on a turn, mark it with an action token after it resolves its first action for the turn.
You may give an action to a multiple-dial warrior anytime during your action phase. Once you give an action to a multiple-dial warrior, however, all actions given to that warrior must be resolved before other warriors are given actions that turn.
A multiple-dial warrior’s move actions, if any, must be resolved before it is given any close or ranged combat action or special action that turn. Once a close or ranged combat action or special action is given to a multiple-dial warrior on a turn, it cannot be given move actions that turn.
Base Contact Combat dials that extend beyond a multiple-dial warrior’s base are a part of the base when determining base contact.
Controlling Objectives A multiple-dial warrior cannot end its movement so that it is in base contact with more than one objective token; that is, it cannot control and/or contest more than one objective at a time.
Ending the Game If the game ends and no player controls the majority of objectives, for tiebreaking purposes your opponent might still receive points for your multiple-dial warrior still on the battlefield.
If your multiple-dial warrior has a total of three, four, or five symbols appearing in the stat slots of its combat dials, if you have only one opponent he or she
receives points equal to one-half the multiple-dial warrior’s point value (round down).
If your multiple-dial warrior has a total of three, four, or five symbols appearing in the stat slots of its combat dials, if you have more than one opponent divide one-half the multiple-dial warrior’s point value (round down) by the number of opponents; each opponent receives that number of points (round down).
Measuring All distances to and from a multiple-dial warrior are measured using its center dot.
Pushing and Damage If a multiple-dial warrior is dealt damage that does not affect a particular section (such as by pushing), its controller chooses which active section is dealt the damage.
Special Abilities, Relics, and Spells A special ability applies only to the section in which it appears. However, a multiple-dial warrior with the wave or wing speed type or the Aquatic or Flight special ability in one of its active sections is considered to have that speed type or special ability in all of its active sections.
Other warriors’ special abilities that affect a multiple-dial warrior, such as Defend, affect only the particular section(s) with which the other warriors are in base contact.
If another warrior is wielding or affected by a relic/item or spell that also affects warriors in base contact with it, such relics/items or spells will affect only the particular section(s) of a multiple-dial warrior that the other warrior is in base contact with.
Movement A multiple-dial warrior can move in only one of two ways:
1. Change its facing by rotating on its center dot, if desired, and then move forward in a straight line OR2. Move backward in a straight line without changing its facing.
More than one move action given to a multiple-dial warrior on a single turn must be combined into a single movement. To determine the total distance a multiple-dial warrior can move, add up the speed values of all the active sections given move actions that turn.
When changing its facing and/or moving, a multiple-dial warrior ignores the bases of all other warriors except other multiple-dial warriors; a multiple-dial warrior must end its movement when its movement path would place it in base contact with another multiple-dial warrior.
Movement Template A movement template is printed on a multiple-dial warrior’s packaging; cut out the template to use in the game.
When you want to move a multiple-dial warrior, place the template on the battlefield to show where it will be on the battlefield after the movement. Establish the movement path by drawing an imaginary line from the center line printed on the template to the warrior’s center dot. When all players are satisfied with the movement path, place the multiple-dial warrior on the template, and then remove the template from the battlefield.
Breaking Away A multiple-dial warrior must break away if any of its sections (active or inactive) are in base contact with an opposing warrior when it is given a move action. Only one die roll is required to break away, regardless of how many sections are in base contact with opposing warriors.
Close Combat The target of a close combat attack made by a multiple-dial warrior must be in base contact with the active section given the close combat action.
Ranged Combat An active section of a multiple-dial warrior can be given a ranged combat action if all the following conditions are true:
• It has a range value. • It has an attack value greater than 0. • It is not in base contact with any opposing warrior.
The line of fire is measured from the warrior’s center dot, and it must pass through the active section given the action.
Long-Range Attack Option If a ranged combat action is given to a titan, multiple-dial warrior, or castle section, and the target is another titan, multiple-dial warrior, or castle section, the attacker can double its range value; this is called a long-range attack. If an attacker makes a long-range attack, it gets –2 to its ranged damage value for that attack.
Attacks against Multiple-Dial Warriors
Close Combat Attacks against Multiple-Dial Warriors To resolve a close combat action against a multiple-dial warrior, the attacker must be in base contact with one of the multiple-dial warrior’s active sections. If an attacker tries to affect an inactive section, the attacker chooses any of the multiple-dial warrior’s active sections against which to resolve the attack.
If an attacker is in base contact with two sections, the multiple-dial warrior’s controller chooses which of the two sections is affected by the close combat attack.
Warriors friendly to the attacker can use the gang up proficiency if they are in base contact with any of the multiple-dial warrior’s sections.
Ranged Combat Attacks against Multiple-Dial Warriors To resolve a ranged combat action against a multiple-dial warrior, the attacker’s (or primary attacker’s) line of fire must pass through one of the multiple-dial warrior’s active sections. If an attacker tries to affect an inactive section, the attacker chooses any of the multiple-dial warrior’s active sections against which to resolve the attack.
A section cannot be affected by a ranged combat attack if a warrior friendly to the attacker is in base contact with that section.
If the line of fire passes through the borderline between two sections, the multiple-dial warrior’s controller chooses which of the two sections is affected by the ranged combat attack. If the chosen section cannot be affected, the attack cannot be made, and the attacker must choose another use for the action.
Example: An opposing warrior attacks a Venomous Shadow Dragon with a ranged combat attack. The line of fire crosses hindering terrain and passes through the borderline between the left side section and the rear section of the Dragon. The Dragon’s controller chooses to have the attack affect the rear section because that section has Stealth. Because the line of fire passes through hindering terrain, the line of fire is blocked and the attack cannot be made.
Area of Effect Attacks If a multiple-dial warrior is within the area of effect of an attack (such as a Bombardment attack), a single section (only) will be affected by the attack. To determine which section, draw a straight line from the center of the area of effect to the target multiple-dial warrior. The section the line passes through is the affected section. If an attack affects an inactive section, the attacker chooses any of the multiple-dial warrior’s active sections against which to resolve the attack instead. If the line passes through the borderline between two sections, the multiple-dial warrior’s controller chooses which of the two sections is affected by the attack. If the center of the area of effect is the center of the multiple-dial warrior, the multiple-dial warrior’s controller chooses which section is affected by the attack.
Follow these same guidelines if the multiple-dial warrior is within the area of effect for any relic or spell that damages or heals the warrior.
CHARIOTS
Chariots are multiple-dial warriors that can carry passengers. They are identified by the wheel () speed type.
Movement Chariots move like other multiple-dial warriors except that they cannot move backwards.
Passengers Each chariot has a rear compartment that can carry a single warrior that is friendly to you. A warrior occupying this compartment is called a passenger. Multiple-dial warriors, titans, and warriors with the horseshoe speed type cannot be passengers. A chariot can begin the game with a passenger. A chariot can carry only one passenger at a time.
Passengers are not considered to be in base contact with anything on the battlefield. This includes the chariot itself, warriors in base contact with the chariot, and tokens (including glyph spell elements, item tokens, and objective tokens). Passengers can make close combat attacks, as described in Combat Actions below. Passengers cannot be affected by items, domains or spells which would cause the passenger’s friendly or opposing status to change.
Passengers can be given actions. They are marked with their own action tokens, which are separate from any of the chariot’s action tokens. Passengers’ speed special abilities are ignored. While passengers, warriors must remain in their chariots’ rear compartment until they disembark.
Boarding and Disembarking Passengers A warrior can become a passenger if it is given a move action while in base contact with a side section or the rear section of a chariot that is friendly to it; this is called boarding. To board a chariot, a warrior’s speed value must be more than 0, and it cannot be a captor. Give the warrior a move action, and then place it inside the chariot’s rear compartment. The warrior is now also a passenger.
A passenger with a speed value more than 0 that is given a move action can leave its chariot; this is called disembarking. Place the warrior in base contact with a side section or the rear section of the chariot.
Passengers and Items If a passenger drops an item, or is eliminated while wielding an item, place the corresponding item token in base contact with a side section or the rear section of the chariot.
Combat Actions A passenger’s front arc is both side sections and the rear section of its chariot. A passenger cannot target or affect its chariot with any attack or special ability.
Close Combat A passenger can make a close combat attack against any warrior in base contact with its front arc. A passenger cannot become a captor.
Ranged Combat A passenger can make a ranged combat attack on a turn if its chariot has not yet moved that turn.
A passenger uses the chariot’s center dot when determining line of fire. If the range value of a passenger is more than 8, it is 8 instead. A passenger’s base never blocks its own line of fire.
A passenger cannot target an opposing warrior in base contact with the chariot with a ranged combat attack.
The passenger only uses the chariot’s sides and rear arc as its front arc while attacking. Effects, such as Venom, which rely on base contact with the front arc will not take effect. (p.12)
Damaging a Passenger A passenger cannot be affected by any attack, ability, item, spell, or domain which deals clicks of damage or healing. However, if a side or the rear chariot section is dealt at least 1 damage, its passenger might also be damaged.
Whenever an effect deals at least 1 damage to a side or the rear section of the chariot, its controller rolls one six-sided die. If the result is 5 or 6, the passenger is dealt damage equal to the damage dealt to the chariot’s section from the effect.
Example: The side section of a chariot is dealt 4 damage. That section has the Toughness special ability, so it is dealt only 3 damage. The attacker rolls one six-sided die to see if the passenger is also dealt that 3 damage. The result is a 5, so the passenger is dealt 3 damage. If the passenger also has Toughness, it would be dealt only 2 damage.
When a chariot is eliminated, remove it from the battlefield and place its passenger on the battlefield with its center dot in the position formerly occupied by the chariot’s center dot. The warrior can have any facing, determined by its controller. Then roll one six-sided die; the warrior is dealt damage equal to the result.
TITANS RULES Mage Knight titan figures are substantially larger and more powerful than most other Mage Knight warriors. Huge creatures and powerful siege engines are examples of titans.
Titans have the titan ( )damage type.
Al l Mage Knight rules apply to titans, except as noted in this document.
POINT VALUE Each titan has multiple point values, which are printed on a sticker on the bottom of its base. You can play a titan in games of various build totals by choosing from among its point values; this adjusts its strength in the game—the higher the point value, the more powerful the titan. The sticker also indicates how many times the titan’s combat dial must be turned in order for it to begin the game at a particular point value. Before the game begins, choose a point value for the titan and turn its combat dial clockwise the indicated number of times from the starting marker.
GENERAL RULES Because of its enormous size and power level, a titan
• cannot be a captive or a captor; • cannot be part of any formation; • cannot use the double-time or surge proficiencies; • cannot be reanimated by the Necromancy or Summon special abilities or the Revenant subfaction ability; • ignores other warriors’ Healing, Immobilize, Magic Confusion, Magic Freeze, Magic Healing, Magic Levitation, Strong Flier, Terrify, Tinker, and
Venom special abilities; • fails to break away only on a die roll result of 1; • cannot be affected by the trample proficiency; • cannot be affected by domains, items, or spells which would cause the titan’s friendly and opposing status to change; and • cannot be the target of an enchantment.
Actions In Mage Knight games, a titan can be given two of its controller’s actions in a turn if it is not in base contact with an opposing warrior at the beginning of its controller’s current command phase. If it is in base contact with an opposing warrior at the beginning of its controller’s current command phase, it can be given only one action that turn. This one action can be a move action, a close or ranged combat action, or a special action.
If a titan is given two actions, the first must be a move action. The second can be another move action, a close or ranged combat action, or a special action. Even if a titan is given two actions during a turn, it gets only one action token; give it the token after it resolves its first action for the turn.
Pushing A titan is pushed if you give it an action that causes it to be given a second action token. It is dealt 1 pushing damage after the action that gave it the second action token resolves. The titan can still be given a second action on a turn it is pushed, as long as it was not in base contact with an opposing warrior at the beginning of its controller’s current command phase. If it is given a second action on a turn it was already pushed, it does not take another 1 pushing damage that turn.
Attacking When a titan attacks a castle section, it gets +2 to its attack value for that attack.
Ranged Combat Attack Option If a ranged combat action is given to a titan, multiple-dial warrior, or castle section, and the target is another titan, multiple-dial warrior, or castle section, the attacker can double its range value; if it does, it gets –2 to its damage value for that attack.
For a figure with a minimum and maximum range value, only the maximum range value is doubled for an attack targeting a titan, multiple-dial warrior, or castle section.
Warriors with the explosive ( ) attack type can damage other warriors near the target when they make a ranged combat attack.
If a warrior with the explosive attack type succeeds at a ranged combat attack, resolve the attack against the target. Then deal 1 explosive damage to all warriors (including the attacker, if applicable, but not the target) within a 3” area of effect of the target. This explosive damage ignores the attacker’s special abilities, and it cannot be increased in any way. Blocking terrain (except water terrain) between the target and warriors within a 3” area of effect of the target will prevent those warriors from taking the explosive damage.
If a warrior with the explosive attack type makes an unsuccessful ranged combat attack, no explosive damage occurs.
Indirect-Fire Ranged Combat Titans with minimum and maximum range values can be given a ranged combat action targeting a single opposing warrior without needing a clear line of fire to the target. This attack is called an indirect-fire attack. The line of fire must still pass through the attacker’s front arc, but it ignores terrain and other warriors, and cannot be blocked. The line of fire cannot exceed the attacker’s maximum range value or be less than the attacker’s minimum range value. All other ranged combat attack rules apply.
To resolve an indirect-fire attack, roll two six-sided dice and add the attacker’s attack value. The attacker gets –1 to its ranged damage value, and the target gets +2 to its defense value for this attack.
If the attack succeeds and the attacker has the explosive attack type, apply explosive damage, as appropriate.
CASTLE RULES Castle sections are unique Mage Knight figures because they can function both as warriors and terrain. A Mage Knight warrior can move onto, fight from, and move off some castle sections during a game, and some castle sections can make attacks on their own.
A castle section is eliminated when 3 broken tower symbols ( )appear in the stat slot.
For castles, the Speed symbol is replaced by the Fortification symbol ().
The printed damage value is the castle section’s ranged damage value.
All Mage Knight rules for warriors apply to castle sections, except as noted in these rules.
POINT VALUE Castle sections can be put into games at two different build totals by adjusting their point value and strength. Before a game begins, choose a point value for the section and rotate its combat dial clockwise the indicated number of clicks from the Starting Position.
GENERAL RULES Because of their size and special characteristics, castle sections:
• Cannot capture or be captured. • Cannot be affected by Healing, Immobilize, Leadership, Life Drain, Magic Confusion, Magic Freeze, Magic Healing, Magic Levitation, Vampirism
or Venom. • Cannot be reanimated. • Do not take damage from pushing or critical misses. • Cannot be part of a formation. • Have a 360-degree front arc and no rear arc. • Can never move or be moved. • Cannot make free spins. • Are never considered to be in base contact with any figure, friendly or opposing. • Cannot be affected by the trample proficiency. • Cannot be healed. • Cannot be affected by domains, items, or spells which would cause its friendly and opposing status to change. • Cannot be the target of an enchantment.
Elevation Levels Regardless of the design of the castle sections, all castle sections are considered to be the same height. A warrior on top of a castle section is on abrupt elevated terrain and is at the same elevation level as a warrior on any other castle section or other piece of elevated terrain.
Sections A castle section is defined as a single castle piece with a combat dial. Even if pieces are connected, they are considered separate sections as long as they have their own combat dial. The combat values shown in each section represent the capabilities of that section.
All castle sections are considered to be abrupt elevated terrain, as well as being considered warriors.
Playing Area and Set-up Before play begins, all players in the game must agree that castle sections will be used and choose which player will be allowed to use them.
Like all Mage Knight warriors, castle sections have a point value. One player may use any portion of their army’s build total on castle sections rather than warriors.
Castle sections are placed on the battlefield before terrain or warriors. Castle sections must be placed on the castle player’s side of the battlefield, up to 18 inches away from the castle player’s starting edge and at least 30 inches from the opponent’s starting area. Castle sections do not have to be placed 3 inches apart from other castle sections or 3 inches away from the edges of the battlefield. Castle sections may enclose a portion of the battlefield. If they do, players may not place terrain pieces into the enclosed area.
To set up your castle: • Choose a location within 18” of your starting area and place the castle. • Measure 30” toward the opponent’s starting area. • The opponent may set up anywhere on their side, as long as their figures are more than 30” away from the castle. • A castle that encloses a portion of the battlefield must include at least one section containing a portal that allows movement in and out of the
enclosed area. • The castle player’s starting area is considered to be anywhere in base contact with any of their castle sections. None of the castle player’s warriors
may be placed within 30 inches of the opponent’s starting area. The castle player’s warriors may begin the game on top of their castle sections.
Planking and Ladders If planking or ladders are used, they must be placed after all castle sections, but before terrain or warriors. Planking is printed on the packaging of the Castle Wall Packs; cut out the planks before disposing of the packaging. Planking is used to connect castle wall sections between buttresses or where a ledge does not fit. Ladders are used to create additional access points to castle wall sections.
Ladders may be placed next to any castle wall section to create access points at its upper and lower ends. Each player may have one ladder per three wall sections in their castle, to be placed as desired. If you do not have ladders, simply use a token of some sort to indicate the placement of the ladders.
One ladder (or ladder token) may be carried by a formation without penalty. Ladders may be placed next to castle sections to create access points by giving a movement action to a formation. Ladders may be removed by giving a movement action to a formation when no enemy is on the access point.
Planking is placed on the inside of wall sections wherever the construction of the player’s castle creates gaps in the walkways. Planking is always placed parallel to a wall and touching that wall. Planking is considered to be part of the wall section it is touching.
A player may place as many planking sections as are necessary to form a continuous walkway inside their wall sections, but are not required to place any. If planking is not placed, walkways are not considered to be continuous.
Access Points Warriors move onto, off and between different castle sections by using access points, which represent doorways, staircases, ladders and so on. All access points in the same castle section are connected access points. The special rules for each castle section indicate any connected access points for that section.
Some castle sections have access points. These sections follow normal rules for moving onto or off of abrupt elevated terrain. Mounts, cavalry units, warriors with “peanut”-shaped bases, multiple-dial warriors, and titans may never occupy a castle section.
Warriors may move freely between wall sections and the tops of castle sections.
Warriors on top of castle sections may be in base contact with warriors on adjacent wall sections. Look down from above the castle to determine whether base contact would be possible if the design of the castle section did not prevent it. If so, then base contact is assumed.
Close CombatA warrior whose front arc is in contact with an access point may make a close combat attack against a figure touching a connected access point. This represents the two figures fighting on the stairs or ladder between their two positions. The two figures are considered to be in base contact for purposes of this attack, but are not in base contact for any other purpose. Gang up may be used as long as all warriors using gang up are touching an access point connected to the target’s access point.
If the target is at a higher elevation than the primary attacker, the target receives the +1 defense height advantage modifier.
If there is more than one opposing figure touching a connected access point, the defender may choose which figure will be the target of the attack.
Portals Some castle sections have portals, which are represented on the section by a door, gate, or portcullis. The special rules for each castle section indicate that section’s portals.
All portals are considered closed at the start of the game. Warriors may not move or draw a line of fire through a closed portal. A closed portal is not considered connected to any other access points.
At the beginning of the castle player’s command phase, that player declares whether they are opening or closing any of their portals for the turn, and then opens or closes the appropriate portions of the castle. The portals then remain in that state until the beginning of the castle player’s next command phase.
If a section has several portals, the player may choose to open or close each one individually.
A castle section that is showing the Demoralized special ability has been breached. Wall sections are breached when the fortification value appears in yellow. As soon as a section is breached, all of its portals are immediately opened. They may not be closed for the remainder of the game.
ACTIONS A castle may be given one or more of its owning player’s actions during a turn. Each section of a castle may only be given 1 action per turn. If a castle section is given an action, mark that section with an action token. If several sections are given actions, mark each of them with an action token. A ranged combat action can be given to any active castle section that has a range and attack value greater than 0. Castle sections may not be given move, close combat or special actions.
If a castle section takes an action on two consecutive turns, mark it with a second action token. It is considered pushed, but does not take pushing damage. A castle section may not be given an action when it has two action tokens.
Mage Knight: In a Mage Knight game, a player receives 1 extra action per turn as long as his army contains a keep section.
Conquest: In a Conquest game, a player with any non-wall castle sections in his army receives 1 extra action per turn. A player with a keep section will receive 2 extra actions, instead. These extra actions can only be given to castle sections.
Attacks Castle sections may only make ranged combat attacks. The line of fire from a castle section is drawn from that section’s center point, and is never blocked by figure bases.
The center point is considered to be on elevated terrain. When measuring the range, measure only the horizontal distance to the target.
A castle section may not make a ranged combat attack against a target if the range to that target is 4 inches or less.
Long Range Attacks Castle sections may make and be targeted by long-range combat attacks as if they were multiple-dial warriors. If a castle section is given a ranged combat action and the target of the attack is a multiple-dial warrior, a titan, or an opposing castle section, the firer may double the range value of the castle section while reducing its printed ranged damage value by 2.
ATTACKING THE CASTLE
Castle sections may only be attacked by the following types of warriors: • Multiple-dial warriors. • Titans. • Warriors making a ranged combat attack using the Mage Blast, Bombardment, or Pierce abilities. • Warriors making a ranged combat attack that delivers Explosive Damage. • Warriors who have a printed damage value of 4 or more making a close combat attack. • Warriors who have a printed ranged damage value of 4 or more making a ranged combat attack. • Warriors making a close combat attack using the Crushing Blow, Smite, or Thunder Blow special abilities. • Warriors who have the Ram special ability making a close combat attack.
Warriors who do not fall into one of these categories may not target castle sections with close combat or ranged combat attacks. They may not be part of ranged combat formations that target castle sections, and may not use gang up against castle sections.
For ranged combat attacks, the line of fire to a castle section is drawn to that section’s center point and is never blocked by figure bases. The center point is considered to be on elevated terrain. The section will receive the height advantage modifier if the attacker is not also on elevated terrain. When measuring the range, measure only the horizontal distance to the target.
For close combat attacks, opposing figures whose front arcs are touching a castle section may attack it as if they were in base contact with it.
A warrior may never attack a castle section on which they are standing.
Eliminating Castle Sections
When 3 broken tower symbols ( ) are revealed in a castle section’s stat slot, that section is eliminated and is removed from play. Place a “Rubble” hindering terrain template (provided on the castle section package), the same size and shape as the eliminated castle section and its planking, on the battlefield in its place. Place any figures that were on that section on the template in the same locations as they occupied before the section was eliminated, with their facing determined by their controlling player. Finally, roll 1 six-sided die for each of these figures and deliver that many clicks of damage to that figure.
Players may replace planking pieces with other, shorter planking pieces as walls are eliminated, so that the wall sections left standing retain their portions of the walkway.
Attacking Warriors on Castle Sections When a ranged combat attack is made against a target standing on a castle section, the target adds a fortification modifier to their defense value. This modifier is the fortification value currently showing for the castle section that the target is on. If the target is at a higher elevation than the primary attacker, the target also receives the +1 defense height advantage modifier.
During the siege of the Fortress of the Lich King Anjou, Dave’s Steam Mauler attacks Mark’s Skull Golem. The Steam Mauler is on the ground outside the castle, while the Skull Golem is on a castle wall section with a fortification value of 3. The target’s defense value is 16, +1 for the height advantage, +3 for the fortification, for a total of 19 (after the rule of 3 is applied)! This result makes Dave think seriously about taking on the wall with his next attack.
The target does not receive the fortification modifier if the attacker is also on a castle section. The target also does not receive the fortification modifier if they are on a wall section and the attacker’s line of fire does not cross the outside edge of any section. This represents the warrior being protected from attacks from outside the castle, but not attacks from opponents who have broken into the castle.
Victory Points Elimination points are awarded for eliminated and surviving castle sections as if they were standard warriors.
If the castle section has been breached, but not eliminated,, the player whose figure caused it to become breached gets elimination points equal to half the castle section’s point value, rounded down.
CASTLE SECTION RULESEach castle section has unique rules.
Keep The keep has two portals, represented by the two doors. The two doors and the entire top surface of the keep are connected access points.
Round Tower The tower has one portal, represented by the door. The door and the entire top surface of the tower are connected access points.
Gatehouse The gatehouse has two portals, represented by a portcullis and double doors. The gatehouse has no access points. Any warrior on top of the gatehouse is considered to be in base contact with any other warrior on top of the same gatehouse. Warriors may be placed in the open archway of the gatehouse. The portals of the gatehouse may not be closed if they would overlap a figure’s base once closed. Warriors on top of the gatehouse may move onto the walls on either side.
Walls Wall sections with doorways have one portal. Wall sections without doorways have no portals. Wall sections have no access points, though some may be added through the use of ladders. Wall sections do not have an attack or damage value. They are Demoralized and breached when a yellow square appears in the fortification slot.
Mage Knight Conquest Mage Knight Conquest provides an entertaining and fast way to play large-scale Mage Knight battles, using castles, artillery pieces and armies created from dozens of battle-hungry warriors.
All Mage Knight rules apply to Conquest games, except as noted below.
These Conquest rules apply to games in which there are two players or two teams of players.
Changes to Warriors in Conquest All warriors have a 360 degree front arc and no rear arc, except Unique warriors, warriors who are part of a cavalry unit, titans, and multiple-dial warriors.
At the end of each player’s turn, warriors in that player’s army which have the Demoralized special ability showing on their dial and do not have their starting marker showing are eliminated. The figure that dealt the damage which caused the warrior to gain Demoralized is considered to have eliminated that warrior.
When a castle section gains Demoralized, it is not eliminated. It is breached and its portals are opened, per the castle rules.
A multiple-dial warrior is only eliminated when a total of six symbols appear in the stat slots of its combat dials.
A titan is only eliminated when a total of three symbols appear in the stat slots of its combat dial.
Getting Started
Building Your Army Build totals of Conquest armies must be in multiples of 400 points, and must be at least 1200 points in size.
Items No more than two items (only one of which may be a relic) may be included in a Conquest army for every 400 points in the build total.
Setup Conquest games require larger battlefields than standard Mage Knight games. Use the following guidelines when determining the battlefield size, number of objectives, the number of terrain pieces each player places in the terrain pile, and the number of terrain pieces placed on the battlefield for Conquest games.
Terrain Pieces per Player Build Total Battlefield Size Number of Objectives Provided to Pool Placed
1200 to 2000 4’ by 6’ 5 6 3 2400 to 3200 4’ by 8’ 7 8 4
Greater than 3200 6’ by 9’ 9 8 5
Conquest deployment areas extend at least 4” into the battlefield. The far edge of each player’s deployment area must be at least 30” apart. All players must agree on the deployment area sizes before the game begins.
Placing Terrain and Objective Tokens Place one objective token in the center of the battlefield and give each player half of the remaining tokens. Next, each player rolls two six-sided dice. Reroll ties. The player with the highest result is the first player. The first player places one of his or her objective tokens on the battlefield a distance from the far edge of his or her deployment area equal to the dice roll result. Once the first player has placed his or her first objective token, the second player places their first token in the same way using their dice roll result.
Each player then rolls two six-sided dice, using this result to place their second objective token. When placing this token, measure from the centerline of the battlefield instead of the far edge of each player’s deployment area. Each player continues to roll two six-sided dice and place an objective token (alternating the measurement between using the deployment area and the center line) until all objective tokens are place.
Place the quantities of terrain outlined in the Setup section above according to the Mage Knight rules.
Deploying Your Army The first team or player deploys at least half of their build total, rounded up. The second team or player then deploys at least half of their build total. The first team or player then deploys the remainder of their warriors, followed by the second team or player. Play begins starting with the first team or player.
How to Play
Turns, Actions, and Phases Each side receives one action per turn per full 400 points of their army’s build total. You receive one additional action if you have at least one figure with the Command special ability in your army.
For example, a 2,000-point game gives each side five actions per turn. If one player has three figures with the Command special ability, they get an additional action each turn for a total of six actions. They also can roll for Command actions for each of those three figures each turn, giving them a potential of nine total actions each turn.
Castle Sections: A side with any non-wall castle sections in their army receives one additional action per turn. If that side has a castle Keep section in their army, they receive two additional actions, instead of one. These additional actions can only be given to castle sections.
Multiple-Dial Warriors : When a multiple-dial warrior is given a single move action, it may combine the speed value of any number of its sections together. Sections that are used for movement may not be given another action that turn.
Titans: Titan warriors may only be given one action per turn. If the titan is given an action while not in base contact with an opposing warrior it may move (as if it had been given a move action) before resolving the action.
Formations Movement formations can be composed of three to ten warriors sharing a faction symbol. Warriors at soaring level may form movement formations in Conquest games.
Ranged combat formations are composed of three to five warriors. Each warrior in addition to the primary attacker in the ranged combat formation adds +1 to the attack value and +1 to the ranged damage value, regardless of attack type.
Capturing Capturing is not used in Mage Knight Conquest.
Adventuring Companies Adventuring Companies are not used in Mage Knight Conquest.
Battlefield-wide Effects Glyphs and Illusions which affect figures without being restricted by range instead affect only figures within 24” of the caster’s center-dot.
Items which are not restricted by range instead affect only figures within 24” of the wielder’s center-dot.
Standard Game The standard game is a suggested set of conditions under which to play Mage Knight Conquest, and is described below:
• The playing surface is 4’ by 6’. • Each army has a build total of 2,000 points, giving five actions to each player at the beginning of every turn and allowing each army no more than
ten items, of which five may be Relics. • The time limit for the game is 120 minutes.
The Apocalypse Dragon In the Age of Mists, the Apocalypse Dragon birthed thousands of twisted Mage Spawn and led them on a rampage that laid waste to the entire Land. The Dragon was finally defeated by mighty heroes in an epic battle that shook the world, and the egg that survived has been guarded by the Draconum for centuries—lest it be hatched. Yet now the Shyft have captured the egg, and the Apocalypse Dragon has been reborn! As its rampage begins anew, the heroes and warlords of the Land must once again face the Dragon on the battlefield.
With the exception of these rules, the Apocalypse Dragon is subject to all multiple-dial warrior rules, which are included after these rules.
The Dials The Apocalypse Dragon has four sections, each with its own combat dial, allowing it to be confronted at three different levels of power. The front and rear dials each have 20 clicks, and each side (right and left) dial has 12 clicks. The number of combat dials the player of the Apocalypse Dragon chooses to use determines its point value and power level in the game.
Dials being used in a game are active dials. If a section’s dial is not being used in a game, click it until the name of the power level being played appears in the
stat slot; this is an unused dial. If an active dial is ever turned such that three symbols show, that dial is inactive. An inactive dial may not be given actions.
Eliminating the Dragon. When the required number of skulls are showing on inactive dials, the Dragon is eliminated.
Point Value Power Level Active Sections Actions per Turn Skulls Showing to Eliminate 600 Angry Front 1 3 900 Furious Front, Left, Right 3 6
1,200 Rampaging Front, Left, Right, Rear 4 9
Opposing the Dragon Battles involving the Apocalypse Dragon may be a single army versus the Dragon or multiple small armies working together to win. The cumulative point value of all armies opposing the Dragon cannot exceed the point value of the Dragon used in that game. It is suggested that the available points be distributed to players in multiples of 100.
The Base Scenario In the base scenario, warriors of all the Land’s factions recognize the need to defeat the Apocalypse Dragon. In this scenario, though only the warriors within a single army are friendly to one another, only the Dragon is considered an opposing warrior.
Playing the Dragon. In this scenario, a single player may control the Dragon using these rules. Alternatively, all players may bring opposing armies to face the Dragon; in these situations, control of the Dragon in its first turn goes to the player who brings the army with the lowest total point value. Control of the Dragon passes to the left at the beginning of each of the Dragon’s turns.
Setup. Click each of the Dragon’s active dials until the symbol appears in their stat slots. Place no objectives on the battlefield. The player who will control the Dragon on its first turn places it so that its center dot is at the center of the battlefield. One less piece of terrain is placed on the battlefield for each of the Dragon’s active dials.
Winning the scenario. Once the scenario begins, it continues until all opposing warriors are eliminated OR the Dragon is eliminated OR the time limit (if any) for the battle is reached. If all opposing warriors are eliminated, the player controlling the Dragon wins the scenario. If an opposing warrior eliminates the Dragon, the player controlling that warrior wins the scenario. If a time limit is reached, subtract 300 points from the Dragon’s point value for each dial that began the game active but that is inactive when the time limit is reached; whichever side has the most points’ worth of units on the battlefield—Dragon (not including any Brood [see the Beastmother special ability, below]) or opposing players—wins.
Special Rules • When the Dragon is given an action, the action is assigned to an active section and an action token is placed on that section. Resolve the action
using that dial’s combat values and special abilities, if applicable. • The Dragon does not take pushing damage when one of its active sections is pushed. • If a section isn’t given an action token on one of the Dragon’s turns, all tokens are removed from that section at the end of that turn. • At the beginning of its controller’s command phase, before being given any other actions, the Dragon may be given a free action to move a
maximum distance equal to the total of the speed values of all active sections. If the Dragon is given this free action on a turn, it may not be givenmove actions for the rest of that turn.
• The Dragon does not use a movement template when moving. • The Dragon ignores terrain for movement purposes. Its base may not overlap terrain when placed on the battlefield. • An active section with the wand attack type may use the counter spell proficiency even if it has an action token on it. • The Dragon breaks away without a die roll. • When an opposing warrior is in base contact with an active section of the Dragon, that section may make ranged combat attacks. • When an opposing warrior deals damage to the Dragon, the Dragon may make an immediate close or ranged combat attack against that warrior. • The Dragon is in base contact with soaring warriors whose flight stands are in base contact with it. • The Dragon ignores the height advantage modifier when it attacks. • If a warrior is given an action targeting an inactive section of the Dragon, the warrior gets –3 to its attack value for that action. • If an opposing player gains control of the Dragon, the duration of that control ends after the Dragon resolves one action given to it by that player.
• Any ability or game effect that cancels or ignores any of the Dragon’s special abilities end at the beginning of the Dragon’s end phase. • When an opposing warrior succeeds at an attack using either Crushing Blow or Pierce against the Dragon, roll one six-sided die. On a result of 1–4,
the Dragon’s defense special abilities are not ignored. • The Dragon is not eliminated unless the required number of skulls show in the stat slots of active sections. • When played as part of an army outside of the base scenario, the Dragon’s point value is added to the build total of the army, but the Dragon
contributes only the number of actions indicated for the Dragon’s power level to the army’s action total.
Powers of the Apocalypse The Apocalypse Dragon has access to multiple special powers based on its power level:
• Angry : Beastmother, Control • Furious: Beastmother, Control, Famine, Pestilence, War• Rampaging: Beastmother, Control, Death, Famine, Pestilence, Smash, War
To use an available power, give an action to an active section that does not already have two action tokens on it. Unless specified otherwise, that section is the source of the action, and its arc is the arc for the power. Each power may be used only once per turn.
BEASTMOTHER Roll one six-sided die and subtract 2 from the result, minimum result 1. Bring a number of Mage Spawn warriors (each with a point value of 40 or less) equal to the result into play within 3″ of the outer edge of the section; these Mage Spawn are called Brood. When Brood are in play, after the Dragon has completed its actions for a turn, the Dragon’s controller receives five actions that may be given to Brood that turn; any actions not given to Brood during that turn are lost.
CONTROL Target a single opposing warrior with a ranged combat attack. If the attack succeeds, deal no damage. Instead, the target is controlled by the Dragon. Each time a controlled target is given an action, roll two six-sided dice. On a result of 2–7, the Dragon loses control of the target after the action resolves. The maximum number of targets that can be affected by this power is equal to the number of the Dragon’s active dials.
FAMINE Roll one six-sided die. Target a number of figures equal to the result within range of the section. Deal each target pushing damage equal to the number of action tokens on that target, and then remove all action tokens from the targets.
DEATH (optional) If the Dragon or any Brood deals damage to an opposing target figure that would eliminate that target, instead gain control of the target, turn it to its starting click, and give it a close or ranged combat action targeting a single opposing figure. After the action resolves, remove the target from the game. The section given the action to use this special ability does not receive an action token.
PESTILENCE Make a close combat attack against all opposing figures within 8″ of the section. For each figure hit by the attack, heal an active section of 1 damage.
SMASH Each figure wielding an item or relic within 8″ of the Dragon must roll a six-sided die and add its attack bonus (if any) to the result; roll separately for each item or relic carried by a figure. If a figure’s result is 6 or less, it drops that item or relic.
WAR Target an opposing figure with zero action tokens within range of the section. Gain control of the target and give it a close combat action targeting a single opposing figure. Do not give the target an action token for the action or deal it pushing damage.
Any type of action may be given to activate a Power of the Apocalypse. (p.11)
SPEED SPECIAL ABILITIES CHARGE (optional) This warrior cannot use the surge proficiency. Give this warrior a close combat action when it is not in base contact with an opposing figure. This warrior can move up to its full speed value and then make a close combat attack. This attack does not require an extra action.
QUICKNESS (optional) This warrior cannot be part of movement formations. This warrior can perform a move action without using one of your actions for the turn. If it does, it is treated for all other purposes as if it were given an action, and is given an action token.
MAGIC LEVITATION (optional) Give this warrior a special action. Select a target figure, which has not been given an action this turn, in base contact with this warrior. Move the target up to 10” in any direction, ignoring terrain and figure bases. The target does not need to break away, and you determine its new facing. The target cannot end the movement in blocking terrain. The target cannot be given an action this turn.
FLIGHT This warrior cannot be part of movement formations. This warrior cannot use the double-time proficiency. This warrior ignores terrain and figure bases while moving. This warrior cannot end its movement on another figure’s base or in blocking terrain. This warrior fails to break away only on a die roll result of 1.
AQUATIC This warrior treats all water terrain as clear terrain for movement purposes. This warrior cannot use the double-time proficiency. While this warrior occupies any water terrain, it gets +2 to its defense value against ranged combat attacks that target or affect it.
STEALTH (optional) Any line of fire drawn to this warrior that passes through hindering or concealing terrain is blocked.
BOUND (optional) Give this warrior a ranged combat action when it is not in base contact with an opposing figure. This warrior can move up to its full speed value and then make a ranged combat attack. This attack does not require an extra action.
PATHFINDER (optional) This warrior’s movement is not affected by hindering terrain. All figures in a movement formation with this warrior gain the Pathfinder special ability.
FORCED MARCH (optional) All figures in a movement formation with this warrior use this warrior’s speed value instead of their own.
NIMBLE (optional) This warrior can change its facing at any time during your turn without being given an action. This warrior cannot use this ability during the resolution of a close or ranged combat action or other special ability.
FRENZY This warrior cannot be a part of any formation. During your turn, if this warrior has 0 or 1 action token, you must give this warrior an action before you can give actions to figures that do not have Frenzy. If you have more warriors with Frenzy than you have actions, choose which warriors with Frenzy will be given an action. A warrior with Frenzy cannot capture or be captured. If this warrior is a captor when it gains Frenzy, its captive is eliminated.
RAM (optional) This warrior cannot be part of movement formations and does not deal shake off damage. If, after moving, this warrior’s front arc is in base contact with one or more opposing figures, it deals 1 damage to each of those figures after their free spin opportunity.
SUMMON (optional) Give this warrior a special action when it is not in base contact with an opposing figure. Reanimate one of your eliminated Mage Spawn figures with a point value no greater than this warrior’s point value, turn its combat dial to the starting marker, and place it in base contact with this warrior.
STRONG FLIER (optional) Give this warrior a move action. If this warrior moves and is not at soaring level, select a target friendly figure—that has not already been given an action this turn—in base contact with this warrior. The target moves with this warrior and must end the movement in base contact with this warrior. At the end of the movement, give the target an action token if it has zero or one action token. The target cannot be given an action this turn.
SUBMERGED When preparing the battlefield, deploy this warrior after all players have deployed their figures without Submerged. This warrior can be deployed in any water terrain, though it cannot be deployed in base contact with an opposing figure.
Charge may not be used at the same time as effects that require you to give the warrior an action. However, it may be used with effects that say “when this warrior is given a close combat action.” (p.19)
If an opposing figure has Pole Arm, the active player chooses which order to resolve the abilities. If a figure with Ram moves into base contact with an opposing Cavalry unit, both the opposing mount and rider will be affected by Ram. (p.20)
If a figure has Frenzy, you will not be able to use any abilities which require you to give an action during your command phase, unless the Frenzy figure has an ability allowing it do do so as well, since the Frenzy figure must be given an action first.
Bound may not be used at the same time as effects that require you to give the warrior an action. However, it may be used with effects that say “when this warrior is given a ranged combat action.”
If the Frenzy figure is affected by something that prevents it from being given an action, Frenzy does not take effect;(p.19-20)
SWORD ATTACK SPECIAL ABILITIES HEALING (optional) Give this warrior a close combat action, with a single friendly figure without the GOLEM damage type as the target. Neither this warrior nor the target can be in base contact with an opposing figure. Ignore all modifiers to the close combat attack. If the attack succeeds, deal no damage to the target. Instead, heal the target of damage equal to this warrior’s damage value, or roll one six-sided die and heal the target of damage equal to the result.
WEAPON MASTER (optional) Give this warrior a close combat action. If the attack succeeds, roll one six-sided die. Use the result instead of this warrior’s damage value.
MAGIC BLAST (optional) Give this warrior a ranged combat action, with a single opposing figure as the target. For this attack, this warrior treats all terrain as clear terrain for line of fire purposes, no terrain modifiers apply to the target, and figure bases do not block line of fire. If the attack succeeds, roll one six-sided die. Use the result instead of this warrior’s damage value.
FLAME/LIGHTNING (optional) Give this warrior a ranged combat action. If the attack succeeds, compare the attack result to the defense value of each figure in base contact with the target(s). This warrior deals 1 damage to each figure against which the attack succeeds.
SHOCKWAVE (optional) Give this warrior a special action. Reduce its range value by half (rounded up); this is the warrior’s area of effect. Make one attack roll and compare the attack result to each friendly and opposing figure within this warrior’s area of effect. Deal 1 pushing damage to each figure against which the attack succeeds. If there is only one friendly or opposing figure in this warrior’s area of effect against which the attack succeeds, instead deal damage to the figure equal to this warrior’s damage value.
VAMPIRISM When this warrior succeeds at a close combat attack against a target figure and deals at least 1 damage, it is healed of 1 damage.
MAGIC HEALING (optional) Give this warrior a ranged combat action, with a single friendly figure without the GOLEM damage type as the target. The target cannot be in base contact with an opposing figure, but can be in base contact with this warrior. Ignore all modifiers to the ranged combat attack. If the attack succeeds, deal no damage to the target. Instead, roll one six-sided die. The target is healed of damage equal to the result.
THUNDER BLOW (optional) Give this warrior a close combat action, with a single opposing figure as the target. If the attack succeeds, this warrior can continue to attack that target until an attack is unsuccessful. This warrior gets –1 to its attack value for each additional attack. This warrior gets +1 to its damage value for each successful attack after the first.
PARRY (optional) When this warrior is the single target of a close combat attack, roll one six-sided die and subtract 2 from the result. If the result is less than 1, the result is 1. Reduce the attacker’s attack value by the result of the die roll for that attack.
VENOM At the beginning of your command phase, this warrior deals 1 damage to each opposing figure in base contact with its front arc.
SNEAK ATTACK (optional) If this warrior is given a move action, and is in base contact with an opposing figure at the end of its movement, the opposing figure does not get a free spin opportunity. If this warrior is given a close combat action when it is in base contact with a target figure’s rear arc, double this warrior’s damage value for that attack.
SWEEP (optional) This warrior cannot capture other figures. When this warrior makes a close combat attack, every opposing figure in base contact with its front arc is a target. Make one attack roll, and compare the attack result to the defense values of all targets. This warrior deals damage equal to its damage value to all targets against which the attack succeeds.
COUNTERATTACK (optional) After this warrior is the target of an unsuccessful close combat attack made by an opposing target figure in its front arc, it can immediately make a close combat attack against the target. This warrior may use a single special ability which requires a close combat action (except Charge), but is not given an action token for using Counterattack.
SMITE (optional) Give this warrior a close combat action, with a single opposing figure as the target. If the attack succeeds, also compare the attack result to the defense values of all opposing figures in base contact with the target to determine if the attack would also be successful against them. Deal damage equal to this warrior’s damage value to each figure against which the attack succeeds. After completing the attack action, deal this warrior 1 pushing damage.
Applying clicks of healing or damage is part of the attack. Thus, modifiers to a warriors damage value are ignored during a healing attempt. (p.13)
Shockwave can be used if the warrior is in base contact with opposing figure. If only one warrior is affected, the damage dealt is not pushing damage. Critical Hit damage is not pushing damage. A warrior does not affect itself with Shockwave. (p.21)
Sneak Attack cannot be used while using the surge proficiency. (p.21)
If the warrior hits more than one target figure during the attack, it will be healed of 1 damage for each target figure that was dealt at least 1 damage. (p.21)
Sweep may be used to attack both the mount and rider of a cavalry unit. (p.21)
You may choose to end Thunder Blow after any successful attack. Any effects that depend upon a successful close combat attack are triggered only if the final attack roll is successful. (p.21) If the target figure has Counterattack, and the final attack roll of Thunder Blow is unsuccessful, the Counterattack is resolved before damage is dealt from the Thunder Blow attack. Use the damage value showing after Counterattack is resolved. (p.21) A figure with Dodge may attempt a Dodge roll for each Thunder Blow attack roll. (p.20)
If you accidentally forget to resolve Venom during your command phase, you lose the opportunity for the turn. (p.21-22)
Note that this modifier to the attack value is subject to the rule of 3.
BOW ATTACK SPECIAL ABILITIES ARCING FIRE (optional) This warrior ignores figure bases for line of fire purposes.
BOMBARDMENT (optional) For details on Bombardment attacks, see the Complete Rules of Play.
OVERWATCH (optional) Give this warrior a ranged combat action, but do not choose any targets, determine any lines of fire, or make any attacks. Give this warrior an action token and an Overwatch token. At the beginning of your next command phase, remove the Overwatch token; this warrior can resolve the ranged combat action it was given on its last turn.
WAND ATTACK SPECIAL ABILITIES HEX (optional) Give this warrior a special action and a Hex token. Once until the beginning of your next command phase, you can choose a target friendly or opposing figure that has made an attack roll within 18” of this warrior. The target must reroll the attack. Use the rerolled result instead of the initial result. Remove the Hex token when the target rerolls the attack or at the beginning of your next command phase.
MAGIC HEALING (optional) Give this warrior a ranged combat action, with a single friendly figure without the damage type as the target. The target cannot be in base contact with an opposing figure, but can be in base contact with this warrior. Ignore all modifiers to the ranged combat attack. If the attack succeeds, deal no damage to the target. Instead, roll one six-sided die. The target is healed of damage equal to the result.
STORMFIRE (optional) Give this warrior a ranged combat action, with a single opposing figure as the target. If the attack succeeds, compare the attack result to the defense value of each figure in base contact with the target. Deal damage equal to this warrior’s ranged damage value to the target and 1 damage to each other figure against which the attack succeeds.
MAGE BLAST (optional) Give this warrior a ranged combat action, with a single opposing figure as the target. If the attack succeeds, roll one six-sided die. Use the result instead of this warrior’s ranged damage value.
If a figure moves into base contact with the warrior using Overwatch after the Overwatch has been activated, the attack can still be resolved as the action itself has already been given. (p.20)
If a critical hit is rolled while making a Stormfire attack, all affected figures will take an extra click of damage from the critical hit. (p.21)
DEFENSE SPECIAL ABILITIES BATTLE ARMOR This warrior gets +2 to its defense value against ranged combat attacks that target it or affect it.
POLE ARM I f an opposing figure moves, and is in base contact with this warrior’s front arc after the free spin opportunity, this warrior deals 1 damage to the opposing figure. The opposing figure’s action ends.
MAGIC IMMUNITY This warrior cannot be affected by any special ability with the word “magic” in its name, and cannot be targeted by WAND ranged combat attacks.
TOUGHNESS Decrease any damage (except pushing damage) dealt to this warrior by 1.
DEFEND (optional) Friendly figures in base contact with this warrior can use this warrior’s unmodified defense value instead of their own.
REGENERATION (optional) Give this warrior a special action. Roll one six-sided die and subtract 2 from the result. If the result is less than 1, the result is 1. Heal this warrior of damage equal to the result.
INVULNERABILITY (optional) This warrior gets +2 to its defense value against ranged combat attacks that target it or affect it. Reduce by 2 any damage dealt to this warrior. This warrior cannot be healed.
GHOSTFORM This warrior cannot be the target of ranged combat attacks. This warrior’s base does not block line of fire. This warrior fails to break away only on a die roll result of 1.
INFILTRATE (optional) When preparing the battlefield, deploy this warrior after all players have deployed their figures without Infiltrate or Submerged. This warrior can be deployed in hindering or concealing terrain up to its speed value away from its deployment area instead of in its deployment area. If this warrior was deployed outside of its deployment area, give it an action token.
DODGE (optional) Each time this warrior is affected by a close or ranged combat attack, roll one six-sided die. On a result of 4–6, the attack is unsuccessful against this warrior.
MAGIC RETALIATION When this warrior is dealt damage greater than 0 by a close or ranged combat attack, it deals the attacker (or primary attacker, if damaged by a formation attack) 1 damage.
LIMITED INVISIBILITY (optional) This warrior cannot be the target of ranged combat attacks.
TERRIFY (optional) When an opposing player moves a non-Hero figure so that it would come into base contact with this warrior, that player rolls one six-sided die. On a result of 1 or 2, the figure cannot move into base contact with this warrior this turn. This warrior is not affected by another figure’s Terrify.
CURSED When this warrior is affected by an action from a figure with the WAND attack type, deal 1 damage to this warrior after the action resolves.
SPELL RESISTANCE (optional) When this warrior is the target of a WAND attack, reduce the attacker’s attack value by 3.
If an opposing warrior with Crushing Blow surges into a Pole Arm figure, its action will end after resolving the movement. Crushing Blow does not take effect until the attack itself, which happens after the movement is completely resolved. (p.15)
A Cursed warrior is “affected” by any action made by a wand figure (other than itself) that causes the warrior to be moved, to be dealt damage, to be healed of damage, to gain or lose action tokens, or to be the target of a spell. (p.19)
You can roll for Dodge even if the attack resulted in a critical hit. If the Dodge roll is 4-6, the critical hit is unsuccessful instead. (p.19)
Invulnerability does not reduce pushing damage. (p.20)
If an opposing warrior wants to use surge to move into base contact with a figure with Terrify, roll for Terrify before moving the warrior using surge. If the Terrify roll is a 1 or 2, the move cannot be made, and the action must be reassigned. (p.21) Cavalry units attempting to move into base contact with a figure with Terrify must make two rolls – one for the mount, one for the rider. If either roll fails, that move cannot be made. (p.21)
DAMAGE SPECIAL ABILITIES STARTING POSITION A warrior with this special ability must be deployed with this ability showing on its combat dial. This special ability color might be split with another damage special ability color, which can also apply per its description. When this warrior is healed of damage, do not turn its combat dial past this special ability. If this warrior is reanimated by the Necromancy or Summon special abilities or Revenant subfaction ability, replace all instances of “starting marker” with “Starting Position” in those ability descriptions for the duration of the action.
BERSERK This warrior cannot be given ranged combat actions and cannot capture or be captured. If this warrior is a captor when it gains Berserk, its captive is eliminated.
MAGIC ENHANCEMENT (optional) Each friendly figure in base contact with this warrior gets +1 to its ranged damage value when it succeeds at a ranged combat attack. Magic Enhancement cannot be used to increase healing.
BATTLE FURY This warrior cannot capture or be captured. If this warrior is a captor when it gains Battle Fury, its captive is freed.
DEMORALIZED This warrior can be given only move and special actions. This warrior cannot move into base contact with an opposing figure. This warrior cannot control an objective. Opposing figures fail to break away from this warrior only on a die roll result of 1.
NECROMANCY (optional) Give this warrior a special action. It cannot be in base contact with an opposing figure. Reanimate one of your eliminated figures (except a multiple-dial or titan figure), and turn its combat dial to the starting marker. Roll one six-sided die. On a result of 1–3, turn the reanimated figure’s combat dial clockwise a number of times equal to the result. If three skulls are not showing in its stat slot, place it in base contact with this warrior. On a result of 4–6, remove it from the game. Do not turn the combat dial clockwise for reanimated figures with the words Zombie or Skeleton in their names; they always return to the battlefield with their combat dials at their starting markers.
COMMAND This warrior cannot be captured. At the beginning of your command phase, roll one six-sided die. On a result of 6, add one action to your action total for that turn. Also, at the beginning of your command phase, each friendly figure with Demoralized that is in base contact with this warrior is healed of 2 damage.
CRUSHING BLOW When this warrior makes a close combat attack, it ignores the defense special abilities of all target figures for the duration of the attack.
LIFE DRAIN (optional) When this warrior succeeds at a ranged combat attack against a target figure and deals at least 1 damage, it is healed of 1 damage.
TINKER (optional) Give this warrior a close combat action, with a single friendly figure with the GOLEM damage type as the target. Neither this warrior nor the target can be in base contact with an opposing figure. Ignore all modifiers to the close combat attack. If the attack succeeds, heal the target of damage equal to this warrior’s damage value. The target cannot be healed if a repair marker or the starting marker appears on its combat dial.
PIERCE When this warrior makes a ranged combat attack, it ignores the defense special abilities of all target figures for the duration of the attack.
MAGIC FREEZE (optional) Give this warrior a ranged combat action. If the attack succeeds against one or more opposing target figures with zero or one action token, roll one six-sided die. On a result of 4–6, give each target an action token. If a second action token is given to a target, the target is pushed.
MAGIC CONFUSION (optional) Give this warrior a ranged combat action, with a single opposing figure as the target. If the attack succeeds, the target is dealt no damage. Treat the target as if it were given a move action, but you control the action. The target cannot be moved into base contact with a figure friendly to you. None of the target’s optional special abilities can be canceled while you resolve this action. Do not give the target an action token for this action, and do not deal it pushing damage.
LEADERSHIP (optional) If this warrior has zero action tokens, when an action is given to a friendly figure within 10” of this warrior and there is a clear line of fire between this warrior and the figure, you can give this warrior the action token instead of giving it to the friendly figure.
IMMOBILIZE (optional) Give this warrior a close combat action, with a single opposing figure as the target. If the attack succeeds, deal no damage to the target. Instead, if the target has zero or one action token, give it an action token. If a second action token is given to the target in this way, the target is pushed.
Though Command is not optional, if you forget to resolve it’s effects during your command phase, you lose the opportunity to use it for that turn. (p.19)
The line of fire must pass through the Leadership figure’s front arc. (p.20)
Pierce will not ignore Ghostform or Limited Invisibility, but will ignore Dodge. (p.20)
If the warrior hits more than one target figure during the attack, it will be healed of 1 damage for each target figure that was dealt at least 1 damage.
The modifier affects the attacker, not the target. If the attacker has Magic Immunity, its damage value is not affected. Magic Immunity on the target figure does not affect Magic Enhancement.
Dark Riders DARK UNITY (optional) At the beginning of your command phase, deal 1 pushing damage to this unit’s rider to heal its mount of 1 damage. This ability can be used only once on each of your command phases.
Mi nions of Apocalypse BEDLAM No figure within 10” of this warrior may use gang up. (optional) When given a close or ranged combat action, this warrior may use the unmodified attack value of any Minions of Apocalypse figure on the battlefield instead of its own attack value.
Atl antean Empire
Delphana FOCUS This warrior gets +1 to its counterspell rolls.
Golemkore FIELD REPAIR Give this warrior a close combat action, with a single friendly figure with the GOLEM damage type as the target. Ignore all modifiers to the close combat attack. If the attack succeeds, and the target is not on its starting marker, heal the target of 1 damage. Ignore all repair markers on the target’s combat dial for purposes of healing.
Imperial Legion RALLY If this warrior has Demoralized at the beginning of your command phase, heal this warrior of 2 damage. If this warrior has a captive at the beginning of your command phase, this warrior can eliminate the captive without being given a close combat action; the attack succeeds without an attack roll.
Black Powder Revolutionaries
Bloody Thorns SNIPER This warrior can change its facing at any time during your turn without being given an action. When this warrior makes a ranged combat attack, decrease the defense value of each target figure by 2 for that attack.
Forgemasters SPELLBREACH (optional) This warrior ignores other warriors’ Magic Immunity and magic immunity defense type.
Northlanders RECONNAISSANCE If at least one-half the build total of your army is composed of Northlander figures, you can reveal two terrain cards instead of one terrain card during battlefield preparation. Once all players have revealed their cards, select one of your terrain cards to use and remove the other terrain card from play.
Dark Crusaders
Blood Cultists SIPHON ENERGY (optional) Once at the beginning of your command phase, if a friendly figure is in base contact with this warrior, deal 1 pushing damage to that figure; remove an action token from this warrior.
Deathspeakers REVENANT (optional) At the beginning of your command phase, if this warrior does not have Demoralized, give this warrior a special action. Reanimate any eliminated figure (except a multiple-dial or titan figure), turn its combat dial to the starting marker, and place it on the battlefield within 10” of this warrior at ground level. The reanimated figure is friendly to your army while it remains on the battlefield. At the beginning of your end phase, remove it from the game.
Order of Vladd VAMPIRISM When this warrior succeeds at a close combat attack against a target figure and deals at least 1 damage, it is healed of 1 damage.
Draconum
Dragon Mystics ANCIENT MASTERY This warrior can use any spell with an affinity page count, regardless of faction requirement. This warrior uses the affinity page count for all spells in spellbooks it wields.
Note that the use of Revenant costs an action, and counts against your action total for the turn. (p.11) If the reanimated figure is eliminated before the beginning of your end phase, it is still removed from the game. (p.24) Reanimating an eliminated warrior into base contact with an opposing figure is not considered moving that warrior, and the opposing figure will not get a free spin. (p.15)
When using Bedlam, only the attack value of the other Minions of Apocalypse figure can be used. The other Minions of Apocalypse figure’s attack bonus is not added to the attack value. (p.23-24)
Repair markers are only ignored when actively using the Field Repair ability for healing, not Tinker.
Storm Druids NATURE’S FURY When this warrior is given a close or ranged combat action, roll one six-sided die. If the result is less than or equal to its unmodified damage value, add its attack bonus (if any) to the attack.
Wylden Host NATURE’S ALLY This warrior’s line of fire is not affected by hindering or concealing terrain. Targets of this warrior’s ranged combat attacks treat hindering and concealing terrain as clear terrain for those attacks. When this warrior is in hindering terrain, it gets +1 to its defense value.
Elven Lords
Free Armies FORCED MARCH Each Free Armies figure in a movement formation with this warrior can use this warrior’s speed value instead of its own.
Order of Sorcery
LEY HARMONY Spells in spellbooks this warrior wields that have a browse cost of have a browse cost of instead.
Temple Masters GALLANT DEFENSE Each friendly Temple Masters figure in base contact with this warrior can use this warrior’s unmodified defense value instead of its own.
Mage Spawn
Order of the Ninth Circle PACT In addition to its own faction symbol (if any), this warrior gains the faction symbols of all friendly figures.
Orc Khans
Broken Tusk RECKLESS When this warrior succeeds at a close combat attack, you can deal 1 pushing damage to it to increase its damage value by 1. If this does not eliminate the warrior or cause it to gain Demoralized, you can continue to deal pushing damage to this warrior to increase its damage value any number of times for that attack.
Chaos Shamans MAGESTONE TRANCE (optional) Give this warrior a second action this turn. After it resolves, roll two six-sided dice. If the result is less than its unmodified attack value (do not use this warrior’s attack bonus), roll again. Deal 1 pushing damage to this warrior for each result less than its unmodified attack value.
Shadow Khans LURK Decrease any damage (except pushing damage) dealt to this warrior by 1. When this warrior is in concealing terrain, increase its defense value by 1.
Shyft
Darkmarch AUGMENT (optional) If this warrior has zero or one action token, any friendly figure sharing a faction symbol with the warrior uses this warrior’s unmodified attack value (not including attack bonuses, if any) instead of its own when making attacks. The friendly figure is dealt l pushing damage after the attack resolves.
Solonavi
Oracles of Rokos MIND TAP (optional) At the beginning of your command phase, this warrior gains a single special ability of a single target figure within its range value until the beginning of your end phase.
When resolving Magestone Trance, roll the dice until the result is not less than the unmodified attack value, and then deal 1 pushing damage for each of those rolls less than the unmodified attack value. (p.24)
A warrior may not use Mind Tap to target itself. (p.24)
If a Wylden Host warrior targets another Wylden Host warrior occupying hindering terrain, the target ignores that hindering terrain, and does not get the +1 to its defense value. (p.24)
Note that the rule of 3 is applied when calculating the modifier to the damage value, even if you use Reckless to give the Broken Tusk figure more than 3 clicks of pushing damage.
The second action is treated as a regular action, and if it causes the Chaos Shaman figure to receive a second action token, it will take a click of damage for pushing in addition to the damage from the Magestone Trance rules text.
CREDITS Combat Dial System, Mage Knight High Concept, Universe, and Creative Direction..................................................................................... Jordan Weisman Mage Knight Brand Manager .......................................................................................................................................................................................Kevin Goddard Mage Knight Original Rules Design................................................................................................................................................................................Kevin Barrett Mage Knight Rules............................................................................................................................................Kelly Bonilla, Jeff Grubb, Jim Long, Matt Robinson Mage Knight Unit Stats .................................................................................................................................................................................................. Matt Robinson Dark Riders Design............................................................................................................................................................................................................Kelly Bonilla Sorcery Design................................................................................................................................................................................................................. Matt Robinson Additional Game Design.....................................................................................................................................................................Jon Leitheusser, Mike Mulvihill Universe Continuity .................................................................................................................................................................................................... Scott Hungerford Editor ............................................................................................................................................................................................................................... Michael Arnaud WizKids Art Direction ................................................................................................................................................................... Sandra Garavito, Dawne Weisman Illustration .......................................................................................................................................Wayne England, Ethan Pasternack, Shane Small, Shane Hartley WizKids Graphic Design Group .............................................................. Sandra Garavito, Ethan Pasternack, Shane Hartley, Kim Goddard, David Heutmaker,
Kian Ng, Shane Small, Heather Luke, Carolyn Hazard WizKids Production Management.................................................................................................................................... Sharon Turner Mulvihill, Juliane Parsons WizKids Sculpting Directors ..................................................................................................................................................................... Jeff Grace, Steve Saunders WizKids Sculpting Staff ........................James Carter, Brian Dugas, Arwen King, Tim Prow, James Van Schaik, David Studer, Dave Summers, Jeff Wilhelm WizKids Prototyping and Decoration.............................................................................................Brian Dugas, Jeff Grace , Chris Hart, Arwen King, Tim Prow WizKids Testing Coordinator .............................................................................................................................................................................................Julie Haehn Playtesters.................................................................... Anthony Blue, Vic Bonilla, Jim Bryant, Adam Christensen, Kevin Goddard, Russell Kludy, Gordon Ku,
Will Littrell, Paul Nobles, Dawn Piehl, Adam Root, Gus Schultz, Chris Smith, Brook Willeford Photography................................................................................................................................................................................................................... Jennifer Greiner
REFERENCES CITED:
WizKids, Inc. (2003). Mage Knight Complete Rules of Play.
WizKids, Inc. (2004). Mage Knight Cavalry Rules.
WizKids, Inc. (2004). Mage Knight Sorcery Rules.
WizKids, Inc. (2005). Mage Knight Omens Rules.
WizKids, Inc. (2005). Mage Knight Questions and Answers, March 2005.
WizKids, Inc. (2005). Mage Knight Comprehensive Tournament Rules.
WizKids, Inc. (2005). Multiple-Dial Warriors Rules.
WizKids, Inc. (2005). Titans Rules.
WizKids, Inc. (2005). Castle Rules.
WizKids, Inc. (2005). Mage Knight Conquest.
WizKids, Inc. (2005). Apocalypse Dragon Rules.
All faction, subfaction, and other symbols found in this document are the property of WizKids, Inc.
If you notice a textual discrepancy between the printed rules (or FAQ corrections) and what is contained in this document, please contact [email protected] to report the error.
Document Compilation by Scott Lewis. Reviewed by Derek Beaushaw, David Blizzard, Mike Bowsher, Jason Farris, Josh Lewis, Bobby Kline, Chris Kwak, Ken Takacs, and Dylan Walsh
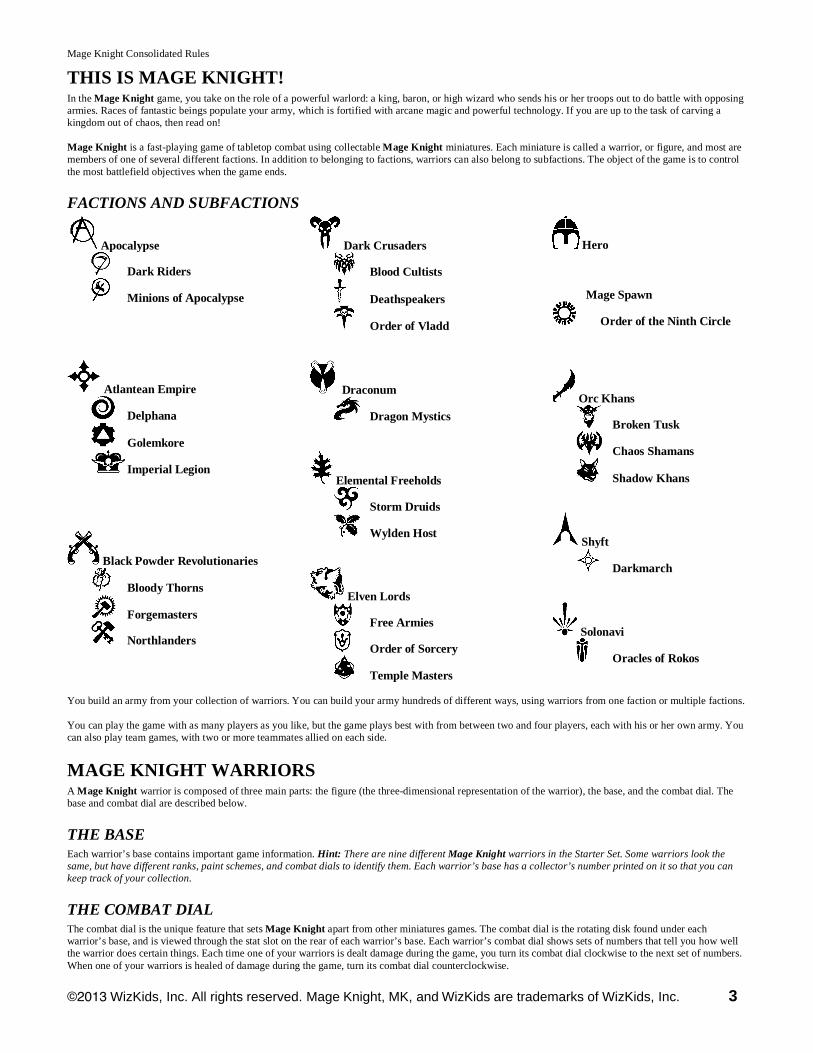
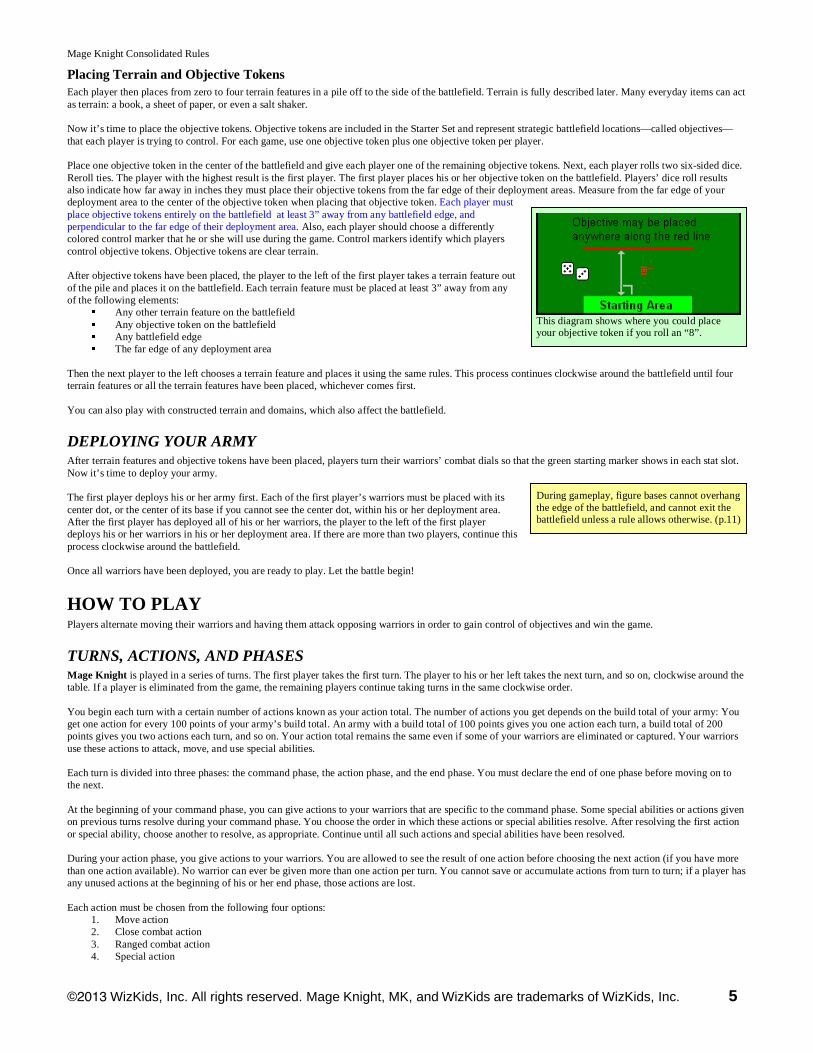
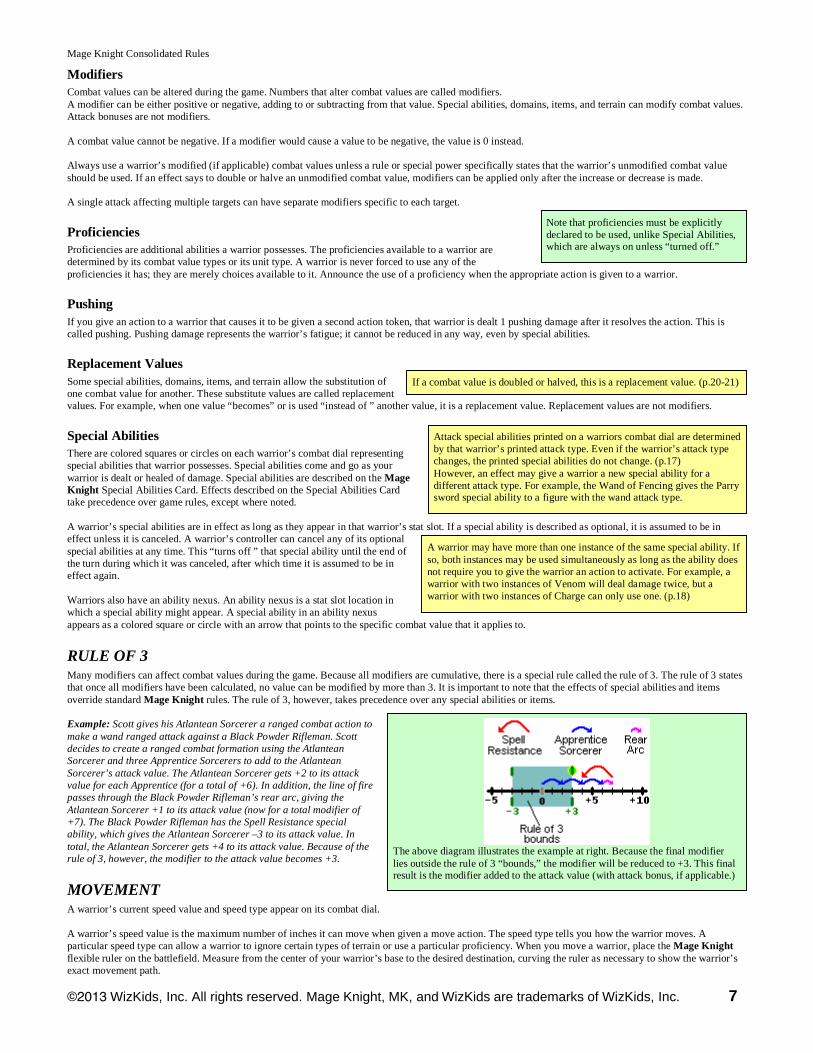

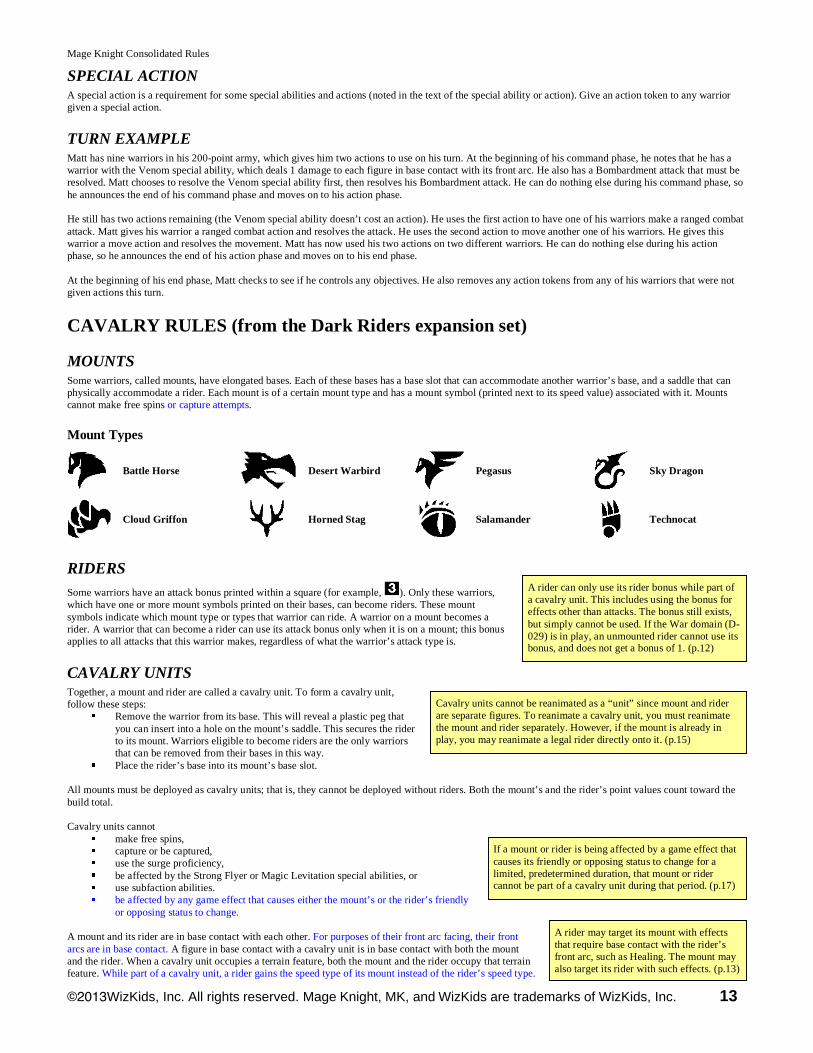
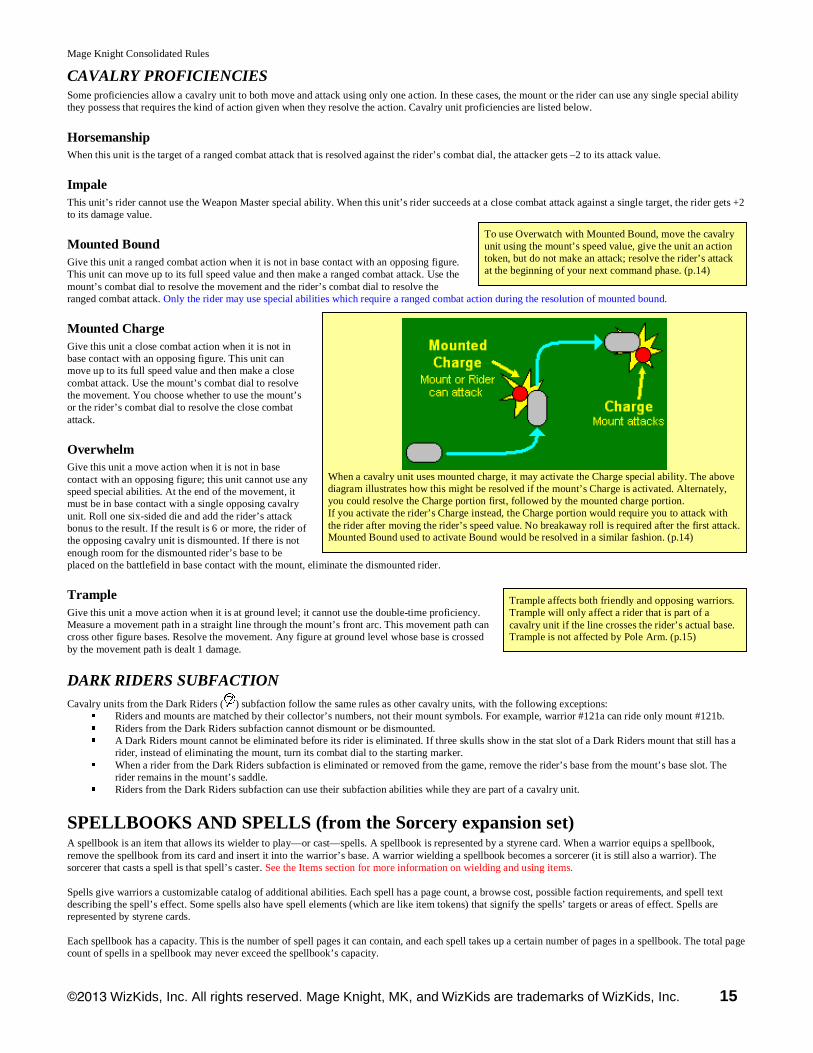
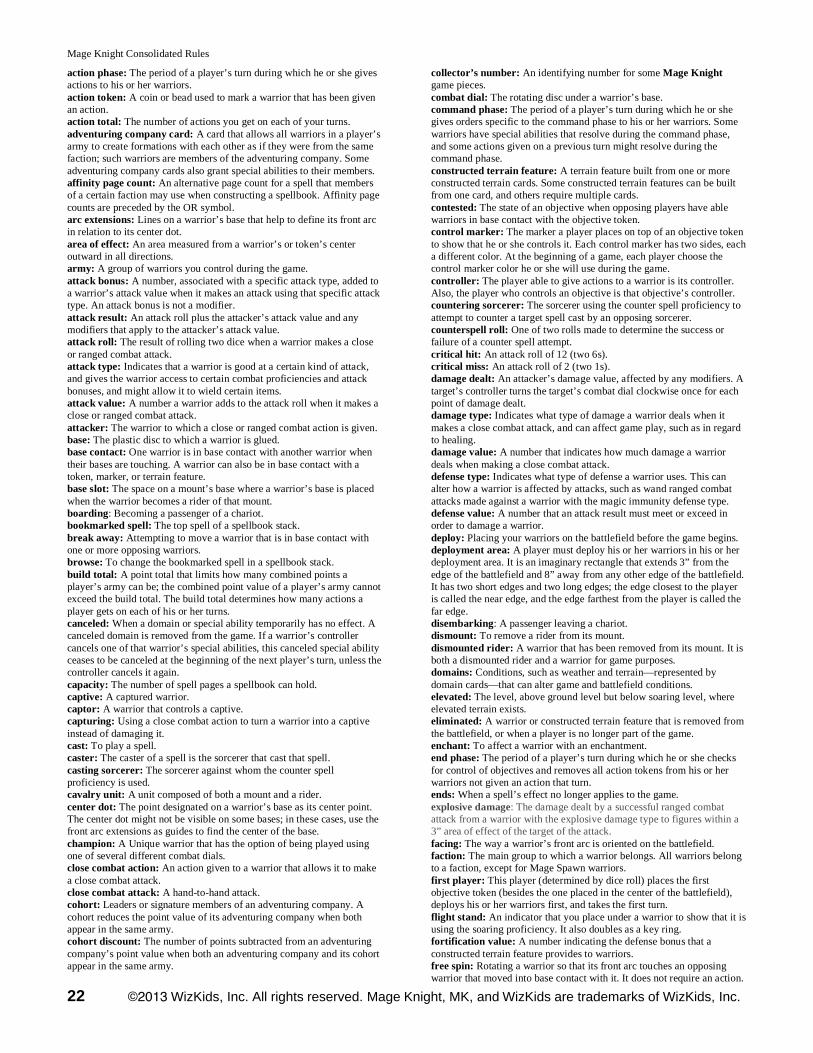
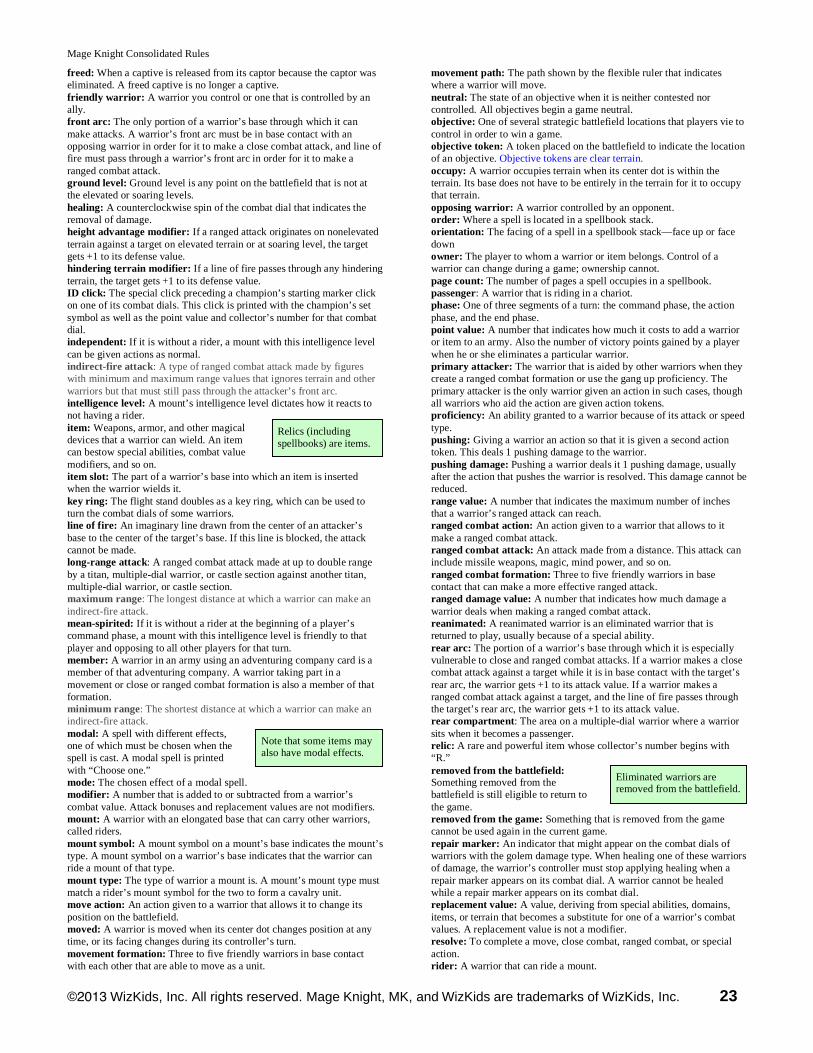
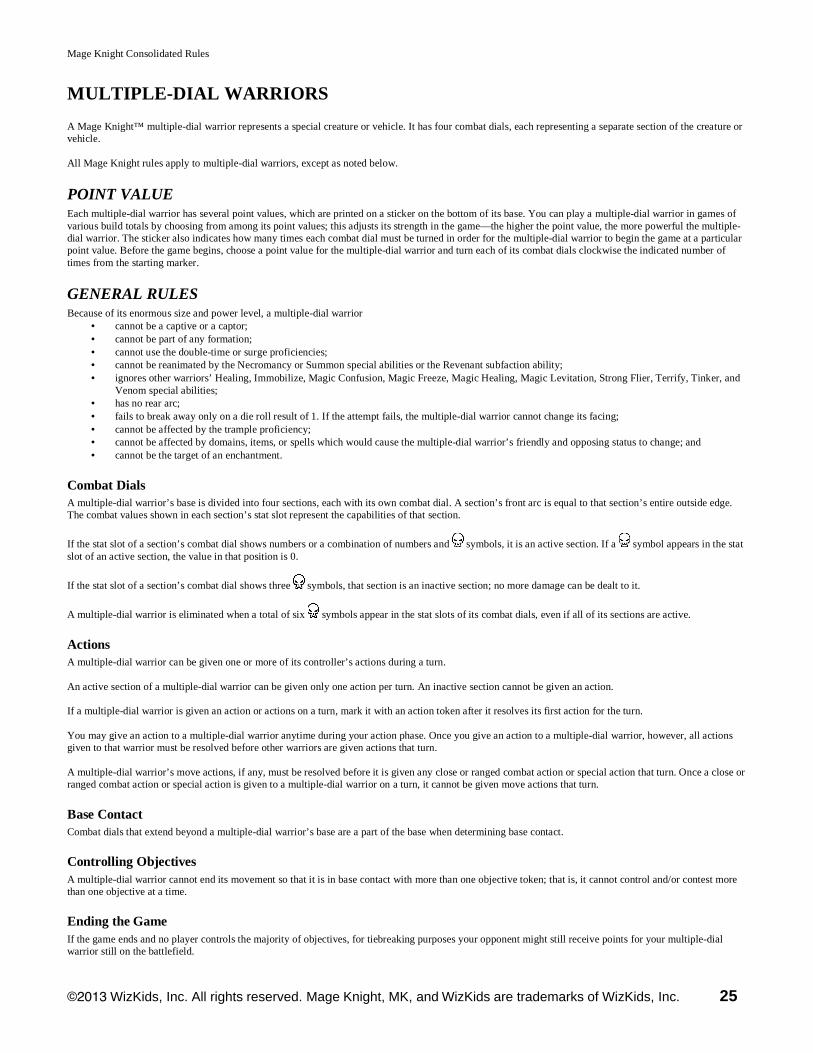
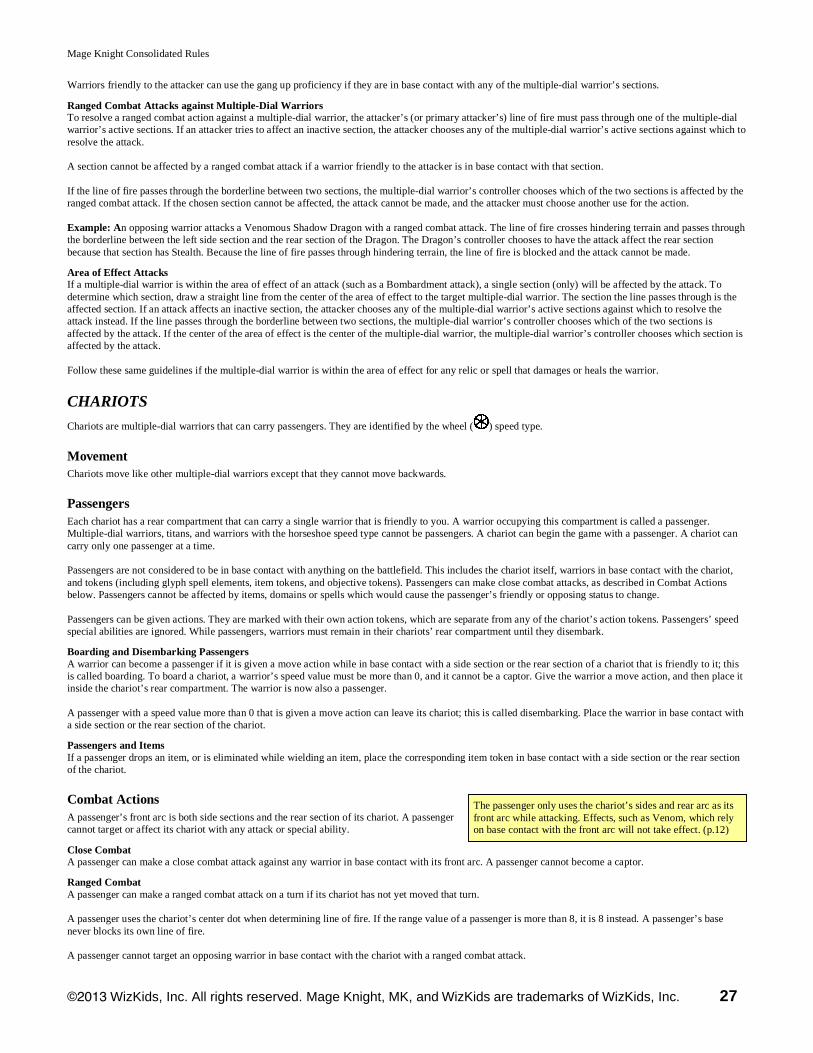
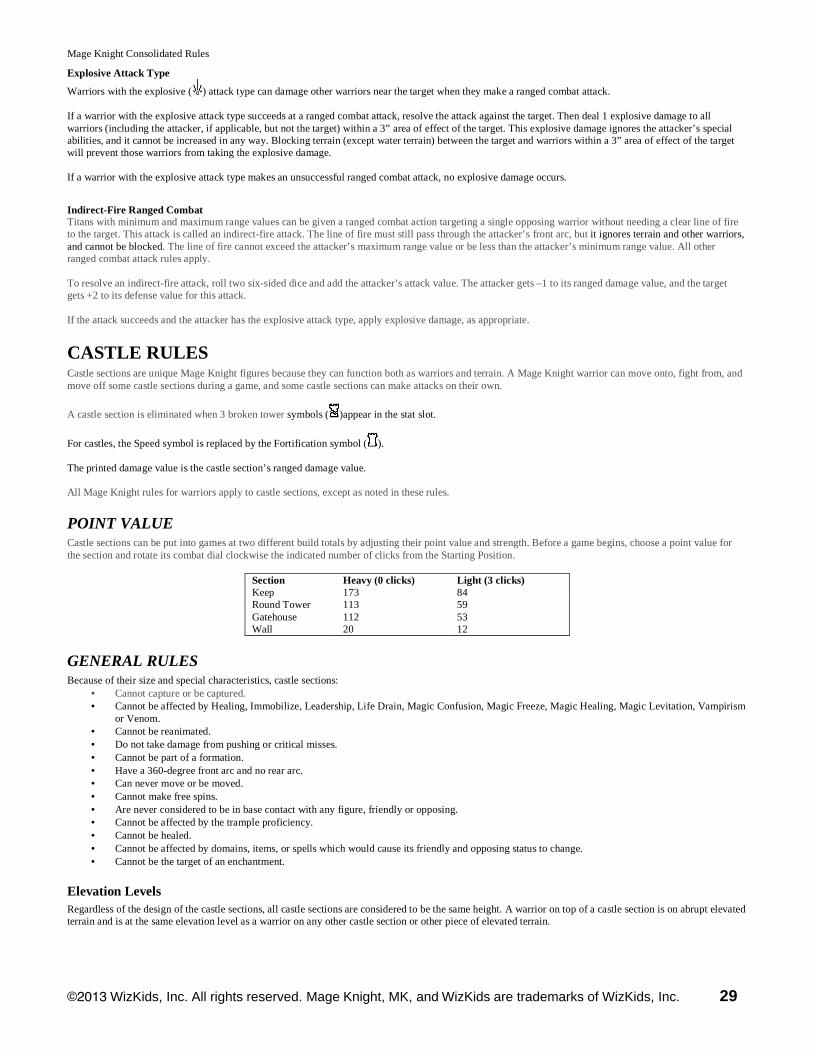

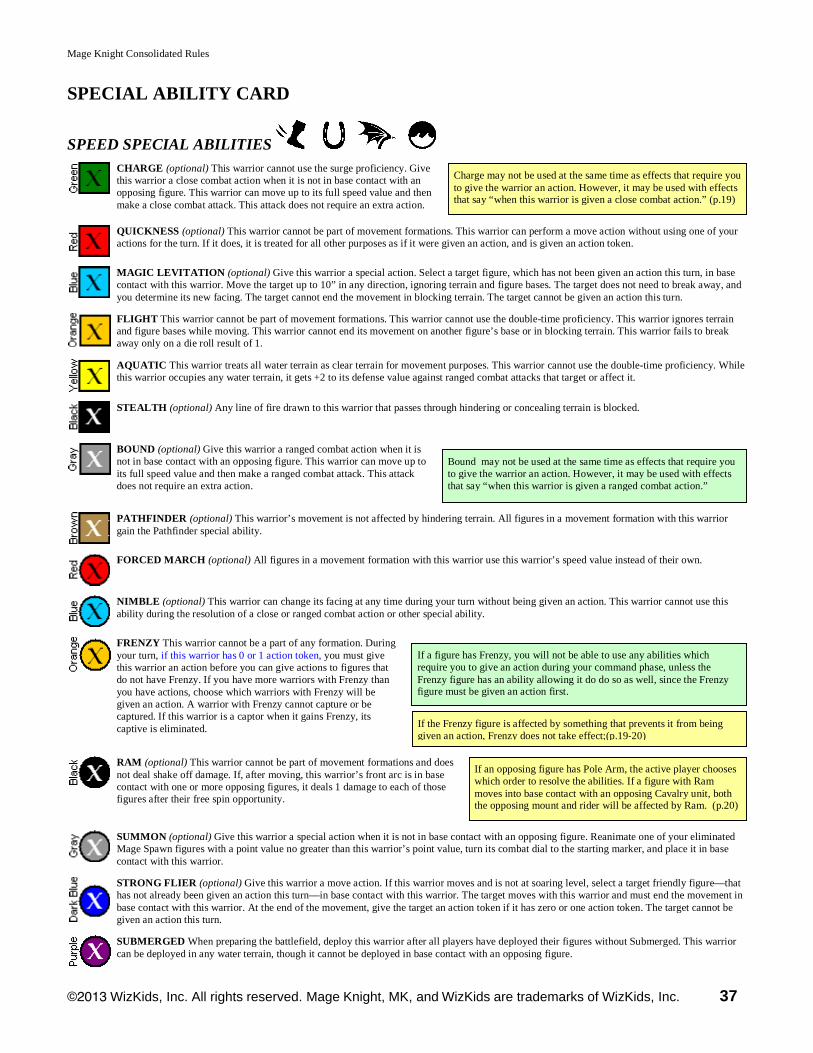

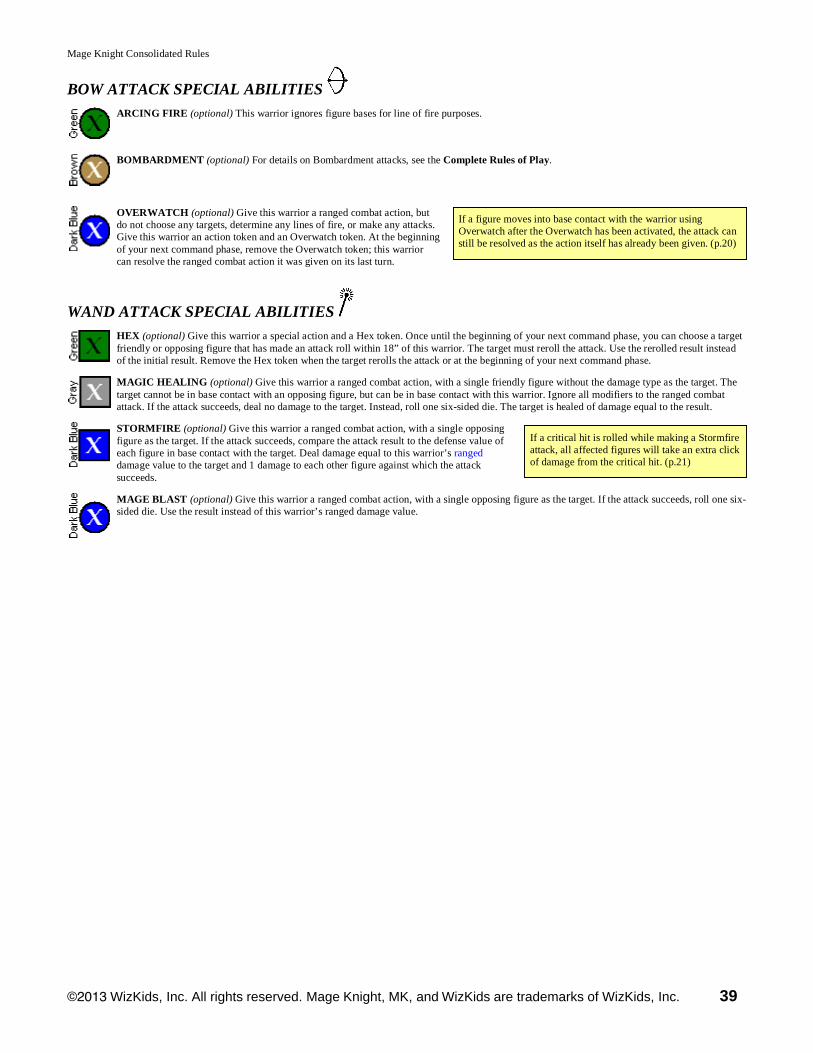
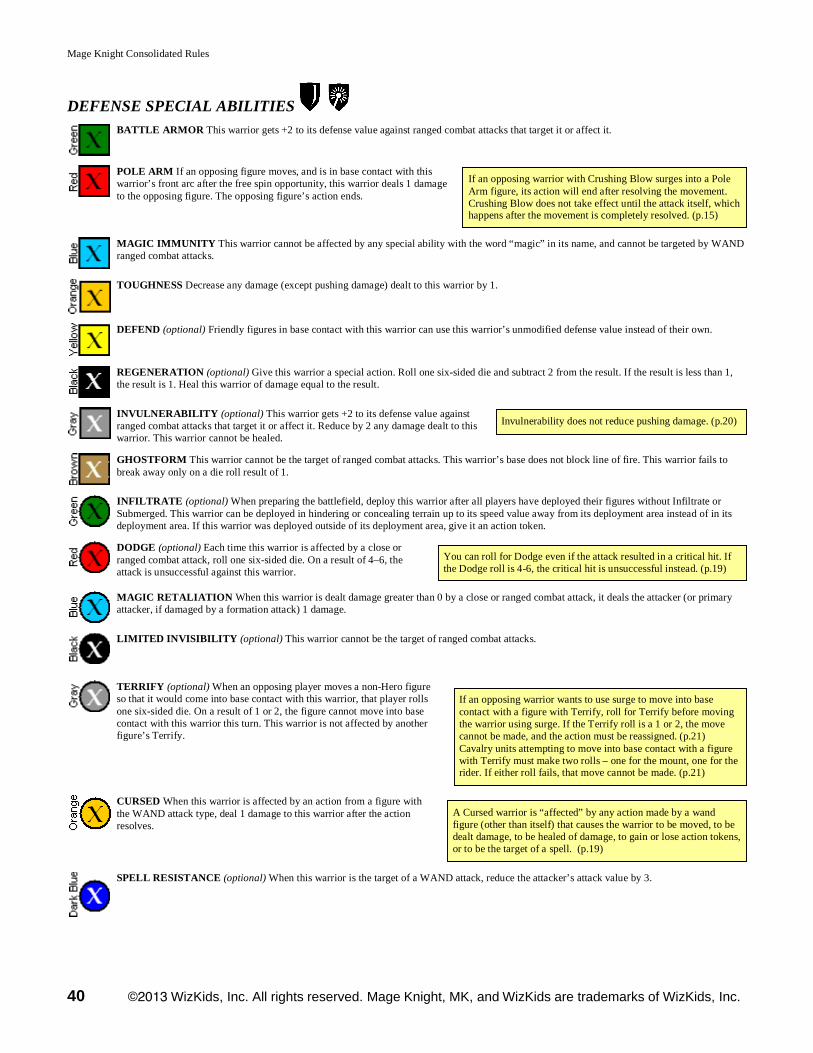
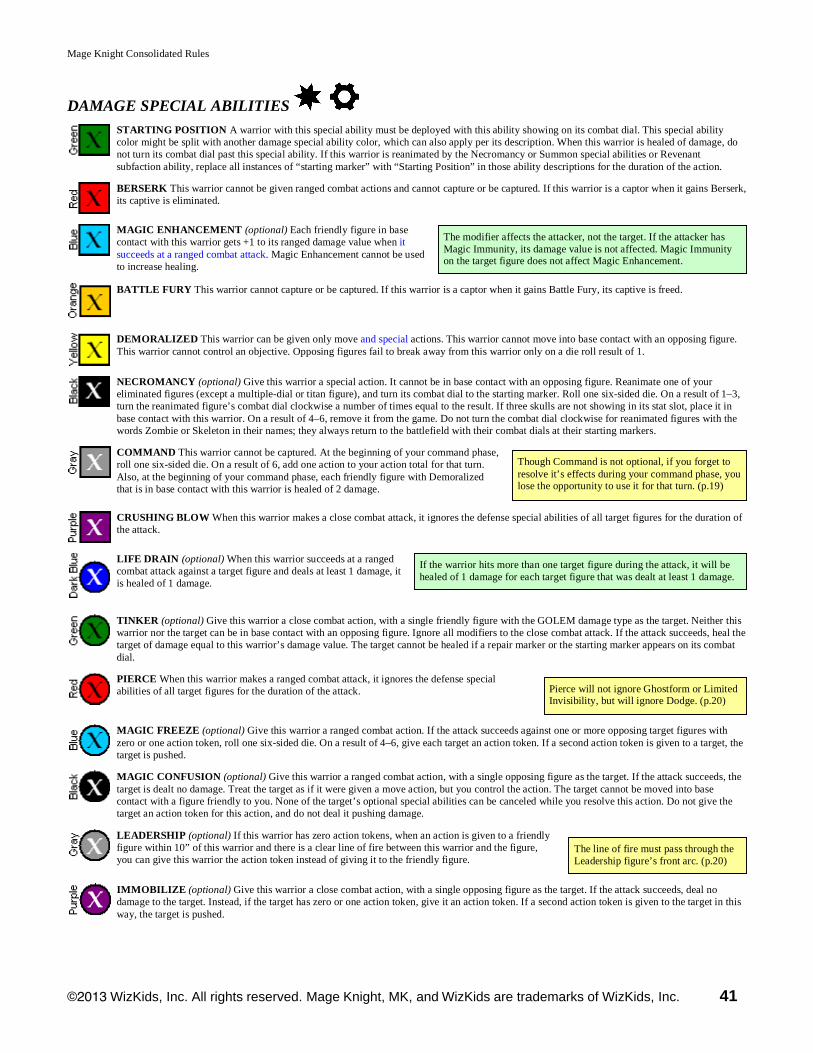
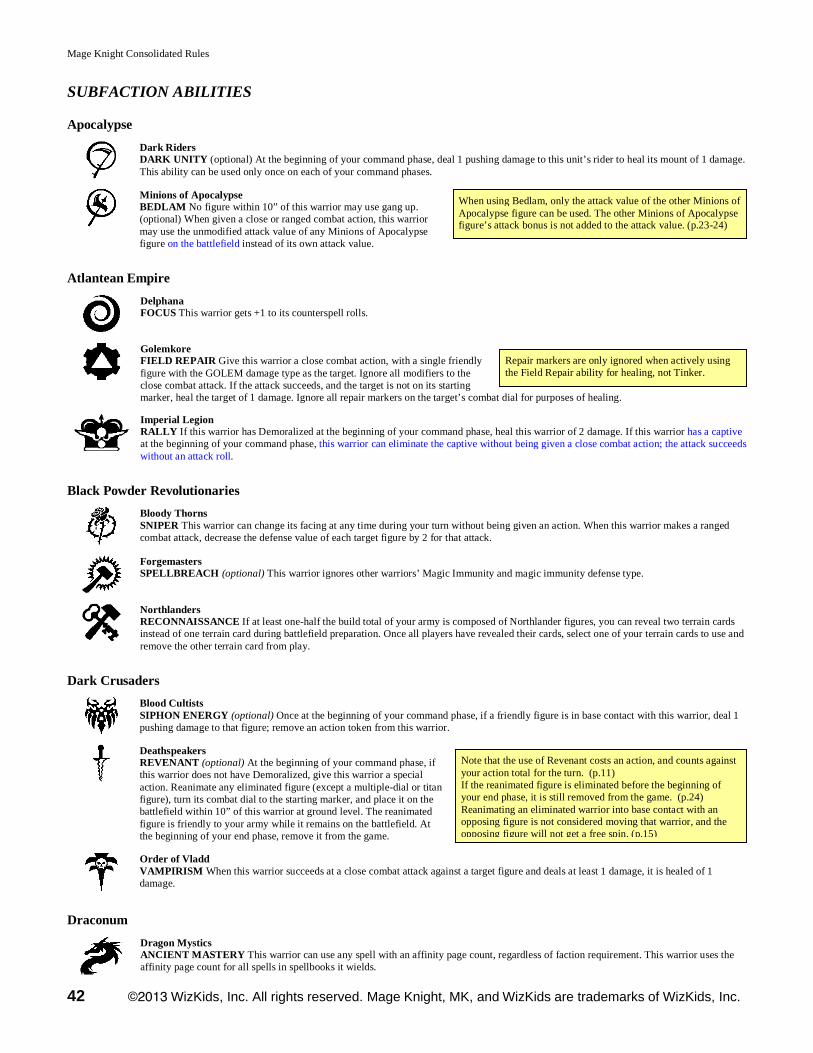
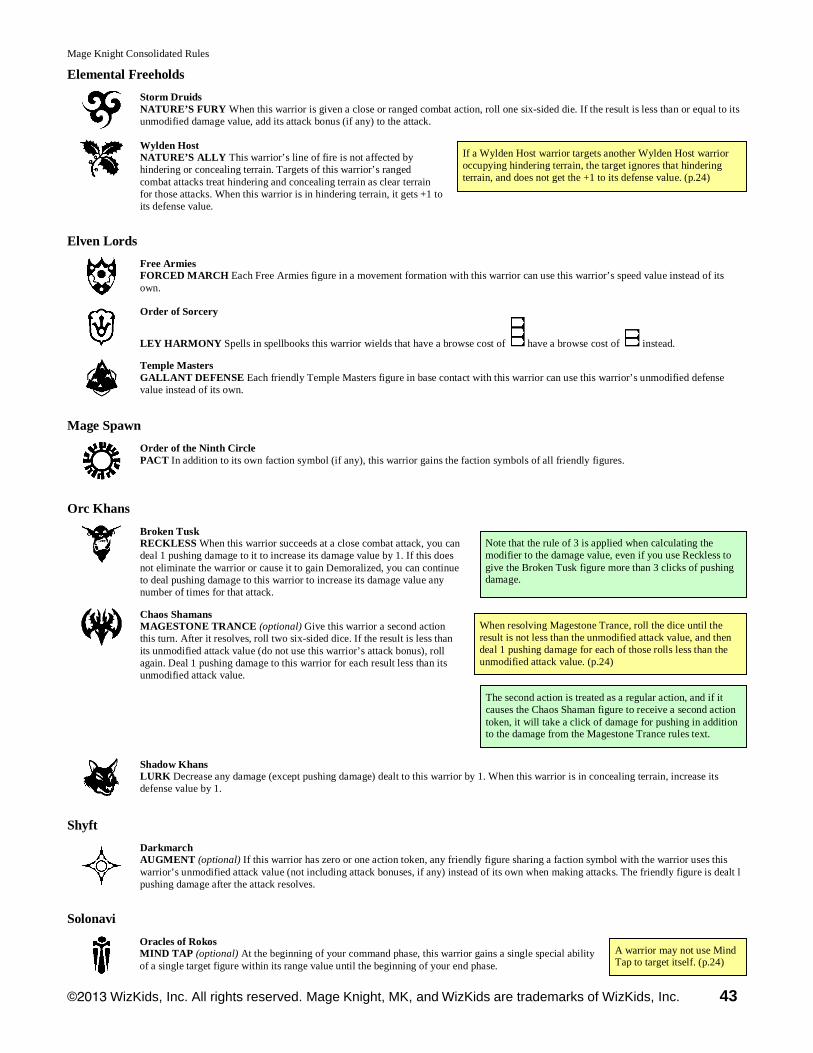


![The Takeaway from the library last week.. McKinney’s Consolidated Laws of New York Annotated found in a law library [including ours] and on Westlaw Consolidated.](https://static.documents.pub/doc/80x56/56649d375503460f94a0f594/the-takeaway-from-the-library-last-week-mckinneys-consolidated-laws-of.jpg)
