26
yright© 2003 Avaya Inc. All rights reserved PUBVT Loading and Implementation instructions for the Pre- upgrade, Backup Verification Tool
| Date post: | 27-Dec-2015 |
| Category: |
Documents |
| Upload: | deborah-copeland |
| View: | 213 times |
| Download: | 0 times |
Copyright© 2003 Avaya Inc. All rights reserved
PUBVT Loading and Implementation instructions for the Pre-upgrade, Backup Verification
Tool

2Copyright© 2003 Avaya Inc. All rights reserved
Topics
• Installing the pubvt package on the MSS
– Using a CD
• Using the Pre-upgrade Information tool
– Looking for errors or warnings • The first run of this tool should be reviewed by the Avaya
Global Services Delivery team 2 to 3 weeks in advance of the upgrade.
• Using the Backup Verification Tool
– Looking for errors

3Copyright© 2003 Avaya Inc. All rights reserved
Using a CD to load the package
• Go to the Download Center. Once logged in, access Downloads for the Pre-upgrade and Backup Verification Tool.
• Copy the pubvt.rpm file to a CD. It can not be in any sub folders on that CD.
• Insert the CD into the DVD drive on the MSS
• Login the MSS with craft or dadmin
• From the Main menu- Utilities-Software Management-Software Installation Menu
• Select CD

4Copyright© 2003 Avaya Inc. All rights reserved
Continue without backup
• Select continue this operation without current backup
• This install is not service effecting

5Copyright© 2003 Avaya Inc. All rights reserved
Select package pubvt
• On this window
• check the package pubvt
• Then select Install selected packages

6Copyright© 2003 Avaya Inc. All rights reserved
Installation of package
• This install takes about 1 min
• You should see a successful message After it is installed
• Select Return to software Management menu from this screen

7Copyright© 2003 Avaya Inc. All rights reserved
Return to Main
• You should be on this screen
• From the software management menu
• Select return to main

8Copyright© 2003 Avaya Inc. All rights reserved
1st Details on the Pre-Upgrade Information tool.
• Here is some of the output of the Pre-Upgrade information tool• The number of DVD to do the upgrade• An estimated total time it will take to do the upgrade
– 3 hours fixed time is rack and stack time– The MSS estimate veries by the amount of data stored.
• This time estimate includes, stopping the system, doing a backup, Verifying the backup, reloading the system, restoring the system and finishing up admin.
– The MAS estimated time is 6~7.5 hours pre MAS depending on the number of MAS’s. • This estimate includes, backup time, changing of hard drive, Changing DVD if need, running Install scripts (MISCM,
MMDCT), loading antivirus software, getting window and antivirus updates, finishing up admin and customer testing. • The second trough sixth server might take less time depending on what services are loaded.
• The total number of Subscribers• Errors and Warning
– Here is a list of what are errors, if we have error do not upgrade• Minor or major alarms• VMD problems
– Bad license– More the 2000 subscribers
» Need s3500 hardware on the MSS
• No MAS back ups– List of warnings
• More the 20 dvd’s• MAS backups are old• IP name or address issue• LDAP leading zero issue (refer to slide 14)
• All issues should be taken care of before the upgrade.

9Copyright© 2003 Avaya Inc. All rights reserved
IP issues the tool is looks for.
• private IP address is in the range 10.0.0.0 - 10.255.255.255, 172.16.0.0 - 172.31.255.255 or 192.168.0.0 - 192.168.255.255
• The private and corporate IP address is on the same subnet.
• The private name of the mss is mss1
• The corporate name is not mss1.b.c

10Copyright© 2003 Avaya Inc. All rights reserved
This is a picture of Entire Menu
• Under Utilities
• Or view entire menu
• New menu choice Pre-Upgrade Information
• This tool should be used about 2- 3 weeks before the upgrade
• Then again the day of the upgrade to verify no new errors or alarms
11Copyright© 2003 Avaya Inc. All rights reserved
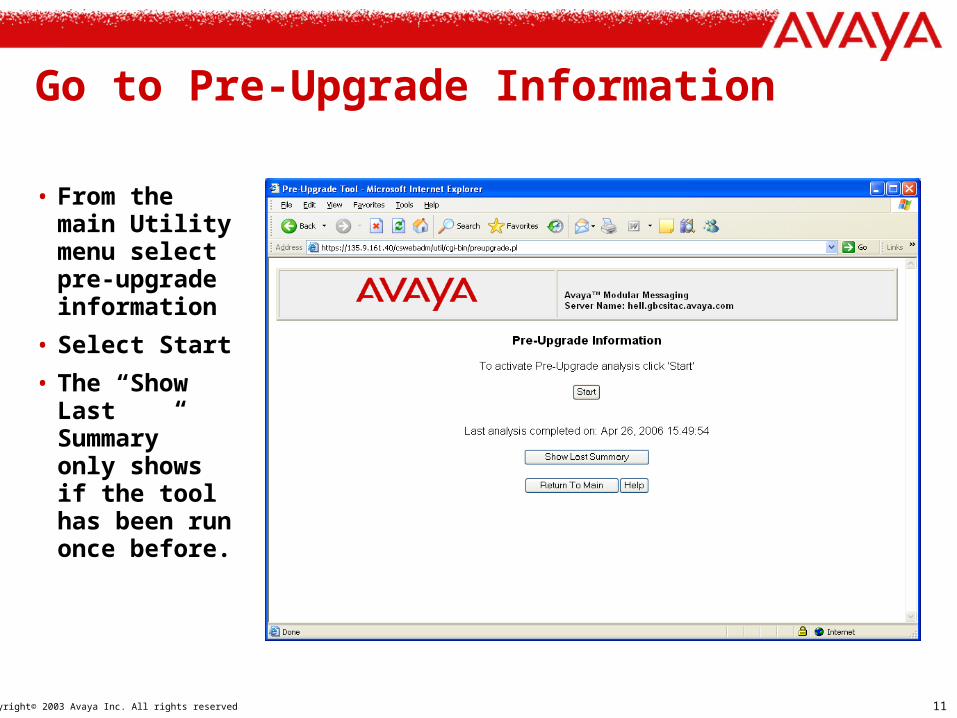
Go to Pre-Upgrade Information
• From the main Utility menu select pre-upgrade information
• Select Start
• The “Show Last Summary” only shows if the tool has been run once before.

12Copyright© 2003 Avaya Inc. All rights reserved
Continue
• You will get output every 15 seconds as the tool is running
• You can Abort if needed

13Copyright© 2003 Avaya Inc. All rights reserved
Pre-upgrade output
• The tool takes about 5 minutes to finish
• You are looking for no errors or warnings
• If you have errors or warnings deal with them before upgrading

14Copyright© 2003 Avaya Inc. All rights reserved
Pre-Upgrade: LDAP Leading Zero Warning
• To restore the data to a 3.1 system, you must follow PSN 1978U. By applying A5011rf+k as instructed in PSN 1978U the leading zero issue will be corrected. (The text output of the tool does not provide this information.)
• Restore onto 4.0 or newer MSS will automatically fix leading zero issue

15Copyright© 2003 Avaya Inc. All rights reserved
2nd Details on the Back up verification tool
• Things that will keep the backup verification tool from running
– If you are not logged in as tsc, craft or dadmin
– If no DVD is in the Drive
– If a Backup is running
– If a restore is running
– If some one else is running a Backup verification
– If you leave the verification page with out using the “Abort” button
• “Stop Runaways” Button is if you left the web page or it timed out on you and you need to start over

16Copyright© 2003 Avaya Inc. All rights reserved
What is the Backup verification tool looking for• The time the backup was made
• What MSS did the Backup come from
• The number of DVD’s
– If you put in the wrong DVD in during verification, it will let you know.
• That the backup is a full backup and that it has
– System-Data
– Audix-Names
– Greetings-and-Messages
• That the data is good. It looks for
– files that are missing that should be there
– extra files that should not be there
– The CPIO (copy) file to be good and that they will be able to unpack correctly.

17Copyright© 2003 Avaya Inc. All rights reserved
Backup Verification tool Menu
• To verify that the backup is a good backup.
• From the Utilities/ Backup/Restore Menu
• Select Backup Verification tool
• Again this tool and the Per-Upgrade tool can only be run with the tsc, craft and dadmin logins

18Copyright© 2003 Avaya Inc. All rights reserved
View from Backup Verification Tool
• In the backup Verification tool menu
• Select Start
• Stop Runaways is if the verification appears hung
• Show Last Summary is if some one has verified a backup before

19Copyright© 2003 Avaya Inc. All rights reserved
Here is the output if you are verifying a backup from a different system • You will get a
warning if you are verifying a backup from a different MSS system
• It is Ok to select “Yes” to Proceed
• Or “Abort” if you want to stop

20Copyright© 2003 Avaya Inc. All rights reserved
Continue
• Here is the output of a verification that is started
• Please see the Note: Closing … backups again
• The “Runaway button” is the key if you leave this page

21Copyright© 2003 Avaya Inc. All rights reserved
Continue
• The output will give you the percentage of the verification that is complete and what file it is verifying
• Errors will be displayed in the verification log if any are found

22Copyright© 2003 Avaya Inc. All rights reserved
If the verification takes more then 15 minutes • You will get an
Error box• You will select OK
on the Netscape Error box
• Then you must hit the Reload button on the toolbar.
• This will refresh the output.
• If you do not reload this page you will never get a refresh every 15 seconds and there for will not know when the verification is finished

23Copyright© 2003 Avaya Inc. All rights reserved
Here is another Error picture you might see• Again select
OK on the Error boxes
• Then Reload on the web browser toolbar
24Copyright© 2003 Avaya Inc. All rights reserved
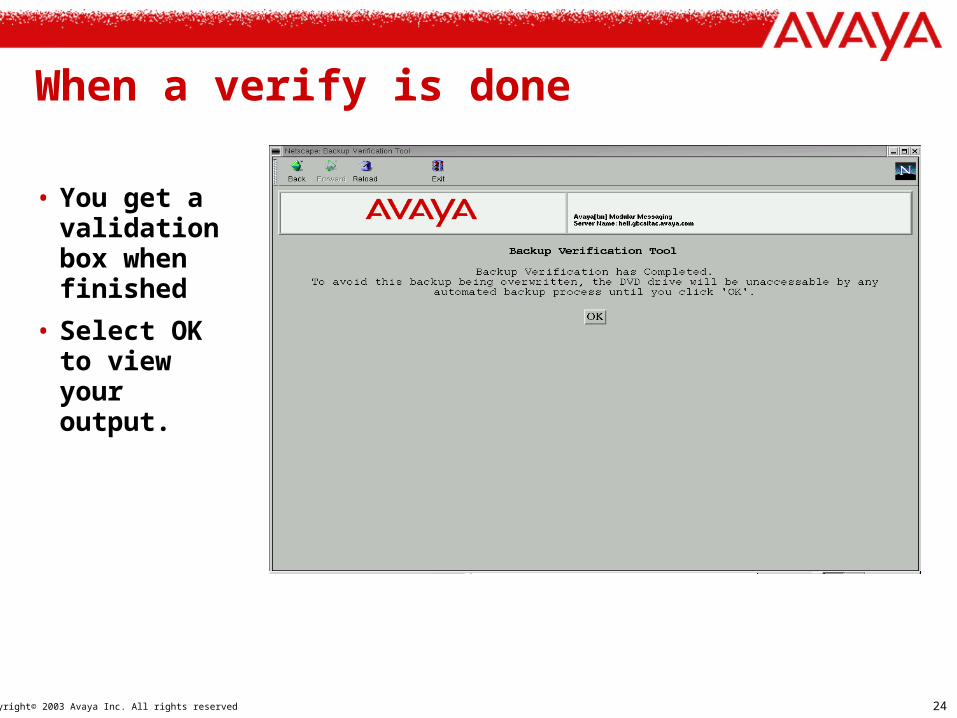
When a verify is done
• You get a validation box when finished
• Select OK to view your output.

25Copyright© 2003 Avaya Inc. All rights reserved
Here is a good Verification
• You are looking for “Backup Verification Succeeded with no Errors”
• After you are finished you can return to main
• Then Shutdown system to continue with the upgrade.

26Copyright© 2003 Avaya Inc. All rights reserved
A Bad backup
• Missing some Greetings-and-Messages
• Return to main
• Redo backup


