190


Copyright © 2009 by Connectivity Systems, Incorporated All Rights Reserved
RESTRICTED RIGHTS LEGEND Use, duplication, or disclosure by the Government is subject to the restrictions as set forth in subparagraph (c)(1)(ii) of the Rights in Technical Data and Computer Software clause at DFARS 252.227-7013.
This material contains confidential and proprietary material of Connectivity Systems, Inc. and may not be used in any way without written authorization from Connectivity Systems, Inc. This material may not be reproduced, in whole or in part, in any way, without prior written permission from Connectivity Systems, Inc.
Permission is hereby granted to copy and distribute this document as follows:
• Each copy must be a complete and accurate copy. • All copyright notices must be retained. • No modifications may be made. • Use of each copy is restricted to the evaluation and/or
promotion of Connectivity Systems, Inc.’s BIM-FAQS/PCS product or in accordance with a license agreement.
Trial Guide, Version 5 Release 3A-40 July 2009
Published by Connectivity Systems, Inc. 8120 State Route 138, Williamsport OH 43164 Phone: 800-795-4914 Fax: 740-986-6022
E-Mail: [email protected]
Internet: http://www.csi-international.com

Trial Guide i
Contents
About This Guide Purpose .............................................................................................................................. ATG–1 Organization .................................................................................................................... ATG –1 How To Use This Manual .............................................................................................. ATG –2 Who Should Use This Manual....................................................................................... ATG –3 Publications ...................................................................................................................... ATG –4 Related Publications........................................................................................................ ATG –5 Diagnostic Procedures .................................................................................................... ATG –6
Collecting Diagnostic Data ..................................................................................... ATG –6 Interpreting Diagnostic Data .................................................................................. ATG –7 Calling Technical Support....................................................................................... ATG –7
Chapter 1: About BIM-FAQS/PCS Overview ..................................................................................................................................1–1 What Is an Event?....................................................................................................................1–2 BIM-FAQS/PCS Scheduler and Schedules..........................................................................1–4 BIM-FAQS/PCS Online..........................................................................................................1–5 JCL Management.....................................................................................................................1–6 Online Displays and Batch Reports ......................................................................................1–7 Security and Configuration....................................................................................................1–8 Integration with Other Products ...........................................................................................1–9 Beyond Your Trial ...................................................................................................................1–9
Chapter 2: Installing and Initializing BIM-FAQS/PCS In This Chapter ........................................................................................................................2–1 Installing BIM-GSS..................................................................................................................2–3
Task Overview..................................................................................................................2–3 Task I: Defining a Residence Library ...........................................................................2–4 Task II: Defining Labels for Required PDSs ................................................................2–5 Task III: Running the Installation Jobstream, IBGS....................................................2–7
Installing BIM-FAQS/PCS...................................................................................................2–10 Task Overview................................................................................................................2–10 Task I: Defining a Label for the BIM-FAQS/PCS PDS ............................................2–11

ii BIM-FAQS/PCS
Task II: Defining the FAQSMSG VSAM File ............................................................ 2–13 Task III: Running the Installation Jobstream, IASO................................................. 2–14
Initializing BIM-FAQS/PCS................................................................................................ 2–18 Task Overview ............................................................................................................... 2–18 Running the Initialization Jobstream .......................................................................... 2–18
Activating the Scheduler...................................................................................................... 2–22 Task Overview ............................................................................................................... 2–22 Activating the Scheduler............................................................................................... 2–23
Initializing Online Interfaces............................................................................................... 2–25 Overview......................................................................................................................... 2–25 Initializing the CICS Interface: BIM$TICI ................................................................. 2–26 Initializing the VTAM Interface: BIM$TIDR............................................................. 2–29 Tailoring the Control File ............................................................................................. 2–31 Summary......................................................................................................................... 2–34
Chapter 3: Defining System Configuration In This Chapter........................................................................................................................ 3–1
What Is BIM-FAQS/PCS Configuration?.............................................................. 3–1 Getting Started with BIM-FAQS/PCS Online .................................................................... 3–3 Using the Configuration Options Menu Index................................................................... 3–4 Defining System Options ....................................................................................................... 3–6
Defining Library Defaults............................................................................................... 3–6 Defining CMS Server Defaults....................................................................................... 3–8 Defining CPU ID Synonyms ........................................................................................ 3–10 Defining Holiday Defaults ........................................................................................... 3–12 Defining System Panel Defaults .................................................................................. 3–14 Summary......................................................................................................................... 3–16
Chapter 4: Defining and Scheduling Events In This Chapter........................................................................................................................ 4–1 BIM-FAQS/PCS Online Panels............................................................................................. 4–3
Overview........................................................................................................................... 4–3 Master Event Maintenance Panel .................................................................................. 4–5 Event Maintenance Edit Panel ....................................................................................... 4–6 Predecessor Condition Panel ......................................................................................... 4–9
Defining the EXAMPLE Events .......................................................................................... 4–10 Task Overview ............................................................................................................... 4–10 Task I: Defining Event EXAMPLE1............................................................................ 4–13 Task II: Defining Event EXAMPLE2 .......................................................................... 4–16 Task III: Defining Event EXAMPLE3......................................................................... 4–21

Trial Guide iii
Task IV: Defining Event EXAMPLE4 .........................................................................4–26 Scheduling the EXAMPLE Events ......................................................................................4–29
Task Overview................................................................................................................4–29 Task I: Transferring a Subset of Events to the Current Event Directory ...............4–30 Task II: Scheduling a Subset of Events.......................................................................4–32 Task III: Scheduling All of the EXAMPLE Events ....................................................4–34 Summary .........................................................................................................................4–37
Chapter 5: Defining and Scheduling Advanced Events In This Chapter ........................................................................................................................5–1 Defining an Event to Run a Forecast Report .......................................................................5–2
Task Overview..................................................................................................................5–2 Task I: Defining Event EXAMPLE5 ..............................................................................5–3 Task II: Scheduling Event EXAMPLE5 ......................................................................5–10
Defining Events to Run Backups.........................................................................................5–13 Task Overview................................................................................................................5–13 Task I: Defining Event BKUPMON ............................................................................5–15 Task II: Defining Event BKUPVIO..............................................................................5–21 Task II: Defining Event BKUPLOG ............................................................................5–27 Task II: Defining Event BKUPEVT .............................................................................5–33 Task IV: Scheduling the Backup Events.....................................................................5–39 Summary .........................................................................................................................5–40
Chapter 6: Viewing Event Information In This Chapter ........................................................................................................................6–1 Viewing History Information ................................................................................................6–2
Task Overview..................................................................................................................6–2 Task I: Producing an Audit History Display...............................................................6–3 Task II: Producing an Account History Display.........................................................6–8
Viewing Current Schedule Information.............................................................................6–14 Task Overview................................................................................................................6–14 Producing an Event Cross-Reference Report .............................................................6–15
Viewing Forecast Information.............................................................................................6–18 Task Overview................................................................................................................6–18 Task I: Producing an Event Forecast Display............................................................6–19 Task II: Producing a Partition Occupancy Report ....................................................6–23 Summary .........................................................................................................................6–27

iv BIM-FAQS/PCS
Appendix A: Sample Error Messages BIM-GSS .................................................................................................................................. A–1 BIM-FAQS/PCS ..................................................................................................................... A–2 MSHP....................................................................................................................................... A–2
Index ...........................................................................................................................Index-1

Trial Guide ATG–1
About This Guide
Welcome to BIM-FAQS/PCS, BIM’s production control system for the VSE operating environment!
This self-directed trial guide is designed to introduce you to the features and benefits of BIM-FAQS/PCS and help you to become proficient in using it.
Purpose The purpose of the Trial Guide is to provide you with a step-by-step explanation of how to use the BIM-FAQS/PCS scheduler, define and schedule events, and view online event information and batch reports.
Organization This manual is divided into two parts:
Part Contents
Chapters 2-3 Installation and system configuration information. These chapters provide instructions for installing BIM-FAQS/PCS and for quickly getting it up and running.
Chapters 4-6 Procedures for learning how to use BIM-FAQS/PCS. These tutorial chapters teach you many of the basic BIM-FAQS/PCS tasks you need to know to start creating your own schedule. If you've never used BIM-FAQS/PCS before, we highly recommend that you read through the tutorial chapters.

How To Use This Manual
ATG–2 BIM-FAQS/PCS
How To Use This Manual How to Get the Most Out of Your Trial
To get the most out of your trial:
• Read the chapters in this manual in sequence, as each successive chapter builds on the skills you developed and the terms you learned in the chapter that preceded it.
• Use BIM-FAQS/PCS Online panels to perform the procedures and examples presented in Chapters 4-6. You will get a better idea of how BIM-FAQS/PCS works, and you will learn where fields and information are located on the panels.
• Try some or all of the additional examples on your own. This is the best way to get your questions answered about BIM-FAQS/PCS.
• When you're done reading all of the chapters in this manual, feel free to delete all events and jobs you defined to avoid cluttering your schedule.
Objectives of This Manual
After reading this manual, you will have learned how to:
• Install and initialize BIM-FAQS/PCS
• Configure your BIM-FAQS/PCS system
• Define basic and advanced events
• Submit events to the BIM-FAQS/PCS scheduler
• Display BIM-FAQS/PCS information online and in batch reports

Who Should Use This Manual
Trial Guide ATG–3
Who Should Use This Manual The BIM-FAQS/PCS Trial Guide is intended for people who are responsible for:
• Installing, starting, and maintaining BIM-FAQS/PCS
• Activating the scheduler
• Defining system configuration
• Creating job schedules
• Defining, updating, and scheduling events
• Defining and modifying JCL members
• Analyzing scheduler activity
What You Need to Know
This manual assumes that you are familiar with the VSE (Virtual Storage Extended) operating system and with VSE JCL (Job Control Language).

Publications
ATG–4 BIM-FAQS/PCS
Publications Overview of Documentation Set
The documentation set provided with BIM-FAQS/PCS consists of the following manuals:
• BIM-FAQS common manuals
• BIM-FAQS/PCS Implementation Guide
• BIM-FAQS/PCS Operations Guide
BIM-FAQS Common Manuals
Manual Contents
Installation and Initialization Guide
Information you need to install and initialize the BIM-FAQS products
Message Guide A list of messages and codes you might encounter using the BIM-FAQS products, and an explanation and action for each one
Product-Specific Documentation
Manual Contents
Implementation Guide Information on how to get started after installation, including where to store your JCL, how to activate the scheduler, how to monitor your schedule, and how to define system security and configuration
Operations Guide Information on how to perform the day-to-day operations of the data center using BIM-FAQS/PCS

Related Publications
Trial Guide ATG–5
Related Publications Besides the manuals in this BIM-FAQS/PCS documentation set, the following reference materials can help you to use BIM-FAQS/PCS:
• IBM VSE advanced functions manuals:
• Data Management Concepts (GC33-6192)
• System Control Statements (SC33-6198)
• DOS/VSE JCL, by Steve Eckols
• The REXX Language: A Practical Approach to Programming, by M.F. Cowlishaw
Command Conventions
The following table lists and explains the conventions used throughout this manual when command format or JCL statement format is shown:
Convention Explanation Example
UPPERCASE LETTERS
Required part of a command. Any part of a command in uppercase letters must be typed exactly as it is shown.
The following command must be typed exactly as shown:
CREF
Bold type Enter the bolded item. Any part of a command in bolded type must be entered exactly as it is shown. Then press ENTER.
Type the following command as it is shown. Then press ENTER.
WORK
lowercase italic type Variable value. Any part of a command or JCL statement in lowercase italic type must be replaced with specific variable information.
hh:mm must be replaced with the number or hours (hh) and minutes (mm) between occurrences:
FREQ hh:mm

Diagnostic Procedures
ATG–6 BIM-FAQS/PCS
Diagnostic Procedures Refer to the table below for a summary of the procedures you should follow if you have a problem with a BIM software product. Each of these procedures is detailed on the following pages.
Step Action
1 Categorize the problem and collect data. See “Collecting Diagnostic Data.”
2 Try to identify the problem. See “Interpreting Diagnostic Data.”
3 Call support. See “Calling Technical Support.”
4 Work with Technical Support to solve the problem.
Collecting Diagnostic Data
In the table below, use the left column to categorize the problem your site has encountered. Then, follow the instructions in the corresponding right column to generate useful diagnostic data.
For Be Sure to Check
Installation errors All output produced by MSHP when the product was installed.
Screen errors Copies of the screens in error. Listings of all user-coded BIM-FAQS/PCS interfaces in use.
BIM-FAQS/PCS abends The CICS generated dump. All JCL, console logs and messages for the failure. Listings of all user-coded BIM-FAQS/PCS interfaces in use.
User-initiated functions Check the console logs, all JCL, listings, and screens for failure. Listings of all user-coded BIM-FAQS/PCS interfaces in use.

Diagnostic Procedures
Trial Guide ATG–7
Interpreting Diagnostic Data
After collecting the specified diagnostic data, write down answers to the following questions:
• What was the sequence of events prior to the error condition?
• What circumstances existed when the problem occurred and what action was taken?
• Has this situation occurred before? What was different then?
• Did the problem occur after a particular PTF was applied or after a new release of the software was installed?
• Was a new release of the operating system installed recently?
• Has the hardware configuration (tape drives, disk drives, and so forth) changed?
From the answers to these questions and the diagnostic data, try to identify the cause and resolve the problem. If it is determined that the problem is a result of an error in a BIM software product, contact BIM Technical Support.
Calling Technical Support
CSI International provides support for all its products.
If you are in North America, call (800) 795-4914. Outside North America, call your local BIM Software Agent. You can also reach CSI Technical Support online at [email protected].
Please have the following information ready before BIM Technical Support:
• All the diagnostic information described in "Collecting Diagnostic Data." Product name and release number.
• Product name and release number of any other software you suspect is involved.
• Release level and PUTLEVEL of the operating system.
• Your name, telephone number and extension (if any).
• Your company name.

Diagnostic Procedures
ATG–8 BIM-FAQS/PCS

Trial Guide 1–1
Chapter 1 About BIM-FAQS/PCS
Overview What Is BIM-FAQS/PCS?
BIM-FAQS/PCS is a production control system for the VSE operating environment. BIM-FAQS/PCS provides state-of-the-art automated scheduling for VSE data centers. The BIM-FAQS/PCS scheduler triggers an unlimited number of events that have simple and complex dependencies.
Product Features
BIM-FAQS/PCS provides event-based scheduling, including a comprehensive online user interface and a full set of batch utilities. BIM-FAQS/PCS features:
• Event-driven scheduling
• An easy-to-use online system
• JCL management
• Extensive online information and batch reports
• Comprehensive security and configuration
• Integration with many other products
BIM-FAQS/PCS requires no modifications to the IBM operating system.

What Is an Event?
1–2 BIM-FAQS/PCS
What Is an Event? Introduction
In BIM-FAQS/PCS, the term event has two distinct, yet related, meanings:
• A command processed by the scheduler
• Any occurrence detected on the system
Commands As Events
A BIM-FAQS/PCS event can be thought of as a command that will be processed by the scheduler. An event command can be, for example:
• A user job
• An operator command
• A POWER command
• A scheduler command
• A compiled REXX procedure
Event Definition
In addition to the command that will be issued, an event can also contain requirements that must be met before the command can be issued. The command and its requirements, together, make up the event definition. The event definition helps the scheduler know when to process the command. For example, you can define an event command to be issued according to:
• Day and time of day
• Manual conditions that must take place
• Data that must be entered before manual conditions are executed
• Available resource percentages
• Alteration of a BIM-FAQS/PCS global variable
• Notification from another product
• Multiple jobs from specific partitions completing in a designated order and with certain return codes
• Any combination of the above dependencies
Once the event dependencies have been satisfied, BIM-FAQS/PCS automatically schedules the event command--on time, every time, without error. Your systems and operations staffs no longer have to worry about calendar cycles, dependencies, and job conflicts.

What Is an Event?
Trial Guide 1–3
System Occurrences As Events
The BIM-FAQS/PCS scheduler also recognizes an event as any occurrence detected on the system. An event in this sense can be the execution of a DOS job or the occurrence of a console message. So, you can define an event to be scheduled upon the completion of another event--in other words, you can specify that an event command be scheduled upon the completion of a DOS job or the occurrence of a console message.
About Defining Events
In this trial, you will define events using BIM-FAQS/PCS Online panels. Event definition is fast and easy with BIM-FAQS/PCS for the following reasons:
• You can define events by filling in fields on panels. These fields eliminate the need to learn the syntax for event definition statements.
• You can easily verify when your event will run by displaying a processing period calendar. This calendar displays the days of the month when the event is valid for scheduling. All of this is accomplished without leaving the event definition panel.
• You can determine the valid values for a particular field by using field-level help. For instance, you can access a list of all supplied scheduling keywords by placing the cursor in the field and pressing PF1; an online help panel is displayed and the keywords are described.
BIM-FAQS/PCS Scheduler and Schedules
1–4 BIM-FAQS/PCS
BIM-FAQS/PCS Scheduler and Schedules Introduction
In this trial, you will learn the basics of how to set up a schedule. A schedule is a set of events. Setting up a schedule involves determining when events should run, what events have to run before other events, what events cannot run at the same time, and the order of all events in the schedule.
Master Vs. Current Schedule
The master schedule, also known as the master event maintenance file, is the permanent file that contains all BIM-FAQS/PCS events. The current schedule, also known as the current event maintenance file, contains all events defined for the current processing period. In other words, the current schedule contains all of the events waiting to be scheduled.
The BIM-FAQS/PCS scheduler loads a subset of events contained in the master schedule into the current schedule each day at midnight by default. In order to be scheduled, events in the master event maintenance file must be transferred to the current event maintenance file.
In this trial, you'll define events in the master event maintenance file and transfer them to the current event maintenance file to be scheduled.
JCLSCHED
JCLSCHED, the BIM-FAQS/PCS scheduler, is the control program that monitors the current event maintenance file. It scans the events in the current schedule, examines the event commands, locates the commands that are ready to be processed, and processes those commands.

BIM-FAQS/PCS Online
Trial Guide 1–5
BIM-FAQS/PCS Online Introduction
Online refers to the accessing of information in BIM-FAQS/PCS by means of the computer terminal. The BIM-FAQS/PCS Online facility is composed of a series of panels that enable you to display, create, change, and track information in BIM-FAQS/PCS.
Online Interfaces
You can access the online system through any of the following interfaces:
• CMS
• CICS
• VTAM
In this trial, you'll learn how to initialize the VTAM and CICS interfaces for BIM-FAQS/PCS.
Directories
Most BIM-FAQS/PCS online panels present information in a "directory" format. Directories offer the following advantages:
• Panel hierarchies enable you to access information of increasing detail on successive panels, usually by cursor-selecting the desired item.
• Prefix commands entered next to an item enable you to manipulate it or to access related information. For example, the Audit History information associated with an event can be accessed by using the A command.
• Subsets of a directory can be viewed using selection criteria provided on many displays. For example, you can view only those events that have completed execution.
In this trial, you'll be using online panels to configure your system, define events, display event directories, and access event history information.
Online Help
All BIM-FAQS/PCS panels offer online help. Selected panels also offer field-sensitive help.

JCL Management
1–6 BIM-FAQS/PCS
JCL Management Introduction
BIM-FAQS/PCS supports user job control in many existing libraries. You can retrieve JCL from:
• BIM-FAQS/PCS partitioned datasets
• VSE libraries
• CMS minidisks
• ICCF libraries
• BIM-EDIT, CA-PANVALET, CONDOR, CA-VOLLIE, and CA-LIBRARIAN, libraries
BIM-FAQS/PCS PDS
BIM-FAQS/PCS supplies its own PDS (partitioned dataset). You can keep your JCL where it currently resides or move it to the BIM-FAQS/PCS PDS.
Conditional JCL
BIM-FAQS/PCS supports conditional JCL (submit time and run time) that can:
• Set and query global variables
• Substitute variable data anywhere in a job
• Insert additional jobsteps
• Initiate REXX IMODs
• Alter job flow (conditional branches)
Modifying JCL
BIM-FAQS/PCS lets you modify JCL--including actual date or JCL substitution--before or during job execution.
Additional Functions
BIM-FAQS/PCS provides additional functions for JCL that resides in the PDS, such as:
• Security and auditing control
• Report cross-referencing
• JCL global updating

Online Displays and Batch Reports
Trial Guide 1–7
Online Displays and Batch Reports Introduction
BIM-FAQS/PCS provides you with a variety of online displays and batch reports that keep you informed about your past, present, and future schedule activity.
History Information
BIM-FAQS/PCS enables you to view data about your events and jobs that have already been scheduled. For your trial, you'll view the following two displays:
• The Audit History display provides information about the activity of events and PDS members. Changes to BIM-FAQS/PCS events or JCL members create audit records. All auditing information is available for viewing online.
• The Account History display provides information about all jobs submitted by BIM-FAQS/PCS. Accounting displays are available online to view summarized average start time, duration, CPU usage, and I/Os initiated by all executions of an event.
Current Schedule Information
BIM-FAQS/PCS enables you to view data about your current schedule and event definitions. For your trial, you'll produce the Event Cross-Reference report, which displays cross-references of events based on their dependency conditions.
Forecast Information
By using BIM-FAQS/PCS's forecasting displays and reports, you can project how your schedule will be working in the future. The forecasting information shows you the events that will trigger on a targeted day or series of days, according to information in the current schedule. For your trial, you'll view the following two forecasting displays:
• The Event Forecast display shows you the events that will be scheduled on a specified day.
• The Partition Occupancy report displays the partitions that events might run in on a future date.

Security and Configuration
1–8 BIM-FAQS/PCS
Security and Configuration Security and Configuration
BIM-FAQS/PCS security and configuration are defined online. With security definitions, you can control access to:
• Online panels
• BIM-FAQS/PCS events and event groups
• PDS members
• User classes
• BIM-FAQS/PCS utilities
With configuration options, you can establish options for the system or for a specific user ID. In this trial, you'll be defining some of the system configuration options.
System Configuration
To set up configuration for the system, you can define:
• Event definition defaults
• CMS server defaults
• User classes for common security needs
• Global system options, including batch configuration defaults
• External library defaults
• CPU ID synonyms
• Holidays and cycles
User Configuration
You can also set up configuration for a specific user ID. For example, you can define:
• CMS submission defaults
• Event definition defaults

Integration with Other Products
Trial Guide 1–9
Integration with Other Products Introduction
The following examples demonstrate how BIM-FAQS/PCS can be integrated with other products:.
Product Example
BIM-FAQS/ASO BIM’s VSE automated operations and console management product can inform BIM-FAQS/PCS of message occurrences. Then BIM-FAQS/PCS can take appropriate action, including scheduling a job, issuing a command, or executing a REXX procedure.
CA-EXPLORE for VSE CA-EXPLORE for CICS CA-EXPLORE for SQL/DS
All of Computer Associates VSE performance monitors can notify BIM-FAQS/PCS when thresholds are reached, to invoke a predefined event such as a file reorganization.
CA-MASTERCAT for VSE CA-MASTERCAT manages and maintains VSAM datasets and can detect when a VSAM file is nearly full. You can use BIM-FAQS/PCS to schedule a job to reallocate the file through CA-FAVER, Computer Associates fast VSAM backup, restore, and reorganization product.
You can also access multiple BIM and CA products from a single panel. You can easily toggle between the products and identify problems, without having to exit one product to get to another.
Beyond Your Trial For More Information
In your trial, you will use many of the BIM-FAQS/PCS features described in this introduction. However, BIM-FAQS/PCS has many more advanced features that you will want to explore once you have become familiar with it.
For more information about BIM-FAQS/PCS, see the following documentation:
• BIM-FAQS (ASO & PCS) Installation and Initialization Guide
• BIM-FAQS/PCS Implementation Guide
• BIM-FAQS/PCS Operations Guide

Beyond Your Trial
1–10 BIM-FAQS/PCS

Trial Guide 2–1
Chapter 2 Installing and Initializing BIM-FAQS/PCS
This chapter covers everything you need to know to install BIM-FAQS/PCS successfully.
In This Chapter What You'll Learn
In this chapter, you'll learn to:
• Install BIM-GSS
• Install BIM-FAQS/PCS
• Initialize BIM-FAQS/PCS
• Activate the scheduler
• Initialize an online interface
• Tailor the control file
• Setup BIM-ALERT/VSE
What You Need to Know
All the tasks discussed in this chapter must be performed as described in order to ensure a smooth and trouble-free trial.
Before you install BIM-FAQS/PCS, you must first successfully install BIM-GSS.
Before you can use BIM-FAQS/PCS, you must install the product, initialize it, and start an online interface for it.
BIM-GSS Product Users
If you have BIM-EPIC, or BIM-FAQS/ASO installed on your system, you have already installed BIM-GSS. However, please continue reading this section. You'll want to make sure you have the current version of BIM-GSS installed, and you also need to make sure the sizes of the required PDSs are sufficient to run BIM-FAQS/PCS.

In This Chapter
2–2 BIM-FAQS/PCS
BIM-FAQS/ASO Users
If you have BIM-FAQS/ASO installed on your system, you have already installed BIM-GSS and BIM-FAQS/PCS. You do not need to read through the procedures in the following sections, but please continue with the trial by reading the section titled "Activating the Scheduler".
Topics
This chapter covers the following topics:
Topic See
Installing BIM-GSS
Defining a residence library
Defining labels for required PDSs
Running the installation jobstream, IDCM
Installing BIM-GSS
Installing BIM-FAQS/PCS
Defining labels for the BIM-FAQS/PCS PDS
Defining the FAQSMSG VSAM file (only pre-ESA 2.x systems)
Running the installation jobstream, IASO
Installing BIM-FAQS/PCS
Initializing BIM-FAQS/PCS Initializing BIM-FAQS/PCS
Activating the scheduler Activating the Scheduler
Initializing online interfaces:
• CICS
• VTAM
Initializing Online Interfaces
Tailoring the control file Tailoring the Control File

Installing BIM-GSS
Trial Guide 2–3
Installing BIM-GSS
Task Overview
Introduction
To avoid unnecessary duplication of common code, BIM provides BIM-GSS (Global SubSystem). You must have BIM-GSS successfully installed on your system before you can install BIM-FAQS/PCS.
This section covers preinstallation considerations and the BIM-GSS installation procedure.
Why You Need BIM-GSS
BIM-GSS helps to make your VSE data center more efficient. BIM-GSS contains various phases and panel procedures that are common to BIM-FAQS/ASO and BIM-FAQS/PCS, in addition to many CA products. By combining these common elements in one set of code, BIM-GSS ensures that these products:
• Will not cause an unnecessary burden on storage
• Will not experience downlevel code conflicts
• Will be compatible and have the same look and feel
For More Information
For more information about BIM-GSS, see the following BIM-GSS documentation:
• BIM-GSS Installation Guide
• BIM-GSS Utilities Guide
• BIM-GSS REXX User's Guide
• BIM-GSS Messages Guide
Tasks
In this section of the trial, you will have the opportunity to perform the following tasks:
Task Action
I Define a residence library
II Define labels for the required PDSs
III Run IDCM, the BIM-GSS installation jobstream

Installing BIM-GSS
2–4 BIM-FAQS/PCS
Task I: Defining a Residence Library
Requirements
You must allocate disk space to store the residence library dataset. Do not use your VSE machine's SYSRES library as the BIM-GSS residence library.
Create Your Own Residence Library
For the purposes of this trial, create your own lib.sublib and use it as the BIM-GSS residence library. You must use this lib.sublib as the BIM-FAQS/PCS residence library when you install BIM-FAQS/PCS. For example, you could install into a lib.sublib called BIMPCS.TRIAL.
Disk Space Conversion Chart
Your residence library will require about 5000 1K library blocks. This amount of disk space should be sufficient for BIM-GSS and BIM-FAQS/PCS.
Use the following table to translate this figure into tracks and cylinders for the type of DASD where the residence library will reside:
DASD Type Number of 1K Blocks Per Track
Number of 1K Blocks Per Cylinder
3330 11 209
3340 7 84
3350 15 450
3375 25 300
3380 46 690
3390 55 824
Conclusion
Once you've defined a residence library using LIBR, you're ready to define labels for the required PDSs. Since BIM-GSS contains phases and screen procedures that BIM-FAQS/PCS needs, defining labels for these PDSs ensures a smooth and trouble-free BIM-FAQS/PCS installation.

Installing BIM-GSS
Trial Guide 2–5
Task II: Defining Labels for Required PDSs
Introduction
Successful BIM-GSS installation requires that the CSS$MON and CSS$VIO PDSs (partitioned datasets) have appropriate labels. A PDS is a dataset containing members that are directly accessible from the device where they reside. BIM-GSS formats CSS$MON and CSS$VIO if they don't already exist, but you must define appropriate labels for them.
Required PDSs (Partitioned Datasets)
You must define labels for the following PDSs prior to installing BIM-GSS:
PDS Contents
CSS$MON BIM-supplied IMODs
JCL statements
CSS$VIO System control files
Screen definition files
Files containing password definitions and other control information
Temporary PDS processing space
Procedure
To define labels for CSS$MON and CSS$VIO, follow these steps:
1. Include DLBL and EXTENT statements for CSS$MON and CSS$VIO in your system standard labels.
2. Define CSS$MON and CSS$VIO as sequential files.
3. Specify a volume serial number and omit the logical unit.
4. Allocate at least 3000 4K blocks (24000 FBA blocks) of disk space for each PDS.

Installing BIM-GSS
2–6 BIM-FAQS/PCS
Sample JCL
The following table shows sample DLBL and EXTENT statements for CSS$MON and CSS$VIO on a 3380 DASD:
PDS Sample JCL
CSS$MON // DLBL CSS$MON,'file.ID',99/365 // EXTENT ,RES001,1,0,7680,300
CSS$VIO // DLBL CSS$VIO,'file.ID',99/365 // EXTENT ,RES001,1,0,30,300
file.ID is the unique file identifier you assign to CSS$MON or CSS$VIO. We recommend you use a file identifier that suggests the function of the PDS.
Avoiding IPL Before Installation
You can use the OPTION STDLABEL=ADD statement to update your standard labels and avoid an IPL before installation.
Conclusion
Once you've defined labels for the required PDSs, you're ready to install BIM-GSS.

Installing BIM-GSS
Trial Guide 2–7
Task III: Running the Installation Jobstream, IBGS
Introduction
The BIM-GSS installation jobstream, called IBGS, asks questions about your environment and then performs the installation.
The IBGS jobstream is loaded into the POWER RDR queue, link-edits the IBGS installation program, and catalogs that program into the lib.sublib you specify.
The system display in the procedure below presents those messages requiring a response. However, you'll see a number of messages not documented here; these messages are normal.
The installation procedure must complete successfully before you can install BIM-FAQS/PCS. If you encounter any problems with the installation, see Appendix A, "Sample Error Messages." Appendix A contains a list of IBGS error messages you could encounter.
Procedure
To load the installation jobstream and install BIM-GSS, follow these steps:
1. Start a POWER RDR task on the tape device where the installation tape is mounted. To do this, enter:
S RDR,cuu
where cuu is the address of the tape device.
2. Release IBGS. Enter:
R RDR,IBGS
IBGS is placed in the POWER RDR queue with class 0 and disposition L. IBGS must run in the BG (background) partition because the installation performs a SET SDL.
3. Enter 0 SETPARM LIB='lib.sublib'
where lib is the library and sublib is the sublibrary where you want to install BIM-GSS.

Installing BIM-GSS
2–8 BIM-FAQS/PCS
IBGS prompts you to specify a lib.sublib where you want to install BIM-GSS.
BG 000 * --------------------------------------------------------+ BG 000 * BIM-GSS VERSION 5.3A | BG 000 * | BG 000 * THIS TAPE CONTAINS THE BIM-GSS MODULES AND IS REQUIRED | BG 000 * FOR BIM-FAQS/ASO, BIM-FAQS/PCS AND BIM-EPIC | BG 000 * | BG 000 * | BG 000 * IJSYSRS.SYSLIB INSTALLS ARE DISCOURAGED BUT ALLOWED. | BG 000 * BIM-FAQS/ASO AND BIM-FAQS/PCS MUST BE DISABLED IF | BG 000 * YOU MUST INSTALL INTO THE VSE SYSTEM LIBRARY, | BG 000 * IJSYSRS.SYSLIB SINCE THE SVA IS RELOADED. THIS CAN | BG 000 * CAUSE SERIOUS PROBLEMS AND AN IPL WILL BE REQUIRED | BG 000 * WITH THE POSSIBILITY OF MIXED RELEASES. | BG 000 * | BG 000 * ALSO, THE MOST COMMON CAUSE OF MIXED RELEASES IS | BG 000 * DUE TO HAVING $PHASES RESIDING IN SYSRES AND | BG 000 * TRYING TO TEST A NEW VERSION IN ANOTHER LIBRARY. | BG 000 * IJSYSRS.SYSLIB IS SEARCHED FIRST FOR PHASES THAT | BG 000 * START WITH "$" | BG 000 * --------------------------------------------------------+ BG 000 // PAUSE ENTER ==> 0 SETPARM LIB='LIB.SUBLIB'
4. Enter 0
IBGS accepts the SETPARM statement and waits. The following statement is displayed:
*BG-000 0D61D READY
5. Enter 0 cuu
where cuu is the address of the tape device where the installation tape is mounted. IBGS prompts you for the address of the tape drive containing the installation tape.
Enter 0 YES if the information is correct or enter 0 CANCEL if you do not want to link-edit the modules into the library specified by lib.sublib or if you have specified the tape drive incorrectly. IBGS displays the following:
0c0 BG 000 * --------------------------------------------------------+ BG 000 | DO YOU WISH TO INSTALL INTO lib.sublib FROM cuu | BG 000 | ENTER YES OR CANCEL | BG 000 +---------------------------------------------------------+

Installing BIM-GSS
Trial Guide 2–9
6. Enter: 0 xxxx
where xxxx is either MSHP or LIBR. IBGS displays the following:
yes BG 000 * --------------------------------------------------------+ BG 000 | DO YOU WISH TO INSTALL USING MSHP OR LIBR | BG 000 | ENTER MSHP OR LIBR | BG 000 +---------------------------------------------------------+
When you see this message, the BIM-GSS installation is complete: mshp
BG 000 * --------------------------------------------------------+ BG 000 * BIM-GSS VERSION 5.3A | BG 000 * | BG 000 * That's all folks.... | BG 000 * --------------------------------------------------------+
Conclusion
Your BIM-GSS installation is complete. You're ready to install BIM-FAQS/PCS.

Installing BIM-FAQS/PCS
2–10 BIM-FAQS/PCS
Installing BIM-FAQS/PCS
Task Overview
Introduction
Now that you've successfully installed BIM-GSS, you're ready to install BIM-FAQS/PCS. You need to take some preliminary steps, just like you did with BIM-GSS, before you can install BIM-FAQS/PCS. This section covers preinstallation considerations and the BIM-FAQS/PCS installation procedure.
Tasks
In this section, you will have the opportunity to perform the following tasks:
Task Action
I Define a label for the BIM-FAQS/PCS PDS
II Define the FAQSMSG VSAM file (only pre-ESA 2.x)
III Run IASO, the BIM-FAQS/PCS installation jobstream

Installing BIM-FAQS/PCS
Trial Guide 2–11
Task I: Defining a Label for the BIM-FAQS/PCS PDS
Introduction
Before you install BIM-FAQS/PCS, you should define a label for the CSS$EVT and CSS$LOG PDS’s. CSS$LOG supports dataset logging for BIM-FAQS/PCS. CSS$EVT contains the event definition and various other event information.
BIM-FAQS/PCS has audit and accounting capabilities that has the data put onto this CSS$LOG PDS. Therefore it is necessary to make this large enough to hold this data. You can access this through the online and batch system.
Dataset Logging Feature
Using the dataset dependency feature, BIM-FAQS/PCS lets you define an event to be dependent on the activity of a dataset. For example, you can specify that an event not be scheduled if a file is open or being updated. Or you can specify that an event be scheduled only if a file has been updated or only after a file is closed.
The dataset logging facility enables you to view detailed dataset history information. You can see who updated files and when the files were opened and closed. This audit information is helpful when identifying datasets used by programs and jobstreams, or all programs that access certain datasets. CSS$LOG is the PDS that contains these records.
We won't offer examples of using CSS$LOG for the purposes of the trial. However, once you've defined a label for this file, the file will be formatted during the installation for use at a later date. So, if you want to explore BIM-FAQS/PCS features on your own, you'll be prepared to do so successfully.
Procedure
To define labels for CSS$EVT and CSS$LOG, follow these steps:
1. Include DLBL and EXTENT statements for CSS$EVT and CSS$LOG in your system standard labels.
2. Define CSS$EVT and CSS$LOG as sequential files.
3. Specify a volume serial number and omit the logical unit.
4. Allocate at least 3000 4K blocks (36000 FBA blocks) for CSS$LOG.
5. Allocate at least 2000 4K blocks (16000 FBA blocks) for CSS$EVT.

Installing BIM-FAQS/PCS
2–12 BIM-FAQS/PCS
Sample JCL
The following shows sample DLBL and EXTENT statements for CSS$EVT and CSS$LOG on a 3380 DASD: // DLBL CSS$EVT,'file.ID',99/365 // EXTENT ,RES001,1,0,2500,200 // DLBL CSS$LOG,'file.ID',99/365 // EXTENT ,RES001,1,0,7680,3000
file.ID is the unique file identifier you assign to each PDS. We recommend you use a file identifier that suggests the function of each PDS.
Conclusion
Once the BIM-FAQS/PCS PDS’s have labels, you need to define the FAQSMSG VSAM file (only on pre-ESA 2.x systems).

Installing BIM-FAQS/PCS
Trial Guide 2–13
Task II: Defining the FAQSMSG VSAM File
Introduction
This task is only applicable for pre-ESA 2.x system users. The FAQSMSG VSAM file contains system and user-defined messages.
Procedure
To define the FAQSMSG VSAM file, take the following steps:
1. Specify a DLBL of FAQSMSG. The DLBL must be FAQSMSG, and it must reside in system standard labels.
2. Specify a key length of 12 and a key position of 0.
3. Specify an average record size of 1024 bytes and a maximum record size of 6000 bytes.
Sample JCL
The following shows sample JCL for defining the FAQSMSG VSAM file: // JOB DEFINE - DEFINE VSAM FILE // EXEC IDCAMS,SIZE=AUTO DEFINE CLUSTER - VOL(volser) - NAME(BIM.FAQS.ERROR.MESSAGE) - SHAREOPTIONS(2) - KEYS(12 0) - FSPC(10 10) - INDEXED) - DATA - CYL(2 1) - NAME(BIM.FAQS.ERROR.MESSAGE.DATA) - RECSZ(1024 6000) - CISZ(6144)) - INDEX - NAME(BIM.FAQS.ERROR.MESSAGE.INDEX)) - CATALOG(catalog) /* /&
catalog is the VSAM catalog name. volser is the DASD volume serial number.
Conclusion
Once you've defined the FAQSMSG VSAM file, you're ready to install BIM-FAQS/PCS.

Installing BIM-FAQS/PCS
2–14 BIM-FAQS/PCS
Task III: Running the Installation Jobstream, IASO
Introduction
The installation jobstream, IASO, contains multiple files. The first file is a POWER RDR file containing the installation jobstream. The installation jobstream performs a link-edit to the lib.sublib that you specify.
Note that in the following procedure you will be installing BIM-FAQS/PCS and BIM-FAQS/ASO. These products must be installed together--you cannot install one without the other. Since they share phases and online screens, it's easier and more efficient to consolidate the installation procedure for both products. Once the installation is complete, you will need to initialize only BIM-FAQS/PCS.
The installation procedure must complete successfully. Failure to install BIM-FAQS/PCS without errors will seriously impact your ability to benefit from this trial. If you encounter any problems with the installation, see Appendix A, "Sample Error Messages." Appendix A contains a list of possible IASO error messages.
Residence Library
Install BIM-FAQS/PCS into the same residence library where you installed BIM-GSS.
Procedure
BIM-FAQS/PCS installation is interactive. At various points in the installation, you will be prompted to respond before the installation can continue. The procedure below presents the messages that require a response. However, you'll see a number of messages not documented here; these messages are normal. Some sample messages are given in the last step of the following procedure.
To load the installation jobstream and install BIM-FAQS/PCS, follow these steps:
1. Start a POWER RDR task on the tape device where the installation tape is mounted. Enter:
S RDR,cuu
where cuu is the address of the tape device.
2. Release IASO. Enter:
R RDR,IASO
IASO is placed in the POWER RDR queue with class 0 and disposition L. IASO must run in the BG (background) partition because the installation performs a SET SDL.

Installing BIM-FAQS/PCS
Trial Guide 2–15
3. Enter:
0 SETPARM LIB='lib.sublib'
where lib is the library and sublib is the sublibrary where you want to install BIM-FAQS/PCS.
IASO prompts you to specify a lib.sublib where you want to install BIM-FAQS/PCS. At the prompt, enter the name of the lib.sublib you chose as the BIM-FAQS/PCS residence library.
BG 000 * --------------------------------------------------------+ BG 000 * BIM-FAQS VERSION 5.3A FOR VSE/ESA 1.3 AND ABOVE | BG 000 * | BG 000 * BIM-FAQS/ASO AND BIM-FAQS/PCS | BG 000 * | BG 000 * BIM-FAQS/ASO - AUTOMATED SYSTEMS OPERATIONS, CONSOLE | BG 000 * MANAGEMENT, ONLINE TOOLS AND SYSTEM | BG 000 * ENHANCEMENTS | BG 000 * BIM-FAQS/PCS - PRODUCTION CONTROL SYSTEM FOR VSE | BG 000 * | BG 000 * 1. WHAT LIBRARY.SUBLIBRARY WILL BE USED ? | BG 000 * AT THE PAUSE ENTER A SETPARM FOR THE | BG 000 * TARGET OR RESIDENCE LIBRARY.SUBLIB | BG 000 * | BG 000 * 0 SETPARM LIB='LIB.SUBLIB' | BG 000 * | BG 000 * IJSYSRS.SYSLIB INSTALLS ARE DISCOURAGED BUT ALLOWED. | BG 000 * BIM-FAQS/ASO AND BIM-FAQS/PCS MUST BE DISABLED IF | BG 000 * YOU ARE INSTALLING INTO IJSYSRS.SYSLIB SINCE THE SVA | BG 000 * IS RELOADED. THIS CAN CAUSE SERIOUS PROBLEMS AND AN | BG 000 * IPL WILL BE REQUIRED WITH THE POSSIBILITY OF MIXED | BG 000 * RELEASES. | BG 000 * | BG 000 * ALSO, THE MOST COMMON CAUSE OF MIXED RELEASES IS | BG 000 * DUE TO HAVING $PHASES RESIDING IN SYSRES AND | BG 000 * TRYING TO TEST A NEW VERSION IN ANOTHER LIBRARY. | BG 000 * IJSYSRS.SYSLIB IS SEARCHED FIRST FOR PHASES THAT | BG 000 * START WITH "$". | BG 000 * --------------------------------------------------------+ BG 000 // PAUSE ENTER ==> 0 SETPARM LIB='LIB.SUBLIB' *BG-000
4. Enter: 0
IASO accepts the SETPARM statement and waits. The following statement is displayed:
BG 000 * 0D61D READY

Installing BIM-FAQS/PCS
2–16 BIM-FAQS/PCS
5. Enter: 0 cuu
where cuu is the address of the tape device where the installation tape is mounted.
IASO prompts you for the address of the tape drive containing the installation tape.
6. Enter 0 YES if the information is correct.
Enter 0 CANCEL if you do not want to install into the library specified by lib.sublib, or if you have specified the tape drive incorrectly. IASO displays the following:
0c0 BG 000 * --------------------------------------------------------+ BG 000 * DO YOU WISH TO INSTALL INTO lib.sublib FROM cuu | BG 000 * ENTER YES OR CANCEL | BG 000 *---------------------------------------------------------+ *BG-000
7. Enter: 0 xxxx
where xxxx is either MSHP or LIBR. IASO displays the following:
yes BG 000 * --------------------------------------------------------+ BG 000 * DO YOU WISH TO INSTALL USING MSHP OR LIBR | BG 000 * ENTER MSHP OR LIBR | BG 000 * --------------------------------------------------------+ *BG-000
8. Enter: 0 YES
IASO displays the following:
mshp BG 000 * --------------------------------------------------------+ BG 000 * DO YOU WISH TO INSTALL BIM-FAQS/ASO and BIM-FAQS/PCS | BG 000 * ENTER YES OR NO | BG 000 * --------------------------------------------------------+ *BG-000
Note: BIM-FAQS/ASO and BIM-FAQS/PCS must be installed together. Since these products share common phases and online screens, it's easier and more efficient to consolidate the installation procedure for both products.

Installing BIM-FAQS/PCS
Trial Guide 2–17
9. Enter: 0 xxx
where xxx is YES or NO. IASO displays the following:
yes
IASO displays a series of messages. These messages are all informational. BG 000 DCM SYSTEMS - BIM-FAQS/ASO V5.3A - FAQSMSG
BG 000 UTILITY PROGRAM BG 000 GFV130I nnnn RECORDS READ BG 000 GFV131I nnnn RECORDS WRITTEN
These messages will be repeated until all the system messages and help screens are loaded.
The following message indicates that the installation is complete: BG 000 * --------------------------------------------------------+ BG 000 * BIM-FAQS VERSION 5.3A | BG 000 * | BG 000 * THAT'S ALL FOLKS . . . | BG 000 * --------------------------------------------------------+
Conclusion
Congratulations! You just performed a complete installation of BIM-FAQS/PCS.
Now you must initialize BIM-FAQS/PCS, and you must initialize at least one online interface for it. Once BIM-FAQS/PCS is initialized, you can use all of its powerful online features.

Initializing BIM-FAQS/PCS
2–18 BIM-FAQS/PCS
Initializing BIM-FAQS/PCS
Task Overview
Introduction
Installing BIM-FAQS/PCS is only the first step in using the product. Once it is installed, you must start it. If you do not initialize the product, it literally will not work.
Task
In this section, you'll have the opportunity to initialize BIM-FAQS/PCS using the sample jobstream provided in “Procedure: Sample Jobstream,” in the next section.
Running the Initialization Jobstream
Introduction
For your trial, we recommend that you run a jobstream like the sample jobstream in “Procedure: Sample Jobstream” later in this section to initialize BIM-FAQS/PCS for your trial. The recommended jobstream is the safest, fastest method for getting BIM-FAQS/PCS up and running.
For the purposes of your trial, run the sample jobstream as a batch job. However, as a general rule, you would put the BIM-FAQS/PCS initialization procedure in your BG ASI IPL procedure.
VSE/SP Users
If you are running VSE/SP, activate BIM-FAQS/PCS using JCLXCU before POWER startup.
Multiple-CPU Considerations
Run the sample jobstream on every CPU used to schedule jobs, and on every CPU where BIM-FAQS/PCS job conditions will occur.
What This Jobstream Does
The sample jobstream initializes BIM-FAQS/PCS, and activates various BIM-FAQS/PCS features. The following utilities and statements are contained in the sample jobstream:
• JCLXCU is the BIM batch utility that enables you to initialize BIM-FAQS/PCS.

Initializing BIM-FAQS/PCS
Trial Guide 2–19
• The ENABLE statement activates BIM-FAQS/PCS job hooks, which are responsible for enabling various features and for data collection. ENABLE LOAD=N enables all of the BIM-FAQS/PCS hooks necessary for this trial.
SVA Storage Requirements
The sample jobstream also loads phases into the SVA. Make sure you have enough storage before running this jobstream:
• If you have any other products that use BIM-GSS, you will need 80-100K of SVA storage.
• If you do not have any other products that use BIM-GSS, you will need 120-140K of SVA storage.
System GETVIS
System GETVIS is required. The minimum used is 4K, the maximum used is 472K. 2048 Events will require 68K (Default). To calculate amount required use the following formula: ((32bytes * #evts) + 32)
rounded to next 4K.
Procedure: Sample Jobstream
To initialize BIM-FAQS/PCS, run a jobstream like the following:
$$ JOB JNM=JCLXCU.CLASS=0,DISP=D
// JOB JCLSCU
// LIBDEF *,SEARCH=lib.sublib
* SET SVA PHASES
SET SDL
JCLPOST,SVA
PCSADR,SVA
PCSSUC,SVA
GSAOGEM,SVA (only if you do not have BIM-FAQS/ASO)
$FAQS,SVA (only if you do not have BIM-FAQS/ASO and use IMODs)
$FAQSAO,SVA (only if you do not have BIM-FAQS/ASO and use IMODs)
BIM$PV21,SVA (only if you do not have BIM-FAQS/ASO)

Initializing BIM-FAQS/PCS
2–20 BIM-FAQS/PCS
BIM$PV31,SVA (only if you do not have BIM-FAQS/ASO)
/*
* START BIM-FAQS/PCS
// EXEC JCLXCU,SIZE=JCLXCU
ENABLE LOAD=N,EVENTS=2500
/*
/&
* $$ EOJ
where lib.sublib is the BIM-FAQS/PCS residence library you specified at the installation.
The SET SDL entries for BIM$PV24 and BIM$PV31 are only required if BIM-FAQS/ASO is not used.

Initializing BIM-FAQS/PCS
Trial Guide 2–21
Sample Messages
When you run the sample jobstream above, you'll see a series of messages similar to the following. These messages are normal. * STARTUP FAQS/PCS GJJ304I BIM-FAQS/PCS V5.3A ACTIVE. CPUID=039001 GJJ349I BIM-FAQS/PCS PRODUCT DEFINED TO IBM GJJ316I BIM-FAQS/PCS JOBEXIT ENABLE REQUESTED GJJ313I PCS $JOBEX00 SDL SUCCESSFULLY ACTIVATED GJJ344I PCS $JOBEXIT ACTIVATED AS $JOBEX00 GJJ316I BIM-FAQS/PCS JCLACCT ENABLE REQUESTED GJJ313I PCS $JOBACCT SDL SUCCESSFULLY ACTIVATED GJJ325I BIM-FAQS/PCS ACCOUNT LOGGING ACTIVATED GJJ830I EVENTS SUCCESSFULLY LOADED GJJ316I BIM-FAQS/PCS $$BOPEN ENABLE REQUESTED GJJ313I PCS $$BOPEN SDL SUCCESSFULLY ACTIVATED GJJ316I BIM-FAQS/PCS $$BCLOSE ENABLE REQUESTED GJJ313I PCS $$BCLOSE SDL SUCCESSFULLY ACTIVATED
Conclusion
You just initialized BIM-FAQS/PCS using the recommended sample jobstream.
In the next section, you'll learn how to initialize one or more of the BIM-FAQS/PCS online interfaces.

Activating the Scheduler
2–22 BIM-FAQS/PCS
Activating the Scheduler
Task Overview
Introduction
In this section, you'll activate JCLSCHED, BIM-FAQS/PCS's powerful event scheduler. JCLSCHED schedules events and dispatches event commands.
JCLSCHED Storage Requirements
Before activating JCLSCHED, make sure the partition where JCLSCHED will run meets the following storage requirements.
The following requirements are for the BIM-FAQS/PCS trial only. In the future, you may need to adjust storage space depending on the BIM-FAQS/PCS functions you will use.
1 Meg of partition GETVIS is recommended.
To run You need a minimum of
BIM-FAQS/PCS 400K for phases loaded and scheduler commands
BIM-FAQS/PCS and BIM-FAQS/ASO
700K for phases loaded and for running BIM-FAQS/ASO under the scheduler
Activating the Scheduler
Trial Guide 2–23
Activating the Scheduler
Introduction
When JCLSCHED starts up, it locates the JCLSCHED.CTL member in the CSS$MON PDS, reads it, and executes the commands found there. Later in this chapter, you'll learn how to add startup commands to your JCLSCHED.CTL member in order to automate your initialization procedure.
WARNING!
BIM-FAQS/ASO users, please note that the JCLSCHED.CTL file contains the command AUTO &FAQSAO, which may already be running under BIM-FAQS/ASO. Remove this command from the JCLSCHED.CTL file, or terminate the program. For information about tailoring your JCLSCHED.CTL member, see the section entitled, “Tailoring the Control File.”
Activation Methods
You can start JCLSCHED using either of the following methods:
• As a main task in any partition
• As a subtask of CICS (not recommended for VSE/ESA 1.3+ systems)
As a Main Task
Activating JCLSCHED as a main task is the preferred activation method--it is also the easier method.
To activate JCLSCHED as a main task in a dedicated batch partition, execute the following JCL: // JOB JCLSCHED // LIBDEF *,SEARCH=lib.sublib // EXEC JCLSCHED,SIZE=JCLSCHED /* /&
where lib.sublib is the residence library where you installed BIM-FAQS/PCS.
The JCL causes an outstanding reply ID on the console, enabling you to communicate with the scheduler. For example, you can respond to this reply ID by requesting that jobs be generated on demand.

Activating the Scheduler
2–24 BIM-FAQS/PCS
When you execute the JCL above, the following messages are displayed. You will see other messages as well, but these should be displayed. ** BIM-FAQS/PCS SCHEDULER V5.3A GJJ224I PROCESSING JCLSCHED.CTL COMMAND FILE GJJ228I BIM-FAQS/ASO INTERFACE INITIATION REQUESTED GJJ931I BIM-FAQS/PCS SERVER STARTED BIM-FAQS/ASO REXX PROCESSOR - FAQSAO V5.3A 12/23/05 VSE/SP 6.1.2 GJJ846I MESSAGE TABLE LOAD REQUESTED No CPU specific FAQSASO Initialization File found MSGNOH machine enabled Outstanding IMODS purged IMOD Instruction limit set to 20000 IMOD Search chain: MON, POWER PRINT - Wednesday - 11 Feb 2006 - 15:31:41 No CPU specific Auto Print file found GJJ206I JOB SCHEDULER ACTIVE
As a Subtask of CICS
To activate JCLSCHED as a subtask of CICS, you must enter the following CICS table entries where appropriate. Before making these changes, you may want to make sure you have enough GETVIS in the CICS partition to run the scheduler as a subtask.
Note: This is not recommended for VSE/ESA 1.3 and above.
CICS PCT entry: DFHPCT TYPE=ENTRY,TRANSID=PCSS,PROGRAM=PCSPLT
CICS PPT entry: DFHPPT TYPE=ENTRY,PROGRAM=PCSPLT,PGMLANG=ASSEMBLER
CICS PLT entry: DFHPLT TYPE=ENTRY,PROGRAM=PCSPLT,PGMLANG=ASSEMBLER
After you've made these changes, recycle CICS in order for these table entries to take effect.

Initializing Online Interfaces
Trial Guide 2–25
Initializing Online Interfaces
Overview
Introduction
The data processing needs of businesses today require products to be accessible from a variety of software environments. As a result, BIM-FAQS/PCS comes with multiple user interfaces. However, you must initialize at least one online interface before you can access BIM-FAQS/PCS Online. For example, if you want to access BIM-FAQS/PCS from CICS, you must first initialize a BIM-FAQS/PCS CICS interface.
Online Interfaces
In BIM-FAQS/PCS, an online interface lets you display and maintain scheduling data. You can use the interface to control BIM-FAQS/PCS schedules and events, display auditing and accounting information, and browse, update, submit, and delete JCL members. An online interface for BIM-FAQS/PCS is available through:
• CICS
• CMS
• VTAM
For this trial, you'll learn to initialize the CICS and VTAM interfaces. Choose the desired interface and refer to the indicated section:
To initialize the See
CICS interface Initializing the CICS Interface: BIM$TICI
VTAM interface Initializing the VTAM Interface: BIM$TIDR
CMS interface The BIM-FAQS/PCS Implementation Guide
BIM-FAQS/ASO Users
If you have BIM-FAQS/ASO, you already have an online interface running. You're ready to use BIM-FAQS/PCS Online. You can skip the following sections about initializing online interfaces, but please read the section titled "Tailoring the Control File".

Initializing Online Interfaces
2–26 BIM-FAQS/PCS
Initializing the CICS Interface: BIM$TICI
Introduction
If you want to access BIM-FAQS/PCS from CICS, you must initialize the BIM-FAQS/PCS CICS interface. You do this by modifying the required CICS table entries shown in the following procedure. You can modify the optional table entries, depending on your system requirements. Then you can access the BIM$TICI program, which enables you to use BIM-FAQS/PCS online in CICS.
BIM$TICI and BIM$TIDR
BIM$TICI works along with another program, BIM$TIDR; to use one, you must have the other. You must have BIM$TIDR loaded and running in a batch partition to access BIM$TICI from CICS.
BIM$TICI runs in the same partition as CICS, whereas BIM$TIDR runs in a different partition. Working through XPCC, BIM$TICI uses storage from the partition where BIM$TIDR is running, thereby freeing CICS storage for other uses.
Reasons to Use BIM$TICI
The most important reasons for using BIM$TICI are that it:
• Requires minimal CICS partition GETVIS
• Makes CICS storage available if you're CICS storage-constrained

Initializing Online Interfaces
Trial Guide 2–27
Procedure
Take the following steps to access BIM-FAQS/PCS from CICS:
1. Whether you're assembling your CICS table definitions or using RDO to initialize the BIM-FAQS/PCS CICS interface, the following CICS table modifications are required. From a CICS session, make the following PCT and PPT entries:
DFHPCT TYPE=ENTRY,TRANSID=PCS,PROGRAM=BIM$TICI DFHPPT TYPE=ENTRY,PROGRAM=BIM$TICI,PGMLANG=ASSEMBLER,RES=YES
where PCS is the valid transaction ID for BIM-FAQS/PCS.
2. Execute BIM$TIDR as:
A main task in a dedicated partition. Execute the following JCL in a batch partition:
// EXEC BIM$TIDR,SIZE=BIM$TIDR
A subtask of BIM-FAQS/PCS's job scheduler JCLSCHED. To get the online interface up and running temporarily, enter the following:
// EXEC JCLSCHED,SIZE=JCLSCHED
3. This causes an outstanding reply ID on the console, enabling you to communicate with the scheduler. Respond to this reply ID by entering the following:
replid $BIM$TIDR
where replid is the partition reply ID.
4. To permanently execute BIM$TIDR as a subtask of JCLSCHED, add the following statement to the JCLSCHED.CTL file:
AUTO $BIM$TIDR
Later in this chapter, you'll tailor the JCLSCHED.CTL member. For more information, see section entitled “Tailoring the Control File.”
5. From CICS, enter PCS to access the BIM$TICI interface. The BIM-FAQS/PCS Menu Index is displayed.
6. To exit BIM-FAQS/PCS Online, press PF12 (Exit). For more information on BIM$TIDR, see the BIM-FAQS (ASO & PCS) Installation and Initialization Guide.
7. Please refer to the section entitled “Tailoring the Control File.”

Initializing Online Interfaces
2–28 BIM-FAQS/PCS
Menu Index
JOLMENU0.5 ** BIM-FAQS/PCS Online V5.3A ** ID=VSE.Q008 ===> ** BIM-FAQS/PCS Online - Menu Index ** C Current Event Maintenance E Master Events Maintenance U PDS Update P Event Forecasting R Retrieve Member from CMS T Transfer to CMS Y Verify Process Periods Z Account History Display B Browse PDS Member F CA-FLEE Online H General Help M Utilities V Define Variables X Exit I REXX Member Update J BIM-FAQS/CALL Definitions W Work/Data Station A Audit History Display O Configuration Options S System Security D Resource Utilization PDS ===> MON (PDS ID for Security Display and Update) *** Copyright (c) 2002, CONNECTIVITY SYSTEMS, INC. *** PF1=Help PF3=Return PF4=MSHP PF12=Exit

Initializing Online Interfaces
Trial Guide 2–29
Initializing the VTAM Interface: BIM$TIDR
Introduction
BIM$TIDR is a VTAM application that enables you to access BIM-FAQS/PCS from any VTAM-controlled terminal.
In practice, BIM$TIDR serves as the interface. BIM$TIDR is a BIM-GSS utility that was loaded when you installed BIM-GSS. You can use BIM$TIDR to access many BIM and CA products online.
Reason to Use BIM$TIDR
The most important reason for using BIM$TIDR is that it is the only online interface available for native VSE users that does not require CICS.
Activating BIM$TIDR
To activate BIM$TIDR as a VTAM application, follow these steps:
1. Define your product application's major node. Add the following statement to your VBUILD command list:
applid APPL ACBNAME=BIM$TIDR,EAS=5
where applid can be anything you want it to be. However, we recommend that you use BIM$TIDR as the VTAM application ID.
The ACBNAME must be BIM$TIDR.
2. You can enable the VTAM interface as:
A main task. Execute the following job control in a batch partition. Ensure that a LIBDEF search for your product's sublibraries and the VTAM sublibraries is in effect.
// EXEC BIM$TIDR,SIZE=BIM$TIDR,PARM='VTAM=YES'
A subtask of BIM-FAQS/PCS's job scheduler JCLSCHED. To get the online interface up and running temporarily, enter the following:
// EXEC JCLSCHED,SIZE=JCLSCHED
3. This causes an outstanding reply ID on the console, enabling you to communicate with the scheduler. Respond to this reply ID by entering the following:
replid $BIM$TIDR
where replid is the partition reply ID.

Initializing Online Interfaces
2–30 BIM-FAQS/PCS
4. To permanently execute BIM$TIDR as a subtask of JCLSCHED, add the following statement to the JCLSCHED.CTL file:
AUTO $BIM$TIDR
Later in this chapter, you'll tailor the JCLSCHED.CTL member. For more information, refer to the section “Tailoring the Control File.”
5. Log on to the BIM-FAQS/PCS VTAM application program by using the following command:
LOGON APPLID(applid)
where applid is the VTAM application ID you chose in Step 1.
When you initialize BIM$TIDR, you'll see messages indicating that BIM$TIDR is started.
For more information on BIM$TIDR, see the BIM-FAQS (ASO & PCS) Installation and Initialization Guide.

Initializing Online Interfaces
Trial Guide 2–31
Tailoring the Control File
Introduction
When JCLSCHED starts up, it locates the JCLSCHED.CTL member in the CSS$MON PDS, reads it, and executes the commands found there.
The JCLSCHED.CTL member is shipped with BIM-FAQS/PCS and already contains a command, AUTO &FAQSAO. You can add other commands to be initialized when your scheduler starts up.
Recommended Commands
We recommend that you add the following commands to your JCLSCHED.CTL member:
Command Explanation
AUTO &FAQSAO &FAQSAO is the command that sets up the interface to use REXX IMODs. &FAQSAO enables you to execute REXX IMODs and use message features.
If you have BIM-FAQS/ASO, this program may already be running. Remove it from your JCLSCHED.CTL member, or terminate the program.
AUTO $PCSSRV The PCSSRV program monitors all dataset activity and performs dataset logging. PCSSRV must be active on all CPUs where dataset detection will be used.
AUTO $PCSLOG PCSLOG improves the performance of BIM-FAQS/PCS. PCSLOG is recommended; it can save at least three I/O actions per jobstep and will noticeably decrease the time it takes to run a job. If you are using remote scheduling, then the use of PCSLOG is mandatory.

Initializing Online Interfaces
2–32 BIM-FAQS/PCS
BIM-FAQS/ASO Users
If you have BIM-FAQS/ASO, you can consolidate the startup for your products into one partition by subtasking a variety of phases under the BIM-FAQS/PCS scheduler. For example, you could subtask the REXX processor and the FAQSVMX and FAQSMAIN programs by including them in your JCLSCHED.CTL member.
To load and attach a subtask, use the $phasename command. Prefix the appropriate program name with a dollar sign ($).
Procedure
To tailor the JCLSCHED.CTL member, complete the following steps:
Step Action
1 On the BIM-FAQS/PCS Menu Index, select the PDS Update option by entering U at the command line. The PDS Directory Display and Maintenance panel is displayed.
JOLUPD .U ** BIM-FAQS/PCS Online V5.3A ** ID=VSE.Q008 ===> BIM-FAQS/PCS PDS DIRECTORY DISPLAY AND MEMBER MAINTENANCE Member Mask ===> *.* PDS ID ===> MON For the Member Mask supply one to eight characters for the member name, and optionally supply the three character member type delimited from the member name by a period. Mask characters may be used to match a member name. A "+" mask matches one character while an "*" mask matches a group of characters. Following are a few examples: +++CICS+.MON - Will select any member that has the character string CICS beginning at position 4 in the name. *CICS* - Will select any MON type member that has the character CICS anywhere in the name. JCLVER0.MON - Will select the member JCLVER0.MON. PF1=Help PF3=Return PF4=External Library PF5=Entire Directory
2 Type JCLSCHED.CTL over the asterisks (*.*) in the Member Mask===> field. The PDS ID===> field should already display MON.
Continued

Initializing Online Interfaces
Trial Guide 2–33
Continued
Step Action
3 Press ENTER. The PDS Directory Maintenance panel is displayed:
JOLUPD .0 ** BIM-FAQS/PCS Online V5.3A ** ID=VSE.Q008 ===> ===> MON:JCLSCHED.CTL MEMBER NAME RECS BLKS UPDATE TIMESTAMP EXECUTE TIMESTAMP _ JCLSCHED.CTL 3 1 01/07/98 10.57.32 02/16/98 14.03.41 Actions: A=Audit B=Browse C=Copy D=Documentation L=Delete P=Pull List R=Rename S=Submit T=Transfer X=Edit Z=Accounting PF1=Help PF3=Return PF4=External Lib
4 Type X in the input field next to JCLSCHED.CTL.
5 Press ENTER. The JCLSCHED.CTL member is displayed:
=> MEM=JCLSCHED LINE=0 1...5...10...15...20...25...30...35...40...45...50...55...60...65...70...75...8 * * * * B E G I N F I L E * * * * ===== AUTO &FAQSAO ===== * * * * E N D F I L E * * * * =====
6 Add two lines after the AUTO &FAQSAO command by entering A2 in the prefix area (=====).
7 Add the AUTO $PCSSRV command, the AUTO $BIM$TIDR command, and the AUTO $PCSLOG command:
=> MEM=JCLSCHED LINE=0 1...5...10...15...20...25...30...35...40...45...50...55...60...65...70...75...8 * * * * B E G I N F I L E * * * * ===== AUTO &FAQSAO ===== AUTO $PCSSRV ===== AUTO $BIM$TIDR ===== AUTO $PCSLOG ===== * * * * E N D F I L E * * * * =====
8 At the command line, enter FILE. The change is saved.
9 Press PF3 (Return) until you get back to the BIM-FAQS/PCS Menu Index.

Initializing Online Interfaces
2–34 BIM-FAQS/PCS
Multiple-CPU Parameter
If you have multiple CPUs, you can use CPU=cpu_ID as a parameter with each of the AUTO statements to indicate the CPU IDs to which the statements apply. If used, CPU= must be the last parameter on the AUTO statement. cpu_ID can be six characters.
In the following example, the command AUTO $PCSSRV will be performed only on CPU ID 000001: AUTO &FAQSAO AUTO $PCSSRV CPU=000001 AUTO $PCSLOG
Conclusion
In this section, you learned how to initialize the VTAM and CICS interfaces for BIM-FAQS/PCS. You also learned how to tailor your JCLSCHED.CTL member. Now you can access BIM-FAQS/PCS from any environment you want through the interface(s) you just initialized.
BIM-ALERT/VSE Setup
When using BIM-ALERT/VSE for batch security, check the JCLJAUTO.CTL member so that it will not insert the ‘//ID’ card in the submitted JCL. The ‘//ID’ card may cause security problems in other areas, so it is important that JCLJAUTO.CTL be checked.
BIM-FAQS/PCS will automatically check for BIM-ALERT/VSE and insert a POWER SEC card if active. If a user supplied card is found, BIM-FAQS/.PCS will override it. If you are on a release prior to BIM-ALERT/VSE 5.1B you may need to contact CSI International Technical Support for BIM-ALERT for VSE for a patch.
Summary
What You Did
In this chapter, you:
• Installed BIM-GSS
• Installed BIM-FAQS/PCS
• Initialized BIM-FAQS/PCS
• Activated the scheduler
• Initialized an online interface for BIM-FAQS/PCS
• Tailored the JCLSCHED.CTL member

Initializing Online Interfaces
Trial Guide 2–35
What's Next?
The next chapter explains how to establish configuration options for BIM-FAQS/PCS.

Initializing Online Interfaces
2–36 BIM-FAQS/PCS

Trial Guide 3–1
Chapter 3 Defining System Configuration
Now that the scheduler is up and running, you need to configure your system before you define events and run jobs. All of the system configuration options you'll define in this trial will make it easier for you to define events.
In This Chapter
What Is BIM-FAQS/PCS Configuration?
BIM-FAQS/PCS configuration definitions control the operation of BIM-FAQS/PCS. Configuration options are either private or system options:
• You can set configuration values for your user ID using private options.
• You can set up global configuration values and system defaults using system options.
If you are an authorized user, you can define, update, and display BIM-FAQS/PCS configuration.
What You'll Learn
In this chapter, you'll learn to define a few of the system configuration options.

In This Chapter
3–2 BIM-FAQS/PCS
Configuration Questions
Before you begin, you need to answer the following questions about your system. These questions will help you decide how best to configure your system:
Decision Question Configuration Action
1 Where will you submit your JCL from?
If you'll submit your JCL from a library, define library defaults. If you'll submit your JCL from CMS, define CMS server defaults.
2 Which system CPUs will you use?
Define synonyms for those CPU IDs.
3 What days will need special scheduling considerations?
Define a default holiday ID that includes all of these days.
4 What default information should be used in event definitions?
Define system panel defaults for the event definition panels.

Getting Started with BIM-FAQS/PCS Online
Trial Guide 3–3
Getting Started with BIM-FAQS/PCS Online What Is BIM-FAQS/PCS Online?
BIM-FAQS/PCS Online enables you to set up system security and configuration, as well as define events using a series of panels. Online panels display information in the following ways:
• Menus
• Help panels
• Editing fields
• Function keys
Online Help
BIM-FAQS/PCS Online has an online help facility. To display help information for most panels, press PF1 (Help). Selected panels also offer field-sensitive help.
Sample BIM-FAQS/PCS Online Menu Index
JOLMENU0.3 ** BIM-FAQS/PCS Online V5.3A ** ID=VSE.Q008 ===> ** BIM-FAQS/PCS Online - Menu Index ** C Current Event Maintenance E Master Events Maintenance U PDS Update P Event Forecasting R Retrieve Member from CMS T Transfer to CMS Y Verify Process Periods Z Account History Display B Browse PDS Member F CA-FLEE Online H General Help M Utilities V Define Variables X Exit I REXX Member Update J BIM-FAQS/CALL Definitions W Work/Data Station A Audit History Display O Configuration Options S System Security D Resource Utilization PDS ===> MON (PDS ID for Security Display and Update) *** Copyright (c) 2002, CONNECTIVITY SYSTEMS, INC. *** PF1=Help PF3=Return PF4=MSHP PF12=Exit
Selecting Menu Options
You can select an option from the BIM-FAQS/PCS Menu Index in one of the following ways:
• Enter a letter or number identifier for the option at the command prompt (===>).
• Place the cursor on the appropriate option identifier and press ENTER.

Using the Configuration Options Menu Index
3–4 BIM-FAQS/PCS
Using the Configuration Options Menu Index Introduction
The BIM-FAQS/PCS Configuration Options Menu Index displays all of the configuration options. At first glance, the number of options may seem intimidating. However, setting system defaults and user ID options is made easy by the BIM-FAQS/PCS Online configuration panels.
In this chapter, you'll define a few of the important system configuration options that will be useful when you're ready to create events.
Accessing BIM-FAQS/PCS Configuration
To access the Configuration Options Menu Index, select Configuration Options from the BIM-FAQS/PCS Menu Index by entering O at the command line. The Configuration Options Menu Index is displayed: JOLOPT .O ** BIM-FAQS/PCS Online V5.3A ** ID=VSE.Q008 ===> ** BIM-FAQS/PCS Configuration Options - Menu Index ** Private User ID Options System Options V CMS Submit Defaults Q System CMS Submit Defaults E Panel Defaults R System Panel Defaults S CMS Server Defaults G Global Configuration Options U User Class Config. Options C User ID Classes I Library Defaults F Define Holidays and Cycles D CPUID Synonyms & Nodes N Dataset Exclusion T Dataset Logging J Partner Node Names PF1=Help PF3=Return PF6=Update

Using the Configuration Options Menu Index
Trial Guide 3–5
System Configuration Options
System configuration options are used to define and maintain defaults to be used by any BIM-FAQS/PCS user. In this trial, you'll define the following system configuration options:
Option Function
Library Defaults Sets up default library options for interfaces
CMS Server Defaults Defines the CMS server machine options
CPU-Id Synonym Table Defines CPU ID synonyms
Define Holidays Defines default event holidays
System Panel Defaults Defines defaults for online event definition panels

Defining System Options
3–6 BIM-FAQS/PCS
Defining System Options
Defining Library Defaults
Introduction
If you'll be submitting your JCL from a library, you should define library defaults. The Library Defaults configuration option enables you to set up default library names. The names that you define are shorter and are often easier to remember when you need to include them in an event command.
Why Set Up Library Defaults?
Default library names enable you to enter shorter commands to access library members. For example, if you need to access a member in a ICCF library, you enter D=libname M=membname. If you have already set up a default name for the ICCF library, all you need to enter is D:membname.
Sample Panel
The following is an example of the Library Defaults panel: JOLLIB .I ** BIM-FAQS/PCS Online V5.3A ** ID=VSE.Q008 ===> ** Library Defaults ** BIM-EDIT Library Name ===> ________________ BIM-EDIT Logon Parameter ===> ______________ CA-LIBRARIAN Library Name ===> _______ CA-VOLLIE Library Name ===> _______ CONDOR Library Name ===> _______ CA-PANVALET Library Name ===> _______ ICCF Primary Library ===> 0008 ICCF Connected Library ===> 0008 ICCF Common Library ===> 0008 PDS Search String ===> MON ___ ___ ___ ___ PF1=Help PF3=Return PF4=Update PF9=Delete

Defining System Options
Trial Guide 3–7
Procedure
To define default library names, follow these steps:
1. From the Configuration Options Menu Index, select the Library Defaults option by entering I at the command line or moving the cursor to the "I" and pressing enter.
2. To add a default, tab to the library you want to set the default name for and enter a valid library name. This will be the library name accessed by the shorter access command.
3. For information about ICCF defaults and the PDS search string, see the paragraphs following this procedure.
4. Press PF4 (Update) to update the default library name.
5. Press PF3 (Return) to return to the Configuration Options Menu Index.
Defining ICCF Defaults
If you use ICCF, you can define default names for a primary library, a connected library, and a common library. Members in these libraries are also searched sequentially.
Defining the PDS Search String
The system default for a PDS is MON. To define a string to use to search for PDS members, enter the PDS names in the order in which they should be searched. When a PDS access command is issued, the system looks in the first PDS specified in the string, and if the member is not there, it searches the second, then the third, and so on.
The PDS search string is not required. It is used for JCL scheduling purposes only.
Conclusion
Once you've defined library defaults, you can re-access the Library Defaults panel to edit, maintain, and delete the definitions if necessary.

Defining System Options
3–8 BIM-FAQS/PCS
Defining CMS Server Defaults
Introduction
If you'll be submitting your JCL from CMS, you should define CMS server defaults. By defining these defaults, you won't have to move your JCL from where it currently resides. The CMS Server Defaults option enables you to define the CMS server machine options. More specifically, you can tell BIM-FAQS/PCS which spool class to spool the JCL to for each VSE guest. A single CMS server can submit to a maximum of 30 VM guest machines.
What Is a Server Machine?
A CMS server machine is a CMS user ID that is dedicated to submitting JCL from CMS minidisks to VSE.
PCSSERV is the default CMS server machine ID, and A is the default spool class for each VSE machine.
Sample Panel
The following is an example of the CMS Server Defaults panel: JOLSERV .S ** BIM-FAQS/PCS Online V5.3A ** ID=VSE.Q008 ===> BIM-FAQS/PCS CMS Server ID Defaults Server VM Machine ID ===> PCSSERV VSE Machine ID Spool Class VSE Machine ID Spool Class VSE A ________ _ VSE14 A ________ _ ________ _ ________ _ ________ _ ________ _ ________ _ ________ _ ________ _ ________ _ ________ _ ________ _ ________ _ ________ _ ________ _ ________ _ ________ _ ________ _ ________ _ ________ _ ________ _ ________ _ ________ _ ________ _ ________ _ ________ _ ________ _ ________ _ ________ _ ________ _ PF1=Help PF3=Return PF4=Update

Defining System Options
Trial Guide 3–9
Procedure
To define CMS server defaults, follow these steps:
1. From the Configuration Options Menu Index, select the CMS Server Defaults option by entering S at the command line or moving the cursor to the "S" and pressing enter.
2. In the Server VM Machine (ID ===> field), enter the CMS server machine ID.
3. In the VSE Machine ID column, enter the target VSE guest machine you're sending jobs to.
4. In the Spool Class column, enter the VM spool class for each VSE machine.
5. Press PF4 (Update) to save the updates.
6. Reinitialize the scheduler to make these definitions take effect.
Conclusion
Once you have defined CMS server defaults, you can re-access the CMS Server Defaults panel to view the defaults and make changes if necessary.

Defining System Options
3–10 BIM-FAQS/PCS
Defining CPU ID Synonyms
Introduction
If you know which system CPUs you will be using, you should define synonyms for those CPU IDs. The CPU-ID Synonym Table option enables you to define synonyms for CPU IDs. You can assign a name or a word as a synonym for a 6 or 8 digit CPU ID.
For your trial, we recommend that you define at least one CPU ID synonym. You will use this synonym in event definitions.
One reason to define CPU ID synonyms is that it is easier to remember a name than a 6 or 8 digit number--in fact, using CPU ID synonyms may reduce user typing errors. Another reason to define CPU ID synonyms is that if you need to change CPUs, you only need to change the IDs in one place. The CPU ID NODEID Synonym Table makes it easy to make these changes on one online panel.
Authorized users can define up to 32 synonyms.
Sample Panel
The following is an example of the CPUID NODEID Synonym Table: JOLCPU .D ** BIM-FAQS/PCS Online V5.3A ** ID=VSE.Q008 ===> ** CPUID NODEID SYNONYM TABLE ** SYNONYM CPUID SYNONYM CPUID VSE = FF039001 ________ = ________ VSENONE = 99999999 ________ = ________ VSE14 = 039002 ________ = ________ ________ = ________ ________ = ________ ________ = ________ ________ = ________ ________ = ________ ________ = ________ ________ = ________ ________ = ________ ________ = ________ ________ = ________ ________ = ________ ________ = ________ ________ = ________ ________ = ________ ________ = ________ ________ = ________ ________ = ________ ________ = ________ ________ = ________ ________ = ________ ________ = ________ ________ = ________ ________ = ________ ________ = ________ ________ = ________ ________ = ________ PF1=Help PF3=Return PF4=Write to Disk

Defining System Options
Trial Guide 3–11
Procedure
To define CPU ID synonyms, follow these steps:
1. From the Configuration Options Menu Index, select the CPU-Id Synonym Table option by entering D at the command line or moving the cursor to the "D" and pressing enter.
2. Enter a synonym in the SYNONYM column. The synonym value is 1-8 characters. For example, as a synonym for the CPU where testing occurs, enter TESTVSE in the SYNONYM column.
3. In the CPUID column, enter the last 6 or 8 digits of the CPU ID. For example, FF050047, or 050047.
4. Press PF4 (Write to Disk) to write the definition to disk and pass the new information to the VSE machine where the function was performed. This step must be done on each machine where the BIM-FAQS/PCS scheduler (JCLSCHED) is running.
5. Press PF3 (Return) to return to the Configuration Options Menu Index.
Conclusion
Once you've defined CPU ID synonyms, you can use the synonyms in event definitions to tell BIM-FAQS/PCS where to schedule the event. You can re-access the CPUID NODEID Synonym Table to view the CPU IDs and their synonyms.

Defining System Options
3–12 BIM-FAQS/PCS
Defining Holiday Defaults
Introduction
If you know of days that will need special scheduling considerations, you should define a default holiday ID. A holiday ID contains dates that are considered as holidays or workdays that need special scheduling considerations. In order to use any of the BIM-FAQS/PCS scheduling keywords associated with holidays and workdays in an event, you must define default holidays and workdays in a default holiday ID.
The Holiday ID 000 Display and Edit option enables you to define default holidays and workdays.
Default Holiday
The default holiday ID is 000. Because this ID will be used in many event definitions, it should contain your default holidays--dates that typically have special scheduling considerations.
For example, you can define the default holiday ID to contain all U.S. government holidays such as Memorial Day, the Fourth of July, Labor Day, etc. In an event definition, use the default holiday ID to indicate that the event should be scheduled on all days except those contained in the holiday ID. By default, your event will not be scheduled on Memorial Day, the Fourth of July, Labor Day, etc.
Sample Panel
The following is an example of the Holiday Definitions panel: JOLCAL .B ** BIM-FAQS/PCS Online V5.3A ** ID=VSE.Q008 ===> Holiday Id ===> 000 Desc ===> Default Holidays **/12/25 ________ ________ ________ 98/09/07 ________ ________ ________ **/01/01 ________ ________ ________ 98/11/27 ________ ________ ________ **/07/06 ________ ________ ________ 98/11/26 ________ ________ ________ 98/05/25 ________ ________ ________ ________ ________ ________ ________ ________ ________ ________ ________ ________ ________ ________ ________ ________ ________ ________ ________ ________ ________ ________ ________ ________ ________ ________ ________ ________ ________ ________ ________ MTWTFSS Enter Holidays in YY/MM/DD Format XXXXX__ <=== Workdays Place X beneath valid workdays PF1=Help PF3=Return PF4=Write to Disk

Defining System Options
Trial Guide 3–13
Procedure
To define default holidays and workdays in a default holiday ID, follow these steps:
1. From the Configuration Options Menu Index, select the Holiday and Cycle Definition Entry panel by entering F at the command line. The Holiday and Cycle Definition Entry panel is displayed.
2. From the Holiday and Cycle Definition Entry panel, select the Holiday ID 000 Display and Edit option by entering B at the command line.
3. The (Holiday Id ===>) field should already show 000, the default holiday ID.
4. To define another holiday ID, you can enter a 3-digit ID number ranging from 000 to 255.
5. In the (Desc ===>) field, enter a description of the holiday ID of up to 20 characters. For example, you may want to describe your default ID as Default holidays.
6. Enter a maximum of 64 dates. Dates must be defined in yy/mm/dd format. You can substitute ** for yy, mm, or dd to globally match on any year, month, or day. Holidays are any of the defined dates.
7. Define workdays by entering X beneath valid workdays in the MTWTFSS column. Workdays are days that do not fall on a holiday--in other words, non-holidays. Once default workdays are defined, you can use all of the BIM-FAQS/PCS event day keywords (excluding cycle keywords). You'll learn more about event day keywords later in the trial.
8. Press PF4 (Write to Disk) to save the definitions.
9. Press PF3 (Return) to return to the Holiday and Cycle Definition Entry panel.
Conclusion
Once you have defined your default holiday ID, you can view it on the List of Holiday Definitions by ID panel. To access this panel from the Holiday and Cycle Definition Entry panel, select the Holiday Definition List by IDs option by entering A at the command line.

Defining System Options
3–14 BIM-FAQS/PCS
Defining System Panel Defaults
Introduction
The System Panel Defaults option enables you to establish online system defaults for creating events, the event definition panels, and the PDS browse and update functions. The following table shows the various defaults you can set using the System Panel Defaults option:
Options Explanation
Event Default Values
You can define the following event defaults:
• Earliest time of day the event can be scheduled
• Time of day the event is marked as Late
• Latest time of day the event can be scheduled
• CPU ID of the system that will submit the event
BIM-FAQS/PCS supplies these default values in their proper fields when you do not specify a value.
Event Panel Display Options
You can set the following panel display options:
• Whether the event directory is refreshed upon exiting the Event Maintenance Edit panel
• Whether event group information or time information is displayed
• Whether events are sorted by time or by name
• Whether events can be transferred to the master event directory
PDS Update and Browse Defaults
You can define the following PDS defaults:
• PDS ID to browse or update
• Data type to browse or update
Miscellaneous Defaults
You can set the following panel defaults:
• Whether the user is prompted with a confirmation message when deleting an event or PDS member.
• Whether the log files are read LIFO or FIFO.

Defining System Options
Trial Guide 3–15
Sample Panel
The following is an example of the Online Set Up Event and PDS Browse and Update Defaults panel: JOLOPT .R ** BIM-FAQS/PCS Online V5.3A ** ID=VSE.Q008 ===> **BIM-FAQS/PCS Set Up Event and PCS Update and Browse Defaults** User ===> $DEFAULT Event Default Values Event Panel Display Options Early Time ===> 0800 Event Refresh ===> Late Time ===> 2400 Display Group ===> Abort Time ===> 3000 Sort Time ===> Event Cpu ID ===> VSE Tran to Mast ===> N PDS Update and Browse Defaults Miscellaneous Defaults PDS Id ===> MON Confirm Deletes ===> Y Data Type ===> JCL Log direction ===> L PF1=Help PF3=Return PF4=Update PF12=Exit
Procedure
To define system event defaults, follow these steps:
1. From the Configuration Options Menu Index, select the System Panel Defaults option by entering R at the command line. The Online Set Up Event and PDS Browse and Update Defaults panel is displayed.
2. To change the system options for a user ID, enter the user ID in the (User ===>) field.
3. Specify user event defaults in any of the following fields. Note that values specified on one of the Event Maintenance panels override the defaults defined here.
For your trial, we recommend that you allow the Early Time, Late Time, and Abort Time fields to use the BIM-FAQS/PCS defaults. For now, you do not need to enter values in these fields. However, after your trial, you can define your own defaults for these fields.
Early Time - the earliest desired time for the event to execute. The BIM-FAQS/PCS default is 0000, midnight.
Late Time - the time after which the event is marked as Late. The BIM-FAQS/PCS default is 2400.
Abort Time - the time when the event can no longer be executed. The BIM-FAQS/PCS default is 2400.
4. Enter a default event CPU ID. This value should correspond to a synonym that you defined earlier on the CPUID NODEID Synonym Table.

Defining System Options
3–16 BIM-FAQS/PCS
Event Cpuid - the CPU ID of the machine that will submit the event.
5. Specify user panel defaults in any of the following fields:
Event Refresh -- whether the event directory will be refreshed upon exiting the Event Maintenance Edit panel. For your trial, enter Y (Yes).
Display Group -- whether group information or late or abort time information is displayed. For your trial, enter Y (Yes).
Sort Time -- whether the events will be sorted by time rather than by name. For your trial, enter N (No).
Tran to Mast -- whether the events will be transferred to the master event directory. For your trial, enter N (No).
6. Specify user PDS defaults in any of the following fields:
PDS ID -- the PDS ID to browse or update.
Data type -- the data type to browse or update.
7. Specify miscellaneous panel defaults in the following fields:
Confirm Deletes -- whether the user is prompted with a confirmation message when deleting events or PDS members. Specify Y or N.
Log direction -- whether log files are displayed LIFO or FIFO. Specify L or F.
8. To update the values on disk, press PF4 (Update).
Conclusion
Once you've defined your system panel defaults, you will come to rely on these defaults when you define and schedule events.
Summary
What You Did
In this chapter you learned how to define some of the BIM-FAQS/PCS system configuration options, including:
• Library defaults
• CMS server defaults
• CPU ID synonyms
• Holiday defaults
• Panel defaults
What's Next?
The next chapter explains how to define and schedule BIM-FAQS/PCS events.

Trial Guide 4–1
Chapter 4 Defining and Scheduling Events
In this chapter, you'll learn to define four events using BIM-FAQS/PCS Online panels and schedule the four events.
In This Chapter Introduction
The remainder of this guide is a tutorial designed to help you learn BIM-FAQS/PCS by creating events from scratch, scheduling your events, and viewing online event information and batch reports. Before you start, be sure you've read the first three chapters of this guide and installed, initialized, and configured BIM-FAQS/PCS successfully.
Tutorial Overview
This tutorial consists of three lessons:
1. Defining and scheduling basic events
2. Defining and scheduling advanced events
3. Viewing online event information and batch reports
Each lesson covers several tasks and provides step-by-step instructions and illustrations to help you follow along. You need to go through these lessons to get a basic understanding of how BIM-FAQS/PCS events are defined. Then you'll be able to define more detailed events and to use the online display and report features explained in the last two chapters.
What You'll Learn
In this chapter, you'll learn to:
• Define four events using BIM-FAQS/PCS Online panels
• Schedule the four events

In This Chapter
4–2 BIM-FAQS/PCS
Topics
This chapter covers the following topics:
• Master Event Maintenance panel
• Event Maintenance Edit panel
• Predecessor Condition panel
• Defining the EXAMPLE events
• Scheduling the EXAMPLE events

BIM-FAQS/PCS Online Panels
Trial Guide 4–3
BIM-FAQS/PCS Online Panels
Overview
What Can an Event Do?
A BIM-FAQS/PCS event can submit jobs, issue commands, and initiate REXX IMODs. You can define an event to be scheduled according to numerous conditions and scheduling criteria.
To define BIM-FAQS/PCS events, you'll use BIM-FAQS/PCS Online panels. The panels you'll need to be familiar with are:
• Master and Current Event Maintenance panels
• Event Maintenance Edit panel
• Predecessor Condition panel
Event Maintenance Panels
Both the Master and Current Event Maintenance panels display the master and current event directories, respectively.
These directories contain information about events, including:
• Name of the event
• Job to be scheduled or command to be executed when the event is scheduled
• Day the event is to be scheduled
• Time of day the event is to be scheduled
• User-assigned group to which the event belongs
• CPU ID of the scheduler that will submit the event command
• Description of event
• Status of the event
Master Event Directory
Remember, the master event directory contains every event that has been created in BIM-FAQS/PCS. The scheduler loads a subset of these events into the current event directory each day at midnight or at some user-defined time.
On the Master Event Maintenance panel, the DAY/CAL field displays all days and day keywords for which events are scheduled.

BIM-FAQS/PCS Online Panels
4–4 BIM-FAQS/PCS
Current Event Directory
The current event directory contains every event that has been created for the current processing period. These are the events the scheduler is monitoring.
On the Current Event Maintenance panel, the DAY/CAL field displays the events for the current processing period only.
Online Help
Online help is available for BIM-FAQS/PCS Online panels. Press PF1 (Help) from any BIM-FAQS/PCS panel to access help information.
Some panels, such as the Event Maintenance Edit panel, have field-level help to assist you in determining the values available for a particular field. To access help information for a field, place the cursor in the field and press PF1 (Help).

BIM-FAQS/PCS Online Panels
Trial Guide 4–5
Master Event Maintenance Panel
Introduction
For the trial, you'll define events in the master event directory and transfer them to the current event directory to be scheduled.
Access
To access the Master Event Maintenance panel from the BIM-FAQS/PCS Menu Index, select the Master Events Maintenance option by entering E at the command prompt.
Sample Master Event Maintenance Panel
JOLEVT .E ** BIM-FAQS/PCS Online V5.3A ** ID=VSE.Q008 ===> ** BIM-FAQS/PCS ONLINE - Event maintenance ** Event Name ===> * Event File ===> MASTER Cpu ===> * Time ===> * Group ===> * Job ===> * Stat ===> * Event Job/Cmd Day/Cal C Early Group Cpuid Description Stat _ AFTERGRP PCSEVRP WORKDAYS 00:00 VSE After the grp Mast _ BADIOTST BADIOTST DEMAND 14:25 TEST VSE test bad io rc Mast _ BCKCLIFF PDSMONBK ALL 00:00 TEST1 VSE Cliff Mast Test Past _ BIGAUX &CP ....F..+ 10:25 TEST VSE Big AUX file tst Mast _ BIGAUX1 &CP ....F..+ 10:25 TEST VSE Big AUX file tst Mast _ BIMJCL BIMJCL FOM 10:00 TEST VSE Sub BIM-EDIT sht Mast _ BIMJCLBG BIMJCL-M FOM 10:00 TEST VSE Sub BIM-EDIT lng Mast _ CART &CP ¬..W..S.+ 08:00 TEST VSE TEST CART Mast _ CARTTAPE &CP ¬....FSS+ 08:45 TEST VSE TEST TAPE & CART Mast _ EVLD1 &EVLOAD DEMAND 00:00 EVLOAD VSE EVLOAD G=TEST Mast _ EVLD2 &EVLOAD DEMAND 00:00 EVLOAD VSE EVLOAD G=TR* Mast _ EVLD3 &EVLOAD DEMAND 00:00 EVLOAD VSE EVLOAD G=GVAR Mast _ EVNTRJD7 $EVTFORC SAT 05:00 RDOUGHE VSE run annual forc. Mast _ FIRST BIM$PUTL .T..... 08:00 FIRST VSE THE FIRST EVT R: Mast Actions: A=Audit C=Data D=Doc F=Dsuc G=Graph J=Job L=Del N=Note O=Demand T=Tape V=Vars W=Work X=Edit Z=Acct PF1=Help PF2=Switch PF3=Return PF4=Create PF5=Copy PF6=/st PF8=Fwd

BIM-FAQS/PCS Online Panels
4–6 BIM-FAQS/PCS
Event Maintenance Edit Panel
Introduction
When you press PF4 (Create) on either of the Event Maintenance panels, the Event Maintenance Edit panel is displayed. This is the panel you will use to define new events. You can also use this panel to update existing events.
Access
To access the Event Maintenance Edit panel from the Master Event Maintenance panel, press PF4 (Create).
Sample Event Maintenance Edit Panel
JOLEVT .4 ** BIM-FAQS/PCS Online V5.3A ** ID=VSE.Q008 ===> ** Event Maintenance for File=MASTER --- Status= ** Event Name ===> Group Name ===> Description ===> Event Hold ===> Event Cpuid ===> ABND RC ===> Command ===> CSPD ===> ____ Target Node ===> Early Time ===> Late Time ===> Abort Time ===> XDATE OR ¬ MTWTFSS CYCLE H Hol-id W Event Day ===> ___ _ _ _______ ___ _ ___ _ Occurrences ===> Frequency ===> Start Date ===> End Date ===> When Cond. ===> N Successors ===> N Variables ===> N Data Sets ===> N Tape Reels ===> Cartridges ===> Resources ===> N Excl type ===> Exclude ===> More PF1=Hlp PF2=Tra PF3=Ret PF4=Upd PF5=New PF8=Fwd PF9=Del PF10=When PF11=For

BIM-FAQS/PCS Online Panels
Trial Guide 4–7
Field Sections
The fields on the Event Maintenance Edit panel are grouped into three sections, at the top, middle, and bottom of the panel:
Section Fields General Function
Top Event Name Group Name Description Event Hold Event Cpuid ABND RC Command CSPD Target Node
Defining event information
Middle Early Time Late Time Abort Time Event Day (Event Day fields) Occurrences Frequency Start Date End Date
Defining event scheduling information
Bottom When Cond. Successors Variables Data Sets Tape Reels Cartridges Resources Excl type Exclude
Defining event dependency information
Required Fields
The following two fields on the Event Maintenance Edit panel are the only ones that you must complete to define an event:
• Event Name
• Command

BIM-FAQS/PCS Online Panels
4–8 BIM-FAQS/PCS
Fields You'll Use
In this section of the trial, you will be making entries in the following fields on the Event Maintenance Edit panel:
Field Entry
Event Name
Name of the event, 1-8 characters in length. Any name can be used for an event, including the name of a PDS member. This field is required.
Group Name
Group to which the defined event should belong. The group name is a specific group ID. Specifying a group name associates an event with the specified group ID. A group name consists of 1-8 alphanumeric characters.
Description Brief description of the event. You can enter up to 16 characters in this field.
Event Hold Whether the event will be held for some kind of manual intervention or verification. The event will not be dispatched when Hold is specified as Y.
Event Cpuid
CPU ID of the system that will submit the event. This is usually the CPU in which the event will run. If no value is supplied, this field defaults to the current CPU ID.
Command Event command that will be executed when the event is scheduled. The command can be 55 characters long. This field is required.
CSPD POWER overrides. To specify overrides, enter values in the CSPD field underneath the desired characters. Values entered here override existing job statement definitions.
Event Day Day or days the event is to be scheduled. This entry defines the processing period that tells the scheduler which day to load the specified event into the current event directory for processing. The Event Day field can contain a valid day keyword.
When Cond.
Whether the event has predecessor conditions defined.
Successors Whether the event has additional commands to be executed once the event has completed--in other words, successor conditions.
Online Help
Remember, this panel has online help available for each field. Place your cursor in a field and press PF1 (Help) to access information about valid values for that field.

BIM-FAQS/PCS Online Panels
Trial Guide 4–9
Predecessor Condition Panel
Introduction
In a few of the examples you'll define, you need to add event conditions. The Predecessor Condition panel enables you to define these conditions. Predecessor conditions are required conditions--in other words, these conditions must occur before the event can be scheduled.
Access
To access the Predecessor Condition panel from the Event Maintenance Edit panel, press PF10 (When). This is the panel you'll use to define predecessor conditions for the events in this trial.
You can also access the Predecessor Condition panel from the Event Maintenance Edit panel by pressing PF8 (Fwd). This version of the panel differs in how the fields are displayed, but the conditions you define are the same. You may want to take a look at this panel; however, we'll be using the other version of the panel for this trial.
Sample Panel
The following is an example of the Predecessor Condition panel that is displayed when you press PF10 (When) from the Event Maintenance Edit panel: JOLEXPT .A ** BIM-FAQS/PCS Online V5.3A ** ID=VSE.Q008 ===> _ Or Condition With Next _ Condition Has Occured WHEN1 Primary Condition Primary Qualifier _ Event _ Power User _ Dos Job _ Dos Job _ PDS Member Update _ Power Job _ Power Job _ Work Station _ Event _ Phase _ Data Station _ Group _ Group _ Global Variable _ PCS Proc _ User Posted _ -CA- Product _ Message Condition Value ===> Qualifier Value ===> Secondary Qualifiers EQ NE GE LE GT LT PCS User Id ===> ________ _ _ Partition Id ===> __ _ _ IBM CC ===> __ _ _ _ _ _ _ $RC Value ===> ____ _ _ _ _ _ _ $MRC Value ===> ____ _ _ _ _ _ _ CPU Id ===> ________ _ _ Time Frame ===> ____ : ____ _ _ PF1=Help PF2=Insert PF3=Return PF7=Bwd PF8=Fwd PF9=Delete
Let's Begin
Now that you have some understanding of the panels you'll be using and the information you'll be providing on the Event Maintenance Edit panel, let's begin using these panels to define events.
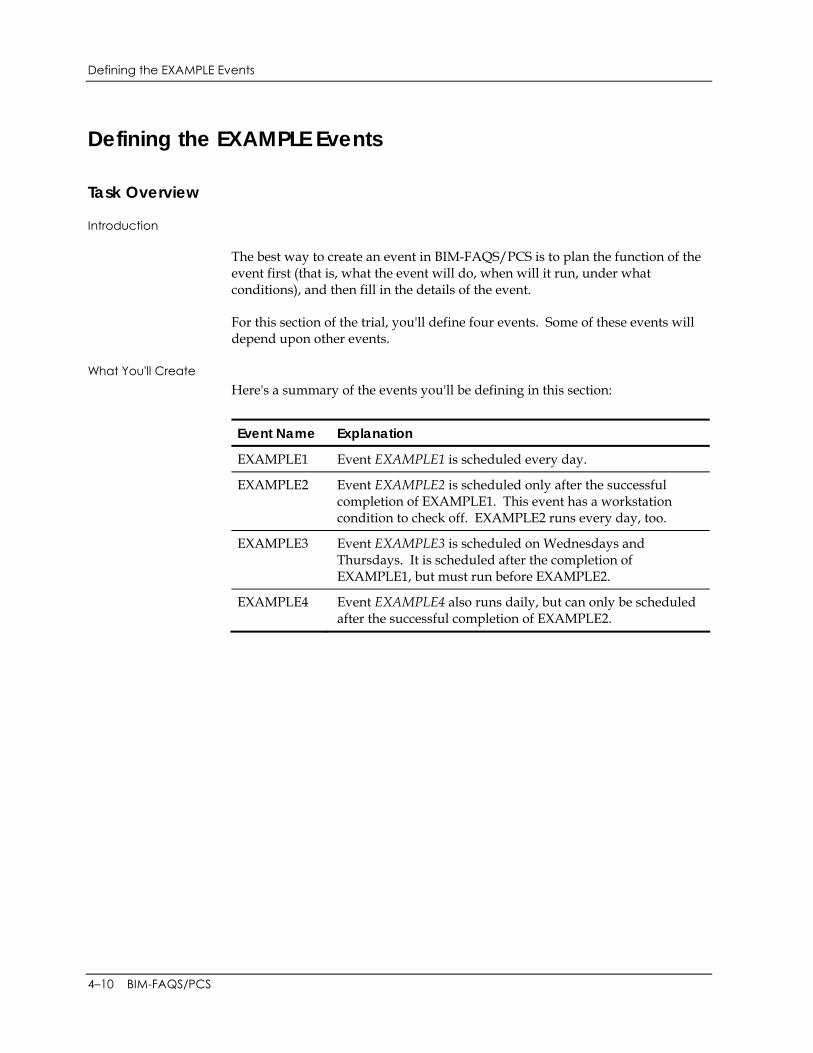
Defining the EXAMPLE Events
4–10 BIM-FAQS/PCS
Defining the EXAMPLE Events
Task Overview
Introduction
The best way to create an event in BIM-FAQS/PCS is to plan the function of the event first (that is, what the event will do, when will it run, under what conditions), and then fill in the details of the event.
For this section of the trial, you'll define four events. Some of these events will depend upon other events.
What You'll Create
Here's a summary of the events you'll be defining in this section:
Event Name Explanation
EXAMPLE1 Event EXAMPLE1 is scheduled every day.
EXAMPLE2 Event EXAMPLE2 is scheduled only after the successful completion of EXAMPLE1. This event has a workstation condition to check off. EXAMPLE2 runs every day, too.
EXAMPLE3 Event EXAMPLE3 is scheduled on Wednesdays and Thursdays. It is scheduled after the completion of EXAMPLE1, but must run before EXAMPLE2.
EXAMPLE4 Event EXAMPLE4 also runs daily, but can only be scheduled after the successful completion of EXAMPLE2.

Defining the EXAMPLE Events
Trial Guide 4–11
Provided Field Values
For the purposes of the trial, you should define the following fields on the Event Maintenance Edit panel with the provided values or values specific to your system:
Field Value
Group Name
All of the events in this tutorial have an event group value of TRIAL. This makes it easy for you to identify all of the trial examples.
Command Three of the events in this tutorial use supplied BIM-FAQS/PCS JCL members. These jobs are basically do-nothing jobs--that is, when these events are scheduled, the jobs specified in the event commands will not harm your system in any way. All of these members are located in the CSS$MON PDS.
Event Cpuid
This is where you enter the CPU ID of the system that will submit the event. This is usually the CPU in which the event will run.
Specify a CPU ID synonym you defined on the CPUID NODEID Synonym Table in Chapter 3. Or, do not specify a value in this field, and the name of the default CPU ID that you defined on the System Panel Defaults configuration option in Chapter 3 will be supplied.
In the following examples, we've entered the CPU ID of TESTVSE.
Unused Fields
In the fields for which you do not specify values, BIM-FAQS/PCS supplies the default values.

Defining the EXAMPLE Events
4–12 BIM-FAQS/PCS
Tasks
In this section, you'll have the opportunity to perform the following tasks:
Task Action
I-IV Define four events by:
Filling in the fields of the Event Maintenance Edit panel.
Setting up event dependencies--for example, adding specific predecessor conditions, successor conditions, and workstation conditions.
Pressing PF4 (Upd). The event is added to the master event directory.
Perform these basic lessons in the order in which they're given. Take your time, don't worry about mistakes, and have fun.

Defining the EXAMPLE Events
Trial Guide 4–13
Task I: Defining Event EXAMPLE1
Introduction
The first event you will define, EXAMPLE1, is an event that will run every day. It belongs in the event group TRIAL along with the rest of the events you will be defining for this trial.
Defining Event Information
To define event information for event EXAMPLE1, take the following steps:
1. From the Master Event Maintenance panel, press PF4 (Create) to create a new event. The Event Maintenance Edit panel is displayed.
2. Define event information. To do this, enter the following:
EXAMPLE1 in the Event Name field. Remember, this field is required.
TRIAL in the Group Name field.
A DAILY EVENT in the Description field.
3. In the Event Hold field, enter Y. This means that you will schedule this event manually. Typically, events are not put on Hold status. Because this event has no dependencies, meaning that it would be scheduled right away, you will want to manually initiate when this event will run.
4. In the Event Cpuid field, enter a CPU ID synonym of the system that will submit this event, or press ENTER and the default is supplied. In our example, we'll enter TESTVSE.
5. In the Command field, enter JCLEX1. This is a JCL member supplied by BIM-FAQS/PCS. This member contains a LIBR job that will not harm your system.
6. In the CSPD field, enter the class or partition where you'd like this job to run. Valid values are:
C POWER class override 0-9, A-Z.
S POWER SYSID override 0-9. Value 0 is the default.
P POWER priority override 1-9.
D POWER disposition override D, H, L, K.
We'll use BG in our example, by entering 0 in the CSPD field. Now, all of the event information is defined.
7. Define the event scheduling information. To do this, enter DAILY in the Event Day field.
Note: To view a list of all valid event day keywords, place the cursor in the Event Day field and press PF1 (Help).
8. Now that all of the fields necessary for this event are defined, press PF4 (Upd) to update and save this event definition. BIM-FAQS/PCS supplies default values in the fields that you did not define.

Defining the EXAMPLE Events
4–14 BIM-FAQS/PCS
The following message is displayed at the command prompt: EVENT EXAMPLE1 UPDATED IN THE MASTER FILE
Event EXAMPLE1
The following panel displays the completed definition and all of the field values for event EXAMPLE1. This definition shows that EXAMPLE1 will be scheduled every day (except on the days specified in the default holiday ID, which is one of the default values supplied in this definition). This definition also shows that the event command is JCLEX1, and identifies that this event will be put on Hold status. Default values are supplied in the fields in which you didn't specify a value. JOLEVT .Z ** BIM-FAQS/PCS Online V5.3A ** ID=VSE.Q008 ===> ** Event Maintenance for File=MASTER --- Status=Mast ** Event Name ===> EXAMPLE1 Group Name ===> TRIAL Description ===> A DAILY EVENT Event Hold ===> Y Event Cpuid ===> TESTVSE ABND RC ===> Command ===> JCLEX1 CSPD ===> 0___ Target Node ===> Early Time ===> 0000 Late Time ===> 2400 Abort Time ===> 2400 XDATE OR ¬ MTWTFSS CYCLE H Hol-id W Event Day ===> DAILY ___ _ _ _______ 000 _ 000 _ Occurrences ===> Frequency ===> Start Date ===> End Date ===> When Cond. ===> N Successors ===> N Variables ===> N Data Sets ===> N Tape Reels ===> 00 Cartridges ===> 00 Resources ===> N Excl type ===> Exclude ===> PF1=Hlp PF2=Tra PF3=Ret PF4=Upd PF5=New PF8=Fwd PF9=Del PF10=When PF11=For

Defining the EXAMPLE Events
Trial Guide 4–15
Processing Period Calendar
You can view a processing period calendar for this event by pressing PF11 (For) from the Event Maintenance Edit panel. The processing period calendar highlights the days of the month when this event is valid for scheduling. This panel also displays the specified event day keyword.
The following is an example of the processing period calendar for event EXAMPLE1: JOLDATE .B ** BIM-FAQS/PCS Online V5.3A ** ID=VSE.Q008 ===> Month of February 98 Sun Mon Tue Wed Thu Fri Sat Event Day DAILY 1 2 3 4 5 6 7 OR ¬MTWTFSS 8 9 10 11 12 13 14 Cycle 000 15 16 17 18 19 20 21 H W 22 23 24 25 26 27 28 Hol-ID 000 XDATE ___ PF1=Help PF3=Return PF7=Bwd PF8=Fwd
Conclusion
You've just defined your first BIM-FAQS/PCS event! Now, let's continue and define event EXAMPLE2.

Defining the EXAMPLE Events
4–16 BIM-FAQS/PCS
Task II: Defining Event EXAMPLE2
Introduction
The next event you will define, EXAMPLE2, is an event that will run immediately upon the successful completion of event EXAMPLE1. This event also runs every day. Also, EXAMPLE2 will have a workstation condition that a user must check off.
To define this event, you will specify two conditions:
• Predecessor condition
• Workstation condition
What Is a Workstation?
A workstation enables you to define an event which requires manual intervention. In this task, you will define the workstation so that a user will have to access the event's workstation and manually check off a condition.
Defining Event Information
To define event information for event EXAMPLE2, take the following steps:
1. From the Event Maintenance Edit panel, press PF5 (New). A blank Event Maintenance Edit panel is displayed. Use this blank panel to create a new event.
2. Define event information. To do this, enter the following:
EXAMPLE2 in the Event Name field.
TRIAL in the Group Name field.
DAILY EVENT TOO in the Description field.
Don't enter a value in the Event Hold field--when you save the event, this field will default to N. You don't want to manually schedule this event, since it will run after the completion of EXAMPLE1.
3. In the Event Cpuid field, enter a CPU ID synonym of the system that will submit the event, or press ENTER and the default is supplied. Again, in our example, we'll enter TESTVSE.
4. In the Command field, enter D LST,JCLEX1. When this command executes, it will display the LST queue entry for the previous job--the event command in EXAMPLE1.

Defining the EXAMPLE Events
Trial Guide 4–17
5. In the CSPD field, enter the same class or partition that you entered in the previous event definition. Again, in our example, we'll use BG by entering 0 in the CSPD field.
Now, all of the event information is defined
6. Define the event scheduling information. To do this, enter DAILY in the Event Day field.
7. Now your event scheduling information has been defined. Press PF4 (Upd) to save the event definition.
Because this event must be scheduled after the successful completion of EXAMPLE1, we need to define a predecessor condition. Continue with the next procedure.

Defining the EXAMPLE Events
4–18 BIM-FAQS/PCS
Defining a Predecessor Condition
To define the predecessor condition for EXAMPLE2, take the following steps:
Step Action
1 From the Event Maintenance Edit panel, press PF10 (When) to access the panel that enables you to define predecessor conditions for this event.
2 Specify for EXAMPLE2 to run after the completion of EXAMPLE1 by doing all the following:
a. In the list of Primary Conditions, type X in the Event field.
b. In the list of Primary Qualifiers, type X in the Group field.
c. In the Condition Value field, type EXAMPLE1.
d. In the Qualifier Value field, type TRIAL. This is the name of the group to which the event belongs.
JOLEXPT .A ** BIM-FAQS/PCS Online V5.3A ** ID=VSE.Q008 ===> _ Or Condition With Next _ Condition Has Occured WHEN1 Primary Condition Primary Qualifier X Event _ Power User _ Dos Job _ Dos Job _ PDS Member Update _ Power Job _ Power Job _ Work Station _ Event _ Phase _ Data Station X Group _ Group _ Global Variable _ PCS Proc _ User Posted _ -CA- Product _ Message Condition Value ===> EXAMPLE1 Qualifier Value ===> TRIAL Secondary Qualifiers EQ NE GE LE GT LT PCS User Id ===> ________ _ _ Partition Id ===> __ _ _ IBM CC ===> __ _ _ _ _ _ _ $RC Value ===> ____ _ _ _ _ _ _ $MRC Value ===> ____ _ _ _ _ _ _ CPU Id ===> ________ _ _ Time Frame ===> ____ : ____ _ _ PF1=Help PF2=Insert PF3=Return PF7=Bwd PF8=Fwd PF9=Delete
We selected an event rather than a DOS job on this panel because we want this event to be scheduled after the event runs instead of after the job command completes.
Note: The return codes for this condition (displayed on the lower half of this panel) must all complete with a value of 000 for the condition to be satisfied.
3 Now you are ready to define the workstation for this event. Continue with the next procedure.

Defining the EXAMPLE Events
Trial Guide 4–19
Defining a Workstation
To define the workstation for event EXAMPLE2, follow these steps:
Step Action
1 From the Predecessor Condition panel, press PF8 (Fwd). A blank Predecessor Condition panel is displayed for you to define the second predecessor condition.
2 Specify that EXAMPLE2 will run after a user has checked off a workstation condition. To do this, enter X in the Work Station field in the list of Primary Conditions.
JOLEXPT .8 ** BIM-FAQS/PCS Online V5.3A ** ID=VSE.Q008 ===> _ Or Condition With Next _ Condition Has Occured WHEN2 Primary Condition Primary Qualifier _ Event _ Power User _ Dos Job _ Dos Job _ PDS Member Update _ Power Job _ Power Job X Work Station _ Event _ Phase _ Data Station _ Group _ Group _ Global Variable _ PCS Proc _ User Posted _ -CA- Product _ Message Condition Value ===> Qualifier Value ===> Secondary Qualifiers EQ NE GE LE GT LT PCS User Id ===> ________ _ _ Partition Id ===> __ _ _ IBM CC ===> __ _ _ _ _ _ _ $RC Value ===> ____ _ _ _ _ _ _ $MRC Value ===> ____ _ _ _ _ _ _ CPU Id ===> ________ _ _ Time Frame ===> ____ : ____ _ _ PF1=Help PF2=Insert PF3=Return PF7=Bwd PF8=Fwd PF9=Delete
3 Press PF3 (Return) to return to the Event Maintenance Edit panel.
4 Press PF4 (Upd) to save your event definitions.
5 Now you must define the workstation condition. To do this, enter WORK at the command prompt. The Event Manual Work Station panel is displayed.
6 Enter the condition you want the user to check off before the event is scheduled.
JOLMAND .w ** BIM-FAQS/PCS Online V5.3A ** ID=VSE.Q008 ===> BIM-FAQS/PCS EVENT MANUAL WORK STATION PANEL Event Name ===> EXAMPLE2 _ ===> Check this condition when you have received confirmation to run ===> this job. ===> PF1=Help PF3=Return PF4=Update
7 Press PF4 (Update) to save this workstation definition. The following message will be displayed at the command prompt: AUX MEMBER UPDATED FOR EVENT EXAMPLE2.
Continued

Defining the EXAMPLE Events
4–20 BIM-FAQS/PCS
Continued
Step Action
8 Press PF3 (Return) to return to the Event Maintenance Edit panel.
9 Press PF4 (Upd) to update and save this event definition.
The following message is displayed at the command prompt: EVENT EXAMPLE2 UPDATED IN THE MASTER FILE
Event EXAMPLE2
The following panel displays the completed definition and all of the field values for event EXAMPLE2. This event definition shows that EXAMPLE2 is a daily event that will issue the D LST,JCLEX1 command. It also shows that this event has a predecessor condition. JOLEVT .Z ** BIM-FAQS/PCS Online V5.3A ** ID=VSE.Q008 ===> ** Event Maintenance for File=MASTER --- Status=Mast ** Event Name ===> EXAMPLE2 Group Name ===> TRIAL Description ===> DAILY EVENT TOO Event Hold ===> N Event Cpuid ===> TESTVSE ABND RC ===> Command ===> D LST,JCLEX1 CSPD ===> 0___ Target Node ===> Early Time ===> 0000 Late Time ===> 2400 Abort Time ===> 2400 XDATE OR ¬ MTWTFSS CYCLE H Hol-id W Event Day ===> DAILY ___ _ _ _______ 000 _ 000 _ Occurrences ===> Frequency ===> Start Date ===> End Date ===> When Cond. ===> Y Successors ===> N Variables ===> N Data Sets ===> N Tape Reels ===> 00 Cartridges ===> 00 Resources ===> N Excl type ===> Exclude ===> PF1=Hlp PF2=Tra PF3=Ret PF4=Upd PF5=New PF8=Fwd PF9=Del PF10=When PF11=For
If you'd like to see the processing period calendar for this event, press PF11 (For).
Conclusion
Now that EXAMPLE2 is defined, let's throw a wrench into the works. Let's define EXAMPLE3--an event which will be scheduled only on Wednesdays and Thursdays, and has to run after EXAMPLE1 but before EXAMPLE2.

Defining the EXAMPLE Events
Trial Guide 4–21
Task III: Defining Event EXAMPLE3
Introduction
The next event you will define, EXAMPLE3, is an event that will be scheduled only on Wednesdays and Thursdays, and must run immediately upon the successful completion of event EXAMPLE1, but before event EXAMPLE2. Because of the different scheduling days of this event, you'll have to define EXAMPLE2 as a successor event of EXAMPLE3--that is, you must indicate that EXAMPLE 3 will run before EXAMPLE2.
To define this event, you will specify an event successor condition.
What Is a Successor?
Event successors are used to establish dynamic relationships among events. Successor events follow the completion of another, specific event. Defining event successors is one way to specify what order your events will run in.
Predecessors Vs. Successors
In EXAMPLE2, you defined predecessor conditions--conditions that must be met before the event can be scheduled. Successor conditions are different, because you're defining conditions that must be met after the event is scheduled. In other words, successor events follow the completion of an event, whereas predecessor events run before an event can be scheduled.
To illustrate this difference, we'll use our sample events in an example. If you defined EXAMPLE3 as a predecessor of EXAMPLE2 (that is, EXAMPLE3 must successfully complete before EXAMPLE2 can be scheduled), EXAMPLE2 would never be scheduled on Sunday, Monday, Tuesday, Friday, and Saturday. This is because EXAMPLE3 is only scheduled on Wednesdays and Thursdays.
The only way to correctly specify this relationship is to use successors--specifying that EXAMPLE3 will be scheduled before EXAMPLE2, on Wednesdays and Thursdays only. On all other days, EXAMPLE2 will run after EXAMPLE1, as defined.

Defining the EXAMPLE Events
4–22 BIM-FAQS/PCS
Defining Event Information
To define event information for event EXAMPLE3, take the following steps:
1. From the Event Maintenance Edit panel, press PF5 (New). A blank Event Maintenance Edit panel is displayed. Use this blank panel to create a new event.
2. Define event information. To do this, enter the following:
EXAMPLE3 in the Event Name field. Remember, this field is required.
TRIAL in the Group Name field.
MIDWEEK EVENT in the Description field.
3. In the Event Cpuid field, enter a CPU ID synonym of the system that will submit the event, or press ENTER and the default is supplied. Again, in our example, we'll enter TESTVSE.
4. In the Command field, enter JCLANAL. This is a JCL member supplied by BIM-FAQS/PCS. This member contains a BIM$PUTL analyze of the MON PDS. This job will not harm your system.
5. In the CSPD field, enter the same class or partition that you entered in the previous event definition. Again, in our example, we'll use BG by entering 0 in the CSPD field.
Now, all of the event information is defined.
6. Specify that this event should only be scheduled on Wednesday and Thursday. To do this, enter X under the days the event should be scheduled in the MTWTFSS fields--so, in our example, enter X under W and T (Thursday).
7. Now your event scheduling information has been defined. Press PF4 (Upd) to save the definition.
Because this event must be scheduled after the successful completion of EXAMPLE1, we need to define a predecessor condition. Continue with the next procedure.

Defining the EXAMPLE Events
Trial Guide 4–23
Defining a Predecessor Condition
To define the predecessor condition for EXAMPLE3, follow these steps:
Step Action
1 From the Event Maintenance Edit panel, press PF10 (When) to access the panel that enables you to define conditions for this event.
2 Specify for EXAMPLE3 to run after the completion of EXAMPLE1 by doing all the following:
a. In the list of Primary Conditions, type X in the Event field.
b. In the list of Primary Qualifiers, type X in the Group field.
c. In the Condition Value field, type EXAMPLE1. In
d. In the Qualifier Value field, type TRIAL. This is the name of the group to which the event belongs.
JOLEXPT .A ** BIM-FAQS/PCS Online V5.3A ** ID=VSE.Q008 ===> _ Or Condition With Next _ Condition Has Occured WHEN1 Primary Condition Primary Qualifier X Event _ Power User _ Dos Job _ Dos Job _ PDS Member Update _ Power Job _ Power Job _ Work Station _ Event _ Phase _ Data Station X Group _ Group _ Global Variable _ PCS Proc _ User Posted _ -CA- Product _ Message Condition Value ===> EXAMPLE1 Qualifier Value ===> TRIAL Secondary Qualifiers EQ NE GE LE GT LT PCS User Id ===> ________ _ _ Partition Id ===> __ _ _ IBM CC ===> __ _ _ _ _ _ _ $RC Value ===> ____ _ _ _ _ _ _ $MRC Value ===> ____ _ _ _ _ _ _ CPU Id ===> ________ _ _ Time Frame ===> ____ : ____ _ _ PF1=Help PF2=Insert PF3=Return PF7=Bwd PF8=Fwd PF9=Delete
Again, we selected an event rather than a DOS job on this panel because we want this event to be scheduled after the event runs instead of after the job command completes.
3 Press PF3 (Return) to return to the Event Maintenance Edit panel.
4 Now your predecessor condition is defined. Press PF4 (Upd) to save your event definition. Now you're ready to define the successor condition. Continue with the next procedure.

Defining the EXAMPLE Events
4–24 BIM-FAQS/PCS
Defining a Successor Condition
To define the successor condition for EXAMPLE3, follow these steps:
Step Action
1 From the Event Maintenance Edit panel, enter SUCC at the command prompt. The PCS Event Successor panel is displayed.
2 Specify that EXAMPLE2 will run after the successful completion of EXAMPLE3. To do this, enter EXAMPLE2 in the Event field.
JOLSUC .D ** BIM-FAQS/PCS Online V5.3A ** ID=VSE.Q008 ===> * PCS EVENT SUCCESSOR COMMANDS AND EVENTS FOR EVENT EXAMPLE3 * Notify ===> ________ ________ ________ ________ ________ ________ ________ $MRC Cond Abnd Command ===> _____________________________________________ ____ __ _ Command ===> _____________________________________________ ____ __ _ Event Group $MRC Cond Abnd Event Group $MRC Cond Abnd EXAMPLE2 TRIAL ____ __ _ ________ ________ ____ __ _ ________ ________ ____ __ _ ________ ________ ____ __ _ ________ ________ ____ __ _ ________ ________ ____ __ _ ________ ________ ____ __ _ ________ ________ ____ __ _ ________ ________ ____ __ _ ________ ________ ____ __ _ ________ ________ ____ __ _ ________ ________ ____ __ _ ________ ________ ____ __ _ ________ ________ ____ __ _ ________ ________ ____ __ _ ________ ________ ____ __ _ ________ ________ ____ __ _ ________ ________ ____ __ _ ________ ________ ____ __ _ ________ ________ ____ __ _ ________ ________ ____ __ _ ________ ________ ____ __ _ ________ ________ ____ __ _ ________ ________ ____ __ _ PF1=Help PF3=Return PF4=Update PF9=Delete
3 Press PF4 (Update) to update and save this successor event definition. BIM-FAQS/PCS supplies the related fields with the default values.
Note: The $MRC and Abnd conditions must both be true for either the event command to be processed or the event condition to be satisfied. The default maximum return code is 0000. The default Abnd value is N, meaning that the condition will be satisfied only if the cancel code is X'00' or X'10'.
4 Now your successor is defined. Press PF3 (Return) to return to the Event Maintenance Edit panel.
5 Press PF4 (Upd) to update and save this event definition. Notice that the When Cond. field and the Successors field both contain Y, indicating that conditions are defined for this event.
The following message is displayed at the command prompt: EVENT EXAMPLE3 UPDATED IN THE MASTER FILE

Defining the EXAMPLE Events
Trial Guide 4–25
EXAMPLE3 Event
The following panel displays the event definition and all of the field values for event EXAMPLE3. This definition shows that EXAMPLE3's event command JCLANAL will be processed on Wednesdays and Thursdays. It also shows that this event has a predecessor condition and a successor condition. JOLEVT .Z ** BIM-FAQS/PCS Online V5.3A ** ID=VSE.Q008 ===> ** Event Maintenance for File=MASTER --- Status=Mast ** Event Name ===> EXAMPLE3 Group Name ===> TRIAL Description ===> MIDWEEK EVENT Event Hold ===> N Event Cpuid ===> TESTVSE ABND RC ===> Command ===> JCLANAL CSPD ===> 0___ Target Node ===> Early Time ===> 0000 Late Time ===> 2400 Abort Time ===> 2400 XDATE OR ¬ MTWTFSS CYCLE H Hol-id W Event Day ===> ___ _ _ __XX___ 000 _ 000 _ Occurrences ===> Frequency ===> Start Date ===> End Date ===> When Cond. ===> Y Successors ===> Y Variables ===> N Data Sets ===> N Tape Reels ===> 00 Cartridges ===> 00 Resources ===> N Excl type ===> Exclude ===> PF1=Hlp PF2=Tra PF3=Ret PF4=Upd PF5=New PF8=Fwd PF9=Del PF10=When PF11=For
If you'd like to view the processing period calendar for this event, press PF11 (For).
Conclusion
Now that EXAMPLE3 is defined, let's continue and define EXAMPLE4.

Defining the EXAMPLE Events
4–26 BIM-FAQS/PCS
Task IV: Defining Event EXAMPLE4
Introduction
The next event you will define, EXAMPLE4, is an event that will wait on event EXAMPLE2. Recall that EXAMPLE2 can't be scheduled until a user has checked off the workstation condition. So, EXAMPLE4 will wait to be scheduled until EXAMPLE2's workstation condition has been satisfied and its event command is completed. EXAMPLE4 will be scheduled every day.
You will define one predecessor condition for this event.
Defining Event Information
To define event EXAMPLE4, take the following steps:
1. From the Event Maintenance Edit panel, press PF5 (New). A blank Event Maintenance Edit panel is displayed. Use this blank panel to create a new event.
2. Define event information. To do this, enter the following:
EXAMPLE4 in the Event Name field.
TRIAL in the Group Name field.
WAIT ON EXAMPLE2 in the Description field.
3. In the Event Cpuid field, enter a CPU ID synonym of the system that will submit the event, or press ENTER and the default is supplied. Again, in our example, we'll enter TESTVSE.
4. In the Command field, enter JCLJOBP. This is a JCL member supplied by BIM-FAQS/PCS. This member contains a dummy job that will not harm your system.
5. In the CSPD field, enter the same class or partition that you entered in the previous event definition. Again, in our example, we'll use BG by entering 0 in the CSPD field.
Now, all of the event information is defined.
6. Define the event scheduling information. To do this, enter DAILY in the Event Day field.
7. Now your event scheduling information has been defined. Press PF4 (Upd) to save this definition.
Because this event must be scheduled after the successful completion of EXAMPLE2, we need to define a predecessor condition. Continue with the next procedure.

Defining the EXAMPLE Events
Trial Guide 4–27
Defining a Predecessor Condition
To define the predecessor condition for this event, follow these steps:
Step Action
1 From the Event Maintenance panel, press PF10 (When) to access the panel that enables you to define conditions for this event.
2 Specify that EXAMPLE4 will run after the completion of EXAMPLE2. To do this,
a. In the list of Primary Conditions, type X in the Event field.
b. In the list of Primary Qualifiers, type X in the Group field.
c. In the Condition Value field, type EXAMPLE2.
d. In the Qualifier Value field, type TRIAL. This is the name of the group to which the event belongs.
JOLEXPT .A ** BIM-FAQS/PCS Online V5.3A ** ID=VSE.Q008 ===> _ Or Condition With Next _ Condition Has Occured WHEN1 Primary Condition Primary Qualifier X Event _ Power User _ Dos Job _ Dos Job _ PDS Member Update _ Power Job _ Power Job _ Work Station _ Event _ Phase _ Data Station X Group _ Group _ Global Variable _ PCS Proc _ User Posted _ -CA- Product _ Message Condition Value ===> EXAMPLE2 Qualifier Value ===> TRIAL Secondary Qualifiers EQ NE GE LE GT LT PCS User Id ===> ________ _ _ Partition Id ===> __ _ _ IBM CC ===> __ _ _ _ _ _ _ $RC Value ===> ____ _ _ _ _ _ _ $MRC Value ===> ____ _ _ _ _ _ _ CPU Id ===> ________ _ _ Time Frame ===> ____ : ____ _ _ PF1=Help PF2=Insert PF3=Return PF7=Bwd PF8=Fwd PF9=Delete
Again, we selected an event rather than a DOS job on this panel because we want EXAMPLE4 to be scheduled after EXAMPLE2 completes, instead of after the job command completes.
3 Press PF3 (Return) to return to the Event Maintenance Edit panel.
4 Press PF4 (Upd) to save your event definition. The following message is displayed at the command prompt: EVENT EXAMPLE4 UPDATED IN THE MASTER FILE

Defining the EXAMPLE Events
4–28 BIM-FAQS/PCS
Event EXAMPLE4
The following panel displays the completed event definition and all of the field values for event EXAMPLE4. This definition shows that EXAMPLE4 will be scheduled every day (again, except on the days specified in the default holiday ID). It also shows that this event has a predecessor condition. JOLEVT .Z ** BIM-FAQS/PCS Online V5.3A ** ID=VSE.Q008 ===> ** Event Maintenance for File=MASTER --- Status=Mast ** Event Name ===> EXAMPLE4 Group Name ===> TRIAL Description ===> WAIT ON EXAMPLE2 Event Hold ===> N Event Cpuid ===> TESTVSE ABND RC ===> Command ===> JCLJOBP CSPD ===> 0___ Target Node ===> Early Time ===> 0000 Late Time ===> 2400 Abort Time ===> 2400 XDATE OR ¬ MTWTFSS CYCLE H Hol-id W Event Day ===> DAILY ___ _ _ _______ 000 _ 000 _ Occurrences ===> Frequency ===> Start Date ===> End Date ===> When Cond. ===> Y Successors ===> N Variables ===> N Data Sets ===> N Tape Reels ===> 00 Cartridges ===> 00 Resources ===> N Excl type ===> Exclude ===> PF1=Hlp PF2=Tra PF3=Ret PF4=Upd PF5=New PF8=Fwd PF9=Del PF10=When PF11=For
To view the processing period calendar for this event, press PF11 (For).
Conclusion
Now that event EXAMPLE4 is defined, you're ready to view all four of these events in the master event directory, and transfer them to the current event directory for scheduling. The next section explains how to do this.
Scheduling the EXAMPLE Events
Trial Guide 4–29
Scheduling the EXAMPLE Events
Task Overview
Introduction
To schedule an event means to load the event into the current event directory, enabling the scheduler, when the conditions are met, to issue the event command and process the event. In this section, you'll transfer the four events you just defined from the master event directory to the current event directory. Then, you'll release EXAMPLE1 from Hold status and watch the events get scheduled.
Tasks
In this section, you will perform the following tasks:
Task Action
I Transfer a subset of events from the master event directory to the current event directory.
II Schedule the subset of events.
III Transfer all four of the events from the master event directory to the current event directory and schedule the four events.

Scheduling the EXAMPLE Events
4–30 BIM-FAQS/PCS
Task I: Transferring a Subset of Events to the Current Event Directory
Introduction
In the following procedure, you will transfer a subset of events from the master event directory to the current event directory for scheduling. You will transfer the sample events EXAMPLE1, EXAMPLE2, and EXAMPLE4. These are the events that run every day.
Procedure
To transfer events from the master event directory to the current event directory, follow these steps:
1. From the Event Maintenance Edit panel, press PF3 (Return) to return to the Master Event Maintenance panel.
2. With the cursor at the command prompt, refresh the display by pressing ENTER. (To place the cursor at the command prompt, press HOME.) All of the events you defined are displayed in the master event directory.
3. If you have more events defined and you want to view only the events you defined in the previous section, tab to the (Group ===> field) and enter TRIAL to display all of the trial events.
4. Transfer event EXAMPLE1 to the current event directory by entering O (Demand) in the input field of this event. The following message is displayed:
EVENT EXAMPLE1 TRANSFERRED TO THE CURRENT FILE
5. Repeat Step 4, transferring events EXAMPLE2 and EXAMPLE4 to the current event directory.
6. Press PF2 (Switch) to access the Current Event Maintenance panel. EXAMPLE1, EXAMPLE2, and EXAMPLE4 are displayed in the current event directory.

Scheduling the EXAMPLE Events
Trial Guide 4–31
Viewing Events in the Current Event Directory
Now that you have transferred three events to the current event directory, you can view each event on the Current Event Maintenance panel. This panel displays each event's name, command, scheduling information, group, CPU ID, and description. The Stat column shows the status codes for each event. JOLEVT .C ** BIM-FAQS/PCS Online V5.3A ** ID=VSE.Q008 ===> ** BIM-FAQS/PCS ONLINE - Event maintenance ** Event Name ===> * Event File ===> CURRENT Cpu ===> * Time ===> * Group ===> TRIAL Job ===> * Stat ===> * Event Job/Cmd Day/Cal N Early Group Cpuid Description Stat _ EXAMPLE1 JCLEX1 MON 00:00 TRIAL TESTVSE A DAILY EVENT Hold _ EXAMPLE2 D MON 00:00 TRIAL TESTVSE DAILY EVENT TOO Work _ EXAMPLE4 JCLJOBP MON 00:00 TRIAL TESTVSE WAIT ON EXAMPLE2 Wait Actions: A=Audit C=Data D=Doc F=Dsuc G=Graph H=Hold J=Job L=Del N=Note P=Post R=Reset T=Tape U=Uhld V=Vars W=Work X=Edit Y=Wsuc Z=Acct PF1=Help PF2=Switch PF3=Return PF4=Create PF6=/st PF8=Fwd
Status Explanations
The status codes of the three sample events have the following meanings:
Event Status Explanation
EXAMPLE1 Hold The event is being held. Recall that when you defined this event, you specified the hold. Any event conditions may still be satisfied; however, the event will not be scheduled until it is taken off hold by the U (Unhold) command.
EXAMPLE2 Work The event is waiting for a user to access the workstation and complete the checklist.
EXAMPLE4 Wait The event has at least one condition that has not yet been satisfied. Remember, this event must run after EXAMPLE2, which is waiting on the workstation to be completed.
Conclusion
Now that you've transferred these events to the current event directory, the scheduler is waiting to process them. The next section explains how to release EXAMPLE1 from Hold status so the events can be scheduled.

Scheduling the EXAMPLE Events
4–32 BIM-FAQS/PCS
Task II: Scheduling a Subset of Events
Introduction
In the following procedure, you will release EXAMPLE1 from Hold status; this will schedule the event and also satisfy the predecessor condition you defined for EXAMPLE2. Second, you will check off the workstation condition in EXAMPLE2; this will schedule EXAMPLE2 and EXAMPLE4.
After these events have completed, we'll look at the event status codes.
Procedure
To schedule a subset of events, follow these steps:
1. From the Current Event Maintenance panel, unhold EXAMPLE1 by entering U (Unhold) in the input field next to this event. EXAMPLE1 is scheduled right away.
2. Enter W (Workstation) in the input field of EXAMPLE2. This accesses the workstation condition.
3. Check off the condition by entering X in the input field next to the condition.
4. Press PF4 (Update) to update this change. The following message is displayed:
MANUAL WORK STATION DEPENDENCIES RELEASED
5. Press PF3 (Return) to return to the Current Event Maintenance panel.
6. Refresh the display by pressing HOME to place the cursor at the command prompt, and then pressing ENTER. The panel is refreshed.
You can see that EXAMPLE2 and EXAMPLE4 are scheduled because their status codes are updated as soon as the events are scheduled. You may see status codes of Run and Schd; these status codes mean the event is ready to run or is being scheduled. Once an event has been scheduled, the status code changes to Comp, meaning the event has been successfully scheduled and completed. The following sample panel shows that all events have Comp status.
Note: If a status code remains as Run for an extended period, either the scheduler is not active or the event definition specifies an incorrect CPU ID.

Scheduling the EXAMPLE Events
Trial Guide 4–33
Sample Panel
JOLEVT .C ** BIM-FAQS/PCS Online V5.3A ** ID=VSE.Q008 ===> ** BIM-FAQS/PCS ONLINE - Event maintenance ** Event Name ===> * Event File ===> CURRENT Cpu ===> * Time ===> * Group ===> TRIAL Job ===> * Stat ===> * Event Job/Cmd Day/Cal N Early Group Cpuid Description Stat _ EXAMPLE1 JCLEX1 MON 00:00 TRIAL TESTVSE A DAILY EVENT Comp _ EXAMPLE2 D MON 00:00 TRIAL TESTVSE DAILY EVENT TOO Comp _ EXAMPLE4 JCLJOBP MON 00:00 TRIAL TESTVSE WAIT ON EXAMPLE2 Comp Actions: A=Audit C=Data D=Doc F=Dsuc G=Graph H=Hold J=Job L=Del N=Note P=Post R=Reset T=Tape U=Uhld V=Vars W=Work X=Edit Y=Wsuc Z=Acct PF1=Help PF2=Switch PF3=Return PF4=Create PF6=/st PF8=Fwd
Conclusion
Now that you've successfully transferred and scheduled three events, let's transfer the sample events to the current file again, this time including EXAMPLE3. Once again, we'll see how the event relationships are important.

Scheduling the EXAMPLE Events
4–34 BIM-FAQS/PCS
Task III: Scheduling All of the EXAMPLE Events
Introduction
In the following procedure, you will transfer all four of the events to the current event directory to be scheduled. You'll see how they depend on each other and how they are affected when another event is added to the schedule.
To transfer the events to the current event directory for scheduling, you'll use the same procedures you performed in the previous section. This time, you'll transfer all four events to the current event directory.
Transferring the Events
To transfer events from the master event directory to the current event directory, follow these steps:
1. From the Current Event Maintenance panel, access the Master Event Maintenance panel by pressing PF2 (Switch). You should have all of the EXAMPLE events displayed on the panel.
2. Transfer event EXAMPLE1 to the current event directory by entering O (Demand) in the input field of this event. The following message is displayed:
EVENT EXAMPLE1 TRANSFERRED TO THE CURRENT FILE
3. Repeat Step 2, transferring the remaining EXAMPLE events to the current event directory: EXAMPLE2, EXAMPLE3, and EXAMPLE4.
Note: Because EXAMPLE3 should be scheduled only on Wednesday and Thursday, by demanding that it be transferred to the current event directory, you are overriding the event definition. Normally, on Wednesday and Thursday the scheduler will automatically submit this event to the current event directory.
4. Press PF2 (Switch) to access the Current Event Maintenance panel. All of the EXAMPLE events are displayed in the current event directory, as shown in the sample panel that follows.
5. Notice that EXAMPLE3 has a status code of Wait. Remember, it will be scheduled after EXAMPLE1 and before EXAMPLE2. It is waiting for EXAMPLE1 to be released from Hold status and to complete successfully.

Scheduling the EXAMPLE Events
Trial Guide 4–35
Sample Panel
JOLEVT .C ** BIM-FAQS/PCS Online V5.3A ** ID=VSE.Q008 ===> ** BIM-FAQS/PCS ONLINE - Event maintenance ** Event Name ===> * Event File ===> CURRENT Cpu ===> * Time ===> * Group ===> TRIAL Job ===> * Stat ===> * Event Job/Cmd Day/Cal N Early Group Cpuid Description Stat _ EXAMPLE1 JCLEX1 TUE 00:00 TRIAL TESTVSE A DAILY EVENT Hold _ EXAMPLE2 D TUE 00:00 TRIAL TESTVSE DAILY EVENT TOO Work _ EXAMPLE3 JCLANAL TUE 00:00 TRIAL TESTVSE MIDWEEK EVENT Wait _ EXAMPLE4 JCLJOBP TUE 00:00 TRIAL TESTVSE WAIT ON EXAMPLE2 Wait Actions: A=Audit C=Data D=Doc F=Dsuc G=Graph H=Hold J=Job L=Del N=Note P=Post R=Reset T=Tape U=Uhld V=Vars W=Work X=Edit Y=Wsuc Z=Acct PF1=Help PF2=Switch PF3=Return PF4=Create PF6=/st PF8=Fwd

Scheduling the EXAMPLE Events
4–36 BIM-FAQS/PCS
Scheduling the Events
To schedule the EXAMPLE events, follow these steps. This time, let's check off the workstation condition in EXAMPLE2 so that the event is ready to be scheduled.
1. In the input field of EXAMPLE2, enter W (Workstation) to access the workstation condition.
2. Check off the condition by entering X in the input field next to the condition.
3. Press PF4 (Update) to update this change. The following message is displayed:
MANUAL WORK STATION DEPENDENCIES RELEASED
4. Press PF3 (Return) to return to the Current Event Maintenance panel.
5. Refresh the display by pressing HOME to place the cursor at the command prompt, and then pressing ENTER. The panel is refreshed.
Notice the status of EXAMPLE2 changed from Work to Succ. Succ indicates that this event is specified as a successor by another event. Remember, EXAMPLE3 specified EXAMPLE2 as a successor--in other words, EXAMPLE2 cannot be scheduled until EXAMPLE3 has completed.
6. Unhold EXAMPLE1 by entering U (Unhold) in the input field next to this event. EXAMPLE1 is scheduled right away.
7. Continue to refresh the display. When EXAMPLE1 completes, EXAMPLE3 is scheduled, followed by EXAMPLE2, followed by EXAMPLE4. Notice that the status codes change as soon as events are scheduled.
You may see a display like the sample panel that follows.
When all of the events go to Comp status, your event schedule is complete.

Scheduling the EXAMPLE Events
Trial Guide 4–37
Sample Panel
JOLEVT .C ** BIM-FAQS/PCS Online V5.3A ** ID=VSE.Q008 ===> ** BIM-FAQS/PCS ONLINE - Event maintenance ** Event Name ===> * Event File ===> CURRENT Cpu ===> * Time ===> * Group ===> TRIAL Job ===> * Stat ===> * Event Job/Cmd Day/Cal N Early Group Cpuid Description Stat _ EXAMPLE1 JCLEX1 TUE 00:00 TRIAL TESTVSE A DAILY EVENT Comp _ EXAMPLE2 D TUE 00:00 TRIAL TESTVSE DAILY EVENT TOO Succ _ EXAMPLE3 JCLANAL TUE 00:00 TRIAL TESTVSE MIDWEEK EVENT Schd _ EXAMPLE4 JCLJOBP TUE 00:00 TRIAL TESTVSE WAIT ON EXAMPLE2 Wait Actions: A=Audit C=Data D=Doc F=Dsuc G=Graph H=Hold J=Job L=Del N=Note P=Post R=Reset T=Tape U=Uhld V=Vars W=Work X=Edit Y=Wsuc Z=Acct PF1=Help PF2=Switch PF3=Return PF4=Create PF6=/st PF8=Fwd
Conclusion
Congratulations! You've defined and scheduled your own BIM-FAQS/PCS events. If you want to continue to transfer events from the master event directory to the current event directory for scheduling, please feel free to go back and perform the procedures in this section again.
Summary
What You Did
In this chapter, you learned how to define and schedule four basic events.
What's Next?
In the next chapter, you'll define more events using other BIM-FAQS/PCS event definition features. You'll also transfer these events to the current event directory to be scheduled.

Scheduling the EXAMPLE Events
4–38 BIM-FAQS/PCS

Trial Guide 5–1
Chapter 5 Defining and Scheduling Advanced Events
In this chapter, you'll learn to define four advanced events using BIM-FAQS/PCS Online panels and transfer the four advanced events to the current event directory for scheduling.
In This Chapter Introduction
Now that you have learned to define a few basic BIM-FAQS/PCS events, you're ready to define some advanced events. "Advanced" doesn't mean these events are more complicated or difficult; it simply means that you'll be using more of the powerful, flexible, and easy-to-use BIM-FAQS/PCS event definition features.
What You'll Learn
In this chapter, you'll learn to:
• Define three advanced events using BIM-FAQS/PCS Online panels
• Transfer the four advanced events to the current event directory for scheduling
Topics
This chapter covers the following topics:
• Defining and scheduling an event to run a forecasting report
• Defining and scheduling events to run PDS backups

Defining an Event to Run a Forecast Report
5–2 BIM-FAQS/PCS
Defining an Event to Run a Forecast Report
Task Overview
Introduction
In this section of the trial, you will define event EXAMPLE5. In this event, a user enters a date in a datastation. This date is passed to a job that adds one day to the date and produces a forecasting report. It may sound complicated, but once you've defined this event, you'll see how BIM-FAQS/PCS makes multi-step event definitions easy to define.
Tasks
In this section, you'll perform the following tasks:
Task Action
I Define event EXAMPLE5
II Transfer event EXAMPLE5 to the current event directory for scheduling
Before You Begin
Before you begin the procedures in this chapter, you want to be at the Master Event Maintenance panel.

Defining an Event to Run a Forecast Report
Trial Guide 5–3
Task I: Defining Event EXAMPLE5
Introduction
The first event you will define in this chapter, EXAMPLE5, is an event that will run every day. For this event, you will define a BIM-FAQS/PCS datastation where a user must enter the date. The datastation makes this date accessible to a job, which you will also define. The job produces a forecasting report according to the date in the variable. Once again, this event belongs in the event group TRIAL, along with the rest of the events you will define in this trial.
To define EXAMPLE5, you will:
• Create a JCL member
• Define a datastation condition
Using the Systems Editor
In this example, you'll define a JCL member to be used as the event command. You'll define this member in a BIM-FAQS/PCS PDS using the systems editor. The systems editor allows you to create and edit the JCL associated with an event or command file. The editor is similar to CMS XEDIT.
What Is a Datastation?
A BIM-FAQS/PCS event datastation lets you set up an event that requires a user to manually enter data in order for the event to complete. Since some events require manual data entry, using a datastation eliminates the possibility that important variable information needed to correctly run an event has not been forgotten before the event runs.

Defining an Event to Run a Forecast Report
5–4 BIM-FAQS/PCS
Defining Event Information
To define event information for event EXAMPLE5, take the following steps:
1. From the Master Event Maintenance panel, press PF4 (Create) to create a new event. The Event Maintenance Edit panel is displayed.
2. Define event information. To do this, enter the following:
EXAMPLE5 in the Event Name field.
TRIAL in the Group Name field.
DATA STATION in the Description field.
cpuid in the Event Cpuid field of the system that will submit this event, or press ENTER to supply the default.
FORECAST in the Command field. You'll define this member in the next procedure.
value in the CSPD field of the class or partition where this event will run.
Now, all of the event information is defined.
3. Press PF4 (Upd) to save your definition.
4. BIM-FAQS/PCS will automatically take you to a blank JCL member edit panel for you to define the FORECAST member. To define the FORECAST JCL member, continue with the next procedure.
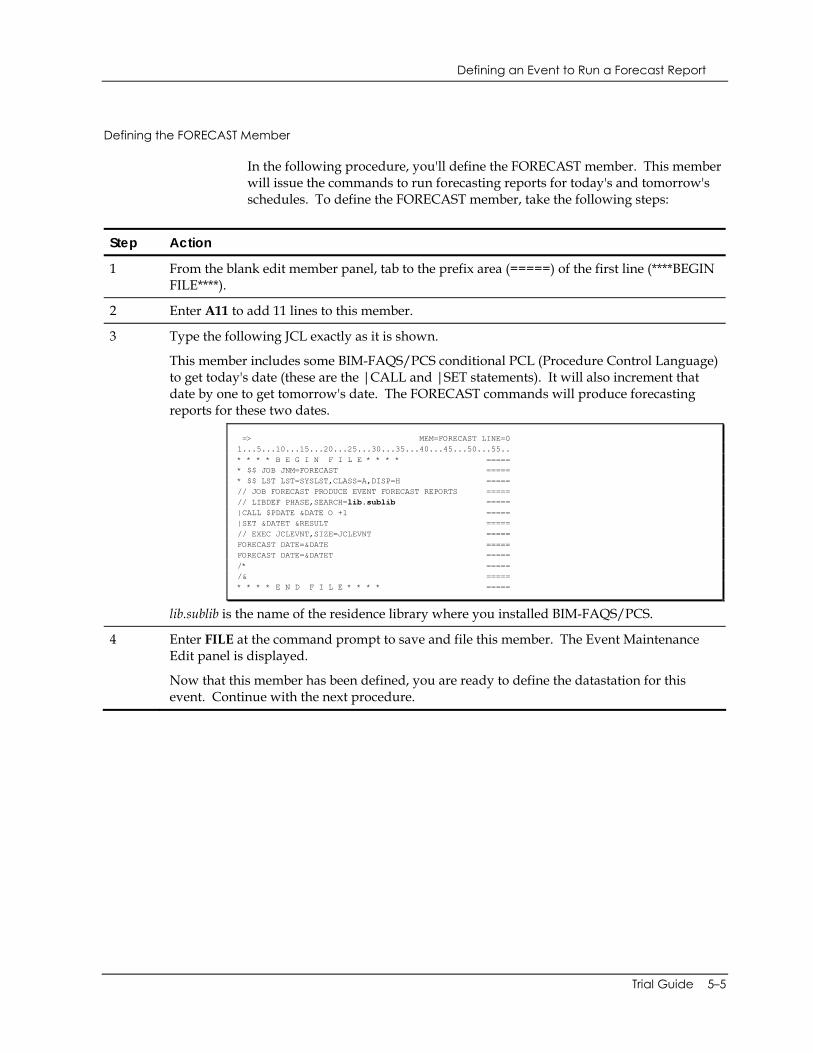
Defining an Event to Run a Forecast Report
Trial Guide 5–5
Defining the FORECAST Member
In the following procedure, you'll define the FORECAST member. This member will issue the commands to run forecasting reports for today's and tomorrow's schedules. To define the FORECAST member, take the following steps:
Step Action
1 From the blank edit member panel, tab to the prefix area (=====) of the first line (****BEGIN FILE****).
2 Enter A11 to add 11 lines to this member.
3 Type the following JCL exactly as it is shown.
This member includes some BIM-FAQS/PCS conditional PCL (Procedure Control Language) to get today's date (these are the |CALL and |SET statements). It will also increment that date by one to get tomorrow's date. The FORECAST commands will produce forecasting reports for these two dates.
=> MEM=FORECAST LINE=0 1...5...10...15...20...25...30...35...40...45...50...55.. * * * * B E G I N F I L E * * * * ===== * $$ JOB JNM=FORECAST ===== * $$ LST LST=SYSLST,CLASS=A,DISP=H ===== // JOB FORECAST PRODUCE EVENT FORECAST REPORTS ===== // LIBDEF PHASE,SEARCH=lib.sublib ===== |CALL $PDATE &DATE O +1 ===== |SET &DATET &RESULT ===== // EXEC JCLEVNT,SIZE=JCLEVNT ===== FORECAST DATE=&DATE ===== FORECAST DATE=&DATET ===== /* ===== /& ===== * * * * E N D F I L E * * * * =====
lib.sublib is the name of the residence library where you installed BIM-FAQS/PCS.
4 Enter FILE at the command prompt to save and file this member. The Event Maintenance Edit panel is displayed.
Now that this member has been defined, you are ready to define the datastation for this event. Continue with the next procedure.

Defining an Event to Run a Forecast Report
5–6 BIM-FAQS/PCS
Defining a Datastation
To define the datastation for event EXAMPLE5, follow these steps:
Step Action
1 From the Event Maintenance Edit panel, press PF10 (When) to access the panel that enables you to define conditions for this event.
2 Specify that EXAMPLE5 will run after a user has completed a datastation condition. To do this, enter X in the Data Station field in the list of Primary Conditions.
JOLEXPT .A ** BIM-FAQS/PCS Online V5.3A ** ID=VSE.Q008 ===> _ Or Condition With Next _ Condition Has Occured WHEN1 Primary Condition Primary Qualifier _ Event _ Power User _ Dos Job _ Dos Job _ PDS Member Update _ Power Job _ Power Job _ Work Station _ Event _ Phase X Data Station _ Group _ Group _ Global Variable _ PCS Proc _ User Posted _ -CA- Product _ Message Condition Value ===> Qualifier Value ===> Secondary Qualifiers EQ NE GE LE GT LT PCS User Id ===> ________ _ _ Partition Id ===> __ _ _ IBM CC ===> __ _ _ _ _ _ _ $RC Value ===> ____ _ _ _ _ _ _ $MRC Value ===> ____ _ _ _ _ _ _ CPU Id ===> ________ _ _ Time Frame ===> ____ : ____ _ _ PF1=Help PF2=Insert PF3=Return PF7=Bwd PF8=Fwd PF9=Delete
3 Press PF3 (Return) to return to the Event Maintenance Edit panel.
4 Press PF4 (Upd) to save your event definition.
5 Now you must define the datastation condition. To do this, enter DATA at the command prompt. The Define User Input Data Definitions panel is displayed:
JOLUVAR .C ** BIM-FAQS/PCS Online V5.3A ** ID=VSE.Q008 ===> Variable Name Global Data Type Ver Imod Req Strip ________ _ ____ ________ _ _ ________ _ ____ ________ _ _ ________ _ ____ ________ _ _ ________ _ ____ ________ _ _ ________ _ ____ ________ _ _ ________ _ ____ ________ _ _ ________ _ ____ ________ _ _ ________ _ ____ ________ _ _ ________ _ ____ ________ _ _ ________ _ ____ ________ _ _ ________ _ ____ ________ _ _ ________ _ ____ ________ _ _ ________ _ ____ ________ _ _ PF1=Help PF2=Define Text PF3=Return PF4=Update
Continued

Defining an Event to Run a Forecast Report
Trial Guide 5–7
Continued
Step Action
6 Define the datastation by entering the following:
DATE in the Variable Name field to name the variable that will receive input. This is the variable &DATE that you added to the FORECAST member. Note the leading ampersand (&) is not needed here.
N (No) in the Global field to specify that the variable is not a global variable, but is a local variable. A local variable is specific to one event, only.
CHAR in the Data Type field to specify that the variable value is character data.
Y in the Req field to specify that the user must supply a variable value to update the AUX DATA condition.
Y in the Strip field to indicate that leading and trailing blanks will be removed from the input value.
Your datastation definition should look like this:
JOLUVAR .C ** BIM-FAQS/PCS Online V5.3A ** ID=VSE.Q008 ===> Variable Name Global Data Type Ver Imod Req Strip DATE____ N CHAR ________ Y Y ________ _ ____ ________ _ _
7 Now, you need to set up the panel that the user will be prompted with when it's time to satisfy the datastation. Press PF2 (Define Text) to access a blank panel.
8 On the first input line, enter the instruction for the user to read. In this example, enter the following:
JOLUVAR .2 ** BIM-FAQS/PCS Online V5.3A ** ID=VSE.Q008 ===> _ Please enter the date in YY!/MM!/DD format: _
The exclamation point (!) indicates that the character that follows is to be displayed on the panel; in other words, the slash (/) will appear on the Data Station panel that the user accesses.
9 On the second input line, indicate where the input data should be placed. To do this, use the following screen formatting characters:
Character Designates
? Start of the input field
& Where the user will enter data
~ or ⊄ End of the input field
Continued

Defining an Event to Run a Forecast Report
5–8 BIM-FAQS/PCS
Continued
Step Action
So, for our example, enter ?&(seven spaces)~ at the prompt ===> <===, as shown below:
JOLUVAR .2 ** BIM-FAQS/PCS Online V5.3A ** ID=VSE.Q008 ===> _ Please enter the date in YY!/MM!/DD format _ _ _ ====>?& ~<==== _
10 Enter DEBUG at the command prompt to see how this panel will look to the user.
11 Press PF3 (Return) to return to the Define User Input Data Definitions panel.
12 Press PF4 (Update) to save these definitions. The following message is displayed at the command prompt: DATA UPDATED
13 Press PF3 (Return) to return to the Event Maintenance Edit panel.
14 Press PF4 (Upd) to update and save this event definition. The following message is displayed at the command prompt: EVENT EXAMPLE5 UPDATED IN THE MASTER FILE

Defining an Event to Run a Forecast Report
Trial Guide 5–9
Event EXAMPLE5
The following panel displays the completed definition and all of the field values for event EXAMPLE5. This definition shows that EXAMPLE5 will be scheduled every day. Because we didn't specify a value in the Event Day field, BIM-FAQS/PCS supplies the default ALL, meaning all days except holidays. This definition shows the event command is FORECAST, and it also shows that the event has a predecessor condition. JOLEVT .Z ** BIM-FAQS/PCS Online V5.3A ** ID=VSE.Q008 ===> ** Event Maintenance for File=MASTER --- Status=Mast ** Event Name ===> EXAMPLE5 Group Name ===> TRIAL Description ===> DATA STATION Event Hold ===> N Event Cpuid ===> TESTVSE ABND RC ===> Command ===> FORECAST CSPD ===> 0___ Target Node ===> Early Time ===> 0000 Late Time ===> 2400 Abort Time ===> 2400 XDATE OR ¬ MTWTFSS CYCLE H Hol-id W Event Day ===> ALL ___ _ _ _______ 000 _ 000 _ Occurrences ===> Frequency ===> Start Date ===> End Date ===> When Cond. ===> Y Successors ===> N Variables ===> N Data Sets ===> N Tape Reels ===> 00 Cartridges ===> 00 Resources ===> N Excl type ===> Exclude ===> PF1=Hlp PF2=Tra PF3=Ret PF4=Upd PF5=New PF8=Fwd PF9=Del PF10=When PF11=For
Before You Continue
Before you continue, press PF3 (Return) to access the Master Event Maintenance panel. Refresh the display by pressing HOME, and then ENTER. Event EXAMPLE5 is displayed on the panel.
Conclusion
Now that this event is defined, let's transfer it to the current event directory for scheduling.

Defining an Event to Run a Forecast Report
5–10 BIM-FAQS/PCS
Task II: Scheduling Event EXAMPLE5
Introduction
In the following procedures, you will transfer event EXAMPLE5 to the current event directory for scheduling. Before the event can be scheduled, you will have to enter today's date on the datastation.
Transferring EXAMPLE5 to the Current Directory
To transfer EXAMPLE5 from the master event directory to the current event directory, follow these steps:
Step Action
1 On the Master Event Maintenance panel, enter O (Demand) in the input field next to EXAMPLE5. Because there is a datastation condition for this event, you will be prompted with the following panel:
JOLEVT .s ** BIM-FAQS/PCS Online V5.3A ** ID=VSE.Q008 ===> Data Entry Front End for Events That Require Data Input Event: EXAMPLE5 Day: ALL Function: DEMAND ** DATA INPUT REQUIRED FOR THIS EVENT. PRESS PF5 TO SUPPLY VALUES ** PF1=Help PF3=Return PF4=Schedule PF5=Update Data
BIM-FAQS/PCS assumes that if you are manually transferring an event to the current event directory, you want the event to be scheduled. This panel gives you the opportunity to complete the datastation condition before the event is transferred to the current event file, so that when the event is ready to be scheduled, it will not wait on the datastation condition.
For our demonstration, we're not going to complete the datastation condition at this time, but instead we'll transfer the event to the current event directory.
2 Press PF4 (Schedule) to transfer the event to the current event directory. The following messages are displayed on the panel: Function Complete.
Function DEMAND has been processed for event EXAMPLE5. Function completed with data input not provided.
3 Press PF3 (Return) to return to the Master Event Maintenance panel.
4 Press PF2 (Switch) to access the Current Event Maintenance panel. EXAMPLE5 is displayed on the panel.

Defining an Event to Run a Forecast Report
Trial Guide 5–11
Status of EXAMPLE5
On the Current Event Maintenance panel, Data appears as the status code for EXAMPLE5. This means that a datastation condition is waiting to be completed. This status code signals that a user must access the Data Station panel and enter an appropriate value before the event can continue.
Completing the Datastation Condition
To complete the datastation condition, which will schedule EXAMPLE5, follow these steps:
Step Action
1 From the Current Event Maintenance panel, enter C in the input field of event EXAMPLE5. The Data Station panel is displayed:
JOLUVAR .0 ** BIM-FAQS/PCS Online V5.3A ** ID=VSE.Q008 ===> Please enter the date in YY/MM/DD format ====> <==== PF1=Help PF2=Gener PF3=Return PF4=Update
2 Tab to the input field, and enter today's date, in yy/mm/dd format. You must also enter the slashes.
JOLUVAR .0 ** BIM-FAQS/PCS Online V5.3A ** ID=VSE.Q008 ===> Please enter the date in YY/MM/DD format ====> 96/03/03 <====
3 Press PF4 (Update) to save your entry. This condition is released and the event will run. The following message is displayed at the command prompt: Data Station Conditions complete for EXAMPLE5
4 Press PF3 (Return) to return to the Current Event Maintenance panel.
5 Refresh the display by pressing HOME, and then ENTER. EXAMPLE5 is scheduled.

Defining an Event to Run a Forecast Report
5–12 BIM-FAQS/PCS
Forecast Report
In EXAMPLE5, as soon as a user enters a date in the datastation and updates the datastation, the variable information becomes accessible to the FORECAST member. Remember, you entered a statement in that member to use the date from the datastation (today's date) and to add one day. Today's date and tomorrow's date will be used to produce the forecasting report. Let's take a look at that report.
The completed forecast report, titled FORECAST, is located in the POWER LST queue. You can print the report if you are unable to view it online. The following is an example of the FORECAST report. You'll learn more about event forecasting reports in the next chapter.
====> FORECAST: 25283 RECS: 556 LINE: 1 PAGE: 1 OF 2 JOB DOCFORC 02/17/06 11:37:48 VSE6.1.2 JCLEVNT BIM-FAQS/PCS V5.3A EVENT SCHEDULER UTILITY ** BIM-FAQS/PCS BATCH EVENT SCHEDULER INTERFACE UTILTIY ** PAGE 001 FOR DATE=06/02/17 JOB DOCFORC 02/17/06 11:37:48 VSE6.1.2 JCLEVNT BIM-FAQS/PCS V5.3A EVENT SCHEDULER UTILITY ** BIM-FAQS/PCS BATCH EVENT SCHEDULER INTERFACE UTILTIY ** PAGE 002 JCLEVNT FORECAST REPORT FOR TUE 06/02/17 EVENT COMMAND EARLY START M S CPUID PN DURATION DESCRIPTION AFTERGRP &SUB PCSEVRP.JCL.B 00:00 00:00 D VSE AFTER THE GRP ALRTBCK AXPL10.DAY 22:00 22:00 D VSE ALERT BACKUPS BACKEVT PDSEVTBK 22:00 22:00 D VSE BACKUP EVT PD BACKMON PDSMONBK 22:00 22:00 D VSE BACKUP MON PD BACKVIO PDSVIOBK 22:00 22:00 D VSE BACKUP VIO PD

Defining Events to Run Backups
Trial Guide 5–13
Defining Events to Run Backups
Task Overview
Introduction
The last three events you will define in this chapter are events that will perform daily backups of the PDSs, CSS$LOG, CSS$MON, CSS$EVT, and CSS$VIO.
Tasks
In this section, you'll perform the following tasks:
Task Action
I Define event BKUPMON
II Define event BKUPVIO
III Define event BKUPLOG
IV Define event BKUPEVT
V Transfer the backup events to the current event directory for scheduling

Defining Events to Run Backups
5–14 BIM-FAQS/PCS
New Fields You'll Use
In this section, you'll be using many of the same fields you used in the previous chapter. However, you'll also learn to use a few new fields. You will be making entries in the following fields on the Event Maintenance Edit panel:
Field Entry
Early Time
Earliest time of day the event can be scheduled. Early time can range from 0000 to 9959. Values between 2400 and 9959 cause today's event to be valid for the next day.
Late Time Time of day the event will be marked as Late in the Stat field on the Current Event Maintenance panel. Late time can range from 0000 to 9959.
Abort Time
Latest time of day the event can be scheduled. Abort time can range from 0000 to 9959.
Tape Reels Number of available tape reels this event needs to execute the event command. The Tape Reels field detects only tape reels--for example, a 3420 tape drive.
Cartridges Number of available cartridge drives this event needs to execute the event command. The Cartridges field detects only cartridge drives--for example, a 3480 tape drive.
Resources Indicates whether the event has user-defined resource dependencies defined.
Before You Begin
Before you begin the procedures in this section, you want to be at the Master Event Maintenance panel.

Defining Events to Run Backups
Trial Guide 5–15
Task I: Defining Event BKUPMON
Introduction
The first event you will define in this chapter is event BKUPMON. This event will perform a daily backup of the CSS$MON PDS and will have some conditions to meet before it can run. You'll define the time of day this event should be run, marked as late, or aborted. You'll also specify the number of tape drives that will be used for the backup. Finally, you'll specify that this event needs a specific amount of system resources to run.
To define BKUPMON, you will:
• Create a JCL member using the systems editor
• Specify tape drive dependencies
• Define resource dependencies
Tape Drive Dependencies
When the event command is ready to be scheduled, BIM-FAQS/PCS scans the VSE control tables on the CPU where the scheduler is executing (PCS can only interrogate tape drives on the current CPU) to determine whether there are enough tape drives available. If there are not enough tape drives available, the event waits for them; the Current Event Maintenance panel displays the event's status as Tape, and a message is produced on the console identifying the event name and the number of tape drives needed.
You will be specifying the number of tape drives--either reels or cartridges--that need to be available to perform the backup.
Resource Dependencies
When you define a resource for an event, the event will not be dispatched unless the specified percentage or more of that resource is available. Once the event is scheduled, it owns the specified percentage of the resource until it completes.
In this example, you'll specify that event BKUPMON needs 100% of the tape drive's resource in order to perform the backup. Under normal operating conditions, you may not need to reserve 100% of this resource to do a backup. However, for the trial, you'll be specifying this for demonstration purposes only.

Defining Events to Run Backups
5–16 BIM-FAQS/PCS
Defining Event Information
To define event information for event BKUPMON, take the following steps:
1. From the Master Event Maintenance panel, press PF4 (Create) to create a new event. The Event Maintenance Edit panel is displayed.
2. Define event information. To do this, enter the following:
BKUPMON in the Event Name field.
TRIAL in the Group Name field.
BACKUP MON PDS in the Description field.
cpuid in the Event Cpuid field of the system that will submit this event.
BKUPMON in the Command field. You'll define this member in the next procedure.
value in the CSPD field of the class or partition where this event will run.
Now, all of the event information is defined.
3. Press PF4 (Upd) to save your definition.
4. BIM-FAQS/PCS will automatically take you to a blank JCL member edit panel for you to define the BKUPMON member. To define the BKUPMON JCL member, continue with the next procedure.

Defining Events to Run Backups
Trial Guide 5–17
Defining the BKUPMON Member
The BKUPMON member contains the JCL used to back up the CSS$MON PDS. To define the BKUPMON member, take the following steps:
Step Action
1 From the blank edit member panel, tab to the prefix area (=====) of the first line (****BEGIN FILE****).
2 Enter A20 to add 20 lines to this member.
3 Type the following JCL, including the statements specifying whether a tape manager is present. lib.sublib is the name of the residence library where you installed BIM-FAQS/PCS.
=> MEM=BKUPMON LINE=0 1...5...10...15...20...25...30...35...40...45...50... * * * * B E G I N F I L E * * * * ===== * $$ JOB JNM=BKUPMON ===== * $$ LST LST=SYSLST,CLASS=A,DISP=H ===== // JOB BKUPMON BACKUP CSS$MON PDS ===== // LIBDEF PHASE,SEARCH=lib.sublib ===== /* ===== /* ENTER STATEMENTS FOR TAPE MANAGER HERE ===== /* ===== /* ENTER THE FOLLOWING STATEMENTS IF NO TAPE ===== /* MANAGER IS PRESENT ===== /* ===== // ASSGN SYS010,TAPE ===== // TLBL GSPDSO,'CSS$MON.BACKUP' ===== /* ===== // EXEC BIM$PUTL,SIZE=BIM$PUTL ===== PDS=MON,BACKUP ===== /* ===== /& ===== * * * * E N D F I L E * * * * =====
If you use a tape manager, include the appropriate EXEC and ASSGN statements:
If you have Code the following JCL:
BIM-EPIC // EXEC TSIDASS
// ASSGN SYS010,DUMMY
/*
/* END OF BIM-EPIC
CA-DYNAM/T // EXEC TDYNASN
// ASSGN SYS010,DUMMY
/*
/* END OF CA-DYNAM/T
4 Enter FILE at the command prompt to save and file this member. The Event Maintenance Edit panel is displayed.
Now that this member has been defined, continue defining the event.

Defining Events to Run Backups
5–18 BIM-FAQS/PCS
Defining Event Scheduling and Dependency Information
To define event scheduling and dependency information for event BKUPMON, follow these steps:
1. Define the event scheduling information. To do this, enter the following:
2900 in the Early Time field. The event will be scheduled at or after 5:00 AM the following morning.
3000 in the Late Time field. If the event hasn't been scheduled by 6:00 AM, the event is marked as Late.
3600 in the Abort Time field. The event will not be scheduled after 12:00 PM.
2. Enter DAILY in the Event Day field to schedule this event every day.
3. Define event dependency information. To do this, first specify tape drive requirements.
4. Enter a number from 0 to 99 to indicate the number of tape drives that must be available for the event to run in either the Tape Reels field or the Cartridges field. For this example, we'll enter 01 in the Cartridges field.
5. Press PF4 (Upd) to update and save this event definition.
Now you are ready to define the resource dependencies for this event. Continue with the next procedure.

Defining Events to Run Backups
Trial Guide 5–19
Defining Resource Dependencies
To define resource dependencies for event BKUPMON, follow these steps:
Step Action
1 From the Event Maintenance Edit panel, enter RES at the command prompt. The Event Resource Definition panel is displayed.
2 Specify that this event will be scheduled when 100% of the tape drive is available, so that the backup can occur. To do this, enter the following:
A name for the resource in the Resource Name field. This can be any name, up to 44 characters in length. For our example, enter TAPE.DRIVES.
100 in the Util/Rate field
JOLRES .J ** BIM-FAQS/PCS Online V5.3A ** ID=VSE.Q008 ===> * PCS EVENT RESOURCE DEFINITIONS FOR EVENT BKUPMON * Resource Name Util/Rate Type AND/OR TAPE.DRIVES 100 % _ ___ ____________________________________________ ___ % _ ___ ____________________________________________ ___ % _ ___
3 Press PF4 (Update) to save this resource definition. BIM-FAQS/PCS supplies the default value in the Type field.
The following message is displayed at the command prompt: RESOURCE CONDITIONS FOR EVENT BKUPMON UPDATED
4 Press PF3 (Return) to return to the Event Maintenance Edit panel.
5 Press PF4 (Upd) to save the entire event definition.
The following message is displayed at the command prompt: EVENT BKUPMON UPDATED IN THE MASTER FILE

Defining Events to Run Backups
5–20 BIM-FAQS/PCS
Event BKUPMON
The following panel displays the completed definition and all of the field values for event BKUPMON. This definition shows that BKUPMON will be scheduled every day (except on holidays). The event will be scheduled between the hours of 5:00 AM and 12:00 PM the following day. This definition also shows that there are resource dependencies defined for this event. JOLEVT .Z ** BIM-FAQS/PCS Online V5.3A ** ID=VSE.Q008 ===> ** Event Maintenance for File=MASTER --- Status=Mast ** Event Name ===> BKUPMON Group Name ===> TRIAL Description ===> BACKUP MON PDS Event Hold ===> N Event Cpuid ===> TESTVSE ABND RC ===> Command ===> BKUPMON CSPD ===> 0___ Target Node ===> Early Time ===> 2900 Late Time ===> 3000 Abort Time ===> 3600 XDATE OR ¬ MTWTFSS CYCLE H Hol-id W Event Day ===> ALL ___ _ _ _______ 000 _ 000 _ Occurrences ===> Frequency ===> Start Date ===> End Date ===> When Cond. ===> N Successors ===> N Variables ===> N Data Sets ===> N Tape Reels ===> Cartridges ===> 01 Resources ===> Y Excl type ===> Exclude ===> PF1=Hlp PF2=Tra PF3=Ret PF4=Upd PF5=New PF8=Fwd PF9=Del PF10=When PF11=For
Conclusion
Before we schedule event BKUPMON, let's define events BKUPVIO and BKUPEVT.

Defining Events to Run Backups
Trial Guide 5–21
Task II: Defining Event BKUPVIO
Introduction
The next event you will define in this chapter is event BKUPVIO. This event will perform a daily backup of the CSS$VIO PDS.
Just like the previous event, BKUPVIO will have a couple of conditions to meet before it can run. You'll define the time of day this event should be run, marked as late, or aborted. You'll also define the number of tape drives needed to run this backup. Finally, you'll specify that this event needs 100% of the tape drive's resource to run.

Defining Events to Run Backups
5–22 BIM-FAQS/PCS
Copying Event Definitions
Event BKUPVIO basically has the same definition as event BKUPMON; the only difference is the PDS specified (CSS$VIO instead of CSS$MON). Because these events are similar, you can copy the event definition of BKUPMON and save it as BKUPVIO, saving yourself some time and some steps. The following procedure will copy the event definition, including the resource condition, but not the JCL member. You'll still have to create the BKUPVIO member.
To copy the event definition of BKUPMON to event BKUPVIO, take the following steps:
Step Action
1 From the Event Maintenance Edit panel, press PF3 (Return) to return to the Master Event Maintenance panel.
2 Press PF5 (Copy). The Master Event Copy panel is displayed.
JOLECOPY.5 ** BIM-FAQS/PCS Online V5.3A-40 ** ID=VSE.Q008 ===> ┌───────────────────────────────────────────────────────────────────────┐ │ ** Master Event Copy Panel ** │ ├────────────────┬──────────────────────────────────────────────────────┤ │ │ │ │ Source Event │ ===> <=== │ │ Source Group │ ===> <=== │ │ │ │ ├────────────────┼──────────────────────────────────────────────────────┤ │ │ │ │ Target Event │ ===> <=== │ │ Target Group │ ===> <=== │ │ │ │ └────────────────┴──────────────────────────────────────────────────────┘ PF1=Help PF3=Return PF4=Copy Event
3 Type BKUPMON in the Source Event field.
4 Type TRIAL in the Source Group field.
5 Type BKUPVIO in the Target Event field.
6 Type TRIAL in the Target Group field.
7 Press PF4 (Copy Event) to copy the event definition. The following message is displayed at the prompt: Event BKUPMON TRIAL has been copied to event BKUPVIO TRIAL.
8 Press PF3 (Return) to return to the Master Event Maintenance panel.

Defining Events to Run Backups
Trial Guide 5–23
9 Refresh the display by pressing HOME and then ENTER. Event BKUPVIO is displayed in the directory.
The event definition is copied, including the resource conditions. However, you'll want to change a couple of fields to specify CSS$VIO, and you'll need to define the event command BKUPVIO. Continue with the next procedure.

Defining Events to Run Backups
5–24 BIM-FAQS/PCS
Specifying CSS$VIO
To specify the CSS$VIO PDS in the event definition, follow these steps:
1. In the input field next to event BKUPVIO, enter X (Edit). The Event Maintenance Edit panel for event BKUPVIO is displayed.
2. Change all references of MON to VIO. To do this, type over the values in the following fields with the values given. Enter:
BKUPVIO in the Event Name field.
BACKUP VIO PDS in the Description field.
BKUPVIO in the Command field. You'll define this member in the next procedure.
3. Press PF4 (Upd) to save your definition.
BIM-FAQS/PCS will automatically take you to a blank JCL member edit panel for you to define the BKUPVIO member. To define the BKUPVIO JCL member, continue with the next procedure.

Defining Events to Run Backups
Trial Guide 5–25
Defining the BKUPVIO Member
The BKUPVIO member will issue the backup of the VIO PDS. Because the BKUPVIO JCL member will be basically the same as the BKUPMON JCL member, we'll copy the JCL from the BKUPMON member into the BKUPVIO member. Again, this saves you some time and some steps. All you'll have to change is all references of MON to VIO.
To define the BKUPVIO member, take the following steps:
Step Action
1 From the blank edit member panel, enter GET BKUPMON at the command prompt. The BKUPMON JCL member is displayed.
2 Change all references of MON to VIO. This includes the jobname and the specified PDS name. Your completed member should look like the following:
=> MEM=BKUPVIO LINE=0 1...5...10...15...20...25...30...35...40...45...50.. * * * * B E G I N F I L E * * * * ===== * $$ JOB JNM=BKUPVIO ===== * $$ LST LST=SYSLST,CLASS=A,DISP=H ===== // JOB BKUPVIO BACKUP CSS$VIO PDS ===== // LIBDEF PHASE,SEARCH=lib.sublib ===== /* ===== /* ENTER STATEMENTS FOR TAPE MANAGER HERE ===== /* ===== /* ENTER THE FOLLOWING STATEMENTS IF NO TAPE ===== /* MANAGER IS PRESENT ===== /* ===== // ASSGN SYS010,TAPE ===== // TLBL GSPDSO,'CSS$VIO.BACKUP' ===== /* ===== // EXEC BIM$PUTL,SIZE=BIM$PUTL ===== PDS=VIO,BACKUP ===== /* ===== /& ===== * * * * E N D F I L E * * * * =====
If you included EXEC and ASSGN statements for your tape manager, these statements are copied into your BKUPVIO member.
3 Enter FILE at the command prompt to save and file this member. The Event Maintenance Edit panel is displayed.
4 Press PF4 (Upd) to save the entire event definition. Remember, using the event definition copy function, the resource condition is copied over and the event definition is complete.

Defining Events to Run Backups
5–26 BIM-FAQS/PCS
Event BKUPVIO
The following panel displays the completed definition and all of the field values for event BKUPVIO. This definition shows that BKUPVIO will be scheduled every day (except on holidays). The event will be scheduled between the hours of 5:00 AM and 12:00 PM the following day. This definition also shows that there are resource dependencies defined for this event. JOLEVT .Z ** BIM-FAQS/PCS Online V5.3A ** ID=VSE.Q008 ===> ** Event Maintenance for File=MASTER --- Status=Mast ** Event Name ===> BKUPVIO Group Name ===> TRIAL Description ===> BACKUP VIO PDS Event Hold ===> N Event Cpuid ===> TESTVSE ABND RC ===> Command ===> BKUPVIO CSPD ===> 0___ Target Node ===> Early Time ===> 2900 Late Time ===> 3000 Abort Time ===> 3600 XDATE OR ¬ MTWTFSS CYCLE H Hol-id W Event Day ===> ALL ___ _ _ _______ 000 _ 000 _ Occurrences ===> Frequency ===> Start Date ===> End Date ===> When Cond. ===> N Successors ===> N Variables ===> N Data Sets ===> N Tape Reels ===> Cartridges ===> 01 Resources ===> Y Excl type ===> Exclude ===> PF1=Hlp PF2=Tra PF3=Ret PF4=Upd PF5=New PF8=Fwd PF9=Del PF10=When PF11=For
Conclusion
Before we schedule events BKUPMON, BKUPLOG, and BKUPVIO, let's define event BKUPEVT.

Defining Events to Run Backups
Trial Guide 5–27
Task II: Defining Event BKUPLOG
Introduction
The next event you will define in this chapter is event BKUPLOG. This event will perform a daily backup of the CSS$LOG PDS.
BKUPLOG will have a couple of conditions to meet before it can run. You will define the time of day this event should be run, marked as late, or aborted. You will also define the number of tape drives needed to run this backup. Finally, you will specify that this event needs 100% of the tape drive's resource to run.

Defining Events to Run Backups
5–28 BIM-FAQS/PCS
Copying Event Definitions
Event BKUPLOG basically has the same definition as event BKUPMON. The only difference is the PDS specified (CSS$LOG instead of CSS$MON). Because these events are similar, you can copy the event definition of BKUPMON and save it as BKUPLOG, saving yourself some time and some steps. The following procedure will copy the event definition, including the resource condition, but not the JCL member. You will still have to create the BKUPLOG member.
To copy the event definition of BKUPMON to event BKUPLOG, take the following steps:
Step Action
1 From the Event Maintenance Edit panel, press PF3 (Return) to return to the Master Event Maintenance panel.
2 Press PF5 (Copy). The Master Event Copy panel is displayed.
JOLECOPY.5 ** BIM-FAQS/PCS Online V5.3A-40 ** ID=VSE.Q008 ===> ┌───────────────────────────────────────────────────────────────────────┐ │ ** Master Event Copy Panel ** │ ├────────────────┬──────────────────────────────────────────────────────┤ │ │ │ │ Source Event │ ===> <=== │ │ Source Group │ ===> <=== │ │ │ │ ├────────────────┼──────────────────────────────────────────────────────┤ │ │ │ │ Target Event │ ===> <=== │ │ Target Group │ ===> <=== │ │ │ │ └────────────────┴──────────────────────────────────────────────────────┘ PF1=Help PF3=Return PF4=Copy Event
3 Type BKUPMON in the Source Event field.
4 Type TRIAL in the Source Group field.
5 Type BKUPLOG in the Target Event field.
6 Type TRIAL in the Target Group field.
5 Press PF4 (Copy Event) to copy the event definition. The following message is displayed at the prompt: Event BKUPMON TRIAL has been copied to event BKUPLOG TRIAL.
6 Press PF3 (Return) to return to the Master Event Maintenance panel.

Defining Events to Run Backups
Trial Guide 5–29
7 Refresh the display by pressing HOME and then ENTER. Event BKUPLOG is displayed in the directory.
The event definition is copied, including the resource conditions. However, you'll want to change a couple of fields to specify CSS$LOG, and you'll need to define the event command BKUPLOG. Continue with the next procedure.

Defining Events to Run Backups
5–30 BIM-FAQS/PCS
Specifying CSS$LOG
To specify the CSS$LOG PDS in the event definition, follow these steps:
1. In the input field next to event BKUPLOG, enter X (Edit). The Event Maintenance Edit panel for event BKUPLOG is displayed.
2. Change all references of MON to LOG. To do this, type over the values in the following fields with the values given. Enter:
BKUPLOG in the Event Name field.
BACKUP LOG PDS in the Description field.
BKUPLOG in the Command field. You'll define this member in the next procedure.
3. Press PF4 (Upd) to save your definition.
BIM-FAQS/PCS will automatically take you to a blank JCL member edit panel for you to define the BKUPLOG member. To define the BKUPLOG JCL member, continue with the next procedure.

Defining Events to Run Backups
Trial Guide 5–31
Defining the BKUPLOG Member
The BKUPLOG member will issue the backup of the LOG PDS. Because the BKUPLOG JCL member will be the same as the BKUPMON JCL member, we will copy the JCL from the BKUPMON member into the BKUPLOG member. Again, this saves you some time and some steps. All you'll have to change is all references of MON to LOG.
To define the BKUPLOG member, take the following steps:
Step Action
1 From the blank edit member panel, enter GET BKUPMON at the command prompt. The BKUPMON JCL member is displayed.
2 Change all references of MON to LOG. This includes the jobname and the specified PDS name. Your completed member should look like the following:
=> MEM=BKUPLOG LINE=0 1...5...10...15...20...25...30...35...40...45...50.. * * * * B E G I N F I L E * * * * ===== * $$ JOB JNM=BKUPLOG ===== * $$ LST LST=SYSLST,CLASS=A,DISP=H ===== // JOB BKUPLOG BACKUP CSS$LOG PDS ===== // LIBDEF PHASE,SEARCH=lib.sublib ===== /* ===== /* ENTER STATEMENTS FOR TAPE MANAGER HERE ===== /* ===== /* ENTER THE FOLLOWING STATEMENTS IF NO TAPE ===== /* MANAGER IS PRESENT ===== /* ===== // ASSGN SYS010,TAPE ===== // TLBL GSPDSO,'CSS$LOG.BACKUP' ===== /* ===== // EXEC BIM$PUTL,SIZE=BIM$PUTL ===== PDS=LOG,BACKUP ===== /* ===== /& ===== * * * * E N D F I L E * * * * =====
If you included EXEC and ASSGN statements for your tape manager, these statements are copied into your BKUPLOG member.
3 Enter FILE at the command prompt to save and file this member. The Event Maintenance Edit panel is displayed.
4 Press PF4 (Upd) to save the entire event definition. Remember, using the event definition copy function, the resource condition is copied over and the event definition is complete.

Defining Events to Run Backups
5–32 BIM-FAQS/PCS
Event BKUPLOG
The following panel displays the completed definition and all of the field values for event BKUPLOG. This definition shows that BKUPLOG will be scheduled every day (except on holidays). The event will be scheduled between the hours of 5:00 AM and 12:00 PM the following day. This definition also shows that there are resource dependencies defined for this event. JOLEVT .Z ** BIM-FAQS/PCS Online V5.3A ** ID=VSE.Q008 ===> ** Event Maintenance for File=MASTER --- Status=Mast ** Event Name ===> BKUPLOG Group Name ===> TRIAL Description ===> BACKUP LOG PDS Event Hold ===> N Event Cpuid ===> TESTVSE ABND RC ===> Command ===> BKUPLOG CSPD ===> 0___ Target Node ===> Early Time ===> 2900 Late Time ===> 3000 Abort Time ===> 3600 XDATE OR ¬ MTWTFSS CYCLE H Hol-id W Event Day ===> ALL ___ _ _ _______ 000 _ 000 _ Occurrences ===> Frequency ===> Start Date ===> End Date ===> When Cond. ===> N Successors ===> N Variables ===> N Data Sets ===> N Tape Reels ===> Cartridges ===> 01 Resources ===> Y Excl type ===> Exclude ===> PF1=Hlp PF2=Tra PF3=Ret PF4=Upd PF5=New PF8=Fwd PF9=Del PF10=When PF11=For
Conclusion
Before we schedule events BKUPMON, BKUPLOG, and BKUPLOG, let's define event BKUPEVT.

Defining Events to Run Backups
Trial Guide 5–33
Task IV: Defining Event BKUPEVT
Introduction
The next event you will define in this chapter is event BKUPEVT. This event will perform a daily backup of the MASTER Event File.
Just like the previous event, BKUPEVT will have a couple of conditions to meet before it can run. You'll define the time of day this event should be run, marked as late, or aborted. You'll also define the number of tape drives needed to run this backup. Finally, you'll specify that this event needs 100% of the tape drive's resource to run.

Defining Events to Run Backups
5–34 BIM-FAQS/PCS
Copying Event Definitions
Event BKUPEVT basically has the same definition as event BKUPMON; the only difference is the PDS specified (CSS$EVT instead of CSS$MON). Because these events are similar, you can copy the event definition of BKUPMON and save it as BKUPEVT, saving yourself some time and some steps. The following procedure will copy the event definition, including the resource condition, but not the JCL member. You'll still have to create the BKUPEVT member.
To copy the event definition of BKUPMON to event BKUPEVT, take the following steps:
Step Action
1 From the Event Maintenance Edit panel, press PF3 (Return) to return to the Master Event Maintenance panel.
2 Press PF5 (Copy). The Master Event Copy panel is displayed.
JOLECOPY.5 ** BIM-FAQS/PCS Online V5.3A-40 ** ID=VSE.Q008 ===> ┌───────────────────────────────────────────────────────────────────────┐ │ ** Master Event Copy Panel ** │ ├────────────────┬──────────────────────────────────────────────────────┤ │ │ │ │ Source Event │ ===> <=== │ │ Source Group │ ===> <=== │ │ │ │ ├────────────────┼──────────────────────────────────────────────────────┤ │ │ │ │ Target Event │ ===> <=== │ │ Target Group │ ===> <=== │ │ │ │ └────────────────┴──────────────────────────────────────────────────────┘ PF1=Help PF3=Return PF4=Copy Event
3 Type BKUPMON in the Source Event field.
4 Type TRIAL in the Source Group field.
5 Type BKUPEVT in the Target Event field.
6 Type TRIAL in the Target Group field.
7 Press PF4 (Copy Event) to copy the event definition. The following message is displayed at the prompt: Event BKUPMON TRIAL has been copied to event BKUPEVT TRIAL.
8 Press PF3 (Return) to return to the Master Event Maintenance panel.

Defining Events to Run Backups
Trial Guide 5–35
9 Refresh the display by pressing HOME and then ENTER. Event BKUPEVT is displayed in the directory.
The event definition is copied, including the resource conditions. However, you'll want to change a couple of fields to specify CSS$EVT, and you'll need to define the event command BKUPEVT. Continue with the next procedure.

Defining Events to Run Backups
5–36 BIM-FAQS/PCS
Specifying CSS$EVT
To specify the CSS$EVT PDS in the event definition, follow these steps:
1. In the input field next to event BKUPEVT, enter X (Edit). The Event Maintenance Edit panel for event BKUPEVT is displayed.
2. Change all references of MON to EVT. To do this, type over the values in the following fields with the values given. Enter:
BKUPEVT in the Event Name field.
BACKUP EVT File in the Description field.
BKUPEVT in the Command field. You'll define this member in the next procedure.
3. Press PF4 (Upd) to save your definition.
BIM-FAQS/PCS will automatically take you to a blank JCL member edit panel for you to define the BKUPEVT member. To define the BKUPEVT JCL member, continue with the next procedure.

Defining Events to Run Backups
Trial Guide 5–37
Defining the BKUPEVT Member
The BKUPEVT member contains the JCL used to backup the Event File. To define the BKUPEVT member, take the following steps:
Step Action
1 From the blank edit member panel, tab to the prefix area (=====) of the first line (****BEGIN FILE****).
2 Enter A20 to add 20 lines to this member.
3 Type the following JCL, including the statements specifying whether a tape manager is present. lib.sublib is the name of the residence library where you installed BIM-FAQS/PCS.
=> MEM=BKUPMON LINE=0 1...5...10...15...20...25...30...35...40...45...50... * * * * B E G I N F I L E * * * * ===== /* BACKUP JCL USED TO BACKUP THE EVENT FILE ===== // JOB PCSEVBR BACKUP EVENTS ===== /* THE DLBL & EXTENT FOR THE CSS$EVT PDS SHOULD ===== /* BE IN STD LABELS, IF NOT ADD TO THE JCL ===== // TLBL PCSEVO, BACKUP.EVTS' ===== // ASSGN SYS010,TAPE ===== // EXEC PCSEVBR,SIZE=PCSEVBR ===== BACKUP LIST=YES ===== /* ===== * * * * E N D F I L E * * * * =====
If you use a tape manager, include the appropriate EXEC and ASSGN statements:
4 Enter FILE at the command prompt to save and file this member. The Event Maintenance Edit panel is displayed.
Now that this member has been defined, continue defining the event.

Defining Events to Run Backups
5–38 BIM-FAQS/PCS
Event BKUPEVT
The following panel displays the completed definition and all of the field values for event BKUPEVT. This definition shows that BKUPEVT will be scheduled every day (except on holidays). The event will be scheduled between the hours of 5:00 AM and 12:00 PM the following day. This definition also shows that there are resource dependencies defined for this event. JOLEVT .Z ** BIM-FAQS/PCS Online V5.3A ** ID=VSE.Q008 ===> ** Event Maintenance for File=MASTER --- Status=Mast ** Event Name ===> BKUPEVT Group Name ===> TRIAL Description ===> BACKUP EVT PDS Event Hold ===> N Event Cpuid ===> TESTVSE ABND RC ===> Command ===> BKUPEVT CSPD ===> 0___ Target Node ===> Early Time ===> 2900 Late Time ===> 3000 Abort Time ===> 3600 XDATE OR ¬ MTWTFSS CYCLE H Hol-id W Event Day ===> ALL ___ _ _ _______ 000 _ 000 _ Occurrences ===> Frequency ===> Start Date ===> End Date ===> When Cond. ===> N Successors ===> N Variables ===> N Data Sets ===> N Tape Reels ===> Cartridges ===> 01 Resources ===> Y Excl type ===> Exclude ===> PF1=Hlp PF2=Tra PF3=Ret PF4=Upd PF5=New PF8=Fwd PF9=Del PF10=When PF11=For
Conclusion
Now the three backup events are complete. In the next section, you'll transfer the events to the current event directory for scheduling.

Defining Events to Run Backups
Trial Guide 5–39
Task V: Scheduling the Backup Events
Introduction
In the following procedures, you will transfer events BKUPMON, BKUPEVT, BKUPLOG, and BKUPVIO to the current event directory for scheduling. These events do not depend on each other in order to be scheduled; however, they do need to use the same resource. Because these events need 100% of the tape drive's resource, they cannot be scheduled at the same time.
Please be reminded, under normal operations, there is no reason these events should not be able to run at the same time. We've defined these events and their resources for demonstration purposes only.
Transferring Events to the Current Directory
To transfer the backup events from the master event directory to the current event directory, follow these steps:
1. On the Master Event Maintenance panel, enter O (Demand) in the input field next to BKUPMON. The following message is displayed at the command prompt:
EVENT BKUPMON TRANSFERRED TO THE CURRENT FILE
2. Repeat Step 1 two more times, transferring events BKUPEVT, BKUPLOG, and BKUPVIO to the current event directory.
3. Press PF2 (Switch) to access the Current Event Maintenance panel. BKUPMON, BKUPEVT, BKUPLOG, and BKUPVIO are displayed on the panel.
Scheduling Events
Once these events are transferred to the current event directory, BKUPMON will be scheduled after 5:00 AM the following morning as all of the conditions are met. (BKUPMON will run first because, in this case, events are prioritized in alphabetical order.) Because the first condition this event is waiting on is the start time, the status of BKUPMON is Time. After 5:00 AM, if BKUPMON is waiting for the resources to become available, its status will be Reso. If resources are available, but no tape drives--in our example, cartridges--are available, BKUPMON's status will be Tape. Tape drives is the last condition checked by the scheduler.
Events BKUPVIO, BKUPLOG, and BKUPEVT will have a status of Reso until the resources being used by BKUPMON are available. Once the resources are available, it is possible the status will change to Tape.

Defining Events to Run Backups
5–40 BIM-FAQS/PCS
Conclusion
You've just defined and scheduled three events that perform backups on the PDSs. We recommend that you keep these events in your schedule and run these backups daily. You will want to adjust the event definition to suit your needs.
Summary
What You Did
In this chapter, you learned to use more of the event definition features of BIM-FAQS/PCS. You defined an event that requires user data to produce a forecasting report. You also defined three events that perform backups of PDSs--events that are critical to maintaining your system.
What's Next?
In the next chapter, you'll learn how to generate a variety of BIM-FAQS/PCS online displays and batch reports.

Trial Guide 6–1
Chapter 6 Viewing Event Information
Now that you have defined and scheduled some BIM-FAQS/PCS events, you can view a variety of extensive online displays and batch reports about those events.
In This Chapter What You'll Learn
In this chapter, you'll learn to produce BIM-FAQS/PCS online displays and batch reports to give you information about your:
• Past schedule activity
• Present schedule specifications
• Future schedule workload
Topics
This chapter covers the following topics:
• Audit History display
• Account History display
• Event Cross-Reference reports
• Event Forecast display
• Partition Occupancy report
Before You Begin
Before you begin the procedures in this chapter, you want to be at the BIM-FAQS/PCS Menu Index.

Viewing History Information
6–2 BIM-FAQS/PCS
Viewing History Information
Task Overview
Introduction
BIM-FAQS/PCS provides a variety of online displays that produce event history information. By viewing history information, you can, for example:
• Verify that events and jobs ran at the correct time
• Determine why specific jobs didn't run
• See how long an event ran
• Check the duration of the job, and the total start I/Os and CPU time used by the job
• See types of activity performed on PDS members, when the PDS members were changed, and who changed them
History Displays
A few of the BIM-FAQS/PCS history displays are:
• The Dataset Audit Log, which shows detailed dataset history information
• The Audit History display, which shows the activity of events and PDS members
• The Account History display, which shows system usage statistics for each event's job
You can view all history information online, or you can print a history report using one of the corresponding batch utilities: BIM$DSUT, BIM$ADUT, or BIM$ACUT.
Tasks
In this section, you'll perform the following tasks:
Task Action
I Produce an online Audit History display
II Produce an online Account History display

Viewing History Information
Trial Guide 6–3
Task I: Producing an Audit History Display
Introduction
Online job auditing is useful to determine the activity that has occurred on events or PDS members. All changes to BIM-FAQS/PCS events or PDS members create audit records for Audit History displays. You can view Audit History displays for:
• Specific events, a group of events, or all events
• Specific PDS members, a group of PDS members, or all PDS members
• Events or members that executed on a specific date
• Events or members in a specific PDS library
In this section, you'll produce an Audit History display for the events you defined earlier in the trial.
What This Display Shows You
The Audit History display produces information about the activity that has occurred on events or PDS members. The online display produces information such as:
• Event or member name
• Function performed on the event or member (for example, if it was copied, executed, updated, deleted)
• Location of the event or member
• User ID of the person that performed the function
• Library where the event or member was accessed from
• CPU ID where the function was performed
• The day, date, and time the function occurred

Viewing History Information
6–4 BIM-FAQS/PCS
Procedure
To produce an online Audit History display, follow these steps:
Step Action
1 From the BIM-FAQS/PCS Menu Index, select the Audit History Display option by entering A at the command prompt. The Audit History Selection panel is displayed. This panel enables you to determine the contents of the Audit History display.
JOLAUDT .A ** BIM-FAQS/PCS Online V5.3A-40 ** ID=VSE.Q008 ===> BIM-FAQS/PCS AUDIT HISTORY SELECTION PANEL Name ===> (Event or PDS member name Generics supported) Group ===> (Group name Generics supported) Date ===> (= > < YY/MM/DD or *) Lib ===> (PDS DLBL name or External Library Name) Functions Member Type _ All Functions _ All Types of Members _ ADD _ Events (Current and Master File) _ COPY _ Master Event File _ DELETE _ Current Event File _ EXEC _ PDS Members _ MOVE _ Source or BIM$OIEI Submit _ REPLACE _ ICCF Members _ UPDATE _ VSE Library Members _ DSPL _ BIM-EDIT Members _ RSGE _ CONDOR Members _ POST _ CA-LIBRARIAN Members _ RESET _ CA-PANVALET Members _ UNHOLD _ CA-VOLLIE Members _ HOLD _ USER Members _ LATE _ POWER RDR Queue PF1=Help PF3=Return
2 Specify that you want to view audit history for all of the sample events for all days. To do this, type
EXAMPLE* in the Name===> field
* in the Date===> field to view the audit history for all days
JOLAUDT .A ** BIM-FAQS/PCS Online V5.3A-40 ** ID=VSE.Q008 ===> BIM-FAQS/PCS AUDIT HISTORY SELECTION PANEL Name ===> EXAMPLE* (Event or PDS member name Generics supported) Group ===> (Group name Generics supported) Date ===> * (= > < YY/MM/DD or *) Lib ===> (PDS DLBL name or External Library Name)
Continued

Viewing History Information
Trial Guide 6–5
Continued
Step Action
3 Indicate that you want to display all functions for events in the current and master event directories. To do this, enter
X in the input field of All Functions
X in the input field of Events
JOLAUDT .A ** BIM-FAQS/PCS Online V5.3A-40 ** ID=VSE.Q008 ===> BIM-FAQS/PCS AUDIT HISTORY SELECTION PANEL Name ===> EXAMPLE* (Event or PDS member name Generics supported) Group ===> (Group name Generics supported) Date ===> * (= > < YY/MM/DD or *) Lib ===> (PDS DLBL name or External Library Name) Functions Member Type X All Functions _ All Types of Members _ ADD X Events (Current and Master File) _ COPY _ Master Event File _ DELETE _ Current Event File _ EXEC _ PDS Members _ MOVE _ Source or BIM$OIEI Submit _ REPLACE _ ICCF Members _ UPDATE _ VSE Library Members _ DSPL _ BIM-EDIT Members _ RSGE _ CONDOR Members _ POST _ CA-LIBRARIAN Members _ RESET _ CA-PANVALET Members _ UNHOLD _ CA-VOLLIE Members _ HOLD _ USER Members _ LATE _ POWER RDR Queue PF1=Help PF3=Return
4 Press ENTER. The Audit History display is produced.
Sample Display
The following panels are an example of the full Audit History display for all of the sample events:
JOLAUDT .A ** BIM-FAQS/PCS Online V5.3A-40 ** ID=VSE.Q008 ===> Audit History for EXAMPLE* * Member Typ Request Lib User Library CPU E Day Date Time EXAMPLE- EXEC B ADMN DRJ FF000420 N WED 09/05/13 11.00.10 EXAMPLE- EXEC B ADMN DRJ FF000420 N WED 09/05/13 10.00.07 EXAMPLE3 EVT EXEC A ADMN SYS$EVT FF000420 N WED 09/05/13 03.00.03 EXAMPLE1 EVT EXEC A ADMN SYS$EVT FF000420 N WED 09/05/13 02.59.59 EXAMPLE- EXEC B ADMN DRJ FF000420 N TUE 09/05/12 11.00.21 EXAMPLE- EXEC B ADMN DRJ FF000420 N TUE 09/05/12 10.00.05 EXAMPLE1 EVT EXEC A ADMN SYS$EVT FF000420 N TUE 09/05/12 03.00.00 EXAMPLE- EXEC B ADMN DRJ FF000420 N MON 09/05/11 11.00.13 EXAMPLE- EXEC B ADMN DRJ FF000420 N MON 09/05/11 10.00.03 EXAMPLE1 EVT EXEC A ADMN SYS$EVT FF000420 N MON 09/05/11 03.00.00 EXAMPLE- EXEC B ADMN DRJ FF000420 N SUN 09/05/10 11.00.07 EXAMPLE1 EVT EXEC A ADMN SYS$EVT FF000420 N SUN 09/05/10 03.00.00 EXAMPLE- EXEC B ADMN DRJ FF000420 N SAT 09/05/09 11.00.08 EXAMPLE1 EVT EXEC A ADMN SYS$EVT FF000420 N SAT 09/05/09 03.00.00 EXAMPLE- EXEC B ADMN DRJ FF000420 N FRI 09/05/08 11.00.09 EXAMPLE- EXEC B ADMN DRJ FF000420 N FRI 09/05/08 10.00.06 EXAMPLE1 EVT EXEC A ADMN SYS$EVT FF000420 N FRI 09/05/08 03.00.00 EXAMPLE- EXEC B ADMN DRJ FF000420 N THU 09/05/07 11.00.14 EXAMPLE- EXEC B ADMN DRJ FF000420 N THU 09/05/07 10.00.05 PF1=Help PF2=FIFO PF3=Return PF8=Fwd PF11=Right

Viewing History Information
6–6 BIM-FAQS/PCS
JOLAUDT .B ** BIM-FAQS/PCS Online V5.3A-40 ** ID=VSE.Q008 ===> Audit History for EXAMPLE* * PJOB Pn POWER User Field Group JCLSCHED F4 JCLSCHED F4 JCLSCHED F4 TRIAL JCLSCHED F4 TRIAL JCLSCHED F4 JCLSCHED F4 JCLSCHED F4 TRIAL JCLSCHED F4 JCLSCHED F4 JCLSCHED F4 TRIAL JCLSCHED F4 JCLSCHED F4 TRIAL JCLSCHED F4 JCLSCHED F4 TRIAL JCLSCHED F4 JCLSCHED F4 JCLSCHED F4 TRIAL JCLSCHED F4 JCLSCHED F4 PF1=Help PF2=FIFO PF3=Return PF8=Fwd PF10=Left
Moving Around in the Online Display
To move from the first panel to the second panel, press PF11 (Right); to return to the first from the second, press PF10 (Left).
To scroll the report forward one panel, press PF8 (Fwd); to scroll the report backward one panel, press PF7 (Bwd).

Viewing History Information
Trial Guide 6–7
Audit History Fields
Field Explanation
Member Either the PDS member name or event name.
Typ 3-character data type of the library member.
Request Type of request performed on the event or library member.
Lib Location of the member or event:
A The current event directory D The ICCF library E The master event directory L A VSE library P A PDS member S The editor or source library U The user interface
User User ID of whoever performed the PCS function.
Library Library where the member or event was accessed from. This corresponds with the LIB identifier.
CPU CPU ID where the PCS function was performed.
E Detected security violations:
N Indicates the request was successful P Indicates the request was not performed due to a security violation
Day Day of the request.
Date Date of the request.
Time Time of the request.
PJOB POWER jobname of the task that issued the PCS request.
PN VSE partition syslog ID.
POWER User Field
Data specified in the USER parameter on the POWER job card.
Group The name of the group to which the event belongs.
Conclusion
You've generated and viewed auditing information about your sample events. Now that you've seen the activity that has occurred on these events, wouldn't it be nice to see information about the jobs? You can view this information on the Account History display, which is explained in the next section.
Viewing History Information
6–8 BIM-FAQS/PCS
Task II: Producing an Account History Display
Introduction
Accounting information is maintained for all jobs submitted by BIM-FAQS/PCS. An account record is produced because an event or PDS member was executed in a partition. When you initialized BIM-FAQS/PCS, your account file was started.
By generating the BIM-FAQS/PCS Account History display, you can view detailed event accounting information for specific events, a group of events, or all events, and further limit the display by:
• Jobname
• Phase name
• Partition ID
• Date
• Return code
In this section, you'll produce an Account History display for the sample events.
What This Display Shows You
The Account History display produces information about each job. It displays information such as:
• Event or member name
• Jobname
• Amount of start I/Os issued by the jobstep
• CPU time used by this step
• Duration of this job
Event Summary Information
Event history summary data is collected by the EVTSUM control statement of the BIM$ACUT utility. Each time EVTSUM is executed, event summary data is updated. The more frequently EVTSUM is executed, the more accurate and useful the summary data.
For this demonstration, you will not execute the BIM$ACUT utility with the EVTSUM control statement. However, under normal operating conditions, we recommend that you execute this utility daily to provide current data for more accurate forecasting.

Viewing History Information
Trial Guide 6–9
Procedure
To produce an Account History display for the EXAMPLE events, follow these steps:
Step Action
1 From the BIM-FAQS/PCS Menu Index, select the Account History Display option by entering Z at the command prompt. The Account History Selection panel is displayed. This panel enables you to determine the contents of the Account History display.
JOLACCT .Z ** BIM-FAQS/PCS Online V5.3A-30 ** ID=VSE.Q008 ===> ┌───────────────────────────────────────────────────────────────────────┐ │ ** BIM-FAQS/PCS ACCOUNT HISTORY SELECTION PANEL ** │ ├────────────────────────────┬──────────────────────────────────────────┤ │ Event ===> │ (Event name Generics supported) │ │ Group ===> │ (Group name Generics supported) │ │ Proc ===> │ (Proc name Generics supported) │ │ Djob ===> │ (Dos Job Name Generics supported) │ │ Pjob ===> │ (Power Job Name Generics supported) │ │ Phase ===> │ (Phase Name Generics supported) │ │ Pid ===> │ (Partition Id or *) │ │ Date ===> │ (= > < ¬ YY/MM/DD or *) │ │ CC ===> │ (= > < ¬ CC or *) │ │ $RC ===> │ (= > < ¬ $RC or *) │ │ $MRC ===> │ (= > < ¬ $MRC or *) │ │ Type ===> │ (Record type L, S, C, T, or *) │ ├────────────────────────────┴──────────────────────────────────────────┤ │ Fill in information for one or more of the above listed │ │ selections. Any selection that is not specified will │ │ default to *. │ └───────────────────────────────────────────────────────────────────────┘ PF1=Help PF2=Summary PF3=Return
Note: If you executed the GSACCT utility with the EVTSUM control statement, you could use PF2 (Summary) to produce the Event History Summary display. This display shows summaries about various statistics for each event.

Viewing History Information
6–10 BIM-FAQS/PCS
2 Specify that you want to view accounting information for all of the EXAMPLE events. To do this, enter EXAMPLE* in the Event ===> field. Let all of the remaining fields on this panel use their defaults.
JOLACCT .Z ** BIM-FAQS/PCS Online V5.3A-30 ** ID=VSE.Q008 ===> ┌───────────────────────────────────────────────────────────────────────┐ │ ** BIM-FAQS/PCS ACCOUNT HISTORY SELECTION PANEL ** │ ├────────────────────────────┬──────────────────────────────────────────┤ │ Event ===> EXAMPLE* │ (Event name Generics supported) │ │ Group ===> │ (Group name Generics supported) │ │ Proc ===> │ (Proc name Generics supported) │ │ Djob ===> │ (Dos Job Name Generics supported) │ │ Pjob ===> │ (Power Job Name Generics supported) │ │ Phase ===> │ (Phase Name Generics supported) │ │ Pid ===> │ (Partition Id or *) │ │ Date ===> │ (= > < ¬ YY/MM/DD or *) │ │ CC ===> │ (= > < ¬ CC or *) │ │ $RC ===> │ (= > < ¬ $RC or *) │ │ $MRC ===> │ (= > < ¬ $MRC or *) │ │ Type ===> │ (Record type L, S, C, T, or *) │ ├────────────────────────────┴──────────────────────────────────────────┤ │ Fill in information for one or more of the above listed │ │ selections. Any selection that is not specified will │ │ default to *. │ └───────────────────────────────────────────────────────────────────────┘ PF1=Help PF2=Summary PF3=Return
3 Press ENTER. The Account History display is produced.

Viewing History Information
Trial Guide 6–11
Sample Display
The following panels are an example of the full Account History display for the EXAMPLE events: JOLACCT .0 ** BIM-FAQS/PCS Online V5.3A-30 ** ID=VSE.Q008 ===> Account History Information Event DJob Phase PN CC $RC SIO CPUT Date Time Duration EXAMPLE3 JCLANAL BIM$PUTL BG 10 0000 003417 000.30 09/05/13 03.00.04 00.00.01 EXAMPLE1 JCLEX1 LIBR BG 10 0000 001069 000.25 09/05/13 03.00.00 00.00.00 EXAMPLE1 JCLEX1 LIBR BG 10 0000 001069 000.26 09/05/12 03.00.03 00.00.00 EXAMPLE1 JCLEX1 LIBR BG 10 0000 001071 000.26 09/05/11 03.00.04 00.00.01 EXAMPLE1 JCLEX1 LIBR BG 10 0000 001069 000.25 09/05/10 03.00.01 00.00.00 EXAMPLE1 JCLEX1 LIBR BG 10 0000 001071 000.26 09/05/09 03.00.03 00.00.01 EXAMPLE1 JCLEX1 LIBR BG 10 0000 001071 000.26 09/05/08 03.00.04 00.00.02 EXAMPLE3 JCLANAL BIM$PUTL BG 10 0000 003417 000.30 09/05/07 03.00.07 00.00.01 EXAMPLE1 JCLEX1 LIBR BG 10 0000 001071 000.26 09/05/07 03.00.03 00.00.01 EXAMPLE3 JCLANAL BIM$PUTL BG 10 0000 003417 000.30 09/05/06 03.00.06 00.00.00 EXAMPLE1 JCLEX1 LIBR BG 10 0000 001070 000.26 09/05/06 03.00.04 00.00.01 EXAMPLE1 JCLEX1 LIBR BG 10 0000 001069 000.27 09/05/05 03.00.04 00.00.00 EXAMPLE1 JCLEX1 LIBR BG 10 0000 001071 000.27 09/05/04 03.00.07 00.00.01 EXAMPLE1 JCLEX1 LIBR BG 10 0000 001071 000.26 09/05/03 03.00.01 00.00.00 EXAMPLE1 JCLEX1 LIBR BG 10 0000 001069 000.26 09/05/02 03.00.02 00.00.00 EXAMPLE1 JCLEX1 LIBR BG 10 0000 001069 000.26 09/05/01 03.00.03 00.00.00 EXAMPLE3 JCLANAL BIM$PUTL BG 10 0000 003417 000.31 09/04/30 03.00.10 00.00.01 EXAMPLE1 JCLEX1 LIBR BG 10 0000 001071 000.26 09/04/30 03.00.03 00.00.02 EXAMPLE3 JCLANAL BIM$PUTL BG 10 0000 003417 000.30 09/04/29 03.00.06 00.00.01 PF1=Help PF2=FIFO PF3=Return PF8=Fwd PF11=Right
JOLACCT .B ** BIM-FAQS/PCS Online V5.3A-30 ** ID=VSE.Q008 ===> Account History Information Proc PJob Day $MRC Totlsio Totcpu Totldur Cpuid T Userid Group JCLANAL JCLANAL WED 0000 0003417 000.30 00.00.01 FF000420 L ADMN TRIAL JCLEX1 JCLEX1 WED 0000 0001069 000.25 00.00.00 FF000420 L ADMN TRIAL JCLEX1 JCLEX1 TUE 0000 0001069 000.26 00.00.00 FF000420 L ADMN TRIAL JCLEX1 JCLEX1 MON 0000 0001071 000.26 00.00.01 FF000420 L ADMN TRIAL JCLEX1 JCLEX1 SUN 0000 0001069 000.25 00.00.00 FF000420 L ADMN TRIAL JCLEX1 JCLEX1 SAT 0000 0001071 000.26 00.00.01 FF000420 L ADMN TRIAL JCLEX1 JCLEX1 FRI 0000 0001071 000.26 00.00.02 FF000420 L ADMN TRIAL JCLANAL JCLANAL THU 0000 0003417 000.30 00.00.01 FF000420 L ADMN TRIAL JCLEX1 JCLEX1 THU 0000 0001071 000.26 00.00.01 FF000420 L ADMN TRIAL JCLANAL JCLANAL WED 0000 0003417 000.30 00.00.00 FF000420 L ADMN TRIAL JCLEX1 JCLEX1 WED 0000 0001070 000.26 00.00.01 FF000420 L ADMN TRIAL JCLEX1 JCLEX1 TUE 0000 0001069 000.27 00.00.00 FF000420 L ADMN TRIAL JCLEX1 JCLEX1 MON 0000 0001071 000.27 00.00.01 FF000420 L ADMN TRIAL JCLEX1 JCLEX1 SUN 0000 0001071 000.26 00.00.00 FF000420 L ADMN TRIAL JCLEX1 JCLEX1 SAT 0000 0001069 000.26 00.00.00 FF000420 L ADMN TRIAL JCLEX1 JCLEX1 FRI 0000 0001069 000.26 00.00.00 FF000420 L ADMN TRIAL JCLANAL JCLANAL THU 0000 0003417 000.31 00.00.01 FF000420 L ADMN TRIAL JCLEX1 JCLEX1 THU 0000 0001071 000.26 00.00.02 FF000420 L ADMN TRIAL JCLANAL JCLANAL WED 0000 0003417 000.30 00.00.01 FF000420 L ADMN TRIAL PF1=Help PF2=FIFO PF3=Return PF8=Fwd PF10=Left
Moving Around in the Online Display
To move from the first panel to the second, you press PF11 (Right); to return to the first from the second, press PF10 (Left).
To scroll the report forward one panel, press PF8 (Fwd); to scroll the report backward one panel, press PF7 (Bwd).

Viewing History Information
6–12 BIM-FAQS/PCS
Account History Information Fields
Field Explanation
Event PCS event name if the job that ran was scheduled as an event.
DJOB DOS jobname.
Phase Phase that executed.
PN Partition ID where the job ran.
CC IBM cancel code of the jobstep.
$RC IBM return code of the jobstep.
SIO Amount of start I/Os issued by this step, including JOB ACCNT.
CPUT CPU time (in seconds) used by this step and JOB ACCNT.
Date Date when this jobstep ended.
Time Time when this jobstep ended.
Duration Duration of this jobstep.
Proc Name of the PCS proc that caused this jobstep.
PJOB POWER jobname of the job.
Day Day of the week when this jobstep ended.
$MRC IBM maximum return code for this job.
TOTLSIO Total start I/Os used by this job. This field contains a value only at the end of the POWER job that executed as a result of the PCS proc.
TOTCPUT Total CPU time in seconds used by this job. This field contains a value only at the end of the POWER job that executed as a result of the PCS proc.
Totldur Duration of the job. This field contains a value only at the end of the POWER job that executed as a result of the PCS proc.
Cpuid CPU ID where the job executed.
T Type of accounting record. S indicates end-of-step and L indicates end of DOS job.
Userid PCS user ID that caused the PCS proc to execute.
Group The group name of the event.
Conclusion

Viewing History Information
Trial Guide 6–13
You've successfully generated an Account History display. When you have more events in your schedule, these history displays will be helpful to determine whether your events and jobs are being scheduled properly and efficiently.

Viewing Current Schedule Information
6–14 BIM-FAQS/PCS
Viewing Current Schedule Information
Task Overview
Introduction
BIM-FAQS/PCS provides a variety of reports that enable you to view current schedule information. By viewing current event schedule information, you can verify that your system is running smoothly and efficiently. For example, you can:
• List all events in a specific directory
• See what conditions events are waiting on
• Display information about current resource usage
• Verify event processing periods
Reports That Display Current Information
A few of the BIM-FAQS/PCS online displays and batch reports that produce current schedule information are:
• The Event Resource displays, which show information about current resource usage for events that are waiting to use resources
• The Tape Pull List, which displays information about which tapes are required to run specified events at the time of inquiry
• The Event Cross-Reference report, which displays cross-references of events based on their dependency conditions
Task
In this section, you'll use your sample events to produce an Event Cross-Reference report. You can print this report using a batch utility.

Viewing Current Schedule Information
Trial Guide 6–15
Producing an Event Cross-Reference Report
Introduction
The Event Cross-Reference report shows you the events that share event dependencies. To produce the Event Cross-Reference report, you must create a job that includes the CREF command. Because the CREF command looks at all specified events and their predecessor conditions, you can easily find out which events depend on the same event, job, resource, or any other condition.
What This Report Shows You
The CREF command cross-references events based on their conditions. All of the following condition values are used for cross-referencing:
• DOS jobname
• POWER jobname
• POWER user field
• Event name
• Dataset name
• Resources
• Phase name
• Product name
• Work station
• Message ID
• PCS data members
• PCS global variables
Each Event Cross-Reference report begins on a separate page.
CREF Command Format
The following format is required for the CREF command: CREF [EVENT=evtmask GROUP=grpmask DATE=yy/mm/dd]

Viewing Current Schedule Information
6–16 BIM-FAQS/PCS
Parameters
Optional parameters include the event mask and the event date:
• If you use EVENT=, only events that match the evtmask value are cross-referenced. Generics are supported. Both an asterisk (*) and a plus sign (+) create generic masks.
• If you use GROUP=, only events whose group names match the grpmask value are cross-referenced. Generics are supported. Both an asterisk (*) and a plus sign (+) create generic masks.
• A plus sign (+) represents an unconditional match on a specific character.
• An asterisk (*) represents an unconditional match on a group of characters.
• If you use DATE=, only events that match the yy/mm/dd value in the current event directory are cross-referenced.
By default, if only CREF is entered, all events in the master event directory are cross-referenced.
Procedure
To produce an Event Cross-Reference report for the sample events (EXAMPLE1, EXAMPLE2, EXAMPLE3, EXAMPLE4, and EXAMPLE5), create a job with the following jobstream: // JOB JCLCREF CROSS REFERENCE INVENTORY EVENTS // LIBDEF PHASE,SEARCH=lib.sublib // EXEC JCLEVNT,SIZE=JCLEVNT CREF EVENT=EXAMPLE* /* /&
lib.sublib is the name of the residence library where you installed BIM-FAQS/PCS.
Sample Reports
The following are examples of output from the Event Cross-Reference report. Remember, each report begins on a separate page. If a condition type is not found in the event directory, a report for that condition is not produced.
The following sample output shows EXAMPLE events cross-referenced by AUX type: ** CROSS REFERENCE BY AUX TYPE ** DATA EXAMPLE5 WORK EXAMPLE2

Viewing Current Schedule Information
Trial Guide 6–17
The following sample output shows EXAMPLE events cross-referenced by event names: ** CROSS REFERENCE BY EVENT NAMES ** EXAMPLE2 EXAMPLE3 EXAMPLE1 EXAMPLE3 EXAMPLE2 EXAMPLE4
If you run an Event Cross-Reference report on the two backup events that you defined in Chapter 5, "Defining and Scheduling Advanced Events," you will see the backup events cross-referenced by resources: ** CROSS REFERENCE BY RESOURCES ** TAPE.DRIVES BKUPMON BKUPVIO
Conclusion
You've successfully produced an Event Cross-Reference report. When you have more events in your schedule, you will see that the report becomes more comprehensive, as all of the predecessor conditions and their event dependencies are displayed.

Viewing Forecast Information
6–18 BIM-FAQS/PCS
Viewing Forecast Information
Task Overview
Introduction
By using BIM-FAQS/PCS's forecasting displays and reports, you can project how your schedule will be working in the future. Forecasting reports show you the events that will trigger on a targeted day or series of days, and you can make changes in the forecast and see how the schedule is affected.
Because these displays and reports provide an easy-to-read diagnosis of job workloads, the forecast helps you prevent job scheduling bottlenecks and resource usage overload. You can also use forecasting to select the best time for hardware and software maintenance.
Forecast Displays and Reports
A few of the BIM-FAQS/PCS forecast online displays and batch reports are:
• The Event Forecast display, which shows events that will trigger on a specified day
• The Partition Occupancy report, which shows the partitions events might run in on a future date according to the current event schedule
Tasks
In this section of the trial, you'll perform the following tasks:
Task Action
I Produce an online Event Forecast display.
II Produce a Partition Occupancy report.

Viewing Forecast Information
Trial Guide 6–19
Task I: Producing an Event Forecast Display
Introduction
The Event Forecast display enables you to view all events that will be scheduled on a specific date or calendar. This is helpful if you are setting up successor and predecessor events to see which events will be scheduled on a specific day. You can also view event statuses on this display.
What This Display Shows You
The Event Forecast display produces information about event scheduling activity for a specific processing period. Some information that this display produces is:
• Event that will be scheduled on the forecasted date
• Job or command that will be scheduled
• Projected start time based upon historical data and the event's early time
• Partition where the event last ran
• Average duration based upon historical data
Event Summary Information
Event summary data is collected by the EVTSUM control statement of the BIM$ACUT utility. Each time EVTSUM is executed, event summary data is updated. The more frequently EVTSUM is executed, the more accurate and useful the summary data.
For this demonstration, you will not execute the BIM$ACUT utility with the EVTSUM control statement. However, under normal operating conditions, we recommend that you execute this utility daily to provide current data for more accurate forecasting.

Viewing Forecast Information
6–20 BIM-FAQS/PCS
Procedure
To generate an Event Forecast display for a specific processing period, follow these steps:
Step Action
1 On the BIM-FAQS/PCS Menu Index, select the Event Forecasting option by entering P at the command prompt. The Event Forecasting Selection panel is displayed. This panel enables you to determine the contents of the Event Forecast display.
JOLFORC .P ** BIM-FAQS/PCS Online V5.3A ** ID=VSE.Q008 ===> ** BIM-FAQS/PCS ONLINE - Event Forecasting Selection ** Enter A or B on the command line or position the cursor on the appropriate selection and depress the enter key after specifying the associated forecasting argument. Selection Criteria for Event Forecasting A CALKEY - By calendar/keyword Cal ===> None Calendar/Keyword B DATE - By specific date Date ===> 06/02/17 YY/MM/DD PF1=Help PF3=Return
2 Enter a date in yy/mm/dd format in the Date===> field to display all events that will be executed on a specific date. For our example, we'll choose a workday in the middle of the month: 98/02/18.
Selection Criteria for Event Forecasting A CALKEY - By calendar/keyword Cal ===> None Calendar/Keyword B DATE - By specific date Date ===> 06/02/18 YY/MM/DD
3 Enter B (Date) at the command prompt, or position the cursor on B and press ENTER. The events for the specified date are shown on the Event Forecast display.

Viewing Forecast Information
Trial Guide 6–21
Sample Display
The following panel is an example of the Event Forecast display. (Since the schedule where this example was run has more events defined, you'll see event names on this display that you are not familiar with.) Notice that this display is similar in format to the master and current event directories. JOLFORC .B ** BIM-FAQS/PCS Online V5.3A-30 ** ID=Z42.BUBBA ===> ** BIM-FAQS/PCS ONLINE - Event Forecasting ** Event Forecast Report for Wednesday 09/05/13 Event Job/Cmd Start M S Cpuid PN Duration Description Group _ AA RJDPROC 10:00 D Z42 Y1 Second Evt DRJ _ AAATST3 OP 08:35 A Z42 F4 test setup 2 AAA3RD _ AAA3RD OP 08:30 A Z42 U1 Test setup AAA3RD _ AAI520 VSEJOB1 15:40 A Z42 F5 I-GRAD APPL ADV AA _ AAI530 VSEJOB1 03:06 A Z42 BG I-AA GOING TO UF AA _ AAI560 VSEJOB1 12:53 A Z42 F5 GRD WKSH LAT AA _ ABCDE911 &CP 20:03 D Z42 F4 TESTINF COMPRESS TEST _ ADBSPLOG VSEJOB 17:41 A Z42 C1 OFFLOAD DEV PLOG BSY _ ADEVPLOG VSEJOB 02:20 A Z42 F5 OFFLOAD DEV PLOG BSY _ ADEV2PLG VSEJOB 02:01 A Z42 F5 OFFLOAD DEV PLOG BSY _ ADEV3PLG VSEJOB 02:40 A Z42 F5 OFFLOAD DEV PLOG BSY _ ADEV5DWN VSEJOB 18:00 D Z42 BG 0:00:02 adev5 restart BSYS _ AFTERGRP PCSEVRP 19:15 A Z42 BG 0:00:10 After the grp _ ALRTBCK AXPL10 26:32 A Z42 F5 0:00:02 ALERT BACKUPS AXPSYS _ ALRTBCK6 AXPL10 27:31 A Z42 F5 0:00:01 ALERT BACKUPS AXPSYS _ ALRTBCK7 AXPL10 26:32 A Z42 F4 0:00:02 ALERT BACKUPS AXPSYS _ ALWAYS MNTHSCHD 00:00 D Z42 Always on cur ev TEST Actions: A=Audit D=Doc G=Graph I=Refs J=Job N=Note X=Edit Z=Acct K=DSN PF1=Help PF3=Return PF6=/ST PF8=Fwd PF9=/SN PF12=Exit
Moving Around in the Display
To sort the events by time, press PF6 (/ST). To sort the events by name, press PF9 (/SN).
To scroll forward one panel, press PF8 (Fwd); to scroll backward one panel, press PF7 (Bwd).

Viewing Forecast Information
6–22 BIM-FAQS/PCS
Event Forecast Fields
Field Explanation
Event Name of the forecasted event to be scheduled.
Job/Cmd Jobname or command to be scheduled.
Start Projected start time based upon historical data and the event's currently defined early time.
M Whether the event is multi-occurring. Multi-occurring events are identified by *.
S Source of the start time. Values can be
D The defined early time for the event A The average from event history summary data M The modal start time from event history summary data
Cpuid CPU ID from the event definition.
PN Partition where the event last ran as recorded in event history summary data.
Duration Average duration based upon historical data.
Description Brief description of the defined event.
Group The group name of the event.
Event Forecast Actions
The following actions are some of the ones available for the Event Forecast display. You might want to try these on your own. Enter the desired action in the input field of a specific event.
Action Explanation
X Edit or browse an event
J Display job on Event Job Edit panel
A Display current audit history for an event
I Display event relationship information
Z Display event accounting information

Viewing Forecast Information
Trial Guide 6–23
Conclusion
Now that you have produced an Event Forecast display, you may want to change some of the definitions to see how it would affect the schedule. You can change definitions with the Partition Occupancy report, which is explained in the next section.
Task II: Producing a Partition Occupancy Report
Introduction
The Partition Occupancy report enables you to evaluate when and in what partitions events might run according to the current event schedule. You can use additional control statements to change event criteria to see how that change might impact the schedule.
What This Report Shows You
The Partition Occupancy report is different than the Event Forecast report because it doesn't report when events will actually run. Rather, it lets you manipulate the schedule and see the consequences of what changing the schedule (by changing event and non-event conditions) will be. It allows you to ask, "What if this event were to run at this time?" or "What if this subsystem was active in this partition," and then to review the results of those conditions on the Partition Occupancy report.
The Partition Occupancy report shows all POWER-controlled partitions, which are the partitions where BIM-FAQS/PCS can submit events. This report also displays information about configuration, CPU IDs, partitions, and virtual storage.
At the end of the Partition Occupancy report is an Exception report. This report provides you with information that can help you determine why an event may not be scheduled.
Recommendations
Before running the Partition Occupancy report, schedule all your events at least once. This gives the FORECAST command data about event start times and duration.
Also before running this report, you'll want to execute the BIM$ACUT utility with the EVTSUM control statement. To get the most accurate results from the Partition Occupancy report, make sure that BIM$ACUT EVTSUM gets executed on a regular basis. The more frequently EVTSUM is executed, the more useful the data.

Viewing Forecast Information
6–24 BIM-FAQS/PCS
Multiple CPUs: Shared Event Directory
The Partition Occupancy report is generated based upon the event directory information that's on the CPU where the FORECAST command was executed. If an event directory is shared between CPUs, you'll need to run forecasting reports on all the CPUs for which you'd like a report.
Procedure
To produce a Partition Occupancy report, create a job like the following. We'll create a report for February 18, 1997: // JOB JCLOCC PARTITION OCCUPANCY REPORT // LIBDEF PHASE,SEARCH=lib.sublib // EXEC JCLEVNT,SIZE=JCLEVNT FORECAST [DATE=06/02/17] [(OCC] /* /&
lib.sublib is the name of the residence library where you installed BIM-FAQS/PCS.
CSI recommends that you use the utility PCSEVRP to produce a FORECAST report. See the BIM-FAQS/PCS Implementation Guide for further details.

Viewing Forecast Information
Trial Guide 6–25
Sample Report
The following is a sample Partition Occupancy report for February 17, 1998. (Since the schedule where this report was run has more events defined, you'll see some unfamiliar event names on the report.)
JOB DOCOCC 02/17/06 11:57:31 VSE6.1.2 JCLEVNT BIM-FAQS/PCS V5.3A EVENT SCHEDULER UTILITY ** BIM-FAQS/PCS BATCH EVENT SCHEDULER INTERFACE UTILTIY ** PAGE 002 SYSTEM CONFIGURATION SUMMARY CPUID FF500025 SYNONYM DEVTSYS SYSID= VSE/ESA: VSIZE FOR DYNAMIC ALLOC 0006M DYNAL=HIGH JCLSCHED DEFAULTS: CLASS=A SYSID= STATIC PN CLASSES BG A01 F2 L2 F3 K3 F4 J4 F1 H1 DYNAMIC CLASS ALLOC MAX Z 0001M 06 E 0001M 06 C 0002M 03 S 0001M 06 T 0002M 03 V 0002M 03 X 0001M 06 ................................................................................................................. JOB DOCOCC 02/17/06 11:57:31 VSE6.1.2 JCLEVNT BIM-FAQS/PCS V5.3A EVENT SCHEDULER UTILITY ** BIM-FAQS/PCS BATCH EVENT SCHEDULER INTERFACE UTILTIY ** PAGE 003 JCLEVNT FORECASTED PARTITION OCCUPANCY REPORT FOR TUE 98/02/17 START F2 F3 F4 F5 F6 F7 F8 F9 FA FB BG 00:00 DANSSERV DOC2TST EVSTAT1 DOC3TST EXPCBKUP 00:15 PRINTHC SARBKUP 00:30 00:45 01:00 01:15 01:30 01:45 02:00 ASGNTAPE JOBMULTI MULTIJOB TAPE1NGM TAPE2GM TESTVAR PDSANAL2 02:15 02:30 RSAVAS05 02:45 03:00 03:15 CICSMROA 03:30 .... 03:45 .... ICCFPCS 04:00 .... 04:15 .... NICKTST 04:30 .... ZSUC000 04:45 .... ZSUC003

Viewing Forecast Information
6–26 BIM-FAQS/PCS
OCCDATA Statement
The OCCDATA statement, which is used with the FORECAST statement, enables you to provide overrides for forecasted events for which you'd like to produce a Partition Occupancy report, and then to see what would happen if you changed some of the values in that event. You can override:
• POWER class
• Start time for the event
• Duration time for the event
• Non-event condition that is running in the partition
For more information about OCCDATA, including its format and parameters, see the BIM-FAQS/PCS Operations Guide.
Conclusion
When your schedule is complete, you'll want to use the Partition Occupancy report to determine whether there is a more efficient way to run your schedule. Remember, at the end of the Partition Occupancy report is an Exception report. You should double-check the Exception report to see why an event may not be scheduled.

Viewing Forecast Information
Trial Guide 6–27
Summary
What You Did
In this chapter, you learned how to produce BIM-FAQS/PCS online displays and batch reports to give you information about your:
• Past schedule activity
• Present schedule specifications
• Future schedule workload
Looking Ahead
Congratulations! You've completed the BIM-FAQS/PCS trial.
As you create your own schedule, be sure to take advantage of all the features available to you. For a complete description of the BIM-FAQS/PCS documentation set and other features, see the "Preface" at the beginning of this guide.
Exiting BIM-FAQS/PCS Online
If you are finished exploring BIM-FAQS/PCS Online, you can exit by one of the following methods:
1. Press PF3 (Return) until you return to the BIM-FAQS/PCS Menu Index. From the Menu Index, press PF12 (Exit) to exit BIM-FAQS/PCS Online.
2. Enter QQ at the command prompt of any online screen. QQ takes you immediately out of BIM-FAQS/PCS Online. This is faster than using PF keys, which take you backward one panel at a time.

Viewing Forecast Information
6–28 BIM-FAQS/PCS

Trial Guide A–1
Appendix A Sample Error Messages
BIM-GSS Introduction
While we don't anticipate that you'll have any errors when you run the IBGS installation jobstream, it's possible that an error could result. If you can't find sufficient information in this section to troubleshoot any problems yourself, contact BIM Technical Support.
IBGS Error Messages
Message Action
BG 000 +-----------------------------------------------------+
BG 000 | THERE IS A BAD LABEL FOR CSS$xxx RC=yy
BG 000 +-----------------------------------------------------+
xxx is the PDS ID. yy is the return code value.
There is an error in a PDS label. The installation is canceled.
Check all your PDS labels, correct any labeling errors, and run IBGS again.
BG 000 +-----------------------------------------------------+
BG 000 | THERE IS NO LABEL FOR CSS$xxx
BG 000 +-----------------------------------------------------+
There is no PDS label.
Check all your PDS labels, supply any missing PDS labels, and run IBGS again.
BG 000 +-----------------------------------------------------+
BG 000 | CSS$xxx LABEL DOES NOT MATCH VTOC ENTRY ON DISK
BG 000 | A FORMAT OF CSS$xxx WILL OCCUR
BG 000 +-----------------------------------------------------+
A label was found in standard or partition labels that was different from the VTOC entry. In this case, the CSS$xxx PDS will be formatted automatically.

BIM-FAQS/PCS
A–2 BIM-FAQS/PCS
BIM-FAQS/PCS Introduction
While we don't anticipate that you'll have any errors when you run the IASO installation jobstream, it's possible that an error could result. If you can't find sufficient information in this section to troubleshoot any problems yourself, contact BIM Technical Support.
IASO Error Messages
The installation error messages you might encounter in the IASO jobstream are the same as the BIM-GSS IBGS jobstream error messages.
MSHP Introduction
If you chose to do an MSHP installation of BIM-GSS or BIM-FAQS/PCS, you might encounter one or more of the following error messages. If you encounter a problem that you can't troubleshoot on your own, contact BIM Technical Support.
If IBGS or IASO displays Action
BG 000 M083I FUNCTION CANCELED AS REQUESTED
BG 000 1S78I JOB TERMINATED DUE TO RETURN
BG 000 CODE
BG 000 M231D INSTALLATION WILL SUPERSEDE
BG 000 PRODUCT COM342. ENTER
BG 000 "DELETE" OR "KEEP"
*BG 000
0 delete
Enter 0 xxxxxx.
xxxxxx is either DELETE or KEEP. If you enter DELETE, existing history information is deleted for the specified product. If you enter KEEP, existing history information is retained.
BG 000 M234I FOLLOWING
BG 000 SUPERSEDED/OBSOLETED PRODUCTS WILL
BG 000 BE DELETED:
BG 000 COM341 COM342
BG 000 M089D ENTER "GO" TO CONTINUE OR
BG 000 "CANCEL" TO TERMINATE
*BG 000
O go
Enter 0 GO to continue or 0 CANCEL to terminate the installation.

Trial Guide Index–1
Index
&
&FAQSAO, 2-31
A
Abort Time field, 5-14
Account History description of display, 6-8 event summary information, 6-8 general description, 1-7, 6-2 producing a display, 6-8***6-13 sample display, 6-11 using BIM$ACUT, 6-8
activating the scheduler, 2-22***2-24 as a CICS subtask, 2-24 as a main task, 2-23 as a subtask, 2-24 AUTO statements, 2-31 in a partition, 2-23
Audit History description of display, 6-3 general description, 1-7, 6-2 producing a display, 6-3***6-7 sample display, 6-5
avoiding IPL before BIM-GSS installation, 2-6
B
backing up PDSs, 5-13
BIM$ACUT, 6-8, 6-19, 6-23
BIM$TICI, 2-26
BIM$TIDR, 2-26, 2-29
BIM-FAQS/ASO users &FAQSAO statement, 2-31 pre-installation information, 2-2
BIM-FAQS/PCS
definition, 1-1 initializing, 2-18***2-21 installing, 2-10***2-17 product features, 1-1 required PDS, 2-11
BIM-GSS documentation, 2-3 general description, 2-3 installation jobstream, 2-7 installing, 2-3***2-9 required PDSs, 2-5 residence library, 2-4
BIM-GSS product users, information, 2-1
C
calendar, processing period, 4-15
Cartridges field, 5-14
CICS interface BIM$TICI, 2-26 intializing, 2-25 table entries, 2-27
CMS interface intializing, 2-25
CMS server, 3-8
CMS Server Defaults panel, 3-9
Command field, 4-8, 4-11
conditional JCL, 1-6
configuration. see Chapter 3 CMS server defaults, 3-8 considerations, 3-2 CPU ID synonyms, 3-10 default holiday ID, 3-12 general description, 1-8 library defaults, 3-6 options, 3-5 panels
CMS Server Defaults, 3-9 CPUID NODEID Synonym Table, 3-11 Holiday and Cycle Definition Entry, 3-13 Holiday Definitions, 3-13 Library Defaults, 3-7

Index–2 BIM-FAQS/PCS
Online Set Up Event and PDS Browse and Update Defaults, 3-15
system panel defaults, 3-14
Configuration Options Menu Index, 3-4
conversion chart, disk space, 2-4
copying event definitions, 5-22, 5-28, 5-34
CPU ID default, 3-16 Event Cpuid field, 4-8 synonyms, defining, 3-10
CPU= parameter, AUTO statements, 2-34
CPUID NODEID Synonym Table, 3-11
CREF command format, 6-15 sample output, 6-16
CSPD field description, 4-8 valid values, 4-13
CSS$EVT PDS, 2-11
CSS$LOG PDS, 2-11
CSS$MON PDS, 2-5
CSS$VIO PDS, 2-5
Current Event Maintenance panel description, 4-3 viewing events, 4-31
current schedule, definition, 1-4
D
DASD CSS$EVT requirements, 2-11 CSS$LOG requirements, 2-11 CSS$MON requirements, 2-5 CSS$VIO requirements, 2-5 library blocks to tracks/cylinders conversion chart, 2-4
Dataset Audit Log, 6-2
dataset logging, 2-11
datastation completing condition, 5-11 definition, 5-3 specifying, 5-6
defining events. see Chapters 4 and 5
defining events to run backups, 5-13
defining library defaults, 3-7
defining system configuration, 3-6***3-16
defining the FAQSMSG VSAM file, 2-13
defining the ICCF defaults, 3-7
defining the PDS search string, 3-7
Demand, action, 4-30
Description field, 4-8
Diagnosing problems, 0-6
Diagnostic data, interpreting, 0-7
directories, definition, 1-5
disk space conversion chart, 2-4
documentation BIM-FAQS (ASO & PCS) Installation and Initialization Guide, 1-9 BIM-FAQS/PCS, 1-9 BIM-GSS, 2-3
E
Early Time field, 5-14
editor, systems, 5-3
ENABLE statement, in initialization jobstream, 2-19
event BKUPEVT
completed definition, 5-38 defining, 5-33***5-38
BKUPLOG completed definition, 5-32 defining, Error! Not a valid bookmark in entry on page 5-27
BKUPMON completed definition, 5-20 defining, 5-15***5-20 scheduling, 5-39
BKUPVIO completed definition, 5-26 defining, 5-21***5-26 scheduling, 5-39
copying definitions, 5-22, 5-28, 5-34 definition, 1-2 EXAMPLE events, status codes, 4-31 EXAMPLE1
completed definition, 4-14 defining, 4-13***4-15

Trial Guide Index–3
scheduling, 4-29***4-33 EXAMPLE2
completed definition, 4-20 defining, 4-16***4-20 scheduling, 4-29***4-33
EXAMPLE3 completed definition, 4-25 defining, 4-21***4-25 scheduling, 4-34***4-37
EXAMPLE4 completed definition, 4-28 defining, 4-26***4-28 scheduling, 4-29***4-33
EXAMPLE5 completed definition, 5-9 defining, 5-3***5-9 scheduling, 5-10***5-12
history information, 6-2 trial events, summary, 4-10
event command Command field, 4-8 definition, 1-2
Event Cpuid field, 4-8, 4-11
Event Cross-Reference report contents of report, 6-15 general description, 1-7, 6-14 producing a report, 6-15***6-17 sample report, 6-16
Event Day field description, 4-8 valid keywords, 4-13
Event Forecast display actions, 6-22 general description, 1-7, 6-18 producing, 6-19***6-23 sample, 5-12, 6-21 using BIM$ACUT, 6-19
event group Group Name field, 4-8
Event Hold field, 4-8
Event Maintenance Edit panel fields, 4-7, 4-8 provided field values, 4-11
Event Name field, 4-8
Event Resource display, 6-14
exiting BIM-FAQS/PCS Online, 6-27
F
FAQSMSG VSAM file, defining, 2-13
features of BIM-FAQS/PCS, 1-1
FORECAST Command, example, 6-24
forecast report. see Event Forecast display
G
Group Name field, 4-8, 4-11
H
help, online, 1-5
history information, events, 6-2
Holiday and Cycle Definition Entry panel, 3-13
Holiday Definitions panel, 3-13
holiday ID, defining, 3-12
I
IASO description, 2-14 error messages, A-2
IBGS description, 2-7 error messages, A-1
ICCF library defaults, 3-7
initializing BIM-FAQS/PCS, 2-18***2-21 disk space requirements, 2-19 multiple-CPU considerations, 2-18 sample jobstream, 2-19 System GETVIS, 2-19 VSE/SP users, 2-18
initializing online interfaces, 2-25***2-34
installation jobstream BIM-FAQS/PCS, 2-14 BIM-GSS, 2-7 IASO, 2-14 IBGS, 2-7
installation problems, 2-14

Index–4 BIM-FAQS/PCS
installing BIM-FAQS/PCS, 2-10***2-17
installing BIM-GSS, 2-3***2-9
integration with other products, 1-9
interfaces BIM-FAQS/ASO users, information, 2-25 CICS, 2-25 CMS, 2-25 VTAM, 2-25
interfaces, initializing, 2-25***2-34
IPL, avoiding before installation, 2-6
J
JCL management, 1-6
JCLSCHED activating, 2-22***2-24 activating as a main task, 2-23 activation methods, 2-23 definition, 1-4 storage requirements, 2-22
JCLSCHED.CTL member AUTO statements, 2-34 BIM-FAQS/ASO users, warning, 2-31 general description, 2-23 scheduler startup, 2-31 tailoring, 2-32
JCLXCU, in initialization jobstream, 2-18
L
Late Time field, 5-14
library blocks to tracks/cylinders, 2-4
Library Defaults panel, 3-7
library defaults, defining, 3-6
M
Master Event Maintenance panel description, 4-3 sample, 4-5
master schedule, definition, 1-4
modifying JCL, 1-6
O
objectives of this manual, 0-2
online definition, 1-5 exiting, 6-27 help, 1-5 informational displays, 1-7 interfaces, 1-5
online interfaces BIM-FAQS/ASO users, information, 2-25 CICS, 2-25 CMS, 2-25 initializing, 2-25***2-34 VTAM, 2-25
P
panel defaults, defining, 3-14
Partition Occupancy report contents, 6-23 general description, 1-7, 6-18 OCCDATA statement, 6-26 producing, 6-23***6-26 sample, 6-25 using BIM$ACUT, 6-23
partitioned datasets, 2-5
PDS search string, 3-7
PDSs, required CSS$EVT, 2-11 CSS$LOG, 2-11 CSS$MON, 2-5 CSS$VIO, 2-5
POWER overrides CSPD field, 4-8
valid values, 4-13
predecessor condition definition, 4-9 specifying, 4-18 versus successor, 4-21
Predecessor Condition panel, 4-9
prerequisite knowledge, 0-3
Problems, diagnosing, 0-6
processing period calendar, sample, 4-15
producing Account History display, 6-8***6-13

Trial Guide Index–5
producing Audit History display, 6-3***6-7
producing Event Cross-Reference report, 6-15***6-17
producing Event Forecast display, 6-19***6-23
producing Partition Occupancy report, 6-23***6-26
product features, 1-1
R
required PDSs, 2-5, 2-11
residence library BIM-FAQS/PCS, 2-14 BIM-GSS, 2-4 creating, 2-4
Resource displays, 6-14
resources definition, 5-15 specifying, 5-19
Resources field, 5-14
running backups, 5-13
S
schedule, 1-4
scheduler activating, 2-22***2-24 definition, 1-4
scheduling events. see Chapters 4 and 5 definition, 4-29 procedure, 4-32 transferring events to current schedule, 4-30
security, 1-8
selecting menu options, 3-3
storage requirements for JCLSCHED, 2-22
successor condition definition, 4-21 specifying, 4-24 versus predecessor, 4-21
Successors field, 4-8
system configuration. see Chapter 3
System GETVIS, 2-19
system panel defaults, 3-15
systems editor, 5-3
T
tape drives dependencies definition, 5-15 fields, 5-14
Tape Pull List, 6-14
Tape Reels field, 5-14
track/cylinders conversion chart, 2-4
transferring events to current schedule, 4-30
V
VTAM interface BIM$TIDR, 2-29
VTAM interface intializing, 2-25
W
When Cond. field, 4-8
workstation completing condition, 4-32 definition, 4-16 specifying, 4-19

Index–6 BIM-FAQS/PCS


