40
Core Protection for Virtual Machines 1 Comprehensive Threat Protection for Virtual Environments. Installation Guide Endpoint Security d i tS e e e e

Core Protection forVirtual Machines1Comprehensive Threat Protection for Virtual Environments.
Installation Guide
Endpoint Securityd i t S
eeee

Trend Micro Incorporated reserves the right to make changes to this document and to the products described herein without notice. Before installing and using the software, please review the readme files, release notes, and the latest version of the applicable user documentation, which are available from the Trend Micro Web site at:
http://www.trendmicro.com/download
Trend Micro, Core Protection for Virtual Machines, and the Trend Micro t-ball logo are trademarks or registered trademarks of Trend Micro, Incorporated. All other product or company names may be trademarks or registered trademarks of their owners.
Copyright ©2010 Trend Micro Incorporated. All rights reserved.
Document Part No. OSEM14003/90119
Release Date: July 2010
Version: 1.0 Service Pack 1
The user documentation for Trend Micro Core Protection for Virtual Machines is intended to introduce the main features of the software and installation instructions for your production environment. You should read through it prior to installing or using the software.
Detailed information about how to use specific features within the software are available in the online help file and the online Knowledge Base at Trend Micro’s Web site.
Trend Micro is always seeking to improve its documentation. Your feedback is always welcome. Please evaluate this documentation on the following site:
http://www.trendmicro.com/download/documentation/rating.asp
i
Contents
Chapter 1: Installation PlanningSystem Requirements ..................................................................................... 1-2
Installation Recommendations ..................................................................... 1-4
Trend Micro OfficeScan™ Server Compatibility ...................................... 1-4
Trend Micro ServerProtect™ Server Compatibility .................................. 1-5
Chapter 2: Installing Core Protection for Virtual MachinesInstalling the CPVM Server Software .......................................................... 2-2
Preparing Windows XP or Vista Machines for Agent Installation ....... 2-20
Installing Scanning Agents and Real-Time Agents .................................. 2-26
Configuring Core Protection for Virtual Machines ................................. 2-28
Uninstalling Core Protection for Virtual Machines ................................. 2-28Uninstalling the Agents ........................................................................... 2-28Uninstalling the CPVM Server ............................................................... 2-29

Preface
Welcome to the Trend Micro™ Core Protection for Virtual Machines™ Installation Guide. This book contains information about product settings and service levels.
This preface discusses the following topics: • Core Protection for Virtual Machines Documentation on page iii• Audience on page iii• Document Conventions on page iv
ii

Preface
Core Protection for Virtual Machines Documentation
The Trend Micro™ Core Protection for Virtual Machines™ documentation consists of the following:
Installation Guide—Describes the system requirements and steps to install Core Protection for Virtual Machines.
Administrator’s Guide—Helps you plan for deployment, installation, and configuration of all product settings, and how to manage and administer the product.
Administrator Online Help—Helps you configure all features through the user interface. You can access the online help by opening the Administrator Web console and then clicking the help icon ( ).
Readme File—Contains late-breaking product information that might not be found in the other documentation. Topics include a description of features, installation tips, known issues, and product release history.
The Trend Micro Core Protection for Virtual Machines documentation is available at:http://www.trendmicro.com/download
AudienceThe Core Protection for Virtual Machines documentation is written for IT managers, IT security managers, and virtual infrastructure managers. The documentation assumes that the reader has an in-depth knowledge of virtualization technologies and networks, including details related to the following:• Antivirus and content security protection• Network concepts (such as IP address, subnet mask, and LAN settings)• Network devices and their administration• Network configuration (such as the use of VLAN and SNMP)• VMware VI3
iii

Preface
Document ConventionsTo help you locate and interpret information easily, the Core Protection for Virtual Machines documentation uses the following conventions.
CONVENTION DESCRIPTION
ALL CAPITALS Acronyms, abbreviations, and names of certain commands and keys on the keyboard
Bold Menus and menu commands, command buttons, tabs, options, and Core Protection for Virtual Machines tasks
Italics References to other documentation
Monospace Examples, sample command lines, program code, Web URLs, file names, and program output
Note:Configuration notes
Tip: Recommendations
WARNING! Reminders on actions or configurations that should be avoided
iv

Chapter 1
Installation Planning
This chapter describes how to prepare your environment for installing the Trend Micro Core Protection for Virtual Machines. Topics include:• System Requirements on page 1-2• Installation Recommendations on page 1-4• Trend Micro OfficeScan™ Server Compatibility on page 1-4• Trend Micro ServerProtect™ Server Compatibility on page 1-5
1-1

Installation Planning
System RequirementsThe following sections describe the system requirements for the CPVM Server, CPVM Scanning Agents, and Real-time Agents.
TABLE 1-1. System Requirements for Core Protection for Virtual Machines
SYSTEM REQUIREMENT DESCRIPTION
CPVM ServerOperating System
• Microsoft™ Windows™ Server 2003 32-bit Enterprise Server with Service Pack 1 or 2
• Microsoft™ Windows™ Server 2003 R2 32-bit Enterprise Edition with Service Pack 1 or 2
CPVM ServerHardware
Minimum Requirements• 800MHz Intel™ Pentium™ II processor or equivalent• 512MB of RAM• 1GB of available disk space• Network Interface Card (NIC)• Monitor that supports 800 x 600 resolution at 256
colors or higherRecommended Requirements• 2.4GHz Intel Pentium 4 or faster• 1GB of RAM• 2GB of disk space• Network Interface Card (NIC)• Monitor that supports 1024 x 768 resolution at 32-bit
colors or higher
Web Server • Microsoft Internet Information Server (IIS), Windows 2003 Server, Version 6.0
• Administrator or Domain Administrator access on the server machine
• Microsoft .NET Framework 2.0 (CPVM installs it if it is not present)
• File and printer sharing for Microsoft Networks installed on the server and client machine
1-2

Installation Planning
Administration Web Console
• 300MHz Intel Pentium processor or equivalent• 128MB of RAM• 30MB of available disk space• Monitor that supports 800 x 600 resolution at 256
colors or higher• Microsoft Internet Explorer™ 6.0 or 7.0
Scanning Agents Operating System• Windows XP Professional with Service Pack 3 or
later, 32-bit and 64-bit versions• Windows 2003 Enterprise Server with Service Pack 2
or later• Windows Server 2008 (Standard, Enterprise,
Datacenter and Web Editions) with Service Pack 1 or later
• Windows Server 2008 R2 (Standard, Enterprise, Datacenter and Web Editions), 64-bit versions
Required: Microsoft .NET Framework 2.0 SP2 or later
Real-time Agents Operating system• Windows XP Professional with Service Pack 3 or
later, 32-bit and 64-bit versions • Windows 2003 Enterprise Server with Service Pack 2
or later, 32-bit and 64-bit versions • Windows Vista Ultimate Edition with Service Pack 1
or later, 32-bit and 64-bit versions• Windows Server 2008 (Standard, Enterprise,
Datacenter and Web Editions) with Service Pack 1 or later
• Windows Server 2008 R2 (Standard, Enterprise, Datacenter and Web Editions), 64-bit versions
TABLE 1-1. System Requirements for Core Protection for Virtual Machines
SYSTEM REQUIREMENT DESCRIPTION
1-3
Installation Planning
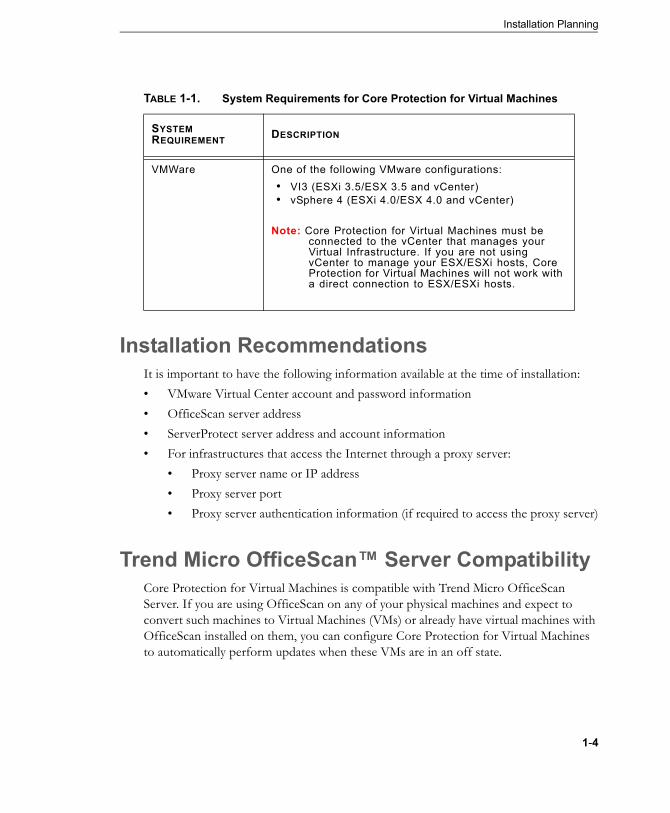
Installation RecommendationsIt is important to have the following information available at the time of installation:• VMware Virtual Center account and password information• OfficeScan server address• ServerProtect server address and account information• For infrastructures that access the Internet through a proxy server:
• Proxy server name or IP address• Proxy server port• Proxy server authentication information (if required to access the proxy server)
Trend Micro OfficeScan™ Server CompatibilityCore Protection for Virtual Machines is compatible with Trend Micro OfficeScan Server. If you are using OfficeScan on any of your physical machines and expect to convert such machines to Virtual Machines (VMs) or already have virtual machines with OfficeScan installed on them, you can configure Core Protection for Virtual Machines to automatically perform updates when these VMs are in an off state.
VMWare One of the following VMware configurations:• VI3 (ESXi 3.5/ESX 3.5 and vCenter)• vSphere 4 (ESXi 4.0/ESX 4.0 and vCenter)
Note: Core Protection for Virtual Machines must be connected to the vCenter that manages your Virtual Infrastructure. If you are not using vCenter to manage your ESX/ESXi hosts, Core Protection for Virtual Machines will not work with a direct connection to ESX/ESXi hosts.
TABLE 1-1. System Requirements for Core Protection for Virtual Machines
SYSTEM REQUIREMENT DESCRIPTION
1-4

Installation Planning
Trend Micro ServerProtect™ Server Compatibility
Core Protection for Virtual Machines is compatible with Trend Micro ServerProtect Server. If you are using ServerProtect on any of your physical machines and expect to convert such machines to Virtual Machines or already have Virtual Machines with ServerProtect installed on them, you can configure Core Protection for Virtual Machines to automatically perform updates when these virtual machines are in off state.
1-5

Chapter 2
Installing Core Protection for Virtual Machines
This chapter describes how to install the CPVM Server and Agents. Topics include:• Installing the CPVM Server Software on page 2-2• Preparing Windows XP or Vista Machines for Agent Installation on page 2-19• Installing Scanning Agents and Real-Time Agents on page 2-25• Configuring Core Protection for Virtual Machines on page 2-27• Uninstalling Core Protection for Virtual Machines on page 2-28
For a discussion of system requirements, see Installation Planning starting on page 1-1.
2-1

Installing Core Protection for Virtual Machines
Installing the CPVM Server SoftwareThe Core Protecton for Virtual Machines (CPVM) Server is an HTTP-based server that is the central repository for all scanning agents, real-time agent configurations, security risk logs, and updates.
The package installs the CPVM server, scanning agents, and real-time agents.
During the installation:• Click the Help button for screen-specific information and instructions.• Cancel the installation at any time.• Access the default administrative shares (such as C$ and D$).
After installation, check the installation log file TMMCS.LOG in %windir%.
Installation prerequisites:• You must have administrator privileges for the target machine.• In a domain environment, file and folder sharing must be turned on.
To install Trend Micro Core Protection for Virtual Machines:
1. If you have an installation CD, insert the CD. To install from the Trend Micro Web site, go to http://www.trendmicro.com/download/, log in with your username and password, and follow the instructions to download the software.
2. The installation package or the CD contains an MCS folder. Copy the folder to the machine where you want to install the CPVM server—for example, C:\CPVM\MCS.
2-2

Installing Core Protection for Virtual Machines
3. Go to the MCS folder and double-click setup.exe to initiate the install.
FIGURE 2-1 Welcome screen
2-3

Installing Core Protection for Virtual Machines
4. On the Welcome screen, click Next.
FIGURE 2-2 License Agreement screen
5. On the License Agreement screen, read the license and select I accept the terms of the license agreement. Click Next. You can view the license agreements at the following locations:{install directory}/License.txt {install directory}/ThirdPartyLicenses.txt http://www.trendmicro.com/en/purchase/license
2-4

Installing Core Protection for Virtual Machines
FIGURE 2-3 Ready to Install the Program screen
CPVM Server requires Microsoft™ .NET Framework 2.0. If the framework is not installed on your system, it will be installed as part of the CPVM Server installation.
2-5

Installing Core Protection for Virtual Machines
6. On the Ready to Install the Program screen, click Install.To install .NET 2.0, follow the online installation instructions.
FIGURE 2-4 Computer Prescan screen
After NET 2.0 is installed, the Computer Prescan screen appears. 7. On the Computer Prescan screen, select whether you want to scan the target
computer.Before the CPVM Server installation commences, the Setup program can scan the target computer for virus/malware and spyware/grayware programs in the most vulnerable areas of the computer:• Boot area and boot directory (for boot viruses)• Windows folder• Program files folder
2-6

Installing Core Protection for Virtual Machines
You can take the following actions against detected virus/malware programs:• Delete: Deletes an infected file.• Clean: Cleans a cleanable file before allowing full access to the file, or lets the
specified next action handle an uncleanable file.• Rename: Changes the infected file’s extension to "vir". Users cannot open the
file initially, but can do so if they associate the file with a certain application. A virus/malware may execute when opening the renamed infected file.
• Pass: Allows full access to the infected file without doing anything to the file. A user may copy, delete, or open the file.
You can take the following actions against spyware/grayware:• Delete: Deletes an infected file• Clean: Terminates processes or delete registries, files, cookies and shortcuts.• Pass: Logs the spyware/grayware detection for assessment.
8. Click Next.
FIGURE 2-5 Installation Path screen
2-7

Installing Core Protection for Virtual Machines
9. On the Installation Path screen, enter the CPVM Server installation path and click Next. You can install the CPVM Server either on the computer where you launched it or on other computers in your network.If you install/upgrade remotely, Setup analyzes whether the target computer meets the requirements for server installation/upgrade. Before you proceed:• Ensure that you have administrator rights to the target computer.• Take note of the host name and logon credentials of the computer.• Make sure the computer has Microsoft IIS 6.0 or higher if using this as the Web
server.• Verify that the target computer meets the minimum requirements for installing
the CPVM Server as described in System Requirements on page 1-2.
FIGURE 2-6 Proxy Settings screen
The CPVM Server uses the HTTP protocol to connect to the Trend Micro ActiveUpdate Server and download updates. If a proxy server handles Internet
2-8

Installing Core Protection for Virtual Machines
traffic on your network, CPVM Server needs the proxy settings to ensure that the server can download updates from the ActiveUpdate Server.
10. On the Proxy Server screen, select Use a proxy server and type the proxy information (if you are using a proxy server). Leave this screen blank if you are not using a proxy server.
Note: You can also specify proxy settings after installation using the Administrator Web console.
11. Click Next.
FIGURE 2-7 Virtual Center screen
Core Protection for Virtual Machines requires access to the VMware Virtual Center for virtual machine inventory information and management. It is recommended that you create a separate user account with privileges to mount VMDKs and access
2-9
Installing Core Protection for Virtual Machines
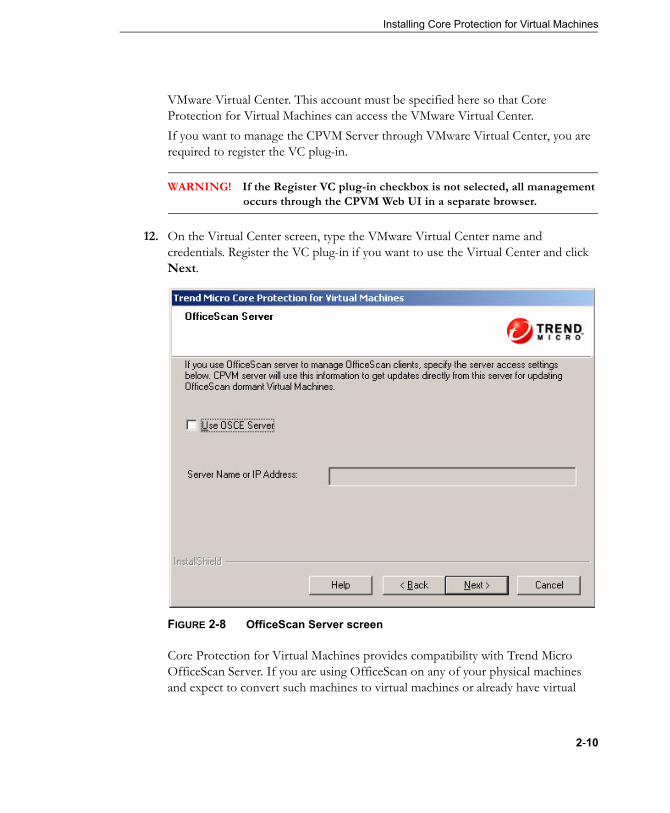
VMware Virtual Center. This account must be specified here so that Core Protection for Virtual Machines can access the VMware Virtual Center.If you want to manage the CPVM Server through VMware Virtual Center, you are required to register the VC plug-in.
WARNING! If the Register VC plug-in checkbox is not selected, all management occurs through the CPVM Web UI in a separate browser.
12. On the Virtual Center screen, type the VMware Virtual Center name and credentials. Register the VC plug-in if you want to use the Virtual Center and click Next.
FIGURE 2-8 OfficeScan Server screen
Core Protection for Virtual Machines provides compatibility with Trend Micro OfficeScan Server. If you are using OfficeScan on any of your physical machines and expect to convert such machines to virtual machines or already have virtual
2-10

Installing Core Protection for Virtual Machines
machines with OfficeScan installed on them, you can configure Core Protection for virtual machines to automatically perform updates when these virtual machines are in an off state.
13. On the OfficeScan Server screen, select Use OSCE Server and type the server name or IP address if you want to enable updates to OfficeScan, and click Next.
FIGURE 2-9 ServerProtect Server screen
2-11
Installing Core Protection for Virtual Machines
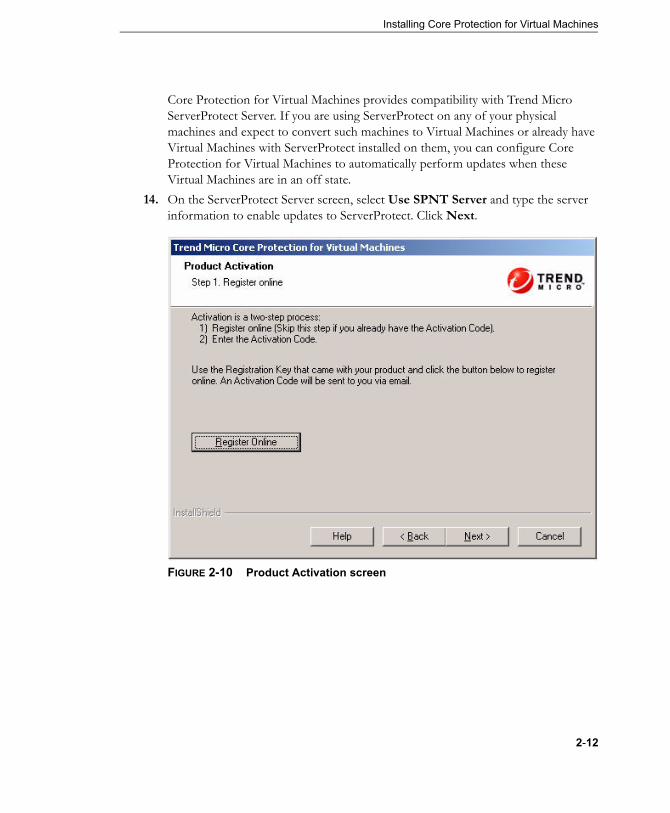
Core Protection for Virtual Machines provides compatibility with Trend Micro ServerProtect Server. If you are using ServerProtect on any of your physical machines and expect to convert such machines to Virtual Machines or already have Virtual Machines with ServerProtect installed on them, you can configure Core Protection for Virtual Machines to automatically perform updates when these Virtual Machines are in an off state.
14. On the ServerProtect Server screen, select Use SPNT Server and type the server information to enable updates to ServerProtect. Click Next.
FIGURE 2-10 Product Activation screen
2-12

Installing Core Protection for Virtual Machines
15. On the Product Activation screen, click Register Online and type the product registration information on the Online Registration page.Setup directs you to the Trend Micro registration Web site.Core Protection for Virtual Machines has one product service and requires an Activation Code. After you complete the registration form, Trend Micro sends an email with the Activation Code. You can then continue with the installation process.
16. If you already have the Activation Code, click Next to continue with the installation.
FIGURE 2-11 Product Activation screen
2-13

Installing Core Protection for Virtual Machines
17. On the Product Activation screen, type the Activation Code and click Next. The Activation Code is case-sensitive.
FIGURE 2-12 Administrator Account Password screen
18. On the Administrator Account Password screen, type a password for accessing the CPVM Administrator Web console.
Note: The password must contain at least one special character.
19. Make a note of the password since this is required to log in to the Core Protection for Virtual Machines Administrator Web console.
2-14

Installing Core Protection for Virtual Machines
20. Click Next.
FIGURE 2-13 Select Program Folder screen
2-15

Installing Core Protection for Virtual Machines
21. On the Select Program Folder screen, accept the default folder, or enter a new folder and click Next.
FIGURE 2-14 Installation Information screen
2-16

Installing Core Protection for Virtual Machines
22. On the Installation Information screen, verify that the installation information is correct and click Next.
FIGURE 2-15 Setup Status screen
Core Protection for Virtual Machines installation begins. The Setup Status screen displays the installation progress.
2-17

Installing Core Protection for Virtual Machines
FIGURE 2-16 Installation Successful screen
When the installation is complete, the wizard displays an installation success message.
23. Click Finish.
After installation is complete, see the Installing Scanning Agents and Real-Time Agents, Configuring Core Protection for Virtual Machines, and Configuring Core Protection for Virtual Machines sections.
2-18

Installing Core Protection for Virtual Machines
Preparing Windows XP or Vista Machines for Agent Installation
WARNING! It is recommended that you not install the Scanning Agent on the same machine as the CPVM Server. If you do, you cannot upgrade the Scanning Agent. However, you can protect the CPVM Server by installing a Real-Time Agent.
For real-time agent installations on Windows XP (32- or 64-bit) or Windows Vista (32- or 64-bit), you must perform these actions:• Join the CPVM Server and all target machines to the same domain.• Enable remote administration and network sharing on the target machines.
WARNING! Joining the CPVM server and all target machines in the same domain is strongly recommended. It is more stable than joining a Workgroup.
To enable remote administration and network sharing in a non-Active Directory (AD) environment:
Depending on your operating system, perform one of the following two actions:• For Vista - Enable "File and Printer Sharing" and "Remote Administration" under
Windows Firewall Settings > Exceptions. You can run the following command on each target machine to enable "Remote Administration":
netsh firewall set service RemoteAdmin enable
2-19
Installing Core Protection for Virtual Machines
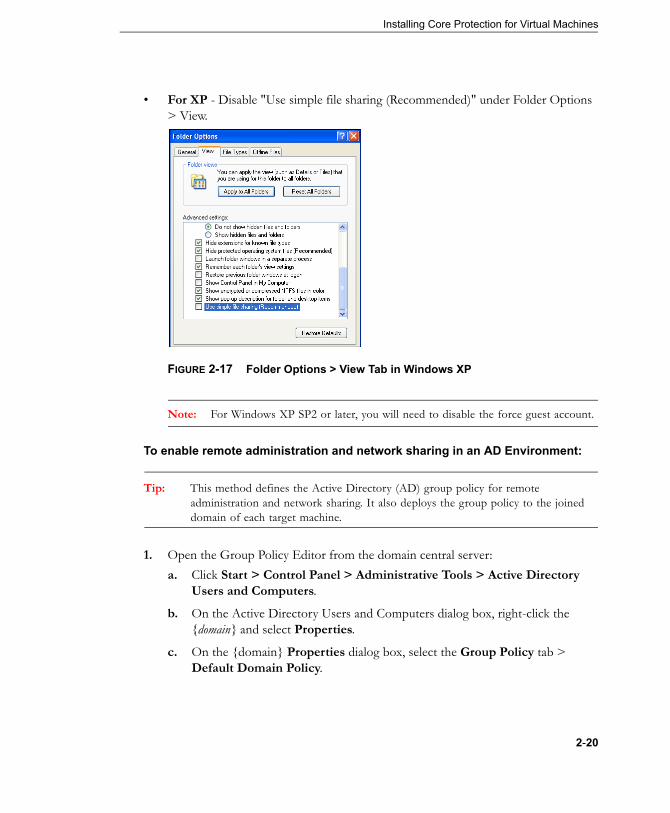
• For XP - Disable "Use simple file sharing (Recommended)" under Folder Options > View.
FIGURE 2-17 Folder Options > View Tab in Windows XP
Note: For Windows XP SP2 or later, you will need to disable the force guest account.
To enable remote administration and network sharing in an AD Environment:
Tip: This method defines the Active Directory (AD) group policy for remote administration and network sharing. It also deploys the group policy to the joined domain of each target machine.
1. Open the Group Policy Editor from the domain central server:a. Click Start > Control Panel > Administrative Tools > Active Directory
Users and Computers.
b. On the Active Directory Users and Computers dialog box, right-click the {domain} and select Properties.
c. On the {domain} Properties dialog box, select the Group Policy tab > Default Domain Policy.
2-20

Installing Core Protection for Virtual Machines
2. On the Group Policy Editor, click Computer Configuration > Administrative Templates > Network > Network Connections > Windows Firewall > Domain Profile.
FIGURE 2-18 Group Policy Editor - Domain Profile
2-21

Installing Core Protection for Virtual Machines
3. Double-click Windows Firewall: Allow remote administration exception, and select Enabled.
FIGURE 2-19 Remote Administration Exception Dialog Box
2-22

Installing Core Protection for Virtual Machines
4. Click OK.5. Click Computer Configuration > Windows Settings > Security settings >
Local Policies > Security Options.
FIGURE 2-20 Group Policy Editor - Security Options
2-23

Installing Core Protection for Virtual Machines
6. Double-click Network access: Sharing and security model for local accounts, and select Define this policy setting.
FIGURE 2-21 Network Access Sharing Dialog Box
7. Select Classic - local users authenticate as themselves and click OK.
8. Deploy the policies to all machines joined to domain.
2-24

Installing Core Protection for Virtual Machines
Installing Scanning Agents and Real-Time Agents
Use the Administrator Web console to install agents. You must have administrator privileges on the target machine. If the account is a domain account, use "domain\account” format. If you select multiple targets, the same user name and password is used to install components for all targets. Therefor, be sure that the user name and password can access all selected target machines.
Tip: The performing scanning agent may require large CPU and memory usage during a scan task. This could affect the daily work of the normal user or other services that the CPVM server provides. Therefore, it is best practices to intall the scanning agent on a VM guest or physical machine dedicated to scan tasks only and that the administrator directly manages.
WARNING! It is recommended that you not install the Scanning Agent on the same machine as the CPVM Server. If you do, you cannot upgrade the Scanning Agent. However, you can protect the CPVM Server by installing a Real-Time Agent. You must have VMware tools installed on the Virtual Machines where you want to install an agent. Otherwise, the install will fail.
Tip: Before attempting to install agents, test the connection from the CPVM server to the target machine using the following address: \\target-machine-hotname\admin$
2-25
Installing Core Protection for Virtual Machines
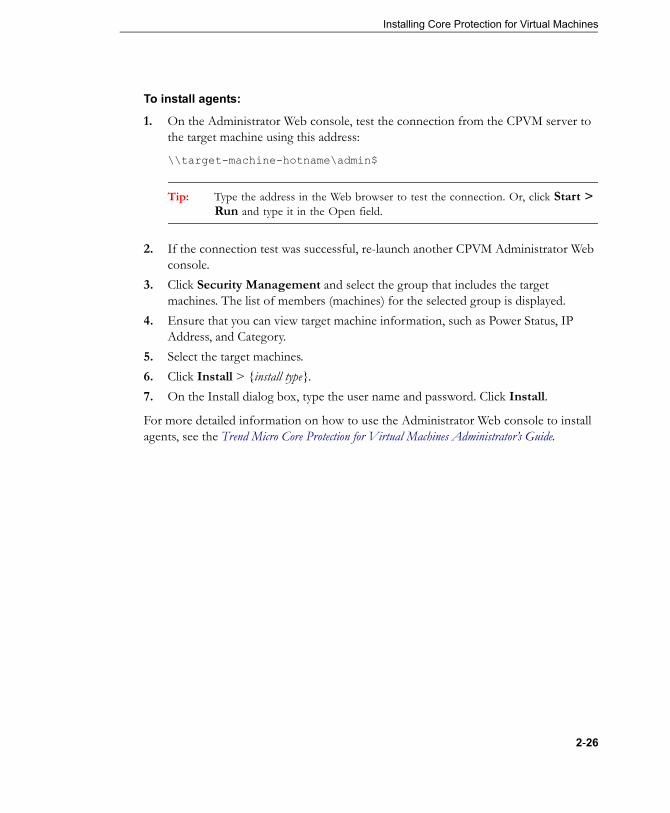
To install agents:
1. On the Administrator Web console, test the connection from the CPVM server to the target machine using this address:
\\target-machine-hotname\admin$
Tip: Type the address in the Web browser to test the connection. Or, click Start > Run and type it in the Open field.
2. If the connection test was successful, re-launch another CPVM Administrator Web console.
3. Click Security Management and select the group that includes the target machines. The list of members (machines) for the selected group is displayed.
4. Ensure that you can view target machine information, such as Power Status, IP Address, and Category.
5. Select the target machines.6. Click Install > {install type}. 7. On the Install dialog box, type the user name and password. Click Install.
For more detailed information on how to use the Administrator Web console to install agents, see the Trend Micro Core Protection for Virtual Machines Administrator’s Guide.
2-26

Installing Core Protection for Virtual Machines
To set inbound firewall rule for VMs running Vista or 2008 OS’s not joined to a domain:
Note: If you have Windows Vista or 2008 operating systems that are not joined to the domain, you must add an inbound firewall rule that allows additional port communication.
1. Open Windows Firewall with Advanced Security:Select Control Panel > Administrative Tools > Windows Firewall with Advanced Security.
2. Select Inbound Rules > New Rule… to display the New Inbound Rule Wizard.3. On the New Inbound Rule Wizard, select Custom and click Next.4. Select This program path, and type the applicable path:
%ProgramFiles%\Trend Micro\CPVM Scanning Agent\MsaSVC.exe %ProgramFiles%\Trend Micro\CPVM Real-Time Agent\RTASvc.exe
5. Click Next.6. On the Protocol and Ports screen, select TCP for the Protocal type.7. Select Specific Ports for the Local port.8. In the Local port text box, type 3628, 5168, 5169 and click Next. 9. On the Scope screen, click Next. 10. On the Action screen, click Next. 11. On the Profile screen, click Next. 12. On hte Name screen, type the name for this rule and click Finish.
Configuring Core Protection for Virtual Machines
After installing the Trend Micro Core Protection for Virtual Machines software, the next step is to open the Administrator Web console and configure the program. For details on how to configure Core Protection for Virtual Machines, see the Trend Micro Core Protection for Virtual Machines Administration Guide.
2-27

Installing Core Protection for Virtual Machines
Uninstalling Core Protection for Virtual Machines
WARNING! To uninstall CPVM, the agents must be uninstalled first.
Use the Administrator Web console to select multiple members for uninstalling agents simultaneously.
Uninstalling the AgentsThe agents can be uninstalled from the Security Management page of the Administrator Web console or from the VMs where they are installed. When an agent is uninstalled from a VM or physical machine, the machine must be rebooted before reinstalling CPVM to avoid locking issues with shared files, drivers, and resources.
To uninstall from the Administrator Web console:
1. On the CPVM left navigation bar, select Security Management.2. Select one or more agent VMs from the list of members.3. Click Install > Uninstall Agent. 4. On the Uninstall dialog box, type the username and password and click Uninstall.
To uninstall from the VM:
1. Log onto the VM.2. Go to Add or Remove Programs.3. Select the Scanning Agent or the Real-time Agent, and click Remove.
Uninstalling the CPVM ServerTo uninstall the server:
1. Log onto the server machine.2. Go to Add or Remove Programs or Add or Remove Programs and Features.
3. Select CPVM Server and click Remove.
2-28


