+ All Categories
Home > Documents > CorelLASER Laser Engraving Cutting Software User … · 2 Chapter 1Software installation 1.1...

CorelLASER Laser Engraving Cutting Software User … · 2 Chapter 1Software installation 1.1...

Date post: 01-Jul-2018
Category:
Upload: vanhanh
View: 222 times
Download: 0 times
Share this document with a friend
8
1 User User User Users Manual Manual Manual Manual of of of of Laser Laser Laser Laser Engraving Engraving Engraving Engraving Cutting Cutting Cutting Cutting Software Software Software Software CorelLASER CorelLASER CorelLASER CorelLASER
Transcript

1

UserUserUserUser’’’’ssss ManualManualManualManual ofofofofLaserLaserLaserLaser EngravingEngravingEngravingEngraving CuttingCuttingCuttingCutting SoftwareSoftwareSoftwareSoftware

CorelLASERCorelLASERCorelLASERCorelLASER

2

ChapterChapterChapterChapter 1111 SoftwareSoftwareSoftwareSoftware installationinstallationinstallationinstallation

1111.1.1.1.1 InstallInstallInstallInstall stepsstepsstepssteps

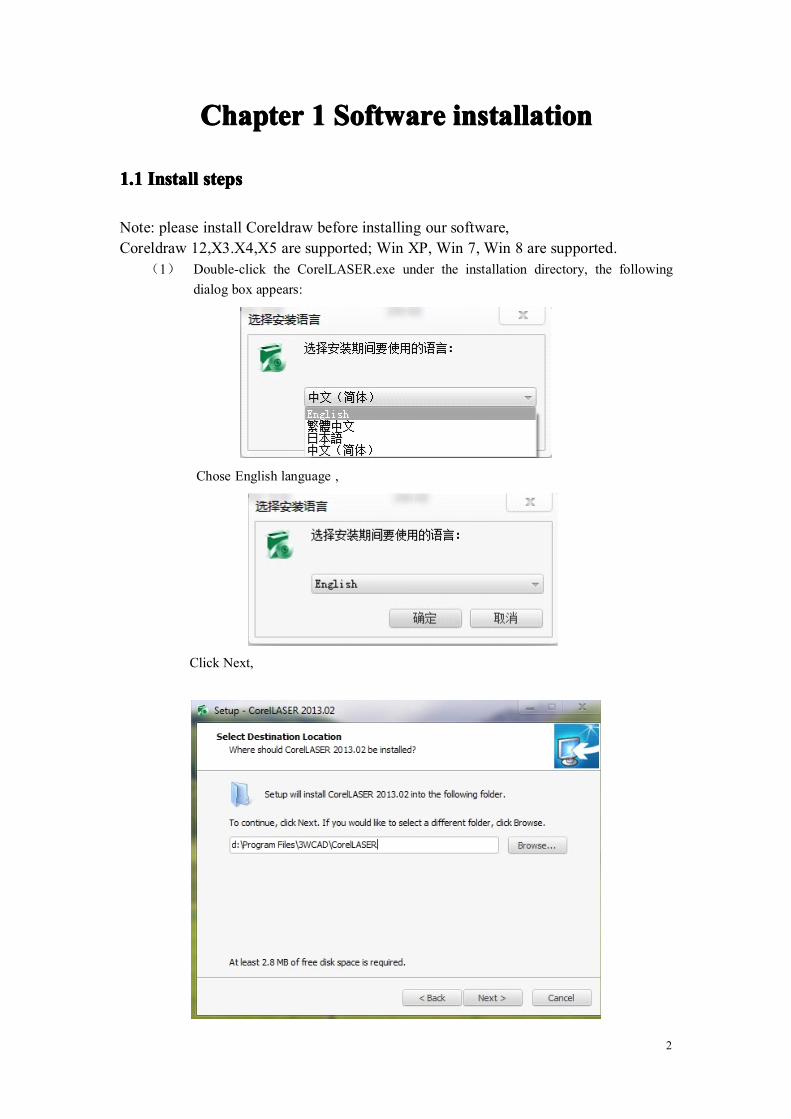
Note: please install Coreldraw before installing our software,Coreldraw 12,X3.X4,X5 are supported; Win XP, Win 7, Win 8 are supported.

(1) Double-click the CorelLASER.exe under the installation directory, the followingdialog box appears:

Chose English language ,

Click Next,

3

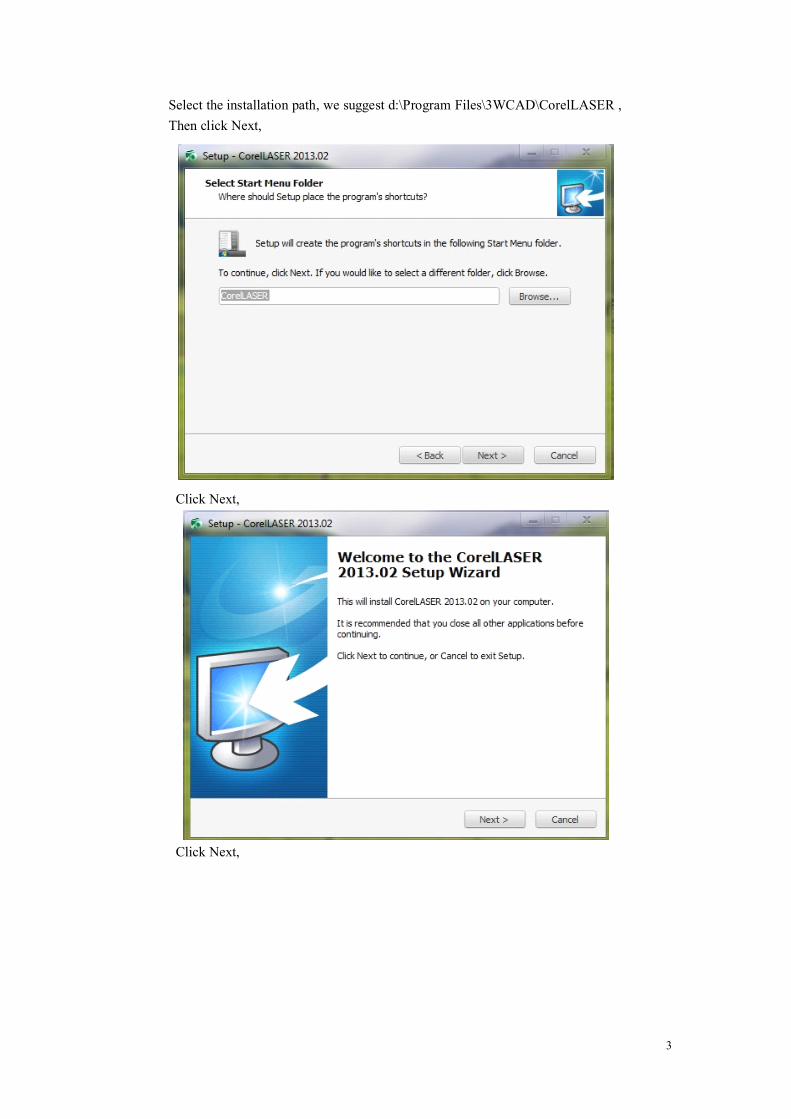
Select the installation path, we suggest d:\Program Files\3WCAD\CorelLASER ,Then click Next,

Click Next,

Click Next,

4

(2) Click【Install】,when extract copy is to be completed, the installation will be finished,

Click Finish, then the software was installed .

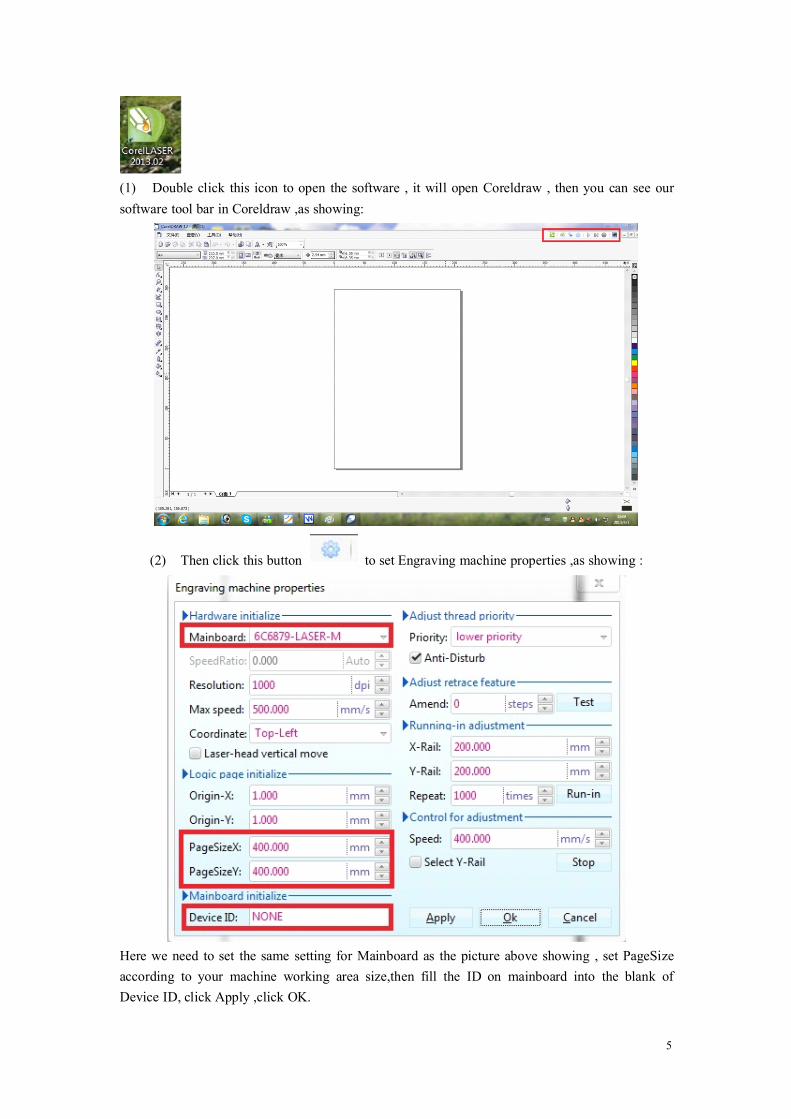
1.2 Engraving machine propertiesAfter the installation ,there will be a icon on your desktop ,as showing :

5

(1) Double click this icon to open the software , it will open Coreldraw , then you can see oursoftware tool bar in Coreldraw ,as showing:

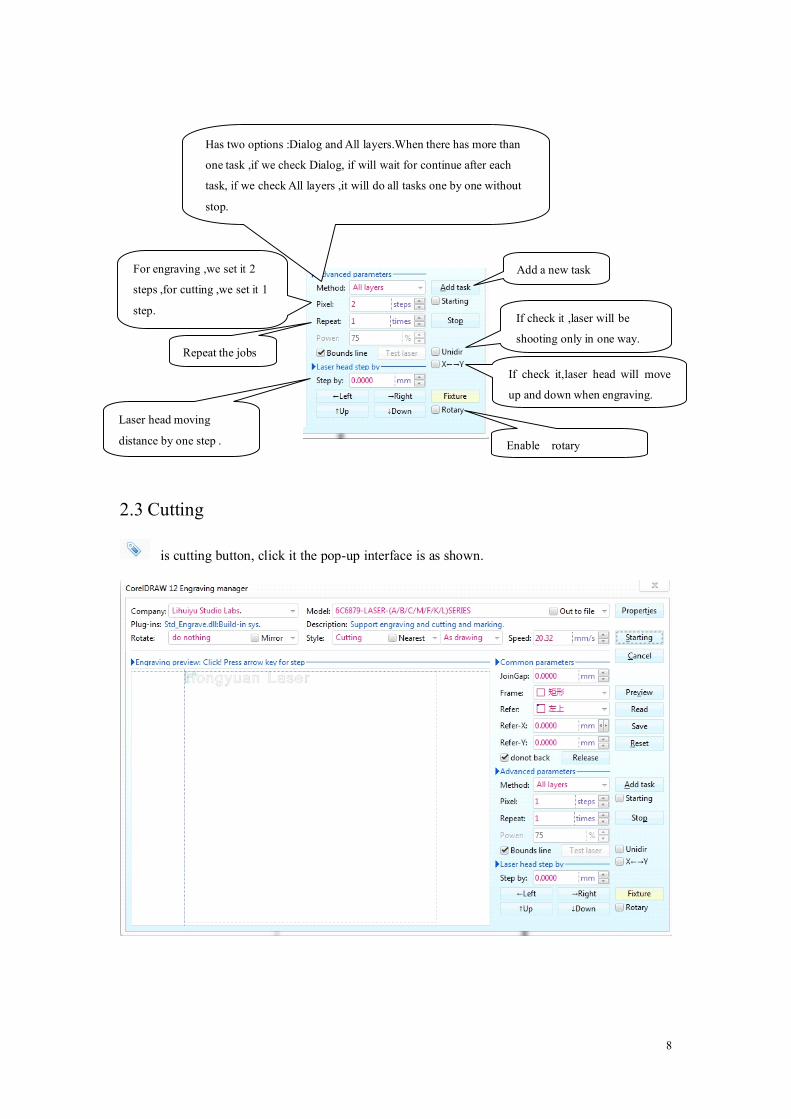
(2) Then click this button to set Engraving machine properties ,as showing :

Here we need to set the same setting for Mainboard as the picture above showing , set PageSizeaccording to your machine working area size,then fill the ID on mainboard into the blank ofDevice ID, click Apply ,click OK.

6

Chapter 2 Software instruction2.1 CorelDRAW Setting

is CorelDRAW setting button, click this button, the pop-up interface is as shown:

Please set the settings on Data setting interface the same as we did above.

2.2 Engraving

is Engraving button,click this button, the pop-up interface will be as shown:

7

Used to rotate

the design.

Set the disign

mirror.Working speed, set it

according to the working

style and material.

Output the

job to

machine.

If check this function when engraving,

letters will be engraved directly,

otherwise ,engrave background.

There have three processing

styles: Engraving,Cutting

Marking

The preview of the design, when drag

this icon by mouse, the laser head will

move at same time,this function always

used for setting Working Origin.

Leave a Margin.Select the shape of frame.

Relative position of laser head

X coordinate of laser head

Y coordinate of laser head

Check this ,laser head will stay

there after finish the job.

Release motor ,then we can

move laser head easily by

hands without damage .

Reset Origin point

Save the current settings,include

Speed ,Common parameters and

Advance parameters

Read the saved settings

Preview the working

8

2.3 Cutting

is cutting button, click it the pop-up interface is as shown.

Has two options :Dialog andAll layers.When there has more than

one task ,if we check Dialog, if will wait for continue after each

task, if we check All layers ,it will do all tasks one by one without

stop.

For engraving ,we set it 2

steps ,for cutting ,we set it 1

step.

Repeat the jobs

Laser head moving

distance by one step .

If check it,laser head will move

up and down when engraving.

If check it ,laser will be

shooting only in one way.

Add a new task

Enable rotary


Recommended