63
| Date post: | 08-Mar-2016 |
| Category: |
Documents |
| Upload: | the-prepared-pantry |
| View: | 216 times |
| Download: | 0 times |

10
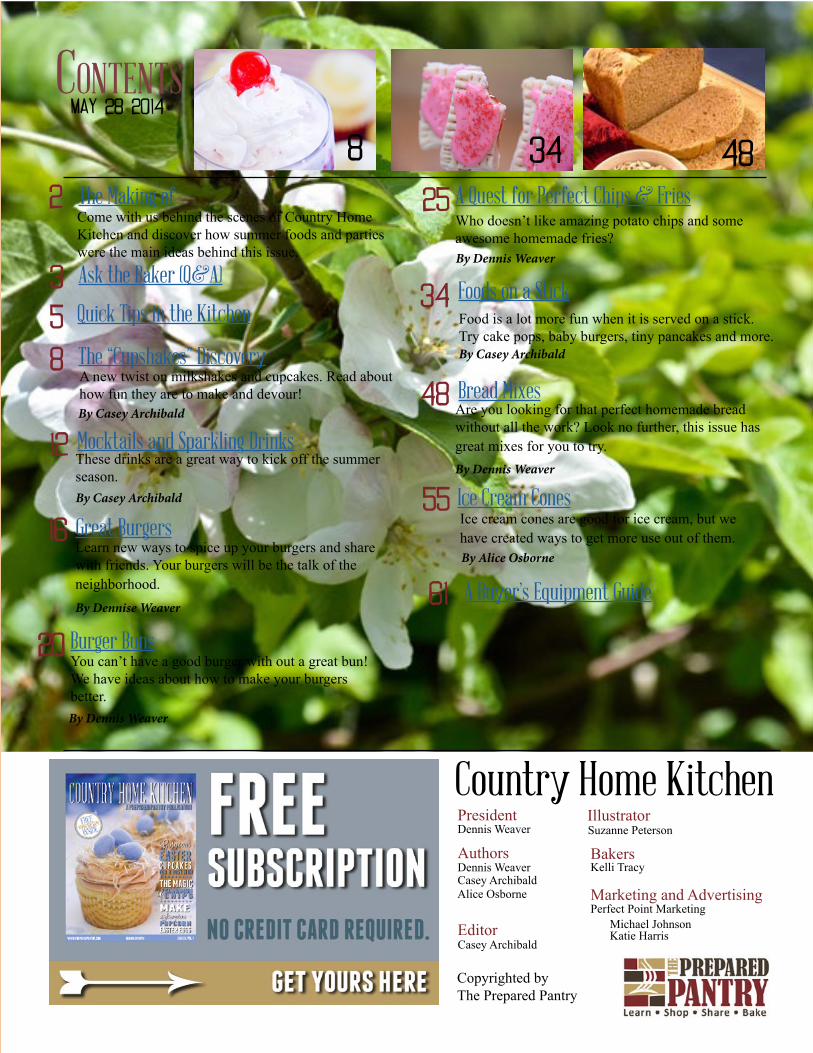
ContentsMay 28 2014
34 488
Bread MixesAre you looking for that perfect homemade bread without all the work? Look no further, this issue has great mixes for you to try. By Dennis Weaver
These drinks are a great way to kick off the summer season. By Casey Archibald
Mocktails and Sparkling Drinks
Great BurgersLearn new ways to spice up your burgers and share with friends. Your burgers will be the talk of the neighborhood. By Dennise Weaver
Quick Tips in the Kitchen
By Casey Archibald
A new twist on milkshakes and cupcakes. Read about how fun they are to make and devour!
The “Cupshakes” Discovery
Burger BunsYou can’t have a good burger with out a great bun! We have ideas about how to make your burgers better.
Ask the Baker (Q&A)
Come with us behind the scenes of Country Home Kitchen and discover how summer foods and parties were the main ideas behind this issue.
The Making of
Food is a lot more fun when it is served on a stick. Try cake pops, baby burgers, tiny pancakes and more.
Foods on a Stick
By Casey Archibald
2
3
5
8
12
16
20
34
48
A Buyer’s Equipment Guide61
Country Home KitchenPresidentDennis Weaver
AuthorsDennis WeaverCasey Archibald
Editor
IllustratorSuzanne Peterson
BakersKelli Tracy
Marketing and AdvertisingPerfect Point Marketing
Michael JohnsonKatie Harris
Copyrighted byThe Prepared Pantry
Ice Cream Cones55
Alice Osborne
A Quest for Perfect Chips & FriesWho doesn’t like amazing potato chips and some awesome homemade fries? By Dennis Weaver
25
Ice cream cones are good for ice cream, but we have created ways to get more use out of them. By Alice Osborne
By Dennis Weaver
Casey Archibald

Country Home KitCHenThe Making of
Summer Fever: We’ve got it bad.
We all have a little summer fever here at The Prepared Pantry. The birds are out; they are chirping and skimming the surface of the little canal outside the office with their wings. Wildflowers are starting to blossom and expose their petals to the sun. Even on cloudy, rainy days, I find it hard to resist slipping into a short sleeved shirt in anticipation for the long-awaited summer months. Yes, we have summer fever and we’ve got it bad.
In fact, the fever even seeped into the food made for this issue of Country Home Kitchen. We enjoyed developing everything from fruity spritzers to juicy burgers.
Summer months are outdoor party months. That’s what inspired the feature article of this issue, which is all about food that can be served on a stick. We tested (and snacked on) mini corn dogs, puny poptarts and baby burgers among others. They were all delicious.
With the content of this issue, we imagine you, our reader, enjoying a warm summer day with your family and friends...with the help of these recipes and ideas.
Let me paint the picture for you: the sound of hamburgers sizzling on the grill is just white noise compared to the pleasant buzz of conversations between your favorite people in the world. Each has a drink in his or her hand that tastes like summer and tingles the tongue with fruity carbonation. Children are playing in the yard with popsicle residue stuck to their cheeks. You hear laughter and look to see your loved ones slipping bite-sized food off skewers.
The scene is set. You have the recipes. We are passing on our summer fever to you.
Now plan yourself a party.
Happy summer!
3
My spices seem to have lost their flavor. Is this normal? How long should I keep my spices before I throw them out?
Dried spices should be replaced about every six months to guarantee the most flavor. Buy them a little bit at a time. Some stores offer spices by the pound. That’s a
When I’m using a crock pot, why does my meat get overcooked, even on the low setting?
Slow cookers are all created differently and therefore they don’t all cook at the same pace. You have to get to know your slow cooker by using it often. It helps to use high-quality recipes. If you are consistently overcooking the meat or food, start with a shorter amount of time than the recipe calls for and work your way up. You might try checking the temperature of the meat with a meat thermometer until it reaches a safe temperature, instead of when the timer sounds.
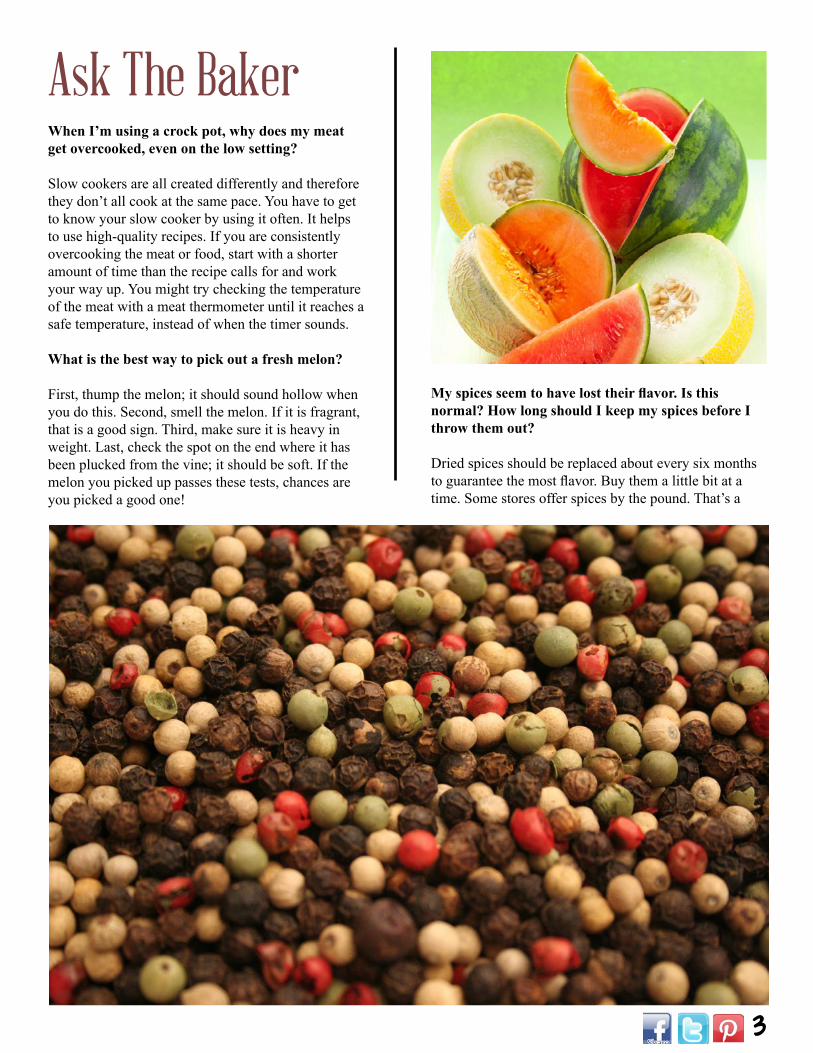
What is the best way to pick out a fresh melon?
First, thump the melon; it should sound hollow when you do this. Second, smell the melon. If it is fragrant, that is a good sign. Third, make sure it is heavy in weight. Last, check the spot on the end where it has been plucked from the vine; it should be soft. If the melon you picked up passes these tests, chances are you picked a good one!
Ask The Baker

4
great way to go because you can get a small amount at a time and reuse old spice bottles. If you are really looking for flavor, try using fresh spices instead of dried spices. They are more expensive, but very worth it.
What is bloom and can it hurt the chocolate?
Bloom is that white frosted look that chocolate sometimes when it is stored for a long time. It is bits of cocoa butter on the surface of the chocolate that is often caused by temperature fluctuations in storage or transit. For baking purposes, the chocolate is unaffected.
What are aebleskivers?
A holiday in Denmark often begins with a breakfast of puffy little pastries called aebleskivers (ebleskivers). These round pastries are made on the stovetop and filled with sweet or savory fillings.
Traditionally, they are made with an apple filling or served with applesauce (hence their name). Like other great pastries, wonderful variations have evolved. Now you can find aebleskivers filled with everything from jam to pastry cream to cheese.
How much seasoning should I use in my cooking?
That may be the question we get asked the most. It’s not as hard as it may seem. Start with less. In most cases, you can add more. You’ll use more with beef than you will with chicken or fish.
Often you want the seasoning to simply be a background flavor–complexity without competition. Don’t overpower the dish. Chicken should always taste like chicken but a little spice will transform “everyday” into interesting. For a pound of ground beef, use a Tablespoon of mild spice—though you might want to start with a teaspoon
or two and add more to taste after it’s cooked. Tastes are different; we have a friend that uses about twice as much

5
spice as we do. As we get older, we lose taste buds and prefer more seasoning. Go a little mild if there are children in your home.
Can I substitute fresh fruits for frozen when making cobbler, or pastry pies?
We found that by using a base recipe we could substitute different fruits. Depending on the type of fruit and its ripeness, the sweetness and flavor differ. We simply tasted the filling along the way and increased the amount of fruit or sugar to achieve the taste we wanted.
How long should I let my bread rise?
It depends. The best way to tell if the dough has risen enough is not by time—though it helps to set the timer so you don’t forget about it—but by look and feel. It will look soft and bloated. When you touch the dough, it will be soft and your finger will leave an indentation when lightly pressed against the dough. If it is not ready, the dough will slowly spring back. If you want light, fluffy bread, the dough should rise until it is puffy. The more gas that is incorporated in the dough, the lighter it will be. If too much gas is captured in the dough, it may collapse.
The trick is to let it rise until you get just to the edge of the pan and then bake it. In most cases, that means that the dough will double—or more—in volume. With a free-standing loaf, since the pan can’t support the loaf, you cannot let the bread rise as much. A lean, moist dough in a warm kitchen will probably rise in 45 minutes or less. A firmer dough with less moisture will take longer to rise. Yeast is very sensitive to temperature; even a few degrees less in the kitchen can extend the rise time significantly. A change of 17 degrees will cut the rise time in half.
How do I whip cream cheese without it getting too soft when I am making cream cheese whipped cream?
Several people have mentioned that their whipped cream isn’t as stiff as ours. I don’t think we’re doing anything special but we’re whipping it hard and fast. I’ve gotten the same results with a hand held electric mixer. We are using one ounce of cream cheese per cup of whipping cream for our whipped cream. The cream cheese stabilizes the whipped cream, helps it hold its
shape, and gives it a little flavor.
If you store your whipped cream in the fridge, it may get a little soft. Simply whip it again for a few minutes and it will be good as new.
6
Quick Tips
Party Food Safety
If you are having a party food is usually an essential part. But you want to make sure your guests don’t get sick and that you are practicing proper food safety. The maximum time for leaving prepared foods at room temperature is two hours. That includes the time for preparation, serving and eating. Toss any perishable foods that have been left at room temperature for longer than two hours. If you are eating outdoors and the temperature outside is over 90 degrees, discard foods after one hour.
Make a Game Plan
If you are throwing a party and you want to plan out a variety of h’orderves, make sure you develop a game plan before you start. Think about which recipes you need the oven for and which ones take the longest and plan around that. Start with the things that take a long time to cook, and work your way down the list. And remember, it’s okay if you are pulling things out of the oven once your guests arrive because
you are the host, but you want to enjoy your party too. Get as much as you can done beforehand and remember why you planned the party in the first place—to be with your friends!
Soak wooden skewers before you use them
Soak wooden skewers in water for 30 minutes before using them on a grill or in the oven so they won’t burn during cooking. The water will prevent them from becoming blackened and ruining the taste or texture of the food you are cooking.
Double Skewers
If you are having a problem keeping food on a skewer, use two instead of one. Keep the skewers parallel and then stick the food on. This will help
prevent pieces from slipping off before enjoyers can bite into them.
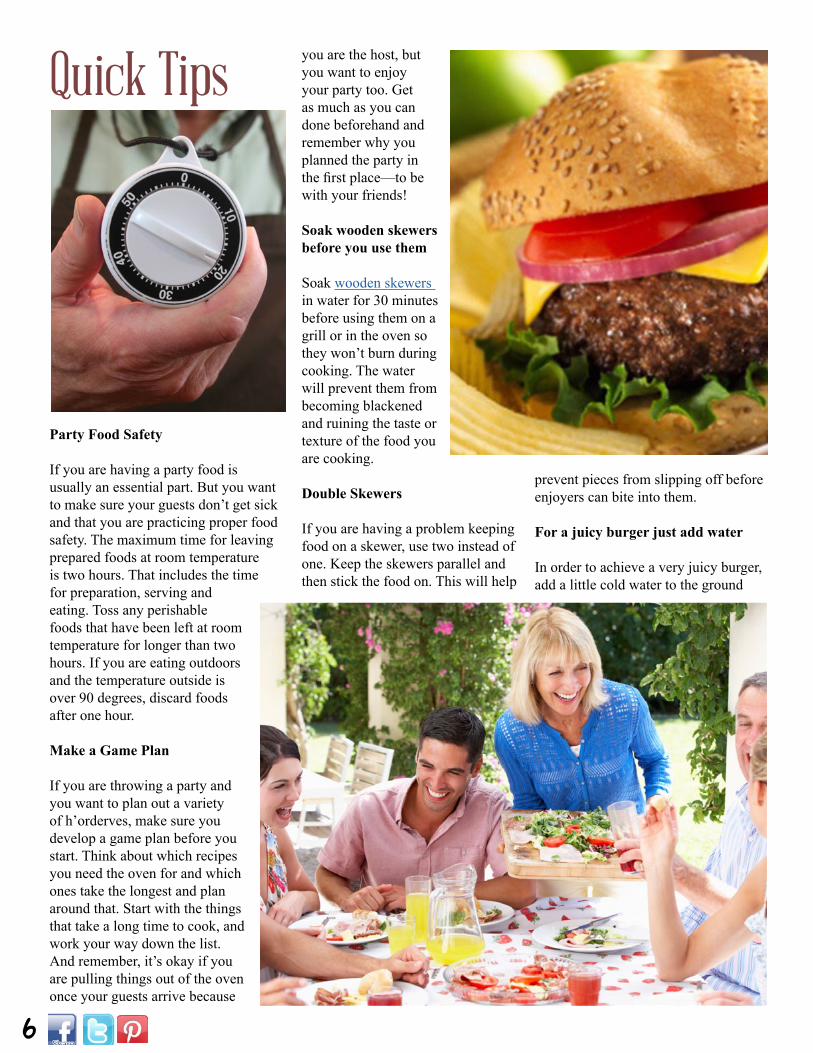
For a juicy burger just add water
In order to achieve a very juicy burger, add a little cold water to the ground
7
beef before you grill it. The best ratio is ½ cup of water to 1 pound of ground beef.
Get the most out of your lemons
If you microwave a lemon for 10 to 15 seconds before you squeeze it to get the juice out, you will get almost double the juice out of it as you would from a cold lemon. Don’t over-microwave it.
Make freshly cut basil last
Don’t refrigerate fresh basil, it doesn’t do well in the cold. Instead, store it in a glass on your kitchen counter. Fill the glass with only enough water to cover the stems of the basil. Your basil may even grow roots when stored this way.
Don’t toss pie crust or biscuit scraps
If you just made a pie or biscuits and have a few extra scraps of dough, don’t throw them away. Instead, sprinkle them with cinnamon and
sugar (and maybe a little butter) and bake them in the oven. Yum.
Don’t let pasta boil over
There are so many hokey tips out there for preventing pasta from boiling over. Many of them don’t work, but rubbing the inside of the pot with canola oil before you pour the water in to boil can reduce the risk.
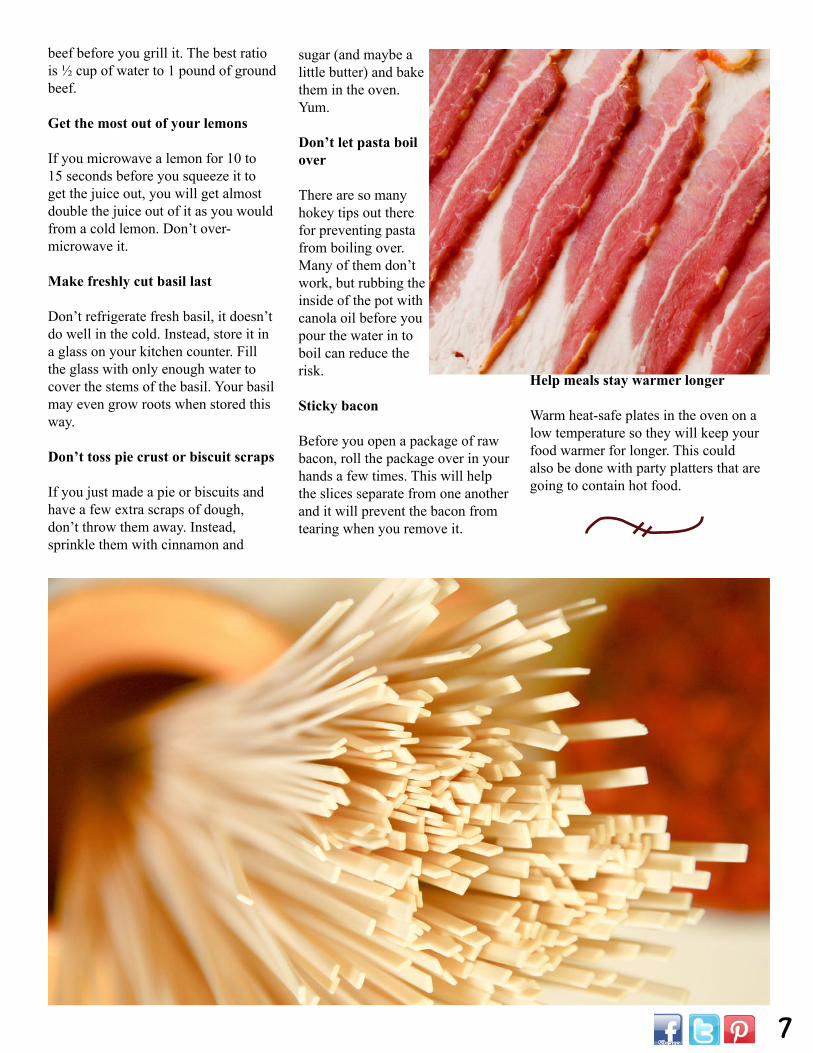
Sticky bacon
Before you open a package of raw bacon, roll the package over in your hands a few times. This will help the slices separate from one another and it will prevent the bacon from tearing when you remove it.
Help meals stay warmer longer
Warm heat-safe plates in the oven on a low temperature so they will keep your food warmer for longer. This could also be done with party platters that are going to contain hot food.
8
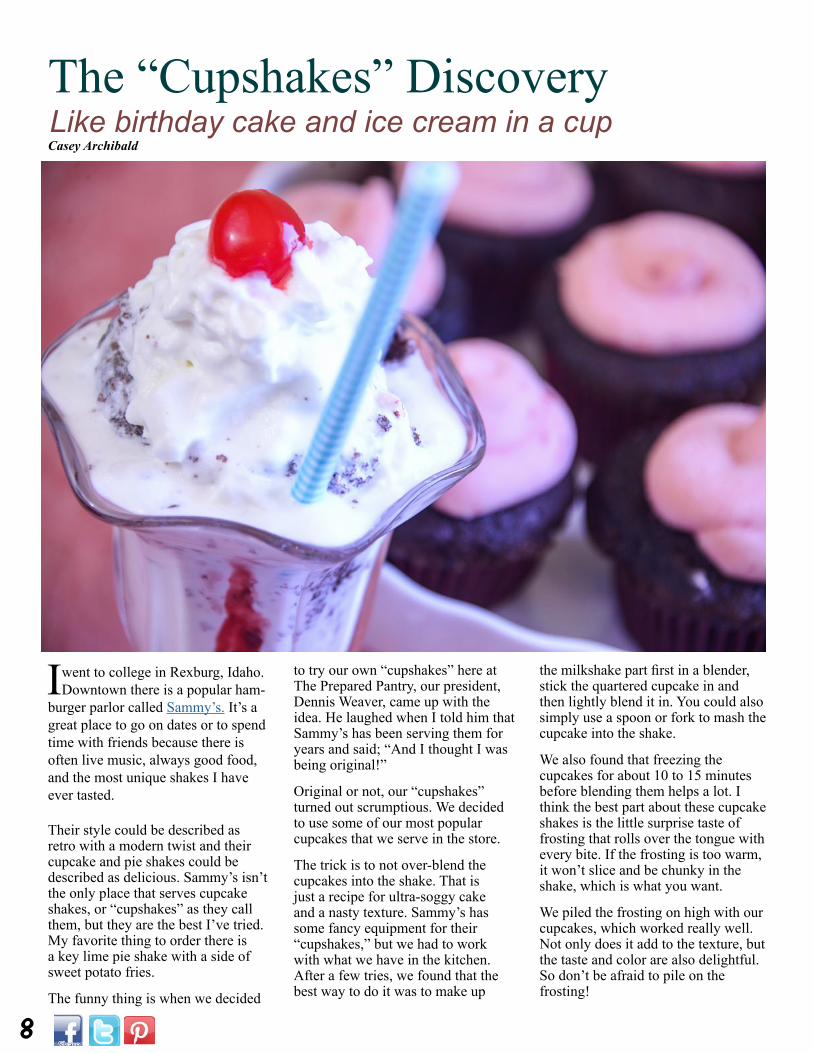
The “Cupshakes” DiscoveryLike birthday cake and ice cream in a cupCasey Archibald
I went to college in Rexburg, Idaho. Downtown there is a popular ham-
burger parlor called Sammy’s. It’s a great place to go on dates or to spend time with friends because there is often live music, always good food, and the most unique shakes I have ever tasted.
Their style could be described as retro with a modern twist and their cupcake and pie shakes could be described as delicious. Sammy’s isn’t the only place that serves cupcake shakes, or “cupshakes” as they call them, but they are the best I’ve tried. My favorite thing to order there is a key lime pie shake with a side of sweet potato fries.
The funny thing is when we decided
to try our own “cupshakes” here at The Prepared Pantry, our president, Dennis Weaver, came up with the idea. He laughed when I told him that Sammy’s has been serving them for years and said; “And I thought I was being original!”
Original or not, our “cupshakes” turned out scrumptious. We decided to use some of our most popular cupcakes that we serve in the store.
The trick is to not over-blend the cupcakes into the shake. That is just a recipe for ultra-soggy cake and a nasty texture. Sammy’s has some fancy equipment for their “cupshakes,” but we had to work with what we have in the kitchen. After a few tries, we found that the best way to do it was to make up
the milkshake part first in a blender, stick the quartered cupcake in and then lightly blend it in. You could also simply use a spoon or fork to mash the cupcake into the shake.
We also found that freezing the cupcakes for about 10 to 15 minutes before blending them helps a lot. I think the best part about these cupcake shakes is the little surprise taste of frosting that rolls over the tongue with every bite. If the frosting is too warm, it won’t slice and be chunky in the shake, which is what you want.
We piled the frosting on high with our cupcakes, which worked really well. Not only does it add to the texture, but the taste and color are also delightful. So don’t be afraid to pile on the frosting!
9
Here’s how to make “cupshakes” in two easy steps.
1. Add 1/4 cup milk and 1 1/2 cups of ice cream to a blender. Blend to make a shake.
2. Cut a cupcake into fourths. Pulse the blender just long enough to cut the cupcake into chunks. Don’t over blend.
Dennis loved the chocolate cherry and the chocolate strawberry cupcakes in vanilla ice cream. We used our chocolate baby cakes for the cupcakes and inserted a cherry filling or strawberry filling. I preferred the vanilla cupcakes with lemon frosting and raspberry filling, blended into a vanilla shake.
Don’t be afraid to play with the flavors. We’ve outlined the “cupshakes” that we tried in our test kitchen, but the options for these delicious treats are endless.
Try using chocolate or strawberry ice cream instead of vanilla. You might try adding some sprinkles to the mix or chocolate chips.
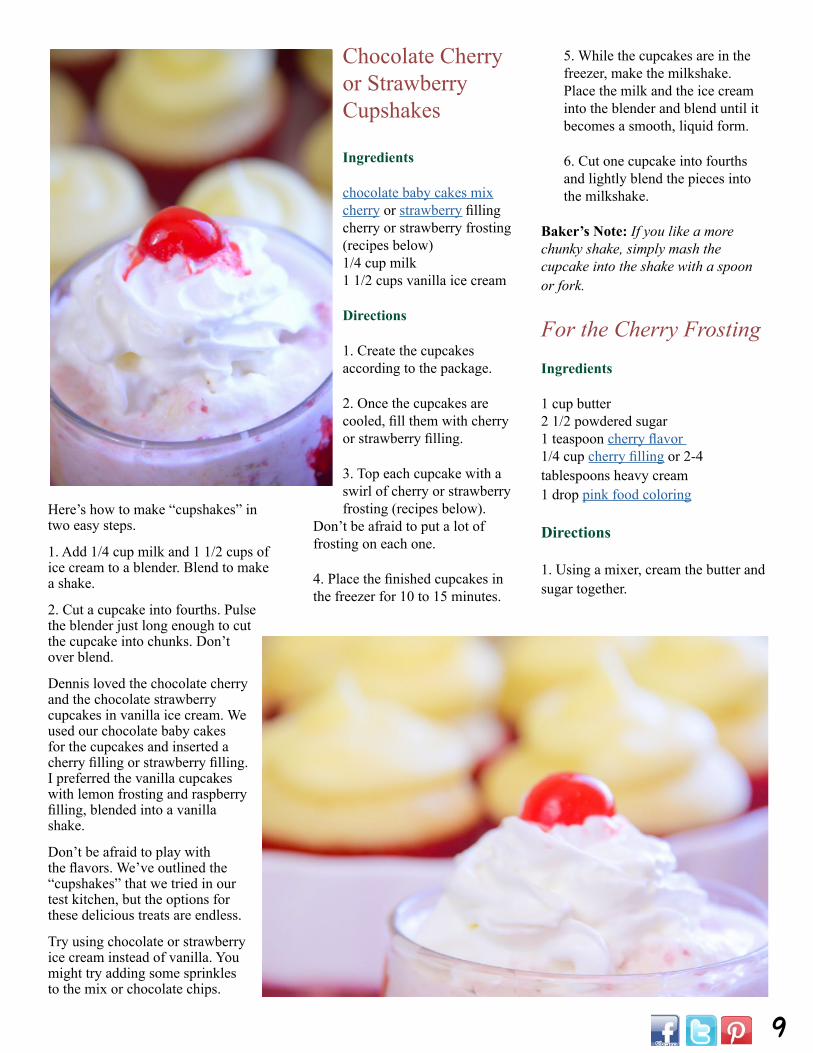
Chocolate Cherry or Strawberry Cupshakes
Ingredients
chocolate baby cakes mixcherry or strawberry fillingcherry or strawberry frosting (recipes below)1/4 cup milk1 1/2 cups vanilla ice cream
Directions
1. Create the cupcakes according to the package.
2. Once the cupcakes are cooled, fill them with cherry or strawberry filling.
3. Top each cupcake with a swirl of cherry or strawberry frosting (recipes below).
Don’t be afraid to put a lot of frosting on each one.
4. Place the finished cupcakes in the freezer for 10 to 15 minutes.
5. While the cupcakes are in the freezer, make the milkshake. Place the milk and the ice cream into the blender and blend until it becomes a smooth, liquid form.
6. Cut one cupcake into fourths and lightly blend the pieces into the milkshake.
Baker’s Note: If you like a more chunky shake, simply mash the cupcake into the shake with a spoon or fork.
For the Cherry FrostingIngredients
1 cup butter2 1/2 powdered sugar1 teaspoon cherry flavor 1/4 cup cherry filling or 2-4 tablespoons heavy cream1 drop pink food coloring
Directions
1. Using a mixer, cream the butter and sugar together.
10
2. Add the flavor, the coloring and the filling or heavy cream. Continue mixing until blended thoroughly.
For the Strawberry FrostingIngredients
1 cup butter2 1/2 powdered sugar1 teaspoon strawberry flavor1/4 cup strawberry filling or 2-4 tablespoons heavy cream1 drop pink food coloring
Directions
1. Using a mixer, cream the butter and sugar together.
2. Add the flavor, the coloring and the filling or heavy cream. Continue mixing until blended thoroughly.
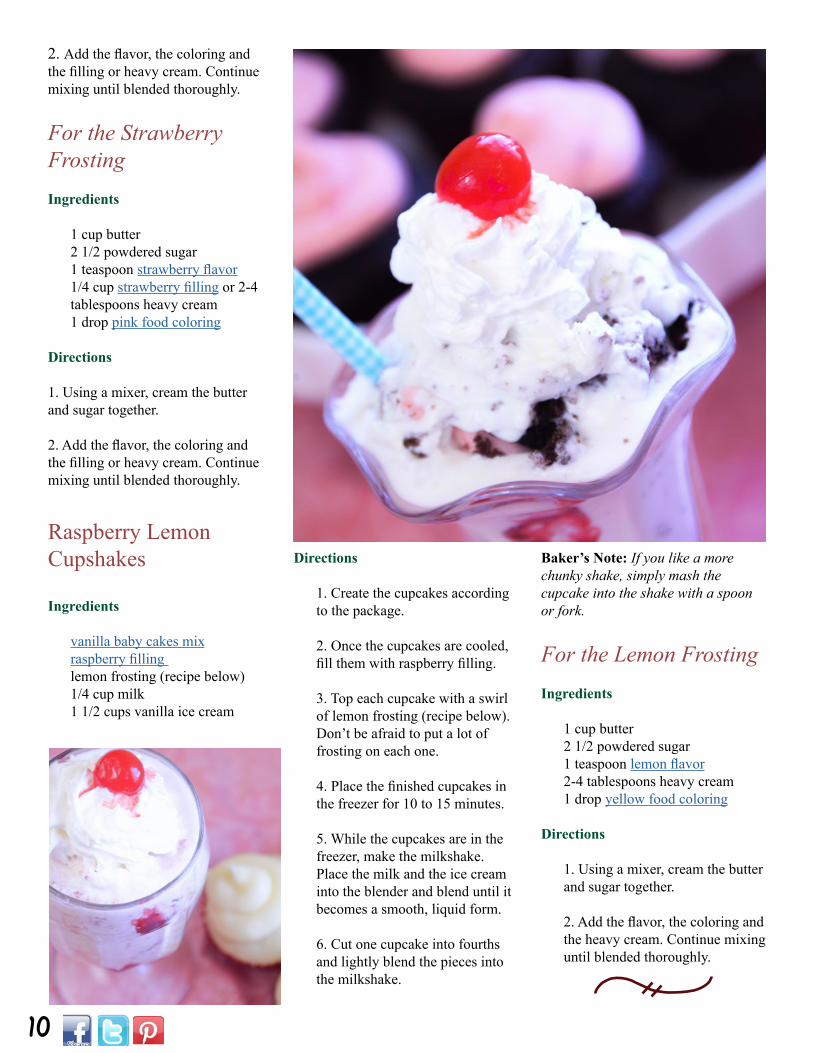
Raspberry Lemon Cupshakes
Ingredients
vanilla baby cakes mixraspberry filling lemon frosting (recipe below)1/4 cup milk1 1/2 cups vanilla ice cream
Directions
1. Create the cupcakes according to the package.
2. Once the cupcakes are cooled, fill them with raspberry filling.
3. Top each cupcake with a swirl of lemon frosting (recipe below). Don’t be afraid to put a lot of frosting on each one.
4. Place the finished cupcakes in the freezer for 10 to 15 minutes.
5. While the cupcakes are in the freezer, make the milkshake. Place the milk and the ice cream into the blender and blend until it becomes a smooth, liquid form.
6. Cut one cupcake into fourths and lightly blend the pieces into the milkshake.
Baker’s Note: If you like a more chunky shake, simply mash the cupcake into the shake with a spoon or fork.
For the Lemon FrostingIngredients
1 cup butter2 1/2 powdered sugar1 teaspoon lemon flavor2-4 tablespoons heavy cream1 drop yellow food coloring
Directions
1. Using a mixer, cream the butter and sugar together.
2. Add the flavor, the coloring and the heavy cream. Continue mixing until blended thoroughly.

TitleSubtitleAuthor
Any text is just the body text
Example Use this box as a template for all
of the other fun boxes/sidebars. It’s 12pt font of the Aparajita style . Use the big A with the underling and the small a with the arrow pointing up
to change where the text is centered. The red text is Aardvark Cafe 26pt.The squiggley line is not connected, copy and place it where ever. And
make the background match the page.
8
“Use this quote box. The font is called QuoteBox.Just type in the box, you may have to
change the right and left para-graph indent and the drop down (on the top bar it’s the big ‘A’
with the little ‘a’ and the arrow pointing up).”
12
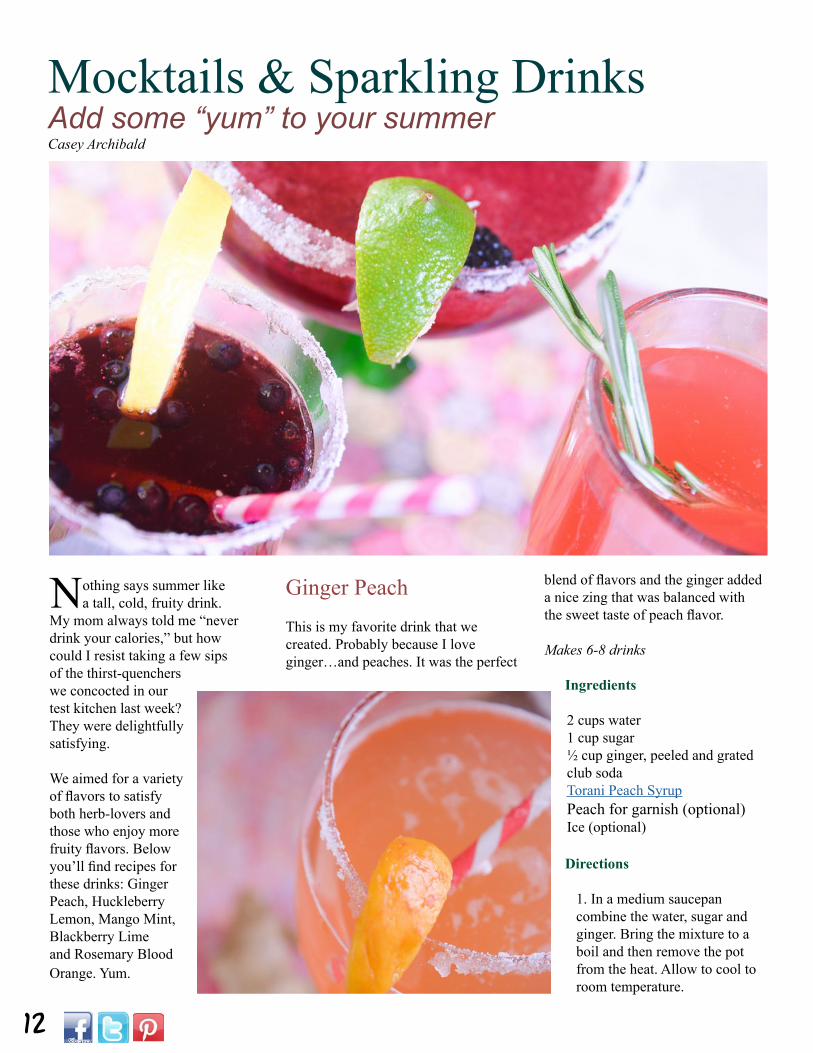
Mocktails & Sparkling DrinksAdd some “yum” to your summerCasey Archibald
Nothing says summer like a tall, cold, fruity drink.
My mom always told me “never drink your calories,” but how could I resist taking a few sips of the thirst-quenchers we concocted in our test kitchen last week? They were delightfully satisfying.
We aimed for a variety of flavors to satisfy both herb-lovers and those who enjoy more fruity flavors. Below you’ll find recipes for these drinks: Ginger Peach, Huckleberry Lemon, Mango Mint, Blackberry Lime and Rosemary Blood Orange. Yum.
Ginger PeachThis is my favorite drink that we created. Probably because I love ginger…and peaches. It was the perfect
blend of flavors and the ginger added a nice zing that was balanced with the sweet taste of peach flavor.
Makes 6-8 drinks
Ingredients
2 cups water1 cup sugar ½ cup ginger, peeled and gratedclub soda Torani Peach SyrupPeach for garnish (optional)Ice (optional)
Directions
1. In a medium saucepan combine the water, sugar and ginger. Bring the mixture to a boil and then remove the pot from the heat. Allow to cool to room temperature.

13
2. Strain the liquid to remove the pieces of ginger. Chill the mixture.
3. For each drink serving, pour ¼ cup of the ginger syrup created above, 8 oz of club soda and ¼ cup of the peach syrup. Garnish the glass with a slice of peach.
Huckleberry Lemon
Huckleberry flavor is all the rage right now, and it is excellent paired with fresh lemon. Kelli, our test kitchen cook, picked the huckleberries you see in these pictures in the mountains and they were a great addition to the drink.
Makes 1-2 servings
Ingredients
1 ½ cups lemon-lime soda1 ½ Tablespoons freshly
squeezed lemon juice ¼ cup Torani Huckleberry SyrupLemon and huckleberries for garnish
Directions
1. In each serving glass, add 1 ½ Tablespoons freshly squeezed lemon juice, ¼ cup huckleberry syrup and ½ cups lemon lime soda.
2. Garnish with huckleberries and lemon slices.
Mango MintMakes 1 serving
This was my other favorite drink, and it was one of the most simple to make. Mint makes such a great addition to a variety of sparkling drinks. If I had to describe this drink in one word, it would be “refreshing.”
Ingredients
¼ cup Torani Mango Syrup3 mint leaves (plus more for garnish)8 oz club soda Ice (optional)
Directions
1. In each serving glass, place 3 crushed mint leaves in the bottom.
2. Pour the mango syrup, club soda and additional mint leaves for garnish in each glass. Stir and serve.
Baker’s Note: For a fancier look, sugar the rim of the glass. To do this wet the rim of the empty glass and rub it upside down on a plate of granulated sugar. Let it dry and be careful when pouring in the beverage, not to wash the sugar off.
Blackberry Lime Margaritas This drink is a little different from the others we included in this article. It is a little more frozen and
14
smoothie-like, but not as lumpy. The lime and the blackberry flavors worked together seamlessly.
Makes 2-3 servings
Ingredients
¾ cup blackberries½ cup freshly squeezed lime juice1 cup ice cubes2/3 cup Torani Blackberry Syrup1 cup lemon lime sodagranulated sugar1 Tablespoon lime zest
Directions
1. Mix the lime zest with enough sugar to rim each glass. Then wet the rims of the glasses and rim them with the lime zest/sugar mixture.
2. In a blender, puree the blackberries. Strain out the seeds, then pour the liquid back into the blender and discard. Blend in the lime juice, ice and the blackberry syrup.
3. Add the lemon-lime soda into the blackberry mixture then pour into the prepared glasses. If desired, add a lime wedge and some blackberries to each glass.
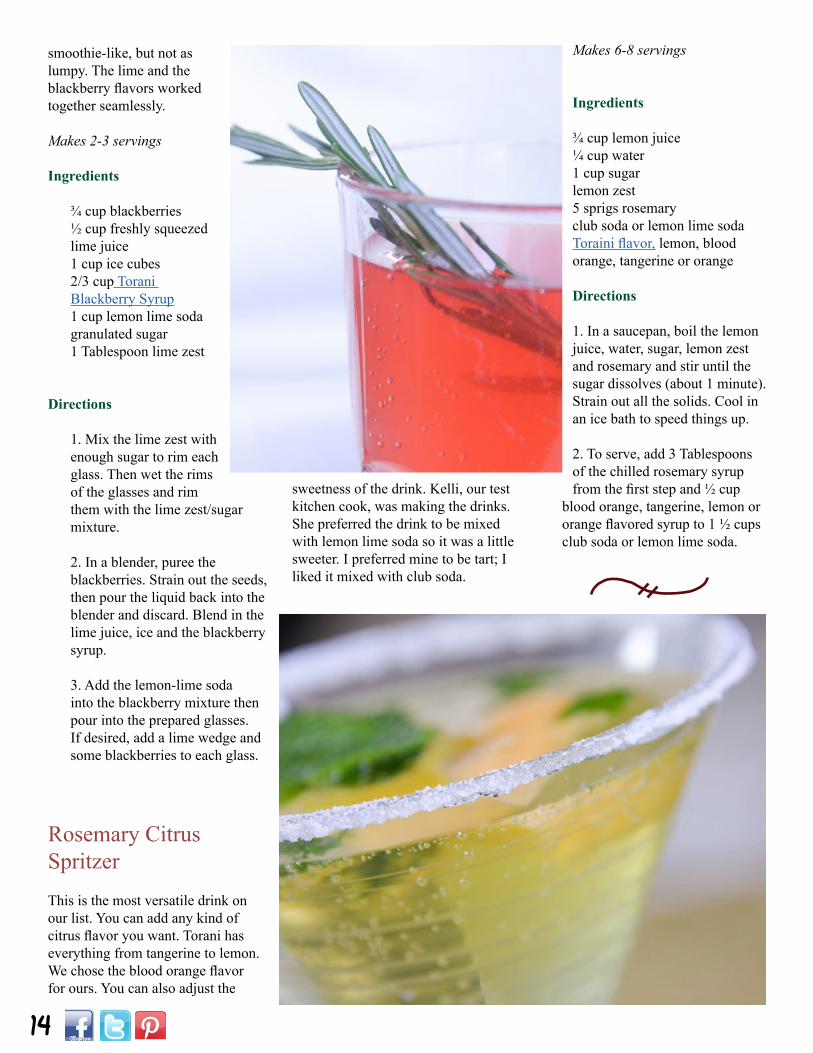
Rosemary Citrus SpritzerThis is the most versatile drink on our list. You can add any kind of citrus flavor you want. Torani has everything from tangerine to lemon. We chose the blood orange flavor for ours. You can also adjust the
sweetness of the drink. Kelli, our test kitchen cook, was making the drinks. She preferred the drink to be mixed with lemon lime soda so it was a little sweeter. I preferred mine to be tart; I liked it mixed with club soda.
Makes 6-8 servings
Ingredients
¾ cup lemon juice¼ cup water1 cup sugarlemon zest5 sprigs rosemaryclub soda or lemon lime sodaToraini flavor, lemon, blood orange, tangerine or orange
Directions
1. In a saucepan, boil the lemon juice, water, sugar, lemon zest and rosemary and stir until the sugar dissolves (about 1 minute). Strain out all the solids. Cool in an ice bath to speed things up.
2. To serve, add 3 Tablespoons of the chilled rosemary syrup from the first step and ½ cup
blood orange, tangerine, lemon or orange flavored syrup to 1 ½ cups club soda or lemon lime soda.
16
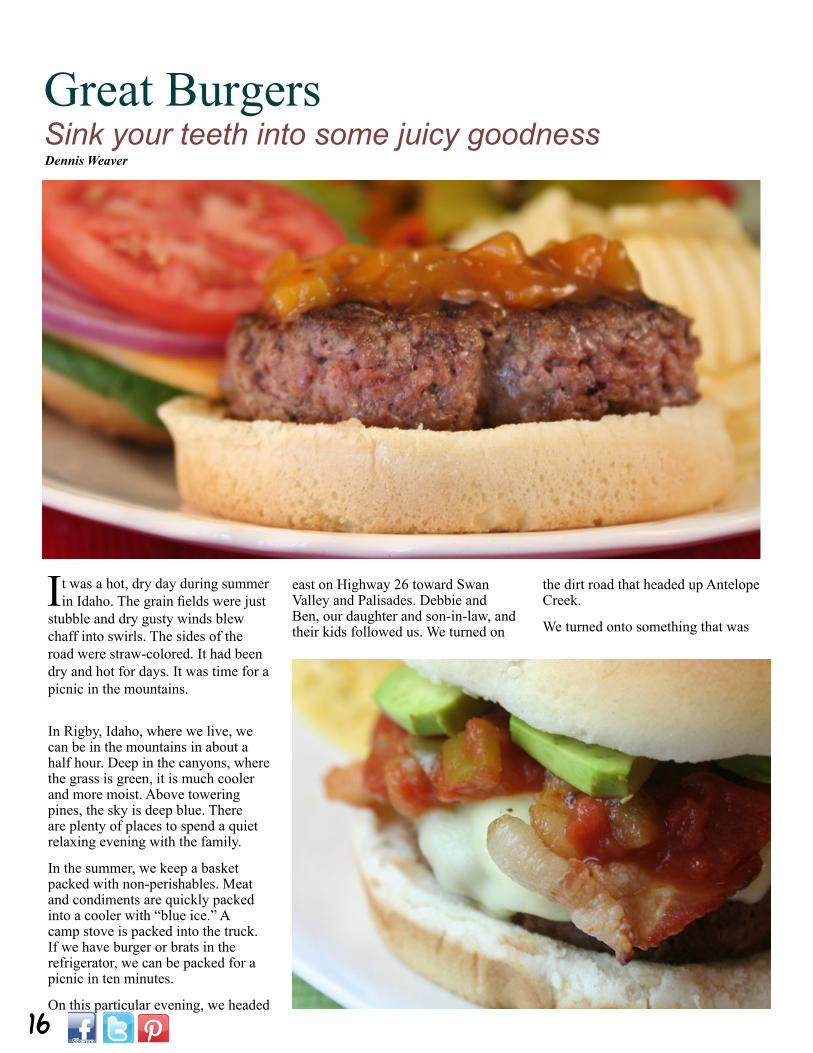
Asian SaucesGreat BurgersSink your teeth into some juicy goodnessDennis Weaver
It was a hot, dry day during summer in Idaho. The grain fields were just
stubble and dry gusty winds blew chaff into swirls. The sides of the road were straw-colored. It had been dry and hot for days. It was time for a picnic in the mountains.
In Rigby, Idaho, where we live, we can be in the mountains in about a half hour. Deep in the canyons, where the grass is green, it is much cooler and more moist. Above towering pines, the sky is deep blue. There are plenty of places to spend a quiet relaxing evening with the family.
In the summer, we keep a basket packed with non-perishables. Meat and condiments are quickly packed into a cooler with “blue ice.” A camp stove is packed into the truck. If we have burger or brats in the refrigerator, we can be packed for a picnic in ten minutes.
On this particular evening, we headed
east on Highway 26 toward Swan Valley and Palisades. Debbie and Ben, our daughter and son-in-law, and their kids followed us. We turned on
the dirt road that headed up Antelope Creek.
We turned onto something that was
17
not much more than an ATV track. At the top of a narrow meadow we stopped. The picnic spot looked down the meadow to the tiny creek where a trail crossed it. If the granddaughters don’t make too much noise, there’s always a chance that we might spot a deer slipping through the willows. We set the camp stove up on the tailgate and set up a table for condiments and serving.
I would like to say that this particular evening we made fantastic burgers, something exotic. Most of the time, we just make burgers, plain burgers—though the mountains always seem to make them better. But we know how to make great burgers.
Today, we’ll tell you how to make great burgers—burgers stuffed two ways: with the filling mixed into the ground beef and with the filling
cached between two layers of ground beef. You can make great burgers either way and stuff them with the fillings that you love.
How to Make Stuffed Burgers
For us, one of the real advantages of stuffed burgers is that we can use lean meat. For most burgers, you need a relatively high fat content; use 80% or 85% lean burger. It’s the fat that makes the burger juicy and satisfying. But with these burgers, you can use leaner meat because there is cheese, butter, or bacon inside inside the meat.
Method 1:
Mix the filling ingredients right into the
ground beef before forming the patties.
Method 2:
Make two thin patties—a burger press helps for this—put cheese or another goodie between the patties, and press the edges together.
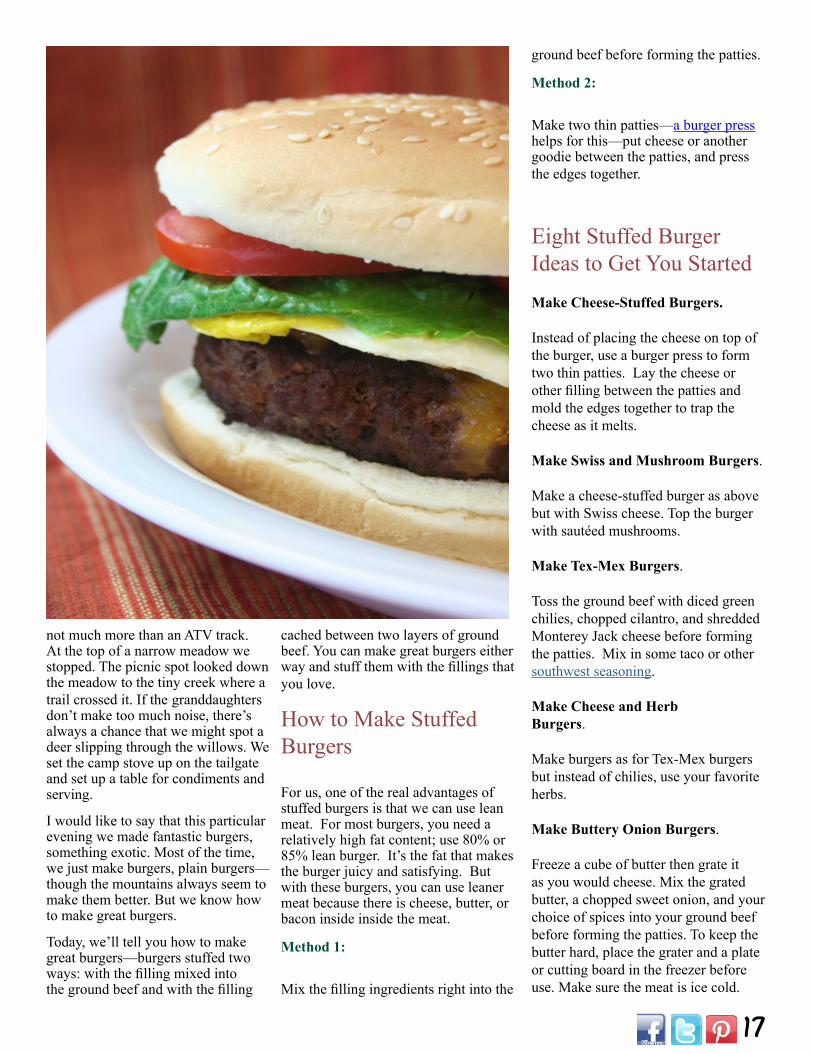
Eight Stuffed Burger Ideas to Get You StartedMake Cheese-Stuffed Burgers.
Instead of placing the cheese on top of the burger, use a burger press to form two thin patties. Lay the cheese or other filling between the patties and mold the edges together to trap the cheese as it melts.
Make Swiss and Mushroom Burgers.
Make a cheese-stuffed burger as above but with Swiss cheese. Top the burger with sautéed mushrooms.
Make Tex-Mex Burgers.
Toss the ground beef with diced green chilies, chopped cilantro, and shredded Monterey Jack cheese before forming the patties. Mix in some taco or other southwest seasoning.
Make Cheese and Herb Burgers.
Make burgers as for Tex-Mex burgers but instead of chilies, use your favorite herbs.
Make Buttery Onion Burgers.
Freeze a cube of butter then grate it as you would cheese. Mix the grated butter, a chopped sweet onion, and your choice of spices into your ground beef before forming the patties. To keep the butter hard, place the grater and a plate or cutting board in the freezer before use. Make sure the meat is ice cold.
18
Make Blue Cheese and Bacon Burgers.
Mix crumbled blue cheese into the ground beef. Cook and top with crisply fried bacon. If you are cooking on the grill, try wrapping the bacon strips around the burger patties before cooking. Secure the strips with toothpicks.
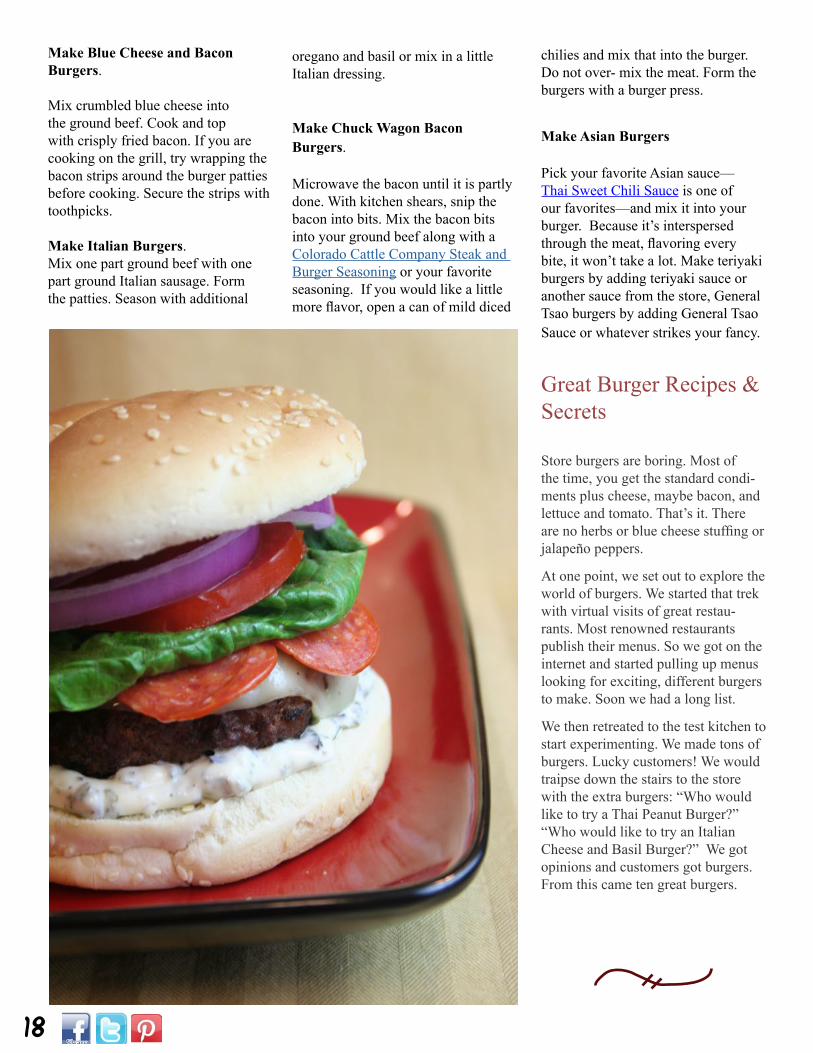
Make Italian Burgers. Mix one part ground beef with one part ground Italian sausage. Form the patties. Season with additional
oregano and basil or mix in a little Italian dressing.
Make Chuck Wagon Bacon Burgers.
Microwave the bacon until it is partly done. With kitchen shears, snip the bacon into bits. Mix the bacon bits into your ground beef along with a Colorado Cattle Company Steak and Burger Seasoning or your favorite seasoning. If you would like a little more flavor, open a can of mild diced
chilies and mix that into the burger. Do not over- mix the meat. Form the burgers with a burger press.
Make Asian Burgers
Pick your favorite Asian sauce—Thai Sweet Chili Sauce is one of our favorites—and mix it into your burger. Because it’s interspersed through the meat, flavoring every bite, it won’t take a lot. Make teriyaki burgers by adding teriyaki sauce or another sauce from the store, General Tsao burgers by adding General Tsao Sauce or whatever strikes your fancy.
Great Burger Recipes & Secrets
Store burgers are boring. Most of the time, you get the standard condi-ments plus cheese, maybe bacon, and lettuce and tomato. That’s it. There are no herbs or blue cheese stuffing or jalapeño peppers.
At one point, we set out to explore the world of burgers. We started that trek with virtual visits of great restau-rants. Most renowned restaurants publish their menus. So we got on the internet and started pulling up menus looking for exciting, different burgers to make. Soon we had a long list.
We then retreated to the test kitchen to start experimenting. We made tons of burgers. Lucky customers! We would traipse down the stairs to the store with the extra burgers: “Who would like to try a Thai Peanut Burger?” “Who would like to try an Italian Cheese and Basil Burger?” We got opinions and customers got burgers. From this came ten great burgers.
19
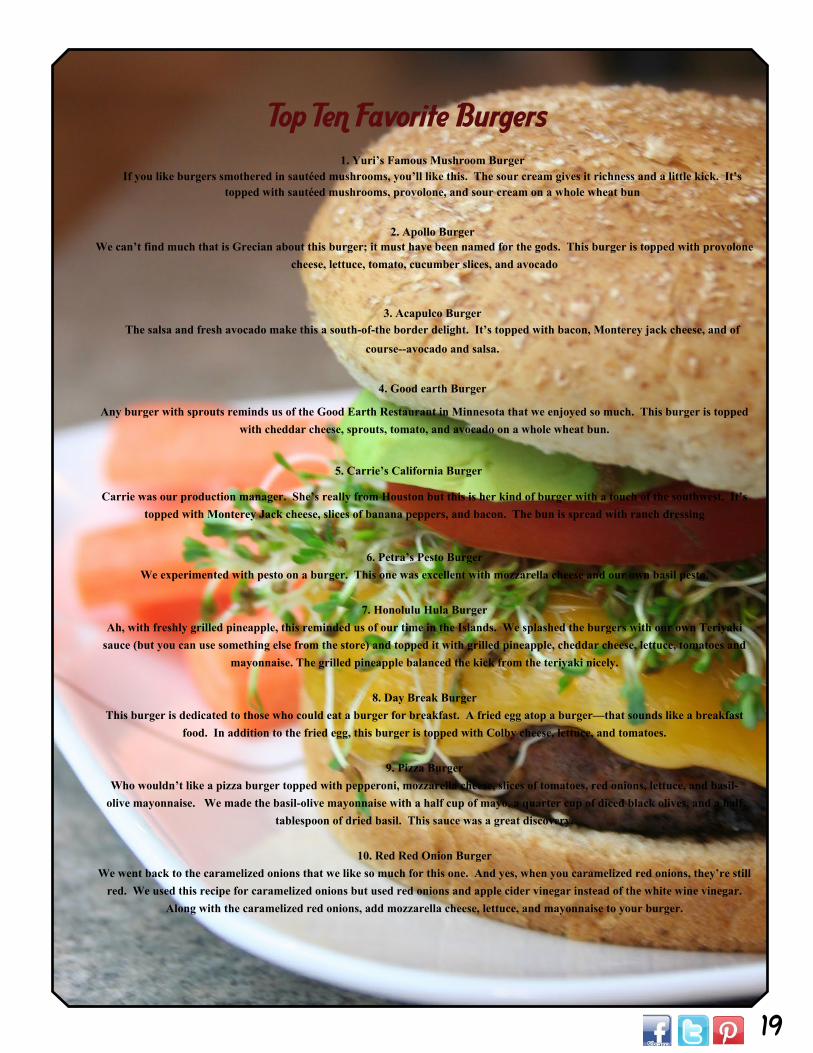
Top Ten Favorite Burgers 1. Yuri’s Famous Mushroom Burger
If you like burgers smothered in sautéed mushrooms, you’ll like this. The sour cream gives it richness and a little kick. It’s topped with sautéed mushrooms, provolone, and sour cream on a whole wheat bun
2. Apollo BurgerWe can’t find much that is Grecian about this burger; it must have been named for the gods. This burger is topped with provolone
cheese, lettuce, tomato, cucumber slices, and avocado
3. Acapulco BurgerThe salsa and fresh avocado make this a south-of-the border delight. It’s topped with bacon, Monterey jack cheese, and of
course--avocado and salsa.
4. Good earth Burger
Any burger with sprouts reminds us of the Good Earth Restaurant in Minnesota that we enjoyed so much. This burger is topped with cheddar cheese, sprouts, tomato, and avocado on a whole wheat bun.
5. Carrie’s California Burger
Carrie was our production manager. She’s really from Houston but this is her kind of burger with a touch of the southwest. It’s topped with Monterey Jack cheese, slices of banana peppers, and bacon. The bun is spread with ranch dressing
6. Petra’s Pesto BurgerWe experimented with pesto on a burger. This one was excellent with mozzarella cheese and our own basil pesto.
7. Honolulu Hula BurgerAh, with freshly grilled pineapple, this reminded us of our time in the Islands. We splashed the burgers with our own Teriyaki
sauce (but you can use something else from the store) and topped it with grilled pineapple, cheddar cheese, lettuce, tomatoes and mayonnaise. The grilled pineapple balanced the kick from the teriyaki nicely.
8. Day Break BurgerThis burger is dedicated to those who could eat a burger for breakfast. A fried egg atop a burger—that sounds like a breakfast
food. In addition to the fried egg, this burger is topped with Colby cheese, lettuce, and tomatoes.
9. Pizza BurgerWho wouldn’t like a pizza burger topped with pepperoni, mozzarella cheese, slices of tomatoes, red onions, lettuce, and basil-
olive mayonnaise. We made the basil-olive mayonnaise with a half cup of mayo, a quarter cup of diced black olives, and a half tablespoon of dried basil. This sauce was a great discovery.
10. Red Red Onion BurgerWe went back to the caramelized onions that we like so much for this one. And yes, when you caramelized red onions, they’re still
red. We used this recipe for caramelized onions but used red onions and apple cider vinegar instead of the white wine vinegar. Along with the caramelized red onions, add mozzarella cheese, lettuce, and mayonnaise to your burger.

Burger BunsWhat’s a burger without a great bun?Dennis Weaver
“It’s amazing how much of a difference a really good bun can
make.”
20
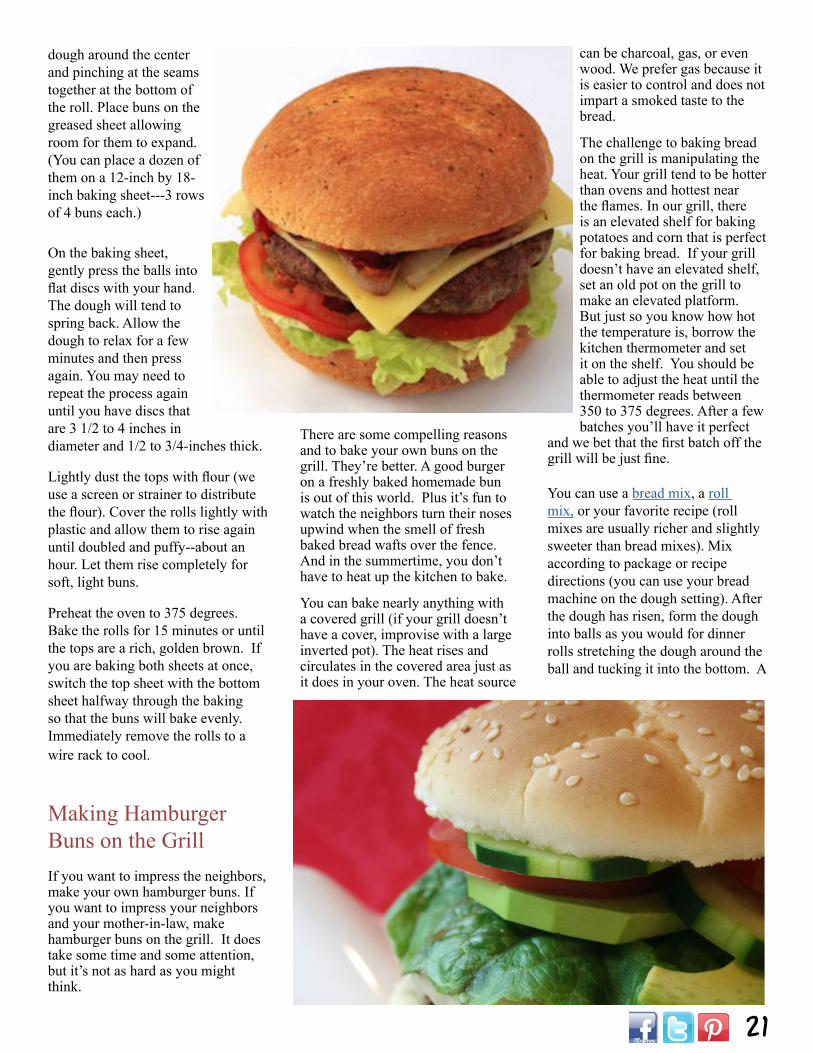
Build a better burger with a better bun. It’s amazing how much dif-
ference a really good bun can make. Instead of the bun being merely a carrier for the meat and condiments, a really good bun will be as much of a treat as the contents. The burger and the bun should complement each other perfectly.
We discovered how good a hamburger bun can be years ago. After some experimentation, we discovered that a Honey Wheat Bread mix makes a great hamburger bun. And as busy are we are—especially at this time of year—the best part of these buns may be their convenience: Mix, let rise, form into shapes, and bake. The mix goes together quickly (just-add-water-andbutter) and you can be doing other things during the rising and the baking.
These also make great sandwich
rolls. Try them with your favorite deli meat.
We suggest having several of these mixes on hand to make buns or to make homemade bread. Either can be special treat for your family.
Making Great Hamburger (or Sandwich) Buns
We’ve said it before, “Buns make the burger” and nothing makes a better burger than homemade buns. In fact, once you’ve had a burger on a fresh homemade bun, burgers will never be the same. You can use your favorite bread mix (or bread recipe) to make some
terrific hamburger or sandwich buns. A single-loaf mix will make eight or ten buns. We have mixes especially designed for making rolls and buns. Mix the dough according to the package or recipe directions, then remove the dough to a greased bowl and cover it with plastic. Let
it rise until it is doubled and very puffy (an hour or more.)
Grease two large baking sheets (for a two loaf mix) or cover them with parchment paper. Once the dough has risen, deflate it and divide the dough into eighteen equal pieces
with a sharp knife (or scale the pieces at 3 ounces each on your kitchen scale). Form smooth, round balls by pulling the
21
dough around the center and pinching at the seams together at the bottom of the roll. Place buns on the greased sheet allowing room for them to expand. (You can place a dozen of them on a 12-inch by 18-inch baking sheet---3 rows of 4 buns each.)
On the baking sheet, gently press the balls into flat discs with your hand. The dough will tend to spring back. Allow the dough to relax for a few minutes and then press again. You may need to repeat the process again until you have discs that are 3 1/2 to 4 inches in diameter and 1/2 to 3/4-inches thick.
Lightly dust the tops with flour (we use a screen or strainer to distribute the flour). Cover the rolls lightly with plastic and allow them to rise again until doubled and puffy--about an hour. Let them rise completely for soft, light buns.
Preheat the oven to 375 degrees. Bake the rolls for 15 minutes or until the tops are a rich, golden brown. If you are baking both sheets at once, switch the top sheet with the bottom sheet halfway through the baking so that the buns will bake evenly. Immediately remove the rolls to a wire rack to cool.
Making Hamburger Buns on the Grill If you want to impress the neighbors, make your own hamburger buns. If you want to impress your neighbors and your mother-in-law, make hamburger buns on the grill. It does take some time and some attention, but it’s not as hard as you might think.
There are some compelling reasons and to bake your own buns on the grill. They’re better. A good burger on a freshly baked homemade bun is out of this world. Plus it’s fun to watch the neighbors turn their noses upwind when the smell of fresh baked bread wafts over the fence. And in the summertime, you don’t have to heat up the kitchen to bake.
You can bake nearly anything with a covered grill (if your grill doesn’t have a cover, improvise with a large inverted pot). The heat rises and circulates in the covered area just as it does in your oven. The heat source
can be charcoal, gas, or even wood. We prefer gas because it is easier to control and does not impart a smoked taste to the bread.
The challenge to baking bread on the grill is manipulating the heat. Your grill tend to be hotter than ovens and hottest near the flames. In our grill, there is an elevated shelf for baking potatoes and corn that is perfect for baking bread. If your grill doesn’t have an elevated shelf, set an old pot on the grill to make an elevated platform. But just so you know how hot the temperature is, borrow the kitchen thermometer and set it on the shelf. You should be able to adjust the heat until the thermometer reads between 350 to 375 degrees. After a few batches you’ll have it perfect
and we bet that the first batch off the grill will be just fine.
You can use a bread mix, a roll mix, or your favorite recipe (roll mixes are usually richer and slightly sweeter than bread mixes). Mix according to package or recipe directions (you can use your bread machine on the dough setting). After the dough has risen, form the dough into balls as you would for dinner rolls stretching the dough around the ball and tucking it into the bottom. A
22
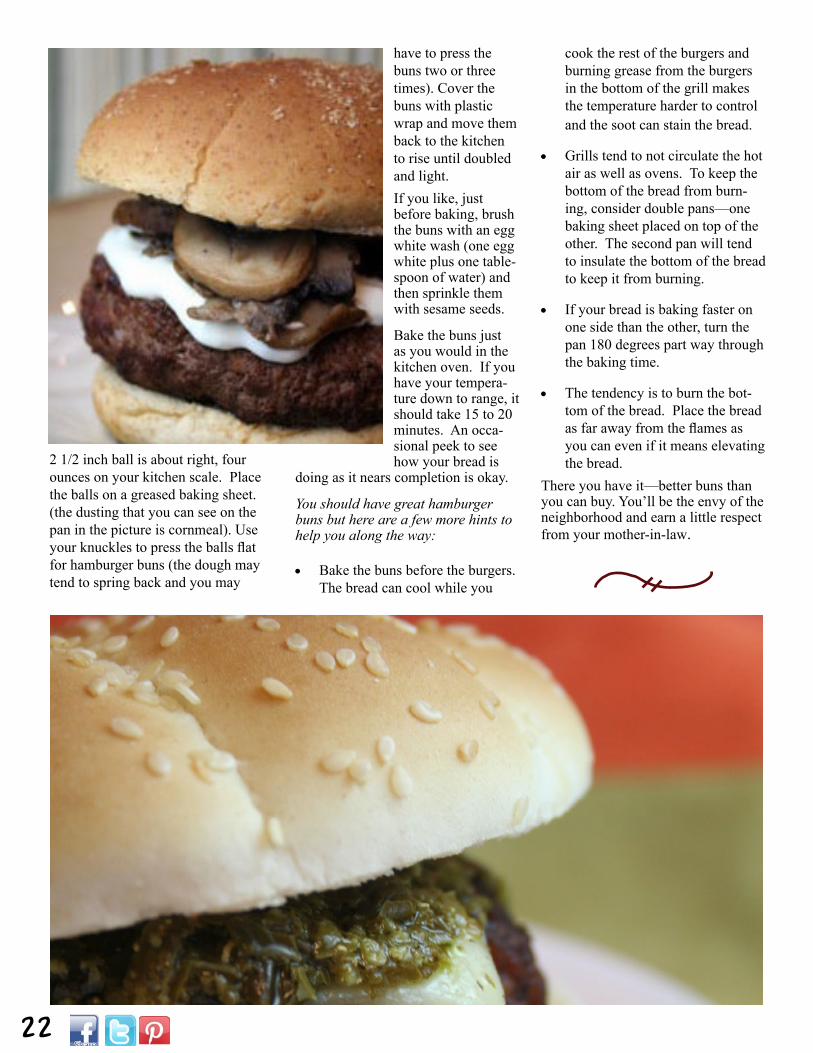
2 1/2 inch ball is about right, four ounces on your kitchen scale. Place the balls on a greased baking sheet. (the dusting that you can see on the pan in the picture is cornmeal). Use your knuckles to press the balls flat for hamburger buns (the dough may tend to spring back and you may
have to press the buns two or three times). Cover the buns with plastic wrap and move them back to the kitchen to rise until doubled and light.If you like, just before baking, brush the buns with an egg white wash (one egg white plus one table-spoon of water) and then sprinkle them with sesame seeds.
Bake the buns just as you would in the kitchen oven. If you have your tempera-ture down to range, it should take 15 to 20 minutes. An occa-sional peek to see how your bread is
doing as it nears completion is okay.
You should have great hamburger buns but here are a few more hints to help you along the way:
• Bake the buns before the burgers. The bread can cool while you
cook the rest of the burgers and burning grease from the burgers in the bottom of the grill makes the temperature harder to control and the soot can stain the bread.
• Grills tend to not circulate the hot air as well as ovens. To keep the bottom of the bread from burn-ing, consider double pans—one baking sheet placed on top of the other. The second pan will tend to insulate the bottom of the bread to keep it from burning.
• If your bread is baking faster on one side than the other, turn the pan 180 degrees part way through the baking time.
• The tendency is to burn the bot-tom of the bread. Place the bread as far away from the flames as you can even if it means elevating the bread.
There you have it—better buns than you can buy. You’ll be the envy of the neighborhood and earn a little respect from your mother-in-law.
22

23
25
A Quest for Perfect Chips & FriesThe perfect side for the perfect BurgerDennis Weaver
“There I made a discovery: fresh, warm potato chips were much better and very
different than those from a bag. “
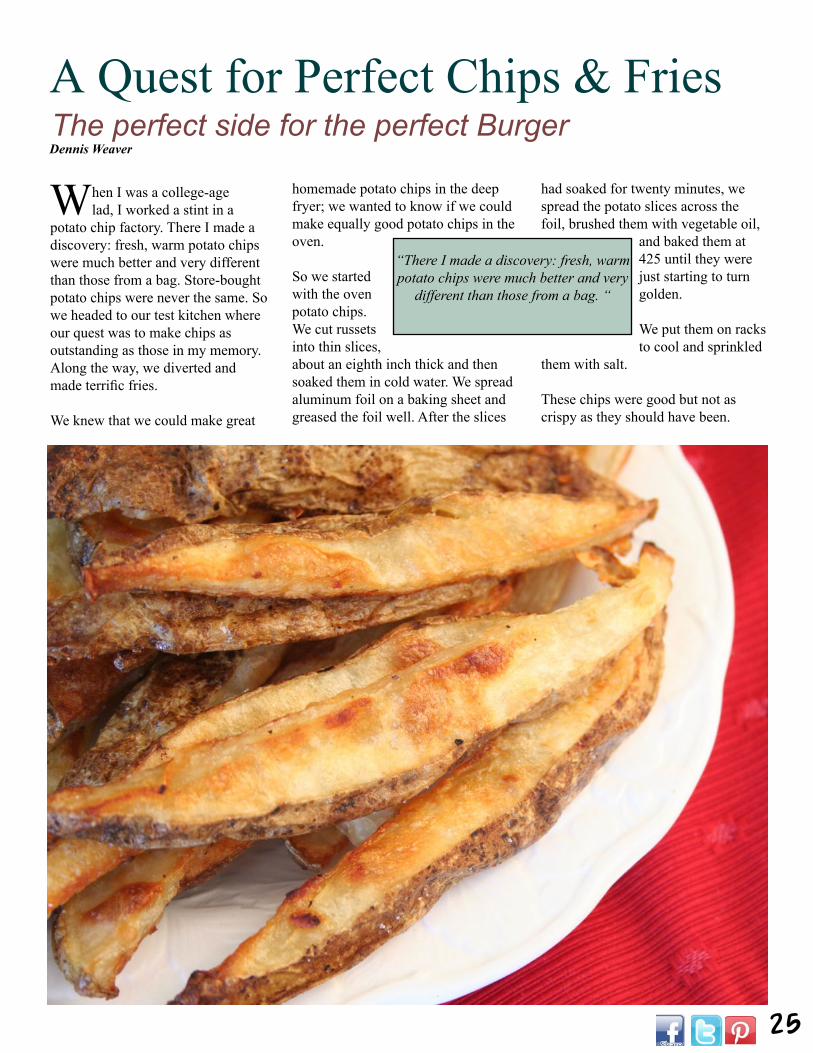
When I was a college-age lad, I worked a stint in a
potato chip factory. There I made a discovery: fresh, warm potato chips were much better and very different than those from a bag. Store-bought potato chips were never the same. So we headed to our test kitchen where our quest was to make chips as outstanding as those in my memory. Along the way, we diverted and made terrific fries.
We knew that we could make great
homemade potato chips in the deep fryer; we wanted to know if we could make equally good potato chips in the oven.
So we started with the oven potato chips. We cut russets into thin slices, about an eighth inch thick and then soaked them in cold water. We spread aluminum foil on a baking sheet and greased the foil well. After the slices
had soaked for twenty minutes, we spread the potato slices across the foil, brushed them with vegetable oil,
and baked them at 425 until they were just starting to turn golden.
We put them on racks to cool and sprinkled
them with salt.
These chips were good but not as crispy as they should have been.
28
Back to the drawing board. We thought maybe a slower bake would draw more moisture from them and make them crispy. We lowered the temperature again and again. The best chips came at 325 degrees, slow baking for 20 minutes.
We then turned to deep fried potato chips.We heated the oil in our deep fryer to 360 degrees. We fried them in small quantities until they started to turn a golden color, drained them on paper towels and then moved them to a rack to cool completely. Sprinkled with a little salt, they were delightful—much better than potato chips out of a bag.
And yes, the fried potato chips were much better than the baked ones.
How to Make Great Potato Chips Pick good-quality russet potatoes. Wash them and cut out any bad spots.
Cut them into 1/8-inch thick slices. You can do so with a knife; it’s a lot easier to get uniform slices with a mandolin or with the attachment to your mixer.
Heat the oil between 350 and 375 degrees. You can do so, on the stovetop or with a thermostatically controlled deep fryer. If you are frying on the stovetop, use a deep pan and a candy thermometer. If your oil becomes too hot, it can burst into flames.
Cook a small amount of potato chips at a time. If you cook too many, the potatoes will drop the temperature of the oil too far. Oil that is not hot enough will make your potato chips soggy.
Cook the potato chips until they are a light, golden color and begin to float.Remove the chips to a paper towel to
absorb grease. Sprinkle with salt and your favorite seasoning.
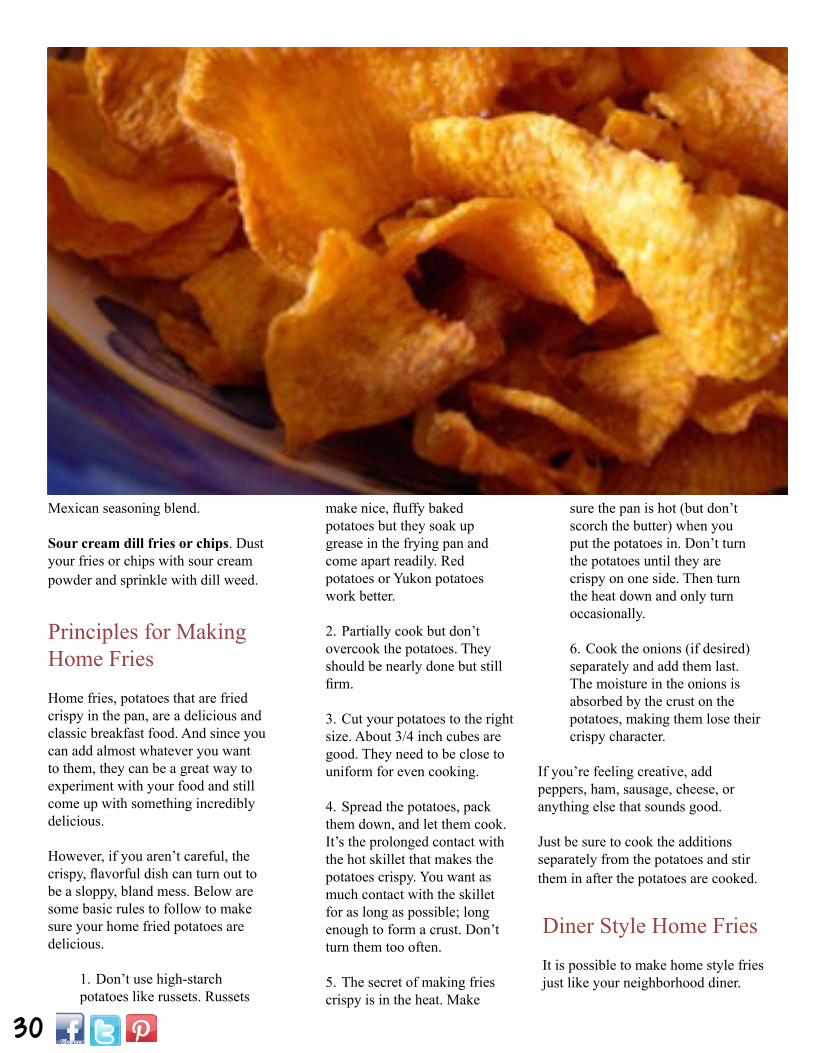
The Sweet Potato Chip EffortWe had tons of trouble making really great sweet potato chips. So we turned to our subscribers for help. Diane Tietjens came to the rescue.
“These are one of my favorites,” she reported. “Slice the sweet potatoes with a potato peeler rather than a knife.”
It seems that the secret of crisp sweet potato chips is to slice the potatoes very thin. An adjustable mandoline works well.
We cooked them in oil at 350 degrees for 4 or 5 minutes. They were just starting to brown and were rising to the top. We drained them on paper towels and sprinkled them with a little salt.
No wonder these are one of Diane’s favorites.
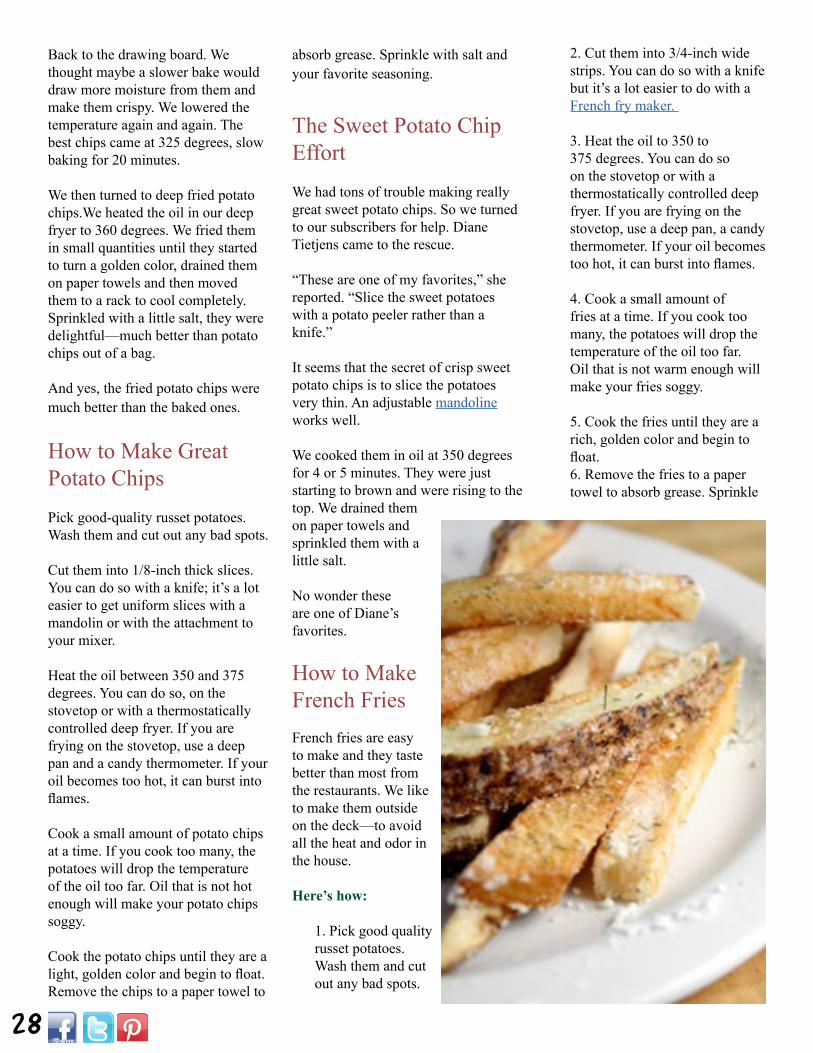
How to Make French FriesFrench fries are easy to make and they taste better than most from the restaurants. We like to make them outside on the deck—to avoid all the heat and odor in the house.
Here’s how:
1. Pick good quality russet potatoes. Wash them and cut out any bad spots.
2. Cut them into 3/4-inch wide strips. You can do so with a knife but it’s a lot easier to do with a French fry maker.
3. Heat the oil to 350 to 375 degrees. You can do so on the stovetop or with a thermostatically controlled deep fryer. If you are frying on the stovetop, use a deep pan, a candy thermometer. If your oil becomes too hot, it can burst into flames.
4. Cook a small amount of fries at a time. If you cook too many, the potatoes will drop the temperature of the oil too far. Oil that is not warm enough will make your fries soggy.
5. Cook the fries until they are a rich, golden color and begin to float. 6. Remove the fries to a paper towel to absorb grease. Sprinkle

29
with salt and maybe your favorite seasoning. Serve immediately.
The Prepared Pantry Oven FriesIngredients
2 1/2 pounds russet or other baking potatoes (not peeled)1/2 tablespoon vegetable oil 2 teaspoons granulated sugar 1 teaspoon salt pepper
Directions
Preheat oven to 425 degrees.
1. Line a baking sheet with foil or use a crisper and spray the crisper. If using a baking sheet,
spray the foil well with a mister. (Because of the sugar, these fries will stick. Grease the surface.)
2. Cut the potatoes into 1/2 inch thick fries.
3. In a large mixing bowl, mix together the oil, sugar, salt, and pepper. Toss the potatoes in with the mixture. Spread on the baking sheet or crisper in one layer.
4. Bake for 40 minutes or until the potatoes are tender and browned. Serve immediately.
Cheesy Oven Fries and Other Variations on the Potato
It’s easy to make cheesy oven fries and other variations of homemade fries and potato chips—simply take the basic recipe and add cheese, spices, or powdered flavors to your chips and fries. We’ll give you the basic recipe and make some suggestions to get you started.
Cheesy oven fries. Sprinkle grated cheddar on the fries just as they come from the oven. A little paprika or pepper will provide some extra flavor.
Rosemary fries or chips. Sprinkle on crushed rosemary.
Thyme fries or chips. Sprinkle on crushed thyme.
Italian fries or chips. Sprinkle on an Italian seasoning blend.
Taco fries or chips. Sprinkle on a
30
Mexican seasoning blend.
Sour cream dill fries or chips. Dust your fries or chips with sour cream powder and sprinkle with dill weed.
Principles for Making Home FriesHome fries, potatoes that are fried crispy in the pan, are a delicious and classic breakfast food. And since you can add almost whatever you want to them, they can be a great way to experiment with your food and still come up with something incredibly delicious.
However, if you aren’t careful, the crispy, flavorful dish can turn out to be a sloppy, bland mess. Below are some basic rules to follow to make sure your home fried potatoes are delicious.
1. Don’t use high-starch potatoes like russets. Russets
make nice, fluffy baked potatoes but they soak up grease in the frying pan and come apart readily. Red potatoes or Yukon potatoes work better.
2. Partially cook but don’t overcook the potatoes. They should be nearly done but still firm.
3. Cut your potatoes to the right size. About 3/4 inch cubes are good. They need to be close to uniform for even cooking.
4. Spread the potatoes, pack them down, and let them cook. It’s the prolonged contact with the hot skillet that makes the potatoes crispy. You want as much contact with the skillet for as long as possible; long enough to form a crust. Don’t turn them too often.
5. The secret of making fries crispy is in the heat. Make
Diner Style Home FriesIt is possible to make home style fries just like your neighborhood diner.
sure the pan is hot (but don’t scorch the butter) when you put the potatoes in. Don’t turn the potatoes until they are crispy on one side. Then turn the heat down and only turn occasionally.
6. Cook the onions (if desired) separately and add them last. The moisture in the onions is absorbed by the crust on the potatoes, making them lose their crispy character.
If you’re feeling creative, add peppers, ham, sausage, cheese, or anything else that sounds good.
Just be sure to cook the additions separately from the potatoes and stir them in after the potatoes are cooked.
Here’s how.
Ingredients2 1/2 pounds red potatoes, washed and 3/4-inch cubed1/2 cup butter1 large onion, dicedsalt and pepper to taste1/2 teaspoon garlic salt
Directions
1. Place the potatoes and one tablespoon of the butter in a microwave safe bowl. Cover with plastic and cook for 3 to 5 minutes or until cooked but still firm. Shake the potatoes in the bowl with plastic on them to distribute the butter.
2. While the potatoes are cooking, cook the onion in the skillet in one tablespoon butter until the onion pieces are tender and cooked. Remove to a bowl and set aside.
3. Melt the remaining butter in the skillet over medium high heat. Distribute the potatoes (but not the onion) in the skillet. Add salt and pepper. Pack down with a spatula and let cook until crispy on one side, about five minutes. Turn the potatoes, turn down the heat, and repeat until the potatoes are crispy throughout. Add the garlic salt. Add more salt and pepper to taste if necessary. Stir in the onions and serve.
Baker’s Note: We use a heavy, nonstick skillet. A well-seasoned cast iron skillet should work equally well

10
10
34
Foods on a StickEverything is better served on a stickCasey Archibald
“Maybe it’s a girl thing, but itty bitty usually
means adorable in my book.”
My husband laughs at me because I think all things small
are cute (except for things in the insect or reptile categories). He chuckled when he saw me squeal at the sight of newborn lambs at the fair. He
raised his eyebrows when I picked up a miniature tuxedo in the infant
section at our local department store. He even rolled his eyes when I wanted to buy some Coca Cola in tiny bottles just because they were cute. Maybe it’s a girl thing, but
itty bitty usually means adorable in my book. With this in mind, I set out to find bite-sized foods and during my research most of what I found came on a stick! What could be better when it comes to party appetizers?
We came up with several easy ideas for food on a stick (or just itty bitty) that will be great for your next patio party. We’ve divided the ideas into sections: brunch, lunch/dinner and dessert depending on what kind of party you are having.
Brunch
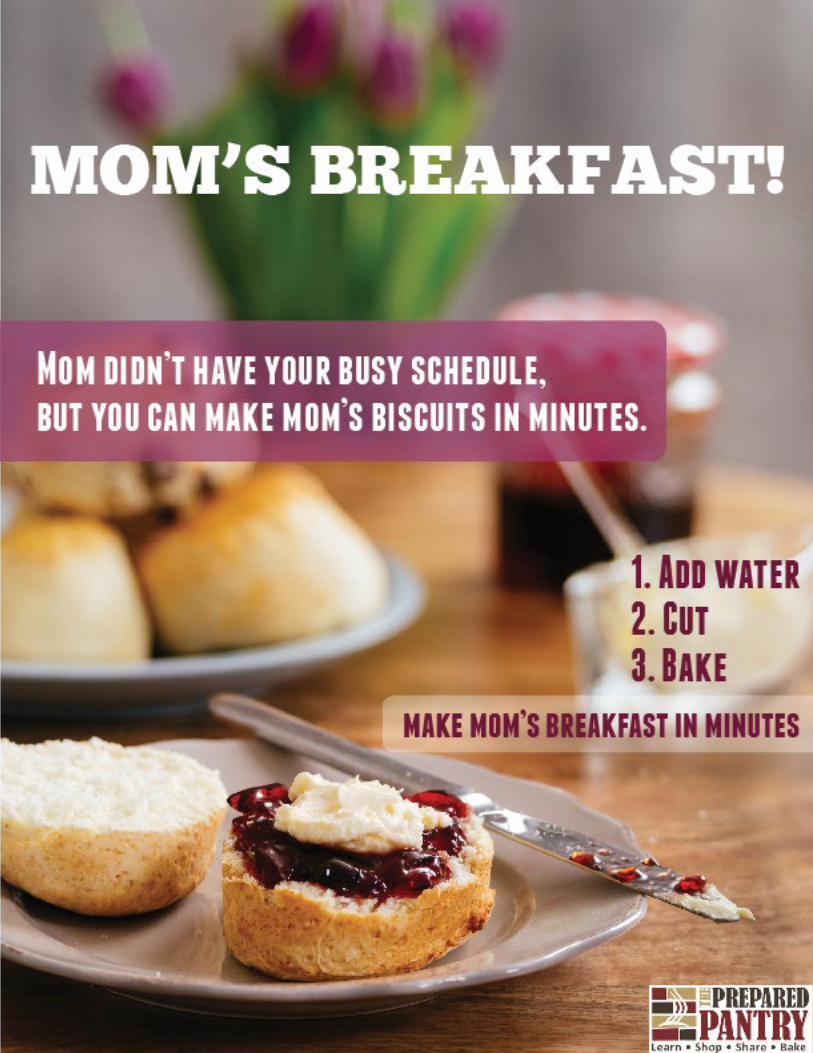
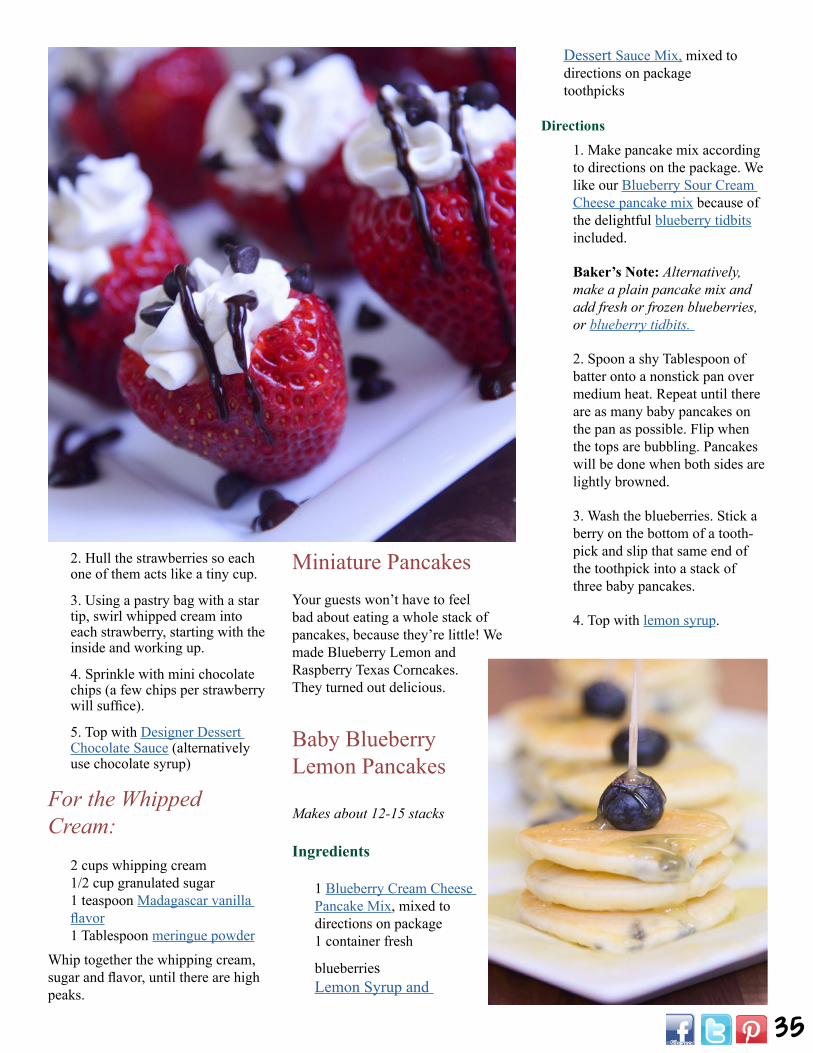
Whipped Cream Filled Strawberries
These are an easy treat and so fun—even though they are not on a stick. We made homemade whipped cream because it’s de-licious, but whipped cream from the can is a fair substitute. We also sprinkled them with our tiny chocolate chips and finished them off with our Designer Dessert Chocolate Sauce. Yum.
Makes 20 strawberries
Ingredients
20 strawberrieswhipped cream (recipe below)
¼ cup mini chocolate chipsDesigner Dessert Chocolate Sauce
Directions
1. Wash the strawberries. Cut the tips off of each one so they will stand up by themselves.
35
2. Hull the strawberries so each one of them acts like a tiny cup.
3. Using a pastry bag with a star tip, swirl whipped cream into each strawberry, starting with the inside and working up.
4. Sprinkle with mini chocolate chips (a few chips per strawberry will suffice).
5. Top with Designer Dessert Chocolate Sauce (alternatively use chocolate syrup)
For the Whipped Cream:
2 cups whipping cream 1/2 cup granulated sugar 1 teaspoon Madagascar vanilla flavor1 Tablespoon meringue powder
Whip together the whipping cream, sugar and flavor, until there are high peaks.
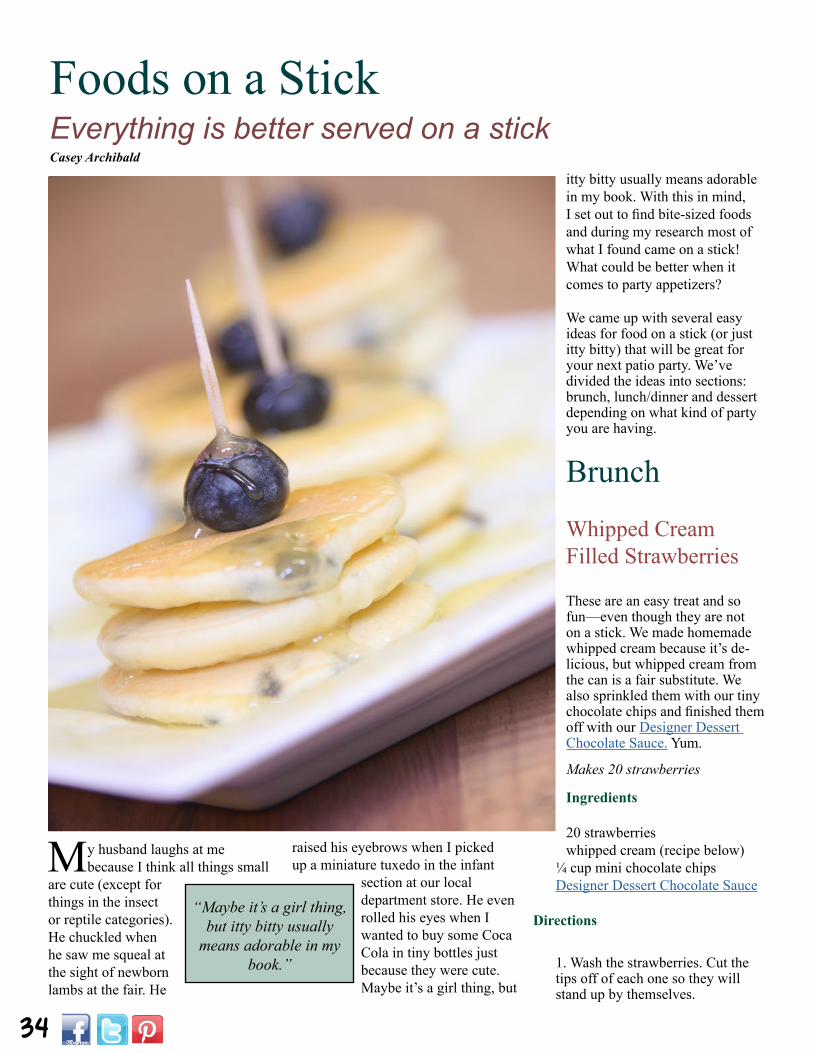
Miniature PancakesYour guests won’t have to feel bad about eating a whole stack of pancakes, because they’re little! We made Blueberry Lemon and Raspberry Texas Corncakes. They turned out delicious.
Baby Blueberry Lemon Pancakes Makes about 12-15 stacks
Ingredients
1 Blueberry Cream Cheese Pancake Mix, mixed to directions on package1 container fresh
blueberriesLemon Syrup and
Dessert Sauce Mix, mixed to directions on packagetoothpicks
Directions
1. Make pancake mix according to directions on the package. We like our Blueberry Sour Cream Cheese pancake mix because of the delightful blueberry tidbits included.
Baker’s Note: Alternatively, make a plain pancake mix and add fresh or frozen blueberries, or blueberry tidbits.
2. Spoon a shy Tablespoon of batter onto a nonstick pan over medium heat. Repeat until there are as many baby pancakes on the pan as possible. Flip when the tops are bubbling. Pancakes will be done when both sides are lightly browned.
3. Wash the blueberries. Stick a berry on the bottom of a tooth-pick and slip that same end of the toothpick into a stack of three baby pancakes.
4. Top with lemon syrup.
36
Tiny Texas Corncakes Makes 12-15 stacks
Ingredients
Texas Corncakes Pancake Mix, mixed to directions on package1 container fresh raspberriesMaple Buttermilk Syrup mix, mixed to directions on packagetoothpicks
Directions
1. Make pancake mix according to directions on the package. Our Texas Corncakes are a popular choice.
2. Spoon a shy Tablespoon of batter onto a nonstick pan over medium heat. Repeat until there are as many baby pancakes on the pan as possible. Flip when the tops are bubbling. Pancakes will be done when both sides are lightly browned.
3. Wash the raspberries. Stick a berry on the bottom of a toothpick and slip that same end
into a stack of three baby pancakes.
4. Top with Maple Buttermilk syrup and serve.
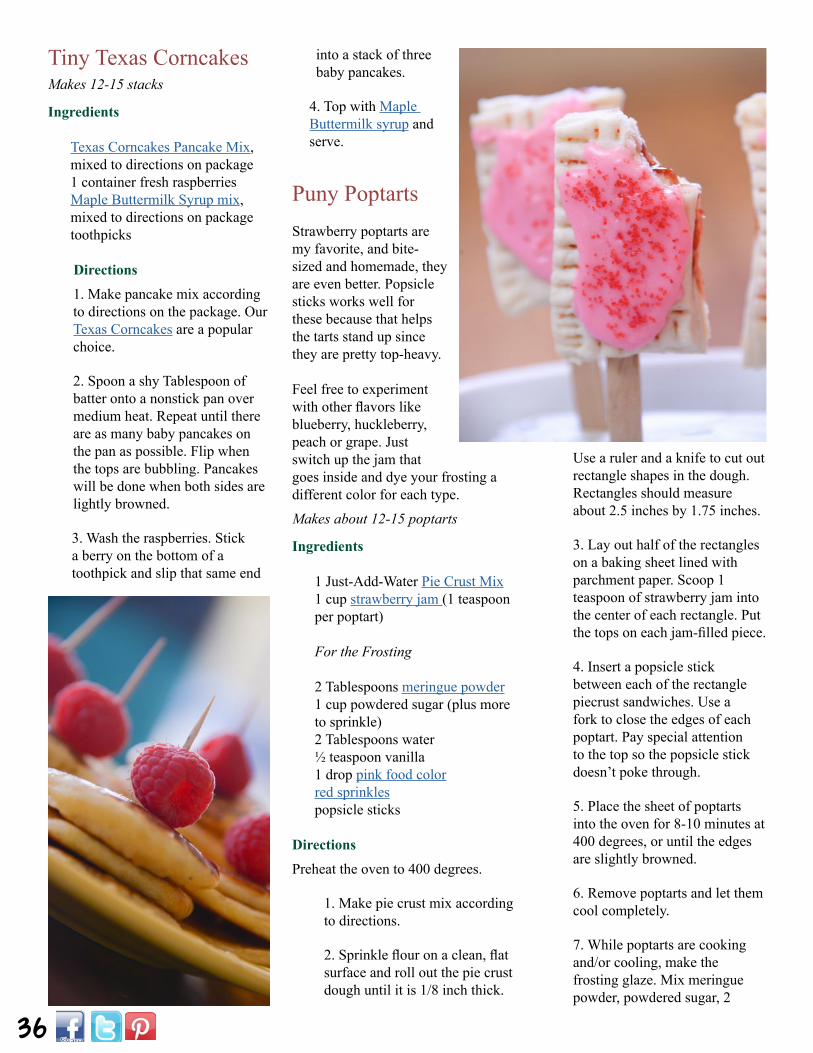
Puny Poptarts Strawberry poptarts are my favorite, and bite-sized and homemade, they are even better. Popsicle sticks works well for these because that helps the tarts stand up since they are pretty top-heavy.
Feel free to experiment with other flavors like blueberry, huckleberry, peach or grape. Just switch up the jam that goes inside and dye your frosting a different color for each type.
Makes about 12-15 poptarts
Ingredients
1 Just-Add-Water Pie Crust Mix1 cup strawberry jam (1 teaspoon per poptart)
For the Frosting
2 Tablespoons meringue powder1 cup powdered sugar (plus more to sprinkle)2 Tablespoons water½ teaspoon vanilla1 drop pink food colorred sprinklespopsicle sticks
Directions
Preheat the oven to 400 degrees.
1. Make pie crust mix according to directions.
2. Sprinkle flour on a clean, flat surface and roll out the pie crust dough until it is 1/8 inch thick.
Use a ruler and a knife to cut out rectangle shapes in the dough. Rectangles should measure about 2.5 inches by 1.75 inches.
3. Lay out half of the rectangles on a baking sheet lined with parchment paper. Scoop 1 teaspoon of strawberry jam into the center of each rectangle. Put the tops on each jam-filled piece.
4. Insert a popsicle stick between each of the rectangle piecrust sandwiches. Use a fork to close the edges of each poptart. Pay special attention to the top so the popsicle stick doesn’t poke through.
5. Place the sheet of poptarts into the oven for 8-10 minutes at 400 degrees, or until the edges are slightly browned.
6. Remove poptarts and let them cool completely.
7. While poptarts are cooking and/or cooling, make the frosting glaze. Mix meringue powder, powdered sugar, 2
37
Tablespoons of water, vanilla and food color in a bowl and mix until smooth.
8. When the poptarts are completely cooled, spoon about a teaspoon of frosting glaze onto each one. Sprinkle with red sugar or sprinkles.
9. Let the frosting set up and then serve. Try sticking the poptarts in a vase or container with floral foam in the bottom so they stand upright.
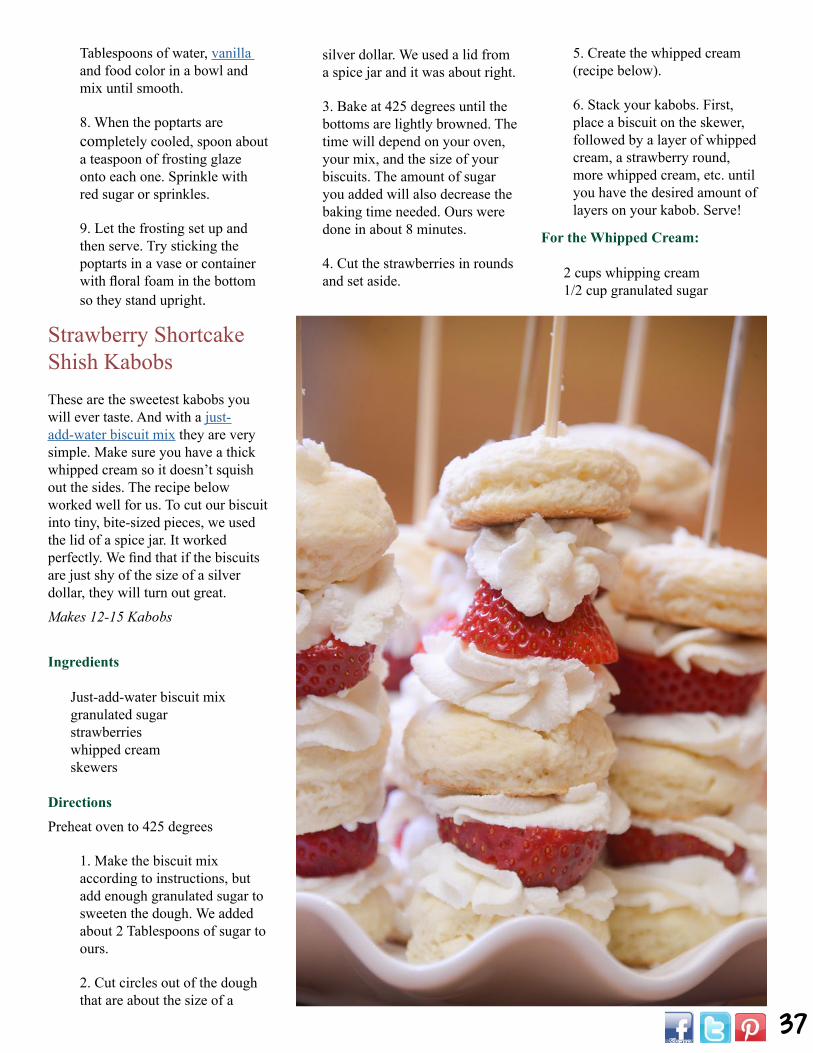
Strawberry Shortcake Shish KabobsThese are the sweetest kabobs you will ever taste. And with a just-add-water biscuit mix they are very simple. Make sure you have a thick whipped cream so it doesn’t squish out the sides. The recipe below worked well for us. To cut our biscuit into tiny, bite-sized pieces, we used the lid of a spice jar. It worked perfectly. We find that if the biscuits are just shy of the size of a silver dollar, they will turn out great.
Makes 12-15 Kabobs
Ingredients
Just-add-water biscuit mixgranulated sugarstrawberrieswhipped creamskewers
Directions
Preheat oven to 425 degrees
1. Make the biscuit mix according to instructions, but add enough granulated sugar to sweeten the dough. We added about 2 Tablespoons of sugar to ours.
2. Cut circles out of the dough that are about the size of a
silver dollar. We used a lid from a spice jar and it was about right.
3. Bake at 425 degrees until the bottoms are lightly browned. The time will depend on your oven, your mix, and the size of your biscuits. The amount of sugar you added will also decrease the baking time needed. Ours were done in about 8 minutes.
4. Cut the strawberries in rounds and set aside.
5. Create the whipped cream (recipe below).
6. Stack your kabobs. First, place a biscuit on the skewer, followed by a layer of whipped cream, a strawberry round, more whipped cream, etc. until you have the desired amount of layers on your kabob. Serve!
For the Whipped Cream:
2 cups whipping cream 1/2 cup granulated sugar
38
1 teaspoons Madagascar vanilla1 Tablespoon meringue powder
Whip together the whipping cream, sugar and flavor, until there are high peaks.
Lunch/Dinner on a StickSavory snacks were a little more difficult to come up with when it came to food on a stick. Of course you have your corndogs and kababs, but we wanted to take it a step further. Enjoy these traditional on-a-stick recipes and the unusual too!
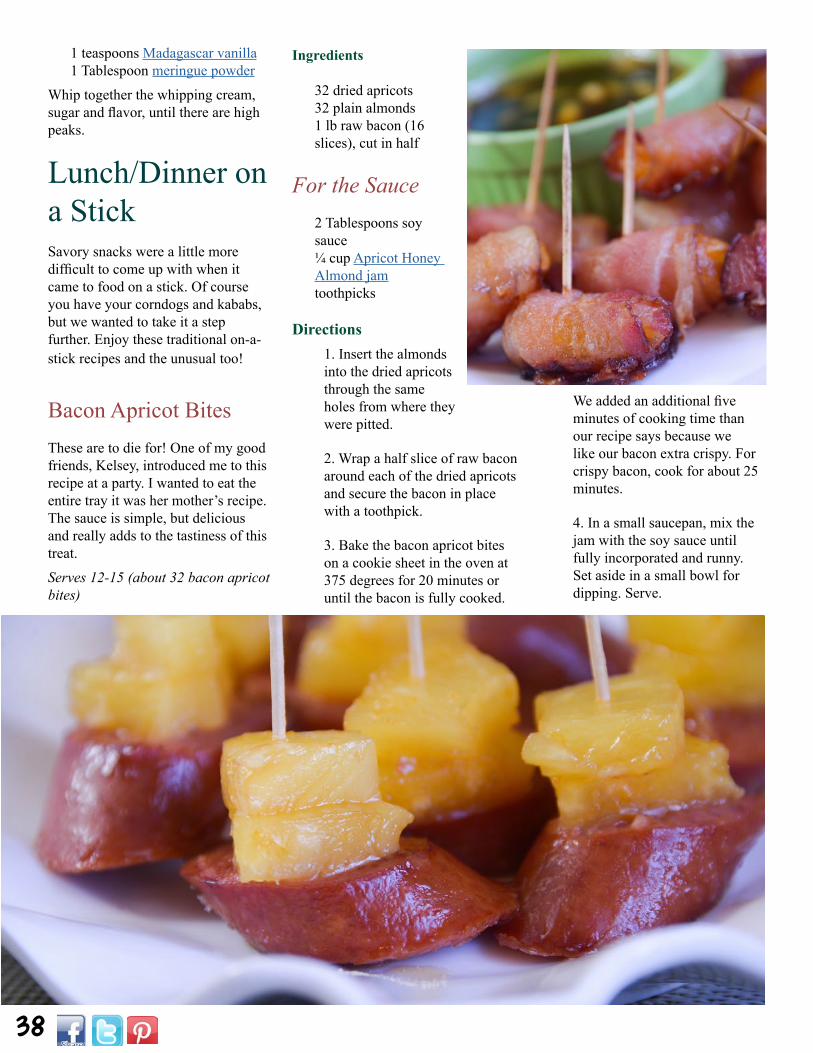
Bacon Apricot BitesThese are to die for! One of my good friends, Kelsey, introduced me to this recipe at a party. I wanted to eat the entire tray it was her mother’s recipe. The sauce is simple, but delicious and really adds to the tastiness of this treat.
Serves 12-15 (about 32 bacon apricot bites)
Ingredients
32 dried apricots32 plain almonds1 lb raw bacon (16 slices), cut in half
For the Sauce2 Tablespoons soy sauce¼ cup Apricot Honey Almond jamtoothpicks
Directions1. Insert the almonds into the dried apricots through the same holes from where they were pitted.
2. Wrap a half slice of raw bacon around each of the dried apricots and secure the bacon in place with a toothpick.
3. Bake the bacon apricot bites on a cookie sheet in the oven at 375 degrees for 20 minutes or until the bacon is fully cooked.
We added an additional five minutes of cooking time than our recipe says because we like our bacon extra crispy. For crispy bacon, cook for about 25 minutes.
4. In a small saucepan, mix the jam with the soy sauce until fully incorporated and runny. Set aside in a small bowl for dipping. Serve.
39
Hawaiian Pineapple Sausage BitesThese were my brainchild when I was coming up with snacks for a party one day and lucky for me, they turned out delicious. My guests adored them (see page 38 for photo).
Serves about 12-15.
Ingredients
1 kielbasa sausage, pre-cooked1 can pineapple tidbits2 Tablespoons soy sauce4 Tablespoons apricot, plum or pineapple jam
Directions1. Slice the kielbasa sausage into bite-sized pieces.
2. In a stir-fry pan or large saucepan, cook the sausage bites until they are browned.
3. When browned, add the pine-apple with ¼ cup of the pineap-ple juice from the can.
4. Add the soy sauce and jam and mix until the sausage pieces are fully coated.
5. Skewer one or two pineapple pieces with one sausage piece on a toothpick. Repeat with remain-ing sausage bites. Serve warm.
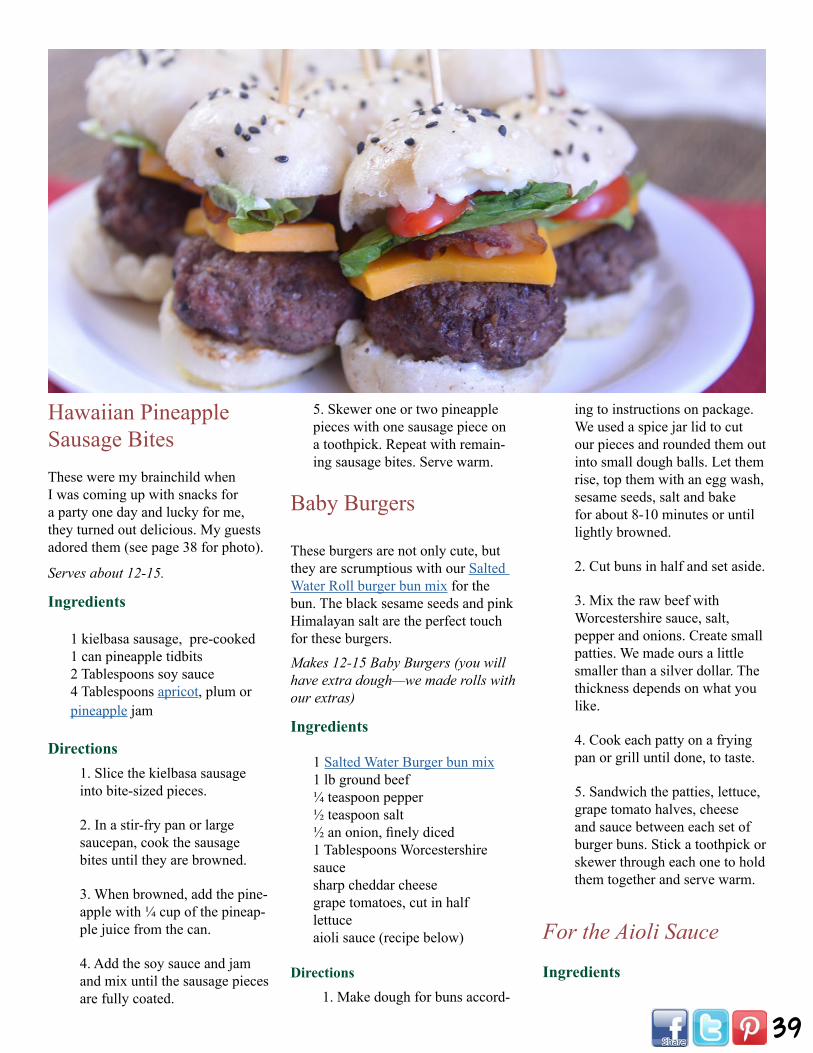
Baby Burgers
These burgers are not only cute, but they are scrumptious with our Salted Water Roll burger bun mix for the bun. The black sesame seeds and pink Himalayan salt are the perfect touch for these burgers.
Makes 12-15 Baby Burgers (you will have extra dough—we made rolls with our extras)
Ingredients
1 Salted Water Burger bun mix1 lb ground beef¼ teaspoon pepper½ teaspoon salt½ an onion, finely diced1 Tablespoons Worcestershire saucesharp cheddar cheesegrape tomatoes, cut in halflettuceaioli sauce (recipe below)
Directions
1. Make dough for buns accord-
ing to instructions on package. We used a spice jar lid to cut our pieces and rounded them out into small dough balls. Let them rise, top them with an egg wash, sesame seeds, salt and bake for about 8-10 minutes or until lightly browned.
2. Cut buns in half and set aside.
3. Mix the raw beef with Worcestershire sauce, salt, pepper and onions. Create small patties. We made ours a little smaller than a silver dollar. The thickness depends on what you like.
4. Cook each patty on a frying pan or grill until done, to taste.
5. Sandwich the patties, lettuce, grape tomato halves, cheese and sauce between each set of burger buns. Stick a toothpick or skewer through each one to hold them together and serve warm.
For the Aioli Sauce
Ingredients
40
¾ cup mayonnaise 1 teaspoon Dijon mustard3 cloves garlic, finely minced2 ½ Tablespoons lemon juice¼ teaspoon salt ½ teaspoon black pepper
Directions
1. Mix all ingredients together in a small bowl. Refrigerate any unused sauce.
Oven-Grilled Shish Kabobs
These are the easiest shish kabobs we have ever made. Just put them in the oven and forget them. When you can’t grill on the deck, this is the way to quick and easy shish kabobs.
The marinade is excellent.
Serves 12-15
Ingredients
2 pounds sirloin steak or other beef cut salt1/4 cup vinegar 1/2 cup vegetable oil 1 teaspoon seasoning salt 1/4 teaspoon garlic powder 1/4 teaspoon onion powder 1/4 teaspoon ground black pepper dash cayenne pepper1 large sweet onion
2 bell peppers, red or green
Directions1. Trim the beef and cut
it into 1 to 1 1/2-inch cubes. Salt the meat and set it aside.
2. Prepare the marinade by mixing the vinegar, oil, seasoning salt, garlic powder, onion powder, and peppers together. Add the meat to the marinade, cover the dish, and let it sit in the refrigerator for several hours or overnight.
3. When it is time to prepare the meal, prep the vegetables: Quarter the onion vertically and then cut the layers into squares about the size of the meat. Seed and cut the peppers into square pieces.
4. To make the shish kabobs, thread the meat, alternating with the vegetables, onto skewers.
5. Preheat the oven to 400 degrees.
6. Place an oven-proof cooling rack on a baking sheet lined with aluminum foil. This method will work best if the rack sits an inch or so off the pan to allow air to circulate under the rack and cook the food from below.
7. Place the shish kabobs on the rack and bake until done, about 15 minutes. Using an open rack with space beneath for air circulation, there is no need to turn the shish kabobs.
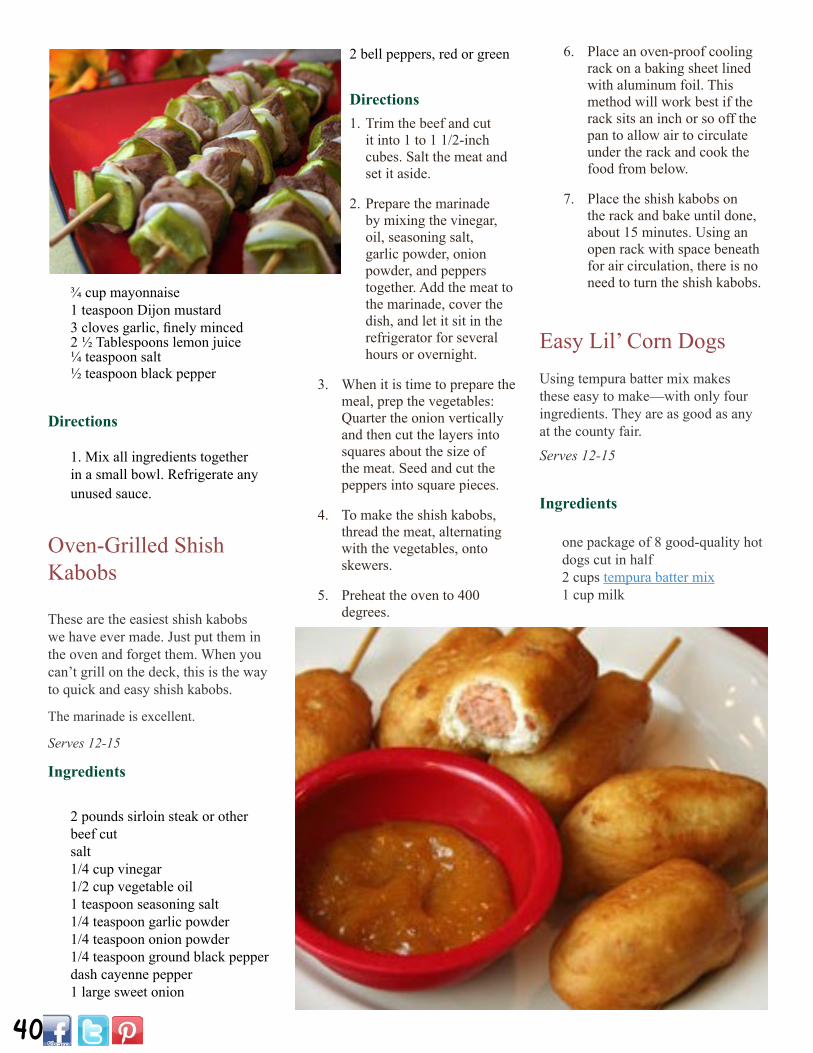
Easy Lil’ Corn DogsUsing tempura batter mix makes these easy to make—with only four ingredients. They are as good as any at the county fair.
Serves 12-15
Ingredients
one package of 8 good-quality hot dogs cut in half 2 cups tempura batter mix 1 cup milk

1010
42
1 large egg
16 wooden skewers about 4-inches long (cut longer skewers into shorter sticks)
Directions
1. Insert the skewers into the ends of the hot dogs.
2. In a large bowl, stir the batter mix, the egg, and the milk together. The batter will be thick.
3. Pour one inch of oil into a large, heavy skillet or use a deep fryer. Heat to 365 degrees.
4. Holding the hot dogs over the bowl of batter, dip and swirl to remove excess
5. Lay the coated hot dogs, 3 or 4 at a time, in the hot oil. Turn them with tongs after 10 to 15 seconds of cooking to prevent the batter from sliding off the hot dogs. Cook for 2 to 3 minutes more or until golden brown, turning to brown evenly. Remove with tongs and drain on a baking sheet lined with paper towels.
6. Serve with your favorite dip, ketchup, or the apricot mustard dip below.
For the Apricot Mustard DipAdd 1 Tablespoon prepared Dijon mustard to every 1/4 cup apricot pineapple jam. Add more jam or more mustard to suit your taste.
Easy Corn FrittersWe’ve made corn fritters for years. Using tempura batter makes them quick and easy. We like them with the
diced green chilies but you can leave them out. Try serving them with a syrup or a flavored honey.
Serves 12-15
Ingredients
1 1/2 cups of tempura batter mix 3/4 cup cold water 1 can corn, well drained 2 tablespoons diced chilies, well drained (optional)
Directions1. Mix the tempura mix, water,
drained corn, and optional chilies together in a large bowl.
2. In a deep fryer or heavy pan, heat enough oil for deep frying. The oil should be hot, (about 365 degrees).
3. Drop 3 or 4 large spoonfuls of batter into the hot oil. Let them cook for three or four
minutes, turning once, or until they just start to brown. Remove them to dry on paper towels. Serve immediately drizzled with syrup or honey.
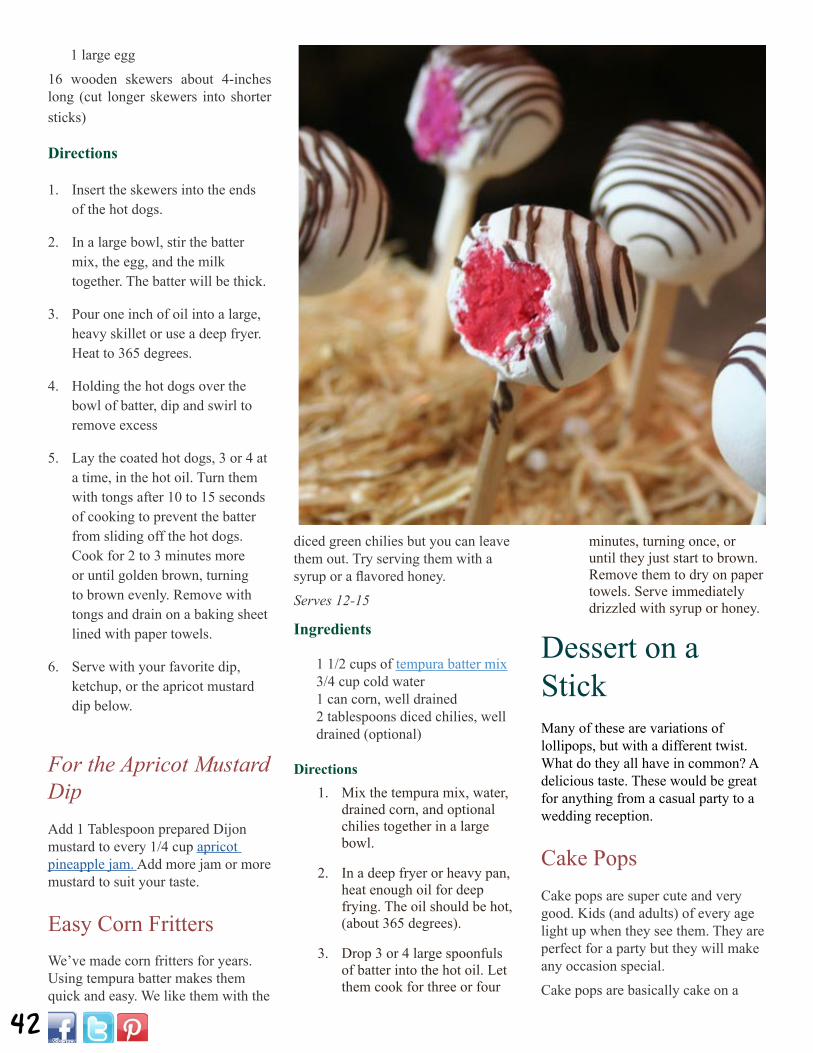
Dessert on a StickMany of these are variations of lollipops, but with a different twist. What do they all have in common? A delicious taste. These would be great for anything from a casual party to a wedding reception.
Cake PopsCake pops are super cute and very good. Kids (and adults) of every age light up when they see them. They are perfect for a party but they will make any occasion special.
Cake pops are basically cake on a
43
stick dipped in chocolate and then decorated.
What you’ll need:
• A cake mix• A tub of store-bought frosting• White chocolate wafers• Craft sticks• Your favorite color (optional)• Corresponding food flavor
(optional)• Dark chocolate wafers• Disposable cake decorating
bags (optional)• PP Jimmies or other sprinkles
(optional)
Step One: Bake them Make the cake according to the recipe or package directions. If you want to flavor the cake, add 1 teaspoon of your flavor to the cake batter. Color the batter with food colors as well if desired. Bake it in a 9 x 13-inch baking pan. Let cool.
Step Two: Mold them into balls Put the cake into a large mixing bowl and break into small crumbs. Add 1/3 to 1/2 of the tub of frosting to the cake crumbs and mix together until it is moist enough to form balls, use a mixer if you wish. If desired, add another teaspoon of flavor and more food color. Use a medium-sized cookie scoop to make even balls of dough. Roll the dough in your hands to make smooth balls. Refrigerate the balls until firm.
Step Three: Insert craft sticks into each ball Go ahead and push the sticks almost all the way down to the bottom. You want to make sure you don’t lose your ball while dipping. Sometimes it helps to dip the tip of the
stick into the melted chocolate before pushing it into the ball. Flat craft sticks seem to hold the ball better as well.
Step Four: Dip the balls in melted white chocolate To melt the wafers, microwave in 15 second intervals stirring after each until they are smooth. Do not overdo it. If you cook the chocolate it will not set up very pretty. Dip the pops into the melted chocolate completely. We don’t want to see any of the cake. Mugs work very well for these. They are the perfect size and the thick mug holds the heat in so that the chocolate stays warm for a while. They will no longer look shiny and will get a dull appearance when the chocolate is set up.
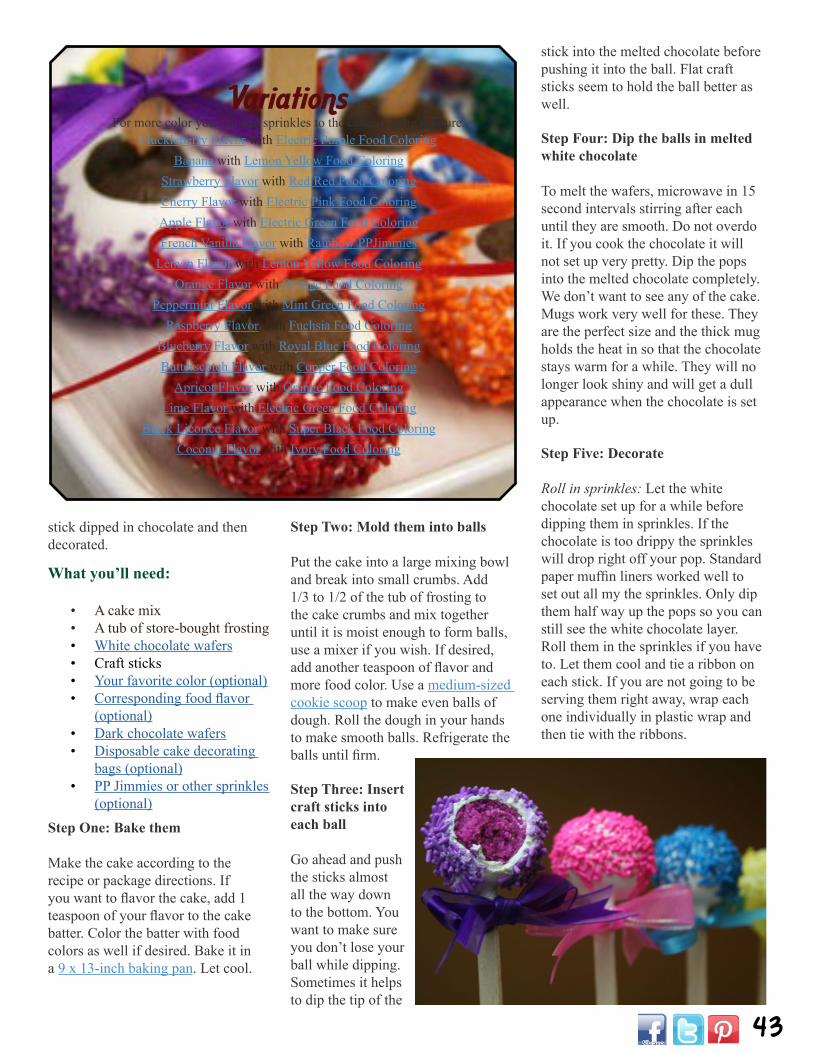
Step Five: Decorate Roll in sprinkles: Let the white chocolate set up for a while before dipping them in sprinkles. If the chocolate is too drippy the sprinkles will drop right off your pop. Standard paper muffin liners worked well to set out all my the sprinkles. Only dip them half way up the pops so you can still see the white chocolate layer. Roll them in the sprinkles if you have to. Let them cool and tie a ribbon on each stick. If you are not going to be serving them right away, wrap each one individually in plastic wrap and then tie with the ribbons.
Variations For more color you can add sprinkles to the cake/frosting mixture.
Huckleberry Flavor with Electric Purple Food ColoringBanana with Lemon Yellow Food Coloring
Strawberry Flavor with Red Red Food ColoringCherry Flavor with Electric Pink Food ColoringApple Flavor with Electric Green Food ColoringFrench Vanilla Flavor with Rainbow PPJimmies
Lemon Flavor with Lemon Yellow Food ColoringOrange Flavor with Orange Food Coloring
Peppermint Flavor with Mint Green Food ColoringRaspberry Flavor with Fuchsia Food Coloring
Blueberry Flavor with Royal Blue Food ColoringButterscotch Flavor with Copper Food Coloring
Apricot Flavor with Orange Food ColoringLime Flavor with Electric Green Food Coloring
Black Licorice Flavor with Super Black Food ColoringCoconut Flavor with Ivory Food Coloring
44
Drizzle in chocolate: Let the white chocolate set up before drizzling them in dark chocolate. Melt the dark chocolate the same way you melted the white chocolate. Pour the dark chocolate into a disposable decorating bag or zip top bag. Firmly close the bag or tie the decorating bag with a wire twist tie. Cut a small hole in the corner of the zip top bag or the end of the decorating bag. Drizzle the chocolate over the pop in any design you would like.
Brownie PopsThese are very similar to cake pops, but can be made with your favorite brownie mix or recipe. They are great for the chocolate-lover. See the directions and pictures below for how to make them.
What you’ll need:
• A fudgy brownie mix• Dark chocolate wafers• White chocolate wafers• Craft sticks• PPJimmies or other sprinkles
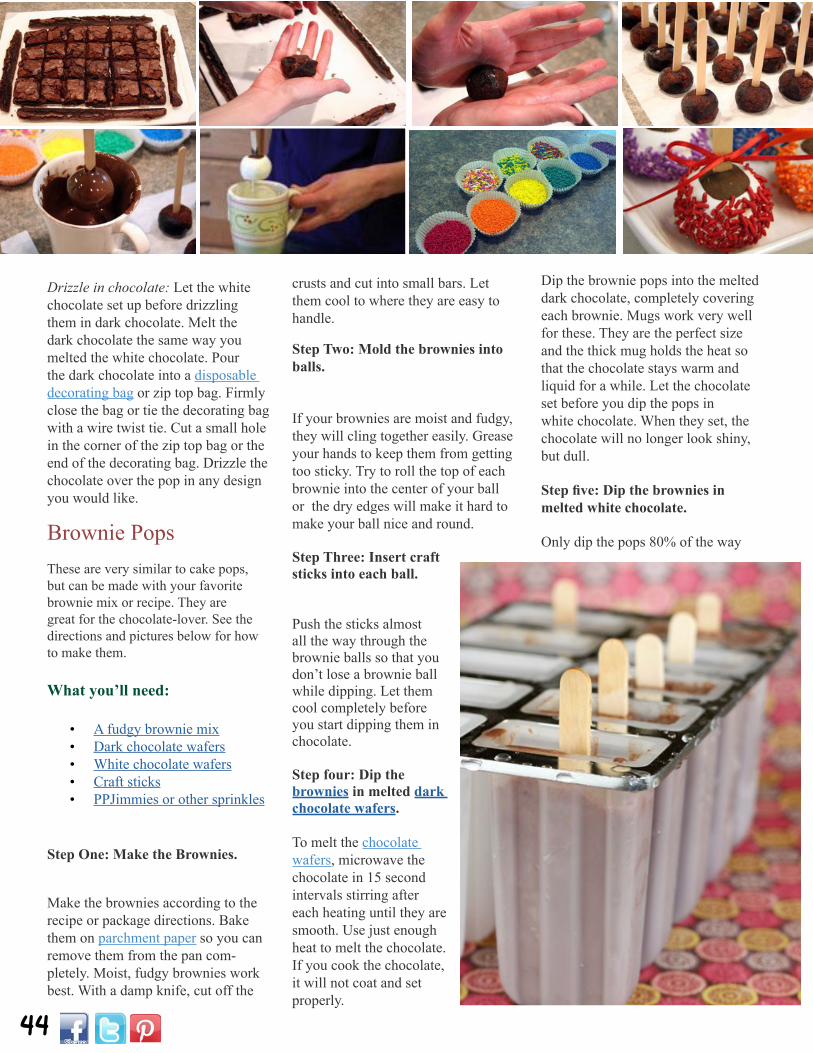
Step One: Make the Brownies.
Make the brownies according to the recipe or package directions. Bake them on parchment paper so you can remove them from the pan com-pletely. Moist, fudgy brownies work best. With a damp knife, cut off the
crusts and cut into small bars. Let them cool to where they are easy to handle.
Step Two: Mold the brownies into balls.
If your brownies are moist and fudgy, they will cling together easily. Grease your hands to keep them from getting too sticky. Try to roll the top of each brownie into the center of your ball or the dry edges will make it hard to make your ball nice and round.
Step Three: Insert craft sticks into each ball.
Push the sticks almost all the way through the brownie balls so that you don’t lose a brownie ball while dipping. Let them cool completely before you start dipping them in chocolate.
Step four: Dip the brownies in melted dark chocolate wafers.
To melt the chocolate wafers, microwave the chocolate in 15 second intervals stirring after each heating until they are smooth. Use just enough heat to melt the chocolate. If you cook the chocolate, it will not coat and set properly.
Dip the brownie pops into the melted dark chocolate, completely covering each brownie. Mugs work very well for these. They are the perfect size and the thick mug holds the heat so that the chocolate stays warm and liquid for a while. Let the chocolate set before you dip the pops in white chocolate. When they set, the chocolate will no longer look shiny, but dull.
Step five: Dip the brownies in melted white chocolate.
Only dip the pops 80% of the way
45
into the white chocolate. It looks nice to see the dark chocolate layer peeking out. Let the white chocolate set up for a while before dipping them in sprinkles. If the chocolate is too soft, the sprinkles will drip off your pops.
Step six: Roll the brownies in PPJimmies or other sprinkles.
Stage your sprinkles in standard paper muffin liners. Dip them half way up the pops so you can still see the white chocolate layer. Roll them in the jimmies (sprinkles) if you have to.
Let them cool and tie a ribbon on each stick. If you are not going to be serving them right away wrap each one individually in plastic wrap and then tie with the ribbons.
Chocolate Fudgesicles
When it’s hot outside, there’s no better way to cool off than with a creamy, chocolately fudgesicle. Save money and a trip to the store by making your own. With only four ingredients, this recipe couldn’t be easier. With no baking or chopping required, this makes a great recipe for kids.
The Secret’s in the CocoaThe only way to have a really good fudgesicle is to use really good cocoa. We use our Ramstadt-Breda Dark Cocoa. It’s rich, smooth, and incredibly flavorful. This will make the difference between a good fudgesicle and an exceptional one.
Ingredients
1 can 14-oz. sweetened condensed milk 1/2 cup milk
1/4 cup Ramstadt-Breda Dark Cocoa 1 teaspoon vanilla
Directions1. Mix all ingredients together until smooth.
2. Pour into popsicle molds.
3. Freeze for at least six hours. Makes about six pops.
While popsicle molds work the best, you could also use paper cups or even glass ramekins for more of a frozen custard feel.
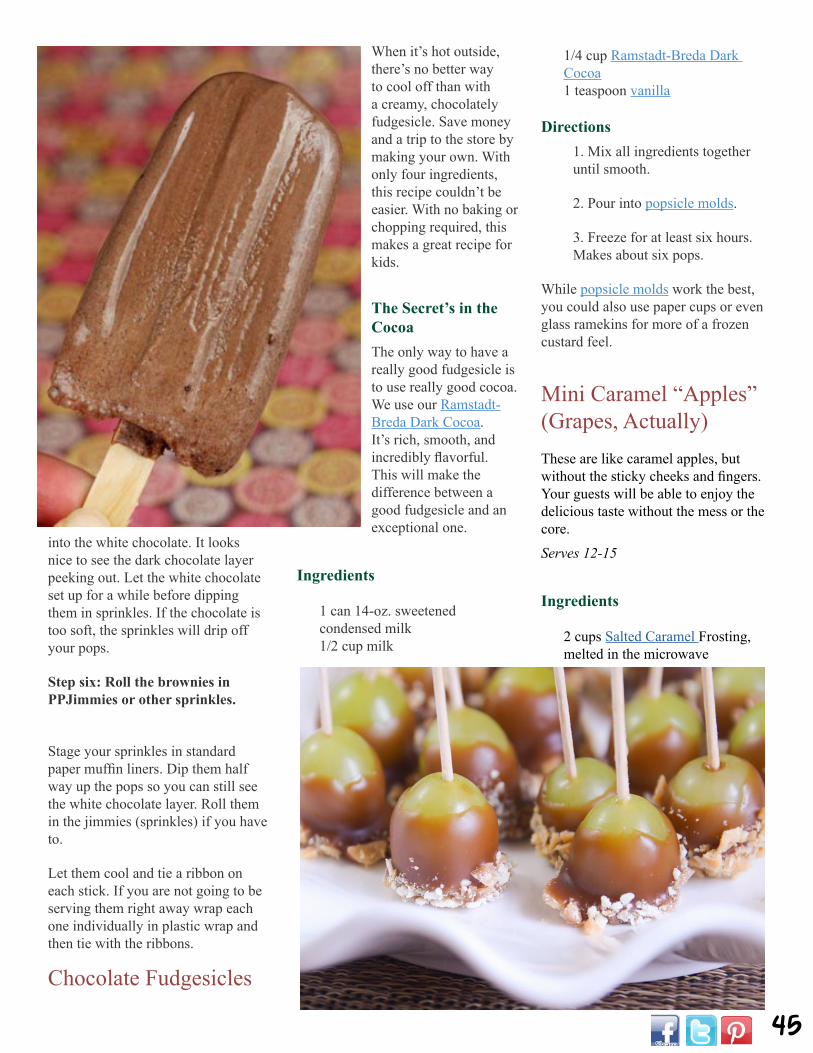
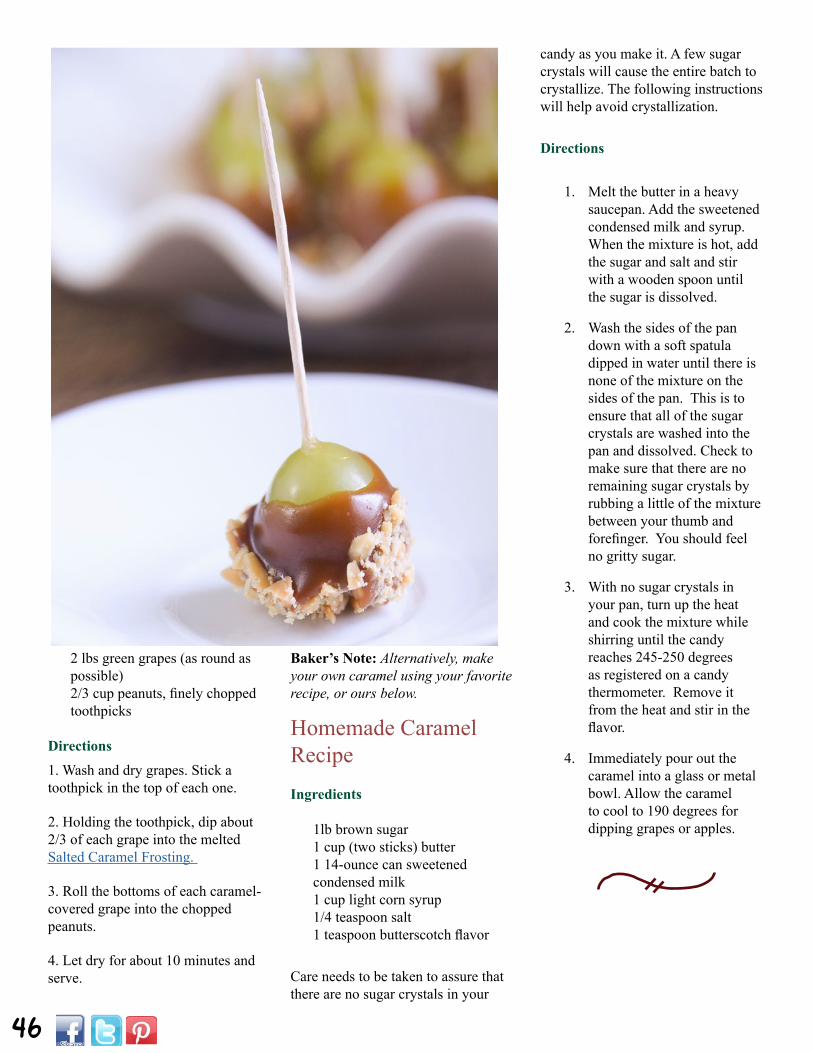
Mini Caramel “Apples” (Grapes, Actually)These are like caramel apples, but without the sticky cheeks and fingers. Your guests will be able to enjoy the delicious taste without the mess or the core.
Serves 12-15
Ingredients
2 cups Salted Caramel Frosting, melted in the microwave
46
2 lbs green grapes (as round as possible)2/3 cup peanuts, finely choppedtoothpicks
Directions1. Wash and dry grapes. Stick a toothpick in the top of each one.
2. Holding the toothpick, dip about 2/3 of each grape into the melted Salted Caramel Frosting.
3. Roll the bottoms of each caramel-covered grape into the chopped peanuts.
4. Let dry for about 10 minutes and serve.
Baker’s Note: Alternatively, make your own caramel using your favorite recipe, or ours below.
Homemade Caramel RecipeIngredients
1lb brown sugar 1 cup (two sticks) butter 1 14-ounce can sweetened condensed milk 1 cup light corn syrup 1/4 teaspoon salt 1 teaspoon butterscotch flavor
Care needs to be taken to assure that there are no sugar crystals in your
candy as you make it. A few sugar crystals will cause the entire batch to crystallize. The following instructions will help avoid crystallization.
Directions
1. Melt the butter in a heavy saucepan. Add the sweetened condensed milk and syrup. When the mixture is hot, add the sugar and salt and stir with a wooden spoon until the sugar is dissolved.
2. Wash the sides of the pan down with a soft spatula dipped in water until there is none of the mixture on the sides of the pan. This is to ensure that all of the sugar crystals are washed into the pan and dissolved. Check to make sure that there are no remaining sugar crystals by rubbing a little of the mixture between your thumb and forefinger. You should feel no gritty sugar.
3. With no sugar crystals in your pan, turn up the heat and cook the mixture while shirring until the candy reaches 245-250 degrees as registered on a candy thermometer. Remove it from the heat and stir in the flavor.
4. Immediately pour out the caramel into a glass or metal bowl. Allow the caramel to cool to 190 degrees for dipping grapes or apples.

1010

48
Bread MixesForget your Oven this SummerDennis Weaver
Breads are my passion. I love hearty breads and rye and
sourdough and fruited breads. You’ll find lots of these here. And when we find another great bread, we try to make it a mix.
The Prepared Pantry is one of the
largest sellers of bread mixes on the internet, selling thousands of mixes every week.
We produce our own bread mixes--you are buying directly from the producer--the freshest, best mixes
on the market. We understand bread mixes; the science and the art. We test them constantly.
We offer more than over 100 bread mixes. They are tried, proven, and dependable. You can bake with confidence.
You’ll make great homemade bread every time! We guarantee it. See what makes these
bread mixes better. Check out the breads that follow and give them a try.
Forget turning on your oven this summer—take out the bread machine instead. If you don’t have a bread machine, these breads can also be baked in your oven.
These are our top selling bread machine mixes. Check them out and make fresh bread this summer.
1. Black Russian2. San Francisco Sourdough3. French Bread Machine Mix4. Farmhouse Honey Wheat5. Prairie Sunflower
“The Prepared Pantry is one of the largest sellers
of bread mixes on the internet...”

This is the good stuff--read the reviews.
It’s authentic, what you would expect from a good New York or European bakery. Bring the taste of Eastern Europe to the table with real pumpernickel bread. It’ll fill your kitchen with the warm, rich smell of a little rustic bakery tucked away in a corner of Kiev.
It is one of our most popular breads--an outstanding bread, an amazing bread to make in your bread machine.
This bread is dark, moist, and chewy. It’s a full-bodied, robust bread and it’s terrific!
This bread is distinctive and so good your family and friends won’t believe you baked it.
See it here.
Black Russian
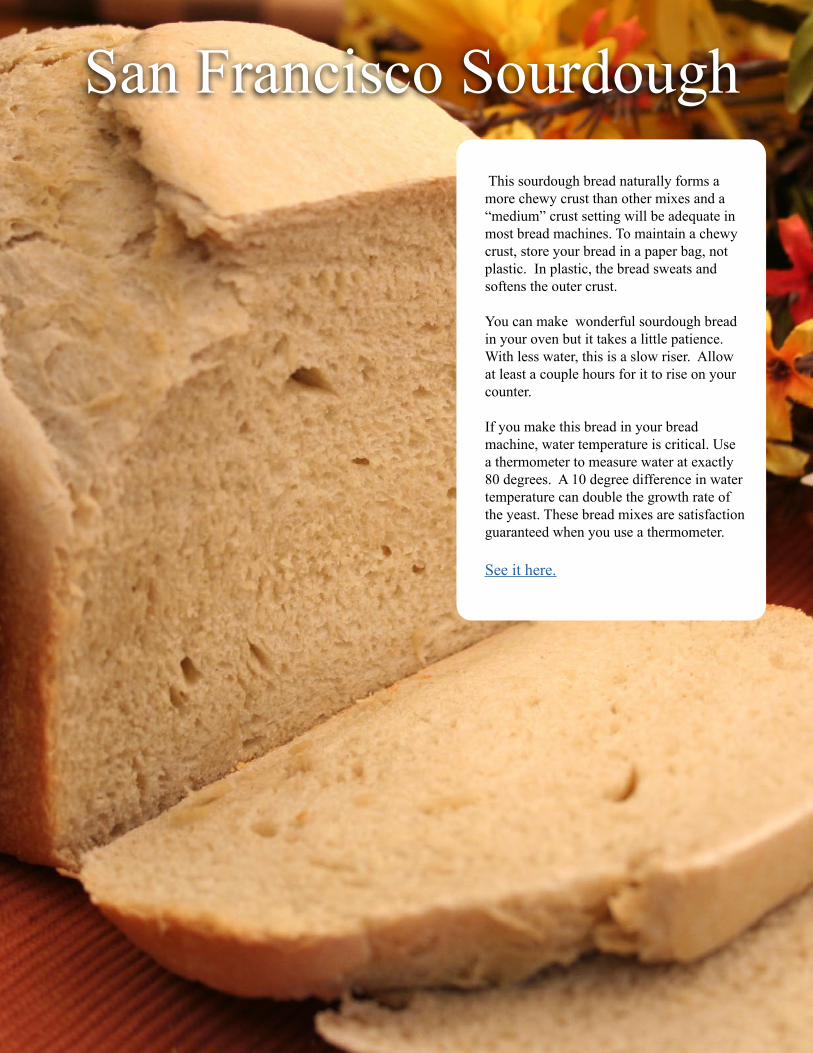
This sourdough bread naturally forms a more chewy crust than other mixes and a “medium” crust setting will be adequate in most bread machines. To maintain a chewy crust, store your bread in a paper bag, not plastic. In plastic, the bread sweats and softens the outer crust.
You can make wonderful sourdough bread in your oven but it takes a little patience. With less water, this is a slow riser. Allow at least a couple hours for it to rise on your counter.
If you make this bread in your bread machine, water temperature is critical. Use a thermometer to measure water at exactly 80 degrees. A 10 degree difference in water temperature can double the growth rate of the yeast. These bread mixes are satisfaction guaranteed when you use a thermometer.
See it here.
San Francisco Sourdough
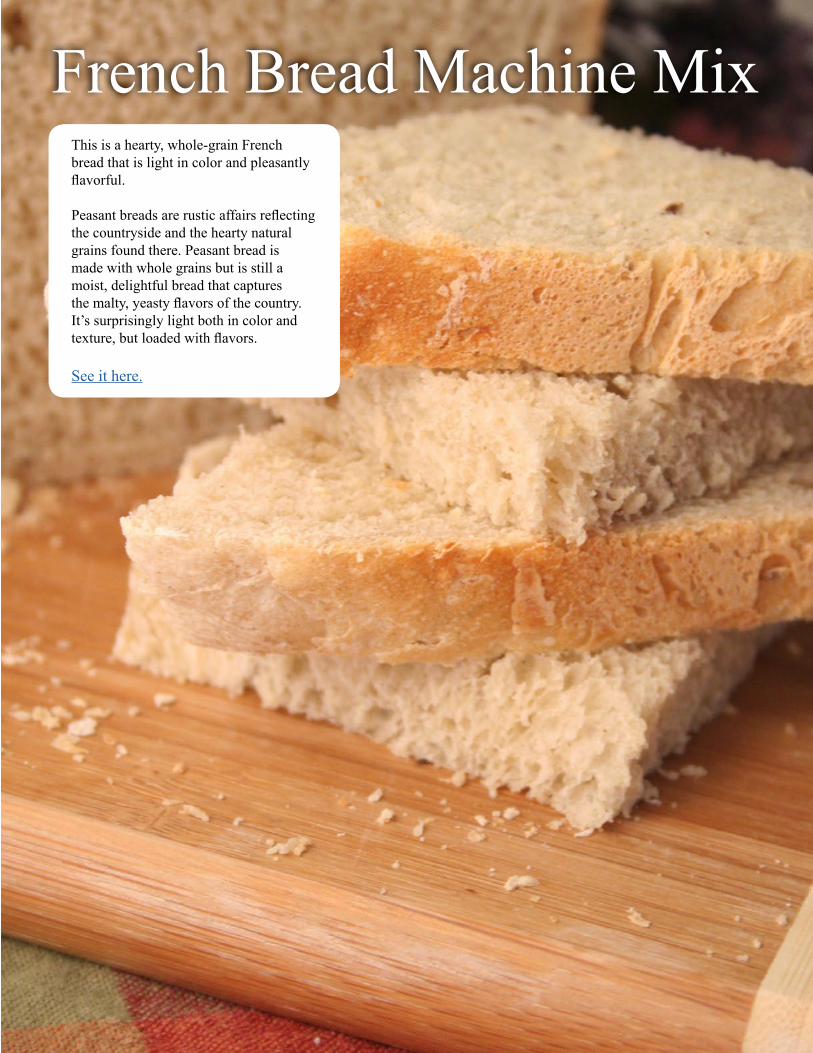
This is a hearty, whole-grain French bread that is light in color and pleasantly flavorful.
Peasant breads are rustic affairs reflecting the countryside and the hearty natural grains found there. Peasant bread is made with whole grains but is still a moist, delightful bread that captures the malty, yeasty flavors of the country. It’s surprisingly light both in color and texture, but loaded with flavors.
See it here.
French Bread Machine Mix
10 10
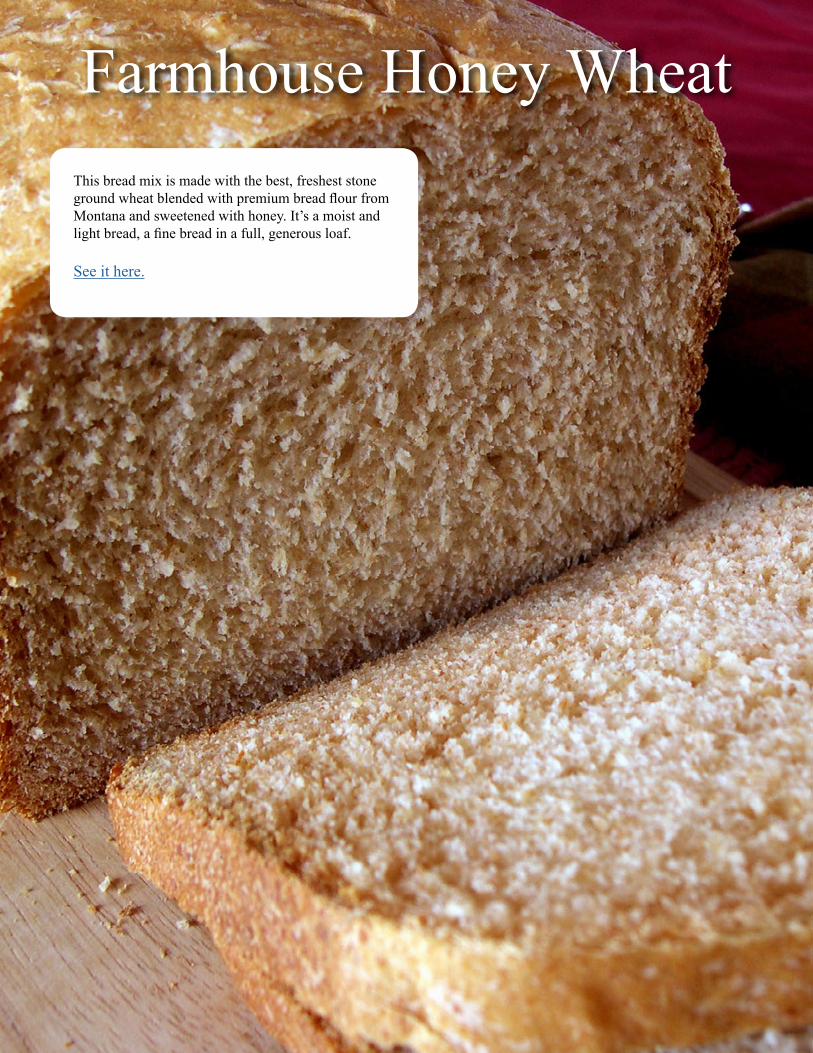
This bread mix is made with the best, freshest stone ground wheat blended with premium bread flour from Montana and sweetened with honey. It’s a moist and light bread, a fine bread in a full, generous loaf.
See it here.
Farmhouse Honey Wheat
10
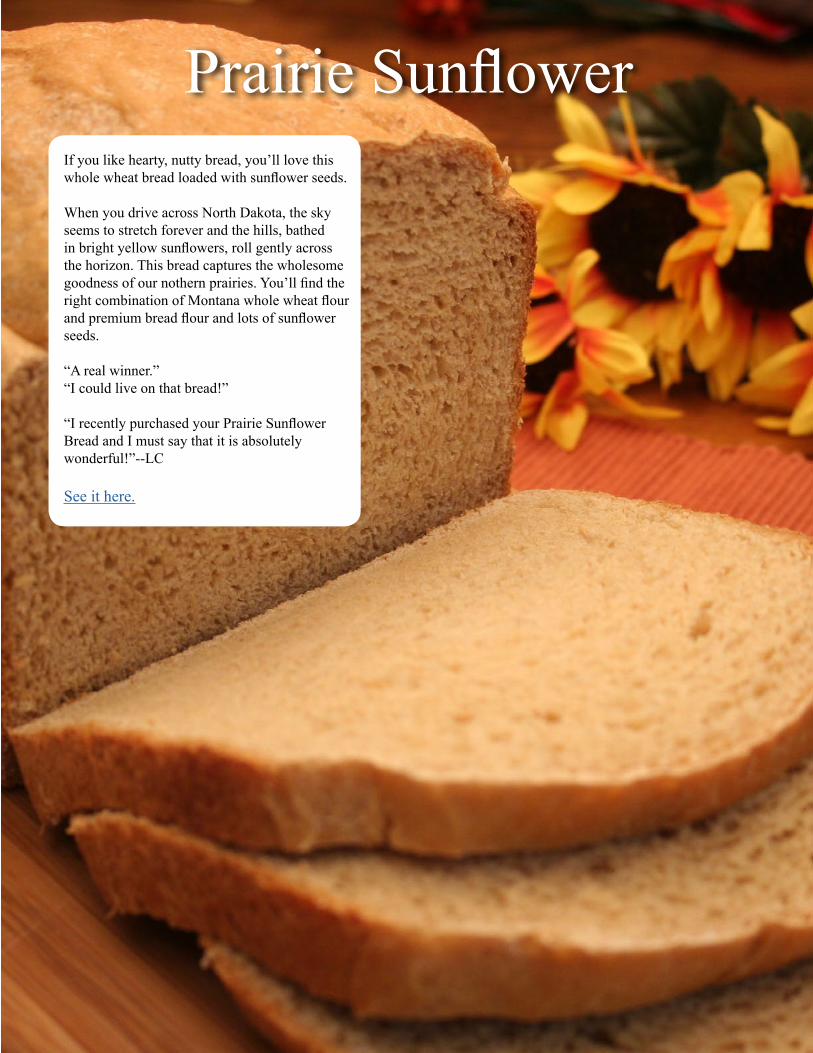
If you like hearty, nutty bread, you’ll love this whole wheat bread loaded with sunflower seeds.
When you drive across North Dakota, the sky seems to stretch forever and the hills, bathed in bright yellow sunflowers, roll gently across the horizon. This bread captures the wholesome goodness of our nothern prairies. You’ll find the right combination of Montana whole wheat flour and premium bread flour and lots of sunflower seeds. “A real winner.” “I could live on that bread!”
“I recently purchased your Prairie Sunflower Bread and I must say that it is absolutely wonderful!”--LC
See it here.
Prairie Sunflower
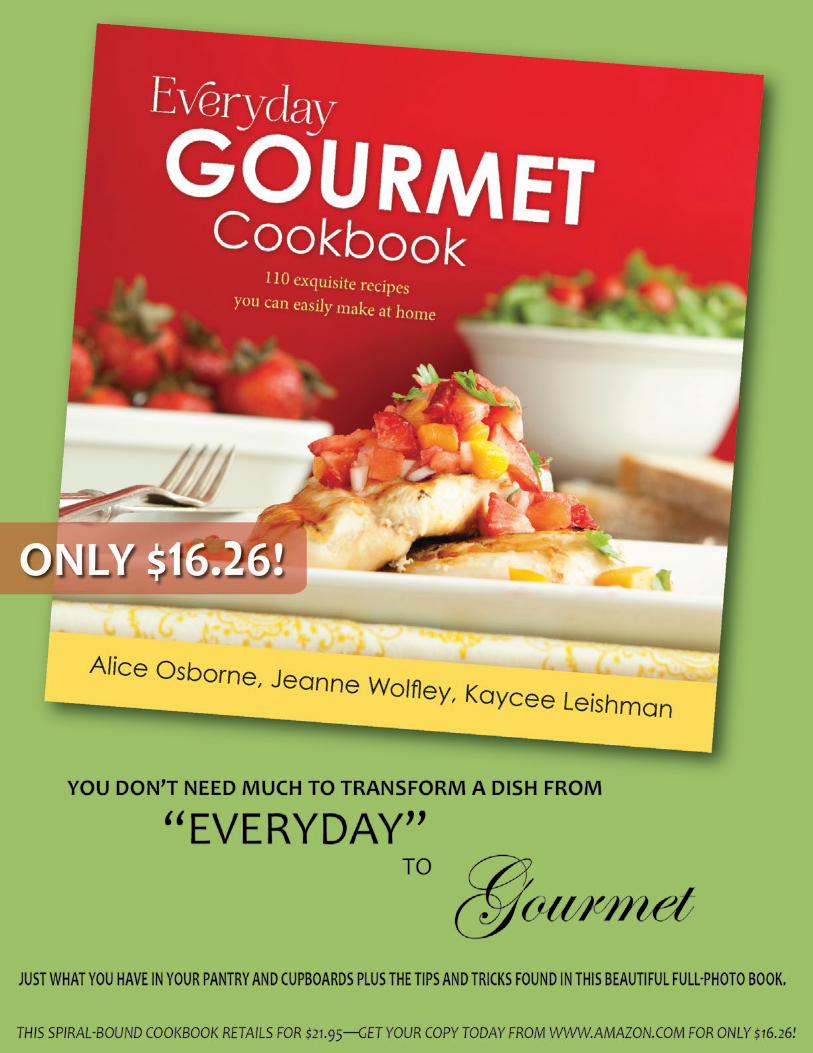
10 10
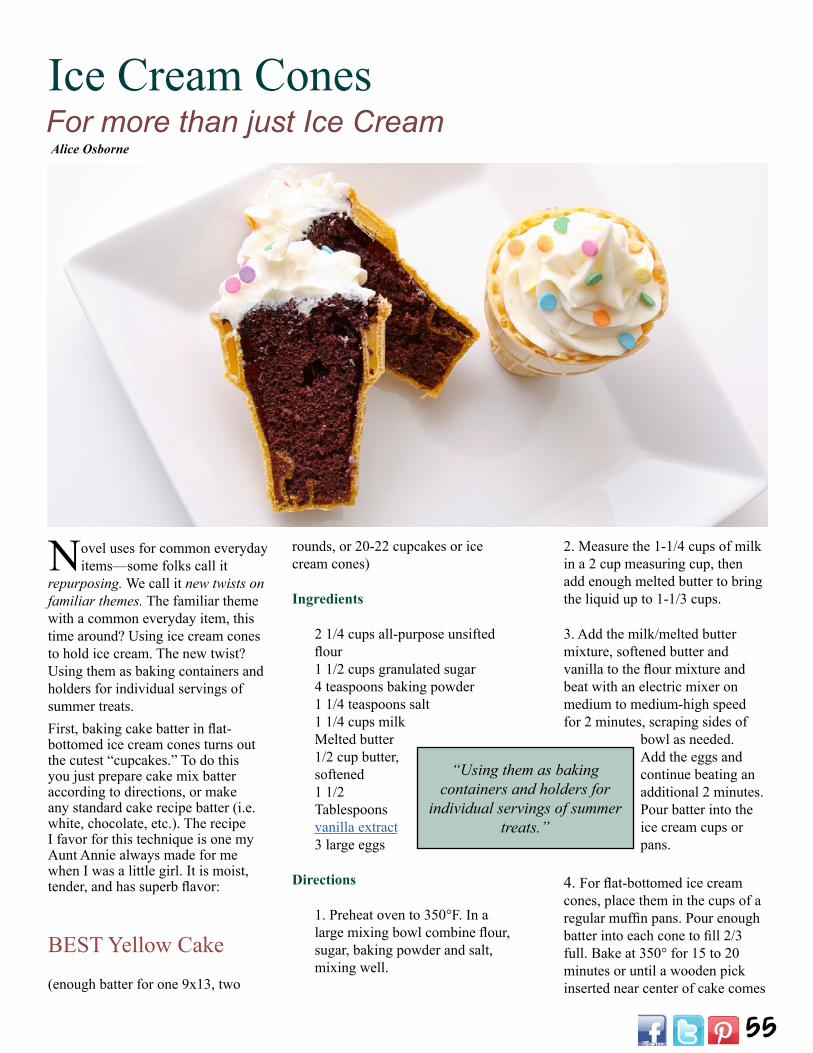
55
Ice Cream ConesFor more than just Ice CreamAlice Osborne
“Using them as baking containers and holders for
individual servings of summer treats.”
Novel uses for common everyday items—some folks call it
repurposing. We call it new twists on familiar themes. The familiar theme with a common everyday item, this time around? Using ice cream cones to hold ice cream. The new twist? Using them as baking containers and holders for individual servings of summer treats.First, baking cake batter in flat-bottomed ice cream cones turns out the cutest “cupcakes.” To do this you just prepare cake mix batter according to directions, or make any standard cake recipe batter (i.e. white, chocolate, etc.). The recipe I favor for this technique is one my Aunt Annie always made for me when I was a little girl. It is moist, tender, and has superb flavor:
BEST Yellow Cake (enough batter for one 9x13, two
rounds, or 20-22 cupcakes or ice cream cones)
Ingredients
2 1/4 cups all-purpose unsifted flour 1 1/2 cups granulated sugar 4 teaspoons baking powder 1 1/4 teaspoons salt 1 1/4 cups milk Melted butter 1/2 cup butter, softened 1 1/2 Tablespoons vanilla extract 3 large eggs
Directions
1. Preheat oven to 350°F. In a large mixing bowl combine flour, sugar, baking powder and salt, mixing well.
2. Measure the 1-1/4 cups of milk in a 2 cup measuring cup, then add enough melted butter to bring the liquid up to 1-1/3 cups. 3. Add the milk/melted butter mixture, softened butter and vanilla to the flour mixture and beat with an electric mixer on medium to medium-high speed for 2 minutes, scraping sides of
bowl as needed. Add the eggs and continue beating an additional 2 minutes. Pour batter into the ice cream cups or pans.
4. For flat-bottomed ice cream cones, place them in the cups of a regular muffin pans. Pour enough batter into each cone to fill 2/3 full. Bake at 350° for 15 to 20 minutes or until a wooden pick inserted near center of cake comes
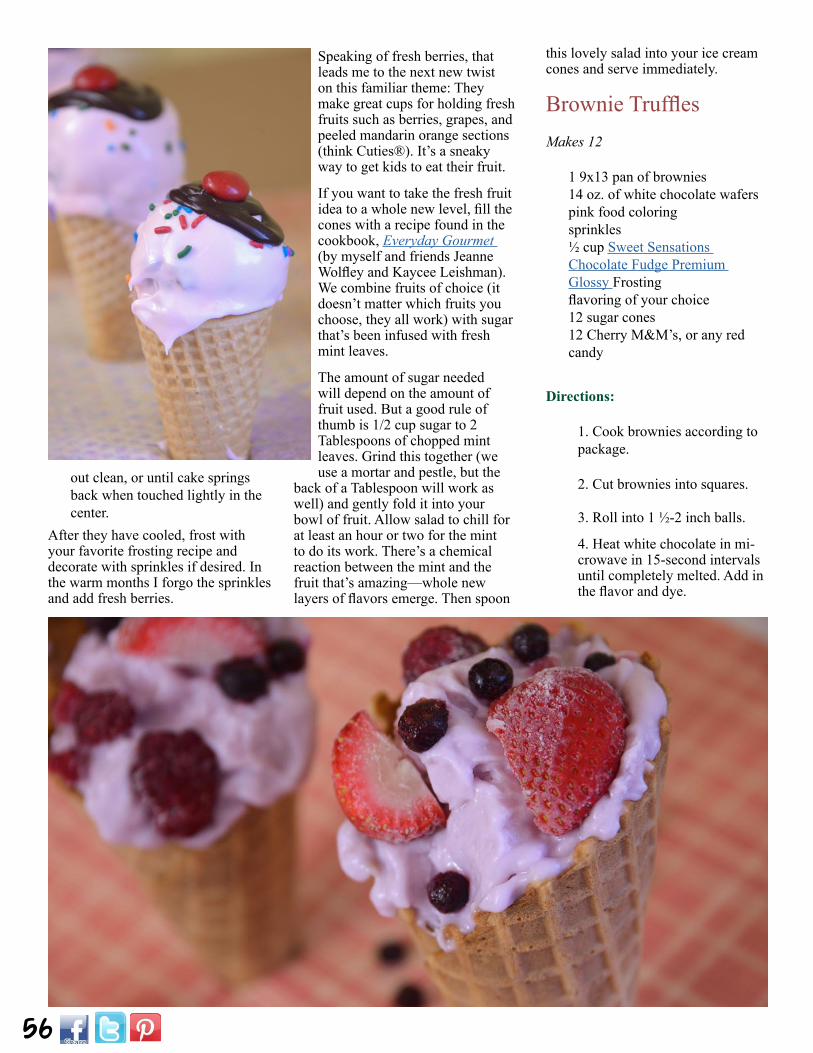
56
out clean, or until cake springs back when touched lightly in the center.
After they have cooled, frost with your favorite frosting recipe and decorate with sprinkles if desired. In the warm months I forgo the sprinkles and add fresh berries.
Speaking of fresh berries, that leads me to the next new twist on this familiar theme: They make great cups for holding fresh fruits such as berries, grapes, and peeled mandarin orange sections (think Cuties®). It’s a sneaky way to get kids to eat their fruit.
If you want to take the fresh fruit idea to a whole new level, fill the cones with a recipe found in the cookbook, Everyday Gourmet (by myself and friends Jeanne Wolfley and Kaycee Leishman). We combine fruits of choice (it doesn’t matter which fruits you choose, they all work) with sugar that’s been infused with fresh mint leaves.
The amount of sugar needed will depend on the amount of fruit used. But a good rule of thumb is 1/2 cup sugar to 2 Tablespoons of chopped mint leaves. Grind this together (we use a mortar and pestle, but the
back of a Tablespoon will work as well) and gently fold it into your bowl of fruit. Allow salad to chill for at least an hour or two for the mint to do its work. There’s a chemical reaction between the mint and the fruit that’s amazing—whole new layers of flavors emerge. Then spoon
this lovely salad into your ice cream cones and serve immediately.
Brownie TrufflesMakes 12
1 9x13 pan of brownies14 oz. of white chocolate waferspink food coloringsprinkles½ cup Sweet Sensations Chocolate Fudge Premium Glossy Frostingflavoring of your choice12 sugar cones12 Cherry M&M’s, or any red candy
Directions:
1. Cook brownies according to package.
2. Cut brownies into squares.
3. Roll into 1 ½-2 inch balls.
4. Heat white chocolate in mi-crowave in 15-second intervals until completely melted. Add in the flavor and dye.
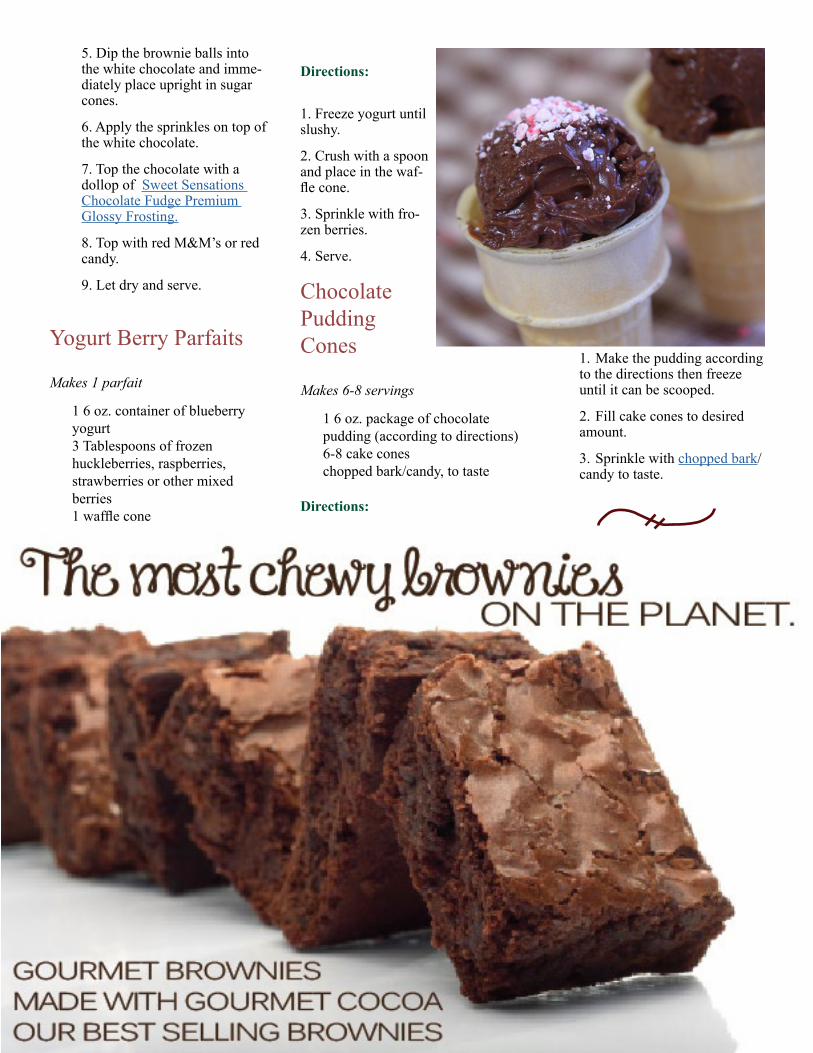
49
5. Dip the brownie balls into the white chocolate and imme-diately place upright in sugar cones.
6. Apply the sprinkles on top of the white chocolate.
7. Top the chocolate with a dollop of Sweet Sensations Chocolate Fudge Premium Glossy Frosting.
8. Top with red M&M’s or red candy.
9. Let dry and serve.
Yogurt Berry Parfaits
Makes 1 parfait
1 6 oz. container of blueberry yogurt3 Tablespoons of frozen huckleberries, raspberries, strawberries or other mixed berries1 waffle cone
Directions:
1. Freeze yogurt until slushy.
2. Crush with a spoon and place in the waf-fle cone.
3. Sprinkle with fro-zen berries.
4. Serve.
Chocolate Pudding Cones
Makes 6-8 servings
1 6 oz. package of chocolate pudding (according to directions)6-8 cake coneschopped bark/candy, to taste
Directions:
1. Make the pudding according to the directions then freeze until it can be scooped.
2. Fill cake cones to desired amount.
3. Sprinkle with chopped bark/candy to taste.

50

53

10
Ask the Baker and Quick Tips: - Apple Filling- Aebleskivers- Wooden Skewers
Cupshakes:- Vanilla Baby Cakes Mix- Raspberry Filling- Cherry Flavor- Strawberry Flavor
Sparkling Drinks:- Torani Peach Syrup- Torani Huckleberry Syrup- Torani Mango Syrup- Torani Blackberry Syrup
Burgers &Buns:- Colorado Cattle Company Steak and Burger Seasoning- Thai Sweet Chili
Foods on a Stick:- Designer Dessert Chocolate Sauce- Pie Crust Mix- Texas Corncakes Pancake Mix- Tempura Batter- Blueberry Cream Cheese Pancake Mix- Meringue Powder
Ice Cream Cones:- Sweet Sensations Chocolate Fudge Premium Glossy Frosting- Chopped Bark- Madagascar Vanilla Extract
A Buyer’s Equipment Guide