more tutorials on www.mooict.com Create a simple LAN in packet tracer Things you will need 1) Generic PC 1) Switch 1) Server open packet tracer on the bottom left hand corner you will find all the devices you need. Click on END DEVICES and drag a PC to the area PC Server
Transcript
more tutorials on www.mooict.com
Create a simple LAN in packet tracer
Things you will need
1) Generic PC
1) Switch
1) Server
open packet tracer
on the bottom left hand corner you will find all the devices you need.
Click on END DEVICES and drag a PC to the area
PC
Server
more tutorials on www.mooict.com
Follow the picture above. Now to add a switch click on the switches from the same place you picked
a PC and add the first switch to the screen.
after this we need a server.
click on the END DEVICES again to select the SERVER to the screen. Its the third icon on the list
Well done.
Now we need to connect the three devices together and check if they are communicating over the
LAN.
Click on the lightning bolt icon by the END DEVICES it represents the connections.
Inside it we have several different cable types.
PC SERVER and SWITCH they all use the COPPER STRAIGHT THROUGH cable. Its the black line icon
third on the list.
more tutorials on www.mooict.com
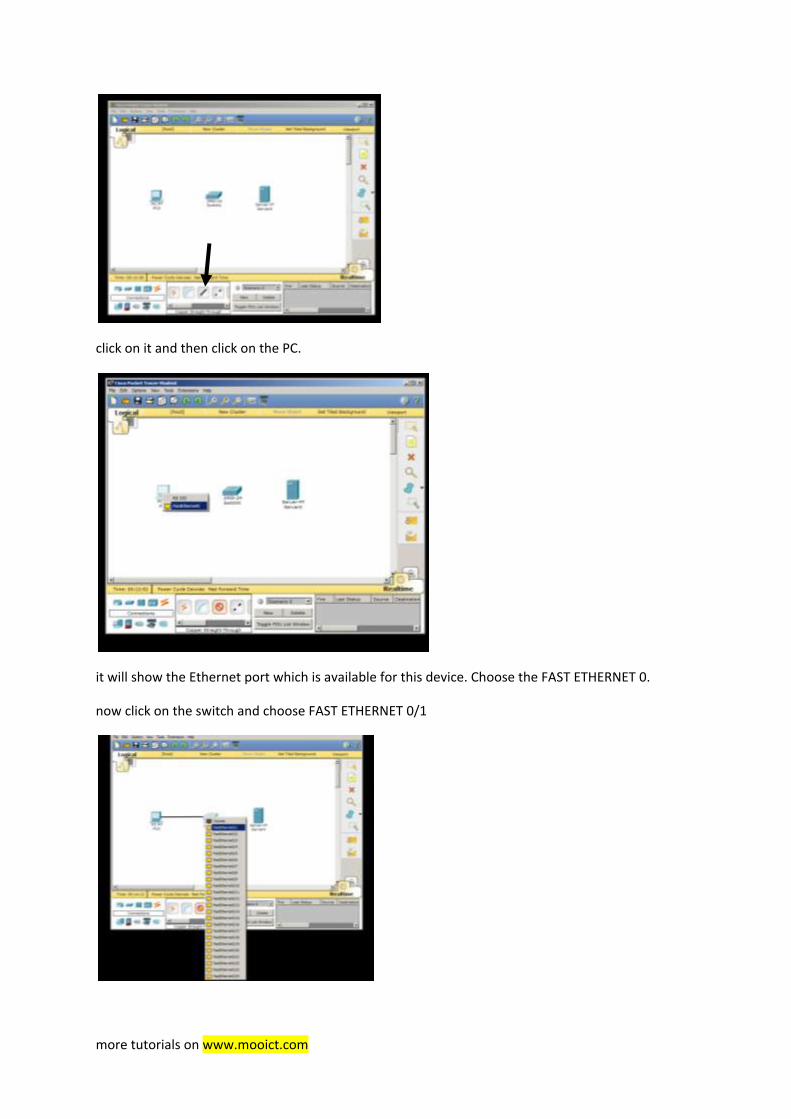
click on it and then click on the PC.
it will show the Ethernet port which is available for this device. Choose the FAST ETHERNET 0.
now click on the switch and choose FAST ETHERNET 0/1
more tutorials on www.mooict.com
Switches have multiple Ethernet connections so we can pick any from the list. Its a good practice to
choose the first one to stay organised.
Now do the same from the switch to the server
Choose copper straight through wire from the switch to the server.
Well done.
Now we need to give each of these devices their own IP address to find each other on the network.
PC - 192.168.1.100
Switch - no need for an IP address
Server - 192.168.1.254
Lets enter these IP addresses to the devices
Click on the PC0 icon
This box will come up
more tutorials on www.mooict.com
This is the configure screen for the devices.
We will go in to detail about this page later.
Click on config on the top
Now click on FASTETHERNET0 on the left.
more tutorials on www.mooict.com
Enter the IP address for the pc in the following BOX with says IP address and press enter
192.168.1.100 and press enter.
Once you pressed enter it will give you the subnet MASK address automatically. No need to worry
about that. Close the PC0 config Screen.
Now the server. Click on the server ICON.
more tutorials on www.mooict.com
you will see the configuration screen
click on config on top
more tutorials on www.mooict.com
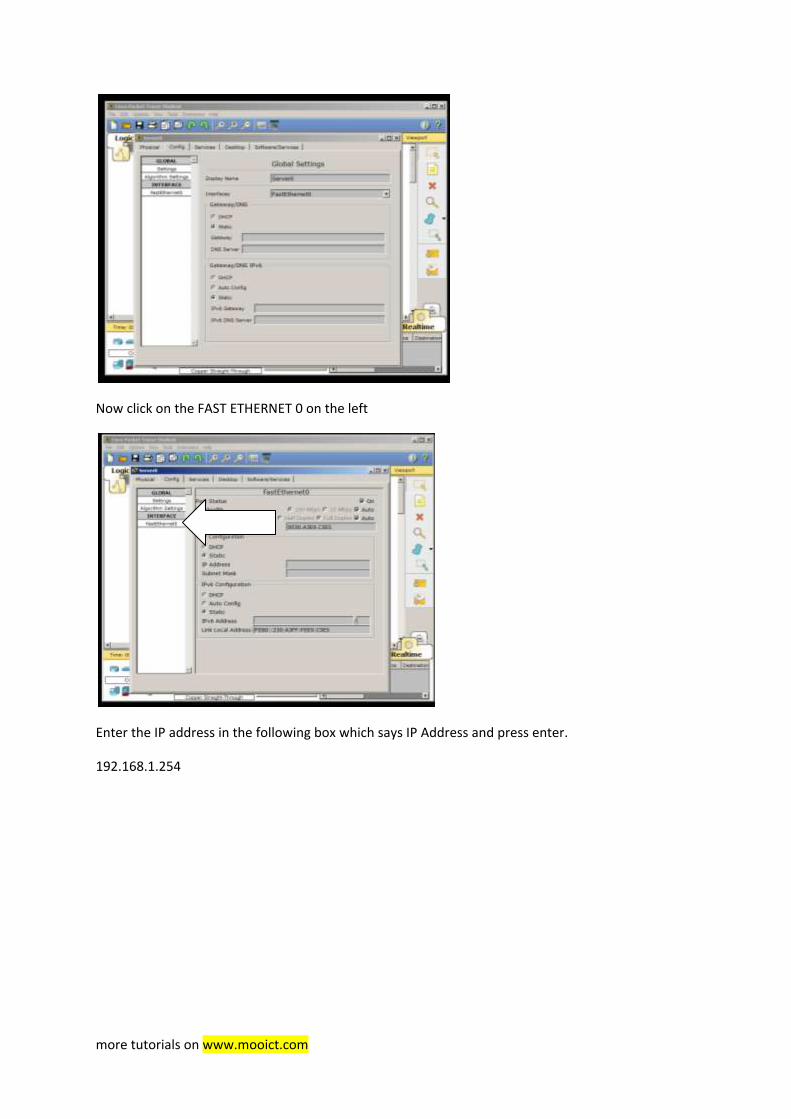
Now click on the FAST ETHERNET 0 on the left
Enter the IP address in the following box which says IP Address and press enter.
192.168.1.254
more tutorials on www.mooict.com
Subnet mark address will be filled automatically.
Well done thus far.
Check so far
you create a small LAN with one device and one server
connecting both through a switch
Given IP address for both
Now what?
We need to check if they are communicating in the network.
Packet tracer has its own MSDOS installed in the pc we will ping the server to check if it responds to
the PC.
Click on the PC icon and go to the configuration screen.
more tutorials on www.mooict.com
Click on the DESKTOP tab on the top.
This PC comes with its own apps cool right.
Now click on the COMMAND PROMP icon.
more tutorials on www.mooict.com
type
ping 192.168.1.254 and press enter.
that is our server address
The server has replied to our ping. It means the ports are open for upload and download
communication between the devices.
Now we need to name our devices so we know which is which.
At the moment its PC0 Swtch0 and Server0
This information doesnt help anyone.
Lets fix it.
more tutorials on www.mooict.com
Click on the where it says PC0. It will automatically go in the typing screen which will allow you to
rename the device on screen.
Name the PC my room PC and click away it will register the new name to the device.
Name the switch Main Switch
Name the server My Server.
You screen should look like this.
more tutorials on www.mooict.com
Now do the following Tasks to the LAN.
Add two more PC
Name them Work PC and Games PC
Work PC IP address will be 192.168.1.101
Games PC IP address will be 192.168.1.102
Connect them both to the switch using the Copper Straight Through wire.
Configure their IP address in the config screen as you have with the first PC.