51
Irfan Dhia Irsyad PT Validata Teknologi, Bandung, Indonesia MUM Indonesia 2016, Jakarta Create Your Own Secure VPN Connection Using OpenVPN

Irfan Dhia Irsyad
PT Validata Teknologi, Bandung, Indonesia
MUM Indonesia 2016, Jakarta
Create Your Own Secure VPN
Connection Using OpenVPN

Biodata Pribadi
– Irfan Dhia Irsyad
– Bandung
– 28 Oktober
– Jl. Cihampelas Blk. 16 Komp. Perumahan
Flat Kimia Farma No. B.09 Kota Bandung
– Server Architect at PT Validata Teknologi, Insan Mulia Building Jl. Soekarno Hatta No. 550 Bandung
– IT Consultant based in Bandung
– 085797246688
– MTCNA
– Find me on all social media : irdhirs
Why?
• All available infrastructures can’t reach existing location
• ISP difference at each spot
• Limited at budgeting
• Free, but secure
• etc.

How To Create It?
• Certificate creation
– Generate in OpenSSL (linux server required)
– Generate in MikroTik router
• Import the certificates
• Set OpenVPN server at head office side
• Set OpenVPN client at branch office side
• Add network routing
• Configuration testing

The Topology

CERTIFICATE CREATION USING OPENSSL
Certificate Creation Using OpenSSL
• Using linux server with OpenSSL installed before
• Certificate creation steps :
– Generate CA Private Key & CA Certificate Pair
– Generate Private Key/Certificate Pair for server side
– Generate Private Key/Certificate Pair for client side
– Certificate function testing
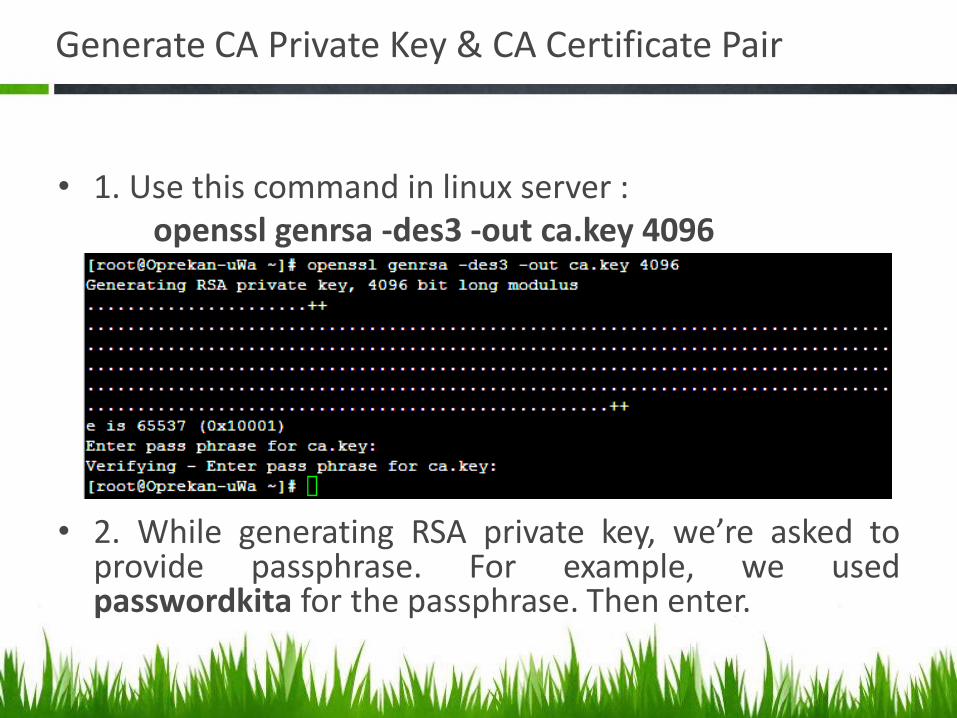
Generate CA Private Key & CA Certificate Pair
• 1. Use this command in linux server : openssl genrsa -des3 -out ca.key 4096 • 2. While generating RSA private key, we’re asked to
provide passphrase. For example, we used passwordkita for the passphrase. Then enter.

Generate CA Private Key & CA Certificate Pair
3. Generate CA Certificate file using this command : openssl req -new -x509 -days 3650 -key ca.key -out ca.crt
4. Provide the passphrase which is created before : passwordkita. Then provide the information needed for CA Certificate such as Common Name (CN), Organization, State or province, etc.

Generate CA Private Key & CA Certificate Pair
• Notes : Several RouterOS version doesn’t support certificate private keys with .key extension, but supports keys with .pem extension. Generate it using this command :
openssl req -new -key ca.key -out ca.pem

Generate CA Private Key & CA Certificate Pair
• Provide the information needed.
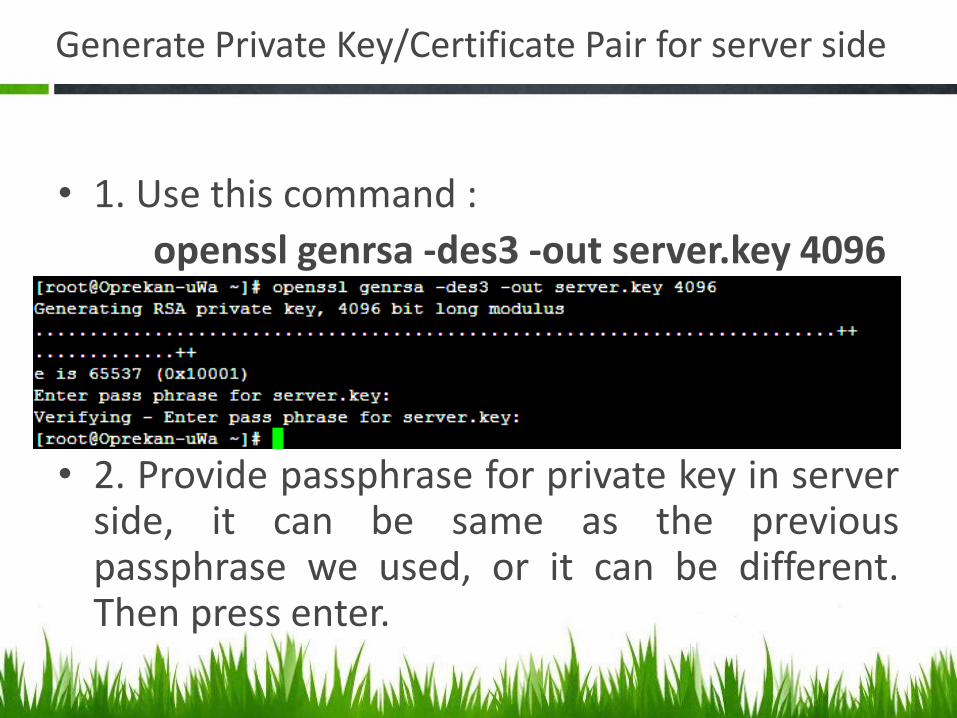
Generate Private Key/Certificate Pair for server side
• 1. Use this command :
openssl genrsa -des3 -out server.key 4096
• 2. Provide passphrase for private key in server side, it can be same as the previous passphrase we used, or it can be different. Then press enter.

Generate Private Key/Certificate Pair for server side
• 3. Provide the information just like before. But for your attention that you must make a difference for Common Name. For example, if we provide it with niagateknologi.net before, for this time we use different name, such as server.

Generate Private Key/Certificate Pair for server side
• 5. Generate the server certificate using : openssl x509 -req -days 3650 -in server.csr -CA ca.crt -CAkey ca.key -set_serial 01 -out server.crt
• 6. Input the CA key password : passwordkita, then press enter. And the server certificates are ready to use.

Generate Private Key/Certificate Pair for server side
• Notes : Several RouterOS version doesn’t support certificate private keys with .key extension, but supports keys with .pem extension. Generate it using this command :
openssl req -new -key server.key -out server.pem

Generate Private Key/Certificate Pair for server side
• Provide the information just like before.
Generate Private Key/Certificate Pair for client side
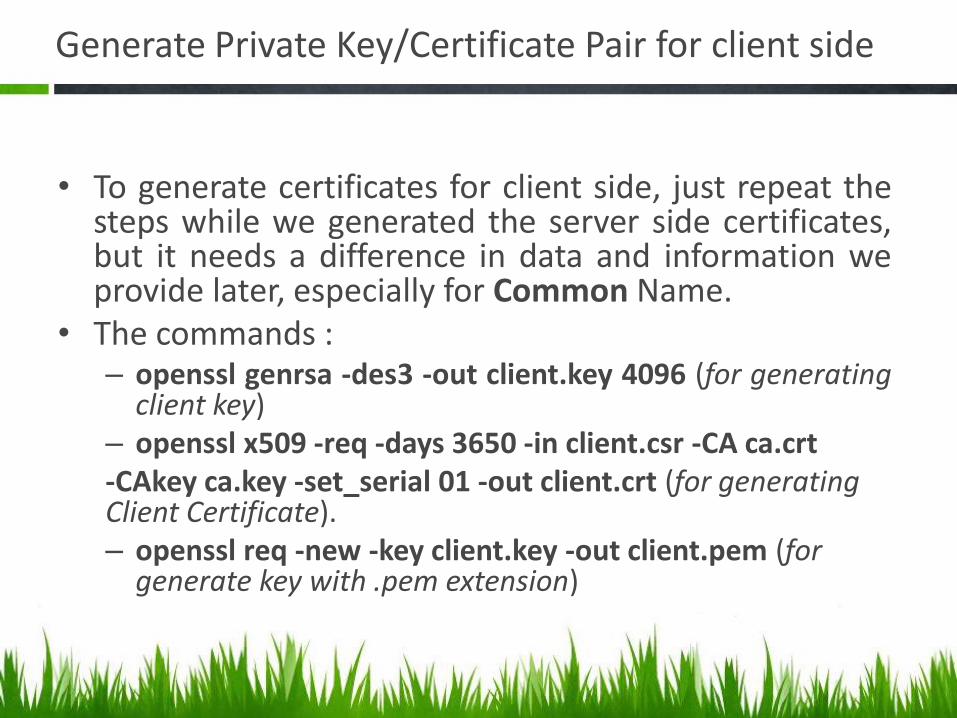
• To generate certificates for client side, just repeat the steps while we generated the server side certificates, but it needs a difference in data and information we provide later, especially for Common Name.
• The commands : – openssl genrsa -des3 -out client.key 4096 (for generating
client key) – openssl x509 -req -days 3650 -in client.csr -CA ca.crt -CAkey ca.key -set_serial 01 -out client.crt (for generating Client Certificate). – openssl req -new -key client.key -out client.pem (for
generate key with .pem extension)

Certificate Function Testing
• To test if the certificates we generated before are working or not, use these commands :
– openssl x509 -noout -text -in server.crt --purpose
– openssl x509 -noout -text -in client.crt --purpose

Certificate Function Testing
• Make sure that there is no Error or Warning in Certificate purposes. It’s OK if there is a No expression for the certificate.

CERTIFICATE CREATION USING MIKROTIK ROUTER

Certificate Creation Using Mikrotik Router
• Using commands or features in MikroTik Terminal or WinBox.
• Certification creation steps – Make a template for each certificate (CA, server,
client)
– Certificate signing
– Set sertifikat to be ‘trusted’
– Export certificates to each routers (server or client)

Certificate Creation Using Mikrotik Router
• 1. Go to System > Certificates, Then click ‘Add’ (+) to make CA template.
• 2. Provide the information needed. Then click OK.

Make A Template For Certificates
• 3. CA template has been made.

Make A Template For Certificates
• 4. Add certificate to make Server and Client templates.

Make A Template For Certificates
• 5. Server and Client templates has been made.

Certificate Signing
• Signing process is easier to use terminal because the features is hidden in GUI/WinBox. /certificate
sign CA ca-crl-host=40.50.60.70 name=CA
sign server ca=CA name=server
sign client1 ca=CA name=client1

Set Certificate to be ‘trusted’ & Export Certificates
• For certificates which is not ‘trusted’, use this command :
/certificate
set server trusted=yes
Set CA trusted=yes
• Export certificate to each router (server and client)

IMPORT CERTIFICATES INTO MIKROTIK ROUTER

Import Certificates
• Can use 2 methods
– FTP
– Drag & Drop into Winbox we use this
• Files uploaded to server
– CA (ca.crt & ca.pem/ca.key)
– Server Certificate (server.crt & server.pem/server.key)
• Files uploaded to client
– CA (ca.crt & ca.pem/ca.key)
– Client Certificate (client.crt & client.pem/client.key)
Import Certificates – via Winbox
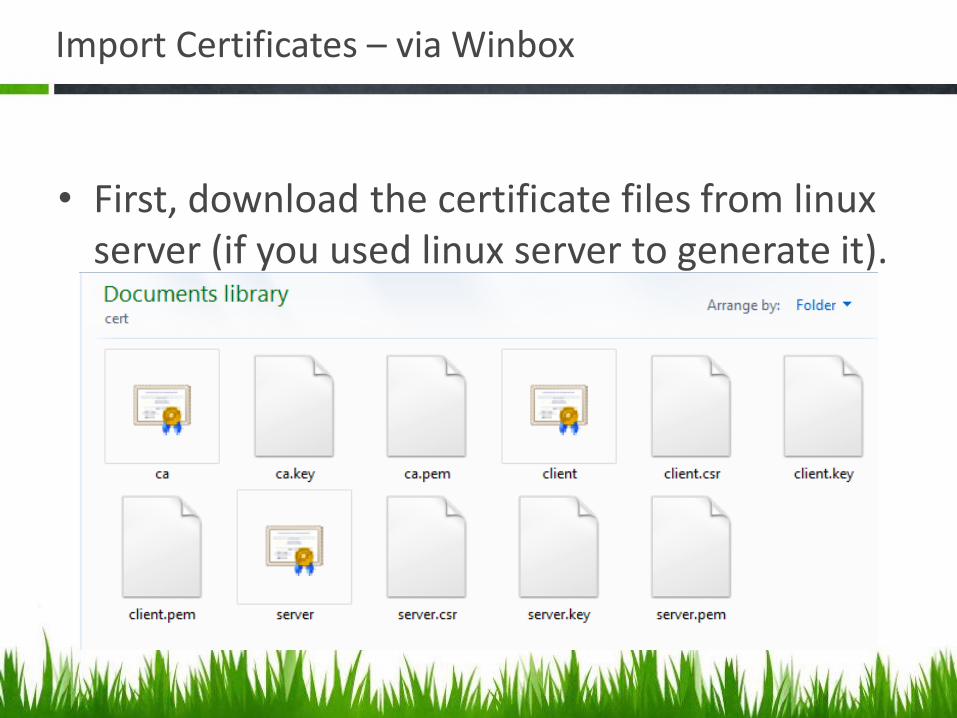
• First, download the certificate files from linux server (if you used linux server to generate it).

Import Certificates – via Winbox
• Drag and Drop CA and Server Certificate files to server side router

Import Certificates – via Winbox
• To import uploaded certificates, click on System > Certificates, then click Import. Choose ca.crt file first, then input the passphrase we provided it before, then click Import.
Import Certificates – via Winbox
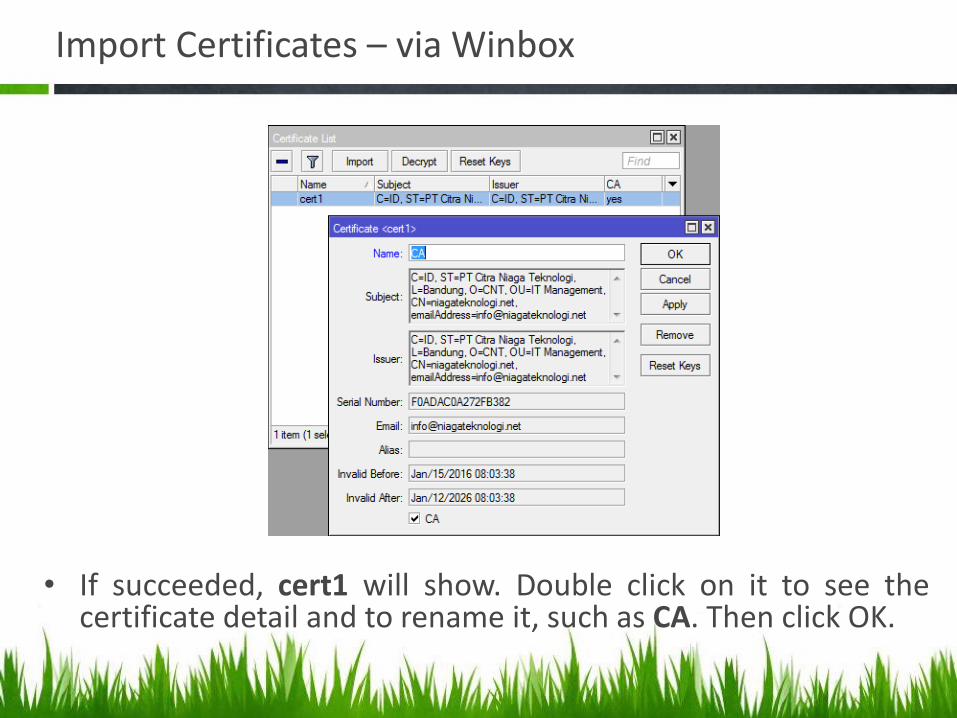
• If succeeded, cert1 will show. Double click on it to see the certificate detail and to rename it, such as CA. Then click OK.

Import Certificates – via Winbox
• Kemudian import file ca.pem/ca.key (tergantung versi RouterOS-nya support untuk ekstensi apa) dan inputkan passphrase-nya. Kemudian klik Import.

Import Certificates – via Winbox
• If the import process succeed, the KR/KT information (depends on RouterOS version) will show.
– K = private key / decrypted private key
– R = rsa
– T = trusted

Import Certificates – via Winbox
• For server certificates, import it according to CA private key importing steps. Make sure the information is KR/KT.

Import Certificates – via Winbox
• For client side, use the same steps just like to import server side certificates. But just upload the client certificates, no need to upload the CA certificates.

Import Certificates – via Winbox
• Make sure the information is KR/KT.

SET OPENVPN SERVER AT HEAD OFFICE SIDE
Set OpenVPN Server at Head Office Side
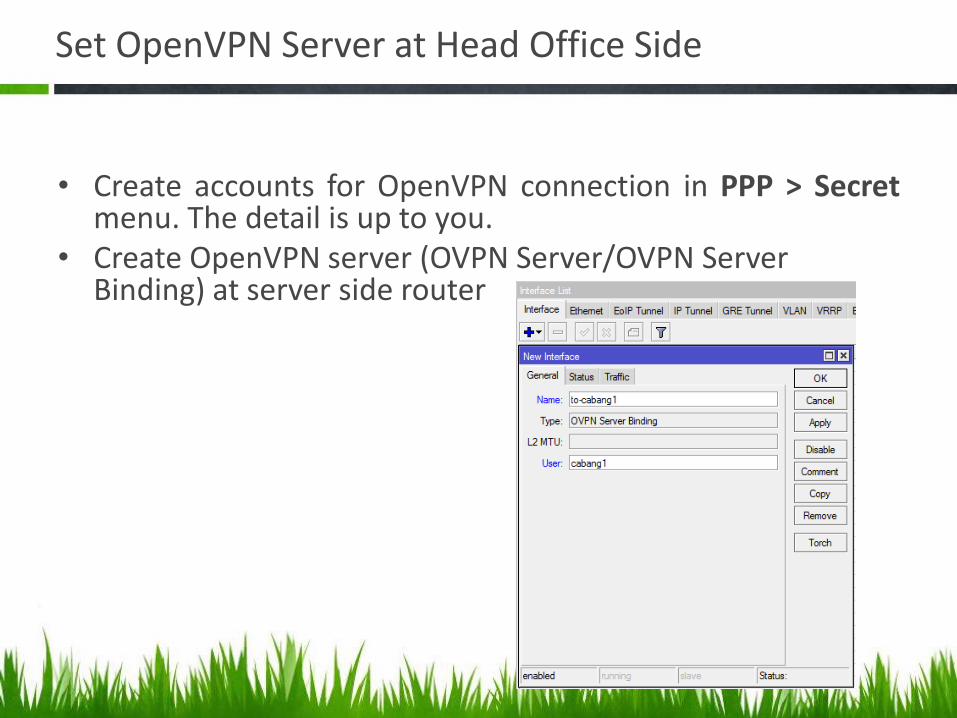
• Create accounts for OpenVPN connection in PPP > Secret menu. The detail is up to you.
• Create OpenVPN server (OVPN Server/OVPN Server Binding) at server side router
• n

SET OPENVPN CLIENT AT BRANCH OFFICE SIDE

Set OpenVPN Client at Branch Office Side
• Set OpenVPN Client at Branch Office Side.

ADD NETWORK ROUTING

Add Network Routing
• In each side, add network routing to each destination.
• Client :
• Server :

CONFIGURATION TESTING
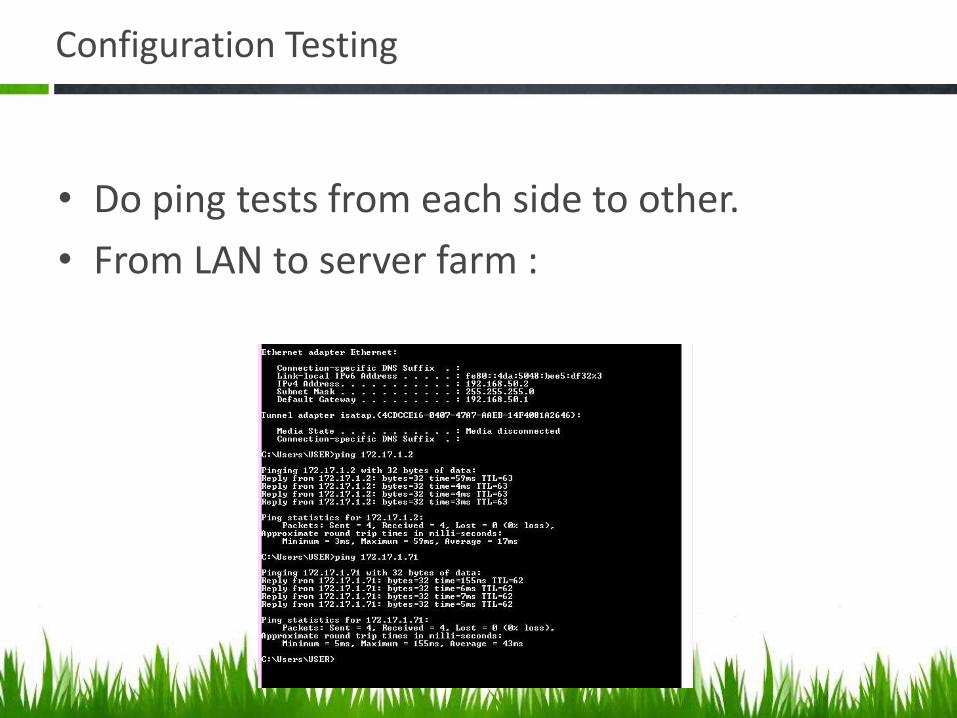
Configuration Testing
• Do ping tests from each side to other.
• From LAN to server farm :

Configuration Testing
• From server to LAN :

Easy, isn’t it?

Overview
• Before

Overview
• After

Terima kasih. ====================
Thank You.


