16
Creating “Scribed” Notes for Attendings
Creating “Scribed” Notes
for Attendings

Creating “Scribed” Notes
for Attendings
• Only use your personal LOGIN ID to access the EHR.
• Student document types are always set as the medical student note so they will need to change the document type while on service/clinic
• When medical students are working in a “scribe” capacity, they are to select the Document Type and template that the attending would select if he or she were documenting in the record.
• The student documents as directed by the attending physician ONLY. The student is acting as a living recorder and not using his or her own assessment and conclusions to document the note. Students MAY NOT accept verbal orders or enter orders as a Scribe.
• Students may only scribe for attending's.
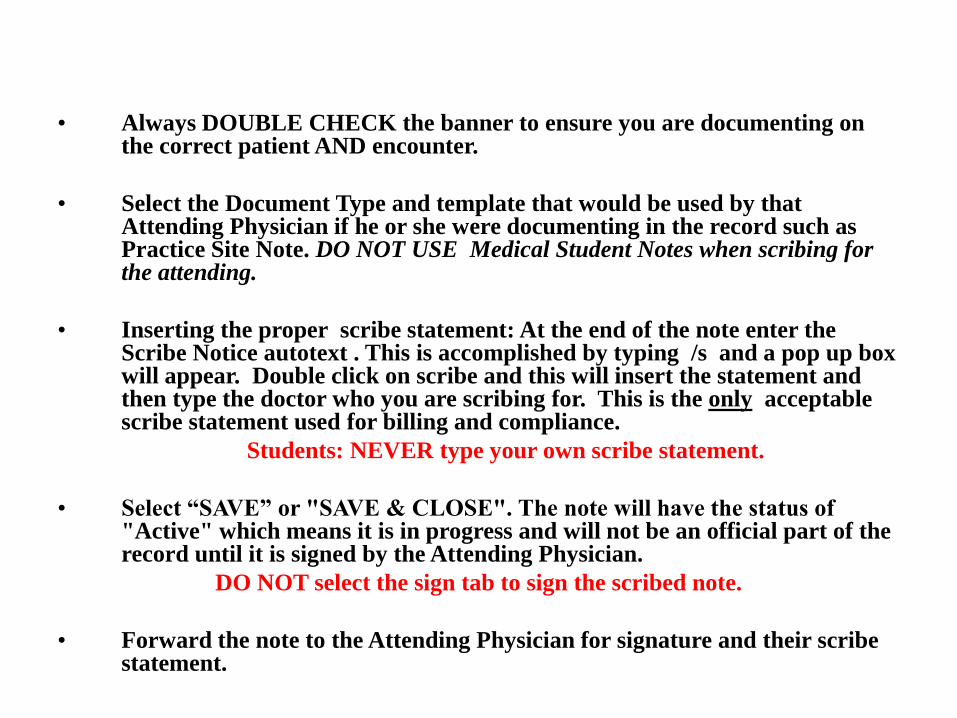
• Always DOUBLE CHECK the banner to ensure you are documenting on the correct patient AND encounter.
• Select the Document Type and template that would be used by that Attending Physician if he or she were documenting in the record such as Practice Site Note. DO NOT USE Medical Student Notes when scribing for the attending.
• Inserting the proper scribe statement: At the end of the note enter the Scribe Notice autotext . This is accomplished by typing /s and a pop up box will appear. Double click on scribe and this will insert the statement and then type the doctor who you are scribing for. This is the only acceptable scribe statement used for billing and compliance.
Students: NEVER type your own scribe statement.
• Select “SAVE” or "SAVE & CLOSE". The note will have the status of "Active" which means it is in progress and will not be an official part of the record until it is signed by the Attending Physician.
DO NOT select the sign tab to sign the scribed note.
• Forward the note to the Attending Physician for signature and their scribe statement.

Entering a Scribed PowerNote
PowerNote is opened from the Documents tab.
In the Documents tab, click on the Add button.
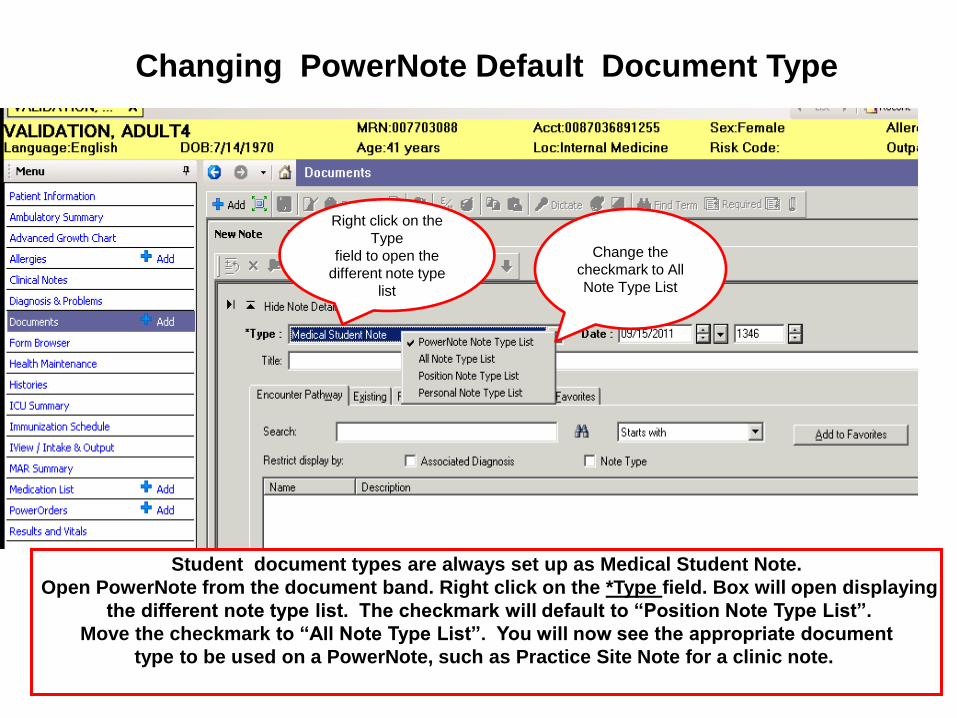
Changing PowerNote Default Document Type
Right click on the
Type
field to open the
different note type
list
Change the
checkmark to All
Note Type List
Student document types are always set up as Medical Student Note.
Open PowerNote from the document band. Right click on the *Type field. Box will open displaying
the different note type list. The checkmark will default to “Position Note Type List”.
Move the checkmark to “All Note Type List”. You will now see the appropriate document
type to be used on a PowerNote, such as Practice Site Note for a clinic note.
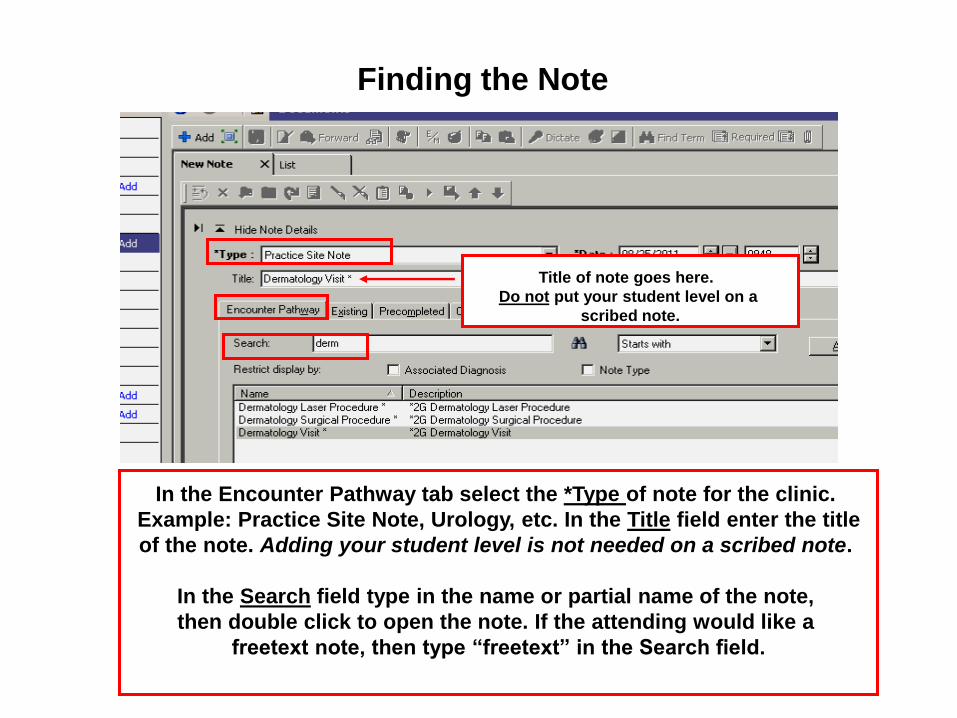
Finding the Note
In the Encounter Pathway tab select the *Type of note for the clinic.
Example: Practice Site Note, Urology, etc. In the Title field enter the title
of the note. Adding your student level is not needed on a scribed note.
In the Search field type in the name or partial name of the note,
then double click to open the note. If the attending would like a
freetext note, then type “freetext” in the Search field.
Title of note goes here.
Do not put your student level on a
scribed note.

Auto Population Window
The auto population window will open. Put a check mark by the
items the attending would want automatically included in the note.
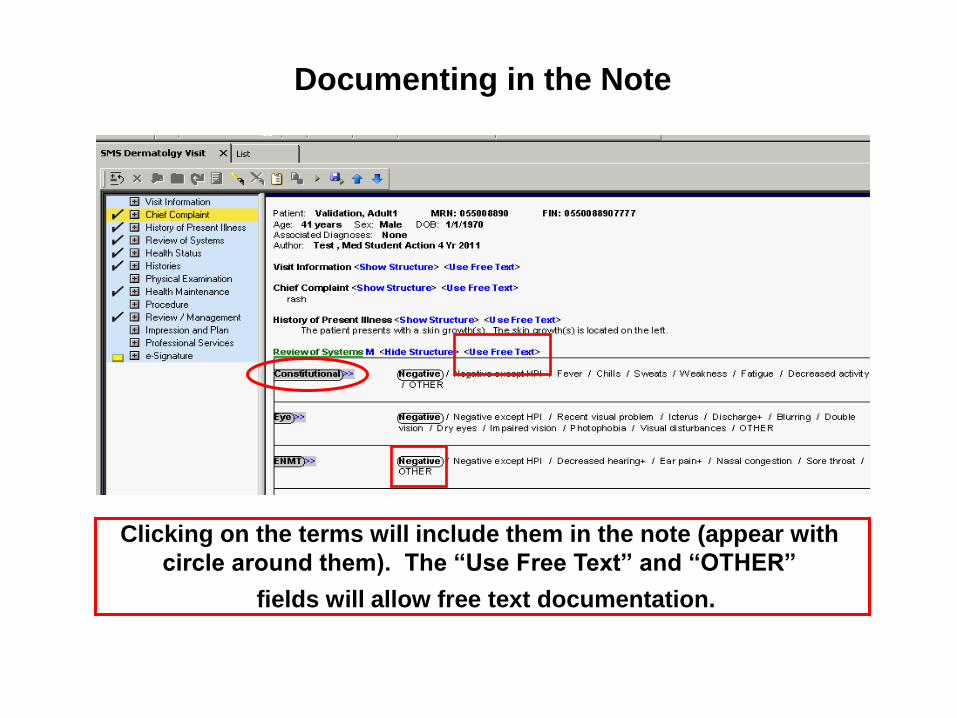
Documenting in the Note
Clicking on the terms will include them in the note (appear with
circle around them). The “Use Free Text” and “OTHER”
fields will allow free text documentation.

Inserting the Scribe Auto Text
At the end of the note, insert the medical student auto text. Type “/s”. The auto text
“/scriber” will display on the list and double click on it to insert it into the note.
This must be done in a scribed note because it indicates who you are scribing
for, and it stamps the note with your name.
Note: Students will longer place their scribe statement at the top of the
document.
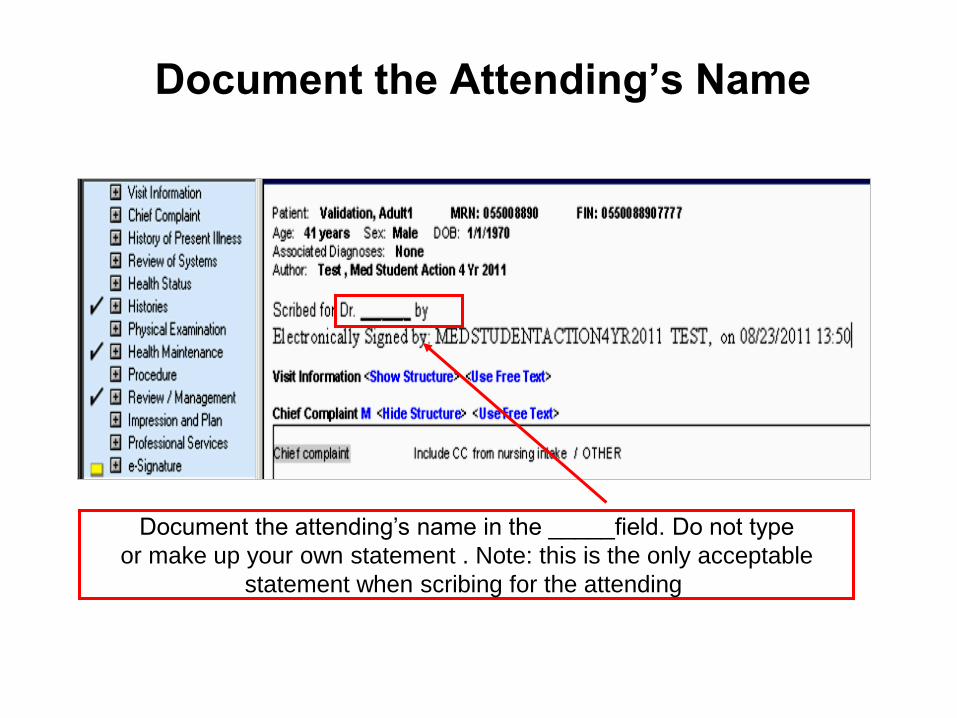
Document the Attending’s Name
The students are to add their student level to the
subject line and the name of the note.
Document the attending’s name in the _____field. Do not type
or make up your own statement . Note: this is the only acceptable
statement when scribing for the attending
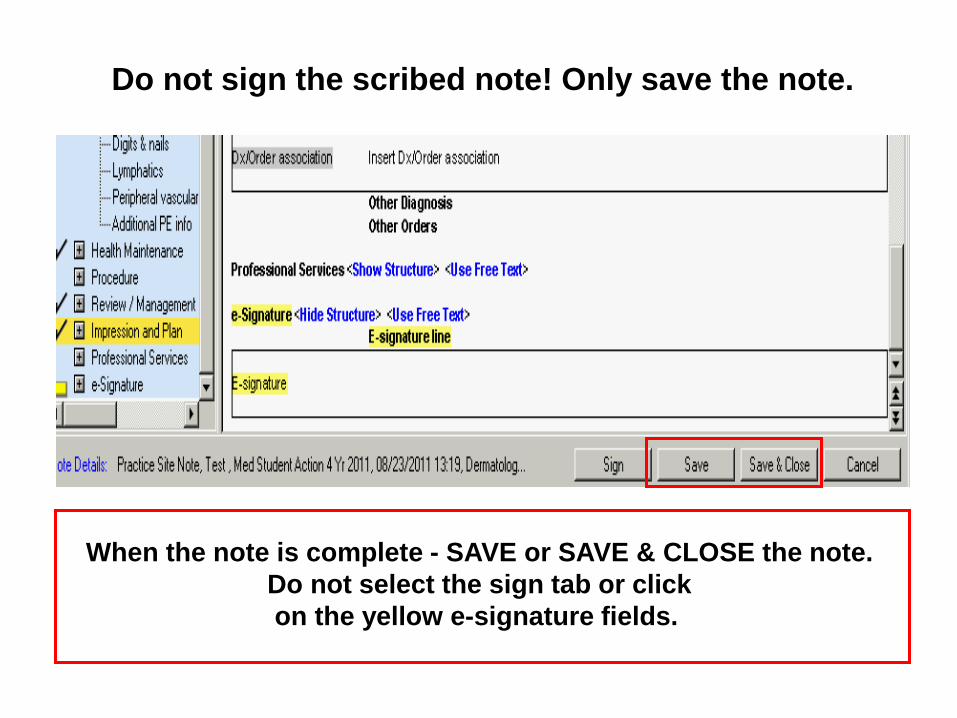
Do not sign the scribed note! Only save the note.
When the note is complete - SAVE or SAVE & CLOSE the note.
Do not select the sign tab or click
on the yellow e-signature fields.
The students are to add their student level to the
subject line and the name of the note.
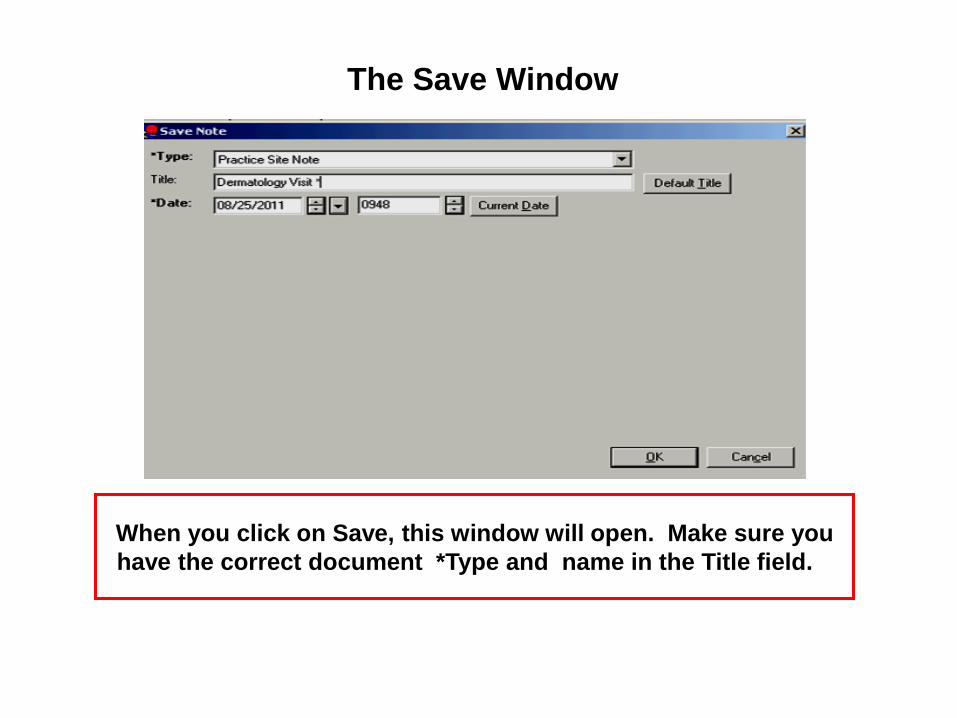
The Save Window
When you click on Save, this window will open. Make sure you
have the correct document *Type and name in the Title field.
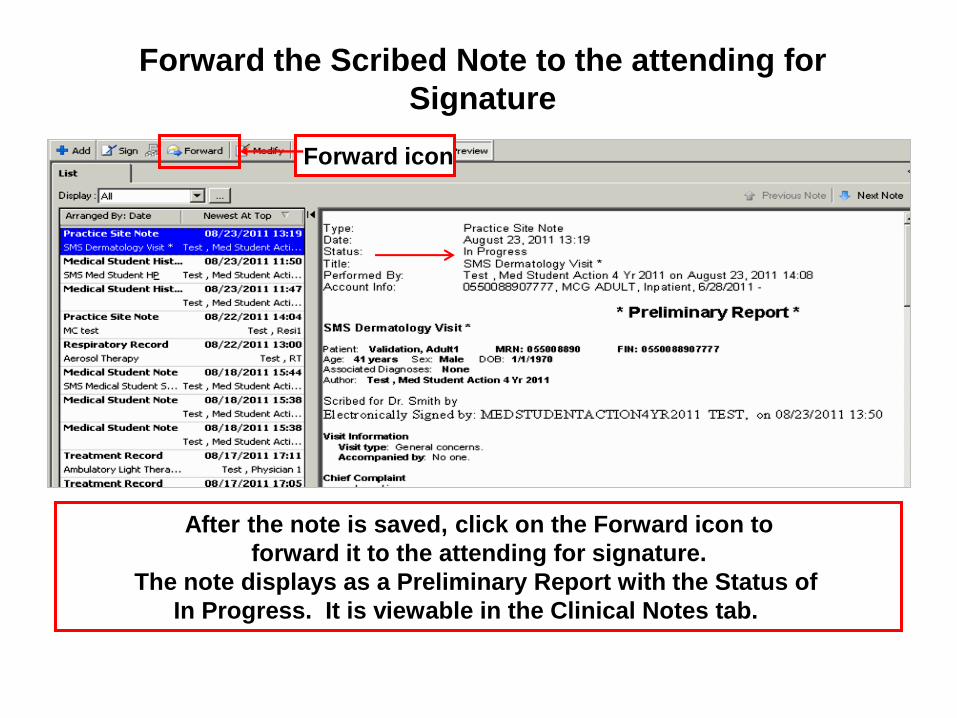
Forward the Scribed Note to the attending for
Signature
After the note is saved, click on the Forward icon to
forward it to the attending for signature.
The note displays as a Preliminary Report with the Status of
In Progress. It is viewable in the Clinical Notes tab.
The students are to add their student level to the
subject line and the name of the note.
Forward icon
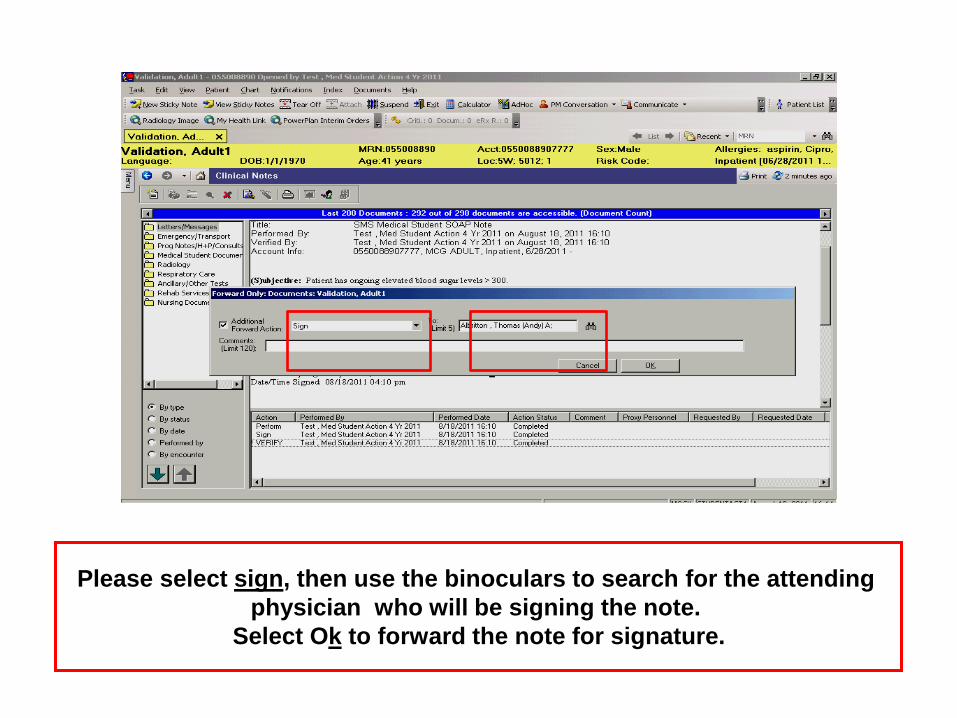
Please select sign, then use the binoculars to search for the attending
physician who will be signing the note.
Select Ok to forward the note for signature.

Modify or In Error Scribed Note
After saving the note, you can modify before it is signed
by the attending by clicking on the Modify button in the
Documents tab. You can also In Error it by clicking on the
In Error button.
The students are to add their student level to the
subject line and the name of the note.
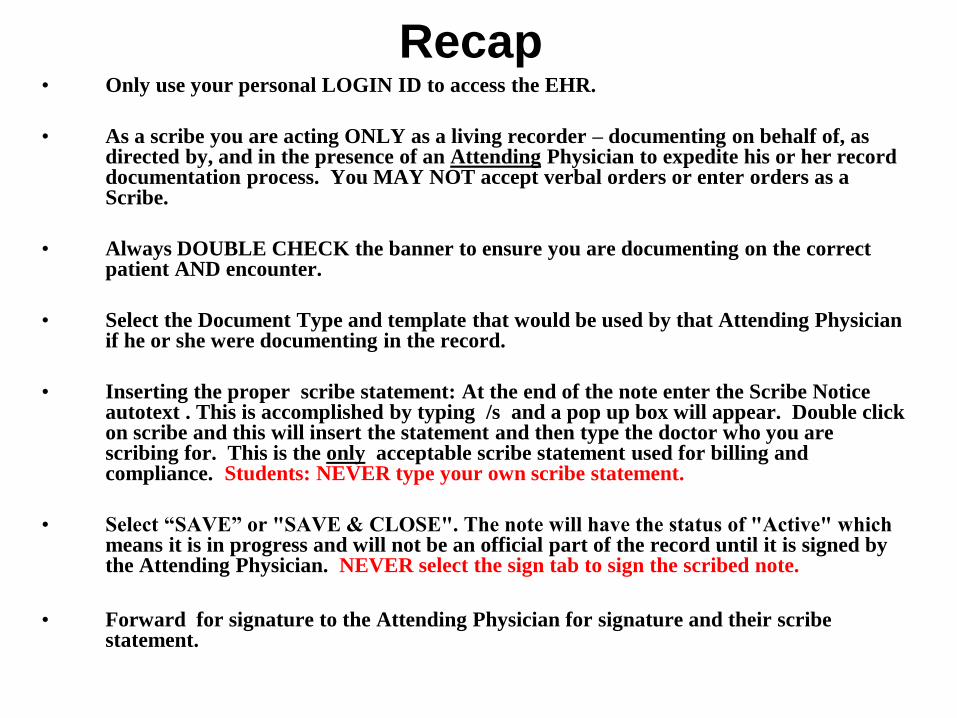
Recap • Only use your personal LOGIN ID to access the EHR.
• As a scribe you are acting ONLY as a living recorder – documenting on behalf of, as directed by, and in the presence of an Attending Physician to expedite his or her record documentation process. You MAY NOT accept verbal orders or enter orders as a Scribe.
• Always DOUBLE CHECK the banner to ensure you are documenting on the correct patient AND encounter.
• Select the Document Type and template that would be used by that Attending Physician if he or she were documenting in the record.
• Inserting the proper scribe statement: At the end of the note enter the Scribe Notice autotext . This is accomplished by typing /s and a pop up box will appear. Double click on scribe and this will insert the statement and then type the doctor who you are scribing for. This is the only acceptable scribe statement used for billing and compliance. Students: NEVER type your own scribe statement.
• Select “SAVE” or "SAVE & CLOSE". The note will have the status of "Active" which means it is in progress and will not be an official part of the record until it is signed by the Attending Physician. NEVER select the sign tab to sign the scribed note.
• Forward for signature to the Attending Physician for signature and their scribe
statement.


