Creating Surveys in SharePoint A few words about good survey design .................................................................................. 1 Points to remember when drafting questions .......................................................................... 1 Initial survey setup................................................................................................................... 1 Creating a survey ................................................................................................................... 1 Understanding how SharePoint handles confidentiality/anonymity ......................................... 2 Revealing user names ............................................................................................................ 3 Allowing multiple responses ................................................................................................... 3 Creating a user-friendly survey name ..................................................................................... 3 Setting user permissions ........................................................................................................ 3 Creating survey questions ...................................................................................................... 4 Adding additional questions .................................................................................................... 4 Open-ended vs. closed-ended questions................................................................................ 4 Taking a closer look at the question type options ................................................................... 4 Editing questions .................................................................................................................... 5 Deleting questions .................................................................................................................. 6 Making it clear what type of data you expect .......................................................................... 6 Inserting default answers ........................................................................................................ 6 Should you make questions required? .................................................................................... 6 Changing the order of questions ............................................................................................. 7 Using the page separator option ............................................................................................. 8 Survey branching..................................................................................................................... 8 Using branching ..................................................................................................................... 8 How branching affects the structure of your survey ................................................................ 9 Getting the survey ready to send out ....................................................................................10 Testing a survey ....................................................................................................................10 Deleting test responses .........................................................................................................10 Preparing a formatted survey link that hides its long URL ......................................................11 Editing hyperlinks ..................................................................................................................12 Sending a survey...................................................................................................................12 Creating an alert to monitor responses ..................................................................................12 Reviewing responses ............................................................................................................13 Exporting survey results to Excel ...........................................................................................14 Creating a linked Excel file ....................................................................................................15
Transcript
Creating Surveys in SharePoint
A few words about good survey design .................................................................................. 1 Points to remember when drafting questions .......................................................................... 1
Initial survey setup................................................................................................................... 1 Creating a survey ................................................................................................................... 1 Understanding how SharePoint handles confidentiality/anonymity ......................................... 2 Revealing user names ............................................................................................................ 3 Allowing multiple responses ................................................................................................... 3 Creating a user-friendly survey name ..................................................................................... 3 Setting user permissions ........................................................................................................ 3
Creating survey questions ...................................................................................................... 4 Adding additional questions .................................................................................................... 4 Open-ended vs. closed-ended questions ................................................................................ 4 Taking a closer look at the question type options ................................................................... 4 Editing questions .................................................................................................................... 5 Deleting questions .................................................................................................................. 6 Making it clear what type of data you expect .......................................................................... 6 Inserting default answers ........................................................................................................ 6 Should you make questions required? .................................................................................... 6 Changing the order of questions ............................................................................................. 7 Using the page separator option ............................................................................................. 8
Survey branching ..................................................................................................................... 8 Using branching ..................................................................................................................... 8 How branching affects the structure of your survey ................................................................ 9
Getting the survey ready to send out ....................................................................................10 Testing a survey ....................................................................................................................10 Deleting test responses .........................................................................................................10 Preparing a formatted survey link that hides its long URL ......................................................11 Editing hyperlinks ..................................................................................................................12 Sending a survey ...................................................................................................................12 Creating an alert to monitor responses ..................................................................................12 Reviewing responses ............................................................................................................13 Exporting survey results to Excel ...........................................................................................14 Creating a linked Excel file ....................................................................................................15
SharePoint surveys offer departments a quick and easy means of gathering opinions about a topic. Surveys can only be created by site designers, and surveys built on a departmental site are only available to users of that site. If your department needs to create a survey to be taken by people in other departments, you can use the Surveys site to do so. Its address is https://ia.albemarle.org/surveys. All County employees (Local Government and School Division) can access this site, but you will need to be granted design permissions in order to create a survey here. For more information contact Elizabeth-Latta Brother ([email protected] or 296-5827 x3447).
A few words about good survey design
Start by identifying your objective. What do you want to find out through this survey? Keep questions simple and to the point. Respondents don’t want to read a novella before answering a question. Good surveys include a mix of questions designed to give you quantitative and qualitative data.
Quantitative: answers will yield specific information that can be analyzed and reported upon. For example, if you ask users what their favorite color is and give them a list of possibilities, you will be able to determine percentages of respondents who favor red vs. pink.
Qualitative: answers will yield descriptive, textual responses Depending on how you set up a question, you can ask a question that yields either type of result. Quantitative: I learn best using:
Classroom instruction
Reading a book/manual
Working with a group
Computer-based training Qualitative: Describe how you learn best:
Points to remember when drafting questions
Don’t ask two questions within the same question—this makes it difficult for respondents to answer the question and for you to interpret the results accurately.
Avoid absolutes like “never” and “always.”
Use precise language—avoid words like “often,” “generally,” “frequently,” because those terms mean different things to different people.
Don’t ask leading questions Leading: We have recently upgraded SharePoint’s features to become a first class tool. What are your thoughts on the new site? Neutral: What are your thoughts on the upgrades to SharePoint?
Always try to include a N/A option—it can improve the quality of data collected, because people are more likely to answer
Initial survey setup
Creating a survey
Click on the Site Actions button on the right side of the page and select Create from the
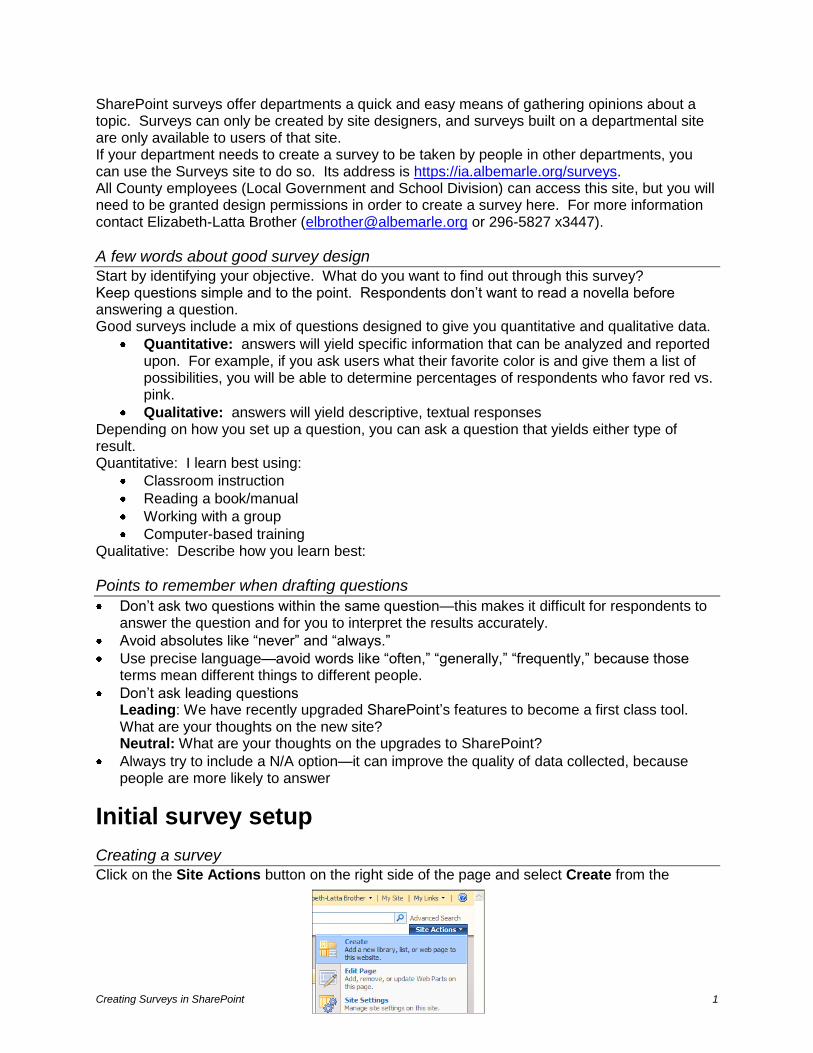
dropdown menu. On the Create page, select Survey from the Tracking column. On the New page that appears next, give the survey a short, URL-friendly name in the Name textbox. You will rename the survey in the next step; a short name with no spaces is critical to creating the URL properly.
Enter a description if you would like to do so; information entered here appears below the name of the survey once you’ve finished creating it. In the Navigation section, specify whether or not a link should be available on the Quick Launch area of the left navigation pane. Note: it’s generally a good idea to select No initially, so that curious users don’t see your survey before you’re ready to open it to the public. In the Survey Options area, specify if user names will be available in survey results and whether users can respond multiple times. See the sections “Understanding how SharePoint handles confidentiality/anonymity” and “Allowing multiple responses” for additional discussion of these options. When you have finished, click on the Next button. The New Question page appears where you can begin the process of building your questions. See the “Adding additional questions” section for additional information on creating your questions. Once you have created your first question, you can click on the Next Question button to create another question, Finish to complete the survey (at least for now!), or Cancel to go to the Customize page.
Understanding how SharePoint handles confidentiality/anonymity
It’s a sad truth that it is impossible for any survey conducted using SharePoint to guarantee anonymity. When you first set up your survey, you can specify that user names not be shown in the results, but the user names are still being gathered, and at any time you can change that setting to reveal user names. Note: “user names” to SharePoint means the network ID used to log onto the computer and access the Intranet. If someone has logged on using a generic ID such as “Training1,” that is what shows up in the results. If someone borrows your computer to take a survey, your user name will show up in the survey results unless that person first logs you off and then logs on as him/herself.
The most accurate thing you can say to survey respondents who ask if results are anonymous is that you guarantee confidentiality, but not anonymity. If true anonymity is critical to collecting accurate data, you will need to use a different survey tool.
Revealing user names
If you decide that you need to see user names after all, you reveal them by following these steps: On the main page for your survey, click on the Settings button and select Survey Settings. In the General Settings column, click on the link for Title, description and navigation. In the Survey General Settings page, go to the Survey Options section and change the selection under “Show user names in results?” from No to Yes. Click on the Save button to finalize your change. When you return to the survey’s homepage, click on the Show all responses link. You will now see a new column, “Created By,” which lists respondents’ user names.
Allowing multiple responses
Generally speaking, you will want to leave the “Allow multiple responses” option set to Yes during the initial development of your survey, so that you and others can test repeatedly, if necessary. The decision on whether or not to allow multiple responses for the live survey depends in large part on your respondents’ access to computers. If you know that each respondent has her own computer and network ID, then you can set that option to No. However, if multiple people will need to take the survey from the same computer/network ID, you will have to leave that option at Yes.
Creating a user-friendly survey name
Once you’ve completed the initial setup of the survey, the first thing you want to do is create a more-descriptive name for your survey. Click on the Settings menu and select Survey Settings. On the Customize page, click on the Title, description and navigation link. Use the Name textbox to give your survey a longer, more-detailed name. Make any other necessary changes and then click on the Save button.
Setting user permissions
Depending on the sensitivity of the survey questions, you may need to tweak SharePoint’s default settings to make sure respondents cannot see others’ responses. Note: the default settings will allow users to view all results, but only be able to edit their own answers. To make sure users can only see their own results: Click on the Settings menu and select Survey Settings. On the Customize page, click on the Advanced Settings link. In the Item-Level Permissions section, change the Read access question to “Only their own.”
Also make sure that the Edit access option is set to “Only their own.” For maximum confidentiality, set the Search area option to No, so that survey results don’t show up in any site searches.
Creating survey questions
Adding additional questions
Once you hit the Finish button after initial survey setup, you have to go into the Customize page to add more questions. Click on the Settings menu and select Survey Settings. On the Customize page, click on the Add a question link below the list of existing questions to reopen the New Question page.
Once you have created your question, click on the Next Question button to add another question, or Finish to return to the Survey Settings page.
Open-ended vs. closed-ended questions
There are two basic types of questions that you can create in a SharePoint survey: Open-ended: questions that give users the chance to answer in their own words rather than selecting from a list of options. Open-ended questions can yield a wealth of information, but they are difficult to quantify and track because they are text based. Examples of open-ended question types:
Single line of text
Multiple lines of text Closed-ended: questions that have a finite set of answers from which the users must choose, although you can often include an “Other” option that allows users to offer different information. Closed-ended questions are easy to analyze and use for data mining, but they can be more difficult to create because the list of possible answers should, ideally, include all possibilities. Examples of closed-ended question types:
Choice
Rating Scale
Taking a closer look at the question type options
Most surveys only use a small number of different types of questions, but in true Microsoft fashion, SharePoint has a lot of different options for the types of questions you can ask.
Answer Question Type
Description How you can customize it
Single line of text
Open Allows users to enter a few words.
You can specify the maximum number of characters.
Multiple lines of text
Open Allows users to type one or more sentences.
You can specify the maximum number of lines and the type of text formatting: Plain text: no formatting at all Rich text: change font or text color and alignment
Enhanced text: add pictures, tables, and hyperlinks
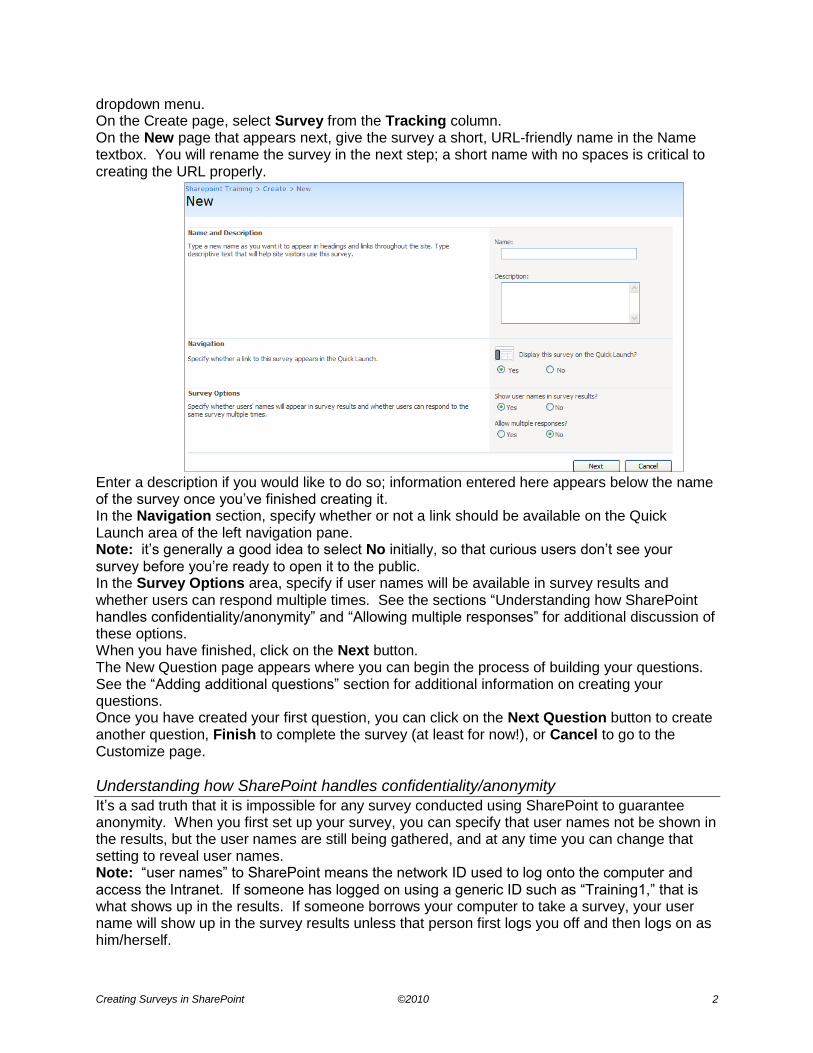
Choice Open or closed
Users choose from a set of selections that you provide.
Users can pick the best answer or answers from choices represented as a dropdown list, set of option buttons, or set of check boxes. You make the question open-ended by allowing users to type their own choice.
Rating scale Closed Users choose their preference on a numeric scale.
This type is often used to obtain feedback on provided services.
Number Open Users enter a numeric value.
You can specify a lower and upper limit as well as the number of decimal places that users can enter.
Currency Open Users enter a monetary value.
Select the currency format based on a geographic region, a lower and upper limit for the value, and the number of decimal places.
Date and time Open Enter a date or a date and time.
Lookup Closed Users choose from an existing list on your site that contains the available choices.
The advantage to this question type is that others can update the list of possible choices without having to have the permissions necessary to build a survey.
Yes/No Closed Users check a box (or not).
This question type is often subject to misinterpretation—you might have better luck getting the right answers by using a Choice type question and having the two choices be Yes and No.
Person or Group
Closed Users choose a user or group who have access to the site as the response.
Similar to a choice answer type because the responses are predetermined.
Page separator
N/A Use this type to insert a break when you want your survey to span multiple pages (rather than one long page that requires users to scroll down).
Icon Set (Snapshot)
Business Data Closed Users select a choice from a data source outside SharePoint.
Not yet available to County users.
Editing questions
Once you have created your questions, you can, fortunately, change almost anything about them, including the question type (to a certain degree) and the text itself. On the survey’s homepage, click on the Settings menu and select Survey Settings.
Click on the text of the question to open it. Once the edit page appears, you can do almost anything you want to the question, including rewriting it completely. Note: some question types, most notably the rating scale, limit your ability to modify the question type any further. If you find yourself in that situation, your best bet will probably be to delete the existing question and create a new one of the correct type. Click on the OK button when you’ve finished to save your changes.
Deleting questions
On the survey’s homepage, click on the Settings menu and select Survey Settings. Click on the text of the question to open it. Click on the Delete button at the bottom of the page. Note: unlike many other places in Microsoft-land, this is one time when no warning appears about deleting something, so if you accidentally hit the Delete button, there’s no stopping it from getting rid of your question, whether you wanted it to or not!
Making it clear what type of data you expect
When building your survey, try to write each question so that it is absolutely clear what sort of response is expected. For example, the two sample questions below ask the same thing but are likely to get different results:
When you did you start working for Albemarle County?
On what date did you start working for Albemarle County? You will probably get a specific year, or a text-based answer such as “early 90s” to the first question, while the second question will hopefully give you more complete data. You can sometimes help your user out by inserting some directional text, such as “Please enter a numerical value.”
Inserting default answers
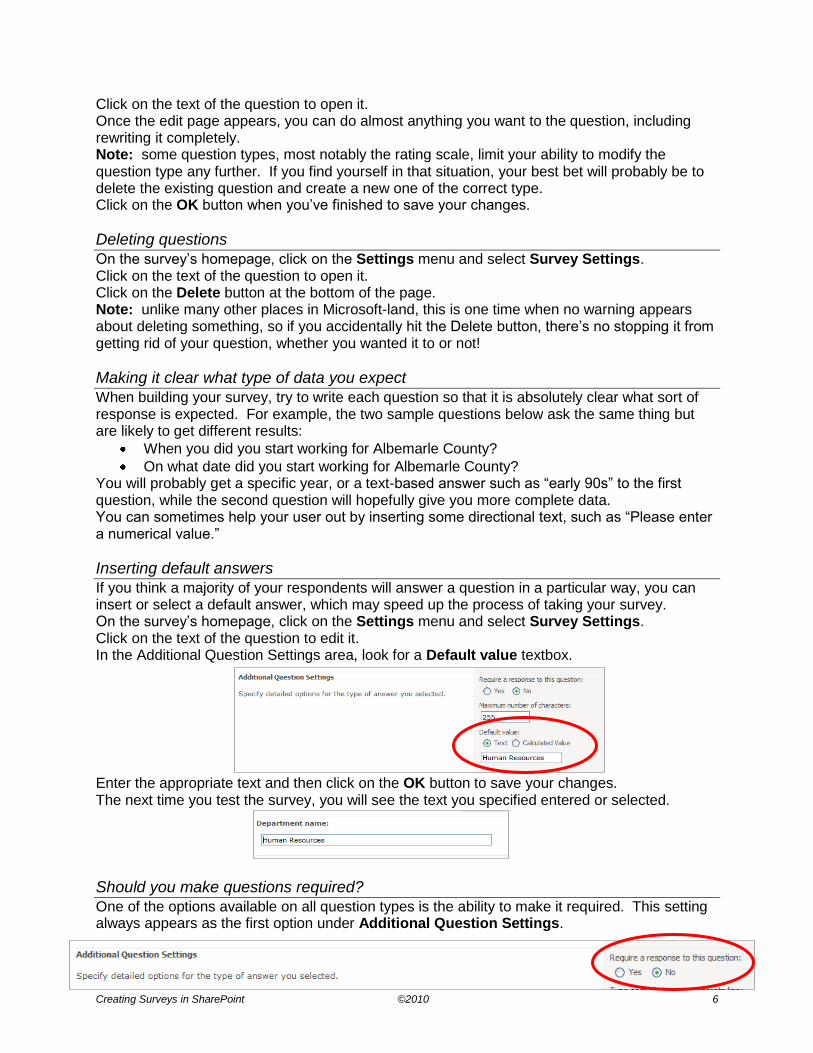
If you think a majority of your respondents will answer a question in a particular way, you can insert or select a default answer, which may speed up the process of taking your survey. On the survey’s homepage, click on the Settings menu and select Survey Settings. Click on the text of the question to edit it. In the Additional Question Settings area, look for a Default value textbox.
Enter the appropriate text and then click on the OK button to save your changes. The next time you test the survey, you will see the text you specified entered or selected.
Should you make questions required?
One of the options available on all question types is the ability to make it required. This setting always appears as the first option under Additional Question Settings.
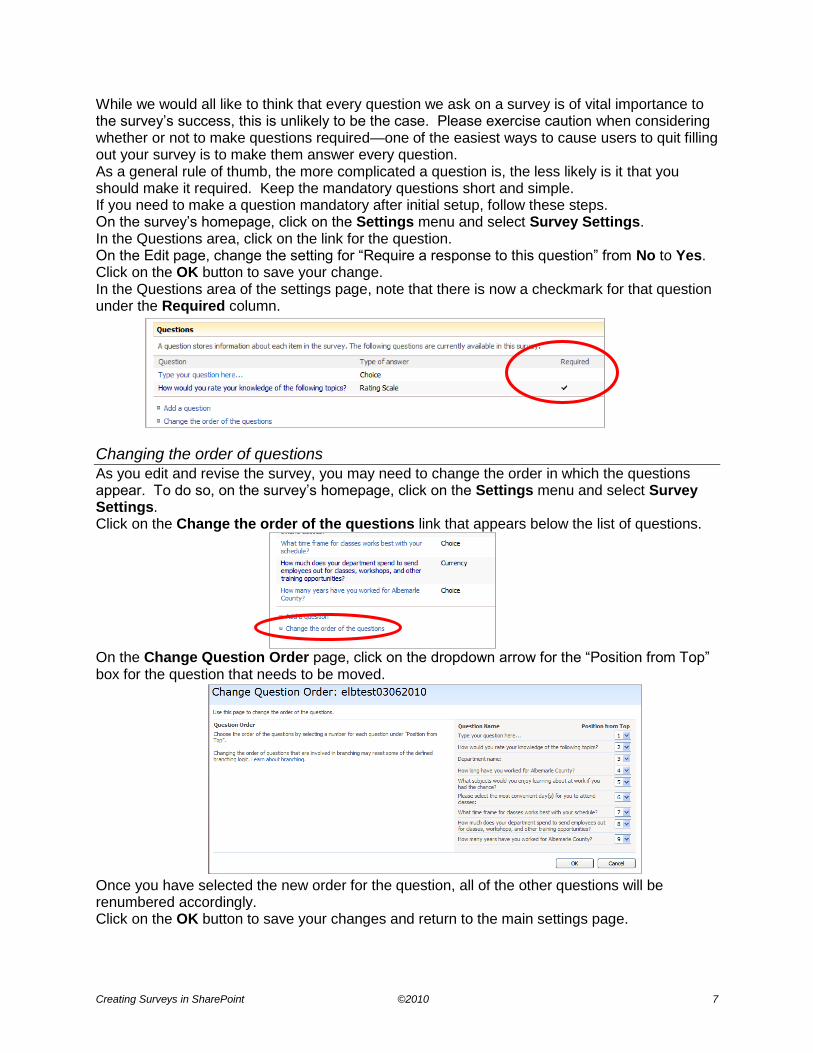
While we would all like to think that every question we ask on a survey is of vital importance to the survey’s success, this is unlikely to be the case. Please exercise caution when considering whether or not to make questions required—one of the easiest ways to cause users to quit filling out your survey is to make them answer every question. As a general rule of thumb, the more complicated a question is, the less likely is it that you should make it required. Keep the mandatory questions short and simple. If you need to make a question mandatory after initial setup, follow these steps. On the survey’s homepage, click on the Settings menu and select Survey Settings. In the Questions area, click on the link for the question. On the Edit page, change the setting for “Require a response to this question” from No to Yes. Click on the OK button to save your change. In the Questions area of the settings page, note that there is now a checkmark for that question under the Required column.
Changing the order of questions
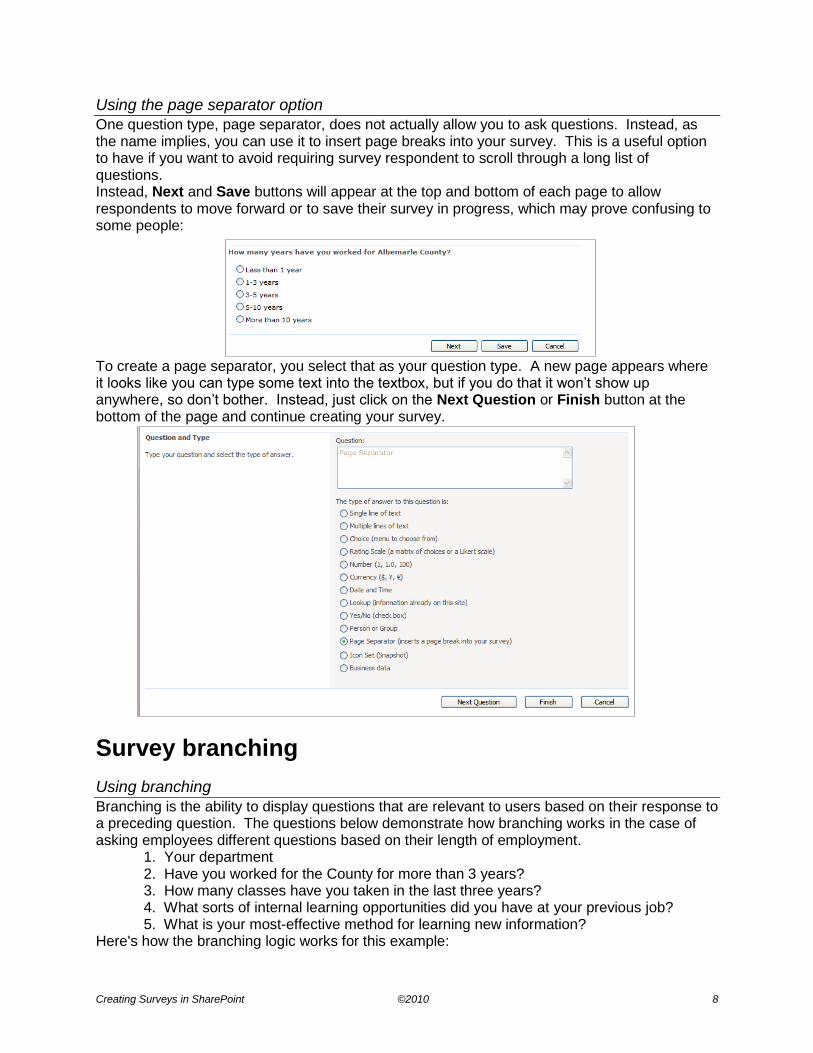
As you edit and revise the survey, you may need to change the order in which the questions appear. To do so, on the survey’s homepage, click on the Settings menu and select Survey Settings. Click on the Change the order of the questions link that appears below the list of questions.
On the Change Question Order page, click on the dropdown arrow for the “Position from Top” box for the question that needs to be moved.
Once you have selected the new order for the question, all of the other questions will be renumbered accordingly. Click on the OK button to save your changes and return to the main settings page.
One question type, page separator, does not actually allow you to ask questions. Instead, as the name implies, you can use it to insert page breaks into your survey. This is a useful option to have if you want to avoid requiring survey respondent to scroll through a long list of questions. Instead, Next and Save buttons will appear at the top and bottom of each page to allow respondents to move forward or to save their survey in progress, which may prove confusing to some people:
To create a page separator, you select that as your question type. A new page appears where it looks like you can type some text into the textbox, but if you do that it won’t show up anywhere, so don’t bother. Instead, just click on the Next Question or Finish button at the bottom of the page and continue creating your survey.
Survey branching
Using branching
Branching is the ability to display questions that are relevant to users based on their response to a preceding question. The questions below demonstrate how branching works in the case of asking employees different questions based on their length of employment.
1. Your department 2. Have you worked for the County for more than 3 years? 3. How many classes have you taken in the last three years? 4. What sorts of internal learning opportunities did you have at your previous job? 5. What is your most-effective method for learning new information?
Here's how the branching logic works for this example:
Question #4 doesn't need any branching logic because it will proceed automatically to #5.
Notes:
Branching works best on the Choice question type, because you have a limited number of responses. Branching doesn’t work for open-ended questions at all, because there is no way to tell what response you will get.
If you are going to use branching in your survey, be sure to test it thoroughly before sending the survey out to all users!
Branching cannot be set when creating the question on the New Question page; it can only be done from the Customize page.
It is possible to create multi-branched surveys. Just be careful to keep track of all the possible paths a user might take so they don’t skip answering a question that is critical to your survey.
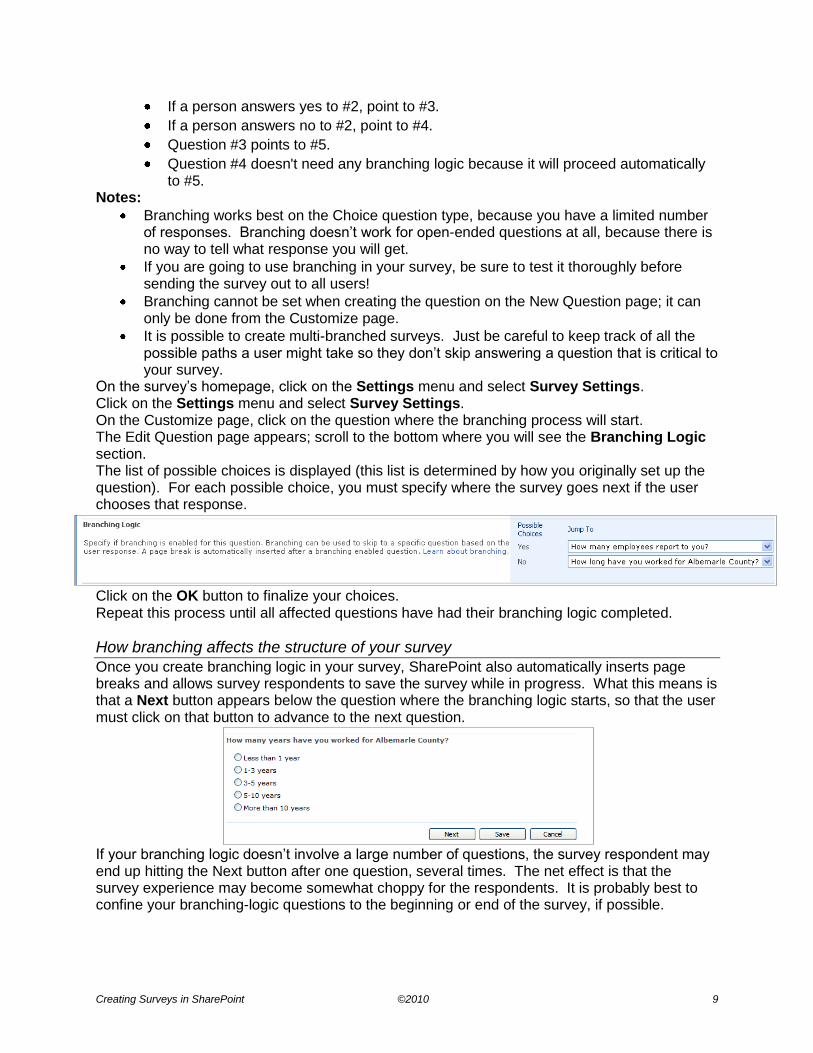
On the survey’s homepage, click on the Settings menu and select Survey Settings. Click on the Settings menu and select Survey Settings. On the Customize page, click on the question where the branching process will start. The Edit Question page appears; scroll to the bottom where you will see the Branching Logic section. The list of possible choices is displayed (this list is determined by how you originally set up the question). For each possible choice, you must specify where the survey goes next if the user chooses that response.
Click on the OK button to finalize your choices. Repeat this process until all affected questions have had their branching logic completed.
How branching affects the structure of your survey
Once you create branching logic in your survey, SharePoint also automatically inserts page breaks and allows survey respondents to save the survey while in progress. What this means is that a Next button appears below the question where the branching logic starts, so that the user must click on that button to advance to the next question.
If your branching logic doesn’t involve a large number of questions, the survey respondent may end up hitting the Next button after one question, several times. The net effect is that the survey experience may become somewhat choppy for the respondents. It is probably best to confine your branching-logic questions to the beginning or end of the survey, if possible.
There are several steps you should take before formally opening your survey:
Take it yourself
Have someone else take it
Delete test responses
Double-check permissions
Test your link before sending your announcement email (if that’s how you’re opening the survey)
Draft and send an email containing a survey link
Testing a survey
Once you have finished setting up a survey, you should take it yourself to test it, and ask a coworker to test it as well. If you have built in branching possibilities, be sure to test every possible combination of responses to make sure that all possibilities work correctly. You can preview a survey without responding to the questions, but if your survey contains branching logic, you will have to respond to test those. Your test responses can easily be deleted before the survey is sent out to users.
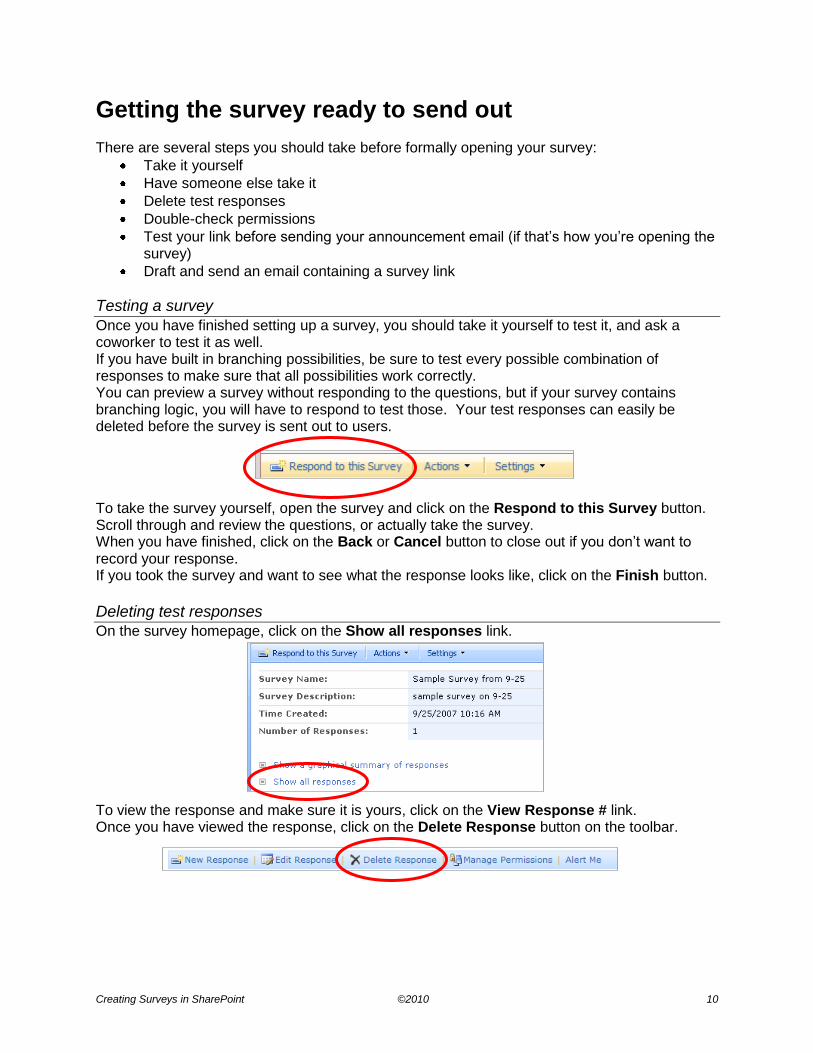
To take the survey yourself, open the survey and click on the Respond to this Survey button. Scroll through and review the questions, or actually take the survey. When you have finished, click on the Back or Cancel button to close out if you don’t want to record your response. If you took the survey and want to see what the response looks like, click on the Finish button.
Deleting test responses
On the survey homepage, click on the Show all responses link.
To view the response and make sure it is yours, click on the View Response # link. Once you have viewed the response, click on the Delete Response button on the toolbar.
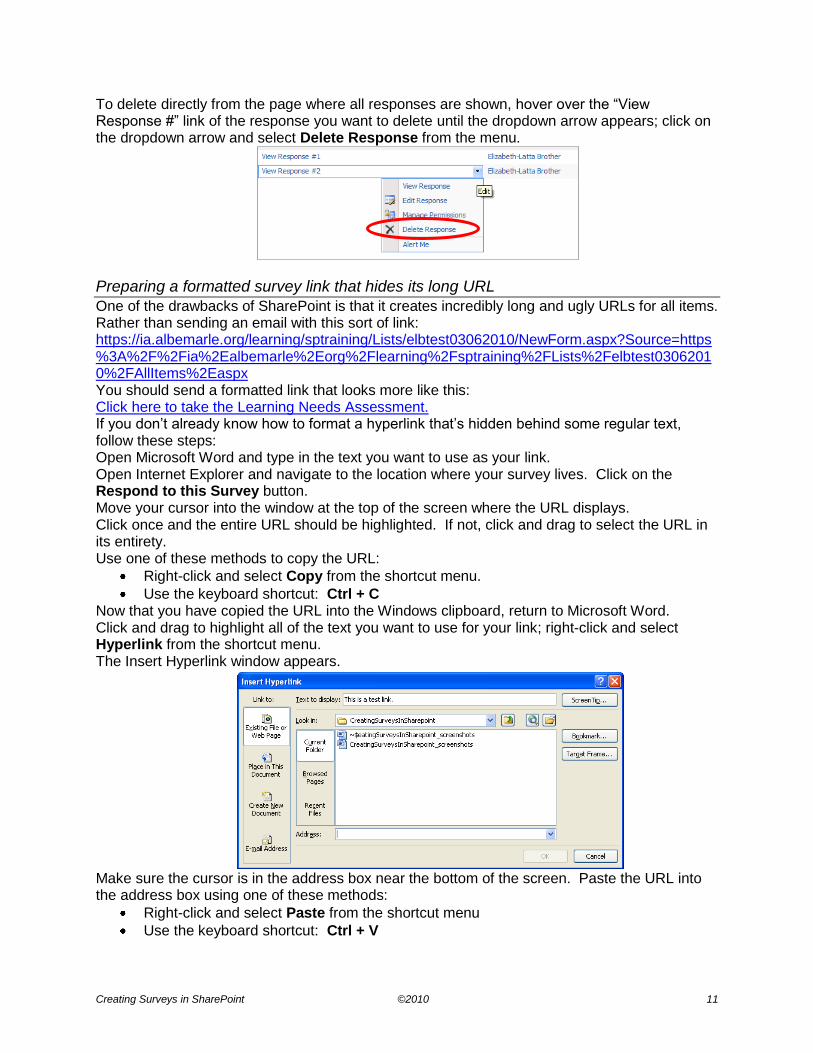
To delete directly from the page where all responses are shown, hover over the “View Response #” link of the response you want to delete until the dropdown arrow appears; click on the dropdown arrow and select Delete Response from the menu.
Preparing a formatted survey link that hides its long URL
One of the drawbacks of SharePoint is that it creates incredibly long and ugly URLs for all items. Rather than sending an email with this sort of link: https://ia.albemarle.org/learning/sptraining/Lists/elbtest03062010/NewForm.aspx?Source=https%3A%2F%2Fia%2Ealbemarle%2Eorg%2Flearning%2Fsptraining%2FLists%2Felbtest03062010%2FAllItems%2Easpx You should send a formatted link that looks more like this: Click here to take the Learning Needs Assessment. If you don’t already know how to format a hyperlink that’s hidden behind some regular text, follow these steps: Open Microsoft Word and type in the text you want to use as your link. Open Internet Explorer and navigate to the location where your survey lives. Click on the Respond to this Survey button. Move your cursor into the window at the top of the screen where the URL displays. Click once and the entire URL should be highlighted. If not, click and drag to select the URL in its entirety. Use one of these methods to copy the URL:
Right-click and select Copy from the shortcut menu.
Use the keyboard shortcut: Ctrl + C Now that you have copied the URL into the Windows clipboard, return to Microsoft Word. Click and drag to highlight all of the text you want to use for your link; right-click and select Hyperlink from the shortcut menu. The Insert Hyperlink window appears.
Make sure the cursor is in the address box near the bottom of the screen. Paste the URL into the address box using one of these methods:
Right-click and select Paste from the shortcut menu
You should see that very long URL appear in the address box, and the OK button in the lower-right corner is no longer grayed out.
Click on the OK button to finalize the hyperlink. To test your hyperlink: Hold down the CTRL key and hover over the link until your cursor turns into a hand. Click on the link and (after a short wait) your survey should open in a new Internet Explorer window.
Editing hyperlinks
If something is wrong with your hyperlink, the best course of action is to remove it and start all over again, rather than trying to edit the existing link. Click and drag to select all of the linked text. Right-click and select Remove Hyperlink from the shortcut menu. The text should no longer be formatted as a hyperlink. You can now start over!
Sending a survey
When it’s time to send out your survey, you can email a link to your survey respondents to make it easy for them to complete the survey. Be sure that your email includes the following information:
a concise description of who is running the survey and what data the survey will collect
an explanation of how this data will be used
how long the survey will take to complete
whether the survey is anonymous/confidential
Creating an alert to monitor responses
Creating an email alert to notify you of survey responses will save you from constantly checking to see if anyone has responded. On the survey homepage, click on the Actions button and select Alert Me from the dropdown menu.
The New Alert page that appears allows you to tailor the email alert to your preferences.
Alert Title: you should be able to leave this alone since it already has the survey name there
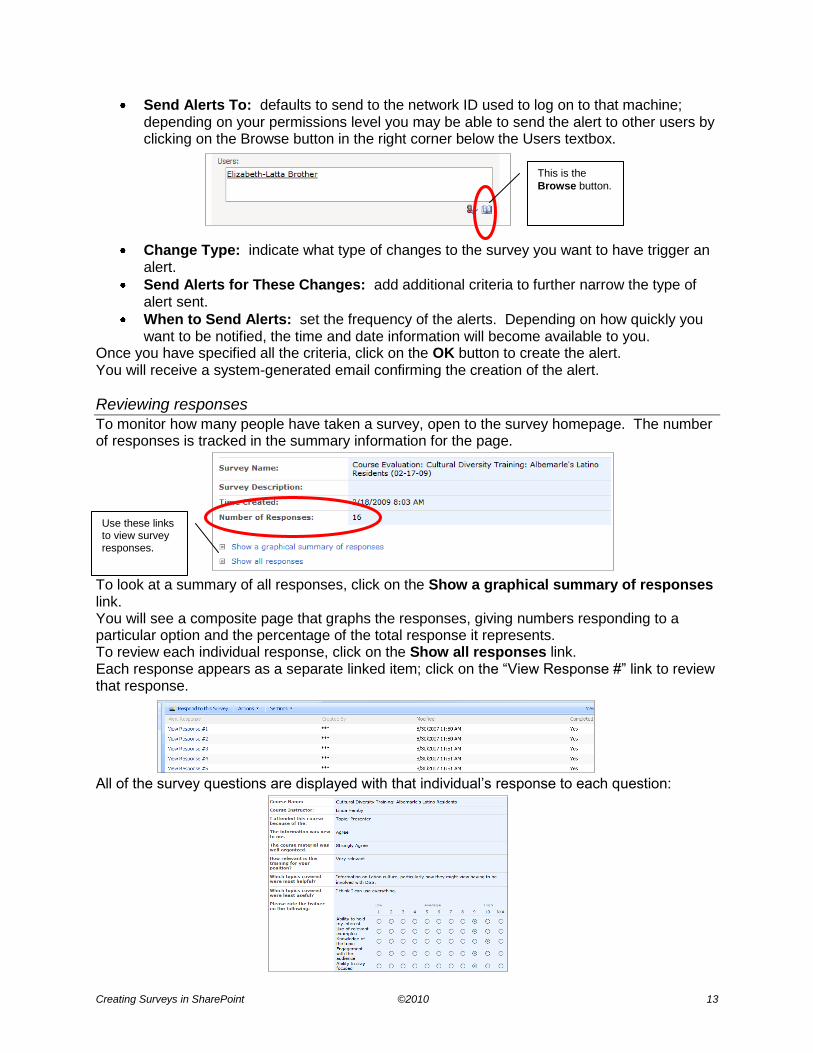
Send Alerts To: defaults to send to the network ID used to log on to that machine; depending on your permissions level you may be able to send the alert to other users by clicking on the Browse button in the right corner below the Users textbox.
Change Type: indicate what type of changes to the survey you want to have trigger an alert.
Send Alerts for These Changes: add additional criteria to further narrow the type of alert sent.
When to Send Alerts: set the frequency of the alerts. Depending on how quickly you want to be notified, the time and date information will become available to you.
Once you have specified all the criteria, click on the OK button to create the alert. You will receive a system-generated email confirming the creation of the alert.
Reviewing responses
To monitor how many people have taken a survey, open to the survey homepage. The number of responses is tracked in the summary information for the page.
To look at a summary of all responses, click on the Show a graphical summary of responses link. You will see a composite page that graphs the responses, giving numbers responding to a particular option and the percentage of the total response it represents. To review each individual response, click on the Show all responses link. Each response appears as a separate linked item; click on the “View Response #” link to review that response.
All of the survey questions are displayed with that individual’s response to each question:
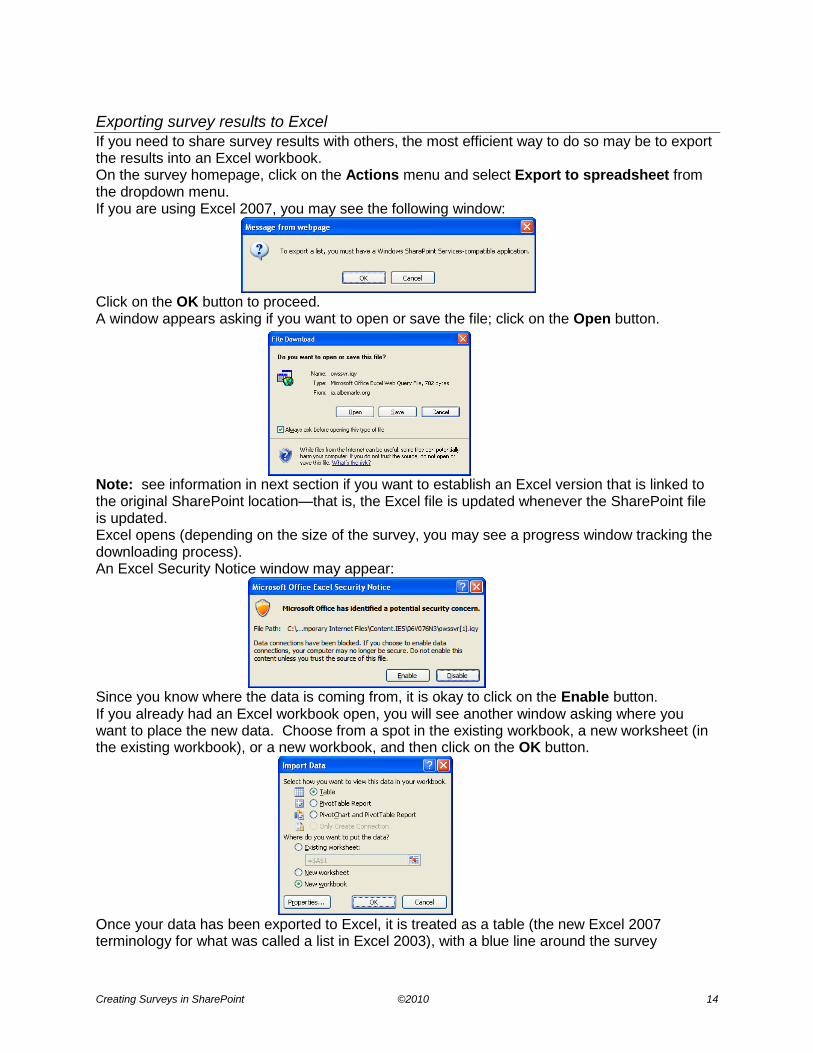
If you need to share survey results with others, the most efficient way to do so may be to export the results into an Excel workbook. On the survey homepage, click on the Actions menu and select Export to spreadsheet from the dropdown menu. If you are using Excel 2007, you may see the following window:
Click on the OK button to proceed. A window appears asking if you want to open or save the file; click on the Open button.
Note: see information in next section if you want to establish an Excel version that is linked to the original SharePoint location—that is, the Excel file is updated whenever the SharePoint file is updated. Excel opens (depending on the size of the survey, you may see a progress window tracking the downloading process). An Excel Security Notice window may appear:
Since you know where the data is coming from, it is okay to click on the Enable button. If you already had an Excel workbook open, you will see another window asking where you want to place the new data. Choose from a spot in the existing workbook, a new worksheet (in the existing workbook), or a new workbook, and then click on the OK button.
Once your data has been exported to Excel, it is treated as a table (the new Excel 2007 terminology for what was called a list in Excel 2003), with a blue line around the survey
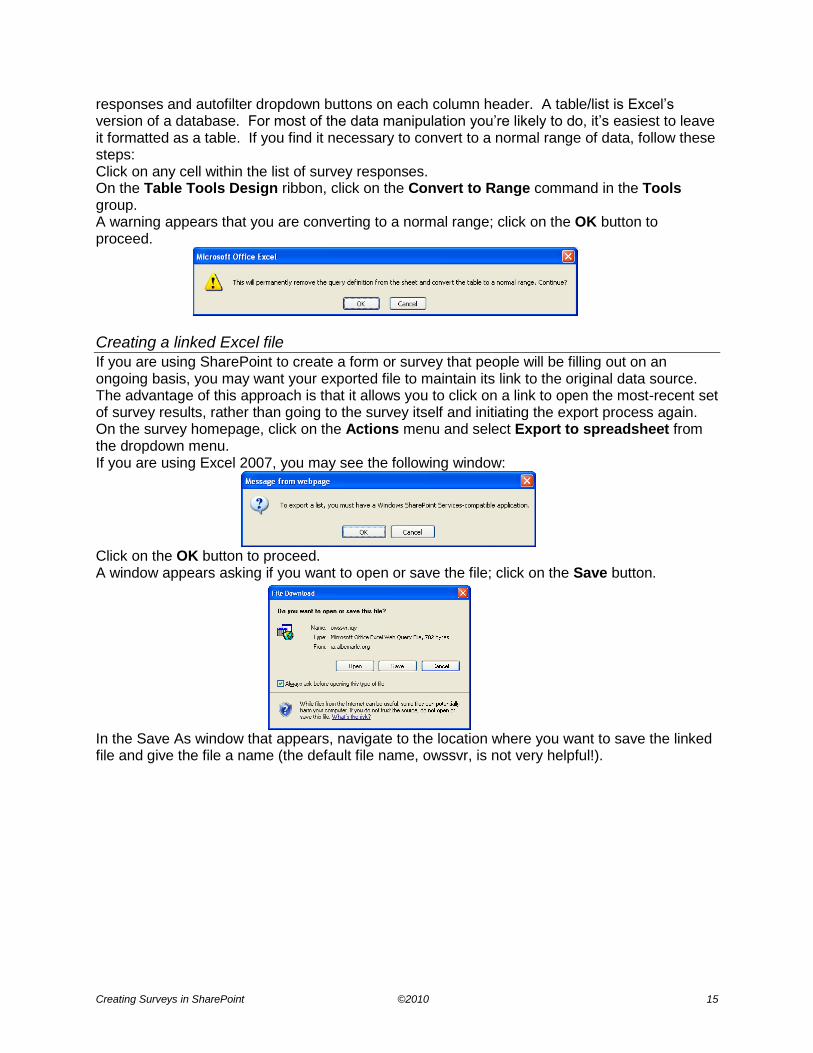
responses and autofilter dropdown buttons on each column header. A table/list is Excel’s version of a database. For most of the data manipulation you’re likely to do, it’s easiest to leave it formatted as a table. If you find it necessary to convert to a normal range of data, follow these steps: Click on any cell within the list of survey responses. On the Table Tools Design ribbon, click on the Convert to Range command in the Tools group. A warning appears that you are converting to a normal range; click on the OK button to proceed.
Creating a linked Excel file
If you are using SharePoint to create a form or survey that people will be filling out on an ongoing basis, you may want your exported file to maintain its link to the original data source. The advantage of this approach is that it allows you to click on a link to open the most-recent set of survey results, rather than going to the survey itself and initiating the export process again. On the survey homepage, click on the Actions menu and select Export to spreadsheet from the dropdown menu. If you are using Excel 2007, you may see the following window:
Click on the OK button to proceed. A window appears asking if you want to open or save the file; click on the Save button.
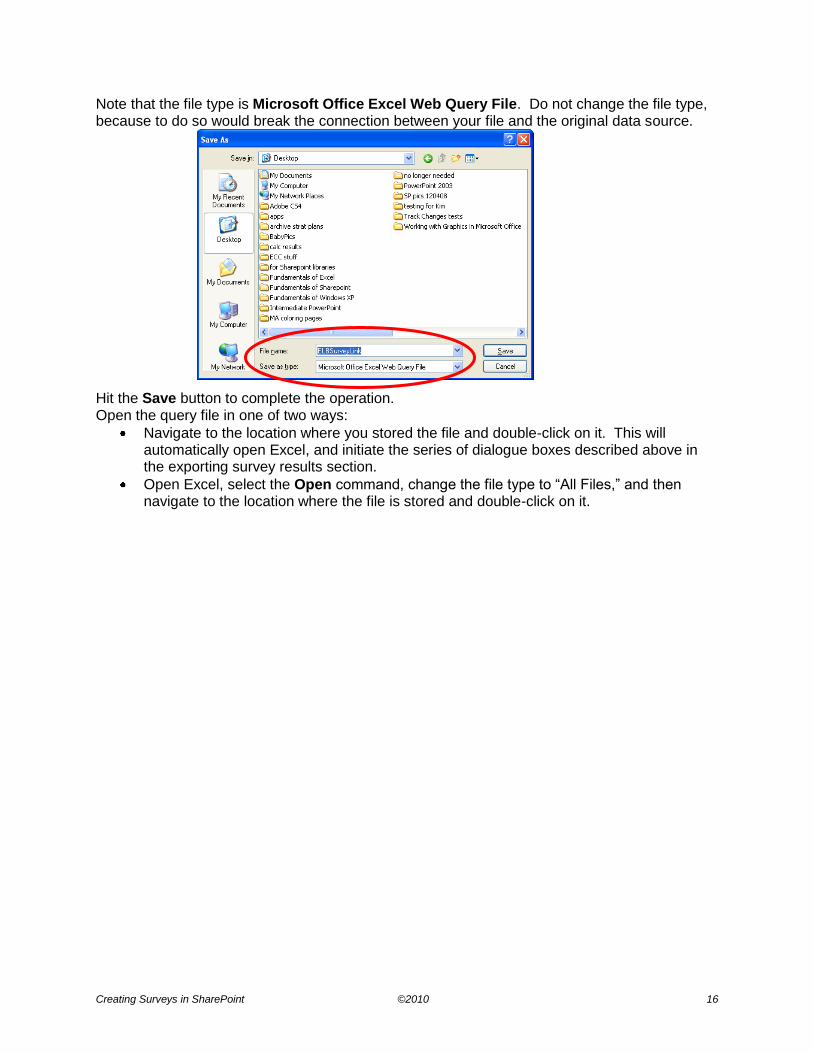
In the Save As window that appears, navigate to the location where you want to save the linked file and give the file a name (the default file name, owssvr, is not very helpful!).
Note that the file type is Microsoft Office Excel Web Query File. Do not change the file type, because to do so would break the connection between your file and the original data source.
Hit the Save button to complete the operation. Open the query file in one of two ways:
Navigate to the location where you stored the file and double-click on it. This will automatically open Excel, and initiate the series of dialogue boxes described above in the exporting survey results section.
Open Excel, select the Open command, change the file type to “All Files,” and then navigate to the location where the file is stored and double-click on it.