Credit/Debit Canadian T42xx Application (for the EVERLINK Host) User Interface Specification September 15, 2009 Document Version 1.0 for Software Release 6.01 Authors : Alex Afonin, Richard West, Howard Russo, Louis Sousa Checked: _______________________ Document Number: Date: ___________________________ NO WARRANTIES OF ANY NATURE ARE EXTENDED BY THIS DOCUMENT. Any product and related material disclosed herein are only furnished pursuant and subject to the terms and conditions of a duly executed Program Product License or Agreement to purchase or lease equipment. The only warranties made by MSC, if any, with respect to the products described in this document are set forth in such License or Agreement. MSC cannot accept any financial or other responsibility that may be the result of your use of the information or software material, including direct, indirect, special or consequential damages. You should be careful to ensure that the use of this information and/or software material complies with the laws, rules, and regulations of the jurisdictions with respect to which it is used.
Transcript
Credit/Debit Canadian T42xx Application
(for the EVERLINK Host)
User Interface Specification September 15, 2009
Document Version 1.0 for Software Release 6.01
Authors : Alex Afonin, Richard West, Howard Russo, Louis Sousa Checked: _______________________ Document Number: Date: ___________________________
NO WARRANTIES OF ANY NATURE ARE EXTENDED BY THIS DOCUMENT. Any product and related material disclosed herein are only furnished pursuant and subject to the terms and conditions of a duly executed Program Product License or Agreement to purchase or lease equipment. The only warranties made by MSC, if any, with respect to the products described in this document are set forth in such License or Agreement. MSC cannot accept any financial or other responsibility that may be the result of your use of the information or software material, including direct, indirect, special or consequential damages. You should be careful to ensure that the use of this information and/or software material complies with the laws, rules, and regulations of the jurisdictions with respect to which it is used.
T42xx– User Interface Specification
M S C Revision 1.0 Page 2 of 84
TABLE OF CONTENTS
REVISION STATUS ............................................................................................................... 4
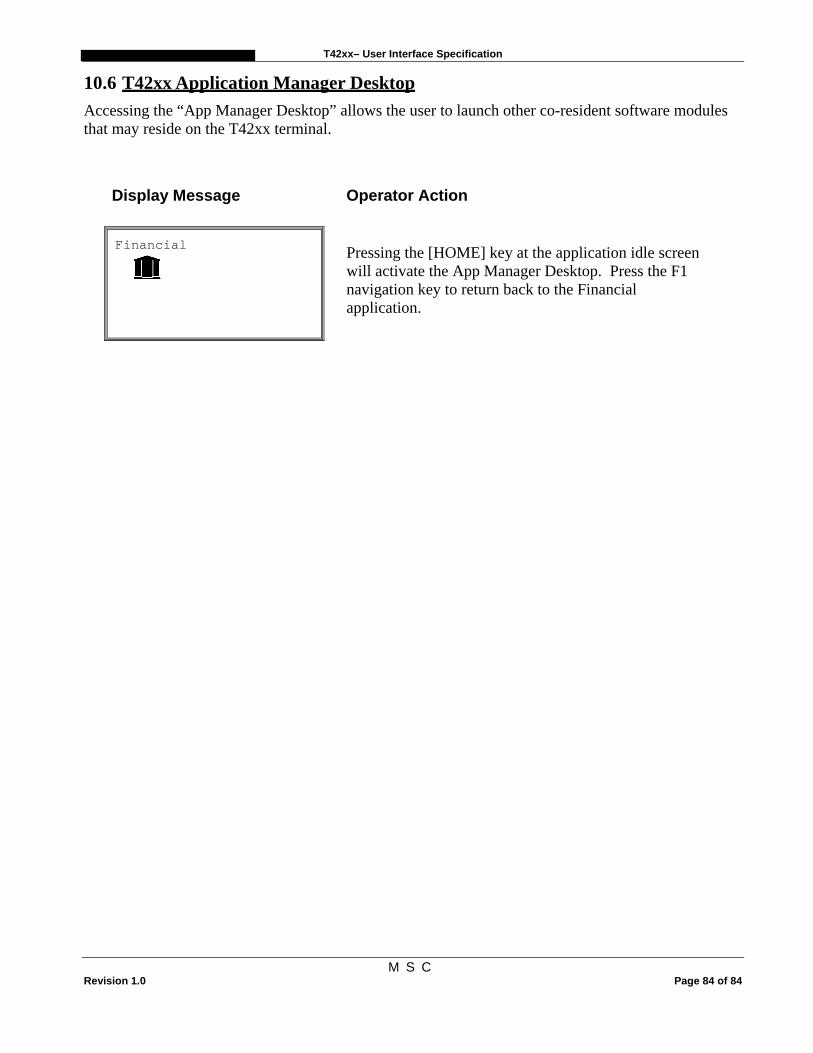
10.4 Training Mode ....................................................................................................................... 81 10.5 Communication Test.............................................................................................................. 83 10.6 T42xx Application Manager Desktop.................................................................................... 84
T42xx– User Interface Specification
M S C Revision 1.0 Page 4 of 84
REVISION STATUS Revision Status Date Description 1.0 Draft Sept 10, 2009 Initial version
T42xx– User Interface Specification
M S C Revision 1.0 Page 5 of 84
1 INTRODUCTION
1.1 Purpose This document describes the user interface functionality for the MSC T42xx Point of Sale Application (from now on referred to as the application or app).
1.2 Aim A primary aim of this document has been to design the UI for generic Credit/Debit POS application running on T42xx hardware.
1.3 Scope The scope of this document is limited to a description of UI within the T42xx POS Application. UIs associated with any other co-resident software modules are excluded and outside the scope of this document. Refer to section 10.6 for information on accessing/launching co-resident software modules through the T42xx Application Manager Desktop.
1.4 Definitions, Acronyms and Abbreviations
ABBREV Description POS Point Of Sale MCR Magnetic Card Reader Off-line A transaction that does not require communication with the Host. On-line A transaction that does require communication with the Host. PIN Personal Identification Number for a banking card. This is a 4- to 12-digit secret code. Host Remote transaction processing back end which the T42xx communicates with App The T42xx POS software UI User Interface Txn Transaction IP Internet Protocol LAN Local Area Network Ether / Ethernet Ethernet LAN protocol, used to access the Internet from a T42xx DHCP Dynamic Host Configuration Protocol (used in Ethernet mode) NIC Network Interface Controller GPRS General Packet Radio Service is a packet oriented mobile (wireless) data service.
T42xx– User Interface Specification
M S C Revision 1.0 Page 6 of 84
2 Overview
2.1 Product Overview The T42xx* terminal is a cost effective, flexible solution ideal for use in financial, retail and service environments. Credit and Debit transactions, are supported within the applications. The T42xx allows transaction receipts to be produced. The saved transactions within the current unsettled\open batch are reviewable via the T42XX display and several different types of printed reports are available.
*Hypercom Optimum T42xx platform consists of 3 model types:
1. T4210 – Dial only terminal 2. T4220 – IP terminal with dial backup 3. T4230 – Wireless GPRS terminal with dial backup
2.2 Transaction Support Several transactions from the major categories, Credit and Debit, are supported by the T42xx.
2.2.1 Credit Transactions
Txn Name
Comments Account # Input Type
Online Monetary*
Credit Sale Credit purchase transaction. Swiped & Keyed
Yes Yes
Credit Return
Reimburse the account holder for the amount of a previously performed credit sale transaction.
Swiped & Keyed
Yes Yes
Credit Void Nullifies a credit sale/return transaction contained in the current batch.
Swiped & Keyed
Yes Yes
Pre-Auth
Pre-authorization of amount and reduces the cardholders option-to-buy. A corresponding completion has to be performed for a monetary transaction to take effect.
Swiped & Keyed
Yes No
Pre-Auth Completion
Must be performed to complete the pre-auth once the total amount has been ascertained.
Swiped & keyed
Yes Yes
Force Post Credit purchase authorized by other means. This transaction is settled via the close.
Swiped & keyed
Yes Yes
Note: *Monetary transactions are captured within the terminal memory, affect totals, appear in all reports and are available for review via the T42xx reports.
T42xx– User Interface Specification
M S C Revision 1.0 Page 7 of 84
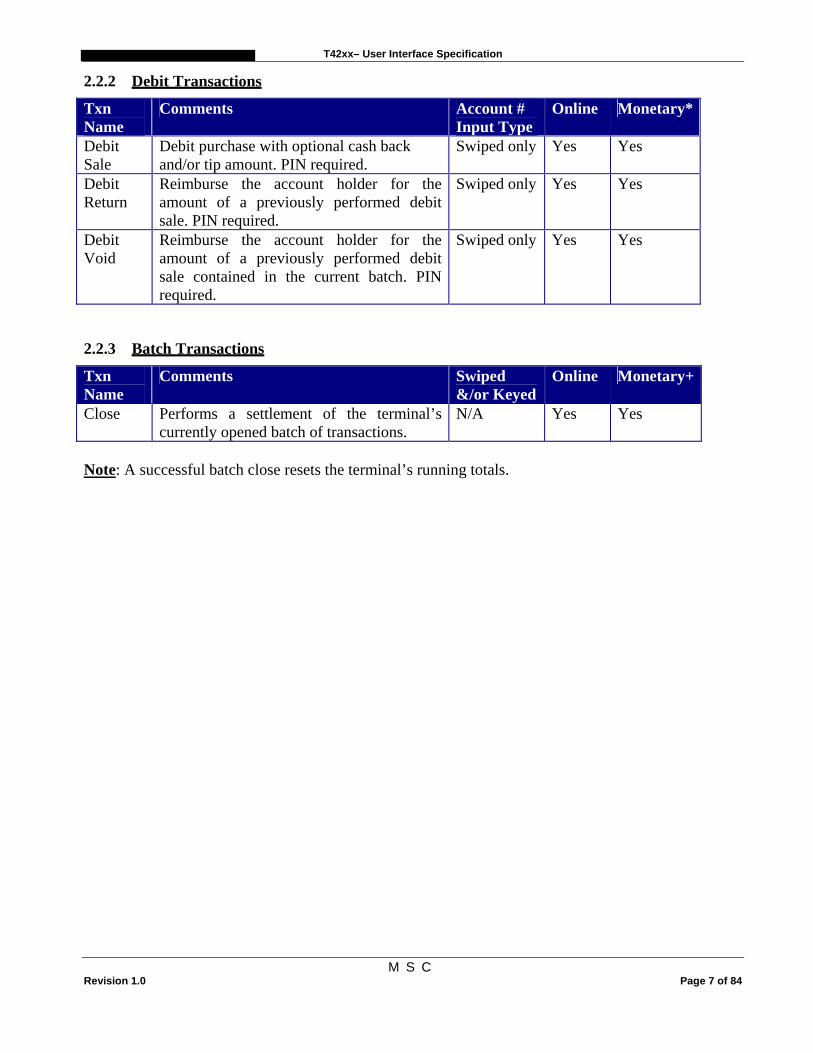
2.2.2 Debit Transactions
Txn Name
Comments Account # Input Type
Online Monetary*
Debit Sale
Debit purchase with optional cash back and/or tip amount. PIN required.
Swiped only Yes Yes
Debit Return
Reimburse the account holder for the amount of a previously performed debit sale. PIN required.
Swiped only Yes Yes
Debit Void
Reimburse the account holder for the amount of a previously performed debit sale contained in the current batch. PIN required.
Swiped only Yes Yes
2.2.3 Batch Transactions
Txn Name
Comments Swiped &/or Keyed
Online Monetary+
Close Performs a settlement of the terminal’s currently opened batch of transactions.
N/A Yes Yes
Note: A successful batch close resets the terminal’s running totals.
T42xx– User Interface Specification
M S C Revision 1.0 Page 8 of 84
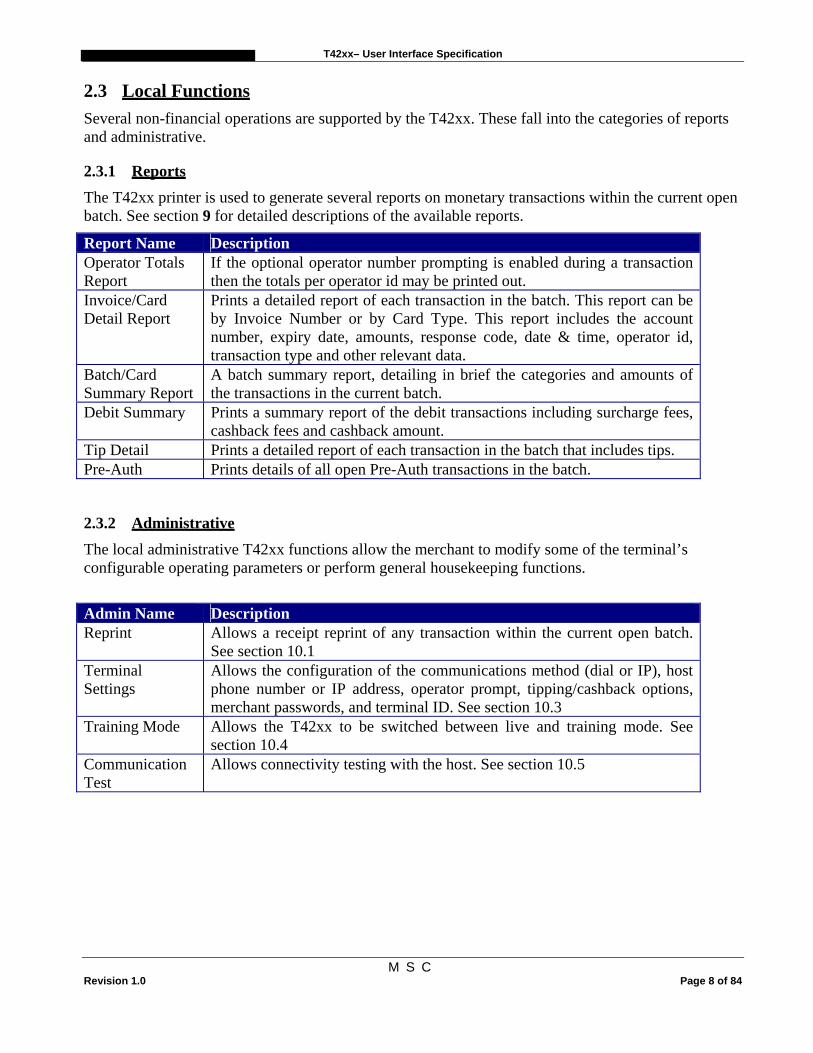
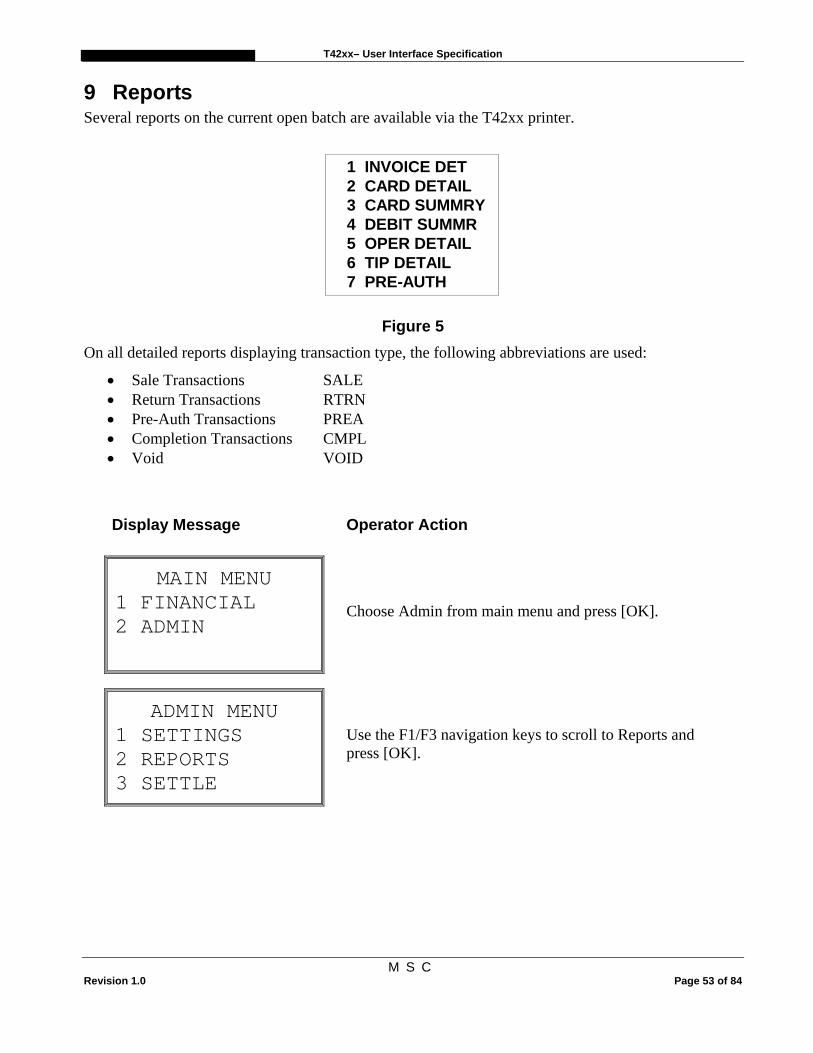
2.3 Local Functions Several non-financial operations are supported by the T42xx. These fall into the categories of reports and administrative.
2.3.1 Reports The T42xx printer is used to generate several reports on monetary transactions within the current open batch. See section 9 for detailed descriptions of the available reports.
Report Name Description Operator Totals Report
If the optional operator number prompting is enabled during a transaction then the totals per operator id may be printed out.
Invoice/Card Detail Report
Prints a detailed report of each transaction in the batch. This report can be by Invoice Number or by Card Type. This report includes the account number, expiry date, amounts, response code, date & time, operator id, transaction type and other relevant data.
Batch/Card Summary Report
A batch summary report, detailing in brief the categories and amounts of the transactions in the current batch.
Debit Summary Prints a summary report of the debit transactions including surcharge fees, cashback fees and cashback amount.
Tip Detail Prints a detailed report of each transaction in the batch that includes tips. Pre-Auth Prints details of all open Pre-Auth transactions in the batch.
2.3.2 Administrative The local administrative T42xx functions allow the merchant to modify some of the terminal’s configurable operating parameters or perform general housekeeping functions.
Admin Name Description Reprint Allows a receipt reprint of any transaction within the current open batch.
See section 10.1 Terminal Settings
Allows the configuration of the communications method (dial or IP), host phone number or IP address, operator prompt, tipping/cashback options, merchant passwords, and terminal ID. See section 10.3
Training Mode Allows the T42xx to be switched between live and training mode. See section 10.4
Communication Test
Allows connectivity testing with the host. See section 10.5
T42xx– User Interface Specification
M S C Revision 1.0 Page 9 of 84
3 T42xx* UI Introduction As shown in Figure 1, the T42xx* consists of a bidirectional track1, 2 & 3 manual swipe card reader, 160 by 80 pixel graphics display, 0-9 numeric keys supporting alpha input, 6 navigation keys along with ok, clear, cancel, and function keys. The built-in thermal printer is a clamshell design with drop-in paper roll loading.
*Hypercom Optimum T42xx platform consists of 3 model types:
4. T4210 – Dial only terminal 5. T4220 – IP terminal with dial backup 6. T4230 – Wireless GPRS terminal with dial backup
Figure 1
3.1 Display During normal operation the T42xx graphics display yields a 14 character by 4-line text display.
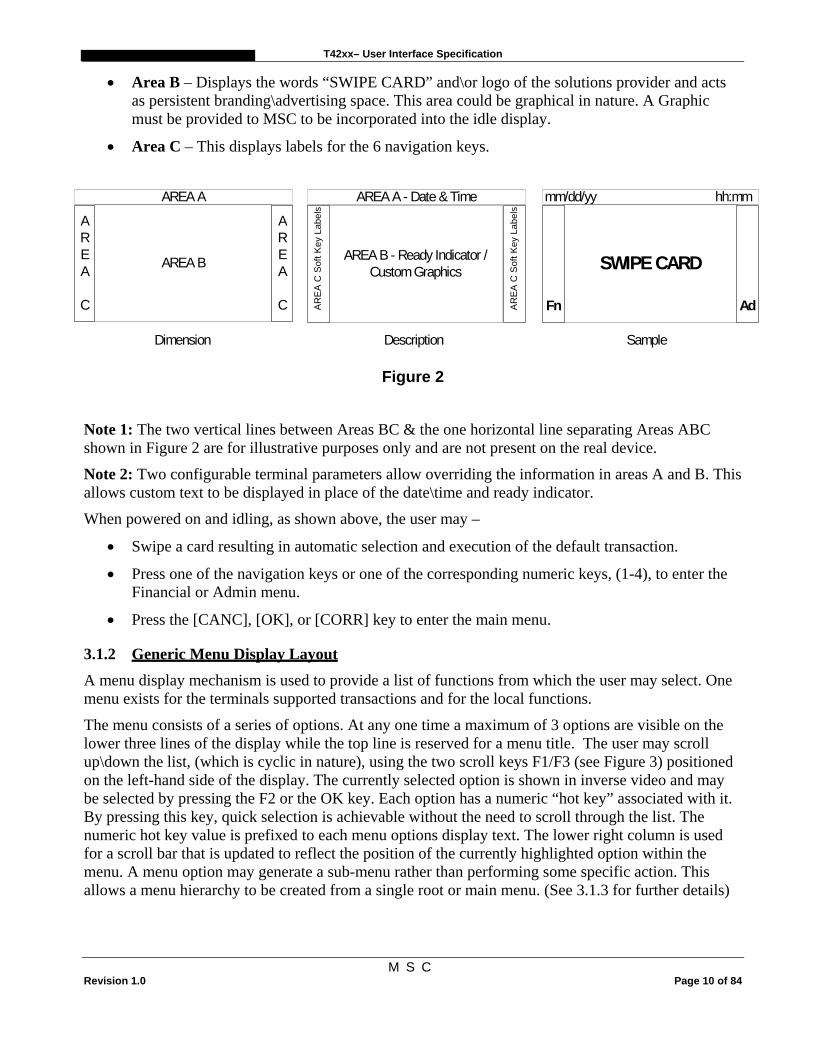
3.1.1 Idle Display When the terminal is powered on but sitting at idle waiting for user stimulus its display is broken into 3 logical areas as shown in Figure 2.
• Area A - Displays the date & time using a special small font. The time format is configurable as military or am\pm style.
T42xx– User Interface Specification
M S C Revision 1.0 Page 10 of 84
• Area B – Displays the words “SWIPE CARD” and\or logo of the solutions provider and acts as persistent branding\advertising space. This area could be graphical in nature. A Graphic must be provided to MSC to be incorporated into the idle display.
• Area C – This displays labels for the 6 navigation keys.
Figure 2
Note 1: The two vertical lines between Areas BC & the one horizontal line separating Areas ABC shown in Figure 2 are for illustrative purposes only and are not present on the real device.
Note 2: Two configurable terminal parameters allow overriding the information in areas A and B. This allows custom text to be displayed in place of the date\time and ready indicator.
When powered on and idling, as shown above, the user may –
• Swipe a card resulting in automatic selection and execution of the default transaction.
• Press one of the navigation keys or one of the corresponding numeric keys, (1-4), to enter the Financial or Admin menu.
• Press the [CANC], [OK], or [CORR] key to enter the main menu.
3.1.2 Generic Menu Display Layout A menu display mechanism is used to provide a list of functions from which the user may select. One menu exists for the terminals supported transactions and for the local functions.
The menu consists of a series of options. At any one time a maximum of 3 options are visible on the lower three lines of the display while the top line is reserved for a menu title. The user may scroll up\down the list, (which is cyclic in nature), using the two scroll keys F1/F3 (see Figure 3) positioned on the left-hand side of the display. The currently selected option is shown in inverse video and may be selected by pressing the F2 or the OK key. Each option has a numeric “hot key” associated with it. By pressing this key, quick selection is achievable without the need to scroll through the list. The numeric hot key value is prefixed to each menu options display text. The lower right column is used for a scroll bar that is updated to reflect the position of the currently highlighted option within the menu. A menu option may generate a sub-menu rather than performing some specific action. This allows a menu hierarchy to be created from a single root or main menu. (See 3.1.3 for further details)
AREA A
AREA B
mm/dd/yy hh:mm
SWIPE CARD
AREA A - Date & Time
AREA B - Ready Indicator /Custom Graphics
Dimension Description Sample
AREA
C
AREA
C AR
EA
C S
oft K
ey L
abel
s
AR
EA
C S
oft K
ey L
abel
s
Fn Ad
T42xx– User Interface Specification
M S C Revision 1.0 Page 11 of 84
FINANCIAL 1 SALE 2 RETURN 3 VOID
T42xx Display
Numeric Hot KeyIndicator Menu Title
Scroll Bar
F1
Navigation keys (6)
Scroll Keydown
Scroll Keyup
F6
F5
F4
F3
F2
Figure 3
Note 1: The 6 navigation keys (3 located to either side of the T42xx display), are not labeled on the physical terminal. They’re designated F1 through F6 in the above illustration, and referenced throughout this document.
Note 2: The currently selected option is displayed using inverse video on the real T42xx device. This has not been shown in the above diagram.
Note 3: The clear key, (marked “CORR” in Figure 1), is used to return from a lower sub-menu back to the original higher-level owner. The cancel key, (marked “CANC” in Figure 1 and situated above the display), is used to immediately exit the menus and return to the idle screen. Pressing cancel from the top-level or any sub-level menu always results in the idle screen being displayed.
T42xx– User Interface Specification
M S C Revision 1.0 Page 12 of 84
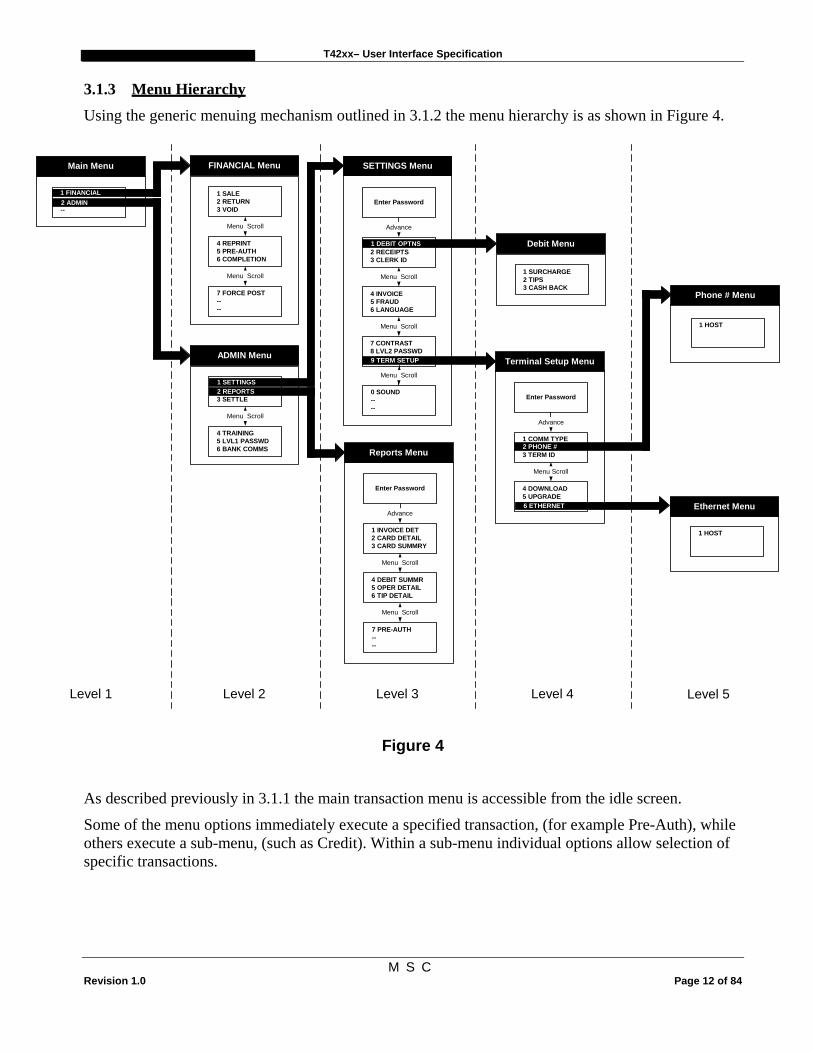
3.1.3 Menu Hierarchy Using the generic menuing mechanism outlined in 3.1.2 the menu hierarchy is as shown in Figure 4.
1 CREDIT DEBT2 ADMIN--2 ADMIN
Level 1 Level 2
FINANCIAL Menu
1 SALE2 RETURN3 VOID
4 REPRINT5 PRE-AUTH6 COMPLETION
7 FORCE POST----
Menu Scroll
Menu Scroll
Main Menu
1 FINANCIAL
ADMIN Menu
1 SETTINGS2 REPORTS3 SETTLE
4 TRAINING5 LVL1 PASSWD6 BANK COMMS
Menu Scroll
SETTINGS Menu
2 RECEIPTS3 CLERK ID
4 INVOICE5 FRAUD6 LANGUAGE
Menu Scroll
Menu Scroll
1 SETTINGS
7 CONTRAST8 LVL2 PASSWD9 TERM SETUP
Level 3
2 REPORTS
Reports Menu
1 INVOICE DET2 CARD DETAIL3 CARD SUMMRY
4 DEBIT SUMMR5 OPER DETAIL6 TIP DETAIL
Menu Scroll
Enter Password
Advance
Enter Password
Advance
Debit Menu
1 SURCHARGE2 TIPS3 CASH BACK
1 DEBIT OPTNS
Level 4
Menu Scroll
7 PRE-AUTH----
Terminal Setup Menu
1 COMM TYPE2 PHONE #3 TERM ID
4 DOWNLOAD5 UPGRADE
Menu Scroll
Enter Password
Advance
9 TERM SETUP
0 SOUND----
Menu Scroll
Level 5
Phone # Menu
1 HOST
2 PHONE #
Ethernet Menu
1 HOST
6 ETHERNET
Figure 4
As described previously in 3.1.1 the main transaction menu is accessible from the idle screen.
Some of the menu options immediately execute a specified transaction, (for example Pre-Auth), while others execute a sub-menu, (such as Credit). Within a sub-menu individual options allow selection of specific transactions.
T42xx– User Interface Specification
M S C Revision 1.0 Page 13 of 84
3.1.4 Screen Data Input When data input is requested the top 3 lines are used for prompting of information while all keyed data appears on the bottom line and from the lower right side of the display. If more than 14 characters of data are required then the current input is redisplayed in a smaller font allowing more data to be entered on the same line.
T42xx– User Interface Specification
M S C Revision 1.0 Page 14 of 84
3.2 Keypad The T42XX keypad as shown in Figure 1 is used for menu manipulation and all data input activities during a transaction or local functions.
3.2.1 Keyed Data Input The keypad is used as follows for data input operations –
• The clear key, (marked “CORR” in Figure 1), deletes the last character entered when pressed once. If the CORR key is held down for more than 2 second, all the information on the current input line is cleared. If pressed while no data is present the transaction\local function is terminated.
• The cancel key, (marked “CANC” in Figure 1), exits the current input function and aborts the current operation. Either the transaction or the local function is terminated.
• When numeric only input is required the keys marked 0 through 9 in Figure 1 is used with the data appearing from the right hand side.
• When alphanumeric input is required, the first press of the key the appropriate digit appears. On the second to N key presses the associated alpha character appears. Continuously pressing the key eventually results in the numeric digit reappearing on the display.
• The ok key, (marked “OK” in Figure 1), acts as an input termination signal. The next input request is then prompted for.
• When appropriate, (and detailed in later sections of this document), the navigation keys on either side of the display are used. For example, prompting the user for Yes or No selections is an obvious use. Pressing “CORR” or “CANC” on these screens aborts the transaction.
• Pressing the Zero “0” key repetitively while in alphanumeric input mode allows access to the characters shown below:
0 . , ‘ - : ( ) ! @ # $ % & * + = / ?
3.2.2 Auto Paper Feed Pressing and holding the Zero “0” key or Paper Feed “*” key from the Idle screen causes the printer to feed paper until the Zero key is released.
3.2.3 Customer Receipts For a financial transaction a merchant copy of the receipt is always printed. For a debit transaction the customer copy is always printed (at the “press OK for customer copy” screen). For a credit transaction there is a choice of printing or not printing the customer copy. If the [OK] key is pressed (at the “press OK for customer copy” screen) then a customer copy is printed, if [CORR] is pressed, then no customer copy is printed.
T42xx– User Interface Specification
M S C Revision 1.0 Page 15 of 84
4 Transaction UI Composition The following table details the constituent phases for each of the transactions supported by the T42xx terminal.
Note: In the table, O = Optional, M = Mandatory and X = not allowed.
Transaction Action
Cre
dit S
ale
Cre
dit
Ret
urn
Pre-
Aut
h
Voi
d
Deb
it Sa
le
Deb
it R
etur
n D
ebit
Voi
d
Bat
ch C
lose
Pre-
Atu
h C
ompl
etio
n
Level 1 Password X X M M X M M M X Invoice #1 X X M M X X M X M Swipe Card1,S,W M M X X M M M X X Key Account #1,K,W M M X X X X X X X Key Expiry Date1,K M M X X X X X X X Credit Card Checks C M M X X X X X X X Operator ID O O X X O O X X X Amount M M X X M M X X M Cashback Amount2 X X X X O X X X X Tip Amount V X X X X O X X X X PIN X X X X M M M X X Comms3 M M M M M M M M M Receipt4 M M M M M M M M M Approval Message5 M M M M M M M X M
Table 1 1At the transaction initiation phase either the card data is supplied by swipingS or the user keysK both the account number and expiry date. Additionally, the void transaction prompts the user for an invoice number. Only one of the above three input mechanisms occurs. 2The cashback amount is only prompted for on a debit sale. It may be configured off or on. 3During communications with the remote host the T42xx display is updated to provide user feedback. 4Appropriate receipts are printed for the transactions. 5An approval message displays the 6-character authorization code. SOnly occurs if the card data was swiped. KOnly occurs if the card data was keyed WWarnings are generated if –
• The maximum number of transactions stored within the terminals memory has reached the limit and a transaction is attempted.
• If a bad card swipe occurs. CChecks on the account number for mod10 and valid expiry date are performed. BThe close batch transaction is configured to automatically print the summary report after settlement. VTip prompt is enabled from the setup prompts menu.
T42xx– User Interface Specification
M S C Revision 1.0 Page 16 of 84
4.1 Transaction Initiation A transaction may be initiated via selection by the user from the menu or by swiping the card at the idle screen. Credit/Debit sale is setup as the default transaction.
4.2 Invoice Number Each transaction captured by the T42xx in the open batch is assigned a unique invoice number. Points of note are –
• Invoice numbers begin at 1 and increment upwards for each transaction.
• No two transactions in the same batch will ever have the same invoice number.
• The invoice number is printed on the receipt.
• The invoice number can be used to retrieve and review particular transactions information by use of the local functions.
4.3 Maximum Batch Size The absolute maximum number of transactions in an open batch is limited to 300, (but may be reset to a lower value if required). Once this has been reached the terminal must perform a close batch. The terminal disallows any other transactions until batch close is performed. A default terminal has an open batch limit of 300 for dial-up batch. Warnings are provided when the maximum number of transactions is getting close (i.e. when batch is 90% full).
4.4 Receipt Printing Customer copy of the receipt may be printed in addition to the merchant’s copy. The customer receipt has neither the signature line nor the custom agreement lines. Xs replace the account number except for the last four digits and the expiry date is not printed.
4.5 Predial Support The application supports predial in order to reduce transaction time for dial-up transactions. Predial to the host is initiated for all dial-up online transactions, (except the batch transaction), after the user has entered the card details and the card checks have been performed.
4.6 Display of The Transaction Name At all times throughout the lifetime of the transaction its name is always displayed on the top line of the T42xx.
T42xx– User Interface Specification
M S C Revision 1.0 Page 17 of 84
4.7 Training Mode All transactions may be performed in training mode. However, the printed receipt clearly indicates that it is a training transaction and the auth code always ends with ‘T’(training). When the terminal is in training mode the date and time normally displayed on the top line of the display during idle mode are replaced with the words “Training”.
When the terminal is switched from training mode to “live” mode all training mode transactions are deleted. The terminal can only be switched from “live” to training mode when there are zero transactions in the current open batch.
4.8 Credit Card Checks The following credit card checks are performed on swiped cards. If failure occurs then the transaction is aborted with an appropriate error message.
• Account range match – The card is rejected if it is not found within the valid account range tables.
• Mod10 (luhn check) – The account number must pass the Mod10 algorithm.
• Expiry date - The expiry date must be valid.
T42xx– User Interface Specification
M S C Revision 1.0 Page 18 of 84
5 Credit Transactions The following section details the various retail credit transactions in their different mode of swiped and keyed.
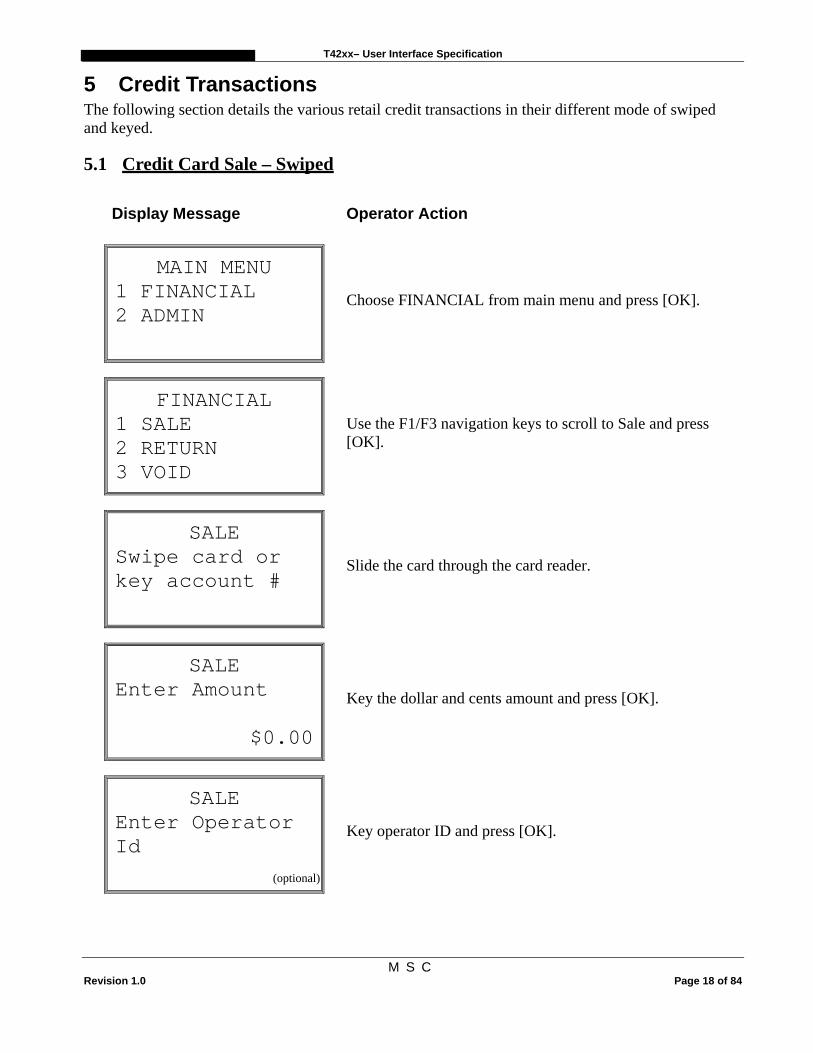
5.1 Credit Card Sale – Swiped
Display Message Operator Action
MAIN MENU 1 FINANCIAL 2 ADMIN
Choose FINANCIAL from main menu and press [OK].
FINANCIAL 1 SALE 2 RETURN 3 VOID
Use the F1/F3 navigation keys to scroll to Sale and press [OK].
SALE Swipe card or key account #
Slide the card through the card reader.
SALE Enter Amount
$0.00
Key the dollar and cents amount and press [OK].
SALE Enter Operator Id
Key operator ID and press [OK].
(optional)
T42xx– User Interface Specification
M S C Revision 1.0 Page 19 of 84
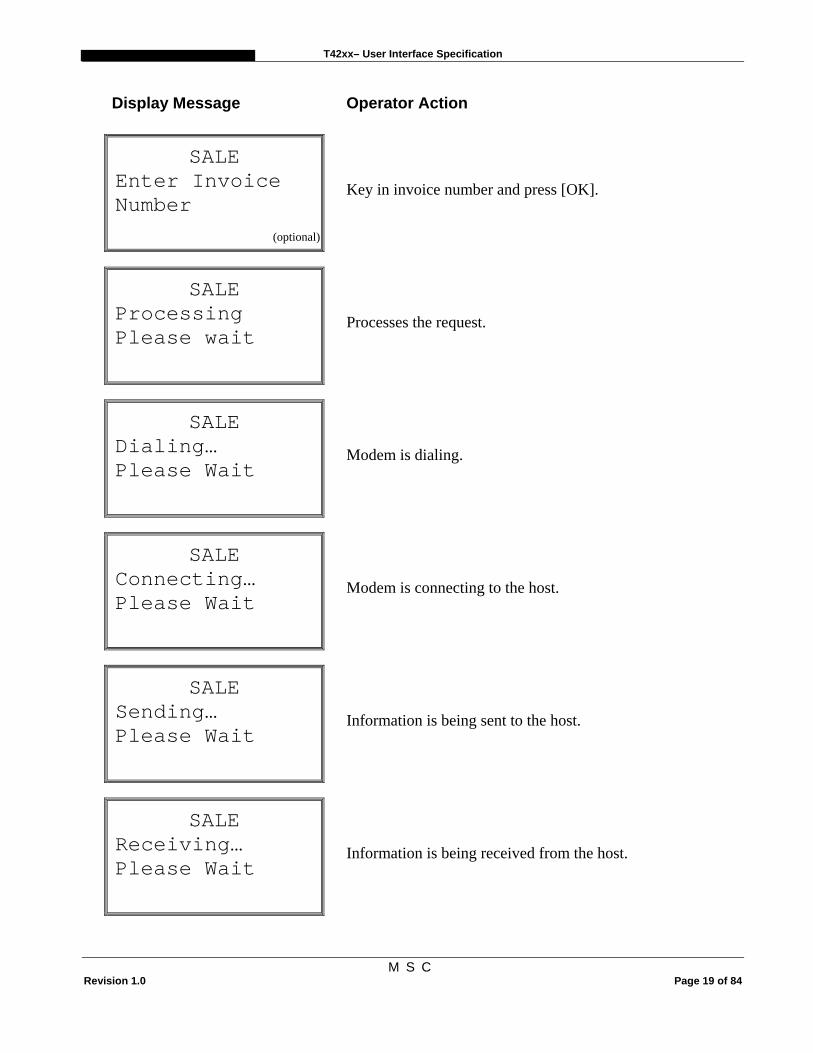
Display Message Operator Action
SALE Enter Invoice Number
Key in invoice number and press [OK].
SALE Processing Please wait
Processes the request.
SALE Dialing… Please Wait
Modem is dialing.
SALE Connecting… Please Wait
Modem is connecting to the host.
SALE Sending… Please Wait
Information is being sent to the host.
SALE Receiving… Please Wait
Information is being received from the host.
(optional)
T42xx– User Interface Specification
M S C Revision 1.0 Page 20 of 84
Display Message Operator Action
SALE APPROVED AUTH : nnnnnn Inv.#: nnnn
The approval message is displayed. The terminal displays the message until the receipt is printed.
SALE Press OK for customer copy
The terminal displays this message, waiting for acknowledgement for printing the customer receipt.
SALE APPROVED AUTH : nnnnnn Inv.#: nnnn
The approval message is displayed. Press [CORR] to return to either the idle or transaction menu screen.
T42xx– User Interface Specification
M S C Revision 1.0 Page 21 of 84
5.2 Credit Card Sale - Manual Entry
Display Message Operator Action
SALE Swipe card or key account #
Key the cardholder’s account number (max 19 digits) and press [OK].
SALE Enter Expiry Date MMYY
Key in four-digit expiration date using two digits for the month and two for the year.
SALE Enter Amount
$0.00
Key the dollar and cents amount and press [OK].
SALE Enter Operator Id
Key operator ID and press [OK].
SALE Enter Receipt Number
Key in receipt number and press [OK].
(optional)
(optional)
T42xx– User Interface Specification
M S C Revision 1.0 Page 22 of 84
Display Message Operator Action
SALE Various Text
The terminal displays several messages indicating it is communicating with the host. These are dialing, redialing, sending, receiving and processing.
SALE APPROVED AUTH : nnnnnn Inv.#: nnnn
The approval message is displayed. The terminal displays the message until the receipt is printed.
SALE Press OK for customer copy
The terminal displays this message, waiting for acknowledgement for printing the customer receipt.
SALE APPROVED AUTH : nnnnnn Inv.#: nnnn
The approval message is displayed. Press [CORR] to return to either the idle or transaction menu screen.
Credit Card Sales receipt is the same format as shown in 5.3.
T42xx– User Interface Specification
M S C Revision 1.0 Page 23 of 84
5.3 Credit Card Sale – Receipt
CREDIT SALE RECEIPT
Custom Header Line 1 Custom Header Line 2 Custom Header Line 3 Custom Header Line 4
Term ID:nnnnnnnnnnnnnn Invoice #:nnn VISA PURCHASE Op Id:XX Card #:nnnnnnnnnnnnnnn Exp:mm/yy APPROVED XXX AMOUNT $nnnn.nn X____________________________ I agree to pay above total, as per cardholder or merchant agreement. Retain this copy for your records. LAST/FIRST NAME Ref #: XXXXXXXX S Auth.#: XXXXXX Date: yyyy/mm/dd Time: hh:mmP
Custom Trailer Line 1 Custom Trailer Line 2 Custom Trailer Line 3 Custom Trailer Line 4
-Transaction type -Custom header lines (max 4) -Terminal ID -Invoice # -Card, trans type -Operator ID (optional) -Card number (masked) -Expiry Date -Approval text, including Bank response code -Purchase Amount -Card Holder Signature -Card Holder Agreement -Card Holder Name (swiped transactions only) -Terminal Serial #, Card Entry Indicator (S-Swiped, M-Manual) -Host Authorization # -Transaction date & time -Custom trailer lines (max 4)
T42xx– User Interface Specification
M S C Revision 1.0 Page 24 of 84
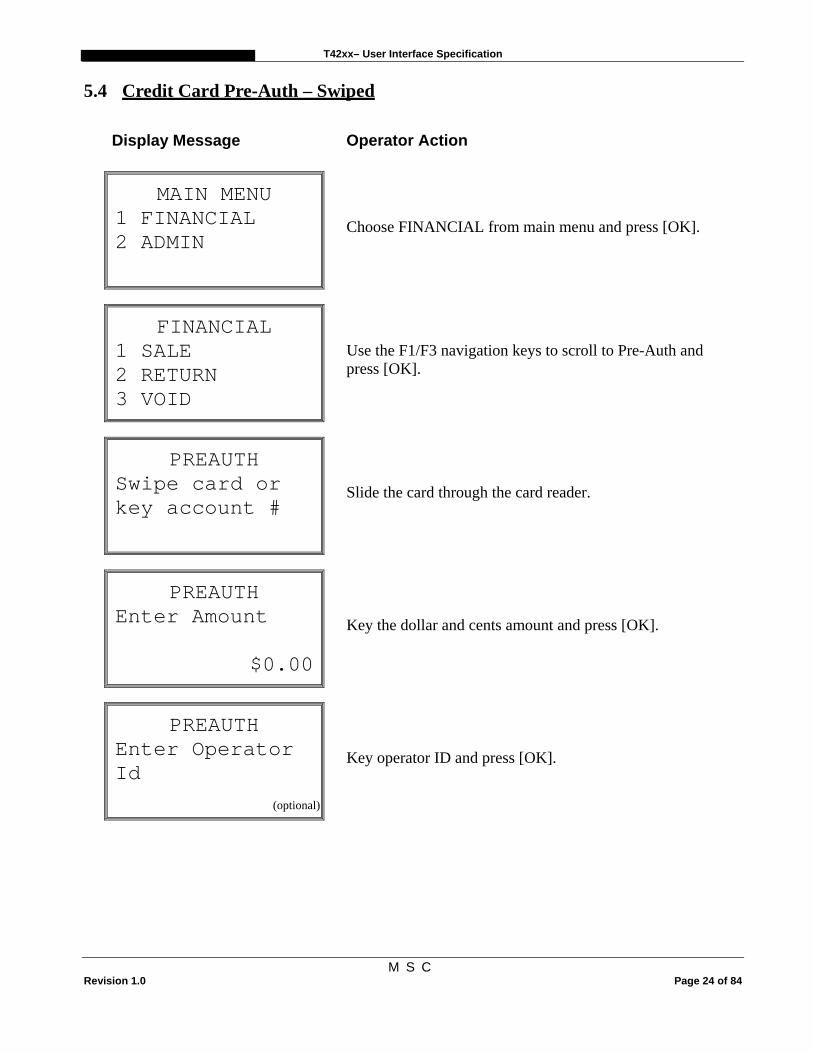
5.4 Credit Card Pre-Auth – Swiped
Display Message Operator Action
MAIN MENU 1 FINANCIAL 2 ADMIN
Choose FINANCIAL from main menu and press [OK].
FINANCIAL 1 SALE 2 RETURN 3 VOID
Use the F1/F3 navigation keys to scroll to Pre-Auth and press [OK].
PREAUTH Swipe card or key account #
Slide the card through the card reader.
PREAUTH Enter Amount
$0.00
Key the dollar and cents amount and press [OK].
PREAUTH Enter Operator Id
Key operator ID and press [OK].
(optional)
T42xx– User Interface Specification
M S C Revision 1.0 Page 25 of 84
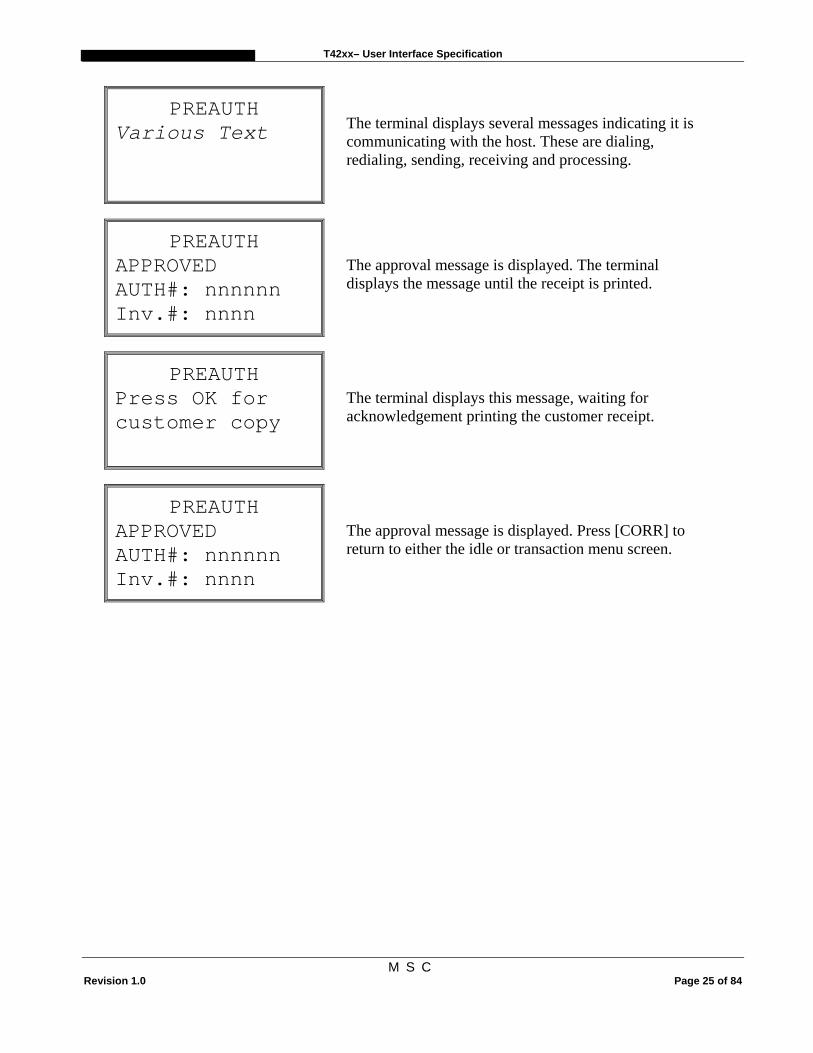
PREAUTH Various Text
The terminal displays several messages indicating it is communicating with the host. These are dialing, redialing, sending, receiving and processing.
PREAUTH APPROVED AUTH#: nnnnnn Inv.#: nnnn
The approval message is displayed. The terminal displays the message until the receipt is printed.
PREAUTH Press OK for customer copy
The terminal displays this message, waiting for acknowledgement printing the customer receipt.
PREAUTH APPROVED AUTH#: nnnnnn Inv.#: nnnn
The approval message is displayed. Press [CORR] to return to either the idle or transaction menu screen.
T42xx– User Interface Specification
M S C Revision 1.0 Page 26 of 84
5.5 Credit Card Pre-Auth – Manual Entry
Display Message Operator Action
MAIN MENU 1 FINANCIAL 2 ADMIN
Choose FINANCIAL from main menu and press [OK].
FINANCIAL 1 SALE 2 RETURN 3 VOID
Use the F1/F3 navigation keys to scroll to Pre-Auth and press [OK].
PREAUTH Swipe card or key account #
Key cardholder’s account number (max 19 digits) and press [OK].
PREAUTH Enter Expiry Date MMYY
Key in the four-digit expiration date using two digits for the month and two for the year.
PREAUTH Enter Amount
$0.00
Key the dollar and cents amount and press [OK].
T42xx– User Interface Specification
M S C Revision 1.0 Page 27 of 84
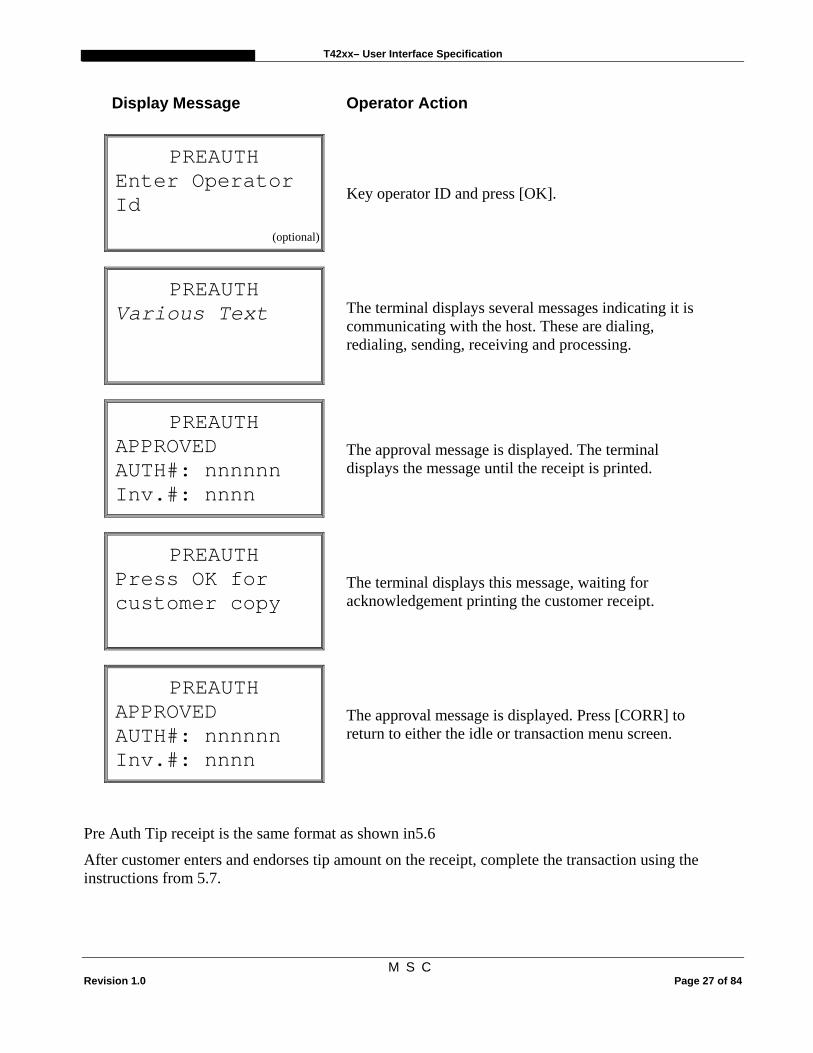
Display Message Operator Action
PREAUTH Enter Operator Id
Key operator ID and press [OK].
PREAUTH Various Text
The terminal displays several messages indicating it is communicating with the host. These are dialing, redialing, sending, receiving and processing.
PREAUTH APPROVED AUTH#: nnnnnn Inv.#: nnnn
The approval message is displayed. The terminal displays the message until the receipt is printed.
PREAUTH Press OK for customer copy
The terminal displays this message, waiting for acknowledgement printing the customer receipt.
PREAUTH APPROVED AUTH#: nnnnnn Inv.#: nnnn
The approval message is displayed. Press [CORR] to return to either the idle or transaction menu screen.
Pre Auth Tip receipt is the same format as shown in5.6
After customer enters and endorses tip amount on the receipt, complete the transaction using the instructions from 5.7.
(optional)
T42xx– User Interface Specification
M S C Revision 1.0 Page 28 of 84
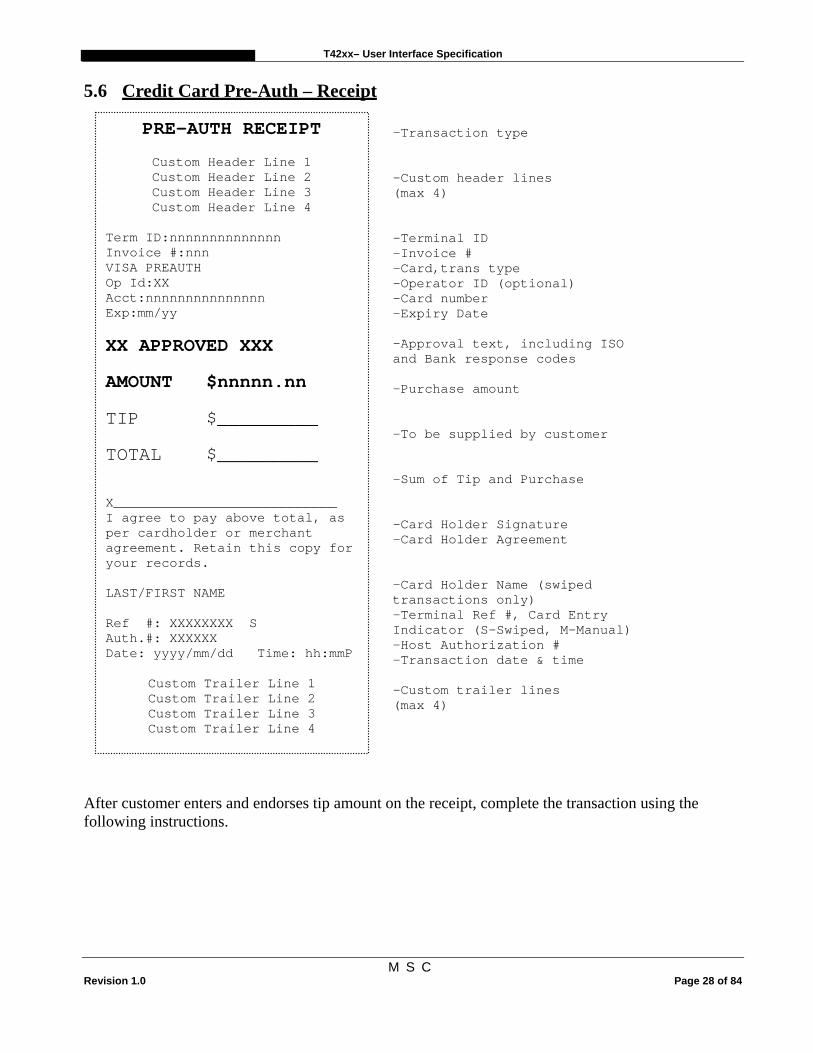
5.6 Credit Card Pre-Auth – Receipt
After customer enters and endorses tip amount on the receipt, complete the transaction using the following instructions.
PRE-AUTH RECEIPT
Custom Header Line 1 Custom Header Line 2 Custom Header Line 3 Custom Header Line 4
Term ID:nnnnnnnnnnnnnn Invoice #:nnn VISA PREAUTH Op Id:XX Acct:nnnnnnnnnnnnnnn Exp:mm/yy XX APPROVED XXX AMOUNT $nnnnn.nn
TIP $_________
TOTAL $_________ X____________________________ I agree to pay above total, as per cardholder or merchant agreement. Retain this copy for your records. LAST/FIRST NAME Ref #: XXXXXXXX S Auth.#: XXXXXX Date: yyyy/mm/dd Time: hh:mmP
Custom Trailer Line 1 Custom Trailer Line 2 Custom Trailer Line 3 Custom Trailer Line 4
-Transaction type -Custom header lines (max 4) -Terminal ID -Invoice # -Card,trans type -Operator ID (optional) -Card number -Expiry Date -Approval text, including ISO and Bank response codes -Purchase amount -To be supplied by customer -Sum of Tip and Purchase -Card Holder Signature -Card Holder Agreement -Card Holder Name (swiped transactions only) -Terminal Ref #, Card Entry Indicator (S-Swiped, M-Manual) -Host Authorization # -Transaction date & time -Custom trailer lines (max 4)
T42xx– User Interface Specification
M S C Revision 1.0 Page 29 of 84
5.7 Credit Card Pre-Auth Completion
Display Message Operator Action
MAIN MENU 1 FINANCIAL 2 ADMIN
Choose FINANCIAL from main menu and press [OK].
FINANCIAL 1 Sale 2 Return 3 Void
Use the F1/F3 navigation keys to scroll to Completion and press [OK].
COMPLETION Enter Invoice
Key in invoice number from Pre-Authorized receipt (located under terminal id) and press [OK].
COMPLETION nnn PREAUTH
$nn.nn PREV NEXT
Ensure that the invoice number is correct on the top left hand side and pre-auth amount is correct on the bottom right had side. If both are correct, then press [OK].
COMPLETION VISA XXXXXXXXXXXXX Date Swiped
Press [OK] to verify swipe amount, date swiped and card type if all are correct.
T42xx– User Interface Specification
M S C Revision 1.0 Page 30 of 84
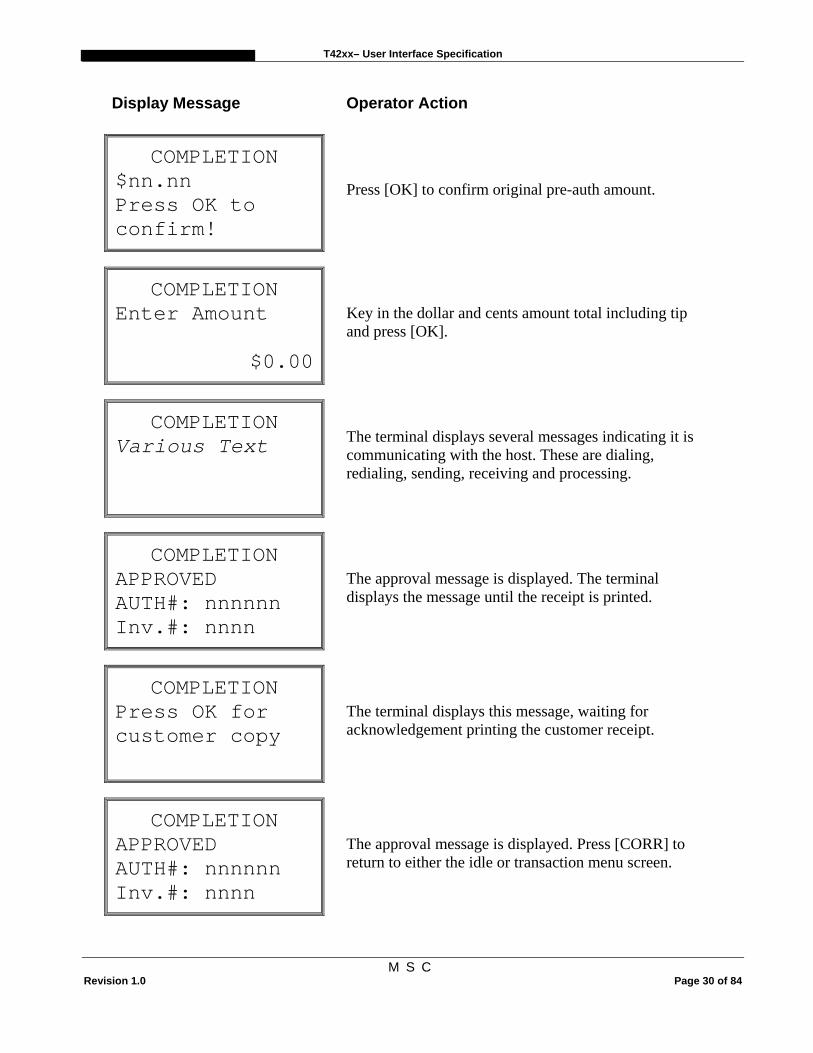
Display Message Operator Action
COMPLETION $nn.nn Press OK to confirm!
Press [OK] to confirm original pre-auth amount.
COMPLETION Enter Amount
$0.00
Key in the dollar and cents amount total including tip and press [OK].
COMPLETION Various Text
The terminal displays several messages indicating it is communicating with the host. These are dialing, redialing, sending, receiving and processing.
COMPLETION APPROVED AUTH#: nnnnnn Inv.#: nnnn
The approval message is displayed. The terminal displays the message until the receipt is printed.
COMPLETION Press OK for customer copy
The terminal displays this message, waiting for acknowledgement printing the customer receipt.
COMPLETION APPROVED AUTH#: nnnnnn Inv.#: nnnn
The approval message is displayed. Press [CORR] to return to either the idle or transaction menu screen.
T42xx– User Interface Specification
M S C Revision 1.0 Page 31 of 84
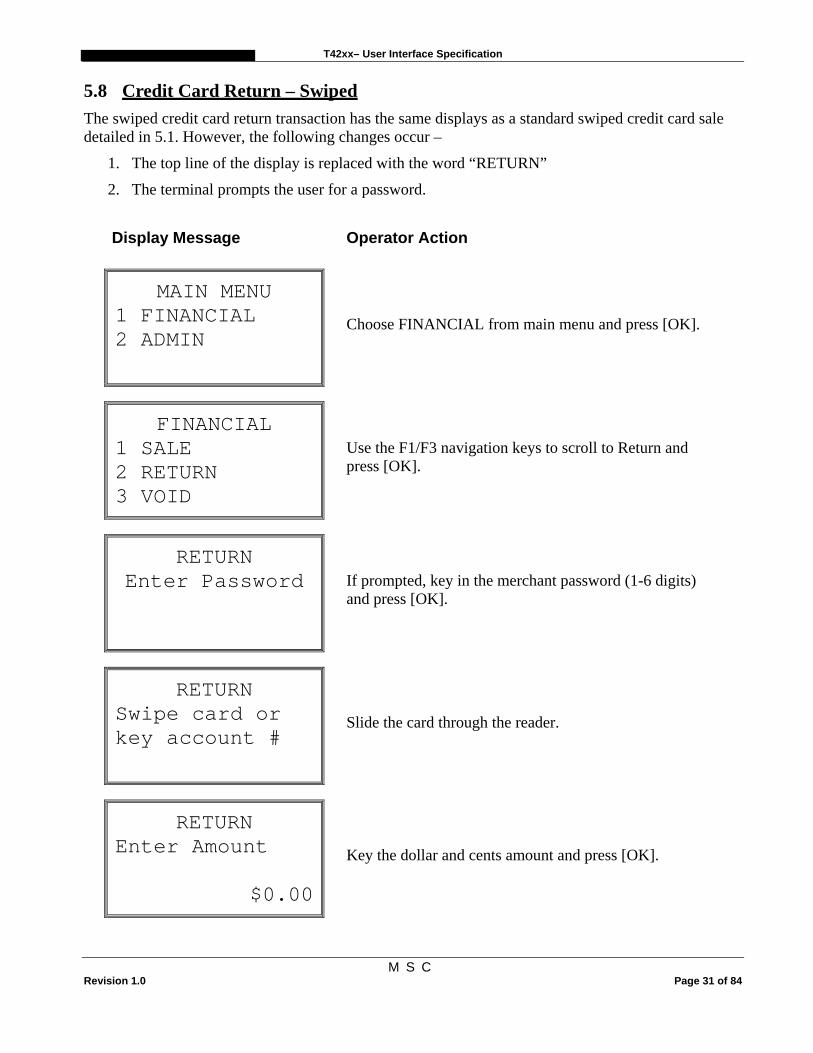
5.8 Credit Card Return – Swiped The swiped credit card return transaction has the same displays as a standard swiped credit card sale detailed in 5.1. However, the following changes occur –
1. The top line of the display is replaced with the word “RETURN”
2. The terminal prompts the user for a password.
Display Message Operator Action
MAIN MENU 1 FINANCIAL 2 ADMIN
Choose FINANCIAL from main menu and press [OK].
FINANCIAL 1 SALE 2 RETURN 3 VOID
Use the F1/F3 navigation keys to scroll to Return and press [OK].
RETURN Enter Password
If prompted, key in the merchant password (1-6 digits) and press [OK].
RETURN Swipe card or key account #
Slide the card through the reader.
RETURN Enter Amount
$0.00
Key the dollar and cents amount and press [OK].
T42xx– User Interface Specification
M S C Revision 1.0 Page 32 of 84
Display Message Operator Action
RETURN Enter Operator ID
Enter the operator ID.
RETURN Various Text
The terminal displays several messages indicating it is communicating with the host. These are dialing, redialing, sending, receiving and processing.
RETURN APPROVED AUTH#: nnnnnn Inv.#: nnnn
The approval message is displayed. The terminal displays the message until the receipt is printed.
5.9 Credit Card Return – Manual Entry The sequence is the same as the standard keyed credit card sale as detailed in 5.2 with the same changes as 5.8.
5.10 Credit Card Return - Receipt The keyed or swiped credit card return receipt has the same format as the standard credit card sale receipt detailed in 5.3. However the transaction type adjacent to the card name says “REFUND”.
(optional)
T42xx– User Interface Specification
M S C Revision 1.0 Page 33 of 84
5.11 Void Transaction
Display Message Operator Action
MAIN MENU 1 FINANCIAL 2 ADMIN
Choose FINANCIAL from main menu and press [OK].
FINANCIAL 1 SALE 2 RETURN 3 VOID
Use the F1/F3 navigation keys to scroll to Void and press [OK].
VOID Enter Password
If prompted, key in the merchant password (1-6 digits) and press [OK].
VOID Enter Invoice
Key in the invoice number (maximum 4 digits) of the transaction to void and press [OK].
VOID nnnn TYPE $nnnnnn.nn Prev Next
The invoice number and transaction name are displayed on the second line followed by the dollar amount. If the transaction is already voided this is indicated.
Press the F3 navigation key to view the previous invoice.
Press the F6 navigation key to view the next invoice.
Press [OK] to select the current invoice for voiding.
Press [CORR] to enter a new invoice number.
T42xx– User Interface Specification
M S C Revision 1.0 Page 34 of 84
Display Message Operator Action
VOID Card Type nnnnnnnnnnnnn MM/YY Swiped
Further details of the transaction are displayed including Card Type, Account Number, Expiry date and account entry method i.e. Swiped or Keyed.
Press [OK] to select the current invoice for voiding.
Press [CORR] to exit.
VOID Void inv. nnnn Press OK to Confirm!
Press [OK] to confirm void.
VOID Various Text
The terminal displays several messages indicating it is communicating with the host. These are dialing, redialing, sending, receiving and processing.
VOID VOIDED AUTH : nnnnnn Inv.#: nnnn
The approval code is displayed along with the invoice number. The terminal displays this message until the receipt is printed assuming that the printer is available.
VOID Press OK for customer copy
The terminal displays this message, waiting for acknowledgement before printing the customer receipt.
VOID VOIDED AUTH : nnnnnn Inv.#: nnnn
The approval code is displayed along with the invoice number. The text “Accepted” appears only for voided credit return and ticket only transactions. Press [CORR] to return to either the idle or transaction menu screen.
T42xx– User Interface Specification
M S C Revision 1.0 Page 35 of 84
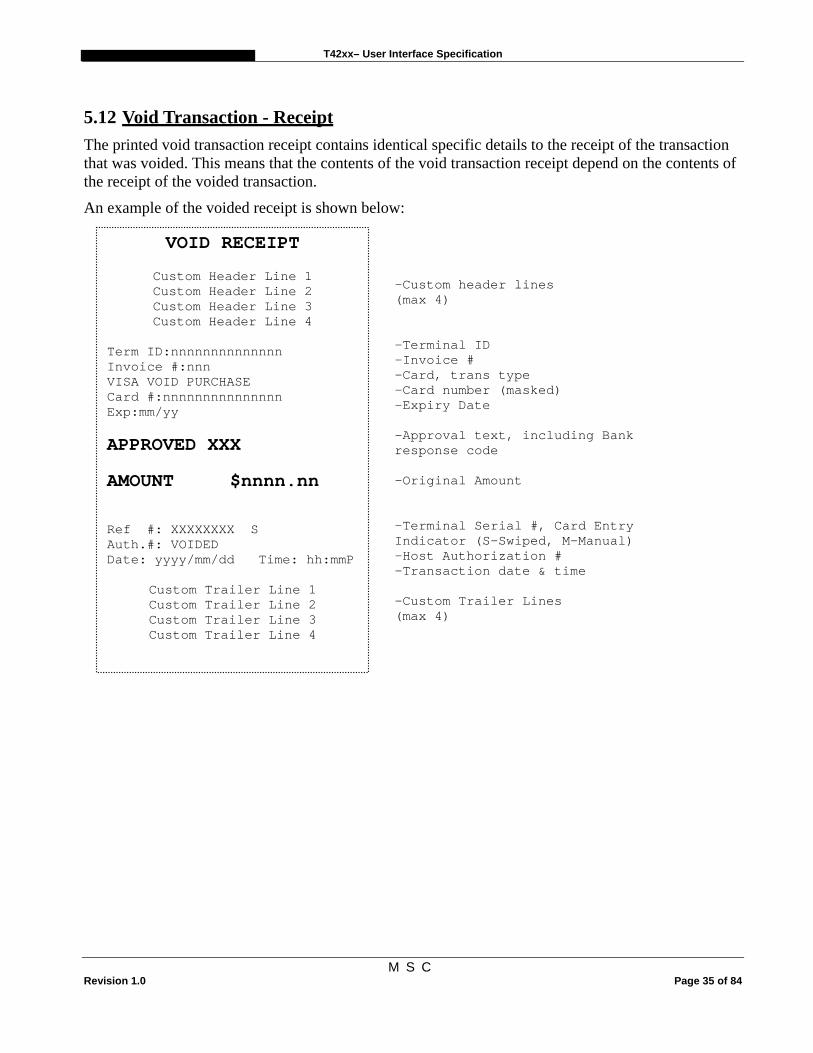
5.12 Void Transaction - Receipt The printed void transaction receipt contains identical specific details to the receipt of the transaction that was voided. This means that the contents of the void transaction receipt depend on the contents of the receipt of the voided transaction.
An example of the voided receipt is shown below:
VOID RECEIPT
Custom Header Line 1 Custom Header Line 2 Custom Header Line 3 Custom Header Line 4
Term ID:nnnnnnnnnnnnnn Invoice #:nnn VISA VOID PURCHASE Card #:nnnnnnnnnnnnnnn Exp:mm/yy APPROVED XXX AMOUNT $nnnn.nn Ref #: XXXXXXXX S Auth.#: VOIDED Date: yyyy/mm/dd Time: hh:mmP
Custom Trailer Line 1 Custom Trailer Line 2 Custom Trailer Line 3 Custom Trailer Line 4
-Custom header lines (max 4) -Terminal ID -Invoice # -Card, trans type -Card number (masked) -Expiry Date -Approval text, including Bank response code -Original Amount -Terminal Serial #, Card Entry Indicator (S-Swiped, M-Manual) -Host Authorization # -Transaction date & time -Custom Trailer Lines (max 4)
T42xx– User Interface Specification
M S C Revision 1.0 Page 36 of 84
5.13 Force Post Transaction
Display Message Operator Action
MAIN MENU 1 FINANCIAL 2 ADMIN
Choose FINANCIAL from main menu and press [OK].
FINANCIAL 1 SALE 2 RETURN 3 VOID
Use the F1/F3 navigation keys to scroll to Force Post and press [OK].
FORCE POST Swipe card or Key account #
Swipe credit card or key in credit card number and press OK.
FORCE POST Enter Amount
$0.00
Key in the amount and press [OK].
FORCE POST Enter Approval Code
Enter the alphanumeric approval code and press [OK].
T42xx– User Interface Specification
M S C Revision 1.0 Page 37 of 84
Display Message Operator Action
FORCE POST Various Text
The terminal displays several messages indicating it is communicating with the host. These are dialing, redialing, sending, receiving and processing.
FORCE POST APPROVED AUTH#: nnnnnn Inv.#: nnnn
Press [OK] to confirm .
FORCE POST Press OK for customer copy
The terminal displays this message, waiting for acknowledgement before printing the customer receipt.
T42xx– User Interface Specification
M S C Revision 1.0 Page 38 of 84
5.14 Force Post Transaction - Receipt An example of the force post transaction receipt is shown below:
FORCE POST RECEIPT
Custom Header Line 1 Custom Header Line 2 Custom Header Line 3 Custom Header Line 4
Term ID:nnnnnnnnnnnnnn Invoice #: nnnn VISA FORCE POST Acct:nnnnnnnnnnnnnnn Exp:mm/yy XX APPROVED XXX AMOUNT $nnnn.nn I agree to pay above total as per card holder or merchant agreement. Retain this copy for your records LAST/FIRST NAME Ref #: XXXXXXXX S Auth.#: nnnnnT – nnnnn Date: yyyy/mm/dd Time: hh:mmP
Custom Trailer Line 1 Custom Trailer Line 2 Custom Trailer Line 3 Custom Trailer Line 4
-Custom header lines (max 4) -Terminal ID -Card, trans type -Card number -Expiry Date -Approval text, including ISO and Bank response codes -Original Amount - Merchant agreement and signature line -Card Holder Name (swiped transactions only) -Terminal Serial #, Card Entry Indicator (S-Swiped, M-Manual) -Host Authorization # -Transaction date & time -Custom Trailer Lines (max 4)
T42xx– User Interface Specification
M S C Revision 1.0 Page 39 of 84
6 Debit Transactions Debit Sale and Debit Return transactions with PIN entry are supported.
6.1 Debit Sale
Display Message Operator Action
SALE Swipe card
Slide the card though the card reader. Manual entry is not allowed for debit transactions.
SALE Enter Amount
$0.00
Key the dollar and cents amount and press [OK].
SALE Enter Operator Id
Key operator ID and press [OK].
SALE Enter Cashback Amount
If cashback is enabled, key the cashback amount then press [OK].
(optional)
(optional)
T42xx– User Interface Specification
M S C Revision 1.0 Page 40 of 84
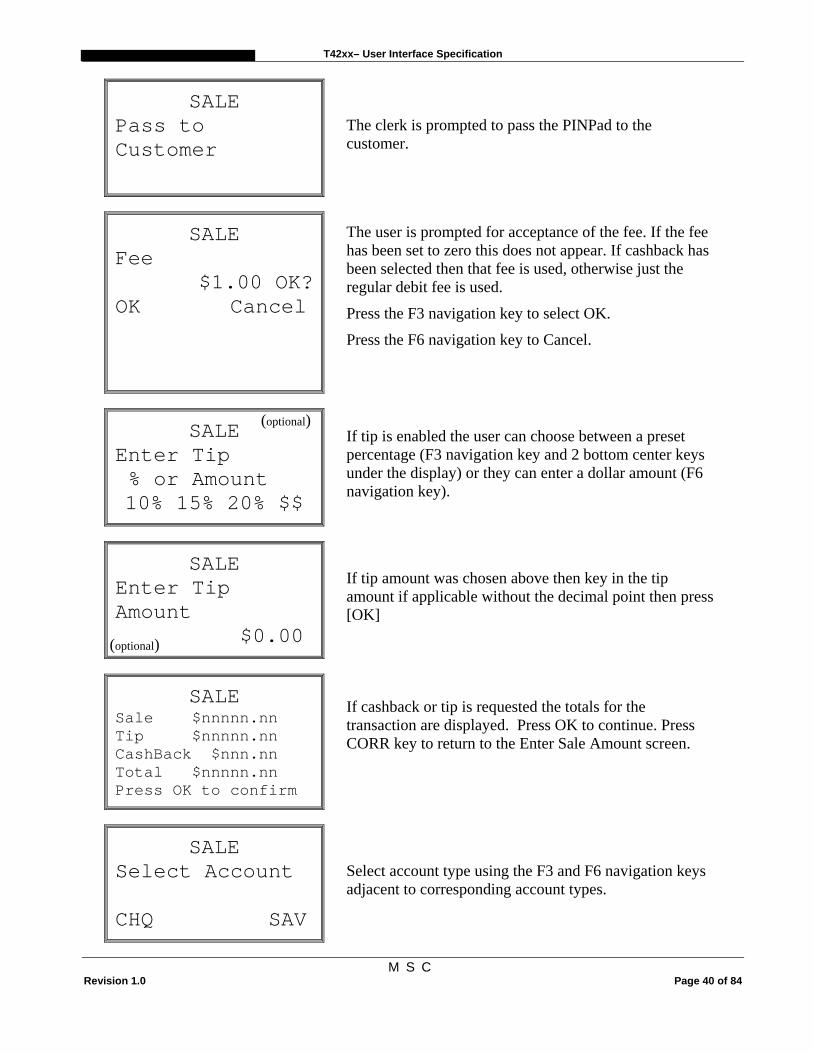
SALE Pass to Customer
The clerk is prompted to pass the PINPad to the customer.
SALE Fee
$1.00 OK? OK Cancel
The user is prompted for acceptance of the fee. If the fee has been set to zero this does not appear. If cashback has been selected then that fee is used, otherwise just the regular debit fee is used.
Press the F3 navigation key to select OK.
Press the F6 navigation key to Cancel.
SALE Enter Tip % or Amount 10% 15% 20% $$
If tip is enabled the user can choose between a preset percentage (F3 navigation key and 2 bottom center keys under the display) or they can enter a dollar amount (F6 navigation key).
SALE Enter Tip Amount $0.00
If tip amount was chosen above then key in the tip amount if applicable without the decimal point then press [OK]
SALE Sale $nnnnn.nn Tip $nnnnn.nn CashBack $nnn.nn Total $nnnnn.nn Press OK to confirm
If cashback or tip is requested the totals for the transaction are displayed. Press OK to continue. Press CORR key to return to the Enter Sale Amount screen.
SALE Select Account CHQ SAV
Select account type using the F3 and F6 navigation keys adjacent to corresponding account types.
(optional)
(optional)
T42xx– User Interface Specification
M S C Revision 1.0 Page 41 of 84
SALE Enter PIN + OK
Key in the PIN number (4 to 12 digits) and then press [OK]. Each digit entered appears as the ‘*’ symbol.
SALE Various Text
The terminal displays several messages indicating it is communicating with the host. These are dialing, redialing, sending, receiving and processing.
SALE APPROVED AUTH : nnnnnn Inv.#: nnnn
The approval message is displayed. The terminal displays the message until the receipt is printed.
SALE Press OK for customer copy
The terminal displays this message, waiting for acknowledgement for printing the customer receipt.
SALE Pass to Clerk
The customer is prompted to pass the PINPad back to the clerk.
SALE APPROVED AUTH : nnnnnn Inv.#: nnnn
The approval message is displayed. Press [CORR] to return to either the idle or transaction menu screen.
T42xx– User Interface Specification
M S C Revision 1.0 Page 42 of 84
6.2 Debit Sale - Receipt
Notes: 1. For user cancelled transactions, the receipt does not contain the Ref # and Auth.# lines.
DEBIT SALE RECEIPT
Custom Header Line 1 Custom Header Line 2 Custom Header Line 3 Custom Header Line 4
Term ID:nnnnnnnnnnnnnn Invoice #:nnn DBT PURCHASE Op Id:XX Card #:nnnnnnnnnnnnnnnn APPROVED XXX Acct: Chequing AMOUNT $nnnnn.nn TIP $nnnnn.nn CASHBACK $nnnnn.nn FEE $nnnnn.nn ========== TOTAL $nnnnn.nn Ref #: XXXXXXXX XXXXXXXXXX S Auth.#: XXXXXX Date: yyyy/mm/dd Time: hh:mmP
Custom Trailer Line 1 Custom Trailer Line 2 Custom Trailer Line 3 Custom Trailer Line 4
-Custom header lines (max 4) -Terminal ID -Invoice # -Transaction type -Operator ID (optional) -Card number (masked) -Approval text, including Bank response code -Account type -Purchase amount
-Tip amount (optional)
-Cash back amount (optional)
-Fee amount (optional)
-Total Sale amount (optional) -Reference number (includes terminal serial # and transaction sequence #) -Host Authorization # -Transaction date & time -Custom trailer lines (max 4)
T42xx– User Interface Specification
M S C Revision 1.0 Page 43 of 84
6.3 Debit Return
Display Message Operator Action
RETURN Enter Password
Key in merchant password (1-6 digits) and press [OK].
RETURN Swipe card or key account #
Slide the card though the card reader. Manual entry is not allowed for debit transactions.
RETURN Enter Amount
$0.00
Key the dollar and cents amount and press [OK].
RETURN Pass to Customer
The clerk is prompted to pass the PINPad to the customer.
RETURN Return $nnnn.nn Press OK to confirm
Return total for the transaction is displayed. Press OK to continue. Press [CORR] key to return to the Enter Sale Amount screen.
T42xx– User Interface Specification
M S C Revision 1.0 Page 44 of 84
Display Message Operator Action
RETURN Select account CHQ SAV
Select account type using the F3 and F6 navigation keys adjacent to corresponding account types.
RETURN Enter PIN + OK
Key in the PIN number (4 to 12 digits) and then press [OK]. Each digit entered appears as the ‘*’ symbol.
RETURN Various Text
The terminal displays several messages indicating it is communicating with the host. These are dialing, redialing, sending, receiving and processing.
RETURN APPROVED AUTH : nnnnnn Inv.#: nnnn
The approval message is displayed. The terminal displays the message until the receipt is printed.
RETURN Press OK for customer copy
The terminal displays this message, waiting for acknowledgement for printing the customer receipt.
RETURN Pass to Clerk
The customer is prompted to pass the PINPad back to the clerk.
T42xx– User Interface Specification
M S C Revision 1.0 Page 45 of 84
Display Message Operator Action
RETURN APPROVED AUTH : nnnnnn
Inv.#: nnnn
The approval message is displayed. Press [CORR] to return to either the idle or transaction menu screen.
Note: Debit returns may be disallowed depending on options set at the time the application was
loaded into the T42xx. This is indicated by the “RETURN Not Available” display when a debit card is swiped after a Return transaction is initiated.
T42xx– User Interface Specification
M S C Revision 1.0 Page 46 of 84
6.4 Debit Return - Receipt
DEBIT RETURN RECEIPT
Custom Header Line 1 Custom Header Line 2 Custom Header Line 3 Custom Header Line 4
Term ID:nnnnnnnnnnnnnn Invoice #:nnnn DBT REFUND Op ID: nnnn Card #:nnnnnnnnnnnnnnnn APPROVED XXX Acct: Savings AMOUNT $nnnnn.nn Ref #: XXXXXXXX XXXXXXXXXX S Auth.#: XXXXXX Date: yyyy/mm/dd Time: hh:mmP
Custom Trailer Line 1 Custom Trailer Line 2 Custom Trailer Line 3 Custom Trailer Line 4
-Custom header lines (max 4) -Terminal ID -Invoice # -Trans type (underlined) -Operator ID (optional) -Card number (masked) -Approval text, including Bank response code
-Account type -Return amount -Reference number (includes terminal serial # and transaction sequence #) -Host Authorization # -Transaction date & time -Custom trailer lines (max 4)
T42xx– User Interface Specification
M S C Revision 1.0 Page 47 of 84
6.5 Debit Void A debit void proceeds in the same way as a credit void until the transaction is ready to send to the host. At this point the card holder is asked to swipe their card and enter their PIN. The account type is not asked for.
Display Message Operator Action
VOID
Follow the steps in credit void (5.11).
VOID Swipe Card
Slide the card though the card reader. Manual entry is not allowed for debit transactions.
VOID Pass to Customer
The clerk is prompted to pass the PINPad to the customer.
VOID Select account CHQ SAV
Select account type using the F3 and F6 navigation keys adjacent to corresponding account types.
VOID Enter PIN + OK
Key in the PIN number (4 to 12 digits) and then press [OK]. Each digit entered appears as the ‘*’ symbol.
T42xx– User Interface Specification
M S C Revision 1.0 Page 48 of 84
Display Message Operator Action
VOID Various Text
The terminal displays several messages indicating it is communicating with the host. These are dialing, redialing, sending, receiving and processing.
VOID APPROVED AUTH : nnnnnn Inv.#: nnnn
The approval message is displayed. The terminal displays the message until the receipt is printed.
VOID Press OK for customer copy
The terminal displays this message, waiting for acknowledgement for printing the customer receipt.
VOID Pass to Clerk
The customer is prompted to pass the PINPad back to the clerk.
VOID APPROVED AUTH : nnnnnn Inv.#: nnnn
The approval message is displayed. Press [CORR] to return to either the idle or transaction menu screen.
T42xx– User Interface Specification
M S C Revision 1.0 Page 49 of 84
7 Batch Transactions The batch close transaction is supported.
7.1 Batch Close
Display Message Operator Action
MAIN MENU 1 FINANCIAL 2 ADMIN
Choose Admin from main menu and press [OK].
ADMIN MENU 1 SETTINGS 2 REPORTS 3 SETTLE
Use the F1/F3 navigation keys to scroll to Settle and press [OK].
BATCH CLOSE Enter Password
Key in the merchant password (1-6 digits) and press [OK]
BATCH CLOSE Print Report? Yes No
Press the F3 navigation key to print a summary report and detailed report. Press the F6 navigation key to print batch summary and invoice details reports.
BATCH CLOSE Credit $nnnnn.nn Debit $nnnnn.nn Total $nnnnn.nn Press Ok to Cont.
The Batch Credit/Debit/Total amounts are displayed.
Press OK to confirm the close.
T42xx– User Interface Specification
M S C Revision 1.0 Page 50 of 84
Display Message Operator Action
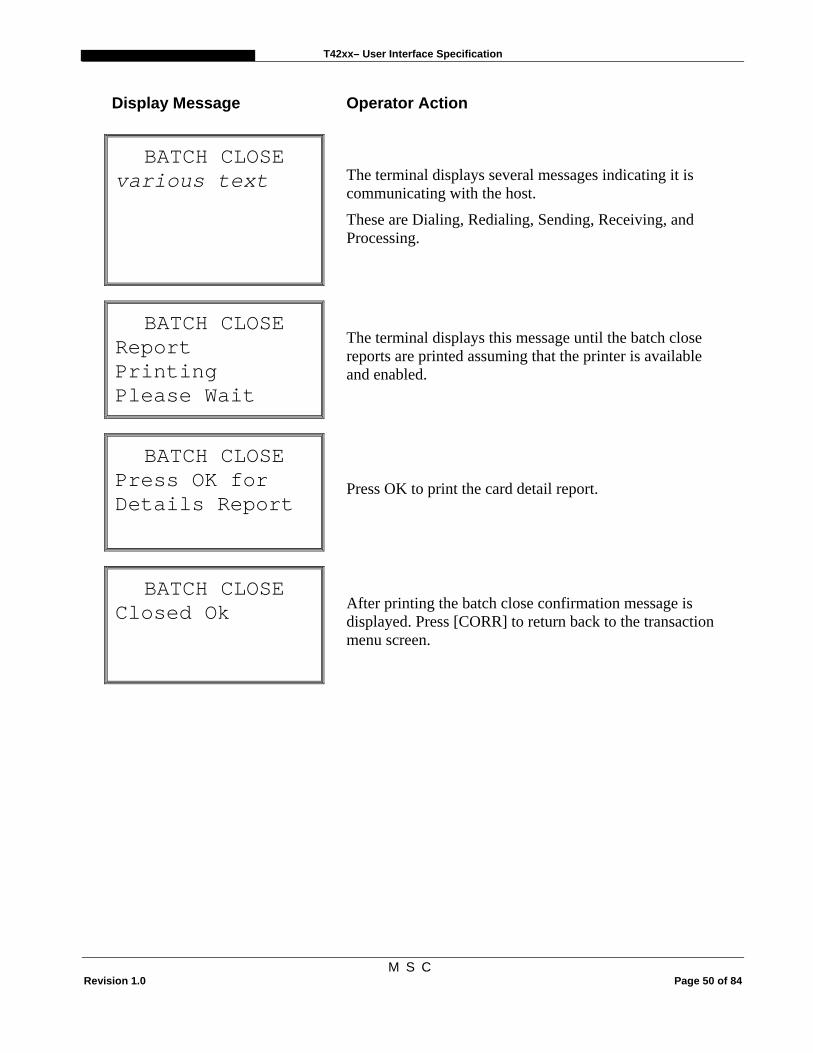
BATCH CLOSE various text
The terminal displays several messages indicating it is communicating with the host.
These are Dialing, Redialing, Sending, Receiving, and Processing.
BATCH CLOSE Report Printing Please Wait
The terminal displays this message until the batch close reports are printed assuming that the printer is available and enabled.
BATCH CLOSE Press OK for Details Report
Press OK to print the card detail report.
BATCH CLOSE Closed Ok
After printing the batch close confirmation message is displayed. Press [CORR] to return back to the transaction menu screen.
T42xx– User Interface Specification
M S C Revision 1.0 Page 51 of 84
8 Miscellaneous Transactions
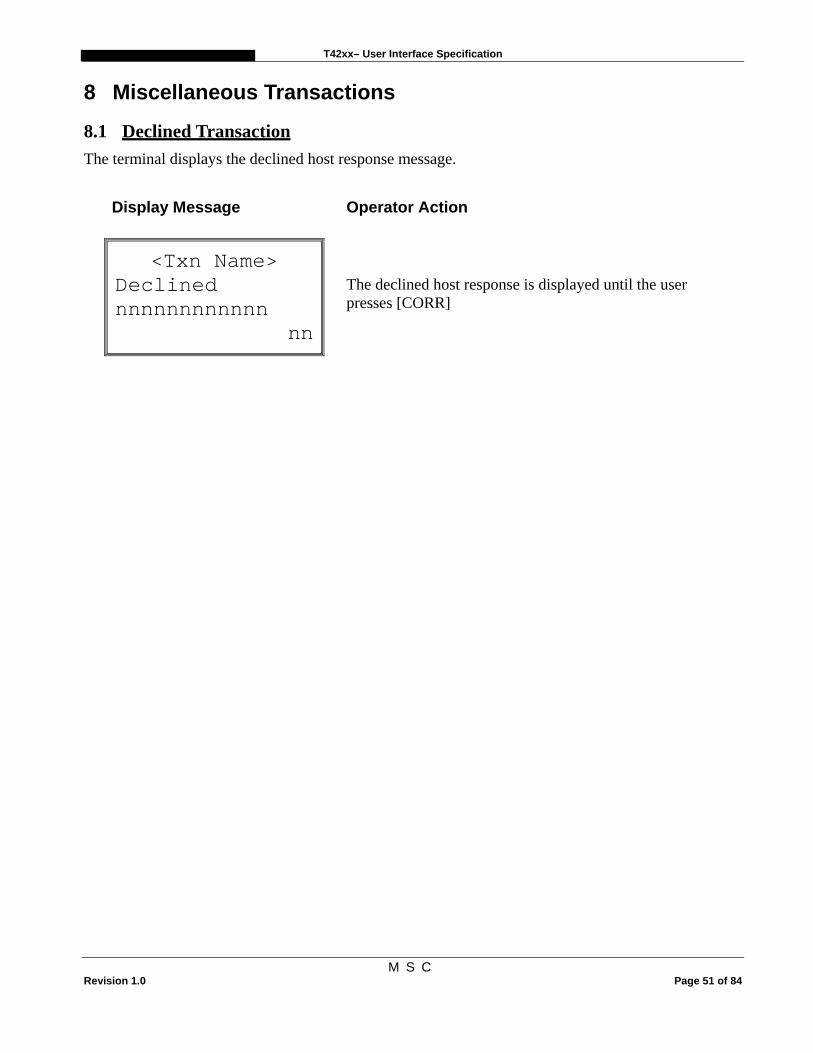
8.1 Declined Transaction The terminal displays the declined host response message.
Display Message Operator Action
<Txn Name> Declined nnnnnnnnnnnn
nn
The declined host response is displayed until the user presses [CORR]
T42xx– User Interface Specification
M S C Revision 1.0 Page 52 of 84
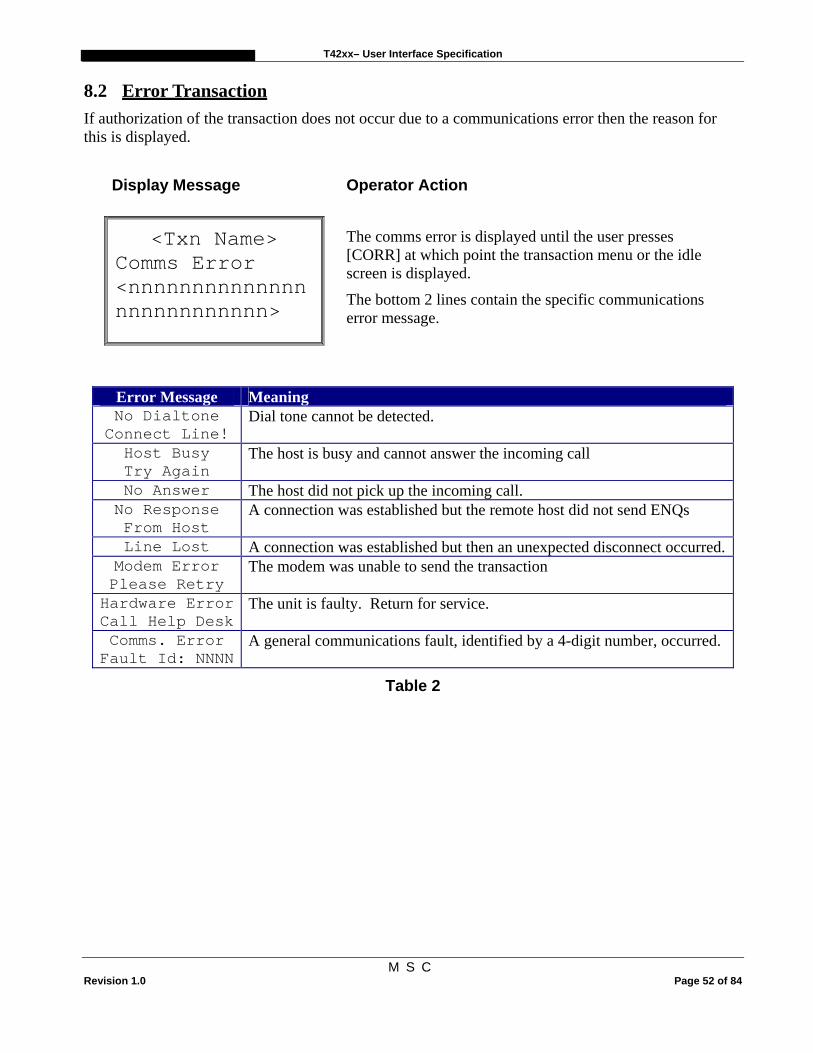
8.2 Error Transaction If authorization of the transaction does not occur due to a communications error then the reason for this is displayed.
On all detailed reports displaying transaction type, the following abbreviations are used:
• Sale Transactions SALE • Return Transactions RTRN • Pre-Auth Transactions PREA • Completion Transactions CMPL • Void VOID
Display Message Operator Action
MAIN MENU 1 FINANCIAL 2 ADMIN
Choose Admin from main menu and press [OK].
ADMIN MENU 1 SETTINGS 2 REPORTS 3 SETTLE
Use the F1/F3 navigation keys to scroll to Reports and press [OK].
T42xx– User Interface Specification
M S C Revision 1.0 Page 54 of 84
9.1 Report – Invoice Detail Prints a detailed report of all transactions in the current open batch ordered by Invoice Number. This report is printed after Batch Close transaction performed on the terminal.
Display Message Operator Action
INVOICE DET Report Printing Please Wait
The following display appears while the report is printing. The local functions menu then appears.
T42xx– User Interface Specification
M S C Revision 1.0 Page 55 of 84
The Invoice detail report looks like this:
Notes: 1. Voided transactions are displayed in the Invoice Detail report.
2. The Card Numbers are masked. For example, card number 1234567890123456 is printed as 1234XXXXXXX3456
INVOICE DET REPORT
Custom Header Line 1 Custom Header Line 2 Custom Header Line 3 Custom Header Line 4
Term Id:nnnnnnnnnnnnnn Date: yyyy/mm/dd Time:hh:mmP Invoice #:nnnn VISA SALE:Swiped Card #:nnnnnnnnnnnnnnnn Exp:mm/yy Op Id:nnnn Date:mm/dd/yy Time:hh:mmP Ref. #:nnnnnnnnnnnnnnn S Resp:APPROVED AMOUNT $nnnnn.nn Invoice #:nnnn DEBIT SALE Card #:nnnnnnnnnnnnnnnn Op Id:nnnn Date:yyyy/mm/dd Time:hh:mmP Ref. #: nnnnnnnnnnnnnn AMOUNT $nnnnn.nn
CashBack:$nnnnn.nn Tip:$nnnnn.nn
Surcharge:$nn.nn Total:$nnnnn.nn
END OF REPORT
-Report type -Custom header lines (max 4) -Terminal ID -Report date & time -Invoice#, card type, trans type & entry method -Account number -Expiry date -Operator id (optional) -Transaction date & time -Reference #, entry method (S=Swiped, M=Manual) -Host response -Purchase amount -Invoice#, card type, trans type -Account number -Operator id -Transaction date & time -Host response -Purchase amount -Optional cashback amount -Optional tip amount -Optional surcharge amount -Optional total -End of report marker
T42xx– User Interface Specification
M S C Revision 1.0 Page 56 of 84
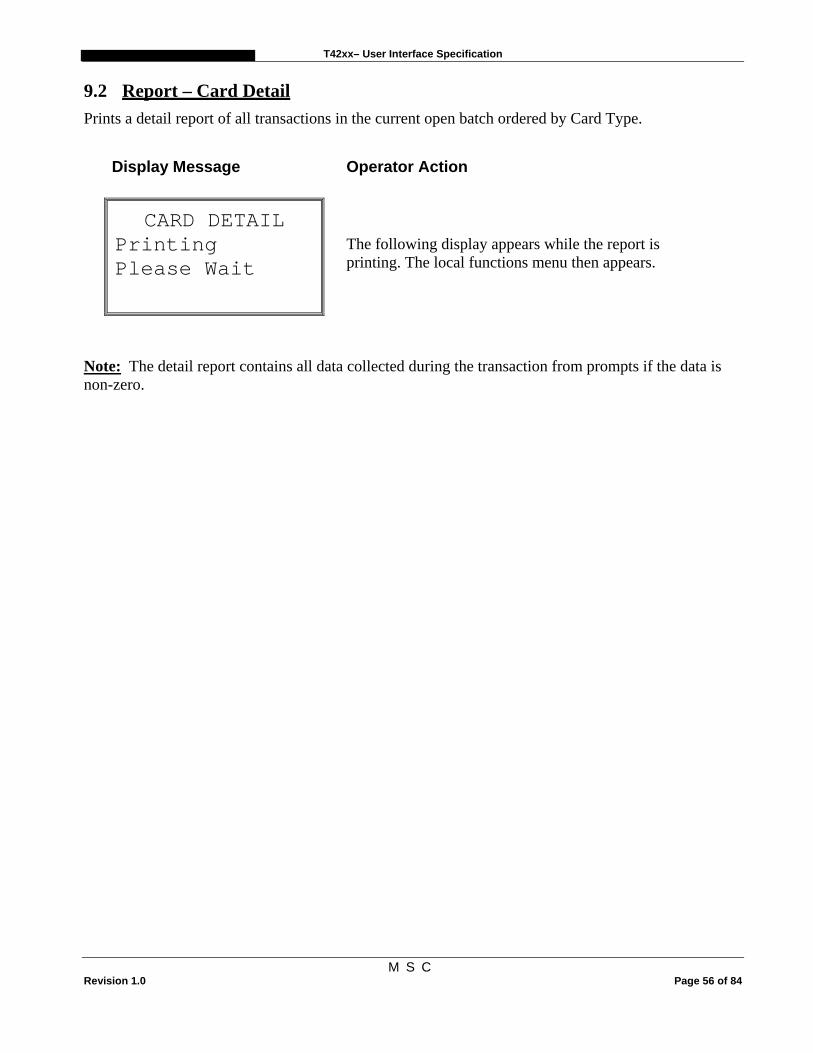
9.2 Report – Card Detail Prints a detail report of all transactions in the current open batch ordered by Card Type.
Display Message Operator Action
CARD DETAIL Printing Please Wait
The following display appears while the report is printing. The local functions menu then appears.
Note: The detail report contains all data collected during the transaction from prompts if the data is non-zero.
T42xx– User Interface Specification
M S C Revision 1.0 Page 57 of 84
The transaction detail report looks like this:
Notes: 1. Voided transactions are displayed in the Card Detail report.
2. If no transactions are present for a particular card type, the card type is not displayed in the report.
3. The Card Numbers are masked. For example, card number 1234567890123456 are printed as 1234XXXXXXX3456
CARD DETAIL REPORT
Custom Header Line 1 Custom Header Line 2 Custom Header Line 3 Custom Header Line 4
Term Id:nnnnnnnnnnnnnn Date: yyyy/mm/dd Time:hh:mmP
-Report type -Custom header lines (max 4) -Terminal ID -Report date & time -Card Type -Invoice#, card type & entry method -Account number and expiry date -Expiry Date -Operator id -Transaction date & time -Reference number, entry method (S=Swiped, M=Manual) -Host response -Purchase amount -Card Type -Invoice#, transaction type -Account number -Operator id -Transaction date & time -Reference number -Host response -Purchase amount -Optional cashback amount -Optional tip amount -Optional surcharge amount -Optional total -End of report marker
T42xx– User Interface Specification
M S C Revision 1.0 Page 58 of 84
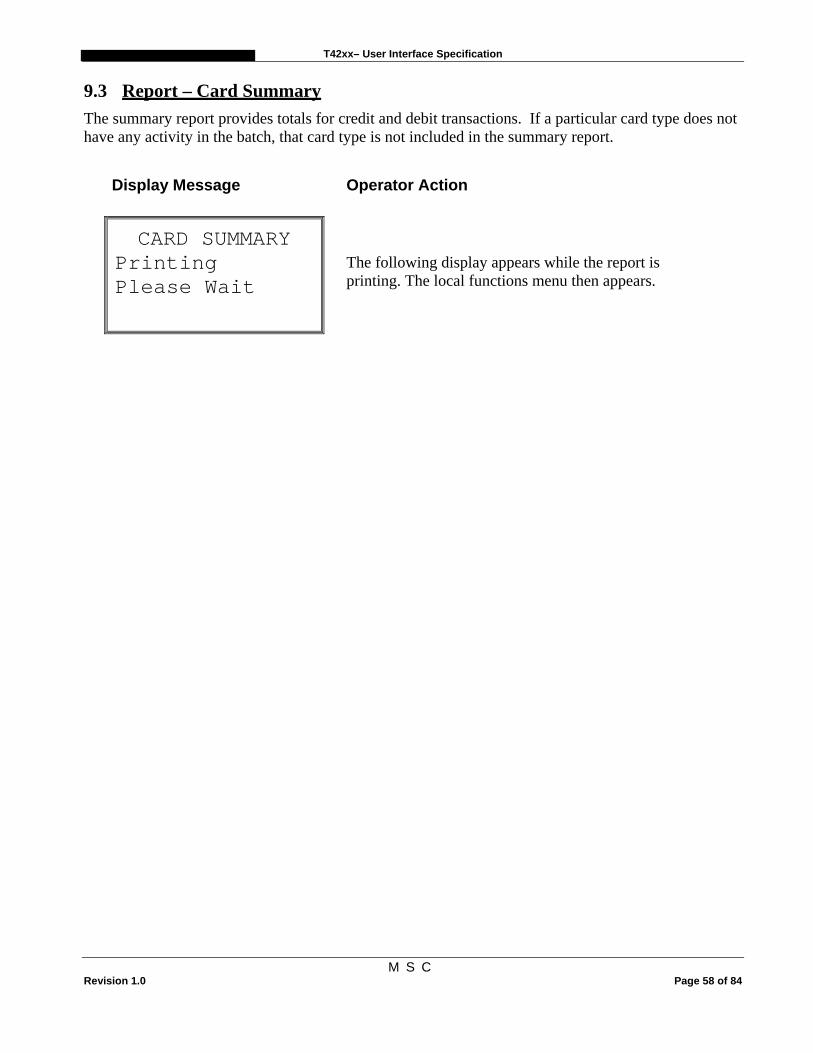
9.3 Report – Card Summary The summary report provides totals for credit and debit transactions. If a particular card type does not have any activity in the batch, that card type is not included in the summary report.
Display Message Operator Action
CARD SUMMARY Printing Please Wait
The following display appears while the report is printing. The local functions menu then appears.
T42xx– User Interface Specification
M S C Revision 1.0 Page 59 of 84
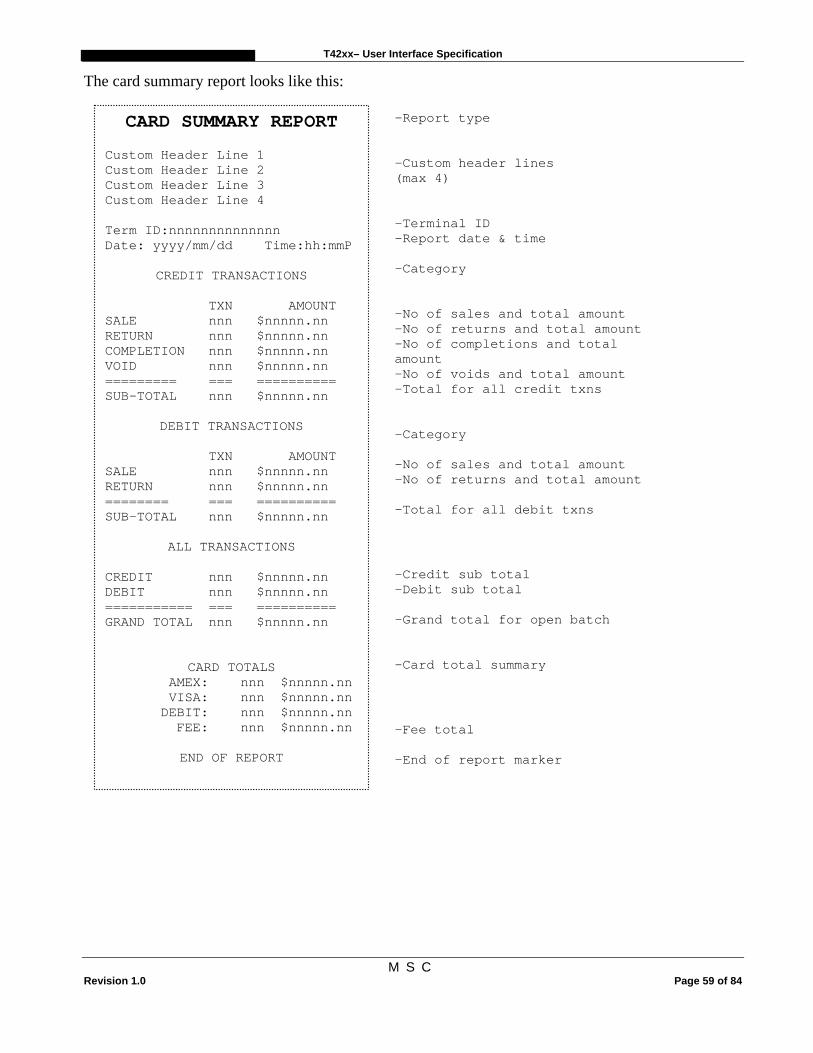
The card summary report looks like this:
CARD SUMMARY REPORT Custom Header Line 1 Custom Header Line 2 Custom Header Line 3 Custom Header Line 4 Term ID:nnnnnnnnnnnnnn Date: yyyy/mm/dd Time:hh:mmP
-Report type -Custom header lines (max 4) -Terminal ID -Report date & time -Category -No of sales and total amount -No of returns and total amount -No of completions and total amount -No of voids and total amount -Total for all credit txns -Category -No of sales and total amount -No of returns and total amount -Total for all debit txns -Credit sub total -Debit sub total -Grand total for open batch -Card total summary -Fee total -End of report marker
T42xx– User Interface Specification
M S C Revision 1.0 Page 60 of 84
9.4 Report – Debit Summary The summary report provides totals for debit transactions.
Display Message Operator Action
DEBIT SUMMARY Printing Please Wait
The following display appears while the report is printing. The local functions menu then appears.
T42xx– User Interface Specification
M S C Revision 1.0 Page 61 of 84
The card summary report looks like this:
DEBIT SUMMARY REPORT Custom Header Line 1 Custom Header Line 2 Custom Header Line 3 Custom Header Line 4 Term ID:nnnnnnnnnnnnnn Date: yyyy/mm/dd Time:hh:mmP
DEBIT TRANSACTIONS TXN AMOUNT BASE SALE nnn $nnnnn.nn BASE RETURN nnn $nnnnn.nn BASE VOID nnn $nnnnn.nn SURCHARG FEE nnn $nnnnn nn CASHBACK FEE nnn $nnnnn nn CASHBACK nnn $nnnnn nn ======== ========== SUB-TOTAL $nnnnn.nn
END OF REPORT
-Report type -Custom header lines (max 4) -Terminal ID -Report date & time -No of sales and total amount -No of returns and total amount -No of voids and total amount -No of surcharge fees collected amount -No of cashback fees and collected amount. -No. of cashbacks and total amount -Total for all debit txns -End of report marker
T42xx– User Interface Specification
M S C Revision 1.0 Page 62 of 84
9.5 Report – Operator Detail A report detailing the transactions performed for a single operator or all operators is available. This assumes that the configurable operator id prompt is enabled during transaction processing.
Display Message Operator Action
OPERATOR Enter Operator Id
XXXX
Key in the operator id required then press [OK] or just press [OK] to select all operators.
The standard printing please wait screen is then displayed followed by a return to the menus.
If a report for all operators is requested (Operator Summary Report) then an ordered report is generated with the operator id printed above the invoice, card trans total heading. This section is then repeated for each unique operator id.
OPERATOR XX REPORT
Custom Header Line 1 Custom Header Line 2 Custom Header Line 3 Custom Header Line 4 Term Id:nnnnnnnnnnnnnn Date: yyyy/mm/dd Time:hh:mmP INV. CARD TRANS TOTAL 001 MC SALE $nnnnn.nn 008 VISA RTRN $nnnnn.nn ========== SUB-TOTAL $nnnnn.nn
END OF REPORT
-Report Type and op id -Custom header lines (max 4) -Terminal ID -Report date & time -Invoice#, card\txn type & amount -Total value for operator -End of report marker
T42xx– User Interface Specification
M S C Revision 1.0 Page 63 of 84
9.6 Report – Tip Detail The tip detail report provides details of all transactions that include tip amount. The report format is the same as the Invoice Details report shown in 9.1
9.7 Report – Pre-Auth This report prints all the open preauth transactions from the current batch. The report format is the same as the Invoice Details report shown in 9.1
9.8 Aborting Reports During the printing of the Invoice Detail, Card Detail and Operator ID Reports the printing may be aborted by pressing the Cancel key. The print out of the aborted report ends with the text “REPORT ABORTED”. On pressing the Cancel key the following screen appears:
Display Message Operator Action
XXXXXXXXXX Abort Report? Yes No
Press the F3 navigation key or the [CORR] key to continue the report printing. Press the F6 navigation key to abort the report. XXXXXXXXXX represents the report type.
T42xx– User Interface Specification
M S C Revision 1.0 Page 64 of 84
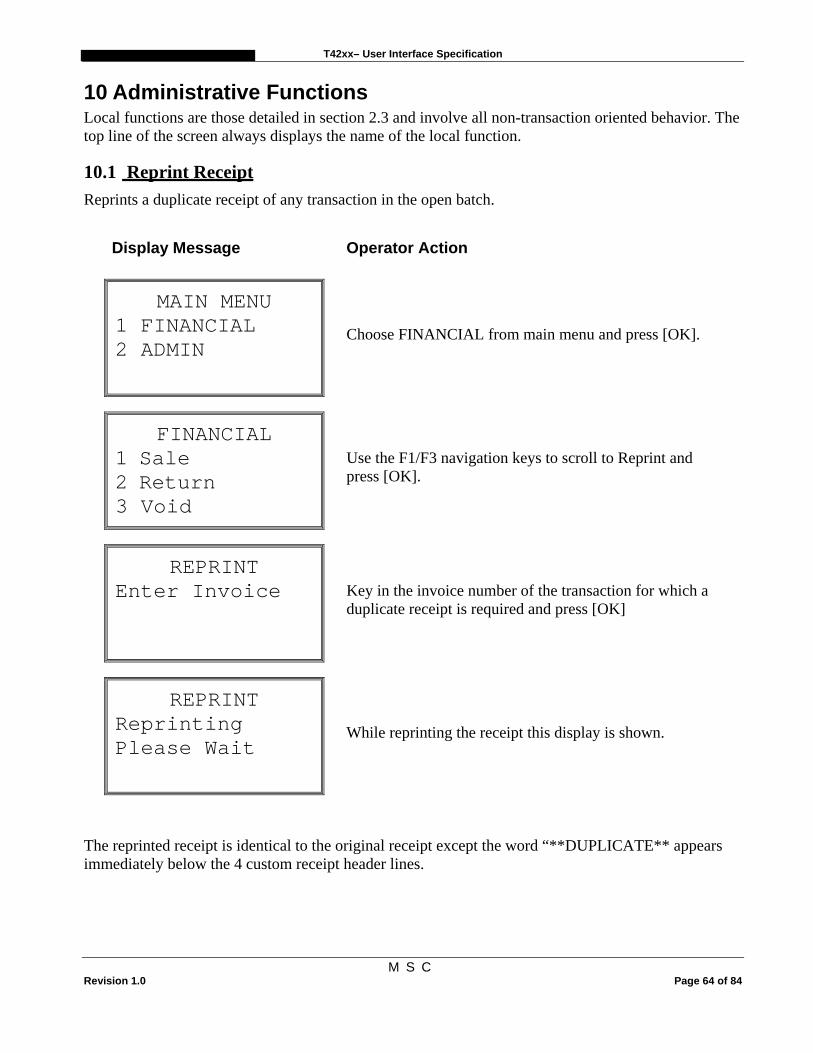
10 Administrative Functions Local functions are those detailed in section 2.3 and involve all non-transaction oriented behavior. The top line of the screen always displays the name of the local function.
10.1 Reprint Receipt Reprints a duplicate receipt of any transaction in the open batch.
Display Message Operator Action
MAIN MENU 1 FINANCIAL 2 ADMIN
Choose FINANCIAL from main menu and press [OK].
FINANCIAL 1 Sale 2 Return 3 Void
Use the F1/F3 navigation keys to scroll to Reprint and press [OK].
REPRINT Enter Invoice
Key in the invoice number of the transaction for which a duplicate receipt is required and press [OK]
REPRINT Reprinting Please Wait
While reprinting the receipt this display is shown.
The reprinted receipt is identical to the original receipt except the word “**DUPLICATE** appears immediately below the 4 custom receipt header lines.
T42xx– User Interface Specification
M S C Revision 1.0 Page 65 of 84
10.2 Level 1 Password The merchant password may be changed by this option.
Display Message Operator Action
PASSWORD Enter Password
Key in the merchant password (1-6 digits) and press [OK]. This prompt always occurs
PASSWORD SETUP Enter New Password
Key in the new merchant password (1-6 digits) and press [OK]
PASSWORD SETUP Confirm New Password
As confirmation key in the new merchant password (1-6 digits) and press [OK]
PASSWORD SETUP Change Confirmed!
The confirmation message is displayed before returning to the menus
T42xx– User Interface Specification
M S C Revision 1.0 Page 66 of 84
10.3 Terminal Settings The settings menu always prompts for a password when the menu option is selected
Use the F1/F3 navigation keys to scroll to Settings and press [OK].
SETTINGS MENU Enter Password
Key in the merchant password (1-6 digits) and press [OK]
T42xx– User Interface Specification
M S C Revision 1.0 Page 67 of 84
10.3.1 Debit Options
10.3.1.1 Surcharge
Debit surcharge may be enabled or disabled by this option. When the surcharge amount is non-zero then the user is asked if this amount is acceptable as a fee. There is a separate surcharge for cashback. Only one of the surcharge amounts applies. If cashback is taken then the cashback surcharge applies, otherwise the regular debit surcharge applies.
Display Message Operator Action
SURCHARGE Enter fee Amount
$0.00
Enter the amount for the fee.
10.3.1.2 Tip
Debit tipping may be enabled or disabled by this option. When enabled, the tip amount entry prompt appears for a debit sale transaction.
Display Message Operator Action
TIPS Mode:[Off] Change? Yes No
Press the F3 navigation key to enable debit tipping.
Press the F6 navigation key or the [CORR] key to leave the status unchanged and exit to the menus.
OR
TIPS Mode:[On] Change? Yes No
Press the F3 navigation key to disable debit tipping.
Press the F6 navigation key or the [CORR] key to leave the status unchanged and exit to the menus.
T42xx– User Interface Specification
M S C Revision 1.0 Page 68 of 84
10.3.1.3 Cashback
Debit cashback prompt may be enabled or disabled by this option. When enabled, the cashback amount prompt appears for a debit sale transaction. This menu also prompts for the surcharge amount for a cashback.
Display Message Operator Action
CASHBACK Mode:[Off] Change? Yes No
Press the F3 navigation key to enable cash back option.
Press the F6 navigation key or the [CORR] key to leave the status unchanged and exit to the menus.
SURCHARGE Enter Fee Amount
$0.00
Enter the amount for the fee for cashback.
CASH BACK Enter maximum Amount
$0.00
Enter the amount for the maximum cashback amount that can be entered. The minimum maximum is $10 and the maximum $1000.
OR
CASHBACK Mode:[On] Change? Yes No
Press the F3 navigation key to key to disable cash back option.
Press the F6 navigation key or the [CORR] key to proceed to the surcharge fee screen.
T42xx– User Interface Specification
M S C Revision 1.0 Page 69 of 84
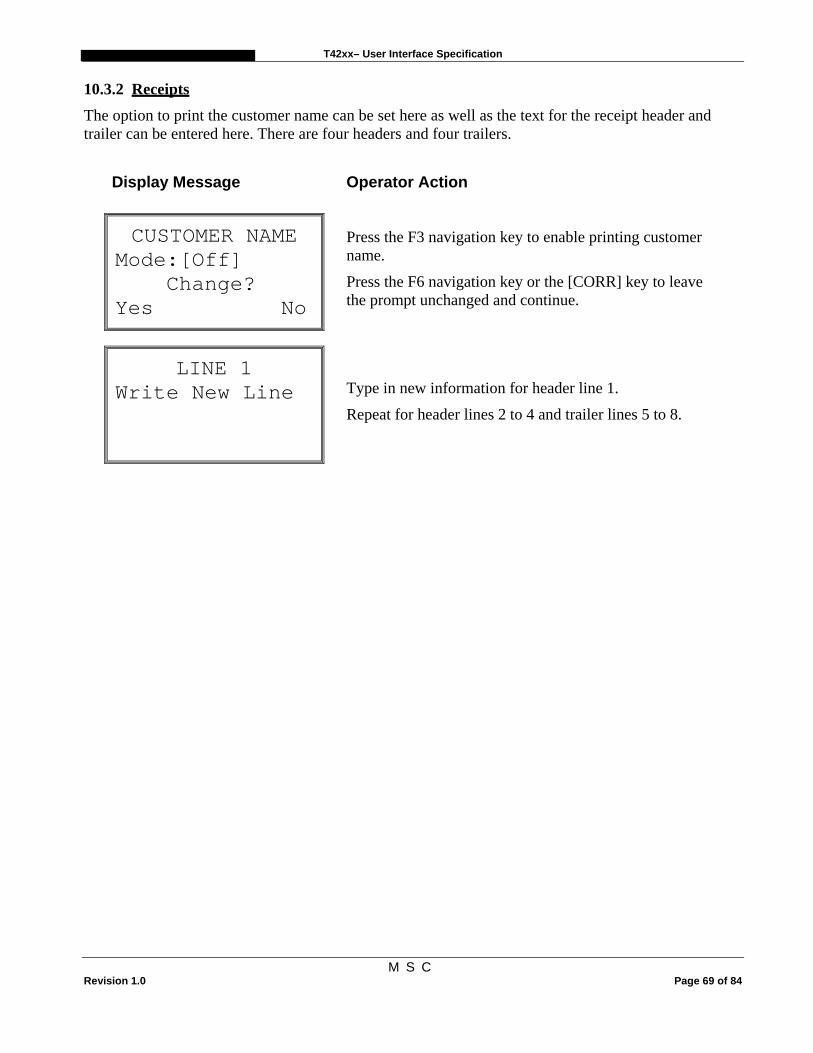
10.3.2 Receipts The option to print the customer name can be set here as well as the text for the receipt header and trailer can be entered here. There are four headers and four trailers.
Display Message Operator Action
CUSTOMER NAME Mode:[Off] Change? Yes No
Press the F3 navigation key to enable printing customer name.
Press the F6 navigation key or the [CORR] key to leave the prompt unchanged and continue.
LINE 1 Write New Line
Type in new information for header line 1.
Repeat for header lines 2 to 4 and trailer lines 5 to 8.
T42xx– User Interface Specification
M S C Revision 1.0 Page 70 of 84
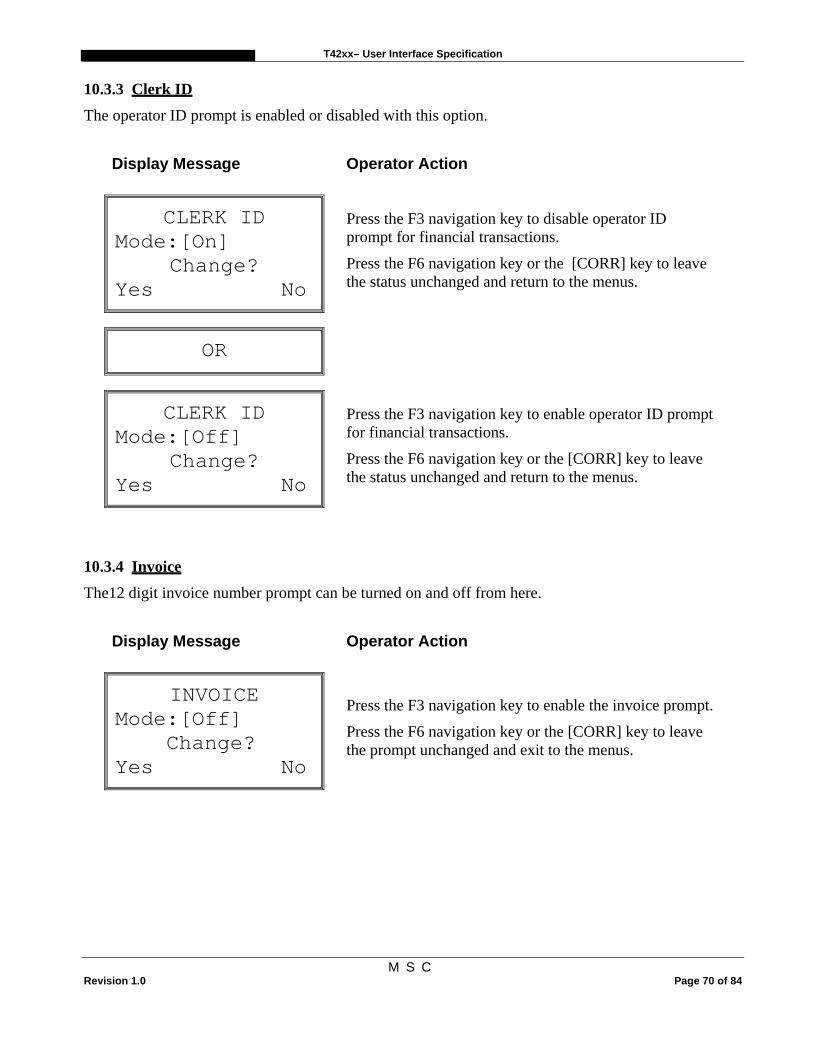
10.3.3 Clerk ID The operator ID prompt is enabled or disabled with this option.
Display Message Operator Action
CLERK ID Mode:[On]
Change? Yes No
Press the F3 navigation key to disable operator ID prompt for financial transactions.
Press the F6 navigation key or the [CORR] key to leave the status unchanged and return to the menus.
OR
CLERK ID Mode:[Off]
Change? Yes No
Press the F3 navigation key to enable operator ID prompt for financial transactions.
Press the F6 navigation key or the [CORR] key to leave the status unchanged and return to the menus.
10.3.4 Invoice The12 digit invoice number prompt can be turned on and off from here.
Display Message Operator Action
INVOICE Mode:[Off] Change? Yes No
Press the F3 navigation key to enable the invoice prompt.
Press the F6 navigation key or the [CORR] key to leave the prompt unchanged and exit to the menus.
T42xx– User Interface Specification
M S C Revision 1.0 Page 71 of 84
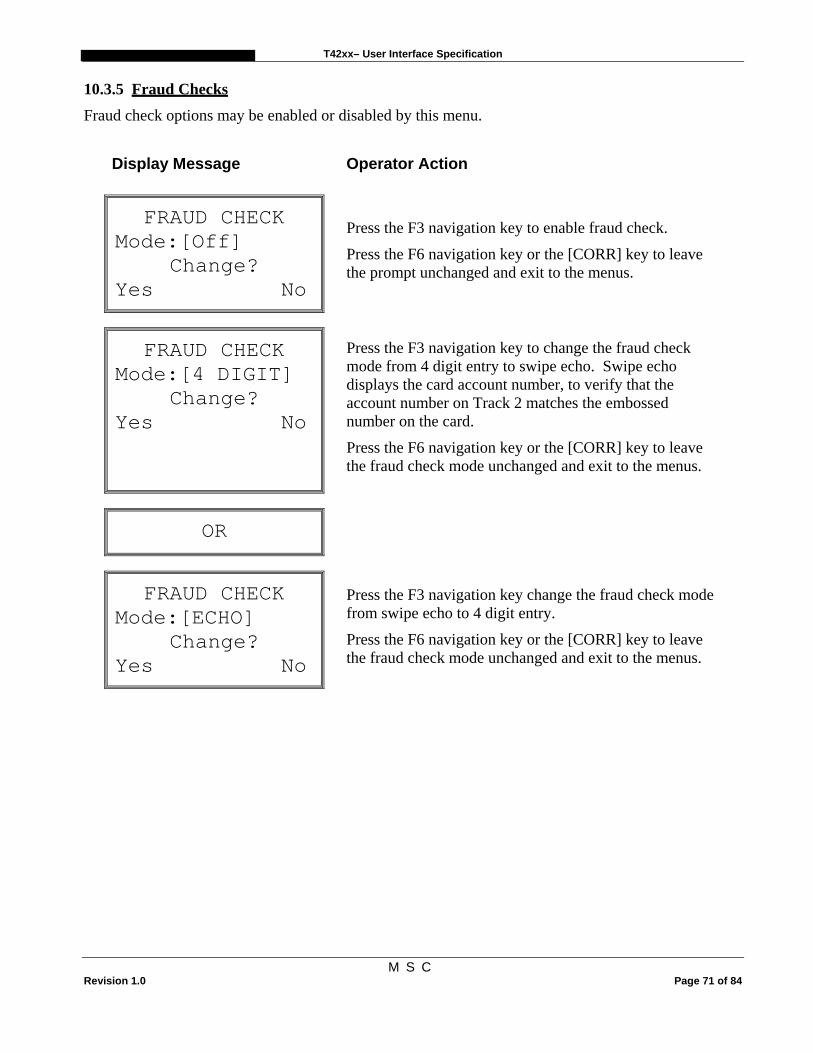
10.3.5 Fraud Checks Fraud check options may be enabled or disabled by this menu.
Display Message Operator Action
FRAUD CHECK Mode:[Off]
Change? Yes No
Press the F3 navigation key to enable fraud check.
Press the F6 navigation key or the [CORR] key to leave the prompt unchanged and exit to the menus.
FRAUD CHECK Mode:[4 DIGIT]
Change? Yes No
Press the F3 navigation key to change the fraud check mode from 4 digit entry to swipe echo. Swipe echo displays the card account number, to verify that the account number on Track 2 matches the embossed number on the card.
Press the F6 navigation key or the [CORR] key to leave the fraud check mode unchanged and exit to the menus.
OR
FRAUD CHECK Mode:[ECHO]
Change? Yes No
Press the F3 navigation key change the fraud check mode from swipe echo to 4 digit entry.
Press the F6 navigation key or the [CORR] key to leave the fraud check mode unchanged and exit to the menus.
T42xx– User Interface Specification
M S C Revision 1.0 Page 72 of 84
10.3.6 Language The language is the language that the terminal operates in. This can be set to English or French.
Display Message Operator Action
LANGUAGE English
Change? Yes No
Select “Yes” to change the terminal to French. Exit the Admin menu for the change to take place.
10.3.7 Contrast This allows the user to adjust the terminal contrast.
Display Message Operator Action
CONTRAST Press “OK” to Save setting Up Down
Adjust the contrast by selecting the F3/F6 navigation keys. Press OK to save the setting.
T42xx– User Interface Specification
M S C Revision 1.0 Page 73 of 84
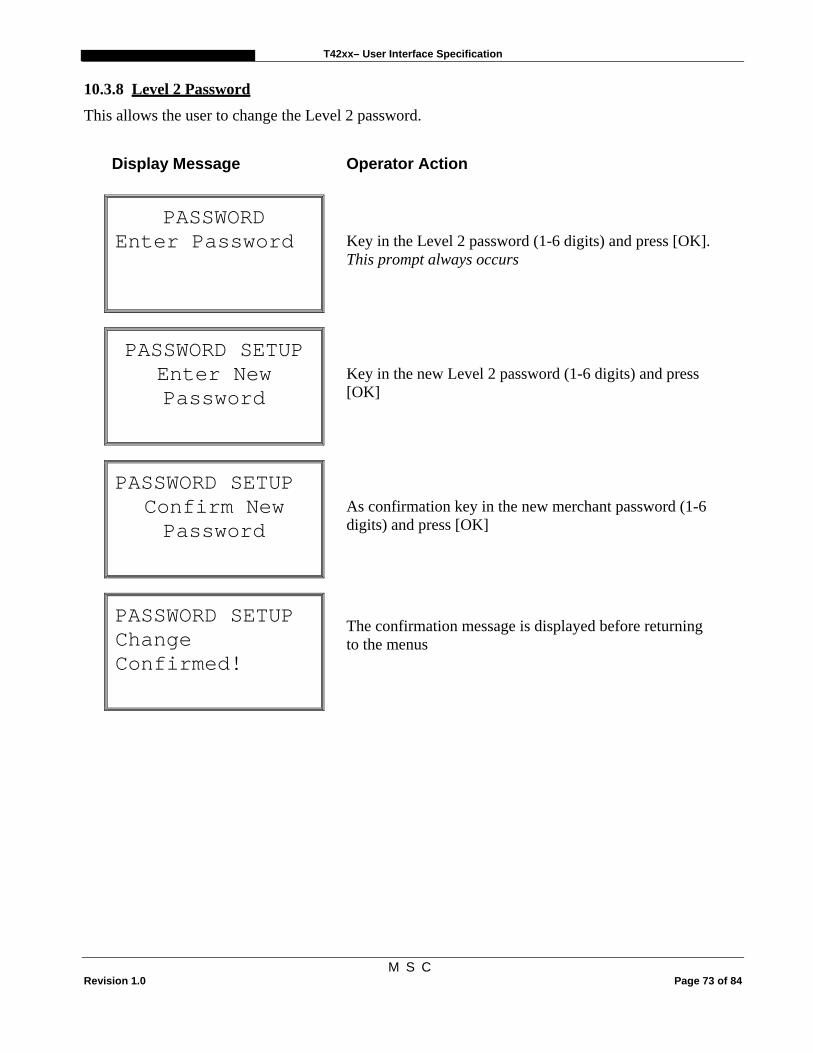
10.3.8 Level 2 Password This allows the user to change the Level 2 password.
Display Message Operator Action
PASSWORD Enter Password
Key in the Level 2 password (1-6 digits) and press [OK]. This prompt always occurs
PASSWORD SETUP Enter New Password
Key in the new Level 2 password (1-6 digits) and press [OK]
PASSWORD SETUP Confirm New Password
As confirmation key in the new merchant password (1-6 digits) and press [OK]
PASSWORD SETUP Change Confirmed!
The confirmation message is displayed before returning to the menus
T42xx– User Interface Specification
M S C Revision 1.0 Page 74 of 84
10.3.9 Terminal Setup Items included in the Terminal Setup menu are as follows:
1 COMM TYPE2 PHONE #3 TERM ID4 DOWNLOAD5 UPGRADE6 ETHERNET
Figure 7
NOTE: Menu option item 6 ETHERNET is only displayed on T4220 IP or T3230 GPRS terminals.
10.3.9.1 Communication Type
Display the current selection (DIAL / ETHERNET) and allow selection of a different mode.
The user is prompted to first close the batch if the batch contains any transactions and the communication mode is to be changed.
NOTE: Pressing the CANC key at any time in these menus will return to the previous menu, canceling any partial changes.
Display Message Operator Action
COMM TYPE ETHERNET
Change? Yes No
Press the F3 navigation key to change the Communication mode to Dial.
Press the F6 navigation key or the [CORR] key to leave the communications mode unchanged.
Both selections return to the Terminal Setup menu.
10.3.9.2 Phone #
Item included in the Phone# menu is as follows:
PHONE MENU1 HOST
Figure 8
T42xx– User Interface Specification
M S C Revision 1.0 Page 75 of 84
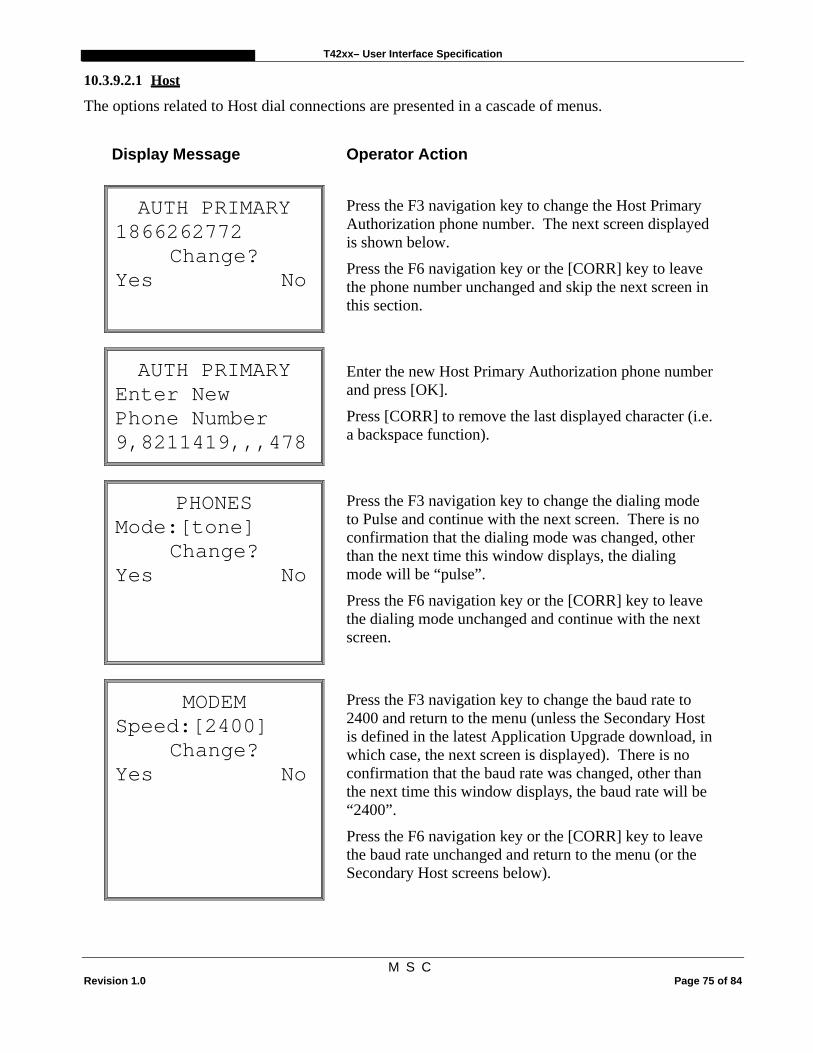
10.3.9.2.1 Host
The options related to Host dial connections are presented in a cascade of menus.
Display Message Operator Action
AUTH PRIMARY 1866262772
Change? Yes No
Press the F3 navigation key to change the Host Primary Authorization phone number. The next screen displayed is shown below.
Press the F6 navigation key or the [CORR] key to leave the phone number unchanged and skip the next screen in this section.
AUTH PRIMARY Enter New Phone Number 9,8211419,,,478
Enter the new Host Primary Authorization phone number and press [OK].
Press [CORR] to remove the last displayed character (i.e. a backspace function).
PHONES Mode:[tone]
Change? Yes No
Press the F3 navigation key to change the dialing mode to Pulse and continue with the next screen. There is no confirmation that the dialing mode was changed, other than the next time this window displays, the dialing mode will be “pulse”.
Press the F6 navigation key or the [CORR] key to leave the dialing mode unchanged and continue with the next screen.
MODEM Speed:[2400]
Change? Yes No
Press the F3 navigation key to change the baud rate to 2400 and return to the menu (unless the Secondary Host is defined in the latest Application Upgrade download, in which case, the next screen is displayed). There is no confirmation that the baud rate was changed, other than the next time this window displays, the baud rate will be “2400”.
Press the F6 navigation key or the [CORR] key to leave the baud rate unchanged and return to the menu (or the Secondary Host screens below).
T42xx– User Interface Specification
M S C Revision 1.0 Page 76 of 84
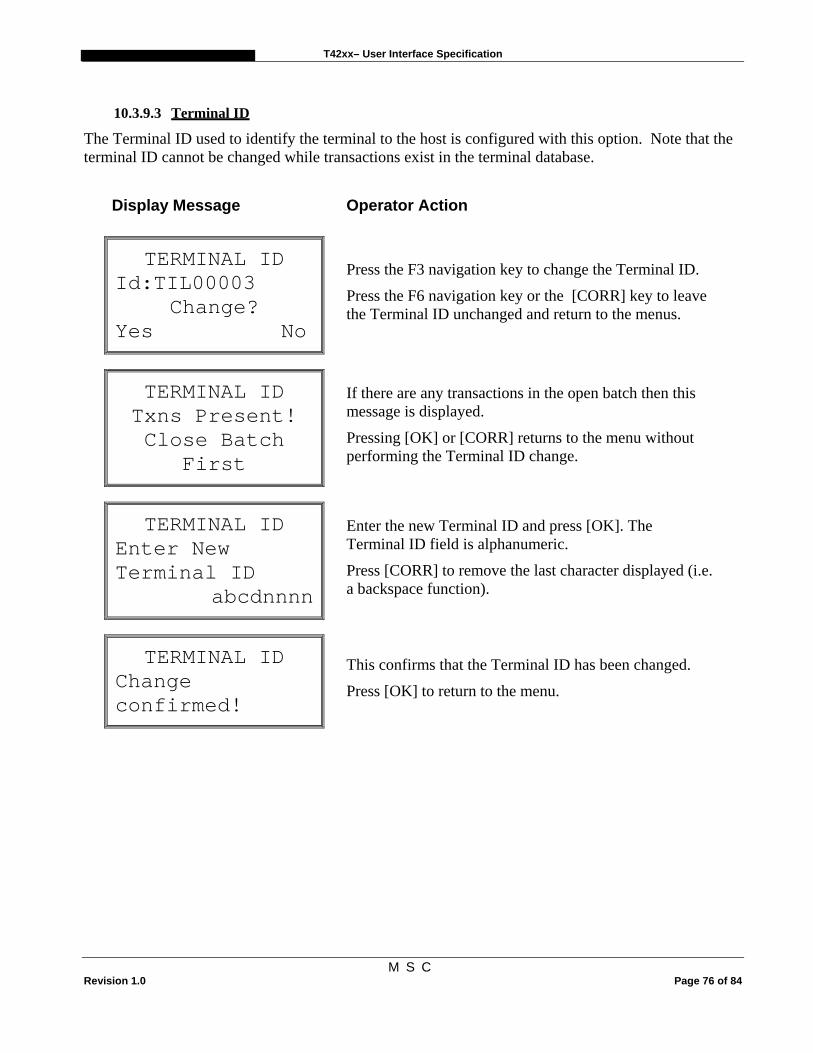
10.3.9.3 Terminal ID
The Terminal ID used to identify the terminal to the host is configured with this option. Note that the terminal ID cannot be changed while transactions exist in the terminal database.
Display Message Operator Action
TERMINAL ID Id:TIL00003
Change? Yes No
Press the F3 navigation key to change the Terminal ID.
Press the F6 navigation key or the [CORR] key to leave the Terminal ID unchanged and return to the menus.
TERMINAL ID Txns Present! Close Batch
First
If there are any transactions in the open batch then this message is displayed.
Pressing [OK] or [CORR] returns to the menu without performing the Terminal ID change.
TERMINAL ID Enter New Terminal ID
abcdnnnn
Enter the new Terminal ID and press [OK]. The Terminal ID field is alphanumeric.
Press [CORR] to remove the last character displayed (i.e. a backspace function).
TERMINAL ID Change confirmed!
This confirms that the Terminal ID has been changed.
Press [OK] to return to the menu.
T42xx– User Interface Specification
M S C Revision 1.0 Page 77 of 84
10.3.9.4 Download
This performs a parameter download from the B24 host.
If the batch contains any transaction, the user is prompted to first close the batch.
Display Message Operator Action
DOWNLOAD Txns Present! Close Batch
First
If there are any transactions in the open batch then this message is displayed.
Pressing [OK] or [CORR] returns to the menu without performing the parameter download.
DOWNLOAD [progress messages]
None. Once the download is complete, the terminal automatically reboots itself.
10.3.9.5 Upgrade
This allows the user to perform an Application Software Download. This should only be performed when facilitated and directed by the financial host or deployment agent.
If the batch contains any transaction, the user is prompted to first close the batch.
Display Message Operator Action
APP UPGRADE Start Upgrade
Confirm? YES NO
Start an Application Software Upgrade by selecting the F3 navigation key.
Press the F6 navigation key or [CORR] to cancel the Application Software Upgrade.
APP UPGRADE Txns Present! Close Batch
First
If there are any transactions in the open batch then this message is displayed. Pressing [OK] or [CORR] returns to the menu without performing the Application Software Upgrade.
T42xx– User Interface Specification
M S C Revision 1.0 Page 78 of 84
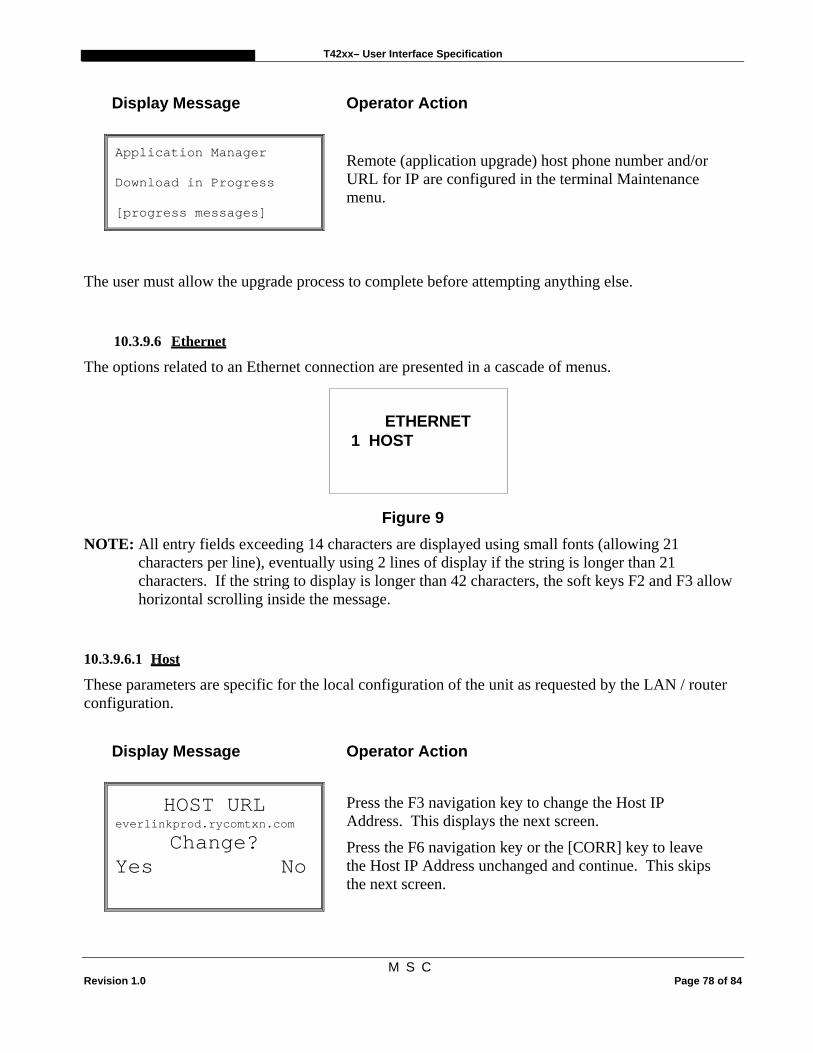
Display Message Operator Action
Application Manager Download in Progress [progress messages]
Remote (application upgrade) host phone number and/or URL for IP are configured in the terminal Maintenance menu.
The user must allow the upgrade process to complete before attempting anything else.
10.3.9.6 Ethernet
The options related to an Ethernet connection are presented in a cascade of menus.
ETHERNET1 HOST
Figure 9
NOTE: All entry fields exceeding 14 characters are displayed using small fonts (allowing 21 characters per line), eventually using 2 lines of display if the string is longer than 21 characters. If the string to display is longer than 42 characters, the soft keys F2 and F3 allow horizontal scrolling inside the message.
10.3.9.6.1 Host
These parameters are specific for the local configuration of the unit as requested by the LAN / router configuration.
Display Message Operator Action
HOST URL everlinkprod.rycomtxn.com
Change? Yes No
Press the F3 navigation key to change the Host IP Address. This displays the next screen.
Press the F6 navigation key or the [CORR] key to leave the Host IP Address unchanged and continue. This skips the next screen.
T42xx– User Interface Specification
M S C Revision 1.0 Page 79 of 84
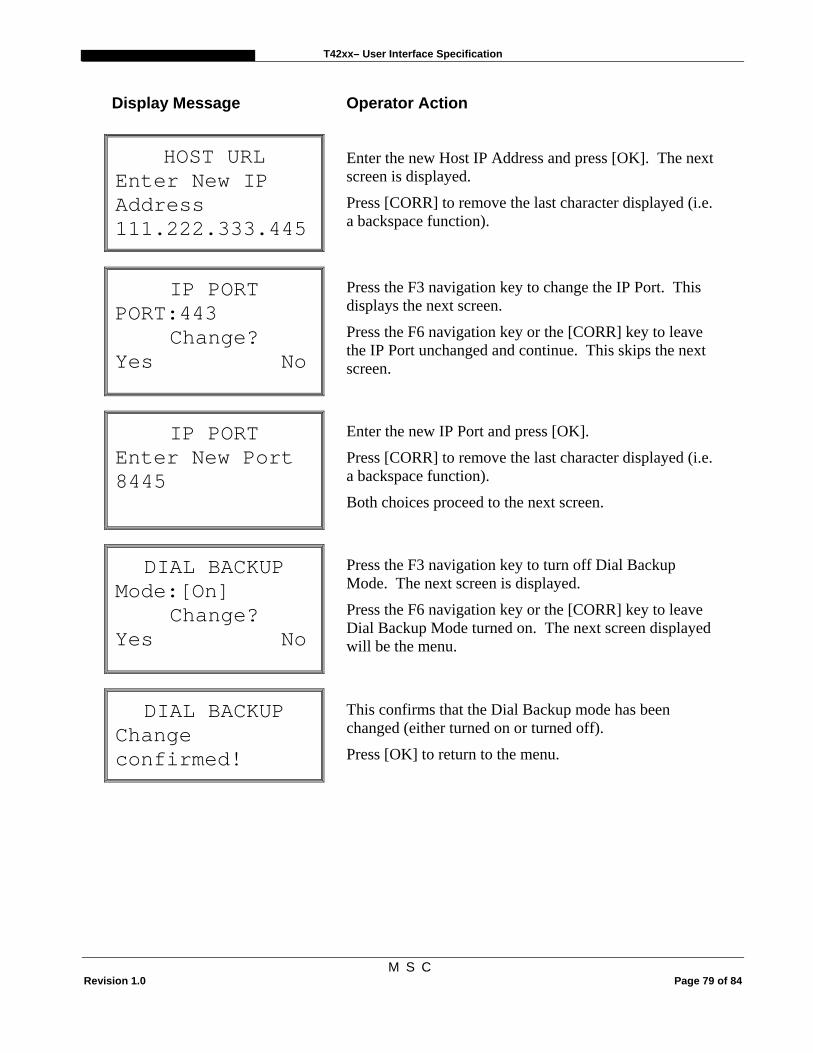
Display Message Operator Action
HOST URL Enter New IP Address 111.222.333.445
Enter the new Host IP Address and press [OK]. The next screen is displayed.
Press [CORR] to remove the last character displayed (i.e. a backspace function).
IP PORT PORT:443
Change? Yes No
Press the F3 navigation key to change the IP Port. This displays the next screen.
Press the F6 navigation key or the [CORR] key to leave the IP Port unchanged and continue. This skips the next screen.
IP PORT Enter New Port 8445
Enter the new IP Port and press [OK].
Press [CORR] to remove the last character displayed (i.e. a backspace function).
Both choices proceed to the next screen.
DIAL BACKUP Mode:[On]
Change? Yes No
Press the F3 navigation key to turn off Dial Backup Mode. The next screen is displayed.
Press the F6 navigation key or the [CORR] key to leave Dial Backup Mode turned on. The next screen displayed will be the menu.
DIAL BACKUP Change confirmed!
This confirms that the Dial Backup mode has been changed (either turned on or turned off).
Press [OK] to return to the menu.
T42xx– User Interface Specification
M S C Revision 1.0 Page 80 of 84
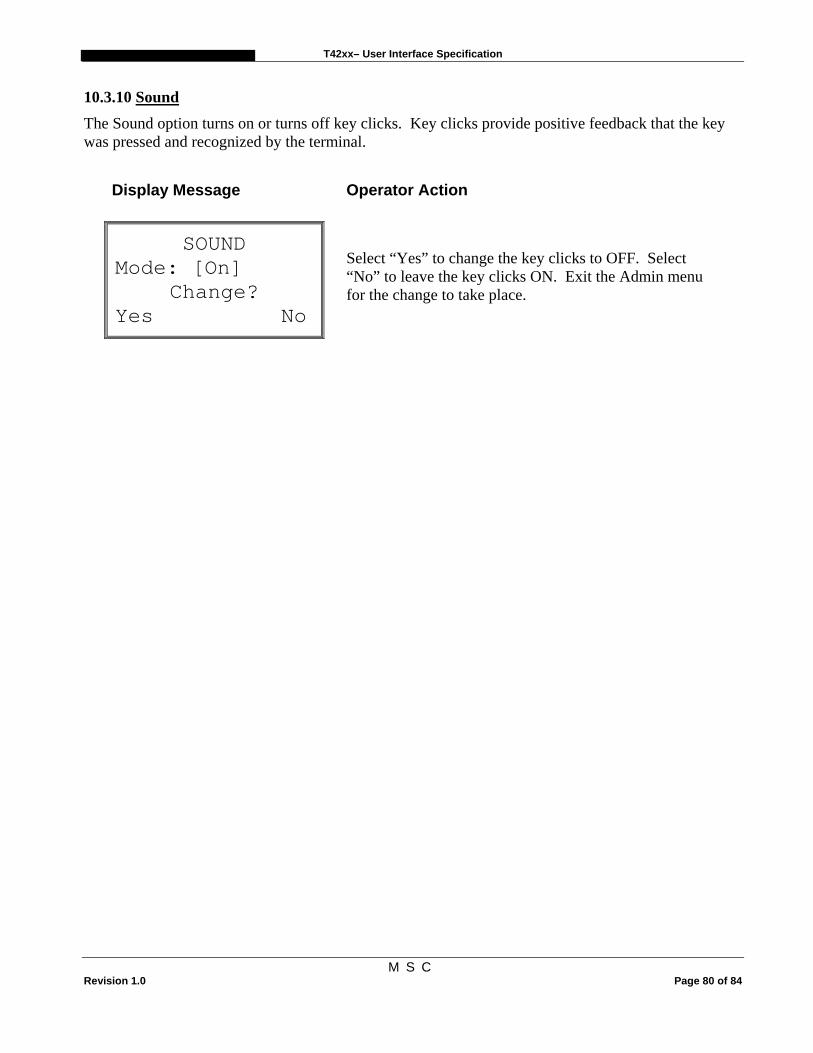
10.3.10 Sound The Sound option turns on or turns off key clicks. Key clicks provide positive feedback that the key was pressed and recognized by the terminal.
Display Message Operator Action
SOUND Mode: [On]
Change? Yes No
Select “Yes” to change the key clicks to OFF. Select “No” to leave the key clicks ON. Exit the Admin menu for the change to take place.
T42xx– User Interface Specification
M S C Revision 1.0 Page 81 of 84
10.4 Training Mode Training mode allows all transactions, reports, and reviews to be performed in a “fake” training mode. Application upgrade downloads are prevented. Training mode may only be entered when there are no transactions in the open batch. When training mode is exited the training transactions are deleted.
In Training mode, all receipts print the following message at the top of the receipt, and the authorization code always ends with ‘T’ (training):
***VOID***VOID*** *****TRAINING*****
Display Message Operator Action
ADMIN MENU 1 SETTINGS 2 REPORTS 3 SETTLE
Use the F1/F3 navigation keys to scroll down to Training and press [OK].
TRAINING Enter Password
Key in the merchant password (1-6 digits) and press [OK].
TRAINING Mode:[**Off**]
Change? Yes No
Press the F3 navigation key to enable training mode and go to the confirmation screen.
Press the F6 navigation key or the [CORR] key to leave the status unchanged and exit to the menus.
TRAINING Txns Present! Close Batch
First
If there are any transactions in the open batch then this message is displayed if the Yes navigation key was pressed in the screen above. Pressing [OK] or [CORR] returns to the menu without entering training mode.
T42xx– User Interface Specification
M S C Revision 1.0 Page 82 of 84
Display Message Operator Action
TRAINING Entering demo mode Initializing
The confirmation message is displayed before returning to the menus
-- OR --
TRAINING Mode:[**On**] Change? Yes No
Press the F3 navigation key to exit training mode and go to the confirmation screen.
Press the F6 navigation key or the [CORR] key to leave the status unchanged and exit to the menus.
TRAINING Exiting demo mode Initializing
The confirmation message is displayed before returning to the menus
T42xx– User Interface Specification
M S C Revision 1.0 Page 83 of 84
10.5 Communication Test This function allows the user to test communications between the terminal and the host.
Display Message Operator Action
ADMIN MENU 1 SETTINGS 2 REPORTS 3 SETTLE
Use the F1/F3 navigation keys to scroll down to Bank Comms and press [OK].
BANK COMMS Enter Password
Key in the merchant password (1-6 digits) and press [OK].
BANK COMMS Various Text
The terminal displays several messages indicating it is communicating with the host. These are dialing, redialing, sending, receiving and processing.
BANK COMMS Successful
Press [OK], [CORR] or [CANC] key to return to Admin Menu
T42xx– User Interface Specification
M S C Revision 1.0 Page 84 of 84
10.6 T42xx Application Manager Desktop Accessing the “App Manager Desktop” allows the user to launch other co-resident software modules that may reside on the T42xx terminal.
Display Message Operator Action
Financial
Pressing the [HOME] key at the application idle screen will activate the App Manager Desktop. Press the F1 navigation key to return back to the Financial application.