12
Deaerators Troubleshooting & Inspection Guide cochrane.com
Deaerators Troubleshooting & Inspection Guide
cochrane.com
a legacy of innovation. since 1863.
Deaerator Troubleshooting & Inspection Guide
The deaerator (DA) in your facility is key part of your boiler feedwater treatment system and a vital safeguard for protecting and preserving your boiler equipment. By removing damaging dissolved gases, it prevents the rusting, pitting and thinning of steel surfaces that the presence of oxygen and carbon dioxide can cause.
This guide has been developed to assist you in properly monitoring and optimizing your deaerator’s performance to maximize boiler efficiency and minimize the use and ongoing expense of oxygen scavenging chemicals.
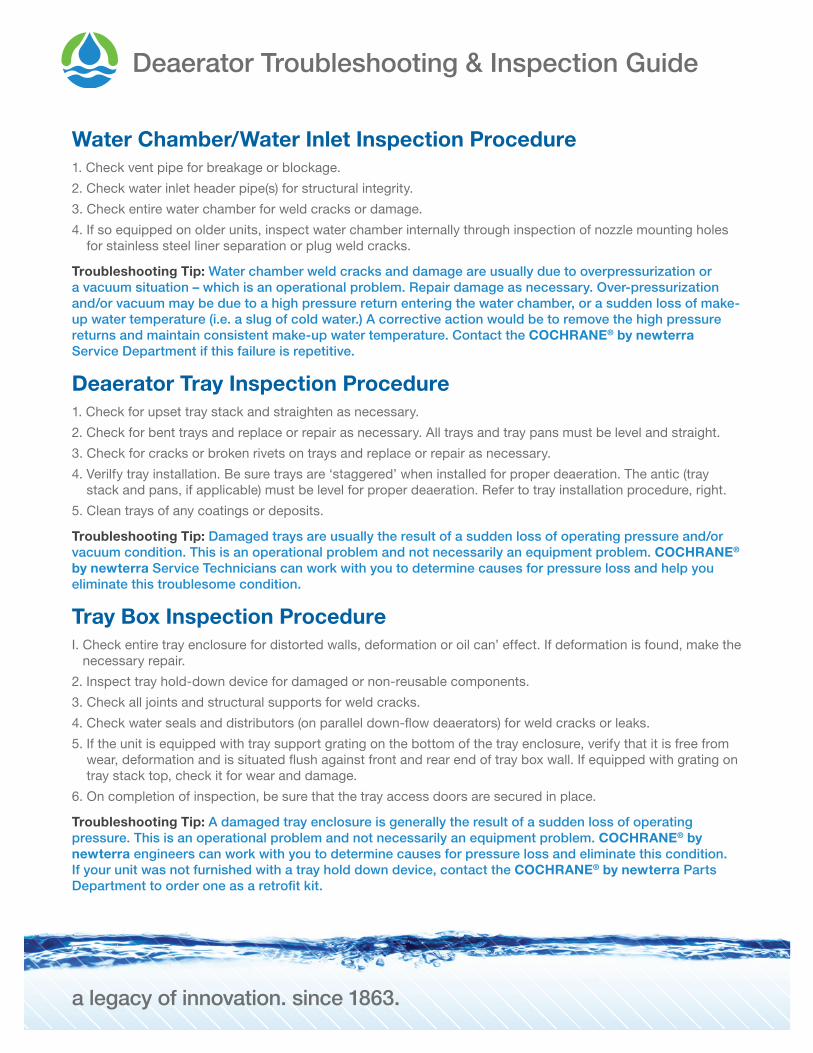
Spray Nozzle Inspection Procedure1. Inspect nozzle(s) and verify that they are installed securely.
2. Inspect for blockage or foreign matter.
3. Inspect spring for damage and/or weakness. Nozzles should not ‘hang open’.
4. Inspect valve body, spring retainer, lower body, valve disc, spring cap and deflectors for wear. Inspect valve body and disc for uneven wear in particular.
5. Inspect main stem for wear or deposits: main stern should be smooth.
6. In the case of ACCU-SPRAY nozzles, check Teflon bushing for wear.
Troubleshooting Tip: A symptom of poor spray nozzle performance is high oxygen content in deaerator effluent. Consistently worn spray nozzle stems, bushings and spreaders can be a result of high pressure returns entering the water chamber with the makeup. Generally, this condition can be corrected by reducing or removing the high pressure condensate returns to the water chamber. The condition may also be caused by the cycling of the feed water control valve. If the valve controller is set to maintain a narrow band of water level control versus using the full band available, a small change in storage tank water level will cause a rapid and large change in valve stroke – in turn causing the control valve to admit sudden large quantities of cold water. This condition will prevent the main steam control valve from supplying adequate steam and can result in violent flashing returns which may wear spray nozzle components prematurely. This problem can be corrected by adjusting (widening) the band of the water level controller. If the spray nozzle valve body and/or disc shows indications or uneven wear, this may be an effect of ‘side thrust’ on the nozzle. This ‘side thrust’ effect on units with a ‘header’ type water chamber is where the water flows across the nozzle stem. The spray nozzle stem will not produce a consistent spray pattern, resulting in poor deaeration and uneven wear or ‘wire draw’ on the nozzles’ moving parts. Nearly all horizontal units have this header type water chamber and may experience this condition. COCHRANE® by newterra can re-fit most horizontal units with guided ACCU-SPRAY nozzles that will eliminate this condition. Always consult the O&M Manual. If the condition persists, contact the COCHRANE® by newterra for service or a quote on ACCU-SPRAY nozzles.
7. In the case of COCHRANE® by newterra ACCU-SPRAY A-101 and A-2500 nozzles, check the Teflon mounting gasket for proper installation. A reddish orange color around the gasket indicates a possible water leak. Replace the gasket and mounting nuts.
CAUTION! DO NOT use a power wrench to remove lock nuts. The mounting studs may strip or shear off. It is recommended that new lock nuts and gaskets be installed vs. reuse.

For Parts & Service, call 1.800.633.7435 or visit cochrane.com
Solutions To Typical Operating ProblemsProblem: Insufficient Heating/Excessive Oxygen Content in Deaerator Effluent Insufficient heating is defined as a difference of 3˚ or more between saturation temperature, corresponding to steam pressure in unit and outlet water temperature.
Troubleshooting Tip: These conditions are usually caused by: (1) Insufficient venting. Increasing the vent rate by opening the manually operated air vent valve may resolve the issue. (2) Improper spray nozzle operation. Repair as described above. (3) Excessive free air. This may be due to leaking stuffing boxes on pumps upstream of the deaerator, which have negative suction head. Repair stuffing box or seal, or install free air vent trap in water inlet line to the deaerator. (4) Improper operation sizing or hookup of steam pressure reducing valve. Check valve for free operation, sizing and make certain that the control line is connected to the fitting provided on the deaerator for this purpose, and not to the piping downstream of the valve.
Problem: High Water Level/Low Water Level
Troubleshooting Tip: Improper sizing, installation and/or operation of inlet control valve. Adjust as necessary. Also, check condition of float or displacer in controller. Repair or replace as necessary.
Problem: High or Low Pressure
Troubleshooting Tip: (1) Check for faulty operation of the steam pressure reducing valve. (2) Check for mis-sizing of the valve, including the failure to use two stage pressure reducing stations when the steam supply is greater than 100 PSIG. (3) Check for improper installation, including incorrect pressure sensing point – as well as sensing lines that accumulate condensate above the pilot or pressure sensor. (4) Check relief valves on the deaerator and in the main steam supply system for proper operation.
Problem: Excessive Steam Pressure Loss Through Deaerator
Troubleshooting Tip: Check trays for sediment and deposits. Remove and clean if necessary.
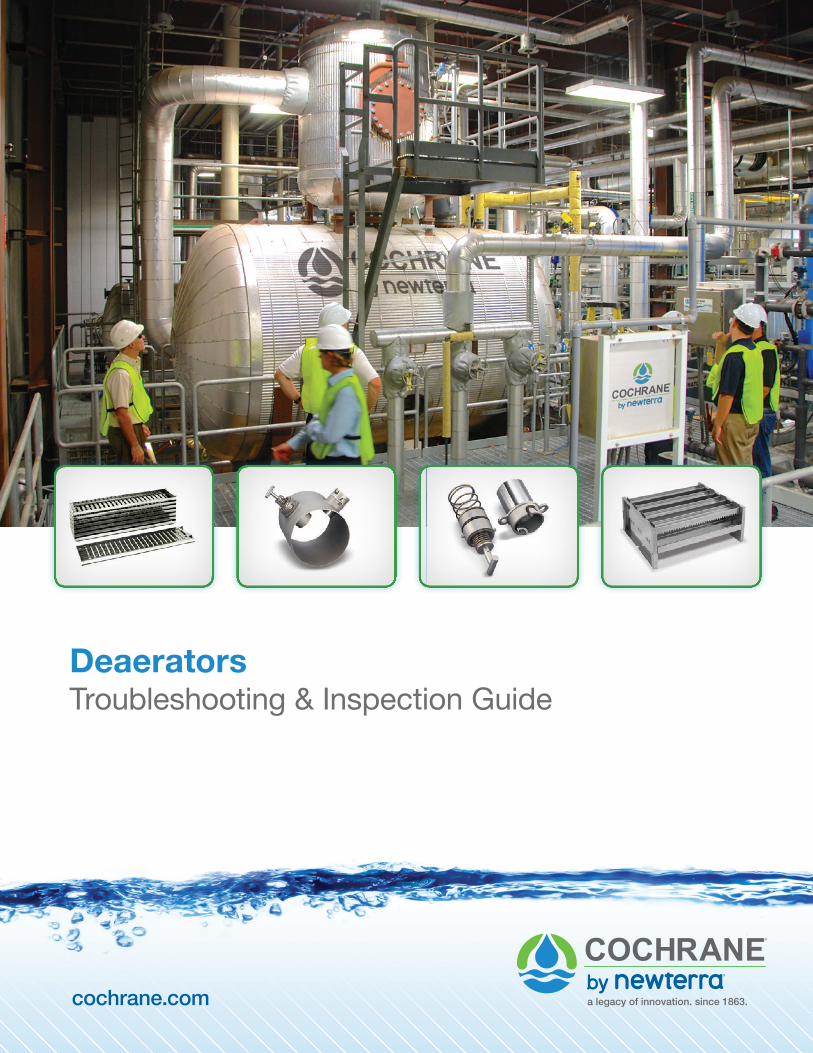
Typical Spray NozzlesSpray nozzles are the heart of your deaerator and their performance is critical. COCHRANE® by newterra spray nozzles, such as the ACCU-SPRAY, typically account for up to 95% of oxygen removal in a deaerator. Ask us about adapters for incorporating ACCU-SPRAY nozzles into deaeration equipment not manufactured by COCHRANE® by newterra.
a legacy of innovation. since 1863.
Deaerator Troubleshooting & Inspection Guide
Water Chamber/Water Inlet Inspection Procedure1. Check vent pipe for breakage or blockage.
2. Check water inlet header pipe(s) for structural integrity.
3. Check entire water chamber for weld cracks or damage.
4. If so equipped on older units, inspect water chamber internally through inspection of nozzle mounting holes for stainless steel liner separation or plug weld cracks.
Troubleshooting Tip: Water chamber weld cracks and damage are usually due to overpressurization or a vacuum situation – which is an operational problem. Repair damage as necessary. Over-pressurization and/or vacuum may be due to a high pressure return entering the water chamber, or a sudden loss of make-up water temperature (i.e. a slug of cold water.) A corrective action would be to remove the high pressure returns and maintain consistent make-up water temperature. Contact the COCHRANE® by newterra Service Department if this failure is repetitive.
Deaerator Tray Inspection Procedure1. Check for upset tray stack and straighten as necessary.
2. Check for bent trays and replace or repair as necessary. All trays and tray pans must be level and straight.
3. Check for cracks or broken rivets on trays and replace or repair as necessary.
4. Verilfy tray installation. Be sure trays are ‘staggered’ when installed for proper deaeration. The antic (tray stack and pans, if applicable) must be level for proper deaeration. Refer to tray installation procedure, right.
5. Clean trays of any coatings or deposits.
Troubleshooting Tip: Damaged trays are usually the result of a sudden loss of operating pressure and/or vacuum condition. This is an operational problem and not necessarily an equipment problem. COCHRANE® by newterra Service Technicians can work with you to determine causes for pressure loss and help you eliminate this troublesome condition.
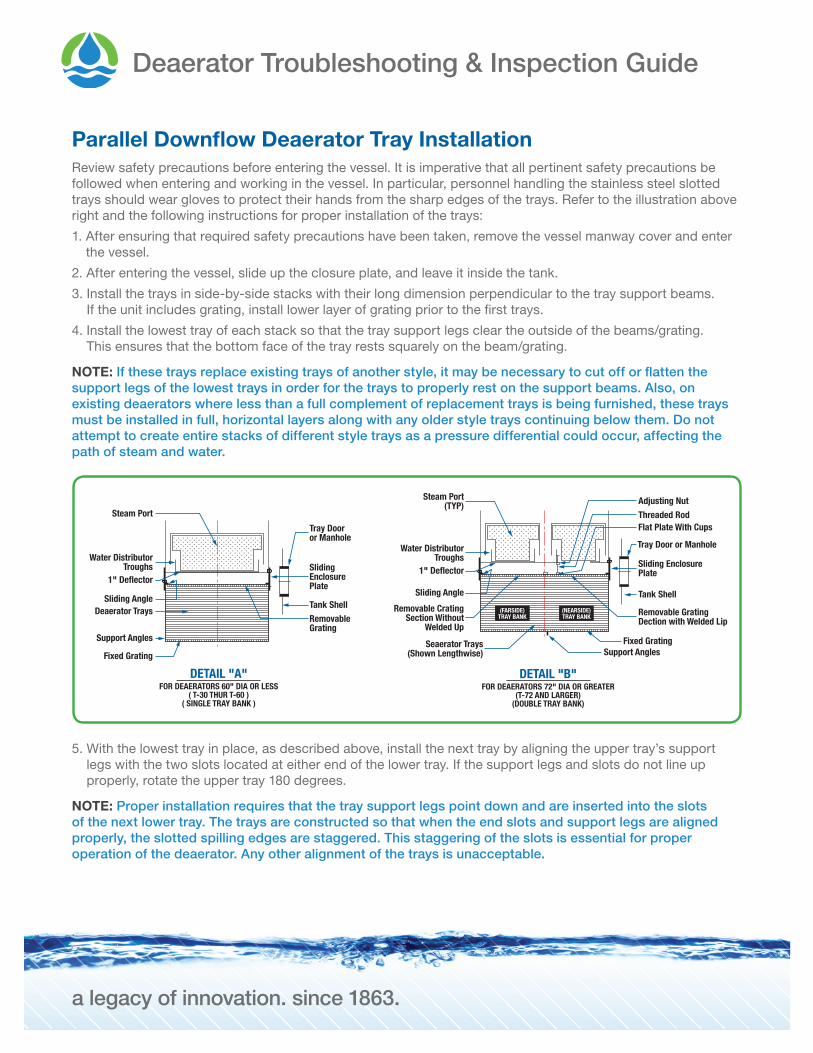
Tray Box Inspection ProcedureI. Check entire tray enclosure for distorted walls, deformation or oil can’ effect. If deformation is found, make the
necessary repair.
2. Inspect tray hold-down device for damaged or non-reusable components.
3. Check all joints and structural supports for weld cracks.
4. Check water seals and distributors (on parallel down-flow deaerators) for weld cracks or leaks.
5. If the unit is equipped with tray support grating on the bottom of the tray enclosure, verify that it is free from wear, deformation and is situated flush against front and rear end of tray box wall. If equipped with grating on tray stack top, check it for wear and damage.
6. On completion of inspection, be sure that the tray access doors are secured in place.
Troubleshooting Tip: A damaged tray enclosure is generally the result of a sudden loss of operating pressure. This is an operational problem and not necessarily an equipment problem. COCHRANE® by newterra engineers can work with you to determine causes for pressure loss and eliminate this condition. If your unit was not furnished with a tray hold down device, contact the COCHRANE® by newterra Parts Department to order one as a retrofit kit.

For Parts & Service, call 1.800.633.7435 or visit cochrane.com
Belco®
Pan Type
Chicago Heater®
Channel Trough Type
COCHRANE®
Slotted Type
Typical Deaerating Trays
Typical Water Inlet Arrangements
Tray Dooror Manhole
Tray Door or Manhole
Adjusting NutThreaded RodFlat Plate With Cups
SlidingEnclosurePlate
Sliding EnclosurePlate
Removable GratingDection with Welded Lip
Tank Shell
Tank Shell
Fixed GratingSupport Angles
RemovableGrating
Steam Port
Water DistributorTroughs
Sliding Angle
1" Deflector
Deaerator Trays
Support Angles
Fixed Grating
Water DistributorTroughs
Sliding Angle
1" Deflector
Steam Port(TYP)
Removable CratingSection Without
Welded Up
Seaerator Trays(Shown Lengthwise)
DETAIL "A"FOR DEAERATORS 60" DIA OR LESS
( T-30 THUR T-60 )( SINGLE TRAY BANK )
DETAIL "B"FOR DEAERATORS 72" DIA OR GREATER
(T-72 AND LARGER)(DOUBLE TRAY BANK)
(FARSIDE)TRAY BANK
(NEARSIDE)TRAY BANK
a legacy of innovation. since 1863.
Deaerator Troubleshooting & Inspection Guide
Parallel Downflow Deaerator Tray InstallationReview safety precautions before entering the vessel. It is imperative that all pertinent safety precautions be followed when entering and working in the vessel. In particular, personnel handling the stainless steel slotted trays should wear gloves to protect their hands from the sharp edges of the trays. Refer to the illustration above right and the following instructions for proper installation of the trays:
1. After ensuring that required safety precautions have been taken, remove the vessel manway cover and enter the vessel.
2. After entering the vessel, slide up the closure plate, and leave it inside the tank.
3. Install the trays in side-by-side stacks with their long dimension perpendicular to the tray support beams. If the unit includes grating, install lower layer of grating prior to the first trays.
4. Install the lowest tray of each stack so that the tray support legs clear the outside of the beams/grating. This ensures that the bottom face of the tray rests squarely on the beam/grating.
NOTE: If these trays replace existing trays of another style, it may be necessary to cut off or flatten the support legs of the lowest trays in order for the trays to properly rest on the support beams. Also, on existing deaerators where less than a full complement of replacement trays is being furnished, these trays must be installed in full, horizontal layers along with any older style trays continuing below them. Do not attempt to create entire stacks of different style trays as a pressure differential could occur, affecting the path of steam and water.
5. With the lowest tray in place, as described above, install the next tray by aligning the upper tray’s support legs with the two slots located at either end of the lower tray. If the support legs and slots do not line up properly, rotate the upper tray 180 degrees.
NOTE: Proper installation requires that the tray support legs point down and are inserted into the slots of the next lower tray. The trays are constructed so that when the end slots and support legs are aligned properly, the slotted spilling edges are staggered. This staggering of the slots is essential for proper operation of the deaerator. Any other alignment of the trays is unacceptable.

For Parts & Service, call 1.800.633.7435 or visit cochrane.com
6. Continue stacking the trays as described above until all trays have been installed. Refer to the table in your tray installation manual or the correct stack height and quantity of trays for your deaerator size. If unit includes top grating, slide grating on top of upper tray.
7. After all trays have been installed, firmly secure the closure plate on the inner compartment so that water and steam leakage are minimized.
Notes:
a legacy of innovation. since 1863.
Deaerator Troubleshooting & Inspection Guide
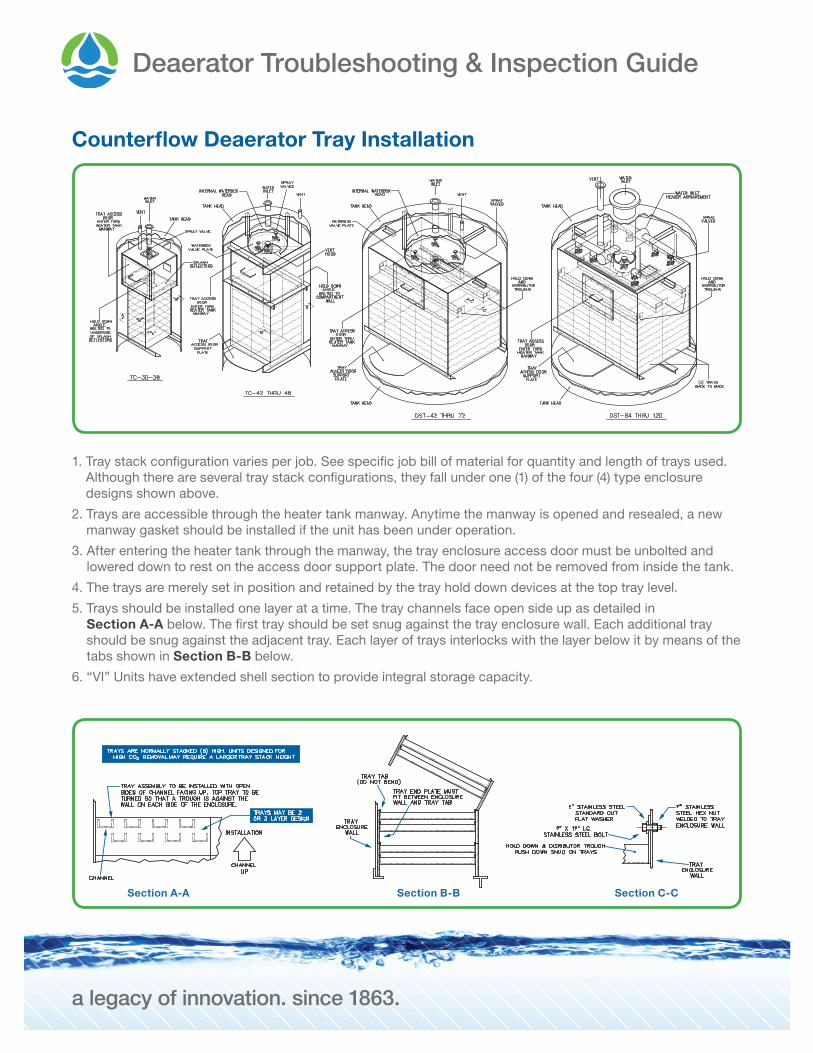
Counterflow Deaerator Tray Installation
1. Tray stack configuration varies per job. See specific job bill of material for quantity and length of trays used. Although there are several tray stack configurations, they fall under one (1) of the four (4) type enclosure designs shown above.
2. Trays are accessible through the heater tank manway. Anytime the manway is opened and resealed, a new manway gasket should be installed if the unit has been under operation.
3. After entering the heater tank through the manway, the tray enclosure access door must be unbolted and lowered down to rest on the access door support plate. The door need not be removed from inside the tank.
4. The trays are merely set in position and retained by the tray hold down devices at the top tray level.
5. Trays should be installed one layer at a time. The tray channels face open side up as detailed in Section A-A below. The first tray should be set snug against the tray enclosure wall. Each additional tray should be snug against the adjacent tray. Each layer of trays interlocks with the layer below it by means of the tabs shown in Section B-B below.
6. “VI” Units have extended shell section to provide integral storage capacity.
Section A-A Section B-B Section C-C
5
12
2
6
34
910
8
7
SteamGenerator
SteamTurbine
Condenser
Generator
Cooling Tower
Source WaterSource Water
For Parts & Service, call 1.800.633.7435 or visit cochrane.com
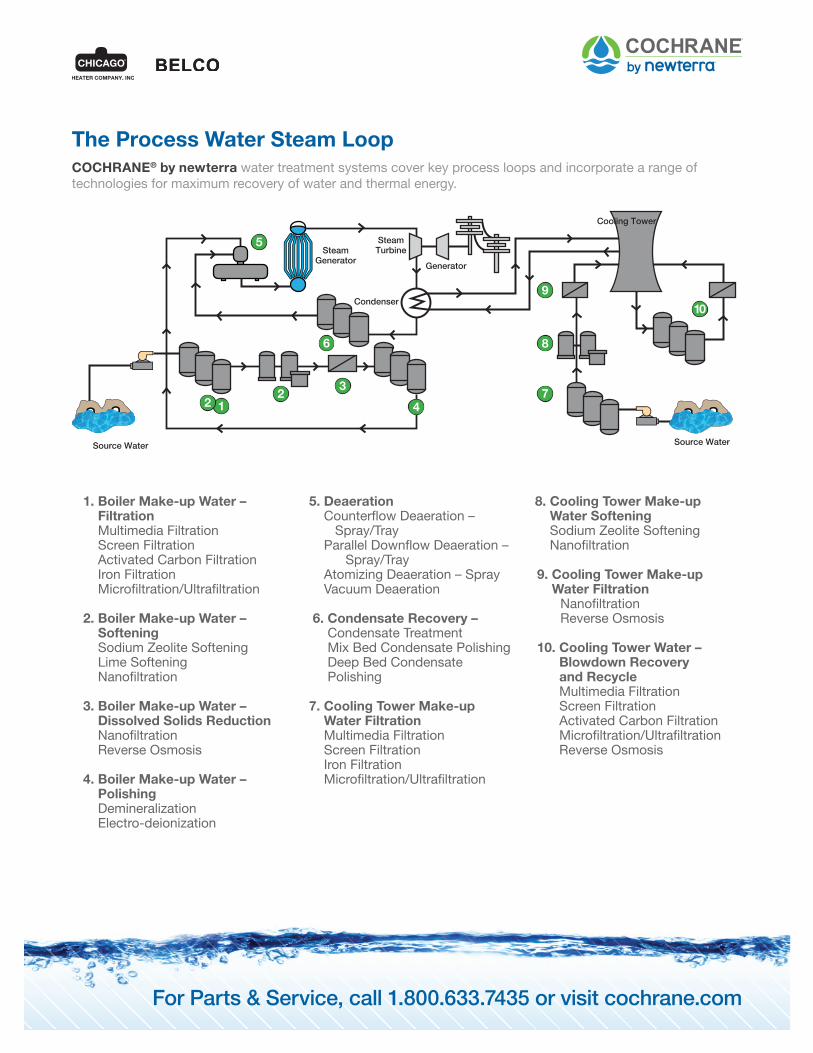
The Process Water Steam LoopCOCHRANE® by newterra water treatment systems cover key process loops and incorporate a range of technologies for maximum recovery of water and thermal energy.
1. Boiler Make-up Water – Filtration Multimedia Filtration Screen Filtration Activated Carbon Filtration Iron Filtration Microfiltration/Ultrafiltration
2. Boiler Make-up Water – Softening Sodium Zeolite Softening Lime Softening Nanofiltration
3. Boiler Make-up Water – Dissolved Solids Reduction Nanofiltration Reverse Osmosis
4. Boiler Make-up Water –
Polishing Demineralization Electro-deionization
5. Deaeration Counterflow Deaeration – Spray/Tray Parallel Downflow Deaeration – Spray/Tray Atomizing Deaeration – Spray Vacuum Deaeration
6. Condensate Recovery – Condensate Treatment Mix Bed Condensate Polishing Deep Bed Condensate Polishing
7. Cooling Tower Make-up Water Filtration Multimedia Filtration Screen Filtration Iron Filtration Microfiltration/Ultrafiltration
8. Cooling Tower Make-up Water Softening Sodium Zeolite Softening Nanofiltration
9. Cooling Tower Make-up Water Filtration Nanofiltration Reverse Osmosis
10. Cooling Tower Water – Blowdown Recovery and Recycle Multimedia Filtration Screen Filtration Activated Carbon Filtration Microfiltration/Ultrafiltration Reverse Osmosis

Boiler Feedwater OEM Aftermarket Parts
a legacy of innovation. since 1863.
Look to COCHRANE® by newterra for:Deaerator Parts Spray NozzlesTraysManhole CoversManhole GasketsTray Hold-DownsTray BoxesWater BoxesGauge Glass KitsRegulating ValvesSteam ControllersDO KitsOverflow TrapsVacuum TrapsPressure GaugesThermometers
Steam Specialty PartsMultiport Relief ValvesExhaust Heads
Sample Coolers
Drainer Parts
From the company that’s been in your boiler room for over 150 years.COCHRANE® by newterra is your only source for genuine COCHRANE, Chicago Heater and Belco Water parts. We have the expertise, replacement parts and certified service technicians to keep any make of boiler feedwater and process water treatment system up and running.

For Parts & Service, call 1.800.633.7435 or visit cochrane.com
Look to COCHRANE® by newterra for:Controls, control valves, replacement tanks, flow meters, pressure & flow switches, and more...
Reverse Osmosis PartsMembranesPressure VesselsHigh Pressure PumpsValvesInstrumentationFilter HousingsFilter CartridgesRebuilds/UpgradesDemineralizer Parts
Regenerate DistributorsUnderdrains (NEVA CLOG®)Chemical PumpsResin TrapsNeutralization SkidsEductors
Media Filter PartsMediaUnder Drains (NEVA CLOG®)Distributors
Softener & Condensate Polisher PartsTanksChemicalsChemical PumpsResinValvesPLC ControlsUnderdrains (NEVA CLOG®)Eductors
Condenser PartsOEM Tube SheetsWater Box DoorsExpansion BeltsTube SheetsEjectorsSteam ChestsDiffusers
Choose expertise, quality parts and certified service. COCHRANE® by newterra has over 10,000 installations worldwide – some of which date back over fifty years and are still in operation today. Our ability to build and support robust, modular water treatment solutions using a wide range of technologies has made us an invaluable partner to our utility, industrial and institutional clients.

About newterraA Global Water Technology Leadernewterra is recognized as a leader in the development of modular treatment solutions for water, sewage, wastewater and groundwater remediation for industrial, municipal, land development, commercial & residential markets. Our heritage of innovation in providing clean water solutions dates all the way back to 1863. Over that time, newterra has grown to over 200 people and we’ve installed thousands of treatment systems – some of which operate in the most extreme conditions on the planet.
Full Control from Start to FinishAt newterra, we take full control of virtually every aspect of the treatment systems we build – from process design and engineering to manufacturing, installation, operations and ongoing parts & service support. That also includes manufacturing our own MicroClear® UF membranes in newterra’sISO 9001:2008 certi� ed facility. This award-winning approach ensures newterra treatment systems meet our high standards for quality and on-time delivery.
200+Employees
40+Professional Engineers
10,000+Installations Worldwide
2015Global Cleantech
TOP 100 COMPANY
100
Langgöns, GermanyMicroClear Of� ce & Manufacturing Facility
Burlington, ONEngineering & Sales Of� ce
Calgary, ABSales Of� ce &Service Center
Venice, FLSales Of� ce, Manufacturing Facility & Service Center
Santiago, ChileSales Of� ce & Service Center
Trooper, PAEngineering & Sales Of� ce
Macon, GAManufacturing Facility
Brockville, Canada
Langgöns, Germany
Brockville, ONHead Of� ce & Manufacturing Facility
AM
-DE
A-I
NS
P-0
617
1.800.420.4056
cochrane.com | newterra.com


