Page 1
DEEP ENERGY RETROFIT OF A
1976 RAISED RANCH IN N. VT.
Eco Houses of Vermont, LLC
Presented by:
Chris West
Certified Passive House Consultant
[email protected]
Looking at what it takes and how we did it
Page 2
The House Before the Retrofit
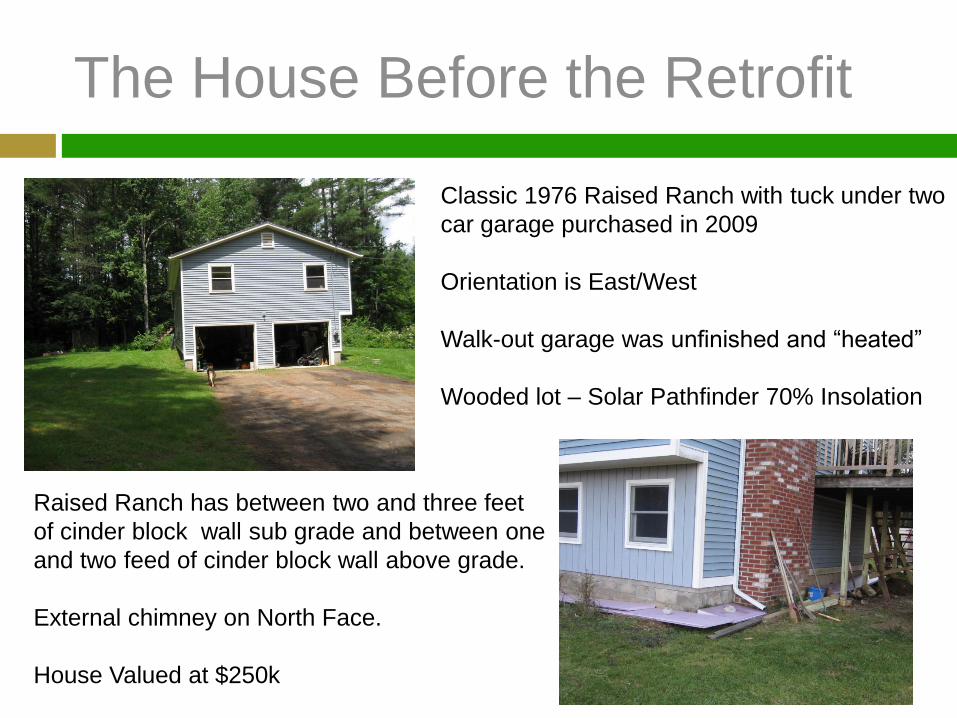
Classic 1976 Raised Ranch with tuck under two
car garage purchased in 2009
Orientation is East/West
Walk-out garage was unfinished and “heated”
Wooded lot – Solar Pathfinder 70% Insolation
Raised Ranch has between two and three feet
of cinder block wall sub grade and between one
and two feed of cinder block wall above grade.
External chimney on North Face.
House Valued at $250k
Page 3
The House Before the Retrofit
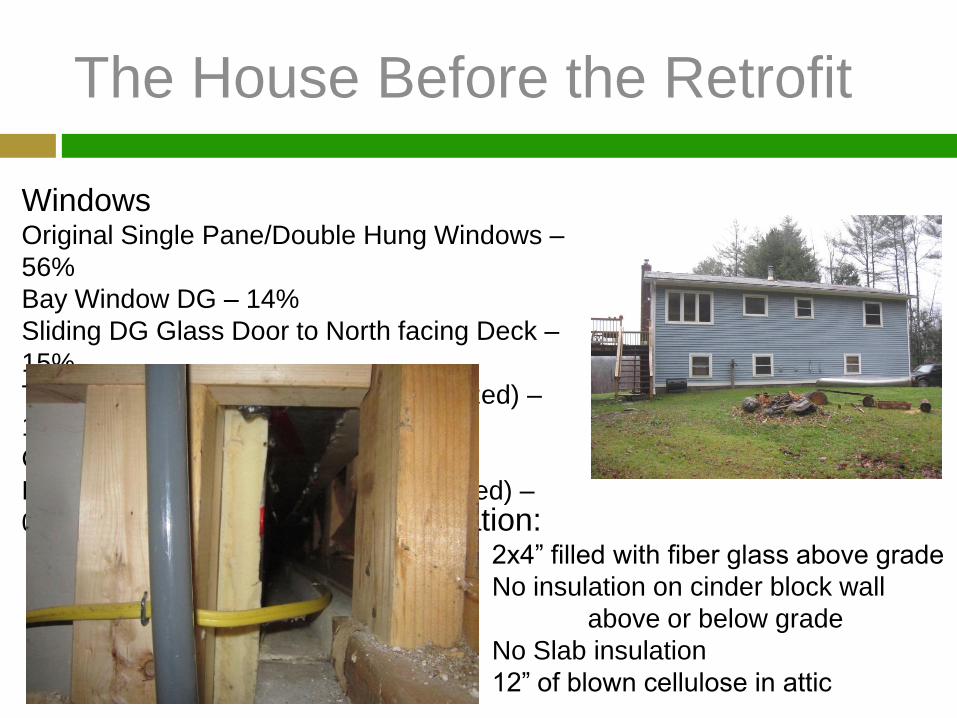
Windows Original Single Pane/Double Hung Windows –
56%
Bay Window DG – 14%
Sliding DG Glass Door to North facing Deck –
15%
Three Casement windows (double glazed) –
10.5%
One Awning (double glazed) – 4%
Door and Panel Windows (double glazed) –
0.5%
Insulation: 2x4” filled with fiber glass above grade
No insulation on cinder block wall
above or below grade
No Slab insulation
12” of blown cellulose in attic
Page 4
The House Before the Retrofit
Heating Plant
30 year old oil burner for heat and hot water
Wood Stove insert in fireplace with blower
fan to help push heat further into house.
Fuel use – 500 to 700 gal oil
+ 3.5 cords hard wood (approx. 89
kBtu/sq ft/yr
Ventilation: Panasonic direct vent bathroom fan with light -120
cfm
Initial Blower Door Test: 1806 cfm = 8.25 ACH50
Vermont is a Climate Zone 6 Cold – Humid with 7200 –
8200 HDD/yr.
Page 5
What was done before the Plan
On advice from local renovator the best windows available in the US were
Prior to taking CPHC classes in Dec 2010
U – 0.29
Whole window R-3.5
SHGC – 0.39
Worst decision in the entire history of this house!
I have brand new, really poor windows for the next 20
yrs!
Page 6
The Plan part 0
Ask smarter people that I for advice
• Lots of time asking watching others presentations about
retrofits on similar construction
• Asked smarter people that I am about their opinions of
assemblies I came up with regarding durability
• Lean on the shoulders of giants
• Try it on your own house before you do it for a paying client
Page 7
The Plan part 1
Remove garage doors and close in to make conditioned space
Add 6” sweater of insulation of rigid insulation to outside of house
• 6” Polyisocyanurate Board to framed part of house
• Modified Chainsaw Retrofit to remove thermal bridging at roof/wall
conj.
• 6” of EPS to cinder block wall both sub-grade and above grade
Add 10” of rockwool to downstairs frame wall & build wall out
1.5” Service Cavity inside of interior air barrior
Have the 2nd floor ceiling air sealed
Add as much cellulose as will fit (extra 12”)
Page 8
The Plan part 2
Wrap house in air sealing membrane
Remove bay window and replace with picture window
Make wood stove sealed combustion
Remove oil boiler and replace with air to air heat pump
Install HRV
Model house to estimate size of HRV and Heating Plant
Budget of $70k
Page 9
Windows?
Not replacing windows!
Already spent too much $
on that – not enough $ to
do it again.
Page 10
The Work-Replace garage doors with
walls
Page 11
Repurposed Insulation Saves $
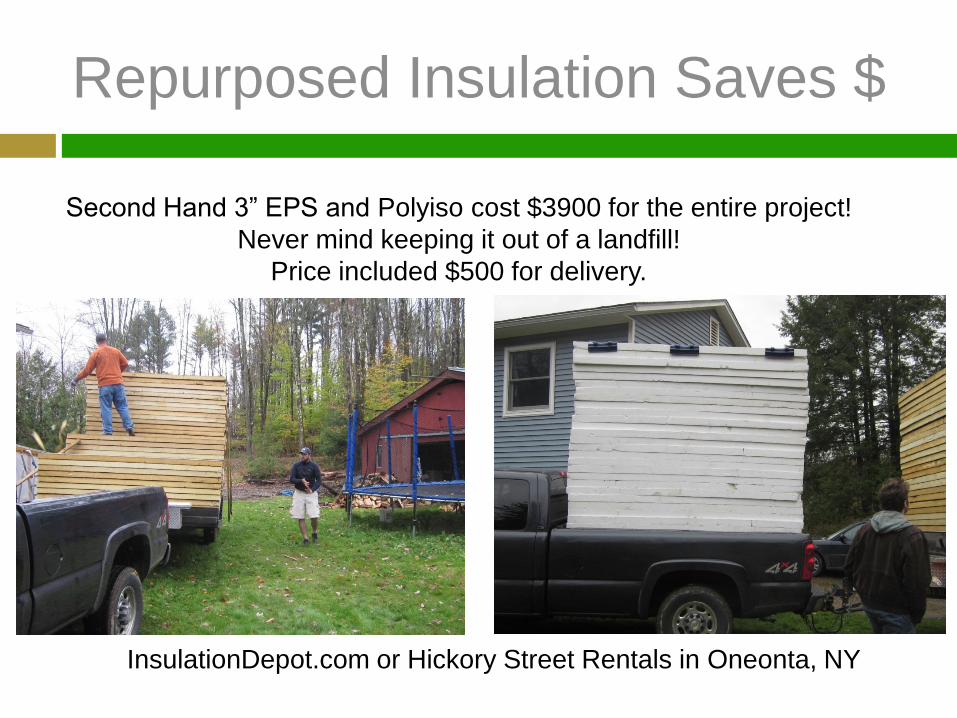
Second Hand 3” EPS and Polyiso cost $3900 for the entire project!
Never mind keeping it out of a landfill!
Price included $500 for delivery.
InsulationDepot.com or Hickory Street Rentals in Oneonta, NY
Page 12
The Work – Modified Chainsaw Retro
3/12 Pitch Roof – not much room for full chainsaw retrofit.
Went with Thermal Break in ceiling joist.
Page 13
The Work – Air sealing in attic
Foam in first 12” from top plate for air sealing and higher R-value at low part of
roof.
This ties in with the polyiso outside and was then refilled with cellulose.
All ceiling
penetrations, lighting
fixtures, ceiling fans,
recessed lights, etc
were air sealed during
this process.
Final R-value = 84
Page 14
The Work – Attached deck and stairs
moved away from house
To remove thermal bridging, make applying insulation and detailing easier the
deck and front stairs were detached and moved one foot from the structure.
Page 15
The Work – Dig up sub grade and
insulate
My pull along backhoe! Took about four hours to dig a 45’ long 4’ deep 4’ wide
trench.
Page 16
The Work – Dig up sub grade and
insulate
Soprema Bitumen EPS
Waterproofing peel and stick
membrane.
Final R-value = 35 (w/2” on
inside)
Why not add a new perimeter
drain while we are at it?
Page 17
The Work – A nice wooly sweater
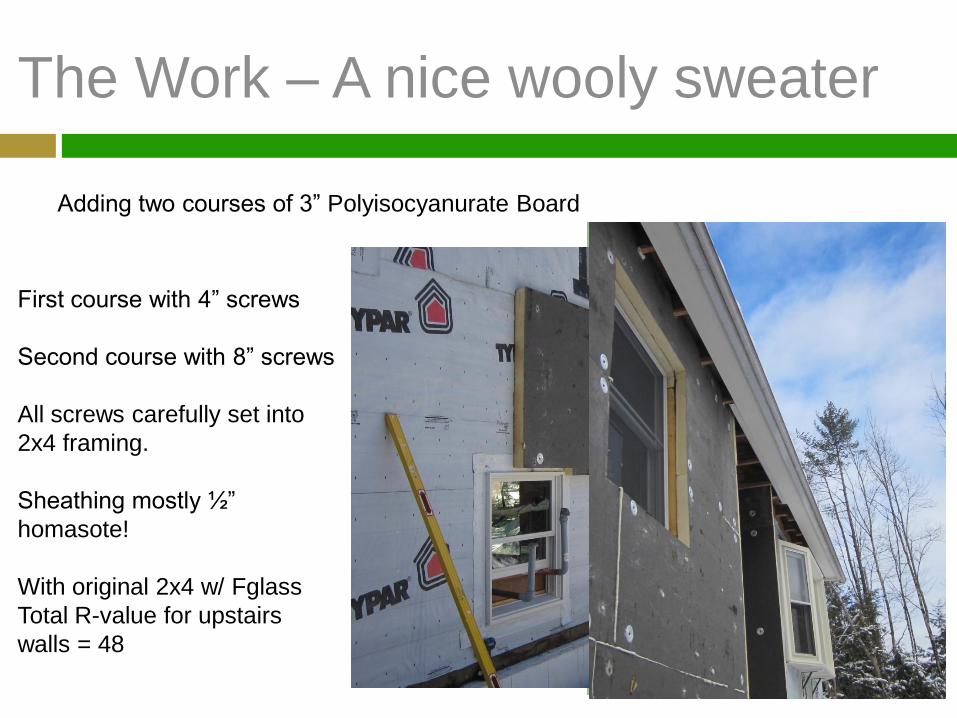
Adding two courses of 3” Polyisocyanurate Board
First course with 4” screws
Second course with 8” screws
All screws carefully set into
2x4 framing.
Sheathing mostly ½”
homasote!
With original 2x4 w/ Fglass
Total R-value for upstairs
walls = 48
Page 18
The Work – Wrapping it up
Air Sealing the entire frame section with Mento 1000
Vapor open 34 perm
Tescon tape used for seams and
window detailing
Twice as expensive as
Typar/Tyvec
Took twice as long to install due
to level of detail
Page 19
The Work – Strapping for rain screen
A 1” x 4” strapping was used for siding nailer and rain screen
Screwed on using 10” screws
Screwed into 2x4 framing of
house
Corners with extra wide plywood
Windows framed to receive trim
Page 20
The Work – Window bucks
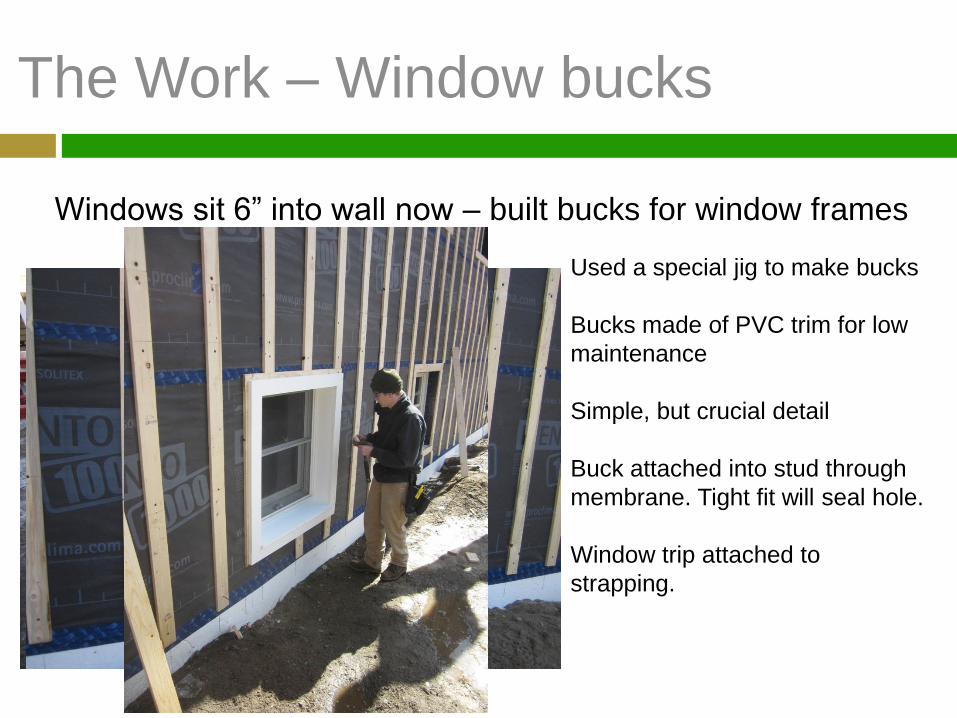
Windows sit 6” into wall now – built bucks for window frames
Used a special jig to make bucks
Bucks made of PVC trim for low
maintenance
Simple, but crucial detail
Buck attached into stud through
membrane. Tight fit will seal hole.
Window trip attached to
strapping.
Page 21
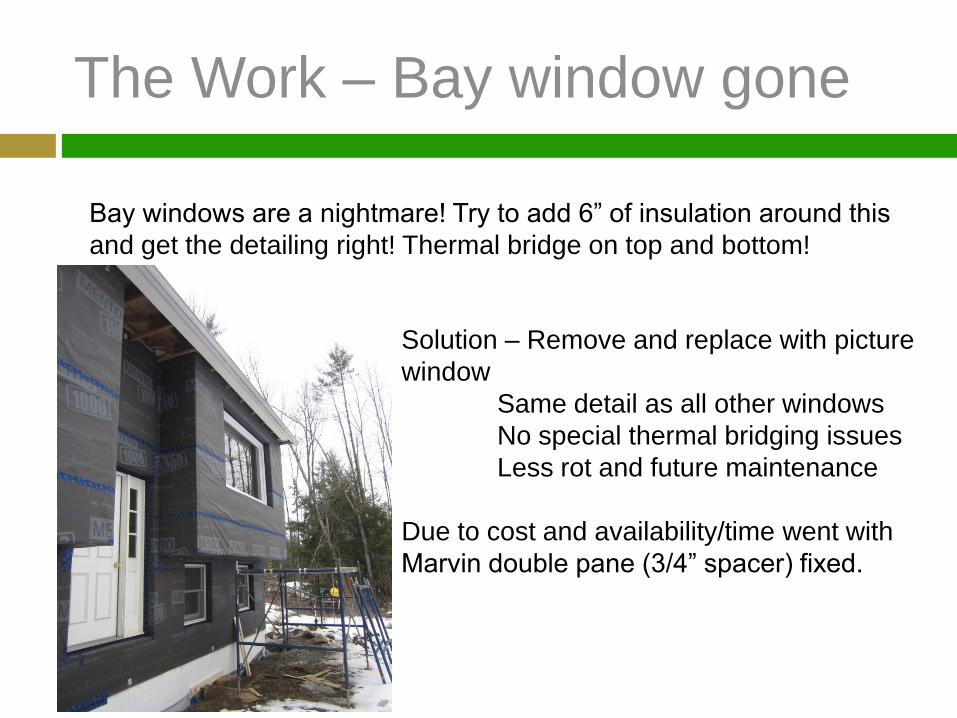
The Work – Bay window gone
Bay windows are a nightmare! Try to add 6” of insulation around this
and get the detailing right! Thermal bridge on top and bottom!
Solution – Remove and replace with picture
window
Same detail as all other windows
No special thermal bridging issues
Less rot and future maintenance
Due to cost and availability/time went with
Marvin double pane (3/4” spacer) fixed.
Page 22
The Work – Chimney? Take it off?
In Vt Wood is plentiful and cheap. Up to
50% of Vt’ers use at least some wood to
heat their homes.
Chimneys are huge thermal bridges –
especially if it is outside like mine!
What to do?
Wrap it!
3” of Roxul board (R-4/in)
¾” plywood on top
3” of Roxul board
Wrap it with Mento 1000 for air sealing
Top of ceiling insulation is 2’ below roxul.
Page 23
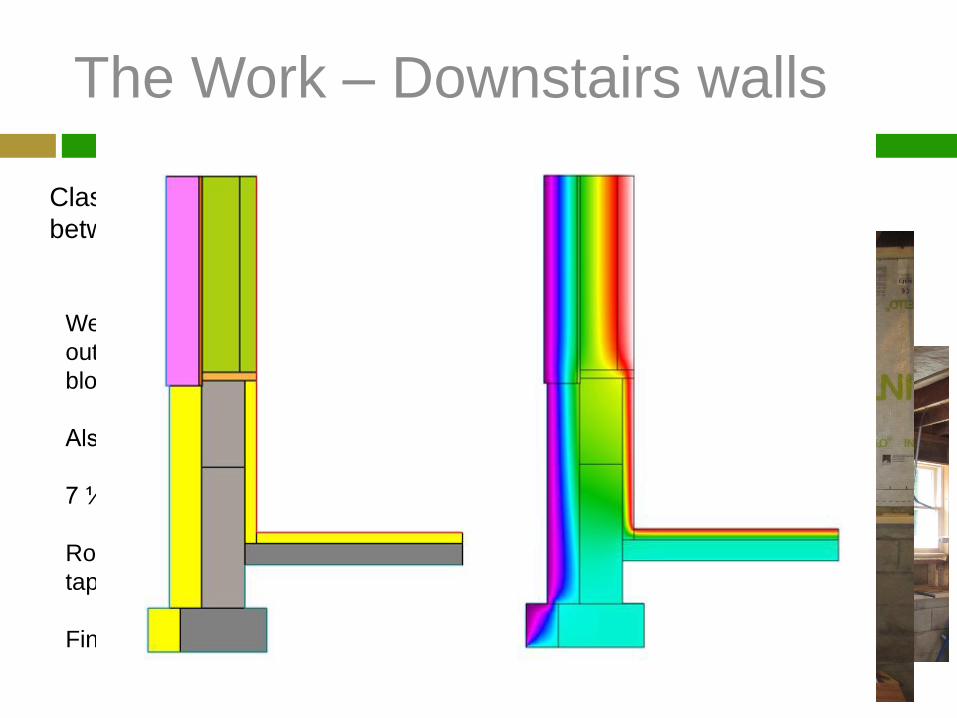
The Work – Downstairs walls
Classic raised ranch downstairs wall has bump due to difference
between cinder block wall and frame wall.
We wanted a straight wall requiring a build
out of the frame wall to meet the cinder
block.
Also adding 2” of insulation inside the wall
7 ¼” of roxul will be put into these cavities
Roxul to be covered with Intello membrane
taped to the EPS with Tescon tape.
Final R-value of wall = 66.5
Page 24
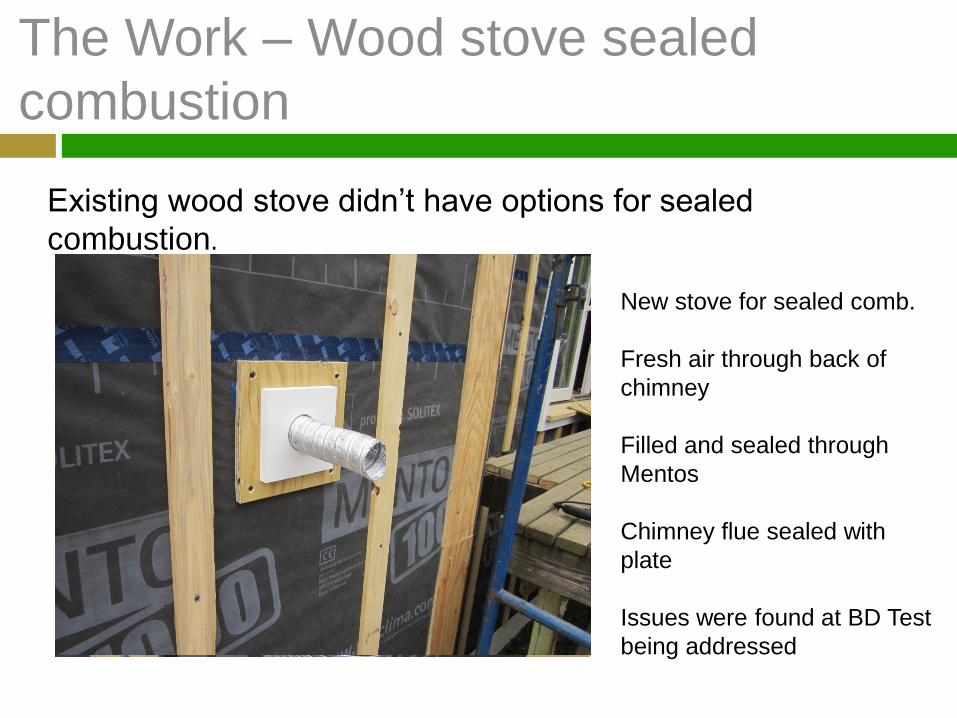
The Work – Wood stove sealed
combustion
Existing wood stove didn’t have options for sealed
combustion.
New stove for sealed comb.
Fresh air through back of
chimney
Filled and sealed through
Mentos
Chimney flue sealed with
plate
Issues were found at BD Test
being addressed
Page 25
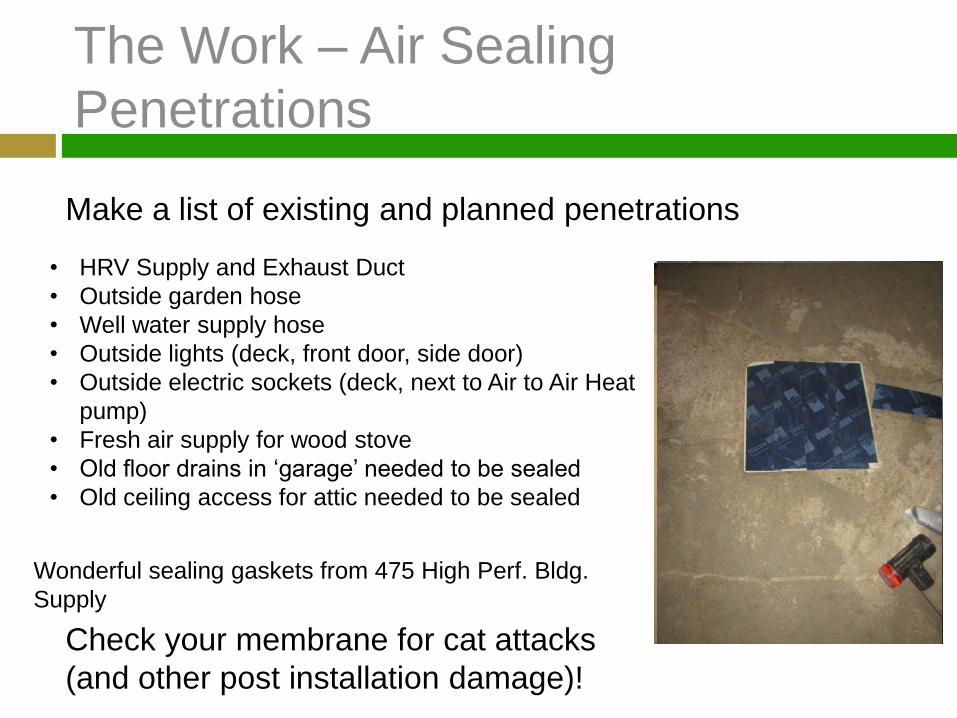
The Work – Air Sealing
Penetrations
Make a list of existing and planned penetrations
• HRV Supply and Exhaust Duct
• Outside garden hose
• Well water supply hose
• Outside lights (deck, front door, side door)
• Outside electric sockets (deck, next to Air to Air Heat
pump)
• Fresh air supply for wood stove
• Old floor drains in ‘garage’ needed to be sealed
• Old ceiling access for attic needed to be sealed
Wonderful sealing gaskets from 475 High Perf. Bldg.
Supply
Check your membrane for cat attacks
(and other post installation damage)!
Page 26
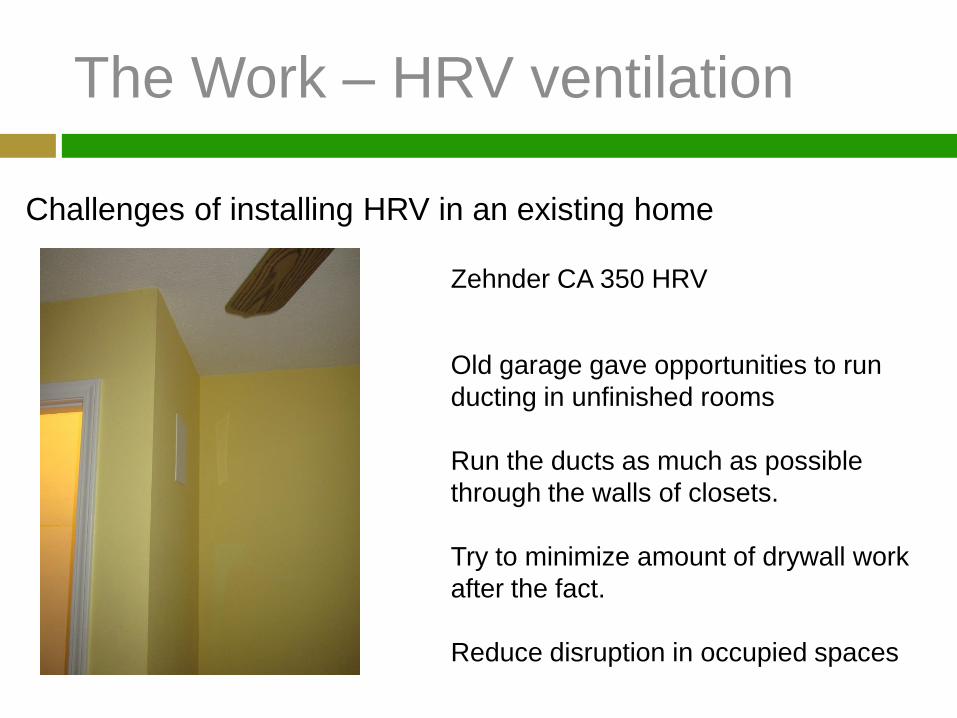
The Work – HRV ventilation
Challenges of installing HRV in an existing home
Old garage gave opportunities to run
ducting in unfinished rooms
Run the ducts as much as possible
through the walls of closets.
Try to minimize amount of drywall work
after the fact.
Reduce disruption in occupied spaces
Zehnder CA 350 HRV
Page 27
HRV/ERV – Issues
Challenges of installing HRV in an existing home
First year HRV core dried the house out
Moved to ERV
Lack of ground preheater loop (due to ledge)
meant too cold air supply on really cold days
(below 0F)
Just turned it off for this time (2
ACH50)
Left space between wall and ERV to
allow for addition of ground preheater
loop in future if desired (but where?)
Page 28
The Work – Heating Plant
Removing Oil Boiler and replacing with Air-to-Air Heat Pump
Modeling shows Heat Load from 112,000 Btu/hr to 22,500 Btu/hr
(82% reduction) Nowhere near Enerfit but a major reduction!
New Heating Plant
Wood stove 55,000 Btu/hr – incidental extra heat
Mitsubishi Hyperheat A2A Heat Pump 22,500 Btu/hr (to 5 F)
or 15,750 Btu/hr (to -18 F)
We added a 2nd heat pump this summer for better distribution.
Use wood stove to offset deficiencies in heat pump performance
at very cold temps.
Page 29
The Costs
Retrofits are expensive!
Reduced costs through:
• Doing as much work as possible myself
• Used repurposed materials when possible
Hired Professionals when necessary and sought out companies
that were already known for doing good work/winning awards
from Efficiency Vermont.
Jim Bradley and his crew at Caleb Construction, Cambridge,
Vt.
Page 30
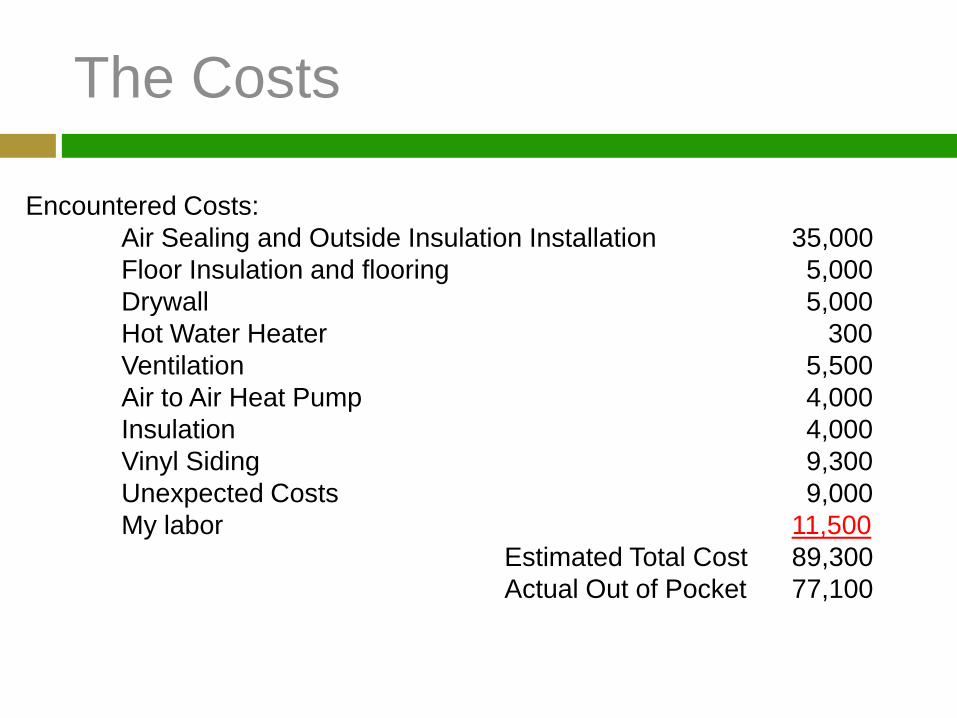
The Costs
Encountered Costs:
Air Sealing and Outside Insulation Installation 35,000
Floor Insulation and flooring 5,000
Drywall 5,000
Hot Water Heater 300
Ventilation 5,500
Air to Air Heat Pump 4,000
Insulation 4,000
Vinyl Siding 9,300
Unexpected Costs 9,000
My labor 11,500
Estimated Total Cost 89,300
Actual Out of Pocket 77,100
Page 31
The Results
Heating Load Reduced from 89 kBtu/hr to 24 kBtu/hr PHPP
Three times the Enerfit numbers
Why?
• No new windows (the $20k was too much for our
budget).
• Only 2” EPS on floor – Not 10” to 12” under slab
• Orientation all wrong – If the house burned down we
could change the orientation then all of the E window
losses would turn to gains.
• Couldn’t get rid of some thermal bridges easily
Page 32
The Results
Air infiltration reduced from 8.25 ACH50 to 2 ACH50!
1802 cfm to 425 cfm!
A 76.4% reduction!
Found a leak at a seam in the chimney
block which Jim Bradley estimated was
approx 30 cfm. This brings us to 395
cfm once that is fixed!
Page 33
The Results
Comfort in house is greatly increased.
Much lower heating fuel usage
• Was 750+ gal oil per heating season and 3 cords wood
Approximately $3150/year
• Actual with HP and some wood: $780 in elect and ¼ cord
wood ($56) a 73% reduction
• Net Zero reached with 27 PV panels (off site community farm)
• With Community PV farm 12 year loan @ $255/month
• Currently paying $200/month for all electricity (heat incl.)s
Page 34
Lessons Learned
Be realistic about costs and achievable goals
ERV over HRV in Cold Climates Without ground loop preheater may need to turn off at very cold
temps
Single Head heat pump distribution through ERV is overstated without a ground loop preheater
You are stuck with some Thermal Bridges (slab edge, stem wall) Existing door thresholds are often big TB’s
Invest in the best windows you can!!!
Be careful with wrapping a chimney – must have a liner!
Retrofits are never perfect…for super insulated better to start from scratch – no inherited issues
Page 35
Lessons Learned:
Testing the Chimney
Blog post on Green Building Advisor
Contributor brought up issues of charification of wood
Wood exposed to +170F temps turn to charcoal which has a much
lower ignition temp
What to do?
Test it with sensors
72 hour test with 40F outside temp and wood stove at highest temp
Sensors – one on each of three sides of chimney at inside of wood
plywood
Considered worst case
Results showed…
Page 36
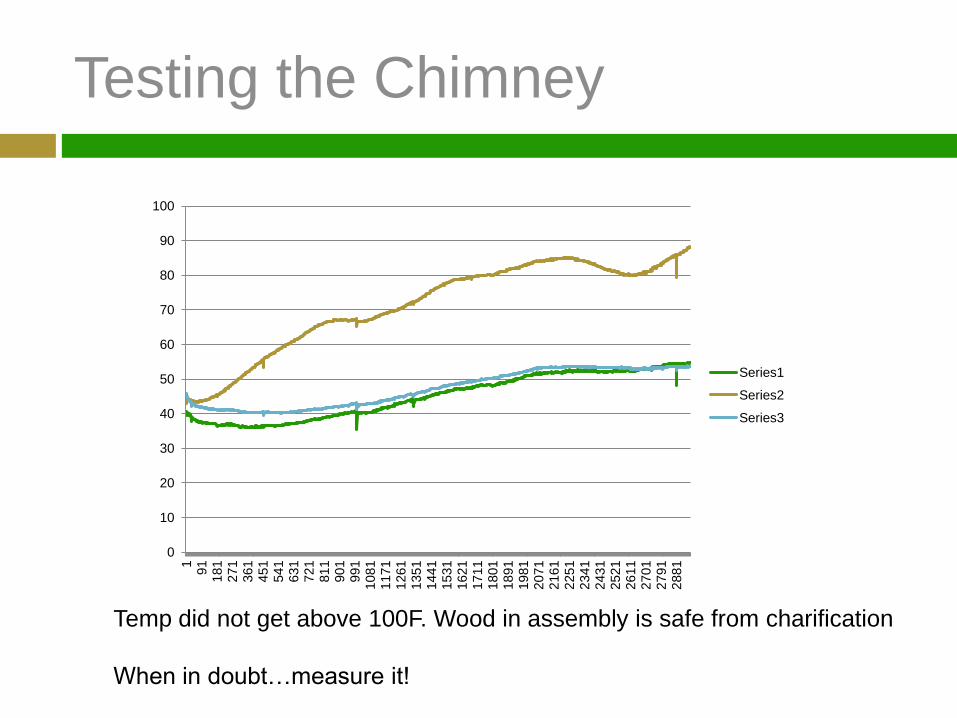
Testing the Chimney
0
10
20
30
40
50
60
70
80
90
100
1
91
181
271
361
451
541
631
721
811
901
991
1081
1171
1261
1351
1441
1531
1621
1711
1801
1891
1981
2071
2161
2251
2341
2431
2521
2611
2701
2791
2881
Series1
Series2
Series3
Temp did not get above 100F. Wood in assembly is safe from charification
When in doubt…measure it!
Page 37
Conclusions on DER in Vermont
More than 99% of housing stock is existing stock.
The biggest savings is to be found making these houses
energy efficient.
It cost approximately 30% of the value of a house to do a
Deep Energy Retrofit, never mind hitting the Enerfit
standard.
Vermont is a Climate Zone 6 Cold – Humid with 7200 –
8200 HDD/yr
Very challenging place to build/retrofit homes.
Page 38
Questions?
Follow the blog on this project at www.ecohousesofvt.com