82
Defender 5.6 Software Token User Guide

Defender 5.6Software Token User Guide
©2010 Quest Software, Inc. ALL RIGHTS RESERVED.
This guide contains proprietary information protected by copyright. The software described in this guide is furnished under a software license or nondisclosure agreement. This software may be used or copied only in accordance with the terms of the applicable agreement. No part of this guide may be reproduced or transmitted in any form or by any means, electronic or mechanical, including photocopying and recording for any purpose other than the purchaser's personal use without the written permission of Quest Software, Inc.
If you have any questions regarding your potential use of this material, contact:
Quest Software World Headquarters LEGAL Dept 5 Polaris Way Aliso Viejo, CA 92656 USA www.quest.com email: [email protected]
Refer to our Web site for regional and international office information.
TRADEMARKS
Quest, Quest Software, the Quest Software logo and iToken are trademarks and registered trademarks of Quest Software, Inc. in the United States of America and other countries. Gridsure and the Gridsure logos are trademarks and registered trademarks of Gridlock TS Limited. All other trademarks and registered trademarks are property of their respective owners.
Disclaimer
The information in this document is provided in connection with Quest products. No license, express or implied, by estoppel or otherwise, to any intellectual property right is granted by this document or in connection with the sale of Quest products. EXCEPT AS SET FORTH IN QUEST'S TERMS AND CONDITIONS AS SPECIFIED IN THE LICENSE AGREEMENT FOR THIS PRODUCT, QUEST ASSUMES NO LIABILITY WHATSOEVER AND DISCLAIMS ANY EXPRESS, IMPLIED OR STATUTORY WARRANTY RELATING TO ITS PRODUCTS INCLUDING, BUT NOT LIMITED TO, THE IMPLIED WARRANTY OF MERCHANTABILITY, FITNESS FOR A PARTICULAR PURPOSE, OR NON-INFRINGEMENT. IN NO EVENT SHALL QUEST BE LIABLE FOR ANY DIRECT, INDIRECT, CONSEQUENTIAL, PUNITIVE, SPECIAL OR INCIDENTAL DAMAGES (INCLUDING, WITHOUT LIMITATION, DAMAGES FOR LOSS OF PROFITS, BUSINESS INTERRUPTION OR LOSS OF INFORMATION) ARISING OUT OF THE USE OR INABILITY TO USE THIS DOCUMENT, EVEN IF QUEST HAS BEEN ADVISED OF THE POSSIBILITY OF SUCH DAMAGES. Quest makes no representations or warranties with respect to the accuracy or completeness of the contents of this document and reserves the right to make changes to specifications and product descriptions at any time without notice. Quest does not make any commitment to update the information contained in this document.
Defender Software Token User GuideUpdated - November 2010Software Version - 5.6

iii
ContentsABOUT THIS GUIDE . . . . . . . . . . . . . . . . . . . . . . . . . . . . . . . . 5
QUEST ONE IDENTITY SOLUTION. . . . . . . . . . . . . . . . . . . . . . 6ABOUT THIS GUIDE. . . . . . . . . . . . . . . . . . . . . . . . . . . . . . 7AUDIENCE AND SCOPE . . . . . . . . . . . . . . . . . . . . . . . . . . . . 7CONVENTIONS . . . . . . . . . . . . . . . . . . . . . . . . . . . . . . . . . 7ABOUT QUEST SOFTWARE . . . . . . . . . . . . . . . . . . . . . . . . . . 8CONTACTING QUEST SOFTWARE . . . . . . . . . . . . . . . . . . . . . . 9
CONTACTING CUSTOMER SUPPORT. . . . . . . . . . . . . . . . . . 9
CHAPTER 1 DEFENDER TOKEN BASICS . . . . . . . . . . . . . . . . . . . .11
INTRODUCTION . . . . . . . . . . . . . . . . . . . . . . . . . . . . . . . .12DEFENDER NETWORK PROTECTION. . . . . . . . . . . . . . . . . . . . .13WHAT IS A TOKEN? . . . . . . . . . . . . . . . . . . . . . . . . . . . . .13
SOFTWARE TOKENS. . . . . . . . . . . . . . . . . . . . . . . . . . .13
HOW A TOKEN WORKS. . . . . . . . . . . . . . . . . . . . . . . . . . . .15
CHAPTER 2 DEFENDER DESKTOP TOKEN . . . . . . . . . . . . . . . . . . .17
INTRODUCTION . . . . . . . . . . . . . . . . . . . . . . . . . . . . . . . .18SYSTEM HARDWARE AND SOFTWARE REQUIREMENTS. . . . . . . . . .20
FOR A MOBILE DEVICE. . . . . . . . . . . . . . . . . . . . . . . . .20
WHAT YOU NEED FROM THE SECURITY ADMINISTRATOR. . . . .20
INSTALLING THE DEFENDER DESKTOP TOKEN SOFTWARE ON A PC .21ACTIVATING YOUR DEFENDER DESKTOP TOKEN . . . . . . . . . . . . .24AUTHENTICATING WITH A DEFENDER DESKTOP TOKEN . . . . . . . . .32
SYNCHRONOUS MODE . . . . . . . . . . . . . . . . . . . . . . . . .32
ASYNCHRONOUS MODE . . . . . . . . . . . . . . . . . . . . . . . .34
SIMPLIFYING THE AUTHENTICATION PROCESS . . . . . . . . . . .37
TOKEN MANAGEMENT OPTIONS. . . . . . . . . . . . . . . . . . . . . . .38CHANGING THE PASSPHRASE . . . . . . . . . . . . . . . . . . . . .39
Defender Software Token User Guide
iv
INSTALLING THE DEFENDER DESKTOP TOKEN ON A BLACKBERRY . .43DISTRIBUTING THE QUEST SOFT TOKEN FOR BLACKBERRY USING THE JAD FILE . .50
INSTALLING ON THE BLACKBERRY DEVICE . . . . . . . . . . . . .52
ACTIVATING THE DEFENDER TOKEN . . . . . . . . . . . . . . . . .56
USING THE TOKEN . . . . . . . . . . . . . . . . . . . . . . . . . . .56
DELETING A TOKEN. . . . . . . . . . . . . . . . . . . . . . . . . . .56
INSTALLING THE PALM TOKEN SOFTWARE . . . . . . . . . . . . . . . .57ACTIVATING THE DEFENDER TOKEN . . . . . . . . . . . . . . . . .57
INSTALLING THE WINDOWS MOBILE/IPAQ TOKEN SOFTWARE. . . . .58ACTIVATING THE DEFENDER TOKEN . . . . . . . . . . . . . . . . .61
USING THE TOKEN . . . . . . . . . . . . . . . . . . . . . . . . . . .61
DELETING THE TOKEN . . . . . . . . . . . . . . . . . . . . . . . . .62
AUTHENTICATING WITH A DEFENDER TOKEN ON A MOBILE DEVICE . . .63
ASYNCHRONOUS MODE . . . . . . . . . . . . . . . . . . . . . . . .63
SYNCHRONOUS MODE . . . . . . . . . . . . . . . . . . . . . . . . .64
QUEST® ITOKEN™. . . . . . . . . . . . . . . . . . . . . . . . . . . . . .65WHAT IS THE QUEST® ITOKEN™ . . . . . . . . . . . . . . . . . .65
INSTALLING THE QUEST® ITOKEN™ SOFTWARE . . . . . . . . .66
ACTIVATING THE QUEST® ITOKEN™ . . . . . . . . . . . . . . . .74
AUTHENTICATING WITH THE QUEST® ITOKEN™ . . . . . . . . .78
AUTHENTICATION PROCEDURE . . . . . . . . . . . . . . . . . . . .79
REPLACING AN EXISTING ITOKEN . . . . . . . . . . . . . . . . . .81
CHAPTER 3 DEFENDER SMS TOKEN . . . . . . . . . . . . . . . . . . . . . .83
INTRODUCTION . . . . . . . . . . . . . . . . . . . . . . . . . . . . . . . .84SYSTEM HARDWARE AND SOFTWARE REQUIREMENTS. . . . . . . . . .84AUTHENTICATING WITH A DEFENDER SMS TOKEN . . . . . . . . . . .85
About this Guide
• Quest One Identity Solution
• RADIUS Authentication
• Communications Protocol
• Defender Tokens
• Audience and Scope
• Conventions
• About Quest Software
• Contacting Quest Software

Defender Software Token User Guide
6
Quest One Identity SolutionDefender is a component of the Quest One Identity Solution, a set of enabling technologies, products, and integration that empowers organizations to simplify identity and access management by:
• Reducing the number of identities
• Automating identity administration
• Ensuring the security of identities
• Leveraging existing investments, including Microsoft Active Directory
Quest One improves efficiency, enhances security and helps organizations achieve and maintain compliance by addressing identity and access management challenges as they relate to:
• Single sign-on
• Directory consolidation
• Provisioning
• Password management
• Strong authentication
• Privileged account management
• Audit and compliance.
About
7
About this GuideThis manual contains the information that users need to authenticate to a Defender-protected network using one of the following tokens:
• Quest® iToken ™
• Defender Desktop Token
• Defender Mobile.
Audience and ScopeThis book is intended for administrators and users who want to use Defender tokens for authentication.
This book does not provide tutorial information on the use of the Windows operating system or on network communication concepts. Users must have experience in using the specified operating system and an understanding of networking concepts
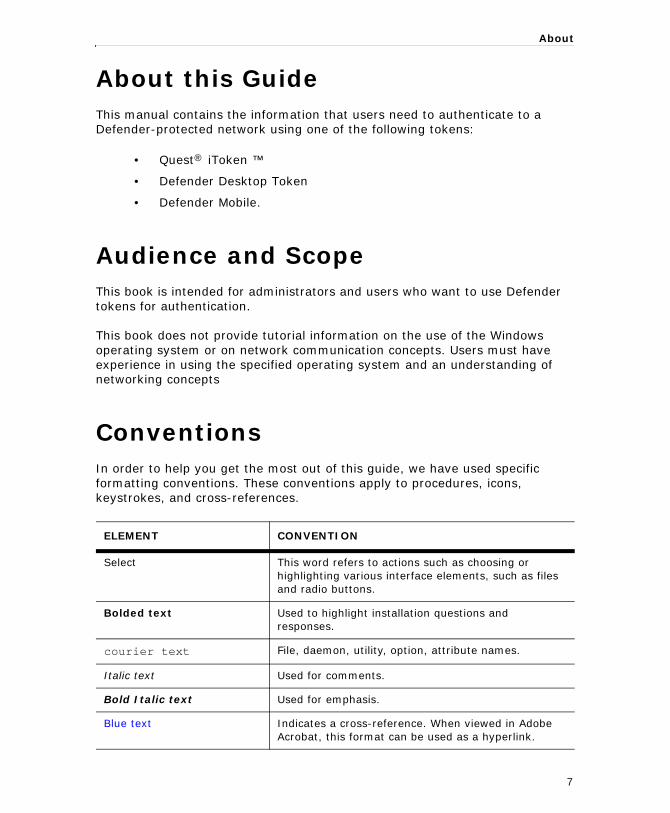
ConventionsIn order to help you get the most out of this guide, we have used specific formatting conventions. These conventions apply to procedures, icons, keystrokes, and cross-references.
ELEMENT CONVENTION
Select This word refers to actions such as choosing or highlighting various interface elements, such as files and radio buttons.
Bolded text Used to highlight installation questions and responses.
courier text File, daemon, utility, option, attribute names.
Italic text Used for comments.
Bold Italic text Used for emphasis.
Blue text Indicates a cross-reference. When viewed in Adobe Acrobat, this format can be used as a hyperlink.

Defender Software Token User Guide
8
About Quest SoftwareQuest Software, Inc., a two-time winner of Microsoft’s Global Independent Software Vendor Partner of the Year award, delivers innovative products that help organizations get more performance and productivity from their applications, databases Windows infrastructure and virtual environments. Through a deep expertise in IT operations and a continued focus on what works best, Quest helps more than 100,000 customers worldwide meet higher expectations for enterprise IT. Quest’s Windows management solutions simplify, automate secure and extend Active Directory, Exchange Server, SharePoint, SQL Server, .NET and Windows Server as well as integrating Unix, Linux and Java into the managed environment. Quest Software can be found in offices around the globe and at www.quest.com.
Used to highlight additional information pertinent to the process being described.
Used to provide Best Practice information. A best practice details the recommended course of action for the best result.
Used to highlight processes that should be performed with care.
+ A plus sign between two keystrokes means that you must press them at the same time.
| A pipe symbol (vertical bar) between elements means that you must select the elements in that particular sequence.
\ The back slash, immediately followed by a new line, indicates a Unix command line continuation.
<version>.<build number> References to the product version you are installing are displayed with <version>.<build number> in angle brackets.
ELEMENT CONVENTION

About
9
Contacting Quest SoftwarePhone 949.754.8000 (United States and Canada)
Email [email protected]
Mail Quest Software World Headquarters
5 Polaris Way
Aliso Viejo, CA 92656
Web site www.quest.com
Please refer to our Web site for regional and international office information.
Contacting Customer Support
Quest Software's world-class support team is dedicated to ensuring successful product installation and use for all Quest Software solutions.
SupportLink www.quest.com/support
Email at [email protected]
You can use SupportLink to do the following:
• Create, update, or view support requests
• Search the knowledge base
• Access FAQs
• Download patches

11
1
Defender Token Basics
• Introduction
• Defender Network Protection
• What is a Token?
• Software Tokens
• How a Token Works

Defender Software Token User Guide
12
IntroductionIf you are a remote user who must access a Defender-protected network, you need a Defender token to access your network. This token is configured for you by your security administrator. This chapter provides a description of what tokens are and how they work.
This chapter contains the following information:
• Defender network protection
• What is a token?
• How does a token work?
After reading this overview, see the following chapters for information on how to use the different token types:
• Chapter 2, Defender Desktop Token
• Blackberry
• Palm
• Windows Mobile/iPaq device
• Quest® iToken™ installed on an Apple iPhone or iPad
• Chapter 3, SMS Token
• GrIDsure - refer to the guide entitled Defender - Configuring for Use with GrIDsure Tokens
• Quest Soft Token for Android - refer to the Quest Soft Token for Android Administration and User Guide.
Introduction
13
Defender Network ProtectionA Defender Security Server resides on your network and authenticates remote users who connect to the network, thereby ensuring that the network is accessed only by authorized users.
Remote users require an authorized token and, optionally, an appropriate personal identification number (PIN) before they can access the network.
What is a Token?A token implemented in software or hardware helps remote users gain access to computer resources on a Defender-protected network. The process of gaining access to a secure network through the use of passwords, challenge/response methods, and synchronous methods is called authentication.
The Defender solution supports a variety of token options. All provide strong two-factor authentication.
Before a token can be used, it’s security record is created in the Defender Administration Console by the supervisor and then stored in Active Directory. Some tokens must be initialized by the supervisor, while others can be initialized remotely by the user.
Software Tokens
This guide describes the software tokens available for use with Defender 5.
Defender Desktop Token
The Defender Desktop Token is a software token that is created and activated in Defender 5. For convenience, the Defender Desktop Token can be stored locally on your machine, on a removable disk for extra security and portabililty, or on a Blackberry, Palm, Windows Mobile/iPaq device, iPhone or Android. The Defender Desktop Token allows authentication via asynchronous (challenge/response) and/or synchronous (internal challenge) authentication.

Defender Software Token User Guide
14
Defender SMS Token
Defender SMS is a token that uses your cell phones to provide secure, two-factor authentication. The Defender SMS Token allows authentication via an automatically generated one-time password that is sent to the specified mobile number.
Migrating Defender Software Tokens
The tokens listed below can be migrated from Defender 4 and used for authentication in Defender 5. The tokens must be created and activated in the earlier version of Defender, before they are migrated to Defender 5. These tokens cannot be created in Defender 5.
• Defender Electronically Distributed Software Token - authentication software installed on the user’s computer which allows the remote user to access a Defender-protected network and authenticate to the Defender Security Server.
• Defender Software Token - this token is initialized with the user’s security record by the supervisor prior to distribution.
• Self-Registering Defender Software Token - authentication software installed on the user’s computer which allows the remote user to access a Defender-protected network and authenticate to the Defender Security Server.
The Defender Client Software enables the use of the Defender Software Token, Defender Electronically Distributed Software Token and Self-Registering Defender Software Token. It is provided as a self-extracting file which the token administrator makes accessible to users prior to the distribution of the user unique token information.
The Defender Electronically Distributed Software Token, Defender Software Token and the Self-Registering Defender Software Token allow users to authenticate to the Defender Security Server via an automatic challenge/response dialog that initiates when the user enters a PIN on his workstation. If authentication is successful, the Defender Security Server allows the user to access the corporate network.
For further advice and assistance with token migration, please contact Customer Support.
Introduction
15
How a Token WorksYour security supervisor determines your organization’s security requirements and programs your Defender token based on those security requirements. When a token is programmed, information is saved to the token so that when the Defender Security Server challenges you, the token generates the response or one-time password expected by the Defender Security Server. If the PIN used to unlock the token is incorrect, the generated response or password will not be correct.
17
2
Defender Desktop Token
• Introduction
• System Hardware and Software Requirements
• Installing the Defender Desktop Token Software on a PC
• Activating your Defender Desktop Token
• Authenticating with a Defender Desktop Token
• Token Management Options
• Installing the Defender Desktop Token on a BlackBerry
• Installing the Palm Token Software
• Installing the Windows Mobile/iPaq Token Software
• Authenticating with a Defender Token on a Mobile Device
• Installing the Quest® iToken™ software
• Activating the Quest® iToken™
• Authenticating with the Quest® iToken™
Defender Software Token User Guide
18
IntroductionThe Defender Desktop Token is software that you install on your Windows PC or mobile device.
The Defender Desktop Token is supported on:
• Windows Desktop
• BlackBerry
• Windows Mobile/iPaq
• Palm
• Quest® iToken™ installed on the Apple iPhone or iPad.
When you attempt to access a Defender-protected network from a remote location, the Defender network security system intercepts the call. The token is used to communicate with the security system on the protected network. If your credentials are accepted by the Defender security system, and if the challenge/response dialog between the token and the Defender device is valid, you are allowed to access the network. The Defender Desktop Token is distributed to you by your Defender administrator.

Defender Desktop Token
19
This guide describes:
• hardware and software requirements for the Defender Desktop Token
• installing the Defender Desktop Token software on a PC or mobile device
• activating the Defender Desktop Token
• authenticating using a Defender Desktop Token
• token management options.
To use a Defender Desktop Token you must:
• install the Defender Desktop Token software provided to you by your Defender administrator
• activate the Defender Desktop Token.
Defender Software Token User Guide
20
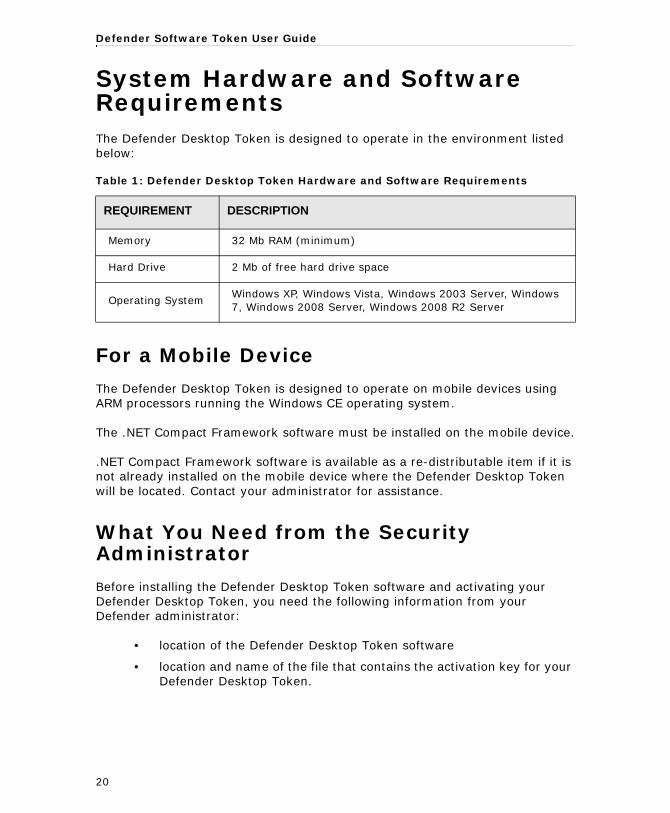
System Hardware and Software RequirementsThe Defender Desktop Token is designed to operate in the environment listed below:
For a Mobile Device
The Defender Desktop Token is designed to operate on mobile devices using ARM processors running the Windows CE operating system.
The .NET Compact Framework software must be installed on the mobile device.
.NET Compact Framework software is available as a re-distributable item if it is not already installed on the mobile device where the Defender Desktop Token will be located. Contact your administrator for assistance.
What You Need from the Security Administrator
Before installing the Defender Desktop Token software and activating your Defender Desktop Token, you need the following information from your Defender administrator:
• location of the Defender Desktop Token software
• location and name of the file that contains the activation key for your Defender Desktop Token.
Table 1: Defender Desktop Token Hardware and Software Requirements
REQUIREMENT DESCRIPTION
Memory 32 Mb RAM (minimum)
Hard Drive 2 Mb of free hard drive space
Operating SystemWindows XP, Windows Vista, Windows 2003 Server, Windows 7, Windows 2008 Server, Windows 2008 R2 Server

Defender Desktop Token
21
Installing the Defender Desktop Token Software on a PCYour system administrator will provide you with the Defender Desktop Token software required to for your Token. This file may be made available to you through a network share, a web site, or a CD.
To install the Defender Desktop Token software, perform the following steps:
1. Locate and run the Defender Desktop Token Installer.exe file. The Defender Desktop Token Installation Wizard starts:
Figure 1: Defender Desktop Token Installation Wizard
2. Click Next. The Defender Desktop Token Installation Wizard (License Agreement) page is displayed. Check the box to accept the License agreement, then click Next. The Defender Desktop Token Installation Wizard (Install Location) page is displayed:
Defender Software Token User Guide
22
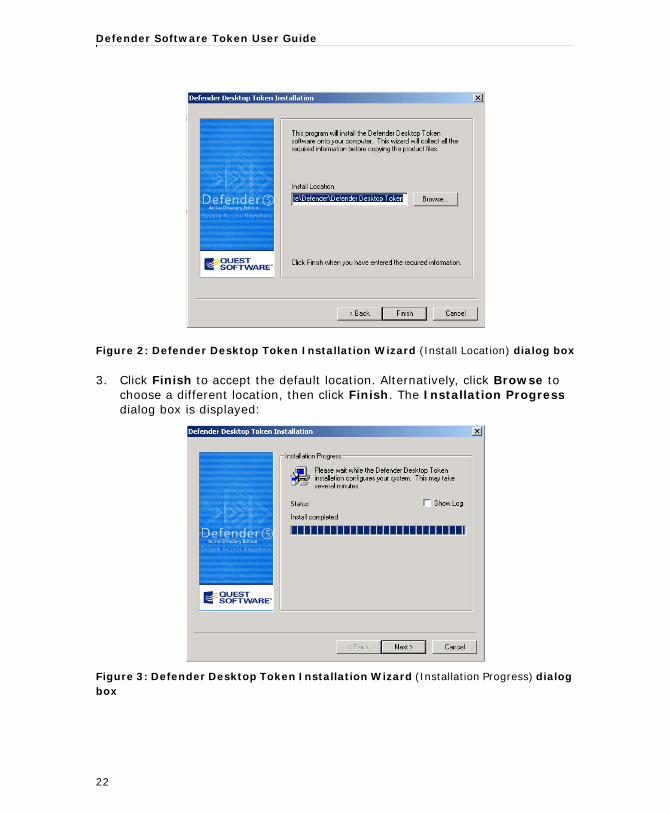
Figure 2: Defender Desktop Token Installation Wizard (Install Location) dialog box
3. Click Finish to accept the default location. Alternatively, click Browse to choose a different location, then click Finish. The Installation Progress dialog box is displayed:
Figure 3: Defender Desktop Token Installation Wizard (Installation Progress) dialog box

Defender Desktop Token
23
4. The Installation Complete dialog box is then displayed:
Figure 4: Defender Desktop Token Installation Wizard (Installation Complete) dia-log box
5. Click Finish. On completion of the installation a Defender Desktop Token program group is created.
Defender Software Token User Guide
24
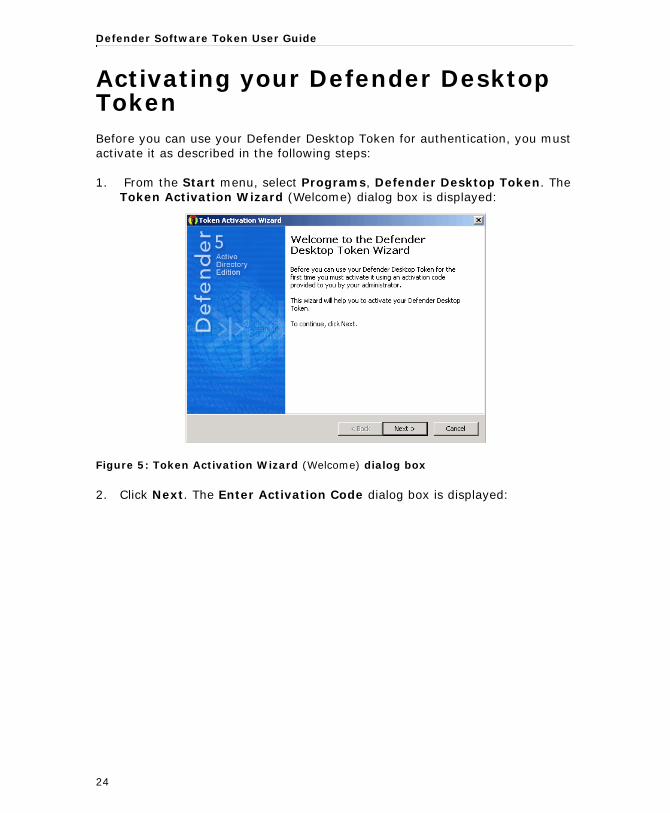
Activating your Defender Desktop TokenBefore you can use your Defender Desktop Token for authentication, you must activate it as described in the following steps:
1. From the Start menu, select Programs, Defender Desktop Token. The Token Activation Wizard (Welcome) dialog box is displayed:
Figure 5: Token Activation Wizard (Welcome) dialog box
2. Click Next. The Enter Activation Code dialog box is displayed:

Defender Desktop Token
25
Figure 6: Token Activation Wizard (Enter Activation Code) dialog box
When the Defender Administrator generates a Defender Desktop Token for a user, the username.txt file is automatically created. This file can optionally contain the token details for a single user or token details for multiple users. For further information, refer to the Defender Token Administration Guide.
3. Click Browse to select the required username.txt file. The activation key is automatically copied from the username.txt file and pasted into the Code field.

Defender Software Token User Guide
26
Alternatively, you can copy the activation code from the username.txt file and paste it into the Code field.
4. Click Next. The Token Activation Wizard - Select Storage dialog box is displayed:
Figure 7: Token Activation Wizard (Select Storage) dialog box
5. To store the activated Defender Desktop Token:
• in your application data folder, click the Your application data folder button
• in a different folder, click the Another Folder radio button, then click Browse to navigate to the required location
Defender Desktop Token
27
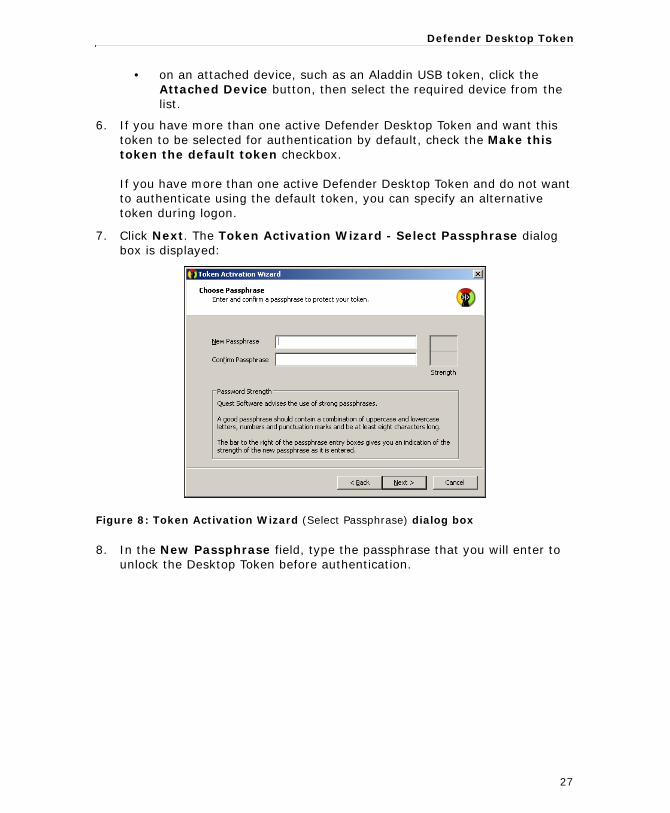
• on an attached device, such as an Aladdin USB token, click the Attached Device button, then select the required device from the list.
6. If you have more than one active Defender Desktop Token and want this token to be selected for authentication by default, check the Make this token the default token checkbox. If you have more than one active Defender Desktop Token and do not want to authenticate using the default token, you can specify an alternative token during logon.
7. Click Next. The Token Activation Wizard - Select Passphrase dialog box is displayed:
Figure 8: Token Activation Wizard (Select Passphrase) dialog box
8. In the New Passphrase field, type the passphrase that you will enter to unlock the Desktop Token before authentication.

Defender Software Token User Guide
28
9. In the Confirm Passphrase field, type the passphrase again to confirm your choice.
Figure 9: Token Activation Wizard (Strong Passphrase) dialog box
Defender Desktop Token
29
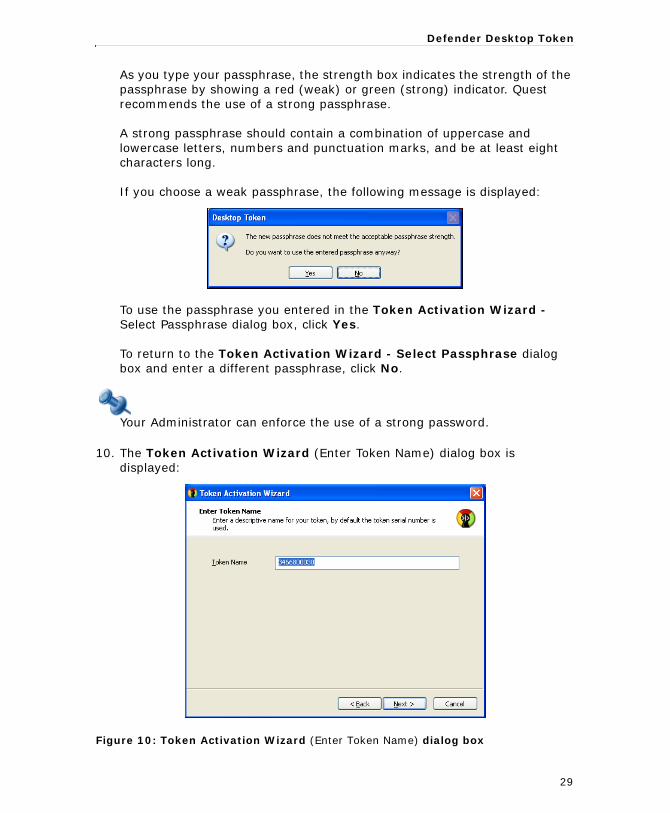
As you type your passphrase, the strength box indicates the strength of the passphrase by showing a red (weak) or green (strong) indicator. Quest recommends the use of a strong passphrase. A strong passphrase should contain a combination of uppercase and lowercase letters, numbers and punctuation marks, and be at least eight characters long. If you choose a weak passphrase, the following message is displayed:
To use the passphrase you entered in the Token Activation Wizard - Select Passphrase dialog box, click Yes. To return to the Token Activation Wizard - Select Passphrase dialog box and enter a different passphrase, click No.
Your Administrator can enforce the use of a strong password.
10. The Token Activation Wizard (Enter Token Name) dialog box is displayed:
Figure 10: Token Activation Wizard (Enter Token Name) dialog box

Defender Software Token User Guide
30
11. In the Token Name field, type a name that will help you identify this token. If you choose not to give the token a name, the token serial number will be used as the token name.
12. Click Next. The Token Activation Wizard (Defender Desktop Token Activation Complete) dialog box is displayed:
Figure 11: Token Activation Wizard (Defender Desktop Token Activation Complete) dialog box
On completion of the activation procedure, the token can be managed from the Start menu, Defender Desktop Token program group, shown below:
Figure 12: Defender Desktop Tokens (Token Management) dialog box

Defender Desktop Token
31
If you specified a default token during the activation procedure, the Enter Passphrase dialog for the default token will be displayed when you select the Defender Desktop Token program group from the Start menu. To display the token management options, or select an alternative token for authentication, click Tokens.
For authentication information, refer to Authenticating with a Defender Desktop Token.
Defender Software Token User Guide
32
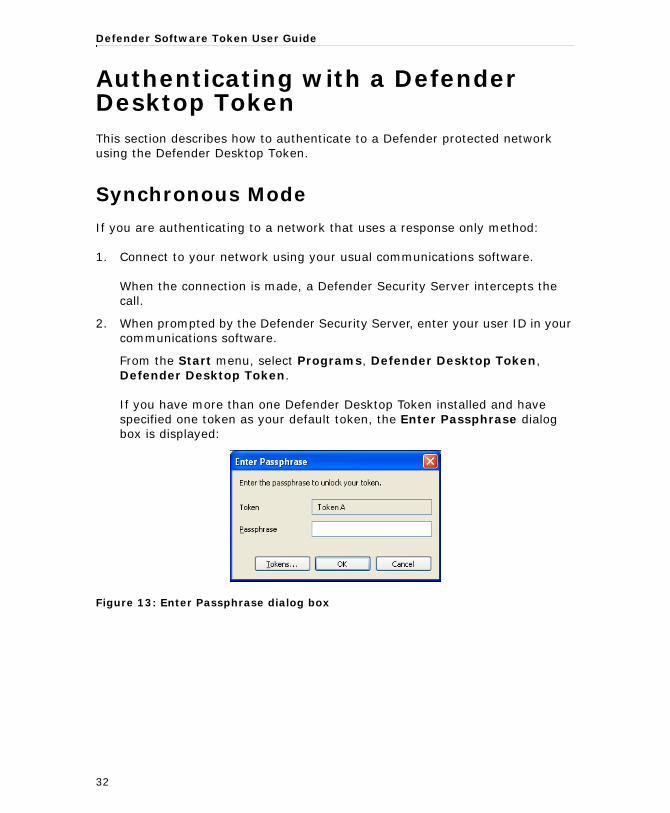
Authenticating with a Defender Desktop TokenThis section describes how to authenticate to a Defender protected network using the Defender Desktop Token.
Synchronous Mode
If you are authenticating to a network that uses a response only method:
1. Connect to your network using your usual communications software. When the connection is made, a Defender Security Server intercepts the call.
2. When prompted by the Defender Security Server, enter your user ID in your communications software.
From the Start menu, select Programs, Defender Desktop Token, Defender Desktop Token. If you have more than one Defender Desktop Token installed and have specified one token as your default token, the Enter Passphrase dialog box is displayed:
Figure 13: Enter Passphrase dialog box

Defender Desktop Token
33
If you do not want to use your default token for authentication, click Tokens. The Defender Desktop Tokens dialog box is displayed:
Figure 14: Defender Desktop Tokens dialog box
Double-click the required token. The Enter Passphrase dialog box is displayed:
Figure 15: Enter Passphrase dialog box
3. In the Passphrase field, type your passphrase.
4. Click OK. The Defender Desktop Token Response dialog box is displayed:
Figure 16: Defender Desktop Token Response dialog box
Defender Software Token User Guide
34
5. Click Get Response. The token response is displayed in the Response field. To automatically copy the token response to the clipboard and leave the Defender Desktop Token Response window open, check the Automatically copy response to the clipboard checkbox. To automatically close the Defender Desktop Token Response window after the response has been copied to the clipboard, check the Automatically close this window checkbox. If you chose not to automatically copy the token response to the clipboard, click Copy to copy the response to the clipboard. Click Cancel to close the Defender Desktop Token Response window.
6. Paste the Defender Desktop Token response into your communications software. Place the cursor in the communication software window and press Control-V to paste the response into the communication software window.
7. Press Enter on your computer keyboard.
8. Defender verifies the response.
If the response the Defender Security Server receives matches the one it expects, you are connected and granted access to the protected network.
Asynchronous Mode
If you are authenticating to a network that uses a challenge/response method:
1. Connect to your network using your usual communications software. When the connection is made, a Defender Security Server intercepts the call.
2. When prompted by the Defender Security Server, enter your user ID in your communications software.The Defender Security Server displays a challenge value in your communications software.

Defender Desktop Token
35
3. From the Start menu, select Programs, Defender Desktop Token, Defender Desktop Token. If you:
• have more than one Defender Desktop Token assigned to you, the Defender Desktop Tokens dialog box is displayed.
Figure 17: Defender Desktop Tokens dialog box
Select the required token. Go to Step 4.
• specified a default token during the activation procedure, the Enter Passphrase dialog for the default token will be displayed when you select the Defender Desktop Token program group from the Start menu. To display the token management options, or select an alternative token for authentication, click Tokens.
Select the required token. Go to Step 4.
4. The Enter Passphrase dialog box is displayed:
Figure 18: Enter Passphrase dialog box
5. In the Passphrase field, type your passphrase.

Defender Software Token User Guide
36
6. Click OK. The Defender Desktop Token Response page is displayed:
Figure 19: Defender Desktop Token Response page
7. In the Challenge field, type the challenge displayed by the Defender Security Server.
8. To automatically copy the token response to the clipboard and close the Defender Desktop Token Response window, check the box, then click Get Response. If you chose not to automatically copy the token response to the clipboard, click Get Response, then use the copy function to copy the response to the clipboard. Click Cancel to close the Defender Desktop Token Response window.
9. Place the cursor in the communication software window and press Control-V to paste the response into the window.
10. Press Enter on your computer keyboard.
11. Defender verifies the response.
If the response the Defender Security Server receives matches the one it expects, you are connected and granted access to the protected network.
Defender Desktop Token
37
Simplifying the Authentication Process
The authentication process can be greatly simplified and performed automatically if the Defender VPN Integrator component is installed.
The VPN Integrator is installed and configured on the end-user’s desktop, along with the Desktop Token software. When a Defender protected VPN connection is initiated, VPN Integrator communicates between the Defender Desktop Token software and the third-party VPN client, to ensure that the secure, one-time password authentication process is handled automatically. The entire operation is seamless and very fast.
For installation and configuration details for the VPN Integrator, please refer to the Defender VPN Integrator Installation and Configuration Guide.
Defender Software Token User Guide
38
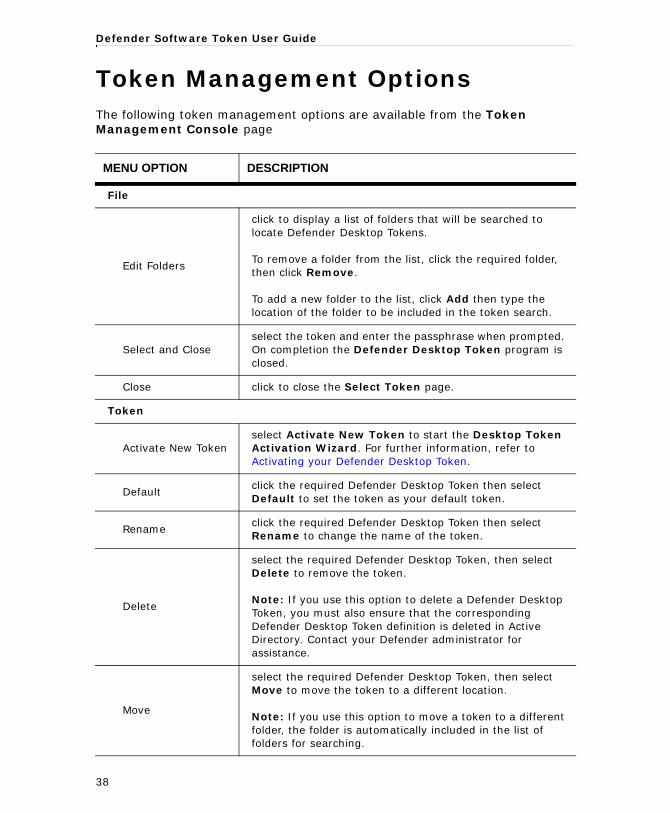
Token Management OptionsThe following token management options are available from the Token Management Console page
MENU OPTION DESCRIPTION
File
Edit Folders
click to display a list of folders that will be searched to locate Defender Desktop Tokens.
To remove a folder from the list, click the required folder, then click Remove.
To add a new folder to the list, click Add then type the location of the folder to be included in the token search.
Select and Closeselect the token and enter the passphrase when prompted. On completion the Defender Desktop Token program is closed.
Close click to close the Select Token page.
Token
Activate New Tokenselect Activate New Token to start the Desktop Token Activation Wizard. For further information, refer to Activating your Defender Desktop Token.
Default click the required Defender Desktop Token then select Default to set the token as your default token.
Renameclick the required Defender Desktop Token then select Rename to change the name of the token.
Delete
select the required Defender Desktop Token, then select Delete to remove the token. Note: If you use this option to delete a Defender Desktop Token, you must also ensure that the corresponding Defender Desktop Token definition is deleted in Active Directory. Contact your Defender administrator for assistance.
Move
select the required Defender Desktop Token, then select Move to move the token to a different location.
Note: If you use this option to move a token to a different folder, the folder is automatically included in the list of folders for searching.

Defender Desktop Token
39
Changing the Passphrase
To change the passphrase for a Defender Desktop Token:
1. From the Start menu, select Programs, Defender Desktop Token, Defender Desktop Token. The Enter Passphrase page is displayed.
2. Click Tokens to select the required token.
3. On the menu bar, click Token, Change Passphrase. The Change Passphrase Wizard starts.
4. Click Next. You are prompted to enter your current passphrase for this token. Enter the passphrase.
5. Click Next. Enter your new passphrase for this token.
6. Confirm the new passphrase.
7. Click Next. The Change Passphrase Wizard confirms that the passphrase was changed successfully.
Change passphraseselect the required Defender Desktop Token, then select Change passphrase to change the current passphrase.
Reset passphraseselect the required Defender Desktop Token, then select Reset passphrase to reset a locked passphrase.
Propertiesselect the required Defender Desktop Token then select Properties to display the token information page.
View
Icons click to display tokens as icons.
Detailsclick to display tokens as details.
Options
Prompt for username to unlock token
select the required Defender Desktop Token, then select Options, Prompt for username to unlock token to display the username at the passphrase prompt. The passphrase is also required.
Centre Window at Startup
select this option to ensure that the login dialog is always positioned centrally on the user’s display.
Help
About Defender Desktop Token
click Help, About to display version information for the Defender Desktop Token program.
MENU OPTION DESCRIPTION

Defender Software Token User Guide
40
If you forget your Passphrase
If you forget your passphrase or your token is locked because you have exceeded the permitted number of incorrect passphrase attempts, the following message is displayed:
Your passphrase is locked. You must reset your passphrase.
To begin the unlock procedure, which requires a dialog with the Defender Administrator:
1. Select Start, Programs, Defender Desktop Token, Defender Desktop Token.
Figure 20: Defender Desktop Token - Enter Passphrase
2. Click Tokens. The Defender Desktop Tokens dialog is displayed:
Figure 21: Defender Desktop Token - Reset Passphrase

Defender Desktop Token
41
3. Right-click the token that you want to reset, then select Reset Passphrase from the list. The Defender Desktop Token Wizard starts:
Figure 22: Defender Desktop Token Wizard
4. Click Next.
Figure 23: Defender Desktop Token - Reset Passphrase
5. Tell your Administrator the number displayed in the Challenge field. Your Administrator will then reply with an unlock code.
6. Enter the unlock code into the Unlock Code field.
7. In the New Passphrase field, type your new passphrase.
Defender Software Token User Guide
42
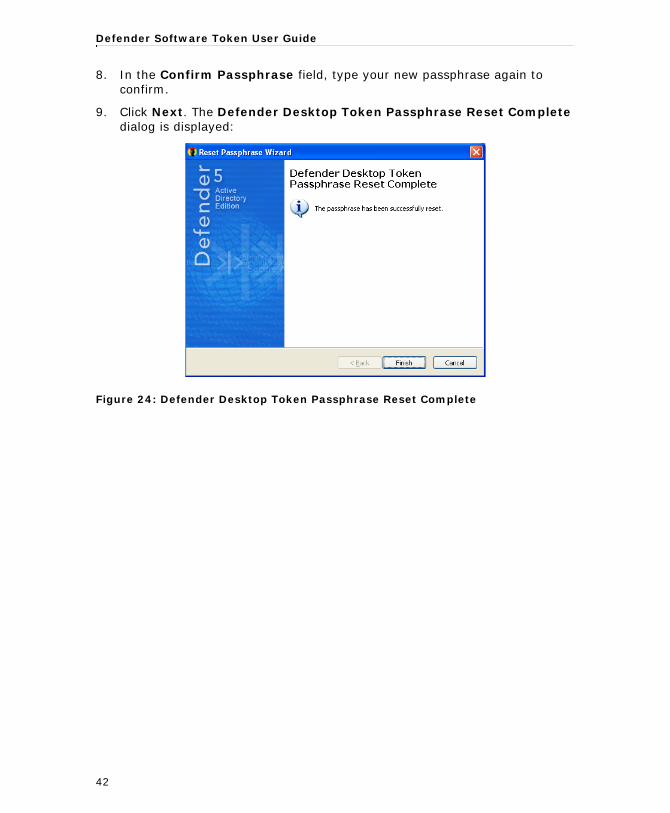
8. In the Confirm Passphrase field, type your new passphrase again to confirm.
9. Click Next. The Defender Desktop Token Passphrase Reset Complete dialog is displayed:
Figure 24: Defender Desktop Token Passphrase Reset Complete
Defender Desktop Token
43
Installing the Defender Desktop Token on a BlackBerryBefore you can activate and use the Defender Desktop Token on your BlackBerry, you must install the BlackBerry Token Software. The following steps describe how to install the BlackBerry Token Software using the BlackBerry Desktop Manager.
in Defender 5.6 the BlackBerry Token Software can be downloaded from the BlackBerry App World. The software can also be installed on the BlackBerry device using the BlackBerry Enterprise Server.
1. Determine which operating system is running on your Blackberry. This can be found on the About dialog, from within Options.
2. Download the latest version of the BlackBerry Token Software from the Defender product pages of the Quest SupportLink site and save to either a local or shared network drive.
The BlackBerry Token Software is available for different versions of the operating system. Please ensure that you select the correct version for your BlackBerry.
Defender Software Token User Guide
44
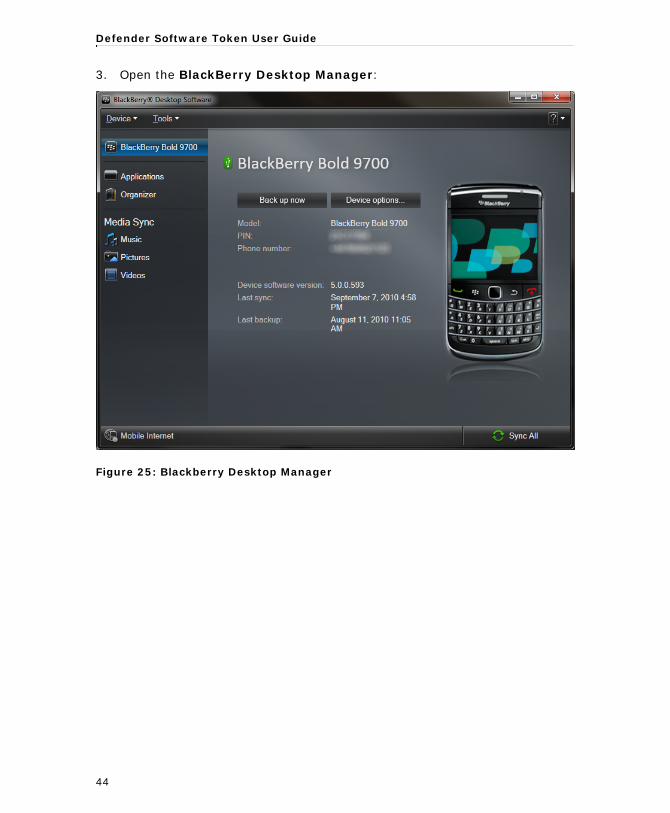
3. Open the BlackBerry Desktop Manager:
Figure 25: Blackberry Desktop Manager

Defender Desktop Token
45
4. Click Applications to load the token software onto your BlackBerry:
Figure 26: Blackberry Application Loader
Defender Software Token User Guide
46
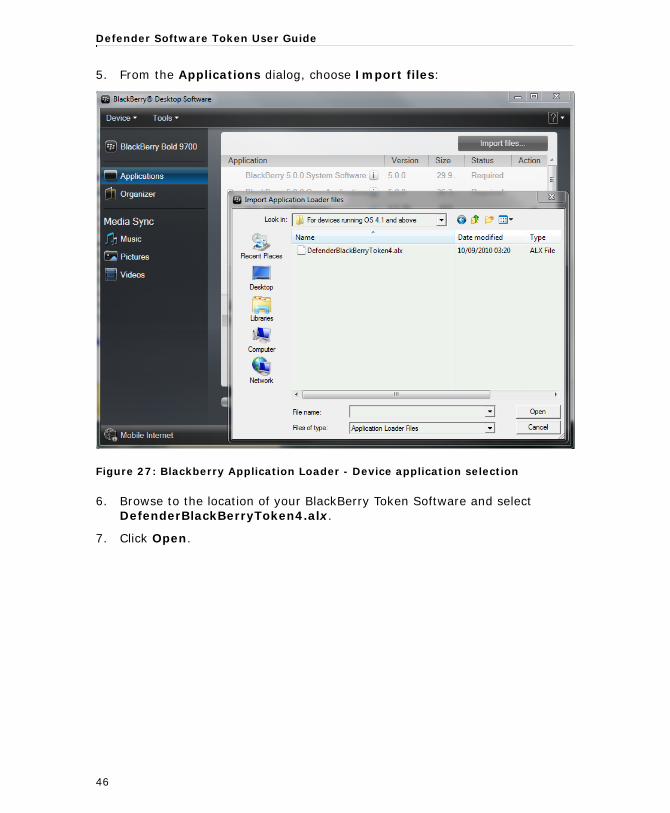
5. From the Applications dialog, choose Import files:
Figure 27: Blackberry Application Loader - Device application selection
6. Browse to the location of your BlackBerry Token Software and select DefenderBlackBerryToken4.alx.
7. Click Open.
Defender Desktop Token
47
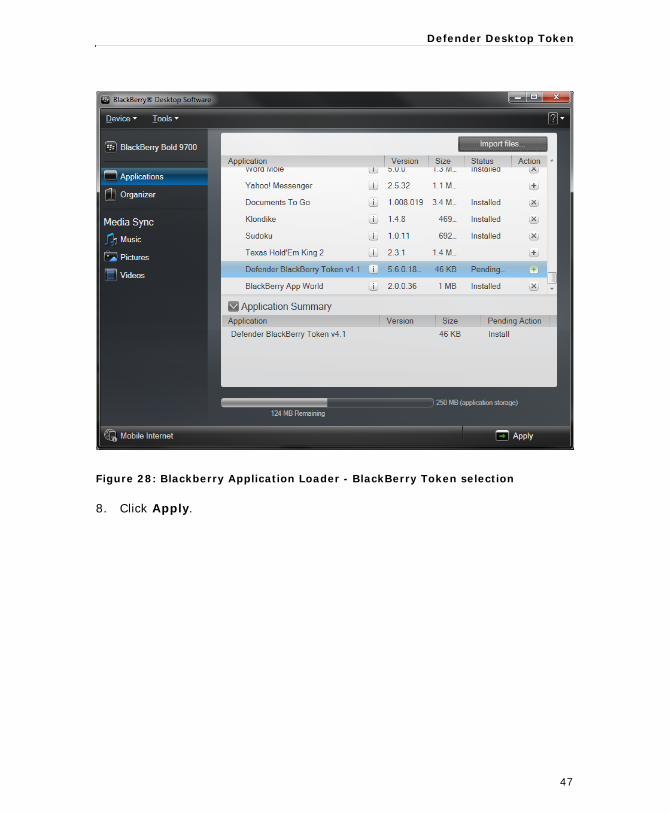
Figure 28: Blackberry Application Loader - BlackBerry Token selection
8. Click Apply.
Defender Software Token User Guide
48
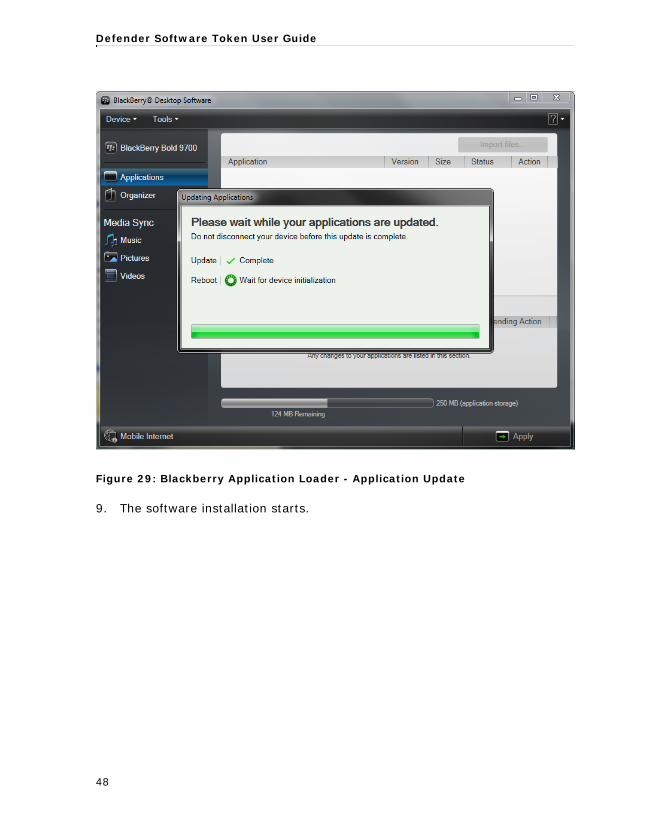
Figure 29: Blackberry Application Loader - Application Update
9. The software installation starts.
Defender Desktop Token
49
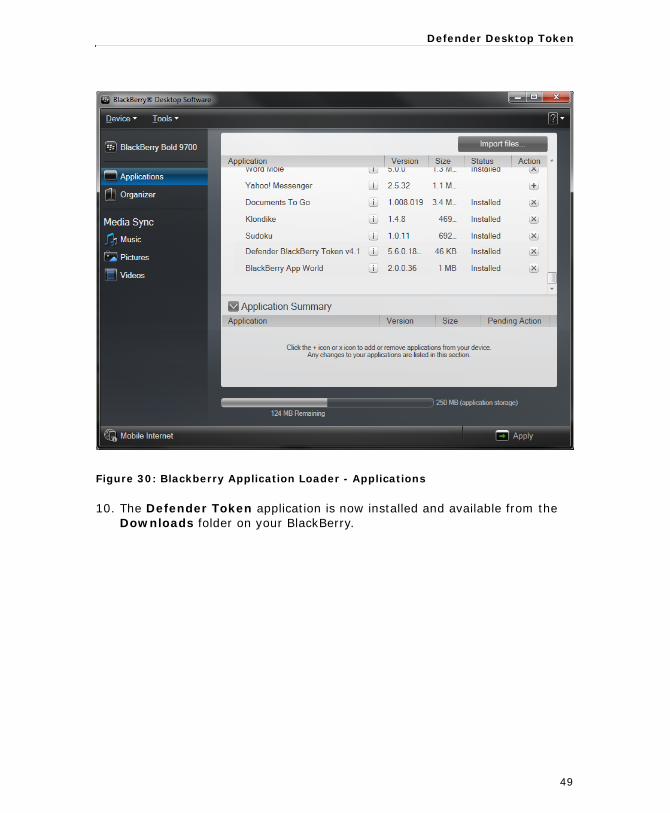
Figure 30: Blackberry Application Loader - Applications
10. The Defender Token application is now installed and available from the Downloads folder on your BlackBerry.

Defender Software Token User Guide
50
Distributing the Quest Soft Token for BlackBerry using the JAD file
Defender versions 5.6 and later support the use of a JAD file for the distribution of the Quest Soft Token for Blackberry. The JAD file, DefenderBlackBerryToken4.jad, is included on the installation CD in the Tokens\BlackBerry Token folder. Both the JAD and COD files are required for web based deployment.
The following sections describe how to configure IIS 6 and IIS7 to deploy the BlackBerry JAD file, and provide an example web page.
IIS 6
1. Open IIS Manager and right-click the required web site.
2. Select Properties.
3. Select HTTP Headers.
4. Select MIME Types.

Defender Desktop Token
51
1. Add the following two new MIME types:
2. Copy the DefenderBlackBerryToken4.jad and DefenderBlackBerryToken4.cod files to your web site. The files should be located in the same folder.
3. Create or modify an existing web page to link to the DefenderBlackBerryToken4.jad file. A simple example is provided below:
<html>
<head><title>Quest Soft Token for Blackberry - Download</title></head>
<body>
<a href="DefenderBlackBerryToken4.jad">Download Software</a>
</body>
</html>
4. Restart the web site for the changes to take effect.
IIS 7
1. Open IIS Manager and select the required web site.
2. Select MIME Types and Open Feature.
3. Select Add and add the following two MIME types:
4. Copy the DefenderBlackBerryToken4.jad and DefenderBlackBerryToken4.cod files to your web site. The files should be located in the same folder.
5. Create or modify an existing web page to link to the DefenderBlackBerryToken4.jad file. (See the above example).
6. Restart the web site for the changes to take effect.
Extension MIME Typejad text/vnd.sun.j2me.app-descriptorcod application/vnd.rim.cod
Extension MIME Typejad text/vnd.sun.j2me.app-descriptorcod application/vnd.rim.cod
Defender Software Token User Guide
52
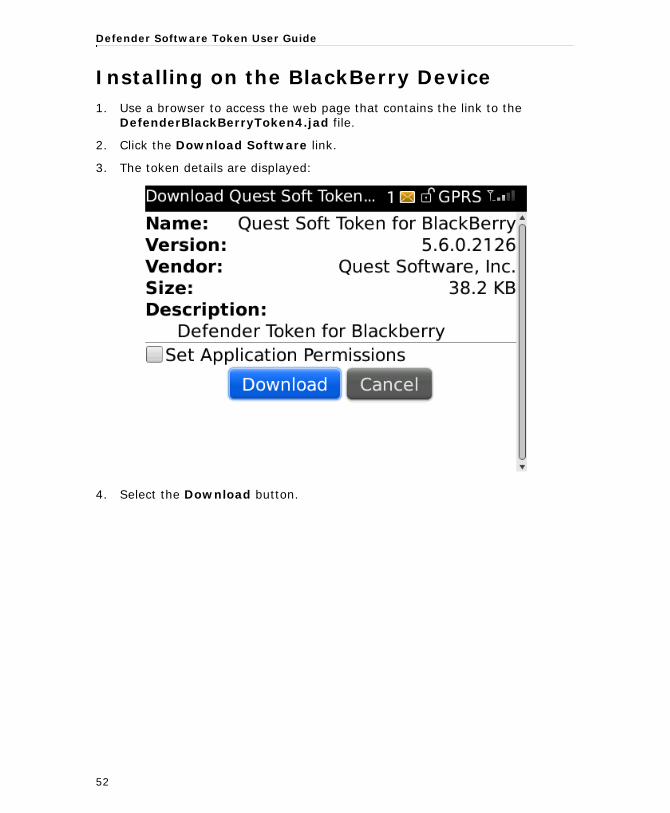
Installing on the BlackBerry Device1. Use a browser to access the web page that contains the link to the
DefenderBlackBerryToken4.jad file.
2. Click the Download Software link.
3. The token details are displayed:
4. Select the Download button.

Defender Desktop Token
53
5. A message tells you that the application was installed successfully.
6. Click OK.
Defender Software Token User Guide
54
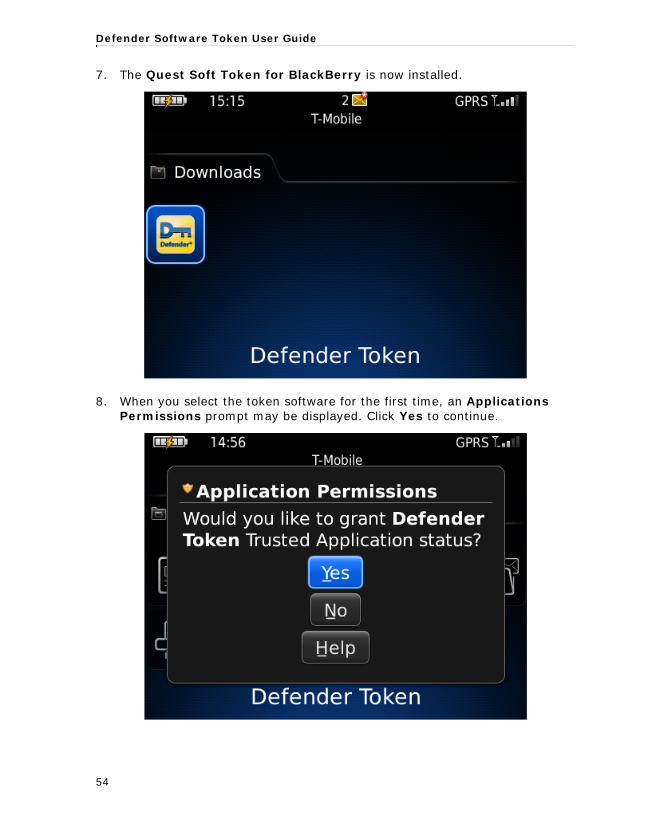
7. The Quest Soft Token for BlackBerry is now installed.
8. When you select the token software for the first time, an Applications Permissions prompt may be displayed. Click Yes to continue.
Defender Desktop Token
55
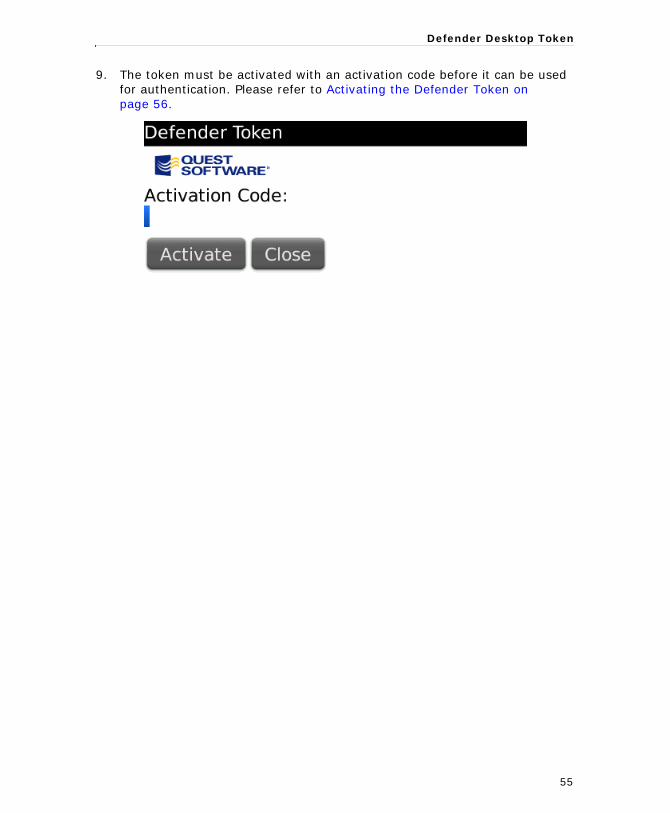
9. The token must be activated with an activation code before it can be used for authentication. Please refer to Activating the Defender Token on page 56.
Defender Software Token User Guide
56
Activating the Defender Token1. On your BlackBerry, select Applications, then Defender Token.
You are prompted to enter the Defender Token activation key. The activation key is supplied to you separately by your Defender administrator.
2. At the prompt, type the key or use copy and paste.
3. Click OK to activate the token. A message tells you that the token was activated successfully.
Using the Token
To use the Defender Token on your BlackBerry:
1. From Applications on your BlackBerry, select the Defender Token appli-cation.
2. A token response is displayed.
3. Enter this response into the login page on your PC.
Deleting a Token
To de-activate a Defender Token on your BlackBerry:
1. From Applications on your BlackBerry, select the Defender Token appli-cation.
2. Press Menu to display the Defender menu.
3. Select Delete Token from the menu.

Defender Desktop Token
57
Installing the Palm Token SoftwareBefore you can activate the Defender Token on your Palm, you must install the Palm Token Software on a workstation as described in the following steps:
1. Download the latest version of the Palm Token Software from the Defender product pages of the Quest SupportLink site.
2. Run the DefenderPalmToken_Installer.exe.
3. Select your username and click OK.
4. Connect your Palm device to your PC and press the HotSync button. The token software is transferred to your Palm device.
The Palm HotSync Manager is required to install the token software on your Palm device.
Activating the Defender Token1. On your Palm, select the Defender Token. You are prompted to enter the
Defender Token activation key. The activation key is supplied separately.
2. At the prompt, type the key.
3. Click OK to activate the token. A message tells you that the token was activated successfully.
Defender Software Token User Guide
58
Installing the Windows Mobile/iPaq Token SoftwareBefore you can activate the Defender Token on your Windows Mobile/iPaq device, you must install the Windows Mobile/iPaq Software. Download the latest version of the Windows Mobile Token Software from the Defender product pages on the Quest SupportLink site, then perform the following steps:
1. Connect your Windows Mobile/iPaq device to your PC and place it in the cra-dle with Microsoft ActivSync running. On your PC, the ActivSync dialog box displays Connected.
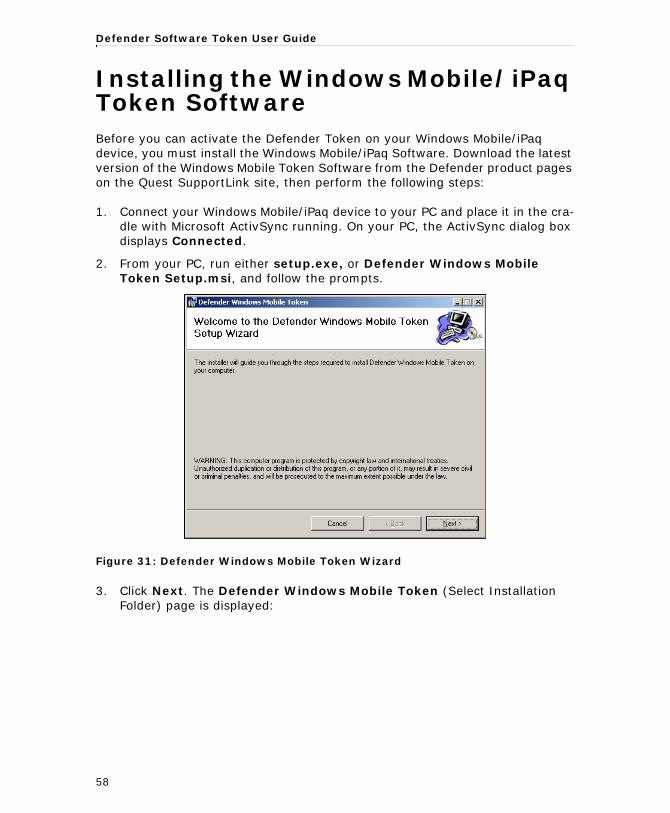
2. From your PC, run either setup.exe, or Defender Windows Mobile Token Setup.msi, and follow the prompts.
Figure 31: Defender Windows Mobile Token Wizard
3. Click Next. The Defender Windows Mobile Token (Select Installation Folder) page is displayed:

Defender Desktop Token
59
Figure 32: Defender Windows Mobile Token (Select Installation Folder) page
4. Click Next to accept the default location. Alternatively, click Browse to choose a different location.
5. If you want the token software for your use only, click the Just me button. If you want the token to be available to anyone who uses this computer, click the Everyone button.
Defender Software Token User Guide
60
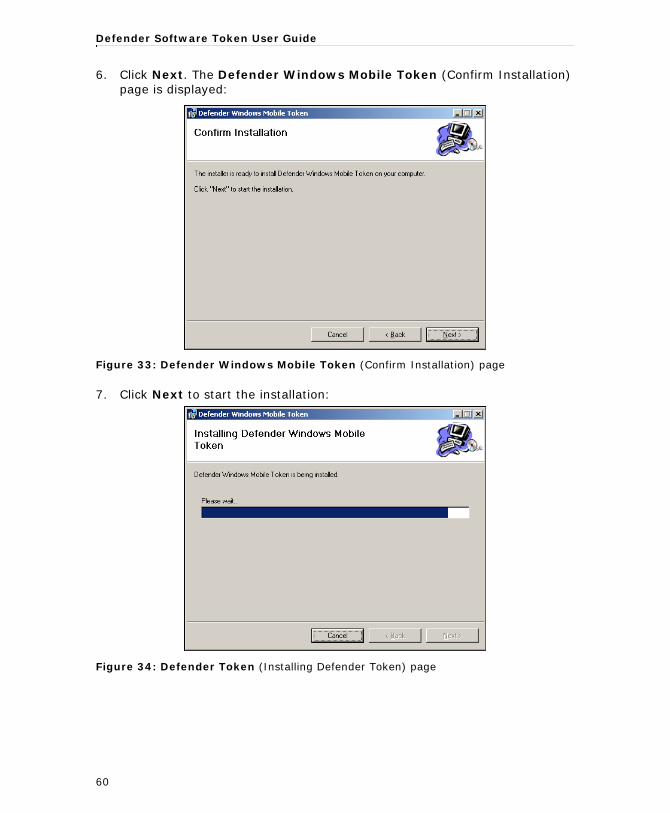
6. Click Next. The Defender Windows Mobile Token (Confirm Installation) page is displayed:
Figure 33: Defender Windows Mobile Token (Confirm Installation) page
7. Click Next to start the installation:
Figure 34: Defender Token (Installing Defender Token) page
Defender Desktop Token
61
8. On completion of the installation, click Next to continue. The Installing Applications dialog box is displayed. Select Yes to install the Defender Palm Token software into the default directory on your mobile device. Alternatively, click No to choose a different directory. The Application Downloading Complete dialog box is then displayed.
9. Perform any further steps that may be required by your mobile device to complete the installation.
Activating the Defender Token1. On your device, select Defender Token.
2. You are prompted to enter an Activation Key. Locate the Activation Key supplied to you by your Defender Administrator and enter it into the Activation Key field.
3. Click OK.
4. The Defender Token application is now ready to use.
Using the Token
To use the Defender Token on your device:
1. Select the Defender Token application from the menu on your device.
2. A token response is displayed.
3. Enter this response at the authentication prompt.

Defender Software Token User Guide
62
Deleting the Token
To delete the Defender Token from your device and remove the Defender Token software from your PC:
1. Connect your device to your PC and place it in the cradle with Microsoft ActivSync running. On your PC, the ActivSync dialog box displays Con-nected.
2. From the Control Panel, select Add/Remove Programs.
3. Locate Defender Token in the list of applications, then click Remove.
4. The Microsoft ActivSync dialog box displays a list of applications.
5. Select Defender Token.
6. Click Remove. The Defender Token is removed from your PC and device.
Defender Desktop Token
63
Authenticating with a Defender Token on a Mobile DeviceThis section describes how to authenticate to a Defender protected network using the Defender Desktop Token on a mobile device.
Asynchronous Mode
If you are authenticating to a network that uses a challenge/response method:
1. Connect to your network using your usual communications software. When the connection is made, a Defender Security Server intercepts the call.
2. When prompted by the Defender Security Server, enter your user ID in your communications software. The Defender Security Server displays a challenge value in your communications software.
3. On your mobile device, select Start, then Defender Token.
4. In the Challenge field, type the challenge issued by the Defender Security Server.
5. Click Get Response.
6. A response is displayed in the Response field.
7. Type the response in the Response field in your communications software.
8. Press Enter on your computer keyboard.
9. Defender verifies the response.
If the response the Defender Security Server receives matches the one it expects, you are connected and granted access to the protected network.
Defender Software Token User Guide
64
Synchronous Mode
If you are authenticating to a network that uses a response only method:
1. Connect to your network using your usual communications software. When the connection is made, a Defender Security Server intercepts the call.
2. When prompted by the Defender Security Server, enter your user ID in your communications software. The Defender Security Server displays a challenge value in your communications software.
3. On your mobile device, select Start, then Defender Token.
4. A response is displayed in the Response field.
5. Type the response in the Response field in your communications software.
6. Press Enter on your computer keyboard.
7. Defender verifies the response. If the response the Defender Security Server receives matches the one it expects, you are connected and granted access to the protected network.

Defender Desktop Token
65
Quest® iToken™
This section describes how to install, activate and use the iToken on the Apple - iPhone.
What is the Quest® iToken™
The Quest® iToken™ is an OATH-compliant two-factor authentication token that can be used with any OATH-compliant authentication server, such as Quest Defender, to gain secure access to network, web, and applications-based resources.
Figure 35: Quest® iToken™ on the iPhone
The picture above shows an example of the Quest® iToken™ displayed on the iPhone. The token response 555476 is entered as the One Time Password (OTP) into the authentication login dialog.
Defender Software Token User Guide
66
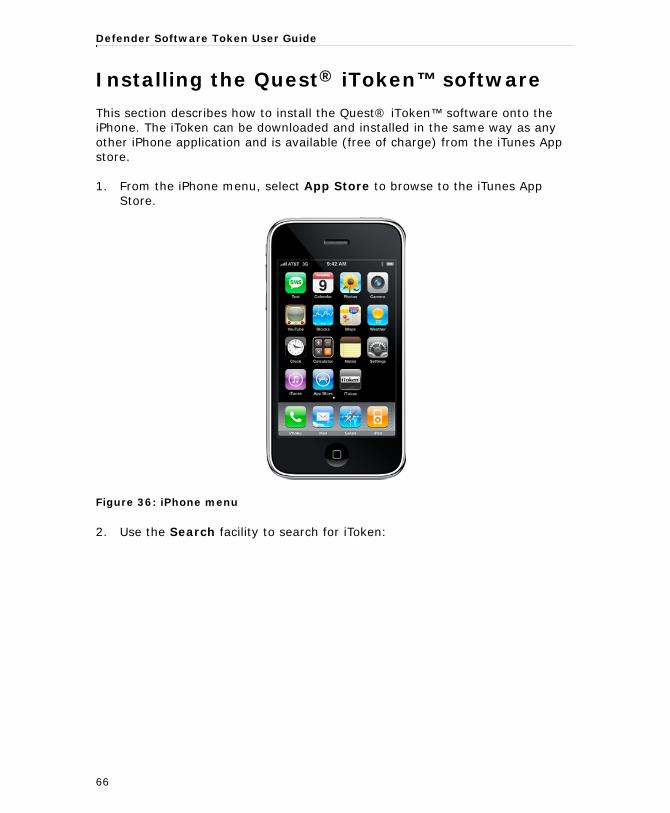
Installing the Quest® iToken™ software
This section describes how to install the Quest® iToken™ software onto the iPhone. The iToken can be downloaded and installed in the same way as any other iPhone application and is available (free of charge) from the iTunes App store.
1. From the iPhone menu, select App Store to browse to the iTunes App Store.
Figure 36: iPhone menu
2. Use the Search facility to search for iToken:
Defender Desktop Token
67
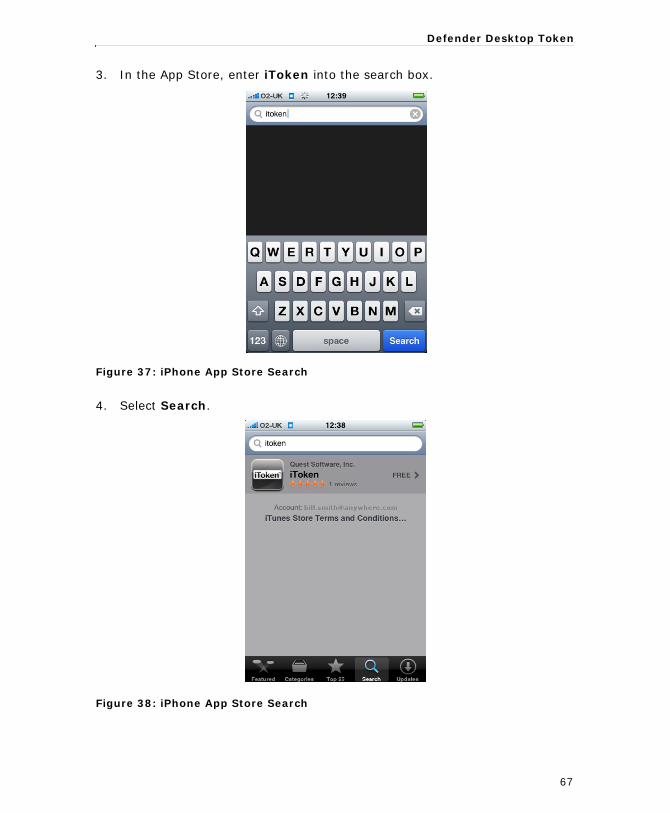
3. In the App Store, enter iToken into the search box.
Figure 37: iPhone App Store Search
4. Select Search.
Figure 38: iPhone App Store Search
Defender Software Token User Guide
68
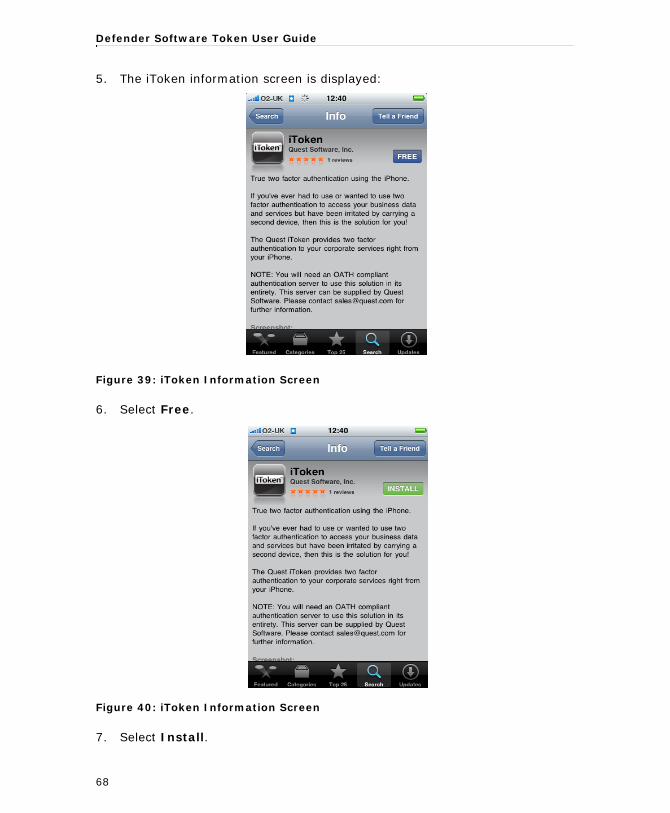
5. The iToken information screen is displayed:
Figure 39: iToken Information Screen
6. Select Free.
Figure 40: iToken Information Screen
7. Select Install.
Defender Desktop Token
69
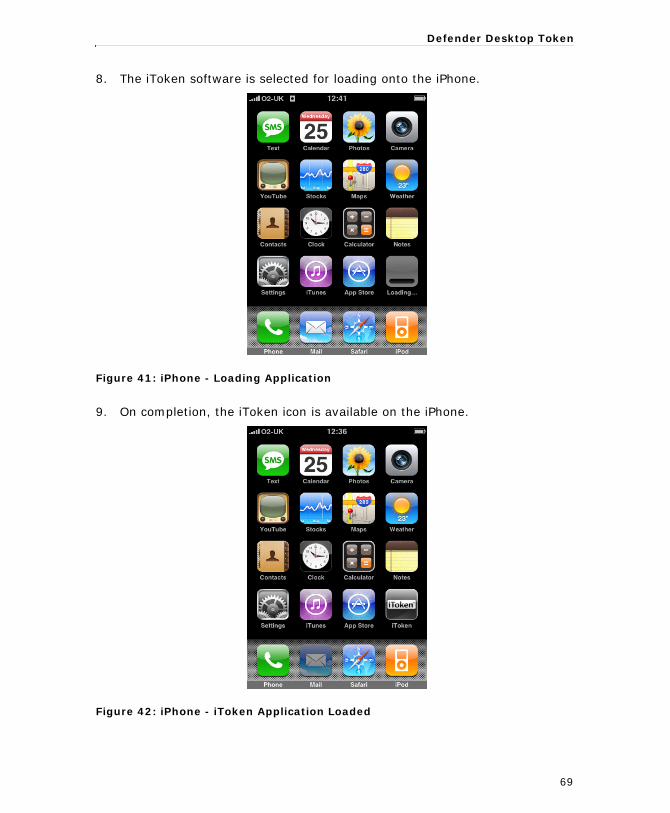
8. The iToken software is selected for loading onto the iPhone.
Figure 41: iPhone - Loading Application
9. On completion, the iToken icon is available on the iPhone.
Figure 42: iPhone - iToken Application Loaded

Defender Software Token User Guide
70
Alternative Installation Method
The iToken software can be downloaded to your desktop from the App Store. To do this:
1. Browse to the iTunes App Store.
2. Locate the iToken software (search for iToken).
3. Select Get App.
Figure 43: App Store - Quest® iToken™ Software Installation
4. Follow the prompts provided by the App Store to download the iToken software.
Defender Desktop Token
71
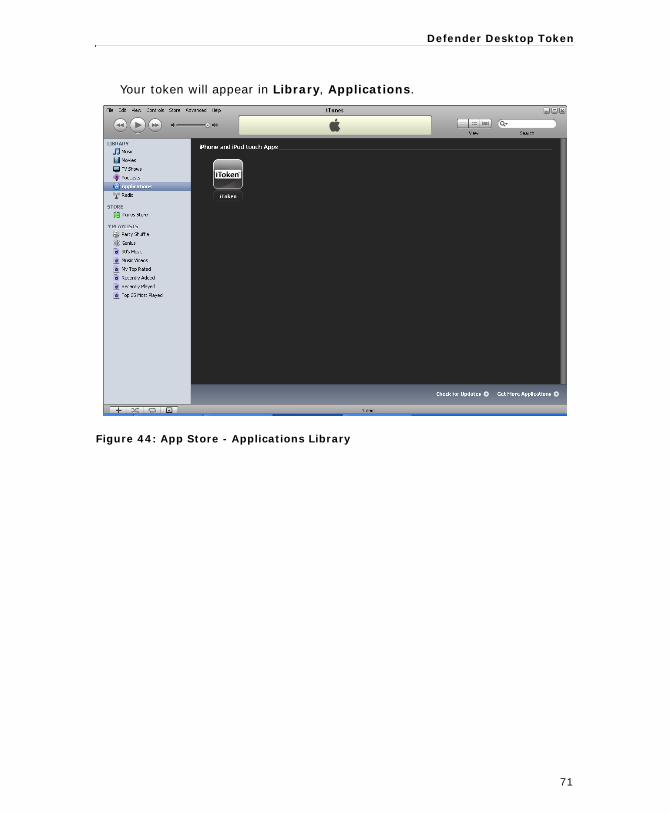
Your token will appear in Library, Applications.
Figure 44: App Store - Applications Library

Defender Software Token User Guide
72
5. Select your iPhone from Devices, then select the Applications tab.
Figure 45: App Store - Devices, Applications

Defender Desktop Token
73
6. Select Apply.
Figure 46: App Store - Sync Applications
7. Select Sync to install the iToken software onto your iPhone.

Defender Software Token User Guide
74
Activating the Quest® iToken™1. To activate the iToken, you need to import the activation code provided to
you by the Defender Administrator onto the iPhone. To do this:
Figure 47: iPhone menu
1. On the iPhone, select the iToken application to display the iToken screen, as shown in the example below.
Figure 48: iPhone - Quest® iToken™
Defender Desktop Token
75
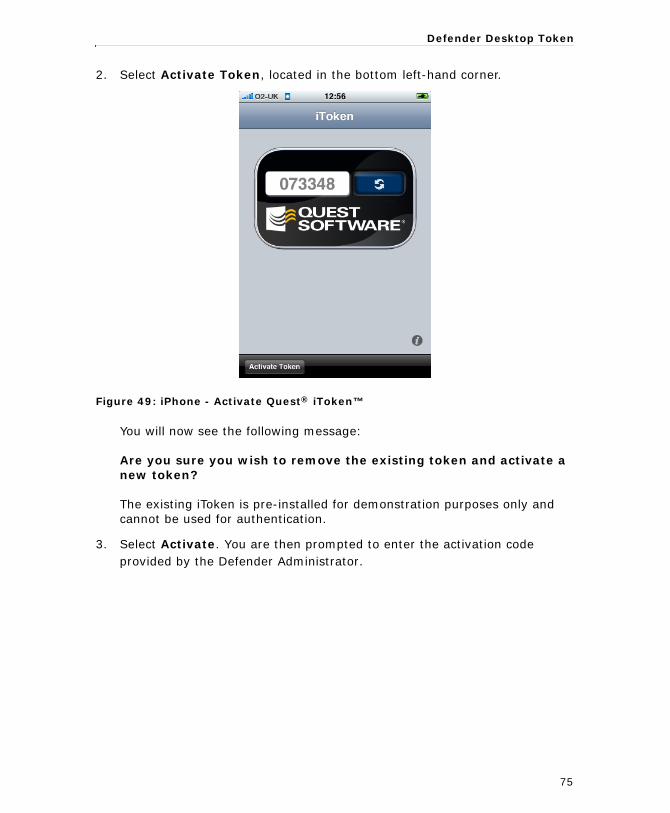
2. Select Activate Token, located in the bottom left-hand corner.
Figure 49: iPhone - Activate Quest® iToken™
You will now see the following message: Are you sure you wish to remove the existing token and activate a new token? The existing iToken is pre-installed for demonstration purposes only and cannot be used for authentication.
3. Select Activate. You are then prompted to enter the activation code provided by the Defender Administrator.

Defender Software Token User Guide
76
Figure 50: iPhone - Quest® iToken™ Activation Code
4. Type in the code at the Enter Activation Code prompt.
Defender Desktop Token
77
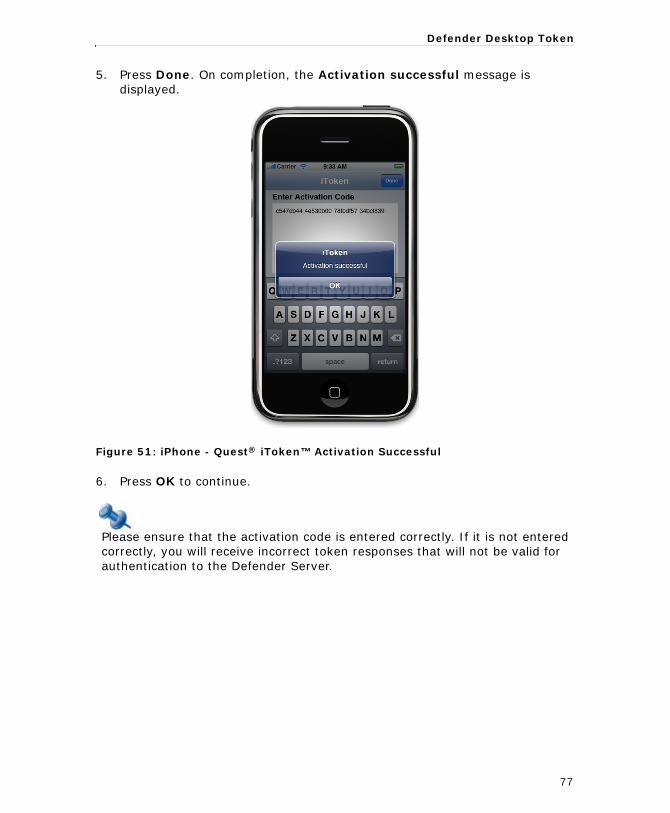
5. Press Done. On completion, the Activation successful message is displayed.
Figure 51: iPhone - Quest® iToken™ Activation Successful
6. Press OK to continue.
Please ensure that the activation code is entered correctly. If it is not entered correctly, you will receive incorrect token responses that will not be valid for authentication to the Defender Server.

Defender Software Token User Guide
78
Authenticating with the Quest® iToken™
Once the iToken has been activated, the token response is displayed on the iToken screen.
Figure 52: iPhone - Quest® iToken™ Response
Press the button to generate the next response.
The 6 digit value is your One Time Password (OTP). You will be prompted to enter the OTP during the authentication process.
Defender Desktop Token
79
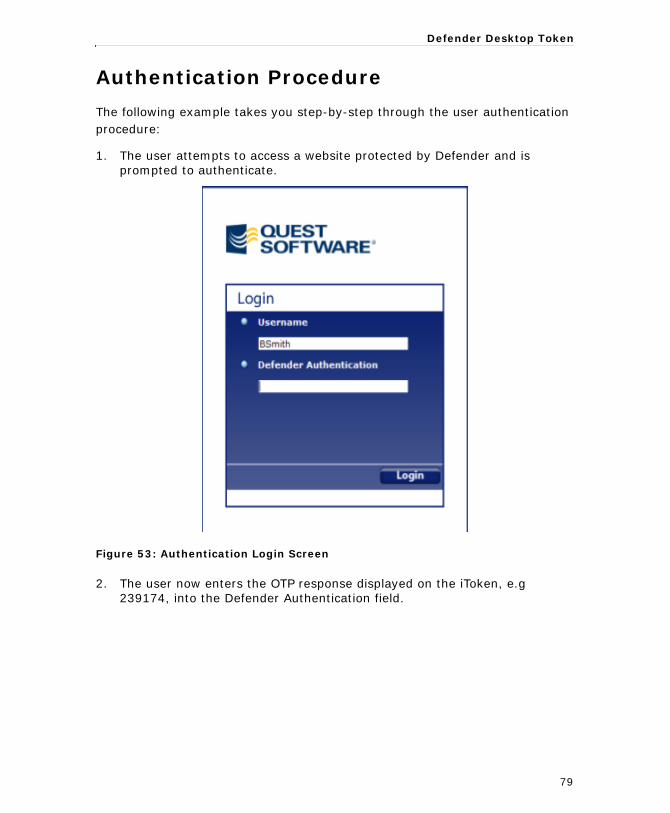
Authentication Procedure
The following example takes you step-by-step through the user authentication procedure:
1. The user attempts to access a website protected by Defender and is prompted to authenticate.
Figure 53: Authentication Login Screen
2. The user now enters the OTP response displayed on the iToken, e.g 239174, into the Defender Authentication field.

Defender Software Token User Guide
80
If the response is entered correctly, the user is authenticated by Defender and allowed access to the protected website.
Defender Desktop Token
81
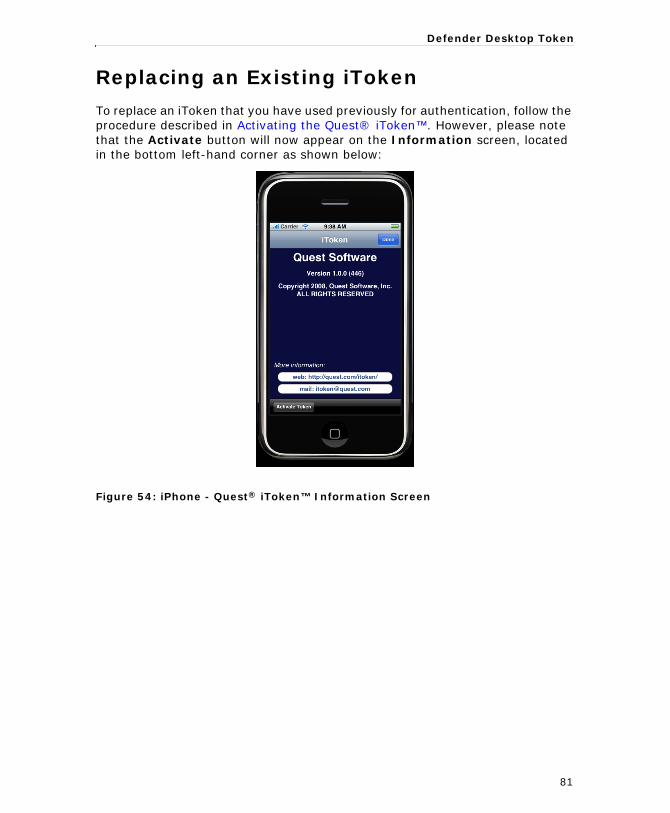
Replacing an Existing iToken
To replace an iToken that you have used previously for authentication, follow the procedure described in Activating the Quest® iToken™. However, please note that the Activate button will now appear on the Information screen, located in the bottom left-hand corner as shown below:
Figure 54: iPhone - Quest® iToken™ Information Screen

83
3
Defender SMS Token
• Introduction
• System Hardware and Software Requirements
• Authenticating with a Defender SMS Token

Defender Software Token User Guide
84
IntroductionDefender SMS is a low cost, easy to deploy solution that uses your cell phones to provide secure, two-factor authentication.
Defender SMS is a token backup solution and a simple way to ensure secure two-factor authentication when accessing the network from multiple remote locations. Defender SMS works with all devices capable of receiving SMS, from Cell phones to PDA’s.
Defender SMS:
• requires no additional software or hardware
• works with any device capable of receiving SMS (Short Message Service)
• sends a one-time password (OTP) directly to a specified cell phone
• supports all applications protected by Defender.
System Hardware and Software RequirementsDefender SMS requires no additional hardware or software. The details of your mobile provider are defined in Defender by the system administrator.
For information on programming the Defender SMS token, refer to the Defender Token Administration Guide.

Defender Mobile Token
85
Authenticating with a Defender SMS TokenThis section describes how to authenticate to a Defender protected network using the Defender SMS Token.
To authenticate using the Defender SMS token:
1. At the prompt, type your user name.
2. Enter your Defender Token PIN or keyword if required, as defined by your System Administrator. Defender processes your authentication request, generates a one-time password, and then automatically sends the password to your mobile number as a SMS.
3. When prompted, enter your Defender PIN if required, and token response. If the information you enter is correct, you are authenticated by Defender and granted access to the systems/information that you are authorized to access.


