106
Dell EMC Avamar for SAP with Oracle Version 18.1 User Guide 302-004-682 REV 01

Dell EMC Avamar for SAP with OracleVersion 18.1
User Guide302-004-682
REV 01

Copyright © 2001-2018 Dell Inc. or its subsidiaries. All rights reserved.
Published July 2018
Dell believes the information in this publication is accurate as of its publication date. The information is subject to change without notice.
THE INFORMATION IN THIS PUBLICATION IS PROVIDED “AS-IS.“ DELL MAKES NO REPRESENTATIONS OR WARRANTIES OF ANY KIND
WITH RESPECT TO THE INFORMATION IN THIS PUBLICATION, AND SPECIFICALLY DISCLAIMS IMPLIED WARRANTIES OF
MERCHANTABILITY OR FITNESS FOR A PARTICULAR PURPOSE. USE, COPYING, AND DISTRIBUTION OF ANY DELL SOFTWARE DESCRIBED
IN THIS PUBLICATION REQUIRES AN APPLICABLE SOFTWARE LICENSE.
Dell, EMC, and other trademarks are trademarks of Dell Inc. or its subsidiaries. Other trademarks may be the property of their respective owners.
Published in the USA.
Dell EMCHopkinton, Massachusetts 01748-91031-508-435-1000 In North America 1-866-464-7381www.DellEMC.com
2 Avamar for SAP with Oracle 18.1 User Guide

7
9
11
Introduction 15Architecture................................................................................................16
Stand-alone configuration.............................................................. 16High-availability cluster configuration.............................................17Data Domain system support..........................................................18Multiple BR*Tools and Oracle versions on the same host.............. 18Solaris zones.................................................................................. 18Oracle Automatic Storage Management.........................................18
Backup........................................................................................................ 18Complete backup protection.......................................................... 19Basic backup features.................................................................... 19Scheduled backups versus on-demand backups............................ 20
Restore and recovery................................................................................. 20Basic restore and recovery features.............................................. 20Restore and recovery operations....................................................21Restore and recovery from the Cloud.............................................21
Concurrent backups and restores............................................................... 21Internationalization (I18N).......................................................................... 22
Support of non-English characters................................................ 23Multi-streaming.......................................................................................... 23Software processes....................................................................................23
Backup processes with Avamar Administrator............................... 23Backup processes with the CLI......................................................25Restore processes......................................................................... 26
Installation and Configuration 29Preparing to install the Avamar Plug-in for SAP with Oracle...................... 30
System requirements.....................................................................30SAP server requirements...............................................................30Cluster system requirements.........................................................30User Account Control setting on Microsoft Windows.................... 30Downloading the software..............................................................31Installing the Avamar file system client...........................................31
Installing, upgrading, and uninstalling the software on HP-UX....................32Installing the Avamar Plug-in for SAP with Oracle on HP-UX........ 32Upgrading the Avamar Plug-in for SAP with Oracle on HP-UX...... 33Uninstalling the Avamar Plug-in for SAP with Oracle on HP-UX.... 33
Installing, upgrading, and uninstalling the software on IBM AIX.................. 34Installing the Avamar Plug-in for SAP with Oracle on IBM AIX.......34Upgrading the Avamar Plug-in for SAP with Oracle on IBM AIX.... 35
Figures
Tables
Preface
Chapter 1
Chapter 2
CONTENTS
Avamar for SAP with Oracle 18.1 User Guide 3

Uninstalling the Avamar Plug-in for SAP with Oracle on IBM AIX....36
Installing, upgrading, and uninstalling the software on Linux...................... 36Installing the Avamar Plug-in for SAP with Oracle on Linux........... 36Upgrading the Avamar Plug-in for SAP with Oracle on Linux......... 37Uninstalling the Avamar Plug-in for SAP with Oracle on Linux.......38
Installing, upgrading, and uninstalling the software on Solaris.................... 38Installing the Avamar Plug-in for SAP with Oracle on Solaris.........38Upgrading the Avamar Plug-in for SAP with Oracle on Solaris.......39Uninstalling the Avamar Plug-in for SAP with Oracle on Solaris.....39
Installing, upgrading, and uninstalling the software on Windows................ 40Installing the Avamar Plug-in for SAP with Oracle on Windows..... 40Configuring the cluster client on Windows..................................... 41Upgrading the Avamar Plug-in for SAP with Oracle on Windows...42Uninstalling the Avamar Plug-in for SAP with Oracle on Windows....44
Performing post-installation tasks..............................................................45Linking the SAP plug-in backint program with BR*Tools............... 45Setting the backup device type parameter.................................... 46Enabling administrator privileges for the SAP plug-in on Windows....46Excluding database files and logs from file system backups...........47
Backup 49Backup feature support..............................................................................50Performing on-demand backups.................................................................50Scheduling backups....................................................................................59
Creating a dataset......................................................................... 59Creating a group............................................................................62Enabling scheduled backups.......................................................... 64
Monitoring backups.................................................................................... 64Canceling backups......................................................................................64
Canceling backups in Avamar Administrator.................................. 64Canceling backups on the SAP client host.....................................65
Reviewing backups.....................................................................................65List the backups for a client...........................................................65List the content of the most recent backup...................................66List the content of a specific backup.............................................66List the history of a backup............................................................67
Restore and Recovery 69Performing restores from the CLI...............................................................70Monitoring restores.................................................................................... 72Canceling restores......................................................................................72Disaster recovery........................................................................................72
Protecting the computing environment......................................... 72Recovering from a disaster............................................................ 73
Plug-in Options 75How to set plug-in options..........................................................................76Plug-in options in Avamar Administrator.....................................................76
Browse options in Avamar Administrator....................................... 76Backup options in Avamar Administrator........................................77Additional plug-in options.............................................................. 80
Chapter 3
Chapter 4
Appendix A
CONTENTS
4 Avamar for SAP with Oracle 18.1 User Guide

Command Line Interface 83Performing on-demand backups from the CLI............................................ 84Examples of BR*Tools command syntax.................................................... 85
BR*Tools backup commands.........................................................86BR*Tools restore and recovery commands....................................87
SAP plug-in parameter file......................................................................... 90Specifying a SAP plug-in parameter file......................................... 91SAP plug-in parameters................................................................. 91
Troubleshooting 95Log information.......................................................................................... 96
avsap and avtar log files................................................................ 96backint log files..............................................................................97
Configuration problems and solutions.........................................................97Verify the versions of SAP BR*Tools.............................................97Verify the Avamar client and SAP plug-in installation.................... 98Avamar client and SAP plug-in registration....................................99Disk space for the /var/avamar directory......................................99Directory for the .switch files.......................................................100
Common problems and solutions............................................................... 101Backup fails due to trailing slash in ORACLE_HOME setting........ 101Restore fails in a Windows cluster environment............................ 101Unable to browse Oracle databases with Avamar Administrator... 101
103
Appendix B
Appendix C
Glossary
CONTENTS
Avamar for SAP with Oracle 18.1 User Guide 5

CONTENTS
6 Avamar for SAP with Oracle 18.1 User Guide

Avamar Plug-in for SAP with Oracle in a stand-alone configuration............................ 17Backup processes initiated from Avamar Administrator..............................................24Backup processes initiated from the CLI.................................................................... 25Restore processes...................................................................................................... 26Location of the SAP Oracle database......................................................................... 48Browse Command Line Options dialog box..................................................................51Backup Command Line Options.................................................................................. 54Manage All Datasets window.......................................................................................61SAPSWITCH setting................................................................................................. 100
123456789
FIGURES
Avamar for SAP with Oracle 18.1 User Guide 7

FIGURES
8 Avamar for SAP with Oracle 18.1 User Guide

Typographical conventions..........................................................................................12SAP plug-in installation packages................................................................................31SAP browse options in Avamar Administrator.............................................................76SAP backup options in Avamar Administrator............................................................. 77Options for brbackup and brarchive commands..........................................................86Options for brrestore and brrecover commands......................................................... 89SAP plug-in parameters..............................................................................................92Command to verify the Avamar client and SAP plug-in installation.............................98
12345678
TABLES
Avamar for SAP with Oracle 18.1 User Guide 9

TABLES
10 Avamar for SAP with Oracle 18.1 User Guide

PREFACE
As part of an effort to improve the product lines, revisions of the software andhardware are periodically released. Therefore, some functions that are described inthis document might not be supported by all versions of the software or hardwarecurrently in use. The product release notes provide the most up-to-date informationon product features.
Contact the technical support professional when a product does not function correctlyor does not function as described in this document.
Note
This document was accurate at publication time. To find the latest version of thisdocument, go to Online Support (https://support.EMC.com).
PurposeThis guide describes how to install Avamar in a SAP environment with Oracle, and howto back up and restore SAP servers with Oracle databases.
AudienceThis document is intended for the following users:
l System administrators who are responsible for installing software and maintainingservers and clients on a network
l Oracle database administrators (DBAs) who are responsible for backing up andmaintaining Oracle databases in SAP systems
Readers of this document must be familiar with the following topics:
l SAP terminology and concepts, especially those related to Oracle database backupand recovery through SAP BR*Tools
l Backup and recovery procedures
l Disaster recovery procedures
Revision historyThe following table presents the revision history of this document.
Revision Date Description
01 July 7, 2018 GA release of Avamar 18.1
Related documentationThe following publications provide additional information:
l Avamar Compatibility and Interoperability Matrix
l Avamar Administration Guide
l Avamar and Data Domain System Integration Guide
l Avamar Backup Clients User Guide
l Avamar for Windows Server User Guide
l Avamar Operational Best Practices Guide
l Avamar Product Security Guide
Avamar for SAP with Oracle 18.1 User Guide 11

l Avamar Release Notes
The following additional documentation may be useful:
l SAP with Oracle backup and recovery documentation
Special notice conventions used in this documentThese conventions are used for special notices.
DANGER
Indicates a hazardous situation which, if not avoided, results in death or seriousinjury.
WARNING
Indicates a hazardous situation which, if not avoided, could result in death orserious injury.
CAUTION
Indicates a hazardous situation which, if not avoided, could result in minor ormoderate injury.
NOTICE
Addresses practices that are not related to personal injury.
Note
Presents information that is important, but not hazard-related.
Typographical conventionsThese type style conventions are used in this document.
Table 1 Typographical conventions
Bold Used for names of interface elements, such as names of windows,dialog boxes, buttons, fields, tab names, key names, and menu paths(what the user specifically selects or clicks)
Italic Used for full titles of publications that are referenced in text
Monospace Used for:
l System code
l System output, such as an error message or script
l Pathnames, filenames, prompts, and syntax
l Commands and options
Monospace italic Used for variables
Monospace bold Used for user input
[ ] Square brackets enclose optional values
| Vertical bar indicates alternate selections - the bar means “or”
{ } Braces enclose content that the user must specify, such as x or y orz
PREFACE
12 Avamar for SAP with Oracle 18.1 User Guide

Table 1 Typographical conventions (continued)
... Ellipses indicate nonessential information that is omitted from theexample
Where to get helpThe Avamar support page provides access to licensing information, productdocumentation, advisories, and downloads, as well as how-to and troubleshootinginformation. This information may resolve a product issue before contacting CustomerSupport.
To access the Avamar support page:
1. Go to https://support.EMC.com/products.
2. Type a product name in the Find a Product by Name box.
3. Select the product from the list that appears.
4. Click the arrow next to the Find a Product by Name box.
5. (Optional) Add the product to the My Products list by clicking Add to My SavedProducts in the upper right corner of the Support by Product page.
Comments and suggestionsComments and suggestions help to continue to improve the accuracy, organization,and overall quality of the user publications. Send comments and suggestions aboutthis document to [email protected].
Please include the following information:
l Product name and version
l Document name, part number, and revision (for example, 01)
l Page numbers
l Other details to help address documentation issues
PREFACE
Avamar for SAP with Oracle 18.1 User Guide 13

PREFACE
14 Avamar for SAP with Oracle 18.1 User Guide

CHAPTER 1
Introduction
This chapter includes the following topics:
l Architecture....................................................................................................... 16l Backup................................................................................................................18l Restore and recovery.........................................................................................20l Concurrent backups and restores....................................................................... 21l Internationalization (I18N)..................................................................................22l Multi-streaming..................................................................................................23l Software processes........................................................................................... 23
Introduction 15

ArchitectureThe Avamar® Plug-in for SAP with Oracle (SAP plug-in) is a software that works withthe Avamar server software and client software. The SAP plug-in providesdeduplication backup and recovery for SAP with Oracle data by using an Avamarserver or Data Domain® system as a backup storage device.
The SAP plug-in uses the BR*Tools backint interface to back up and restore theOracle data.
Deploy the SAP plug-in in an Avamar client/server system in a network environment.The Avamar server stores and manages client backups in a deduplicated format. TheSAP with Oracle server host is an Avamar client that accesses the Avamar server forbackup and restore services.
An Avamar server can optionally use a Data Domain system as a storage device forbackup and restore operations. Data Domain system support on page 18 providesdetails.
You can use the Avamar Administrator graphical user interface (GUI) to remotelyadminister an Avamar system from a supported Windows or Linux computer.
The Glossary provides details about terms that are used in this guide.
Stand-alone configurationYou can deploy the SAP plug-in a stand-alone configuration on one of the supportedoperating systems.
You must install the following software on the SAP with Oracle host:
l Oracle database supported by the SAP system.
l SAP BR*Tools, which consist of brbackup, brarchive, brrecover,brrestore, and other utilities that the SAP plug-in supports. The AvamarCompatibility and Interoperability Matrix provides details.
l Platform-specific Avamar client.
l Avamar Plug-in for SAP with Oracle.
The following figure shows a stand-alone configuration that uses the SAP plug-in toback up or restore an Oracle database to or from an Avamar server or a Data Domainsystem.
Introduction
16 Avamar for SAP with Oracle 18.1 User Guide
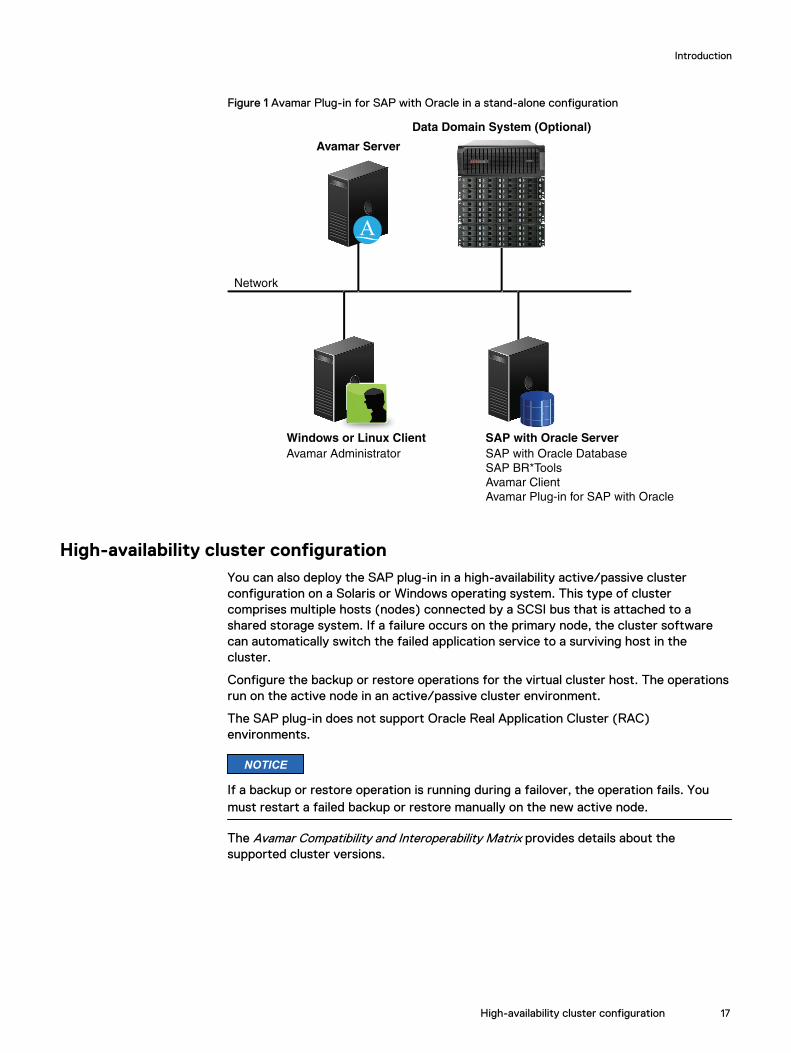
Figure 1 Avamar Plug-in for SAP with Oracle in a stand-alone configuration
Network
Avamar Administrator
Windows or Linux Client
Avamar Server
Data Domain System (Optional)
SAP with Oracle Server
SAP with Oracle Database
SAP BR*Tools
Avamar Client
Avamar Plug-in for SAP with Oracle
High-availability cluster configurationYou can also deploy the SAP plug-in in a high-availability active/passive clusterconfiguration on a Solaris or Windows operating system. This type of clustercomprises multiple hosts (nodes) connected by a SCSI bus that is attached to ashared storage system. If a failure occurs on the primary node, the cluster softwarecan automatically switch the failed application service to a surviving host in thecluster.
Configure the backup or restore operations for the virtual cluster host. The operationsrun on the active node in an active/passive cluster environment.
The SAP plug-in does not support Oracle Real Application Cluster (RAC)environments.
NOTICE
If a backup or restore operation is running during a failover, the operation fails. Youmust restart a failed backup or restore manually on the new active node.
The Avamar Compatibility and Interoperability Matrix provides details about thesupported cluster versions.
Introduction
High-availability cluster configuration 17

Data Domain system supportThe SAP plug-in supports backups to and restores from a Data Domain system. TheSAP plug-in stores the backup data on the Data Domain system, and stores backupmetadata on the Avamar server. The Avamar server manages the backups.
Before you can store backups on a Data Domain system, you must add the DataDomain system to the Avamar configuration by using Avamar Administrator. Then youselect the Data Domain system in the plug-in options when you perform an on-demandbackup or when you create a dataset for a scheduled backup. You can also use thecommand line interface (CLI) to perform backups to a Data Domain system.
If you specify a Data Domain system as the backup destination, then the SAP plug-inbacks up all the Oracle data to that destination. You cannot back up part of the data toa Data Domain system and another part of the data to an Avamar server during asingle backup.
A single brrestore command can restore files from multiple backups, which can beon the Avamar server or on a Data Domain system. The steps to restore backups arethe same whether you restore from the Avamar server or a Data Domain system. Therestore process determines the location of the backup and restores the backup.
The Avamar and Data Domain System Integration Guide provides more information aboutData Domain systems in an Avamar environment, including detailed steps to add aData Domain system to the Avamar configuration.
Multiple BR*Tools and Oracle versions on the same hostThe SAP plug-in supports multiple BR*Tools versions and multiple Oracle versions onthe same SAP server host. The SAP plug-in also supports multiple instances of a SAPOracle database.
Note
You cannot have 32-bit and 64-bit versions of the SAP plug-in on the same SAPserver host.
Solaris zonesThe SAP plug-in supports Solaris global zones, whole root zones, and sparse rootzones. You must install the Avamar client and SAP plug-in in the same zone as theSAP Oracle database to be protected.
Oracle Automatic Storage ManagementThe SAP plug-in does not support Oracle Automatic Storage Management (ASM) asthe storage option for the SAP Oracle database.
BackupThe SAP plug-in supports specific features for SAP Oracle backups.
Backup processes with Avamar Administrator on page 23 and Backup processes withthe CLI on page 25 describe the processes in SAP plug-in backups to an Avamarserver.
Introduction
18 Avamar for SAP with Oracle 18.1 User Guide

The SAP plug-in also supports backups to a Data Domain system as described in DataDomain system support on page 18.
Multi-streaming on page 23 describes how to use multiple sessions to improve thebackup performance.
Complete backup protectionTo complete data protection, a viable backup strategy must include frequent backupsof the SAP Oracle database data, transaction logs, and the database configurationfiles and control files.
You require these backups for the following reasons:
l Without data backups, you cannot restore a database at all.
l Without transaction logs, you can restore a database only to the time of the lastconsistent backup, but you cannot recover the database to an arbitrary point-in-time after that backup.
l Without the configuration files and control files, you cannot recover the databasesetup.
To prepare a SAP Oracle environment for disaster recovery, perform frequentscheduled backups of the SAP Oracle databases, archive logs, and other critical files. Disaster recovery on page 72 provides details about preparing for disaster recovery.
Ensure that you set the required backup expiration. A data file backup (created withthe brbackup command) and an archive log backup (created with the brarchivecommand) are independent backups. If the data file backup expires before the logbackup, the log backup becomes unusable.
For example, if a database backup runs daily and an archive log backup runs everythree hours, you must set the database backup expiration at least one day longer thanthe log backup expiration.
Basic backup featuresThe SAP plug-in supports backups of Oracle database files and archive log files, onlineand offline backups, full backups, scheduled backups, and on-demand backups.
The details of the supported backup types are as follows:
l Backups of Oracle database files and archive log files—The SAP plug-in can backup the following types of files:
n Entire database (all data files in a database)
n Tablespaces (set of data files)
n Database control file
Note
The SAP plug-in always backs up the control file with a database file.
n Archive redo logs
Note
Each backup also automatically backs up the BR*Tools profile and backup catalog.
l Online and offline backups—The SAP plug-in can back up SAP Oracle data whilethe database is running or after the database is shut down.
Introduction
Complete backup protection 19

l Full backups—The SAP plug-in backs up a database file regardless of whether thedata has changed since the last backup or not.
l Scheduled and on-demand backups—The SAP plug-in supports both scheduledbackups that run automatically and on-demand backups that you start.
On UNIX and Linux systems, the SAP plug-in supports symbolic links to database filelocations to the extent supported by BR*Tools. For example, BR*Tools does notsupport chained symbolic links. The SAP Note 27428 provides details.
The SAP plug-in does not support backups of the following data:
l Data on a raw partition
l Directories (brbackup -m sap_dir|ora_dir|all_dir|specific_directory)
Scheduled backups versus on-demand backupsThe SAP plug-in supports scheduled backups and on-demand (manual) backups.
The Avamar server automatically runs a scheduled backup according to Avamar policysettings that you configure. Scheduling backups on page 59 provides details.
You can run an on-demand backup by using one of the following methods:
l You can use the Avamar Administrator to specify the required backup options andto start the backup. Performing on-demand backups on page 50 providesdetails.
l You can manually run BR*Tools commands with the required options from theoperating system CLI on the SAP Oracle database host. Performing on-demandbackups from the CLI on page 84 provides details.
Restore and recoveryThe SAP plug-in supports specific features for SAP Oracle restore and recovery.
Restore processes on page 26 describes the processes in SAP plug-in restores froman Avamar server.
The SAP plug-in also supports restores from a Data Domain system as described in Data Domain system support on page 18.
Multi-streaming on page 23 describes how to use multiple sessions to improve therestore performance.
Basic restore and recovery featuresThe terms restore and recovery have specific meanings in this guide:
l Restore is the process of retrieving data from a backup server and copying thedata to disk.
l Recovery is the process of applying transaction logs to the restored data to bringthe data to a specified point-in-time.
The SAP plug-in restores data through the CLI only. You must start a restore on theOracle database host by running a BR*Tools command, such as brrestore,brrecover, or brtools from the operating system CLI.
NOTICE
The SAP plug-in does not support restores through Avamar Administrator.
Introduction
20 Avamar for SAP with Oracle 18.1 User Guide

Restore and recovery operationsThe SAP plug-in supports complete database recovery, database point-in-timerecovery, archive log restores, relocation restores, and disaster recovery.
The details of the supported restore and recovery operations are as follows:
l A complete database recovery restores the lost or damaged data files from abackup and brings the data to the current time by applying redo log files. Missingarchive logs are restored and used for recovery.
l A database point-in-time recovery is a database restore followed by the restoreand application of the required redo log files to bring the database to a specificpoint-in-time. The database is opened with the RESETLOG option.
l An archive log restore retrieves only the archive log files that are required forrecovery.
l A relocation restore is a restore to a different specified location on the originalhost or an alternate host.
l A disaster recovery is the restore of BR*Tools catalog and configuration files,performed when an entire Oracle database system is lost. Disaster recovery onpage 72 provides details.
The SAP plug-in does not support restores of the following data:
l Data on a raw partition
l Directories (brrestore -m sap_dir|ora_dir|all_dir|specific_directory)
Restore and recovery from the CloudFor Elastic Cloud Storage (ECS), when backups are in the Cloud and absent on Activetier, direct read from ECS for SAP enables common restore scenarios by using theplugin restore operations with DD 6.1 and above. When the user perform restores ofbackups in the ECS, Avamar plug-in for SAP transparently restores data from ECSwithout performing a recall operation first.
For other Cloud providers, a two step process is in place for restoring and recoveringdata:
l Recall data from the Cloud
l Restore and recover data
Refer to Restore operations for cloud tier in the Avamar Data Domain System IntegrationGuide for more information.
Concurrent backups and restoresThe SAP plug-in supports a maximum of six concurrent backups or restores. You canstart each backup or restore by using either Avamar Administrator or the BR*Toolscommands from the CLI.
You can run concurrent backups or restores for the following configurations:
l Multiple SAP Oracle database instances on the same SAP server host
l Multiple BR*Tools versions on the same SAP server host
l Multiple Oracle versions on the same SAP server host
BR*Tools does not support the concurrent backup of different data files or controlfiles from the same database. For example, you cannot perform concurrent backups of
Introduction
Restore and recovery operations 21

two tablespaces from the same database. However, you can perform concurrentbackups of data files and archive logs through the concurrent use of the brbackupand brarchive programs.
Each backup or restore can run multiple data sessions to or from the Avamar server orthe Data Domain system.
Note
The recommended maximum number of concurrent data sessions is 10.
Multi-streaming on page 23 provides details about running multiple data sessions.
Internationalization (I18N)Internationalization (I18N) support enables the browsing, backup, monitoring, andrestore of non-English data from Avamar clients when the software itself is notlocalized.
NOTICE
Do not confuse I18N support with localization (L10N) support, in which the softwareuser interface and operational messages are translated into localized languages. ThisSAP plug-in release does not provide L10N support.
The extent of I18N support by the SAP plug-in depends on the following support:
l Internationalized operating system
l Unicode version of BR*Tools
l Oracle globalization support (NLS_LANG)
l Avamar server and client I18N support
The SAP plug-in support for non-ASCII environments is limited by the I18N supportthat is provided by Oracle, BR*Tools, the Avamar client and server, and the underlyingoperating system. For example (the following list is not exhaustive):
l Oracle requires ASCII characters for the following items:
n ORACLE_HOME environment variable.
n Oracle instance name, DBSID.
l BR*Tools requires ASCII characters for the following items:
n Connection strings (database username and password) to the SAP Oracledatabase.
n Oracle data files, log files, control files, and parameter file names.
n Oracle tablespace names.
l Avamar software includes the following limitations:
n Supports only UTF8 encoding on Linux and UNIX systems.
n Supports only ASCII characters in parameter names and parameter values setinside the Avamar parameter files, including the .utl and .cmd files.
n Might not render non-English characters correctly in the logs and AvamarAdministrator GUI.
The Avamar Release Notes provides details about these limitations.
Introduction
22 Avamar for SAP with Oracle 18.1 User Guide

Support of non-English charactersThe SAP plug-in supports non-English characters for the following pathnames:
l Full pathname of BR*Tools location
l Full pathnames of SAP initialization file, initDBSID.sap, and SAP plug-inparameter file, initDBSID.utl
Multi-streamingMulti-streaming is a feature that enables a single backup or restore to use multiplesessions (data streams) to the Avamar server or Data Domain system to improve thebackup or restore performance.
The multi-streaming setting specifies the maximum number of backup or restoresessions to run concurrently for an operation. The default value is 1. The maximumvalue is 128.
The software always tries to use the specified number of data streams for backupsand restores.
NOTICE
The recommended maximum number of concurrent sessions on a host is 10. Forexample, you can run two concurrent backups with a multi-streaming setting of 5 foreach backup. A warning message appears if the multi-streaming setting is greater than10 for an operation. If you set the multi-streaming value too high, the system might not have sufficientresources to perform the backup or restore.
The SAP plug-in starts an avtar process for each stream. Each avtar processcreates one file cache and one hash cache for each session. The cache name formatdiffers for data file operations and archive log operations.
For example, a database backup session with the brbackup program creates thefollowing cache files:
l instance_session _number_p_cache.dat
l instance_session_number_f_cache2.dat
An archive log backup session with the brarchive program creates the followingcache files:
l a_instance_session_number_p_cache.datl a_instance_session_number_f_cache2.dat
Software processesThe SAP plug-in uses specific processes during the supported backup and restoreoperations.
Backup processes with Avamar AdministratorThe following figure and steps describe the process interactions in a scheduled backupor on-demand backup that is initiated from Avamar Administrator.
Introduction
Support of non-English characters 23

Figure 2 Backup processes initiated from Avamar Administrator
Management Console
Server (MCS)
data
data
avagent
avsap
brbackup / brarchive
backint
avtar
SAP server Avamar server
Utility node
Data Server
(GSAN)
SAP Oracle data
Procedure
1. The avagent process on the SAP plug-in host performs the following actions:
a. Polls the Management Console Server (MCS) for a backup workorder.
A backup workorder is an XML message with details about the backup toperform.
b. Starts the avsap process and passes the workorder to the process.
2. The avsap binary runs the required BR*Tools command, either brbackup fora database backup or brarchive for a backup of archive redo logs.
3. The brbackup or brarchive process communicates with the Oracle databaseto gather information for the backup, shuts down, or starts up the databaseinstance if needed, and starts the SAP plug-in backint process.
4. The backint process starts one or more avtar processes, depending on themulti-streaming configuration, and passes a list of database files or archivetransaction log files to be backed up.
5. Depending on the specified data storage destination, the avtar process storesthe backup data to the Avamar server or a Data Domain system.
6. The backint process sends backup progress updates to the avsap process,which sends the updates to MCS through the avagent process.
7. The backint process communicates the success or failure of the backup tothe brbackup process, which sends the return status to the avsap process.
Introduction
24 Avamar for SAP with Oracle 18.1 User Guide

8. The avsap process sends the return status to MCS through the avagentprocess.
NOTICE
If you perform a backup with the verification option, Avamar Administrator doesnot display the progress of the verification operation. However, the success orfailure of verification operation is communicated to BR*Tools.
Backup processes with the CLIWhen you start an on-demand backup from the CLI with the BR*Tools brbackup orbrarchive command, the backup does not include the avsap process. The followingfigure and process steps describe the backup process interactions.
Figure 3 Backup processes initiated from the CLI
Management Console
Server (MCS)
data
data
avagent
brbackup / brarchive
backint
avtar
SAP server Avamar server
Utility node
Data Server
(GSAN)
SAP Oracle data
Procedure
1. You can perform a backup by running a BR*Tools command, such as brbackupor brarchive, from the CLI.
2. The brbackup or brarchive process communicates with the Oracle databaseto gather information for the backup, shuts down, or starts up the databaseinstance if needed, and starts the SAP plug-in backint process.
3. The backint process starts an activity monitor operation in MCS through theavagent process.
4. The backint process starts one or more avtar processes, depending on themulti-streaming setting in the SAP plug-in parameter file (flagfile). Thebackint process also passes a list of database files or archive transaction logfiles to be backed up.
Introduction
Backup processes with the CLI 25

5. Depending on the specified data storage destination, the avtar process storesthe backup data to the Avamar server or a Data Domain system.
6. The backint process sends backup progress updates to the MCS activitymonitor operation through the avagent process.
7. The backint process communicates the success or failure of the backup tothe MCS activity monitor operation and BR*Tools.
Restore processesYou must restore a backup from the CLI on the SAP Oracle database server with therequired BR*Tools command, for example, brrestore or brrecover.
The following figure and process steps describe how the BR*Tools, Avamar server,and SAP plug-in processes interact during a restore.
Figure 4 Restore processes
Management Console
Server (MCS)
data
data
avagent
brrestore / brrecover
backint
avtar
SAP server Avamar server
Utility node
Data Server
(GSAN)
SAP Oracle data
Procedure
1. The brrestore command starts the backint process.
2. The backint process starts an activity monitor operation in MCS through theavagent process.
3. The backint process queries the Avamar server for the requested backupfiles.
4. The backint process starts one or more avtar processes, depending on themulti-streaming setting in the SAP plug-in parameter file (flagfile), whichrestore the specified files.
5. The backint process communicates the success or failure of the restore toBR*Tools.
6. You run brrecover or Oracle SQLPlus to recover the database.
Introduction
26 Avamar for SAP with Oracle 18.1 User Guide

7. The backint process sends restore progress updates to the MCS activitymonitor operation through the avagent process.
8. The backint process communicates the success or failure of the restore tothe MCS activity monitor operation and BR*Tools.
Introduction
Restore processes 27

Introduction
28 Avamar for SAP with Oracle 18.1 User Guide

CHAPTER 2
Installation and Configuration
This chapter includes the following topics:
l Preparing to install the Avamar Plug-in for SAP with Oracle..............................30l Installing, upgrading, and uninstalling the software on HP-UX........................... 32l Installing, upgrading, and uninstalling the software on IBM AIX..........................34l Installing, upgrading, and uninstalling the software on Linux.............................. 36l Installing, upgrading, and uninstalling the software on Solaris............................38l Installing, upgrading, and uninstalling the software on Windows........................ 40l Performing post-installation tasks......................................................................45
Installation and Configuration 29

Preparing to install the Avamar Plug-in for SAP with OracleReview the system requirements for the Avamar Plug-in for SAP with Oracle, andensure that the environment meets the requirements before you install the plug-in.You also must download the Avamar file system client and plug-in installation packagefrom the Avamar server, install the file system client, and register the client with theAvamar server.
System requirementsThe environment must meet client compatibility requirements before you installAvamar client software.
See the compatibility guide on Online Support (http://compatibilityguide.emc.com:8080/CompGuideApp) for information about client compatibility requirements andsupported operating systems and application versions.
The Avamar file system client and the SAP plug-in that you install on the host musthave the same version number. The Avamar client and SAP plug-in must work withyour version of BR*Tools. The SAP plug-in must be installed in the same directory asthe Avamar client.
SAP server requirementsEnsure that you meet the following requirements on the SAP server host:
l You have operating system root privileges on the SAP server host.
l Oracle software is installed and is functioning correctly.
l The Avamar server is operational and present on the same network as the SAPserver.
To verify the network connectivity, you can open a command shell and type thefollowing command:
ping Avamar_serverwhere Avamar_server is the network hostname (as defined in DNS) or IP address ofthe Avamar server.
Cluster system requirementsIn a cluster system on Solaris, ensure that you meet the pre-installation requirementsfor a Solaris Cluster or Veritas Cluster Server (VCS) as described in the AvamarBackup Clients User Guide.
In a Windows cluster system, ensure that the Microsoft .NET Framework 4 softwarehas been downloaded and installed from the Microsoft Download Center.
User Account Control setting on Microsoft WindowsThe User Account Control (UAC) feature limits application software to standard userprivileges. You must provide administrator privileges for certain tasks, such asinstalling software. UAC is enabled by default.
If you start an Avamar client or plug-in installer without administrator privileges on aWindows computer with UAC enabled, then the software does not install correctly.
Installation and Configuration
30 Avamar for SAP with Oracle 18.1 User Guide

You can disable or bypass UAC. The installation procedures in this chapter provide onemethod to bypass UAC. The Microsoft documentation provides other methods andadditional information.
Downloading the softwareIn a supported cluster, you must download the Avamar Plug-in for SAP with Oracleinstallation package to each node that requires the software to be installed.
Procedure
1. Log in to the SAP server host with the necessary privileges to perform aninstallation.
2. Open a web browser and type the following URL:
https://Avamar_serverwhere Avamar_server is the DNS name or IP address of the Avamar server.
The Avamar Web Restore page appears.
3. Click Downloads.
The Downloads list appears.
4. Click + next to the platform heading for the SAP server.
5. Click + next to the operating system heading for the SAP server.
6. Click the link for the SAP plug-in installation package as listed in the followingtable.
Table 2 SAP plug-in installation packages
Operatingsystem
Package name
HP-UX AvamarSAP-hpux11iv3-itan-version.depotFor example: AvamarSAP-hpux11iv3-itan-7.2.100-218.depot
IBM AIX AvamarSAP-aix6-ppc64-version.bffFor example: AvamarSAP-aix6-ppc64-7.2.100-218.bff
Linux AvamarSAP-linux-package-version.rpmFor example: AvamarSAP-linux-rhel4-x86_64-7.2.100-218.rpm
Solaris AvamarSAP-solarisversion-package-version.pkgFor example: AvamarSAP-solaris10-sparc64-7.2.100-218.pkg
MicrosoftWindows
AvamarSAP-windows-package-version.msiFor example: AvamarSAP-windows-x86_64-7.2.100-218.msi
7. Save the SAP plug-in installation package to a temporary directory.
Installing the Avamar file system clientAvamar file system clients include the Avamar agent and an Avamar file system plug-in. The Avamar agent is required for backups and restores with the SAP plug-in. You
Installation and Configuration
Downloading the software 31

can use the file system plug-in to back up operating system and application binaryfiles, which are required for disaster recovery.
Install and register the Avamar file system client on each SAP host computer:
l For HP-UX, IBM AIX, Linux, and Solaris systems, follow the instructions in theAvamar Backup Clients User Guide.
l For Windows systems, follow the instructions in the Avamar for Windows ServerUser Guide.
l In a cluster environment, install the client software in the same directory on eachnode in the cluster, and register each node in the cluster with the Avamar server.
Installing, upgrading, and uninstalling the software on HP-UX
You can install, upgrade, and uninstall the Avamar Plug-in for SAP with Oracle on HP-UX.
Installing the Avamar Plug-in for SAP with Oracle on HP-UXYou can install the Avamar Client for HP-UX in either the default installation directoryor an alternate directory. You must install the Avamar Plug-in for SAP with Oracle inthe same directory as the Avamar Client for HP-UX.
Note
If the setuid or setgid bits are set on the brbackup or brarchive executables,you must install the file system client and SAP plug-in in the default installationdirectory.
You can specify an alternate location for the var directory during the Avamar Clientfor HP-UX installation by using the -x ask=true option with the swinstallcommand as described in the Avamar Backup Clients User Guide. When you install theSAP plug-in after you install the Avamar Client for HP-UX, the plug-in installationautomatically uses the same location for the var directory that you specified duringthe Avamar Client for HP-UX installation.
Procedure
1. Log in to the SAP server host as root.
2. Type the following command to change to the temporary directory thatcontains the SAP plug-in installation package:
cd tmpwhere tmp is the pathname of the temporary directory.
3. Install the SAP plug-in in the default directory or an alternate directory:
l To install the SAP plug-in in the default directory, type the followingcommand:
swinstall -s /tmp/AvamarSAP-hpux11iv3-itan-version.depot \*where version is the Avamar software version.
l To install the SAP plug-in in an alternate directory, type the followingcommand:
Installation and Configuration
32 Avamar for SAP with Oracle 18.1 User Guide

swinstall -s /tmp/AvamarSAP-hpux11iv3-itan-version.depothpuxsap,l=/alternate_pathwhere:
n version is the Avamar software version.
n alternate_path is the pathname of the alternate directory where youinstalled the Avamar Client for HP-UX.
Upgrading the Avamar Plug-in for SAP with Oracle on HP-UXYou must complete the required steps to upgrade the Avamar Plug-in for SAP withOracle on HP-UX.
Procedure
1. Uninstall the SAP plug-in. Uninstalling the Avamar Plug-in for SAP with Oracleon HP-UX on page 33 provides instructions.
2. Uninstall the Avamar file system client. The Avamar Backup Clients User Guideprovides instructions.
3. Download and install the new version of the Avamar file system client. TheAvamar Backup Clients User Guide provides instructions.
Note
The versions of the Avamar file system client and SAP plug-in must be thesame.
4. Download the SAP plug-in installation package. Downloading the software onpage 31 provides instructions.
5. Install the new version of the SAP plug-in. Installing the Avamar Plug-in for SAPwith Oracle on HP-UX on page 32 provides instructions.
Uninstalling the Avamar Plug-in for SAP with Oracle on HP-UXYou can uninstall the Avamar Plug-in for SAP with Oracle on HP-UX by using theswremove command.
Procedure
1. Log in to the SAP server host as root.
2. Type the following command to uninstall the SAP plug-in:
swremove hpuxsap
Installation and Configuration
Upgrading the Avamar Plug-in for SAP with Oracle on HP-UX 33

Installing, upgrading, and uninstalling the software on IBMAIX
You can install, upgrade, and uninstall the Avamar Plug-in for SAP with Oracle on IBMAIX.
Installing the Avamar Plug-in for SAP with Oracle on IBM AIXYou can install the Avamar Client for AIX in either the default installation directory oran alternate directory. You must install the Avamar Plug-in for SAP with Oracle in thesame directory as the Avamar Client for AIX.
Note
If the setuid or setgid bits are set on the brbackup or brarchive executables,you must install the file system client and SAP plug-in in the default installationdirectory.
You can specify an alternate location for the var directory during the Avamar Clientfor AIX installation by setting the VARDIR environment variable as described in theAvamar Backup Clients User Guide. When you install the SAP plug-in after you installthe Avamar Client for AIX, the plug-in installation automatically uses the same locationfor the var directory that you specified during the Avamar Client for AIX installation.
Procedure
1. Log in to the SAP server host as root.
2. Type the following command to change to the temporary directory thatcontains the SAP plug-in installation package:
cd tmpwhere tmp is the pathname of the temporary directory.
3. Install the SAP plug-in in the default directory or an alternate directory:
l To install the SAP plug-in in the default directory, type the followingcommand:
installp -d /tmp/AvamarSAP-aix6-ppc64-version.bff allwhere version is the Avamar software version.
l To install the SAP plug-in in an alternate directory, type the followingcommand:
installp -R alternate_path -d /tmp/AvamarSAP-aix6-ppc64-version.bff allwhere:
n alternate_path is the pathname of the alternate directory where youinstalled the Avamar Client for AIX.
n version is the Avamar software version.
Installation and Configuration
34 Avamar for SAP with Oracle 18.1 User Guide

Upgrading the Avamar Plug-in for SAP with Oracle on IBM AIXYou must complete the required steps to upgrade the Avamar Plug-in for SAP withOracle on IBM AIX.
You must upgrade the SAP plug-in before you upgrade the Avamar file system client.
Note
The versions of the Avamar file system client and SAP plug-in must be the same.
Procedure
1. Log in to the SAP server host as root.
2. Download the SAP plug-in installation package. Downloading the software onpage 31 provides instructions.
3. Type the following command to change to the temporary directory thatcontains the SAP plug-in installation package:
cd tmpwhere tmp is the pathname of the temporary directory.
4. Upgrade the SAP plug-in in the default directory or an alternate directory:
l To upgrade the SAP plug-in in the default directory, type the followingcommand:
installp -d /tmp/AvamarSAP-aix6-ppc64-version.bff allwhere version is the Avamar software version.
l To upgrade the SAP plug-in in an alternate directory, type the followingcommand:
installp -R alternate_path -d /tmp/AvamarSAP-aix6-ppc64-version.bff allwhere:
n alternate_path is the pathname of the alternate directory.
n version is the Avamar software version.
5. Download the Avamar file system client. The Avamar Backup Clients User Guideprovides instructions.
6. Upgrade the Avamar file system client in the default directory or an alternatedirectory:
l To upgrade the Avamar file system client in the default directory, type thefollowing command:
installp -d /tmp/AvamarClient-platform-version.bff allwhere:
n platform is the AIX system type.
n version is the Avamar software version.
l To upgrade the Avamar file system client in an alternate directory, type thefollowing command:
installp -R alternate_path -d /tmp/AvamarClient-platform-version.bff all
Installation and Configuration
Upgrading the Avamar Plug-in for SAP with Oracle on IBM AIX 35

where:
n alternate_path is the pathname of the alternate directory.
n platform is the AIX system type.
n version is the Avamar software version.
Uninstalling the Avamar Plug-in for SAP with Oracle on IBM AIXYou can uninstall the Avamar Plug-in for SAP with Oracle on IBM AIX by using theinstallp command.
Procedure
1. Log in to the SAP server host as root.
2. View all the Avamar packages installed on the system:
l To view the Avamar packages installed in the default directory, type thefollowing command:
lslpp -la | grep Avamarl To view the Avamar packages installed in an alternate directory, type the
following command:
lslpp -R alternate_path -la | grep Avamarwhere alternate_path is the pathname of the alternate directory.
3. Uninstall the SAP plug-in from the default directory or an alternate directory:
l To uninstall the SAP plug-in from the default directory, type the followingcommand:
installp -u AvamarSAP-aix6-ppc64l To uninstall the SAP plug-in from an alternate directory, type the following
command:
installp -R alternate_path -u AvamarSAP-aix6-ppc64where alternate_path is the pathname of the alternate directory.
Installing, upgrading, and uninstalling the software on LinuxYou can uninstall the Avamar Plug-in for SAP with Oracle on Linux.
Installing the Avamar Plug-in for SAP with Oracle on LinuxYou can install the Avamar Client for Linux in either the default installation directory oran alternate directory. You must install the Avamar Plug-in for SAP with Oracle in thesame directory as the Avamar Client for Linux.
Note
If the setuid or setgid bits are set on the brbackup or brarchive executables,you must install the file system client and SAP plug-in in the default installationdirectory.
You can specify an alternate location for the var directory during the Avamar Clientfor Linux installation as described in the Avamar Backup Clients User Guide. When youinstall the SAP plug-in after you install the Avamar Client for Linux, the plug-ininstallation automatically uses the same location for the var directory that youspecified during the Avamar Client for Linux installation.
Installation and Configuration
36 Avamar for SAP with Oracle 18.1 User Guide
Procedure
1. Log in to the SAP server host as root.
2. Type the following command to change to the temporary directory thatcontains the SAP plug-in installation package:
cd tmpwhere tmp is the pathname to the temporary directory.
3. Install the SAP plug-in in the default directory or an alternate directory:
l To install the SAP plug-in in the default directory, type the followingcommand:
rpm -ivh AvamarSAP-linux-package-version.rpmwhere package-version is the package type and Avamar software version.
l To install the SAP plug-in in an alternate directory, type the followingcommand:
rpm -ivh --relocate /usr/local/avamar=/alternate_pathAvamarSAP-linux-package-version.rpmwhere:
n alternate_path is the pathname of the alternate directory where youinstalled the Avamar Client for Linux.
n package-version is the package type and Avamar software version.
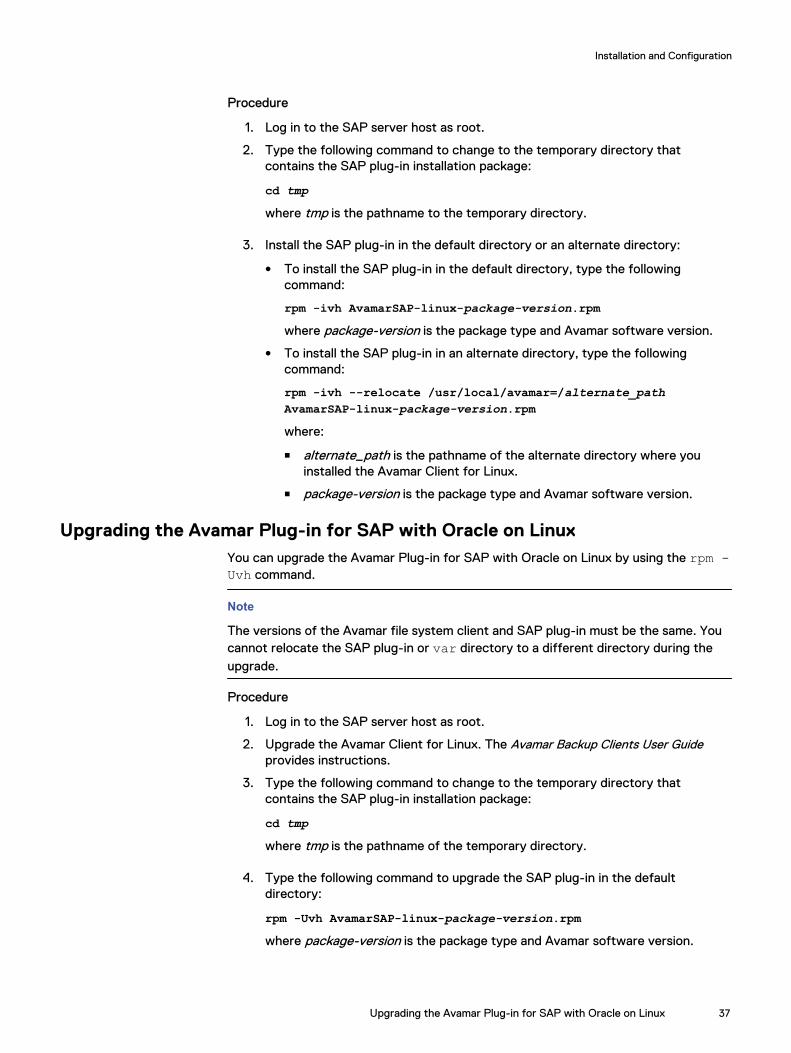
Upgrading the Avamar Plug-in for SAP with Oracle on LinuxYou can upgrade the Avamar Plug-in for SAP with Oracle on Linux by using the rpm -Uvh command.
Note
The versions of the Avamar file system client and SAP plug-in must be the same. Youcannot relocate the SAP plug-in or var directory to a different directory during theupgrade.
Procedure
1. Log in to the SAP server host as root.
2. Upgrade the Avamar Client for Linux. The Avamar Backup Clients User Guideprovides instructions.
3. Type the following command to change to the temporary directory thatcontains the SAP plug-in installation package:
cd tmpwhere tmp is the pathname of the temporary directory.
4. Type the following command to upgrade the SAP plug-in in the defaultdirectory:
rpm -Uvh AvamarSAP-linux-package-version.rpmwhere package-version is the package type and Avamar software version.
Installation and Configuration
Upgrading the Avamar Plug-in for SAP with Oracle on Linux 37

The rpm -Uvh command automatically uninstalls the earlier version of the SAPplug-in and then installs the new version.
Uninstalling the Avamar Plug-in for SAP with Oracle on LinuxYou can uninstall the Avamar Plug-in for SAP with Oracle on Linux by using the rpm -e command.
Procedure
1. Log in to the SAP server host as root.
2. Type the following command to view all the Avamar packages that are installedon the system:
rpm -qa | grep AvFor example, the following output appears in the command shell:
AvamarSAP-versionAvamarClient-version
where version is the Avamar software version.
3. Type the following command to uninstall the SAP plug-in:
rpm -e AvamarSAP-version
Installing, upgrading, and uninstalling the software onSolaris
You can install, upgrade, and install the Avamar Plug-in for SAP with Oracle on Solaris.
Installing the Avamar Plug-in for SAP with Oracle on SolarisYou can install the Avamar Client for Solaris in either the default installation directoryor an alternate directory. The SAP plug-in installation process automatically installsthe Avamar Plug-in for SAP with Oracle in the same directory as the Avamar Client forSolaris.
Note
If the setuid or setgid bits are set on the brbackup or brarchive executables,you must install the file system client and SAP plug-in in the default installationdirectory.
You can use the following instructions to install the Avamar Plug-in for SAP withOracle on a stand-alone Solaris system or on each node in a cluster.
Procedure
1. Log in to the SAP server host as root.
2. Type the following command to change to the temporary directory thatcontains the SAP plug-in installation package:
cd tmpwhere tmp is the pathname of the temporary directory.
Installation and Configuration
38 Avamar for SAP with Oracle 18.1 User Guide

3. Type the following command to install the SAP plug-in:
pkgadd -d AvamarSAP-solarisversion-package-version.pkgwhere AvamarSAP-solarisversion-package-version.pkg is the filename of the SAP plug-in installation package that you downloaded.
The command displays installation activity.
4. Perform the following additional procedures in a cluster system on Solaris:
l In a Solaris Cluster system, configure the resource groups on each nodeaccording to instructions in the Solaris Cluster chapter of the Avamar BackupClients User Guide.
l In a VCS system, install the Avamar Cluster Client for Solaris on each node,starting with the active VCS node first, according to instructions in the VCSchapter of the Avamar Backup Clients User Guide. Depending on the Solarisoperating system, use the correct installation package.
Upgrading the Avamar Plug-in for SAP with Oracle on SolarisYou must complete the required steps to upgrade the Avamar Plug-in for SAP withOracle on a stand-alone Solaris system or on each node in a cluster.
Procedure
1. Uninstall the SAP plug-in. Uninstalling the Avamar Plug-in for SAP with Oracleon Solaris on page 39 provides instructions.
2. Uninstall the Avamar file system client. The Avamar Backup Clients User Guideprovides instructions.
Note
The versions of the Avamar file system client and SAP plug-in must be thesame.
3. Download the Avamar file system client and the SAP plug-in installationpackages. Downloading the software on page 31 provides instructions.
4. Install the new version of the Avamar file system client. The Avamar BackupClients User Guide provides instructions.
5. Install the new version of the SAP plug-in. Installing the Avamar Plug-in for SAPwith Oracle on Solaris on page 38 provides instructions.
Uninstalling the Avamar Plug-in for SAP with Oracle on SolarisYou must complete the required steps to uninstall the Avamar Plug-in for SAP withOracle on a stand-alone Solaris system or on each node in a cluster.
Procedure
1. Log in to the SAP server host as root.
2. If you are uninstalling in a cluster configuration, run the correct clusterconfiguration script:
l For a Solaris Cluster configuration, run the suncluster-configure.shscript to remove the Avamar agent resource from the Solaris Clusterresource group.
Installation and Configuration
Upgrading the Avamar Plug-in for SAP with Oracle on Solaris 39
l For a VCS configuration, run the avclusuninstall script.
The Avamar Backup Clients User Guide provides details.
3. Type the following command to view all the Avamar packages installed on thesystem:
pkginfo | grep AVMR
A list of all the Avamar packages installed on the system appears, including theAVMRsap package that is the SAP plug-in package.
4. Note the package names.
5. Type the following command to uninstall a software package:
pkgrm package_namewhere package_name is one of the Avamar software packages displayed in step3.
6. Type y and press Enter when prompted to remove the package.
7. Repeat previous 2 steps as required to remove the Avamar software packages.
8. In a VCS system, uninstall the Avamar Cluster Client for Solaris according toinstructions in the VCS chapter of the Avamar Backup Clients User Guide.
Installing, upgrading, and uninstalling the software onWindows
You can install, upgrade, and uninstall the Avamar Plug-in for SAP with Oracle onWindows.
Installing the Avamar Plug-in for SAP with Oracle on WindowsYou can install the Avamar Client for Windows in either the default installationdirectory or an alternate directory. The SAP plug-in installation process automaticallyinstalls the Avamar Plug-in for SAP with Oracle in the same directory as the AvamarClient for Windows.
You can use the following instructions to install the Avamar Client for Windows on astand-alone Windows system or on each node in a cluster.
Procedure
1. Log in to the SAP server host as an administrator.
2. Go to the temporary directory that contains the SAP plug-in installationpackage that you downloaded in Downloading the software on page 31.
3. Start the SAP plug-in installation by using the correct procedure:
l If UAC is disabled, double-click the installation package.
l If UAC is enabled, perform the following steps:
a. Right-click the Command Prompt icon, and select Run asadministrator.
b. In the Command Prompt window, type the following command tochange the working directory to the location of the installation package:
cd tmp
Installation and Configuration
40 Avamar for SAP with Oracle 18.1 User Guide

where tmp is the pathname of the directory that contains the installationpackage.
c. Type the following command on a single command line to start theinstallation:
msiexec /i AvamarSAP-windows-package-version.msiwhere package-version is the package type and Avamar softwareversion.
User Account Control setting on Microsoft Windows on page 30 providesdetails about UAC.
4. Follow the instructions in the wizard to install the SAP plug-in.
5. Click Finish when the installation completes.
Configuring the cluster client on WindowsThe Avamar cluster client enables you to back up and restore SAP Oracle data onshared storage in a cluster, regardless of which node is managing the data at the timeof the backup or restore. The Cluster Configuration Tool walks you through the stepsto configure the Avamar cluster client for the Avamar Plug-in for SAP with Oracle.
Before you begin
Before you run the Cluster Configuration Tool, ensure that the Avamar Client forWindows and the Avamar Plug-in for SAP with Oracle are installed on each node in thecluster.
Procedure
1. Log in to the active node in the cluster as a domain administrator. The accountmust be a member of the local Administrators group on each cluster node.
2. Start the Cluster Configuration Tool. On Windows Server 2008, open the Startmenu and select Program Files > EMC Avamar > Cluster Configuration Tool.
The welcome page appears.
3. Click Next.
The Plug-ins page appears.
4. Select SAP with Oracle in the Avamar Backup Plug-ins list, and click Next.
The Cluster Nodes page appears with a list of nodes and each node's status.
5. Ensure that the environment meets the following requirements:
l The status for each node is Up.
l The installation status of the Windows client on each node is Installed.
l The installation status of the plug-in on each node is Installed.
6. Click Next.
The Operations page appears.
7. Select Configure a new cluster client for all nodes, and click Next.
The Prerequisites page appears. A check mark next to a prerequisite indicatesthat the prerequisite is met.
8. Ensure that the environment meets all the prerequisites on the Prerequisitespage.
Installation and Configuration
Configuring the cluster client on Windows 41

If a prerequisite is not met, then exit the wizard, resolve the issue, and restartthe wizard.
9. Select the IP version that the environment uses, and click Next.
The Attach to Service page appears.
10. Select the cluster service to use for the new cluster client, and click Next.
The Server Settings page appears.
11. Specify the settings for the Avamar server:
a. Type either the DNS name of the Avamar server in the Name box or the IPaddress in the IPv4/IPv6 address box.
b. Type the name of the Avamar domain in the Avamar client domain for thecluster client box.
To specify a domain at the root level, type /domain, where domain is thedomain name. To specify a subdomain, type /domain/subdomain, wheredomain is the domain name and subdomain is the subdomain name.
c. Type the data port for Avamar client/server communication in the Portnumber box.
Note
Port 28001 is the default port that the Avamar client uses to communicatewith the administrator server.
d. Type the name of the shared network directory or volume in the Clusterclient’s var directory box, or click Browse to select a shared networkdirectory or volume.
The shared network directory or volume stores the cluster clientconfiguration and log files. All nodes in the cluster must have write access tothis directory or volume.
Note
Select a volume that the cluster owns instead of a remote pathname on thenetwork.
e. Click Next.
The Summary page appears.
12. Review the configuration settings that you specified in the wizard, and clickConfigure.
The Progress page provides the status of the configuration. When theconfiguration process completes, the Results page appears.
13. Click Close.
Upgrading the Avamar Plug-in for SAP with Oracle on WindowsThe steps to upgrade the Avamar Plug-in for SAP with Oracle on Windows depend onwhether the installation is on a stand-alone server or in a cluster.
Note
The versions of the Avamar file system client and SAP plug-in must be the same.
Installation and Configuration
42 Avamar for SAP with Oracle 18.1 User Guide

Upgrading on a stand-alone Windows serverYou must complete the required steps to upgrade the Avamar Plug-in for SAP withOracle on a stand-alone Windows server.
Procedure
1. Ensure that the environment meets all the system requirements for the newversion. Preparing to install the Avamar Plug-in for SAP with Oracle on page 30provides details.
2. Upgrade the Avamar Client for Windows by running the Windows clientinstallation wizard for the new version on the client computer. The Avamar forWindows Server User Guide provides instructions.
3. Upgrade the SAP plug-in by running the plug-in installation wizard for the newversion on the client computer. Installing the Avamar Plug-in for SAP withOracle on Windows on page 40 provides instructions.
Upgrading in a Windows clusterYou must complete the required steps to upgrade the Avamar Plug-in for SAP withOracle in a Windows cluster.
Procedure
1. Uninstall the earlier version of the Avamar Client for Windows and SAP plug-in:
a. Use the Avamar Cluster Configuration utility to uninstall the Avamar clusterclient.
b. Uninstall the earlier version of the SAP plug-in on each node in the cluster.
c. Uninstall the earlier version of the Avamar Client for Windows on each nodein the cluster.
The plug-in guide for the earlier version provides instructions for each of thesesteps.
2. Install the new version of the Avamar Client for Windows and SAP plug-in:
a. Install the Avamar Client for Windows in the same directory on each node inthe cluster. The Avamar for Windows Server User Guide provides instructions.
b. Install the SAP plug-in in the same directory on each node in the cluster. Installing the Avamar Plug-in for SAP with Oracle on Windows on page 40provides instructions.
c. Register each node in the cluster with the Avamar server. The Avamar forWindows Server User Guide provides instructions.
d. Run the Cluster Configuration Tool on an active node to install the Avamarcluster client. Configuring the cluster client on Windows on page 41 providesinstructions.
Installation and Configuration
Upgrading the Avamar Plug-in for SAP with Oracle on Windows 43

Uninstalling the Avamar Plug-in for SAP with Oracle on WindowsThe steps to uninstall the Avamar Plug-in for SAP with Oracle on Windows depend onwhether the installation is on a stand-alone server or in a cluster.
Uninstalling the software on a stand-alone Windows serverYou must use the Windows uninstall feature to uninstall the Avamar Plug-in for SAPwith Oracle and Avamar Client for Windows software on a stand-alone Windowsserver.
Procedure
1. Uninstall the Avamar Plug-in for SAP with Oracle by using Programs andFeatures.
2. Uninstall the Avamar Client for Windows by using Programs and Features.
Uninstalling the software in a Windows clusterIn a Windows cluster, use the Cluster Configuration Tool to uninstall the Avamarcluster client. Then use the Windows uninstall feature to uninstall the Avamar Plug-infor SAP with Oracle and Avamar Client for Windows software on each node.
Procedure
1. Run the Cluster Configuration Tool on the active node to uninstall the Avamarcluster client:
a. Log in to the active node in the cluster as a domain administrator. Theaccount must be a member of the local Administrators group on each clusternode.
b. Start the Cluster Configuration Tool. On Windows Server 2008, open theStart menu and select Program Files > Avamar > Cluster ConfigurationTool.
The welcome page appears.
c. Click Next.
The Plug-ins page appears.
d. Select SAP with Oracle in the Avamar Backup Plug-ins list, and click Next.
The Cluster Nodes page appears with a list of nodes and each node’sstatus.
e. Ensure that the status of each node is Up, and click Next.
The Operations page appears.
f. Select Remove the cluster client from all nodes, and click Next.
The Prerequisites page appears. A check mark next to a prerequisiteindicates that the prerequisite has been met.
g. Ensure that the environment meets all the prerequisites on the page, andclick Next.
The Summary page appears.
h. Review the summary information, and click Uninstall.
The Progress page provides the status of the uninstall operation. When theuninstall completes, the Results page appears.
Installation and Configuration
44 Avamar for SAP with Oracle 18.1 User Guide
i. Click Close.
2. Uninstall the Avamar Plug-in for SAP with Oracle on each node by usingPrograms and Features.
3. Uninstall the Avamar Client for Windows on each node by using Programs andFeatures.
Performing post-installation tasksYou must perform the required configuration procedures after a successful installationof the Avamar Plug-in for SAP with Oracle.
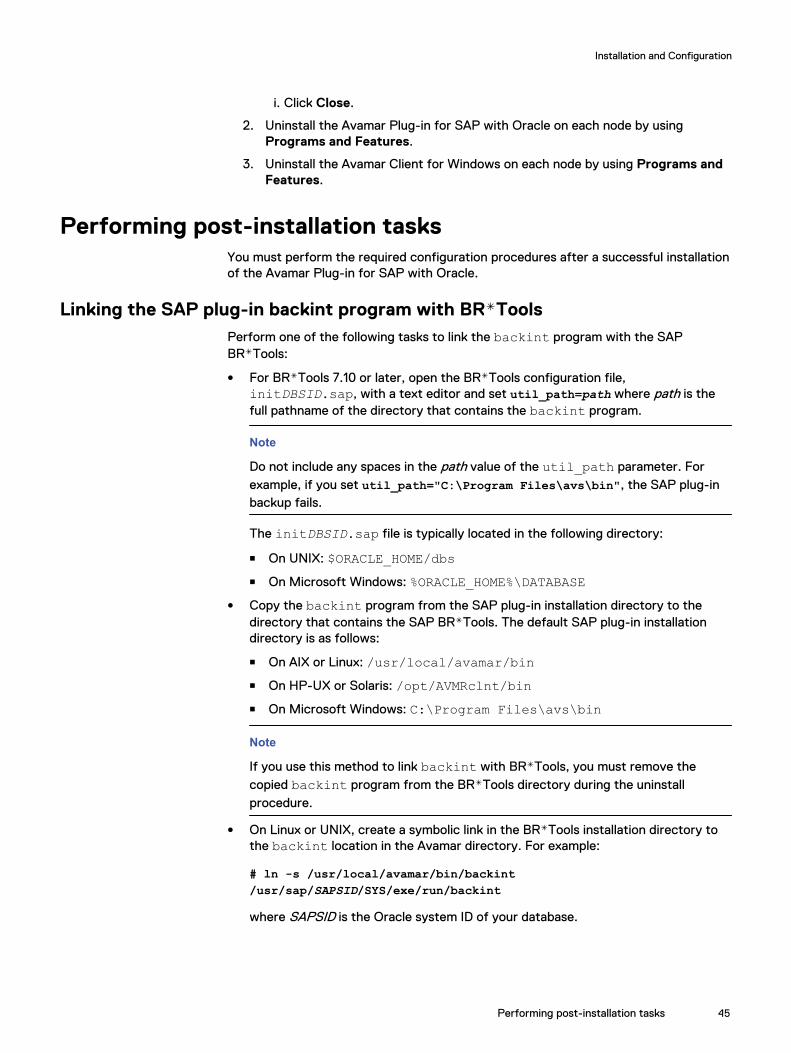
Linking the SAP plug-in backint program with BR*ToolsPerform one of the following tasks to link the backint program with the SAPBR*Tools:
l For BR*Tools 7.10 or later, open the BR*Tools configuration file,initDBSID.sap, with a text editor and set util_path=path where path is thefull pathname of the directory that contains the backint program.
Note
Do not include any spaces in the path value of the util_path parameter. Forexample, if you set util_path="C:\Program Files\avs\bin", the SAP plug-inbackup fails.
The initDBSID.sap file is typically located in the following directory:
n On UNIX: $ORACLE_HOME/dbsn On Microsoft Windows: %ORACLE_HOME%\DATABASE
l Copy the backint program from the SAP plug-in installation directory to thedirectory that contains the SAP BR*Tools. The default SAP plug-in installationdirectory is as follows:
n On AIX or Linux: /usr/local/avamar/binn On HP-UX or Solaris: /opt/AVMRclnt/binn On Microsoft Windows: C:\Program Files\avs\bin
Note
If you use this method to link backint with BR*Tools, you must remove thecopied backint program from the BR*Tools directory during the uninstallprocedure.
l On Linux or UNIX, create a symbolic link in the BR*Tools installation directory tothe backint location in the Avamar directory. For example:
# ln -s /usr/local/avamar/bin/backint/usr/sap/SAPSID/SYS/exe/run/backint
where SAPSID is the Oracle system ID of your database.
Installation and Configuration
Performing post-installation tasks 45

Setting the backup device type parameterYou must perform the following steps to specify the SAP plug-in as the defaultprogram for backup, restore, and verification operations.
Procedure
1. Open the BR*Tools initialization profile, initDBSID.sap, in a text editor.
2. Set the backup device type parameter to use the backint program byspecifying one of the following settings in the BR*Tools configuration profile,initDBSID.sap:
backup_dev_type = util_fileorbackup_dev_type = util_file_online
Set backup_dev_type = util_file_online for online backups to decreasethe amount of time each tablespace remains in hot backup mode, resulting in asmaller number of generated transaction logs.
Note
The SAP plug-in does not support the rman_util value setting for thebackup_dev_type parameter.
You can override the default value of the backup device type parameter in thefile by using the BR*Tools command line option, for example, brbackup -dutil_file_online. The BR*Tools documentation provides details. SAP plug-inbackups through Avamar Administrator specify the -d option which is based onuser-selected options in Avamar Administrator.
Enabling administrator privileges for the SAP plug-in on WindowsOn specific type of Microsoft Windows systems, User Account Control (UAC) isdesigned to provide additional operating system security by preventing software frombeing installed or run with administrator privileges unless an administrator authorizesthe elevated privileges.
On Windows systems with UAC enabled, ensure that the administrator privileges areenabled for the SAP plug-in before you start a SAP plug-in backup or restore from theCLI. Otherwise, the SAP plug-in operation from the CLI might fail.
You can enable administrator privileges for a SAP plug-in backup or restore from theCLI.
Procedure
1. Right-click the Command Prompt icon.
2. Select Run as administrator from the list.
Note
The operating system user that performs a SAP plug-in backup with AvamarAdministrator does not require operating system administrator privileges.
Installation and Configuration
46 Avamar for SAP with Oracle 18.1 User Guide

Excluding database files and logs from file system backupsOn the SAP plug-in host, perform file system backups separately from SAP plug-inbackups. To optimize the performance of file system backups, exclude the SAPdatabase data and logs in the dataset for the file system backups.
NOTICE
To provide full protection of SAP Oracle, use the file system backup interface to backup Oracle configuration files, such as the password file, listener, and tnsnames.orafiles and the SAP application files. This list of files is not exhaustive.
You can create a dataset that excludes the SAP Oracle database and log files from thefile system backups.
Procedure
1. In Avamar Administrator, select Tools > Manage Datasets.
The Manage All Datasets window appears.
2. Click New.
The New Dataset dialog box appears.
3. In the Name field, type a name for the new dataset for the file system backup.
The name can include alphanumeric characters (A-Z, a-z, 0-9) and the followingspecial characters: period (.), hyphen (-), underscore (_). Do not use Unicodecharacters or any of the following characters:
` ~ ! @ # $ % ^ & * ( ) = + [ ] { } | \ / ; : ’ ” < > , ?
4. Click the Exclusions tab.
5. Select the correct file system from the Select Plug-In Type list.
6. In the Select Files and/or Folders field, add the location of the SAP Oracledatabase.
Installation and Configuration
Excluding database files and logs from file system backups 47

Figure 5 Location of the SAP Oracle database
7. Click OK.
The New Dataset dialog box closes.
8. Switch to the Manage All Datasets window and click OK.
The Manage All Datasets window closes.
9. Assign the new dataset to the correct client or group. The AvamarAdministration Guide provides instructions.
Installation and Configuration
48 Avamar for SAP with Oracle 18.1 User Guide

CHAPTER 3
Backup
This chapter includes the following topics:
l Backup feature support..................................................................................... 50l Performing on-demand backups........................................................................ 50l Scheduling backups........................................................................................... 59l Monitoring backups............................................................................................64l Canceling backups............................................................................................. 64l Reviewing backups............................................................................................ 65
Backup 49

Backup feature supportBackup on page 18 describes the Avamar Plug-in for SAP with Oracle (SAP plug-in)backup features, including the supported data types and backup limitations. You canperform on-demand backups and scheduled backups with the SAP plug-in.
You can use Avamar Administrator to perform on-demand backups and configurescheduled backups:
l Performing on-demand backups on page 50
l Scheduling backups on page 59
You can also perform on-demand backups from the CLI by using the BR*Toolscommands as described in Performing on-demand backups from the CLI on page 84.
Performing on-demand backupsAn on-demand backup is a user-initiated backup on a client. You can perform an on-demand backup for the first backup of the client immediately after you install theAvamar client software. Perform an on-demand backup before system maintenance,software installations, or software upgrades.
Procedure
1. Start Avamar Administrator and log in.
2. In Avamar Administrator, click the Backup & Restore launcher link button.
The Backup, Restore and Manage window appears.
3. Click the Backup tab.
The upper-left pane contains a list of domains.
4. Click the domain that contains the SAP server host.
A list of Avamar clients appears in the pane below the domains list.
5. Select the SAP server host. If the SAP server is installed in a cluster, select thevirtual server host.
A list of plug-ins that are installed on the client appears in the left pane of theBackup tab.
6. In the left pane of the Backup tab, select the SAP plug-in.
The Browse Command Line Options dialog box appears as in the followingexample.Reset the settings in this dialog box when you want to browse another SAPserver on the same host. To reset the settings, close the Browse CommandLine Options dialog box, then right-click the plug-in, select Refresh, and selectthe plug-in again.
Backup
50 Avamar for SAP with Oracle 18.1 User Guide

Figure 6 Browse Command Line Options dialog box
7. Complete the settings in the Browse Command Line Options dialog box:
a. In the Oracle home (ORACLE_HOME) field, type the full pathname of theOracle installation directory that contains the database to be backed up.
Note
Do not include a final slash, /, at the end of the ORACLE_HOME pathname.
b. In the Oracle locale (NLS_LANG) field, type (in Oracle format) thelanguage locale to use for the database selection. The default value isAMERICAN_AMERICA.US7ASCII. The value for the Oracle globalizationparameter has the following format:
NLS_LANG=language_territory.character_set
c. Select to use either Oracle database authentication or operating systemauthentication for the database connection during the browse operation:
Backup
Performing on-demand backups 51

Note
If you select the operating system authentication, the operating system usermust be configured according to the Oracle documentation. If you selectboth types of authentication, the database authentication takes precedence.
l If you select Use Oracle Database Authentication, complete therequired fields:
n In the Database username field, type the Oracle database username.The user must have SYSDBA privileges.
n In the Database user password field, type the password of theOracle database username.
n In the Oracle Net Service name field, type the Oracle Net servicename of the database to be backed up.
l If you select Use Operating System Authentication, complete therequired fields:
n In the Operating system username field, type the operating systemlogin name of the SAP user who performs the backup.
n In the Operating system user password field, type the operatingsystem user password of the SAP user who performs the backup. Thisfield is mandatory on Windows and optional on UNIX or Linux.
n In the Oracle instance SID (ORACLE_SID) field, type the systemidentifier (SID) of the Oracle database to be backed up.
8. Click OK.
The Backup tab in the Backup, Restore and Manage window displaysinformation about the database that is selected for backup.
9. On the Backup tab, select the checkboxes next to the items to be backed up:
l For a backup of a whole database, select the database instance node or all ofthe tablespaces in the database. For example, you would select the CIDdatabase in the preceding figure.
l For a backup of one or more tablespaces, select only the individualtablespaces that you want to back up.
l To configure an archive log backup, complete the settings in step 12.g onpage 57.
Note
When you choose to back up archive logs only, the backup settings that aremade here are ignored. However, at least one tablespace must be selectedto advance to the next screen.
10. Select Actions > Back Up Now.
The On Demand Backup Options dialog box appears.
11. Complete the settings in the On Demand Backup Options dialog box:
a. Specify the backup retention policy in the Retention Policy Settings groupbox:
Backup
52 Avamar for SAP with Oracle 18.1 User Guide

l To automatically delete this backup from the Avamar server after aspecified period of time, select Retention period and then specify thenumber of days, weeks, months, or years.
l To automatically delete this backup from the Avamar server on a specificcalendar date, select End date and browse to that date on the calendar.
l To retain this backup as long as this client remains active in the Avamarserver, select No end date.
NOTICE
Ensure that the retention policies are set according to the rules described in Complete backup protection on page 19.
b. From the Avamar encryption method list, select the encryption method touse for data transfer between the client and the Avamar server during thebackup.
The encryption technology and bit strength for a client/server connectiondepend on several factors, including the client operating system and theAvamar server version. The Avamar Product Security Guide provides details.
c. Click More Options.
The Backup Command Line Options dialog box appears as in the followingexample.
Backup
Performing on-demand backups 53

Figure 7 Backup Command Line Options
12. Complete the settings in the Backup Command Line Options dialog box:
a. To view the advanced options with red labels, select Show AdvancedOptions at the bottom of the dialog box. Advanced options with red labelsare optional and only required for special configurations. All the text fieldswith black labels are mandatory.
Backup
54 Avamar for SAP with Oracle 18.1 User Guide

NOTICE
The software does not validate these options until the backup runs. You canfind any errors that result from these settings in the avsap or backint logfiles.
b. Select the checkbox for Store backup on Data Domain system if you wantto store the backup data on an attached Data Domain system that youspecify. The metadata for the backup is stored on the Avamar server.
NOTICE
If you specify a Data Domain system as the backup destination, then all thedata is backed up to the Data Domain system. You cannot back up part ofthe data to a Data Domain system and another part to an Avamar server.
The Avamar and Data Domain System Integration Guide provides details aboutconfiguring Data Domain systems for use with Avamar systems.
c. From the Encryption method to Data Domain system list, select theencryption method for data transfer between the client and the Data Domainsystem during the backup.
d. Complete the settings in the Oracle Database and BR*Tools Informationgroup box.
Enter all the mandatory values in this section, although the values werealready entered earlier:
l In the Oracle home (ORACLE_HOME) field, type the full pathname ofthe directory where the Oracle software is installed.
Note
Do not include a final slash, /, at the end of the ORACLE_HOMEpathname.
l In the Oracle instance SID (ORACLE_SID) field, type the systemidentifier (SID) of the Oracle database instance to back up.
l In the Oracle locale (NLS_LANG) field, type (in Oracle format) thelanguage locale to use for the database selection. The default value isAMERICAN_AMERICA.US7ASCII.
l In the Database file location (SAPDATA_HOME) field, type the fullpathname of the directory that contains the SAP database files.
l In the BR*Tools location field, type the full pathname of the directorythat contains the BR*Tools executable files.
l (Optional) In the BR*Tools initialization file (initDBSID.sap) field, typethe full pathname of the BR*Tools initialization profile if the profile is notin the SAP default location ($ORACLE_HOME/dbs or %ORACLE_HOME%\database) or if the profile does not have the default name format(initDBSID.sap).
e. Complete the settings in the Operating System and Database Credentialsgroup box:
l In the Operating system username field, type the operating systemlogin name of the SAP user who performs the backup.
Backup
Performing on-demand backups 55

Note
To back up on Windows with the domain user, use the user principalname (UPN) format, for example, username@DNS_domain_name. TheMicrosoft documentation provides more details about using the UPNformat.
l In the Operating system user password field, type the operatingsystem user password of the SAP user who performs the backup. Thisfield is mandatory on Windows and optional on UNIX or Linux.
l (Optional) If database authentication is used for the databaseconnection, type in the Database username field the username of theOracle database user (with SYSDBA privileges) configured to useBR*Tools.
l (Optional) In the Database user password field, type the password forthe database username.
Setting the database username and password corresponds to running thebrbackup -u db_username/password command. When you do not set thedatabase username and password, the backup uses operating systemauthentication to connect to the Oracle database, which corresponds torunning the brbackup -u / command.
The SAP BR*Tools documentation provides details about the configurationof operating system and database users.
f. Complete the settings in the General Backup Options group box:
l From the Maximum number of streams menu, select the maximumnumber of simultaneous avtar streams to use per backup operation. Thedefault value is 1, and the recommended maximum value is 10. Multi-streaming on page 23 provides details.
l (Optional) In the Additional brbackup options field, specify anyadditional brbackup command line options to use with the backup thatcannot be set through other fields in this dialog box, for example, -verify use_dbv. You cannot specify the following options becausethese options are set based on your field selections: -device, -mode, -profile, -type, -user, -archive.
If you set the -verify option in this field, brbackup restores thebackup to a temporary location and checks the backup for validity. Forthe verify operation to succeed, you must perform the following tasks:
a. Create a SAP plug-in parameter file (flagfile) on the SAP plug-in host.
b. Specify the location of the parameter file either in this field through -r full_path_of_flagfile or by setting the util_par_file parameterin the BR*Tools initDBSID.sap file on the SAP plug-in host.
The parameter file must contain at least the following parameters: --id, --password, --server, and --account. SAP plug-inparameter file on page 90 provides details.
NOTICE
A file pathname used in the options cannot include spaces. If you want tospecify a file pathname that contains spaces, then you must either createa soft link to the file or copy the file to a pathname without spaces.
Backup
56 Avamar for SAP with Oracle 18.1 User Guide
l (Optional) Select Enable debugging messages for debugging purposes.This option enables logging for the avtar, avsap, and backintprocesses. Use this option with caution because the messages can createvery large log files. Troubleshooting on page 95 provides details aboutthe generated logs.
g. Complete the settings in the Archive Log Options group box:
l (Optional) Select Back up only archive redo logs to back up only thearchive redo logs for the instance without backing up any databaseobject. The database selection on the Backup tab is ignored. This optioncorresponds to the SAP brarchive command.
l (Optional) Select Include archive logs to include archive redo logs afterthe database backup. This option corresponds to the SAP brbackupcommand, followed by a separate brarchive command. This setting isignored if you select Back up only archive redo logs.
l (Optional) In the Number of logs to back up field, type the number oflogs to back up. This option corresponds to the brarchive -ncommand. If you set the value to 0, then the default BR*Tools value isused.
l (Optional) Select Delete logs after backup completes to delete the logsafter the logs are backed up. This option corresponds to the brarchive-sd command.
l (Optional) In the Additional brarchive options field, specify anyadditional brarchive command line options to use with the backup ofarchive redo logs, for example, -verify. You cannot specify thefollowing options: -number, -save_delete, -profile, -user. If youselect Delete logs after backup completes, then you cannot specify the-delete_saved option.
Note
A file pathname that is used in the options cannot include spaces.
NOTICE
Do not specify the brarchive option -f number because the operationmight take a long time and block other backup operations.
h. Complete the settings in the Backup Type group box:
l Select Online to specify that the database remains open during thebackup. This option corresponds to the brbackup -t online -dutil_file_online command. This setting is ignored during archivelog backups.
l Select Online consistent - Archive the logs generated during thebackup, then back up these logs to specify that the logs generatedduring the backup are archived and then backed up at the end of thebackup. This option corresponds to the brbackup -t online_cons-d util_file_online command.
l Select Offline to specify that the database is shut down for the backup,provided the SAP system has also been shut down. Otherwise, thedatabase is not shut down and the backup terminates with an error
Backup
Performing on-demand backups 57
message. This option corresponds to the brbackup -t offline -dutil_file command.
l Select Offline force - Shut down the database, even if there are SAPusers connected to specify that the database is shut down for thebackup even if there are SAP users who are connected to the database.This option corresponds to the brbackup -t offline_force -dutil_file command.
i. (Optional) Complete the settings in the BR*Tools Log File Locations groupbox:
l In the SAPARCH field, type the full directory pathname of theBRARCHIVE log files if the files are not located in the SAP defaultlocation, $SAPDATA_HOME/saparch or %SAPDATA_HOME%\saparch.
l In the SAPBACKUP field, type the full directory pathname of theBRBACKUP, BRRESTORE, and BRRECOVER log files if the files are notlocated in the SAP default location, $SAPDATA_HOME/sapbackup or%SAPDATA_HOME%\sapbackup.
l In the SAPCHECK field, type the full directory pathname of theBRCONNECT log files if the files are not located in the SAP defaultlocation, $SAPDATA_HOME/sapcheck or %SAPDATA_HOME%\sapcheck.
l In the SAPREORG field, type the full directory pathname of theBRSPACE log files if the files are not located in the SAP default location,$SAPDATA_HOME/spareorg or %SAPDATA_HOME%\spareorg.
l In the SAPTRACE field, type the full directory pathname of theSAPTRACE log files if the files are not located in the SAP defaultlocation, $SAPDATA_HOME/saptrace or %SAPDATA_HOME%\saptrace.
j. (Optional) If you need to configure additional plug-in options that do notappear in the dialog box, you can set the options as follows:
a. Click More.
b. Type the option name and value in the Enter Attribute and EnterAttribute Value fields, respectively.
c. Click +.
The option and value pair appears in the text box below the + and -buttons.
Additional plug-in options on page 80 provides details about the additionalplug-in options that the SAP plug-in supports.
The Avamar software does not validate the option information that you typein the Enter Attribute and Enter Attribute Value fields. In addition, thevalues in these fields override the option settings that you specify with GUIcontrols (text boxes, checkboxes, radio buttons, and so forth) in AvamarAdministrator. The fields are often used to set options for troubleshootingpurposes.
Backup
58 Avamar for SAP with Oracle 18.1 User Guide

NOTICE
For concurrent online backups of two or more databases on the same client,set the SAPSWITCH environment variable in the Enter Attribute and EnterAttribute Value fields. Set SAPSWITCH to a separate non-default directoryfor each concurrent backup so that the .switch file directory is differentfor each backup. Directory for the .switch files on page 100 providesdetails.
13. Click OK to close the Backup Command Line Options dialog box.
14. Click OK to close the On Demand Backup Options dialog box.
After the dialog box closes, the backup begins. Monitoring backups on page64 describes how to view operational messages about the backup status.
Scheduling backupsScheduled backups run automatically to ensure that backups occur on an ongoingbasis. You can schedule backups to run daily, weekly, or monthly. A scheduled backupcan include multiple clients or a single server.
Procedure
1. Create a dataset for scheduled backups. Creating a dataset on page 59provides instructions.
2. Create a group for the backups. Creating a group on page 62 providesinstructions. During the group creation process, perform the following tasks:
a. Assign the new dataset to the new group.
b. Assign a schedule to the new group.
c. Assign a retention policy to the new group.
d. Add the client to the new group.
3. Enable scheduling for the group. Enabling scheduled backups on page 64provides instructions.
The Avamar Administration Guide provides details about backup groups, grouppolicy, datasets, schedules, and retention policies.
Creating a datasetA dataset specifies the data to include in a scheduled backup and the options to usefor the backup. Create at least one dataset for scheduled backups on a client or groupof clients. Create multiple datasets to segregate client data.
Procedure
1. In Avamar Administrator, select Tools > Manage Datasets.
The Manage All Datasets window appears.
2. Click New.
The New Dataset dialog box appears, listing all the default datasets for all filesystems in the box below the + (add to list) and - (remove from list) buttons.
3. In the New Dataset dialog box:
Backup
Scheduling backups 59
a. In the Name box, type a name for the dataset.
The name can include alphanumeric characters (A-Z, a-z, 0-9) and thefollowing special characters: period (.), hyphen (-), underscore (_). Do notuse Unicode characters or any of the following characters:
` ~ ! @ # $ % ^ & * ( ) = + [ ] { } | \ / ; : ’ ” < > , ?
b. Click the Source Data tab.
c. Select Enter Explicitly.
d. Delete all the default datasets that are listed in the box below the + and -buttons by selecting each dataset in turn and clicking the - button to deletethe dataset.
e. Select the appropriate SAP plug-in from the Select Plug-In Type list.
NOTICE
All Avamar plug-ins are listed in the Select Plug-In Type list, but only plug-ins that are installed on the client are available to add to the dataset.
f. Click the ... button (Browse for files and/or folders) next to the SelectFiles and/or Folders text box.
The Select Files and/or Folders dialog box appears.
4. In the Select Files and/or Folders dialog box:
a. Select the SAP server host from the Clients tree in the left pane. If the SAPserver is installed in a cluster, select the virtual server host.
b. Select the SAP plug-in in the middle pane.
The Browse Command Line Options dialog box appears.
c. Complete the settings in the Browse Command Line Options dialog box asdescribed in step 7 on page 51, and click OK.
d. In the Select Files and/or Folders dialog box, select the items to be backedup:
l For a backup of a whole database, select the database instance node orall of the tablespaces in the database.
l For a backup of one or more tablespaces, select only the individualtablespaces that you want to back up.
l To configure an archive log backup, complete the settings in step 12.g onpage 57.
Note
When you choose to back up archive logs only, then the backup settingswhich are made here are ignored. However, at least one tablespace mustbe selected to advance to the next screen.
e. Click OK.
The Select Files and/or Folders dialog box closes.
Backup
60 Avamar for SAP with Oracle 18.1 User Guide
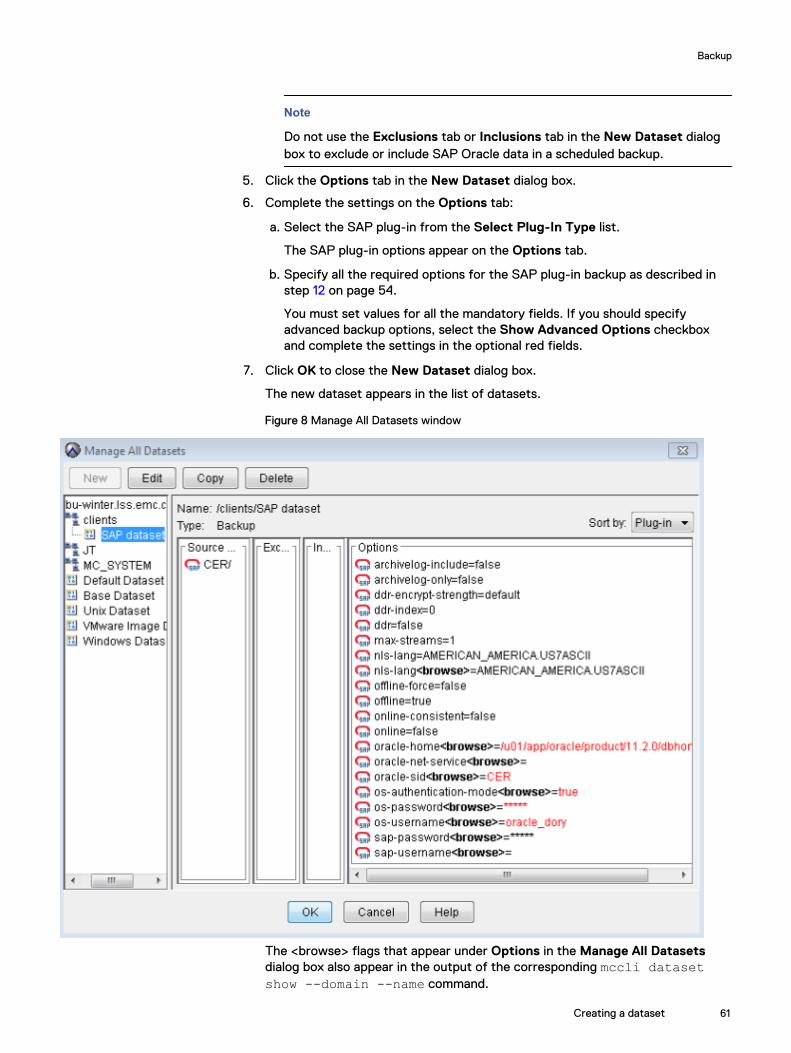
Note
Do not use the Exclusions tab or Inclusions tab in the New Dataset dialogbox to exclude or include SAP Oracle data in a scheduled backup.
5. Click the Options tab in the New Dataset dialog box.
6. Complete the settings on the Options tab:
a. Select the SAP plug-in from the Select Plug-In Type list.
The SAP plug-in options appear on the Options tab.
b. Specify all the required options for the SAP plug-in backup as described instep 12 on page 54.
You must set values for all the mandatory fields. If you should specifyadvanced backup options, select the Show Advanced Options checkboxand complete the settings in the optional red fields.
7. Click OK to close the New Dataset dialog box.
The new dataset appears in the list of datasets.
Figure 8 Manage All Datasets window
The <browse> flags that appear under Options in the Manage All Datasetsdialog box also appear in the output of the corresponding mccli datasetshow --domain --name command.
Backup
Creating a dataset 61

For example:
mccli dataset show --domain=/clients --name=sap_dataset1
0,23000,CLI command completed successfully.Attribute Value------------------------------- -----------------------------------------------------Name sap_dataset1ID 1362064453449Domain /clientsBuilt-in falseALLDATA falseNum Targets 1Linux SAP with Oracle Target CID/Linux SAP with Oracle Target ID 1030Num Includes 0Num Excludes 0Num Flags 23Linux SAP with Oracle Flag type=checkbox:name=archivelog-delete:value=falseLinux SAP with Oracle Flag type=checkbox:name=archivelog-include:value=trueLinux SAP with Oracle Flag type=integer:name=archivelog-no:value=0Linux SAP with Oracle Flag type=checkbox:name=archivelog-only:value=falseLinux SAP with Oracle Flag type=string:name=brtools-path:value=/usr/sap/CID/SYS/exe/runLinux SAP with Oracle Flag type=pulldown:name=ddr-index:value=0Linux SAP with Oracle Flag type=checkbox:name=debug:value=falseLinux SAP with Oracle Flag type=pulldown:name=max-streams:value=1Linux SAP with Oracle Flag type=string:name=nls-lang:value=AMERICAN_AMERICA.US7ASCIILinux SAP with Oracle Flag type=string:name<browse>=nls-lang:value=AMERICAN_AMERICA.US7ASCIILinux SAP with Oracle Flag type=checkbox:name=offline:value=falseLinux SAP with Oracle Flag type=checkbox:name=offline-force:value=falseLinux SAP with Oracle Flag type=checkbox:name=online:value=trueLinux SAP with Oracle Flag type=checkbox:name=online-consistent:value=falseLinux SAP with Oracle Flag type=string:name=oracle-home:value=/home/oracer11/app/oracer11/product/11.2.0/dbhome_1Linux SAP with Oracle Flag type=string:name<browse>=oracle-home:value=/home/oracer11/app/oracer11/product/11.2.0/dbhome_1Linux SAP with Oracle Flag type=string:name<browse>=oracle-net-service:value=CID.worldLinux SAP with Oracle Flag type=string:name=oracle-sid:value=CIDLinux SAP with Oracle Flag type=password:name=os-password:value=*****Linux SAP with Oracle Flag type=string:name=os-username:value=oracleLinux SAP with Oracle Flag type=string:name=sap-datahome:value=/mnt/oracle/CIDLinux SAP with Oracle Flag type=password:name<browse>=sap-password:value=*****Linux SAP with Oracle Flag type=string:name<browse>=sap-username:value=sysIs Link false
Creating a groupYou cannot edit schedules or retention policies from the New Group wizard.
The Avamar Administration Guide provides information about editing scheduleproperties and retention policies.
Procedure
1. In Avamar Administrator, click the Policy launcher link button.
The Policy window appears.
2. Click the Policy Management tab.
3. Click the Groups tab.
4. In the left pane of the Groups tab, select the Avamar domain to which thegroup should belong.
Backup
62 Avamar for SAP with Oracle 18.1 User Guide
5. Select Actions > Group > New > Backup Group.
The New Group wizard appears.
6. In the Name box, type a name for the new group.
The name can include alphanumeric characters (A-Z, a-z, 0-9) and the followingspecial characters: period (.), hyphen (-), underscore (_). Do not use Unicodecharacters or any of the following characters:
` ~ ! @ # $ % ^ & * ( ) = + [ ] { } | \ / ; : ’ ” < > , ?
7. Clear the Disabled checkbox to use this group to perform scheduled clientbackups.
Selecting the checkbox disables backups for the group.
8. From the Avamar encryption method list, select the encryption method fordata transfer between the client and the Avamar server during the groupbackups. This is the method that all clients in the group use unless the methodis overridden at the client level.
The encryption technology and bit strength for a client/server connectiondepend on several factors, including the client operating system and Avamarserver version. The Avamar Product Security Guide provides details.
9. Choose whether to use the assigned schedule for the group or override theassigned schedule:
l To use the assigned schedule, leave the Override Schedule checkbox clear.
l To override the schedule:
a. Select Override Schedule.
Selecting Override Schedule enables the Skip Next Backup and RunNext Backup Once options.
b. Choose whether to skip the next scheduled backup entirely or to performthe next scheduled backup one time only by selecting either Skip NextBackup or Run Next Backup Once.
10. Click Next.
The next New Group wizard screen appears with dataset information.
11. From the Select An Existing Dataset list, select the dataset that you createdin Creating a dataset on page 59, and then click Next.
The next New Group wizard screen appears with schedule information.
12. From the Select An Existing Schedule list, select a schedule for the group, andclick Next.
The next New Group wizard screen appears with retention policy information.
13. From the Select An Existing Retention Policy list, select a retention policy forthe group, and click Next.
NOTICE
Ensure that the retention policies are set according to the rules described in Complete backup protection on page 19.
The final New Group wizard screen appears with a tree of domains and clients.
Backup
Creating a group 63

14. Select the client from the client list.
15. Click Finish.
The New Group wizard closes and the new group appears in the Policywindow.
Enabling scheduled backupsScheduled backups occur only for enabled groups. Groups are disabled by defaultunless you select the Enabled checkbox on the first page of the New Group wizard. Ifyou did not enable the group when you created it, use the menu options in the Policywindow to enable backups.
Procedure
1. In Avamar Administrator, click the Policy launcher link button.
The Policy window appears.
2. Click the Policy Management tab.
3. Click the Groups tab.
4. Select the group that you created.
5. Enable the group by selecting Actions > Group > Disable Group.
Perform this step only if a check mark appears next to the Disable Group menuoption.
6. Click Yes to enable this group.
Monitoring backupsAvamar Administrator displays operational messages on the status of on-demand SAPplug-in backups. The CLI displays such operational messages on the output terminalwhen you run a backup with the brbackup or brarchive command from the CLI.
The Activity Monitor tab in Avamar Administrator displays status information for SAPplug-in operations that you start through Avamar Administrator or the CLI:
l Each backup through Avamar Administrator displays a single row on the screen,which includes both database components and parameter files in the backup.
l Each backup that you run with the brbackup or brarchive command displays aseparate row on the screen for each backint operation that is involved in thebackup. For example, one row is for the backup of data files, and a second row isfor the backup of parameter files.
Canceling backupsYou must perform the required procedure to cancel a running backup either in AvamarAdministrator or on the SAP client host.
Canceling backups in Avamar AdministratorProcedure
1. In Avamar Administrator, select Activity > Activity Monitor.
2. Select the running backup.
Backup
64 Avamar for SAP with Oracle 18.1 User Guide

3. Select Action > Cancel Activity.
Canceling backups on the SAP client hostPerform one of the following procedures to cancel a running backup on the SAP plug-in host:
l (Backup from CLI only) Press either Ctrl-C or the equivalent “attention” keycombination in the command shell or window in which the backup runs.
l (Backup from CLI or backup with Avamar Administrator) In a new command shell,type one of the following commands:
brbackup -g -stopor
brarchive -g -stop
Note
The -g option is supported only in BR*Tools 7.10 and later. The SAP Note 1129197provides details.
Reviewing backupsThe SAP plug-in backs up files, such as data files, archive redo logs, Oracle controlfiles, BR*Tools catalogs, and other files. The resultant backup file names contain thefull path of the file.
Directory level symbolic links are backed up by using their symbolic name, not thedestination name. For example, data files are created in the directory that isnamed /tmp/sapdata5, which is a symbolic link with /tmp/sapdata5 linked to /oracle_data/SCE/sapdata5. The files are backed up under tmp/sapdata5/*datafiles.
At the end of each backup, the SAP plug-in groups all the files backed up by aparticular backint process.
List the backups for a clientTo list all of the backups for a client, type the avtar --backups command. You canuse the same parameter file (flagfile) that would be used for a backup or restore fromthe CLI, as long as those parameters that are not applicable to avtar are commentedout.
For example:
avtar --backups --flagfile=parameter_file
Date Time Seq Label Size Plugin Working directory Targets---------- -------- --- --------------- ------- ------- ----------------- --------2013-03-18 15:30:35 188 behrsbji233ab72b 118K SAP /var/avamar/clientlogs2013-03-18 15:30:04 186 behrsbji233a00dd 981771K SAP /var/avamar/clientlogs2013-03-18 15:27:04 184 behrsbar23377e2c 118K SAP /var/avamar/clientlogs2013-03-18 15:26:33 182 behrsbar2336a709 981771K SAP /var/avamar/clientlogs
where the columns are as follows:
l Date—Date of the backup.
Backup
Canceling backups on the SAP client host 65
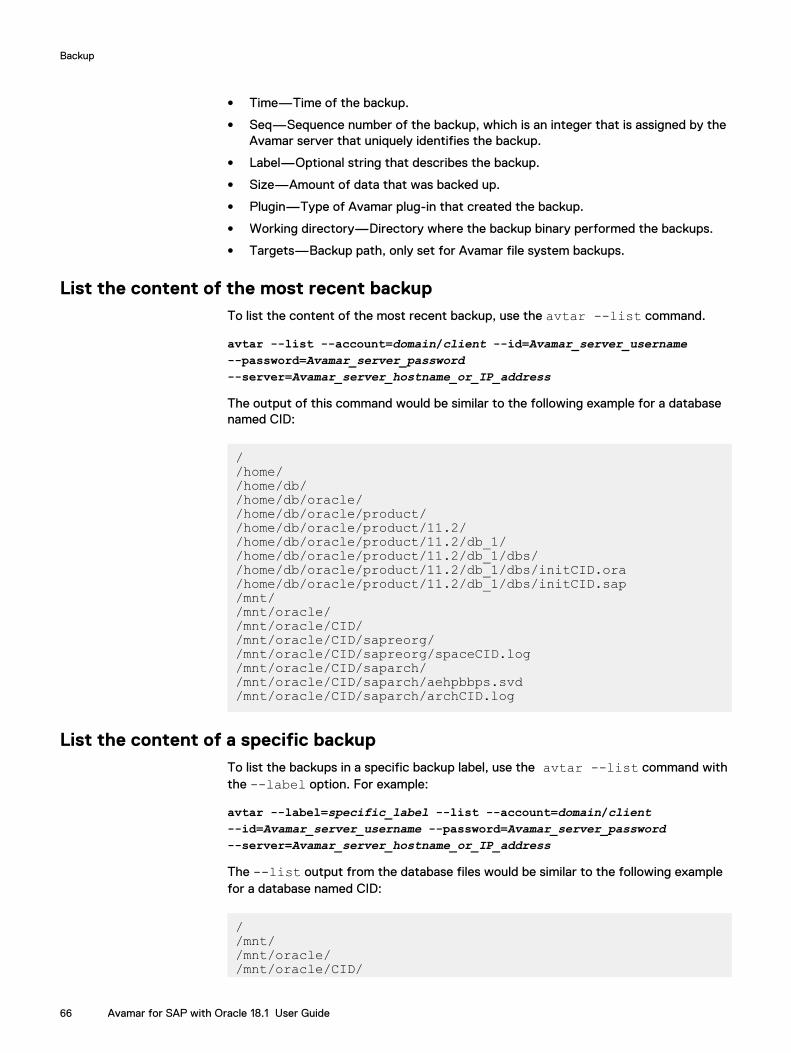
l Time—Time of the backup.
l Seq—Sequence number of the backup, which is an integer that is assigned by theAvamar server that uniquely identifies the backup.
l Label—Optional string that describes the backup.
l Size—Amount of data that was backed up.
l Plugin—Type of Avamar plug-in that created the backup.
l Working directory—Directory where the backup binary performed the backups.
l Targets—Backup path, only set for Avamar file system backups.
List the content of the most recent backupTo list the content of the most recent backup, use the avtar --list command.
avtar --list --account=domain/client --id=Avamar_server_username--password=Avamar_server_password--server=Avamar_server_hostname_or_IP_address
The output of this command would be similar to the following example for a databasenamed CID:
//home//home/db//home/db/oracle//home/db/oracle/product//home/db/oracle/product/11.2//home/db/oracle/product/11.2/db_1//home/db/oracle/product/11.2/db_1/dbs//home/db/oracle/product/11.2/db_1/dbs/initCID.ora/home/db/oracle/product/11.2/db_1/dbs/initCID.sap/mnt//mnt/oracle//mnt/oracle/CID//mnt/oracle/CID/sapreorg//mnt/oracle/CID/sapreorg/spaceCID.log/mnt/oracle/CID/saparch//mnt/oracle/CID/saparch/aehpbbps.svd/mnt/oracle/CID/saparch/archCID.log
List the content of a specific backupTo list the backups in a specific backup label, use the avtar --list command withthe --label option. For example:
avtar --label=specific_label --list --account=domain/client--id=Avamar_server_username --password=Avamar_server_password--server=Avamar_server_hostname_or_IP_address
The --list output from the database files would be similar to the following examplefor a database named CID:
//mnt//mnt/oracle//mnt/oracle/CID/
Backup
66 Avamar for SAP with Oracle 18.1 User Guide

/mnt/oracle/CID/sapdata2//mnt/oracle/CID/sapdata2/cer_1//mnt/oracle/CID/sapdata2/cer_1/cer.data1/mnt/oracle/CID/sapdata3//mnt/oracle/CID/sapdata3/cerusr_1//mnt/oracle/CID/sapdata3/cerusr_1/cerusr.data1/mnt/oracle/CID/sapdata1//mnt/oracle/CID/sapdata1/temp_1//mnt/oracle/CID/sapdata1/temp_1/temp.data1/mnt/oracle/CID/sapdata1/undo_1//mnt/oracle/CID/sapdata1/undo_1/undo.data1/mnt/oracle/CID/sapdata1/system_1//mnt/oracle/CID/sapdata1/system_1/sysaux.dbf/mnt/oracle/CID/sapdata1/system_1/system.data1/mnt/oracle/CID/sapdata1/cntrl//mnt/oracle/CID/sapdata1/cntrl/ctrlCID.ctl/mnt/oracle/CID/dwdata//mnt/oracle/CID/dwdata/data1.dat/mnt/oracle/CID/dwdata/data2.dat/mnt/oracle/CID/dwdata/data3.dat/mnt/oracle/CID/dwdata/data4.dat/mnt/oracle/CID/origlogA//mnt/oracle/CID/origlogA/log1_m1.dbf/mnt/oracle/CID/origlogA/log3_m1.dbf/mnt/oracle/CID/origlogB//mnt/oracle/CID/origlogB/log2_m1.dbf/mnt/oracle/CID/origlogB/log4_m1.dbf
List the history of a backupTo list the history of a backup for a particular file, use the avtar --historycommand. The avtar documentation provides more details about the --historyoption. For example:
avtar --flagfile=parameter_file --history/bigspace/oracle/redhat/64bit/product/11.2.0.1.0/db_1/dbs/initSAP.ora
avtar Info <5551>: Command Line: /usr/local/avamar/bin/avtar.bin--vardir=/usr/local/avamar/var --bindir=/usr/local/avamar/bin--sysdir=/usr/local/avamar/etc--flagfile=/bigspace/oracle/redhat/64bit/product/11.2.0.1.0/db_1/dbs/initSAP.utl --sysdir=/usr/local/avamar/etc--vardir=/usr/local/avamar/var --bindir=/usr/local/avamar/bin--ddr=true --ddr-index=1 --max-streams=2--server=avamar-server.lss.emc.com--account=/clients/avamar.lss.emc.com --id=User1--password=**************** --history/bigspace/oracle/redhat/64bit/product/11.2.0.1.0/db_1/dbs/initSAP.oraavtar Info <7977>: Starting at 2012-02-21 17:41:59 EST [avtar Feb 82012 21:34:29 6.1.100-280 Linux-x86_64]avtar Info <8475>: ADE for multicore architectures enabled (AvamarDeduplication Engine v2.0.0)avtar Info <5552>: Connecting to Avamar Server(avamar-server.lss.emc.com)avtar Info <5554>: Connecting to one node in each datacenteravtar Info <5583>: Login User: "User1", Domain: "default", Account:"/clients/avamar.lss.emc.com"avtar Info <5580>: Logging in on connection 0 (server 0)avtar Info <5582>: Avamar Server login successfulavtar Info <5550>: Successfully logged into Avamar Server
Backup
List the history of a backup 67

[6.1.0-276]avtar Info <5922>: History of /bigspace/oracle/redhat/64bit/product/11.2.0.1.0/db_1/dbs/initSAP.ora for /clients/avamar.lss.emc.com as of 2012-02-2117:42:00 ESTSeq Label Date Time Size Plugin Create--- ---------------- ---------- -------- ------ ------ ---------635 behydpyvd2c76e1e 2012-02-21 17:35:34 1695 1030 1329863921629 aehyagmzcf3e6c79 2012-02-21 01:09:30 1695 1030 1329804590615 behyaftgcf3d4d27 2012-02-21 01:02:20 1695 1030 1329804517599 aehxvirdca18e1a8 2012-02-20 01:10:07 1695 1030 1329718245585 behxvhytca167366 2012-02-20 01:03:13 1695 1030 1329718093569 aehxqkqfc4f03eb3 2012-02-19 01:06:48 1695 1030 1329631695555 behxqkcvc4edcbbd 2012-02-19 01:01:28 1695 1030 1329631544539 aehxlncdbfcc4d22 2012-02-18 01:09:51 1695 1030 1329545455525 behxlmimbfca3f15 2012-02-18 01:03:39 1695 1030 1329545322509 aehxgpmkbaa73835 2012-02-17 01:11:59 1695 1030 1329459138495 behxgonbbaa627b0 2012-02-17 01:02:58 1695 1030 1329459069479 aehxbrlkb57f6b32 2012-02-16 01:09:35 1695 1030 1329372645465 behxbqrmb57d46e9 2012-02-16 01:03:00 1695 1030 1329372510
Backup
68 Avamar for SAP with Oracle 18.1 User Guide

CHAPTER 4
Restore and Recovery
This chapter includes the following topics:
l Performing restores from the CLI...................................................................... 70l Monitoring restores............................................................................................72l Canceling restores............................................................................................. 72l Disaster recovery............................................................................................... 72
Restore and Recovery 69

Performing restores from the CLIYou can configure and perform SAP Oracle data restores with the Avamar Plug-in forSAP with Oracle (SAP plug-in). You can use the SAP plug-in to redirect a restore to adifferent host, recover a database to a consistent state, and perform disasterrecovery.
The SAP plug-in enables you to perform restore and recovery operations from thecommand line interface (CLI) by using the BR*Tools interfaces. For example, thebrtools, brrestore, and brrecover commands, on the SAP Oracle host(destination host) to which the data is restored. The SAP documentation providesdetails about the BR*Tools interfaces.
The SAP plug-in can restore only data that was backed up with the SAP plug-in.
Note
The SAP plug-in does not support a restore with the Avamar Administrator GUI.
You can use the following steps to recover an entire database or a subset of databaseobjects, such as one or more tablespaces or data files.
Procedure
1. (Optional) To restore the data to a different SAP Oracle host (destination host)than the one that was backed up, follow the disaster recovery steps to re-create the environment and restore the configuration files and BR*Tools logs.
2. Log in to the SAP Oracle host (destination host) as the SAP Oracle userconfigured for BR*Tools operations. The SAP BR*Tools documentationprovides details.
3. Ensure that the Oracle and SAP BR*Tools environment is configured properlyfor SAP plug-in restores.
Ensure that the BR*Tools initialization file, initDBSID.sap, is configured forutil_file as the backup device type, or use the proper brrestore orbrrecover options to set this parameter, for example, brrestore -dutil_file. The SAP BR*Tools documentation provides details.
4. Ensure that the Avamar client and SAP plug-in are installed and registered.
5. If you installed the SAP plug-in in an alternate directory, then ensure that theLD_LIBRARY_PATH or LIBPATH environment variable includes the librarylocation. For example, if you use a csh shell on UNIX, type the appropriatecommand to set the variable on the particular system:
l On AIX:setenv LIBPATH alternate_path/usr/local/avamar/lib64:$LIBPATH
l On HP-UX or Solaris x86_64:setenv LD_LIBRARY_PATH alternate_path/lib:$LD_LIBRARY_PATH
l On Solaris SPARC:setenv LD_LIBRARY_PATH alternate_path/lib64:$LD_LIBRARY_PATH
6. Configure the SAP plug-in parameter file (flagfile). The file must contain atleast the following mandatory parameters: --account, --bindir, --id, --password, --server, --sysdir, --vardir. SAP plug-in parameters onpage 91 provides details about the parameters.
Restore and Recovery
70 Avamar for SAP with Oracle 18.1 User Guide
7. Ensure that the BR*Tools initialization file, initDBSID.sap, specifies the SAPplug-in parameter file, util_par_file = parameter_file_location, or use theproper brrestore or brrecover options to set this parameter, for example,brrestore -r parameter_file_location.
8. On a Windows system that has User Account Control (UAC), ensure that theSAP plug-in has administrator privileges as described in Enabling administratorprivileges for the SAP plug-in on Windows on page 46.
9. (Optional) Before performing a restore operation, ensure that the backup to berestored exists by using a verification function. For example, to verify the latestbackup, type the following command:
brrestore -verify [only_conf]To verify a specific backup, type the following command:
brrestore -verify [only_conf] -b BR*Tools_catalog_file
10. Perform the restore and recovery by using the BR*Tools interfaces. Use thebrtools and brrecover commands in the interactive mode because thesefeatures guide you through the restore and recovery process and prepare thedatabase objects for restore.
A recovery (brrecover) operation automatically shuts down the database andrestarts it after the recovery operation completes.
If you run the brrestore command directly, then perform the followingactions:
l Shut down the Oracle database instance when restoring the whole database.
l Take the database object offline when restoring a specific tablespace or datafile.
l Use the Oracle SQLPlus interface to apply redo logs to recover thedatabase. The SAP BR*Tools documentation provides details.
BR*Tools restore and recovery commands on page 87 provide details aboutthe BR*Tools restore and recovery interfaces.
Note
When the brrestore program is used for a restore operation, whether invokeddirectly from the command line or indirectly from the brrecover command orthe brtools interface, it deletes all the original files to be restored before itinvokes backint to restore the backed-up files. If brrestore or backintfails, then the original files are lost. To prevent these issues, perform one of thefollowing actions:
l Restore the files to a different location that does not include any files byusing the -m option and specifying the restore destination, for example:brrestore -m tablespace_name=restore_directoryor
l Use the brrestore -NFD option to prevent deletion of the original files bybrrestore.
Restore and Recovery
Performing restores from the CLI 71

Monitoring restoresThe CLI displays operational messages on the output terminal when you run a restore.
The Activity Monitor tab in Avamar Administrator displays status information for SAPplug-in restores. Each restore that you run from the CLI displays a separate row onthe screen for each backint operation that is involved in the restore.
Note
If Avamar server release is earlier than 7.0, then the Activity Monitor displays therestore with On-Demand Backup in the Type column, instead of Restore.
Canceling restores
To cancel a running restore operation, use one of the following methods:
l Press Ctrl-C in the command shell or window where the restore operation isrunning.
l Type the following command in a different command shell or window on the samehost:
brrestore -g -stop
Note
The -g option is supported only in BR*Tools 7.10 and later. The SAP Note 1129197provides details.
Disaster recoveryFor a comprehensive disaster recovery, it is necessary to fully reconstruct thecomputing environment and all the Oracle and SAP BR*Tools configuration files thatare associated with maintaining data.
Note
Complete backup protection on page 19 describes the impacts of incompleteprotection.
Protecting the computing environmentMaintain accurate and complete records of the network and system configurations,and keep all the original software media in a safe location. Include the followingfeatures:
l Operating system media and patches
l Avamar media
l File system configuration
l IP addresses and hostnames
l User credentials required to restore from the Avamar server
Restore and Recovery
72 Avamar for SAP with Oracle 18.1 User Guide

Use the Avamar client to back up Oracle configuration files, for example,listener.ora, tnsnames.ora, and the password file, which are not backed up bySAP plug-in.
Recovering from a disasterTo recover from a disaster, first restore lost Oracle and SAP configuration files andlost BR*Tools backup log files. The following procedures are concise versions of thedisaster recovery steps that are described in the SAP documentation, which ismodified for the specific requirements of the SAP plug-in environment.
Restoring the required Oracle and SAP BR*Tools files
You can restore the required Oracle and SAP BR*Tools files on the original host or anew host, either of which is called the destination host.
The SAP documentation provides more details about disaster recovery.
Procedure
1. Ensure that the original or new destination host is a client of the Avamar serverthat you want to restore from.
2. If the entire SAP Oracle system has been lost:
a. Reinstall all the required software components that are described in Architecture on page 16.
b. Reconfigure the SAP data layout, such as the SAPDATA_HOME directory andits subdirectories, to the same state as before the disaster.
3. Configure the BR*Tools profile file, initDBSID-dr.sap, and parameter file,initDBSID-dr.utl, for recovery on the destination host. The parameter filemust contain all the parameters that are required for the restore operation. SAPplug-in parameter file on page 90 provides details.
4. On the destination host, start BR*Tools or BrGui and follow the onscreeninstructions to perform a disaster recovery of profiles and logs. Example: UsingBR*Tools for disaster recovery of profiles and logs on page 73 describes howto use BR*Tools for the disaster recovery.
Example: Using BR*Tools for disaster recovery of profiles and logs
You can recover profiles and logs by using the brtools command.
Procedure
1. In the brtools menu, select Restore and Recovery and then Disasterrecovery.
2. On the page BRRECOVER options for disaster recovery, set the location ofthe BR*Tools profile file and the parameter file to be used by brrecover.
Note
If you are restoring the original BR*Tools profile or parameter file, ensure thatthe files used for the disaster recovery have different names or are stored in adifferent location than the original files to be restored.
3. On the page Device type for restoring profiles and log files from BRBACKUP| BRARCHIVE backup, select Backup utility.
Restore and Recovery
Recovering from a disaster 73

4. On the page Parameters for restoring profiles and log files from BRBACKUPbackup utility, specify the files to be restored.
5. On the page Restore of profiles and log files from BRBACKUP backup,select the components that you want to restore.
Recovering a SAP Oracle database after disasterAfter the correct SAP BR*Tools profiles and logs are restored on the SAP Oraclehost, follow the regular BR*Tools recovery procedure to perform database point-in-time recovery or database reset.
Performing restores from the CLI on page 70 provides the procedure to recover a SAPOracle database.
The SAP documentation provides more details about database recovery.
Restore and Recovery
74 Avamar for SAP with Oracle 18.1 User Guide

APPENDIX A
Plug-in Options
This appendix includes the following topics:
l How to set plug-in options................................................................................. 76l Plug-in options in Avamar Administrator............................................................ 76
Plug-in Options 75

How to set plug-in optionsYou can specify plug-in options to control specific actions of a SAP on-demandbackup or scheduled backup with Avamar Administrator.
Use either of the following methods to specify the plug-in options in AvamarAdministrator:
l Set the options with the GUI controls (text boxes, checkboxes, radio buttons, andso on) in different dialog boxes.
l Click More in the Backup Command Line Options dialog box. Then type[avsap]option_name in the Enter Attribute field, and type the option value inthe Enter Attribute Value field.
Use the More button to set only additional options that you cannot specify withthe GUI controls. For example, if you specify the maximum streams value in theBackup Command Line Options dialog box, do not also click More and type[avsap]max-streams in the Enter Attribute field and do not type the maximumstreams value in the Enter Attribute Value field.
Additional plug-in options on page 80 describes the additional plug-in optionsthat the SAP plug-in supports.
NOTICE
The Avamar software does not validate the option information you type in theEnter Attribute and Enter Attribute Value fields. In addition, the values in thesefields override settings that you specify with the GUI controls for the options.
Plug-in options in Avamar AdministratorYou can set plug-in options in Avamar Administrator for browse and backup operationswith the SAP plug-in.
Browse options in Avamar AdministratorThe following table describes the plug-in options that you can set in the BrowseCommand Line Options dialog box in Avamar Administrator, as required to preparefor SAP plug-in backups.
Table 3 SAP browse options in Avamar Administrator
Browse option How to set the option value
Database username Mandatory only if database authentication is selected. Type the Oracle database username.The user must have SYSDBA privileges.
Database user password Mandatory only if database authentication is selected. Type the password of the Oracledatabase username.
Operating system username Mandatory only if operating system authentication is selected. Type the operating systemlogin name of the SAP user who performs the backup.
Operating system userpassword
Mandatory only if operating system authentication is selected on Windows. Type theoperating system user password of the SAP user who performs the backup.
Plug-in Options
76 Avamar for SAP with Oracle 18.1 User Guide

Table 3 SAP browse options in Avamar Administrator (continued)
Browse option How to set the option value
Oracle home(ORACLE_HOME)
Type the full pathname of the Oracle installation directory that contains the database to bebacked up.
Note
Do not include a final slash, /, at the end of the ORACLE_HOME pathname.
Oracle instance SID(ORACLE_SID)
Mandatory only if operating system authentication is selected. Type the system identifier(SID) of the Oracle database to be backed up.
Oracle locale (NLS_LANG) Type (in Oracle format) the language locale to use for the database selection. The defaultvalue is AMERICAN_AMERICA.US7ASCII. The value for the Oracle globalization parameterhas the following format:
NLS_LANG=language_territory.character_set
Oracle Net Service name Mandatory only if database authentication is selected. Type the Oracle Net service name ofthe database to be backed up.
Use Operating SystemAuthentication
(Optional) Select to use Oracle operating system authentication for the database connectionduring the browse operation.
Use Oracle DatabaseAuthentication
(Optional) Select to use Oracle database authentication for the database connection duringthe browse operation.
Backup options in Avamar AdministratorThe following table describes the plug-in options that you can set in either the BackupCommand Line Options dialog box or the New Dataset dialog box in AvamarAdministrator for the SAP plug-in backups.
Note
You can view an option marked “(Advanced option)” in the following table only byselecting the Show Advanced Options checkbox in the Backup Command LineOptions dialog box or the Options tab of the New Dataset dialog box.
Table 4 SAP backup options in Avamar Administrator
Backup option How to set the option value
Additional brarchive options (Optional) Specify any additional brarchive command line options to use with the backup of
archive redo logs, for example, -verify. You cannot specify the following options: -number,
-save_delete, -profile, -user. If you select Delete logs after backupcompletes, then you cannot specify the -delete_saved option.
Additional brbackup options (Optional) Specify any additional brbackup command line options to use with the backup
that cannot be set through other fields in this dialog box, for example, -verify use_dbv.
You cannot specify the following options because these options are set based on your fieldselections: -device, -mode, -profile, -type, -user, -archive.
Back up only archive redologs
(Optional) Select this option to back up only the archive redo logs for the instance without
backing up any database object. The database selection on the Backup tab is ignored. Thisoption corresponds to the SAP brarchive command.
Plug-in Options
Backup options in Avamar Administrator 77

Table 4 SAP backup options in Avamar Administrator (continued)
Backup option How to set the option value
BR*Tools initialization file(initDBSID.sap)
(Optional) Type the full pathname of the BR*Tools initialization profile if the profile is not inthe SAP default location ($ORACLE_HOME/dbs or %ORACLE_HOME%\database) or if the
profile does not have the default name format (initDBSID.sap).
BR*Tools location Type the full pathname of the directory that contains the BR*Tools executable files.
Database file location(SAPDATA_HOME)
Type the full pathname of the directory that contains the SAP database files.
Database username (Optional) If database authentication is used for the database connection, type the usernameof the Oracle database user (with SYSDBA privileges) configured to use BR*Tools.
Database user password (Optional) Type the password for the database username.
Delete logs after backupcompletes
(Optional) Select this option to delete the logs after the logs are backed up. This optioncorresponds to the brarchive -sd command.
Enable debugging messages (Optional) Select this option for debugging purposes. This option enables logging for theavtar, avsap, and backint processes. Use this option with caution because the messages
can create very large log files.
Encryption method to DataDomain system
(Optional) If you store the backup on a Data Domain system, select the encryption method fordata transfer between the client and the Data Domain system during the backup.
Include archive logs (Optional) Select this option to include archive redo logs after the database backup. Thisoption corresponds to the SAP brbackup command, followed by a separate brarchivecommand. This setting is ignored if you select Back up only archive redo logs.
Maximum number of streams Select the maximum number of simultaneous avtar streams to use per backup operation.
The default value is 1, and the recommended maximum value is 10.
Number of logs to back up (Optional) Type the number of logs to back up. This option corresponds to the brarchive -n command. If you set the value to 0, then the default BR*Tools value is used.
Offline Select this option to specify that the database is shut down for the backup, provided the SAPsystem has also been shut down. Otherwise, the database is not shut down and the backupterminates with an error message. This option corresponds to the brbackup -t offline -d util_file command.
Offline force - Shut down thedatabase, even if there areSAP users connected
Select this option to specify that the database is shut down for the backup even if there areSAP users connected to the database. This option corresponds to the brbackup -toffline_force -d util_file command.
Online Select this option to specify that the database remains open during the backup. This optioncorresponds to the brbackup -t online -d util_file_online command. This setting
is ignored during archive log backups.
Online consistent - Archivethe logs generated during thebackup, then back up theselogs
Select this option to specify that the logs generated during the backup are archived and thenbacked up at the end of the backup. This option corresponds to the brbackup -tonline_cons -d util_file_online command.
Operating system username Type the operating system login name of the SAP user who performs the backup.
Plug-in Options
78 Avamar for SAP with Oracle 18.1 User Guide

Table 4 SAP backup options in Avamar Administrator (continued)
Backup option How to set the option value
Note
To back up on Windows with the domain user, use the user principal name (UPN) format, forexample, username@DNS_domain_name. The Microsoft documentation provides more detailsabout using the UPN format.
Operating system userpassword
Mandatory on Windows only. Type the operating system user password of the SAP user whoperforms the backup.
Oracle home(ORACLE_HOME)
Type the full pathname of the directory where the Oracle software is installed.
Note
Do not include a final slash, /, at the end of the ORACLE_HOME pathname.
Oracle instance SID(ORACLE_SID)
Type the system identifier (SID) of the Oracle database instance to be backed up.
Oracle locale (NLS_LANG) Type (in Oracle format) the language locale to use for the database selection. The defaultvalue is AMERICAN_AMERICA.US7ASCII.
SAPARCH (Optional) Type the full directory pathname of the BRARCHIVE log files if the files are notlocated in the SAP default location, $SAPDATA_HOME/saparch or %SAPDATA_HOME%\saparch.
SAPBACKUP (Optional) Type the full directory pathname of the BRBACKUP, BRRESTORE, andBRRECOVER log files if the files are not located in the SAP default location,$SAPDATA_HOME/sapbackup or %SAPDATA_HOME%\sapbackup.
SAPCHECK (Optional) Type the full directory pathname of the BRCONNECT log files if the files are notlocated in the SAP default location, $SAPDATA_HOME/sapcheck or %SAPDATA_HOME%\sapcheck.
SAPREORG (Optional) Type the full directory pathname of the BRSPACE log files if the files are notlocated in the SAP default location, $SAPDATA_HOME/spareorg or %SAPDATA_HOME%\spareorg.
SAPTRACE (Optional) Type the full directory pathname of the SAPTRACE log files if the files are notlocated in the SAP default location, $SAPDATA_HOME/saptrace or %SAPDATA_HOME%\saptrace.
Store backup on Data Domainsystem
Select this option if you want to store the backup data on an attached Data Domain systemthat you specify. The metadata for the backup is stored on the Avamar server.
Note
If you specify a Data Domain system as the backup destination, then all the data is backed upto the Data Domain system. You cannot back up part of the data to a Data Domain system andanother part to an Avamar server.
Plug-in Options
Backup options in Avamar Administrator 79

Additional plug-in optionsUse the More button in the Backup Command Line Options dialog box in AvamarAdministrator to set the additional plug-in options that you cannot specify with theGUI controls.
Additional options for SAP plug-in backupsYou can set the following additional plug-in options for SAP plug-in backups:
l brtools-secure-passwordl brtools-secure-rolel SAPSWITCHThe following sections describe the brtools-secure-password and brtools-secure-role options. Directory for the .switch files on page 100 describes theSAPSWITCH option.
NOTICE
When you set one of these additional plug-in options by using the More button in theBackup Command Line Options dialog box, the Avamar software does not validatethe option information that you type in the Enter Attribute and Enter AttributeValue fields.
The SAP plug-in also supports running the BR*Tools binaries brbackup andbrarchive with the -u // or -u //OS_group_name option in the CLI. The SAPNote 1764043 provides details about how to configure and use the storage of theBR*Tools user or password in secure storage.
Enabling a secure storage passwordSAP Kernel 7.20 Patch Level 100 introduced a new method for the secure storage ofthe SAP database user or password. With BR*Tools Kernel 7.20 Patch 27 or later, youcan avoid using the OPS$ database users by storing the BR*Tools connection data forthe database in a BR*Tools-specific Secure Storage in File System (SSFS). The SAPNote 1764043 provides details about how to configure the storage of the BR*Toolsuser or password in secure storage.
You can specify the plug-in option setting, brtools-secure-password=true, toenable the secure storage password for SAP plug-in backups. This setting causes theBR*Tools binaries brbackup and brarchive to run with the -u // option. Thedefault value of the plug-in option brtools-secure-password is false.
Note
If you specify both plug-in options, brtools-secure-password and brtools-secure-role, then the brtools-secure-password option setting takesprecedence.
To enable the secure storage password with the plug-in option, complete the followingsteps in the Backup Command Line Options dialog box:
1. Click More.
2. Type [avsap]brtools-secure-password in the Enter Attribute field.
3. Type true in the Enter Attribute Value field.
4. Click +.
Plug-in Options
80 Avamar for SAP with Oracle 18.1 User Guide

Enabling role-based secure storageWith BR*Tools Kernel 7.20 Patch 30 or later, you can use role-based storage of theBR*Tools user and password in the secure storage, which assigns the DBA and OPERroles to OS users without the OS users having to belong to the Oracle OS groups dbaand oper.
OS users who are configured for role-based storage must run the DBA action onlywith the BR*Tools. Typically, OS users can call all the BR*Tools programs with theDBA role. OS users with the OPER role can call only brarchive, brbackup, andbrconnect. The SAP Note 1764043 provides details about how to configure the role-based storage of the BR*Tools user and password in secure storage.
You can specify the plug-in option setting, brtools-secure-role=OS_group_name, to enable role-based secure storage for SAP plug-in backups,where OS_group_name is the OS group that is configured for secure storage. Thissetting causes the BR*Tools binaries brbackup and brarchive to run with the -u //OS_group_name option.
Note
If you specify both options, brtools-secure-password and brtools-secure-role, then the brtools-secure-password option setting takes precedence.
To enable role-based secure storage with the plug-in option, complete the followingsteps in the Backup Command Line Options dialog box:
1. Click More.
2. Type [avsap]brtools-secure-role in the Enter Attribute field.
3. Type OS_group_name in the Enter Attribute Value field.
4. Click +.
Plug-in Options
Additional plug-in options 81

Plug-in Options
82 Avamar for SAP with Oracle 18.1 User Guide

APPENDIX B
Command Line Interface
This appendix includes the following topics:
l Performing on-demand backups from the CLI....................................................84l Examples of BR*Tools command syntax............................................................85l SAP plug-in parameter file................................................................................. 90
Command Line Interface 83

Performing on-demand backups from the CLIThe SAP plug-in enables you to perform backups from the command line interface(CLI) by using the SAP BR*Tools commands, brbackup, and brarchive, on theSAP plug-in host.
Procedure
1. Log in to the Avamar client as the operating system user configured forBR*Tools operations. The SAP BR*Tools documentation provides details.
2. Ensure that the SAP environment specifies the correct settings forORACLE_HOME and ORACLE_SID. The SAP BR*Tools documentationprovides details.
Note
Ensure that the ORACLE_HOME setting does not include a final slash, /.
3. If you installed the SAP plug-in in an alternate directory, then ensure that theLD_LIBRARY_PATH or LIBPATH environment variable includes the librarylocation. For example, if you use a csh shell on UNIX, type the appropriatecommand to set the variable on the particular system:
l On AIX:setenv LIBPATH alternate_path/usr/local/avamar/lib64:$LIBPATH
l On HP-UX or Solaris x86_64:setenv LD_LIBRARY_PATH alternate_path/lib:$LD_LIBRARY_PATH
l On Solaris SPARC:setenv LD_LIBRARY_PATH alternate_path/lib64:$LD_LIBRARY_PATH
4. Change to the directory that contains the BR*Tools binaries, brbackup, andbrarchive.
5. Create a SAP plug-in parameter file with all the required parameters for thebackup. SAP plug-in parameter file on page 90 provides examples and detailsabout configuring the file.
6. If a Data Domain system is used for the backup, enable the following fields inthe parameter file:
--ddr=true--ddr-index=index_number
where index_number is the identification number of the Data Domain system tobe used for the backup. Contact the Avamar administrator to determine therequired index number.
7. On a Windows system that has User Account Control (UAC), ensure that theSAP plug-in has administrator privileges as described in Enabling administratorprivileges for the SAP plug-in on Windows on page 46.
8. If you run concurrent online backups of two or more databases on the sameclient, set the SAPSWITCH environment variable to a separate non-defaultdirectory for each backup. For example, if you use a csh shell on UNIX or Linux,you can type the following command to set the variable:
setenv SAPSWITCH .switch_file_directory_pathname
Command Line Interface
84 Avamar for SAP with Oracle 18.1 User Guide

The separate settings ensure that the .switch file directory is different foreach concurrent backup. Directory for the .switch files on page 100 providesdetails.
9. Type the brbackup command with appropriate parameters as shown in thefollowing examples:
Note
The brbackup or barchive command line option takes precedence over acorresponding parameter set in the BR*Tools initDBSID.sap file.
l To back up the whole database, run the appropriate command:
n To perform an offline backup, type the following command:
brbackup -r parameter_file -d util_file -t offlineor
brbackup -m all -r parameter_filen To perform an online backup, type the following command:
brbackup -r parameter_file -d util_file_online -t onlineor
brbackup -m all -r parameter_file -d util_file_online -tonline
l To back up one or more tablespaces, run the appropriate command:
n To perform an offline backup, type the following command:
brbackup -m tablespace -r parameter_filen To perform an online backup, type the following command:
brbackup -m tablespace -r parameter_file -t onlinel To perform a log backup, run the brarchive or brbackup -a command.
You can back up archive logs either in an independent backup with thebrarchive command or as part of a database or tablespace backup withthe brbackup -a command. An archive log backup backs up the archivelogs, SAP profile, and backup catalogs.
For example, to back up a tablespace, type one of the following commands:
brarchiveor
brbackup -r parameter_file -aBR*Tools backup commands on page 86 provides more details.
Examples of BR*Tools command syntaxThis section provides concise versions of the BR*Tools options described in the SAPBR*Tools documentation, modified for the specific requirements of the SAP plug-inenvironment.
You can run the BR*Tools commands, such as brbackup, brarchive, brrestore,and brrecover, from the CLI to initiate backups and restores with the SAP plug-in.
Command Line Interface
Examples of BR*Tools command syntax 85

BR*Tools backup commandsYou can run the brbackup and brarchive commands from the CLI to initiatebackups with the SAP plug-in. Examples of the syntax and options for thesecommands are provided in the following sections.
Synopsis of backup commands
brbackup [-c force] -d {util_file | util_file_online}[-m {all | all_data | full | tablespace_list | file_ID |file_ID1_range | file_list}] [-p profile] [-r parameter_file] [-t{online | online_cons | offline | offline_force}] [-u username/password] [-w [use_dbv | only_conf]]
brarchive [-c force] -d util_file [-f [number | stop | suspend |resume]] [-p profile] [-r parameter_file] [-u username/password]
Backup command optionsOptions that are enclosed in brackets ([ ]) are optional. Options that are enclosed inbraces ({ }) must use at least one of the enclosed options. Variables are in italics.Keywords are in bold text.
The following table lists example options for these commands. The SAPdocumentation provides complete details about these commands.
Note
The command line options override the corresponding parameters set in the SAPparameter file initDBSID.sap.
Table 5 Options for brbackup and brarchive commands
Option Description
-c force Suppresses most of the confirmation messages that interrupt the backup orarchive operation.
-d {util_file |util_file_online}
Specifies that the SAP plug-in with backint is used for the backup or archive
operation.
-f [number] Instructs brarchive to wait for the next offline redo log file that is written by
Oracle and then send it to backint for backup. If number is specified,
brarchive waits until the specified number of files have accumulated in the
archiving directory.
Note
A backup with Avamar Administrator or any other backup from the CLI shouldnot perform an archive log backup when this option is used.
-m database_objects_to_back_up Specifies what database objects to back up, for example, a whole database,selected tablespaces or data files. This option is used by brbackup.
-p profile Specifies an initialization BR*Tools parameter file if the file does not have thedefault name or is not stored in the default location.
Command Line Interface
86 Avamar for SAP with Oracle 18.1 User Guide

Table 5 Options for brbackup and brarchive commands (continued)
Option Description
-r parameter_file Specifies the SAP plug-in parameter file (flagfile) used during the backup orarchive operation. SAP plug-in parameter file on page 90 provides details.
-t backup_type Specifies the type of backup that brbackup and backint perform. During an
online backup, to reduce the number of redo logs that Oracle generates, use thisoption with the -d util_file_online option.
-u username/password Specifies the username and password of the Oracle database administrator.
-w [use_dbv | only_conf] Verifies that the backup after the files have been backed up. Helps to detectpossible hardware problems.
The use_dbv option performs the backup followed by a restore of the backup
to a temporary location. This option approximately doubles the backup time.
BR*Tools restore and recovery commandsIt is recommended that you use the brtools and brrecover commands in theinteractive menu-driven mode to guide you through the process of restore andrecovery.
The following example screen shows how to start a restore by using the brrecovercommand.
BR0280I BRRECOVER time stamp: 2014-11-06 11.35.06BR0707I Recovery of database: CERBR0708I BRRECOVER action ID: vepdccukBR0709I BRRECOVER function ID: rifBR0710I Recovery type: restore
BR0280I BRRECOVER time stamp: 2014-11-06 11.35.06BR0656I Choice menu 120 - please make a selection-------------------------------------------------------------Restore of individual backup files main menu1 = Restore files from BRBACKUP backup2 - Restore individual files from tape3 - Restore individual files from disk4 - Restore individual files from backup utility5 - Restore and apply incremental backup6 * Exit program7 - Reset program status
Standard keys: c - cont, b - back, s - stop, r - refr, h - help-------------------------------------------------------------BR0662I Enter your choice:BR0280I BRRECOVER time stamp: 2014-11-06 11.36.00BR0663I Your choice: '1'
BR0699I Reading log file /mnt/oracle/CER/sapbackup/backCER.log ...BR0280I BRRECOVER time stamp: 2014-11-06 11.36.00BR0658I List menu 121 - please select one entry-------------------------------------------------------------
Command Line Interface
BR*Tools restore and recovery commands 87

BRBACKUP database backups for restore
Pos. Log Start Type Files Device RC1 = bepdbusr.aff 2014-11-06 10.04.13 offline 5/6 util_file 02 - bepcswen.aff 2014-11-04 14.24.13 offline 0/6 util_file 63 - bepaldei.aff 2014-10-23 11.47.00 offline 5/6 util_file 04 - bepalcyt.aff 2014-10-23 11.44.35 offline 5/6 util_file 05 - bepakyjs.aff 2014-10-23 10.53.00 offline 5/6 util_file 06 - bepakydp.aff 2014-10-23 10.50.21 offline 5/6 util_file 07 - bepakxyi.aff 2014-10-23 10.48.04 offline 5/6 util_file 08 - bepakvie.aff 2014-10-23 10.18.32 offline 5/6 util_file 09 - bepakuxs.aff 2014-10-23 10.14.00 offline 5/6 util_file 010 - bepakuay.aff 2014-10-23 10.04.08 offline 5/6 util_file 011 - bepaktss.aff 2014-10-23 10.00.34 offline 5/6 util_file 012 - bepagudv.aff 2014-10-22 14.33.39 offline 5/6 util_file 013 - bepagtwl.aff 2014-10-22 14.30.27 offline 5/6 util_file 014 - bepacaeo.aff 2014-10-21 15.16.54 offline 5/6 util_file 015 - bepabzbc.aff 2014-10-21 15.04.08 offline 5/6 util_file 016 - bepabqri.aff 2014-10-21 13.29.46 offline 5/6 util_file 017 - bepabhnw.aff 2014-10-21 11.46.52 offline 5/6 util_file 018 - bepabckh.aff 2014-10-21 10.48.59 offline 5/6 util_file 519 - bepaayfi.aff 2014-10-21 10.01.46 offline 5/6 util_file 0You can also run the brrestore and brrecover (in non-menu mode) commandsfrom the CLI to initiate restore and recovery operations with the SAP plug-in.Examples of the syntax and options for these commands are as follows.
Synopsis of restore and recovery commands
brrestore [-a [seq1-seq2=new_directory]] [-b backup_catalog_file] [-cforce] -d {util_file [-f last | brrestore_log1, brrestore_log2,... |yyyy-mm-dd hh.mm.ss | number_of_days}] [-m {all | all_data | full |tablespace_list | file_ID | file_ID1_range | file_list}] [-p profile][-q check] [-r parameter_file] [-u username/password]
brrecover [-c force] -d util_file [-p profile] [-pit yyyy-mm-ddhh.mi.ss] [-r parameter_file] [-scn scn] [-t {complete | dbpit | tspit| reset | restore | apply | disaster}] [-tsp {tablespace_name |tablespace_name_list}] [-u username/password]
For example:
brrecover -d util_file -p initGC2.sap -t complete
Restore and recovery command options
Options that are enclosed in brackets ([ ]) are optional. Options that are enclosed inbraces ({ }) must use at least one of the enclosed options. Variables are in italics.Keywords are in bold text.
To restore a complete backup (reset of the database), use the -m full option. Thisoption restores all files, not just the tablespaces, but also the control files, online redolog files (consistent online backup), and offline redo log files (complete offlinebackup).
By default, the brrestore operation uses the backup catalog file (also called thebrbackup log in SAP BR*Tools documentation) created by the last successfulbackup. However, you can specify a previous catalog file by using the -b
Command Line Interface
88 Avamar for SAP with Oracle 18.1 User Guide

backup_catalog_file option, where the backup catalog file was created from afull backup of a whole database.
The following table lists example options for these commands. The SAPdocumentation provides complete details about these commands.
Table 6 Options for brrestore and brrecover commands
Option Description
-a [seq1-seq2=new_directory] Specifies to restore the offline redo log files from the first backup copy. Thebrrestore process uses the brarchive summary log to decide where to
restore the requested files.For example, this command restores the log sequence numbers from 44 to 99into the specified new location:
brrestore -a 44-99=/new_location -c force -rparameter_file
-b backup_catalog_file Specifies the backup catalog file to use for a restore, where the catalog file wascreated from a full backup of a whole database.
-c force Suppresses most of the confirmation messages that interrupt the restore orrecovery operation.
-d util_file Specifies that the SAP plug-in with backint is used for the restore or recovery
operation.
-f restore_to_complete Specifies which restores to restart to restore missing files.
-m database_objects_to_restore Specifies the database objects to restore, for example, the whole database,selected tablespaces, or data files.
-p profile Specifies an initialization BR*Tools parameter file if the file does not have thedefault name or is not stored in the default location.
-pit yyyy-mm-dd hh.mi.ss Specifies the recovery of the database or tablespaces to a specific point-in-time.
-r parameter_file Specifies the SAP plug-in parameter file (flagfile) used during the restore orrecovery operation. SAP plug-in parameter file on page 90 provides details.
-scn scn Specifies the recovery of the database to the specified Oracle system changenumber.
-t {complete | dbpit | tspit |reset | restore | apply |disaster}
Specifies the type of recovery:
l complete—Complete database recovery
l dbpit—Database point-in-time recovery
l tspit—Tablespace point-in-time recovery
l reset—Whole database reset
l restore—Restore of individual backup files
l apply—Apply offline redo log files (archive logs)
l disaster—Disaster recovery
-tsp {tablespace_name |tablespace_name_list}
Specifies the recovery of a single specified tablespace or the tablespaces thatare listed in the specified file.
-u username/password Specifies the username and password of the Oracle database administrator.
Command Line Interface
BR*Tools restore and recovery commands 89

SAP plug-in parameter fileA SAP plug-in parameter file, also called a flagfile, is a text file that can be created tolist sets of parameters and values that are frequently used for specific SAP plug-inbackup and restore operations. A parameter file (flagfile) is required for the followingoperations:
l Backups that include a BR*Tools verify operation.
For example, step 12.f on page 56 describes how to specify a verified operation fora backup with Avamar Administrator.
l Restore operations.
The parameter file (flagfile) is specified with the -r option of the BR*Toolscommands, brbackup, brarchive, brrestore, and brrecover.
A SAP plug-in parameter file should contain one parameter per line, with eachparameter in the following format:
--parameter_name=value
or
--parameter_name
The following example shows sample parameters from a SAP plug-in parameter file fordifferent platforms:
#-----Mandatory Flags#----------- For AIX----------------------bindir=/space/avs_inst/usr/local/avamar/bin--sysdir=/space/avs_inst/usr/local/avamar/etc--vardir=/space/avs_inst/usr/local/avamar/var--id=Avamar_server_username--password=encoded_user_password--account=/clients/AIX_SAP_1--server=avamar.server.com
#----------- For Linux ----------------------bindir=/usr/local/avamar/bin--sysdir=/usr/local/avamar/etc--vardir=/usr/local/avamar/var--id=Avamar_server_username--password=encoded_user_password--account=/clients/Linux_SAP_1--server=avamar.server.com
#---------- For Solaris ---------------------bindir=/opt/AVMRclnt/bin--vardir=/opt/AVMRclnt/var--sysdir=/opt/AVMRclnt/etc--id=Avamar_server_username--password=encoded_user_password--account=/clients/Solaris_SAP_1--server=avamar.server.com
#---------- For Windows ---------------------bindir="C:\Program Files\avs\bin"--sysdir="C:\Program Files\avs\etc"
Command Line Interface
90 Avamar for SAP with Oracle 18.1 User Guide

--vardir="C:\Program Files\avs\var"--id=Avamar_server_username--password=encoded_user_password--account=/clients/Windows_SAP_1--server=avamar.server.com
#----- Optional Flags#----- All Operating Systems ----------------max-streams=5--encrypt-strength=high--ddr=true--ddr-index=1--expires=120--retention-type=daily,weekly,monthly,yearly
#----- For VCS cluster the directory path is -----------bindir=/opt/AVMRclusclnt/cluster/<cluster_group>/bin--sysdir=/opt/AVMRclusclnt/cluster/<cluster_group>/etc--vardir=/opt/AVMRclusclnt/cluster/<cluster_group>/var
#------For Sun cluster the directory path is --------bindir=/opt/AVMRclnt/avcluster<cluster_group>/bin--sysdir=/opt/AVMRclnt/avcluster<cluster_group>/etc--vardir=/opt/AVMRclnt/avcluster<cluster_group>/var
Specifying a SAP plug-in parameter fileThere are two methods to specify a SAP plug-in parameter file (flagfile):
l Directly from the CLI with the BR*Tools command by using either the -r option or-profile option. For example:
brbackup -r parameter_fileor
brrestore -r parameter_filewhere parameter_file is the full pathname of the SAP plug-in parameter file(flagfile).
l Indirectly in the util_par_file parameter in the BR*Tools initialization profileinitDBSID.sap. All BR*Tools commands automatically refer to theutil_par_file parameter if it is set. For example:
util_par_file=parameter_filewhere parameter_file is the full pathname of the SAP plug-in parameter file(flagfile).
Note
If both methods are used, then the CLI method takes precedence.
SAP plug-in parametersThe following table lists all the parameters that you can specify within a SAP plug-inparameter file (flagfile).
Command Line Interface
Specifying a SAP plug-in parameter file 91

Table 7 SAP plug-in parameters
Parameter Description Examples
--account Mandatory for all operations from the CLI andfor backups through Avamar Administrator withthe BR*Tools verify operation.
Specifies the Avamar domain of the client. ThisAvamar domain is usually /domain_name/client_hostname.
--account=/clients/user_pc
--bindir Mandatory for all operations from the CLI.
Specifies the location of the Avamar binary orexecutable files.
l On AIX, HP-UX, Linux:--bindir=/usr/local/avamar/bin
l On Solaris:--bindir=/opt/AVMRClnt/bin
l On Windows:--bindir=”C:\Program Files\avs\bin”
--ddr Optional. Specifies that an Avamar backup is tobe saved to a Data Domain system.
--ddr=true
--ddr-index Mandatory when --ddr is set. Index number (1,
2, 3, or so on) of the Data Domain system onwhich the backup is saved. An index number isassigned to the Data Domain system when it isadded to the Avamar server configuration.
Contact the Avamar Administrator to determinethe required index number.
If you do not set this option when --ddr is set,
then the backup is not reported correctly.
--ddr-index=1
--debug Optional. Turns on the debugging messages. Donot set this option for normal operationsbecause the setting significantly increases thesize of the log files.
--debugor
--debug=true
--encrypt Optional. Specifies the type of encryption to beused by avtar for a backup. The values that
are supported for this parameter areproprietary, ssl, sslverify, tcp, tls,
and tls-sa.
The default value for all backups is the tls type
of encryption.
The Avamar Product Security Guide providesmore details about encryption.
--encrypt=ssl
--encrypt-strength Optional. Specifies the level of encryption to beused by avtar for a backup. The values that
are supported for this parameter are high,
medium, and cleartext.
The default value for all backups is the highencryption strength.
--encrypt-strength=high
Command Line Interface
92 Avamar for SAP with Oracle 18.1 User Guide

Table 7 SAP plug-in parameters (continued)
Parameter Description Examples
--expires Optional. Specifies the backup expiration time innumber of days for a backup from the CLI. Abackup with Avamar Administrator ignores thisparameter if it is set in the parameter file.
The default value is defined by the End User OnDemand Retention policy, which has a defaultvalue of 60 days.
The Avamar Administration Guide provides moredetails about expiration.
--expires=120
--id Mandatory for all operations from the CLI andfor backups through Avamar Administrator withthe BR*Tools verify operation.
Specifies an Avamar server username that hasAvamar Administrator privileges.
--id=MCS_user
--max-streams Optional. Specifies the maximum number ofstreams or avtar processes to be used during a
backup or restore operation.
The default value is 1. The maximum value is128. The recommended maximum number ofconcurrent sessions on a host is 10.
--max-streams=2
--password Mandatory for all operations from the CLI andfor backups through Avamar Administrator withthe BR*Tools verify operation.
Specifies the password of the MCS user who isused for restores.
Note
You can run this avtar command on the
command line to encode a password:avtar --encodepassword=passwordwhere password is the password that you typein clear text on the command line. This avtarcommand returns an encoded password thatyou can then use with the --passwordparameter in the parameter file (flagfile).
--password=a6338f5876bc47974641a51ddcbbbae21aebc7345254de0120f58063211ffc4b947c4eb344b48e7c
The 80-character encoded value is the valuereturned by the avtar --encodepassword=password command.
--retention-type Optional. Specifies the backup retention typefor a backup from the CLI. This parameterdefines the retention type only and does notoverride the expiration. A backup with AvamarAdministrator ignores this parameter if it is setin the parameter file.
The default value is none.
--retention-type=daily, weekly,monthly
Command Line Interface
SAP plug-in parameters 93

Table 7 SAP plug-in parameters (continued)
Parameter Description Examples
The Avamar Administration Guide provides moredetails about retention.
--semaphore-timeout
Optional. Specifies the number of minutes thatbackint waits for brbackup to delete a
semaphore file during an online backup. Ifbrbackup does not delete the file by the end of
the timeout period, backint exits with an
error.
The default timeout is 30 minutes. If brbackupoperates more slowly than expected, you canincrease the timeout.
--semaphore-timeout=40
--server Mandatory for restores, BR*Tools verifyoperations, and backups through AvamarAdministrator with the BR*Tools verifyoperation.
Specifies the DNS hostname or IP address ofthe Avamar server.
--server=server_name.example.com
--sysdir Mandatory for all operations from the CLI.
Specifies the location of the Avamar etcdirectory. The Avamar client documentation forthe avtar --sysdir option provides details.
l On AIX, HP-UX, Linux:--sysdir=/usr/local/avamar/etc
l On Solaris:--sysdir=/opt/AVMRClnt/etc
l On Windows:--sysdir=”C:\Program Files\avs\etc”
--vardir Mandatory for all operations from the CLI.
Specifies the location of the Avamar vardirectory. The Avamar client documentation forthe avtar --vardir option provides details.
l On AIX, HP-UX, Linux:--vardir=/usr/local/avamar/var
l On Solaris:--vardir=/opt/AVMRClnt/var
l On Windows:--vardir=”C:\Program Files\avs\var”
Command Line Interface
94 Avamar for SAP with Oracle 18.1 User Guide
APPENDIX C
Troubleshooting
This appendix includes the following topics:
l Log information..................................................................................................96l Configuration problems and solutions.................................................................97l Common problems and solutions....................................................................... 101
Troubleshooting 95

Log informationDuring backup and restore operations, the Avamar Plug-in for SAP with Oracle (SAPplug-in) creates Avamar plug-in logs (avsap and avtar logs) as well as backintlogs, created by the backint binary. Each of these logs is used for debuggingpurposes only.
avsap and avtar log filesSAP plug-in operations create log files as follows:
l Each SAP plug-in backup that is initiated through the Avamar Administrator GUIruns an avsap process and creates an avsap log file. By default, these log filesare created in the vardir/clientlogs or vardir\clientlogs directory, inthe following format:
n For on-demand backups: MOD-wid-pidnum-pid.logn For scheduled backups: schedule_name-group_name-wid-pidnum-
pid.logwhere:
n wid is a unique number.
n pidnum is the SAP plug-in ID number. Each Avamar plug-in has a unique IDnumber.
n pid is the plug-in name, SAP.
For example, MOD-1326918336023-1030-SAP.log is an avsap log from abackup through Avamar Administrator.
l Each SAP plug-in backup or restore operation runs the avtar process and createsavtar log files. By default, these log files are created in the vardir/clientlogs or vardir\clientlogs directory, in the following format:
n For backup operations through Avamar Administrator:
MOD-wid-pidnum-operation_avtar.logwhere operation can have any of the following values: SAPSNAPUP,SNAPVIEW, SAPRESTORE.
For example, MOD-1326918336023#1-1030-SAPSNAPUP_avtar.log is anavtar log from a backup through Avamar Administrator.
n For backup operations from the CLI:
COD-wid-pidnum-operation_avtar.logFor example, COD-1328191530449#1-1030-SAPSNAPUP_avtar.log is anavtar log for a backup from the CLI.
n For restore operations:
CLI-backup_label-log-backint_pid-backint.logFor example, CLI-beidjwrc6182cfd8-log-29392-backint.log is anavtar log for a restore.
Command Line Interface on page 83 provides details about log options.
Troubleshooting
96 Avamar for SAP with Oracle 18.1 User Guide
backint log filesEach SAP plug-in backup or restore operation runs the backint process, which inturn creates a backint log file. By default, these log files are created in the vardir/clientlogs directory in the following formats:
l For backup operations through Avamar Administrator:
avsap_log_name-log-backint_pid-backint.logwhere:
n avsap_log_name is the name of the avsap log file that is associated with thebackint binary.
n backint_pid is the process ID of the backint instance.
For example, MOD-1326918336023-1030-SAP-log-31219-backint.log isa backint log from a backup through Avamar Administrator.
l For operations from the CLI:
CLI-backup_label-log-backint_pid-backint.logwhere CLI-backup_label is the backup label of the backup, which is formed fromthe SAP detaillog file name (without the file extension) and a timestamp.
For example, CLI-behummlm6f19ad09-log-425-backint.log is a backintlog for an operation from the CLI.
Command Line Interface on page 83 provides details about log options.
Configuration problems and solutionsThe following sections describe common configuration problems and their solutions.
Verify the versions of SAP BR*ToolsYou can determine the version of SAP BR*Tools by using the brbackup -V[ALL]command.
Procedure
1. Log in to the SAP Oracle database host as the SAP user.
2. Type the following:
brbackup -V[ALL]Information similar to the following appears in the command shell:
BR0051I BRBACKUP 7.20 (20)Patch Date Info1 2010-01-26 BR*Tools support for Oracle 11g (note1430669)4 2010-07-28 BR*Tools fail with segmentation fault (coredump) (note 1493500)6 2010-07-28 Parallel incremental backup on disk (note1493614)7 2010-08-25 No incremental backup with patch 6 possible(note 1502257)9 2010-10-27 BR*Tools support for eSourcing databases(note 1523205)
Troubleshooting
backint log files 97

14 2011-05-04 Syntax error in the 'keep' option in RMANcall (note 1585727)17 2011-08-26 BRBACKUP 7.20 EXT fails on Windows withBR0274E (note 1625038)18 2011-09-07 BR*Tools support for Oracle ASM and Exadata(note 1627541)20 2011-10-28 BR*Tools support for bigfile tablespaces(note 1647271)release note 1428529kernel release 720patch date 2011-10-28patch level 20make platform NTAMD64make mode OCI_10201_SHAREmake date Nov 7 2011
Verify the Avamar client and SAP plug-in installationFor all supported platforms, the Avamar client software must be installed beforeinstalling the SAP plug-in software. The versions of the Avamar client and SAP plug-insoftware must be the same.
The following table describes how to verify the installation of the Avamar client andthe SAP plug-in.
Table 8 Command to verify the Avamar client and SAP plug-in installation
Platform How to verify the installation
Microsoft Windows Use Windows Explorer to verify that the C:\Program files\avs\bin folder exists and contains the avsap.exe and backint.exebinaries.
Supported HP-UX Use the swlist command:
swlist -l product hpuxclnt hpuxsapThe following type of output appears in the command shell:
hpuxclnt version Avamar clienthpuxsap version Avamar SAP with Oracle plugin
Supported IBM AIX Use the lslpp command:
lslpp -la | grep AvamarThe following type of output appears in the command shell:
AvamarSAP-versionAvamarClient-version
Supported Linux Use the rpm command:
rpm -qa | grep -i AvamarThe following type of output appears in the command shell:
AvamarSAP-versionAvamarClient-version
Troubleshooting
98 Avamar for SAP with Oracle 18.1 User Guide

Table 8 Command to verify the Avamar client and SAP plug-in installation (continued)
Platform How to verify the installation
Supported Solaris Use the pkginfo command:
pkginfo | grep -i AVMRThe following type of output appears in the command shell:
application AVMRclnt Avamar Clientapplication AVMRsap Avamar Client SAP Pluginfor Oracle
Avamar client and SAP plug-in registrationBackup and restore operations with the SAP plug-in software require the Avamarclient to be registered with the Avamar server. The registration can fail if:
l The Avamar plug-in_catalog.xml does not support the SAP plug-in version.
l An administrator has disabled the SAP plug-in.
If the Avamar client is successfully registered, Avamar Administrator lists theplatform-specific SAP plug-in installation. In addition, the avagent.log file, which islocated by default in the vardir directory, contains information that verifies asuccessful registration. For example:
****** Current MCS name 'avamar-1.example.com' ******2011-4-1 15:08:37 avagent Info <7452>: Registration of client/clients/aiqplum.bgl.avamar.emc with MCS avamar-1.example.com:28001 successful.2011-4-1 15:08:37 avagent Info <5928>: Registration of plugin1002 SAP successful.2011-4-1 15:08:37 avagent Info <5928>: Registration of plugin1001 Unix successful.2011-4-1 15:08:37 avagent Info <5619>: Registration of clientand plugins complete.2011-4-1 15:08:37 avagent Info <7150>: first work requestdelayed for 180 seconds.2011-4-1 15:11:37 avagent Info <7151>: first work request delayfinished.
Disk space for the /var/avamar directoryThe /var/avamar directory must have sufficient disk space for log and other files.Otherwise, a backup or restore fails. Verify the amount of free disk space inthe /var/avamar directory by using the applicable method for the system. Aminimum of 100 MB of disk space is recommended for avsap log files and other files.
The following example shows output from the df -h command on a Linux system:
Filesystem Size Used Avail Use% Mounted on/dev/mapper/VolGroup00-LogVol00 985G 310G 625G 34% /
Troubleshooting
Avamar client and SAP plug-in registration 99

Directory for the .switch filesDuring an online backup with the backup_dev_type=util_file_online setting,BR*Tools and backint programs coordinate the placing of tablespaces into a backupmode through a set of messages written to files called the .switch files.
BR*Tools expects the backint program to create the .switch files(.switch.lis, .switch.sem, and .switch.log) in a predefined location. Bydefault, the program creates the .switch files in the following directory:
l On UNIX: $ORACLE_HOME/sapbackupl On Windows: %SAPBACKUP% if set; otherwise, %SAPDATA_HOME%\sapbackupWith BR*Tools 7.10 or later and the SAP plug-in release 6.1 SP1 or later, you can setthe BR*Tools SAPSWITCH environment variable to specify a non-default location forthe .switch files:
l For backups from the CLI, set the environment variable before you run thebrbackup command:
n On UNIX, set $SAPSWITCH in the system shell.
n On Windows, set %SAPSWITCH% in the command window.
l For backups with Avamar Administrator, click More in the Backup Command LineOptions dialog box and set the SAPSWITCH value as an additional plug-in optionaccording to step 12.j on page 58. The following figure displays an exampleSAPSWITCH setting in the dialog box.
Figure 9 SAPSWITCH setting
Troubleshooting
100 Avamar for SAP with Oracle 18.1 User Guide

The setting of the SAPSWITCH environment variable can be useful when the defaultlocation has insufficient disk space or when concurrent backups cannot share thesame .switch files location.
Common problems and solutionsThe following sections describe the most common problems and solutions for the SAPplug-in software.
Backup fails due to trailing slash in ORACLE_HOME settingA SAP plug-in backup fails if the ORACLE_HOME setting in the environment or inAvamar Administrator includes a final slash character /.
If the ORACLE_HOME setting includes a trailing slash, the avsap process displays awarning message before the start of a backup.
The Oracle documentation specifies that the ORACLE_HOME setting must notinclude a trailing slash.
Restore fails in a Windows cluster environmentA restore in a Windows cluster environment fails if the restore directory does notexist.
To restore a file in a Windows cluster, the restore directory must exist before you runthe brrestore command.
Unable to browse Oracle databases with Avamar AdministratorThe Browse for Instances, Tablespaces, or Datafiles option in Avamar Administratordoes not display SAP database information.
Any of the following circumstances can prevent you from browsing the SAP Oracledatabases:
l The listener on the Oracle database server is not running or correctly configured(typically, the tnsnames.ora file).
l The Oracle database is not running on the server due to a server reboot or a failedstartup of the database software.
l Information is not entered correctly in the Browse Command Line Options dialogbox, including mistakes such as an incorrect username or password or incorrectspelling.
l The database user who is specified for the browse operation does not havesufficient privileges.
Troubleshooting
Common problems and solutions 101

Troubleshooting
102 Avamar for SAP with Oracle 18.1 User Guide

GLOSSARY
A
active/active cluster Type of cluster configuration where a group of linked virtual or physical hosts withshared storage, called cluster nodes, can access the database data from multiple nodesconcurrently.
active/passive cluster Type of cluster configuration where the data server runs on the active physical node,and other nodes are passive nodes that maintain data updates and wait to take over ifthe active node fails.
archive (redo) logs Oracle transaction log files that record a history of all transactions made to a database.Archive redo logs are backed up and used to recover a database to a specific point-in-time.
Avamar Administrator A graphical management console software application that is used to remotelyadminister an Avamar system from a supported Windows or Linux client computer.
Avamar client A computer or workstation that runs Avamar software and accesses the Avamar serverover a network connection. Avamar client software comprises a client agent and one ormore plug-ins.
Avamar server The server component of the Avamar client/server system. Avamar server is a fault-tolerant, high-availability system that efficiently stores the backups from all protectedclients. It also provides essential processes and services required for data restores,client access, and remote system administration. Avamar server runs as a distributedapplication across multiple networked storage nodes.
B
backup (noun) 1. Duplicate of database or application data or an entire computer system storedseparately from the original, which can be used to recover the original if it is lost ordamaged.
2. Operation that saves data to backup storage for use during a recovery.
back up (verb) Make backup copies of data to the Avamar server for later restore in the case of dataloss.
backup browsing Type of browsing that generates a list of objects to be backed up.
C
cluster nodes Group of linked virtual or physical hosts with shared storage in a cluster, which worktogether and represent themselves as a single host called a virtual cluster host.
cold backup See "offline backup."
Avamar for SAP with Oracle 18.1 User Guide 103
D
database 1. A collection of data arranged for ease and speed of update, search, and retrieval bycomputer software.
2. An instance of a database management system (DBMS), which in a simple casemight be a single file containing many records, each of which contains the same setof fields.
disaster recovery Recovery from any disruptive situation, such as hardware failure or software corruption,in which ordinary data recovery procedures are not sufficient to restore a system andits data to normal day-to-day operations. A disaster recovery can be a bare metalrecovery.
F
flagfile or parameter file Configuration file that specifies the parameters and values used by the backintprogram for backup and restore operations.
G
GUI backup or restore On-demand backup or restore that a user initiates through the Avamar Administratorgraphical user interface (GUI).
H
high-availability system System of multiple computers configured as cluster nodes on a network that ensuresthe application services continue despite a hardware or software failure.
host Computer on a network.
hot backup See "online backup."
I
internationalization(I18N)
Capability of the software to display and output data in the same language fonts andnumeric formats that are passed to it by localized operating systems or applications.
M
MCS Management console server. The server subsystem that provides centralizedadministration (scheduling, monitoring, and management) for the Avamar server. TheMCS also runs the server-side processes used by Avamar Administrator.
multi-streaming Feature that enables a single backup or restore to use multiple sessions (data streams)to the Avamar server or Data Domain system.
Glossary
104 Avamar for SAP with Oracle 18.1 User Guide

O
offline backup Backup of database objects performed while the corresponding database instance isshut down and unavailable to users. Also known as a cold backup.
online backup Backup of database objects performed while the corresponding database or instance isrunning and available to users. Also known as a hot backup.
P
point-in-time restore Restore of a backup to a specific point-in-time.
R
recover The process of applying transaction logs to the restored data to bring it to a givenpoint-in-time.
redo log Oracle transaction log file, which records a history of all transactions made to adatabase. Archive redo logs are backed up and used to recover a database to a specificpoint-in-time.
relocated restore Restore of data from a backup to a different location on the same host or an alternatehost.
restore An operation that retrieves one or more file systems, directories, files, or data objectsfrom a backup and writes the data to a designated location.
restore browsing Type of browsing that searches the previously created backups for specific backups tobe restored.
S
scheduled backups Type of backup that is configured to start automatically through an Avamar policy for agroup of one or more Avamar clients.
Glossary
Avamar for SAP with Oracle 18.1 User Guide 105

Glossary
106 Avamar for SAP with Oracle 18.1 User Guide


