Page 1
[LYNC DEPLOYMENT – BY: WAQAS BUTT] January 25, 2014
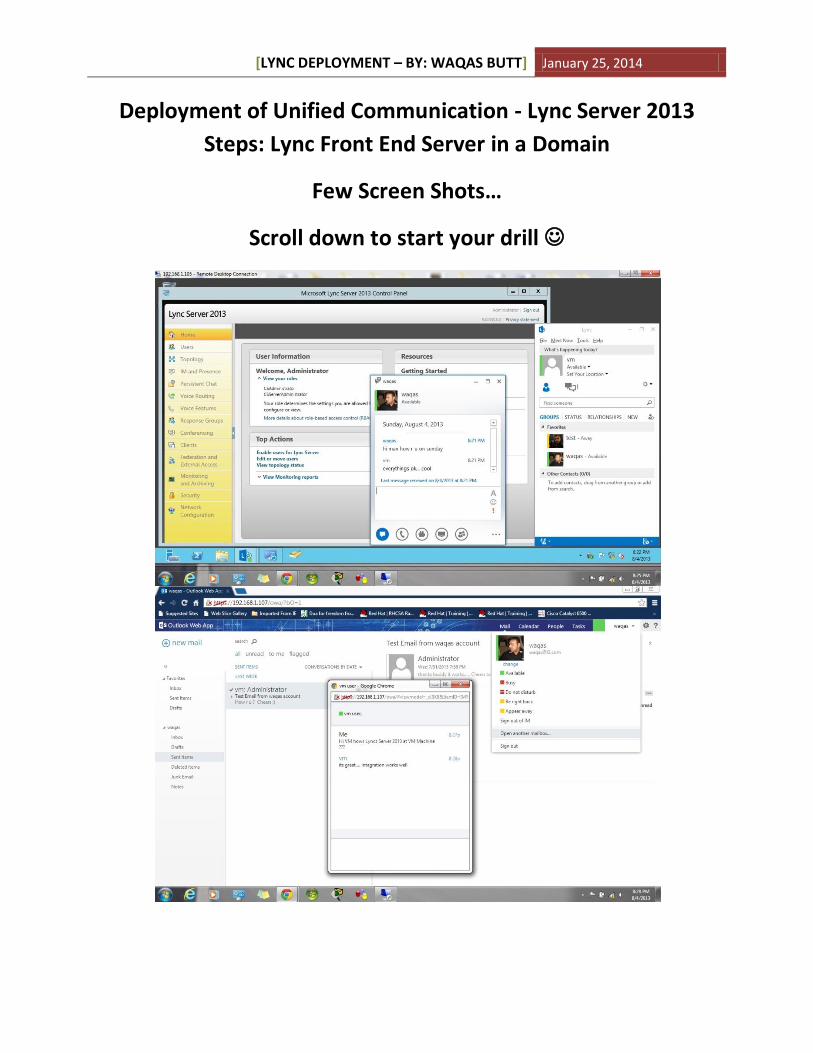
Deployment of Unified Communication - Lync Server 2013
Steps: Lync Front End Server in a Domain
Few Screen Shots…
Scroll down to start your drill
Page 2
[LYNC DEPLOYMENT – BY: WAQAS BUTT] January 25, 2014
1. Install Fresh Server 2012
2. Configure Static IP
3. Join the Domain Server new or (Existing domain controller / Server)
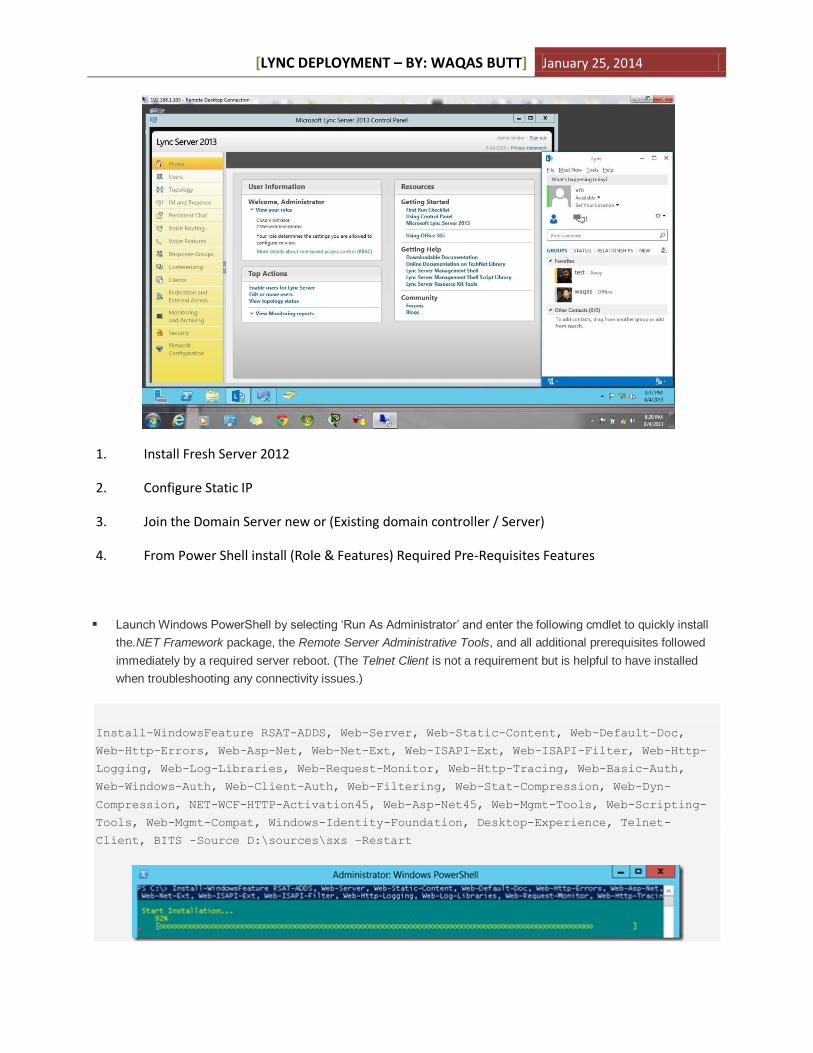
4. From Power Shell install (Role & Features) Required Pre-Requisites Features
Launch Windows PowerShell by selecting ‘Run As Administrator’ and enter the following cmdlet to quickly install
the.NET Framework package, the Remote Server Administrative Tools, and all additional prerequisites followed
immediately by a required server reboot. (The Telnet Client is not a requirement but is helpful to have installed
when troubleshooting any connectivity issues.)
Install-WindowsFeature RSAT-ADDS, Web-Server, Web-Static-Content, Web-Default-Doc,
Web-Http-Errors, Web-Asp-Net, Web-Net-Ext, Web-ISAPI-Ext, Web-ISAPI-Filter, Web-Http-
Logging, Web-Log-Libraries, Web-Request-Monitor, Web-Http-Tracing, Web-Basic-Auth,
Web-Windows-Auth, Web-Client-Auth, Web-Filtering, Web-Stat-Compression, Web-Dyn-
Compression, NET-WCF-HTTP-Activation45, Web-Asp-Net45, Web-Mgmt-Tools, Web-Scripting-
Tools, Web-Mgmt-Compat, Windows-Identity-Foundation, Desktop-Experience, Telnet-
Client, BITS -Source D:\sources\sxs –Restart
Page 3
[LYNC DEPLOYMENT – BY: WAQAS BUTT] January 25, 2014
5. After Reboot
6. Disable Firewall on the Domain Controller so active directory can be prepared on Lync Server.
After the server finishes rebooting disconnect the Windows Server media and mount the Lync
Server 2013 installation media.
Launch the Lync Server 2013 Deployment Wizard from the following path and then select Yes if
prompted to install the Microsoft Visual C++ Runtime package.
7. Deploy Setup from D:\Setup\amd64\setup.exe (or where ever you keep your setup files)
8. Click Prepare Active Directory.
At the main menu of the deployment wizard select Prepare Active Directory and then
click Run on
Step 1: Prepare Schema.
If deploying in an environment with a single domain controller there is no need to run the
optional verification processes.
Select Run on Step 3: Prepare Current Forest and select the Local Domain as the Universal
Group Location if desired. If Lync is being installed into a multiple domain forest and the
universal groups need to be stored in a domain other than the domain that the current server is
a member of then enter the desired domain FQDN.
Advance to Step 5: Prepare Current Domain to complete the Active Directory preparation steps.
9. Add Lync Administrative User To Admin Group
Add the Administrator to “CSAdministrator group”
Go to ADS (PDC) > Users > Administrator > Go to Memeber of >
Add “CS Administrator” & “RTCUniversalServerAdmins”
10. Now Prepare First Standard Edition Server
Now let’s go back to the Deployment Wizard and click “Prepare first Standard Edition server”.
11. You will see the below “Prepare single Standard Edition Server” wizard window and you can just
click “Next”.
During this process the below will be installed:
SQL Server 2008 Express Edition will be installed
RTC databases will be created and populated
Lync Server installation files will be put in place
Etc
Page 4
[LYNC DEPLOYMENT – BY: WAQAS BUTT] January 25, 2014
(Note: as noted in pre-reqs, Windows Identity Foundation 3.5 must be installed for this process
to complete successfully)
(Time: on new AD with no users, 6-10 minutes to Prepare first Server)
12. Configure DNS Records
Lets open DNS Manager on AD server. Right click on your domain (in our case lyncsUC.l3.com)
under Forward Lookup Zones, click “Other New Records…” and scroll down to “Service Location
(SRV)” and click Create Record.
13. Will add a DNS SRV record pointing at our Lync FE Server FQDN (lyncsUC.l3.com in our case)
Service = _sipinternaltls
Protocol = _tcp
Port number = 5061
Host Offering the service = fqdn of Lync Std. FE server or Pool. (In our case
lyncsUC.l3.com)
14. Note: a DNS A record should already be pointing to Lync Front End Server (lyncsUC.l3.com)
We will also create 3 DNS A Records. Right click, “New Host (A or AAAA)…” Add a DNS A record
for
meet
dialin
admin
15. Now Install Administrative Tools
16. Build and Publish Topology
Topology Definition
This section covers creating a new Lync Topology in a new Active Directory forest and domain.
Launch the Lync Server 2013 Topology Builder application and select New Topology from the
initial prompt.
Save a new .tbxml file with any desired name (e.g. lynctopo.tbxml).
For the Primary SIP domain enter the desired domain namespace (e.g. mslync.net).
Add any additional desired SIP domains at this point , but a single SIP domain is sufficient for
most deployments as well as this series of articles.
Select a Name for the first site to be created in the topology (e.g. Chicago) and enter
a Description if desired.
Page 5
[LYNC DEPLOYMENT – BY: WAQAS BUTT] January 25, 2014
Specify the locality information associated with the first Lync site and then complete the wizard.
At this point the Define New Front End Pool wizard should be automatically launched.
On the Define Front End Pool FQDN page enter the Fully Qualified Domain Name (FQDN) of the
Windows domain member server where the Lync Front End services will be hosted. This would
be the same server that all of the prerequisite components have been installed on. Make sure
that the server’s FQDN is correctly configured so that it matches exactly what is entered into the
topology as this is how the later installation process identifies which components to install on
the server.
Select Standard Edition Server and advance to the next page.
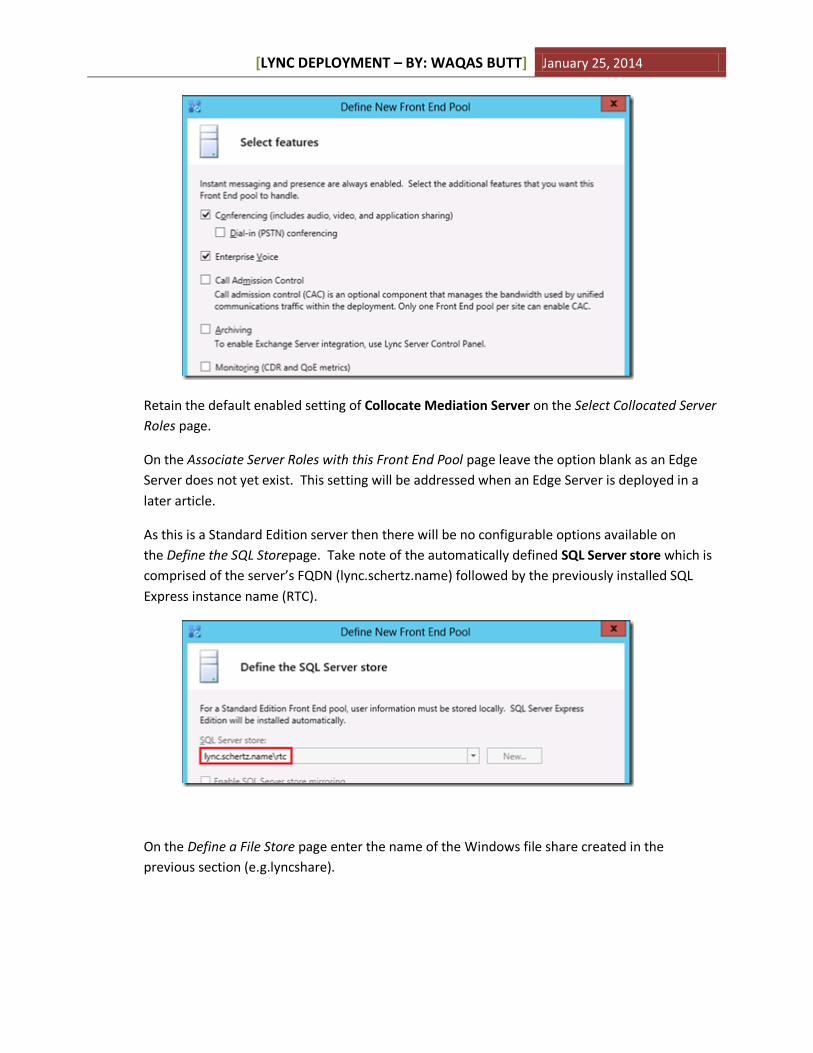
On the Select Features page choose the desired options for this installation. To start
only Conferencing andEnterprise Voice features will be selected, with additional components to
be addressed in later articles.
Page 6
[LYNC DEPLOYMENT – BY: WAQAS BUTT] January 25, 2014
Retain the default enabled setting of Collocate Mediation Server on the Select Collocated Server
Roles page.
On the Associate Server Roles with this Front End Pool page leave the option blank as an Edge
Server does not yet exist. This setting will be addressed when an Edge Server is deployed in a
later article.
As this is a Standard Edition server then there will be no configurable options available on
the Define the SQL Storepage. Take note of the automatically defined SQL Server store which is
comprised of the server’s FQDN (lync.schertz.name) followed by the previously installed SQL
Express instance name (RTC).
On the Define a File Store page enter the name of the Windows file share created in the
previous section (e.g.lyncshare).
Page 7
[LYNC DEPLOYMENT – BY: WAQAS BUTT] January 25, 2014
Let create the Lync file store share right now so we don’t forget. You can create this folder
where ever you want but for this lab we will create a folder called “Share” in C:\ of the Lync
Server. Next go into the properties of the folder and give full access permissions to these
groups:
iversal Services
Click on the “Sharing” tab, click on “Share”.
In the “File Sharing” Wizard click the dropdown beside “Add” and select “Find People…” and in
“Enter the object names to select” type RTC. Now press the CTRL key and select the above
groups. Next you will need to change each group to “Read/Write” and click “Share” to finish
the sharing Wizard.
On the Specify the Web Services URL page the External Base URL will automatically be set to the
same FQDN as the internal Front End server (e.g. lync.schertz.name). For the purposes of this
article the default setting will be retained and in the future when external services are published
this will be updated to reflect the external namespace.
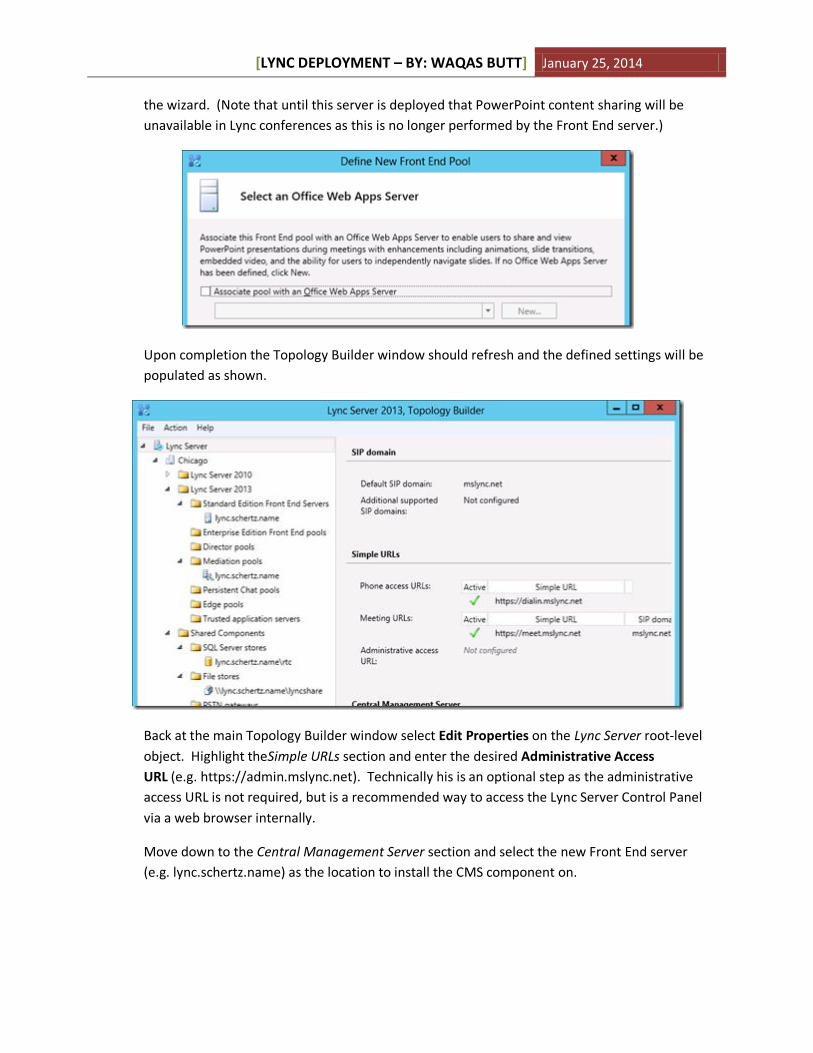
The next page Select an Office Web Apps Server is new to Lync Server 2013 and is used to either
define a new OWAS pool FQDN or associate this server with an existing OWAS pool. As a later
article will cover deploying OWAS simply uncheck this option and then click Finish to complete
Page 8
[LYNC DEPLOYMENT – BY: WAQAS BUTT] January 25, 2014
the wizard. (Note that until this server is deployed that PowerPoint content sharing will be
unavailable in Lync conferences as this is no longer performed by the Front End server.)
Upon completion the Topology Builder window should refresh and the defined settings will be
populated as shown.
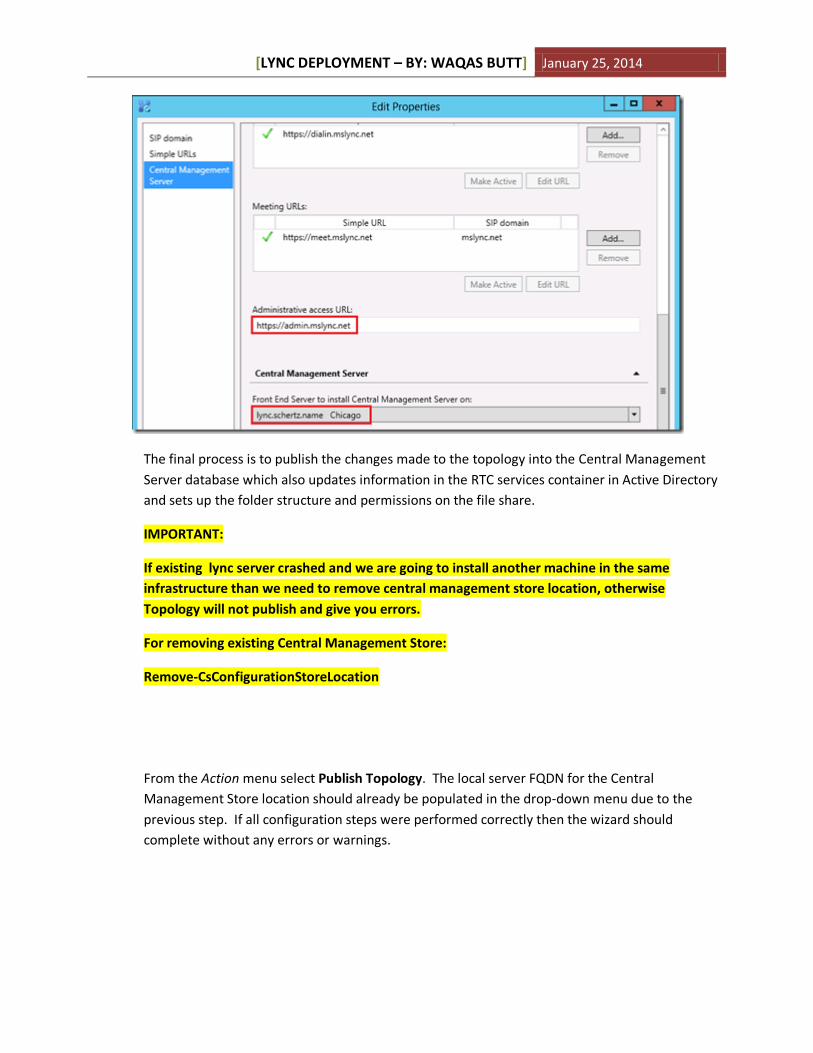
Back at the main Topology Builder window select Edit Properties on the Lync Server root-level
object. Highlight theSimple URLs section and enter the desired Administrative Access
URL (e.g. https://admin.mslync.net). Technically his is an optional step as the administrative
access URL is not required, but is a recommended way to access the Lync Server Control Panel
via a web browser internally.
Move down to the Central Management Server section and select the new Front End server
(e.g. lync.schertz.name) as the location to install the CMS component on.
Page 9
[LYNC DEPLOYMENT – BY: WAQAS BUTT] January 25, 2014
The final process is to publish the changes made to the topology into the Central Management
Server database which also updates information in the RTC services container in Active Directory
and sets up the folder structure and permissions on the file share.
IMPORTANT:
If existing lync server crashed and we are going to install another machine in the same
infrastructure than we need to remove central management store location, otherwise
Topology will not publish and give you errors.
For removing existing Central Management Store:
Remove-CsConfigurationStoreLocation
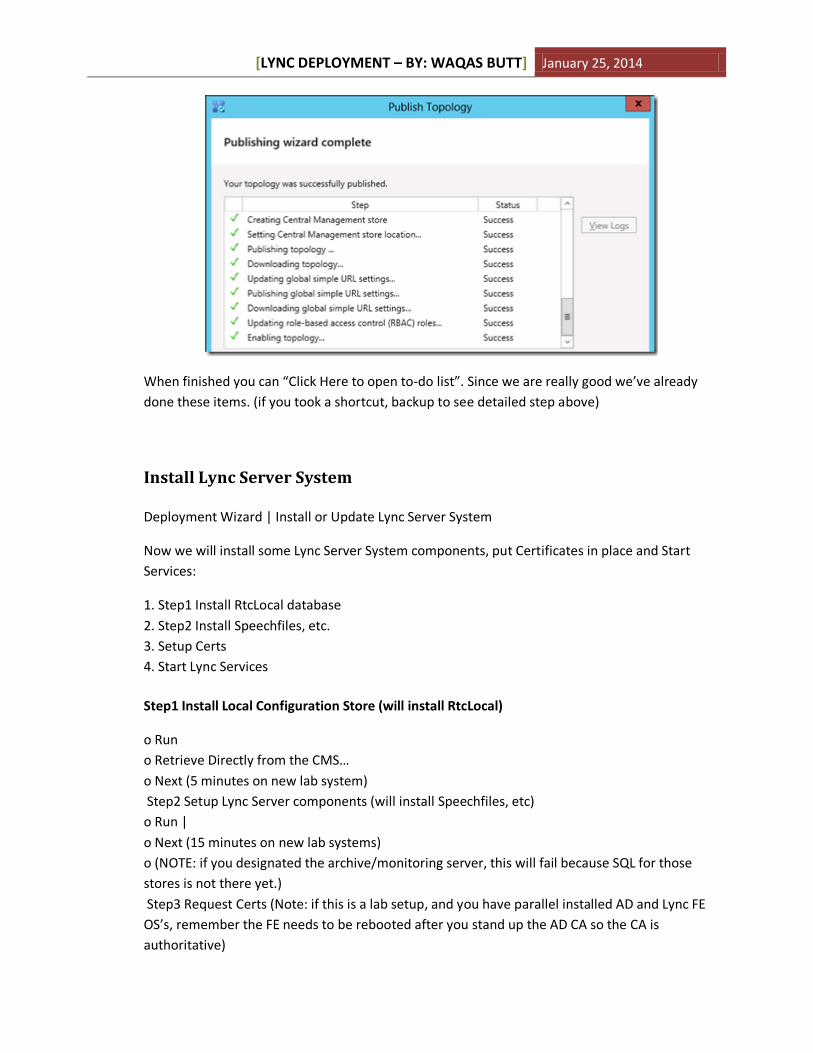
From the Action menu select Publish Topology. The local server FQDN for the Central
Management Store location should already be populated in the drop-down menu due to the
previous step. If all configuration steps were performed correctly then the wizard should
complete without any errors or warnings.
Page 10
[LYNC DEPLOYMENT – BY: WAQAS BUTT] January 25, 2014
When finished you can “Click Here to open to-do list”. Since we are really good we’ve already
done these items. (if you took a shortcut, backup to see detailed step above)
Install Lync Server System Deployment Wizard | Install or Update Lync Server System
Now we will install some Lync Server System components, put Certificates in place and Start
Services:
1. Step1 Install RtcLocal database
2. Step2 Install Speechfiles, etc.
3. Setup Certs
4. Start Lync Services
Step1 Install Local Configuration Store (will install RtcLocal)
o Run
o Retrieve Directly from the CMS…
o Next (5 minutes on new lab system)
Step2 Setup Lync Server components (will install Speechfiles, etc)
o Run |
o Next (15 minutes on new lab systems)
o (NOTE: if you designated the archive/monitoring server, this will fail because SQL for those
stores is not there yet.)
Step3 Request Certs (Note: if this is a lab setup, and you have parallel installed AD and Lync FE
OS’s, remember the FE needs to be rebooted after you stand up the AD CA so the CA is
authoritative)
Page 11
[LYNC DEPLOYMENT – BY: WAQAS BUTT] January 25, 2014
Run, select “Default Certificate” then click “Request”
Certificate Request: Next Delayed or Immediate Request? Send the request immediately to an online cert authority Choose a Certificate Authority (CA): Select a CA from the list
Certification Authority Account: Next Specify Alternative Certificate Template: Next Name and Security Settings: some name Organization Information: fill in Org and Org Unit Geographical Information: fill in Subject Name/Subject Alternative Names: Next SIP Domain Setting on SAN: Select SIP Domain (example: lab.local) | Next
Configure Additional SAN: Next Certificate Request Summary: Next Executing Commands: Completed: Next Online Certificate Request Status: Finish Certificate Assignment: Next Certificate Assignment Summary: Next Executing Commands: Finish Select “Default certificate” and click Assign certs
Now repeat the Certificate Wizard steps for the OAuthTokenIsuer.
Step 4: Start Services
After services are started you can open the Services to verify all the Lync Services are running.