94
DeploymentManager Ver6.5 Operation Guide -First Edition- Rev.001

DeploymentManager Ver6.5
Operation Guide
-First Edition-
Rev.001

2
Contents Introduction .......................................................................................................................... 4
Target Audience and Purpose ............................................................................................................... 4 Document Structure .............................................................................................................................. 4 Documentation Guidelines for DeploymentManager Manuals .............................................................. 4
1. DeploymentManager Basic Concept ............................................................................ 5 1.1. Operation Flow: From Startup to Scenario Execution .............................................................. 5
2. Registering Resources on DeploymentManager ........................................................ 6 2.1. Adding a Machine Group .......................................................................................................... 6 2.2. Registering Managed Machines ............................................................................................... 8
2.2.1.Registering the Managed Machine on the Web Console .......................................................................... 9 2.2.1.1. Registering by automatic acquisition of Management Machine Information......................................... 9 2.2.1.2. Manually Entering Managed Machine Information and Registering the Machine on DPM ................... 12 2.2.2.Using an Automatic Registration File to Register a Managed Machine ..................................................... 14
2.3. Adding a Scenario Group ......................................................................................................... 17 3. Normal Operation .......................................................................................................... 18
3.1. Backup ...................................................................................................................................... 18 3.1.1.Creating a Scenario .................................................................................................................................. 18 3.1.2.Assigning the Scenario ............................................................................................................................. 20 3.1.3.Executing the Scenario ............................................................................................................................. 21 3.1.4.Checking the Scenario Execution Status .................................................................................................. 22 3.1.5.Checking the Scenario Execution Results................................................................................................. 23 3.1.6.Precautions/Others ................................................................................................................................... 24
3.2. Restoration ............................................................................................................................... 25 3.2.1.Creating a Scenario .................................................................................................................................. 25 3.2.2.Assigning the Scenario ............................................................................................................................. 25 3.2.3.Executing the Scenario ............................................................................................................................. 26 3.2.4.Checking the Scenario Execution Status .................................................................................................. 28 3.2.5.Checking the Scenario Execution Results................................................................................................. 29
3.3. OS Installation by Disk Duplication (Windows) ........................................................................ 30 3.3.1.Creating a Master Image ........................................................................................................................... 30 3.3.1.1. Setting Up the Master Machine ............................................................................................................ 31 3.3.1.2. Backing Up the Master Machine (for Recovery) ................................................................................... 32 3.3.1.3. Preparing for Creating the Master Image ............................................................................................. 32 3.3.1.4. Backing Up the Master Machine (for OS Installation by Disk Duplication) ........................................... 38 3.3.2.Restoring the Master Machine .................................................................................................................. 38 3.3.3.Distributing the Master Image ................................................................................................................... 38 3.3.3.1. Creating a Disk Duplication Data File of the Machine to Duplicate ...................................................... 38 3.3.3.2. Restoring the Duplication Destination Machine .................................................................................... 39 3.3.4.Precautions/Others ................................................................................................................................... 41
3.4. OS Installation by Disk Duplication (Linux) .............................................................................. 43 3.4.1.Creating a Master Image ........................................................................................................................... 43 3.4.1.1. Setting Up the Master Machine ............................................................................................................ 43 3.4.1.2. Backing Up the Master Machine (for Recovery) ................................................................................... 43 3.4.1.3. Preparing for Creating the Master Image ............................................................................................. 43 3.4.1.4. Backing Up the Master Machine (for OS Installation by Disk Duplication) ........................................... 46 3.4.2.Restoring the Master Machine .................................................................................................................. 46 3.4.3.Distributing the Master Image ................................................................................................................... 47 3.4.3.1. Creating a Disk Duplication Data File of the Machine to Duplicate ...................................................... 47 3.4.3.2. Restoring the Duplication Destination Machine .................................................................................... 47 3.4.4.Precautions/Others ................................................................................................................................... 48
3.5. OS Clear Installation (Linux)..................................................................................................... 50 3.5.1.Creating and Registering an Image ........................................................................................................... 50 3.5.1.1. Setting up NFS Service ........................................................................................................................ 50 3.5.1.2. Preparing the Red Hat Enterprise Linux Installation Kernel ................................................................. 51 3.5.1.3. Registering an Operating System ........................................................................................................ 51

3
3.5.1.4. Creating the Linux Installation Parameter File ..................................................................................... 54 3.5.2.Creating a Scenario .................................................................................................................................. 54 3.5.3.Assign Scenario ........................................................................................................................................ 55 3.5.4.Executing the Scenario ............................................................................................................................. 55 3.5.5.Checking the Scenario Execution Results................................................................................................. 56 3.5.6.Precautions/Others ................................................................................................................................... 56
3.6. Installing Service Packs, HotFixes, Linux Patch Files, and Applications (Scenario Type) ......................................................................................................................................... 60
3.6.1.Creating and Registering an Image ........................................................................................................... 60 3.6.1.1. Registering Service Packs, HotFixes, Linux Patch Files, and Applications .......................................... 60 3.6.2.Creating a Scenario .................................................................................................................................. 62 3.6.3.Assigning the Scenario ............................................................................................................................. 63 3.6.4.Executing the Scenario ............................................................................................................................. 64 3.6.5.Checking the Scenario Execution Results................................................................................................. 66
3.7. Distributing the BIOS/Firmware Update Floppy Disk Image .................................................... 67 3.7.1.Creating and Registering an Image ........................................................................................................... 67 3.7.1.1. Registering the BIOS/Firmware Update Floppy Disk ........................................................................... 67 3.7.2.Creating a Scenario .................................................................................................................................. 69 3.7.3.Assigning the Scenario ............................................................................................................................. 69 3.7.4.Executing the Scenario ............................................................................................................................. 70 3.7.5.Checking the Scenario Execution Results................................................................................................. 72
4. Useful Functions ........................................................................................................... 73 4.1. Scheduling ................................................................................................................................ 73 4.2. Performing Operations from DPM Command Line .................................................................. 73 4.3. Automatically Registering Packages on Multiple DPM Servers ............................................... 73
4.3.1.Adding the Package Web Server .............................................................................................................. 74 4.3.2.Setting an Automatic Download Time ....................................................................................................... 75 4.3.3.Checking the Automatic Download Results............................................................................................... 76
4.4. Installing Service Packs, HotFixes, and Applications (Automatic Update Type) ..................... 77 4.4.1.Setting up Automatic Updates ................................................................................................................... 78 4.4.2.Executing Automatic Updates ................................................................................................................... 79 4.4.3.Checking the Automatic Update Execution Results .................................................................................. 80
4.5. Distributing a File ...................................................................................................................... 81 4.5.1.Storing a File on the Management Server ................................................................................................. 82 4.5.2.Distributing the File to a Managed Machine .............................................................................................. 82 4.5.3.Checking the File Distribution Results ....................................................................................................... 83
Appendix A Operating DPM without Using the DHCP Server ..................................... 84 Registering the New Managed Machine ............................................................................................... 84 Executing Backup, Restore, or Disk Configuration Check .................................................................... 85 Installing Service Packs, HotFixes, Linux Patch Files, and Applications .............................................. 93
Appendix B Restoring the Backup Image without the Management Server (Local Restoration) ................................................................................... 93
Appendix C Revision History ........................................................................................ 93

4
Introduction
Target Audience and Purpose This "Operation Guide" is intended for system administrators who operate DeploymentManager (DPM) and explains the actual process flow of the operating procedures after installation of DPM.
Document Structure 1 DeploymentManager Basic Concept: Explains the DPM concept. 2 Registering Resources on DeploymentManager: Explains the procedure of registering resources
on DPM. 3 Normal Operation: Explains the machine operation. 4 Useful Functions: Explains useful functions of DPM. Appendix Appendix A Operating DPM without Using the DHCP Server Appendix B Restoring the Backup Image without the Management Server (Local Restoration) Appendix C Revision History
Documentation Guidelines for DeploymentManager Manuals See "Documentation Guidelines for DeploymentManager Manuals" in First Step Guide.

5
1. DeploymentManager Basic Concept
1.1. Operation Flow: From Startup to Scenario Execution
To execute the backup function or OS installation by disk duplication for managed machines, it is necessary to register a managed machine on DPM Server. To perform functions, create a "scenario" equivalent to an execution command, assign the scenario on the managed machine, and execute the scenario. The operation flow from startup to scenario execution for each function is described as follows. For the detailed procedures corresponding to each function, see Section 3, "Normal Operation." ・ When you execute backup, restore, or disk configuration check:
(1) Create a Scenario Create a scenario for executing backup/restore.
(2) Assign the Scenario
Assign the scenario to managed machine.
(3) Execute the Scenario Execute the assigned scenario on the managed machine.
(4) Check the Scenario Execution Results
Check the scenario execution results. ・ When you execute OS installation by disk duplication; OS clear installation; installing service packs,
hotfixes, Linux patch files, and applications; and distribution of floppy disk image for BIOS/firmware:
(1) Create and Registering an Image Create an image to be distributed, and register the image on DPM Server.
(2) Create a Scenario
Create a scenario for related function.
(3) Assign the Scenario Assign the scenario to managed machine.
(4) Execute the Scenario
Execute the scenario assigned to the managed machine.
(5) Check the Scenario Execution Results Check the scenario execution results.
The "managed machine", "scenarios", and "images" are generally called "resources", and each "resource" registered in DPM can be checked by viewing the Operations view on the Web Console.

6
2. Registering Resources on DeploymentManager
2.1. Adding a Machine Group To register a managed machine, add the machine group in which the machine to be affiliated. The following describes the procedure to add a machine group. (1) On the Web Console, click Operations in the title bar to switch to the Operations view. (2) In the tree view, click Resource -> Machines. (3) In the Configuration menu, click Add Group. (4) The following screen appears in the main window. Set each item.
See Section 3.3.1 "Add Machine Group" in Web Console Reference Guide for details. Note the maximum of machine groups and managed machine is as follows.

7
To add a sub-machine group, see Section 3.5.3, "Add Sub Group" in Web Console Reference Guide for details.
Item Upper Limit Total number of machine groups (total number of machine groups including sub-machine groups) 1000
Number of machine group layers 20 Total number of managed machine (total number of managed machine affiliated with all machine groups, including sub-machine groups) 40000

8
2.2. Registering Managed Machines The following describes the procedure to register a managed machine in a machine group. ・ Automatically obtaining and registering the MAC address, UUID, and IP address of the managed
machine (Recommended) DPM can automatically obtain the MAC address, UUID, and IP address of the managed machine and detect them by either of the following operations. (DPM registers the machine in a "New Machine" group).
- Install DPM Client - Restart the service of DPM Client which is already set - Execute PXE boot (IP address cannot be obtained)
A machine registered to a New Machine group can be registered to a machine group on the Web Console. For details, see Section 2.2.1.1, "Registering by automatic acquisition of Management Machine Information"
In case of ESX, it is necessary to register the physical MAC address of NIC, which is started by Wake On LAN. When registering the machine by DPM Client, the MAC address of the virtual NIC of Service Console, which is not started by Wake On LAN, is registered. Therefore, obtain the MAC address and UUID automatically by executing PXE boot and register the machine.
In case of ESXi, because you cannot install DPM Client, obtain the MAC address and UUID automatically by executing PXE boot and register the machine.
・ Manually entering and registering managed machine information
Manually enter the information (including the MAC address, UUID, and IP address) of the managed machine, register the machine to a specified machine group. For details, see Section 2.2.1.2, "Manually Entering Managed Machine Information and Registering the Machine on DPM."
・ Using an automatic registration file to register a managed machine
If you have already installed DPM Client in the managed machine, you can automatically register the managed machine when DPM Client communicates with DPM Server by creating an automatic registration file (a file that described the destination machine group information and the machine IP address or name) in advance. For details, see Section 2.2.2, "Using an Automatic Registration File to Register a Managed Machine."
・ Using the import function on the Web Console to register a managed machine
You can register two or more machines to the specified machine group by creating and importing an import file (a CSV file describes the destination machine group information and the managed machine information) to DPM Server. For details, see Section 3.3.3, "Import Machine Data" in Web Console Reference Guide.

9
2.2.1. Registering the Managed Machine on the Web Console The following describes how to enter managed machine information and register the machine to a specified machine group on the Web Console.
2.2.1.1. Registering by automatic acquisition of Management Machine Information
The following describes that DPM can automatically obtain the MAC address, UUID, and IP address of a managed machine and register them to DPM by either of the following operations, and how you register a managed machine on a machine group. ・ Install DPM Client ・ Restart the service of DPM Client which is already set ・ Execute PXE boot (IP address cannot be obtained)
<Install DPM Client/Restarting the service of DPM Client, which is already set> By installing DPM Client or restarting the service of DPM Client, which is already set, the MAC address, UUID, and IP address of the managed machine are automatically obtained and a managed machine is registered on a New Machine group. After this, see "Register a managed machine from New Machine to a group" as follows. <Execute PXE boot > (1) Power on the managed machine. (When you register two or more machines, it is recommended
that power on each machine one by one, rather than all at same time.) (2) When the managed machine supports PXE boot, OS is started after the machine, which was
powered on was registered on new group in DPM Server. However, when you power off after the registration on DPM Server such as that OS is not installed in the managed machine, you can change the configuration in the following file. <DPM Server installation folder>\DataFile\forceskip.ini If MAC address is described in this file, OS is started without powering off after the machine of the corresponding MAC address was registered. The default is "*". In this setting, all machines are powered on. By describing to eliminate the MAC address of the managed machine to power off, you can power off after the registration of the managed machine.
Example) The wildcard of "*"and "?" can be used. In the above example, OS of the only MAC address (00-50-56-*, 00-0C-29-*) are started after registration on DPM Server. In other machines, the following message appears after registration.
This computer has been just registered by the management server. Press F8 to view menu. (30)
After 30 seconds, the machine is automatically powered off. If you power off immediately, press F8 key and select Power Down from the displayed menu. If you start the machine, press the F8 key and select Local Boot from the displayed menu.
00-50-56-* 00-0C-29-*

10
<Register a managed machine from New Machine to a group> Register a managed machine, which was registered on New Machine by either of the above procedures, to a group. (1) On the Web Console, click Operations in the title bar to switch to the Operations view. (2) In the tree view, click Resource -> Machines -> New Machine. (3) The MAC address, UUID, and IP address of the new machine, which is powered on, appears in
the New Machine List group box in the main window. Select the left check box of the machine. (When the machine is registered by PXE boot, IP address cannot be obtained. When or after registering the machine to a machine group, be sure to set IP address.) Note you can register two or more machines collectively on the same group by entering two or more checkmarks.
(4) Click Add Machine under the Action link. (5) The following screen appears in the main window. Set each item.
For details, see Section 3.9.2, "Register New Machine" in Web Console Reference Guide.

11

12
2.2.1.2. Manually Entering Managed Machine Information and Registering the Machine on DPM
The following describes how to enter the managed machine information and register the machine on a specified machine group manually. (1) On the Web Console, click Operations in the title bar to switch to the Operations view. (2) In the tree view, click Resource -> Machines -> Destination machine group for the managed
machine. (3) In the Configuration menu, click Add Machine.

13
(4) The following screen appears in the main window. Set each item.
For item details, see Section 3.5.5, "Register Managed Machine" in Web Console Reference Guide.

14
2.2.2. Using an Automatic Registration File to Register a Managed Machine
This section describes how to create a file that define the relationship between a managed machine (with DPM Client installed) and a destination machine group, and use it to register the machine on a specified machine group automatically. There are two setup procedures: specifying the machine name or specifying the IP address. (When both the machine name and the IP address match, DPM prioritizes setup for the machine name.)
When a managed machine is automatically registered, all value except those specified in the setup file will be the same as those, which are set at the time the machine, is registered. (Value acquirable by DPM Client is set. All other value is set by default.) For details, see Section 3.5.5, "Register Managed Machine" in Web Console Reference Guide. For the machine group as well, all value except those specified in the setup file will be the same (set to default value) as those which at the time the machine group is added. The character string you can specify in each item of the file are the same with the setting for the group on the Web Console. (However, about the destination machine group, "/" can be used, which is a character to separate between group names.) For details about the above, see Section 3.3.1, "Add Machine Group" in Web Console Reference Guide.
Specify the Machine Name (1) In the folder below, create the file GroupAsName.ini.
<DPM Server installation folder>\DataFile\ (2) Open the file GroupAsName.ini using a text editor and so on, and enter the machine group
information using the format below. Destination machine group;Machine name to be registered[;Destination machine group default gateway; Destination machine group subnet mask]

15
*1 In DPM Ver6.02 or later, the designation method for Destination machine group is changed. (Earlier than DPM Ver6.02)
The name of the machine group to which the machine belongs directly. (DPM Ver6.02 or later)
The full path of the machine group to which the managed machine will be registered. Therefore, when you use the file created in the version earlier than DPM Ver6.02, change to the full path of the machine group. (If you use the file created in the version earlier than DPM Ver6.02, a machine group is created directly under Machines icon.)
Example1) /Group1;ComputerA
・ The managed machine "ComputerA" is registered to the machine group "Group1." (If "Group1" does not exist, the machine group "Group1" will be created in "Subnetwork is same with DPM Server" newly.)
Example2) /Group2/Subgroup21;ComputerB;192.168.1.1;255.255.0.0 ・ The managed machine "ComputerB" is registered to the machine group "Subgroup21"
under "Group2". (If "Group2" and "Subgroup21" do not exist, the group is created with "Subnetwork is not same with DPM Server", with the default gateway "192.168.1.1" and the subnet mask "255.255.0.0.")
Specify the IP Address (1) In the folder below, create the file GroupAsIp.ini.
<DPM Server installation folder>\DataFile\
Item Description Destination machine group (Required)
Specify the full path of the machine group to which the managed machine will be registered. Use "/"(slash) to separate between group names. Example) /Group1/Subgroup11
If the machine group of the specified path does not exist, the group is automatically created. In this case, if Destination machine group default gateway and Destination machine group subnet mask are set, these configurations will be set to this created group. (*1)
Machine name to be registered (Required)
Enter the name of the managed machine to be automatically registered in the machine group.
Destination machine group default gateway
Setting is optional. ・ If you specify both the "Destination machine group
default gateway" and "Destination machine group subnet mask": A new machine group will be created with "Subnetwork is not same with DPM Server", and will use the value of "Default Gateway" and "Subnet Mask".
・ If you specify either the "Destination machine group default gateway" or "Destination machine group subnet mask", or neither of them: A new machine group will be created with "Subnetwork is same with DPM Server".
Destination machine group subnet mask

16
(2) Open the file GroupAsIp.ini using a text editor and so on, and enter the machine group information
using the format below. Destination machine group;IP address to be registered;Subnet mask[; Destination machine group default gateway ;Destination machine group subnet mask]
Item Description Destination machine group (Required)
Specify the full path of the machine group to which the managed machine will be registered. Use "/"(slash) to separate between group names. Example) /Group1/Subgroup11
If the machine group of the specified path does not exist, the group is automatically created. In this case, if Destination machine group default gateway and Destination machine group subnet mask are set, these configurations will be set to this created group. (*1)
IP address to be registered (Required)
Specify the IP address of the managed machines to be registered automatically in the machine group. Both one IP address and two or more IP addresses can be specified. See the following example.
Subnet Mask
Destination machine group default gateway Setting is optional. ・ If you specify both the "Destination machine
group default gateway" and "Destination machine group subnet mask": A new machine group will be created with "Subnetwork is not same with DPM Server", and will use the value of "Default Gateway" and "Subnet Mask".
・ If you specify either the "Destination machine group default gateway" or "Destination machine group subnet mask", or neither of them: A new machine group will be created with "Subnetwork is same with DPM Server".
Destination machine group subnet mask
*1 In DPM Ver6.02 or later, the designation method for Destination machine group is changed. (Earlier than DPM Ver6.02) The name of the machine group to which the machine belongs directly. (DPM Ver6.02 or later) The full path of the machine group to which the managed machine will be registered. Therefore, when you use the file created in the version earlier than DPM Ver6.02, change to the full path of the machine group. (If you use the file created in the version earlier than DPM Ver6.02, a machine group is created directly under Machines icon.)
Example1) /Group1;192.168.1.1
・ The managed machine of the IP address 192.168.1.1 is registered to the machine group "Group1." (If "Group1" does not exist, the machine group "Group1" created with "Subnetwork is same with DPM Server".)

17
Example2) /Group2;192.168.0.0;255.255.0.0
・ The managed machines of the IP addresses 192.168.0.1 to 192.168.255.254 are registered to the machine group "Group2." (If "Group2" does not exist, the group "Group2" is created with "Subnetwork is same with DPM Server".)
Example3) /Group3/Subgroup31;172.16.0.0;255.240.0.0;172.16.1.1;255.240.0.0
・ The managed machines of the IP addresses 172.16.0.1 to 172.31.255.254 are registered to the machine group "Subgroup31" under "Group3". (If "Group3" and "Subgroup31" do not exist, the group is created with "Subnetwork is not same with DPM Server", with the gateway "172.16.1.1" and the subnet mask "255.240.0.0.")
2.3. Adding a Scenario Group The following describes how to add a scenario group. (1) On the Web Console, click Operations in the title bar to switch to the Operations view.
(2) In the tree view, click Resource -> Scenarios. (3) In the Configuration menu, click Add Group. (4) The following screen appears in the main window. Set each item.
For item details, see Section 3.10.1, "Add Scenario Group" in Web Console Reference Guide.
The following table shows the upper limit for scenario groups and scenarios.
If you add a sub-scenario group, see Section 3.12.3, "Add Sub-scenario Group" in Web Console Reference Guide.
Item Upper Limit Total number of scenario groups (total number of scenario groups including sub-scenario groups) 1000
Number of scenario group layers 20 Number of scenarios can be registered per scenario group No limit Total number of scenarios (total number of scenarios affiliated with all scenario groups, including sub-scenario groups) No limit

18
3. Normal Operation
3.1. Backup To back up a managed machine, execute a backup scenario on the managed machine. That is, back up the managed machine by performing the operations outlined from Section 3.1.1, "Creating a Scenario" to Section 3.1.5, "Checking the Scenario Execution Results" in that order.
3.1.1. Creating a Scenario The following describes how to create a scenario. (1) Check the disk/partition number of the backup target.
For details on how to check the disk/partition number, see Section 3.2, "Disk Configuration Check Tool" in Tool Reference Guide.
When you change the configuration of the disk, which is connected to the managed machine, the disk number may change. When you changed the configuration of the disk, execute disk configuration check and recheck the disk number.
(2) On the Web Console, click Operations in the title bar to switch to the Operations view. (3) In the tree view, click Resource -> Scenarios -> Scenario Group. (4) In the Configuration menu, click Add Scenario. (5) The Add Scenario screen appears in the main window. On the Backup/Restore tab, select the
Execute Backup/Restoration check box, select the Backup option button, and set each item. For item details, see Section 3.13.4, "Backup/Restore Tab" in Web Console Reference Guide.

19

20
3.1.2. Assigning the Scenario The following describes how to assign the scenario. (1) On the Web Console, click Operations in the title bar to switch to the Operations view. (2) In the tree view, click Resource -> Machines -> Machine Group. (3) The Machine List group box appears in the main window. Click Managed machine to which the
scenario is to be assigned. (4) In the Operation menu, click Assign Scenario. (5) The following screen appears in the main window. Click Browse, select the scenario to apply, and
click OK.

21
3.1.3. Executing the Scenario The following describes how to execute the scenario.
To execute the backup scenario, you need to set up Deploy-OS that corresponds to
the machine model of the managed machine before scenario execution. For details, see Section 3.7.2, "Edit Managed Machine" in Web Console Reference Guide.
If the managed machine power is ON when you execute the scenario, the scenario will not run. If this happens, perform one of the following operations: ・ From the Edit Scenario screen, select the Option tab and, under the Scenario
Execution Option Setting group box, select Forced Execution Of A Reboot Is Performed Before Execution.
*If the managed machine of Windows is in one of the following states, rebooting cannot be performed even if Forced Execution Of A Reboot Is Performed Before Execution is selected. - The machine is locked by a workstation lock. - The machine is locked by a password-protected screensaver. - The machine is connected from Remote Desktop, Terminal Services, or
other remote connection software. - The machine has data currently being edited or an application that will not
respond to a shutdown request. ・ Reboot the managed machine manually.
Before executing the backup scenario, be sure to check the space in the destination
storage of the backup image. If there is not enough space, the backup process will be aborted before completion. When you execute backup, backup data is created as a temporary file. This temporary file is renamed to the image file name specified in the scenario and automatically deleted upon backup completion. Therefore, if there is an already created backup image, you will need disk space for the temporary file in addition to the already created backup image file.
If Machine Name, MAC Address, and UUID are not selected on the Backup/Restore tab for the backup scenario, execute the scenario on one managed machine. When the same scenario is executed simultaneously on two or more managed machines, a scenario execution error may occur.
When you back up a managed machine with Linux OS installed, MAC address information may be included in the OS network setup file name or setting contents. If you execute backup in this state and then restore the information on another managed machine, the network may not function correctly. When you restore the information on another managed machine, delete the MAC address information before executing backup.
See 3.1.6 "Precautions/Others" for the detail of other precautions.

22
(1) On the Web Console, click Operations in the title bar to switch to the Operations view. (2) In the tree view, click Resource -> Machines -> Machine Group. (3) The Machine List group box appears in the main window. Select the check box on the left of the
Managed machine on which you want to execute the scenario. (4) In the Action menu, select Execute Scenario.
(In the Machine List group box in the main window, Scenario Executing is displayed in the Status column corresponding to the managed machine on which the scenario is executed.)
3.1.4. Checking the Scenario Execution Status The following describes how to check the scenario execution status. (1) On the Web Console, click Monitor in the title bar to switch to the Monitor view. (2) In the tree view, or in the Monitor Function List group box in the main window, click Scenario
Execution List.

23
(3) Scenario Execution List group box appears in the main window. Check the scenario execution
status.
For scenarios including backup/restore, >> appears in the Detail column. Clicking >> displays the following screen, allowing you to check the backup/restore execution status. For screen details, see Section 4.3.2, "Backup/Restore Execute List" in Web Console Reference Guide.
3.1.5. Checking the Scenario Execution Results The following describes how to check the scenario execution results. (1) On the Web Console, click Monitor in the title bar to switch to the Monitor view. (2) In the tree view, or in the Monitor Function List group box in the main window, click Scenario
Execution Result List.

24
(3) Scenario Execution Result List group box appears in the main window. Check the scenario
execution results. For the screen, see Section 4.5, "Scenario Execution Result List Details" in Web Console Reference Guide.
If a scenario execution error occurs, check the message displayed on the screen of the managed machine. For further information about the error, contact your sales or support representative.
If the backup ends in the error, the following message appears on the screen of the managed machine: Press 'p' key to poweroff, 'r' key to reboot: ・ To reboot, press r key and then Enter key. ・ To turn the power off, press p key and then Enter key. Even if you press the p key, the power may not turn off completely, depending on the device. In that case, if the following message appears, that is not a problem. Manually turn the power off.
flushing ide device : hda (* ) system halted.
*The character string displayed differs according to the environment.
3.1.6. Precautions/Others Precaution is as follows. When you changed the partition configuration (deleted or added partition, changed the drive letters
and so on) on the managed machine in which two or more HDDs are mounted, execute backup again without fail. If you restore the backup image file before changing its partition configuration to the managed machine after changing the partition configuration, the drive letters might not restored properly. This is because the drive letters are recorded in both the system disk and data disk, and restoring one of the two causes managed data disaccord and reassignment of the drive letters. When the drive letters are not restored properly, use the Disk Management function of Windows and so on to reset the drive letters.
When network setting is executed by udev on Linux OS, network does not operate properly after completion of restoration even if the configuration of the restoration destination machine is the same as that of machine, which obtained the backup image. See "The network configuration of the machine is associated with the MAC address." in 3.4.4 "Precautions/Others" and set again the network setting.

25
3.2. Restoration To restore a backup image on a managed machine, execute a restore scenario on the managed machine. Operate from Section 3.2.1, "Creating a Scenario" to Section 3.2.5, "Checking the Scenario Execution Results" in order.
3.2.1. Creating a Scenario The following describes how to create a scenario.
If Create Verification Data is checked in the Backup Setting group box on the Backup/Restore tab for a backup scenario, it is recommended that you check if the backup image file is invalid (contains damaged data and so on) using the Backup Image File Check Tool before creating the restore scenario. For Backup Image File Check Tool details, see Section 3.4, "Backup Image File Verification Tool" in Tool Reference Guide.
(1) Check the disk/partition number of the target to restore.
For details on how to check the disk/partition number, see Section 3.2, "Disk Configuration Check Tool" in Tool Reference Guide.
When you change the configuration of the disk which is connected to the managed machine, the disk number may change. When you changed the configuration of the disk, execute disk configuration check and recheck the disk number.
(2) On the Web Console, click Operations in the title bar to switch to the Operations view. (3) In the tree view, click Resource -> Scenarios -> Scenario Group. (4) In the Configuration menu, click Add Scenario. (5) Add Scenario screen appears in the main window. On the Backup/Restore tab, select the
Execute Backup/Restoration check box, select the Restore option button, and set each item. For item details, see Section 3.13.4, "Backup/Restore Tab" in Web Console Reference Guide.
3.2.2. Assigning the Scenario The following describes how to assign the scenario. (1) On the Web Console, click Operations in the title bar to switch to the Operations view. (2) In the tree view, click Resource -> Machines -> Machine Group. (3) The Machine List group box appears in the main window. Click Managed machine to which the
scenario is to be assigned. (4) In the Operation menu, click Assign Scenario.

26
(5) The following screen appears in the main window. Click Browse, select the scenario to apply, and
click OK.
3.2.3. Executing the Scenario The following describes how to execute the scenario.
To execute the restore scenario, you need to set up Deploy-OS that corresponds to the machine model of the managed machine before scenario execution. For details, see Section 3.7.2, "Edit Managed Machine" in Web Console Reference Guide.
The restoration processing may not work correctly in the following case. - You backup when "NEC Express5800 001" is set on Deploy-OS. - After changing to use other Deploy-OS, you restore by using the backup
image. In this case, set "NEC Express5800 001" on Deploy-OS once and restore. After that, set the target value on Deploy-OS and obtain the backup image again. Also, in other cases, set Deploy-OS which is suitable for the backup image and the machine model.
If the managed machine power is ON when you attempt to execute the scenario, the scenario will not run. If this happens, perform one of the following operations: ・ On the Edit Scenario screen, check on the Forced Execution Of A
Reboot Is Performed Before Execution in the Scenario Execution Option Setting group box on the Option tab. * If the Windows managed machine has the following status, the machine
cannot be restarted, even if Forced Execution Of A Reboot Is Performed Before Execution is selected.
- The machine is locked by a workstation lock. - The machine is locked by a password-protected screensaver. - The machine is connected from Remote Desktop, Terminal Services, or
other remote connection software. - The machine has data that is currently being edited or an application that
will not respond to a shutdown request. ・ Reboot the managed machine manually.

27
DPM executes UDP communication when data is sent by multicast. With UDP communication, in the case such as that a device of a different transmission rate is located on the path, a difference occurs in the volume of data transmitted between the sending side and reception side, sometimes causing data transmission failure. In this case, the time required for scenario completion may increase.
(1) On the Web Console, click Operations in the title bar to switch to the Operations view. (2) In the tree view, click Resource - Machines - Machine Group. (3) The Machine List group box appears in the main window. Select the check box on the left of the
Managed machine on which you want to execute the scenario.
(4) In the Action menu, select Execute Scenario. (In the Machine List group box in the main window, Scenario Executing is displayed in the Status column corresponding to the managed machine on which the scenario is executed.)

28
3.2.4. Checking the Scenario Execution Status The following describes how to check the scenario execution status. (1) On the Web Console, click Monitor in the title bar to switch to the Monitor view. (2) In the tree view, or in the Monitor Function List group box in the main window, click Scenario
Execution List. (3) The Scenario Execution List group box appears in the main window. Check the machines that
are currently executing the restore scenario.
For scenarios including backup/restore, >> appears in the Detail column. Clicking >> displays the following screen, allowing you to check the backup/restore execution status. For screen details, see Section 4.3.2, "Backup/Restore Execute List" in Web Console Reference Guide.

29
3.2.5. Checking the Scenario Execution Results The following describes how to check the scenario execution results. (1) On the Web Console, click Monitor in the title bar to switch to the Monitor view. (2) In the tree view, or in the Monitor Function List group box in the main window, click Scenario
Execution Result List. (3) The Scenario Execution Result List group box appears in the main window. Check the scenario
execution results. About the screen, see Section 4.5, "Scenario Execution Result List Details" in Web Console Reference Guide.
If a scenario execution error occurs, check the message displayed on the screen of the managed machine. For the details about the error, contact your sales or support representative.
If the restoring ends in the error, the following message appears on the screen of the managed machine: Press 'p' key to poweroff, 'r' key to reboot: ・ To reboot, press r key and then Enter key. ・ To turn the power off, press p key and then Enter key. Even if you press the p key, the power may not turn off completely, depending on the machine. In that case, if the following message appears, that is not a problem. Manually turn the power off.
flushing ide device : hda (* ) system halted.
*The character string displayed differs according to the environment.

30
3.3. OS Installation by Disk Duplication (Windows)
To execute OS installation by disk duplication (Windows), create a master image for duplication and the specific information for the destination machine, and restore the master image on the destination machine. That is, perform the operations described in Section 3.3.1, "Creating a Master Image" to Section 3.3.3, "Distributing the Master Image" in that order.
3.3.1. Creating a Master Image Create a master image as the following.
In DPM Ver6.0 or later, reflecting specific information in OS installation by disk
duplication can be completed more quickly than the former way (earlier than DPM Ver6.0) and you can speed up the setup of the machine. For Windows Server 2008/Windows Vista or later, the above function is supported.
About a disk duplication data file to set up each managed machine, there are a Windows parameter file(Express) which can speed up the part of duplication processing and a Windows parameter file of the former way. A disk duplication data file which can be used on each OS is as follows.
OS Windows parameter file(Express)
Windows parameter file
Windows Server 2003 R2/ Windows XP or earlier
Yes
Windows Server 2008/ Windows Server 2008 R2/ Windows Vista/Windows 7
Yes Yes
Windows Server 2012/ Windows 8 or later
Yes
When you use a Windows parameter file(Express), you need to use a master
image, which was created following the procedure of Windows parameter file(Express). In addition, when you use a Windows parameter file, you need to use a master image, which was created following the procedure of the Windows parameter file. (The two types are not compatible.) Be careful not to mistake the file name of the master image in the restore scenario for disk duplication. Also, note the name of the disk duplication data file because the name is the same between Windows parameter file(Express) and Windows parameter file.

31
3.3.1.1. Setting Up the Master Machine Set up the master machine for OS installation by disk duplication. (Installing OS, installing drivers, installing service packs, hotfixes, and applications, installing DPM Client and so on)
Be sure to use the same machine model and same hardware configuration layout for the master machine as the duplication source and the machine as the duplication destination. For example, if you have a master without a USB keyboard/mouse, and a duplication destination machine with USB keyboard/mouse, after OS installation by disk duplication, a new device may be detected and reboot required.
If the startup type of the following service is Manual or Disabled, change the type to Automatic. ・ Remote Registry Service If the start type of the service is not Automatic, it will fail to set IP, DNS, WINS, and other settings during master image distribution to the duplication destination.
When setting Windows 7 as the master machine, be sure to change the startup type of the following service to Disabled after stopping the service if it is set to either Automatic or Manual. ・ Windows Media Player Network Sharing Service If you do not do the setting as above, error will occur as follows:
- If you use an information file (the Windows parameter file(Express)) for disk duplication, an error will occur on the managed machine during delivering master image.
- If you use an information file (the Windows parameter file) for disk duplication, an error will occur on the managed machine during executing the Sysprep.bat.
Confirm that DPM Client is installed on the drive, which is not affected by reassigning the drive letter. (C drive is recommended.)

32
3.3.1.2. Backing Up the Master Machine (for Recovery) Backup the master machine for recovery of the master machine. For details of the backup procedure, see Section 3.1, "Backup."
3.3.1.3. Preparing for Creating the Master Image Prepare for creating the master image by either of the following procedures. ・ The procedure when you execute the built-in scenario (only when using Windows parameter
file(Express)). See "Executing the built-in scenario."
・ The procedure when you execute the tool in the installation media manually. See "Executing the tool in the installation media manually."
Be sure to set up the master machine as follows:
・ Join Workgroup ・ For Windows Server 2003 R2/Windows XP or earlier, do not set the
Administrator user password In OS installation by disk duplication, Sysprep is used. When you execute
Sysprep on the same OS, be careful about that the number of executing is limited. For Windows Server 2008 or earlier, limit to three times. For the first three times, at the timing that Sysprep is executed, the valid period will be cleared and a 30-day period will be granted. However, from the fourth time, the valid period will not be cleared and the following error will be displayed. For details, refer below technical information of Microsoft. KB929828 - An error message occurs when you run "Sysprep
/generalize" in Windows Vista or Windows 7: "A fatal error occurred while trying to Sysprep the machine."
In the case of using Windows parameter file(Express), Sysprep will be executed once in one OS installation by disk duplication. In the case of using Windows parameter file, Sysprep will be executed twice in one OS installation by disk duplication. Therefor you cannot execute OS installation by disk duplication two or more times for the same master image. If you need to execute OS installation by disk duplication two or more times for the same master machine, backup the image before executing Sysprep and restore the image after OS installation by disk duplication. Note Sysprep may have been executed at the time of shipment, depending on the machine. For Windows Server 2012/Windows 8 or later, 1000 times is the limit.
In the status that built-in Windows Store Apps is updated or uninstalled, if you execute OS installation by disk duplication for Windows 8/Windows 8.1/Windows 10, an error may occur during executing Sysprep.

33
DPM Client has the information of IP address of the Management Server and the port used by DPM Server and DPM Client. When the service of DPM Client is started, DPM Client tries to connect to DPM Server by IP address and the port that DPM Client has. If DPM Client cannot connect to DPM Server, DPM Client searches the Management Server and gets the information of IP address and the port. The part of the communication sequence of DHCP is used to search the Management Server. (Both when you operate DPM with DHCP server and when you operate DPM without DHCP server) DPM Client uses the port of UDP:68 to receive the data from the Management Server. If DPM Client cannot bind the network by the port of UDP:68, it fails to search the Management Server. DHCP Client of OS standard also uses the port of UDP:68. It is already confirmed that there is no problem.
When DPM Client searches the Management Server in the environment that there are two or more Management Servers, DPM Client obtains the IP address of the Management Server, which responded first.
When the machine, which is set with LAN teaming (AFT/SFT/ALB) by Intel PROSet or with LAN teaming by BACS (Broadcom Advanced Control Suite) of Broadcom, is managed, be careful about the following. ・ TCP/IP information of the disk duplication data file cannot be set properly. ・ The scenario may not be completed when the Check the completion of a
scenario by the communication with DPM Client checkbox is selected in the detail setting of DPM Server. (See Section 2.7.1.1, "General Tab" in Web Console Reference Guide for details about the Check the completion of a scenario by the communication with DPM Client checkbox.)
To avoid these, remove the configuration of LAN teaming before creating the master image and set LAN manually after the completion of OS installation by disk duplication.
When OS installation by disk duplication is completed, log-on screen for Administrator account appears.
Executing the built-in scenario.
Execute the scenario following the procedure below. (1) On the Web Console, click Operations in the title bar to switch to the Operations view. (2) In the tree view, click Resource -> Machines -> Machine Group. (3) The Machine List group box appears in the main window. Click Managed machine to which the
scenario is to be assigned. (4) In the Action menu, click Assign Scenario. (5) Assign Scenario screen appears in the main window. Click Browse, select either of the following
scenarios under Built-in Scenarios scenario group, and click OK. ・ System_WindowsMasterSetup ・ System_WindowsMasterSetupVM

34
When executing OS installation by disk duplication for Windows Server 2012/ Windows 8 or later on the virtual machine, OS installation by disk duplication by System_WindowsMasterSetupVM is faster than that by System_WindowsMasterSetup. This is because the configuration of devices is omitted (same as the master machine) when guest OS of duplication destination machine is started at first in the case of System_WindowsMasterSetupVM. However, because the devices are set as the same with the master machine, the image cannot be deployed when the configuration of devices on the guest OS of the virtual machine is different as the description of the following support technical information (/mode:vm) by Microsoft. https://technet.microsoft.com/en-us/library/hh825033.aspx In addition, you need to operate the machine with DHCP server because you cannot set the fixed IP address.
(6) Returns to the Machine List group box in the main window. Select the checkbox in the left column
of the Managed machine on which you execute the scenario. (7) In the Action menu, select Execute Scenario.
(In the Machine List group box in the main window, Scenario Executing is displayed in the Status column corresponding to the managed machine on which the scenario is executed.)
The managed machine searches DPM Server in the network. Even when you changed the IP address of DPM Server after creating the master image, you do not need to recreate the master image.
(8) In the Operation menu, select Refresh. Check the Status column is blank and the Power is Off,
corresponding to the managed machine on which the scenario is executed. (This is because the processing is also done after Completed Execution was displayed in the Scenario Execution Result List screen.)
Executing the tool in the installation media manually Copy Sysprep file to the master machine and execute it following the procedure below. (1) Log on to the master machine by a user with administrator authority.
(2) On the master machine, execute either of the following files from Explorer and so on.
・ The disk duplication data file (Windows parameter file(Express))
- <Installation media>:\DPM\TOOLS\ExpressSysprep\Windows\Copy-ExpressSysprep.vbs - <Installation media>:\DPM\TOOLS\ExpressSysprep\Windows\Copy-ExpressSysprepVM.vbs
・ The disk duplication data file (Windows parameter file)
<Installation media>:\DPM\TOOLS\SYSPREP\Windows\COPYSYSPREP.VBS

35
If the <OS startup drive>:\Sysprep folder exists, the files for OS installation by
disk duplication will be overwritten. DPM creates an <OS startup drive>:\DPM_DiskCloningTmp folder when OS
installation by disk duplication is executed. If a folder of the same name exists, OS installation by disk duplication may not operate properly.
When executing OS installation by disk duplication for Windows Server 2012/ Windows 8 or later on the virtual machine, OS installation by disk duplication by Copy-ExpressSysprepVM.vbs is faster than that by Copy-ExpressSysprep.vbs. This is because the configuration of devices is omitted (the same with the master machine) when guest OS of duplication destination machine is started at first in the case of Copy-ExpressSysprepVM.vbs. However, the image cannot be deployed to another machine because the configuration of devices is the same with the master machine, as the description of the following support technical information by Microsoft. https://technet.microsoft.com/en-us/library/hh825033.aspx Also, you need to operate the machine with DHCP server because you cannot set the fixed IP address.
(3) The following screen appears. Click OK. The Sysprep folder is created in the OS boot drive of the
master machine, and the necessary modules for disk duplication are copied into the folder.
(4) For Windows Server 2008/Windows Vista or later, the following screen does not appear. Go to
Step (5). In the case of other OS, the following screen appears. Enter the product key used for master machine setup, and click OK.
If you use the backup CD-ROM, enter the product key affixed to the machine.

36
(5) The following screen appears. Click OK.
(6) In case of Windows Server 2008/Windows Vista or later, Steps (6) and (7) are not required. Go to
Step (8). In the case of other OS, copy sysprep.exe and setupcl.exe from the \SUPPORT\TOOLS\DEPLOY.CAB folder on the Windows OS CD-ROM to the Sysprep folder created at Step (3).
Be sure to copy the files from the CD-ROM of the OS installed on the master machine.
(7) Copy netdom.exe from \SUPPORT\TOOLS\SUPPORT.CAB on the Windows OS CD-ROM disk
corresponding to the master machine into the \Sysprep\i386\$OEM$\$$\SYSTEM32 folder created at Step (3).
Be sure to copy the files from the CD-ROM of the OS installed on the master machine.
(8) Edit the information of DPM Server to be connected.
Edit the file according to your operating environment. Change the following underlined IP address of DPM Server manages the master machine and save the file.
ServerIP=192.168.0.1
Also, change the following underlined port of DPM Server manages the master machine and save the file.
FTUnicastPort=26508
・ When you use the disk duplication data file (Windows parameter file(Express)) <OS startup drive>:\Sysprep\Express-Server.ini
・ When you use the disk duplication data file (Windows parameter file)
<OS startup drive>:\Sysprep\server.ini
Do not change any value except the IP address and the port of DPM Server. If you change them, an error may occur.
In OS installation by disk duplication, the managed machine communicates with DPM Server by using the IP address specified at ServerIP and the port specified at FTUnicastPort in the configuration file. About the master image created by DPM Ver6.1 or later, when the managed machine cannot connect to DPM Server by the set ServerIP and FTUnicastPort, the machine searches DPM Server in the network. Therefore, when there was a mistake in the configuration of ServerIP and FTUnicastPort or you changed the IP address and the port of DPM Server after creating the master image, you do not need to re-create the master image.

37
As well, because of the time to search, the time for OS installation by disk duplication may get longer.
Specify the port at FTUnicastPort, following the port number set in DPM Server. You can check the port number set in DPM Server in the following file. <TFTP Root Folder>\Port.ini ・ Key name: FTUnicast ・ Default value: 26508 (When you upgraded DPM Server from the version earlier
than DPM Ver6.1, set 56023.) The default of TFTP root folder is "C:\Program Files (x86)\NEC\DeploymentManager\PXE\Images".
(9) Press R key while pressing Windows logo key on the desktop of the master machine to open Run
dialog box. Enter the command below in the Open box, and press Enter key. <OS startup drive>:\Sysprep\Sysprep.bat
For Windows Server 2003 R2/Windows XP or earlier, Sysprep.exe exists in the same folder, however do not execute this Sysprep.exe.
When you log on to the master machine (Windows Server 2008/Windows Vista or later) by a user except Administrator, you need to execute this as an administrator.
End all running applications, Explorer and so on. (10) The following window appears. Follow the instructions on the screen.
Example) When using Windows parameter file(Express) on Windows Server 2008 ・ The disk duplication data file (Windows parameter file(Express))
Example) When using Windows parameter file on Windows Server 2008. ・ The disk duplication data file (Windows parameter file)
(11) After Sysprep.bat execution, the power of the master machine automatically turns off.
If the master machine restarts, shut the power off by pressing the power switch before the machine obtains an IP address from DHCP server on the POST screen.

38
3.3.1.4. Backing Up the Master Machine (for OS Installation by Disk Duplication)
Backup the master machine which was created until the previous section (3.3.1.3, "Preparing for Creating the Master Image"), and create a master image for OS installation by disk duplication. Backup the master machine seeing Section 3.1, "Backup."
Under Scenario Execution Option Setting on the Option tab of the backup scenario, select the Turn Off Power After Scenario Execution check box.
Be sure to save the file as a backup file different from the file used in Section 3.3.1.2, "Backing Up the Master Machine (for Recovery)."
3.3.2. Restoring the Master Machine To restore the master machine to the state before performing 3.3.1.3, "Preparing for Creating the Master Image", execute the restore scenario using the backup image which was created in Section 3.3.1.2, "Backing Up the Master Machine (for Recovery)." For the restore scenario, see Section 3.2, "Restoration."
You may delete the backup image file which was created in Section 3.3.1.2, "Backing Up the Master Machine (for Recovery)" when you do not need it.
3.3.3. Distributing the Master Image 3.3.3.1. Creating a Disk Duplication Data File of the Machine to
Duplicate Use Image Builder to create a disk duplication data file. Prepare a disk duplication data file for each managed machine to which the master machine will be duplicated. Specific information is automatically reflected on each machine using this disk duplication data file. For details on how to create the disk duplication data file, see the respective sections below. ・ For Windows Server 2003 R2/Windows XP or earlier
Create an information file using Image Builder, and create a disk duplication data file based on the created file. See Section 1.4.1.1, "Creating a Disk Duplication Data File (Windows Server 2003 R2/Windows XP or earlier)" in Tool Reference Guide.
・ When you create a disk duplication data file(Windows parameter file(Express)) for Windows Server
2008/Windows Vista or later See "1. Creating a Disk Duplication Data File (Windows parameter file(Express))" in Section 1.4.1.2, "Creating a Disk Duplication Data File (Windows Server 2008/Windows Vista or Later)" in Tool Reference Guide.
・ When you create a disk duplication data file(Windows parameter file) for Windows Server
2008/Windows Vista/Windows 7 See "2.Creating a Disk Duplication Data File (Windows Parameter File)" in Section 1.4.1.2, "Creating a Disk Duplication Data File (Windows Server 2008/Windows Vista or Later)" in Tool Reference Guide.

39
Create a disk duplication data file for each machine to be duplicated. Failure to do so will cause Sysprep not to function properly.
For Windows Server 2003 R2/Windows XP or earlier, the machine after OS installation by disk duplication maintains the paging file setting of the master machine. If you discard this setting, change the item below in the created disk duplication data file. <Folder for Image (C:\Deploy)>\AnsFile\Sysprep\<MAC Address>.inf [Before edit] [Unattended] KeepPageFile="1" [After edit] [Unattended] KeepPageFile="" If the setting is other than the above (if a space is included and so on), the paging file setting will be maintained as is. If you execute OS installation by disk duplication using a master image created in the version earlier than DPM Ver5.0, the paging file setting will not be maintained.
When you create a disk duplication data file for Windows Server 2008/Windows Vista or later, set the same OS type as the master machine. Also, set Product key correctly.
For OS installation by disk duplication, use the disk duplication data file that has the same name as the MAC address of the managed machine registered in DPM Server.
3.3.3.2. Restoring the Duplication Destination Machine Distribute the master image created in Section 3.3.1.4, "Backing Up the Master Machine (for OS Installation by Disk Duplication)" to the duplication destination seeing Section 3.2, "Restoration." After restoring is completed, the contents of the disk duplication data file of the machine subject to duplication are reflected while the machine is automatically rebooted several times.
If you selected Transmit Data By Multicast under Multicast Condition Setting on the Backup/Restore tab of the restore scenario, restoring begins when the number of ready managed machines is the same as the value set under Maximum Targets or when the value set under Maximum Waiting Time is exceeded. Note when restore is executed on managed machine beyond the specified Maximum Targets, the managed machines beyond the Maximum Targets change to a restore standby state. Restoring will be started on the managed machine in a standby state if either of Maximum Targets or Maximum Waiting Time condition is met at the timing that restoring which is running is completed on the managed machine, or if you click Execute Now on the Backup/Restore Execution List screen. If you do not specify the Maximum Targets or Maximum Waiting Time, restoring will not automatically begin after scenario execution. In that case, on the Backup/Restore Execution List screen, click Execute Now to start restoring. For the Backup/Restore Execution List screen, see Section 4.3.2, "Backup/Restore Execute List" in Web Console Reference Guide.

40
Be sure to use the same machine model and same hardware configuration layout for the master machine serves as the duplication source and the machine that serves as the duplication destination. For example, if you have a master without a USB keyboard or mouse, and a duplication destination machine with USB keyboard or mouse, after OS installation by disk duplication, a new device may be detected and reboot required. When creating the scenario, note the following: ・ As the Image File on the Backup/Restore tab, use the file backed up in Section
3.3.1.4, "Backing Up the Master Machine (for OS Installation by Disk Duplication)."
・ In the Scenario Execution Option Setting group box on the Option tab, do not select the Turn Off Power After Scenario Execution check box.
When the machine, which is set with LAN teaming (AFT/SFT/ALB) by Intel PROSet or with LAN teaming by BACS (Broadcom Advanced Control Suite) of Broadcom, is managed, be careful about the following. ・ TCP/IP information of the disk duplication data file cannot be set. ・ There is a case that the scenario is not completed when the Check the
completion of a scenario by the communication with DPM Client checkbox is selected in the configuration of DPM Server. (See Section 2.7.1.1, "General Tab" in Web Console Reference Guide for details about the Check the completion of a scenario by the communication with DPM Client checkbox.)
To avoid these, remove the configuration of LAN teaming before creating the master image and set LAN manually after the completion of OS installation by disk duplication.

41
3.3.4. Precautions/Others Precautions are as the following. When you distribute the master image in OS installation by disk duplication, the drive letters are
reassigned at the timing OS is reconfigured. According to Microsoft specifications, for the basic disk, the drive letters may be reassigned in the order that disks are recognized in the installation. Example)
For Windows XP and Windows Server 2003, the drives are reassigned in the following order, starting with C. (1) Active partition of the fixed disk (2) If there are two or more fixed disks, the first primary partition of each fixed disk (3) Logical drive of the extended partition for the fixed disk. (4) Removable disk (5) Remaining primary partition of the fixed disk (6) Floppy disk (from A:) (7) CD-ROM
If partitions are additionally created or drive letters are changed after installing Windows, the drive letters may be changed after disk duplication.
Example 1)
Example 2)
In addition, if the letter of drive, on which DPM Client is installed, is changed by the above effect, DPM Client does not work properly.
After OS installation by disk duplication, the connection name registered in Network and Dialup Connections might change back to the initial setting. If this occurs, change the connection name manually.
Using two or more servers, which was set up by OS installation by disk duplication, you cannot to
register NLB (Network Load Balancing) cluster. When you register NLB cluster, GUID (Globally Unique Identifier) of the network adapter is used as the identifier. Duplicated servers have the same network GUID because the network GUID is not changed by Sysprep used in OS installation by disk duplication. Therefore, the NLB Manager recognizes them as the same node and an error occurs. To avoid this problem, you need to recreate the network GUID so that GUID is not duplicated. To recreate the network GUID, delete and then reinstall the network adapter.
[Procedure for recreating the network GUID] (1) Delete the network adapter by Device Manager on a server to be registered on NLB cluster
(by selecting Start -> Administrative Tools -> Computer Management). (2) Reinstall the network adapter by selecting Start -> Control Panel -> Add Computer. (3) Set the IP address and NLB on Network Properties.
Disk 1
Disk 1
Disk 2 Disk 2
Disk 1
Disk 1 Primary (Active) Primary
C: X: Primary (Active) Primary
C: D:
Primary (Active) Primary
C: D: Primary (Active) Primary
C: E: Primary
E: Primary
D:
Before OS installation by disk duplication
After OS installation by disk duplication

42
If you have not prepared a disk duplication data file for the managed machine or if the transmission
process of the disk duplication data files fails, the message below appears on the command prompt of the managed machine.
・ OS installation by disk duplication (Normal) ・ OS installation by disk duplication (Express):
For Windows Server 2008/Windows Vista or later: Close the command prompt with the upper right [x] without pressing any key, and confirm the <OS startup drive>:\Sysprep folder. If Express-Server.ini exists, in addition to confirming that the IP address and the port number of DPM Server are correctly saved in Express-Server.ini and the Windows parameter file(Express) for the managed machine has been created, shut down the managed machine and distribute the master image again. Confirm the environment again if there are no problems. If Server.ini exists, in addition to confirming that the IP address and the port number of DPM Server is correctly registered in Server.ini and the Windows parameter file for the managed machine has been created, shut down the managed machine and distribute the master image again. Confirm the environment again if there are no problems. Also, in the above each case, confirm the MAC address which is included in the file name of the created Windows parameter file(Express) or Windows parameter file is matched with the MAC address with (*) displayed in the Machine Detail screen.
For Windows Server 2003 R2/Windows XP or earlier:
Perform the setup process manually following the wizard displayed after restarting the system.
If you selected Gateway (and Client) Service for Netware or Client Service for Netware under disk duplication data file settings, the Select Netware Logon screen might appear at the logon to Windows. If this happens, the machine automatically logs onto Windows in about 20 minutes, and scenario execution proceeds. Do not perform any operations on the screen.
Depending on the OS type, an activation (license authentication) request may appear. If this
happens, perform the license authentication procedure following the instructions on the screen.
The parameter file for this system is not prepared, or failed to be copied. Follow the wizard to setup displayed after reboot. Press any key to reboot.
The parameter file for this system is not prepared, or failed to be copied.

43
3.4. OS Installation by Disk Duplication (Linux) To execute OS installation by disk duplication (Linux), create a master image for duplication and the specific information for the destination machine, and restore the master image on the destination machine. Perform the operations described in Section 3.4.1, "Creating a Master Image" to Section 3.4.3, "Distributing the Master Image" in that order.
3.4.1. Creating a Master Image Create a master image as follows.
3.4.1.1. Setting Up the Master Machine Set up the master machine, which is the source of OS installation by disk duplication (OS installation, driver installation, RPM update, application installation, and so on).
3.4.1.2. Backing Up the Master Machine (for Recovery) Backup the master machine for recovery of the master machine. For details of the backup procedure, see Section 3.1, "Backup."
3.4.1.3. Preparing for Creating the Master Image Prepare for creating the master image by either of the following procedures.
- The procedure when you execute the built-in scenario, see "Executing the built-in scenario." - The procedure when you execute the tool in the installation media manually,
see "Executing the tool in the installation media manually."
DPM Client has the information of IP address of the Management Server and the
port used by DPM Server and DPM Client. When the service of DPM Client is started, DPM Client tries to connect to DPM Server by IP address and the port that DPM Client has. If DPM Client cannot connect to DPM Server, DPM Client searches the Management Server and gets the information of IP address and the port. The part of the communication sequence of DHCP is used to search the Management Server. (Both when you operate DPM with DHCP server and when you operate DPM without DHCP server) DPM Client uses the port of UDP:68 to receive the data from the Management Server. If DPM Client cannot bind the network by the port of UDP:68, it fails to search the Management Server. DHCP Client of OS standard also uses the port of UDP:68. It is already confirmed there is no problem except dhcpcd of SUSE Linux Enterprise 10. To use the function of searching the Management Server in SUSE Linux Enterprise 10, it is necessary to start DPM Client with the status that dhcpcd is stopped. When you execute OS installation by disk duplication in SUSE Linux Enterprise 10, dhcpcd is necessary. Therefore, be sure to specify IP address of the Management Server not to search the server by seeing "Executing the tool in the installation media manually". In the case except OS installation by disk duplication, if the managed machine does not need dhcpcd, stop dhcpcd. If dhcpcd is necessary, you cannot use the function of searching the Management Server.
When DPM Client searches the Management Server in the environment that there are two or more Management Servers, DPM Client obtains the IP address of the Management Server which responded first.
When the firewall function of the master machine is valid, open the following ports used by DPM Client.

44
Protocol Port number UDP 68 TCP 26509 TCP 26510 TCP 26520 UDP 26529
If the NetworkManager daemon is valid, the DNS setting in the disk duplication
data file is not reflected. If you set DNS, invalidate the NetworkManager daemon as the following.
・ For Red Hat Enterprise Linux 7 or later.
1) Check the status of NetworkManager. #systemctl status NetworkManager (Example of execution result) Active: active (running)
2) After checking that "Active: active (running)" is displayed in the execution result, execute the following command with root authority and invalidate NetworkManager. #systemctl disable NetworkManager #systemctl daemon-reload #systemctl stop NetworkManager
3) delete/etc/sysconfig/network-scripts/ifcfg-Auto_Ethernet* file #cd /etc/sysconfig/network-scripts #rm -f ifcfg-Auto_Ethernet*
・ For Red Hat Enterprise Linux 6 or earlier 1) Check the run level of NetworkManager.
#chkconfig --list NetworkManager
(Example of execution result) NetworkManager 0:off 1:off 2:on 3:on 4:on 5:on 6:off
2) If any of them is "on" in the above, execute the following command with root
authority and invalidate NetworkManager. #chkconfig NetworkManager off
・ In the case of SUSE Linux Enterprise 11 (You can set by the system
management tool (YaST).) 1) Select YaST->Network Devices->Network Settings and open Network
Settings screen. 2) On Global options tab -> Network Setup Method, select Traditional
Method with ifup and click OK.
For RedHat Enterprise Linux Fail in creating the master image when the below folder does not exist.
/etc/sysconfig/network-scripts/ifcfg-ethn (n:device number) For SUSE Linux Enterprise
Fail in creating the master image when the below folder does not exist. /etc/sysconfig/network/ifcfg-ethn (n:device number)

45
Executing the built-in scenario
Execute the scenario following the procedure below. (1) On the Web Console, click Operations in the title bar to switch to the Operations view. (2) In the tree view, click Resource -> Machines -> Machine Group. (3) Machine List group box appears in the main window. Click Managed machine to which the
scenario is to be assigned. (4) In the Action menu, click Assign Scenario. (5) Assign Scenario screen appears in the main window. Click Browse, select
"System_LinuxMasterSetup" under Built-in Scenarios scenario group, and click OK. (6) Returns to Machine List group box in the main window. Select the checkbox in the left column of
Managed machine on which you execute the scenario. (7) In the Action menu, select Execute Scenario.
(In the Machine List group box in the main window, Scenario Executing is displayed in the Status column corresponding to the managed machine on which the scenario is executed.)
The managed machine searches DPM Server in the network. Even when you changed the IP address of DPM Server after creating the master image, you do not need to recreate the master image.
(8) In the Operation menu, select Refresh. Confirm that the Status column is blank and the Power is
Off, corresponding to the managed machine on which the scenario is executed. (This is because that the processing is also done after Completed Execution was displayed in the Scenario Execution Result List screen.)
Executing the tool in the installation media manually
Delete the specific information of the master machine following the procedure below.
(1) Log in to the master machine by root.
(2) Insert the install media into the DVD-ROM drive.
(3) Mount the install media. # mount /mnt/cdrom
(4) Change the current directory. # cd /mnt/cdrom/DPM/Linux/ia32/bin/linuxrep
(5) Execute LinuxRepSetUp.
# ./LinuxRepSetUp
When you execute LinuxRepSetUp, all network settings set up in the current fixed IP address are changed so that they will be obtained from the DHCP server.

46
(6) IP address of DPM Server is requested. Enter the IP address and press Enter key. (When you
omit entering the IP address, press Enter key without entering anything. DPM Client searches the Management Server automatically. It may take some time to search.)
In OS installation by disk duplication, the managed machine communicates with DPM Server by using the IP address specified here. About the master image created by DPM Ver6.1 or later, when the managed machine cannot connect to DPM Server by the specified IP address, the machine searches DPM Server in the network. Therefore, when there was a mistake of the IP address or you changed the IP address of DPM Server after creating the master image, you do not need to re-create the master image. Because of the time to search, the time for OS installation by disk duplication may get longer.
(7) If you turn the power off, do it manually.
The machine will not automatically shut down. Shutdown from the Web Console or by scenario execution is also not possible.
3.4.1.4. Backing Up the Master Machine (for OS Installation by Disk Duplication)
Back up the master machine for duplication created until the previous section (3.4.1.3, "Preparing for Creating the Master Image"), and create a master image. Backup the master machine seeing Section 3.1, "Backup."
Under Scenario Execution Option Setting on the Option tab of the backup scenario, select the Turn Off Power After Scenario Execution check box.
Be sure to save the file as a backup file that is different from the file used in Section 3.4.1.2, "Backing Up the Master Machine (for Recovery)."
3.4.2. Restoring the Master Machine To restore the master machine to the state before performing 3.4.1.3, "Preparing for Creating the Master Image", execute the restore scenario using the backup image created in Section 3.4.1.2, "Backing Up the Master Machine (for Recovery)." For the restore scenario, see Section 3.2, "Restoration"
There will be no problem when you delete backup image file which has been created in Section 3.4.1.2, "Backing Up the Master Machine (for Recovery)."
Enter the IP address of the management server. > 192.168.0.1 ←Please conform to the actual environment

47
3.4.3. Distributing the Master Image 3.4.3.1. Creating a Disk Duplication Data File of the Machine to
Duplicate Use Image Builder to create a disk duplication data file. Prepare a disk duplication data file for each managed machine to which the master machine will be duplicated. Specific information is automatically reflected on each machine using this disk duplication data file. For details on how to create a disk duplication data file, see Section 1.4.3, "Creating a Disk Duplication Data File (Linux)" in Tool Reference Guide.
3.4.3.2. Restoring the Duplication Destination Machine Distribute the master image to the duplication destination seeing Section 3.2, "Restoration" The machine is automatically rebooted and the contents of the disk duplication data file of the machine are reflected.
If you selected Transmit Data By Multicast under Multicast Condition Setting on the Backup/Restore tab of the restore scenario, restoring begins when the number of ready managed machine is the same as the value set under Maximum Targets or when the value set under Maximum Waiting Time is exceeded. Note when restore is executed on managed machine beyond the specified Maximum Targets, the managed machine beyond the Maximum Targets change to a restore standby state. Restoring will be started on the managed machine in a standby state if either of Maximum Targets or Maximum Waiting Time condition is met at the timing that restoring which is running is completed on the managed machine, or if you click Execute Now on the Backup/Restore Execution List screen. If you do not specify the Maximum Targets or Maximum Waiting Time, restoring will not automatically begin after scenario execution. In that case, on the Backup/Restore Execution List screen, click Execute Now to start restoring. For the Backup/Restore Execution List screen, see Section 4.3.2, "Backup/Restore Execute List" in Web Console Reference Guide.
When creating the scenario, note the following: ・ As the Image File on the Backup/Restore tab, use the file backed up in Section
3.4.1.4, "Backing Up the Master Machine (for OS Installation by Disk Duplication)."
・ In the Scenario Execution Option Setting group box on the Option tab, do not select the Turn Off Power After Scenario Execution check box.

48
3.4.4. Precautions/Others Precautions are as the following.
・ After disk duplication, there are cases the following message may appear or X-Window may not run
at Linux OS startup.
* "Hostname" is a host name of the machine after disk duplication.
This is caused by an unregistered hostname in the /etc/hosts file. If this happens, register the hostname in the /etc/hosts file. If the environment uses a fixed IP address, register a line such as follows: Example)
192.168.0.1 servername If the machine obtains an IP address from DHCP, register the hostname with a loopback address as follows:
Example) 127.0.0.1 localdomain.localhost localhost servername
・ The network configuration of the machine is associated with the MAC address.
In OS installation by disk duplication, the network number (eth) may not be set as intended, and that may result in incorrect network configuration because the MAC address between the master machine and the duplication destination machine is different. The countermeasure for this case is as follows.
Red Hat Enterprise Linux
・ Update the settings manually after disk duplication. - Change the MAC address of the "HWADDR" line of the file below to the actual MAC
address. Be careful of the relation between MAC address and eth. /etc/sysconfig/network-scripts/ifcfg-ethn (n:device number)
- Set the settings so that eth and the IP address are corresponded properly. In the case of Red Hat Enterprise Linux 7 or later, set the setting so that IP address is corresponded properly by seeing the execution result of ip addr show command.
SUSE Linux Enterprise
・ Manually update the settings after disk duplication. - Change the MAC address stated in the file below to the actual MAC address. At this time,
be careful of the relation between MAC address and eth. /etc/udev/rules.d/30-net_persistent_names.rules
- Change the MAC address included in the file below to the actual MAC address. /etc/sysconfig/network/ifcfg-eth-id-xx:xx:xx:xx:xx:xx
- Be sure to set the settings so that the IP address stated in the file properly corresponds with the file whose name was changed.
・ Remove the dependency of the MAC address by implementing the following procedure on the master machine. In this case, the PCI Bus ID and eth are linked together.
Could not look up internet address for "Hostname"*. This will prevent GNOME from operating correctly. It may be possible to correct the problem by adding "Hostname"* to the file /etc/hosts.

49
(1) Change the file names of the files below to "ifcfg-ethX (actual NIC number)."
(If necessary, back up the files in advance.) /etc/sysconfig/network/ifcfg-eth-id-xx:xx:xx:xx:xx:xx
Example)
Before modification: /etc/sysconfig/network/ |-ifcfg-eth-id-11:22:33:44:55:66 (Change to eth0) |-ifcfg-eth-id-77:88:99:aa:bb:cc (Change to eth1) |-ifcfg-eth-id-dd:ee:ff:00:11:22 (Change to eth2) After modification: /etc/sysconfig/network/ |-ifcfg-eth0 (before correction is ifcfg-eth-id-11:22:33:44:55:66) |-ifcfg-eth1 (before correction is ifcfg-eth-id-77:88:99:aa:bb:cc) |-ifcfg-eth2 (before correction is ifcfg-eth-id-dd:ee:ff:00:11:22)
(2) /etc/udev/rules.d/30-net_persistent_names.rules is to be edited.
1) Execute the command below, and check <PCI Bus ID> ethtool -i ethX Example)
In the case of the execution result as the following, <PCI Bus ID> is "0000:00:11.0". ethtool -i eth0 ---- driver: pcnet32 version: 1.31c firmware-version: bus-info: 0000:00:11.0 ----
2) Open the following file using a text editor and so on, and change the location of
"SYSFS{address}=="<MAC address>" in all ethX lines to BUS=="pci", ID=="<PCI Bus ID>". (If necessary, back up the file in advance.) /etc/udev/rules.d/30-net_persistent_names.rules Example)
Before modification: ... SUBSYSTEM=="net",ACTION=="add",SYSFS{address}=="00:11:22:33:44:55", IMPORT=="/lib/udev/rename_netiface %k eth0" ... After modification: ... SUBSYSTEM=="net",ACTION=="add",BUS=="pci",ID=="0000:00:11.0", IMPORT=="/lib/udev/rename_netiface %k eth0"

50
3.5. OS Clear Installation (Linux) To execute OS clear installation, install OS to the target machine with installation parameters after creating OS image and installation parameters. Execute from Section 3.5.1, "Creating and Registering an Image" to Section 3.5.5, "Checking the Scenario Execution Results" in order.
3.5.1. Creating and Registering an Image The following describes the DPM setup and procedure for installing Red Hat Enterprise Linux 7 as an example. The basic operations are the same as supported versions except Red Hat Enterprise Linux 7. About different points from Red Hat Enterprise Linux 7, see "Setup procedure for each version" below.
When you execute OS clear installation, do not connect devices such as HDD or an external storage device, which are not the installation targets. The installation may fail.
Setup procedure for each version When you install a version except Red Hat Enterprise Linux 7, replace the description of Red Hat Enterprise Linux 7 in the following with the corresponding version.
The files required for installation are as follows: ・ Installation ISO file/contents of installation CD of Red Hat Enterprise Linux ・ initrd.img/vmlinuz file (for network installation) ・ Setup parameter file (kickstart file) ・ Boot parameter file (parameter file)
Confirm that the machine to be installed runs properly by commercial Red Hat Enterprise Linux package products and installation is possible via the network, and then execute installation. For the Express 5800 series, contact your sales or support representative about Linux distribution information.
Red Hat Enterprise Linux 7 Installation ISO file is necessary for installation procedure described in subsequent sections.
For Red Hat Enterprise Linux 6 or earlier, use not CD-ROM ISO file but CD-ROM. The number of the installation CD differs per distribution.
3.5.1.1. Setting up NFS Service See Appendix C, "Configuring NFS Server" in Installation Guide for the procedure of configuring the NFS Server.
About precautions when you configure NFS Server on the machine except the Management Server, see Section 3.5.6, "Precautions/Others."

51
3.5.1.2. Preparing the Red Hat Enterprise Linux Installation Kernel Prepare mini kernel for network installation (file names: vmlinuz and initrd.img) to be initially loaded in the network boot. The location of the mini kernel is "images\pxeboot\vmlinuz" and "images\pxeboot\initrd.img" in Red Hat Enterprise Linux 7 installation ISO file. Create an appropriate folder in the machine on which the Management Server or Image Builder (Remote Console) is installed, and copy the above mini kernel in the ISO file to the created folder. (When you created the floppy disk, go to Section 3.5.1.3, "Registering an Operating System" and see the description with the disk inserted in the machine.)
3.5.1.3. Registering an Operating System
When you create an NFS public folder except in <Folder for Image>\exports, you need to register the operating system manually without using Image Builder which is described in the following. For details, see "About Linux Installation" in Section 3.5.6, "Precautions/Others."
(1) Log on to the machine, on which Image Builder is installed, by a user with administrator authority.
Log on by a user who installed DPM Server when you use Image Builder on the Management Server.
(2) From Start menu, select All Programs -> DeploymentManager -> Image Builder. When you log on to the OS by a user except Administrator, you need to execute this as an administrator.
(3) Image Builder is launched. Click Registering operating system.

52
(4) The following screen appears. Set each item and click OK.
Operating System Name 126 characters or less can be entered. Alphanumeric characters and symbols can be entered. The following symbols cannot be entered.
" ; \ Names such as "Linux", "Linux(gPXE)", "ks", "daemon", and "pxelinux.*" are reserved and cannot be registered. In Linux, alphanumeric characters and the following symbols can be entered:
( ) - . Operating System Type Select the following OS on the list box.
・ RedHat Enterprise Linux 3,4,5/VMware ESX/Citrix XenServer(*1)
・ Red Hat Enterprise Linux 6 ・ Red Hat Enterprise Linux 7
initrd.img/vmlinuz folder Specify images\pxeboot in Installation Media directly or mount ISO file for installation and select "images/pxeboot". For Red Hat Enterprise Linux 5, specify where initrd.img and vmlinuz are stored.
CD-ROM source folder (When you select "Red Hat Enterprise Linux 6" or "Red Hat Enterprise Linux7" from "Operating System Type", this item is indicated as Install ISO.)
Select the folder OS is stored by clicking Browse. Specify CD-ROM drive name.
*For Red Hat Enterprise Linux 6/7.select ISO file which includes OS image from Browse.
*1 Red Hat Enterprise Linux 3/4 is not supported.
To prepare a Linux image file, copy the specified ISO file (for Red Hat Enterprise Linux 5, copy all below CD-ROM source folder). In Red Hat Enterprise Linux5, two or more CD-ROMs are involved and thus a message prompting you to copy the next CD-ROM will appear after the first CD-ROM is copied. Insert the CD-ROMs in order, and continue copying. If an overwrite confirmation dialog box appears during this time, select Yes or Yes to All, and proceed.

53
(5) Wait until the copy of the vmlinuz/initrd.img files is completed. After the completion of the copy, the
following screen appears. For Red Hat Enterprise Linux6 or later, the procedure is complete.
For Red Hat Enterprise Linux 5, the following screen appears. When you have installation CD to be registered, change the CD and click Next. There are several Red Hat Enterprise Linux installation CDs.
(6) If an overwrite confirmation dialog box appears during the process, click Yes to All.
(7) Once all CDs have been copied, the Red Hat CD Image Copy screen appears. Click End.

54
3.5.1.4. Creating the Linux Installation Parameter File A Linux installation parameter file is a file stores all of the items required during Linux installation setup in advance, enabling unattended OS installation. Use Image Builder to create the Linux installation parameter file. For details on how to create the file, see Section 1.4.5, "Creating a Parameter File for OS Clear Installation (Linux)" in Tool Reference Guide.
Be sure to set up this file if you execute OS clear installation with Linux.
To create a large volume of setup parameter files, see Section 1.4.6, "Batch Creation of Parameter File for OS Clear Installation (Linux)" in Tool Reference Guide.
3.5.2. Creating a Scenario The following describes how to create a scenario. (1) On the Web Console, click Operations in the title bar to switch to the Operations view.
(2) In the tree view, click Resource -> Scenarios -> Scenario Group.
(3) In the Configuration menu, click Add Scenario. (4) The following screen appears. Select the OS tab, and set each item.
For details of items, see Section 3.13.2, "OS Tab" in Web Console Reference Guide.

55
3.5.3. Assign Scenario The following describes how to assign the scenario. (1) On the Web Console, click Operations in the title bar to switch to the Operations view. (2) In the tree view, click Resource -> Machines -> Machine Group. (3) The Machine List group box appears in the main window. Click Managed machine to which the
scenario is to be assigned. (4) In the Operation menu, click Assign Scenario. (5) The following screen appears in the main window. Click Browse, select the scenario to apply, and
click OK.
3.5.4. Executing the Scenario The following describes how to execute the scenario.
If the managed machine power is ON when you execute the scenario, the scenario will not run. If this happens, perform one of the following operations: ・ On the Edit Scenario screen, select the Forced Execution Of A Reboot Is
Performed Before Execution in the Scenario Execution Option Setting group box on the Option tab.
・ Restart the managed machine manually.
Before executing the scenario, confirm that a floppy disk is not inserted in the managed machine where installation is to be performed. If a floppy disk is inserted, OS clear installation may fail.
(1) On the Web Console, click Operations in the title bar to switch to the Operations view. (2) In the tree view, click Resource -> Machines -> Machine Group.

56
(3) The Machine List group box appears in the main window. Select the check box on the left of the Managed machine on which you want to execute the scenario.
(4) In the Action menu, select Execute Scenario.
(In the Machine List group box in the main window, Scenario Executing is displayed in the Status column corresponding to the managed machine on which the scenario is executed.)
For details on how to check the scenario execution status, see Section 4.3, "Scenario Execution List" in Web Console Reference Guide.
3.5.5. Checking the Scenario Execution Results The following describes how to check the OS clear installation scenario execution results. (1) On the Web Console, click Monitor in the title bar to switch to the Monitor view. (2) In the tree view, or in the Monitor Function List group box in the main window, click Scenario
Execution Result List. (3) The Scenario Execution Result List group box appears in the main window. Check the Status
column corresponding to the managed machine. For details on the Scenario Execution Result List group box, see Section 4.5, "Scenario Execution Result List Details" in Web Console Reference Guide.
3.5.6. Precautions/Others Linux is installed over a network using pxelinux.bin and an NFS Server. The "pxelinux.bin" is a loader for Linux installation for PXE boot. DPM sends "pxelinux.bin" to the managed machine by network boot, and get ready for the configuration file that "pxelinux.bin" needs. The "pxelinux.bin" requests the configuration file by tftp. There is a case that it requests the configuration file whose name is different from the name of the files DPM got ready. When the requested configuration file is not ready, DPM outputs the following error on the event log. There is no problem for operation. Type:Application Level:Error Source:DeploymentManager Event ID:1 Description:The requested file could not be found.

57
file = XX(Requested file path is output.) lOsError = 0x00000002
You need to prepare the NFS Server separately because DPM does not have NFS function. When you execute OS clear installation on Red Hat Enterprise Linux 6(except 6.4 or later), configure NFS Server on the server except Windows Server 2012/Windows Server 2012R2. See 2.4 "Notes for OS Clear Installation" in Caution Notes and Trouble Shooting Reference Guide for the details. DPM provides a folder entitled "exports" under the Folder for Image (which is set up on the Detailed Settings screen). DPM registers Linux OS using Image Builder based on the assumption that the exports folder is an NFS shared folder (shared name: exports). If you install the NFS Server on the same machine as DPM Server, set the folder to the NFS shared folder (shared name: exports) as described in Appendix C, "Configuring NFS Server " in Installation Guide. If you install the NFS Server on a different machine, you will need to copy an installation image (ISO image and the CD contents for Red Hat), an installation kernel (vmlinuz, initrd.img), and a Linux installation parameter file to each folder manually. The procedure is described as follows. (1) Create a Linux installation parameter file
The procedure for creating the Linux installation parameter file is the same as that described in Section 3.5.1.4, "Creating the Linux Installation Parameter File." In this case, you need to change the operating mode to offline mode. Offline mode allows you to create a Linux installation parameter file in any location. In offline mode, the Linux boot parameter file and the Linux setup parameter file are created in the same location. The name of the Linux boot parameter file is the same as the saved Linux setup parameter file, however without the extension. For example, if the Linux setup parameter file is SampleComp1.cfg, the Linux boot parameter file is SampleComp1. The default destination folder is <DPM Server installation folder (C:\Program Files (x86)\NEC\DeploymentManager)>\Linux\offline.
(2) Store the Linux installation parameter file Create the exports folder in any location on the NFS Server and share the folder with NFS (shared name: exports). Create a ks folder under this folder and copy the Linux installation parameter file created at Step (1) to the ks folder.
(3) Store the Linux boot parameter file
Copy the Linux boot parameter file created at Step (1) to the Folder for Image(C:\Deploy)\AnsFile\Linux on the Management Server.
(4) Store the installation kernel (vmlinuz and initrd.img)
Create a folder, which has the same name as the boot directory specified for the Linux installation parameter file at Step (1), under <TFTP Root Folder>\pxelinux on the Management Server. Next, copy the installation kernel to the created folder.
The default of the TFTP root folder is "C:\Program Files (x86)\NEC\DeploymentManager\PXE\Images".

58
(5) Store the installation image
Create a folder under NFS shared folder created at step (2) with the same name as the boot directory specified when created Linux installation parameter file at step (1). Copy the ISO file for installation of Red Hat Enterprise Linux and the images folder in the ISO image.
(6) Store DPM Client module
Copy the Folder for Image(C:\Deploy)\exports\daemon folder on the Management Server under the NFS shared folder created at Step (2) for each folder.
The following conditions are required for the above procedure:
・ The name of the boot directory specified when creating the Linux installation parameter file is the same as the name of the destination folder of the installation kernel.
・ The name of the boot directory specified when creating the Linux installation parameter file is the same as the name of the destination folder of the installation image.
・ The shared name of the NFS shared folder is exports. After the above procedure is executed, the file and folder composition will be as follows. In this example, the DPM Server installation folder is "C:\Program Files (x86)\NEC\ DeploymentManager", the DPM Folder for image is "C:\Deploy", the NFS shared folder is "C:\exports", and the boot directory name is "RHEL7".
Management Server C:\
Deploy\
AnsFile\ Boot parameter file (3)
Program Files (x86)\
Installation kernel (4)
DeploymentManager\ PXE\
Images\ pxelinuxbin\
RHEL7\
NEC\

59
NFS Server
C:\(Any drive) exports\(NFS shared name: exports)
Installation parameter file (2)
RHEL7\
ISO file and images folder (5)
daemon\ redhatall\
ia32\
ia64\ Client service module (6)
ks\
Client service module (6)

60
3.6. Installing Service Packs, HotFixes, Linux Patch Files, and Applications (Scenario Type)
To install service packs, hotfixes, Linux patch files, and applications, register the installed image on DPM, and distribute and install the registered image on the target machine. Perform the operations outlined from Section 3.6.1, "Creating and Registering an Image" to Section 3.6.5, "Checking the Scenario Execution Results" in that order.
3.6.1. Creating and Registering an Image Create an image of the service pack, hotfix, Linux patch file, or application to be installed, and register the image on DPM.
3.6.1.1. Registering Service Packs, HotFixes, Linux Patch Files, and Applications
The following describes how to register service packs, hotfixes, Linux patch files, and applications on DPM.
■ The procedures for registering and modifying service packs, hotfixes, Linux patch files, and applications by using Image Builder are as follows. (1) Log on to the machine, on which Image Builder is installed by a user with administrator
authority. When you use Image Builder on the Management Server, log on by the user who installed DPM Server.
(2) From Start menu, select All Programs -> DeploymentManager -> Image Builder. Execute as the administrator when you log on to OS by the user except Administrator.
(3) Image Builder is launched. Click Package registration/modification.
(4) Package registration/modification screen appears. From File menu, select each menu to create/modify package. When creating Windows package -> Create Windows Package See 1.5.1 "Create Windows Package" in Tool Reference Guide for the details. When modifying Windows package -> Modify Windows Package See 1.5.2 "Modify Windows Package" in Tool Reference Guide for the details. When creating Linux package -> Create Linux Package See 1.5.3 "Create Linux Package" in Tool Reference Guide for the details. When modifying Linux package ->Modify Linux Package See 1.5.4 "Modify Linux Package" in Tool Reference Guide for the details.

61
■ For details on how to register service packs, hotfixes, Linux patch files, and applications by using
PackageDescriber, see Section 4.3, "Automatically Registering Packages on Multiple DPM Servers", Section 2.2, "Create Package" in Tool Reference Guide, and Section 2.4, "Registration and Deletion on the Package Web Server" in Tool Reference Guide.
■ Registering from the EXPRESSBUILDER CD-ROM
With the Express 5800/Blade Server series, NEC ESMPRO Agent, NEC ESMPRO AlertManager and Adaptec Storage Manager-Browser Edition can be registered from the EXPRESSBUILDER CD-ROM according to machine model. This section describes the registration procedure when registration to the DPM by the EXPRESSBUILDER CD-ROM is supported.
・ NEC ESMPRO Agent and NEC ESMPRO AlertManager
(1) On the Web Console, confirm that there is no machine executing a scenario.
(2) Insert the EXPRESSBUILDER CD-ROM and select NEC ESMPRO from Setup in the
Master Control Menu that appears automatically.
(3) NEC ESMPRO Setup screen appears. Select Register to DeploymentManager.
"ESMPRO/DeploymentManager" may be displayed while registering NEC ESMPRO Agent or NEC ESMPRO AlertManager according to the versions of the EXPRESSBUILDER CD-ROM. In this case, replace "ESMPRO/DeploymentManager" as "DeploymentManager". Registration will not be affected.
(4) The Registration in DeploymentManager screen appears. Select the application.
If a package with the same name is already registered, a confirmation message of overwrite registration appears.
(5) After you have selected the application, a copy complete confirmation screen appears,
indicating that registration is completed. Click OK to close the screen.
・ Adaptec Storage Manager-Browser Edition
If an Adaptec Storage Manager menu exists in EXPRESSBUILDER, you can register the Adaptec Storage Manager-Browser Edition.
(1) On the Web Console, confirm that there is no machine executing a scenario.
(2) Insert the EXPRESSBUILDER CD-ROM and select Adaptec Storage Manager from
Setup in the Master Control Menu that appears automatically.
(3) The Setup Type screen appears. Select Register ASM in DeploymentManager.
If a package with the same name is already registered, a confirmation message of overwrite registration appears.
(4) The file copy complete confirmation screen appears. Registration is now completed. Click
OK to close the screen.

62
3.6.2. Creating a Scenario The following describes how to create a scenario. (1) On the Web Console, click Operations in the title bar to switch to the Operations view. (2) In the tree view, click Resource -> Scenarios -> Scenario Group. (3) In the Configuration menu, click Add Scenario. (4) The Add Scenario screen appears in the main window. Select the Package tab, and set each
item. For details of items, see Section 3.13.3, "Package Tab" in Web Console Reference Guide.

63
3.6.3. Assigning the Scenario The following describes how to assign the scenario. (1) On the Web Console, click Operations in the title bar to switch to the Operations view. (2) In the tree view, click Resource -> Machines -> Machine Group. (3) The Machine List group box appears in the main window. Click Managed machine to which the
scenario is to be assigned. (4) In the Operation menu, click Assign Scenario. (5) The following screen appears in the main window. Click Browse, select the scenario to apply, and
click OK.

64
3.6.4. Executing the Scenario The following describes how to execute the scenario.
If the managed machine is in one of the following states during scenario execution, the managed machine will not be able to shut down even if the Restart After Applying or Turn Off Power After Scenario Execution check box is selected. ・ The machine is locked by a workstation lock. ・ The machine is locked by a password-protected screen saver. ・ The machine is connected to Remote Desktop, Terminal Services, or other
remote connection software. ・ There are data, which is being edited, or an application, which does not respond
to the shutdown request, on the machine. * For the detail of the item Restart After Applying, see Section 3.13.3, "Package
Tab" in Web Console Reference Guide also, for the detail of the item Turn Off Power After Scenario Execution, see Section 3.13.5, "Option Tab" in Web Console Reference Guide.
If you execute the scenario on two or more managed machines, be sure that the number does not exceed the value specified under Machines for Simultaneous Execution. If the number does exceed the value, change the value specified. For details, see Section 2.7.1.3, "Network Tab" in Web Console Reference Guide.
DPM executes UDP communication for data sending by multicast. On UDP communication, there is a possibility that data cannot be transferred properly due to difference of data between sending side and receiving side when devices of different transfer rate are on the same path. If this happens, the amount of time until scenario completion might increase.
When an executable file generates descendant processes (executable file->child process-> grandchild process), DPM recognizes the completion of the scenario after the executable file and all the child processes finish. The finish of the grandchild process is not monitored. Also, when the executable file is a script file such as bat or sh, DPM recognizes the completion of the scenario after the executable file finishes. The finish of the child and grandchild processes is not monitored.
If you install RUR (revision up release) module for Express 5800 Series by DPM, you need to log on to the target machine by an arbitrary user and execute the scenario without running screen saver. When the machine is locked even if you logged on, or screen saver is started during the installing, the automatic installing cannot be continued in some cases.

65
A managed machine before rebooting can execute 100 scenarios specified under Execute At Next Startup under Execution Timing Setting on the Package tab of the scenario file. If you execute 101 or more scenarios, reboot the managed machine. Rebooting allows you to execute another 100 scenarios.
If you specified an application to be installed at the same time as a service pack, hotfix, or Linux patch file, the service pack, hotfix, or Linux patch file will first be applied followed by application installation.
You can skip a countdown message by the following operation on the managed machine. ・ For Windows OS
A countdown dialog box appears on the managed machine. Click Execute Immediately.
・ For Linux OS A countdown message appears on the console of the managed machine.(In the case of Red Hat Enterprise Linux 7or later, a countdown message appears, only when the console is already launched.) Execute /usr/local/bin/depcancel on the console. In SUSE Linux Enterprise, in the environment, that X-Windows is not launched (run level 3), a message of two lines may appear. This message does not affect operations.
(1) On the Web Console, click Operations in the title bar to switch to the Operations view. (2) In the tree view, click Resource -> Machines -> Machine Group. (3) The Machine List group box appears in the main window. Select the check box on the left of the
Managed machine on which you want to execute the scenario. (4) In the Action menu, select Execute Scenario.
(In the Machine List group box in the main window, Scenario Executing is displayed in the Status column corresponding to the managed machine on which the scenario is executed.)

66
If you selected Transmit Data By Multicast under Multicast Condition Setting on the Package tab, the scenario begins when the number of ready managed machine is the same as the value set under Maximum Targets or when the value set under Maximum Waiting Time is exceeded. There is no function for immediately executing the scenario on a machine that is in a waiting state. Note when scenario is executed on managed machines beyond the specified Maximum Targets, a scenario execution error occurs on the managed machine that exceed the Maximum Targets and attempt to execute the scenario. If this happens, select Remove Error in the Operation menu to clear the scenario execution errors. Then, adjust the Maximum Targets value to an appropriate value, and execute the scenario.
For details on how to check the scenario execution status, see Section 4.3, "Scenario Execution List" in Web Console Reference Guide.
3.6.5. Checking the Scenario Execution Results The following describes how to check the scenario execution results. (1) On the Web Console, click Monitor in the title bar to switch to the Monitor view. (2) In the tree view, or in the Monitor Function List group box in the main window, click Scenario
Execution Result List. (3) The Scenario Execution Result List group box appears in the main window. Check the Status
column corresponding to the managed machine. For details on the Scenario Execution Result List group box, see Section 4.5, "Scenario Execution Result List Details" in Web Console Reference Guide.
If the scenario is not completed within 120 minutes, the time-out occurs and a scenario execution error results.

67
3.7. Distributing the BIOS/Firmware Update Floppy Disk Image
To distribute an image of the BIOS/firmware update floppy disk, register the image to be distributed in DPM, and distribute the registered image to the target machine. That is, perform the operations outlined from Section 3.7.1, "Creating and Registering an Image" to Section 3.7.5, "Checking the Scenario Execution Results" in that order.
3.7.1. Creating and Registering an Image Create an image of the BIOS/firmware update floppy disk to be distributed, and register the image in DPM as follows.
3.7.1.1. Registering the BIOS/Firmware Update Floppy Disk
The size is limited to the floppy disk capacity (1.44MByte). You can also distribute and execute an original tool, which can be started up as a floppy disk, by DPM.
The following describes how to register a floppy disk image on DPM by Image Builder. (1) Prepare a floppy disk to execute BIOS and firmware updates automatically. Insert the disk into the
floppy disk drive of the machine on which Image Builder is installed to register the image on DPM. (2) Log on to the machine, on which Image Builder is installed, by a user with administrator authority.
Log on by a user who installed DPM Server when you use Image Builder on the Management Server.
(3) From Start menu, select All Programs -> DeploymentManager -> Image Builder. When you log on to the OS by a user except Administrator, you need to execute this as an administrator.
(4) Image Builder is launched. Click Creating Floppy Disk Image/Registering EFI application.

68
When you start Image Builder and click a menu item for the first time, the following dialog box appears. Read the contents of the agreement and click I Accept.
(5) The following screen appears. Select Creating Floppy Disk Image and click OK.
(6) The following screen appears. Enter the image file name and click OK.
Image File Name 8 characters or less can be entered. Alphanumeric characters and the following symbols can be entered. . _ -
(7) A confirming screen appears. Confirm the floppy disk is inserted, and click OK.

69
(8) The following confirmation appears. Click OK.
3.7.2. Creating a Scenario The following describes how to create a scenario. (1) On the Web Console, click Operations in the title bar to switch to the Operations view.
(2) In the tree view, click Resource -> Scenarios -> Scenario Group.
(3) In the Configuration menu, click Add Scenario. (4) The Add Scenario screen appears in the main window. Select the HW Setting tab, and set each
item. For details, see Section 3.13.1, "HW Settings Tab" in Web Console Reference Guide.
3.7.3. Assigning the Scenario The following describes how to assign the scenario. (1) On the Web Console, click Operations in the title bar to switch to the Operations view. (2) In the tree view, click Resource -> Machines -> Machine Group. (3) The Machine List group box appears in the main window. Click Managed machine to which the
scenario is to be assigned. (4) In the Operation menu, click Assign Scenario.

70
(5) The following screen appears in the main window. Click Browse, select the scenario to apply, and
click OK.
3.7.4. Executing the Scenario The following describes how to execute the scenario.
If the managed machine power is ON when you execute the scenario, the scenario will not run. If this happens, perform one of the following operations: ・ From the Edit Scenario screen, select the Option tab and, under the Scenario
Execution Option Setting group box, select Forced Execution Of A Reboot Is Performed Before Execution.
*If the managed machine of Windows is in one of the following states, rebooting will not be performed even if Forced Execution Of A Reboot Is Performed Before Execution is selected. - The machine is locked by a workstation lock - The machine is locked by a password-protected screensaver - The machine is connected from Remote Desktop, Terminal Services, or other
remote connection software - The machine has data that is currently being edited or an application that will
not respond to a shutdown request ・ Reboot the managed machine manually.
When the version of BIOS to be distributed is the same as the version of BIOS installed on the managed machine, BIOS installation may stop before completion. If this happens, a scenario execution error will not occur until a DPM time-out occurs. Before executing the scenario, be sure to check the version of BIOS to be distributed.
(1) On the Web Console, click Operations in the title bar to switch to the Operations view. (2) In the tree view, click Resource -> Machines -> Machine Group. (3) The Machine List group box appears in the main window. Select the check box on the left of the
Managed machine on which you want to execute the scenario.

71
(4) In the Action menu, select Execute Scenario.
(In the Machine List group box in the main window, Scenario Executing is displayed in the Status column corresponding to the managed machine on which the scenario is executed.)
For details on how to check the scenario execution status, see Section 4.3, "Scenario Execution List" in Web Console Reference Guide.

72
3.7.5. Checking the Scenario Execution Results The following describes how to check the scenario execution results. (1) On the Web Console, click Monitor in the title bar to switch to the Monitor view. (2) In the tree view, or in the Monitor Function List group box in the main window, click Scenario
Execution Result List. (3) The Scenario Execution Result List group box appears in the main window. Check the Status
column corresponding to the managed machine. For details on the Scenario Execution Result List group box, see Section 4.5, "Scenario Execution Result List Details" in Web Console Reference Guide.

73
4. Useful Functions
4.1. Scheduling DPM allows you to execute a scenario or perform power management operations (power ON or shutdown) on a specified date and at a specified time on managed machines. Set up the schedule in the Scenario Setting group box or the Power Management Schedule group box on either of the screens below. ・ Assign Scenario screen (For details, see Section 3.8.3, "Assign Scenario" in Web Console
Reference Guide.) ・ Add Machine screen (For details, see Section 3.5.5, "Register Managed Machine" in Web
Console Reference Guide.) You can also set up a schedule for executing the scenario collectively for managed machines of the machine group. For details, see Section 3.6.1, "Group Batch Execution" in Web Console Reference Guide.
4.2. Performing Operations from DPM Command Line
DPM Command Line allows you to view client information, execute a scenario and so on without performing operations from the Web Console. For details on how to use Command Line, see Section 4, "DPM Command Line" in Tool Reference Guide.
4.3. Automatically Registering Packages on Multiple DPM Servers
To install multiple DPM Servers, you can commonly manage the packages to be registered on each DPM Server by using the Package Web Server.
About configuration of multiple Management Servers, see Section 2.1.5, "System Configuration" in First Step Guide.
Register the Package Web Server on the Management Server. The registered package is downloaded from the Package Web Server to the Management Server.
For details on how to set up the Package Web Server, see Appendix B, "Configuring the Package Web Server" in Installation Guide.

74
4.3.1. Adding the Package Web Server
You cannot change the package download settings during automatic downloading. If multiple Package Web Servers are registered, automatic downloading is
performed in the order of server ID, not in the order in which the servers were added. The priority order is Numbers -> Letters.
Example)Server ID download order #1:0PackWS #2:ABCD ->the server ID lastly added #3:AD #4:APackWS #5:BPackWS #6:packWS ->the server ID firstly added
You can automatically download packages from the Package Web Server by registering the Package Web Server on multiple Management Servers. The following describes the procedure for adding the Package Web Server to the Management Server. (1) On the Web Console, click Management in the title bar to switch to the Management view. (2) In the tree view, or in the Management Function List group box in the main window, click DPM
Server icon. (3) The Configuration menu for DPM Server icon appears. Click Package Download Setting. (4) The Package Web Server group box appears. Click Add. (5) The following screen appears in the main window. Set each item.
For setting item details, see Section 2.7.3.1, "Add a Package Web Server" in Web Console Reference Guide.
For details of editing and deleting the Package Web Server, see Section 2.7.3.2 "Edit the Package Web Server" and Section 2.7.3.3, "Delete the Package Web Server" in Web Console Reference Guide.

75
4.3.2. Setting an Automatic Download Time The following describes setting procedure to download packages from the Package Web Server
to the Management Server automatically. (1) On the Web Console, click Management in the title bar to switch to the Management view. (2) In the tree view, or in the Management Function List group box in the main window, click DPM
Server icon. (3) The Configuration menu for DPM Server icon appears. Click Package Download Setting. (4) The following screen appears in the main window. Select the Download Automatically check box.
For setting item details, see Section 2.7.3, "Package Download Setting" in Web Console Reference Guide.
When the specified time arrives, the Management Server automatically refers to the Package Web Server and downloads updated packages.

76
4.3.3. Checking the Automatic Download Results The following describes the procedure to confirm download results after packages have been downloaded. (1) When you click Management on the title bar of the Web Console, it will switch to the
Management view. (2) In the tree view, or in the Management Function List group box in the main window, click DPM
Server icon. (3) The Configuration menu for DPM Server icon appears. Click Package Download Setting. (4) The Package Web Server group box appears in the main window. Check the Latest Download
Information. The Latest Download Information indicates whether downloading succeeded or failed, and the latest download time. For Latest Download Information details, see Section 2.7.3, "Package Download Setting" in Web Console Reference Guide. The packages downloaded from the Package Web Server are stored in the Folder for Image. The default Folder for Image is C:\Deploy. For Folder for Image details, see Section 2.7.1.1, "General Tab" in Web Console Reference Guide.
If you have multiple Management Server and delete a package automatically downloaded from the Package Web Server, note the following: You can delete a package by the function to delete registered data of either PackageDescriber or Image Builder (*1). However, if you delete the package by Image Builder, the deletion is temporary, and the package will be downloaded again from the Package Web Server when the next automatic download time arrives. For this reason, to delete the package completely, use PackageDescriber. The package will be deleted the next time automatic download is executed. *1 ・ You can delete the package from the Management Server with Image Builder. ・ You can delete the package from the Package Web Server with
PackageDescriber.

77
4.4. Installing Service Packs, HotFixes, and Applications (Automatic Update Type)
To install service packs, hotfixes, and applications using the automatic update type, register the image for the installation target to DPM and set the settings for automatic update in the managed machine. The automatic update process is executed in accordance with the timing of registered image properties or the contents of automatic update setting for the managed machine. When the timing at which the automatic update is to be executed arrives, the managed machine checks from the Management Server. If there is a package that has not been applied among those that should be applied, the managed machine requests distribution. The Management Server that receives the request distributes the package that has not been applied. The automatic update is executed under any of the following timing or conditions.
Automatic update Timing When a package with the urgency of highest is downloaded from the Package Web Server to the Management Server. When the Package registration/modification window is closed after registering a package of highest urgency with Image Builder. When the time of the managed machine reaches the specified automatic update time. When automatic update is issued from Web Console.
Condition
When there is a newly registered machine
The package to be automatically updated is applied under the following conditions.
Package to be Automatically updated
Condition The package is an OS package supported by the automatic update function in the managed machine (Linux is not supported). The package urgency is high or highest. The package is a service pack with the major version, minor version, or ID information entered. The package is HotFix with the MS number or ID information entered. The package is an application with the display name or ID information entered.
About how to create a package, see Section 1.5, "Package Registration/Modification" in Tool Reference Guide and Section 2.2, "Create Package" in Tool Reference Guide.

78
4.4.1. Setting up Automatic Updates The automatic update time, maximum number of machines for automatic update, maximum transfer rate, and the automatic update function at machine startup for the managed machine can be set as follows. The settings is the default when you add group. Setting for the group and the managed machine already exist should be performed individually. (1) When you click Management on the title bar of the Web Console, it will switch to the
Management view. (2) In the tree view, or in the Management Function List group box in the main window, click DPM
Server icon. (3) The Configuration menu for DPM Server icon appears. Click Automatic Update Setting. (4) The following screen appears in the main window. Set the settings for automatic update.
For automatic update setting details, see Section 2.7.4, "Automatic Update Setting" in Web Console Reference Guide.

79
4.4.2. Executing Automatic Updates After receiving the package, the managed machine applies the package based on the specified application timing. The application timing can be set in the Application Timing on the Automatic Update Setting screen. During the automatic update, the icon for automatic update status is displayed on the task tray of the managed machine. For details on the automatic update statuses displayed in the task tray, see Section 3.3, "Automatic Update Status Display Tool" in Tool Reference Guide.
Depending on the package automatically updated, the machine may be required to reboot. Be careful when you specify the application timing except Show confirmation as the application timing. ・ When the distributed packages include a package that requires rebooting after
installation ・ When the distributed packages include a package that requires exclusive
application and other packages In the above cases, the managed machine needs to be rebooted several times. When the timing for rebooting arrives, the following screen appears and the machine is rebooted after 30-second countdown.
Click Reboot immediately to reboot the managed machine. Click Cancel to cancel rebooting and apply the package at the next startup.

80
When the status of the managed machine is either of the following, the automatic
update cannot be executed. For details about the status, see Section 3.7.1, "Machine Status" in Web Console Reference Guide. ・ Status
- Scenario Executing - Scenario Execution Stop - Remote Power ON Error - Setting Automatic Update Time
・ Power - Off
Also, if the following functions are being executed for the managed machine, the automatic update cannot be executed. These statuses are not displayed in the Status column.
・ File distribution ・ File deletion ・ Obtaining the information of File/Folder List screen
When you execute a scenario during automatic update, a scenario execution error occurs. Execute the scenario after the automatic update is completed.
While running the automatic update, you cannot execute File distribution, File deletion, or obtaining the information in File/Folder List screen. Execute them after the automatic update is completed.
Following settings for automatic update support only Windows Vista or later ・ Do not execute Automatic Update while logon ・ Wait for log off ・ Specified Specify Execute Time
4.4.3. Checking the Automatic Update Execution Results The following describes how to check the automatic update execution results. (1) On the Web Console, click Monitor in the title bar to switch to the Monitor view. (2) In the tree view, or in the Monitor Function List group box in the main window, click Automatic
Update Result List. (3) The Automatic Update Result List group box appears in the main window. Select the managed
machine to be automatically updated, and click Detail ( ) icon.

81
(4) The following screen appears. Check the automatic update execution results.
For automatic update result list details, see Section 4.7, "Automatic Update Result List Details" in Web Console Reference Guide.
4.5. Distributing a File You can distribute files on the Management Server to an arbitrary folder on the managed machine. Also, you can change the setting of access permission when the file is distributed.
You can distribute only a single file to the managed machine. You cannot distribute two or more files or a folder.

82
4.5.1. Storing a File on the Management Server Store the file, which will be distributed to the managed machine, in an arbitrary folder (the folder which is not redirected) on the Management Server.
4.5.2. Distributing the File to a Managed Machine The following describes the procedure to distribute a file on the Management Server to the managed machine on the Web Console. (1) On the Web Console, click Operations in the title bar to switch to the Operations view. (2) In the tree view, click Resource icon -> Machines icon -> Machine Group icon. (3) The Machine List group box appears in the main window, then click the name of the Machine to
which you distribute the file. (4) The Operation menu for the managed machine will be displayed, and then click File Operation. (5) The following screen appears in the main window. Set each item. For details of each item, see
Section 3.8.11, "File Distribution" in Web Console Reference Guide.

83
4.5.3. Checking the File Distribution Results The following describes the procedure to check the result of the file distribution. (1) On the Web Console, click Monitor in the title bar to switch to the Monitor view.
(2) In the tree view, click Monitor icon -> File Operation Result List icon. Alternatively, in the
Monitor Function List group box in the main window, click File Operation Result List.
(3) The File Operation Result List group box appears in the main window. Check the result of the file distribution. For details of the result list, see Section 4.9, "File Operation Result List Details" in Web Console Reference Guide.

84
Appendix A Operating DPM without Using the DHCP Server
This chapter describes the procedure and the note, which are necessary for each function when you operate DPM without DHCP server. The procedure and the note which are not described in this chapter about functions are the same as when you operate DPM with DHCP server. About set up procedure of the Management Server as advance preparation and the list of functions that you can use, see Appendix B, "For Customers Who Do Not Install a DHCP Server" in First Step Guide.
Registering the New Managed Machine Although DPM cannot detect a new machine by the network boot, DPM can detect it automatically by DPM Client. If the machine can communicate with the Management Server, the New Machine icon automatically appears in the tree view when DPM Client is installed.
DPM Client installation is required. See Section 2.2, "Installing DPM Client" in Installation Guide.

85
Executing Backup, Restore, or Disk Configuration Check When you execute backup, restore, or disk configuration check scenario in operation that you do not use DHCP server, you need a bootable CD. Create a bootable CD and execute the scenario as the following procedure. (1) Create a bootable CD.
Files, which are used for the bootable CD, differ depending on Deploy-OS, which is set for the managed machine. Folder for bootable CD corresponding to each Deploy-OS is as the following. In the procedure as described later, use files under "Folder for bootable CD" corresponding to Deploy-OS.
Value which is set on Deploy-OS for the managed machine
Folder for bootable CD
Use Default Value Name, which is displayed in Detail Setting -> General tab -> Default Value of Deploy-OS(IA32). The default is "ia32_110331_26". For details of the corresponding screen, see Section 2.7.1.1, "General Tab" in Web Console Reference Guide.
NEC Express5800 001 ia32_080331_24 ・ NEC Express5800 002 ・ VMware ESX Virtual Machine 001 ・ Microsoft Hyper-V Virtual Machine
001
ia32_110331_26
・ NEC Express5800 006 ・ VMware ESXi Virtual Machine 002 ・ Microsoft Hyper-V Virtual Machine
002
ia32_121228_26
VMware ESXi Virtual Machine 003 ia32_150413_26 Others See the document of the
corresponding module for the machine model.
Create a bootable CD by either of the following procedures: ・ Create a bootable CD where the setup file is stored. ・ Create a bootable CD from cdboot.iso in the installation media.
When the managed machine does not have a console, create a bootable CD by the procedure of "Create a bootable CD where the setup file is stored".
Create a bootable CD where the setup file is stored
By storing a setup file (DPMIP.conf) in a bootable CD, you can omit entering items when a bootable CD is started. Create it by following below procedure.
1) Create a working folder (arbitrary) on the Management Server.

86
Up to approximately 150MByte free space in the hard disk is necessary. The folder structure is different from that for local restoring. When you create
a bootable CD for local restoring, create another folder. About local restoring, contact your sales or support representative.
2) Copy the following folder directly under the working folder.
<Installation media>:\DPM\TOOLS\CDBoot\Tools\
3) Copy the following folder directly under Tools folder, which was copied at step 2). <Installation media>:\DPM\TOOLS\CDBoot\CD-modules\
4) Copy the following folder directly under CD-modules folder which was copied at step 3).
<Installation media>:\DPM\TOOLS\CDBoot\Folder for Bootable CD\ISOLINUX\
5) Copy the following folder directly under CD-modules folder which was copied at step 3). *The following folder does not exist depending on Deploy-OS.
In that case, you do not need to copy. <Installation media>:\DPM\TOOLS\CDBoot\Folder for Bootable CD\EFIBOOT\
6) Copy the following folder directly under CD-modules folder which was copied at step 3).
*The following folder does not exist depending on Deploy-OS. In that case, you do not need to copy. <Installation media>:\DPM\TOOLS\CDBoot\Folder for Bootable CD\config\
nvramrestore.ini
7) Check that folders and files structure under the working folder are as follows.
*EFIBOOT folder and nvramrestore.ini does not exist depending on the type of Deploy-OS.
Working folder\ └ Tools\
├ cygwin1.dll ├ mkisofs.bat ├ mkisofs.exe └ CD-modules\
├ DPMIP.conf ├ nvramrestore.ini (*) ├ rootfs-cdboot └ EFIBOOT\ (*) | ├ efiboot.conf | └ efiboot.img └ ISOLINUX\
├ initrd.img ├ isolinux.bin ├ isolinux.cfg └ vmlinuz

87
8) Remove read only attribute of the following file, enter the following items by text editor and so
on, and save the file. Working Folder\Tools\CD-modules\DPMIP.conf
・ ClientIPAddress:
Enter IP address to be assigned to the managed machine, on which the bootable CD is started, in the format xxx.xxx.xxx.xxx.
・ ServerIPAddress: Enter IP address of the Management Server in the format xxx.xxx.xxx.xxx.
・ Netmask: Enter the netmask in the format xxx.xxx.xxx.xxx. (This can be omitted.)
・ Gateway: Enter IP address of the gateway in the format xxx.xxx.xxx.xxx. (This can be omitted.)
Example)
You can specify the eth number of the managed machine connected to the Management Server by adding ClientEth:x to DPMIP.conf.(Enter the eth number in x.) When you specify the eth number, the connection to the Management Server is checked using the specified eth number. If the connection fails, the connection to the Management Server is checked in the order of eth0 to eth511. When you do not specify the eth number, the connection to the Management Server is checked in the order of eth0 to eth511.
Example)
When you use eth5 for the connection When the managed machine does not have a console, edit DPMIP.conf noting
the following points. ・ To omit entering on the screen, specify each item such as
"ClientIPAddress", "ServerIPAddress", and so on. ・ To shut down the machine automatically without checking the display on
the screen when the processing is completed, specify "AutoShutdown:1".
Example)
ClientIPAddress:192.168.0.12 ServerIPAddress:192.168.0.10 Netmask:255.255.255.0 Gateway:192.128.0.1 ClientEth:5
ClientIPAddress:192.168.0.12 ServerIPAddress:192.168.0.10 Netmask:255.255.255.0 Gateway:192.168.0.1
ClientIPAddress:192.168.0.12 ServerIPAddress:192.168.0.10 Netmask:255.255.255.0 Gateway:192.128.0.1 AutoShutdown:1

88
9) Start the command prompt and change the current folder to the following folder. Working Folder\Tools\
10) Execute mkisofs.bat.
If the following error occurs when you execute mkisofs.bat, the following file may be set to read only attribute.
Working Folder\Tools\CD-modules\ISOLINUX\isolinux.bin mkisofs.exe: Permission denied. Error opening boot image file '.\CD-modules/ISOLINUX/isolinux.bin' for update.
In this case, remove read only attribute of mkisofs.bat and execute it again.
11) The cdboot.iso image is created directly under the current folder.
Create CD by writing software. (Write ISO image.) For details of usage of the writing software, see the manual of the writing software in use.
When you use CD drive of USB connection, it is recommended that you connect the drive directly to the machine, not through USB hub and so on.
Creating a bootable CD from cdboot.iso in the installation media
Create a bootable CD by specifying cdboot.iso in the installation media by a writing software. For details on how to use the writing software, see the manual of the writing software. <Installation media>:\DPM\TOOLS\CDBoot\Folder for Bootable CD\cdboot.iso
When you use a machine with a floppy disk drive, you can omit entering items when the bootable CD is started by using the bootable CD and the floppy disk in which the setup file(DPMIP.conf) is stored. For details on how to create the setup file(DPMIP.conf) which is stored in the floppy disk, see the above "Create a bootable CD where the setup file is stored" -> Step 8). In this case, use the file, which is copied from the following. <Installation media>:\DPM\TOOLS\CDBoot\FD-modules\DPMIP.conf
When you use CD drive of USB connection, it is recommended that you connect the drive directly to the machine, not via USB hub and so on.
(2) Create a scenario.
Create a backup, restore, or disk configuration check scenario. For details on how to create a scenario, see Section 3.1.1, "Creating a Scenario" and Section 3.2.1, "Creating a Scenario" in this manual or Section 3.2, "Disk Configuration Check Tool" in Tool Reference Guide.
Restoring by multicast cannot be executed. In this case, a scenario execution error occurs. When you execute restoring, select the Transmit Data By Unicast.
The setting of Check the completion of a scenario by the communication with DPM Client is ignored.
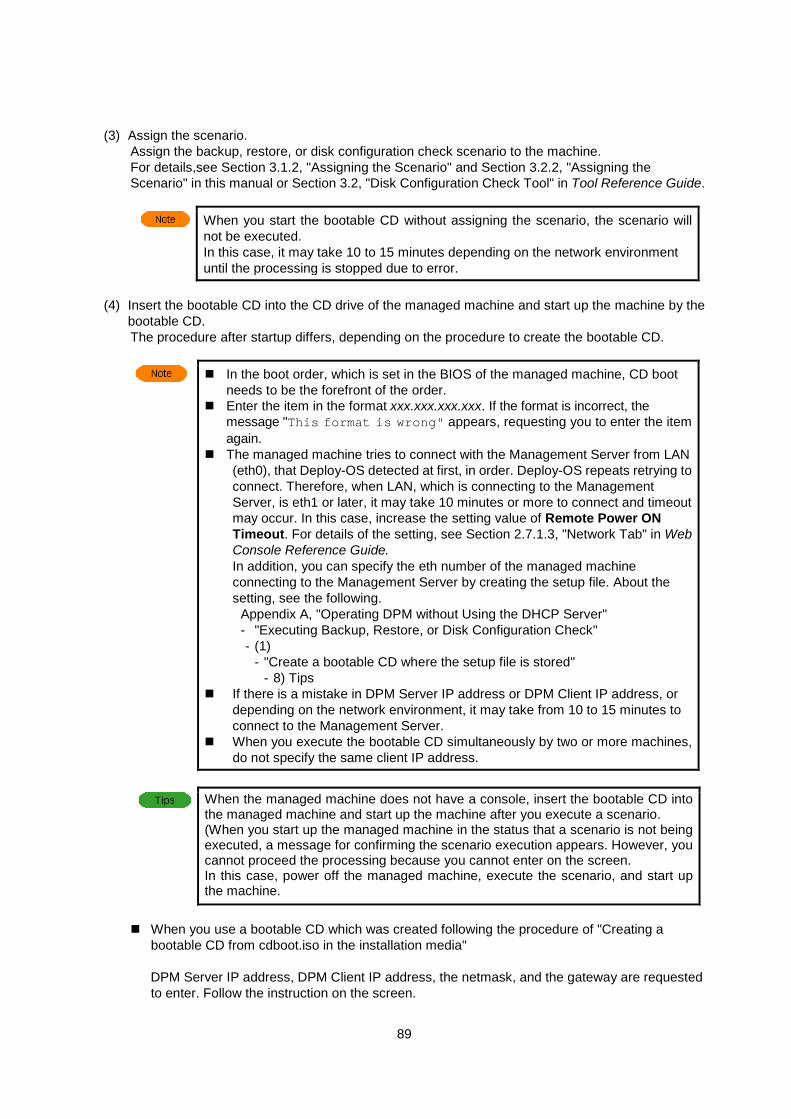
89
(3) Assign the scenario.
Assign the backup, restore, or disk configuration check scenario to the machine. For details,see Section 3.1.2, "Assigning the Scenario" and Section 3.2.2, "Assigning the Scenario" in this manual or Section 3.2, "Disk Configuration Check Tool" in Tool Reference Guide.
When you start the bootable CD without assigning the scenario, the scenario will not be executed. In this case, it may take 10 to 15 minutes depending on the network environment until the processing is stopped due to error.
(4) Insert the bootable CD into the CD drive of the managed machine and start up the machine by the
bootable CD. The procedure after startup differs, depending on the procedure to create the bootable CD.
In the boot order, which is set in the BIOS of the managed machine, CD boot needs to be the forefront of the order.
Enter the item in the format xxx.xxx.xxx.xxx. If the format is incorrect, the message "This format is wrong" appears, requesting you to enter the item again.
The managed machine tries to connect with the Management Server from LAN (eth0), that Deploy-OS detected at first, in order. Deploy-OS repeats retrying to connect. Therefore, when LAN, which is connecting to the Management Server, is eth1 or later, it may take 10 minutes or more to connect and timeout may occur. In this case, increase the setting value of Remote Power ON Timeout. For details of the setting, see Section 2.7.1.3, "Network Tab" in Web Console Reference Guide. In addition, you can specify the eth number of the managed machine connecting to the Management Server by creating the setup file. About the setting, see the following.
Appendix A, "Operating DPM without Using the DHCP Server" - "Executing Backup, Restore, or Disk Configuration Check" - (1)
- "Create a bootable CD where the setup file is stored" - 8) Tips
If there is a mistake in DPM Server IP address or DPM Client IP address, or depending on the network environment, it may take from 10 to 15 minutes to connect to the Management Server.
When you execute the bootable CD simultaneously by two or more machines, do not specify the same client IP address.
When the managed machine does not have a console, insert the bootable CD into the managed machine and start up the machine after you execute a scenario. (When you start up the managed machine in the status that a scenario is not being executed, a message for confirming the scenario execution appears. However, you cannot proceed the processing because you cannot enter on the screen. In this case, power off the managed machine, execute the scenario, and start up the machine.
When you use a bootable CD which was created following the procedure of "Creating a
bootable CD from cdboot.iso in the installation media"
DPM Server IP address, DPM Client IP address, the netmask, and the gateway are requested to enter. Follow the instruction on the screen.

90
1) Enter IP address of the Management Server.
2) Enter IP address of the client.
3) Enter the netmask. (When you omit entering this, press Enter key without any input.)
4) Enter the gateway. (When you omit entering this, press Enter key without any input.)
When you use a bootable CD which was created following the procedure of "Create a bootable CD where the setup file is stored" or when you use a bootable CD and a floppy disk, which was created following the procedure of "Creating a bootable CD from cdboot.iso in the installation media".
Items which are set in DPMIP.conf are not requested to enter. When the setting content cannot be obtained from DPMIP.conf (the item is not entered, the setting is incorrect, and so on), the item is requested to enter on the screen.
Items which could be obtained from DPMIP.conf
Items which are requested to enter ServerIPAddress ClientIPAddress Netmask Gateway
ClientIPAddress only Yes - - Partially ServerIPAddress only - Yes Partially Partially Both - - - -
[Note] Yes: Requested to enter on the screen. Partially: Requested to enter on the screen if the item could not be obtained.
If it failed to obtain the setting content in DPMIP.conf, the following message appears. Check if the setting contents are correct. ・ Failed to get ServerIPAddress from
/mnt/cdrom[/mnt/floppy]/DPMIP.conf(1-6) *Check ServerIPAddress in DPMIP.conf.
・ Failed to get ClientIPAddress from /mnt/cdrom[/mnt/floppy]/DPMIP.conf(1-6) *Check ClientIPAddress in DPMIP.conf.
・ Failed to get Netmask from /mnt/cdrom[/mnt/floppy]/DPMIP.conf(1-6) *Check Netmask in DPMIP.conf.
・ Failed to get Gateway from /mnt/cdrom[/mnt/floppy]/DPMIP.conf(1-6) *Check Gateway in DPMIP.conf.
ServerIPAddress:
ClientIPAddress:
Netmask:
Gateway:

91
(5) Start scenario execution.
There are two ways to execute the scenario as the following: ・ Executing the scenario from the managed machine. ・ Executing the scenario from the Management Server.
The managed machine tries to connect with the Management Server from LAN (eth0), that Deploy-OS detected at first, in order. Deploy-OS repeats retrying to connect. Therefore, when LAN, which is connecting to the Management Server, is eth1 or later, it may take 10 minutes or more to connect and timeout may occur. In this case, increase the setting value of Remote Power ON Timeout. For details of the setting, see Section 2.7.1.3, "Network Tab" in Web Console Reference Guide. In addition, you can specify the eth number of the managed machine, which will connect to the Management Server by creating the setting file. About the setting, see the following.
Appendix A, "Operating DPM without Using the DHCP Server" - "Executing Backup, Restore, or Disk Configuration Check"
- (1) - "Create a bootable CD where the setup file is stored"
- 8) Tips. When NIC which has MAC address with (*) mark displayed on the Machine
Detail screen and NIC connected to the Management Server is different, there is a possibility that scenario execution error might be occurred. In that case, start OS on the managed machine and confirm that whether (*) mark displayed on Machine Detail screen is added to the MAC address of NIC which is connected to the Management Server. Alternatively, change NIC connected to the Management Server to NIC has MAC address with (*) mark.
When you execute the scenario from the managed machine
1) In the status that backup, restore, or disk configuration check scenario is not being executed, insert the bootable CD into the managed machine and start up the machine.
When backup scenario is assigned, the following message appears. Enter y or n.
When restore scenario is assigned, the following message appears. Enter y or n.
When disk configuration check scenario is assigned, the following message appears. Enter y or n.
2) When you enter y, the backup scenario, restore scenario, or disk configuration check scenario is executed. When you enter n, the following message appears and the backup scenario, restore scenario, or disk configuration scenario is not executed.
Would you like to start Backup?(y/n):
Would you like to start Restore?(y/n):
Would you like to start DiskProbe?(y/n):
The scenario did not start.

92
When Use A DHCP Server is specified on Detailed Setting of the Web Console, the scenario will not be executed even if you start up the machine from the bootable CD.
When you execute the scenario from the Management Server
Insert the bootable CD into the machine, execute the backup, restore, or disk configuration check scenario from the Management Server, and then start up the managed machine. In this case, a confirmation message does not appear, and the backup, restore, or disk configuration check scenario is executed.
Check the check box of Forced Execution Of A Reboot Is Performed Before Execution when the managed machine is ON.
Operation without inputting from the machine by using DPMIP.conf when
executing scenario from Management Server is recommended because inputting DPM Server IP address, DPM client IP address, Netmask and Gateway takes time.
(6) End scenario execution.
The following message appears on the machine when the scenario execution is completed or an error occurs in scenario execution stop. Remove the disk from the CD/FD drive. Press 'p' key to poweroff, 'r' key to reboot:
・ To reboot the machine, eject the CD/FD and press r key and then Enter key. ・ To power off the machine, eject the CD/FD and press p key and then Enter key.
After the backup, restore, or disk configuration check scenario is completed, eject the bootable CD. If you start up the machine in the status that the bootable CD is inserted, the scenario will be executed again.
Even if you press the p key, the machine may not be powered off completely, depending on the machine. In this case, there is no problem if the following message appears. After you check the message, power off the machine manually. flushing ide device : hda(* ) system halted.
*The displayed character string differs according to the environment. When the managed machine does not have a console, if you use a bootable
CD in which "AutoShutdown:1" is specified in DPMIP.conf, the machine is shut down automatically after the processing is completed. Eject the bootable CD just after the managed machine is started up next time.

93
Installing Service Packs, HotFixes, Linux Patch Files, and Applications Install service packs, hotfixes, Linux patch files, and applications in the same procedures as those when using a DHCP server. For details, see Section 3.6, "Installing Service Packs, HotFixes, Linux Patch Files, and Applications (Scenario Type)."
When both of the following conditions are met, the scenario execution is completed before powering off or rebooting of the managed machine is completed. ・ You select the Check the completion of a scenario by the communication with
DPM Client check box in the Server Setting group box on the General tab under Detail Setting in the Management view.
・ You select the Turn Off Power After Scenario Execution check box on the Option tab of the scenario.
If you select Use A DHCP Server, the scenario execution is completed after powering off or rebooting of the managed machine is completed.
Appendix B Restoring the Backup Image without the Management Server (Local Restoration)
About this function, contact your sales or support representative about Linux distribution information. Apply module to reboot the managed machine when occurrence of error to avoid stopping machine with displaying error after backup has been executed during nighttime and the user used the managed machine on the next day.
Appendix C Revision History First Edition (Rev.001)(2016.08)New

94
Copyright © NEC 2002-2016. All rights reserved.
Disclaimers All information disclosed in this document is protected by the copyrights of NEC. Copying or reproducing this document, in whole or in part, without the prior written approval of NEC is prohibited. The contents of this document are subject to change without notice. URL and the contents in URL in this document may be changed at any time without prior notice or explanation. NEC assumes no responsibility for any technical or editorial errors or omissions that may exist in this document. NEC does not guarantee the accuracy, usefulness, or completeness of the content or any other information provided in this document.
Trademarks and Copyrights SigmaSystemCenter, MasterScope, iStorage, ESMPRO and EXPRESSBUILDER are trademarks of NEC. The names of products and services contained on this document are trademarks or registered trademarks of respective companies. See "Trademarks and Copyrights" in First Step Guide for details.


