38
Developing JSR-168- Compliant Portlets for the SAS ® Information Delivery Portal 4.3 SAS ® Documentation
Developing JSR-168-Compliant Portlets for the SAS® Information Delivery Portal 4.3
SAS® Documentation

The correct bibliographic citation for this manual is as follows: SAS Institute Inc 2010. Developing JSR-168-Compliant Portlets for the SAS® Information Delivery Portal 4.3. Cary, NC: SAS Institute Inc.
Developing JSR-168-Compliant Portlets for the SAS® Information Delivery Portal 4.3
Copyright © 2010, SAS Institute Inc., Cary, NC, USA
All rights reserved. Produced in the United States of America.
For a hardcopy book: No part of this publication may be reproduced, stored in a retrieval system, or transmitted, in any form or by any means, electronic, mechanical, photocopying, or otherwise, without the prior written permission of the publisher, SAS Institute Inc.
For a Web download or e-book:Your use of this publication shall be governed by the terms established by the vendor at the time you acquire this publication.
U.S. Government Restricted Rights Notice: Use, duplication, or disclosure of this software and related documentation by the U.S. government is subject to the Agreement with SAS Institute and the restrictions set forth in FAR 52.227–19 Commercial Computer Software-Restricted Rights (June 1987).
SAS Institute Inc., SAS Campus Drive, Cary, North Carolina 27513.
1st printing, November 2010
SAS® Publishing provides a complete selection of books and electronic products to help customers use SAS software to its fullest potential. For more information about our e-books, e-learning products, CDs, and hard-copy books, visit the SAS Publishing Web site at support.sas.com/publishing or call 1-800-727-3228.
SAS® and all other SAS Institute Inc. product or service names are registered trademarks or trademarks of SAS Institute Inc. in the USA and other countries. ® indicates USA registration.
Other brand and product names are registered trademarks or trademarks of their respective companies.
Contents
What’s New in Developing JSR–168–Compliant Portlets for SAS Information Delivery Portal 4.3 . . . . . . . . . . . . . . . . . . . . . . . . . . . . . . . . . . . . . . . . . . . . . . . . . . . . . . . . . . v
Chapter 1 • Concepts for Developing JSR-168-Compliant Portlets . . . . . . . . . . . . . . . . . . . . . . . 1Introduction to Developing JSR-168-Compliant Portlets . . . . . . . . . . . . . . . . . . . . . . . . . 1Requirements for Developing JSR-168-Compliant Portlets for SAS . . . . . . . . . . . . . . . . 1
Chapter 2 • Tools for Creating JSR-168-Compliant Portlets . . . . . . . . . . . . . . . . . . . . . . . . . . . . . 3Using the Portlet API . . . . . . . . . . . . . . . . . . . . . . . . . . . . . . . . . . . . . . . . . . . . . . . . . . . . 3Using the Testportlet Scripting Facility . . . . . . . . . . . . . . . . . . . . . . . . . . . . . . . . . . . . . . 4Using the Portlet Deployment Tool . . . . . . . . . . . . . . . . . . . . . . . . . . . . . . . . . . . . . . . . . 6
Chapter 3 • Sample Portlet: HelloUserJSR168PortletSample . . . . . . . . . . . . . . . . . . . . . . . . . . . 13Sample Portlet: HelloUserJSR168PortletSample . . . . . . . . . . . . . . . . . . . . . . . . . . . . . . 13
Appendix 1 • Tips and Best Practices . . . . . . . . . . . . . . . . . . . . . . . . . . . . . . . . . . . . . . . . . . . . . . 31

iv Contents
What’s New in Developing JSR–168–Compliant Portlets for SAS Information Delivery Portal 4.3
Overview
SAS Information Delivery Portal 4.3 contains several enhancements for the Portlet Deployment Tool.
Enhancements for the Portlet Deployment Tool
The Portlet Deployment Tool (PDT) supports the following changes and enhancements:
• The PDT now creates WAR files in the custom content area for the BI Portlets Web application. The files are included automatically when you rebuild the BI Portlets Web application by using the SAS Deployment Manager. It is no longer necessary to redeploy your custom portlets after applying hot fixes or maintenance updates to SAS.
• The PDT supports a new XML properties file as input, as an alternative to the build.properties file. The XML properties file enables you to deploy multiple portlets at once and to specify locale-specific portlet titles and descriptions.
v

vi What's New?

Chapter 1
Concepts for Developing JSR-168-Compliant Portlets
Introduction to Developing JSR-168-Compliant Portlets . . . . . . . . . . . . . . . . . . . . . . 1
Requirements for Developing JSR-168-Compliant Portlets for SAS . . . . . . . . . . . . 1
Introduction to Developing JSR-168-Compliant Portlets
Portlets are the information display components of a Web portal application such as the SAS Information Delivery Portal. A portlet can process requests from the user and generate dynamic content such as report lists, alerts, workflow notifications, or performance metrics.
In addition to a set of standard portlets, the SAS BI Portlets product provides a framework that enables you to create custom portlets that use the JSR 168 portlet specification.
JSR-168-compliant portlets are different from portlets that are proprietary to SAS in the following ways:
• JSR-168-compliant portlets are implemented by using an industry-standard API. Proprietary SAS portlets are implemented by using the SAS Portlet API.
• JSR-168-compliant portlets can be deployed in either IBM WebSphere Portal or SAS Information Delivery Portal. Proprietary SAS portlets can be deployed in SAS Information Delivery Portal only.
For information about developing portlets using the SAS Portlet API, see Developing Portlets for the SAS Information Delivery Portal.
Requirements for Developing JSR-168-Compliant Portlets for SAS
You must meet the following requirements for developing custom JSR-168-compliant portlets:
• SAS Information Delivery Portal and SAS BI Portlets must be installed on the server where you test your custom portlet.
1

• You must perform your initial portlet development for the SAS Information Delivery Portal. Any compatibility issues with IBM WebSphere Portal should be resolved after the portlet is working in the SAS Information Delivery Portal.
SAS recommends that you develop your portlets on a Windows machine and that you use the JBOSS application server.
2 Chapter 1 • Concepts for Developing JSR-168-Compliant Portlets

Chapter 2
Tools for Creating JSR-168-Compliant Portlets
Using the Portlet API . . . . . . . . . . . . . . . . . . . . . . . . . . . . . . . . . . . . . . . . . . . . . . . . . . . 3
Using the Testportlet Scripting Facility . . . . . . . . . . . . . . . . . . . . . . . . . . . . . . . . . . . . 4Overview of the Testportlet Scripting Facility . . . . . . . . . . . . . . . . . . . . . . . . . . . . . . 4Creating a Portlet by Using the Testportlet Scripting Facility . . . . . . . . . . . . . . . . . . 4
Using the Portlet Deployment Tool . . . . . . . . . . . . . . . . . . . . . . . . . . . . . . . . . . . . . . . . 6Overview of the Portlet Deployment Tool . . . . . . . . . . . . . . . . . . . . . . . . . . . . . . . . . 6Specify Build Parameters for the PDT . . . . . . . . . . . . . . . . . . . . . . . . . . . . . . . . . . . . 7Execute the PDT Script . . . . . . . . . . . . . . . . . . . . . . . . . . . . . . . . . . . . . . . . . . . . . . 11Add Portlets to the BI Portlets Web Application . . . . . . . . . . . . . . . . . . . . . . . . . . . 11Remove Custom Portlets from the BI Portlets Web Application . . . . . . . . . . . . . . . 12
Using the Portlet APIIn general, custom JSR-168-compliant portlets for SAS can be developed by using industry-standard Java classes. The com.sas.portal.portlet classes in the SAS API are specific to proprietary portlets and are not used with JSR 168 portlets.
However, a class that is specific to SAS is needed to obtain a user context for the portlet:
com.sas.web.keys.CommonKeysdefines common prefix strings and other keys used to prevent namespace collisions among various SAS domains.
The USER_CONTEXT field contains a string that can be used to obtain the user context for a portlet session.
In JSP code, you can obtain a user context directly from the HTTP session by using the following code fragments:
<%import com.sas.services.user.UserContextInterface;import com.sas.web.keys.CommonKeys;
UserContextInterface userContext = (UserContextInterface) session.getAttribute(CommonKeys.USER_CONTEXT);%>
3

In Java code, you can obtain a user context from the portlet session by using the following code fragments:
import javax.portlet.*;import com.sas.services.user.UserContextInterface;import com.sas.web.keys.CommonKeys;
UserContextInterface userContext = (UserContextInterface) portletRequest.getPortletSession().getAttribute( CommonKeys.USER_CONTEXT, PortletSession.APPLICATION_SCOPE);
The UserContextInterface enables you to access all of the user metadata from the SAS Metadata Repository. For more information, see http://support.sas.com/rnd/gendoc/bi92/api/Foundation/com/sas/services/user/UserContextInterface.html in the SAS API documentation.
Using the Testportlet Scripting Facility
Overview of the Testportlet Scripting FacilityThe Testportlet Scripting Facility is a scripting tool that enables you to initialize your portlet development directories and to compile your portlet source into an EAR file. The files for this facility can be found in the SAS-config-directory\Lev1\CustomAppData\testportlet directory. The scripting facility should be used for portlet development because it provides a process that integrates your custom portlets with the SAS versioned JAR repository.
Note: Before you begin developing a custom portlet, ensure that the SAS Metadata Server is running so that metadata can be accessed during the configuration and deployment processes.
Creating a Portlet by Using the Testportlet Scripting FacilityThe following steps provide an overview of creating a portlet using the scripting facility. For a detailed example of creating a portlet, see “Sample Portlet: HelloUserJSR168PortletSample” on page 13.
1. Create a source directory for the code associated with the portlet. This directory is referred to in subsequent instructions as the portlet source directory.
2. Create a configuration directory for the portlet under the SAS-config-directory\Lev1\CustomAppData\ directory. Use the portlet name for the configuration directory name.
The following rules apply to the portlet name and configuration directory structure:
• Neither portlet names nor their paths can contain spaces.
• The portlet name must be unique.
3. Copy the files from SAS-config-directory/Levn/CustomAppData/testportlet to the new directory.
4. Edit the custom.properties file in the portlet configuration directory to specify the portlet name and title and the locations for the configuration and source files.
4 Chapter 2 • Tools for Creating JSR-168-Compliant Portlets

Note: You must use forward slashes (/) in your directory values. For example, C:/SAS/EBI/Lev1/CustomAppData/SampleHelloUserJSR168Portlet.
5. Enter the following command to create the directory structure for your portlet:
cfg createJSR168PortletDirectories -Dmetadata.connection.passwd="unrestricted-user-password"
where unrestricted-user-password is the password for the unrestricted user.
Note: You can submit a password as clear text or as an encoded string from the PWENCODE procedure. For more information, see Encryption in SAS 9.2.
Check the customconfig.log file in SAS-config-directory/Levn/CustomAppData/SampleHelloUserJSR168Portlet to ensure that the script completed successfully.
The following directory structure is created:
source-directory Configurable ears archive-name META-INF wars archive-name WEB-INF Picklists wars archive-name Static ears archive-name META-INF lib wars archive-name jsp source WEB-INF classes spring-config
The \Configurable and \Static directory hierarchies are used to store the files needed to create PAR, EAR, and WAR files for the portlet, in the same directory structure as the PAR, EAR, and WAR files themselves. The \Configurable hierarchy is used for files in which values are substituted from the portlet configuration file when the portlet is built. The \Static hierarchy is used for files that do not require substitution. The \Picklists directory hierarchy is used to store picklist files that specify which of the JAR files from the SAS versioned JAR repository need to be included in the portlet. The \Static\lib directory is used to store additional JAR files needed at compile time.
6. Create source files for your portlet in the source directory structure.
7. Copy the BI Portlets picklist file to tell the portlet which of the JAR files from the SAS versioned JAR repository need to be included in the portlet.
Using the Testportlet Scripting Facility 5

Note: After a SAS maintenance release is applied at your site, you must copy the updated picklist and rebuild and redeploy the PAR and EAR files for custom portlets.
8. Add any additional JAR files to the \Static\Lib directory.
9. Enter the following command to compile the portlet:
cfg compileJSR168Portlet -Dmetadata.connection.passwd="unrestricted-user-password"
where unrestricted-user-password is the password for the unrestricted user.
Note: You can submit a password as clear text or as an encoded string from the PWENCODE procedure. For more information, see Encryption in SAS 9.2.
Check the customconfig.log file to ensure that the script completed successfully.
10. Enter the following command to build the EAR file:
cfg buildJSR168Webapps -Dmetadata.connection.passwd="unrestricted-user-password"
where unrestricted-user-password is the password for the unrestricted user.
Note: You can submit a password as clear text or as an encoded string from the PWENCODE procedure. For more information, see Encryption in SAS 9.2.
Check the customconfig.log file to ensure that the script completed successfully.
11. Use the Portlet Deployment Tool to deploy the portlet EAR file into the BI Portlets Web application.
12. Stop the Web application server on which the SAS Information Delivery Portal and the BI Portlets Web application are running.
13. Rebuild the SAS Information Delivery Portal and BI Portlets Web applications by using the SAS Deployment Manager. For more information, see "Rebuilding the SAS Web Applications" in the "Middle-Tier Administration" chapter of the SAS Intelligence Platform: Web Application Administration Guide.
14. Redeploy the EAR files for the SAS Information Delivery Portal and the BI Portlets Web application.
The EAR files are located at SAS-config-directory/Levn/Web/Staging/.
For instructions about redeploying Web applications, see "Redeploying Web Applications" in the "Middle-Tier Administration" chapter of the SAS Intelligence Platform: Web Application Administration Guide.
15. Start the Web application server on which the SAS Information Delivery Portal is deployed. The custom portlet should now be available to the portal.
Using the Portlet Deployment Tool
Overview of the Portlet Deployment ToolThe Portlet Deployment Tool (PDT) is a command-line script that enables you to add JSR-168-compliant portlets to the BI Portlets Web application.
The basic process to deploy a portlet with the PDT is as follows:
1. Modify either the build.properties file or the xmlpropfile.xml file to specify the parameters for the PDT.
6 Chapter 2 • Tools for Creating JSR-168-Compliant Portlets
2. Execute the PDT by submitting an Ant command in the directory where the build.properties file or the xmlpropfile.xml file is located. The PDT places your custom portlets in the custom content directory for the BI Portlets Web application so that the portlets are included automatically when you rebuild it. The PDT also creates PAR files for the portlets, which are included automatically in the SAS Information Delivery Portal when you rebuild it.
3. Rebuild the BI Portlets and SAS Information Delivery Portal Web applications by using the SAS Deployment Manager. For more information about rebuilding Web applications, see "Rebuilding the SAS Web Applications" in the "Middle-Tier Administration" chapter of the SAS Intelligence Platform: Web Application Administration Guide.
4. Redeploy the SAS Information Delivery Portal and the BI Portlets Web applications. These files are located in the SAS-config-directory/Levn/Web/Staging/ directory. For more information about redeploying Web applications, see "Redeploying the SAS Web Applications" in the "Middle-Tier Administration" chapter of the SAS Intelligence Platform: Web Application Administration Guide.
Specify Build Parameters for the PDT
Overview of Specifying the PDT Build ParametersThe Portlet Deployment Tool is an Ant script that obtains its build parameters from an external file. You can use either of the following parameters files:
build.propertiesa plain text file. The PDT uses this file by default. This file is simplest to use if you are defining a single portlet and you do not need to specify locale information.
xmlpropfile.xmlan XML file that enables you to define multiple portlets at one time. You can also specify localized titles and descriptions for the portlets. To use the XML file, you must specify the -Dxmlpropfile=xmlpropfile.xml option when you execute the PDT script.
Specifying Parameters in the build.properties FileThe build.properties file is located in SAS-config-directory/Levn/Web/Applications/SASBIPortlets<version>/PortletDeploymentTool/src/. You must specify the following parameters:
servlet-context-namespecifies the context name for the portlet. The value of this parameter must match the value of the <context-root> element in the application.xml file in the portlet source.
Note: If you use the Testportlet Scripting Facility, then the <context-root> value in application.xml is obtained from the webapp.testportlet.contextroot parameter in the custom.properties file.
web-app-namespecifies the name of the WAR file for the portlet, without the .war extension. For example, if the WAR file for your portlet is named sample.hellouser.jsr168.war, then specify the value sample.hellouser.jsr168.
web-app-serverspecifies the type of Java application server where the BI Portlets Web application is deployed. Specify either jboss, weblogic, or websphere.
Using the Portlet Deployment Tool 7
portlet-ear-file-namespecifies the name of the EAR file for the portlet.
portlet-ear-file-pathspecifies the full path to the EAR file for the portlet, including the filename. You must use the forward slash (/) character to delimit the directories in your path, (for example, C:/SAS/EntBIServer/Lev1/Web/Staging/myportlet.ear).
work-dirspecifies the working directory where the PDT places temporary files.
supported-portlet-modesspecifies which portlet modes are supported by this portlet. Specify one of the following values:
all specifies that the view, edit, and help modes are supported.
edit specifies that the view and edit modes are supported.
help specifies that the view and help modes are supported.
If you do not specify a value, then only the view mode is supported.
Specifying Parameters in the xmlpropfile.xml FileThe xmlpropfile.xml file is located in SAS-config-directory/Levn/Web/Applications/SASBIPortlets<version>/PortletDeploymentTool/src/. The format of the xmlpropfile.xml file is as follows:
<webapps server-type="server-type" work-dir="working-directory" > <webapp servlet-context-name="context-name" web-app-name="Web-application-name" portlet-ear-file-name="filename" portlet-ear-file-path="fully-qualified-filename" default-supported-portlet-modes="modes-value" >
<portlets> <portlet name="portlet-name" supported-portlet-modes="modes-value" > <locales> <locale name="locale-code" title="portlet-title" description="portlet-description" /> </locales> </portlet> </portlets> </webapp></webapps>
The file contains one <webapps> element, with a <webapp> element inside it for each Web application that you will add. The TestPortlet Scripting Facility configures each portlet as a separate Web application.
<webapps>specifies the properties that are common to all of the Web applications in the file. You must specify the following attributes:
server-typespecifies the type of Java application server where the BI Portlets Web application is deployed. Specify either jboss, weblogic, or websphere.
8 Chapter 2 • Tools for Creating JSR-168-Compliant Portlets
work-dirspecifies the working directory where the PDT places temporary files.
<webapp>specifies properties for a specific Web application. You must specify the following attributes:
servlet-context-namespecifies the context name for the portlet. The value of this parameter must match the value of the <context-root> element value in the application.xml file in the portlet source.
Note: If you use the Testportlet Scripting Facility, then the <context-root> value in application.xml is obtained from the webapp.testportlet.contextroot parameter in the custom.properties file.
web-app-namespecifies the name of the WAR file for the portlet, without the .war extension. For example, if the WAR file for your portlet is named sample.hellouser.jsr168.war, then specify the value sample.hellouser.jsr168.
portlet-ear-file-namespecifies the name of the EAR file for the portlet.
portlet-ear-file-pathspecifies the full path to the EAR file for the portlet, including the filename. You must use the forward slash (/) character to delimit the directories in your path (for example, C:/SAS/EntBIServer/Lev1/Web/Staging/myportlet.ear).
default-supported-portlet-modesspecifies which portlet modes are supported by default for the portlets in this Web application. Specify one of the following values:
all specifies that the view, edit, and help modes are supported.
edit specifies that the view and edit modes are supported.
help specifies that the view and help modes are supported.
If you do not specify a value, then only the view mode is supported.
Each <webapp> element can contain an optional <portlets> element. The <portlets> element contains one or more <portlet> elements:
<portlet>specifies the properties for a portlet. You can specify the following attributes:
namespecifies the name of the portlet.
supported-portlet-modesspecifies which portlet modes are supported by this portlet. Specify one of the following values:
all specifies that the view, edit, and help modes are supported
edit specifies that the view and edit modes are supported
help specifies that the view and help modes are supported
If you do not specify a value, then only the view mode is supported.
Using the Portlet Deployment Tool 9

Note: The supported-portlet-modes attribute is optional. If you specify a value or a null value, then the supported-portlet-modes attribute overrides the value of the default-supported-portlet-modes attribute on the <webapp> element.
Each <portlet> element can contain an optional <locales> element. The <locales> element contains one or more <locale> elements:
<locale>specifies the properties for a locale. You must specify the following values:
namespecifies the name for the locale.
titlespecifies the locale-specific title for the portlet. The value of this attribute is an escaped-UTF-8 ASCII string.
The value of the title attribute corresponds to the "portlet.description" entry in the locale-specific portletDisplayResources_locale-name.properties file in the portlet's generated PAR file.
descriptionspecifies the locale-specific description for the portlet. The value of this attribute is an escaped-UTF-8 ASCII string.
The value of the description attribute corresponds to the "portlet.description" entry in the locale-specific portletDisplayResources_locale-name.properties file in the portlet's generated PAR file.
For example, the following file deploys two portlets and specifies localization options for the second portlet:
<webapps server-type="websphere" work-dir="c:/temp/pdt-test" > <webapp servlet-context-name="HelloUserJSR168PortletSample" web-app-name="sample.hellouser.jsr168" portlet-ear-file-name="sample.hellouser.jsr168.ear" portlet-ear-file-path="C:/SAS/EBI/Lev1/Web/Staging/sample.hellouser.jsr168.ear" default-supported-portlet-modes="all" > </webapp> <webapp servlet-context-name="HelloUserJSR168PortletSample2" web-app-name="sample2.hellouser.jsr168" portlet-ear-file-name="sample2.hellouser.jsr168.ear" portlet-ear-file-path="C:/SAS/EBI/Lev1/Web/Staging/sample2.hellouser.jsr168.ear" default-supported-portlet-modes="all" > <portlets> <portlet name="HelloUserSample2" supported-portlet-modes="view help"> <locales> <locale name="zh_CN" title="\u4e66\u7b7e" description="\u7528\u6765\u7ba1\u7406\u4e66\u7b7e\u7684 Portlet" /> <locale name="en" title="CheckWindowStateNormalTestPortlet" description="The HelloUserSample 2 portlet" /> </locales> </portlet> </portlets>
10 Chapter 2 • Tools for Creating JSR-168-Compliant Portlets
</webapp></webapps>
Execute the PDT ScriptTo execute the PDT with the build.properties file, follow these steps:
1. In a command shell, navigate to the SAS-config-directory/Levn/Web/Applications/SASBIPortlets<version>/PortletDeploymentTool/src directory.
2. Call the level_env.bat script to set environment variables.
On Windows, enter the following command:
..\..\..\..\..\level_env.bat
On UNIX, enter the following command:
../../../../../level_env.sh
3. Call the launchant.bat script to execute the PDT.
On Windows, enter the following command:
..\..\..\..\..\..\Utilities\launchant.bat
On UNIX, enter the following command:
../../../../../../Utilities/launchant.sh
To execute the PDT with the xmlpropfile.xml file, follow these steps:
1. If you do not have Apache Ant on your machine, download it from ant.apache.org and install it by using the instructions from Apache.
2. In a command shell, navigate to the SAS-config-directory/Levn/Web/Applications/SASBIPortlets<version>/PortletDeploymentTool/src directory.
3. Call the level_env.bat script to set environment variables.
On Windows, enter the following command:
..\..\..\..\..\level_env.bat
On UNIX, enter the following command:
../../../../../level_env.sh
4. Call the ant.bat script to execute the PDT.
On Windows, enter the following command:
ant -lib "%DEPLOYWIZ%"\ant-contrib.jar -lib "%DEPLOYWIZ%"\bsf.jar -lib "%DEPLOYWIZ%"\bsh.jar -Dxmlpropfile=xmlpropfile.xml
On UNIX, enter the following command:
ant -lib $DEPLOYWIZ/ant-contrib.jar -lib $DEPLOYWIZ/bsf.jar -lib $DEPLOYWIZ/bsh.jar -Dxmlpropfile=xmlpropfile.xml
Add Portlets to the BI Portlets Web ApplicationTo add your portlets to the BI Portlets Web Application:
Using the Portlet Deployment Tool 11
1. Stop the Web application server on which the SAS Information Delivery Portal and the BI Portlets Web application are running.
2. Specify the parameters for your custom portlet in build.properties or, for multiple portlets, in xmlpropfile.xml.
3. Run the PDT. The new portlets are added to the custom content area for the BI Portlets Web application.
4. If you want to add additional portlets, repeat steps 2–3 as needed.
5. Rebuild the BI Portlets and SAS Information Delivery Portal Web applications by using the SAS Deployment Manager. For more information about rebuilding Web applications, see "Rebuilding the SAS Web Applications" in the "Middle-Tier Administration" chapter of the SAS Intelligence Platform: Web Application Administration Guide.
6. Redeploy the SAS Information Delivery Portal and the BI Portlets Web applications. These files are located in the SAS-config-directory/Levn/Web/Staging/ directory. For more information about redeploying Web applications, see "Redeploying the SAS Web Applications" in the "Middle-Tier Administration" chapter of the SAS Intelligence Platform: Web Application Administration Guide.
7. Restart the Web application server on which the SAS Information Delivery Portal is deployed.
Remove Custom Portlets from the BI Portlets Web ApplicationIf you want to remove any custom portlets that you added previously, follow these steps:
1. Stop the Web application server on which the SAS Information Delivery Portal and the BI Portlets Web application are running.
2. Remove any portlet PAR files and exploded portlet directories that were generated by the PDT for the custom portlets that you want to remove. The PAR files are located in the SAS-config-directory\Levn\Web\Applications\SASPortlets<version>\Deployed directory. The exploded portlet directories are located in the SAS-config-directory\Levn\Web\Applications\SASPortlets<version>\Exploded directory.
3. Remove the files in the BI Portlets custom content area that were created by the PDT. The files are located in the SAS-config-directory\Levn\Web\Common\<app-server>\SASBIPortlets<version>\CustomContent\ears\sas.biportlets directory.
4. Rebuild the BI Portlets and the SAS Information Delivery Portal Web applications by using the SAS Deployment Manager. For more information about rebuilding Web applications, see "Rebuilding the SAS Web Applications" in the "Middle-Tier Administration" chapter of the SAS Intelligence Platform: Web Application Administration Guide.
5. Redeploy the SAS Information Delivery Portal and the BI Portlets Web applications. These files are located in the SAS-config-directory/Levn/Web/Staging/ directory. For more information about redeploying Web applications, see "Redeploying the SAS Web Applications" in the "Middle-Tier Administration" chapter of the SAS Intelligence Platform: Web Application Administration Guide.
6. Restart the Web application server on which the SAS Information Delivery Portal is deployed.
12 Chapter 2 • Tools for Creating JSR-168-Compliant Portlets

Chapter 3
Sample Portlet: HelloUserJSR168PortletSample
Sample Portlet: HelloUserJSR168PortletSample . . . . . . . . . . . . . . . . . . . . . . . . . . . 13Overview of HelloUserJSR168PortletSample . . . . . . . . . . . . . . . . . . . . . . . . . . . . . 13Step 1: Create the Base Directory for the Portlet Source . . . . . . . . . . . . . . . . . . . . . 14Step 2: Configure the Scripting Facility . . . . . . . . . . . . . . . . . . . . . . . . . . . . . . . . . . 14Step 3: Create the Source Subdirectories . . . . . . . . . . . . . . . . . . . . . . . . . . . . . . . . . 15Step 4: Copy the Picklist of Required JAR Files . . . . . . . . . . . . . . . . . . . . . . . . . . . 16Step 5: Configure Files for the Spring Framework . . . . . . . . . . . . . . . . . . . . . . . . . 17Step 6: Create the Configurable Source Files . . . . . . . . . . . . . . . . . . . . . . . . . . . . . . 17Step 7: Create the Static Source Files . . . . . . . . . . . . . . . . . . . . . . . . . . . . . . . . . . . . 21Step 8: Copy the Images for the Portlet . . . . . . . . . . . . . . . . . . . . . . . . . . . . . . . . . . 27Step 9: Prepare the Development Environment . . . . . . . . . . . . . . . . . . . . . . . . . . . . 27Step 10: Compile the Source Code . . . . . . . . . . . . . . . . . . . . . . . . . . . . . . . . . . . . . . 27Step 11: Load the Portlet into BI Portlets Custom Content Area . . . . . . . . . . . . . . . 28Step 12: Rebuild the Web Applications . . . . . . . . . . . . . . . . . . . . . . . . . . . . . . . . . . 29Step 13: Redeploy the Web Applications . . . . . . . . . . . . . . . . . . . . . . . . . . . . . . . . . 29Step 14: Restart the Web Application Server . . . . . . . . . . . . . . . . . . . . . . . . . . . . . . 29
Sample Portlet: HelloUserJSR168PortletSample
Overview of HelloUserJSR168PortletSampleThe HelloUserJSR168PortletSample portlet is a JSR 168 portlet that greets the user by using the name of the user who is logged on. The portlet also displays images that are packaged with the portlet and retrieves resources from the theme service. The portlet features VIEW, EDIT, and HELP modes.
Figure 3.1 The HelloUserJSR168PortletSample Portlet
The portlet calls a Web application named sample.hellouser.jsr168.war, which uses SAS Foundation Services to access session information from the Portal Web application and
13
obtain the user name of the current user. The sample.hellouser.jsr168.war application generates an HTML fragment that is displayed within the portlet.
To create the HelloUserJSR168PortletSample sample, follow these steps:
1. Create the base directory for the portlet source.
2. Configure the scripting facility.
3. Use the scripting facility to create the subdirectories for the source.
4. Copy the picklist of required JAR files.
5. Configure files for the Spring Framework.
6. Create the configurable source files.
7. Create the static source files.
8. Copy the images for the portlet.
9. Prepare your development environment.
10. Compile the source code and build the portlet EAR file.
11. Load the portlet into the BI Portlets custom content area.
12. Rebuild the SAS Information Delivery Portal and BI Portlets Web applications.
13. Redeploy the Web applications.
14. Restart the Web application server.
Step 1: Create the Base Directory for the Portlet SourceCreate the base directory. All of the portlet source files are placed in subdirectories of this path. Throughout this example, the base directory is referred to as the source-directory.
Step 2: Configure the Scripting FacilityThis sample uses the Testportlet Scripting Facility that is delivered with the SAS Information Delivery Portal. To configure the scripting facility for the sample, follow these steps:
1. Create a new directory within SAS-config-directory/Levn/CustomAppData named SampleHelloUserJSR168Portlet. Use the portlet name for the configuration directory name.
The following rules apply to the portlet name and configuration directory structure:
• Neither portlet names nor their paths can contain spaces.
• The portlet name must be unique.
2. Copy the files from SAS-config-directory/Levn/CustomAppData/testportlet to the new directory.
3. Edit the custom.properties file in your SampleHelloUserJSR168Portlet directory. The code that is highlighted must be changed or added to the file:
# If you change the value "testportlet", make sure to rename in all properties
# here as well as in the custom_config.xml.
config.currprod.12byte=testportlet
14 Chapter 3 • Sample Portlet: HelloUserJSR168PortletSample

# Change the value of this property to be the name of your web application.
config.currprod.legalname=Hello User JSR168 Portlet Sample
# The value of this property should be the location where the configuration
# files are placed. Make sure to change the level directory based on your
# installation and make sure to rename testportlet if the value of
# config.currprod.12byte changes above.
install.currprod.config.dir=SAS-config-directory/Levn/CustomAppData/SampleHelloUserJSR168Portlet
# Do not change the value of this property. The name might be changed if you
# change the value of config.currprod.12byte above.
webappsrv.testportlet.server=server
# Change the value of this property to be the location of your portlet's source
# code and configuration files. The name might be changed if you change the
# value of config.currprod.12byte above.
testportlet.install.dir=portlet-source-directory
# Change the value of this property to be the name of your war and ear
# file. The name might be changed if you change the value of
# config.currprod.12byte above.
webapp.testportlet.archive.name=sample.hellouser.jsr168
# Change the value of this property to be the context root of your web
# application and the name of the portlet. The name might be changed if you
# change the value of config.currprod.12byte above.
webapp.testportlet.contextroot=SampleHelloUserJSR168
# Change the value of this property to be the versioned name of your web
# application. This property is only used for JSR168 portlets. The name might
# be changed if you change the value of config.currprod.12byte above.
webapp.testportlet.display.name=Hello User JSR168 Portlet Sample
# Change the value of this property to be the name of the local services
# to use for the connection information.
webapp.testportlet.localservices.name=SASBIPortlets4.3
# Add any other configuration properties that your JSR168 portlet and/or web
# application may need.
Note: You must use forward slashes (/) in your directory values. For example, C:/SAS/EBI/Lev1/CustomAppData/SampleHelloUserJSR168Portlet.
Step 3: Create the Source SubdirectoriesPerform the following steps to create the source directories that are needed for the portlet source:
1. Ensure that the SAS Metadata Server is running.
2. In a command shell, navigate to the SAS-config-directory/Levn/CustomAppData/SampleHelloUserJSR168Portlet directory.
3. Enter the following command:
cfg createJSR168PortletDirectories -Dmetadata.connection.passwd="unrestricted-user-password"
Sample Portlet: HelloUserJSR168PortletSample 15

where unrestricted-user-password is the password for the unrestricted user.
Note: You can submit a password as clear text or as an encoded string from the PWENCODE procedure. For more information, see Encryption in SAS 9.2.
Check the customconfig.log file in SAS-config-directory/Levn/CustomAppData/SampleHelloUserJSR168Portlet to ensure that the script completed successfully.
4. Manually create these additional directories for this sample:
source-directory/Static/wars/sample.hellouser.jsr168/images
source-directory/Static/wars/sample.hellouser.jsr168/source/sample
source-directory/Static/wars/sample.hellouser.jsr168/source/sample/res
Your source directory should contain the following structure:
source-directory Configurable ears sample.hellouser.jsr168 META-INF wars sample.hellouser.jsr168 WEB-INF Picklists wars sample.hellouser.jsr168 Static ears sample.hellouser.jsr168 META-INF lib wars sample.hellouser.jsr168 images jsp source sample res WEB-INF classes spring-config
Step 4: Copy the Picklist of Required JAR FilesThe portlet sample uses a picklist file to identify the JAR files from the SAS versioned JAR repository that are needed.
Copy the picklist from SAS-Home-Directory/SASBIPortlets/<version>/Picklists/apps/testportlet to source-directory/Picklists/wars/sample.hellouser.jsr168.
Note: If you update your SAS software, then you must update the picklist and repeat steps 9 through 15.
16 Chapter 3 • Sample Portlet: HelloUserJSR168PortletSample

Step 5: Configure Files for the Spring FrameworkThe sample portlet uses the Spring Framework to integrate with the Web Infrastructure Platform. To configure the Spring Framework for the portlet, perform the following steps:
1. Copy the Spring configuration files from SAS-Home-Directory/SASBIPortlets/<version>/Static/wars/sas.biportlets/WEB-INF/spring-config to source-directory/Static/wars/sample.hellouser.jsr168/WEB-INF/spring-config.
2. Modify the pc-config.xml file to remove the following lines:
<bean id="viewerFactory" class="com.sas.portal.plugins.viewers.components.omr.impl.SASPortalViewerImpl"> <constructor-arg ref="baseUrlLocator" /></bean>
<bean id="omrSearchInfoFactory" class="com.sas.portal.plugins.search.components.omr.impl.OMRSearchInfoFactoryImpl"> <constructor-arg ref="localSecuredUser" /><constructor-arg ref="logger" /></bean>
<bean id="searchEngine" class="com.sas.portal.plugins.search.components.engine.impl.SearchEngineImpl"><constructor-arg ref="localInformationService" /><constructor-arg ref="omrSearchInfoFactory" /><constructor-arg ref="logger" /></bean>
Step 6: Create the Configurable Source Files
Overview of the Configurable Source FilesThe configurable source files are files that contain parameter substitutions. These files are placed in the source-directory/Configurable directory structure. These files use values from the custom.properties file that you modified in step 2.
application.xml.origThis file uses parameters from the custom.properties file to describe the contents of the portlet Web application.
Example Code 3.1 /Configurable/ears/sample.hellouser.jsr168/META-INF/application.xml.orig
<?xml version="1.0" encoding="UTF-8"?><application xmlns="http://java.sun.com/xml/ns/j2ee" xmlns:xsi="http://www.w3.org/2001/XMLSchema-instance" xsi:schemaLocation="http://java.sun.com/xml/ns/j2ee http://java.sun.com/xml/ns/j2ee/application_1_4.xsd" version="1.4"> <display-name>@webapp.testportlet.display.name@</display-name> <description>@webapp.testportlet.display.name@</description> <module> <web>
Sample Portlet: HelloUserJSR168PortletSample 17

<web-uri>@[email protected]</web-uri> <context-root>@webapp.testportlet.contextroot@</context-root> </web> </module></application>
web.xml.origThis file uses parameters from the custom.properties file to define settings for the portlet Web application.
Example Code 3.2 /Configurable/wars/sample.hellouser.jsr168/WEB-INF/web.xml.orig
<?xml version="1.0" encoding="UTF-8"?><web-app id="@webapp.testportlet.contextroot@" version="2.4" xmlns="http://java.sun.com/xml/ns/j2ee" xmlns:xsi="http://www.w3.org/2001/XMLSchema-instance" xsi:schemaLocation="http://java.sun.com/xml/ns/j2ee http://java.sun.com/xml/ns/j2ee/web-app_2_4.xsd">
<display-name>@webapp.testportlet.display.name@</display-name> <!-- BEGIN Spring Integration --> <context-param> <param-name>contextConfigLocation</param-name> <param-value> /WEB-INF/spring-config/infrastructure-config.xml, /WEB-INF/spring-config/jps-config-local-remote.xml, /WEB-INF/spring-config/pc-config.xml, /WEB-INF/spring-config/presentation-config.xml, /WEB-INF/spring-config/ppm-config.xml </param-value> </context-param> <!-- beanRefContext.xml is currently provided as part of the sas.svcs.cluster.jar. --> <context-param> <param-name>locatorFactorySelector</param-name> <param-value>classpath:beanRefContext.xml</param-value> </context-param> <context-param> <param-name>parentContextKey</param-name> <param-value>config.context</param-value> </context-param> <!-- This corresponds to the name of your SoftwareComponent object in the SAS Metadata Server. --> <context-param> <param-name>application-name</param-name> <param-value>@webapp.biportlets.software.component.name@</param-value> </context-param> <!-- END Spring Integration -->
<!-- Cross Site Scripting Sanitizer --> <filter> <filter-name>SanitizingRequestFilter</filter-name> <filter-class>org.springframework.web.filter.DelegatingFilterProxy</filter-class> <init-param>
18 Chapter 3 • Sample Portlet: HelloUserJSR168PortletSample

<param-name>targetBeanName</param-name> <param-value>sanitizingRequestFilter</param-value> </init-param> <init-param> <param-name>targetFilterLifecycle</param-name> <param-value>true</param-value> </init-param> </filter> <!-- Cross Site Scripting Filter --> <filter-mapping> <filter-name>SanitizingRequestFilter</filter-name> <url-pattern>/*</url-pattern> </filter-mapping>
<!-- logging context separation listener (this should be the FIRST listener) --> <listener> <listener-class>com.sas.svcs.logging.LoggingContextListener</listener-class> </listener>
<!-- Spring Bootstrap --> <listener> <listener-class>org.springframework.web.context.ContextLoaderListener</listener-class> </listener> <listener> <listener-class>com.sas.portal.plugins.servlet.impl.PortletServletScopeInitializer</listener-class> </listener>
<session-config> <session-timeout>30</session-timeout> </session-config>
<!-- only comes into play if container = WebSphere --> <jsp-config> <taglib> <taglib-uri>http://www.sas.com/portlet</taglib-uri> <taglib-location>/WEB-INF/taglib/portlet-container-was-taglib.tld</taglib-location> </taglib> </jsp-config>
</web-app>
portlet.xml.origThis file uses parameters from the custom.properties file to define settings for the portlet.
Example Code 3.3 /Configurable/wars/sample.hellouser.jsr168/WEB-INF/portlet.xml.orig
<?xml version="1.0" encoding="UTF-8"?> <portlet-app xmlns="http://java.sun.com/xml/ns/portlet/portlet-app_1_0.xsd" xmlns:xsi="http://www.w3.org/2001/XMLSchema-instance" xmlns:portlet="http://java.sun.com/xml/ns/portlet" xsi:schemaLocation="http://java.sun.com/xml/ns/portlet/portlet-app_1_0.xsd /opt/SUNWps/dtd/portlet.xsd" version="1.0">
<!-- Sample Hello User JSR168 Portlet --> <portlet> <description>A sample JSR168 SAS-enabled portlet.</description>
Sample Portlet: HelloUserJSR168PortletSample 19

<!-- *** Name used as PAR file name and displayed to user. *** --> <portlet-name>@webapp.testportlet.contextroot@</portlet-name> <display-name xml:lang="en">@webapp.testportlet.display.name@</display-name> <portlet-class>org.springframework.web.portlet.DispatcherPortlet</portlet-class> <init-param> <name>contextConfigLocation</name> <value>/WEB-INF/spring-config/hellouserjsr168portlet.xml</value> </init-param> <supports> <mime-type>text/html</mime-type> <portlet-mode>VIEW</portlet-mode> <portlet-mode>EDIT</portlet-mode> <portlet-mode>HELP</portlet-mode> </supports> <supported-locale>en</supported-locale>
<!-- Portlet Resource Bundle --> <resource-bundle>sample.res.Resources</resource-bundle>
</portlet>
</portlet-app>
jboss-web.xml.origThis file uses parameters from the custom.properties file to define settings that the portlet uses in the JBOSS server.
Example Code 3.4 /Configurable/wars/sample.hellouser.jsr168/WEB-INF/jboss-web.xml.orig
<?xml version="1.0" encoding="UTF-8" ?><jboss-web> <security-domain>java:/jaas/PFS</security-domain> <context-root>@webapp.testportlet.contextroot@</context-root></jboss-web>
weblogic.xml.origThis file uses parameters from the custom.properties file to define settings that the portlet uses in the Oracle WebLogic server.
Example Code 3.5 /Configurable/wars/sample.hellouser.jsr168/WEB-INF/weblogic.xml.orig
<?xml version="1.0" encoding="UTF-8"?><weblogic-web-app xmlns="http://www.bea.com/ns/weblogic/90" xmlns:xsi="http://www.w3.org/2001/XMLSchema-instance"> <jsp-descriptor> <jsp-param> <param-name>page-check-seconds</param-name> <param-value>-1</param-value> </jsp-param> </jsp-descriptor> <container-descriptor> <servlet-reload-check-secs>-1</servlet-reload-check-secs> <prefer-web-inf-classes>true</prefer-web-inf-classes> </container-descriptor> <context-root>@webapp.testportlet.contextroot@</context-root></weblogic-web-app>
20 Chapter 3 • Sample Portlet: HelloUserJSR168PortletSample

Step 7: Create the Static Source Files
Overview of the Static Source FilesThe static source files are files that do not contain parameter substitutions. These files are placed in the source-directory/Static directory structure.
edit.jspThis file creates the page that is displayed for the EDIT mode of the portlet.
Example Code 3.6 /Static/wars/sample.hellouser.jsr168/jsp/edit.jsp
<%@ page import="javax.portlet.*"%><%@ page import="java.util.*"%><%@ page import="sample.HelloUserJSR168PortletSample"%><%@ taglib uri="http://java.sun.com/portlet" prefix="portlet"%><%@ taglib uri="http://java.sun.com/jsp/jstl/core" prefix="c"%><%@ taglib uri="http://java.sun.com/jsp/jstl/fmt" prefix="fmt"%>
<portlet:defineObjects/><% PortletURL actionUrl = renderResponse.createActionURL();%>
<fmt:setLocale value="${sas_portlet_locale}" /><fmt:setBundle basename="sample.res.Resources" />
<form name="<portlet:namespace />_form1" method="post" action="<%=actionUrl.toString()%>"> <div class="portlet-font" > <fmt:message key="edit1.txt"/> <p> <fmt:message key="edit2.txt"/> <p> <input type="hidden" name="<%=HelloUserJSR168PortletSample.FORM_ACTION%>" value="<%=HelloUserJSR168PortletSample.ACTION_UPDATE%>" /> <input class="button" type="submit" value='<fmt:message key="ok.txt"/>' alt='<fmt:message key="ok.txt"/>' /> </div>
</form>
<c:if test="${PARAM_THEME_IMAGE_PATH != null}"> <form name="<portlet:namespace />_form2" method="post" action="<%=actionUrl.toString()%>"> <div class="portlet-font" > <fmt:message key="edit3.txt"/> <p> <input type="hidden" name="<%=HelloUserJSR168PortletSample.FORM_ACTION%>" value="<%=HelloUserJSR168PortletSample.ACTION_REMOVE%>" /> <input class="button" type="submit" value='<fmt:message key="remove.txt"/>' alt='<fmt:message key="remove.txt"/>'
Sample Portlet: HelloUserJSR168PortletSample 21
/> </div> </form></c:if>
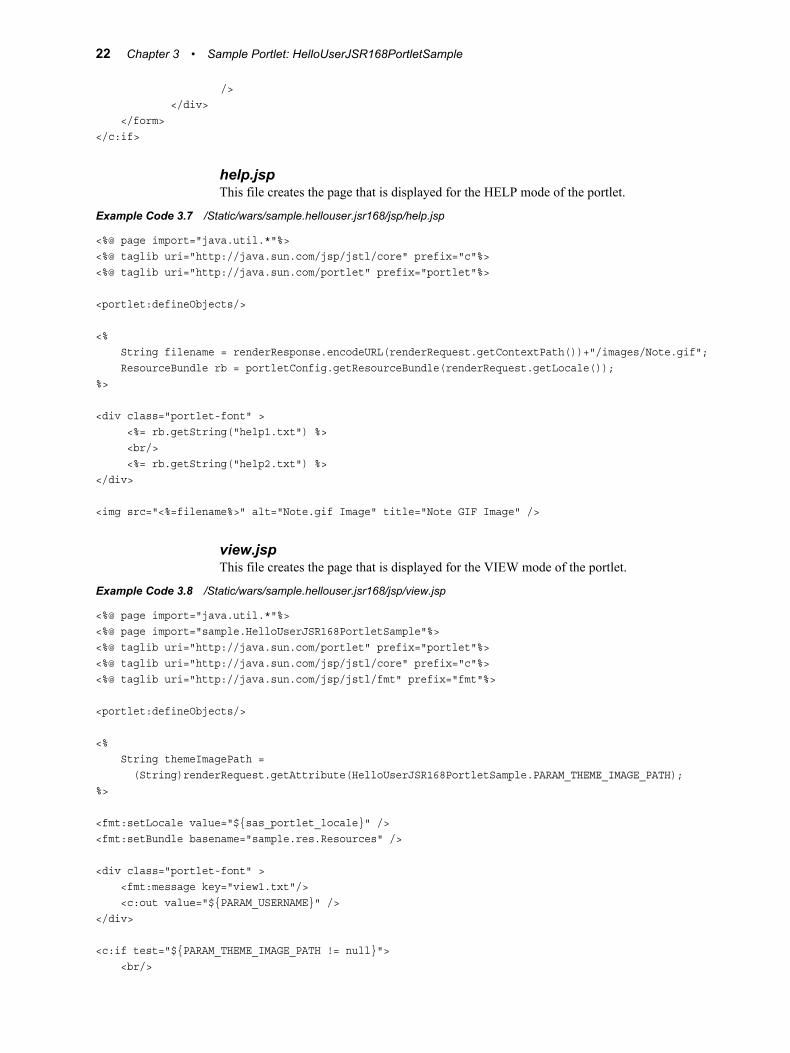
help.jspThis file creates the page that is displayed for the HELP mode of the portlet.
Example Code 3.7 /Static/wars/sample.hellouser.jsr168/jsp/help.jsp
<%@ page import="java.util.*"%><%@ taglib uri="http://java.sun.com/jsp/jstl/core" prefix="c"%><%@ taglib uri="http://java.sun.com/portlet" prefix="portlet"%>
<portlet:defineObjects/>
<% String filename = renderResponse.encodeURL(renderRequest.getContextPath())+"/images/Note.gif"; ResourceBundle rb = portletConfig.getResourceBundle(renderRequest.getLocale());%>
<div class="portlet-font" > <%= rb.getString("help1.txt") %> <br/> <%= rb.getString("help2.txt") %></div>
<img src="<%=filename%>" alt="Note.gif Image" title="Note GIF Image" />
view.jspThis file creates the page that is displayed for the VIEW mode of the portlet.
Example Code 3.8 /Static/wars/sample.hellouser.jsr168/jsp/view.jsp
<%@ page import="java.util.*"%><%@ page import="sample.HelloUserJSR168PortletSample"%><%@ taglib uri="http://java.sun.com/portlet" prefix="portlet"%><%@ taglib uri="http://java.sun.com/jsp/jstl/core" prefix="c"%><%@ taglib uri="http://java.sun.com/jsp/jstl/fmt" prefix="fmt"%>
<portlet:defineObjects/>
<% String themeImagePath = (String)renderRequest.getAttribute(HelloUserJSR168PortletSample.PARAM_THEME_IMAGE_PATH);%>
<fmt:setLocale value="${sas_portlet_locale}" /><fmt:setBundle basename="sample.res.Resources" />
<div class="portlet-font" > <fmt:message key="view1.txt"/> <c:out value="${PARAM_USERNAME}" /></div>
<c:if test="${PARAM_THEME_IMAGE_PATH != null}"> <br/>
22 Chapter 3 • Sample Portlet: HelloUserJSR168PortletSample
<fmt:message key="view2.txt"/> <img src="<%=themeImagePath%>" /> <br/> <fmt:message key="view3.txt"/></c:if>
<br/>
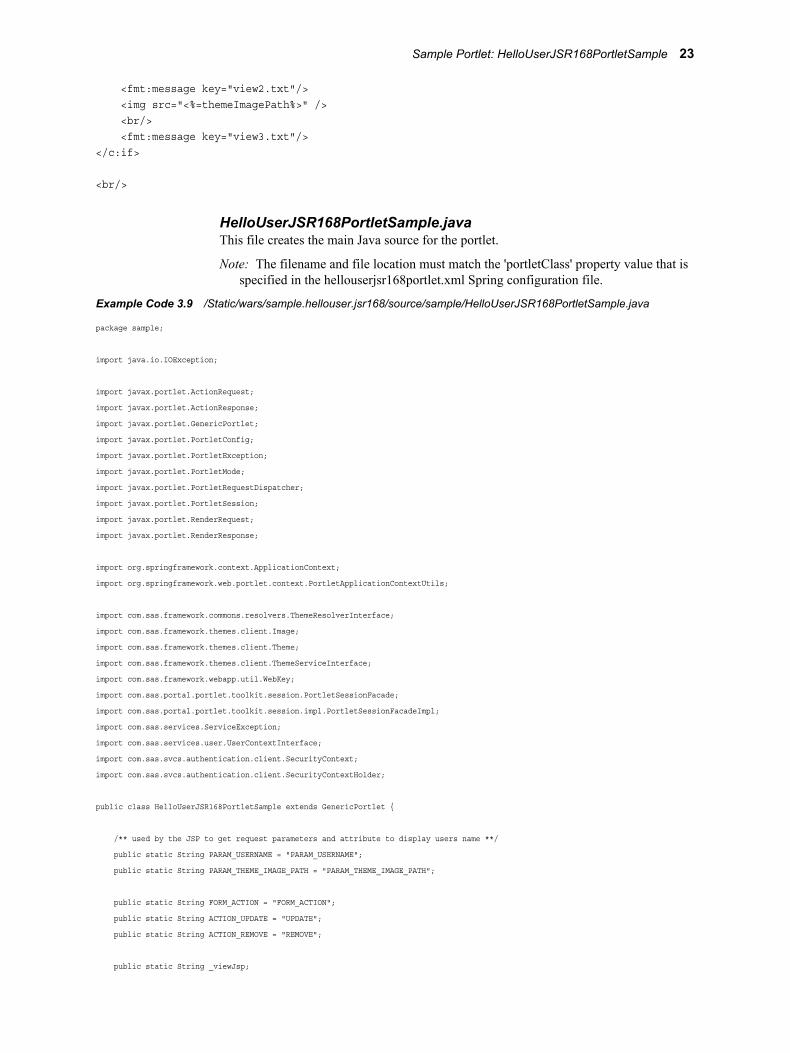
HelloUserJSR168PortletSample.javaThis file creates the main Java source for the portlet.
Note: The filename and file location must match the 'portletClass' property value that is specified in the hellouserjsr168portlet.xml Spring configuration file.
Example Code 3.9 /Static/wars/sample.hellouser.jsr168/source/sample/HelloUserJSR168PortletSample.java
package sample;
import java.io.IOException;
import javax.portlet.ActionRequest;
import javax.portlet.ActionResponse;
import javax.portlet.GenericPortlet;
import javax.portlet.PortletConfig;
import javax.portlet.PortletException;
import javax.portlet.PortletMode;
import javax.portlet.PortletRequestDispatcher;
import javax.portlet.PortletSession;
import javax.portlet.RenderRequest;
import javax.portlet.RenderResponse;
import org.springframework.context.ApplicationContext;
import org.springframework.web.portlet.context.PortletApplicationContextUtils;
import com.sas.framework.commons.resolvers.ThemeResolverInterface;
import com.sas.framework.themes.client.Image;
import com.sas.framework.themes.client.Theme;
import com.sas.framework.themes.client.ThemeServiceInterface;
import com.sas.framework.webapp.util.WebKey;
import com.sas.portal.portlet.toolkit.session.PortletSessionFacade;
import com.sas.portal.portlet.toolkit.session.impl.PortletSessionFacadeImpl;
import com.sas.services.ServiceException;
import com.sas.services.user.UserContextInterface;
import com.sas.svcs.authentication.client.SecurityContext;
import com.sas.svcs.authentication.client.SecurityContextHolder;
public class HelloUserJSR168PortletSample extends GenericPortlet {
/** used by the JSP to get request parameters and attribute to display users name **/
public static String PARAM_USERNAME = "PARAM_USERNAME";
public static String PARAM_THEME_IMAGE_PATH = "PARAM_THEME_IMAGE_PATH";
public static String FORM_ACTION = "FORM_ACTION";
public static String ACTION_UPDATE = "UPDATE";
public static String ACTION_REMOVE = "REMOVE";
public static String _viewJsp;
Sample Portlet: HelloUserJSR168PortletSample 23

public static String _editJsp;
public static String _helpJsp;
public static String _errorJsp;
public void init() {
PortletConfig portletConfig = getPortletConfig();
/** these have to match property values
from WEB-INF/spring-config/hellouserjsr168portlet.xml **/
_viewJsp = portletConfig.getInitParameter("viewPage");
_editJsp = portletConfig.getInitParameter("editPage");
_helpJsp = portletConfig.getInitParameter("helpPage");
_errorJsp = portletConfig.getInitParameter("errorPage");
}
protected void doView(RenderRequest request, RenderResponse response) throws PortletException,
IOException {
String forwardPage = null;
/** get a UserContext from the PortletSessionFacade **/
PortletSessionFacade sessionFacade = PortletSessionFacadeImpl.getSessionFacade(request);
UserContextInterface userContext = sessionFacade.getUserContext();
try {
String userName = userContext.getPerson().getDisplayName();
// set request parameters as attributes for use by JSTL
request.setAttribute(PARAM_USERNAME, userName);
// get the PortletSession to determine if the image should be displayed
PortletSession ps = request.getPortletSession();
// see if theme name exists as the result of a processAction call
String themeImagePath = (String) ps.getAttribute(PARAM_THEME_IMAGE_PATH);
request.setAttribute(PARAM_THEME_IMAGE_PATH, themeImagePath);
forwardPage = _viewJsp;
} catch (ServiceException e) {
forwardPage = _errorJsp;
e.printStackTrace();
}
// forward request to jsp
PortletRequestDispatcher rd = getPortletContext().getRequestDispatcher(forwardPage);
rd.include(request, response);
}
public void doHelp(RenderRequest request, RenderResponse response) throws
IOException, PortletException {
PortletRequestDispatcher rd = getPortletContext().getRequestDispatcher(_helpJsp);
rd.include(request, response);
}
public void doEdit(RenderRequest request, RenderResponse response) throws PortletException, IOException {
PortletSession ps = request.getPortletSession();
String themeImagePath = (String) ps.getAttribute(PARAM_THEME_IMAGE_PATH);
request.setAttribute(PARAM_THEME_IMAGE_PATH, themeImagePath);
PortletRequestDispatcher rd = getPortletContext().getRequestDispatcher(_editJsp);
rd.include(request, response);
}
public void processAction(ActionRequest request, ActionResponse response)
24 Chapter 3 • Sample Portlet: HelloUserJSR168PortletSample
throws PortletException {
PortletSession ps = request.getPortletSession();
// retrieved from the form action hidden field name EDIT_ACTION
String action = request.getParameter(FORM_ACTION);
// ACTION_UPDATE is the value of the hidden field named EDIT_ACTION
if (action != null) {
if (action.equals(ACTION_UPDATE)) {
/** demonstrates accessing WIP Services to get a theme **/
// set the SecurityContext as a thread local attribute needed by WIP Services
SecurityContext sc = (SecurityContext)request.getPortletSession()
.getAttribute(WebKey.SECURITY_CONTEXT, PortletSession.APPLICATION_SCOPE);
SecurityContextHolder.setSecurityContext(sc);
// get the ApplicationContext and ThemeResolver to access the theme service to get the theme
// name being used
ApplicationContext appContext =
PortletApplicationContextUtils.getWebApplicationContext(request.getPortletSession().getPortletContext());
ThemeResolverInterface themeResolver =
(ThemeResolverInterface)appContext.getBean("themeResolver");
String themeName = themeResolver.getCurrentThemeName();
ThemeServiceInterface themeService = (ThemeServiceInterface)appContext.getBean("themeService");
Theme theme = themeService.getTheme(themeName);
// get theme resource to display in View (an image defined in SASthemes.xml)
Image image = theme.getImage("portlet_Help");
String imagePath = image.getFile();
ps.setAttribute(PARAM_THEME_IMAGE_PATH, imagePath);
} else if (action.equals(ACTION_REMOVE)) {
ps.removeAttribute(PARAM_THEME_IMAGE_PATH);
}
}
response.setPortletMode(PortletMode.VIEW);
}
}
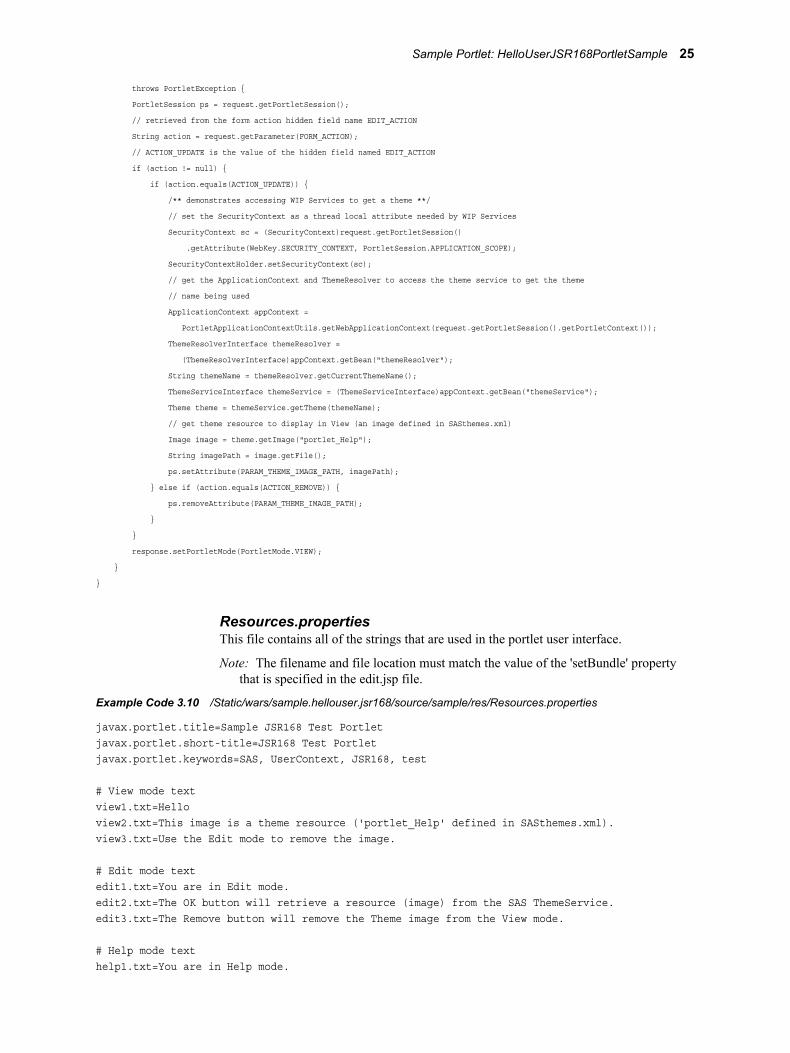
Resources.propertiesThis file contains all of the strings that are used in the portlet user interface.
Note: The filename and file location must match the value of the 'setBundle' property that is specified in the edit.jsp file.
Example Code 3.10 /Static/wars/sample.hellouser.jsr168/source/sample/res/Resources.properties
javax.portlet.title=Sample JSR168 Test Portletjavax.portlet.short-title=JSR168 Test Portletjavax.portlet.keywords=SAS, UserContext, JSR168, test
# View mode textview1.txt=Helloview2.txt=This image is a theme resource ('portlet_Help' defined in SASthemes.xml).view3.txt=Use the Edit mode to remove the image.
# Edit mode textedit1.txt=You are in Edit mode.edit2.txt=The OK button will retrieve a resource (image) from the SAS ThemeService.edit3.txt=The Remove button will remove the Theme image from the View mode.
# Help mode texthelp1.txt=You are in Help mode.
Sample Portlet: HelloUserJSR168PortletSample 25
help2.txt=This shows an image that is included with the portlet.
#buttons ok.txt=Okremove.txt=Remove
interceptors.xmlThis file creates the Spring Framework interceptors for the portlet. Interceptors handle user requests for portlet features.
Note: This file must be located in the same directory as hellouserjsr168portlet.xml.
Example Code 3.11 /Static/wars/sample.hellouser.jsr168/WEB-INF/spring-config/interceptors.xml
<?xml version="1.0" encoding="UTF-8" ?><!DOCTYPE beans PUBLIC "-//SPRING//DTD BEAN//EN" "../../dtd/spring-beans.dtd"><beans> <!-- HandlerIntercepters --> <bean id="sasPortletInterceptor" class="com.sas.portal.portlet.toolkit.interceptor.SASPortletInterceptor" /> <bean id="backToPortalInterceptor" class="com.sas.portal.portlet.toolkit.interceptor.BackToPortalInterceptor" /></beans>
hellouserjsr168portlet.xmlThis file creates the Spring Framework integration parameters for the portlet.
Note: The filename and file location must match the 'contextConfigLocation' property value that is specified in the portlet.xml file.
Example Code 3.12 /Static/wars/sample.hellouser.jsr168/WEB-INF/spring-config/hellouserjsr168portlet.xml
<?xml version="1.0" encoding="UTF-8" ?><!DOCTYPE beans PUBLIC "-//SPRING//DTD BEAN//EN" "../../dtd/spring-beans.dtd"><beans> <import resource="interceptors.xml" /> <bean id="HelloUserJSR168PortletSampleBean" class="org.springframework.web.portlet.mvc.PortletWrappingController"> <property name="portletClass"> <!-- This is the class name for the sample portlet. --> <value>sample.HelloUserJSR168PortletSample</value> </property> <property name="useSharedPortletConfig"> <value>false</value> </property> <property name="initParameters"> <props> <prop key="viewPage">/jsp/view.jsp</prop> <prop key="editPage">/jsp/edit.jsp</prop> <prop key="helpPage">/jsp/help.jsp</prop> <prop key="errorPage">/jsp/error.jsp</prop> </props> </property> </bean> <!-- Handler Mappings --> <bean id="portletModeHandlerMapping" class="org.springframework.web.portlet.handler.PortletModeHandlerMapping"> <property name="interceptors">
26 Chapter 3 • Sample Portlet: HelloUserJSR168PortletSample
<list> <ref bean="sasPortletInterceptor"/> </list> </property> <property name="portletModeMap"> <map> <entry key="view"><ref bean="HelloUserJSR168PortletSampleBean"/></entry> <entry key="edit"><ref bean="HelloUserJSR168PortletSampleBean"/></entry> <entry key="help"><ref bean="HelloUserJSR168PortletSampleBean"/></entry> </map> </property> </bean></beans>
Step 8: Copy the Images for the PortletCopy the file Note.gif from SAS-Home-Directory/SASBIPortlets/<version>/Static/wars/sas.biportlets/images to source-directory/Static/wars/sample.hellouser.jsr168/images.
Step 9: Prepare the Development EnvironmentBefore you compile and deploy the sample portlet, prepare your development environment by following these steps:
1. Stop the Web application server on which the SAS Information Delivery Portal is running.
2. Back up your metadata content. For more information, see the SAS Intelligence Platform: System Administration Guide.
3. Ensure that the SAS Metadata Server is running. The configuration and deployment scripts require access to your metadata.
Step 10: Compile the Source CodeUse the scripting facility to compile your portlet source and build the portlet EAR file:
1. In a command shell, navigate to the SAS-config-directory/Levn/CustomAppData/SampleHelloUserJSR168Portlet directory.
2. Enter the following command to compile the portlet:
cfg compileJSR168Portlet -Dmetadata.connection.passwd="unrestricted-user-password"
where unrestricted-user-password is the password for the unrestricted user.
Note: You can submit a password as clear text or as an encoded string from the PWENCODE procedure. For more information, see Encryption in SAS 9.2.
3. Check the customconfig.log file to ensure that the script completed successfully.
4. Enter the following command to build the EAR file:
cfg buildJSR168Webapps -Dmetadata.connection.passwd="unrestricted-user-password"
where unrestricted-user-password is the password for the unrestricted user.
Sample Portlet: HelloUserJSR168PortletSample 27

Note: You can submit a password as clear text or as an encoded string from the PWENCODE procedure. For more information, see Encryption in SAS 9.2.
5. Check the customconfig.log file to ensure that the script completed successfully.
Step 11: Load the Portlet into BI Portlets Custom Content AreaUse the Portlet Deployment Tool to load the new portlet into the BI Portlets custom content area:
1. Modify the properties file for the PDT. Update the file SAS-config-directory/Levn/Web/Applications/SASBIPortlets<version>/PortletDeploymentTool/src/build.properties with the changes that are highlighted:
################################################################## Properties that will change for each portlet ear processed##################################################################
# the webapps ServletContext name. the value needs to be the same # as the value of the <context-root> tag in the # META-INF/application.xml file of the portlet ear.# # example: SASBIDashboardJsr168servlet-context-name=HelloUserJSR168PortletSample
# the name of the war file that will be processed inside the portlet # ear. Note that this version of the Portlet Deployment Tool can only# process one war file.## example: sas.bidashboardjsr168web-app-name=sample.hellouser.jsr168
# the app server to which the portlet ear file will be deployed.# valid entries are jboss, weblogic, and websphere## example: websphereweb-app-server=server-type
# name of the portlet ear file.#
# example: sas.bidashboardjsr1684.2.earportlet-ear-file-name=sample.hellouser.jsr168.ear
# full path to the portlet ear file.## example: c:/SAS/EntBIServer/Levn/Web/Staging/portlet-ear-file-nameportlet-ear-file-path=SAS-config-directory/Levn/Web/Staging/sample.hellouser.jsr168.ear
# work directory for temporary files.## example: c:/temp/pdtwork-dir=SAS-config-directory/Levn/Web/Temp/PDT
28 Chapter 3 • Sample Portlet: HelloUserJSR168PortletSample

# whitespace-separated list of portlet modes supported by the portlet. # valid values are "all", "edit", "help". Note that view mode# must always be supported so is not listed here. If the list is empty,# it is assumed that only view mode is supported. If "all" is specified,# it is assumed that view, edit, and help modes are supported.supported-portlet-modes=all
2. In a command shell, navigate to the SAS-config-directory/Levn/Web/Applications/SASBIPortlets<version>/PortletDeploymentTool/src directory.
3. Call the level_env.bat script to set environment variables.
On Windows, enter the following command:
..\..\..\..\..\level_env.bat
On UNIX, enter the following command:
../../../../../level_env.sh
4. Call the launchant.bat script to execute the PDT.
On Windows, enter the following command:
..\..\..\..\..\..\Utilities\launchant.bat
On UNIX, enter the following command:
../../../../../../Utilities/launchant.sh
Step 12: Rebuild the Web ApplicationsThe EAR files for the SAS Information Delivery Portal and the BI Portlets Web applications contain files that are associated with each portlet. To add the new portlet, you must rebuild the Web applications by using the SAS Deployment Manager. For more information, see "Rebuilding the SAS Web Applications" in the "Middle-Tier Administration" chapter of the SAS Intelligence Platform: Web Application Administration Guide.
Step 13: Redeploy the Web ApplicationsRedeploy the EAR files for the SAS Information Delivery Portal and the BI Portlets Web applications.
The EAR files are located at SAS-config-directory/Levn/Web/Staging/.
For more information about redeploying Web applications, see "Redeploying Web Applications" in the "Middle-Tier Administration" chapter of the SAS Intelligence Platform: Web Application Administration Guide.
Step 14: Restart the Web Application ServerStart the Web application server on which the SAS Information Delivery Portal is deployed. The custom portlet should now be available to the portal as SampleHelloUserJSR168Portlet.
Sample Portlet: HelloUserJSR168PortletSample 29

30 Chapter 3 • Sample Portlet: HelloUserJSR168PortletSample

Appendix 1
Tips and Best Practices
The following best practices apply to all SAS JSR-168-compliant portlets:
• The HTML that is displayed in the portlet should be as simple as possible to ensure that the portlet is displayed the same way in each portal. For example, avoid using Dojo in JSR 168 portlets.
• The IBM WebSphere Portal expects all portlets to be compatible with Dojo 1.1. In addition, its JSR 168 implementation does not define a namespace. SAS components use Dojo 0.4.3, which does not support namespacing.
• The SAS Information Delivery Portal expects all portlets to be compatible with Dojo 0.4.3. In addition, its JSR 168 implementation does not define a namespace.
• The JSR 168 portlet container in the SAS Information Delivery Portal performs an additional portlet render after each action. Some types of redirect errors might be hidden by the second render. Also, some actions that are performed during renders can cause unwanted changes of state due to the multiple renders.
• The HTML that is displayed in the portlet can use the CSS and images that are included in the SAS Themes Web application.
31

32 Appendix 1 • Tips and Best Practices


