32
DEWATERING PUMP
| Date post: | 16-Dec-2015 |
| Category: |
Documents |
| Upload: | tatiana-haile |
| View: | 223 times |
| Download: | 3 times |
DEWATERING PUMP
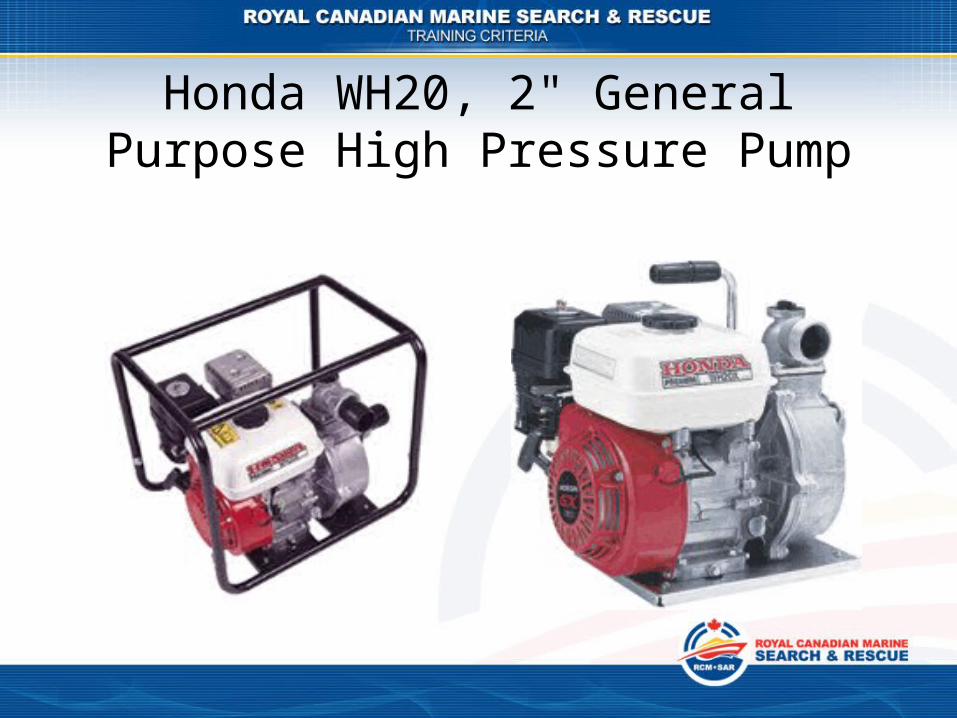
Honda WH20, 2" General Purpose High Pressure Pump

Description
• High Pressure, Centrifugal, Self-priming 2" Pump • Easy-start Honda OHV Commercial engine • 132 gal./min capacity • Cast Iron Impeller & Volute • Lightweight Aluminum Case
• Easy Carry Handle

Specification
• Honda 4-stroke, single cylinder, air cooled engine GX160
• Displacement 163cc • Bore and stroke 2.7" x 1.8" • Compression Ratio 8.5:1
• Oil Alert N/A

Specification
• Pump type High Pressure Centrifugal Self-priming • Volute Rigid Mounted Cast Iron • Impeller Cast Iron • Mechanical Seal Carbon/Ceramic • Priming time 60 sec. at 16.4 ft.
• Drive system Direct

Specification
• Discharge capacity 134 gals./min. • Suction port diameter 2" NPT • Discharge port diameter 2" NPT • Total head lift 141 ft. • Suction head lift 26 ft. • Maximum pressure 61 psi
• Solids handling N/A

Specification
• Dimensions (LxWxH) 16.7" x 14.8" x 15.9" • Dry weight 51.8 lbs.
• Strainer Part # 78325-YB7-702

Specification

Components

Components
• Pump• Nozzle 1• Discharge Hose• Foam Nozzle• Foam Suction• Foam Concentrate• Suction Hose & Strainer

Components
• Discharge outlet
• Controls
• Pull cord
• On/ Off Switch
Operation

Operation
• Check pump is full of fuel.
Operation
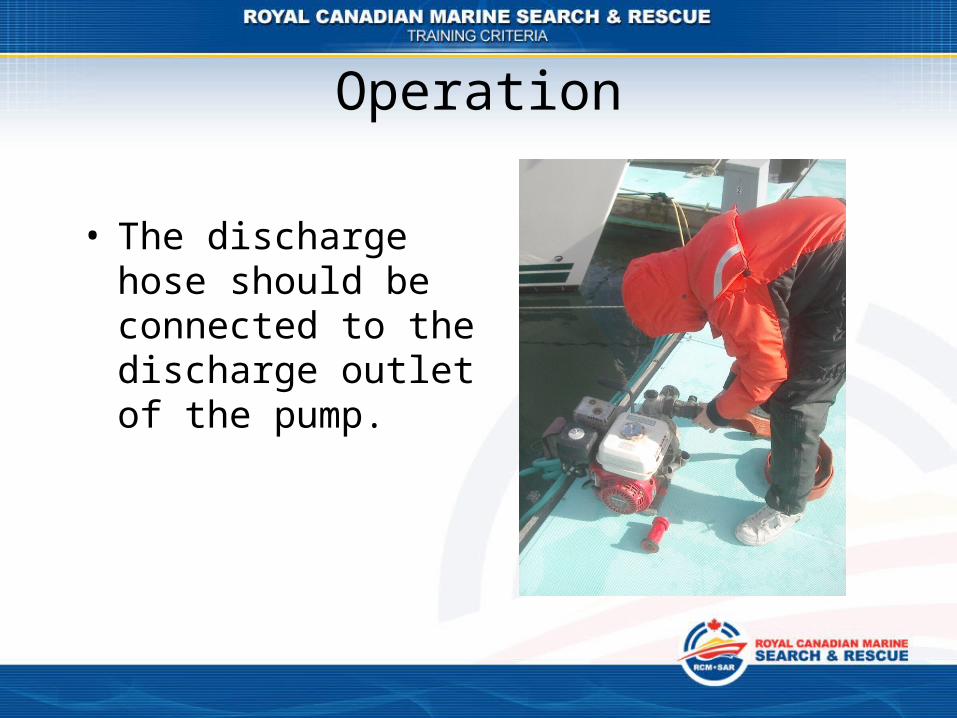
• The discharge hose should be connected to the discharge outlet of the pump.

Operation
• Connect the nozzle to the end of the hose

Operation
• The suction hose should be set up and held, strainer away from the pump, and coupling end towards pump.
Operation
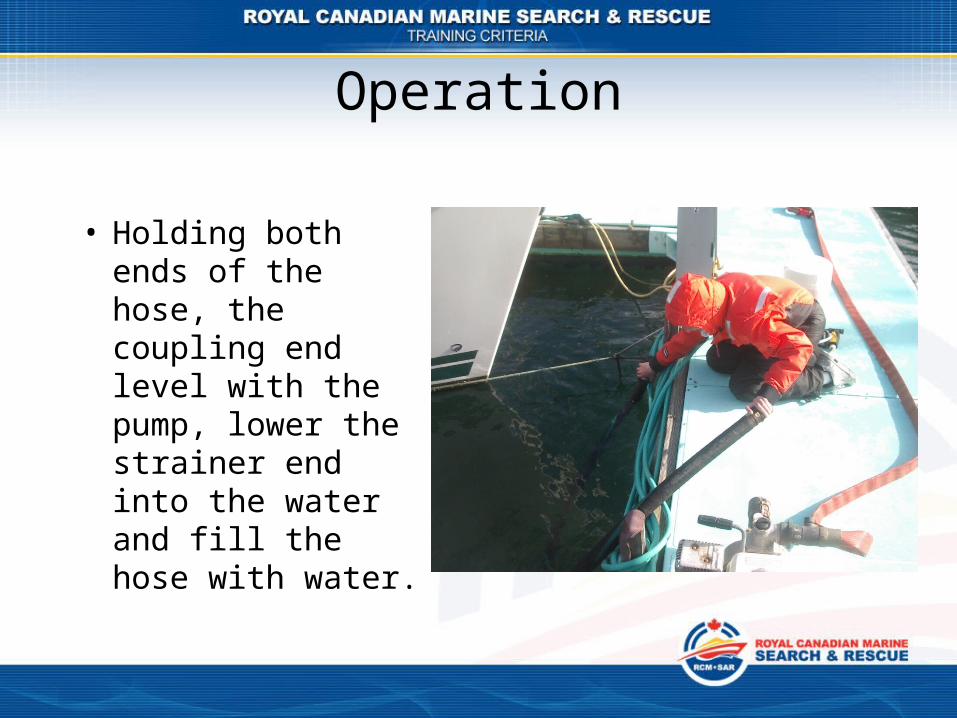
• Holding both ends of the hose, the coupling end level with the pump, lower the strainer end into the water and fill the hose with water.

Operation
• Lift the strainer end level with the pump.

Operation
• Connect the coupling end to the suction connection of the pump, keeping the strainer at the same level as the pump.

Operation
• Throttle• Midway (shown for
starting, - all the way to the left for operation

Operation
• Choke (white)• Full to left (shown)
for cold starting, - all the way to the right for operation

Operation
• Fuel (black)• Full to the right for
ON
Operation
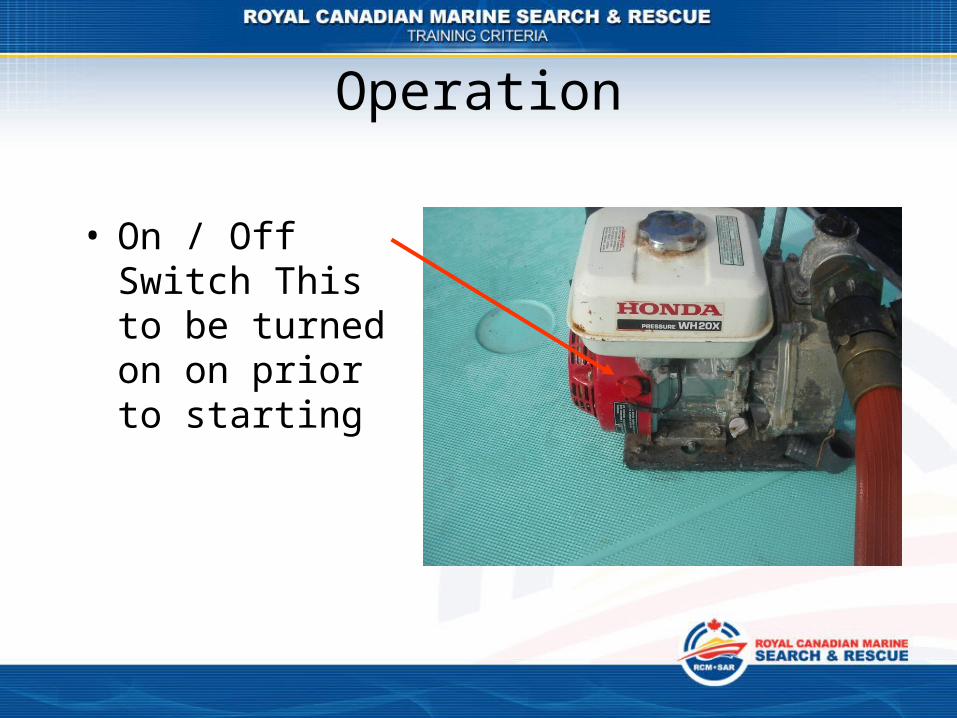
• On / Off Switch This to be turned on on prior to starting

Operation
• Pull on the starter cord until the pump starts.
• Lower the suction strainer into the water.

Operation
• Wait for 5 to 10 seconds and then close the choke and open the throttle to full for maximum pumping rate.
Operation
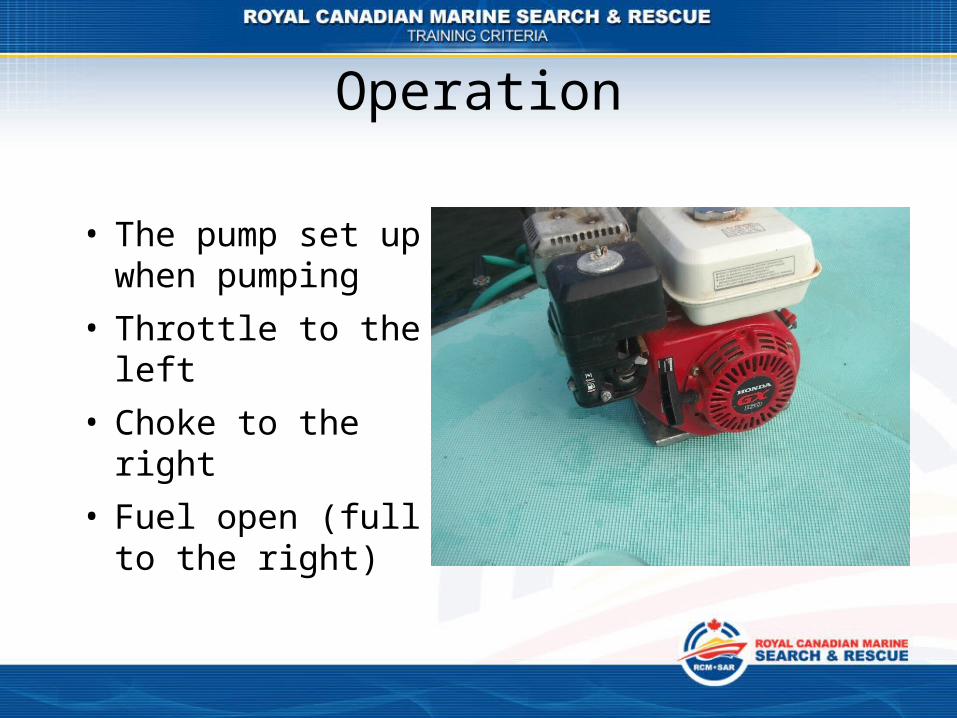
• The pump set up when pumping
• Throttle to the left• Choke to the right• Fuel open (full to
the right)
Operation
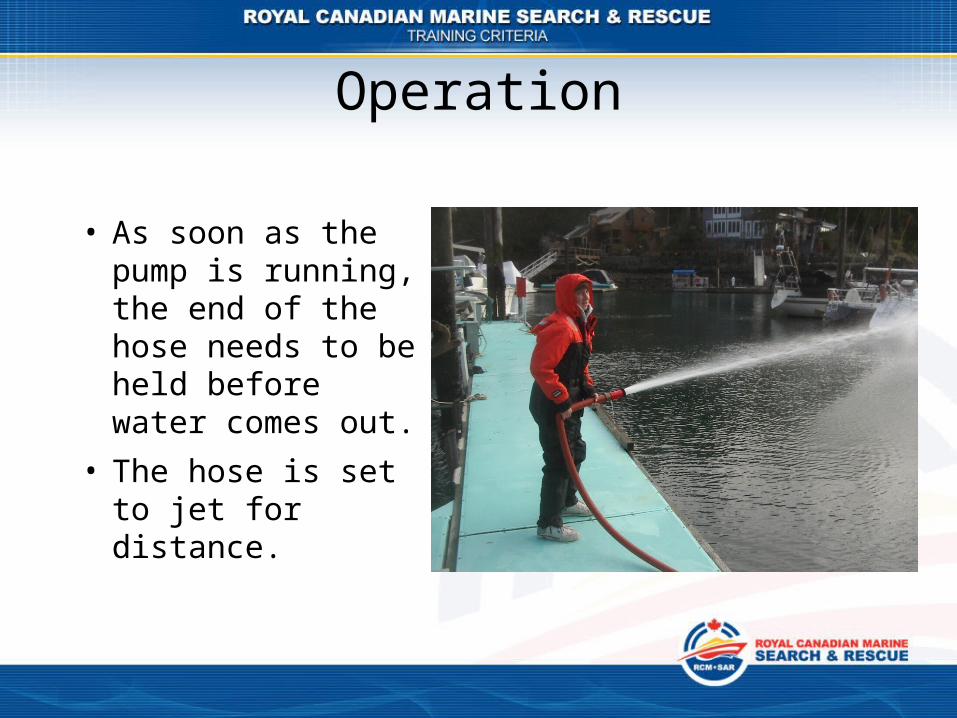
• As soon as the pump is running, the end of the hose needs to be held before water comes out.
• The hose is set to jet for distance.

Operation
• The nozzle to water wall to provide heat protection to self and boat when closing in to pick persons off burning boats.

Operation
• When using the pump for de-watering, do not have a nozzle on the end of the hose to maximise the discharge rate.

Operation
• When pumping out a vessel, have the pump as low as possible, and the suction as low as possible to maximise the discharge.
• The noise of the pump in an enclosed space will be loud.
• The exhaust of the pump in an enclosed space will be dangerous.
• Blocks as many leaks as possible in the early stages.

Operation
• On / Off Switch This to be turned off to stop the pump.

Operation
Now PRACTISE, PRACTISE
and PRACTISE some more


