74
User Manual EN

User Manual
EN

PAGE INTENTIONALLY LEFT BLANK
2/74 F1902142.EN / 05 / 2015 / updated 02/2016

Table of contents
Table of contents
Introduction . . . . . . . . . . . . . . . . . . . . . . . . . . . . . . . . . . . . . . . . . . . 6
1 Indications for Use . . . . . . . . . . . . . . . . . . . . . . . . . . . . . . . . . . . . . . 7
2 Contraindications . . . . . . . . . . . . . . . . . . . . . . . . . . . . . . . . . . . . . . 8
3 Warnings . . . . . . . . . . . . . . . . . . . . . . . . . . . . . . . . . . . . . . . . . . . . . . 9
4 Precautions . . . . . . . . . . . . . . . . . . . . . . . . . . . . . . . . . . . . . . . . . . 14
5 Adverse Reactions . . . . . . . . . . . . . . . . . . . . . . . . . . . . . . . . . . . . . 15
6 Step by Step Instructions . . . . . . . . . . . . . . . . . . . . . . . . . . . . . . . 16
6.1 Document Symbols . . . . . . . . . . . . . . . . . . . . . . . . . . . . . . . . . . . . . 16
6.2 DENTSPLY ENDO IQ™ Application Compatibility . . . . . . . . . . . . . 16
6.3 Package Contents . . . . . . . . . . . . . . . . . . . . . . . . . . . . . . . . . . . . . . 17
6.4 Components not included . . . . . . . . . . . . . . . . . . . . . . . . . . . . . . . . 18
6.5 System Setup . . . . . . . . . . . . . . . . . . . . . . . . . . . . . . . . . . . . . . . . . . 18
6.5.1 Turning on the iPad® and setting the Volume . . . . . . . . . . . . . . . . . . . . . . . 18
6.5.2 Activating the AssistiveTouch . . . . . . . . . . . . . . . . . . . . . . . . . . . . . . . . . . . . 19
6.5.3 Activating the WiFi . . . . . . . . . . . . . . . . . . . . . . . . . . . . . . . . . . . . . . . . . . . . 21
6.5.4 Activating the Bluetooth® . . . . . . . . . . . . . . . . . . . . . . . . . . . . . . . . . . . . . . . . . . . . . . . . . . 21
6.5.5 Installing and Updating the DENTSPLY ENDO IQ™ Application . . . . . . . . . 226.5.5.1 Firmware update . . . . . . . . . . . . . . . . . . . . . . . . . . . . . . . . . . . . . . . . . . . . . . . . . . . . . . 22
6.5.6 Setting up the Complete System . . . . . . . . . . . . . . . . . . . . . . . . . . . . . . . . . 23
6.6 Motor Handpiece . . . . . . . . . . . . . . . . . . . . . . . . . . . . . . . . . . . . . . . 25
6.6.1 Description of the Motor Handpiece . . . . . . . . . . . . . . . . . . . . . . . . . . . . . . . 256.6.1.1 Description of the LED Colors . . . . . . . . . . . . . . . . . . . . . . . . . . . . . . . . . . . . . . . . . . . 266.6.1.2 The Auto Reverse (AutoRev) Functionality . . . . . . . . . . . . . . . . . . . . . . . . . . . . . . . . . 286.6.1.3 Description of the Sounds . . . . . . . . . . . . . . . . . . . . . . . . . . . . . . . . . . . . . . . . . . . . . . . 296.6.1.4 Stand-by Mode . . . . . . . . . . . . . . . . . . . . . . . . . . . . . . . . . . . . . . . . . . . . . . . . . . . . . . . 296.6.1.5 Battery Care . . . . . . . . . . . . . . . . . . . . . . . . . . . . . . . . . . . . . . . . . . . . . . . . . . . . . . . . . 30
6.6.2 Inserting and removing the File . . . . . . . . . . . . . . . . . . . . . . . . . . . . . . . . . . 306.6.2.1 Inserting the File . . . . . . . . . . . . . . . . . . . . . . . . . . . . . . . . . . . . . . . . . . . . . . . . . . . . . . 306.6.2.2 Removing the File . . . . . . . . . . . . . . . . . . . . . . . . . . . . . . . . . . . . . . . . . . . . . . . . . . . . . 31
F1902142.EN / 05 / 2015 / updated 02/2016 3/74
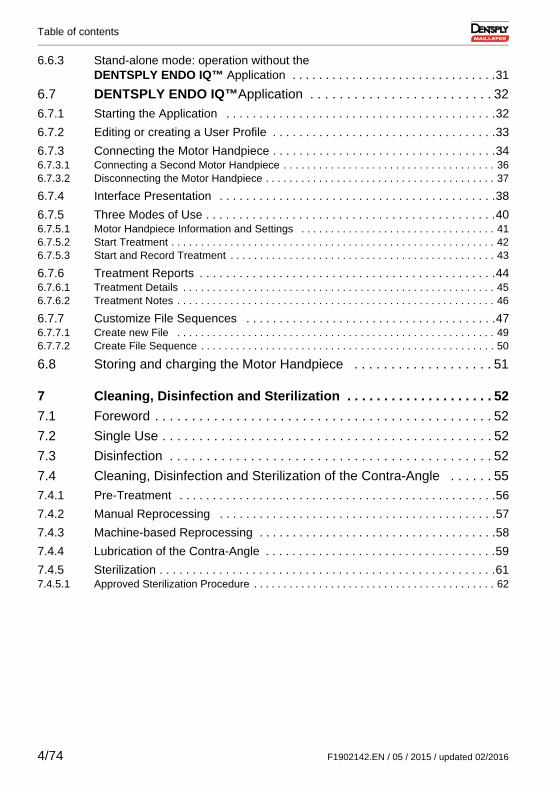
Table of contents
6.6.3 Stand-alone mode: operation without theDENTSPLY ENDO IQ™ Application . . . . . . . . . . . . . . . . . . . . . . . . . . . . . . .31
6.7 DENTSPLY ENDO IQ™Application . . . . . . . . . . . . . . . . . . . . . . . . . 32
6.7.1 Starting the Application . . . . . . . . . . . . . . . . . . . . . . . . . . . . . . . . . . . . . . . . .32
6.7.2 Editing or creating a User Profile . . . . . . . . . . . . . . . . . . . . . . . . . . . . . . . . . .33
6.7.3 Connecting the Motor Handpiece . . . . . . . . . . . . . . . . . . . . . . . . . . . . . . . . . .346.7.3.1 Connecting a Second Motor Handpiece . . . . . . . . . . . . . . . . . . . . . . . . . . . . . . . . . . . . 366.7.3.2 Disconnecting the Motor Handpiece . . . . . . . . . . . . . . . . . . . . . . . . . . . . . . . . . . . . . . . 37
6.7.4 Interface Presentation . . . . . . . . . . . . . . . . . . . . . . . . . . . . . . . . . . . . . . . . . .38
6.7.5 Three Modes of Use . . . . . . . . . . . . . . . . . . . . . . . . . . . . . . . . . . . . . . . . . . . .406.7.5.1 Motor Handpiece Information and Settings . . . . . . . . . . . . . . . . . . . . . . . . . . . . . . . . . 416.7.5.2 Start Treatment . . . . . . . . . . . . . . . . . . . . . . . . . . . . . . . . . . . . . . . . . . . . . . . . . . . . . . . 426.7.5.3 Start and Record Treatment . . . . . . . . . . . . . . . . . . . . . . . . . . . . . . . . . . . . . . . . . . . . . 43
6.7.6 Treatment Reports . . . . . . . . . . . . . . . . . . . . . . . . . . . . . . . . . . . . . . . . . . . . .446.7.6.1 Treatment Details . . . . . . . . . . . . . . . . . . . . . . . . . . . . . . . . . . . . . . . . . . . . . . . . . . . . . 456.7.6.2 Treatment Notes . . . . . . . . . . . . . . . . . . . . . . . . . . . . . . . . . . . . . . . . . . . . . . . . . . . . . . 46
6.7.7 Customize File Sequences . . . . . . . . . . . . . . . . . . . . . . . . . . . . . . . . . . . . . .476.7.7.1 Create new File . . . . . . . . . . . . . . . . . . . . . . . . . . . . . . . . . . . . . . . . . . . . . . . . . . . . . . 496.7.7.2 Create File Sequence . . . . . . . . . . . . . . . . . . . . . . . . . . . . . . . . . . . . . . . . . . . . . . . . . . 50
6.8 Storing and charging the Motor Handpiece . . . . . . . . . . . . . . . . . . . 51
7 Cleaning, Disinfection and Sterilization . . . . . . . . . . . . . . . . . . . . 52
7.1 Foreword . . . . . . . . . . . . . . . . . . . . . . . . . . . . . . . . . . . . . . . . . . . . . . 52
7.2 Single Use . . . . . . . . . . . . . . . . . . . . . . . . . . . . . . . . . . . . . . . . . . . . . 52
7.3 Disinfection . . . . . . . . . . . . . . . . . . . . . . . . . . . . . . . . . . . . . . . . . . . . 52
7.4 Cleaning, Disinfection and Sterilization of the Contra-Angle . . . . . . 55
7.4.1 Pre-Treatment . . . . . . . . . . . . . . . . . . . . . . . . . . . . . . . . . . . . . . . . . . . . . . . .56
7.4.2 Manual Reprocessing . . . . . . . . . . . . . . . . . . . . . . . . . . . . . . . . . . . . . . . . . .57
7.4.3 Machine-based Reprocessing . . . . . . . . . . . . . . . . . . . . . . . . . . . . . . . . . . . .58
7.4.4 Lubrication of the Contra-Angle . . . . . . . . . . . . . . . . . . . . . . . . . . . . . . . . . . .59
7.4.5 Sterilization . . . . . . . . . . . . . . . . . . . . . . . . . . . . . . . . . . . . . . . . . . . . . . . . . . .617.4.5.1 Approved Sterilization Procedure . . . . . . . . . . . . . . . . . . . . . . . . . . . . . . . . . . . . . . . . . 62
4/74 F1902142.EN / 05 / 2015 / updated 02/2016

Table of contents
8 Technical Characteristics . . . . . . . . . . . . . . . . . . . . . . . . . . . . . . . 63
9 Motor Handpiece Error Code . . . . . . . . . . . . . . . . . . . . . . . . . . . . 65
10 Troubleshooting . . . . . . . . . . . . . . . . . . . . . . . . . . . . . . . . . . . . . . . 67
11 Warranty . . . . . . . . . . . . . . . . . . . . . . . . . . . . . . . . . . . . . . . . . . . . . 69
11.1 Exclusion of Liability . . . . . . . . . . . . . . . . . . . . . . . . . . . . . . . . . . . . . 70
12 Disposal of the Product . . . . . . . . . . . . . . . . . . . . . . . . . . . . . . . . . 71
13 Identification of Symbols . . . . . . . . . . . . . . . . . . . . . . . . . . . . . . . 72
13.1 Normative Symbols . . . . . . . . . . . . . . . . . . . . . . . . . . . . . . . . . . . . . 72
F1902142.EN / 05 / 2015 / updated 02/2016 5/74

6/74 F1902142.EN / 05 / 2015 / updated 02/2016
FOR DENTAL USE ONLY
Introduction
Congratulations on your purchase of the X-SMART IQ™ endo motor.
The User Manual is always kept up to date by Maillefer Instruments Holding Sàrl (hereafter Dentsply Maillefer) to bring it in line with the latest developments. You will find the current version on www.dentsplymaillefer.com and integrated into the DENTSPLY ENDO IQ™ application.
In countries where the legal situation enables us to do so, we have decided not to produce a printed version of the User Manual, for environmental reasons.
If no printed version is enclosed in your national language and you wish to have a printed one, we will be happy to send you a copy (free of charge within 7 calendar days to any address in the EU). To order, simply send your request to [email protected].
The User Manual is available in other languages on request.
This User Manual has been compiled with the utmost care. Nevertheless, it is not always possible to completely rule out the risk of error, despite all efforts to do so. We would appreciate your feedback in this area. If any errors are noted, please contact Dentsply Maillefer.
Dentsply Maillefer reserves the right to change the information and data contained in the User Manual without prior notice.
Maillefer Instruments Holding SàrlChemin du Verger 3CH-1338 BallaiguesSwitzerland
Telephone +41 21 843 92 92Fax +41 21 843 92 [email protected]

Indications for Use
F1902142.EN / 05 / 2015 / updated 02/2016 7/74
1 Indications for Use
X-SMART IQ™ is a cordless motor handpiece with torque control used for driving files in both reciprocating and continuous rotation mode during an endodontic procedure.

Contraindications
8/74 F1902142.EN / 05 / 2015 / updated 02/2016
2 Contraindications
Read the following contraindications before use.
• In cases where a patient has been fitted with an implanted heart pacemaker (or other electrical equipment) and has been cautioned against the use of small electrical appliances (such as electric shavers, hair dryers, etc.), X-SMART IQ™ must not be used.
• Do not use X-SMART IQ™ for implants or any other dental procedure outside endodontics.
• Safety and effectiveness have not been established in pregnant women and children.
• Clinical judgment needs to be applied by the end user of the device.

Warnings
3 Warnings
Read the following warnings before use.
Dentist• The motor handpiece is intended for endodontic treatment and may
only be used by trained and qualified professionals such as dentists
Ambient conditions• The device must not be placed in humid surroundings or where it
can come into contact with liquids.• Do not expose the device to direct or indirect heat sources. The
device must be operated and stored in a safe environment.• The device can be operated up to a maximum temperature of 35°C
(95°F) and up to an altitude of 2 000 m (~ 6561ft 8in) above sea level.
• Do not use the device in the presence of free oxygen, anesthetics or flammable substances. The device must be operated and stored in a safe environment.
• The device can cause radio interference or disrupt the operation of equipment in the vicinity. If this happens, the interference should be reduced by reorienting or repositioning the device or by screening off the immediate environment. The electromagnetic radiations emitted by the X-SMART IQ™ motor handpiece are below the recommended limits specified by the applicable relevant provisions (DIN EN 60601-1-2:2007).
• The device requires special precautions with regard to electromagnetic compatibility (EMC) and must be installed and operated in strict compliance with the EMC Directive. In particular, do not use the device in the vicinity of fluorescent lamps, radio transmitters, remote controls or portable or mobile RF communication devices, even if they meet CISPR 8 requirements.
• The iPad® generates, uses and can radiate radio-frequency energy.
The use of the iPad® in a medical environment requires particular care in regards to electromagnetic interference with other devices. Please refer to the Apple User Manual for more information about
the iPad®’s electromagnetic compatibility.
F1902142.EN / 05 / 2015 / updated 02/2016 9/74

Warnings
• The iPad® protective case and the motor handpiece cover contain permanent magnets. Magnets could affect the normal functioning of pacemakers, implanted heart defibrillators and hearing aid devices. Do not place the accessories near these devices or any other object sensitive to static magnetic fields.
• Do not charge, operate or store at high temperatures. Comply with the specified operating and storage conditions.
During treatment• Gloves and a rubber dam are absolutely essential during treatment.• If any irregularities with the device should occur during treatment,
switch it off. Contact Dentsply Maillefer or your Dentsply Maillefer authorized service partner.
Battery• Always use the original charger with the charging cable to charge
the device. Use of non-original chargers jeopardizes the safety of the patient and user.
• If liquid should emerge from the motor handpiece, the batteries may be leaking. In this event, stop using the device immediately and contact Dentsply Maillefer or your Dentsply Maillefer authorized service partner.
• Never open the device yourself. Opening the device voids the warranty. Contact Dentsply Maillefer or your Dentsply Maillefer authorized service partner.
• A device with a faulty battery must not be sent by air freight.• Always check to ensure that both the motor handpiece and the
iPad® have a sufficient battery charge before starting treatment.
Contra-angle• Never press the contra-angle pushbutton when the motor
handpiece is running or if it is coming to a stop. This will lead to detachment of the instrument or cause the pushbutton to overheat.
• Never remove the contra-angle from the motor handpiece during operation.
• Only use undamaged root canal instruments. Please refer to the information provided by the manufacturer.
10/74 F1902142.EN / 05 / 2015 / updated 02/2016

Warnings
• Only insert the instrument when the contra-angle is stationary.• Never place your fingers on the moving parts of the instrument
while it is running or coming to a stop.• Before treatment, check the contra-angle for any damage or loose
parts.• Only use the original Dentsply Maillefer contra-angle.
Root canal instruments• Before use, make sure the instrument is securely locked in place.• Never use continuous rotary instruments in reciprocating mode.• Never use reciprocating instruments in rotary mode.• Use the torque and speed settings recommended by the instrument
manufacturer.
iPad®, iPad® protective case and motor handpiece support/cover• Hygiene measures to prevent cross-contamination are absolutely
essential. Dentsply Maillefer recommends using the iPad® protective case as indicated in 6.5.6 Setting up the Complete System or any other hygienic sleeve/barrier for medical applications.
• The operating conditions and limitations specified by Apple® must be complied with.
• Ensure the iPad® and the accessories are in a stable position during the treatment.
• The motor handpiece cover can be magnetically attached to the
iPad® protective case. The device can fall if subjected to abrupt movements.
• Do not disable the iPad® sound when using X-SMART IQ™.
• Do not disinfect the iPad® protective case if the protective plugs are not properly inserted.
• Apple®, the Apple logo and iPad® are trademarks of Apple Inc.,
registered in the U.S. and other countries. App Store® is a service mark of Apple Inc.
F1902142.EN / 05 / 2015 / updated 02/2016 11/74

Warnings
DENTSPLY ENDO IQ™ application• Dentsply Maillefer cannot be held liable for the developed
application if unauthorized modifications have been made (e.g. jailbreaking, …).
• Treatment notes linked to patients in the application are subject to the requirements of the applicable legislation on data privacy.
• User must take appropriate measures to protect any data associated with a patient such as activating the device master
password, the encryption of the parameters for backup on iTunes®
and avoiding using the iPad® outside the medical environment.• It is strongly recommended to periodically transfer all treatment
notes associated with a patient to your Dental Practice
Management Software and back-up your iPad® using iTunes®.• DENTSPLY ENDO IQ™ does not replace your Dental Practice
Management Software. • It is strongly recommended that all open applications are closed
before launching the DENTSPLY ENDO IQ™ application.
Accessories• The use of the handpiece sleeve is mandatory. This product is
designed for single use and has to be disposed of and changed after every treatment.
• Only use Dentsply Maillefer components/accessories and spare parts.
• Using other makes of accessories/spare parts can lead to increased emission of electromagnetic interferences or to reduced electromagnetic interference immunity.
Repairs and Defects• Do not use the device if you suspect damage or a defect.• Repairs, alterations and modifications to the device are not
permitted unless the manufacturer's prior consent has been obtained. Dentsply Maillefer cannot be held liable if the device has been altered or modified. If a defect should occur, contact Dentsply Maillefer or your Dentsply Maillefer authorized service partner.
12/74 F1902142.EN / 05 / 2015 / updated 02/2016

Warnings
Transport• Intact devices can be transported by land freight or air freight in the
original packaging. The applicable requirements must be met (see table below).
• Defective devices can also be transported by air freight or land freight in the original packaging. If the battery is defective, the device must not be transported by air freight under any circumstances.
• Leaking liquid can be an indicator of a defective battery.
Standards and regulations that apply to the transport of X-SMART IQ™
Air freight Land freight
Intact device or defective device with intact battery.
• UN 3481 Lithium batteries in equipment.
• IATA Packing instruction 967 Part II.
• Special regulations issued by airlines and national regulations must be complied with.
• UN 3481 Lithium batteries in equipment.
• ADR Special provisions 188 f) and g).
Device with defective battery.
Not possible.
• International, multilateral agreements M 228 and M 259.
• ADR SV 661 (international, road).
• Regulations issued by GRS (German Joint Battery Take-back System Foundation) for the transport of waste lithium batteries (FRG, road).
F1902142.EN / 05 / 2015 / updated 02/2016 13/74

Precautions
14/74 F1902142.EN / 05 / 2015 / updated 02/2016
4 Precautions
Read the following precautions before use.
• Please check the compatibility of your DENTSPLY ENDO IQ™
application before updating the iPad® operating system.• Always install the latest version of the DENTSPLY ENDO IQ™
application. Regularly check for updates on the App Store®.

Adverse Reactions
F1902142.EN / 05 / 2015 / updated 02/2016 15/74
5 Adverse Reactions
There are no known adverse reactions.
Safety and effectiveness have not been established in pregnant women and children.

Step by Step Instructions
6 Step by Step Instructions
Refer to the chapter 3 Warnings to verify any special care to exercise before starting to use the complete device.
Before use, please check the exact contents of the package. See 6.3 Package Contents.
6.1 Document Symbols
6.2 DENTSPLY ENDO IQ™ Application Compatibility
Symbol Identification
Consult instructions for use
If the instructions are not followed properly, operation may have risks for the product or the user/patient
Additional information, explanation on operation and performance
Suggestion or advice
Specification Description
iPad® requirement
• iPad Mini™
• iPad Mini™ 2
• iPad Mini™ 3
• iPad Mini™ 4
Operating System• iOS 8.x• iOS 9.x
16/74 F1902142.EN / 05 / 2015 / updated 02/2016

Step by Step Instructions
6.3 Package Contents
.
N° Action
ACarefully remove the device and the accessories from their packaging and place them on a flat surface.
BCheck that the X-SMART IQ™ is supplied with all the components listed below.
Not all components presented below are available in all kits.
Files
Files
Getting Started GuideJust a few images to help you set up your motor easily
and get the most out of it.
Spray nozzle(used for lubrication)
AC adapter
iPad Mini™ protective case*
Motor handpiece
Contra-angle
Getting Started Guide
Rubber plugs and protective case opener*
Motor handpiece support and case
Files*
Samples of motor handpiece single use sleeve are included in the kits.*These components are not available in all kits.
F1902142.EN / 05 / 2015 / updated 02/2016 17/74

Step by Step Instructions
6.4 Components not included
The following components are not included in the kit:
6.5 System Setup
6.5.1 Turning on the iPad® and setting the Volume
iPad® with iOS app (not part of the kit).
N° Action
A Turn on the iPad®.
B Adjust the volume to maximum.
The application uses sounds to give general information, see 6.6.1.3 Description of the Sounds.
18/74 F1902142.EN / 05 / 2015 / updated 02/2016

Step by Step Instructions
6.5.2 Activating the AssistiveTouch
The AssistiveTouch feature replaces the actions of the iPad® Home button which is not accessible when in the protective case.
To activate the AssistiveTouch
N° Key Action
A Select Settings.
B Select General.
C Select Accessibility.
D Select AssistiveTouch.
E Set AssistiveTouch to ON.
A virtual "Home" key is displayed.
F1902142.EN / 05 / 2015 / updated 02/2016 19/74

Step by Step Instructions
To press the Home button with AssistiveTouch
N° Action
A Tap on the virtual home button.
B Select HOME.
It is also possible to use the 4 fingers to swipe in and to return to the Home screen.
20/74 F1902142.EN / 05 / 2015 / updated 02/2016

Step by Step Instructions
6.5.3 Activating the WiFi
You need to activate the WiFi to download the DENTSPLY ENDO IQ™ application.
6.5.4 Activating the Bluetooth®
You need to activate Bluetooth® to connect the motor handpiece to the iPad®.
N° Key Action
A Select Settings.
B Select WiFi.
C Set WiFi to ON.
D Select your network and enter your password.
N° Key Action
A Select Settings.
B Select Bluetooth®.
C Set Bluetooth® to ON.
To connect the motor handpiece to the iPad®, see 6.7.3 Connecting the Motor Handpiece.
F1902142.EN / 05 / 2015 / updated 02/2016 21/74

Step by Step Instructions
6.5.5 Installing and Updating the DENTSPLY ENDO IQ™ Application
The DENTSPLY ENDO IQ™ application is available in the App Store®.
6.5.5.1 Firmware update
The application checks the motor handpiece firmware version and, if the version is obsolete, DENTSPLY ENDO IQ™ suggests an update is performed.
Follow the instructions on the screen to execute the update.
It is strongly recommended that data is backed up regularly by synchronizing with iTunes.
N° Key Action
A Connect to the App Store®.
B Search and download the DENTSPLY ENDO IQ™ application.
To download the DENTSPLY ENDO IQ™ application, you need an Apple ID.If you already have one, use it and log in.If you do not have one, follow the procedure on the Apple.com website to create an ID.
Regularly check for DENTSPLY ENDO IQ™ updates on the App
Store®.
Always check Apple® is compatible with the application information (see 6.2 DENTSPLY ENDO IQ™ Application Compatibility) before
updating your iPad®.
Dentsply iQ
Connect the motor handpiece to the AC adapter before starting the firmware update. See 6.8 Storing and charging the Motor Handpiece.
22/74 F1902142.EN / 05 / 2015 / updated 02/2016

Step by Step Instructions
6.5.6 Setting up the Complete System
N° Action
A Enclose the iPad® in the protective case and fit the rubber plugs.
Pay attention to the iPad® orientation. In case of error, use the red key to open the protective case.
B Separate the motor handpiece cover from the motor handpiece support.
A
B
In case of error, use the red key to open the protective case.
F1902142.EN / 05 / 2015 / updated 02/2016 23/74

Step by Step Instructions
N° Action
C Install the motor handpiece cover as a protective case holder.
Place the assembly on a steady surface. Multiple configurations are possible.
D Insert the contra-angle on the motor handpiece.
Turn off the motor before connecting or disconnecting the contra-angle.
E Place the motor handpiece on its support.
C
D E
Positions 1 and 4 have a limited stability. Monitor the device carefully if you choose one of these positions.
1 2
3
4
24/74 F1902142.EN / 05 / 2015 / updated 02/2016

Step by Step Instructions
6.6 Motor Handpiece
6.6.1 Description of the Motor Handpiece
Motor START/STOP button
iPad®/Motor handpiece Bluetooth® connection status LED►See 6.7.3 Connecting the Motor Handpiece
Multifunction button:
• Connects the motor handpiece to the application via Bluetooth®.► See 6.7.3 Connecting the Motor Handpiece.• Awakens the motor handpiece.
The motor handpiece does not turn off, it automatically switches to Stand-by mode.
► See 6.6.1.4 Stand-by Mode.• Advance to the next file during a treatment.• Go backwards to the previous file during a treatment.• Reset the motor handpiece: press for 10 s.• Factory reset of the motor handpiece: press for 20 s.
Battery charge status LED►See 6.6.1.1 Description of the LED Colors
Continuous rotation mode status LED
Reciprocating motion mode status LED
F1902142.EN / 05 / 2015 / updated 02/2016 25/74

Step by Step Instructions
6.6.1.1 Description of the LED Colors
Button/LED
State Description
Motor handpiece ready.
Motor handpiece ready for calibration.Or motor handpiece in energy-saving mode.
Motor handpiece turning.
Motor handpiece turning in reverse.Or motor handpiece locked.
Error detected.See 10 Troubleshooting.
Bluetooth® ON, motor handpiece ready to be connected.See 6.7.3 Connecting the Motor Handpiece.
When the Bluetooth® LED is blinking blue
during the connection with the iPad®, the motor handpiece is locked (Motor START/STOP button LED is yellow).
Motor handpiece connected to the iPad®.See 6.7.3 Connecting the Motor Handpiece.
Connection lost.See 10 Troubleshooting.
a
a
26/74 F1902142.EN / 05 / 2015 / updated 02/2016

Step by Step Instructions
Second motor handpiece connected to the iPad®.See 6.7.3.1 Connecting a Second Motor Handpiece.
Motor handpiece in stand-alone mode.See 6.6.3 Stand-alone mode: operation without the DENTSPLY ENDO IQ™ Application.
Reciprocating motion mode active.
Continuous rotation mode active.
Device completely charged.Or enough battery available to complete the treatment.
Device charging.For acoustic signals, see 6.6.1.3 Description of the Sounds.
Button/LED
State Description
a
a
a
F1902142.EN / 05 / 2015 / updated 02/2016 27/74

Step by Step Instructions
6.6.1.2 The Auto Reverse (AutoRev) Functionality
Low battery level.Connect the motor handpiece to the AC-adapter.See 6.8 Storing and charging the Motor Handpiece.For acoustic signals, see 6.6.1.3 Description of the Sounds.
Very low battery level.Immediately connect the motor handpiece to the AC-adapter.See 6.8 Storing and charging the Motor Handpiece.For acoustic signals, see 6.6.1.3 Description of the Sounds.
Button/LED
State Description
a
Mode Explanation
AutoRev OFF
If the applied torque on the motor handpiece is higher than the maximum defined torque, the motor handpiece stops. The user must press the Motor START/STOP button to restart the motor.
AutoRev ON
If the applied torque on the motor handpiece is higher than the maximum defined torque, the motor handpiece automatically turns in reverse until the applied torque is lower than a pre-defined threshold (in continuous rotation), or until the Motor START/STOP button is pressed (in reciprocating rotation).
28/74 F1902142.EN / 05 / 2015 / updated 02/2016

Step by Step Instructions
6.6.1.3 Description of the Sounds
6.6.1.4 Stand-by Mode
When the motor handpiece is not used for a certain period of time, it enters stand-by mode as described below.
Mode Description
Device running in continuous rotation
Intermittent sound when:• The device is rotating in reverse.• The torque measured is about 75% over the defined
torque.
Device running in reciprocating motion
Intermittent sound when:• The instrument is subject to increased friction,• After switching to forward rotation.
Battery charge level• One short beep when the battery charge level is low.• Three-second beep when the battery charge level is
critical.
Motor START/STOP button
A short beep when pressing the button.
Multifunction button A short beep when pressing the button.
Mode LED descriptionApplication
displayWake-up action
Device active All LEDs ON.Bluetooth® ON,device visible on status bar.
None.(Device ready to be used).
Stand-by mode 1
(inactive for 35 s)
All LEDs ON.Motor START/STOP button blinking blue every 3 s.
Bluetooth® ON, device visible on status bar.
Pick-up the motor handpiece.
Stand-by mode 2
(inactive for 30 min)All LEDs OFF.
Bluetooth® OFF, device not visible on status bar.
Press the multifunction button.
F1902142.EN / 05 / 2015 / updated 02/2016 29/74

Step by Step Instructions
6.6.1.5 Battery Care
The following notes will help you to ensure the battery provides a long service life:• If the battery LED on the motor handpiece lights up red, charge the
battery. You can continue treatment whilst it is charging.• Charge the battery no more than once a day.• Charge the battery as soon as the battery LED turns red, at the
latest when the LED starts blinking red.• Always fully charge the battery, i.e until the battery LED turns
green.• If the battery is completely flat, charging can take up to six hours.• Continuous operation with the charger connected shortens the
lifetime of the battery. Dentsply Maillefer recommends working without the charging cable connected.
6.6.2 Inserting and removing the File
6.6.2.1 Inserting the File
Please also follow the charging instructions in the section 6.8 Storing and charging the Motor Handpiece and heed the warnings in the Battery section in chapter 3 Warnings.
Please charge the motor handpiece fully before using for the first time (about 6 hours) to optimize battery life.
N° Action
A Insert the file (1) into the chuck (2) until it stops.
B Turn the file (1) gently until it engages with the latch mechanism. Push inwards to click.
C Pull on the file (1) gently to make sure it is locked.
30/74 F1902142.EN / 05 / 2015 / updated 02/2016

Step by Step Instructions
6.6.2.2 Removing the File
6.6.3 Stand-alone mode: operation without the DENTSPLY ENDO IQ™ Application
The motor handpiece can be used without the iPad® and the DENTSPLY ENDO IQ™ application. This mode is called Stand-alone.
To activate Stand-alone mode:• Connect the motor handpiece to the DENTSPLY ENDO IQ™
application.See 6.7.3 Connecting the Motor Handpiece.
• Choose one of the available Stand-alone modes.See 6.7.5.1 Motor Handpiece Information and Settings.
N° Action
A Press the pushbutton (3) and pull out the file (1).
1 2 3
See 6.6.1.1 for motor handpiece LED status in Stand-alone mode.
The motor handpiece must be activated with the DENTSPLY ENDO IQ™ application to be used in Stand-alone mode.
Check the current settings of the stand-alone mode before using the motor handpiece without the DENTSPLY ENDO IQ™ application, see 6.7.5.1 Motor Handpiece Information and Settings.
F1902142.EN / 05 / 2015 / updated 02/2016 31/74
Step by Step Instructions
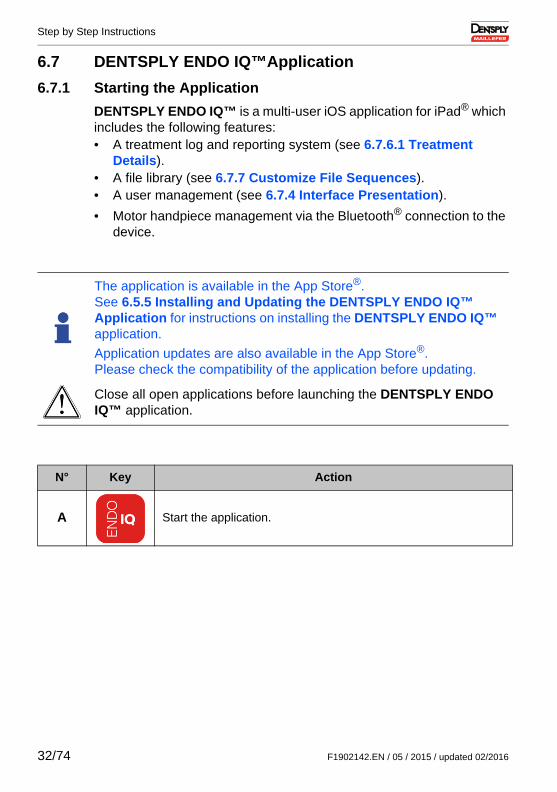
6.7 DENTSPLY ENDO IQ™Application
6.7.1 Starting the Application
DENTSPLY ENDO IQ™ is a multi-user iOS application for iPad® which includes the following features:• A treatment log and reporting system (see 6.7.6.1 Treatment
Details).• A file library (see 6.7.7 Customize File Sequences).• A user management (see 6.7.4 Interface Presentation).
• Motor handpiece management via the Bluetooth® connection to the device.
The application is available in the App Store®.See 6.5.5 Installing and Updating the DENTSPLY ENDO IQ™ Application for instructions on installing the DENTSPLY ENDO IQ™ application.
Application updates are also available in the App Store®.Please check the compatibility of the application before updating.
Close all open applications before launching the DENTSPLY ENDO IQ™ application.
N° Key Action
A Start the application.
32/74 F1902142.EN / 05 / 2015 / updated 02/2016

Step by Step Instructions
6.7.2 Editing or creating a User Profile
The first time you use the application, you will be automatically connected as a default user.
You can edit the profile with your data.
If there is only one user defined, you will be automatically connected as this user.
N° Key Action
AEdit the profile. See 6.7.4 Interface Presentation.
Enter a user name and an email address.Email address is optional.
To add a new user, follow the steps below.
B Log out (see 6.7.4 Interface Presentation).
CCreate a user.
Enter a user name and a email address.Email address is optional.
The email address is used as the default recipient for treatment reports.To use this function, you must have an email address defined in the
settings of the iPad® to send the treatment reports.
F1902142.EN / 05 / 2015 / updated 02/2016 33/74

Step by Step Instructions
6.7.3 Connecting the Motor Handpiece
The motor handpiece and the iPad® communicate via Bluetooth®.
N° Action
APress the multifunction button until the Bluetooth® LED blinks.
Bluetooth® LED blinks blue, see 6.6.1.1 Description of the LED Colors.
B
Wait until the motor handpiece is visible on the DENTSPLY ENDO IQ™ application.
See 10 Troubleshooting if the motor handpiece is not visible on the DENTSPLY ENDO IQ™ application after 10 s.
When the motor handpiece is detected by the DENTSPLY ENDO IQ™ application, the pop-up (1) is displayed.
1
34/74 F1902142.EN / 05 / 2015 / updated 02/2016

Step by Step Instructions
C Select the corresponding motor handpiece serial number from the pop-up.
The serial number (2) can be found at the back of the motor handpiece.
When the motor handpiece is connected :The icon (3) appears.
The Bluetooth® LED on the motor handpiece is now blue.
N° Action
2
3
F1902142.EN / 05 / 2015 / updated 02/2016 35/74

Step by Step Instructions
6.7.3.1 Connecting a Second Motor Handpiece
A second motor handpiece can be connected to the DENTSPLY ENDO IQ™ application.
The second motor handpiece can be recognized by the green Bluetooth® LED and the following icon on the DENTSPLY ENDO IQ™ application.
It is not possible to connect more than two motor handpieces to the DENTSPLY ENDO IQ™ application.
If two motor handpieces are connected to the DENTSPLY ENDO IQ™ application, they have the same motor settings.
36/74 F1902142.EN / 05 / 2015 / updated 02/2016

Step by Step Instructions
6.7.3.2 Disconnecting the Motor Handpiece
N° Action
A Click on the icon (1).
B Select Disconnect (2) and confirm the operation.
The motor handpiece disappears from the status bar.
12
F1902142.EN / 05 / 2015 / updated 02/2016 37/74

Step by Step Instructions
6.7.4 Interface Presentation
Home button, back to home screen
X-SMART IQ™ Warnings
Pop-up menu that contains: Edit user profile and log out
Pop-up menu that contains: Parameters, Statistics and About
To edit the user profile
User Manual
To log out and change user
►See 6.7.5.2 Start Treatment
►See 6.7.5.3 Start and Record Treatment
►See 6.7.6 Treatment Reports
►See 6.7.7 Customize File Sequences
Patient Education Library
►See 6.7.5.1 Motor Handpiece Information and Settings
To customize the application
Statistics about application use
System information
38/74 F1902142.EN / 05 / 2015 / updated 02/2016

Step by Step Instructions
The following buttons are also present in the application:
Button Action
Takes you back to the previous page without saving.
Save and leave the actual page.
Patient information (see 6.7.6 Treatment Reports).
Treatment notes (see 6.7.6.2 Treatment Notes).
File library (see 6.7.7 Customize File Sequences).
Torque recording graph (see 6.7.5.2 Start Treatment).
Calibration (see 6.7.5.2 Start Treatment).
Create and send a PDF report by email (see 6.7.6 Treatment Reports).
Edit (a file, a sequence, a patient, etc.).
Delete (a file, a sequence, a patient, etc.).
More information (see 6.7.6 Treatment Reports).
All icons with a small < + > are used to create: new file, new sequence, new patient, etc.
Continuous rotation mode.
Reciprocating motion mode.
Bluetooth® connection level between the iPad® and the motor handpiece.
Motor turning.
Motor handpiece battery level.
F1902142.EN / 05 / 2015 / updated 02/2016 39/74

Step by Step Instructions
6.7.5 Three Modes of Use
Stand-alone Mode
Using the motor handpiece in one predefined mode without DENTSPLY ENDO IQ™ application.
Start Treatment Start and Record Treatment
Using the motor handpiece with predefined sequences (default or custom sequences).
1. Press the multifunction button to activate the motor handpiece until the
Bluetooth® LED is OFF
►See 6.6.3 Stand-alone mode: operation without the DENTSPLY ENDO IQ™ Application
1. Log in as a user.2. Connect the motor handpiece.3. Select Start Treatment.4. Select a file sequence.
►See 6.7.5.2 Start Treatment
1. Log in as a user.2. Connect the motor handpiece.3. Select Start and Record Treatment.4. Select a file sequence.5. Create or select a patient.6. Add treatment notes.7. Save the data and share the treatment report.
►See 6.7.5.3 Start and Record Treatment
Using the motor handpiece with predefined sequences (default or custom sequences).
Allows treatment data and treatment notes to be recorded and a treatment report to be sent.
40/74 F1902142.EN / 05 / 2015 / updated 02/2016

Step by Step Instructions
6.7.5.1 Motor Handpiece Information and Settings
AAAAA
Motor handpiece battery level
Bluetooth® connection level between the iPad® and the
motor handpiece
Motor handpiece technical data
Stand-alone mode selection for the motor handpiece
(reciprocating motion mode and continuous rotation modes)
To share system status with a Technical support centre
To disconnect the motor handpiece.►See 6.7.3.2 Disconnecting the Motor Handpiece
Motor handpiece battery level
Bluetooth® connection levelbetween the iPad® and the motor handpiece
Motor handpiece is running
Click on it to display the pop-up below:
This symbol is blue for the first motor handpiece connected and green for the second motor handpiece
F1902142.EN / 05 / 2015 / updated 02/2016 41/74

Step by Step Instructions
6.7.5.2 Start Treatment
Real time torque value (displayed in a circular bargraph)
To adjust the torque and speed parameters
To select a file system or a file sequence.►See 6.7.7 Customize File Sequences
To display a torque graph in real time
To calibrate the motor handpiece.
This is required to ensure the motor parameters are accurate.Calibration is recommended before each treatment.
Follow the procedure on the screen
To set auto reverse function.►See 6.6.1.2 The Auto Reverse (AutoRev) Functionality
Click or swipe to move to next file or press the multifunction button.Double press the multifunction button to move to the previous file
Motor turns in reverse when activated
You can easily access "Start Treatment" by clicking on the Motor START/STOP button once the motor handpiece is connected to the X-SMART IQ™ application.
Press the multifunction button on the motor handpiece to move to the next file. Double press to move to the previous file.
42/74 F1902142.EN / 05 / 2015 / updated 02/2016

Step by Step Instructions
6.7.5.3 Start and Record Treatment
The buttons and functions described in "Start Treatment" are also applicable to "Start and Record Treatment".
To assign the current treatment to a patient
To select the tooth on which the treatment is being carried out and add treatment
notes.►See 6.7.6.2 Treatment Notes
To stop recording the current treatment.
When you confirm, it opens the "Treatment Details" screen►See 6.7.6.1 Treatment Details
F1902142.EN / 05 / 2015 / updated 02/2016 43/74

Step by Step Instructions
6.7.6 Treatment Reports
Treatment reports allow you to:• Create, edit or delete a patient.• View, edit or delete the treatments associated with the patients.
To sort patients by names
To sort patients by treatment date
To search for a patient by name
Click on a patient to display additional functions
To display additional information on the treatment.►See 6.7.6.1 Treatment Details
To delete the selected treatment
To create and send a PDF report by email
To create a patient To edit a patient
To delete a patient and all associated treatments
To select the current user's patients (Mine) or all users' patients (if multiple users defined)
44/74 F1902142.EN / 05 / 2015 / updated 02/2016

Step by Step Instructions
6.7.6.1 Treatment Details
Basic information for the patient and specific information for the associated treatment
To delete the treatment
To create and send a PDF report by email
To review your treatment notes.►See 6.7.6.2 Treatment Notes
Technical data of the files used for the treatment
To display a torque graph in real time
F1902142.EN / 05 / 2015 / updated 02/2016 45/74

Step by Step Instructions
6.7.6.2 Treatment Notes
Treated tooth
To save the treatments
Information related to the treatments:
Canal type, Length, Obturation Method, File and Note.
To delete the treatment
Takes you back to the previous page without saving.
46/74 F1902142.EN / 05 / 2015 / updated 02/2016

Step by Step Instructions
6.7.7 Customize File Sequences
A file sequence is a collection of files that are used during a treatment. It is composed of files provided by Dentsply Maillefer or a third-party manufacturer.
The file sequences are divided into 4 categories:• Most frequently used sequences.• Sequences created by the user.• Standard file sequences provided by Dentsply Maillefer.• Standard file sequences provided by VDW.
The "Customize File Sequences" screen allows you to :• Review all file systems and file sequences,• Create, edit or delete file sequences (see 6.7.7.2 Create File
Sequence),• Create and define custom files for third-party products.
Information about the selected file system
Create new file sequence►See 6.7.7.2 Create File Sequence
Custom file►See 6.7.7.1 Create new File
To edit a file sequence
F1902142.EN / 05 / 2015 / updated 02/2016 47/74

Step by Step Instructions
Follow the file manufacturer’s instructions for use of endodontic files.
The file system shown on the display must always match the file in use. This is of the utmost importance in order to avoid misusing reciprocating files and continuous rotary files.
Torque and speed values are liable to modification by the file manufacturers without notice.Therefore, the preset values in the library must be checked prior to use. Torque values shown on the application are accurate and reliable only if the X-SMART IQ™ 6:1 contra-angle is properly maintained and lubricated.
48/74 F1902142.EN / 05 / 2015 / updated 02/2016

Step by Step Instructions
6.7.7.1 Create new File
File picture
Selection of the Auto Reverse Function mode.►See 6.6.1.2 The Auto Reverse (AutoRev) Functionality
File name
Name of the file system
Name of the manufacturer
File purpose
No File Type, Shaping, Glide Path, Cavity Access or
Retreatment
Maximum torque
Indicates the type of rotation for the file
Continuous Rotation File Systems
Reciprocating File Systems
Maximum rotation speed
File color
To save the created file
F1902142.EN / 05 / 2015 / updated 02/2016 49/74

Step by Step Instructions
6.7.7.2 Create File Sequence
The standard file sequence can not be edited or deleted but it is possible to create a copy that can be edited.
A custom file can only be deleted if not used in any sequence.
Click on the arrow to add the file in your sequence
Name of the file sequence
Save your sequence
Delete the selected file from the sequence
Select the file system for your sequence.
Select "Others" to insert a custom file.►See 6.7.7.1 Create new File
Edit the selected file from sequence
Move the position of the file in the sequence
50/74 F1902142.EN / 05 / 2015 / updated 02/2016

Step by Step Instructions
6.8 Storing and charging the Motor Handpiece
N° Action
A Store the motor handpiece in the motor handpiece holder
B Plug in the motor charger.
C Fit the motor handpiece cover.
A
B
C
Charging time: maximum 6 hours
F1902142.EN / 05 / 2015 / updated 02/2016 51/74

Cleaning, Disinfection and Sterilization
7 Cleaning, Disinfection and Sterilization
7.1 Foreword
Regular maintenance of X-SMART IQ™ is essential to ensure that work performed is completely hygienic and that the device will have a long service life.
The components of X-SMART IQ™ have not been disinfected or sterilized when they are delivered. Please perform the necessary steps before the first treatment.
You are responsible for the sterility of accessories; always ensure that only validated methods of cleaning/disinfection and sterilization are used, that regular maintenance and inspections are performed on the equipment (disinfector, sterilizer) and that the validated parameters are maintained in every cycle.
Comply with your national guidelines, standards and requirements for cleaning, disinfection and sterilization.
7.2 Single Use
7.3 Disinfection
The components listed on page 54 must be cleaned and subjected to a wipe-down disinfection before the first treatment and immediately after every subsequent treatment. They are not approved for machine-based cleaning (washer-disinfector) and sterilization.
Wear protective clothing during all cleaning, disinfection and sterilization processes.
The use of the handpiece sleeve is mandatory. This product is designed for single use and has to be disposed of and changed after every treatment. In the event of non-compliance, the contamination risk increases.
52/74 F1902142.EN / 05 / 2015 / updated 02/2016

Cleaning, Disinfection and Sterilization
For wipe-down disinfection proceed as follows:
Never place the components in a washer-disinfector, autoclave or ultrasonic bath.
If you use a disinfectant in the form of a spray, never spray the devices and accessories directly.
Only use surface disinfectants that are certified by officially recognized institutes, do not contain chlorine and have been declared aldehyde-free.
In addition to using the handpiece sleeve, clean and disinfect the handpiece regularly. When subjecting the motor handpiece to wipe-down disinfection ensure that the charging cable is not connected and that the charging socket is closed.
Please refer to the manufacturer’s information on use of the disinfectant.
N° Action
A Separate the motor handpiece cover from the iPad® protective case.
B
After any pre-cleaning, lightly soak a paper tissue or soft cloth in a mild, aldehyde-free disinfection and cleaning solution (bactericidal and fungicidal) and use it to clean/disinfect all components.
Dentsply Maillefer recommends mikrozid® AF wipes manufactured by Schülke.
C
Thoroughly disinfect surfaces with a soaked wipe (min. 30 seconds), making sure the entire surface is wetted, and allow to act (contact time > 30 minutes). If large surfaces have to be treated, use more than one wipe where necessary.
F1902142.EN / 05 / 2015 / updated 02/2016 53/74

Cleaning, Disinfection and Sterilization
Spray nozzle
Charging cable
iPad® protective case
Motor handpiece
Motor handpiece coverMotor handpiece support
54/74 F1902142.EN / 05 / 2015 / updated 02/2016

Cleaning, Disinfection and Sterilization
7.4 Cleaning, Disinfection and Sterilization of the Contra-Angle
The contra-angle must be cleaned, disinfected and sterilized before the first treatment and after every subsequent treatment. Clean and disinfect the contra-angle immediately after every treatment in order to prevent debris from clinging.
According to a recommendation by the Robert Koch Institute (Germany), a distinction must be made between device-based and manual reprocessing, with device-based reprocessing being the preferable measure. Below you will find instructions concerning device-based and manual reprocessing, lubrication and sterilization
Always start with preparation at the point of use and manual pre-cleaning in accordance with section 7.4.1 Pre-Treatment.
Sterilize the contra-angle after you have performed manual or machine-based cleaning and disinfection and then lubricate.
Dentsply Maillefer recommends device-based cleaning in a washer-disinfector. Please refer to the manufacturer’s information concerning equipment, cleaning agents and rinsing agents.
Frequent reprocessing has minimal effects on the service life of contra-angles. The end of the product service life is normally dependent on wear and damage caused by use.
F1902142.EN / 05 / 2015 / updated 02/2016 55/74
Cleaning, Disinfection and Sterilization
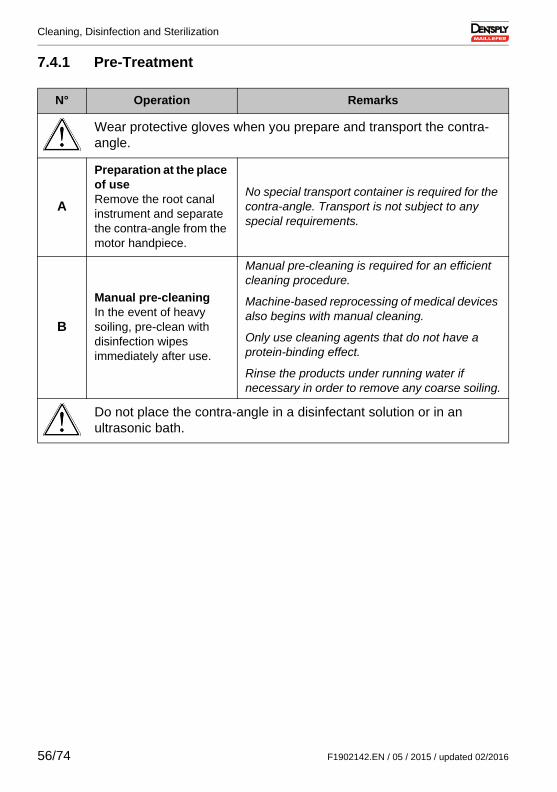
7.4.1 Pre-Treatment
N° Operation Remarks
Wear protective gloves when you prepare and transport the contra-angle.
A
Preparation at the place of useRemove the root canal instrument and separate the contra-angle from the motor handpiece.
No special transport container is required for the contra-angle. Transport is not subject to any special requirements.
B
Manual pre-cleaningIn the event of heavy soiling, pre-clean with disinfection wipes immediately after use.
Manual pre-cleaning is required for an efficient cleaning procedure.
Machine-based reprocessing of medical devices also begins with manual cleaning.
Only use cleaning agents that do not have a protein-binding effect.
Rinse the products under running water if necessary in order to remove any coarse soiling.
Do not place the contra-angle in a disinfectant solution or in an ultrasonic bath.
56/74 F1902142.EN / 05 / 2015 / updated 02/2016

Cleaning, Disinfection and Sterilization
7.4.2 Manual Reprocessing
If you clean and disinfect the contra-angle manually, heed the instructions below and proceed as follows:
N° Operation Remarks
A
Manual cleaningFor 5 minutes, rinse and brush under running deionized water (DI), or water that has this degree of purity (<38°C (100.4°F)).Remove any liquid residues (ultra-absorbent cloth, particle-free compressed air).
Use a cleaning tool (brush).
B
Manual disinfectionThoroughly disinfect surfaces with a soaked wipe, making sure the entire surface is wet, and allow to act (exposure time > 30 minutes).
For disinfection purposes, Dentsply Maillefer
recommends the use of mikrozid® AF wipes manufactured by Schülke.
If large surfaces have to be treated, use more than one wipe where necessary.
Make sure the surface is completely dry after disinfection.
Only use surface disinfectants that are certified by officially recognized institutes, do not contain chlorine and have been declared aldehyde-free.
Please refer to the manufacturer’s information on use of the disinfectant.
F1902142.EN / 05 / 2015 / updated 02/2016 57/74

Cleaning, Disinfection and Sterilization
7.4.3 Machine-based Reprocessing
If you clean and disinfect the contra-angle in a machine, heed the instructions below and proceed as follows:
N° Operation Remarks
A
Automatic cleaning / disinfectionCleaning at 65°C (149°F) holding time 5 min.Disinfection at 90°C (194°F) holding time 5 min.
Use washer-disinfector conforming to EN ISO 15883, e.g. Belimed WD, programme: neutral.
Use cleaning solution: e.g. 0.5% (v/v) deconex 24 LIQ, Borer Chemie.
Use neutralizing solution: e.g. 0.25% (v/v) deconex 26 plus, Borer Chemie.
Deionized water (DI) or water that has this degree of purity is recommended for cleaning.
Make sure the contra-angle attachment is completely dry after thermal disinfection.Remove any residual liquid with particle-free compressed air.
Drying is performed automatically during the drying cycle in the washer-disinfector.
58/74 F1902142.EN / 05 / 2015 / updated 02/2016

Cleaning, Disinfection and Sterilization
7.4.4 Lubrication of the Contra-Angle
It is essential to lubricate the contra-angle after every internal cleaning procedure, before every sterilization or after 30 min. of use, but at least once a day.
Please perform the following steps to lubricate the contra-angle:
When you lubricate the contra-angle take care to ensure that no oil gets into the motor handpiece. Contamination of the motor handpiece with oil can damage it and have a negative impact on safety when it is being operated.
Lubricate the contra-angle immediately after thermal disinfection.
Use the spray nozzle included to lubricate the contra-angle.
Dentsply Maillefer recommends reprocessing the contra-angle using a fully automatic reprocessing device, e.g. the Assistina from W&H.
N° Action
A Remove the spray nozzle cap.
B Attach the spay nozzle to the oil can (e.g. W&H Service Oil MD-400).
CLubricate the contra-angle according to the information in the Instructions for Use of the oil spray can.
A B
C
F1902142.EN / 05 / 2015 / updated 02/2016 59/74

Cleaning, Disinfection and Sterilization
Contra-angle trial run after lubrication:
N° Action
A Attach the contra-angle to the motor handpiece.
B Hold the motor handpiece upside down.
C Run the motor handpiece for 30 seconds to remove any excess oil.
DIf dirt emerges, repeat the entire cleaning and disinfection process and start the lubrication process again.
E Wipe the contra-angle with a paper tissue or a soft cloth.
Always calibrate the motor handpiece when the contra-angle has been lubricated or has been exchanged after sterilization.See 6.7.5.2 Start Treatment for the calibration function from the DENTSPLY ENDO IQ™ application.
Calibrate the motor handpiece without any files attached.
If you only use the motor handpiece in reciprocating mode (without the DENTSPLY ENDO IQ™ application), no calibration is required.
60/74 F1902142.EN / 05 / 2015 / updated 02/2016

Cleaning, Disinfection and Sterilization
7.4.5 Sterilization
N° Operation Remarks
A
PackagingShrink wrap the contra-angle in sterile barrier packages.
Conforming to EN 868-5.
B
SterilizationSterilize at a maximum sterilization temperature of 134°C (274°F).See 7.4.5.1 Approved Sterilization Procedure.
Clean and disinfect before sterilization. The contra-angle should also be lubricated before sterilization.
Make sure you only use dry sterile items.
Use a sterilization temperature with tolerance in compliance with ISO 17665.
Please refer to the information provided by the device manufacturer.
F1902142.EN / 05 / 2015 / updated 02/2016 61/74

Cleaning, Disinfection and Sterilization
7.4.5.1 Approved Sterilization Procedure
N° Operation Remarks
A
SterilizationSteam sterilization with fractionated pre-vacuum method B.Sterilization at 132°C (269.6°F) for at least 4 min. or at 121°C (249.8°F) for at least 30 min.
Comply with your national guidelines, standards and requirements for cleaning, disinfection and sterilization.
Steam sterilization in accordance with EN 13060 or EN 285.
The fast sterilization procedure and the sterilization procedure with non-packaged accessories are not permissible. In addition, do not use hot-air sterilization, radiation sterilization or sterilization with formaldehyde, ethylene oxide or plasma.
B
StorageStore sterile contra-angles in a dry, dust-free place at room temperature.
Before resuming operation: wait until the contra-angle attachment has cooled down and is completely dry.
Contra-angles must be checked for damage before they are reused. Damaged products must be replaced.
62/74 F1902142.EN / 05 / 2015 / updated 02/2016

Technical Characteristics
8 Technical Characteristics
Specification Description
Manufacturer
Maillefer Instruments Holding SàrlChemin du Verger 3CH-1338 BallaiguesSwitzerland
Model X-SMART IQ™
Dimensions (Length x Height x Width) 206 mm x 24.6 mm x 24.8 mm
Material
PBT / PETStainless steel 316LTPE (thermoplastic elastomer)SiliconeABS/PCSomalac VP290Glass
Weight 180 g
Contra-angle
Contra-angle compatible with rotary and reciprocating files, with a 2.35 mm shaft conforming to ISO 1797-1:2011, Type 1
Power supplyLithium ion battery:3.6 V, 2,000 mAh
Charger power supply 100-240 VAC
Frequency 50-60 Hz
Charger nominal power input 5.5 VA
Torque range5 mNm – 50 mNm(0.5 Ncm – 5 Ncm)
Speed range of the micromotor shaft1 200 – 5 100 rpm (in rotary mode)
Type of protection against electrical shockClass II and internally powered equipment
Applied part BF (contra-angle)
Safety level in the presence of flammable anesthetic gas mixtures or oxygen
Not suitable for use in the presence of flammable anesthetic gas mixtures or oxygen.
Mode of operation Continuous operation
F1902142.EN / 05 / 2015 / updated 02/2016 63/74

Technical Characteristics
Ambient conditions
• Use: in enclosed spaces;• Ambient temperature:
15°C - 35°C;(59°F - 95°F)
• Relative humidity: < 80%; non-condensing at 0°C;
• Operating altitude < 2 000 m (~ 6561ft 8in) above sea level;
• Maximum housing temperature according to IEC 60601-1:2006
Medical device classClass IIa, Rule 9, according to MDD 93/42/EEC (Annex IX).
Conditions for transport and storage
• Ambient temperature:-20°C - +50°C(-4°F - 122°F)
• Relative humidity:20% - 80%,non-condensing at > 40°C (104°F)
• Atmospheric pressure:50 kPa - 106 kPa
Bluetooth®
Bluetooth 4.0 low energyDevice contains transmitter with:FCC ID: RFRMSRIC-ID: 4957A-MSRWorking distance: 25 m
iPad® requirement
• iPad Mini™
• iPad Mini™ 2
• iPad Mini™ 3
• iPad Mini™ 4 *
Operating System• iOS 8.x• iOS 9.x
EMC Tables See www.dentsplymaillefer.com
iPad Mini™ protective case is not compatible with iPad Mini™ 4.
Specification Description
64/74 F1902142.EN / 05 / 2015 / updated 02/2016

Motor Handpiece Error Code
9 Motor Handpiece Error Code
If a failure occurs on the motor handpiece, the nature of the failure is given by a combination of colors as described in the following table.
State Failure Solution
Total system failure
Re-initialize the motor handpiece with a Factory Reset (see 6.6.1 Description of the Motor Handpiece).
Battery emptyCharge the battery (see 6.8 Storing and charging the Motor Handpiece).
Motor overheating
Wait for a few minutes and press the multifunction button to reactivate the motor handpiece.
Motor hardware failure
Reset the device (see 6.6.1 Description of the Motor Handpiece).
Battery failure Return the instrument to your service center.
General hardware failure
Reset the device (see 6.6.1 Description of the Motor Handpiece).
OFF
F1902142.EN / 05 / 2015 / updated 02/2016 65/74

Motor Handpiece Error Code
The Motor START/STOP button sensor is not working properly
Reset the device (see 6.6.1 Description of the Motor Handpiece).
Bluetooth radio module failure
Reset the device (see 6.6.1 Description of the Motor Handpiece).
Calibration failed
Lubricate the contra-angle (see 7.4.4 Lubrication of the Contra-Angle) and perform the calibration again.
If the error persists, try to replace the contra-angle and perform the calibration again.
Battery charge not sufficient to perform a firmware upgrade.
Charge the device until the BATTERY indicator turns green. Restart the firmware update.
General firmware failure
Reset the device (see 6.6.1 Description of the Motor Handpiece).
State Failure Solution
66/74 F1902142.EN / 05 / 2015 / updated 02/2016

Troubleshooting
10 Troubleshooting
If the device is not operating properly, read the following checklist. If you are unable to solve the problem by referring to the checklist, contact your service center.
Also refer to the any error codes which may be indicated on the device, as described in chapter 9 Motor Handpiece Error Code.
Problem Cause / Solution
Running motor cannot be stopped during preparation.
The ON/OFF button is blocked or faulty.
Briefly press the multifunction button once to stop the motor. Start and stop the motor again. If the error has not been remedied, contact your service center.
The handpiece cannot be switched on.
The battery is completely flat (all LEDs off).
Connect the motor handpiece to charger (see 6.8 Storing and charging the Motor Handpiece).
The handpiece no longer responds (the LEDs are lit but the motor handpiece does not respond when the button is pressed).
Perform a reset (see 6.6.1 Description of the Motor Handpiece).The motor handpiece automatically switches to ready mode.
The multifunction button is faulty.
Contact your service center.
The motor handpiece cannot be connected
to the iPad®.
The Bluetooth® connection has failed.
iPad®:
1. Activate Bluetooth® on your iPad® under settings (see
6.5.4 Activating the Bluetooth®).
2. Perform a reboot on your iPad® (press and hold the iPad® ON / OFF button for a few seconds).
Motor handpiece:
Perform a factory reset (see 6.6.1 Description of the Motor Handpiece).
F1902142.EN / 05 / 2015 / updated 02/2016 67/74

Troubleshooting
Lost connection between the handpiece and the
iPad®.
iPad® switched off (empty battery).
The handpiece keeps the last used settings for 5 min. You
can either recharge the iPad® and reconnect the motor handpiece or use it in stand-alone mode.
iPad® Bluetooth® switched off.
Switch on the Bluetooth® on the iPad® and reconnect the
motor handpiece (see 6.5.4 Activating the Bluetooth® and 6.7.3 Connecting the Motor Handpiece).
Motor handpiece far from the iPad®.
Place the motor handpiece near the iPad® and re-connect it (see 6.7.3 Connecting the Motor Handpiece).
The contra-angle cannot be calibrated.
The calibration procedure may have been interrupted by increased resistance in the contra-angle.
1. If calibration has been interrupted, calibrate the motor handpiece again to rule out the possibility of a motor fault.
2. Clean and lubricate the contra-angle (see 7.4 Cleaning, Disinfection and Sterilization of the Contra-Angle).
3. Start the calibration procedure again.
Motor handpiece is getting hot.
Overheating.
The device switches off automatically if it overheats. Allow the device to cool down and start again the motor handpiece.
A reciprocating instrument has become jammed in the root canal.
Treatment was not performed properly.
Remove the reciprocating instrument with pliers by rotating clockwise carefully.
A rotary instrument has become jammed in the root canal.
Treatment was not performed properly.
Select reverse rotation, start the motor handpiece and rotate the instrument out of the root canal carefully.
Problem Cause / Solution
68/74 F1902142.EN / 05 / 2015 / updated 02/2016

Warranty
11 Warranty
Dentsply Maillefer certifies that the device has been properly designed, that the highest quality materials have been used, that all the necessary tests have been performed and that the device complies with the relevant laws and regulations.
Full performance capability of X-SMART IQ™ is covered by a 12-month warranty and that of the contra-angle is covered by a 24-month warranty that commences on the date of delivery to the customer (as indicated on the delivery documents bearing the serial number of the product, issued by the seller upon sale).
Only within the term of the warranty is the customer entitled to warranty services and only on condition that he or she informs Dentsply Maillefer of the defect in writing within two months after the date the defect was discovered.
In the event of a substantiated claim, the repair will be performed as soon as possible by the Technical Equipment Service of Dentsply Maillefer or a service partner authorized by Dentsply Maillefer.
This warranty only covers the exchange or repair of individual components or parts that are affected by manufacturing defects. The costs incurred by the dental dealer's technical personnel for visiting the customer and the customer's cost of packaging will not be reimbursed by Dentsply Maillefer. The customer is not entitled to file claims with Dentsply Maillefer that go beyond repair, e.g. indemnity claims. This warranty does not cover any compensation for direct or indirect personal injury or damage to property of whatever nature. The customer is not entitled to demand compensation for device outage times.
The warranty does not cover losses where Dentsply Maillefer produces evidence that they have been caused by negligence on the part of the user with regard to normal maintenance (as indicated in the User Manual), especially when subjecting the battery to charging, discharging and maintenance in accordance with the User Manual and with regard to careful and regular maintenance of the contra-angle.
F1902142.EN / 05 / 2015 / updated 02/2016 69/74

Warranty
The warranty explicitly excludes defects that:• have been caused by damage in transit to Dentsply Maillefer/to a
service partner authorized by Dentsply Maillefer for the purpose of repair;
• have been caused by atmospheric events such as lightning strike, fire and moisture. This warranty is automatically rendered void if the product has been improperly repaired, modified or otherwise tampered with by the user or unauthorized third parties.
The warranty is only valid if the device sent in for repair is accompanied by the invoice confirming the date of delivery of the product.
Legal claims, resulting from product-liability law for example, and claims filed with the person from whom the customer purchased the product, especially ones filed with the dental dealer, shall remain unaffected.
11.1 Exclusion of Liability
In the following cases the manufacturer declines all liability:• Use of X-SMART IQ™ for purposes and applications that differ
from the specific requirements made in this User Manual.• Cleaning, disinfection and sterilization methods contrary to the
directions in this User Manual.• Contra-angle maintenance contrary to the directions in this User
Manual.• Work or repairs performed by unauthorized persons.
• Damage caused to or by the iPad®.• Rights under the warranty or statutory guarantee are rendered void
if the device is opened without permission.• Electrical installations in the room must meet the provisions of IEC
60364-7-710 ("Installation of electrical equipment in rooms used for medical purposes") and the regulations applicable in your country.
If you have any questions, contact your dealer or Dentsply Maillefer.
70/74 F1902142.EN / 05 / 2015 / updated 02/2016

Disposal of the Product
F1902142.EN / 05 / 2015 / updated 02/2016 71/74
12 Disposal of the Product
Comply with your national regulations, guidelines and requirements for the disposal of end-of-life electrical equipment and batteries. Specialist dental dealers will be pleased to provide you with country-specific information concerning disposal.
Make sure the product or battery is not mixed with other types of waste when it is being disposed of. Prior to disassembly and disposal your device must not be contaminated and must have been completely reprocessed (Cleaning/Disinfection/Sterilization).

Identification of Symbols
13 Identification of Symbols
13.1 Normative Symbols
Symbol Identification
Serial number
Lot number
Catalogue number
Refer to instruction manual / booklet
Electronic instruction for use
Date of manufacture
Manufacturer
Class II equipment
Type BF applied part
Recycling: PLEASE DO NOT THROW AWAY! This product and all its components must absolutely be recycled through your distributor
Direct current (connection for power supply)
Sterilizable in a steam sterilizer (autoclave) at temperature specified
SN
REF
134 C°
72/74 F1902142.EN / 05 / 2015 / updated 02/2016

Identification of Symbols
Opened packages are not replaced
CE Mark
Alternate current
Temperature limit
Humidity limitation
Atmospheric pressure limitation
Keep away from rain
Fragile, handle with care
Accessory
Use by date
Do not sterilize
Do not re-use
Caution, consult accompanying documents
Plastic
Symbol Identification
0459
xxx C°
P
F1902142.EN / 05 / 2015 / updated 02/2016 73/74

F1902142.EN / 05 / 2015 / updated 02/2016
www.dentsplymaillefer.com
Maillefer Instruments Holding SàrlChemin du Verger 3CH-1338 BallaiguesSwitzerlandemail: [email protected]


