132

DHTML Utopia Modern Web Design Using JavaScript & DOM (First 4 Chapters)
Thank you for downloading the first four chapters of Stuart Langridge’s book, DHTML Utopia: Modern Web Design Using JavaScript & DOM, published by SitePoint.
This excerpt includes the Summary of Contents, Information about the Author, Editors and SitePoint, Table of Contents, Preface, the first four chapters of the book and the index.
We hope you find this information useful in evaluating this book.
For more information or to order, visit sitepoint.com
Summary of Contents of this Excerpt Introduction ............................................................................... vii
1. DHTML Technologies............................................................. 1
2. The Document Object Model ............................................... 13
3. Handling DOM Events.......................................................... 43
4. Detecting Browser Features ................................................... 75
Index......................................................................................... 305
Summary of Additional Book Contents 5. Animation .............................................................................. 95
6. Forms and Validation .......................................................... 125
7. Advanced Concepts and Menus .......................................... 167
8. Remote Scripting ................................................................. 197
9. Communicating With The Server ....................................... 251
10. DOM Alternatives: XPath ................................................. 287

DHTML UtopiaModern Web Design UsingJavaScript & DOM
by Stuart Langridge

DHTML Utopia: Modern Web Design Using JavaScript & DOMby Stuart Langridge
Copyright © 2005 SitePoint Pty. Ltd.
Index Editor: Bill JohncocksManaging Editor: Simon MackieCover Designer: Julian CarrollTechnical Director: Kevin YankCover Illustrator: Lucas LicataTechnical Editor: Simon Willison
Technical Editor: Nigel McFarlaneEditor: Georgina Laidlaw
Latest Update: May 2005Printing History:First Edition: May 2005
Notice of Rights
All rights reserved. No part of this book may be reproduced, stored in a retrieval system or transmittedin any form or by any means, without the prior written permission of the publisher, except in thecase of brief quotations embodied in critical articles or reviews.
Notice of Liability
The author and publisher have made every effort to ensure the accuracy of the information herein.However, the information contained in this book is sold without warranty, either express or implied.Neither the authors and SitePoint Pty. Ltd., nor its dealers or distributors will be held liable for anydamages to be caused either directly or indirectly by the instructions contained in this book, or bythe software or hardware products described herein.
Trademark Notice
Rather than indicating every occurrence of a trademarked name as such, this book uses the namesonly in an editorial fashion and to the benefit of the trademark owner with no intention of infringe-ment of the trademark.
Published by SitePoint Pty. Ltd.
424 Smith Street CollingwoodVIC Australia 3066.
Web: www.sitepoint.comEmail: [email protected]
ISBN 0–9579218–9–6Printed and bound in the United States of America
About the Author
Stuart Langridge has been playing with the Web since 1994, and is quite possibly theonly person in the world to have a BSc in Computer Science and Philosophy. He inventedthe term “unobtrusive DHTML,” and has been a leader in the quest to popularize thisnew approach to scripting. When not working on the Web, he’s a keen Linux user andpart of the team at open-source radio show LUGRadio. He likes drinking decent beers,studying stone circles and other ancient phenomena, and trying to learn the piano. Stuartcontributes to Stylish Scripting: SitePoint’s DHTML and CSS Blog.
About The Technical Editors
Simon Willison is a seasoned Web developer from the UK, with a reputation for pioneeringin the fields of CSS and DHTML. He specializes in both client- and server-side develop-ment, and recently became a member of the Web Standards project. Visit him athttp://simon.incutio.com/, and at Stylish Scripting: SitePoint’s DHTML and CSS Blog,to which he contributes.
Nigel McFarlane is the Mozilla community’s regular and irregular technical commentator.He is the author of Firefox Hacks (O’Reilly Media) and Rapid Application Development withMozilla (Prentice Hall PTR). When not working for SitePoint, Nigel writes for a numberof trade publications and for the print media. He also consults to industry and government.Nigel’s background is in science and technology, and in Web-enabled telecommunicationssoftware. He resides in Melbourne, Australia.
About The Technical Director
As Technical Director for SitePoint, Kevin Yank oversees all of its technical publica-tions—books, articles, newsletters and blogs. He has written over 50 articles for SitePointon technologies including PHP, XML, ASP.NET, Java, JavaScript and CSS, but is perhapsbest known for his book, Build Your Own Database Driven Website Using PHP & MySQL,also from SitePoint. Kevin now lives in Melbourne, Australia. In his spare time he enjoysflying light aircraft and learning the fine art of improvised acting. Go you big red fire engine!
About SitePoint
SitePoint specializes in publishing fun, practical, and easy-to-understand content for Webprofessionals. Visit http://www.sitepoint.com/ to access our books, newsletters, articlesand community forums.


For Sam, who doesn’t knowwhat all this is about, but
listens anyway.

ii
Table of ContentsIntroduction ............................................................................................. vii
Who Should Read This Book? ........................................................... viiiWhat’s In This Book? ....................................................................... viiiWhither XHTML? ............................................................................... xThe Book’s Website ........................................................................... xii
The Code Archive ....................................................................... xiiUpdates and Errata .................................................................... xii
The SitePoint Forums ......................................................................... xiiThe SitePoint Newsletters .................................................................. xiiYour Feedback .................................................................................. xiiiAcknowledgements ............................................................................ xiii
1. DHTML Technologies ............................................................................. 1HTML Starting Points ......................................................................... 2
Step up to Valid HTML ............................................................... 2Step up to Semantic HTML ......................................................... 4
Adding CSS ......................................................................................... 5A Simple CSS Example ................................................................ 5
Adding JavaScript ................................................................................ 7A Simple JavaScript Example ........................................................ 8Get Some Tools! .......................................................................... 9
Further Reading ................................................................................. 10Summary ........................................................................................... 11
2. The Document Object Model ............................................................... 13The Origins of the DOM .................................................................... 14What is the DOM? ............................................................................ 14
The Importance of Valid HTML ................................................ 16Walking DOM Trees ......................................................................... 16
Finding the Top of the Tree ....................................................... 17Getting an Element from the Tree .............................................. 17Walking from Parents to Children .............................................. 20
What to do with Elements ................................................................. 21Changing Element Attributes ..................................................... 21Changing Text Nodes ................................................................. 22Changing Style Properties .......................................................... 23
Bigger DOM Tree Changes ................................................................ 24Moving Elements ....................................................................... 24Throwing Away Elements ........................................................... 26Creating Elements ...................................................................... 27
Copying Elements ...................................................................... 28Making an Expanding Form ............................................................... 30Making Modular Image Rollovers ....................................................... 33
A Sample HTML Page ............................................................... 34Summary ........................................................................................... 41
3. Handling DOM Events .......................................................................... 43About Elements and Events ................................................................ 43
Common Events ........................................................................ 44Hooking Code to Events ............................................................ 46Making Events Work Cross-Browser ........................................... 53
Smart Uses of Events ......................................................................... 58Creating Smarter Links .............................................................. 59Making Tables More Readable ................................................... 64
Summary ........................................................................................... 73
4. Detecting Browser Features ................................................................. 75Old-Fashioned Browser Sniffing ......................................................... 76Modern DOM Feature Sniffing .......................................................... 77
Which DOM Features Should We Test? .................................... 78Where Should We Test for DOM Features? ............................... 78Testing Non-DOM Features ....................................................... 79
Sniffing at Work: scrollImage ............................................................. 80Setting Up the Page ................................................................... 81Demonstrating the DHTML Effect ............................................. 85How the Code Works ................................................................ 86clientX and clientY Problems ...................................................... 88Browser Detection You Can’t Avoid ........................................... 89Calculating Screen Positions ....................................................... 90
Summary ........................................................................................... 92
5. Animation ........................................................................................... 95Tastefulness and Usability .................................................................. 95Animation Basics ............................................................................... 96
The setTimeout Function ........................................................... 96The setInterval Function .......................................................... 102
Handling Errors ............................................................................... 104When to use try and catch ....................................................... 105The body onerror Handler ........................................................ 106
Scriptless Animation with GIFs ........................................................ 106Movement Example: Rising Tooltips ................................................ 108
Creating Special Tooltip Content ............................................. 108Designing the DHTML Library ................................................ 111
Click here to order the printed 318-page book now (we deliver worldwide)!iv
DHTML Utopia

Animating the Content ............................................................ 116Full Rising Tooltips Example Listing ......................................... 119
Summary ......................................................................................... 123
6. Forms and Validation ......................................................................... 125Reasons for Form Validation ............................................................ 126
Storing Clean Data .................................................................. 126Defending Against Security Exploits ......................................... 126Improving User Interactivity .................................................... 127
Simple Client-Side Validation .......................................................... 127Using Regular Expressions ........................................................ 128Connecting Regular Expressions to Fields ................................. 129Preparing Quality Error Messages ............................................. 131Validation Processing ............................................................... 132Checking on Submission .......................................................... 136
Client-Server Coordination .............................................................. 149Dangers of Validating on the Client Only ................................. 149Full Example: Server Fallback Validation .................................. 149
Improving Form Usability ................................................................ 154Standing on the Shoulders of Giants ........................................ 154How to Find Scripts ................................................................. 159Type-Ahead Drop-Down Lists .................................................. 159
Summary ......................................................................................... 166
7. Advanced Concepts and Menus .......................................................... 167Creating Menu Content ................................................................... 168
Create Semantic Menu Content ............................................... 168Styling the Menu’s Layout ....................................................... 171Styling the Menu’s Appearance ................................................ 173Hiding the Secondary Content ................................................. 174
Making the Menu Work .................................................................. 175Advanced CSS Menu Alternatives ............................................ 176Making Submenus Appear ....................................................... 176Adding Animation .................................................................... 185The Benefit of Object-Based Programming ............................... 192
Summary ......................................................................................... 196
8. Remote Scripting ............................................................................... 197Problems with Frames ...................................................................... 198Remote Scripting Methods ............................................................... 198
Using iframe ............................................................................ 199Example: Autoforms ................................................................. 206Hidden Cookie Updates ........................................................... 219
vClick here to order the printed 318-page book now (we deliver worldwide)!

Example: Name Resolution ...................................................... 220XMLHTTP .............................................................................. 225Example: Checking Usernames ................................................. 228Other Client-Server Options ..................................................... 237
Drawing Code from Servers .............................................................. 238Example: Learning about Beer .................................................. 238Planning the DHTML Beer Pages ............................................. 240Generating the Starting Page from Data ................................... 241Fetching HTML Fragments ...................................................... 243Fetching and Running JavaScript .............................................. 246
Summary ......................................................................................... 250
9. Communicating With The Server ........................................................ 251Example: Managing Files .................................................................. 252
Specifying the File Manager ..................................................... 252Planning the Technology .......................................................... 253Listing Files and Folders ........................................................... 257Server Control Commands ....................................................... 261Implementing Drag-and-Drop .................................................. 263Expanding and Collapsing Lists ................................................ 275
Using XML-RPC .............................................................................. 277Calling XML-RPC APIs ............................................................ 279Example: Weblog Post Editor ................................................... 280
Summary ......................................................................................... 286
10. DOM Alternatives: XPath ................................................................. 287Introducing XPath ........................................................................... 288
Applying XPath to XML ........................................................... 290XPath Learning Resources ........................................................ 292
Example: Parsing RSS Feeds ............................................................. 292About RSS 1.0 ......................................................................... 293Constructing Simple XPaths ..................................................... 295Adding XML Namespaces ........................................................ 296Designing the Blogroll .............................................................. 297Building the Scripts .................................................................. 301
Summary ......................................................................................... 304Index ....................................................................................................... 305
Click here to order the printed 318-page book now (we deliver worldwide)!vi
DHTML Utopia
IntroductionIn a single decade, the Web has evolved from a simple method of deliveringtechnical documents to an essential part of daily life, making and breaking rela-tionships and fortunes along the way. “Looking something up on the Internet,”by which is almost always meant the Web, is now within reach of almost anyoneliving in a first-world country, and the idea of conducting conversations andbusiness (and probably orchestras) in your Web browser is no longer foreign, butpart of life.
As Joe Average grows more used to the technology, he demands more: more in-formation, more ease-of-use, more functionality, more interactivity. And here weare, ready to provide, because he (and we) wants it, and because it’s fun. (Oneof those fortunes mentioned earlier wouldn’t go amiss, either.) As the Web be-comes a major (if not the major) application development platform, there’s agreater need to give Websites the flexibility and power that client-side applicationscan provide. More importantly, even the simplest Website can benefit from alittle interactivity here and there—making it better, more responsive, or easierto use. HTML, the workhorse, manages some of this; CSS adds a few more tricksand a breadth of possibility for the designer. For true flexibility and interactivity,though, we need scripting.
Browser scripting has a long, albeit rather undistinguished, history. From theearliest popup boxes, through rollover images, and into scrolling status bars, ithas provided the means to add that touch of the dynamic—even if it wasn’t usedfor anything very exciting. But, all the while, a quiet movement was building.The JavaScript language was refined and made more powerful; the very buildingblocks of the Website were made available for manipulation; the real communic-ative strengths of the Web were given form and the potential for use. Modernscripting—DOM scripting—is a quantum leap away from the way things were.
In this book, I’ll be explaining how you can get your hands dirty with all thisjuicy scripting goodness, and make your sites truly come alive. From the firstmoment in which you use JavaScript to examine the structure of the page thatcontains that JavaScript, a huge vista of potential really does open up before you.The techniques described in this book will help you make your sites more dynamicand more usable. They’ll assist you to overcome browser limitations and add newfunctions, and occasionally, to do one or two cool things.
Who Should Read This Book?This book is aimed at people who have built Websites before. Although I’ll brieflycover HTML and CSS, you should already have experience working with thesetechnologies. Some experience with JavaScript might also be useful, but it is byno means critical: modern scripting techniques are sometimes quite differentthan “old-style” JavaScript.
By the time you’ve read the whole book, you’ll have a clear understanding ofhow to build your sites so that you can easily hook DHTML scripts into them;you’ll know how to work in a cross-browser and cross-platform way; lastly, youwill understand the power and flexibility that can be brought to your sites throughDOM enhancements.
What’s In This Book?The book comprises ten chapters. The chapters do build on one another, so ifthis is your first time working with DOM techniques, you might want to readthem in order. Once you have some experience with the DOM, hopping aroundto refresh your memory on various points may suit you best.
Chapter 1: DHTML TechnologiesTo successfully write DOM scripts, a few essential basics—which most readersof this book will already know—are required. In this first chapter, I’ll quicklyrun through the essentials of HTML, CSS, and JavaScript. This chapter isworth reading, because it’s critical for good scripting that your HTML andCSS are valid and well-structured; this chapter tells you what that means.
Chapter 2: The Document Object ModelDOM scripting requires a deep understanding of the DOM—the DocumentObject Model—itself. Everything else builds on this knowledge. In thischapter, I’ll explain what the DOM is, how it can be manipulated, and whatsuch manipulations make possible.
Chapter 3: Handling DOM EventsEvents occur when the user does something with your HTML document:clicks a link, loads a page, or moves the mouse. In order to make your sitesinteractive—to react to user input—you will need to work with such events.Here, I explain what events are, show how to attach your code to them, andreveal some of the complexities inherent in DOM events.
Click here to order the printed 318-page book now (we deliver worldwide)!viii
Introduction
Chapter 4: Detecting Browser FeaturesNot every Web browser supports the features required to use DOM code ef-fectively; those that do offer various levels of DOM support. Feature sniffingis the name given to a set of techniques that have been designed to ensurethat your DOM code operates only in browsers that understand it; thiseradicates situations in which your sites work—but not as you expected!—andavoids the dreaded JavaScript error box.
Chapter 5: AnimationAnimation can be a key to improving a site’s usability; letting the user knowwhen something’s happening, or that something has changed, can enhancethe user experience, and be of great value to your site’s success. In this chapter,I describe how to add animation to your pages using DOM scripting tech-niques—and how to ensure that animation works across different browsers.
Chapter 6: Forms and ValidationAny reasonably-sized Website will contain at least a few forms to collect userinput. Scripting can provide some serious improvements to these forms: thevalidation of user input, ease-of-use for users, the collection of better feedback,and so on. Forms are built from HTML, like everything else, but the DOMcan be said to apply to them more than it does to other elements, becauseforms have such a wide range of actions that you can manipulate in yourscripts.
Chapter 7: Advanced Concepts and MenusIn this chapter, we look at a more complex script: a multilevel animated drop-down menu. The chapter describes the code required to build such a script,pulling the techniques described in previous chapters together into a single,real-world example that demonstrates how much power the DOM provides,and how much easier it can be to work with than previous DHTML methodsfor achieving the same tasks.
Chapter 8: Remote ScriptingWhile DOM scripting alone is an extremely useful tool, it can be made morepowerful still with a little assistance from the server. In this chapter, we ex-plore how your scripts can retrieve dynamic content from the server, and in-tegrate that content with the site, eliminating the need for constant page re-freshes.
Chapter 9: Communicating With The ServerCommunication with the server doesn’t mean simply that the server handsout data. Your scripts can also pass data back, and engage in a real dialogue:
ixClick here to order the printed 318-page book now (we deliver worldwide)!
What’s In This Book?
sending back a “something interesting has happened!” message can makeyour Websites work much more like real dynamic applications. This chapterenlarges on the previous one, describing the full power that server communic-ation can create.
Chapter 10: DOM Alternatives: XPathJavaScript offers opportunities for more advanced work through its integrationwith other technologies. In this final chapter, I describe two of those integra-tions: using XPath to work with XML, and integrating your DOM scriptswith Flash.
Whither XHTML?Some people may wonder why all the examples in this book are HTML 4.01Strict. “Why are you using HTML?” they ask. “Why not XHTML? It’s all, y’know,XML and stuff! It must be better.”
There is a reason: using XHTML can cause a lot of upgrade issues, particularlywith the DHTML that we use in this book.
If you choose XHTML, then you’re placed in a “complete upgrade or do nothing”position. When XHTML is served to an ordinary browser, that browser will treatyour lovely XML-compliant XHTML as perfectly ordinary HTML, unless youmake a special effort to do things differently. XHTML treated as ordinary HTMLremoves all the supposed benefits of XHTML; it’s not checked for well-formednessby the browser, for example.
The special effort that you need to make is to change the MIME type with whichyour Web server serves your XHTML document. By default, Web servers willserve it as text/html, which means that it will be treated as “tag soup” HTML,without enjoying any of the XHTML benefits, as mentioned above. Moreover,Ian “Hixie” Hickson, who’s part of both the Mozilla and Opera teams as well asthe CSS working group, has laid out a set of objections[1] which states thatXHTML should not be served as text/html at all.
In order to have a browser treat your XHTML as XHTML (and thence as XML),rather than as tag soup, it must be served with MIME type applica-tion/xhtml+xml. Unfortunately, Internet Explorer (for one, and it’s not alone)does not support XHTML documents served as application/xhtml+xml; it will
[1] http://www.hixie.ch/advocacy/xhtml
Click here to order the printed 318-page book now (we deliver worldwide)!x
Introduction

give you a “download this document” dialog rather than displaying it in thebrowser. That’s a disaster for most Web pages.
It’s possible to have the Web server detect whether the user’s browser can copewith application/xhtml+xml and serve with an appropriate MIME type:text/html for those browsers that do not support application/xhtml+xml.(Remember that serving XHTML as text/html is wrong, according to Hixie’sobjections above.) But, even in those browsers that do support applica-tion/xhtml+xml, and therefore parse your XHTML document as it should beparsed, there are still other problems that take some getting around.
Here are a few examples. CSS in properly-parsed XHTML documents worksdifferently: selectors are case-sensitive, and setting backgrounds and the like onthe body doesn’t propagate those styles up to the document as it does in HTML(the styles must be set on html instead).
Most importantly for this book, XHTML makes using DOM scripting prettyawkward. The HTML collections document.images, document.forms,document.links, and so on, do not exist in many browsers’ implementations ofthe XHTML DOM. Arguably, one should avoid using these anyway in preparationfor XHTML later. Instead, you must use document.getElementsByTagName ap-propriately. The element names in the DOM are also case-sensitive (and alwayslowercase, since XML element names are lowercase and XHTML is XML). Thatcan be a bit of coding style trap. You also can’t use document.write at all, al-though you probably should avoid it anyway, for reasons I’ll explain in this book.
These are not major problems, and if you’re into standards then most of theseissues won’t affect your code anyway, but a final issue remains: you can’t usedocument.createElement to create new elements with the DOM. Instead, becauseXHTML is XML, and therefore supports namespaces, you must create each ele-ment specifically within the XHTML namespace. So, instead of usingdocument.createElement('a'), to create a new a element, you must usedocument.createElementNS('http://www.w3.org/1999/xhtml', 'a').
Of course, you must only use document.createElementNS when your documentis being parsed as XHTML—not when it’s being parsed as HTML (as in InternetExplorer)—so you’ll need to detect which case you’re dealing with, and changewhat the script does appropriately.
In short, using XHTML right now provides very little in the way of benefits, butbrings with it a fair few extra complications. HTML 4.01 Strict is just as “valid”as XHTML—XHTML did not replace HTML but sits alongside it. It’s just aseasy to validate an HTML 4.01 page as it is to validate an XHTML page. I’ve
xiClick here to order the printed 318-page book now (we deliver worldwide)!
Whither XHTML?
used HTML 4.01 Strict for all the examples in this book, and I recommend thatyou use it, too.
Mark Pilgrim has written in more detail about using XHTML[2] and the problemsthat lie therein. For this book, we’re sticking with tried-and-true HTML 4.01.
The Book’s WebsiteLocated at http://www.sitepoint.com/books/dhtml1/, the Website supporting thisbook will give you access to the following facilities:
The Code ArchiveAs you progress through the text, you’ll note that most of the code listings arelabelled with filenames, and a number of references are made to the code archive.This is a downloadable ZIP archive that contains complete code for all the ex-amples presented in this book.
Updates and ErrataThe Errata page on the book’s Website will always have the latest informationabout known typographical and code errors, and necessary updates for changesto technologies.
The SitePoint ForumsWhile I’ve made every attempt to anticipate any questions you may have, andanswer them in this book, there is no way that any book could cover everythingthere is to know about DHTML. If you have a question about anything in thisbook, the bes t p lace to go for a quick answer i shttp://www.sitepoint.com/forums/—SitePoint’s vibrant and knowledgeable com-munity.
The SitePoint NewslettersIn addition to books like this one, SitePoint offers free email newsletters.
[2] http://www.xml.com/pub/a/2003/03/19/dive-into-xml.html
Click here to order the printed 318-page book now (we deliver worldwide)!xii
Introduction
The SitePoint Tech Times covers the latest news, product releases, trends, tips, andtechniques for all technical aspects of Web development. The long-running Site-Point Tribune is a biweekly digest of the business and moneymaking aspects ofthe Web. Whether you’re a freelance developer looking for tips to score thatdream contract, or a marketing major striving to keep abreast of changes to themajor search engines, this is the newsletter for you. The SitePoint Design View isa monthly compilation of the best in Web design. From new CSS layout methodsto subtle PhotoShop techniques, SitePoint’s chief designer shares his years ofexperience in its pages.
Browse the archives or sign up to any of SitePoint’s free newsletters athttp://www.sitepoint.com/newsletter/.
Your FeedbackIf you can’t find your answer through the forums, or you wish to contact me forany other reason, the best place to write is [email protected]. We have awell-manned email support system set up to track your inquiries, and if oursupport staff are unable to answer your question, they send it straight to me.Suggestions for improvement as well as notices of any mistakes you may find areespecially welcome.
AcknowledgementsThe two Simons, Simon Mackie, my editor, and Simon Willison, my expert re-viewer, deserve quite an enormous vote of thanks. This book would not be any-where near as good as it is without them.
I’d also like to raise a hand to the Web development community: there are peopleeverywhere diving into these new technologies with gusto, establishing guidelines,making discoveries, and revealing hitherto unsuspected truths about how coolall this stuff is. Keep it up. We’re fixing the world, and I’m proud to be a part ofit.
xiiiClick here to order the printed 318-page book now (we deliver worldwide)!
Your Feedback

xiv
DHTML Technologies1The White Rabbit put on his spectacles. ‘Where shall I begin, please your Majesty?’ heasked. ‘Begin at the beginning,’ the King said gravely, ‘and go on till you come to the end:then stop.’—Lewis Carroll, Alice’s Adventures in Wonderland
Dynamic HTML, called DHTML for short, is the name given to a set of Webdevelopment techniques that are mostly used in Web pages that have non-trivialuser-input features. DHTML means manipulating the Document Object Modelof an HTML document, fiddling with CSS directives in style information, andusing client-side JavaScript scripting to tie everything together.
In this introductory chapter, I’ll provide a brief overview of some of the thingsyou’ll need to know about: the building blocks that make up DHTML Websites.You’ll find it useful reading if you need to refresh your memory. If you alreadyknow all these details, you might want to flick through the chapter anyway; youmay even be a little surprised by some of it. In the coming pages, we’ll come tounderstand that DHTML is actually a combination of proper HTML for yourcontent, Cascading Style Sheets for your design, and JavaScript for interactivity.Mixing these technologies together can result in a humble stew or a grandiosebuffet. It’s all in the art of cooking, so let’s start rattling those pots and pans!
HTML Starting PointsWebsites are written in HTML. If you’re reading this book, you’ll almost certainlyknow what HTML is and will probably be at least somewhat experienced withit. For a successful DHTML-enhanced Website, it’s critical that your HTML istwo things: valid and semantic. These needs may necessitate a shift away fromyour previous experiences writing HTML. They may also require a different ap-proach than having your preferred tools write HTML for you.
Step up to Valid HTMLA specific set of rules, set out in the HTML recommendation[1], dictate howHTML should be written. HTML that complies with these rules is said to be“valid.” Your HTML needs to be valid so that it can be used as a foundation onwhich you can build DHTML enhancements. While the set of rules is prettycomplex, you can ensure that your HTML is valid by following a few simpleguidelines.
Correctly Nest Tags
Don’t let tags “cross over” one another. For example, don’t have HTML thatlooks like the snippet shown below:
Here is some <strong>bold and <em>italic</strong> text</em>.
Here, the <strong> and <em> tags cross over one another; they’re incorrectlynested. Nesting is extremely important for the proper use of DHTML. In laterchapters of this book, we’ll study the DOM tree, and the reasons why incorrectnesting causes problems will become clear. For now, simply remember that if youcross your tags, each browser will interpret your code in a different way, accordingto different rules (rather than according to the standard). Any hope of your beingable to control the appearance and functionality of your pages across browsersgoes right out the window unless you do this right.
Close Container Tags
Tags such as <strong> or <p>, which contain other items, should always be closedwith </strong> or </p>, or the appropriate closing tag. It’s important to knowwhich tags contain things (e.g. text or other tags) and to make sure you close
[1] http://www.w3.org/TR/html4/
Click here to order the printed 318-page book now (we deliver worldwide)!2
Chapter 1: DHTML Technologies

them. <p>, for example, doesn’t mean “put a paragraph break here,” but “aparagraph begins here,” and should be paired with </p>, “this paragraph endshere.”1 The same logic applies to <li> tags as well.
Always Use a Document Type
A document type (or DOCTYPE) describes the dialect of HTML that’s beenused; there are several different options. In this book, we’ll use the dialect calledHTML 4.01 Strict.2 Your DOCTYPE, which should appear at the very top ofevery HTML page, should look like this:
<!DOCTYPE HTML PUBLIC "-//W3C//DTD HTML 4.01//EN" "http://www.w3.org/TR/html4/strict.dtd">
That information can be typed on a single line, or with a line break after EN”.Don’t worry, for the moment, about what this means: just be sure to place it atthe top of every page. The article Fix Your Site With the Right DOCTYPE![2],published on A List Apart[3], lists all the DOCTYPEs you might want to use,and why you’d need to use them at all. I visit that article all the time to cut andpaste the one I need!
Validate your Page
The most important page creation step is to check that your HTML is valid.There are numerous tools that you can download and run on your own computerto test your code’s validity—some HTML editors even have such tools built in—oryou can use one of the many online validators, the most common of which is theW3C’s own validator[4]. A validator will tell you how you need to adjust yourHTML in order to make it compatible with DHTML techniques. The ultimatereference for what constitutes valid HTML is the HTML recommendation[5].It’s complex and detailed, but if you have any questions about how HTML shouldbe written, or whether a tag really exists, you’ll find the answers there. As men-tioned above, browsers rely on a standard that describes how validated HTML
1Those who know what they’re doing with container tags will be aware that HTML 4.01 does notactually require that all container tags are closed (though XHTML still does). However, it’s neverinvalid to close a container tag, though it is sometimes invalid to not do so. It’s considerably easierto just close everything than it is to remember which tags you’re allowed to leave open.2If you’re thinking, “but I want to use XHTML!” then I bet you already know enough about DOC-TYPEs to use them properly.[2] http://www.alistapart.com/articles/doctype/[3] http://www.alistapart.com/[4] http://validator.w3.org/[5] http://ww.w3.org/TR/html4/
3Click here to order the printed 318-page book now (we deliver worldwide)!
Always Use a Document Type
should be interpreted. However, there are no standards to describe how invalidHTML should be interpreted; each browser maker has established their own rulesto fill that gap. Trying to understand each of these rules would be difficult andlaborious, and you have better things to do with your time. Sticking to validHTML means that any problems you find are deemed to be bugs in thatbrowser—bugs that you may be able to work around. Thus, using valid HTMLgives you more time to spend with your family, play snooker, etc. which, if youask me, is a good reason to do it.
Step up to Semantic HTMLIn addition to its validity, your HTML should be semantic, not presentational.What this means is that you should use HTML tags to describe the nature of anelement in your document, rather than the appearance of that element. So don’tuse a <p> tag if you mean, “put a blank line here.” Use it to mean, “a paragraphbegins here” (and place a </p> at the end of that paragraph). Don’t use<blockquote> to mean, “indent this next bit of text.” Use it to mean, “this blockis a quotation.” If you mark up your HTML in this way, you’ll find it mucheasier to apply DHTML techniques to it further down the line. This approach iscalled semantic markup—a fancy way of saying, “uses tags to describe meaning.”
Let’s look at a few example snippets. First, imagine your Website has a list oflinks to different sections. That list should be marked up on the basis of what itis: a list. Don’t make it a set of <a> tags separated by <br> tags; it’s a list, so itshould be marked up as such, using <ul> and <li> tags. It might look somethinglike this:
<ul> <li><a href="index.html">Home</a></li> <li><a href="about.html">About this Website</a></li> <li><a href="email.html">Contact details</a></li></ul>
You’ll find yourself using the <ul> tag a lot. Many of the items within a Websiteare really lists: a breadcrumb trail is a list of links, a menu structure is a list oflists of links, and a photo gallery is a list of images.
Similarly, if your list contains items with which comments are associated, maybeit should be marked up as a definition list:
<dl> <dt><a href="index.html">Home</a></dt> <dd>Back to the home page</dd>
Click here to order the printed 318-page book now (we deliver worldwide)!4
Chapter 1: DHTML Technologies

<dt><a href="about.html">About this Website</a></dt> <dd>Why this site exists, how it was set up, and who did it </dd> <dt><a href="email.html">Contact details</a></dt> <dd>Getting in contact with the Webmaster: email addresses and phone numbers</dd></dl>
Remember: the way your page looks isn’t really relevant. The important part isthat the information in the page is marked up in a way that describes what it is.There are lots of tags in HTML; don’t think of them as a way to lay out inform-ation on your page, but as a means to define what that information means.
If you don’t use HTML to control the presentation of your pages, how can youmake them look the way you want them to? That’s where Cascading Style Sheetscome in.
Adding CSSCascading Style Sheets (CSS) is a technique that allows you to describe thepresentation of your HTML. In essence, it allows you to state how you want eachelement on your page to look. An element is a piece of HTML that representsone thing: one paragraph, one heading, one image, one list. Elements usuallycorrespond to a particular tag and its content. When CSS styles are used, DHTMLpages can work on the appearance and the content of the page independently.That’s a handy and clean separation. If you want to look good, you need to learnhow to dress up and go to the gym regularly!
A Simple CSS ExampleImagine you want your main page heading (an <h1> tag) to be displayed in big,red, centered text. You should specify that in your style sheet as follows:
h1 { font-size: 300%; color: #FF0000; text-align: center;}
See the section called “Further Reading” at the end of this chapter for some linksto introductory tutorials on CSS, which should help if the above lines don’t makea lot of sense to you.
5Click here to order the printed 318-page book now (we deliver worldwide)!
Adding CSS

Here’s a simple HTML page before and after these styles have been applied:
Figure 1.1. That HTML’s stylin’!
The key point here is to remove the presentation aspects from your HTML andput them into your style sheet. If , for example, you made your page headingbigger by putting <font> tags in your HTML, then you’d need to paste thosetags into every page on which a header was used. By making your HTML semanticand moving the page’s presentation into CSS, you can control the look of headingsacross the whole site through a single style sheet. This makes your job as Websitedeveloper much easier.
Of course, it’s not quite as easy as that. Although the full definition of CSS allowsyou to do some fairly amazing things, and to control the presentation of yourpages to a high degree, not every browser supports everything that CSS has tooffer.
Click here to order the printed 318-page book now (we deliver worldwide)!6
Chapter 1: DHTML Technologies

In order to know about the differences in browser support for CSS, you need toknow what CSS can do. There are two sorts of browser incompatibilities: thingsthat a given browser doesn’t implement, and things that it implements incorrectly.Occasionally, browsers add their own “special features” as well, but we won’t beworried about those in this book.
Missing implementations are relatively easy to deal with: don’t rely on such rulesif you want your CSS to work in browsers that have failed to implement them.This can be a pain, especially since the most commonly used browser in the world,Internet Explorer for Windows, has some serious holes in its CSS support; how-ever, this “solution” is often a necessary compromise. Learning which rules youcan and can’t use is one of the steps on the path to CSS guru-hood.
Badly implemented standards are a bigger problem. In such cases, the browsergets it wrong. Another step to CSS guru-hood is understanding exactly what eachbrowser does wrong, and how you can work around those failings. You don’tneed that knowledge to start with, though: you’ll pick it up as you go along.Workarounds for CSS bugs in different browsers are usually achieved using CSShacks. These hacks take advantage of the bugs in a browser’s CSS parser to de-liver it specific style sheet directives that work around its poor implementationof the standards. A huge variety of these CSS hacks is documented for eachbrowser in various places around the Web; see the section called “Further Reading”for more.
Learning to understand and adapt to the vagaries of CSS handling in variousbrowsers is part of the work that’s required to use CSS effectively. While it canbe a lot of work, many CSS bugs only become apparent with the complex use ofthis technology; most CSS is handled perfectly across platforms and browserswithout the need for hacks or complex tests.
While CSS is powerful, it doesn’t quite give us true flexibility in presentation.The capabilities of CSS increase all the time, and more “interactive” features areconstantly being added to the CSS specification. However, it’s not designed forbuilding truly interactive Websites. For that, we need the final building block ofDHTML: JavaScript.
Adding JavaScriptJavaScript is a simple but powerful programming language. It’s used to add dy-namic behavior to your Website—the D in DHTML. HTML defines the page’sstructure, and CSS defines how it looks, but actions, the things that happen when
7Click here to order the printed 318-page book now (we deliver worldwide)!
Adding JavaScript

you interact with the page—by clicking a button, dragging an image, or movingthe mouse—are defined in JavaScript. JavaScript works with the Document ObjectModel, described in the next chapter, to attach actions to different events(mouseovers, drags, and clicks). We’re not going to describe all the gory JavaScriptsyntax in detail here—the section called “Further Reading” has some links to afew JavaScript tutorials if you need them.
A Simple JavaScript ExampleHere’s a simple piece of JavaScript that converts a text field’s value to uppercasewhen the user tabs out of the field. First let’s see the old, bad way of doing it:
File: oldlisteners.html (excerpt)
<input id="street" type="text" onchange="this.value = this.value.toUpperCase();">
In this book, we’ll recommend a more modern technique. First, the HTML:
File: newlisteners.html (excerpt)
<input id="street" type="text">
Second, the JavaScript, which is usually located in the <head> part of the page:
File: newlisteners.html (excerpt)
<script type="text/javascript">function uppercaseListener() { this.value = this.value.toUpperCase();}
function installListeners() { var element = document.getElementById('street'); element.addEventListener('change', uppercaseListener, false); }
window.addEventListener('load', installListeners, false);</script>
The first function does the work of converting the text. The second functionmakes sure that the first is connected to the right HTML tag. The final line per-forms this connection once the page has loaded in full. Although this means morecode, notice how it keeps the HTML content clean and simple. In future chapters,we’ll explore this kind of approach a lot. Don’t worry about the mechanics toomuch for now—there’s plenty of time for that!
Click here to order the printed 318-page book now (we deliver worldwide)!8
Chapter 1: DHTML Technologies
Get Some Tools!A good JavaScript development environment makes working with JavaScript fareasier than it would otherwise be. Testing pages in Internet Explorer (IE) canleave something to be desired; if your page generates JavaScript errors (as it willdo all the time while you’re building it!), IE isn’t likely to be very helpful at dia-gnosing where, or what, they are. The most useful, yet simple, tool for JavaScriptdebugging is the JavaScript Console in Mozilla or Mozilla Firefox. This consolewill clearly display where any JavaScript error occurs on your page, and what thaterror is. It’s an invaluable tool when building JavaScript scripts. Mozilla Firefoxworks on virtually all platforms, and it’s not a big download; it also offers bettersupport for CSS than Internet Explorer, and should be part of your developmenttoolkit. Beyond this, there’s also the JavaScript debugger in Mozilla, which isnamed Venkman; if you’re the sort of coder who has worked on large projects inother languages and are used to a debugger, Venkman can be useful, but be awarethat it takes a bit of setting up. In practice, though, when you’re enhancing yoursite with DHTML, you don’t need anything as complex as a debugger; theJavaScript Console and judicious use of alert statements to identify what’s goingon will help you through almost every situation.
Another tool that’s definitely useful is a good code editor in which to write yourWebsite. Syntax highlighting for JavaScript is a really handy feature; it makesyour code easier to read while you’re writing it, and quickly alerts you when youleave out a bracket or a quote. Editors are a very personal tool, and you mighthave to kiss a fair few frogs before you find your prince in this regard, but a goodeditor will seriously speed and simplify your coding work. Plenty of powerful,customizable editors are available for free, if you don’t already have a preferredprogram. But, if you’re currently writing code in Windows Notepad, have a lookat what else is available to see if any other product offers an environment that’smore to your liking. You’ll want syntax highlighting, as already mentioned; a wayto tie in the external validation of your pages is also useful. Textpad[6] andCrimson Editor[7] are free, Windows-based editors that cover the basics if you’redeveloping on a Windows platform; Mac users tend to swear by BBEdit[8]; Linuxusers have gedit or Kate or vim to do the basics, and there’s always Emacs.
JavaScript is the engine on which DHTML runs. DHTML focuses on manipulatingyour HTML and CSS to make your page do what the user wants, and it’s Java-
[6] http://www.textpad.com/[7] http://www.crimsoneditor.com/[8] http://www.barebones.com/
9Click here to order the printed 318-page book now (we deliver worldwide)!
Get Some Tools!

Script that effects that manipulation. Through the rest of this book, we’ll explorethat manipulation in more and more detail.
Further ReadingTry these links if you’re hungry for more on CSS itself.
http://www.sitepoint.com/article/css-is-easySitePoint’s easy introduction to the world of CSS is a great place to start.
http://www.w3schools.com/css/W3Schools’ CSS tutorials are helpful whether you’re learning, or simplybrushing up on your knowledge of CSS.
http://www.csszengarden.com/The CSS Zen Garden is a marvelous demonstration of the power of CascadingStyle Sheets alone. It has a real wow factor!
http://centricle.com/ref/css/filters/This comprehensive list of CSS hacks shows you which browsers will be af-fected by a given hack, if you need to hide certain CSS directives (or delivercertain directives) to a particular browser.
http://www.positioniseverything.net/This site demonstrates CSS issues in various browsers and explains how towork around them.
http://www.css-discuss.org/The CSS-Discuss mailing list is “devoted to talking about CSS and ways touse it in the real world; in other words, practical uses and applications.” Theassociated wiki[15] is a repository of useful tips and tricks.
http://www.sitepoint.com/books/If you’re after something more definitive, SitePoint’s book, HTML Utopia:Designing Without Tables Using CSS[17] is a complete guide and reference forthe CSS beginner. The CSS Anthology: 101 Tips, Tricks & Hacks[18] is a perfectchoice if you prefer to learn by doing.
[15] http://css-discuss.incutio.com/[17] http://www.sitepoint.com/books/css1/[18] http://www.sitepoint.com/books/cssant1/
Click here to order the printed 318-page book now (we deliver worldwide)!10
Chapter 1: DHTML Technologies

A lot of tutorials on the Web cover JavaScript. Some explore both DHTML andthe DOM, while others do not; you should try to find the former.
http://www.sitepoint.com/article/javascript-101-1This tutorial provides an introduction to the basics of JavaScript for the totalnon-programmer. Some of the techniques presented in this article aren’t asmodern as the alternatives presented in this book, but you’ll get a good feelfor the language itself.
http://www.quirksmode.org/Peter-Paul Koch’s list of JS techniques and scripts covers a considerableamount of ground in this area.
SummaryIn this chapter, we’ve outlined the very basic building-blocks of DHTML: whatHTML really is, how to arrange and display it in your documents using CSS, andhow to add interactivity using JavaScript. Throughout the rest of this book, we’lllook at the basic techniques you can use to start making your Websites dynamic,then move on to discuss certain advanced scripting techniques that cover specificareas. On with the show!
11Click here to order the printed 318-page book now (we deliver worldwide)!
Summary

12
The Document Object Model2One day someone came in and observed, on the paper sticking out of one of the Teletypes,displayed in magnificent isolation, this ominous phrase:
values of will give rise to dom!
…the phrase itself was just so striking! Utterly meaningless, but it looks like what… awarning? What is “dom?”—Dennis M. Richie[1]
A Web page is a document. To see that document, you can either display it inthe browser window, or you can look at the HTML source. It’s the same documentin both cases. The World Wide Web Consortium’s Document Object Model(DOM) provides another way to look at that same document. It describes thedocument content as a set of objects that a JavaScript program can see. Naturally,this is very useful for DHTML pages on which a lot of scripting occurs. (Thequote above is a pure coincidence—it’s from the days before the Web!)
According to the World Wide Web Consortium[2], “the Document ObjectModel is a platform- and language-neutral interface that will allow programs andscripts to dynamically access and update the content, structure and style of doc-
[1] http://cm.bell-labs.com/cm/cs/who/dmr/odd.html[2] http://www.w3.org/DOM/#what
uments. The document can be further processed and the results of that processingcan be incorporated back into the presented page.” This statement basically saysthat the DOM is not just a novelty—it is useful for doing things. In the comingpages, we’ll take a brief look at the history of the DOM before investigating moredeeply what it is and how we can use it. We’ll finish up with some example scriptsthat demonstrate the power of this critical aspect of DHTML.
The Origins of the DOMIn Netscape Navigator 2, Netscape Communications introduced JavaScript (brieflycalled LiveScript), which gave Web developers scripting access to elements intheir Web pages—first to forms, then, later, to images, links, and other features.Microsoft implemented JavaScript in Internet Explorer 3 (although they calledit JScript) in order to keep up with Netscape.
By version 4, the two browsers had diverged significantly in terms of their respect-ive feature sets and the access they provided to page content. Each browsermanufacturer implemented its own proprietary means of providing scripting accessto layers. Scripts that wanted to work in both browsers needed to contain codefor each method. The ill-fated “browser wars” were all about these proprietaryextensions to the Web, as each manufacturer strove to attract more developersto its platform through the lure of new features. There was little regard for cross-browser compatibility, although Microsoft copied and supported most of theearly innovations made by Netscape.
While all this was taking place, the W3C developed a specification for the Doc-ument Object Model Level 1, which outlined a generic and standard method toaccess the various parts of an XML document using script. Since HTML can bethought of as a dialect of XML, the DOM Level 1 spec applied to HTML as well.
Both major browser manufacturers implemented the DOM Level 1 specification:in Internet Explorer 5 and in Netscape 6. The previously existing proprietaryspecifications were retrospectively titled; since the new standard was DOM Level1, those old and now deprecated methods were called DOM Level 0. (Since then,the W3C has also released the DOM Level 2 and DOM Level 3 specifications,which add more features and are broken into separate modules.) There’s noformal DOM Level 0 standard, though.
What is the DOM?So, you know what the DOM used to be. Now let’s discuss what it is.
Click here to order the printed 318-page book now (we deliver worldwide)!14
Chapter 2: The Document Object Model
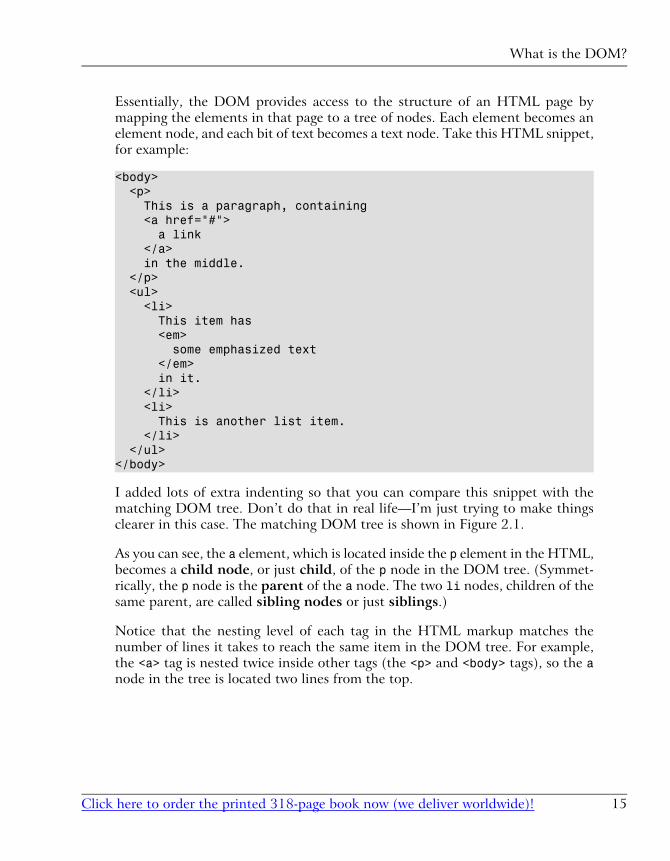
Essentially, the DOM provides access to the structure of an HTML page bymapping the elements in that page to a tree of nodes. Each element becomes anelement node, and each bit of text becomes a text node. Take this HTML snippet,for example:
<body> <p> This is a paragraph, containing <a href="#"> a link </a> in the middle. </p> <ul> <li> This item has <em> some emphasized text </em> in it. </li> <li> This is another list item. </li> </ul></body>
I added lots of extra indenting so that you can compare this snippet with thematching DOM tree. Don’t do that in real life—I’m just trying to make thingsclearer in this case. The matching DOM tree is shown in Figure 2.1.
As you can see, the a element, which is located inside the p element in the HTML,becomes a child node, or just child, of the p node in the DOM tree. (Symmet-rically, the p node is the parent of the a node. The two li nodes, children of thesame parent, are called sibling nodes or just siblings.)
Notice that the nesting level of each tag in the HTML markup matches thenumber of lines it takes to reach the same item in the DOM tree. For example,the <a> tag is nested twice inside other tags (the <p> and <body> tags), so the anode in the tree is located two lines from the top.
15Click here to order the printed 318-page book now (we deliver worldwide)!
What is the DOM?
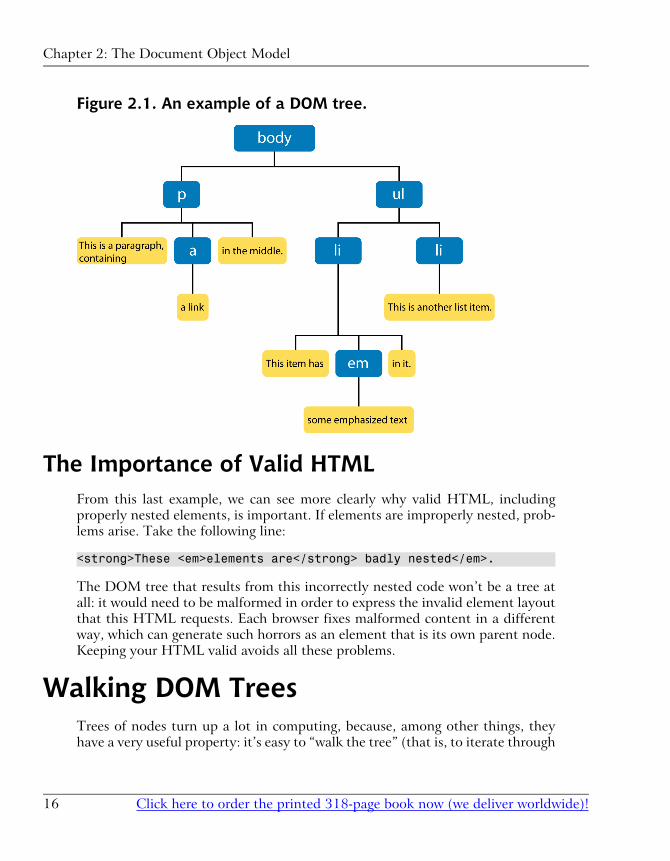
Figure 2.1. An example of a DOM tree.
The Importance of Valid HTMLFrom this last example, we can see more clearly why valid HTML, includingproperly nested elements, is important. If elements are improperly nested, prob-lems arise. Take the following line:
<strong>These <em>elements are</strong> badly nested</em>.
The DOM tree that results from this incorrectly nested code won’t be a tree atall: it would need to be malformed in order to express the invalid element layoutthat this HTML requests. Each browser fixes malformed content in a differentway, which can generate such horrors as an element that is its own parent node.Keeping your HTML valid avoids all these problems.
Walking DOM TreesTrees of nodes turn up a lot in computing, because, among other things, theyhave a very useful property: it’s easy to “walk the tree” (that is, to iterate through
Click here to order the printed 318-page book now (we deliver worldwide)!16
Chapter 2: The Document Object Model
every one of the tree’s nodes in order) with very little code. Walking a tree iseasy because any element node can be considered as the top of its own little tree.Therefore, to walk through a tree, you can use a series of steps, for example:
1. Do something with the node we’re looking at
2. Does this node have children? If so:
3. For each of the child nodes, go to step 1
This process is known as recursion, and is defined as the use of a function thatcalls itself. Each child is the same type of thing as the parent and can thereforebe handled in the same way. We don’t do much with recursion ourselves, but werely quite heavily on the browser recursing through the page’s tree. It’s especiallyuseful when it comes time to work with events, as we’ll see in Chapter 3.
Finding the Top of the TreeIn order to walk the DOM tree, you need a reference to the node at its top: theroot node. That “reference” will be a variable that points to the root node. Theroot node should be available to JavaScript as document.documentElement. Notall browsers support this approach, but fortunately it doesn’t matter, becauseyou’ll rarely need to walk through an entire document’s DOM tree starting fromthe root. Instead, the approach taken is to use one of the getElementsByWhatevermethods to grab a particular part of the tree directly. Those methods start fromthe window.document object—or document for short.
Getting an Element from the TreeThere are two principal methods that can be used to get a particular element orset of elements. The first method, which is used all the time in DHTML program-ming, is getElementById. The second is getElementsByTagName. Anothermethod, getElementsByName, is rarely used, so we’ll look at the first two onlyfor now.
getElementById
In HTML, any element can have a unique ID. The ID must be specified withthe HTML id attribute:
<div id="codesection"> <p id="codepara">
17Click here to order the printed 318-page book now (we deliver worldwide)!
Finding the Top of the Tree
</p> <ul> <li><a href="http://www.sitepoint.com/" id="splink" >SitePoint</a></li> <li><a href="http://www.yahoo.com/" id="yalink" >Yahoo!</a></li> </ul></div>
Each non-list element in that snippet has been given an ID. You should be ableto spot four of them. IDs must be unique within your document—each elementmust have a different ID (or no ID at all)—so you can know that a specific IDidentifies a given element alone. To get a reference to that element in JavaScriptcode, use document.getElementById(elementId):
var sitepoint_link = document.getElementById('splink')
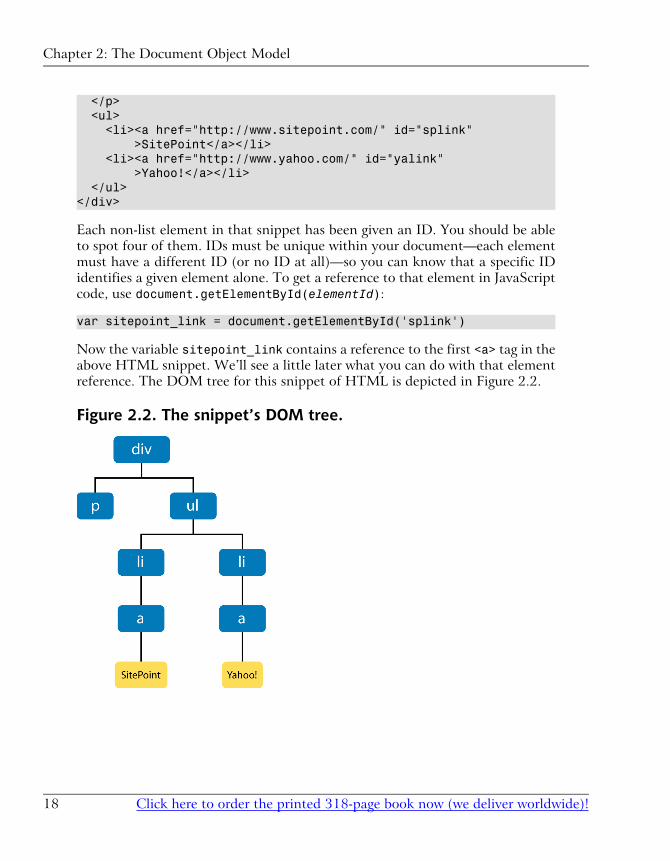
Now the variable sitepoint_link contains a reference to the first <a> tag in theabove HTML snippet. We’ll see a little later what you can do with that elementreference. The DOM tree for this snippet of HTML is depicted in Figure 2.2.
Figure 2.2. The snippet’s DOM tree.
Click here to order the printed 318-page book now (we deliver worldwide)!18
Chapter 2: The Document Object Model
getElementsByTagName
The document.getElementsByTagName method is used to retrieve all elementsof a particular type. The method returns an array1 that contains all matchingelements:
var all_links = document.getElementsByTagName('a');var sitepoint_link = all_links[0];
The all_links variable contains an array, which contains two elements: a refer-ence to the SitePoint link, and a reference to the Yahoo! link. The elements arereturned in the order in which they are found in the HTML, so all_links[0]is the SitePoint link and all_links[1] is the Yahoo! link.
Note that document.getElementsByTagName always returns an array, even ifonly one matching element was found. Imagine we use the method as follows:
var body_list = document.getElementsByTagName('body');
To get a reference to the sole body element in this case, we would need to usethe following:
var body = body_list[0];
We would be very surprised if body_list.length (the array’s size) was anythingother than 1, since there should be only one <body> tag! We could also shortenthe process slightly by replacing the previous two lines with this one:
var body = document.getElementsByTagName('body')[0];
JavaScript allows you to collapse expressions together like this. It can make yourcode a lot more compact, and save you from declaring a lot of variables whicharen’t really used for anything.
There is another useful feature; getElementsByTagName is defined on any nodeat all, not just the document. So, to find all <a> tags in the body of the document,we could use the method like this:
var links_in_body = body.getElementsByTagName('a');
1Technically, it returns a node collection, but this works just like an array.
19Click here to order the printed 318-page book now (we deliver worldwide)!
getElementsByTagName

Note that “Element” is plural in this method’s name, but singular forgetElementById. This is a reminder that the former returns an array of elements,while the latter returns only a single element.
Walking from Parents to ChildrenEach node has one parent (except the root element) and may have multiplechildren. You can obtain a reference to a node’s parent from its parentNodeproperty; a node’s children are found in the node’s childNodes property, whichis an array. The childNodes array may contain nothing if the node has no children(such nodes are called leaf nodes).
Suppose the variable node points to the ul element of the DOM tree. We canget the node’s parent (the div element) like this:
parent = node.parentNode;
We can check if the unordered list has any list items (children) by looking at thelength property of the childNodes array:
if (node.childNodes.length == 0) { alert('no list items found!');}
If there are any children, their numbering starts at zero. We can obtain the secondchild in our example HTML (an li element) as follows:
list_item = node.childNodes[1];
For the special case of the first child, located here:
list_item = node.childNodes[0];
we can also use this shorthand:
child = node.firstChild;
Similarly, the last child (in this case, the second li) has its own special property:
child = node.lastChild;
We’ll see all these properties used routinely through the rest of this book.
Click here to order the printed 318-page book now (we deliver worldwide)!20
Chapter 2: The Document Object Model
What to do with ElementsNow you know how to get references to elements—the nodes in your HTMLpage. The core of DHTML—the D-for-dynamic bit—lies in our ability to changethose elements, to remove them, and to add new ones. Throughout the rest ofthis chapter, we’ll work with the following code snippet, which we saw earlier:
<div id="codesection"> <p id="codepara"> </p> <ul> <li><a href="http://www.sitepoint.com/" id="splink" >SitePoint</a></li> <li><a href="http://www.yahoo.com/" id="yalink" >Yahoo!</a></li> </ul></div>
Changing Element AttributesEvery property of an element, and every CSS style that can be applied to it, canbe set from JavaScript. The attributes that can be applied to an element inHTML—for example, the href attribute of an <a> tag—can also be set and readfrom your scripts, as follows:
// using our sitepoint_link variable from abovesitepoint_link.href = "http://www.google.com/";
Click on that link after the script has run, and you’ll be taken to Google ratherthan SitePoint. The new HTML content, as it exists in the browser’s imagination(the HTML file itself hasn’t changed), looks like this:
<div id="codesection"> <p id="codepara"> </p> <ul> <li><a href="http://www.google.com/" id="splink" >SitePoint</a></li> <li><a href="http://www.yahoo.com/" id="yalink" >Yahoo!</a></li> </ul></div>
21Click here to order the printed 318-page book now (we deliver worldwide)!
What to do with Elements

Each element has a different set of attributes that can be changed: a elementshave the href attribute, <img> elements have the src attribute, and so on. Ingeneral, an attribute that can be applied to a tag in your HTML is also gettableand settable as a property on a node from JavaScript. So, if our code contains areference to an img element, we can change the image that’s displayed by alteringthe img_element.src property.2
The two most useful references that document elements and their supported at-tributes are those provided by the two major browser makers: the Microsoft DOMreference[3], and the Mozilla Foundation’s DOM reference[4].
Importantly, though, when we altered our link’s href above, all we changed wasthe destination for the link. The text of the link, which read “SitePoint” before,has not changed; if we need to alter that, we have to do so separately. Changingthe text in a page is slightly more complex than changing an attribute; to altertext, you need to understand the concept of text nodes.
Changing Text NodesIn Figure 2.1 above, you can see how the HTML in a document can be representedas a DOM tree. One of the important things the figure illustrates is that the textinside an element is not part of that element. In fact, the text is in a differentnode: a child of the element node. If you have a reference to that text node, youcan change the text therein using the node’s nodeValue property:
myTextNode.nodeValue = "Some text to go in the text node";
How can we get a reference to that text node? We need to walk the DOMtree—after all, we have to know where the text node is before we can alter it. Ifwe consider the sitepoint_link node above, we can see that its childNodesarray should contain one node: a text node with a nodeValue of "SitePoint".We can change the value of that text node as follows:
sitepoint_link.childNodes[0].nodeValue = 'Google';
2One notable divergence from this rule is that an element’s class attribute in HTML is availablein JavaScript as node.className, not node.class. This is because “class” is a JavaScript re-served word.[3] http://msdn.microsoft.com/workshop/author/dhtml/reference/dhtml_reference_entry.asp[4] http://www.mozilla.org/docs/dom/domref/
Click here to order the printed 318-page book now (we deliver worldwide)!22
Chapter 2: The Document Object Model

Now, the text displayed on-screen for that link will read Google, which matchesthe link destination that we changed earlier. We can shorten the code slightly tothe following:
sitepoint_link.firstChild.nodeValue = 'Google';
You may recall that a node’s firstChild property, and childNodes[0], bothrefer to the same node; in this case, you can substitute childNodes[0] withsuccess. After this change, the browser will see the following document code:
<div id="codesection"> <p id="codepara"> </p> <ul> <li><a href="http://www.google.com/" id="splink" >Google</a></li> <li><a href="http://www.yahoo.com/" id="yalink" >Yahoo!</a></li> </ul></div>
Changing Style PropertiesAs we have seen, the attributes that are set on an HTML tag are available asproperties of the corresponding DOM node. CSS style properties can also beapplied to that node through the DOM, using the node’s style property. EachCSS property is a property of that style property, with its name slightly trans-formed: a CSS property in words-and-dashes style becomes a property of stylewith dashes removed and all words but the first taking an initial capital letter.This is called InterCaps format. Here’s an example. A CSS property that wasnamed:
some-css-property
would appear to a script as the following JavaScript property:
someCssProperty
So, to set the CSS property font-family for our sitepoint_link element node,we’d use the following code:
sitepoint_link.style.fontFamily = 'sans-serif';
23Click here to order the printed 318-page book now (we deliver worldwide)!
Changing Style Properties

CSS values in JavaScript are almost always set as strings; some values, such asfont-size, are strings because they must contain a dimension3, such as “px” or“%”. Only entirely numeric properties, such as z-index (which is set asnode.style.zIndex, as per the above rule) may be set as a number:
sitepoint_link.style.zIndex = 2;
Many designers alter style properties to make an element appear or disappear.In CSS, the display property is used for this: if it’s set to none, the elementdoesn’t display in the browser. So, to hide an element from display, we can setits display property to none:
sitepoint_link.style.display = 'none';
To show it again, we give it another valid value:
sitepoint_link.style.display = 'inline';
For a complete reference to the available CSS style properties and what eachdoes, see SitePoint’s HTML Utopia: Designing Without Tables Using CSS[5].
Bigger DOM Tree ChangesThe next level of DOM manipulation, above and beyond changing the propertiesof elements that are already there, is to add and remove elements dynamically.Being able to change the display properties of existing elements, and to read andalter the attributes of those elements, puts a lot of power at your disposal, butthe ability to dynamically create or remove parts of a page requires us to leveragea whole new set of techniques.
Moving ElementsTo add an element, we must use the appendChild method of the node that willbecome the added node’s parent. In other words, to add your new element as achild of an existing node in the document, we use that node’s appendChildmethod:
3Internet Explorer will let you get away without using a dimension, as it assumes that a dimensionlessnumber is actually a pixel measurement. However, do not try to take advantage of this assumption;it will break your code in other browsers, and it’s in violation of the specification.[5] http://www.sitepoint.com/books/css1/
Click here to order the printed 318-page book now (we deliver worldwide)!24
Chapter 2: The Document Object Model
// We'll add the link to the end of the paragraphvar para = document.getElementById('codepara');para.appendChild(sitepoint_link);
After this, our page will look a little odd. Here’s the updated HTML code:
<div id="codesection"> <p id="codepara"> <a href="http://www.google.com/" id="splink">Google</a> </p> <ul> <li></li> <li><a href="http://www.yahoo.com/" id="yalink" >Yahoo!</a></li> </ul></div>
Another useful thing to know is that, in order to move the node to its new placein the document, we don’t have to remove it first. If you use appendChild to inserta node into the document, and that node already exists elsewhere in the document,the node will not be duplicated; instead, it will move from its previous locationto the new location at which you’ve inserted it. We can do the same thing withthe Yahoo! link:
para.appendChild(document.getElementById('yalink'));
After this, the page will again be rearranged to match the HTML:
<div id="codesection"> <p id="codepara"> <a href="http://www.google.com/" id="splink">Google</a> <a href="http://www.yahoo.com/" id="yalink">Yahoo!</a> </p> <ul> <li></li> <li></li> </ul></div>
Figure 2.3 shows the new DOM tree so far.
25Click here to order the printed 318-page book now (we deliver worldwide)!
Moving Elements
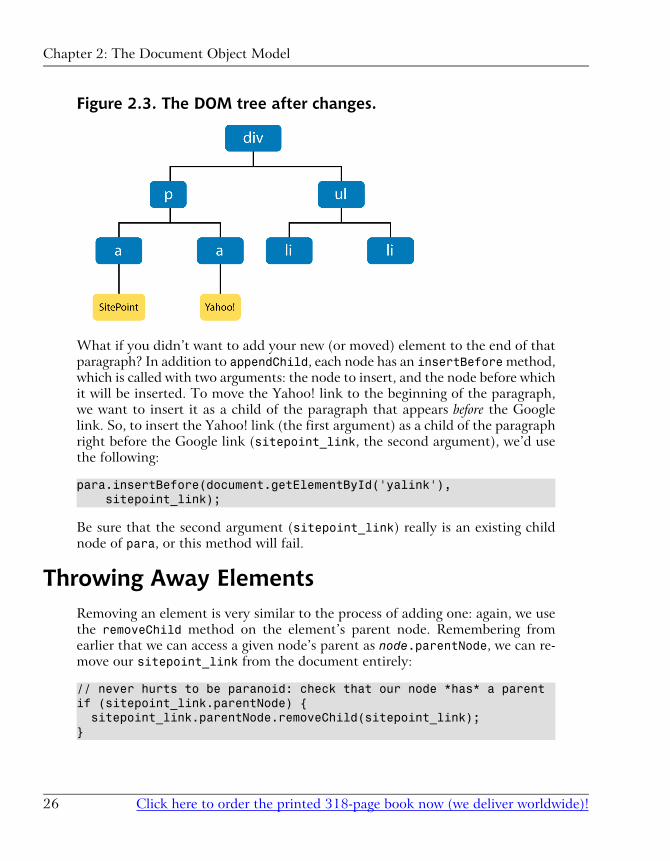
Figure 2.3. The DOM tree after changes.
What if you didn’t want to add your new (or moved) element to the end of thatparagraph? In addition to appendChild, each node has an insertBefore method,which is called with two arguments: the node to insert, and the node before whichit will be inserted. To move the Yahoo! link to the beginning of the paragraph,we want to insert it as a child of the paragraph that appears before the Googlelink. So, to insert the Yahoo! link (the first argument) as a child of the paragraphright before the Google link (sitepoint_link, the second argument), we’d usethe following:
para.insertBefore(document.getElementById('yalink'), sitepoint_link);
Be sure that the second argument (sitepoint_link) really is an existing childnode of para, or this method will fail.
Throwing Away ElementsRemoving an element is very similar to the process of adding one: again, we usethe removeChild method on the element’s parent node. Remembering fromearlier that we can access a given node’s parent as node.parentNode, we can re-move our sitepoint_link from the document entirely:
// never hurts to be paranoid: check that our node *has* a parentif (sitepoint_link.parentNode) { sitepoint_link.parentNode.removeChild(sitepoint_link);}
Click here to order the printed 318-page book now (we deliver worldwide)!26
Chapter 2: The Document Object Model
That action will change the HTML code to that shown below:
<div id="codesection"> <p id="codepara"> <a href="http://www.yahoo.com/" id="yalink">Yahoo!</a> </p> <ul> <li></li> <li></li> </ul></div>
Even after the node’s removal, sitepoint_link still constitutes a referenceto that link. It still exists, it’s just not in the document any more: it’s floatingin limbo. We can add it back to the document somewhere else if we wantto. Set the variable to null to make the deleted element disappear forever.
Creating ElementsMoving existing elements around within the page is a powerful and useful tech-nique (with which you’re well on the way to implementing Space Invaders or PacMan!). But, above and beyond that, we have the ability to create brand new ele-ments and add them to the page, providing the capacity for truly dynamic content.The point to remember is that, as before, a page’s text resides in text nodes, soif we need to create an element that contains text, we must create both the newelement node and a text node to contain its text. To achieve this, we need twonew methods: document.createElement and document.createTextNode.
First, we create the element itself:
var linux_link = document.createElement('a');
Even though we’ve created the element, it’s not yet part of the document. Next,we set some of its properties in the same way that we’d set properties on an ex-isting link:
linux_link.href = 'http://www.linux.org/';
We then create the text node for the text that will appear inside the link. Wepass the text for the text node as a parameter:
var linux_tn = document.createTextNode('The Linux operating system');
27Click here to order the printed 318-page book now (we deliver worldwide)!
Creating Elements
The text node is also floating around, separate from the document. We add thetext node to the element’s list of children, as above:
linux_link.appendChild(linux_tn);
The element and text node now form a mini-tree of two nodes (officially a docu-ment fragment), but they remain separate from the DOM. Finally, we insertthe element into the page, which is the same as putting it into the DOM tree:
para.appendChild(linux_link);
Here’s the resulting HTML:
<div id="codesection"> <p id="codepara"> <a href="http://www.yahoo.com/" id="yalink">Yahoo!</a> <a href="http://www.linux.org/">The Linux operating system</a> </p> <ul> <li></li> <li></li> </ul></div>
As you can see, to create elements, we use the same techniques and know-ledge—text nodes are children of the element node, we append a child withnode.appendChild—we use to work with nodes that are already part of thedocument. To the DOM, a node is a node whether it’s part of the document ornot: it’s just a node object.
Copying ElementsCreating one element is simple, as we’ve seen. But what if you want to add a lotof dynamic content to a page? Having to create a whole batch of new elementsand text nodes—appending the text nodes to their elements, the elements to eachother, and the top element to the page—is something of a laborious process.Fortunately, if you’re adding to the page a copy of something that’s already there,a shortcut is available: the cloneNode method. This returns a copy of the node,including all its attributes and all its children.4 If you have a moderately complexpiece of HTML that contains many elements, cloneNode is a very quick way toreturn a copy of that block of HTML ready for insertion into the document:
4You can elect to clone the node only—not its children—by passing false to the cloneNodemethod.
Click here to order the printed 318-page book now (we deliver worldwide)!28
Chapter 2: The Document Object Model

var newpara = para.cloneNode(true);document.getElementById('codesection').appendChild(newpara);
You can’t rush ahead and just do this, though: it pays to be careful withcloneNode. This method clones all attributes of the node and all its child nodes,including IDs, and IDs must be unique within your document. So, if you haveelements with IDs in your cloned HTML block, you need to fix those IDs beforeyou append the cloned block to the document.
It would be nice to be able to grab the Yahoo! link in our cloned block using thefollowing code:
var new_yahoo_link = newpara.getElementById('yalink');
But, unfortunately, we can’t. The getElementById method is defined only on adocument, not on any arbitrary node. The easiest way around this is to refrainfrom defining IDs on elements in a block that you wish to clone. Here’s a line ofcode that will remove the Yahoo! link’s id:
newpara.firstChild.removeAttribute('id');
We still have the ID on the paragraph itself, though, which means that when weappend the new paragraph to the document, we’ll have two paragraphs with theID codepara. This is bad—it’s not supposed to happen. We must fix it beforewe append the new paragraph, revising the above code as follows:
var newpara = para.cloneNode(true);newpara.id = 'codepara2';newpara.firstChild.removeAttribute('id');document.getElementById('codesection').appendChild(newpara);
This code returns the following results:
<div id="codesection"> <p id="codepara"> <a href="http://www.yahoo.com/">Yahoo!</a> <a href="http://www.linux.org/">The Linux operating system</a> </p> <p id="codepara2"> <a href="http://www.yahoo.com/">Yahoo!</a> <a href="http://www.linux.org/">The Linux operating system</a> </p> <ul> <li></li> <li></li>
29Click here to order the printed 318-page book now (we deliver worldwide)!
Copying Elements
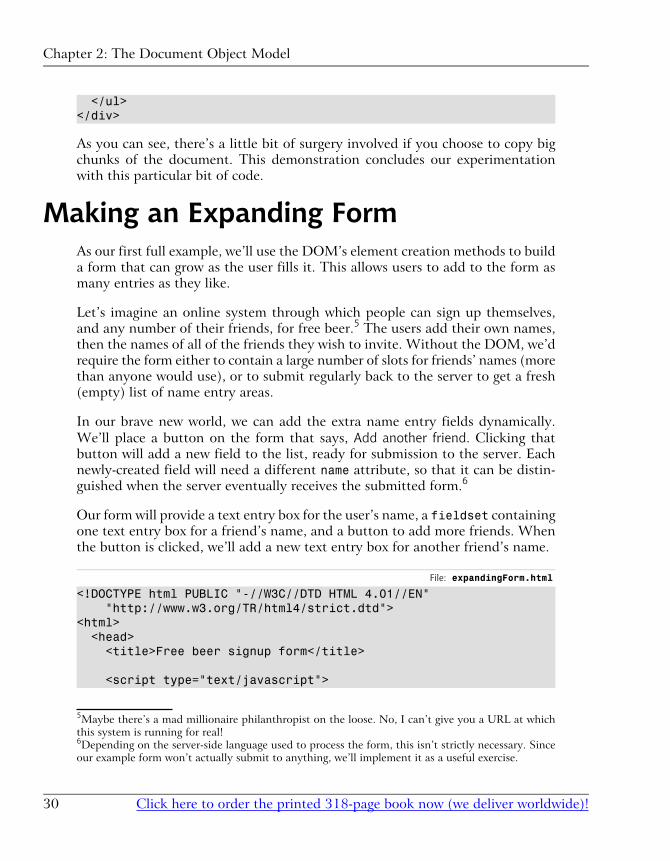
</ul></div>
As you can see, there’s a little bit of surgery involved if you choose to copy bigchunks of the document. This demonstration concludes our experimentationwith this particular bit of code.
Making an Expanding FormAs our first full example, we’ll use the DOM’s element creation methods to builda form that can grow as the user fills it. This allows users to add to the form asmany entries as they like.
Let’s imagine an online system through which people can sign up themselves,and any number of their friends, for free beer.5 The users add their own names,then the names of all of the friends they wish to invite. Without the DOM, we’drequire the form either to contain a large number of slots for friends’ names (morethan anyone would use), or to submit regularly back to the server to get a fresh(empty) list of name entry areas.
In our brave new world, we can add the extra name entry fields dynamically.We’ll place a button on the form that says, Add another friend. Clicking thatbutton will add a new field to the list, ready for submission to the server. Eachnewly-created field will need a different name attribute, so that it can be distin-guished when the server eventually receives the submitted form.6
Our form will provide a text entry box for the user’s name, a fieldset containingone text entry box for a friend’s name, and a button to add more friends. Whenthe button is clicked, we’ll add a new text entry box for another friend’s name.
File: expandingForm.html
<!DOCTYPE html PUBLIC "-//W3C//DTD HTML 4.01//EN" "http://www.w3.org/TR/html4/strict.dtd"><html> <head> <title>Free beer signup form</title>
<script type="text/javascript">
5Maybe there’s a mad millionaire philanthropist on the loose. No, I can’t give you a URL at whichthis system is running for real!6Depending on the server-side language used to process the form, this isn’t strictly necessary. Sinceour example form won’t actually submit to anything, we’ll implement it as a useful exercise.
Click here to order the printed 318-page book now (we deliver worldwide)!30
Chapter 2: The Document Object Model
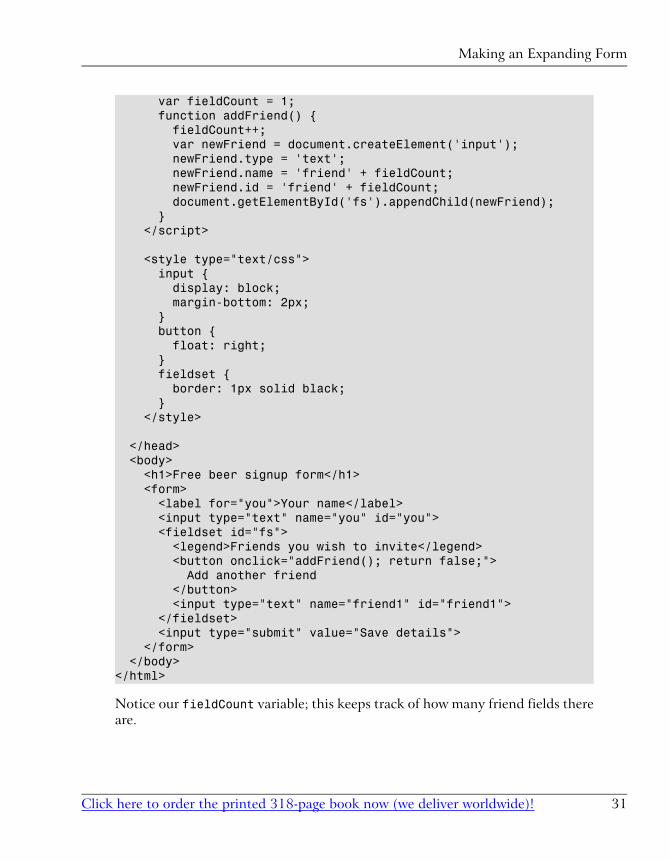
var fieldCount = 1; function addFriend() { fieldCount++; var newFriend = document.createElement('input'); newFriend.type = 'text'; newFriend.name = 'friend' + fieldCount; newFriend.id = 'friend' + fieldCount; document.getElementById('fs').appendChild(newFriend); } </script>
<style type="text/css"> input { display: block; margin-bottom: 2px; } button { float: right; } fieldset { border: 1px solid black; } </style>
</head> <body> <h1>Free beer signup form</h1> <form> <label for="you">Your name</label> <input type="text" name="you" id="you"> <fieldset id="fs"> <legend>Friends you wish to invite</legend> <button onclick="addFriend(); return false;"> Add another friend </button> <input type="text" name="friend1" id="friend1"> </fieldset> <input type="submit" value="Save details"> </form> </body></html>
Notice our fieldCount variable; this keeps track of how many friend fields thereare.
31Click here to order the printed 318-page book now (we deliver worldwide)!
Making an Expanding Form

File: expandingForm.html (excerpt)
var fieldCount = 1;
When the button is clicked, we run the addFriend function (we’ll discuss handlingclicks—and various other kinds of events—more in the next chapter):
<button onclick="addFriend(); return false;">
The addFriend function completes a number of tasks each time it’s run:
1. Increments the fieldCount:
File: expandingForm.html (excerpt)
fieldCount++;
2. Creates a new input element:
File: expandingForm.html (excerpt)
var newFriend = document.createElement('input');
3. Sets its type to text—we want a text entry box, an element specified by<input type="text">:
File: expandingForm.html (excerpt)
newFriend.type = 'text';
4. Sets a unique id and name (because the ID must be unique, and all the entryboxes must have different names so they can be distinguished when theform’s submitted):
File: expandingForm.html (excerpt)
newFriend.name = 'friend' + fieldCount; newFriend.id = 'friend' + fieldCount;
5. Adds this newly-created element to the document:
File: expandingForm.html (excerpt)
document.getElementById('fs').appendChild(newFriend);
Click here to order the printed 318-page book now (we deliver worldwide)!32
Chapter 2: The Document Object Model

Here’s what the page looks like after the “add another friend” button has beenclicked twice, and two friends’ names have been added:
Figure 2.4. Signing up for free beer.
Free beer, thanks to the power of the DOM. We can’t complain about that!
Making Modular Image RolloversImage rollover scripts, in which an image is used as a link, and that image changeswhen the user mouses over it, are a mainstay of JavaScript programming on theWeb. Traditionally, they’ve required a lot of script, and a lot of customization,on the part of the developer. The introspective capability of the DOM—theability of script to inspect the structure of the page in which it’s running—givesus the power to detect rollover images automatically and set them up withoutany customization. This represents a more systematic approach than the old-fashioned use of onmouseover and onmouseout attributes, and keeps rollovercode separate from other content.
We’ll build our page so that the links on which we want to display rollover effectshave a class of rollover. They’ll contain one img element—nothing else. We’llalso provide specially named rollover images: if an image within the page is calledfoo.gif, then the matching rollover image will be named foo_over.gif. Whenthe page loads, we’ll walk the DOM tree, identify all the appropriate links (bychecking their class and whether they contain an img element), and set up the
33Click here to order the printed 318-page book now (we deliver worldwide)!
Making Modular Image Rollovers

rollover on each. This specially-named rollover image allows us to deduce thename of any rollover image without saving that name anywhere. It reduces theamount of data we have to manage.
An alternative technique involves use of a non-HTML attribute in the image tag:
<img src="basic_image.gif" oversrc="roll_image.gif">
However, since oversrc isn’t a standard attribute, this approach would causeyour HTML to be invalid.
Some of the following script may seem a little opaque: we will be attachinglisteners to DOM events to ensure that scripts are run at the appropriate times.If this is confusing, then feel free to revisit this example after you’ve read thediscussion of DOM events in the next chapter.
A Sample HTML PageFirst, the HTML: here we have our links, with class rollover, containing theimages.
File: rollovers.html
<!DOCTYPE html PUBLIC "-//W3C//DTD HTML 4.01//EN" "http://www.w3.org/TR/html4/strict.dtd"><html> <head> <title>Modular rollovers</title> <script type="text/javascript" src="rollovers.js"></script> <style type="text/css"> /* Remove the blue border on the rollover images */ a.rollover img { border-width: 0; } </style> </head> <body> <h1>Modular rollovers</h1> <p>Below we have two links, containing images that we want to change on mouseover.</p> <ul> <li> <a href="" class="rollover" alt="Roll" ><img src="basic_image.gif" /></a> </li>
Click here to order the printed 318-page book now (we deliver worldwide)!34
Chapter 2: The Document Object Model
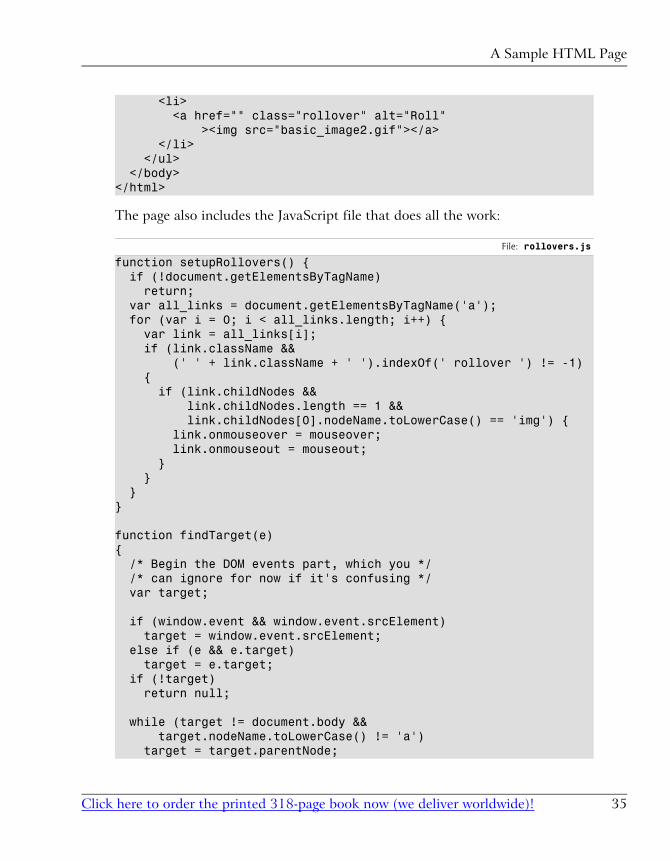
<li> <a href="" class="rollover" alt="Roll" ><img src="basic_image2.gif"></a> </li> </ul> </body></html>
The page also includes the JavaScript file that does all the work:
File: rollovers.js
function setupRollovers() { if (!document.getElementsByTagName) return; var all_links = document.getElementsByTagName('a'); for (var i = 0; i < all_links.length; i++) { var link = all_links[i]; if (link.className && (' ' + link.className + ' ').indexOf(' rollover ') != -1) { if (link.childNodes && link.childNodes.length == 1 && link.childNodes[0].nodeName.toLowerCase() == 'img') { link.onmouseover = mouseover; link.onmouseout = mouseout; } } }}
function findTarget(e){ /* Begin the DOM events part, which you */ /* can ignore for now if it's confusing */ var target;
if (window.event && window.event.srcElement) target = window.event.srcElement; else if (e && e.target) target = e.target; if (!target) return null;
while (target != document.body && target.nodeName.toLowerCase() != 'a') target = target.parentNode;
35Click here to order the printed 318-page book now (we deliver worldwide)!
A Sample HTML Page
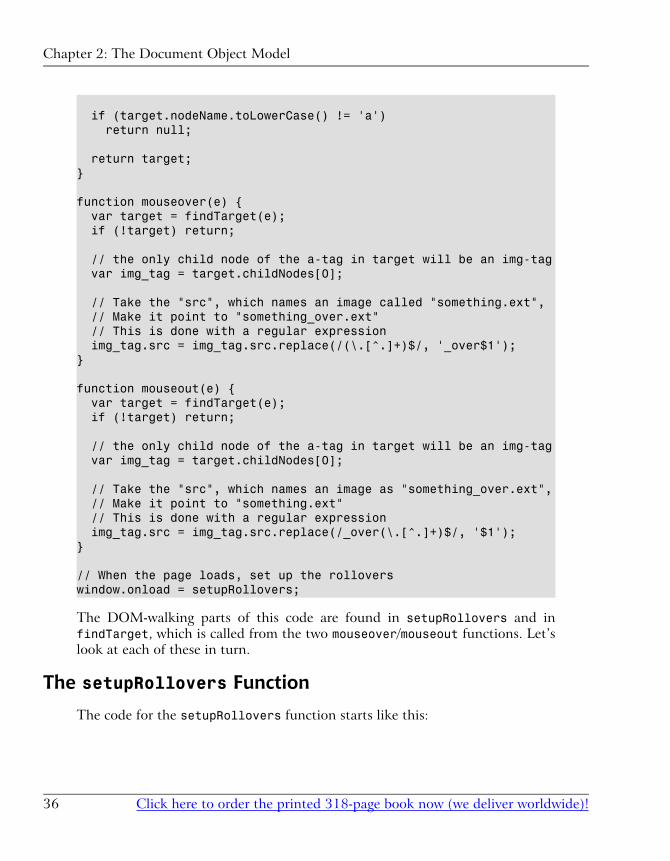
if (target.nodeName.toLowerCase() != 'a') return null;
return target;}
function mouseover(e) { var target = findTarget(e); if (!target) return;
// the only child node of the a-tag in target will be an img-tag var img_tag = target.childNodes[0];
// Take the "src", which names an image called "something.ext", // Make it point to "something_over.ext" // This is done with a regular expression img_tag.src = img_tag.src.replace(/(\.[^.]+)$/, '_over$1');}
function mouseout(e) { var target = findTarget(e); if (!target) return;
// the only child node of the a-tag in target will be an img-tag var img_tag = target.childNodes[0];
// Take the "src", which names an image as "something_over.ext", // Make it point to "something.ext" // This is done with a regular expression img_tag.src = img_tag.src.replace(/_over(\.[^.]+)$/, '$1');}
// When the page loads, set up the rolloverswindow.onload = setupRollovers;
The DOM-walking parts of this code are found in setupRollovers and infindTarget, which is called from the two mouseover/mouseout functions. Let’slook at each of these in turn.
The setupRollovers Function
The code for the setupRollovers function starts like this:
Click here to order the printed 318-page book now (we deliver worldwide)!36
Chapter 2: The Document Object Model
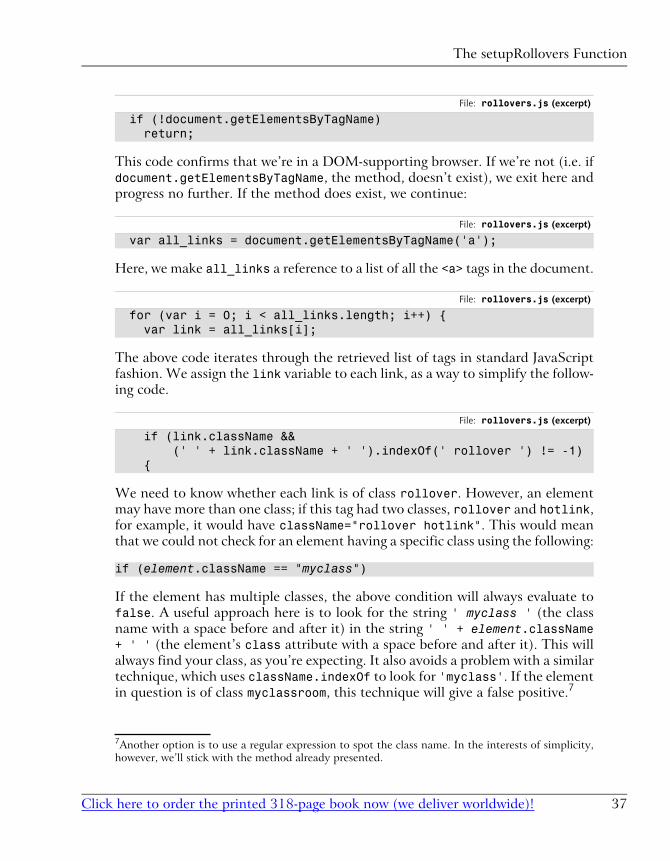
File: rollovers.js (excerpt)
if (!document.getElementsByTagName) return;
This code confirms that we’re in a DOM-supporting browser. If we’re not (i.e. ifdocument.getElementsByTagName, the method, doesn’t exist), we exit here andprogress no further. If the method does exist, we continue:
File: rollovers.js (excerpt)
var all_links = document.getElementsByTagName('a');
Here, we make all_links a reference to a list of all the <a> tags in the document.
File: rollovers.js (excerpt)
for (var i = 0; i < all_links.length; i++) { var link = all_links[i];
The above code iterates through the retrieved list of tags in standard JavaScriptfashion. We assign the link variable to each link, as a way to simplify the follow-ing code.
File: rollovers.js (excerpt)
if (link.className && (' ' + link.className + ' ').indexOf(' rollover ') != -1) {
We need to know whether each link is of class rollover. However, an elementmay have more than one class; if this tag had two classes, rollover and hotlink,for example, it would have className="rollover hotlink". This would meanthat we could not check for an element having a specific class using the following:
if (element.className == "myclass")
If the element has multiple classes, the above condition will always evaluate tofalse. A useful approach here is to look for the string ' myclass ' (the classname with a space before and after it) in the string ' ' + element.className+ ' ' (the element’s class attribute with a space before and after it). This willalways find your class, as you’re expecting. It also avoids a problem with a similartechnique, which uses className.indexOf to look for 'myclass'. If the elementin question is of class myclassroom, this technique will give a false positive.7
7Another option is to use a regular expression to spot the class name. In the interests of simplicity,however, we’ll stick with the method already presented.
37Click here to order the printed 318-page book now (we deliver worldwide)!
The setupRollovers Function
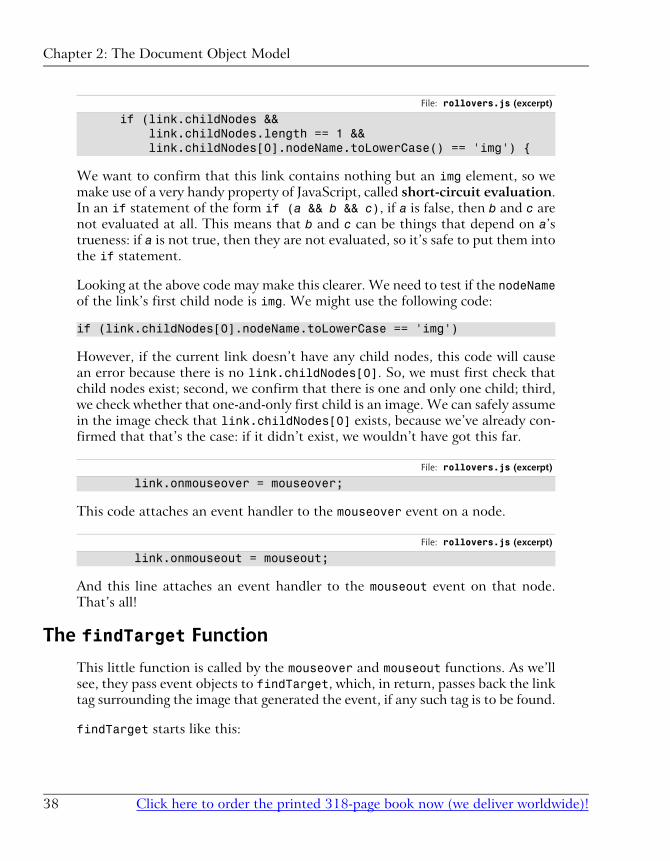
File: rollovers.js (excerpt)
if (link.childNodes && link.childNodes.length == 1 && link.childNodes[0].nodeName.toLowerCase() == 'img') {
We want to confirm that this link contains nothing but an img element, so wemake use of a very handy property of JavaScript, called short-circuit evaluation.In an if statement of the form if (a && b && c), if a is false, then b and c arenot evaluated at all. This means that b and c can be things that depend on a’strueness: if a is not true, then they are not evaluated, so it’s safe to put them intothe if statement.
Looking at the above code may make this clearer. We need to test if the nodeNameof the link’s first child node is img. We might use the following code:
if (link.childNodes[0].nodeName.toLowerCase == 'img')
However, if the current link doesn’t have any child nodes, this code will causean error because there is no link.childNodes[0]. So, we must first check thatchild nodes exist; second, we confirm that there is one and only one child; third,we check whether that one-and-only first child is an image. We can safely assumein the image check that link.childNodes[0] exists, because we’ve already con-firmed that that’s the case: if it didn’t exist, we wouldn’t have got this far.
File: rollovers.js (excerpt)
link.onmouseover = mouseover;
This code attaches an event handler to the mouseover event on a node.
File: rollovers.js (excerpt)
link.onmouseout = mouseout;
And this line attaches an event handler to the mouseout event on that node.That’s all!
The findTarget Function
This little function is called by the mouseover and mouseout functions. As we’llsee, they pass event objects to findTarget, which, in return, passes back the linktag surrounding the image that generated the event, if any such tag is to be found.
findTarget starts like this:
Click here to order the printed 318-page book now (we deliver worldwide)!38
Chapter 2: The Document Object Model
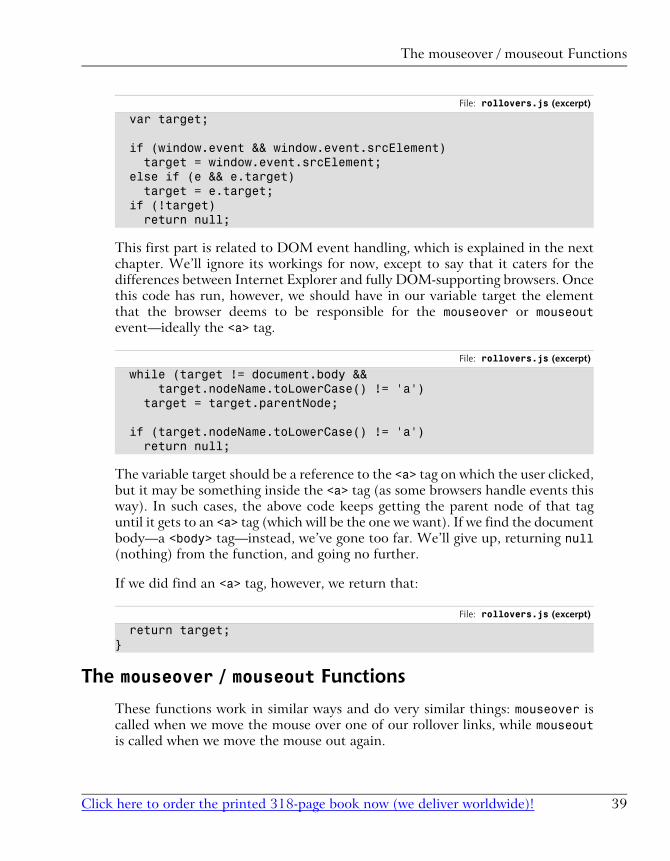
File: rollovers.js (excerpt)
var target;
if (window.event && window.event.srcElement) target = window.event.srcElement; else if (e && e.target) target = e.target; if (!target) return null;
This first part is related to DOM event handling, which is explained in the nextchapter. We’ll ignore its workings for now, except to say that it caters for thedifferences between Internet Explorer and fully DOM-supporting browsers. Oncethis code has run, however, we should have in our variable target the elementthat the browser deems to be responsible for the mouseover or mouseoutevent—ideally the <a> tag.
File: rollovers.js (excerpt)
while (target != document.body && target.nodeName.toLowerCase() != 'a') target = target.parentNode;
if (target.nodeName.toLowerCase() != 'a') return null;
The variable target should be a reference to the <a> tag on which the user clicked,but it may be something inside the <a> tag (as some browsers handle events thisway). In such cases, the above code keeps getting the parent node of that taguntil it gets to an <a> tag (which will be the one we want). If we find the documentbody—a <body> tag—instead, we’ve gone too far. We’ll give up, returning null(nothing) from the function, and going no further.
If we did find an <a> tag, however, we return that:
File: rollovers.js (excerpt)
return target;}
The mouseover / mouseout Functions
These functions work in similar ways and do very similar things: mouseover iscalled when we move the mouse over one of our rollover links, while mouseoutis called when we move the mouse out again.
39Click here to order the printed 318-page book now (we deliver worldwide)!
The mouseover / mouseout Functions
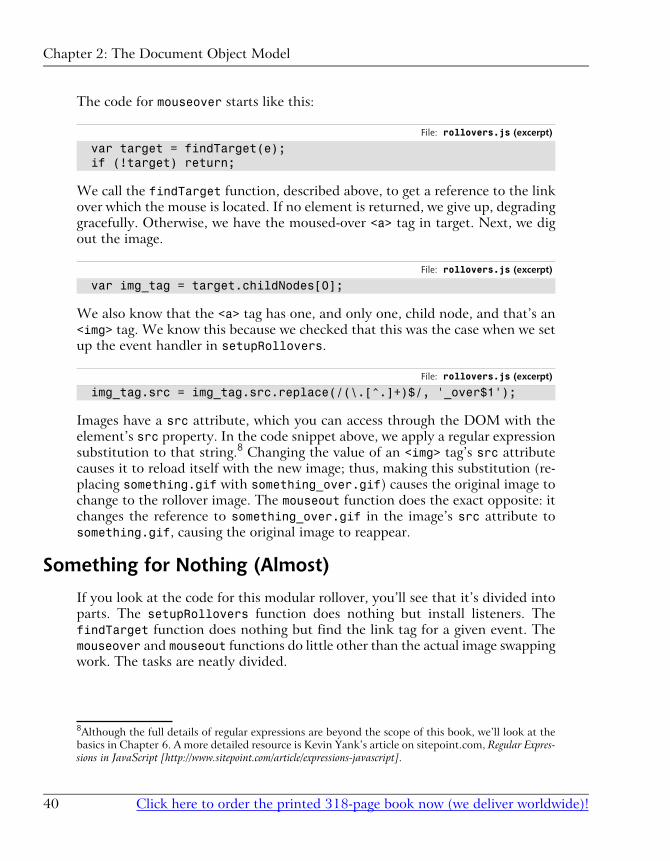
The code for mouseover starts like this:
File: rollovers.js (excerpt)
var target = findTarget(e); if (!target) return;
We call the findTarget function, described above, to get a reference to the linkover which the mouse is located. If no element is returned, we give up, degradinggracefully. Otherwise, we have the moused-over <a> tag in target. Next, we digout the image.
File: rollovers.js (excerpt)
var img_tag = target.childNodes[0];
We also know that the <a> tag has one, and only one, child node, and that’s an<img> tag. We know this because we checked that this was the case when we setup the event handler in setupRollovers.
File: rollovers.js (excerpt)
img_tag.src = img_tag.src.replace(/(\.[^.]+)$/, '_over$1');
Images have a src attribute, which you can access through the DOM with theelement’s src property. In the code snippet above, we apply a regular expressionsubstitution to that string.8 Changing the value of an <img> tag’s src attributecauses it to reload itself with the new image; thus, making this substitution (re-placing something.gif with something_over.gif) causes the original image tochange to the rollover image. The mouseout function does the exact opposite: itchanges the reference to something_over.gif in the image’s src attribute tosomething.gif, causing the original image to reappear.
Something for Nothing (Almost)
If you look at the code for this modular rollover, you’ll see that it’s divided intoparts. The setupRollovers function does nothing but install listeners. ThefindTarget function does nothing but find the link tag for a given event. Themouseover and mouseout functions do little other than the actual image swappingwork. The tasks are neatly divided.
8Although the full details of regular expressions are beyond the scope of this book, we’ll look at thebasics in Chapter 6. A more detailed resource is Kevin Yank’s article on sitepoint.com, Regular Expres-sions in JavaScript [http://www.sitepoint.com/article/expressions-javascript].
Click here to order the printed 318-page book now (we deliver worldwide)!40
Chapter 2: The Document Object Model

That means that this code is good for other applications. We can change themouseover and mouseout functions to do something else—for example, to makepopup help content appear—without needing to start from scratch to get itworking. We get to reuse (or at least rip off with minimal change) the otherfunctions in the script. This is not only convenient; it’s also neat and clean. We’reon the way to a better kind of scripting!
SummaryIn the introduction, we referred to the DOM as a critical part of DHTML. Ex-ploring the DOM—being able to find, change, add, and remove elements fromyour document—is a powerful technique all by itself, and is a fundamental aspectof modern DHTML. Once you’ve mastered the techniques described in thischapter, everything else will fall into place. Through the rest of the book, we’llbe describing techniques and tricks with which you can do wondrous things onyour sites, and in your Web applications, using DHTML. They all build uponthis fundamental approach of manipulating the Document Object Model.
41Click here to order the printed 318-page book now (we deliver worldwide)!
Summary

42
Handling DOM Events3When I can’t handle events, I let them handle themselves.—Henry Ford
An event is something that happens, be it in real life, or in DHTML programming.But to those working with DHTML, events have a very specific meaning. Anevent is generated, or fired, when something happens to an element: a mouseclicks on a button, for example, or a change is made to a form. DHTML program-ming is all about event handling; your code will run in response to the firing ofthis or that event.
Learning which events are available, how to hook your code up to them, and howto make best use of them is a critical part of building dynamic Web applications.1
That’s what we cover in this chapter, along with a couple of real-world examples.
About Elements and EventsWe’re using a modern approach to DHTML, so all our DHTML code will be setto run in response to the firing of an event. If you’ve done any JavaScript Webprogramming before, you may already be using this technique without knowingit. Let’s look at the procedure by which code has traditionally been hooked up
1It does seem that there are quite a few “critical” bits, I know!
to events, learn how to do it under the DOM (and why the DOM method isbetter), and find out exactly what these techniques make possible.
Common EventsEvery page element fires a given selection of events. Some events are commonto all elements; others are more specific. For example, all visible elements willfire a mouseover event when the mouse is moved over them. A change event,however, will only be fired by elements whose contents can be changed: textboxes, text areas, and drop-down lists.
You might have noticed above that I used mouseover, rather than onmouseover,for the event name. Even though the HTML attribute for handling this event isonmouseover, the modern way to describe the event itself is simply mouseover.This allows us to talk about the event (mouseover) and the event handler(onmouseover) separately. The event handler is the location at which an eventhandler is placed. In the bad old browser days, these concepts were all mixed up,but now we can safely think of them as separate entities.
The documents that describe the events fired by a given element are the W3CDOM specifications and HTML recommendations, which were mentioned inthe last chapter, as well as the W3C DOM 2 Events specification[1]. There’s alsosome extra information on key events in the DOM 3 Events specification[2].
A summary of the events that you’re likely to find useful, and that have cross-browser support, is given in Table 3.1. Note that this isn’t an exhaustive survey:it’s a listing of events that you’re likely to use often, rather than everything underthe sun.
[1] http://www.w3.org/TR/DOM-Level-2-Events/Overview.html[2] http://www.w3.org/TR/2003/NOTE-DOM-Level-3-Events-20031107/events.html
Click here to order the printed 318-page book now (we deliver worldwide)!44
Chapter 3: Handling DOM Events
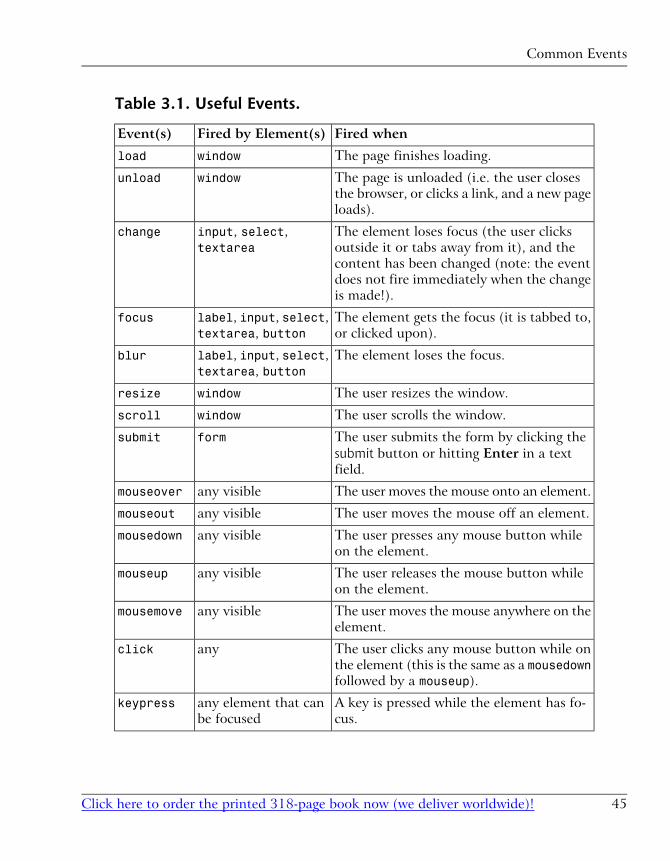
Table 3.1. Useful Events.
Fired whenFired by Element(s)Event(s)
The page finishes loading.windowload
The page is unloaded (i.e. the user closesthe browser, or clicks a link, and a new pageloads).
windowunload
The element loses focus (the user clicksoutside it or tabs away from it), and thecontent has been changed (note: the eventdoes not fire immediately when the changeis made!).
input, select,textarea
change
The element gets the focus (it is tabbed to,or clicked upon).
label, input, select,textarea, button
focus
The element loses the focus.label, input, select,textarea, button
blur
The user resizes the window.windowresize
The user scrolls the window.windowscroll
The user submits the form by clicking thesubmit button or hitting Enter in a textfield.
formsubmit
The user moves the mouse onto an element.any visiblemouseover
The user moves the mouse off an element.any visiblemouseout
The user presses any mouse button whileon the element.
any visiblemousedown
The user releases the mouse button whileon the element.
any visiblemouseup
The user moves the mouse anywhere on theelement.
any visiblemousemove
The user clicks any mouse button while onthe element (this is the same as a mousedownfollowed by a mouseup).
anyclick
A key is pressed while the element has fo-cus.
any element that canbe focused
keypress
45Click here to order the printed 318-page book now (we deliver worldwide)!
Common Events
Hooking Code to EventsSo, now you know some common events, and when they fire. But how do youmake your code run in response to those events?
Hooking up the Old Way
If you’ve done any JavaScript coding before, you’ll probably have written some-thing like this:
<a href="somewhere.html" onclick="myJavaScriptFunction(); return false;" >click me!</a>
That onclick attribute connects some JavaScript code to that link’s click event.When the link is clicked, it will fire a click event, and that code will run. Noproblem! Notice, though, that the code never actually mentions “click,” whichis the actual name of the event.
What if we wanted to detect a keypress? Here’s the equivalent script:
function aKeyWasPressed() { // put event handler code here ...}
And here’s the matching snippet of HTML:
<textarea id="myta" onkeypress="aKeyWasPressed()"></textarea>
In this case, how does our aKeyWasPressed function know which key was pressed?Well, it doesn’t. That’s a major limitation of the old-fashioned approach. But wecan improve on that!
Hooking up the DOM Way
The DOM specifications enlarge the idea of event handlers by providing eventtargets and event listeners. An event target is the thing at which an event isaimed—an element, essentially. An event listener is the thing that grabs the eventwhen it appears, and responds to it. Where do events come from in the firstplace? They come from the user. The browser software captures the user actionand sends the event to the right event target.
Click here to order the printed 318-page book now (we deliver worldwide)!46
Chapter 3: Handling DOM Events
A given event source can be relevant to more than one event listener. Using theold-fashioned method above, only one piece of code could be run in response toany event. For example, an element could have only one onclick attribute.2
Using the modern method, you can run as many pieces of code as you want uponthe firing of an event or events. Listeners get to share events, and events get toshare listeners. To facilitate this, we must move our “hookup” code from theHTML to a separate script section: as noted above, no element can have morethan one onclick attribute.
Event handling works in different ways, depending on the browser. We’ll examinethe W3C-approved way first, before we look at event handling in Internet Ex-plorer. Here’s the W3C approach.
File: keycodedetect.html (excerpt)
function aKeyWasPressed(e) { // put event listener code here...}
var textarea = document.getElementById('myta');textarea.addEventListener('keyup', aKeyWasPressed, false);
And here’s the matching bit of HTML:
File: keycodedetect.html (excerpt)
<textarea id="myta"></textarea>
HTML Before Script… for Now
If you’re working through this example in your HTML editor of choice, besure to place the JavaScript code after the HTML in this and the next fewexamples in this chapter. The textarea must exist before the JavaScriptcode can assign an event listener to it.
If you’re used to placing JavaScript at the top of your HTML files, don’tfret. We’ll discuss an elegant way around this restriction at the end of thesection.
Those few lines of code contain a number of complex concepts. Consider thissnippet:
2Actually, you could have as many as you liked, but each one would overwrite the one before it, so,effectively, you have only one. Alternatively, you could string JavaScript statements together, usingsemicolons in the attribute, but this makes the HTML code even more cluttered.
47Click here to order the printed 318-page book now (we deliver worldwide)!
Hooking up the DOM Way
File: keycodedetect.html (excerpt)
var textarea = document.getElementById('myta');
Here, we see a familiar reference to the <textarea>. Next, there’s somethingnew:
File: keycodedetect.html (excerpt)
textarea.addEventListener('keyup', aKeyWasPressed, false);
This is the crucial line that sets everything up. Each element has anaddEventListener method, which allows you to hook a function to any event3
that the element receives. The method takes three arguments: the event, thefunction that should be called, and a true-or-false value for useCapture. This lastitem relates to a rarely-used feature of DOM events called event capture. Forthe moment, we’ll just set it to false, to indicate that we don’t want to use eventcapture. If you’d like to get the full story, see the DOM Level 3 Events specifica-tion[3] (not for the faint of heart!).
The event is specified as a string, which is the (modern) name of the event (i.e.without the “on” prefix). The function is specified using only the name of thefunction; do not place brackets after it, as in aKeyWasPressed(), as this wouldcall the function. We don’t want to call it now; we want to call it later, when theevent is fired.4
Now, when a key is pressed in our <textarea>, our aKeyWasPressed functionwill be called. Note that JavaScript no longer clutters up our HTML; much likethe separation of design and content facilitated by CSS, we’ve separated our pagecontent (HTML) from our page behavior (JavaScript). This is an important benefitof the new technique: we can switch new event listeners in and out without alter-ing the HTML in our page. It’s the modern way!
We still haven’t addressed the question we posed earlier, though: how does theaKeyWasPressed function know which key was pressed?
3We’ve used the keyup event here, rather than the more commonly expected keypress, because,at the time of writing, Safari on Macintosh does not support the assigning of keypress events usingaddEventListener. Perhaps more importantly, the DOM3 recommendation does not mentiona keypress event.[3] http://www.w3.org/TR/DOM-Level-3-Events/events.html#Events-flow4If you have worked in other languages, you may recognize that this means that functions are first-class objects in JavaScript; we can pass around references to a function using its name, but withoutcalling it. This procedure doesn’t work in all languages, but it’s a very useful feature of JavaScript.
Click here to order the printed 318-page book now (we deliver worldwide)!48
Chapter 3: Handling DOM Events

Getting Event Information
A subtle change that we made in the above code was to give the aKeyWasPressedfunction an argument, e.
File: keycodedetect.html (excerpt)
function aKeyWasPressed(e) { ...
When a function is called as an event listener, it is passed, in the case of a W3Cevents-compliant browser, to an event object, which holds details of the event.This object has a number of properties containing useful information, such astarget, and a reference to the element that fired the event. The precise propertiesthat are available will depend on the type of event in question, but the mostuseful properties are listed in Table 3.2.
Table 3.2. Useful Properties.
MeaningEvent objectproperty
The element that fired the event.target
The event that was fired (e.g. keyup).type
The mouse button that was pressed (if this is a mouse event): 0for the left button, 1 for middle, 2 for right.
button
The character code of the key that was pressed5keyCode
Whether the Shift key was pressed (true or false).shiftKey
5Don’t use charCode here, even though some Websites tell you to. keyCode has good cross-browser support, and charCode does not. Key codes in the DOM are a standards mess! There arethree ways to get the code: keyCode (IE), charCode (Mozilla/Netscape) and data (the officialDOM 3 Events way). Fortunately, all major browsers support the nonstandard keyCode. So alwaysuse this, at least until the data property is widespread (in about 2010!).
Code that identifies which key was pressed would look like this:
File: keycodedetect.html (excerpt)
function aKeyWasPressed(e) { var key = e.keyCode; alert('You pressed the key: ' + String.fromCharCode(key));}
49Click here to order the printed 318-page book now (we deliver worldwide)!
Getting Event Information
var textarea = document.getElementById('myta');textarea.addEventListener('keyup', aKeyWasPressed, false);
When a key is pressed, our function will pop up a dialog box to tell us so.6
Re-using Listeners Across Targets
The target attribute might not seem very useful; after all, we know that it will bea reference to the <textarea>. But we can hook up the same function as an eventlistener on more than one element. We can, for example, attach one single func-tion as an event listener for click events to every link in our page. When any linkis clicked, our function will be called; we can then tell which link was clicked byexamining the function’s e.target. We’ll come back to this in later examples inthis chapter.
For now, all we need to know is that we don’t have to write a separate eventlistener for every single tag in which we’re interested.
What Happens After an Event Fires?
Events have two further important properties: bubbling and default actions.Think about an HTML document. It’s hierarchical: elements are contained byother elements. Consider this HTML snippet:
<div> <p> <a href="">a link</a> </p></div>
Clicking on the link will cause that link to fire a click event. But the link is con-tained within the paragraph, and the paragraph is contained within the <div>.So clicking the link will also cause both the paragraph and the <div> to see theclick event. This is called event bubbling; an event “bubbles” up through theDOM tree, starting with the target element, until it reaches the top. Not all eventsbubble; for example, focus and blur events do not. Bubbling can often be ig-nored,7 but there are times when you’ll want to prevent a specific event frombubbling.
6Note that we use the String.fromCharCode method to convert the keyboard code providedby keyCode to a human-readable string.7There are a lot of complex rules about event bubbling and event capturing, the phase of eventpropagation that occurs before event bubbling. In practice, we don’t need to know much beyond howto stop i t happening, but a complete write-up is avai lable at
Click here to order the printed 318-page book now (we deliver worldwide)!50
Chapter 3: Handling DOM Events
Once you’ve got an event, the DOM Events specification says that you can stopany further bubbling like this:
function aKeyWasPressed(e) { var key = e.keyCode; e.stopPropagation(); ...}
Once the call to stopPropagation is in place, the event will occur on the <a> tagonly: any listeners on the <p> or <div> tags will miss out. If there are no listenerson those other tags, there’s no need to stop bubbling. In this case, the event si-lently passes through the parent tags, having no extra effect.
Some events have a default action. The most obvious example is clicking a link:the default action for this event is to navigate the current window or frame tothe link’s destination. If we wanted to handle clicks on a link entirely within ourJavaScript code, we might want to prevent that default action from being taken.
In our examples so far, we have handled the keyup event, which is fired when akey is released. As it turns out, this event has no default action. A closely-relatedevent that does have a default action is keypress, which occurs whenever acharacter is typed using the combination of keydown and keyup. The keypressevent is nonstandard (i.e. it is not described by the W3C DOM standard), whichis why I have avoided mentioning it until now, but it is well supported by themajor browsers.
Let’s say we want to prevent keypress events from inputting text into ourtextarea. We could do this by setting up an event listener that cancelled thedefault action of that type of event. The DOM standard specifies a method,named preventDefault, that achieves this, but again, Internet Explorer imple-ments its own proprietary technique. Here’s the DOM approach:
function aKeyWasPressed(e) { e.preventDefault();}var textarea = document.getElementById('myta');textarea.addEventListener('keypress', aKeyWasPressed, false);
http://www.quirksmode.org/js/events_order.html for those who would like to know more of the theoryunderlying this aspect of the DOM.
51Click here to order the printed 318-page book now (we deliver worldwide)!
What Happens After an Event Fires?

Assigning Event Listeners on Page Load
In all of the examples we’ve seen so far in this chapter, the JavaScript code hashad to follow the HTML code to which it assigns event listeners. If the JavaScriptcode were to come first, it would be unable to find the HTML elements in ques-tion, as they would not yet exist.
A solution to this problem is to assign event listeners for specific document ele-ments in a listener assigned to the window’s load event. As a result, eventlisteners will only be assigned once the document has finished loading, and allelements are available.
Here’s the complete listing for our keystroke detection example, restructured inthis way:
File: keycodedetect.html
<!DOCTYPE html PUBLIC "-//W3C//DTD HTML 4.01//EN" "http://www.w3.org/TR/html4/strict.dtd"><html> <head> <title>Detect keystrokes</title> <script type="text/javascript"> function aKeyWasPressed(e) { var key = e.keyCode; alert('You pressed the key: ' + String.fromCharCode(key)); }
function addListeners(e) { var textarea = document.getElementById('myta'); textarea.addEventListener('keyup', aKeyWasPressed, false); }
window.addEventListener('load', addListeners, false); </script> </head> <body> <form> <textarea id="myta"></textarea> </form> </body></html>
Click here to order the printed 318-page book now (we deliver worldwide)!52
Chapter 3: Handling DOM Events

Our main event listener, aKeyWasPressed, has not been changed. What haschanged is the way in which this listener is assigned. The code that assigns it hasbeen placed inside a new function, addListeners:
File: keycodedetect.html (excerpt)
function addListeners(e) { var textarea = document.getElementById('myta'); textarea.addEventListener('keyup', aKeyWasPressed, false); }
This function is itself an event listener, which we assign to the window object’sload event:
File: keycodedetect.html (excerpt)
window.addEventListener('load', addListeners, false);
This event is fired once the document has finished loading, to signal that allHTML elements are now available. The addListeners function takes this oppor-tunity to assign listeners to elements as required.
We’ll continue to use this structure as we move forward through this chapter,and the rest of the book.
Making Events Work Cross-BrowserNaturally, making events work cross-browser is not as easy as just following theDOM standard. Internet Explorer doesn’t implement the DOM Events modelvery well. Instead, it offers a proprietary and different way to hook up eventlisteners and gain access to event data.
Adding Event Listeners Portably
Instead of using an addEventListener method on an element, IE has anattachEvent method, and instead of passing an event object to each eventlistener, it has a global event object in window.event. This is inconvenient butnot catastrophic; it just means that you have to take different actions for differentbrowsers. In practice, what this means is that you have a small number ofstandard functions and techniques that you use to carry out event handling ac-tions. One of these is the addEvent function, created by Scott Andrew:
53Click here to order the printed 318-page book now (we deliver worldwide)!
Making Events Work Cross-Browser
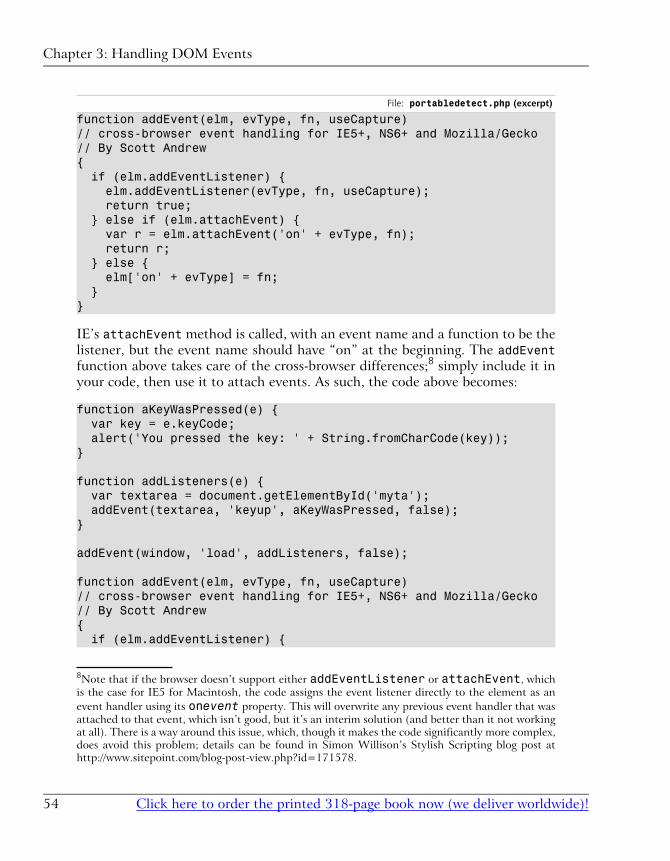
File: portabledetect.php (excerpt)
function addEvent(elm, evType, fn, useCapture) // cross-browser event handling for IE5+, NS6+ and Mozilla/Gecko// By Scott Andrew{ if (elm.addEventListener) { elm.addEventListener(evType, fn, useCapture); return true; } else if (elm.attachEvent) { var r = elm.attachEvent('on' + evType, fn); return r; } else { elm['on' + evType] = fn; }}
IE’s attachEvent method is called, with an event name and a function to be thelistener, but the event name should have “on” at the beginning. The addEventfunction above takes care of the cross-browser differences;8 simply include it inyour code, then use it to attach events. As such, the code above becomes:
function aKeyWasPressed(e) { var key = e.keyCode; alert('You pressed the key: ' + String.fromCharCode(key));}
function addListeners(e) { var textarea = document.getElementById('myta'); addEvent(textarea, 'keyup', aKeyWasPressed, false);}
addEvent(window, 'load', addListeners, false);
function addEvent(elm, evType, fn, useCapture)// cross-browser event handling for IE5+, NS6+ and Mozilla/Gecko// By Scott Andrew{ if (elm.addEventListener) {
8Note that if the browser doesn’t support either addEventListener or attachEvent, whichis the case for IE5 for Macintosh, the code assigns the event listener directly to the element as anevent handler using its onevent property. This will overwrite any previous event handler that wasattached to that event, which isn’t good, but it’s an interim solution (and better than it not workingat all). There is a way around this issue, which, though it makes the code significantly more complex,does avoid this problem; details can be found in Simon Willison’s Stylish Scripting blog post athttp://www.sitepoint.com/blog-post-view.php?id=171578.
Click here to order the printed 318-page book now (we deliver worldwide)!54
Chapter 3: Handling DOM Events

elm.addEventListener(evType, fn, useCapture); return true; } else if (elm.attachEvent) { var r = elm.attachEvent('on' + evType, fn); return r; } else { elm['on' + evType] = fn; }}
We’re now using the addEvent function to make aKeyWasPressed listen for keyupevents on the textarea.
Inspecting Event Objects Portably
This is not the only change that’s required; we also have to take into account thefact that IE doesn’t pass an event object to our event listener, but instead storesthe event object in the window object. Just to make our lives as DHTML developersa little more complex, it also uses slightly different properties on the event objectthat it creates. These are shown in Table 3.3.
Table 3.3. W3C Event Object Properties.
IE window.event PropertyW3C Event Object Property
srcElementtarget
typetype
button10button9
keyCodedata11
shiftKeyshiftKey
90 = left button; 2 = right button; 1 = middle button.101 = left button; 2 = right button; 4 = middle button. For combinations, add numbers: 7 meansall three buttons pressed.11As previously noted, the standard data property is not well supported.
Taking all this into consideration, our portable code becomes:
File: portabledetect.html (excerpt)
function aKeyWasPressed(e) { if (window.event) { var key = window.event.keyCode;
55Click here to order the printed 318-page book now (we deliver worldwide)!
Inspecting Event Objects Portably

} else { var key = e.keyCode; } alert('You pressed the key: ' + String.fromCharCode(key));}
function addListeners(e) { var textarea = document.getElementById('myta'); addEvent(textarea, 'keyup', aKeyWasPressed, false);}
addEvent(window, 'load', addListeners, false);
function addEvent(elm, evType, fn, useCapture)// cross-browser event handling for IE5+, NS6+ and Mozilla/Gecko// By Scott Andrew{ if (elm.addEventListener) { elm.addEventListener(evType, fn, useCapture); return true; } else if (elm.attachEvent) { var r = elm.attachEvent('on' + evType, fn); return r; } else { elm['on' + evType] = fn; }}
This updated version of aKeyWasPressed first checks whether a window.eventobject exists:
File: portabledetect.html (excerpt)
if (window.event) {
If it does, then it and its corresponding window.event.keyCode12 property, areused to obtain the code of the pressed key. If not, the event object passed to thefunction (as e), which also has a keyCode property, is used.
Stopping Propagation and Default Actions Portably
Halting bubbling can be done in two ways, as is the case with much event hand-ling: via the DOM approach and the Internet Explorer approach. In DOM-com-
12This technique for checking that something exists is called feature sniffing, and will be explainedin more detail in the next chapter.
Click here to order the printed 318-page book now (we deliver worldwide)!56
Chapter 3: Handling DOM Events
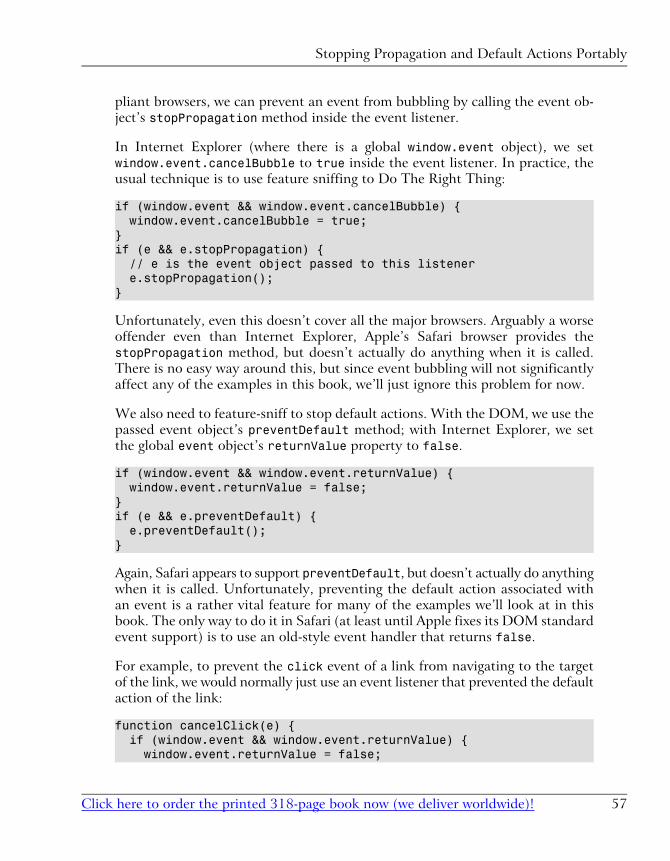
pliant browsers, we can prevent an event from bubbling by calling the event ob-ject’s stopPropagation method inside the event listener.
In Internet Explorer (where there is a global window.event object), we setwindow.event.cancelBubble to true inside the event listener. In practice, theusual technique is to use feature sniffing to Do The Right Thing:
if (window.event && window.event.cancelBubble) { window.event.cancelBubble = true;}if (e && e.stopPropagation) { // e is the event object passed to this listener e.stopPropagation();}
Unfortunately, even this doesn’t cover all the major browsers. Arguably a worseoffender even than Internet Explorer, Apple’s Safari browser provides thestopPropagation method, but doesn’t actually do anything when it is called.There is no easy way around this, but since event bubbling will not significantlyaffect any of the examples in this book, we’ll just ignore this problem for now.
We also need to feature-sniff to stop default actions. With the DOM, we use thepassed event object’s preventDefault method; with Internet Explorer, we setthe global event object’s returnValue property to false.
if (window.event && window.event.returnValue) { window.event.returnValue = false;}if (e && e.preventDefault) { e.preventDefault();}
Again, Safari appears to support preventDefault, but doesn’t actually do anythingwhen it is called. Unfortunately, preventing the default action associated withan event is a rather vital feature for many of the examples we’ll look at in thisbook. The only way to do it in Safari (at least until Apple fixes its DOM standardevent support) is to use an old-style event handler that returns false.
For example, to prevent the click event of a link from navigating to the targetof the link, we would normally just use an event listener that prevented the defaultaction of the link:
function cancelClick(e) { if (window.event && window.event.returnValue) { window.event.returnValue = false;
57Click here to order the printed 318-page book now (we deliver worldwide)!
Stopping Propagation and Default Actions Portably
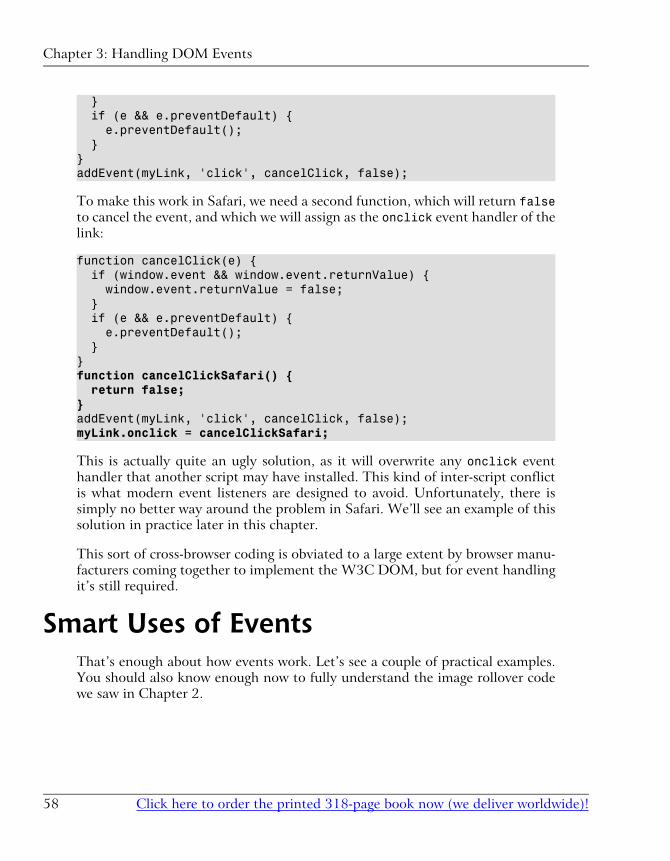
} if (e && e.preventDefault) { e.preventDefault(); }}addEvent(myLink, 'click', cancelClick, false);
To make this work in Safari, we need a second function, which will return falseto cancel the event, and which we will assign as the onclick event handler of thelink:
function cancelClick(e) { if (window.event && window.event.returnValue) { window.event.returnValue = false; } if (e && e.preventDefault) { e.preventDefault(); }}function cancelClickSafari() { return false;}addEvent(myLink, 'click', cancelClick, false);myLink.onclick = cancelClickSafari;
This is actually quite an ugly solution, as it will overwrite any onclick eventhandler that another script may have installed. This kind of inter-script conflictis what modern event listeners are designed to avoid. Unfortunately, there issimply no better way around the problem in Safari. We’ll see an example of thissolution in practice later in this chapter.
This sort of cross-browser coding is obviated to a large extent by browser manu-facturers coming together to implement the W3C DOM, but for event handlingit’s still required.
Smart Uses of EventsThat’s enough about how events work. Let’s see a couple of practical examples.You should also know enough now to fully understand the image rollover codewe saw in Chapter 2.
Click here to order the printed 318-page book now (we deliver worldwide)!58
Chapter 3: Handling DOM Events
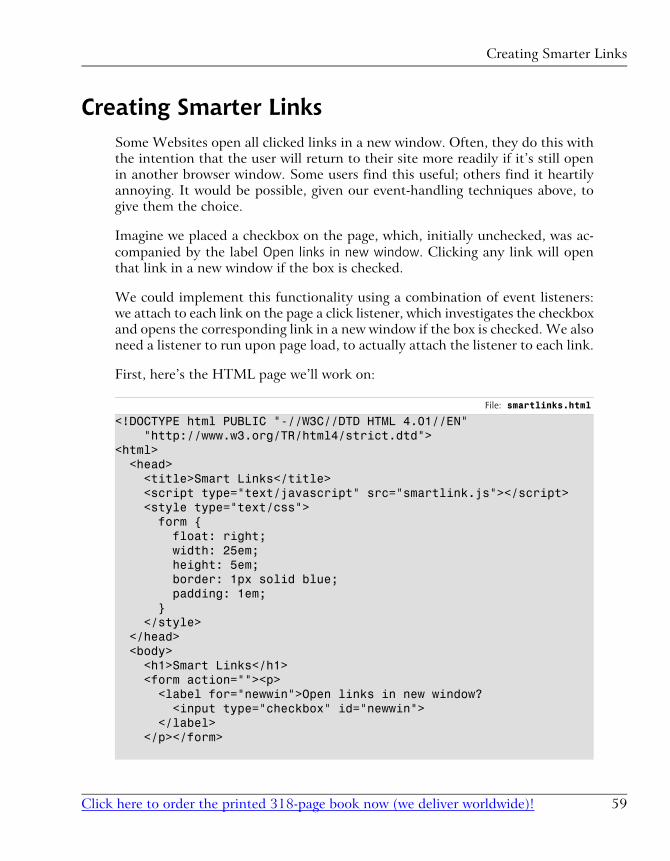
Creating Smarter LinksSome Websites open all clicked links in a new window. Often, they do this withthe intention that the user will return to their site more readily if it’s still openin another browser window. Some users find this useful; others find it heartilyannoying. It would be possible, given our event-handling techniques above, togive them the choice.
Imagine we placed a checkbox on the page, which, initially unchecked, was ac-companied by the label Open links in new window. Clicking any link will openthat link in a new window if the box is checked.
We could implement this functionality using a combination of event listeners:we attach to each link on the page a click listener, which investigates the checkboxand opens the corresponding link in a new window if the box is checked. We alsoneed a listener to run upon page load, to actually attach the listener to each link.
First, here’s the HTML page we’ll work on:
File: smartlinks.html
<!DOCTYPE html PUBLIC "-//W3C//DTD HTML 4.01//EN" "http://www.w3.org/TR/html4/strict.dtd"><html> <head> <title>Smart Links</title> <script type="text/javascript" src="smartlink.js"></script> <style type="text/css"> form { float: right; width: 25em; height: 5em; border: 1px solid blue; padding: 1em; } </style> </head> <body> <h1>Smart Links</h1> <form action=""><p> <label for="newwin">Open links in new window? <input type="checkbox" id="newwin"> </label> </p></form>
59Click here to order the printed 318-page book now (we deliver worldwide)!
Creating Smarter Links

<p>This page contains several links, such as <a href="http://www.sitepoint.com/">SitePoint</a>, <a href="http://www.yahoo.com/">Yahoo!</a>, and <a href="http://www.google.com/">Google</a>. These links should ordinarily open in the same window when clicked, unless the checkbox is checked; this will make them open in a new window. </p> </body></html>
As you can see, this page is quite simple, and contains no JavaScript except forthe file that the <script> tag brings in. Figure 3.1 shows how the code displays:
Figure 3.1. The example “smart links” Web page.
Click here to order the printed 318-page book now (we deliver worldwide)!60
Chapter 3: Handling DOM Events
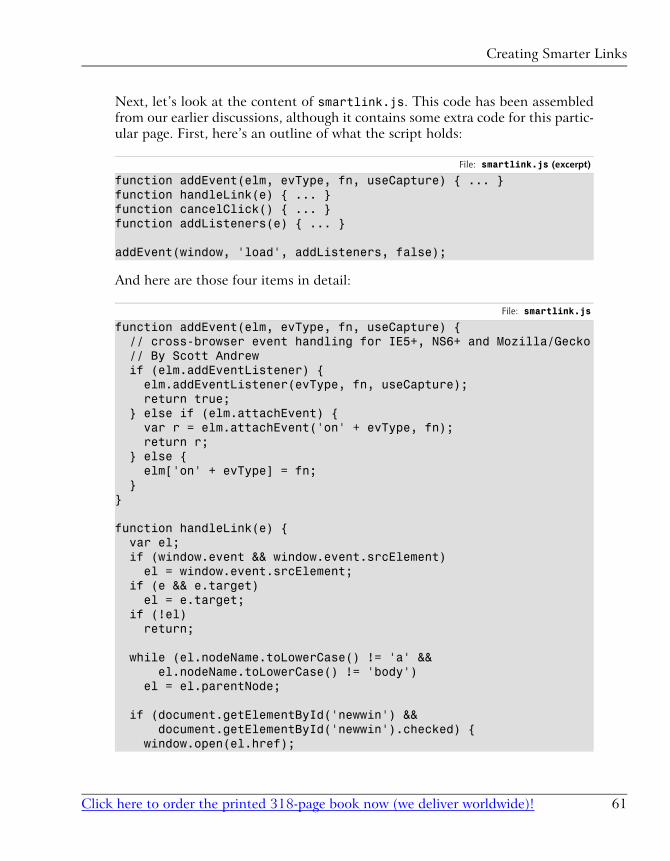
Next, let’s look at the content of smartlink.js. This code has been assembledfrom our earlier discussions, although it contains some extra code for this partic-ular page. First, here’s an outline of what the script holds:
File: smartlink.js (excerpt)
function addEvent(elm, evType, fn, useCapture) { ... }function handleLink(e) { ... }function cancelClick() { ... }function addListeners(e) { ... }
addEvent(window, 'load', addListeners, false);
And here are those four items in detail:
File: smartlink.js
function addEvent(elm, evType, fn, useCapture) { // cross-browser event handling for IE5+, NS6+ and Mozilla/Gecko // By Scott Andrew if (elm.addEventListener) { elm.addEventListener(evType, fn, useCapture); return true; } else if (elm.attachEvent) { var r = elm.attachEvent('on' + evType, fn); return r; } else { elm['on' + evType] = fn; }}
function handleLink(e) { var el; if (window.event && window.event.srcElement) el = window.event.srcElement; if (e && e.target) el = e.target; if (!el) return;
while (el.nodeName.toLowerCase() != 'a' && el.nodeName.toLowerCase() != 'body') el = el.parentNode;
if (document.getElementById('newwin') && document.getElementById('newwin').checked) { window.open(el.href);
61Click here to order the printed 318-page book now (we deliver worldwide)!
Creating Smarter Links

if (window.event) { window.event.cancelBubble = true; window.event.returnValue = false; } if (e && e.stopPropagation && e.preventDefault) { e.stopPropagation(); e.preventDefault(); } }}
function cancelClick() { if (document.getElementById('newwin') && document.getElementById('newwin').checked) { return false; } return true;}
function addListeners() { if (!document.getElementById) return;
var all_links = document.getElementsByTagName('a'); for (var i = 0; i < all_links.length; i++) { addEvent(all_links[i], 'click', handleLink, false); all_links[i].onclick = cancelClick; }}
addEvent(window, 'load', addListeners, false);
Our code includes the now-familiar addEvent function to carry out cross-browserevent hookups. We use it to call the addListeners function once the page hasloaded.
The addListeners function uses another familiar technique; it iterates throughall the links on the page and does something to them. In this case, it attaches thehandleLink function as a click event listener for each link, so that when a linkis clicked, that function will be called. It also attaches the cancelClick functionas the old-style click event listener for each link—this will permit us to cancelthe default action of each link in Safari.
When we click a link, that link fires a click event, and handleLink is run. Thefunction does the following:
Click here to order the printed 318-page book now (we deliver worldwide)!62
Chapter 3: Handling DOM Events
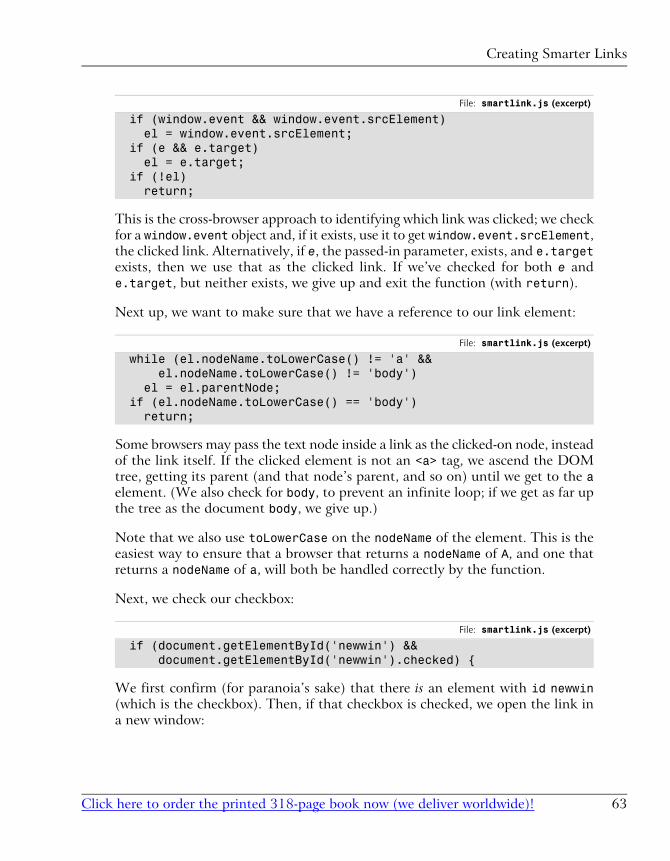
File: smartlink.js (excerpt)
if (window.event && window.event.srcElement) el = window.event.srcElement; if (e && e.target) el = e.target; if (!el) return;
This is the cross-browser approach to identifying which link was clicked; we checkfor a window.event object and, if it exists, use it to get window.event.srcElement,the clicked link. Alternatively, if e, the passed-in parameter, exists, and e.targetexists, then we use that as the clicked link. If we’ve checked for both e ande.target, but neither exists, we give up and exit the function (with return).
Next up, we want to make sure that we have a reference to our link element:
File: smartlink.js (excerpt)
while (el.nodeName.toLowerCase() != 'a' && el.nodeName.toLowerCase() != 'body') el = el.parentNode; if (el.nodeName.toLowerCase() == 'body') return;
Some browsers may pass the text node inside a link as the clicked-on node, insteadof the link itself. If the clicked element is not an <a> tag, we ascend the DOMtree, getting its parent (and that node’s parent, and so on) until we get to the aelement. (We also check for body, to prevent an infinite loop; if we get as far upthe tree as the document body, we give up.)
Note that we also use toLowerCase on the nodeName of the element. This is theeasiest way to ensure that a browser that returns a nodeName of A, and one thatreturns a nodeName of a, will both be handled correctly by the function.
Next, we check our checkbox:
File: smartlink.js (excerpt)
if (document.getElementById('newwin') && document.getElementById('newwin').checked) {
We first confirm (for paranoia’s sake) that there is an element with id newwin(which is the checkbox). Then, if that checkbox is checked, we open the link ina new window:
63Click here to order the printed 318-page book now (we deliver worldwide)!
Creating Smarter Links
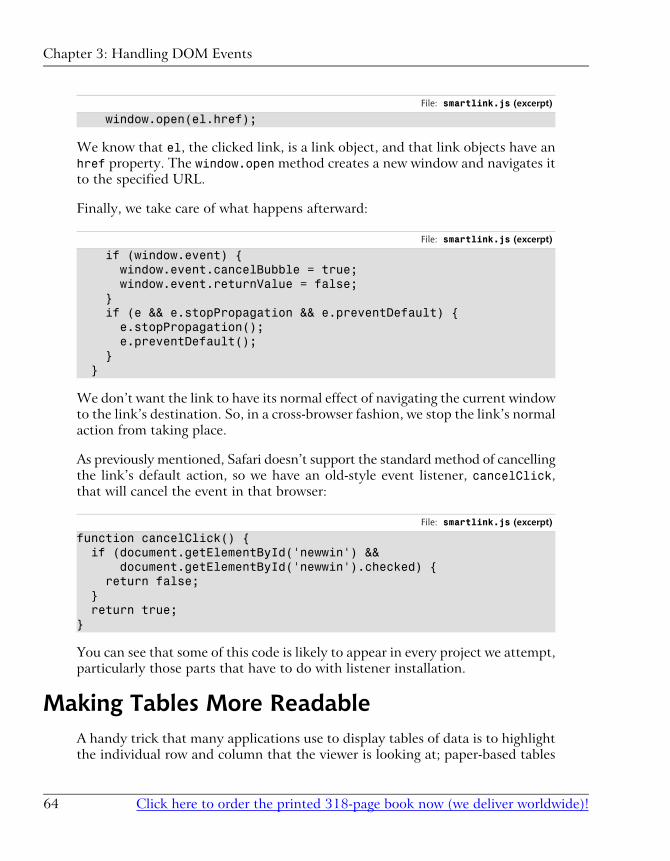
File: smartlink.js (excerpt)
window.open(el.href);
We know that el, the clicked link, is a link object, and that link objects have anhref property. The window.open method creates a new window and navigates itto the specified URL.
Finally, we take care of what happens afterward:
File: smartlink.js (excerpt)
if (window.event) { window.event.cancelBubble = true; window.event.returnValue = false; } if (e && e.stopPropagation && e.preventDefault) { e.stopPropagation(); e.preventDefault(); } }
We don’t want the link to have its normal effect of navigating the current windowto the link’s destination. So, in a cross-browser fashion, we stop the link’s normalaction from taking place.
As previously mentioned, Safari doesn’t support the standard method of cancellingthe link’s default action, so we have an old-style event listener, cancelClick,that will cancel the event in that browser:
File: smartlink.js (excerpt)
function cancelClick() { if (document.getElementById('newwin') && document.getElementById('newwin').checked) { return false; } return true;}
You can see that some of this code is likely to appear in every project we attempt,particularly those parts that have to do with listener installation.
Making Tables More ReadableA handy trick that many applications use to display tables of data is to highlightthe individual row and column that the viewer is looking at; paper-based tables
Click here to order the printed 318-page book now (we deliver worldwide)!64
Chapter 3: Handling DOM Events
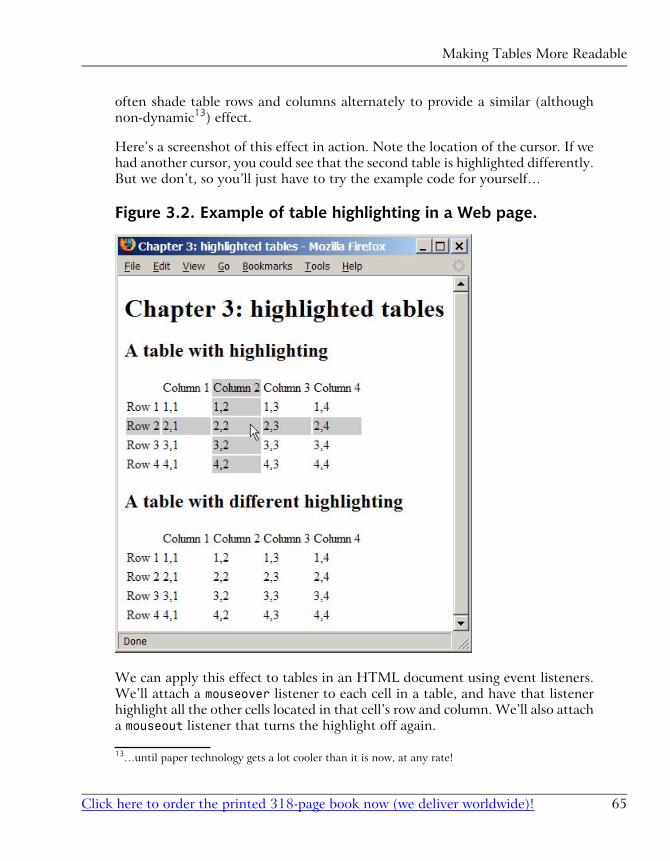
often shade table rows and columns alternately to provide a similar (althoughnon-dynamic13) effect.
Here’s a screenshot of this effect in action. Note the location of the cursor. If wehad another cursor, you could see that the second table is highlighted differently.But we don’t, so you’ll just have to try the example code for yourself…
Figure 3.2. Example of table highlighting in a Web page.
We can apply this effect to tables in an HTML document using event listeners.We’ll attach a mouseover listener to each cell in a table, and have that listenerhighlight all the other cells located in that cell’s row and column. We’ll also attacha mouseout listener that turns the highlight off again.
13…until paper technology gets a lot cooler than it is now, at any rate!
65Click here to order the printed 318-page book now (we deliver worldwide)!
Making Tables More Readable
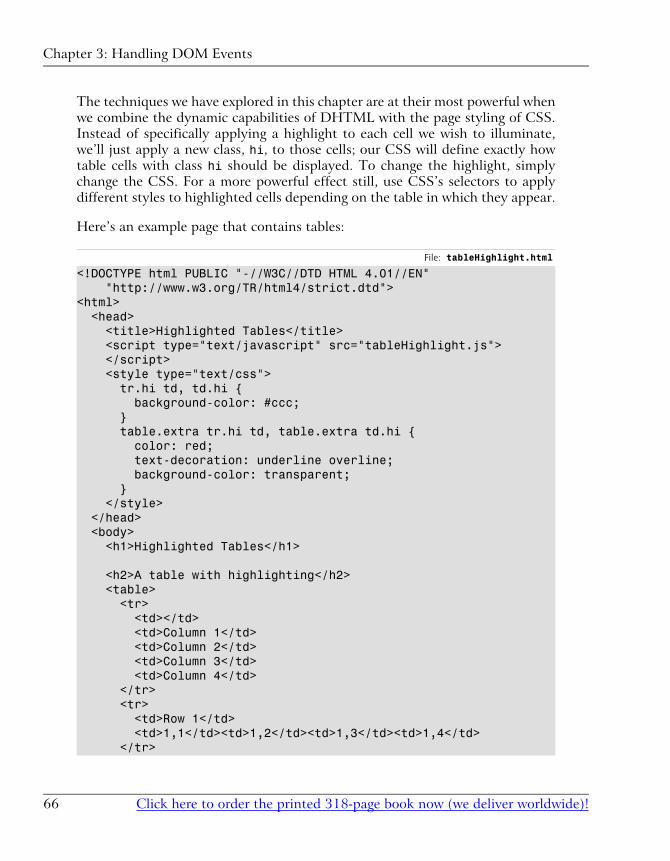
The techniques we have explored in this chapter are at their most powerful whenwe combine the dynamic capabilities of DHTML with the page styling of CSS.Instead of specifically applying a highlight to each cell we wish to illuminate,we’ll just apply a new class, hi, to those cells; our CSS will define exactly howtable cells with class hi should be displayed. To change the highlight, simplychange the CSS. For a more powerful effect still, use CSS’s selectors to applydifferent styles to highlighted cells depending on the table in which they appear.
Here’s an example page that contains tables:
File: tableHighlight.html
<!DOCTYPE html PUBLIC "-//W3C//DTD HTML 4.01//EN" "http://www.w3.org/TR/html4/strict.dtd"><html> <head> <title>Highlighted Tables</title> <script type="text/javascript" src="tableHighlight.js"> </script> <style type="text/css"> tr.hi td, td.hi { background-color: #ccc; } table.extra tr.hi td, table.extra td.hi { color: red; text-decoration: underline overline; background-color: transparent; } </style> </head> <body> <h1>Highlighted Tables</h1>
<h2>A table with highlighting</h2> <table> <tr> <td></td> <td>Column 1</td> <td>Column 2</td> <td>Column 3</td> <td>Column 4</td> </tr> <tr> <td>Row 1</td> <td>1,1</td><td>1,2</td><td>1,3</td><td>1,4</td> </tr>
Click here to order the printed 318-page book now (we deliver worldwide)!66
Chapter 3: Handling DOM Events
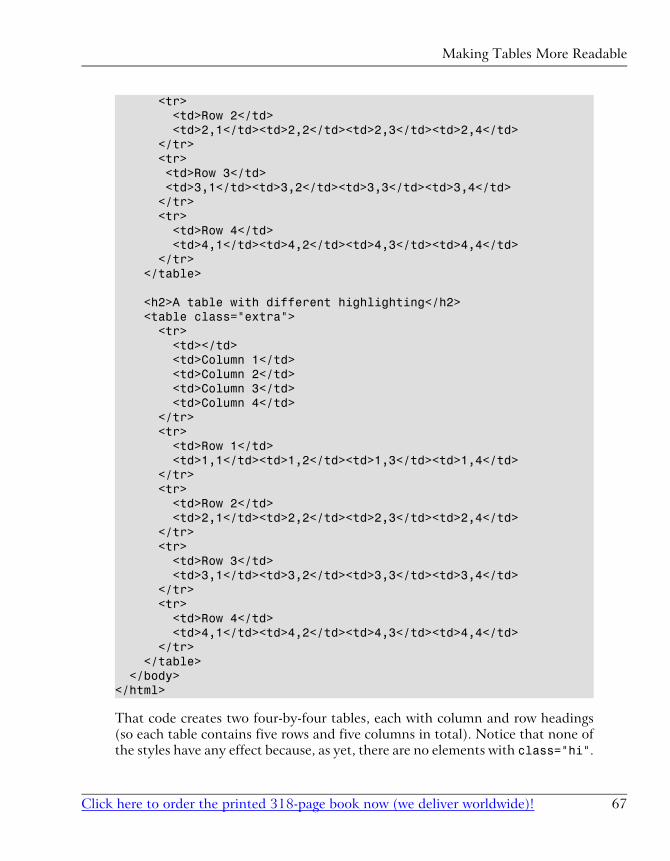
<tr> <td>Row 2</td> <td>2,1</td><td>2,2</td><td>2,3</td><td>2,4</td> </tr> <tr> <td>Row 3</td> <td>3,1</td><td>3,2</td><td>3,3</td><td>3,4</td> </tr> <tr> <td>Row 4</td> <td>4,1</td><td>4,2</td><td>4,3</td><td>4,4</td> </tr> </table>
<h2>A table with different highlighting</h2> <table class="extra"> <tr> <td></td> <td>Column 1</td> <td>Column 2</td> <td>Column 3</td> <td>Column 4</td> </tr> <tr> <td>Row 1</td> <td>1,1</td><td>1,2</td><td>1,3</td><td>1,4</td> </tr> <tr> <td>Row 2</td> <td>2,1</td><td>2,2</td><td>2,3</td><td>2,4</td> </tr> <tr> <td>Row 3</td> <td>3,1</td><td>3,2</td><td>3,3</td><td>3,4</td> </tr> <tr> <td>Row 4</td> <td>4,1</td><td>4,2</td><td>4,3</td><td>4,4</td> </tr> </table> </body></html>
That code creates two four-by-four tables, each with column and row headings(so each table contains five rows and five columns in total). Notice that none ofthe styles have any effect because, as yet, there are no elements with class="hi".
67Click here to order the printed 318-page book now (we deliver worldwide)!
Making Tables More Readable

Let’s look at the matching tableHighlight.js script. Its structure reflects ourearlier discussions, but it contains some additional code for this particular tech-nique. Here’s an outline of the script:
File: tableHighlight.js (excerpt)
function addEvent(elm, evType, fn, useCapture) { ... }function ascendDOM(e, target) { ... }function hi_cell(e) { ... }function lo_cell(e) { ... }function addListeners() { ... }
addEvent(window, 'load', addListeners, false);
Notice how similar the function outline is to the smart links example. Here arethe six items in all their detail.
File: tableHighlight.js
function addEvent(elm, evType, fn, useCapture)// cross-browser event handling for IE5+, NS6+ and Mozilla/Gecko // By Scott Andrew { if (elm.addEventListener) { elm.addEventListener(evType, fn, useCapture); return true; } else if (elm.attachEvent) { var r = elm.attachEvent('on' + evType, fn); return r; } else { elm['on' + evType] = fn; }}
// climb up the tree to the supplied tag.function ascendDOM(e, target) { while (e.nodeName.toLowerCase() != target && e.nodeName.toLowerCase() != 'html') e = e.parentNode;
return (e.nodeName.toLowerCase() == 'html') ? null : e;}
// turn on highlightingfunction hi_cell(e) { var el; if (window.event && window.event.srcElement)
Click here to order the printed 318-page book now (we deliver worldwide)!68
Chapter 3: Handling DOM Events

el = window.event.srcElement; if (e && e.target) el = e.target; if (!el) return;
el = ascendDOM(el, 'td'); if (el == null) return;
var parent_row = ascendDOM(el, 'tr'); if (parent_row == null) return;
var parent_table = ascendDOM(parent_row, 'table'); if (parent_table == null) return;
// row styling parent_row.className += ' hi';
// column styling var ci = -1; for (var i = 0; i < parent_row.cells.length; i++) { if (el === parent_row.cells[i]) { ci = i; } } if (ci == -1) return; // this should never happen
for (var i = 0; i < parent_table.rows.length; i++) { var cell = parent_table.rows[i].cells[ci]; cell.className += ' hi'; }}
// turn off highlightingfunction lo_cell(e) { var el; if (window.event && window.event.srcElement) el = window.event.srcElement; if (e && e.target) el = e.target; if (!el) return;
el = ascendDOM(el, 'td'); if (el == null) return;
var parent_row = ascendDOM(el, 'tr'); if (parent_row == null) return;
69Click here to order the printed 318-page book now (we deliver worldwide)!
Making Tables More Readable

var parent_table = ascendDOM(parent_row, 'table'); if (parent_table == null) return;
// row de-styling parent_row.className = parent_row.className.replace(/\b ?hi\b/, '');
// column de-styling var ci = el.cellIndex; for (var i = 0; i < parent_table.rows.length; i++) { var cell = parent_table.rows[i].cells[ci]; cell.className = cell.className.replace(/\b ?hi\b/, ''); }}
function addListeners() { if (!document.getElementsByTagName) return;
var all_cells = document.getElementsByTagName('td'); for (var i = 0; i < all_cells.length; i++) { addEvent(all_cells[i], 'mouseover', hi_cell, false); addEvent(all_cells[i], 'mouseout', lo_cell, false); }}
addEvent(window, 'load', addListeners, false);
We add our mouseover and mouseout event listeners using the standard approach.The addListeners function sets up our hi_cell and lo_cell functions asmouseover and mouseout event listeners, respectively.
To minimize duplicate code, we’ve added a handy little utility function calledascendDOM. This marches up the tree from the element supplied in the first argu-ment to find the first enclosing tag whose name matches the second argument.
Processing happens as follows. Mousing over a table cell triggers the hi_cellfunction. This finds the moused-over cell, then calculates the row and the tablein which that cell appears. The ascendDOM function is called quite often in thecode, so you can see the benefit of putting that code into a function. In hi_cell,the lines that actually do the styling work are these:
File: tableHighlight.js (excerpt)
parent_row.className += ' hi';
Click here to order the printed 318-page book now (we deliver worldwide)!70
Chapter 3: Handling DOM Events
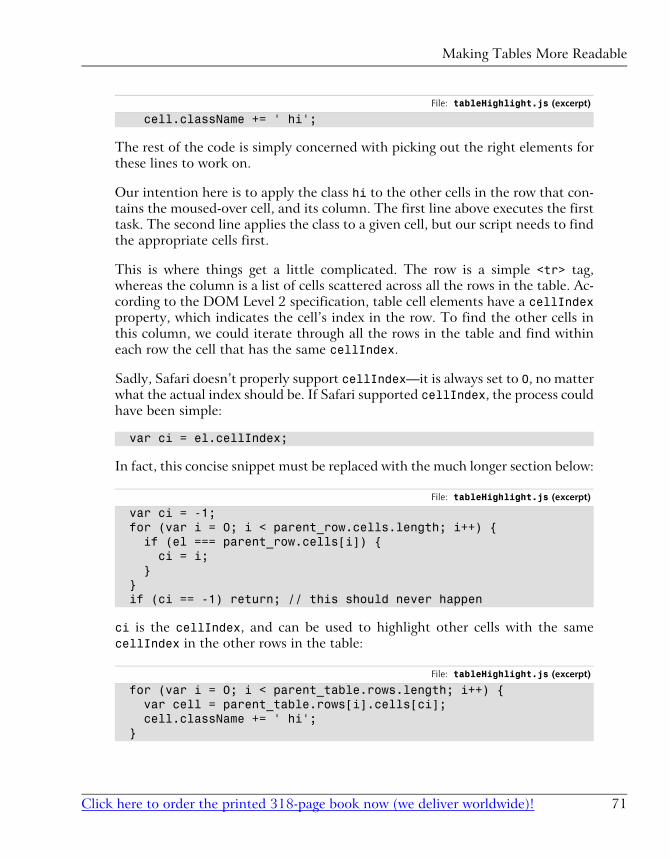
File: tableHighlight.js (excerpt)
cell.className += ' hi';
The rest of the code is simply concerned with picking out the right elements forthese lines to work on.
Our intention here is to apply the class hi to the other cells in the row that con-tains the moused-over cell, and its column. The first line above executes the firsttask. The second line applies the class to a given cell, but our script needs to findthe appropriate cells first.
This is where things get a little complicated. The row is a simple <tr> tag,whereas the column is a list of cells scattered across all the rows in the table. Ac-cording to the DOM Level 2 specification, table cell elements have a cellIndexproperty, which indicates the cell’s index in the row. To find the other cells inthis column, we could iterate through all the rows in the table and find withineach row the cell that has the same cellIndex.
Sadly, Safari doesn’t properly support cellIndex—it is always set to 0, no matterwhat the actual index should be. If Safari supported cellIndex, the process couldhave been simple:
var ci = el.cellIndex;
In fact, this concise snippet must be replaced with the much longer section below:
File: tableHighlight.js (excerpt)
var ci = -1; for (var i = 0; i < parent_row.cells.length; i++) { if (el === parent_row.cells[i]) { ci = i; } } if (ci == -1) return; // this should never happen
ci is the cellIndex, and can be used to highlight other cells with the samecellIndex in the other rows in the table:
File: tableHighlight.js (excerpt)
for (var i = 0; i < parent_table.rows.length; i++) { var cell = parent_table.rows[i].cells[ci]; cell.className += ' hi'; }
71Click here to order the printed 318-page book now (we deliver worldwide)!
Making Tables More Readable
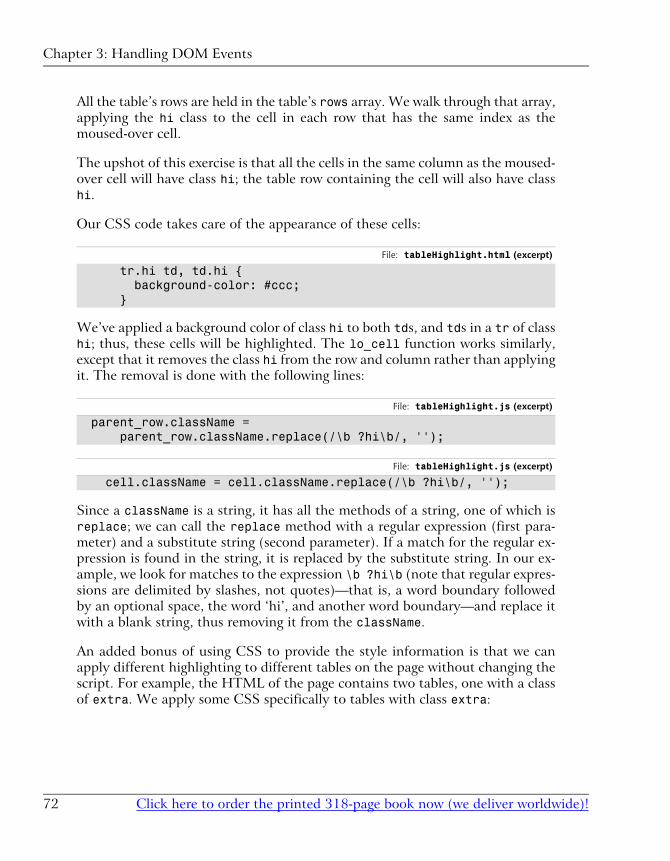
All the table’s rows are held in the table’s rows array. We walk through that array,applying the hi class to the cell in each row that has the same index as themoused-over cell.
The upshot of this exercise is that all the cells in the same column as the moused-over cell will have class hi; the table row containing the cell will also have classhi.
Our CSS code takes care of the appearance of these cells:
File: tableHighlight.html (excerpt)
tr.hi td, td.hi { background-color: #ccc; }
We’ve applied a background color of class hi to both tds, and tds in a tr of classhi; thus, these cells will be highlighted. The lo_cell function works similarly,except that it removes the class hi from the row and column rather than applyingit. The removal is done with the following lines:
File: tableHighlight.js (excerpt)
parent_row.className = parent_row.className.replace(/\b ?hi\b/, '');
File: tableHighlight.js (excerpt)
cell.className = cell.className.replace(/\b ?hi\b/, '');
Since a className is a string, it has all the methods of a string, one of which isreplace; we can call the replace method with a regular expression (first para-meter) and a substitute string (second parameter). If a match for the regular ex-pression is found in the string, it is replaced by the substitute string. In our ex-ample, we look for matches to the expression \b ?hi\b (note that regular expres-sions are delimited by slashes, not quotes)—that is, a word boundary followedby an optional space, the word ‘hi’, and another word boundary—and replace itwith a blank string, thus removing it from the className.
An added bonus of using CSS to provide the style information is that we canapply different highlighting to different tables on the page without changing thescript. For example, the HTML of the page contains two tables, one with a classof extra. We apply some CSS specifically to tables with class extra:
Click here to order the printed 318-page book now (we deliver worldwide)!72
Chapter 3: Handling DOM Events
File: tableHighlight.html (excerpt)
table.extra tr.hi td, table.extra td.hi { color: red; text-decoration: underline overline; background-color: transparent; }
As a result, the highlighted cells in that particular table will be highlighted differ-ently. CSS makes achieving this kind of effect very easy.
SummaryUnderstanding the processes by which events are fired, and by which code ishooked to those events, is vital to DHTML programming. Almost everything youdo in DHTML will involve attaching code to events, as described in this chapter.We’ve examined some common events and the two browser models for listeningto them. We have also covered what happens when an event fires, and how youcan interrupt or alter that process. Finally, we looked at a few events in detail,and saw some simple examples of how code can attach to those events and improvethe user experience on sites that employ these techniques.
73Click here to order the printed 318-page book now (we deliver worldwide)!
Summary

74

Detecting Browser Features4You just listed all my best features.—The Cat, Red Dwarf, Series 3, Episode DNA
An important design constraint when adding DHTML to your Websites is thatit should be unobtrusive. By “unobtrusive,” I mean that if a given Web browserdoesn’t support the DHTML features you’re using, that absence should affectthe user experience as little as possible. Errors should not be shown to the user:the site should be perfectly usable without the DHTML enhancements. Thebrowsers that render your site will fall into the following broad categories:
1. Offer no JavaScript support at all, or have JavaScript turned off.
2. Provide some JavaScript support, but modern features are missing.
3. Have full JavaScript support, but offer no W3C DOM support at all.
4. Provide incomplete DOM support, but some DOM features are missing orbuggy.
5. Offer complete DOM support without bugs.
The first and the last categories hold no concerns for you as a DHTML developer.A browser that does not run JavaScript at all will simply work without callingany of your DHTML code, so you can ignore it for the purposes of this discussion.
You just need to make sure that your page displays correctly when JavaScript isturned off.1 Similarly, a browser that implements the DOM completely andwithout bugs would make life very easy. It’s a shame that such browsers do notexist.
The three categories in the middle of the list are of concern to us in this chapter.Here, we’ll explore how to identify which DHTML features are supported by agiven browser before we try to utilize those features in running our code.
There are basically two ways2 to working out whether the browser that’s beingused supports a given feature. The first approach is to work out which browseris being used, then have a list within your code that states which browser supportswhich features. The second way is to test for the existence of a required featuredirectly. In the following discussion, we’ll see that classifying browsers by typeisn’t as good as detecting features on a case-by-case basis.
Old-Fashioned Browser SniffingIn the bad old days, before browser manufacturers standardized on the DOM,JavaScript developers relied on detection of the browser’s brand and version viaa process known as browser sniffing. Each browser provides a window.navigatorobject, containing details about the browser, which can be checked from Java-Script. We can, for example, find the name of the browser (the “user agent string”)as follows:
var browserName = navigator.userAgent;var isIE = browserName.match(/MSIE/); // find IE and look-alikes
Don’t do this any more! This technique, like many other relics from the DarkAges of JavaScript coding (before the W3C DOM specifications appeared), shouldnot be used. Browser sniffing is flaky and prone to error, and should be avoidedlike the black plague. Really: I’m not kidding here.
Why am I so unenthusiastic about browser sniffing? There are lots of reasons.Some browsers lie about, or attempt to disguise, their true details; some, such asOpera, can be configured to deliver a user agent string of the user’s choice. It’spretty much impossible to stay up-to-date with every version of every browser,
1 For example, if your DHTML shows and hides some areas of the page, those areas should showinitially, then be hidden with DHTML, so that they are available to non-DHTML browsers.2Actually, there’s a third way to identify browser support. The DOM standards specify adocument.implementation.hasFeature method that you can use to detect DOM support.It’s rarely used, though.
Click here to order the printed 318-page book now (we deliver worldwide)!76
Chapter 4: Detecting Browser Features

and it’s definitely impossible to know which features each version supportedupon its release. Moreover, if your site is required to last for any reasonableperiod of time, new browser versions will be released after your site, and yourbrowser-sniffing code will be unable to account for them. Browser sniffing—whatlittle of it remains—should be confined to the dustbin of history. Put it in the“we didn’t know any better” category. There is a significantly better methodavailable: feature sniffing.
Modern DOM Feature SniffingInstead of detecting the user’s browser, then working out for yourself whether itsupports a given feature, simply ask the browser directly whether it supports thefeature. For example, a high proportion of DHTML scripts use the DOM methodgetElementById. To work out whether a particular visitor’s browser supportsthis method, you can use:
if (document.getElementById) { // and here you know it is supported}
If the if statement test passes, we know that the browser supports the featurein question. It is important to note that getElementById is not followed bybrackets! We do not say:
if (document.getElementById())
If we include the brackets, we call the method getElementById. If we do not in-clude the brackets, we’re referring to the JavaScript Function object that underliesthe method. This is a very important distinction. Including the brackets wouldmean that we were testing the return value of the method call, which we do notwant to do. For a start, this would cause an error in a non-DOM browser, becausewe can’t call the getElementById method there at all—it doesn’t exist! Whenwe test the Function object instead, we’re assessing it for existence. Browsersthat don’t support the method will fail the test. Therefore, they will not run thecode enclosed by the if statement; nor will they display an error.
This feature of JavaScript—the ability to test whether a method exists—has beenpart of the language since its inception; thus, it is safe to use it on even the oldestJavaScript-supporting browsers. You may recall from the previous chapter thetechnique of referring to a Function object without calling it. In Chapter 3, weused it to assign a function as an event listener without actually calling it. In
77Click here to order the printed 318-page book now (we deliver worldwide)!
Modern DOM Feature Sniffing
JavaScript, everything can be treated as an object if you try hard enough; methodsare no exception!
Which DOM Features Should We Test?The easiest approach is to test for every DOM method you intend to use. If yourcode uses getElementById and createElement, test for the existence of bothmethods. This will cover browsers in the fourth category above: the ones thatimplement some—but not all—of the DOM.
It is not reasonable to assume that a browser that supports getElementById alsosupports getElementsByTagName. You must explicitly test for each feature.
Where Should We Test for DOM Features?An easy way to handle these tests is to execute them before your DHTML setsup any event listeners. A large subset of DHTML scripts work by setting on pageload some event listeners that will be called as various elements in the browserfire events. If, before setting up the event listeners, you check that the browsersupplies all the DOM features required by the code, event listeners will not beset up for browsers that do not support those features. You can therefore reason-ably assume in setting up your event listeners that all the features you requireare available; this assumption can simplify your code immensely. Here’s an ex-ample:
function myScriptInit() { if (!document.getElementById || !document.getElementsByTagName || !document.createElement) { return; } // set up the event listeners here}
function myScriptEventListener() { var foo = document.getElementById('foo'); // safe to use}
addEvent(window, 'load', myScriptInit, false);
This script contains a myScriptInit function, which sets upmyScriptEventListener as an event listener. But, before we set up that listener,
Click here to order the printed 318-page book now (we deliver worldwide)!78
Chapter 4: Detecting Browser Features
we check for the existence of the DOM methods getElementById,getElementsByTagName, and createElement.
The if statement says: “if the JavaScript Function objectdocument.getElementById does not exist, or if the Function objectdocument.getElementsByTagName does not exist, or if the Function objectdocument.createElement does not exist, exit the myScriptInit function.” Thismeans that, should any of those objects not be supported, the myScriptInitfunction will exit at that point: it will not even get as far as setting up the eventlisteners. Our code will set up listeners only on browsers that do support thosemethods. Therefore, as above, the listener function myScriptEventListener canfeel safe in using document.getElementById without first checking to ensurethat it is supported. If it wasn’t supported, the listener function would not havebeen set up.
All this sniffing relies on JavaScript’s runtime behavior. Even though the scriptsare read by the browser at load time, no checks are done on the objects stated inthe scripts until the code is run. This allows us to put browser objects in all scripts,and use them only when our detection code gets around to it: an arrangementcalled late binding.
Testing Non-DOM FeaturesFeature sniffing can be used on any JavaScript object: not just methods, and notjust those methods that are part of the DOM. Commonly used examples are theoffset properties (offsetWidth, offsetHeight, offsetLeft and offsetTop) ofan element. These JavaScript properties are an extension to the DOM providedby all the major browsers. They return information on the size and position ofan element in pixels. We can test whether those properties are defined on a givenelement’s object as follows:
var foo = document.getElementById('foo');
if (typeof foo.offsetHeight != 'undefined') { var fooHeight = foo.offsetHeight;}
Here, we set fooHeight if, and only if, offsetHeight is supported on foo. Thisis a different type of check from the method we used before, though: isn’t itpossible simply to say, if (foo.offsetHeight)? This isn’t a good approach touse. If foo.offsetHeight is not defined, if (foo.offsetHeight) will not betrue, just as we expect. However, the if statement will also fail if
79Click here to order the printed 318-page book now (we deliver worldwide)!
Testing Non-DOM Features
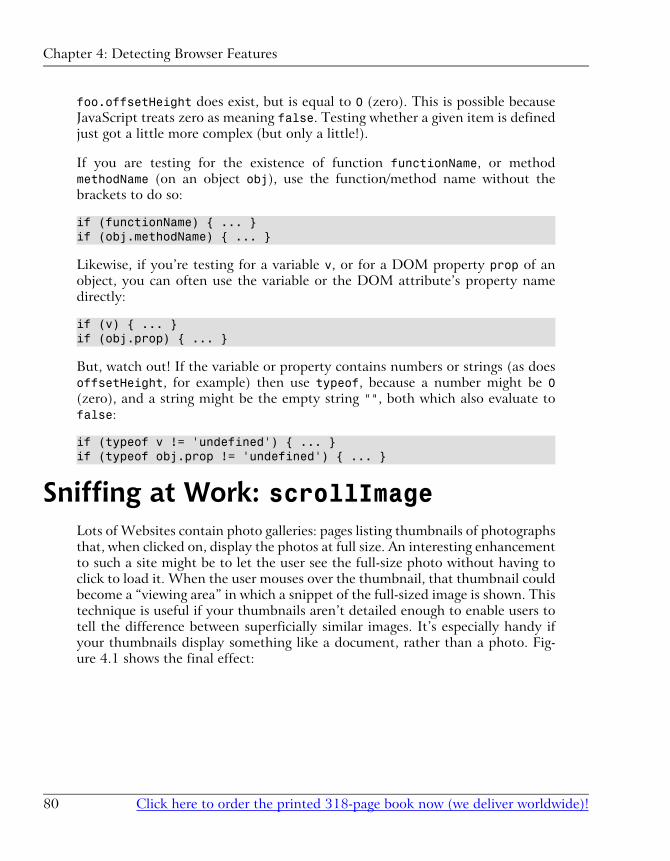
foo.offsetHeight does exist, but is equal to 0 (zero). This is possible becauseJavaScript treats zero as meaning false. Testing whether a given item is definedjust got a little more complex (but only a little!).
If you are testing for the existence of function functionName, or methodmethodName (on an object obj), use the function/method name without thebrackets to do so:
if (functionName) { ... }if (obj.methodName) { ... }
Likewise, if you’re testing for a variable v, or for a DOM property prop of anobject, you can often use the variable or the DOM attribute’s property namedirectly:
if (v) { ... }if (obj.prop) { ... }
But, watch out! If the variable or property contains numbers or strings (as doesoffsetHeight, for example) then use typeof, because a number might be 0(zero), and a string might be the empty string "", both which also evaluate tofalse:
if (typeof v != 'undefined') { ... }if (typeof obj.prop != 'undefined') { ... }
Sniffing at Work: scrollImageLots of Websites contain photo galleries: pages listing thumbnails of photographsthat, when clicked on, display the photos at full size. An interesting enhancementto such a site might be to let the user see the full-size photo without having toclick to load it. When the user mouses over the thumbnail, that thumbnail couldbecome a “viewing area” in which a snippet of the full-sized image is shown. Thistechnique is useful if your thumbnails aren’t detailed enough to enable users totell the difference between superficially similar images. It’s especially handy ifyour thumbnails display something like a document, rather than a photo. Fig-ure 4.1 shows the final effect:
Click here to order the printed 318-page book now (we deliver worldwide)!80
Chapter 4: Detecting Browser Features
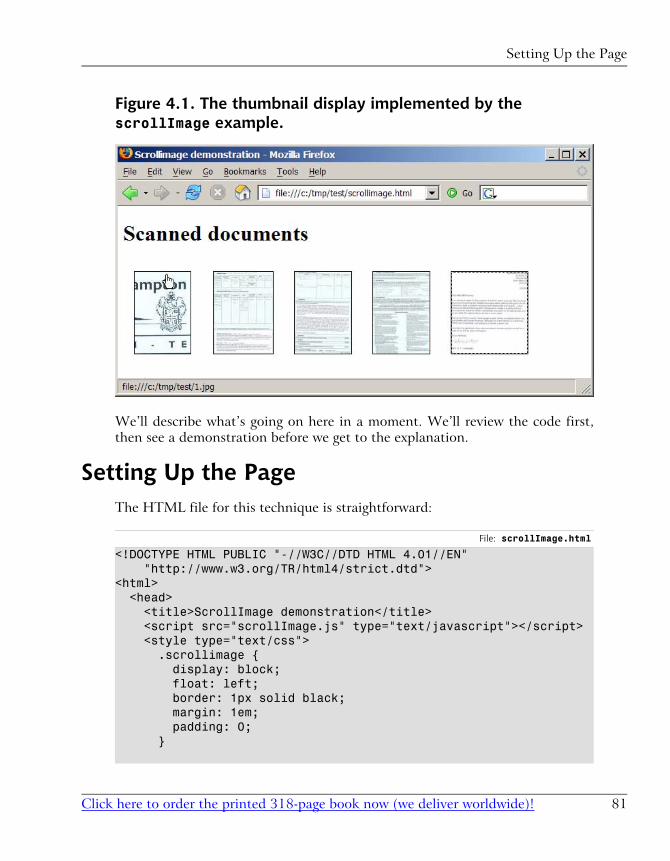
Figure 4.1. The thumbnail display implemented by thescrollImage example.
We’ll describe what’s going on here in a moment. We’ll review the code first,then see a demonstration before we get to the explanation.
Setting Up the PageThe HTML file for this technique is straightforward:
File: scrollImage.html
<!DOCTYPE HTML PUBLIC "-//W3C//DTD HTML 4.01//EN" "http://www.w3.org/TR/html4/strict.dtd"><html> <head> <title>ScrollImage demonstration</title> <script src="scrollImage.js" type="text/javascript"></script> <style type="text/css"> .scrollimage { display: block; float: left; border: 1px solid black; margin: 1em; padding: 0; }
81Click here to order the printed 318-page book now (we deliver worldwide)!
Setting Up the Page
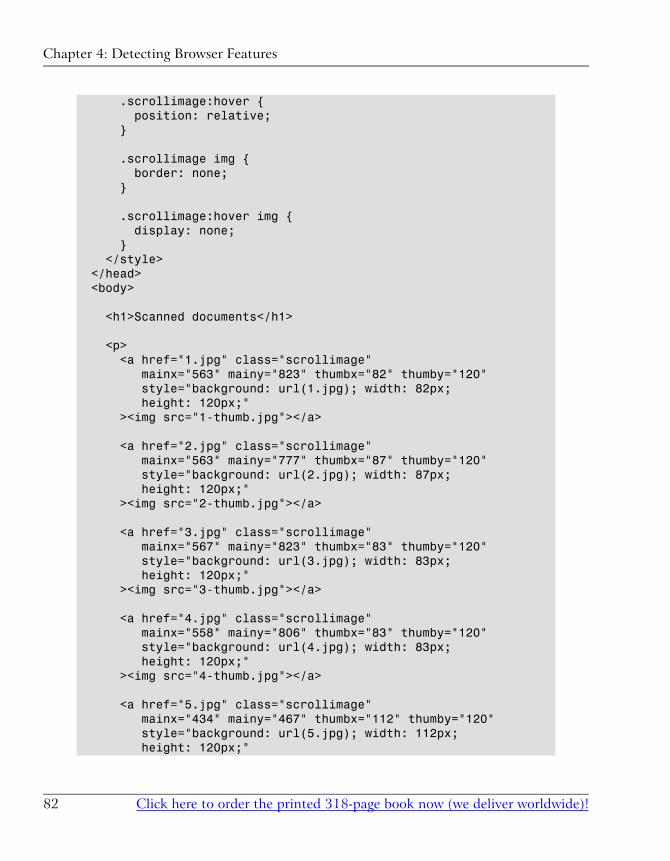
.scrollimage:hover { position: relative; }
.scrollimage img { border: none; }
.scrollimage:hover img { display: none; } </style> </head> <body>
<h1>Scanned documents</h1>
<p> <a href="1.jpg" class="scrollimage" mainx="563" mainy="823" thumbx="82" thumby="120" style="background: url(1.jpg); width: 82px; height: 120px;" ><img src="1-thumb.jpg"></a>
<a href="2.jpg" class="scrollimage" mainx="563" mainy="777" thumbx="87" thumby="120" style="background: url(2.jpg); width: 87px; height: 120px;" ><img src="2-thumb.jpg"></a>
<a href="3.jpg" class="scrollimage" mainx="567" mainy="823" thumbx="83" thumby="120" style="background: url(3.jpg); width: 83px; height: 120px;" ><img src="3-thumb.jpg"></a>
<a href="4.jpg" class="scrollimage" mainx="558" mainy="806" thumbx="83" thumby="120" style="background: url(4.jpg); width: 83px; height: 120px;" ><img src="4-thumb.jpg"></a>
<a href="5.jpg" class="scrollimage" mainx="434" mainy="467" thumbx="112" thumby="120" style="background: url(5.jpg); width: 112px; height: 120px;"
Click here to order the printed 318-page book now (we deliver worldwide)!82
Chapter 4: Detecting Browser Features
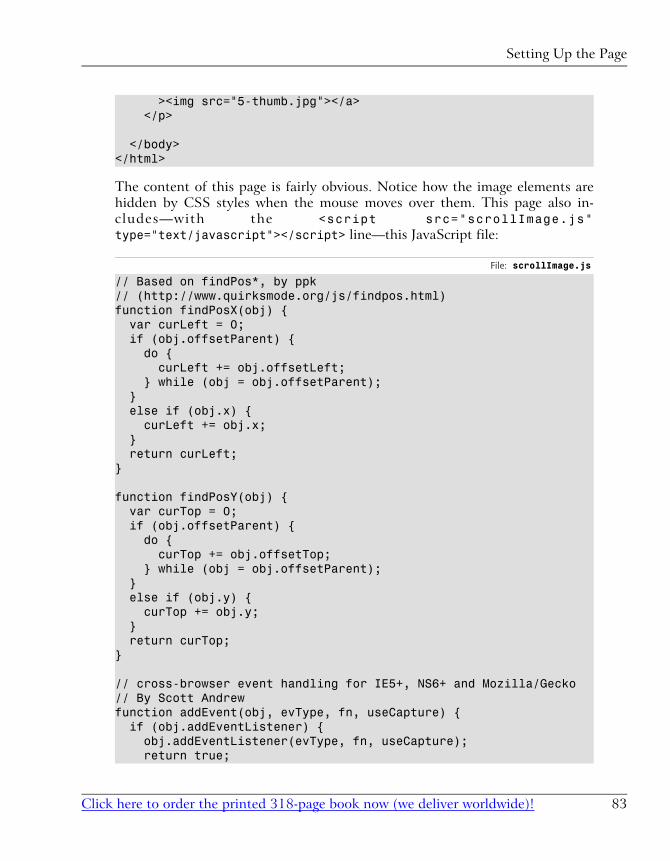
><img src="5-thumb.jpg"></a> </p>
</body></html>
The content of this page is fairly obvious. Notice how the image elements arehidden by CSS styles when the mouse moves over them. This page also in-cludes—with the <script src="scrollImage.js"type="text/javascript"></script> line—this JavaScript file:
File: scrollImage.js
// Based on findPos*, by ppk// (http://www.quirksmode.org/js/findpos.html)function findPosX(obj) { var curLeft = 0; if (obj.offsetParent) { do { curLeft += obj.offsetLeft; } while (obj = obj.offsetParent); } else if (obj.x) { curLeft += obj.x; } return curLeft;}
function findPosY(obj) { var curTop = 0; if (obj.offsetParent) { do { curTop += obj.offsetTop; } while (obj = obj.offsetParent); } else if (obj.y) { curTop += obj.y; } return curTop;}
// cross-browser event handling for IE5+, NS6+ and Mozilla/Gecko// By Scott Andrewfunction addEvent(obj, evType, fn, useCapture) { if (obj.addEventListener) { obj.addEventListener(evType, fn, useCapture); return true;
83Click here to order the printed 318-page book now (we deliver worldwide)!
Setting Up the Page
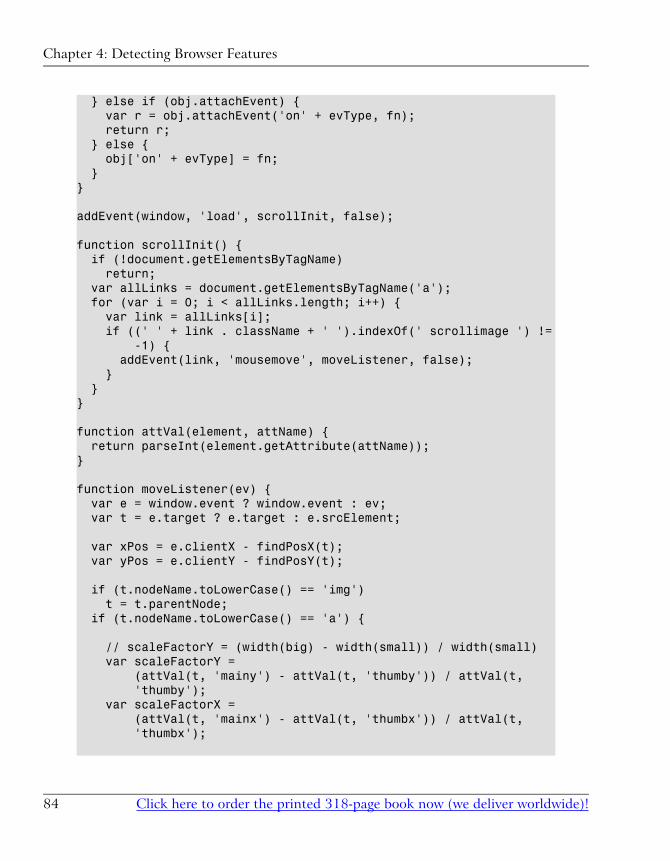
} else if (obj.attachEvent) { var r = obj.attachEvent('on' + evType, fn); return r; } else { obj['on' + evType] = fn; } }
addEvent(window, 'load', scrollInit, false);
function scrollInit() { if (!document.getElementsByTagName) return; var allLinks = document.getElementsByTagName('a'); for (var i = 0; i < allLinks.length; i++) { var link = allLinks[i]; if ((' ' + link . className + ' ').indexOf(' scrollimage ') != -1) { addEvent(link, 'mousemove', moveListener, false); } }}
function attVal(element, attName) { return parseInt(element.getAttribute(attName));}
function moveListener(ev) { var e = window.event ? window.event : ev; var t = e.target ? e.target : e.srcElement;
var xPos = e.clientX - findPosX(t); var yPos = e.clientY - findPosY(t);
if (t.nodeName.toLowerCase() == 'img') t = t.parentNode; if (t.nodeName.toLowerCase() == 'a') {
// scaleFactorY = (width(big) - width(small)) / width(small) var scaleFactorY = (attVal(t, 'mainy') - attVal(t, 'thumby')) / attVal(t, 'thumby'); var scaleFactorX = (attVal(t, 'mainx') - attVal(t, 'thumbx')) / attVal(t, 'thumbx');
Click here to order the printed 318-page book now (we deliver worldwide)!84
Chapter 4: Detecting Browser Features
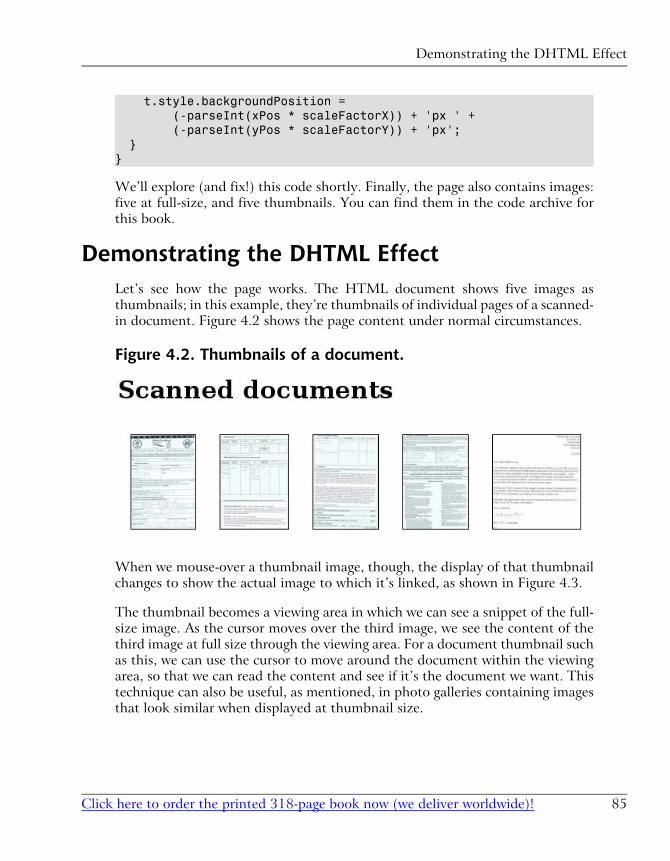
t.style.backgroundPosition = (-parseInt(xPos * scaleFactorX)) + 'px ' + (-parseInt(yPos * scaleFactorY)) + 'px'; }}
We’ll explore (and fix!) this code shortly. Finally, the page also contains images:five at full-size, and five thumbnails. You can find them in the code archive forthis book.
Demonstrating the DHTML EffectLet’s see how the page works. The HTML document shows five images asthumbnails; in this example, they’re thumbnails of individual pages of a scanned-in document. Figure 4.2 shows the page content under normal circumstances.
Figure 4.2. Thumbnails of a document.
When we mouse-over a thumbnail image, though, the display of that thumbnailchanges to show the actual image to which it’s linked, as shown in Figure 4.3.
The thumbnail becomes a viewing area in which we can see a snippet of the full-size image. As the cursor moves over the third image, we see the content of thethird image at full size through the viewing area. For a document thumbnail suchas this, we can use the cursor to move around the document within the viewingarea, so that we can read the content and see if it’s the document we want. Thistechnique can also be useful, as mentioned, in photo galleries containing imagesthat look similar when displayed at thumbnail size.
85Click here to order the printed 318-page book now (we deliver worldwide)!
Demonstrating the DHTML Effect

Figure 4.3. Mousing over a thumbnail.
How the Code WorksConceptually, the code works as follows: we set up the page so that every “scrol-lable” image is made up of an <a> tag of class scrollimage, which contains an<img> tag displaying the thumbnail. We apply the full-size image as the CSSbackground image of the <a> tag. Then, when the user mouses over the a element,we hide the img element entirely, allowing the a element’s background image toshow through. We then manipulate the position of that background image sothat it moves in accordance with the cursor.3
This is all fairly advanced stuff, so we need to confirm that the running browsersupports all the features we need in order to make it work. We start by makingthe script initialize on page load with the line:
File: scrollImage.js (excerpt)
addEvent(window, 'load', scrollInit, false);
We saw the addEvent method in Chapter 3, but, with what we’ve learned aboutfeature detection, its workings should now be much clearer to you. First, we checkfor the existence of an addEventListener method on the passed object, to seeif the user’s browser supports the DOM Events model correctly:
3We’re storing the dimensions of the larger image in custom attributes on the a element: mainx,mainy, thumbx, and thumby. This is a slightly suspect technique: it will prevent the HTML fromvalidating, and should therefore be approached with caution. In this case, however, it is the easiestway to tie the required values to each of the a elements.
Click here to order the printed 318-page book now (we deliver worldwide)!86
Chapter 4: Detecting Browser Features
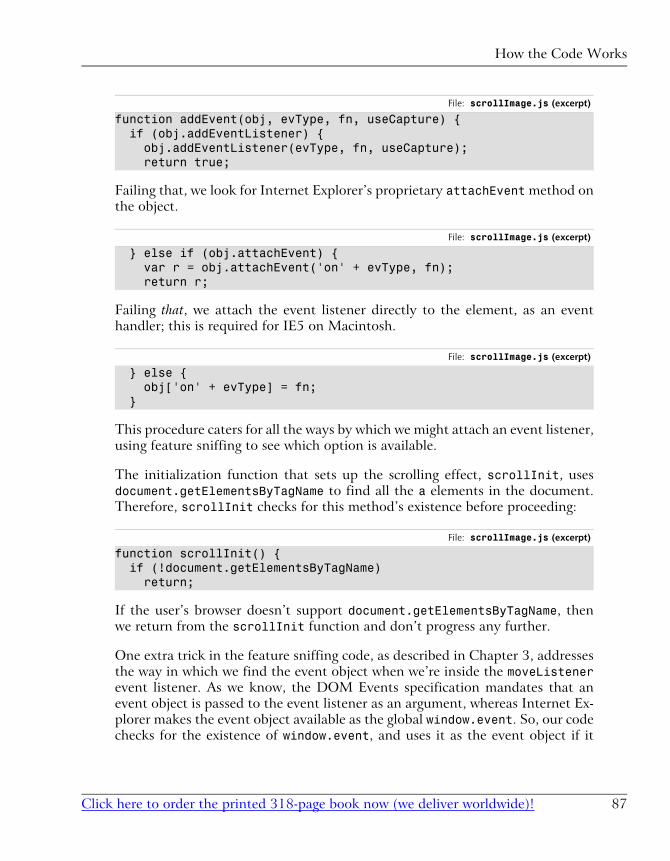
File: scrollImage.js (excerpt)
function addEvent(obj, evType, fn, useCapture) { if (obj.addEventListener) { obj.addEventListener(evType, fn, useCapture); return true;
Failing that, we look for Internet Explorer’s proprietary attachEvent method onthe object.
File: scrollImage.js (excerpt)
} else if (obj.attachEvent) { var r = obj.attachEvent('on' + evType, fn); return r;
Failing that, we attach the event listener directly to the element, as an eventhandler; this is required for IE5 on Macintosh.
File: scrollImage.js (excerpt)
} else { obj['on' + evType] = fn; }
This procedure caters for all the ways by which we might attach an event listener,using feature sniffing to see which option is available.
The initialization function that sets up the scrolling effect, scrollInit, usesdocument.getElementsByTagName to find all the a elements in the document.Therefore, scrollInit checks for this method’s existence before proceeding:
File: scrollImage.js (excerpt)
function scrollInit() { if (!document.getElementsByTagName) return;
If the user’s browser doesn’t support document.getElementsByTagName, thenwe return from the scrollInit function and don’t progress any further.
One extra trick in the feature sniffing code, as described in Chapter 3, addressesthe way in which we find the event object when we’re inside the moveListenerevent listener. As we know, the DOM Events specification mandates that anevent object is passed to the event listener as an argument, whereas Internet Ex-plorer makes the event object available as the global window.event. So, our codechecks for the existence of window.event, and uses it as the event object if it
87Click here to order the printed 318-page book now (we deliver worldwide)!
How the Code Works
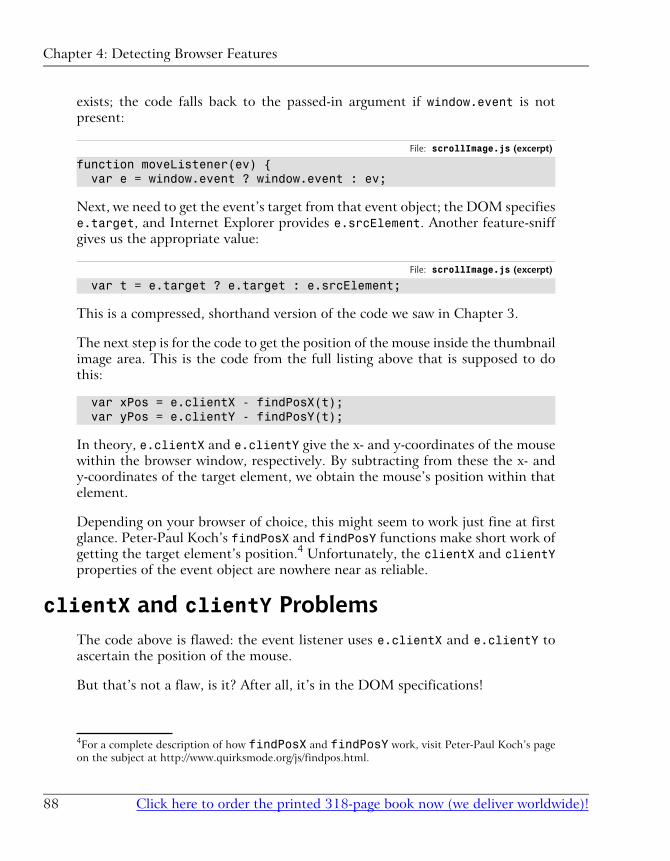
exists; the code falls back to the passed-in argument if window.event is notpresent:
File: scrollImage.js (excerpt)
function moveListener(ev) { var e = window.event ? window.event : ev;
Next, we need to get the event’s target from that event object; the DOM specifiese.target, and Internet Explorer provides e.srcElement. Another feature-sniffgives us the appropriate value:
File: scrollImage.js (excerpt)
var t = e.target ? e.target : e.srcElement;
This is a compressed, shorthand version of the code we saw in Chapter 3.
The next step is for the code to get the position of the mouse inside the thumbnailimage area. This is the code from the full listing above that is supposed to dothis:
var xPos = e.clientX - findPosX(t); var yPos = e.clientY - findPosY(t);
In theory, e.clientX and e.clientY give the x- and y-coordinates of the mousewithin the browser window, respectively. By subtracting from these the x- andy-coordinates of the target element, we obtain the mouse’s position within thatelement.
Depending on your browser of choice, this might seem to work just fine at firstglance. Peter-Paul Koch’s findPosX and findPosY functions make short work ofgetting the target element’s position.4 Unfortunately, the clientX and clientYproperties of the event object are nowhere near as reliable.
clientX and clientY ProblemsThe code above is flawed: the event listener uses e.clientX and e.clientY toascertain the position of the mouse.
But that’s not a flaw, is it? After all, it’s in the DOM specifications!
4For a complete description of how findPosX and findPosY work, visit Peter-Paul Koch’s pageon the subject at http://www.quirksmode.org/js/findpos.html.
Click here to order the printed 318-page book now (we deliver worldwide)!88
Chapter 4: Detecting Browser Features
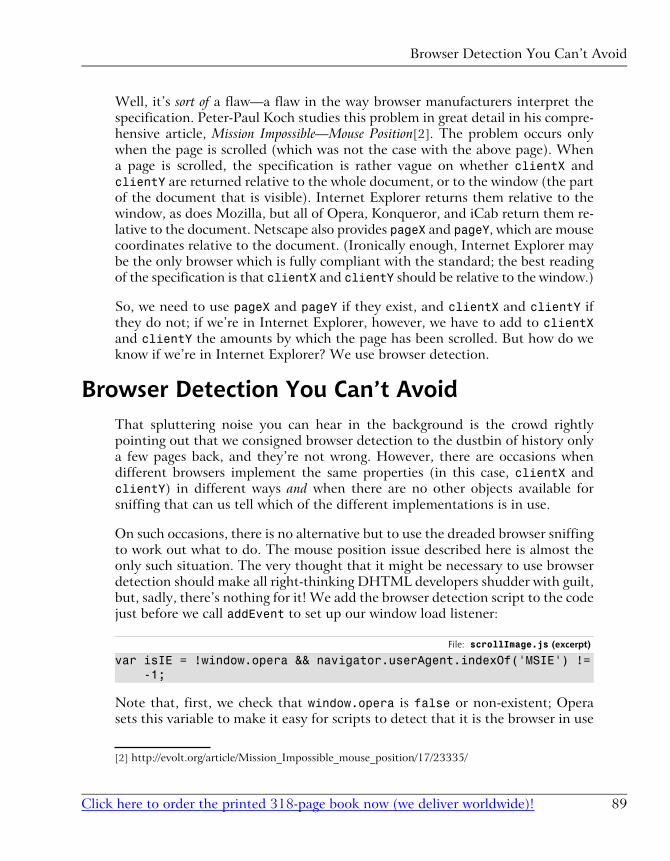
Well, it’s sort of a flaw—a flaw in the way browser manufacturers interpret thespecification. Peter-Paul Koch studies this problem in great detail in his compre-hensive article, Mission Impossible—Mouse Position[2]. The problem occurs onlywhen the page is scrolled (which was not the case with the above page). Whena page is scrolled, the specification is rather vague on whether clientX andclientY are returned relative to the whole document, or to the window (the partof the document that is visible). Internet Explorer returns them relative to thewindow, as does Mozilla, but all of Opera, Konqueror, and iCab return them re-lative to the document. Netscape also provides pageX and pageY, which are mousecoordinates relative to the document. (Ironically enough, Internet Explorer maybe the only browser which is fully compliant with the standard; the best readingof the specification is that clientX and clientY should be relative to the window.)
So, we need to use pageX and pageY if they exist, and clientX and clientY ifthey do not; if we’re in Internet Explorer, however, we have to add to clientXand clientY the amounts by which the page has been scrolled. But how do weknow if we’re in Internet Explorer? We use browser detection.
Browser Detection You Can’t AvoidThat spluttering noise you can hear in the background is the crowd rightlypointing out that we consigned browser detection to the dustbin of history onlya few pages back, and they’re not wrong. However, there are occasions whendifferent browsers implement the same properties (in this case, clientX andclientY) in different ways and when there are no other objects available forsniffing that can us tell which of the different implementations is in use.
On such occasions, there is no alternative but to use the dreaded browser sniffingto work out what to do. The mouse position issue described here is almost theonly such situation. The very thought that it might be necessary to use browserdetection should make all right-thinking DHTML developers shudder with guilt,but, sadly, there’s nothing for it! We add the browser detection script to the codejust before we call addEvent to set up our window load listener:
File: scrollImage.js (excerpt)
var isIE = !window.opera && navigator.userAgent.indexOf('MSIE') != -1;
Note that, first, we check that window.opera is false or non-existent; Operasets this variable to make it easy for scripts to detect that it is the browser in use
[2] http://evolt.org/article/Mission_Impossible_mouse_position/17/23335/
89Click here to order the printed 318-page book now (we deliver worldwide)!
Browser Detection You Can’t Avoid
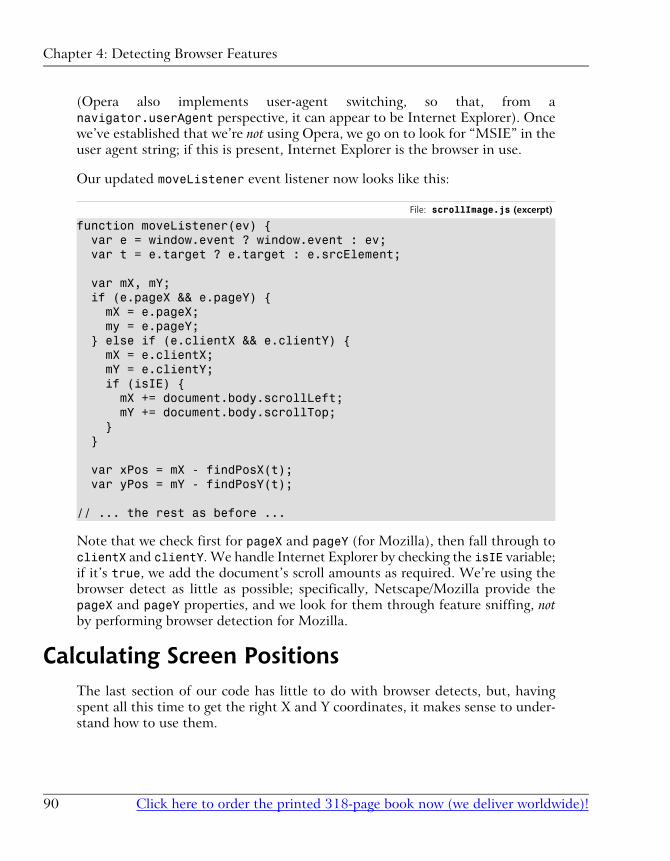
(Opera also implements user-agent switching, so that, from anavigator.userAgent perspective, it can appear to be Internet Explorer). Oncewe’ve established that we’re not using Opera, we go on to look for “MSIE” in theuser agent string; if this is present, Internet Explorer is the browser in use.
Our updated moveListener event listener now looks like this:
File: scrollImage.js (excerpt)
function moveListener(ev) { var e = window.event ? window.event : ev; var t = e.target ? e.target : e.srcElement;
var mX, mY; if (e.pageX && e.pageY) { mX = e.pageX; my = e.pageY; } else if (e.clientX && e.clientY) { mX = e.clientX; mY = e.clientY; if (isIE) { mX += document.body.scrollLeft; mY += document.body.scrollTop; } }
var xPos = mX - findPosX(t); var yPos = mY - findPosY(t);
// ... the rest as before ...
Note that we check first for pageX and pageY (for Mozilla), then fall through toclientX and clientY. We handle Internet Explorer by checking the isIE variable;if it’s true, we add the document’s scroll amounts as required. We’re using thebrowser detect as little as possible; specifically, Netscape/Mozilla provide thepageX and pageY properties, and we look for them through feature sniffing, notby performing browser detection for Mozilla.
Calculating Screen PositionsThe last section of our code has little to do with browser detects, but, havingspent all this time to get the right X and Y coordinates, it makes sense to under-stand how to use them.
Click here to order the printed 318-page book now (we deliver worldwide)!90
Chapter 4: Detecting Browser Features

The last part of the moveListener function starts with a couple of ifs, whichensure that we have in hand a reference to the <a> tag surrounding the thumbnail<img> of interest. No surprises there, so we grab the required DOM element:
File: scrollImage.js (excerpt)
if (t.nodeName.toLowerCase() == 'img') t = t.parentNode; if (t.nodeName.toLowerCase() == 'a') {
Next, we have the first of two sets of calculations:
File: scrollImage.js (excerpt)
// scaleFactorY = (width(big) - width(small)) / width(small) var scaleFactorY = (attVal(t, 'mainy') - attVal(t, 'thumby')) / attVal(t, 'thumby'); var scaleFactorX = (attVal(t, 'mainx') - attVal(t, 'thumbx')) / attVal(t, 'thumbx');
Code like this is liable to be specific to each DHTML effect you undertake, butthe mind-bending you have to do to come up with the code is similar in all cases.Take a deep breath: here we go!
With the large background image showing through the viewing area, what shouldappear when the cursor is in the top-left corner of that viewing area? The top-left corner of the big image should be in the top-left corner of the viewing area:that’s straightforward. Now, what should appear when the cursor is located atthe bottom-right corner of the viewing area? Should the bottom-right corner ofthe full-sized image be in the top-left corner of the viewing area? That’s whatwould happen if the big image were moved by its full size across the viewing areaas the cursor was moved the full distance across the viewing area. Think aboutit carefully; you might like to try experimenting with two pieces of paper, one ofwhich has a rectangular hole in it. The big image would eventually disappear offthe top-left corner of the viewing area! If the background image were tiled (thedefault), additional copies of the image would be visible at this bottom-rightcorner—a very odd result.
We don’t want the image to move that far. If we move the cursor to the extremebottom-right of the viewing area, we want the big image to move by almost itsentire size—but not quite! We want the bottom-right corner of the big image tomove only as far as the bottom-right corner of the viewing area, and not moveany further towards the top-left.
91Click here to order the printed 318-page book now (we deliver worldwide)!
Calculating Screen Positions

Now, to make the big image move, we have to calculate a distance by which tomove it. Take some example figures: suppose the big image is ten times the sizeof the thumbnail. Let’s suppose the image is 500 pixels on each side, and thethumbnail’s 50 pixels on each side. For every pixel by which the cursor moves,the big image should move 500/50: ten times as fast. So the “scale factor” is ten.But, wait a minute! If the cursor moves 50 pixels left, the big image will move500 pixels left: right off the left edge of the viewing area. That’s too far. We wantit to move at most 500 minus 50 pixels, so that it’s always “inside” the viewingarea. Therefore, the real scale factor is (500 – 50) / 50 = 9. The full-sized imageshould move nine times as fast as the cursor. That’s what the first set of calcula-tions does, except that it calculates scale factors in both dimensions, since mostimages are rectangles, not squares.
Next, we want to move the big image. Here’s the second set of calculations:
File: scrollImage.js (excerpt)
t.style.backgroundPosition = (-parseInt(xPos * scaleFactorX)) + 'px ' + (-parseInt(yPos * scaleFactorY)) + 'px';
Now, if (for example) we move the mouse from the top-left towards the bottom-right, we’re scanning diagonally across the viewing area. As we move, we wantnew areas of the big image to come into view. So the big image had better slidein the opposite direction to the mouse: up towards, and beyond, the top left. It’slike using a negative margin to bleed text to the left and top of a page. And that’swhat we do by calculating negative pixel amounts.
This idea may seem back-to-front initially. Think of it as though you wereshooting a scene for a movie. The camera (the thumbnail viewing area) is fixedinto place, so it must be the scene at which the camera points that moves if there’sto be any panning effect. Alternately, imagine yourself looking out of the windowof a moving train without turning your head. It’s the same effect again, providedthe train goes backwards!
SummaryIn this chapter, we’ve learned that browsers don’t always support all the DOMfeatures we’d like, and discussed how feature sniffing helps us as DHTML de-velopers to code defensively around this issue. Browser sniffing allows us to de-liver dynamic features to browsers that can handle them and, at the same time,to avoid crashing or throwing errors in browsers that can’t. We looked at the oldmethod, browser sniffing, and explained why it shouldn’t be used if at all possible.
Click here to order the printed 318-page book now (we deliver worldwide)!92
Chapter 4: Detecting Browser Features
We then explored one occasion on which feature sniffing can’t provide everythingwe need, leaving us the old method as a last resort.
93Click here to order the printed 318-page book now (we deliver worldwide)!
Summary

94
What’s Next? If you’ve enjoyed these chapters from DHTML Utopia: Modern Web Design Using JavaScript & DOM, why not order yourself a copy?
You’ll learn how to enhance your sites’ interactivity and usability in browsers that can handle it, without breaking the functionality on those that can’t. You’ll discover the modern, standards-compliant DHTML techniques behind some of today’s most impressive web applications, like Flickr, Google Suggest, Google Maps, and GMail. You’ll also gain access to the code archive download, so you can try out all the examples without retyping!
In the remaining chapters, you’ll:
Discover how to validate form data using regular expressions, and give dynamic feedback to your users
Build dropdown lists that improve the usability of dropdown menus, just like Google Suggest
Develop a fully standards-compliant, cross-browser, hierarchical navigation menu
Get the lowdown on Remote Scripting techniques and AJAX
Create form fields with name resolution that will automatically resolve an email address from a nickname
Develop a super-cool drag and drop file manager application
And much more!
On top of that, order direct from sitepoint.com and you’ll receive a free and indispensable 17” x 24” DOM & JavaScript Quick Reference Guide poster.
Order now and get it delivered to your doorstep!

IndexAabsolute paths, XPath, 289absolute positioning of submenus, 172accessibility of XMLHTTP and
DHTML, 227ActiveX controls, 237addEvent function, 53
highlighting table rows, 68scrollImage example, 86smartlink.js example, 61
addEventListener method, 48IE equivalent, 53scrollImage example, 86
addFriend function, “free beer” form,32
addListeners function, 53, 62, 70AJAX applications, 227Andrew, Scott, 53
(see also addEvent function)animated GIFs, 106animation, 95–123
animation involving movement,108–123
appearance change animation, 96–104
clock example, 102JavaScript suitability for multiple
animations, 196modeling animation states, 115multi-level animated menu project,
167–196response to mouseouts after starting,
190rising tooltips example, 108–123scriptless animation, 106text fading example, 96
anonymous functions, 98, 104anonymous callbacks, 228, 259, 303
type-ahead drop-down list example,165
APIs (application programming inter-faces), calling with XML-RPC,277, 279
apostrophe escaping, 97appendChild method, 24, 28
“free beer” example form, 32innerHTML alternative, 234
aqtree3 script, 275arrays
beer guide example, 241clippingRectangle array, 188–189getElementsByTagName method, 19listing username alternatives, 235submitted fields in autoform ex-
ample, 214zero-based indexing, 290
ascendDOM function, 70Ashley, Brent, 219
(see also RSLite library)associative arrays, 130asynchronous operation
fetching RSS feeds, 299RSLite library, 222Sarissa library requests, 228
attachEvent method, 53, 87, 183attributes
(see also properties)changing with JavaScript, 21event names and, 44non-HTML, 34, 298XPath node selection by values, 290
autocompletion widget, 155autoforms example, 206–219
indirect submission, 214JavaScript listing, 209serving the page, 216style sheet, 209
Bbackground color and mouseover ef-
fects, 174, 269backspace key, 161, 164bandwidth abuse, 298beer guide example, 238–249
(see also “free beer” example form)display, 238, 245, 249fetching and running JavaScript, 246fetching HTML from the server, 243JavaScript code, 243, 248JavaScript method sequence, 240,
244PHP script, 247planning the DHTML pages, 240style sheet, 239, 243, 246traditional HTML approach, 238
billboard effect, animated menu, 185Blogger API, 279
as example of XML-RPC, 277specification, 280weblog post editor, 283
blogroll example, 292–304display, 298, 301expandable and collapsible lists, 303HTML content, 297RSS feeds and, 292specifying script actions, 299
blur events and validation, 129, 136<body> element, onerror handler, 106Boodman, Aaron, 157, 264
(see also DOM-Drag library)bracket notation
assessing support without callingmethods, 77
passing references without callingfunctions, 48
browser detection, 76–77(see also feature sniffing)mouse position problem and, 89
browser supportassessing DHTML feature support,
76assessing DOM method support, 77for the cellIndex property, 71for character codes, 49for clientX and clientY, 88for CSS, 6, 10for the CSS clip property, 190for the DOM, 37, 39, 75for framesets, 198for hidden <iframe>s, 205for JavaScript, 75for the keypress event, 51for XMLHTTP, 226for XPath, 290
“browser wars”, 14browsers
(see also Internet Explorer; Mozillabrowsers; Netscape browsers;Safari browser)
clock animation example portability,104
cross-browser events tabulated, 44cross-browser identification of
clicked links, 63cross-browser Sarissa library, 227,
290detecting features of, 75evaluating script downloads, 159Opera browser, 89portable event listeners, 53rich-text editors, 155
bubbling (see event bubbling)bugs
CSS parsers, 7, 10IE list item bug, 172, 240IE memory leaks, 182
Ccalendar popups, 156
Click here to order the printed 318-page book now (we deliver worldwide)!306
Index

callback methods, 210, 303(see also anonymous functions)autoform example, 214drag-and-drop file manager, 256, 263name resolution example, 222–224RSLite failure callbacks, 224Sarissa library requests, 228username checking example, 232–
233Camel Casing (see InterCaps format)Camino browser (see Mozilla browsers)cancelBubble property, 57, 141case sensitivity, 8, 63, 163cellIndex property, 71change event listeners
autoforms example, 212name resolution example, 222username checking example, 232
character code support, 49checkValid method, validation example,
130, 132checkValidSubmit method, validation
example, 138childNodes property, 20, 23circular references, 182class attribute, HTML, JavaScript
equivalent, 22className property
indexOf method, 37replace method, 72
clearInterval function, 102clearTimeout function, 99, 185client-side validation, 127–149
error messages, 131example JavaScript listing, 144example screenshot, 147–148example style sheet, 146limitations, 125on form submission, 136submit event listeners, 137when to apply, 129
clientX and clientY properties, 88clip property, CSS, 185, 190clippingRectangle array, 188–189clock animation example, 102cloneNode method, 28closures, creating, 181code editors, 9comma terminators, library object
methods, 114container tags, HTML, 2contentDocument property, 213contentWindow property, 213control characters, 164cookies
hidden cookie updates, 219size limits, 226
country name drop-down lists, 159–160createElement method, 27
innerHTML alternative, 234testing browser support for, 79
createTextNode method, 27cross-site scripting, 126CSS (Cascading Style Sheets), 5–7
bugs and hacks, 7changing style properties, 23dynamic menus using, 176further reading, 10globe animation example, 107highlighting table rows, 66, 72, 246multi-level animated menu project,
171, 173–174, 177rising tooltips animation example,
111z-index stacking problem, CSS2, 110
currentTarget property, 179, 181cursor location
(see also mouseover effects)highlighting table rows, 65Mozilla browser drop targets, 266
cursor movement and image scrolling,91
custom listener functions, 180–181
307Click here to order the printed 318-page book now (we deliver worldwide)!

Ddate entry, calendar popups, 156debugging tools, JavaScript, 9default actions, 50–51, 57
(see also preventDefault method)delegation, 185dialog box error message display, 134,
148dictionaries, 130dimensionless numbers, 24dimensions, temporarily visible objects,
191directories
(see also blogroll example)expandable and collapsible folder
lists, 252, 275, 303display property, CSS, 24<div> tags, rising tooltips animation,
109–110DOCTYPE declarations, 3document fragments, 28document.all and document.layers
properties, 159document.getElement* methods (see
getElement* methods)DOM (Document Object Model), 13
adding and removing elements, 24–30
applicability to XML, 287degrees of browser support, 75event handling, 46history, 14Microsoft and Mozilla references, 22mouse position specification, 88superiority of XPath for XML access,
287, 289testing for the existence of features,
78, 210XPath alternative, 287–304
DOM-Drag library, 264, 273drag-and-drop file manager, 252–277
dropping elements onto targets, 271expanding and collapsing lists, 275handling drag-and-drop events, 273highlighting drop targets, 270HTML, 253identifying drop targets, 265implementing drag-and-drop, 263library objects, 256PHP script, 257, 262Sarissa library use, 259screenshot, 253server control commands, 261specifying, 252style sheet, 255
drop-down lists, type-ahead, 159
Ee parameter, 49E4X standard, 234editors
code, 9rich-text, 155
elements, HTMLadding and removing, 24–30changing attributes, 21copying, 28creating, 27draggable, 264manipulating with JavaScript/DOM,
21possible events tabulated, 43sharing event listeners between, 47,
50elements, XML, selecting, 288email nicknames (see name resolution
example)empty <div> elements, 110empty strings, 80encapsulation (see library objects)error handling, 104
Click here to order the printed 318-page book now (we deliver worldwide)!308
Index
error messagesclient-side validation and, 131display techniques, 134displaying multiple, 137drag-and-drop file manager, 262hiding from users, 75name resolution example, 225pre-submission checks, 136summary error messages, 148
escaping quotes and apostrophes, 97eval function, JavaScript, 238, 246event bubbling, 50–51
(see also stopPropagation method)Event Cache script, 182event capture, 48event handlers, 38, 44
(see also event listeners)rollover script example, 38
event handlingDOM specification, 46event bubbling and default actions,
50–51event targets, 44smarter uses, 58W3C approach, 47
event listeners, 46assigning on page load, 52change event listeners, 212, 222, 232client-side validation and, 129cross-browser operation, 53custom listener functions, 180–181highlighting table rows, 65opening links in a new window, 59portable detection code, 54–55reusing across targets, 50submit events, 137testing browser support for, 78tooltips animation example, 113,
116event model, W3C, 44, 179
event objectsIE storage, 55methods of passing, 87properties tabulated, 49, 55
event targets, 44, 46methods of obtaining, 88
eventslinking code to, 46modern naming of, 44, 48
exception handling, 284expanding form example, 30–33
Ffeature sniffing, 77
portabledetect.html example, 56scrollImage example, 80, 86testing for non-DOM features, 79
file manager example (see drag-and-dropfile manager)
filter property, 269findPosX and findPosY functions, 88Firefox (see Mozilla browsers)firstChild property, 20, 23flicker, 181, 183flyover help (see tooltip animation ex-
ample)folders, expandable and collapsible lists,
252, 275, 303form validation, 125–154
cancelling submission on failure, 141forms design
example expanding form, 30–33real-time forms, 206usability improvement, 154–166
frames, 198, 252“free beer” example form, 30–33function outlines
beer guide example, 240highlighting table rows, 68smartlink event listener example, 61
309Click here to order the printed 318-page book now (we deliver worldwide)!
functionsassessing support without calling, 77passing by name, 98passing references without calling,
48
GGecko-based browsers (see Mozilla
browsers)getElementBy* methods in script
downloads, 159getElementById method, 17
assessing support for, 77limitations, 29testing browser support for, 79
getElementsBy* methods for walkingDOM trees, 17
getElementsByName method, 17, 215getElementsByTagName method, 17,
19scrollImage example, 87testing browser support for, 37, 79XPath alternative, 288
global variables, 98, 102globe animation example, 106
Hhacks
accessing variables within passedfunctions, 99
CSS parser workarounds, 7, 10XMLHTTP distinguished from, 226
handleLink function, smartlink ex-ample, 62
handleValidity method, validation ex-ample, 132
hasFeature method, 76hashes, 130<head> element, as script location, 8headings, styling, 5
hidden objectshidden <iframe> elements, 205,
209hidden cookie updates, 219hidden <iframe> elements, 205,
209hidden image updates, 219hidden list items, 304hidden proxy elements, 267, 269
hideMenu method, sliding-menu.js, 189highlighting
beer guide example, 246drop targets, 265, 270table rows, 64, 66, 68
history lists and replace methods, 206hotspots, 267HTML
(see also elements, HTML)dynamic generation with inner-
HTML, 234dynamic generation, beer guide ex-
ample, 242dynamic generation, drag-and-drop
file manager , 260semantic HTML, 4, 168validity, 2–3, 16, 298
HTMLArea editor, 155htmlFor property, 141HTTP 204 piggybacks, 220HTTP requests, Sarissa support, 228hyperlinks (see links)
Iicons, 207, 253id attribute, HTML, 17IE (see Internet Explorer)<iframe> elements, 199–216
autoforms example, 206–219data exchange example display, 203,
205hidden <iframe>s, 205, 209
Click here to order the printed 318-page book now (we deliver worldwide)!310
Index
overcoming the shortcomings of, 205replacing, using script, 201
image rollovers (see rollover script ex-ample)
imagescalculating screen positions, 90hidden image updates, 219replacing, using the src attribute, 40scrollImage preview example, 80
index numbering, XPath and JavaScriptarrays, 290
indexOf method, className property,37
infinitely nested forms, 207inline error messages, 134innerHTML property, 104, 234insertBefore method, 26InterCaps format, 23Internet Explorer
attaching event listeners, 53CSS support, 7DOM-supporting browsers and, 39list item bug, 172, 240memory leak problem, 182origins of XMLHTTP in, 226rich-text editor, 155support for :hover pseudo-class, 176support for DOM event model, 180support for XPath, 290
invisible objects (see hidden objects)iterating through link elements, 37
JJava applets, 237JavaScript
adding arbitrary properties, 113, 195changing attributes with, 21code positioning, 47–48debugging tools, 9degrees of browser support, 75DHTML encapsulation, 111
evaluating script downloads, 159exception handling, 284further reading, 11<iframe> use with, 201passing code as a string, 97PHP generation of, 218remote scripting, 197–250role in DHTML, 7, 9running from the server, 246sharing between multiple pages, 144testing for non-DOM features, 80URL requests using XMLHTTP, 226Web services restrictions, 280XML-RPC clients, 279
JavaScript Console (Mozilla), 9JavaScript libraries, 256, 259
(see also Sarissa library)aqtree3, 275DOM-Drag, 264, 273
jitter, 190join method, errText array, 141jsolait XML-RPC client, 284
KkeyCode property, 49, 163–164keypress events
default actions and, 51status of keyup and, 48, 161
Koch, Peter-Paul, 88–89, 163
L<label> element, HTML, uses, 137,
157lastChild property, 20late binding, 79leaf nodes, 20legacy scripting techniques, 159length property, childNodes array, 20<li> tags, HTML
(see also <rdf:li> tags; nested lists)drag-and-drop file manager, 260
311Click here to order the printed 318-page book now (we deliver worldwide)!
IE list item bug, 172, 240nested lists, 170semantic markup, 4
library objects, 111autoforms example, 209benefits of object-based program-
ming, 195blogroll example, 301client-side validation example, 127drag-and-drop file manager, 256form validation example, 144multi-level animated menu project,
187name resolution example, 223nesting, for validation, 129regular expression sets in, 129type-ahead drop-down list example,
161username checking example, 232weblog post editor, 282
linksbackground color and activity, 174globe animation example, 106identifying clicked links, 63to <iframe> targets, 203–204iterating through, 37layout, 4opening in a new window, 59
list items (see <li> tags, HTML)load event, assigning listeners, 52lowercase conversion, 63, 163
MMacintosh, IE5 event handling prob-
lems, 54managing files (see drag-and-drop file
manager)maps, 130match method for regular expressions,
134memory leaks, 182
menus(see also multi-level animated menu
project; submenus)scriptless, 176
methods(see also callback methods; functions)termination in library objects, 114testing for the existence of, 77
Meyer, Eric, pure CSS menus, 176Microsoft Corporation
(see also Internet Explorer)DOM element reference, 22
modular code, 33, 40mouse position, scrolling and the DOM
specification, 88mouseout event listeners, 177
introducing a delay, 183proxy elements, 268, 270rollover script example, 39tooltip animation example, 101, 114
mouseout eventsrunning animation response to, 190
mouseover effects(see also rollover scripts)multi-level animated menu project,
174–175scrollImage example, 85tooltips animation example, 113using a:hover, 107, 174
mouseover event listeners, 177proxy elements, 268, 270rising tootips animation, 116rollover script example, 39tooltip animation example, 101, 114
mouseover eventsdrop targets in Mozilla browsers, 266
moveLinks method, rising tooltips an-imation, 116–117
Mozilla browsersclock animation example portability,
104
Click here to order the printed 318-page book now (we deliver worldwide)!312
Index
DOM element reference, 22drop target mouseover problem, 266E4X standard, 234JavaScript debugging, 9support for XMLHTTP, 226support for XPath, 290
multi-level animated menu project,167–196
adding animation, 185avoiding flicker, 183creating the HTML, 168CSS styled menus screenshot, 173–
175JavaScript code, 176, 192–195unstyled content screenshot, 170
Nname resolution example, 220–225
(see also username checking example)PHP script, 221resolve method, 223, 225resolve_callback method, 224
namespace clashes (see library objects)namespaces, XML, 296naming conventions
events, 44, 48, 54JavaScript properties, 23library objects, 112
navigation (see links; multi-level anim-ated menu project)
nestingarrays, PHP, 151expandable and collapsible lists,
252, 275, 303HTML elements and DOM repres-
entations, 15HTML elements and validity, 2infinitely nested forms, 207lists, multi-level animated menu, 170literal objects, 130nested forms design, 206
selecting nested elements withXPath, 289
Netscape browsershistory of the DOM and, 14Netscape 6 and hidden <iframe>s,
205nextSibling property, 114nodes
(see also elements)DOM representation of HTML, 15parent and child, 20XPath view of XML documents, 288
nodeType property and Safari, 117nodeValue property, 22
Oobject detection
animation error handling and, 105DOM methods, 37, 77–79, 210Sarissa library, 233, 259window.event object, 56
object literals (see library objects)object-based programming, 195offset properties, 79offsetParent property, 88on prefix, event naming, 44, 48, 54onclick attribute, DOM alternative, 46onDrag* properties, DOM-Drag library,
274–275onerror event handler, 106online validators, 3onmouseout and onmouseover attrib-
utes, alternatives to, 33opacity property, 269Opera browser, 89oversrc attribute, 34
Ppadding, CSS, and unexpected mouse
effects, 178pageX and pageY properties, 89
313Click here to order the printed 318-page book now (we deliver worldwide)!
‘paranoid’ code, 261–262parentNode property, 20path attribute, drag-and-drop file man-
ager, 255phone number validation, 128photo galleries, 85PHP
beer guide example, 241–242checking for unused usernames, 229drag-and-drop file manager, 257, 262JavaScript written by, 218server-side validation, 150serving the autoform page, 216use with <iframe>s, 205
piggybacks, HTTP 204, 220positioning
absolute, of submenus, 172draggable elements, 265
POST requests, drag-and-drop filemanager, 263
presentation with CSS, not HTML, 5–6
preventDefault method, 51, 57, 141progress hints, 207properties
adding arbitrary properties, 113, 195event objects, tabulated, 55
proxy elements and drop targets, 267–270
highlighting and tagging targets,270–273
Qquery strings with embedded PHP, 205quotes, escaping inside strings, 97
Rradio buttons, 235RDF syntax, 293–294<rdf:li> tags, 294<rdf:RDF> tags, 296
readability of tables, 64receiveData function, 203–204recursion, 17references to elements, 18, 20references to functions, 48refreshing pages, alternatives to, 197–
198regular expressions
alternative to className.indexOf,37
client-side validation and, 128resource on, 40rollover script example, 40server-side validation, 149slash delimiters, 72, 130storing in library objects, 129use with replace methods, 72
relative paths, XPath, 295Remote Procedure Call (see XML-RPC)remote scripting, 197–250
drawing code from servers, 238–249hidden image updates, 219HTTP 204 piggybacks, 220methods enumerated, 198obtaining data from servers, 198–
237other client-server options, 237using <iframe>s, 199–216XMLHTTP, 225–228
remote site links and bandwidth abuse,298
removeAttribute method, 29removeChild method, 26replace methods, 72, 206returnValue property, 57, 141rich-text editors, 155rising tooltips animation, 108–123
content animation, 116content creation, 108DHTML library object, 111full code listing, 119–123
rollover script example, 33–41
Click here to order the printed 318-page book now (we deliver worldwide)!314
Index
findTarget function, 38HTML, 34JavaScript, 35as modular code, 40setupRollovers function, 36, 40
root nodes, 17RSLite library, 219
name resolution example, 220–225potential for username checking, 229
RSS feedsblogroll parsing example, 292–304RSS versions and sample feed, 293
SSafari browser
cellIndex property, 71clock animation example portability,
104link event handling, 117
Sarissa library, 227–228(see also XMLHTTP)checking for presence of, 233, 259cross-browser XPath support, 290drag-and-drop file manager use, 259namespace declarations, 296–297use in beer guide example, 243, 248
screen positions, calculating, 90script (see JavaScript)<script> tags, server-side validation,
153scrollImage example, 80–92
calculating screen positions, 90discussion, 86HTML, 81JavaScript, 83
security and input validation, 126selectNodes and selectSingleNode
methods, 292semantic HTML, 4, 168serialize function, PHP, 218servers, drawing code from, 238–249
beer guide example, 243–246servers, obtaining data from, 198–237
hidden image updates, 219HTTP 204 piggybacks, 220other client-server options, 237using <iframe>s, 199–216XMLHTTP, 225–228
servers, sending instructions to, 251–286
drag-and-drop file manager, 252–277weblog post editor, 280–286XMLHttpRequest and, 261
server-side validation, 149–154security and, 125, 127
setInterval function, 102multi-level animated menu project,
187, 190name resolution example, 222rising tooltips animation, 116
setTimeout function, 96asynchronous operation, 99evaluation context, 98multi-level animated menu project,
184type-ahead drop-down lists example,
164username checking example, 235
short-circuit evaluation, 38showMenu method, sliding-menu.js,
188slashes
regular expression delimiters, 72, 130XPath significance of, 289, 295
sliding menus (see multi-level animatedmenu project)
smartlink event listener example, 59–64
soft hyphens, 260<span> tags
inline error messages, 134–135
315Click here to order the printed 318-page book now (we deliver worldwide)!
rising tooltips animation, 108, 110, 114
SQL injection, 126src attribute, <iframe> tag, 199src attribute, <image> tag, 40src property, image object, 219state property, rising tooltips anima-
tion, 115stopPropagation method, 51, 56, 141string manipulation
fromCharCode method, 50match method, 134replace method, 72
strings, empty, 80style properties, changing, 5, 23
(see also CSS)submenus
animating, 185hiding, 174positioning, 172revealing, 176
submit eventattaching validation, 137blocking, in autoform example, 211
submitting forms indirectly, 214Syntax code editor, 9
Ttables, highlighting rows, 64, 66, 68target attribute, 50target elements
drop targets, 265mouse position and ambiguity, 179shortcut detection code, 133
targetElement, IE, 181ternary operator, 133text
changing text nodes, 22fading animation example, 96
text boxesautocompletion widget, 155
“free beer” example form, 30, 32with instructions, 157word wrapping within, 260
thumbnails, scrollImage example, 80timed activity
(see also animation; setTimeoutfunction)
cancelling timed code, 99delayed reactions to mouseouts, 183wiping submenus, 187
toLowerCase method, 63, 163tooltip animation example, 108–123
HTML, 99JavaScript, 100
toUpperCase method, 8tree structures
ascendDOM function, 70DOM representation of HTML, 15searching using XPath, 289walking DOM trees, 16
try...catch commands, 105, 284“type-ahead find” feature, 160typeof property, 80
U<ul> tags, HTML
menu layouts using, 168nesting lists, 170
‘unobtrusive’ DHTML, 75, 105update function, clock animation ex-
ample, 104uppercasing example, 8usability
animation and, 95HTML widget enhancements, 154–
166<label> elements and, 137remote scripting and, 197supplying progress hints, 207
useCapture parameter, 48
Click here to order the printed 318-page book now (we deliver worldwide)!316
Index
user interface, drag-and-drop functions,263
user-agent switching, 90username checking example, 228–237
building the JavaScript, 232screenshots, 232, 236style sheet, 231
Vvalid HTML, 2
adding new attributes and, 298DOM representations and, 16validators, 3
validation of user input, 125–154client-side validation, 127–149integration of client- and server-side,
149–154on form submission, 136reasons to undertake, 126
variablesaccessing within passed functions,
99element references, 18
Venkman debugger, 9
WW3C (World Wide Web Consortium)
DOM definition, 13event handling approach, 47event model, 44, 179event object properties, 55RDF syntax and, 294XPath and, 288
<wbr> tags, 260Web services
drawing data from servers, 237exposure with XML-RPC, 277JavaScript restrictions, 280
weblog post editor, 280–286coordinating page and server, 283HTML page content, 281
Weblogs(see also Blogger API)blogroll XPath example, 292–304
Webmail (see name resolution example)widget enhancements, 154–166
autocomplete text boxes, 155calendar popups, 156text boxes with instructions, 157type-ahead drop-down lists, 159
window object(see also setTimeout function)open method, 64opera property, 89
window.document object (see getEle-mentsBy* methods)
window.event objectcancelBubble property, 57checking for existence of, 56IE event handling and, 53properties compared with W3C, 55returnValue property, 57
window.location object, replace meth-od, 206
window.navigator object, browsersniffing, 76
window.parent object and <iframe>s,201
wiping effects, multi-level menu project,185
wrapper objects(see also library objects)XHMHTTP implementations, 227
wrapping words within boxes, 260Wubben. Mark, 182
XXML document access, 287, 289XML namespaces, 296XMLHTTP, 225–228
browser support, 226drag-and-drop file manager use, 259
317Click here to order the printed 318-page book now (we deliver worldwide)!

Sarissa library, 227username checking example, 228–
237XMLHttpRequest class, 226–227, 261XML-RPC, 277–280
calling APIs, 279weblog post editor, 280–286
XPath, 287–304adding XML namespaces, 296applying to XML documents, 290blogroll example using, 292–304constructing simple expressions, 295learning resources on, 292
XPCOM components, 237
ZZakas, Nicholas, 156zero values, JavaScript interpretation,
80zero-width spaces, 260z-index property
CSS2 stacking problem, 110–111draggable elements, 275proxy elements for drop targets,
267, 269Zvon XPath tutorial, 292
Click here to order the printed 318-page book now (we deliver worldwide)!318
Index


