20
Distinctive Ring Pattern Detection (DRPD) Fax Line Setup Guide Next

Distinctive Ring Pattern Detection (DRPD)
Fax Line Setup Guide
Next
Fax Easy Setup
NextPrevious
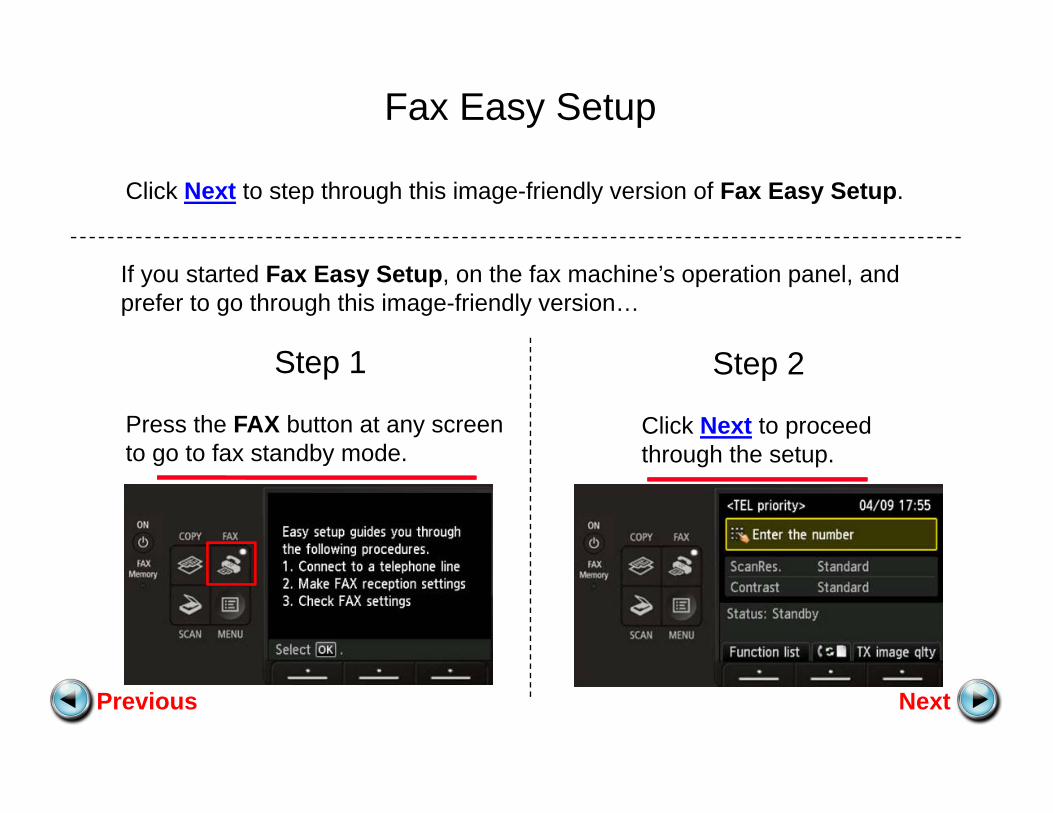
Click Next to step through this image-friendly version of Fax Easy Setup.
If you started Fax Easy Setup, on the fax machine’s operation panel, and prefer to go through this image-friendly version…
Step 1
Press the FAX button at any screen to go to fax standby mode.
Step 2
Click Next to proceed through the setup.

Connecting The Phone Lines
NextPrevious

(Existing Phone Cord)
Wall JackHand Set(Phone)
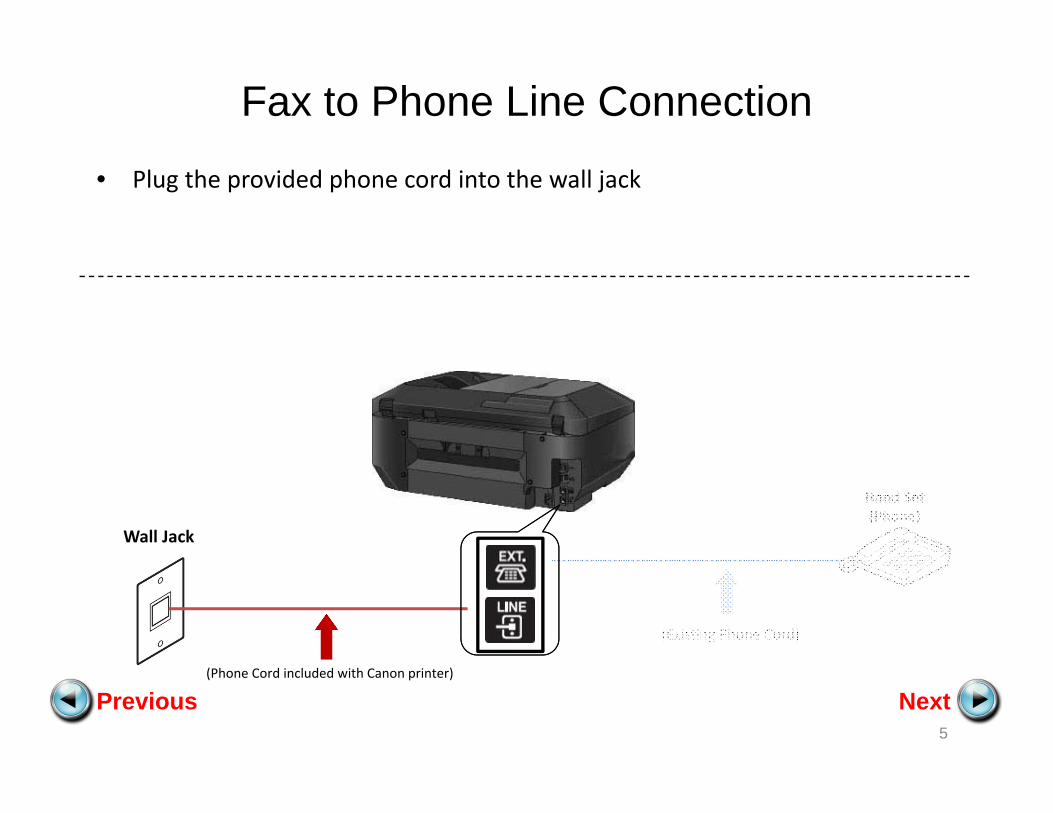
Fax to Phone Line Connection
NextPrevious4
Before
After
Wall Jack
(Existing Phone Cord)
(Phone Cord included with Canon printer)
Hand Set(Phone)
Fax to Phone Line Connection
NextPrevious5
• Plug the provided phone cord into the wall jack
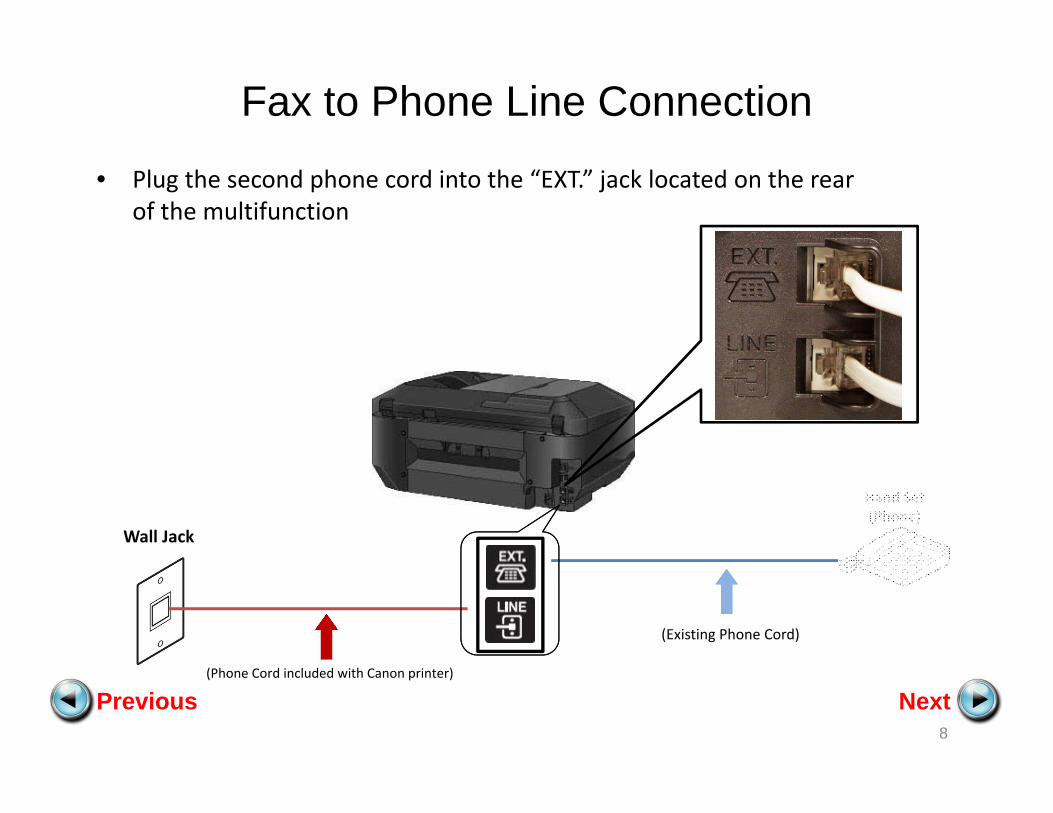
Wall Jack
(Existing Phone Cord)
(Phone Cord included with Canon printer)
Hand Set(Phone)
Fax to Phone Line Connection
NextPrevious6
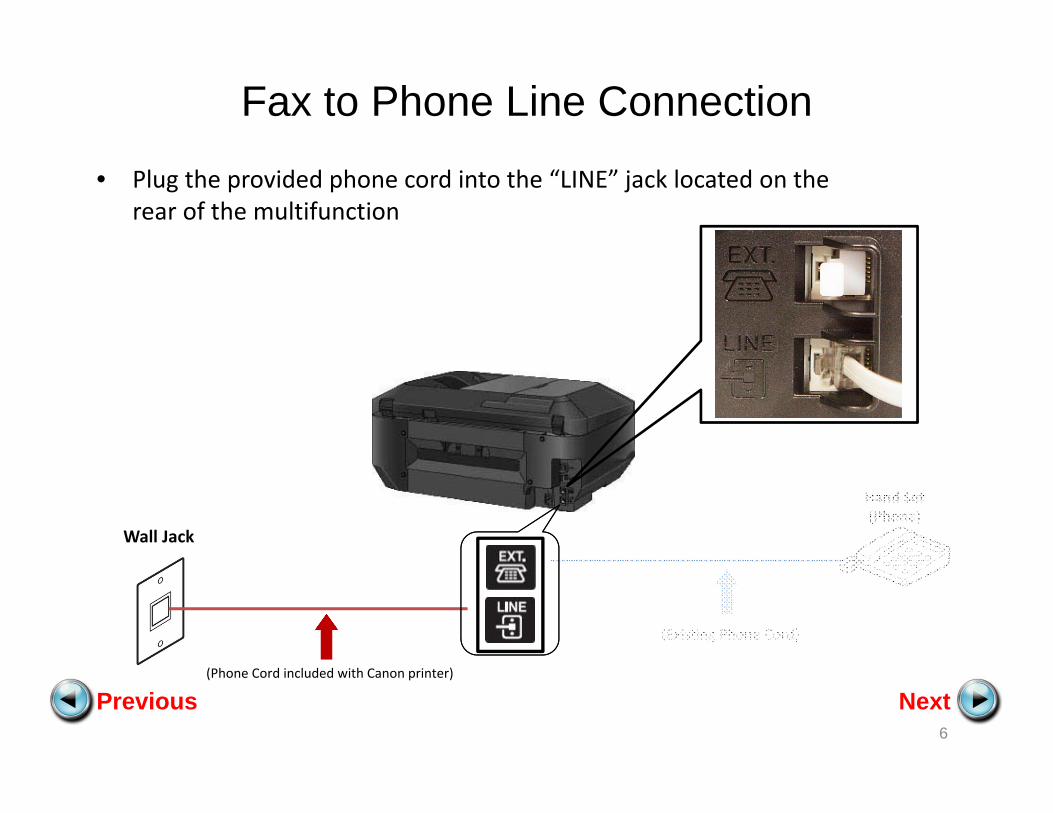
• Plug the provided phone cord into the “LINE” jack located on the rear of the multifunction
Wall Jack
(Existing Phone Cord)
(Phone Cord included with Canon printer)
Hand Set(Phone)
Fax to Phone Line Connection
NextPrevious7
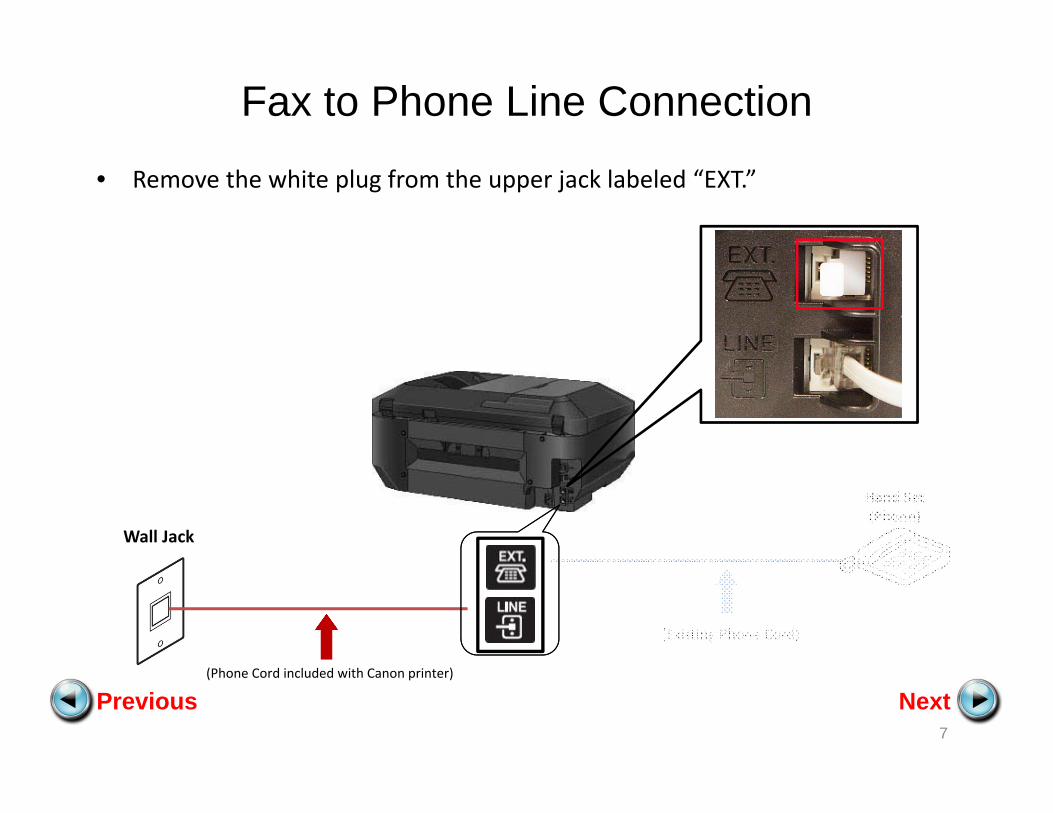
• Remove the white plug from the upper jack labeled “EXT.”
Wall Jack
(Existing Phone Cord)
(Phone Cord included with Canon printer)
Hand Set(Phone)
Fax to Phone Line Connection
NextPrevious8
• Plug the second phone cord into the “EXT.” jack located on the rear of the multifunction
Wall Jack
(Existing Phone Cord)
(Phone Cord included with Canon printer)
Hand Set(Phone)
Fax to Phone Line Connection
NextPrevious9
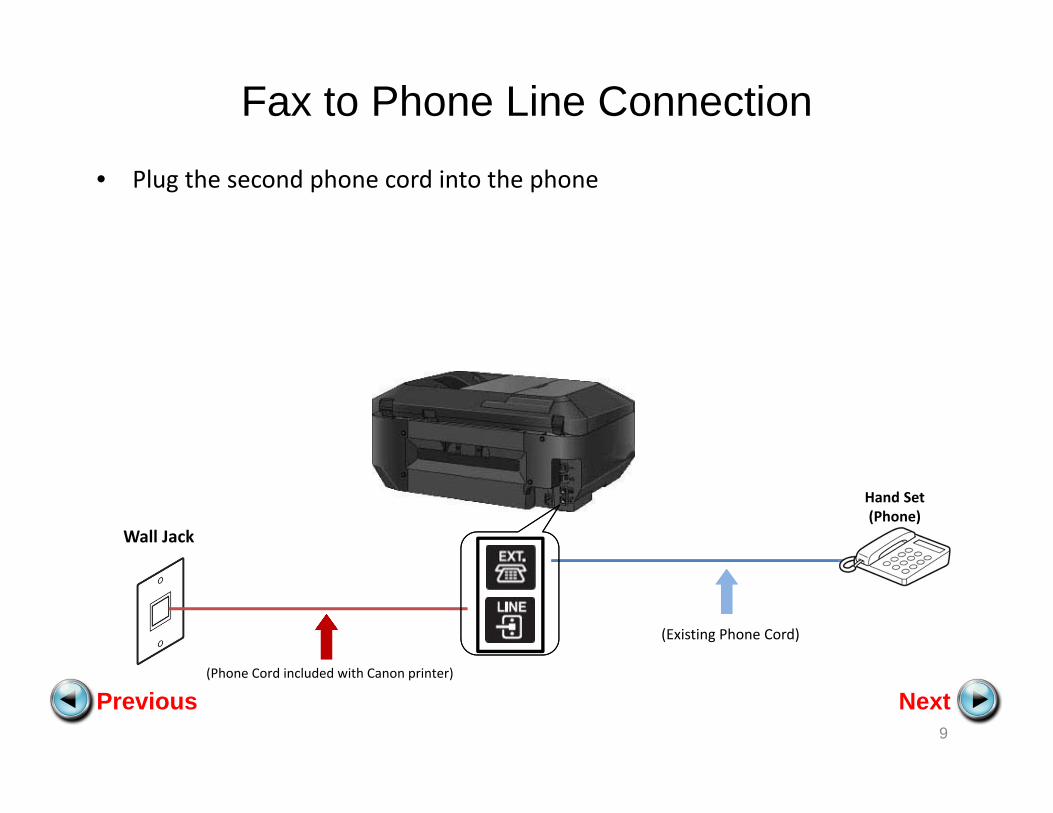
• Plug the second phone cord into the phone
Wall Jack
(Existing Phone Cord)
(Phone Cord included with Canon printer)
Hand Set(Phone)

Setting Up The Receive Mode
NextPrevious
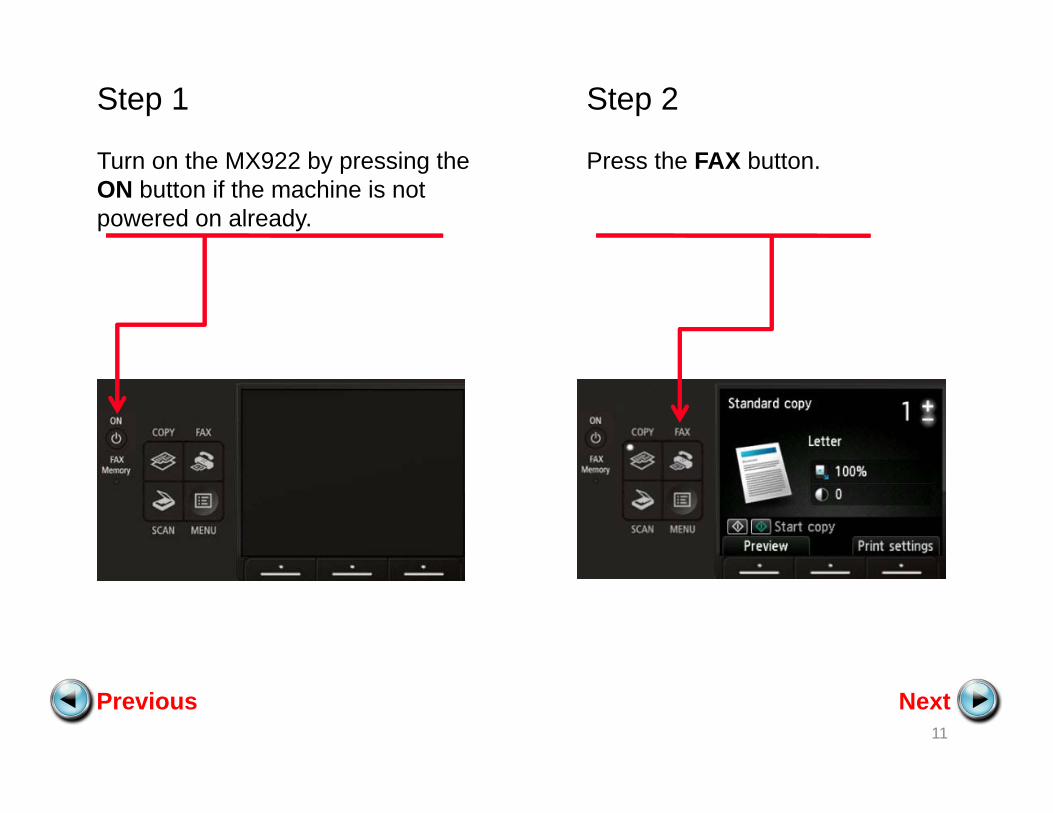
Step 1
Turn on the MX922 by pressing the ON button if the machine is not powered on already.
Step 2
Press the FAX button.
NextPrevious11
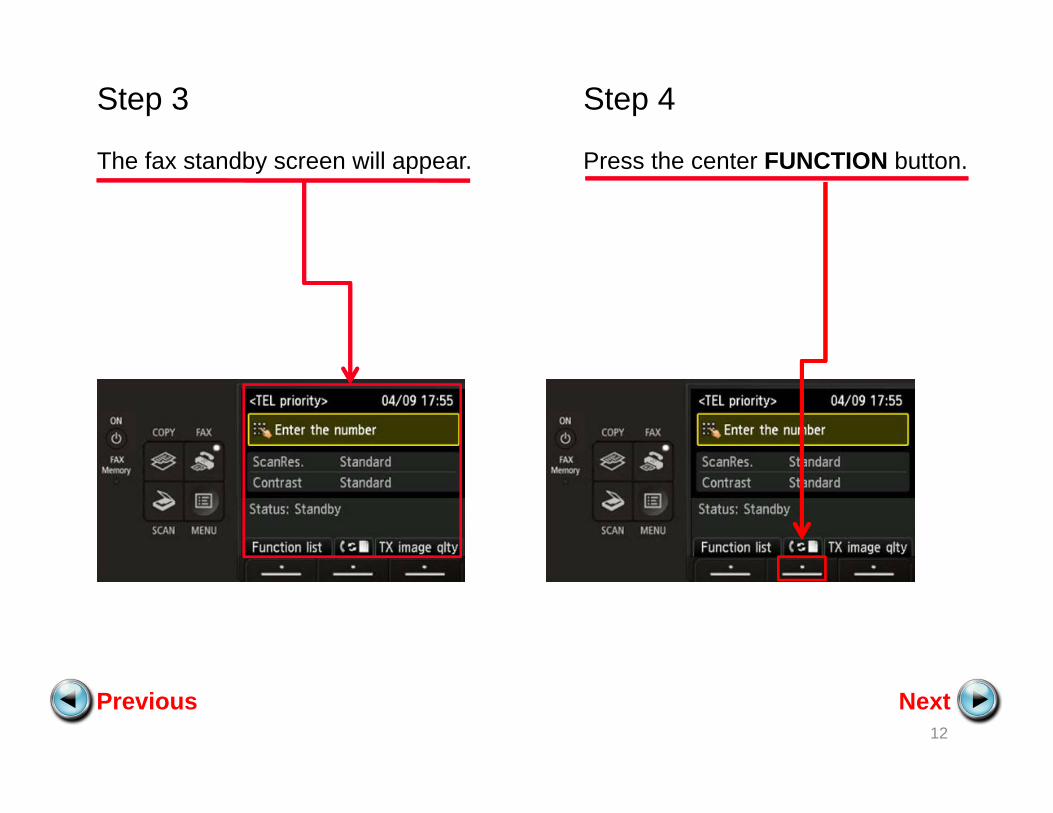
Step 3
The fax standby screen will appear.
Step 4
Press the center FUNCTION button.
NextPrevious12
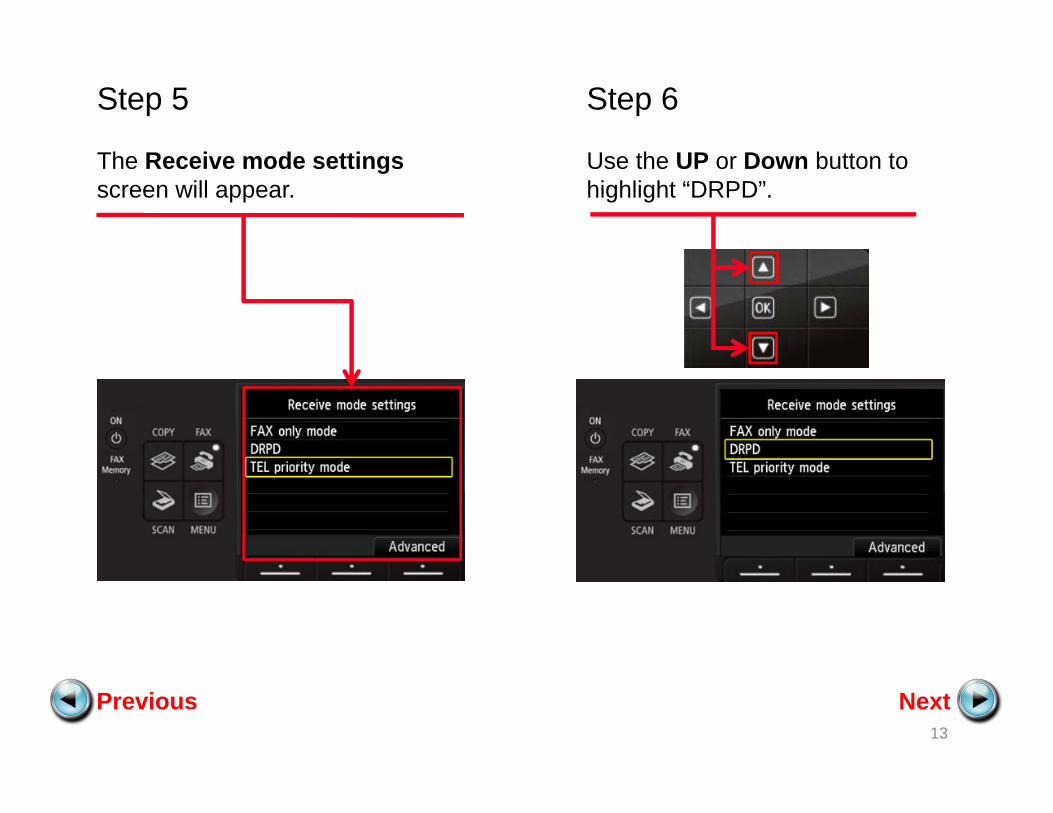
Step 5
The Receive mode settingsscreen will appear.
Step 6
Use the UP or Down button to highlight “DRPD”.
NextPrevious13

Step 7
Press the right FUNCTION button under the Advanced label.
Step 8
The Advanced screen will appear.
NextPrevious14
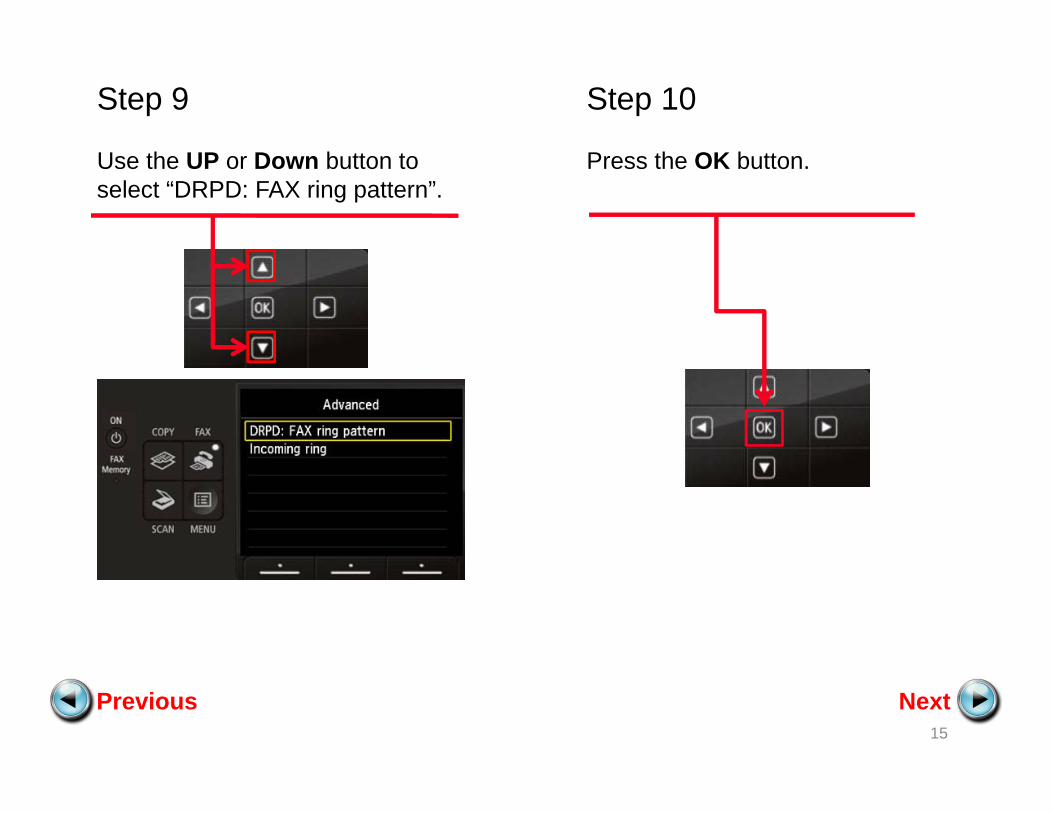
Step 9
Use the UP or Down button to select “DRPD: FAX ring pattern”.
Step 10
Press the OK button.
NextPrevious15
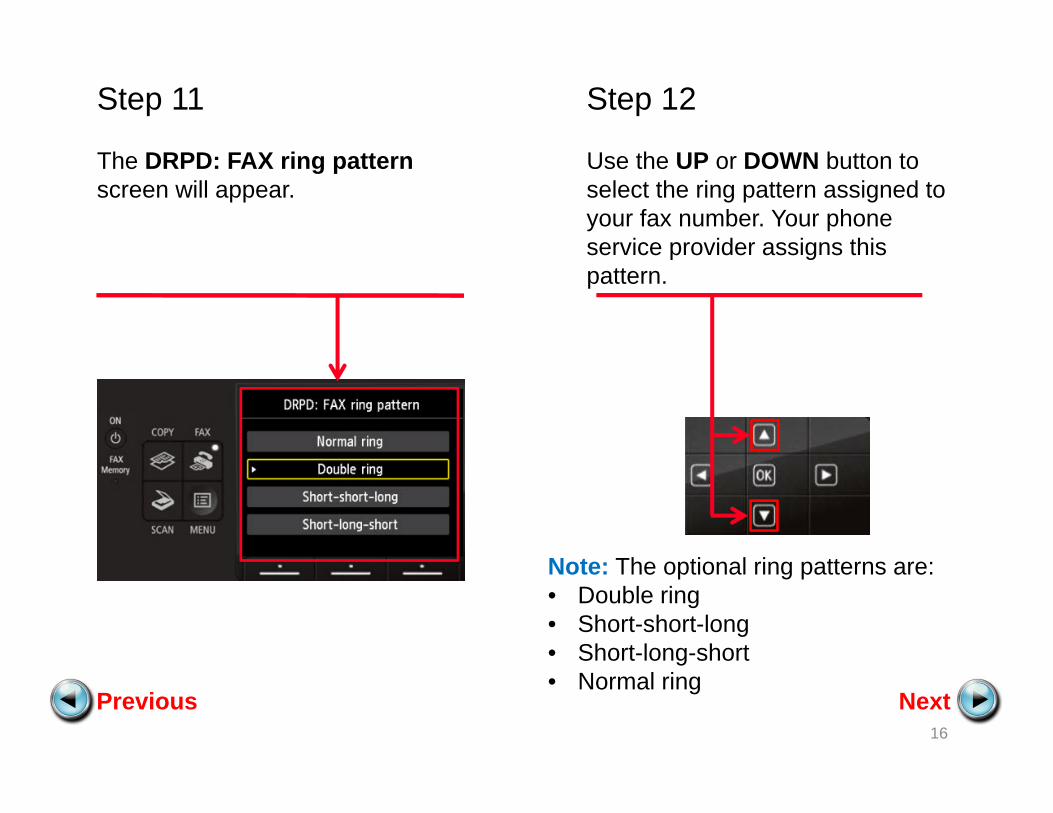
Step 11
The DRPD: FAX ring patternscreen will appear.
Step 12
Use the UP or DOWN button to select the ring pattern assigned to your fax number. Your phone service provider assigns this pattern.
NextPrevious16
Note: The optional ring patterns are:• Double ring• Short-short-long• Short-long-short• Normal ring

Step 13
Press the OK button.
Step 14
The screen will quickly flash “DRPD: FAX ring pattern” with the selected ring type.
NextPrevious17

Step 15
The Advanced screen will appear.
Step 16
Press the Back button to return to the Receive mode settingsscreen.
NextPrevious18
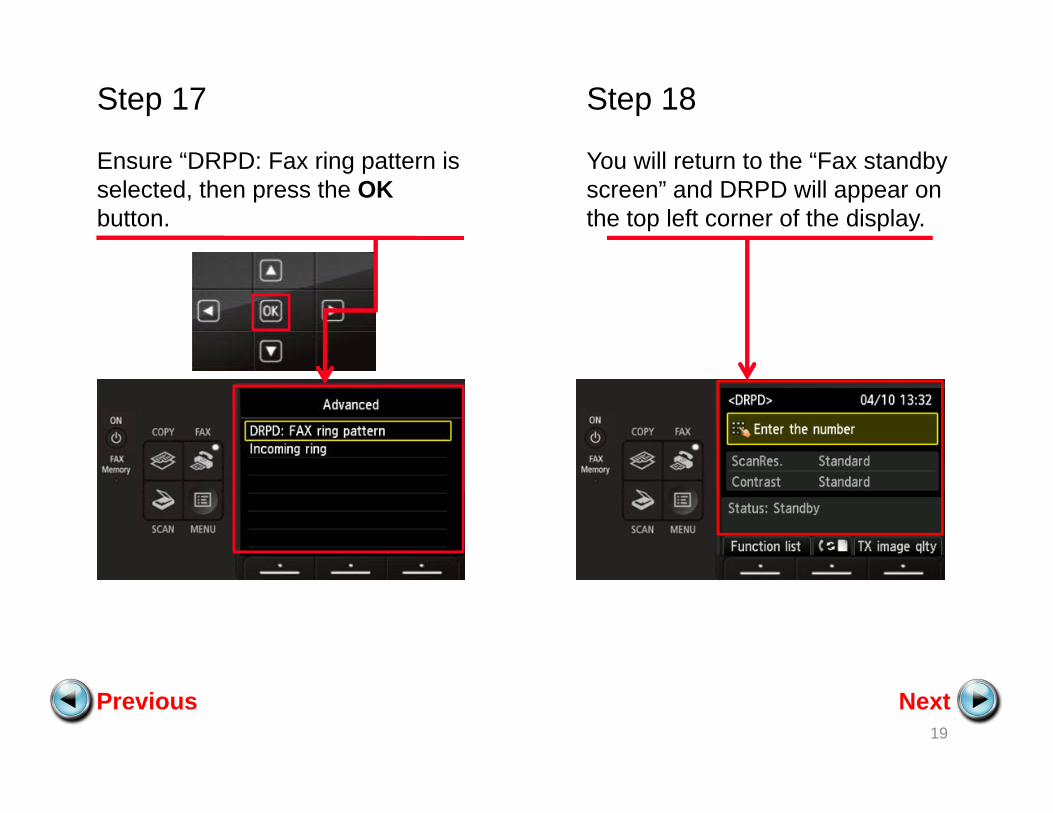
Step 17
Ensure “DRPD: Fax ring pattern is selected, then press the OKbutton.
Step 18
You will return to the “Fax standby screen” and DRPD will appear on the top left corner of the display.
NextPrevious19
Receiving A Fax
When a person dials your DRPD number the MX922 will recognize the distinctive ring pattern and will answer the call.
It will begin receiving the fax automatically.
You do not need to be home or interact with the MX922 in order to receive a fax.
Previous20


