1.2 Server Requirements .................................................................................................................................................................................................. 2
2.1 General Settings .......................................................................................................................................................................................................... 3
2.2 Blog ............................................................................................................................................................................................................................. 4
2.3 Single Post................................................................................................................................................................................................................... 7
3.1 General Settings ........................................................................................................................................................................................................ 14
3.2 Blog and Categories Settings .................................................................................................................................................................................... 16
3.3 Blog Slider ................................................................................................................................................................................................................. 18
3.4 Meta Data ................................................................................................................................................................................................................. 18
4.1 General Settings ........................................................................................................................................................................................................ 19
10. Microdata in Google Search Results .............................................................................................................................................................................. 26
If you have installed the WooCommerce 2+ plugin, you can improve its integration with the FlyingNews theme.
Mix Products and Posts
If you turn on this option and have set your home page as blog, some products will appear between posts. You can
choose these products in the „Show product“ item.
If you have built your home page as a shop, there will be the latest posts mixed between your products.
Show Product
Here you can choose the products you want to be shown between your posts on the main page.
Product Page
Product Page Layout: This option allows you to choose one of three preset layouts for your product page, with a
sidebar on the left or on the right, or without it. If you choose one of the layouts with sidebar, the Product Right
Sidebars or Product Left Sidebars dropdown menu appears. Choose the sidebar item you prefer (please see
subchapter 2.4 Sidebar Manager and chapter 7. Widgets to learn how to set up and use the custom sidebars).
Display Nav Bar on Product Pages: Turn on this option if you want to display the nav bar in individual products.
Product Category
Product Category Layout: Here you can choose one of three preset layouts for your product category, with a sidebar
on the left or on the right, or without it. If you choose one of the layouts with sidebar, the Category Right Sidebars
or Category Left Sidebars dropdown menu appears. Choose the sidebar item you prefer (please see subchapter 2.4
Sidebar Manager and chapter 7. Widgets to learn how to set up and use the custom sidebars).
3. Pages
3.1 General Settings
Here you can easily set up some special features of your pages. To create a new page navigate to Pages -> Add New.
Now, you can see the mentioned options placed below the main content field. There are the same settings available
for editing the pages you have already created (Pages -> All Pages).
Page Layout
This option allows you to choose one of three preset layouts for your page, with a sidebar on the left or on the right,
or without it. If you choose one of the layouts with sidebar, the Blog Right Sidebars or Blog Left Sidebars dropdown
menu appears. Choose the sidebar item you prefer (please see subchapter 2.4 Sidebar Manager and chapter
7. Widgets to learn how to set up and use the custom sidebars).
Page Name
You can allow a page name to be displayed in a preview. Simply choose on or off.
15
Breadcrumb Navigation Bar
Here you can choose whether you allow to display a breadcrumb navigation bar on your page or not.
Menu Background Color
Choose the color you want to use as a background color for the menu, filtering bar and breadcrumb navigation bar.
If you select the first color box, the color will be taken from the main template settings. Choose the Custom Color
box to use your custom menu background color selected in the option below.
16
Custom Menu Background Color
Pick a color from the palette or enter a hex code to set a color for the elements described above.
Custom Menu Text Color
Here you can choose a color of the menu text items.
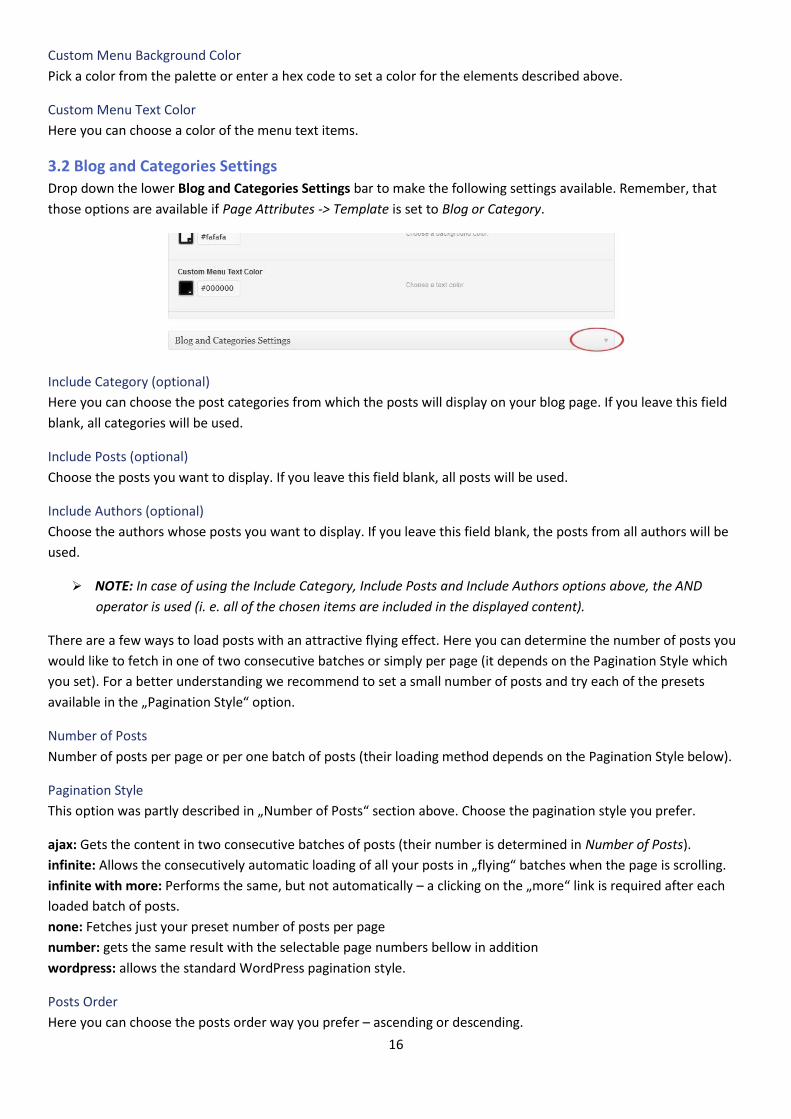
3.2 Blog and Categories Settings
Drop down the lower Blog and Categories Settings bar to make the following settings available. Remember, that
those options are available if Page Attributes -> Template is set to Blog or Category.
Include Category (optional)
Here you can choose the post categories from which the posts will display on your blog page. If you leave this field
blank, all categories will be used.
Include Posts (optional)
Choose the posts you want to display. If you leave this field blank, all posts will be used.
Include Authors (optional)
Choose the authors whose posts you want to display. If you leave this field blank, the posts from all authors will be
used.
NOTE: In case of using the Include Category, Include Posts and Include Authors options above, the AND
operator is used (i. e. all of the chosen items are included in the displayed content).
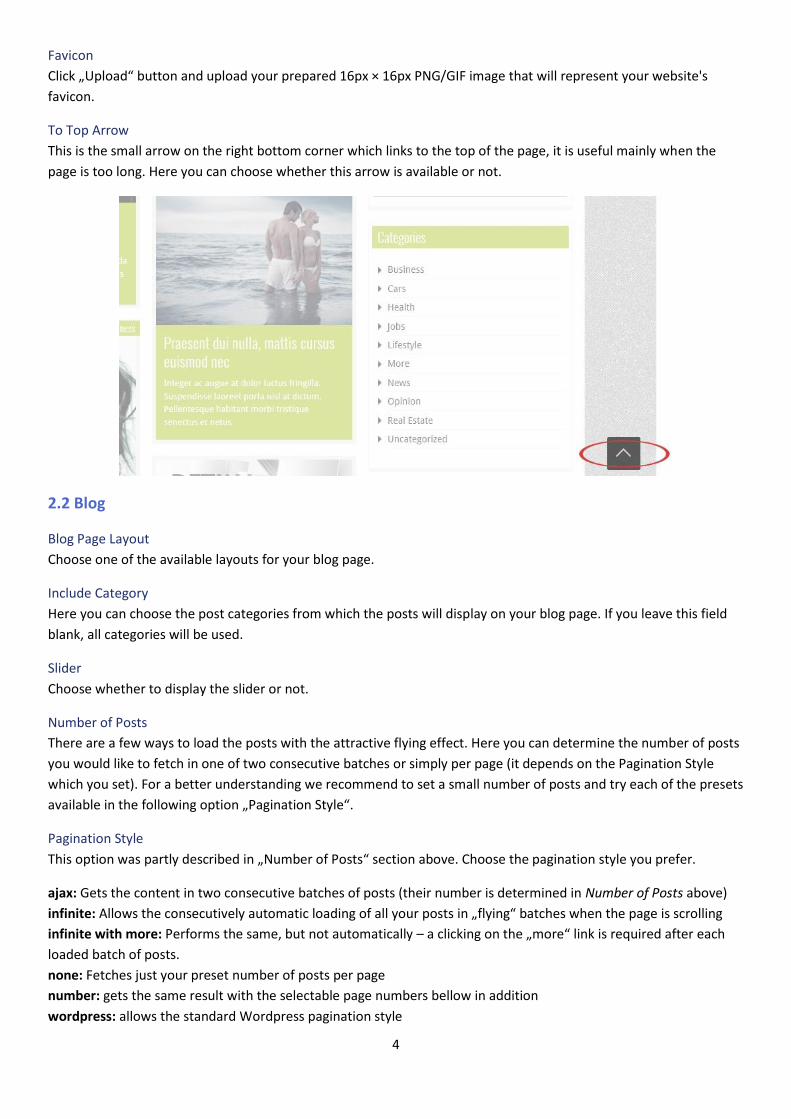
There are a few ways to load posts with an attractive flying effect. Here you can determine the number of posts you
would like to fetch in one of two consecutive batches or simply per page (it depends on the Pagination Style which
you set). For a better understanding we recommend to set a small number of posts and try each of the presets
available in the „Pagination Style“ option.
Number of Posts
Number of posts per page or per one batch of posts (their loading method depends on the Pagination Style below).
Pagination Style
This option was partly described in „Number of Posts“ section above. Choose the pagination style you prefer.
ajax: Gets the content in two consecutive batches of posts (their number is determined in Number of Posts).
infinite: Allows the consecutively automatic loading of all your posts in „flying“ batches when the page is scrolling.
infinite with more: Performs the same, but not automatically – a clicking on the „more“ link is required after each
loaded batch of posts.
none: Fetches just your preset number of posts per page
number: gets the same result with the selectable page numbers bellow in addition
wordpress: allows the standard WordPress pagination style.
Posts Order
Here you can choose the posts order way you prefer – ascending or descending.
17
Post Order by
Choose the parametres you want the posts to be ordered by.
Date: order by date
None: no order
ID: order by post ID
Author: order by author
Title: order by title
Modified: order by the last modified date
Parent: order by post parent IT
Rand: random order
Comment count: order by number of comments.
Post Date Format
Here you can define the date format for your posts. Please click the attached link at this option to learn how to use
the characters convention.
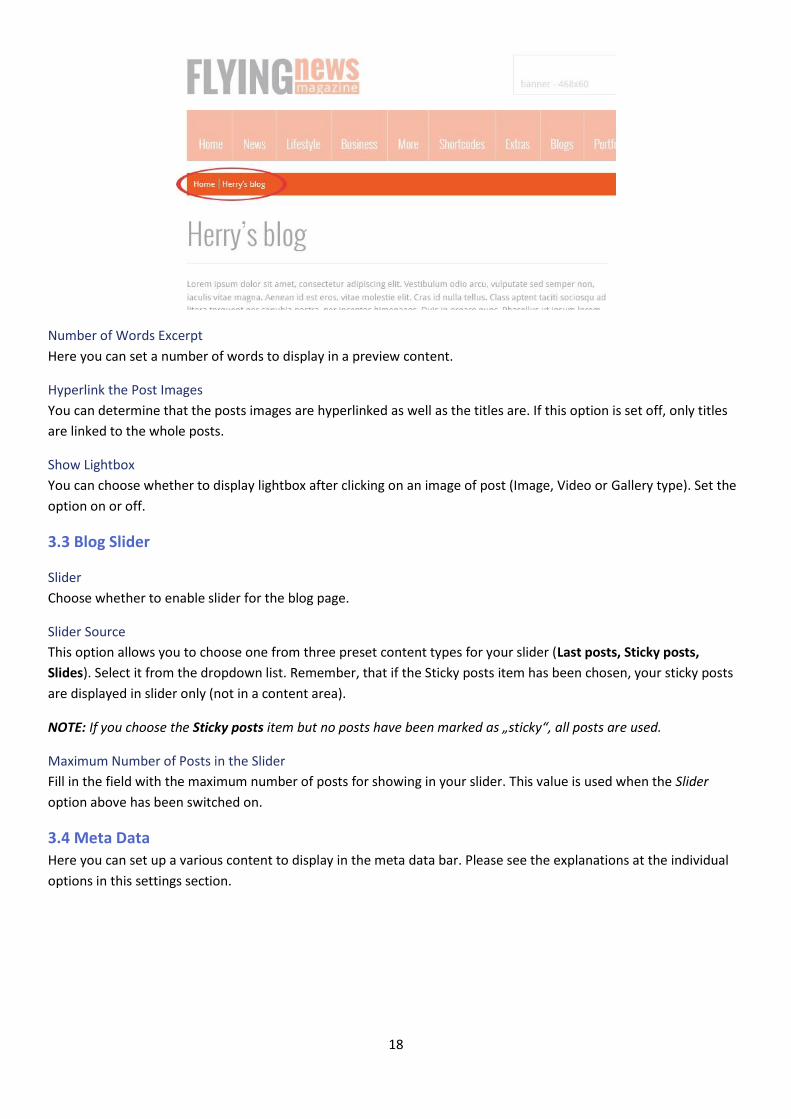
Category Bar Content
You can choose whether the Main Bar in selected category offers the Breadcrumb or Sorting option.
18
Number of Words Excerpt
Here you can set a number of words to display in a preview content.
Hyperlink the Post Images
You can determine that the posts images are hyperlinked as well as the titles are. If this option is set off, only titles
are linked to the whole posts.
Show Lightbox
You can choose whether to display lightbox after clicking on an image of post (Image, Video or Gallery type). Set the
option on or off.
3.3 Blog Slider
Slider
Choose whether to enable slider for the blog page.
Slider Source
This option allows you to choose one from three preset content types for your slider (Last posts, Sticky posts,
Slides). Select it from the dropdown list. Remember, that if the Sticky posts item has been chosen, your sticky posts
are displayed in slider only (not in a content area).
NOTE: If you choose the Sticky posts item but no posts have been marked as „sticky“, all posts are used.
Maximum Number of Posts in the Slider
Fill in the field with the maximum number of posts for showing in your slider. This value is used when the Slider
option above has been switched on.
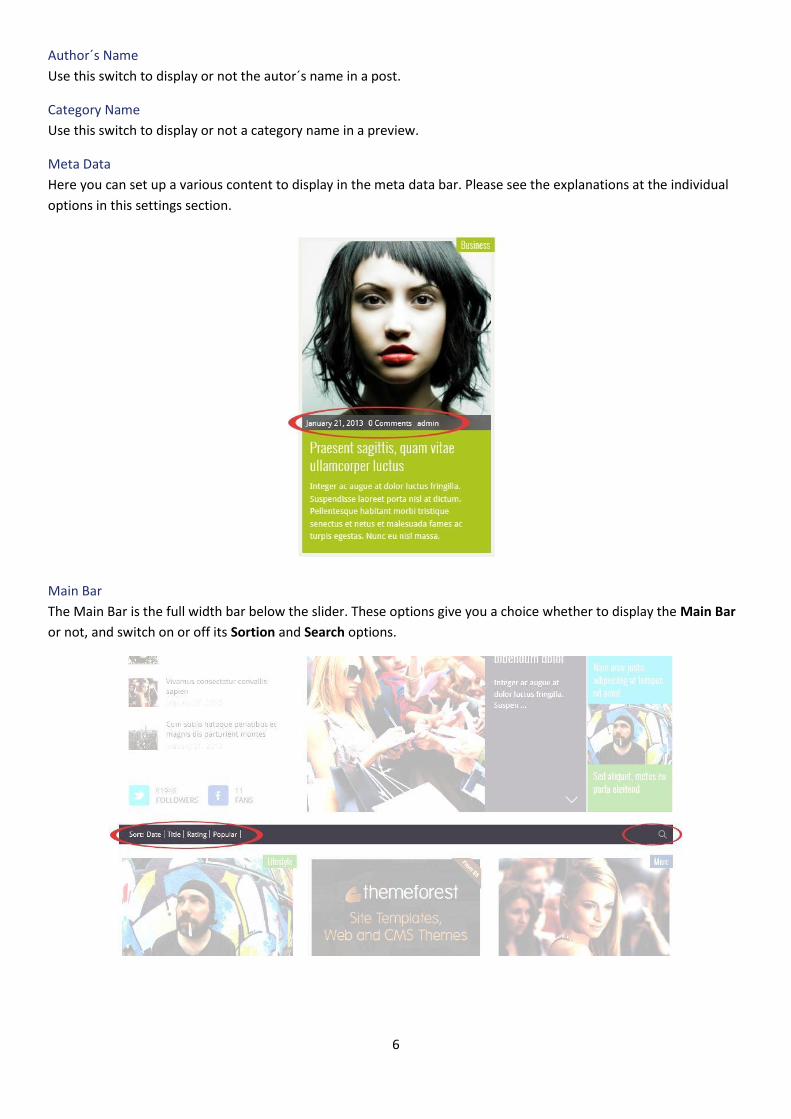
3.4 Meta Data Here you can set up a various content to display in the meta data bar. Please see the explanations at the individual
options in this settings section.
19
4. Posts
4.1 General Settings Posts probably represent the most common content on your web. Here you can easily set up some special features
for all your posts and for the each one of them. To create a new post navigate to Posts -> Add New. Now, you can
see the mentioned options placed below the main content field. There are the same settings available for editing the
posts you have already created (Pages -> All Pages).
Page Layout
This option allows you to choose one of the preset layouts for your page, with a sidebar on the left or on the right, or
without it. Notice, that the „Default Page Layout“ option uses the Post Layout set in Theme Options -> Single Post.
If you choose one of the layouts with sidebar, the Blog Right Sidebars or Blog Left Sidebars dropdown menu
appears. Choose the sidebar item you prefer (please see subchapter 2.4 Sidebar Manager and chapter 7. Widgets to
learn how to set up and use the custom sidebars).
Use Featured Image or Gallery or Video in post
You can choose whether to display a featured image or gallery or video at the top of your post. If the switch is off,
only the possible images which you have put into the post content are shown.
NOTE: An image is displayed always when the featured image has been set. A gallery is taken from the post if
the Gallery post format has been set, a gallery is taken from the link when the Video post format has been
set.
Breadcrumb Navigation Bar
Here you can choose whether you allow to display a breadcrumb navigation bar on the top of your post or not.
4.2 Ratings Settings
Rating Title
This is a label text of your ratings box. Fill in the field with your version.
20
Rating Placement
Choose the ratings placement you prefer. It may be placed at the top or bottom of your post, or turned off.
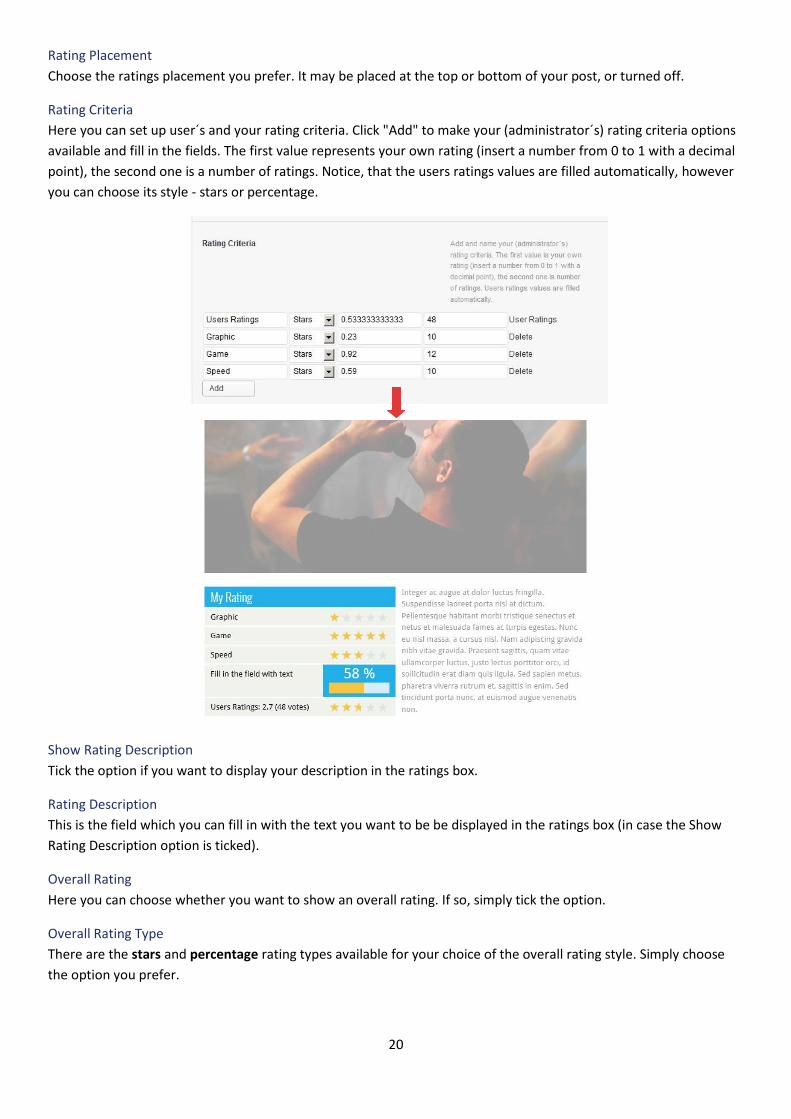
Rating Criteria
Here you can set up user´s and your rating criteria. Click "Add" to make your (administrator´s) rating criteria options
available and fill in the fields. The first value represents your own rating (insert a number from 0 to 1 with a decimal
point), the second one is a number of ratings. Notice, that the users ratings values are filled automatically, however
you can choose its style - stars or percentage.
Show Rating Description
Tick the option if you want to display your description in the ratings box.
Rating Description
This is the field which you can fill in with the text you want to be be displayed in the ratings box (in case the Show
Rating Description option is ticked).
Overall Rating
Here you can choose whether you want to show an overall rating. If so, simply tick the option.
Overall Rating Type
There are the stars and percentage rating types available for your choice of the overall rating style. Simply choose
the option you prefer.
21
Enable User Rating
Tick the option if you want allow users to rate a post.
5. Categories
FLYINGnews theme gives you some extra options for your categories of posts. Navigate to Posts -> Categories and
set up a new category you want, or choose any added one which you need to edit.
Category Color Scheme
Choose a color you want to use for the main graphic elements of selected category. It affects the images
background, the category bar, as well as the background of chosen category´s dropdown item and its subitems in the
main menu. If you select the first color box, the color will be taken from the main template settings. Choose the
Custom Color box to use your custom color selected in the option below.
Custom Category Color Scheme
Pick a color from the palette or enter a hex code to set a color for the elements described above. Remember, that
the Custom Color item in the Category Color Scheme has to be chosen.
Custom Menu Text Color
Pick a color from the palette or enter a hex code to set a menu items color. Remember, that the Custom Color option
in the Category Color Scheme has to be chosen.
Slider
Choose whether to enable slider for the category.
Slider Source
This option allows you to choose one from three preset content types for your slider (Last posts, Sticky posts,
Slides). Select it from the dropdown list. Remember, that if the Sticky posts item has been chosen, your sticky posts
are displayed in slider only (not in a content area).
NOTE: If you choose the Sticky posts item but no posts have been marked as „sticky“, all posts are used.
Maximum Number of Posts in the Slider
Fill in the field with the maximum number of posts for showing in your slider. This value is used when the Slider
option above has been switched on.
Category Bar
Here you can choose whether a category bar (the bar below the main menu) is displayed or not.
22
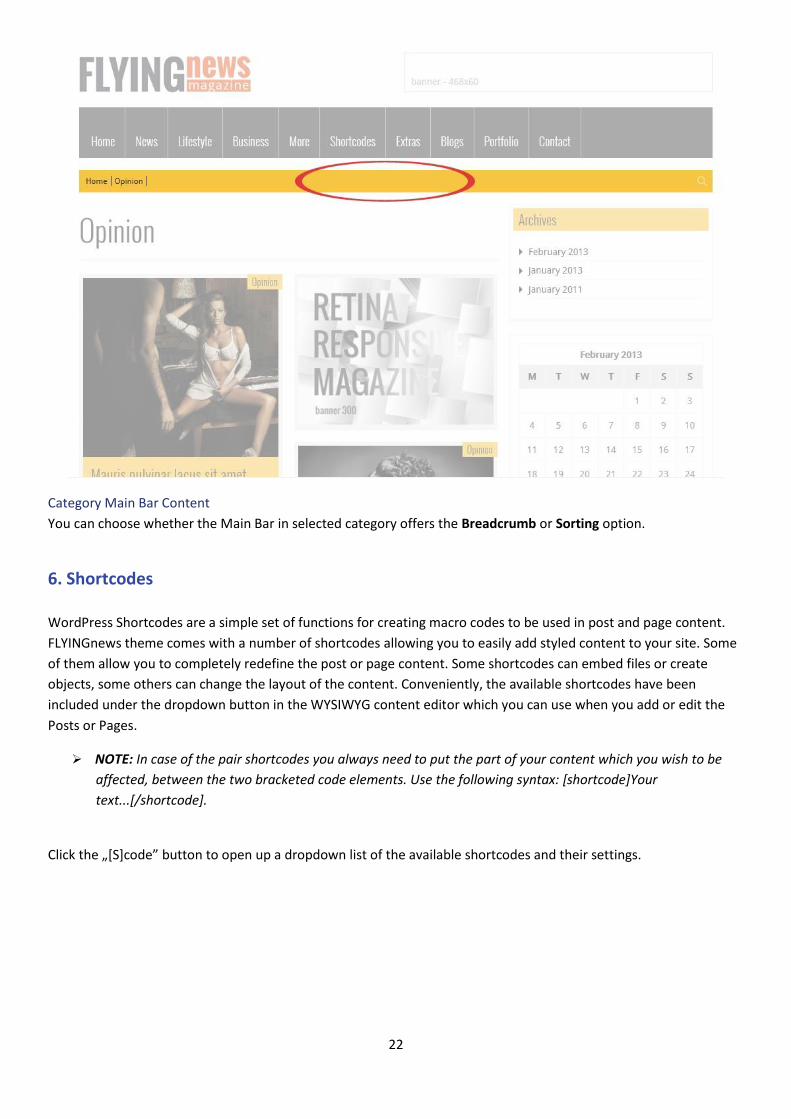
Category Main Bar Content
You can choose whether the Main Bar in selected category offers the Breadcrumb or Sorting option.
6. Shortcodes
WordPress Shortcodes are a simple set of functions for creating macro codes to be used in post and page content.
FLYINGnews theme comes with a number of shortcodes allowing you to easily add styled content to your site. Some
of them allow you to completely redefine the post or page content. Some shortcodes can embed files or create
objects, some others can change the layout of the content. Conveniently, the available shortcodes have been
included under the dropdown button in the WYSIWYG content editor which you can use when you add or edit the
Posts or Pages.
NOTE: In case of the pair shortcodes you always need to put the part of your content which you wish to be
affected, between the two bracketed code elements. Use the following syntax: [shortcode]Your
text...[/shortcode].
Click the „*S+code” button to open up a dropdown list of the available shortcodes and their settings.
23
Columns: Choose this item if you want to wrap your paragraph into some of the offered variants of columns.
Layouts: These shortcodes let you arrange your content to the various layouts.
Typography: Here you find some typoghraphy tools such are blockquote, button, highlight, notice, pre and code.
Divider: You can add a simple or styled divider into you content.
Features: This allows you to embed some objects like Google Maps, iframes etc.
Media: You can embed Youtube or Vimeo video.
Contact Form: Simply set up and embed the contact form.
Porfolio: This shortcode allows you to simply set up and embed a whole portfolio into your post or page.
7. Widgets
FLYINGnews theme gives you 7 custom widgets along with the standard widgets included with Wordpress. You find
them in Appearance -> Widgets. Widgets can be placed into the Featured, Footer 1, Footer 2, Footer 3, as well as
into all your custom sidebar positions you have created in Theme Options -> Sidebar Manager section. Simply move
the chosen widget to the position you need by drag´n drop method. Then open the widget´s dropdown options and
set up all you need.
Contact Form – J&W Widget
Using this widget you can add the theme look-based contact form into the widget position you want. Drag it to the
position you want and fill its fields with what you need.
24
Custom Banner - J&W Widget
This widget allows you to display one of your custom banners (see chapter 2.8 Advertisement Banner – Custom 1,
Custom 2).
Flickr - J&W Widget
You can show your Flickr photos on your page using this widget. Fill in the fields with your values.
Login – J&W Widget
The theme-based login window. This widget has no options to set up.
Social – J&W Widget
Here you can simply add links to your social profiles at Google+, Twitter, Facebook, Youtube, Vimeo, as well as a link
to RSS chanel.
25
Advice to get the required IDs:
To access your Google Plus Page ID follow these steps:
Log in to your Google+ account.
2. Click on the "Page" Icon and select your page.
3. The string between the last slashes in URL which you can see in your browser´s address bar is the ID you need.
To get your Facebook Page ID:
Log into your Facebook and on the sidebar, search for "Pages" and click.
2. On your "Pages", navigate to "Edit Page" on the right hand side.
3. Go to your browser URL bar and copy your Page ID – the string displayed after id?.
To get your Vimeo channel name:
Use the text string from the channel´s URL (e.g. http://vimeo.com/channels/matvmovie)
Tab Posts – J&W Widget
This widget allows you to set up a number and selection of popular and recent posts and comments previews, and a
number of tags as well. This content is sorted to the tabs which labels you can (re)name in this widget too. The
widget looks like that you can see at the following picture from our demo site.
Twitter – J&W Widget
This theme-based widget allows you to set up your latest tweets from the Twitter. You can place it e.g. in a footer
area. Simply fill in your username and a number of tweets to show.
8. Slider
To manage the slides in slider go to Slides -> Add New.
8.1 Upload Images
You don´t need to specially modify your images for slider, because they will be automatically resized and cropped to
fit with it. However, we don't recommend to upload too large images since they take up too much space on a server.
26
Type a name of your picture into Add New Slide field, go to Feature Image box, click Set featured image and upload the image you want.
Slides Settings
Here you can set up some features of the slide that you are creating.
Text Area: Fill in this field with some text you want to show at the slider item.
Image Link: If you want an slide URL to be different from the default insert the URL you need. This rewrites a slides´s
link with the link you have entered.
Link Target: Define a link target.
Slider Background Color: Set a background color for your slide. Choose the Custom Color box to use your custom
color selected in the option below.
Custom Background Color: Choose a background color for your slide. Remember, that the Custom Color option in
the Slider Background Color has to be chosen.
Custom Text Color: Choose a text color for your slide description. The Custom Color option in the Slider Background
Color has to be chosen.
9. Portfolio
At first create a category for your portfolio. Navigate to Portfolio -> Portfolio Categories and add your new category
or categories (e.g. Photography, Videography etc.).
Than go to Portfolio -> Add New. Here you create a portfolio item which type may be selected in the Type
dropdown list below the content field.
Page Layout
Here you can choose one of the available layouts for your portfolio page.
Type
Choose the type of the portfolio post you need to create (Image, Video, Doc, Link) and set up the options which
appear when you choose Video, Doc, or Link item.
Tick the Portfolio Categories which you want the portfolio item to be associate with. If you need, set the other
options and click „Preview“ or „Publish“ button.
REMEMBER: Never put an image to the content field since it won´t be shown. You have to add it and set up
as Featured Image (the option at the bottom right corner).
TIP for a video thumbnail: If you want to use an thumbnail of your choice instead of that generated from
your video URL, you can set your own featured image for this video.
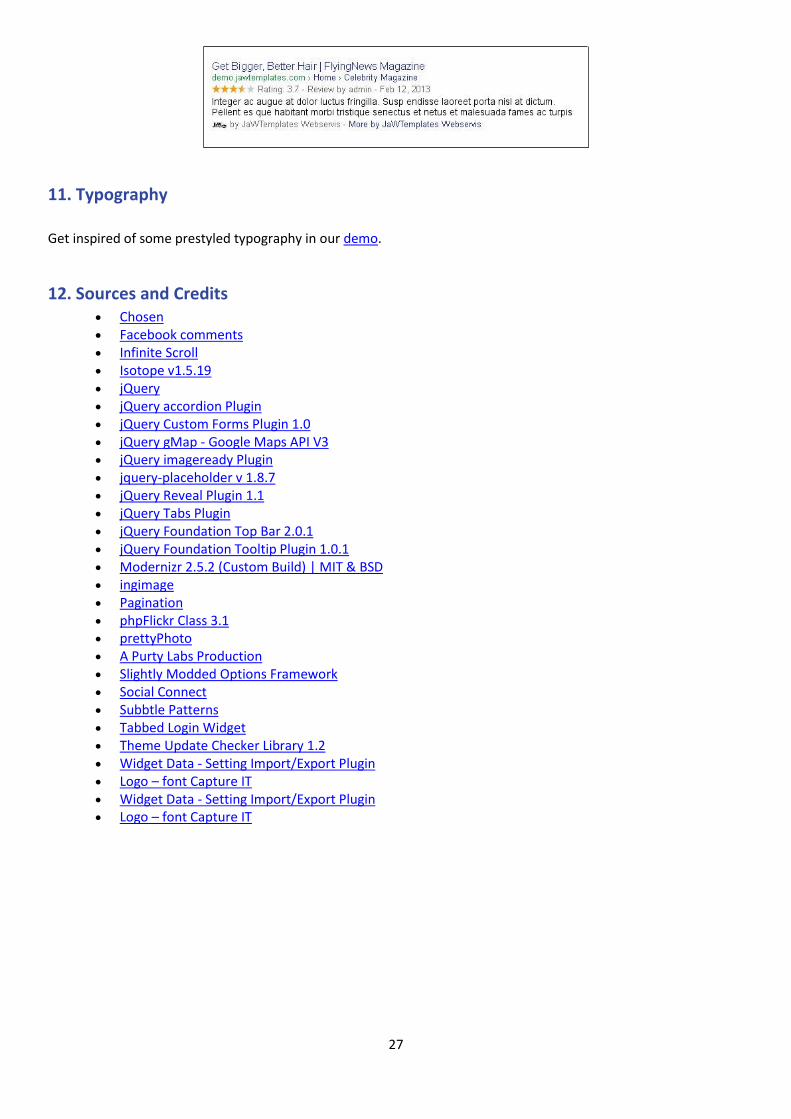
10. Microdata in Google Search Results To correctly display the author in Google searching, set a Google+ URL in User profile in Wordpress administration (navigate to Users section), and add your web domain into the "Contributor To" section in your google+ profile settings. Then your post will be shown between google search results like you can see in the following picture.
27
11. Typography
Get inspired of some prestyled typography in our demo.
12. Sources and Credits Chosen Facebook comments Infinite Scroll Isotope v1.5.19 jQuery jQuery accordion Plugin jQuery Custom Forms Plugin 1.0 jQuery gMap - Google Maps API V3 jQuery imageready Plugin jquery-placeholder v 1.8.7 jQuery Reveal Plugin 1.1 jQuery Tabs Plugin jQuery Foundation Top Bar 2.0.1 jQuery Foundation Tooltip Plugin 1.0.1 Modernizr 2.5.2 (Custom Build) | MIT & BSD ingimage Pagination phpFlickr Class 3.1 prettyPhoto A Purty Labs Production Slightly Modded Options Framework Social Connect Subbtle Patterns Tabbed Login Widget Theme Update Checker Library 1.2 Widget Data - Setting Import/Export Plugin Logo – font Capture IT Widget Data - Setting Import/Export Plugin Logo – font Capture IT