17
DotStar Belly Dance Fans Created by Erin St Blaine Last updated on 2017-04-26 10:02:52 PM UTC
DotStar Belly Dance FansCreated by Erin St Blaine
Last updated on 2017-04-26 10:02:52 PM UTC

23344556
7889
111111
131515
Guide Contents
Guide ContentsOverviewMaterials For Building Two FansBuilding the Fans
Acrylic Fan BaseElectronics EnclosureAttaching the LEDsAdding the Enclosure
WiringElectronics Assembly
Battery ChargerLEDs & Mode Switch
The CodeSoftware SetupFastLED Library
If you encounter trouble…Finishing
Adding Veil Fabric
© Adafruit Industries https://learn.adafruit.com/dotstar-belly-dance-fans Page 2 of 17
OverviewDotStars are super fast clocking pixels that achieve a persistence-of-vision look with moving LED patterns. This project uses DotStars and theFastLED code library to create stardust magic.
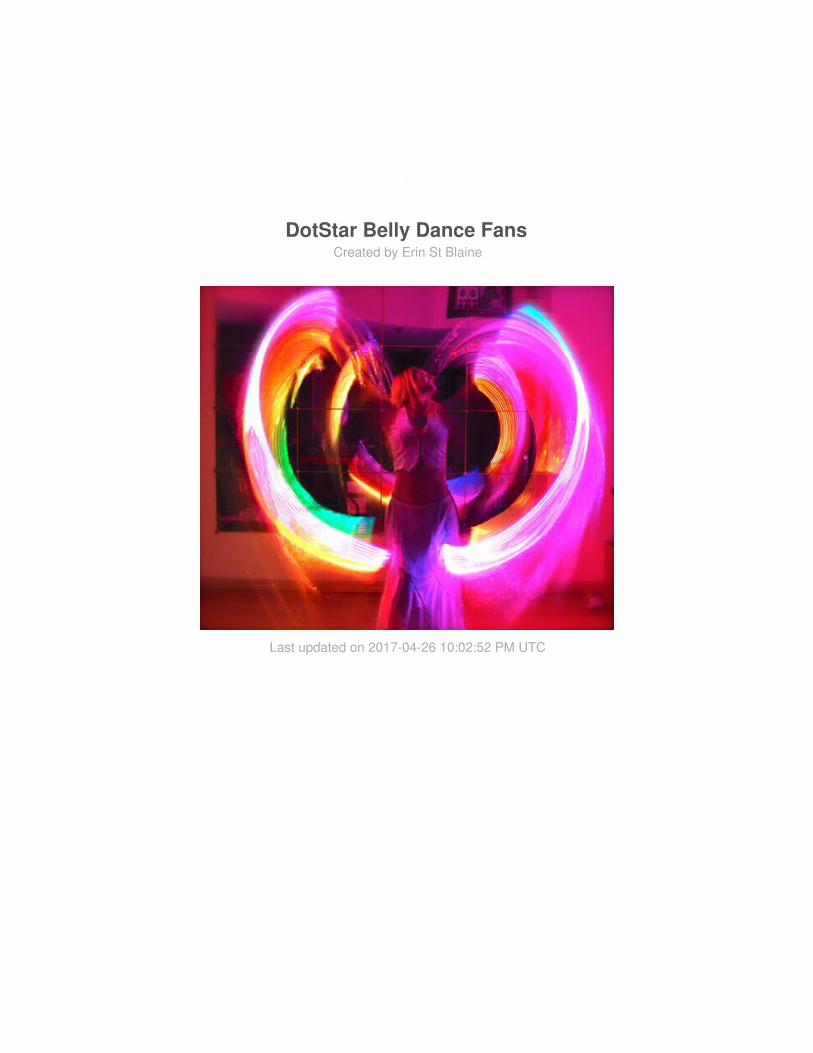
Swing your dance fans slowly to mesmerise your audience with the sparkly, pretty lights. Swing them fast, and magical patterns and picturesappear. Look closely and you may see the spiders from Mars or the cats from Japan.
Three modes are included in the code, and you can easily add your own or modify the existing ones.
Let all the children boogie.
Materials For Building Two Fans2 x Pro Trinket 5vPro Trinket 5vAdd To Cart2 x LiPoly Backpack ChargerPro Trinket LiPoly Backpack Add-onAdd To Cart2 x DotStar LEDs1 m DotStar 60 Per Meter LEDsAdd To Cart2 x On/Off SwitchTactile On/Off Switch with LeadsAdd To Cart2 x Mode Switch Button6mm Tactile Momentary SwitchAdd To Cart2 x Battery500 mAh LiPoly BatteryAdd To Cart
Crafty Stuff:
Sheet of acrylic plastic, at least 9" x 18", and 1/8" thick1 yd sparkly fabric or silkDevcon Silicone Adhesive (1 tube per fan) (http://adafru.it/emE)E6000 glue (http://adafru.it/vKE)
Tools & Misc
Soldering iron & solderHeat shrink tubingHot glue gun26awg wire in assorted colors3D printer (optional)Band saw or multi tool with a cutting attachment
© Adafruit Industries https://learn.adafruit.com/dotstar-belly-dance-fans Page 3 of 17
Building the Fans
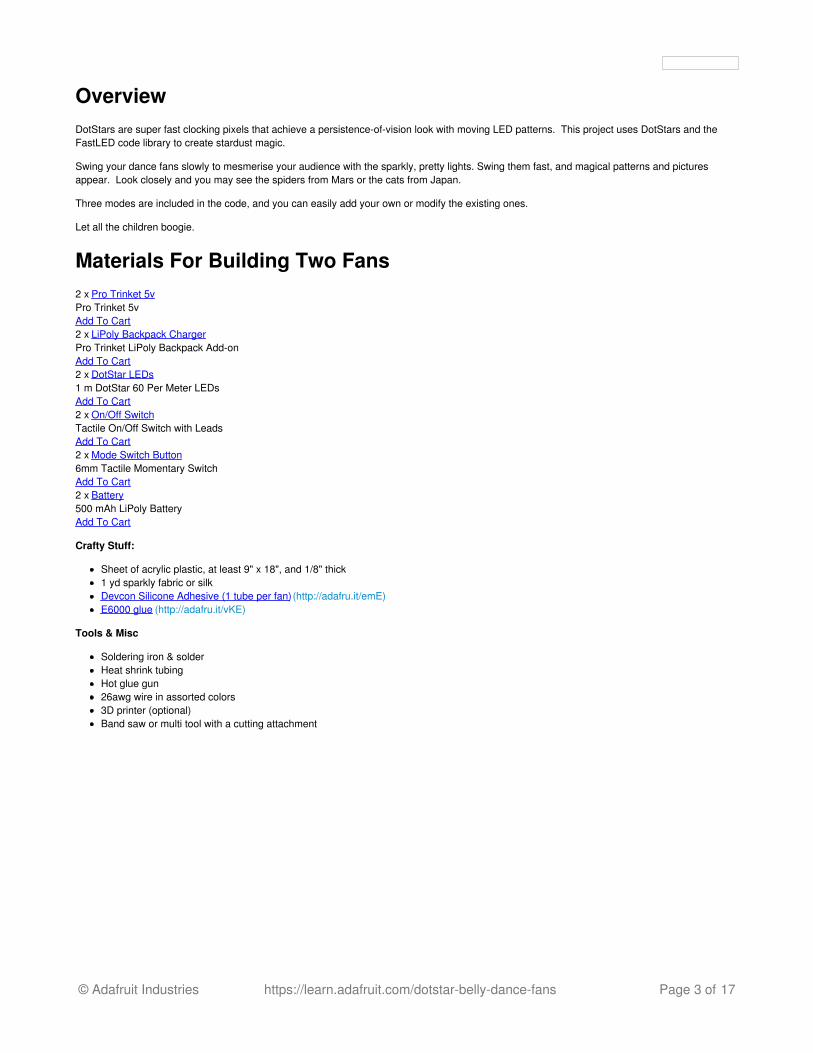
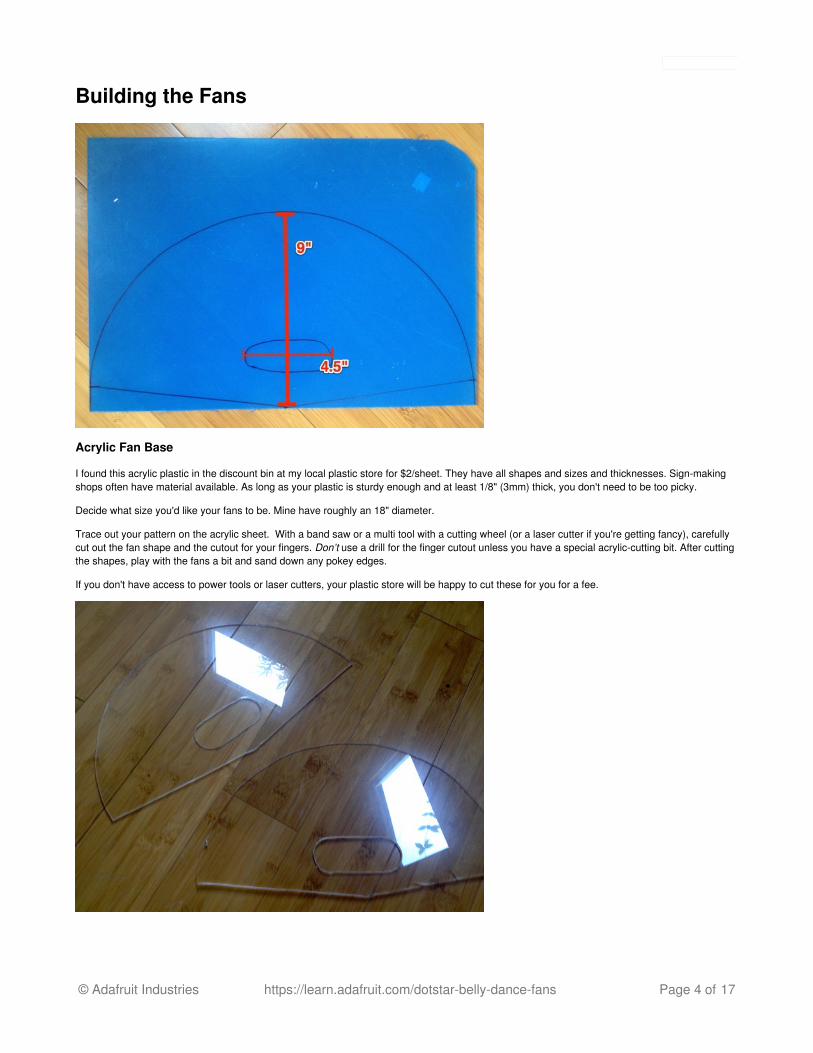
Acrylic Fan Base
I found this acrylic plastic in the discount bin at my local plastic store for $2/sheet. They have all shapes and sizes and thicknesses. Sign-makingshops often have material available. As long as your plastic is sturdy enough and at least 1/8" (3mm) thick, you don't need to be too picky.
Decide what size you'd like your fans to be. Mine have roughly an 18" diameter.
Trace out your pattern on the acrylic sheet. With a band saw or a multi tool with a cutting wheel (or a laser cutter if you're getting fancy), carefullycut out the fan shape and the cutout for your fingers. Don’t use a drill for the finger cutout unless you have a special acrylic-cutting bit. After cuttingthe shapes, play with the fans a bit and sand down any pokey edges.
If you don't have access to power tools or laser cutters, your plastic store will be happy to cut these for you for a fee.
© Adafruit Industries https://learn.adafruit.com/dotstar-belly-dance-fans Page 4 of 17

Electronics Enclosure
The enclosure isn't necessary, but it will protect your battery and Pro Trinket from bumpsand knocking about, and extend the life of your fans.
If you have access to a 3D printer, you can download the electronics enclosure fromThingiverse:
Download led_fans_enclosure.stlhttp://adafru.it/emG
Print in PLA or ABS. Since I'm using a silver veil fabric on the fans, I printed the enclosure in white.
If you don't have a 3D printer, you can order a custom enclosure from Shapeways (http://adafru.it/emH), or you can simply glue the Pro Trinket andbattery directly to the acrylic fan.
Attaching the LEDs
Align the Dotstar strip around the outer edge of the fans, and carefully cut through the strip at the right length. Count how many LEDs you have --mine have 38.
Find the "in" end of the Dotstar strip and solder about 6 inches of wire to each pad. It's a good idea to use a different color of wire for each pad. That will make it much easier to keep them straight when you solder the lights to the Pro Trinket.
Test the strand by hooking up the wires to your Pro Trinket with alligator clips and running the Dotstar strandtest example — this is explained atthe bottom of "The Code" page of this guide. Be sure your strip is working and all the LEDs are in good shape before attaching it permanently toyour fans.
© Adafruit Industries https://learn.adafruit.com/dotstar-belly-dance-fans Page 5 of 17

Set the acrylic fan on top of some supports so its edge is hovering about 1/4" from the table. (The leftover acrylic you just cut off works great as asupport). Line the Dotstar strip against the edge so it's centered both up and down, and left to right.
Run a bead of DevCon Silicone Glue along the edge of the fan where it's touching the Dotstar strip. With a gloved fingertip or tool, smooth theglue into the corner so that it contacts both surfaces as much as possible.
Also add a little glue inside both ends of the Dotstar silicone case to seal it up and keep your soldering secure.
Let the glue dry completely overnight, and repeat with the other side.
Adding the Enclosure
Place the plastic enclosure along the edge of the fan about halfway between the edge ofthe fan and the handle cutout, and glue it down. Hot glue works great for this. Place itso that the wires from the Dotstar strip reach comfortably, but it's far enough away fromthe handle that it doesn't get in your way while holding the fan.
© Adafruit Industries https://learn.adafruit.com/dotstar-belly-dance-fans Page 6 of 17

Wiring
Battery Backpack Connection
Pro Trinket BAT --> Battery Backpack BATPro Trinket G --> Battery Backpack GPro Trinket BUS --> Battery Backpack 5VOn/off switch --> Battery Backpack switch port (cut traces)
LED Dotstar Connections
Pro Trinket 3 --> DotStar CIPro Trinket 4 --> DotStar DIPro Trinket + (on the back) --> Dotstar VCCPro Trinket - (on the back) --> Dotstar GND
NOTE: the DotStar strip's order may not match the order in the picture. Be sure you've got the connections right!
Mode Switch
Pro Trinket 5 --> Momentary SwitchPro Trinket GND --> Momentary Switch
© Adafruit Industries https://learn.adafruit.com/dotstar-belly-dance-fans Page 7 of 17
Electronics Assembly
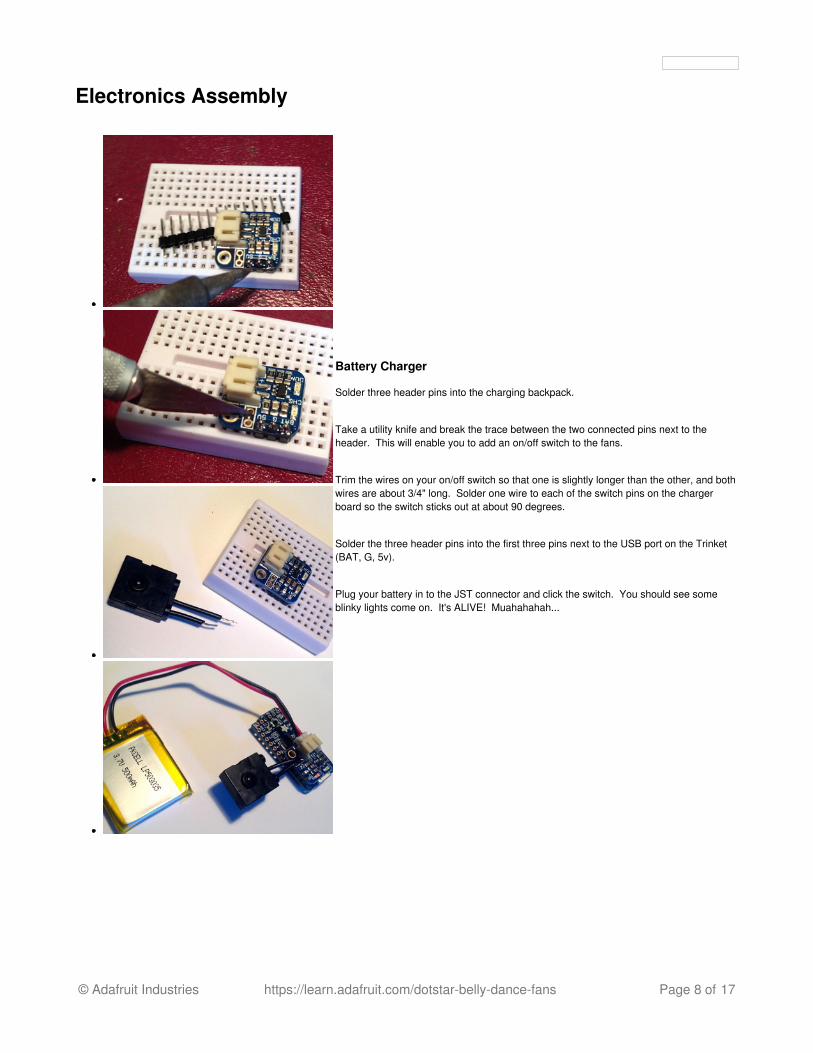
Battery Charger
Solder three header pins into the charging backpack.
Take a utility knife and break the trace between the two connected pins next to theheader. This will enable you to add an on/off switch to the fans.
Trim the wires on your on/off switch so that one is slightly longer than the other, and bothwires are about 3/4" long. Solder one wire to each of the switch pins on the chargerboard so the switch sticks out at about 90 degrees.
Solder the three header pins into the first three pins next to the USB port on the Trinket(BAT, G, 5v).
Plug your battery in to the JST connector and click the switch. You should see someblinky lights come on. It's ALIVE! Muahahahah...
© Adafruit Industries https://learn.adafruit.com/dotstar-belly-dance-fans Page 8 of 17

LEDs & Mode Switch
Unplug the battery and be sure it's unplugged for all the rest of the soldering.
Place the Pro Trinket into the enclosure and thread all four LED wires through the wireslot. Starting with the power and ground wire, measure about how long they need to beand solder them onto the back of the Pro Trinket.
Place the Pro Trinket back in its little spot and do the same with the Data (pin 3) andClock (pin 4) wires. Solder them in place.
Solder a 6" wire to pin 5 and to the GND pin on the Pro Trinket. These wires will go toyour mode switch.
Cut off both legs on one side of your momentary switch. Carefully bend the other twolegs out so your switch can sit flat on the table.
Place the Pro Trinket back in your 3D printed enclosure and feed the switch wires outthrough the slot on the battery side. Trim them to a comfortable length for reaching theswitch with your thumb while holding the fan by the handle.
Slip some heat shrink tubing on to both wires and solder them securely to the remaininglegs on the switch, and secure them with heat shrink.
Place the switch along the narrow edge of the plastic where it's comfortable to reachwith your thumb while holding the fans. Hot glue it in place. Feel free to be generouswith the hot glue so it stays, but be careful not to get any on the working part of theswitch.
Plug the battery in and pop the lid onto the enclosure with the on/off switch positionedinside the hole.
We will glue all this in place later, but for now, let's upload some code and make sure itworks!
© Adafruit Industries https://learn.adafruit.com/dotstar-belly-dance-fans Page 9 of 17

© Adafruit Industries https://learn.adafruit.com/dotstar-belly-dance-fans Page 10 of 17

The CodeSoftware Setup
If this is your first time using Pro Trinket, take a look at Introducting Pro Trinket (http://adafru.it/iPe) to get a guided tour.
FastLED Library
You will also need to install the FastLED library in Arduino (Sketch > Include Library > Manage Libraries... )
Libraries? Why? What's a Library?
In a nutshell, Arduino libraries have a lot of pre-written functions that make your DotStar LEDs easy to command. You can do fancy stuff withoutbeing a code guru. Yay Libraries!
FastLED is a fast, efficient, easy-to-use Arduino library for programming addressable LED strips and pixels. It has a lot of features to get youranimations up and running fast -- and it has a lot of code samples available if you're just learning to code.
All about Arduino Libraries (http://adafru.it/dNR) will tell you everything you ever wanted to know about libraries, including more detailed installationinstructions.
Once your curiosity is satiated and your library is installed, copy and paste the code into your Arduino window.
Go to your Tools menu and select "Pro Trinket 5V USB" from the list of boards. Plug your Pro Trinket into your computer via the onboard USBport. Press the "reset" button on your Pro Trinket and wait for the blinky red light, then click the upload button in Arduino.
//Code includes samples written by Mark Kriegsman and Andrew Tuline. Thanks so much for all your help guys!
#include <FastLED.h>
//---LED SETUP STUFF#define LED_PIN 4#define CLOCK_PIN 3#define BUTTON_PIN 5 #define COLOR_ORDER GBR
#define NUM_LEDS 38 // Change to reflect the number of LEDs you have
CRGB leds[NUM_LEDS]; //naming our LED array
//BUTTON SETUP STUFFbyte prevKeyState = HIGH;
int ledMode = 0; //FIRST ACTIVE MODE
CRGBPalette16 currentPalette;TBlendType currentBlending;
// MODE VARIABLES -- Change these numbers to create new interesting modes
int BRIGHTNESS = 255; //0-255. Lower number saves battery life, higher number is screamingly brightint SATURATION = 255; //0 is white (no color) and 255 is fully saturated with colorint HUE = 0; //0-255, around the color wheelint STEPS = 4; //Wider or narrower bands of colorint SPEEDO = 10; //The speed of the animation
// SIN WAVE SETUP
#define qsubd(x, b) ((x>b)?wavebright:0) // Digital unsigned subtraction macro. if result <0, then => 0. Otherwise, take on fixed value.#define qsuba(x, b) ((x>b)?x-b:0) // Analog Unsigned subtraction macro. if result <0, then => 0
// SINWAVE VARIABLES -- change these numbers to modify Sinwave modeuint8_t wavebright = 255; // You can change the brightness of the waves/bars rolling across the screen.uint8_t thishue = 30; // You can change the starting hue value for the first wave.uint8_t thisrot = 1; // You can change how quickly the hue rotates for this wave. 0= color stays the sameuint8_t allsat = 255; // I like 'em fully saturated with colour.bool thisdir = 0; // You can change direction.int8_t thisspeed = 4; // You can change the speed, and use negative values.uint8_t allfreq = 25; // You can change the frequency, thus overall width of bars.int thisphase = 0; // Phase change value gets calculated.uint8_t thiscutoff = 192; // You can change the cutoff value to display this wave. Lower value = longer wave.int loopdelay = 4; // You can change the delay. Also you can change the allspeed variable above.
© Adafruit Industries https://learn.adafruit.com/dotstar-belly-dance-fans Page 11 of 17

uint8_t bgclr = 0; // A rotating background colour.uint8_t bgbright = 55; // Background color brightness
//RIPPLE VARIABLES
uint8_t colour; // Ripple colour is randomized.int center = 0; // Center of the current ripple.int step = -1; // -1 is the initializing step.uint8_t myfade = 255; // Starting brightness.#define maxsteps 16 // Case statement wouldn't allow a variable.
//------------------SETUP------------------void setup() { delay( 2000 ); // power-up safety delay pinMode(BUTTON_PIN, INPUT_PULLUP);
FastLED.addLeds<DOTSTAR, LED_PIN, CLOCK_PIN, COLOR_ORDER>(leds, NUM_LEDS).setCorrection( TypicalLEDStrip ); FastLED.setBrightness( BRIGHTNESS ); currentBlending = LINEARBLEND; }
#define NUM_MODES 3//------------------MAIN LOOP------------------void loop() { switch (ledMode) { case 0: BRIGHTNESS = 255; Rainbow(); break; //Rainbow -- Change STEPS and SPEED to modify case 1: sinwave_1(); break; //Sin Wave -- Change sinwave variables to modify case 2: ripple(); break; //Ripple -- Change case 3: BRIGHTNESS=0; Solid(); break; //all off -- change BRIGHTNESS to 1-255 for a solid color}
// button management section byte currKeyState = digitalRead(BUTTON_PIN); if ((prevKeyState == LOW) && (currKeyState == HIGH)) { keyRelease(); } prevKeyState = currKeyState; }
// SOLID COLOR -------------------------------------void Solid(){ fill_solid(leds, NUM_LEDS, CHSV(HUE, SATURATION, BRIGHTNESS)); FastLED.show(); }
//SIN WAVEvoid sinwave_1() { one_sin(); show_at_max_brightness_for_power(); delay_at_max_brightness_for_power(loopdelay*2.5); Serial.println(LEDS.getFPS()); }
void one_sin() { // This is the heart of this program. Sure is short. if (thisdir == 0) thisphase+=thisspeed; else thisphase-=thisspeed; // You can change direction and speed individually. thishue = thishue + thisrot; // Hue rotation is fun for thiswave. for (int k=0; k<NUM_LEDS; k++) { int thisbright = qsubd(cubicwave8((k*allfreq)+thisphase), thiscutoff); // qsub sets a minimum value called thiscutoff. If < thiscutoff, then bright = 0. Otherwise, bright = 128 (as defined in qsub).. leds[k] = CHSV(bgclr, 255, bgbright); leds[k] += CHSV(thishue, allsat, thisbright); // Assigning hues and brightness to the led array. } bgclr++;} // one_sin()
// RAINBOW --------------------------------------------------void Rainbow(){ FastLED.setBrightness( BRIGHTNESS ); currentPalette = RainbowColors_p;
© Adafruit Industries https://learn.adafruit.com/dotstar-belly-dance-fans Page 12 of 17

static uint8_t startIndex = 0; startIndex = startIndex + 1;
FillLEDsFromPaletteColors( startIndex); FastLED.show(); FastLED.delay(SPEEDO); }
void FillLEDsFromPaletteColors( uint8_t colorIndex){ for( int i = 0; i < NUM_LEDS; i++) { leds[i] = ColorFromPalette( currentPalette, colorIndex, BRIGHTNESS, currentBlending); colorIndex += STEPS; }}
//RIPPLE --------------------------------------------------------------------------------void ripple() { HUE = 140;HUE++; if (HUE > 220) {HUE = 140;} // constrain BG hue to blues and purples for (int i = 0; i < NUM_LEDS; i++) leds[i] = CHSV(HUE++, 255, 50); // Rotate background colour.
switch (step) {
case -1: // Initialize ripple variables. center = random(NUM_LEDS); colour = random16(0,256); step = 0; break;
case 0: leds[center] = CHSV(colour, 255, 255); // Display the first pixel of the ripple. step ++; break;
case maxsteps: // At the end of the ripples. step = -1; break;
default: // Middle of the ripples. leds[wrap(center + step)] += CHSV(colour, 255, myfade/step*2); // Display the next pixels in the range for one side. leds[wrap(center - step)] += CHSV(colour, 255, myfade/step*2); // Display the next pixels in the range for the other side. step ++; // Next step. break; } // switch step show_at_max_brightness_for_power(); delay_at_max_brightness_for_power(SPEEDO*2.5); } // ripple() int wrap(int step) { if(step < 0) return NUM_LEDS + step; if(step > NUM_LEDS - 1) return step - NUM_LEDS; return step;} // wrap()
//BUTTON CONTROL STUFF// called when button is pressedvoid shortKeyPress() { Serial.println("short"); ledMode++; if (ledMode > NUM_MODES){ ledMode=0; }}
// called when key goes from pressed to not pressedvoid keyRelease() { Serial.println("key release"); shortKeyPress(); }
If you encounter trouble…Any time you hit a roadblock with a DotStar project, we’ll usually ask that you start with the “strandtest” example from our own
© Adafruit Industries https://learn.adafruit.com/dotstar-belly-dance-fans Page 13 of 17

Adafruit_DotStar library. This helps us narrow down whether it’s a hardware or software issue. The library is installed similarly to FastLED or anyother in Arduino (Sketch > Include Library > Manage Libraries... )
You’ll find the strandtest example under File→Sketchbook→Libraries→Adafruit_DotStar→strandtest
If strandtest fails to run, this suggests a hardware issue…for example, connecting to the wrong Trinket pin.
If you’re new to Arduino programming and LEDs, we usually suggest starting with the Adafruit_DotStar library…it’s pretty basic, the stripdeclaration is more conventional, and we can stay on top of keeping it compatible with our own products and the most mainstream Arduinoboards.
As FastLED is a more “bleeding edge” third-party library, we can’t always guarantee compatibility across versions or with specific boards.You can find help through their community on Google+ (http://adafru.it/ebn). This is potent stuff, written by people with a deep appreciation forLED art, and we wanted to showcase it.
© Adafruit Industries https://learn.adafruit.com/dotstar-belly-dance-fans Page 14 of 17
Finishing
Adding Veil Fabric
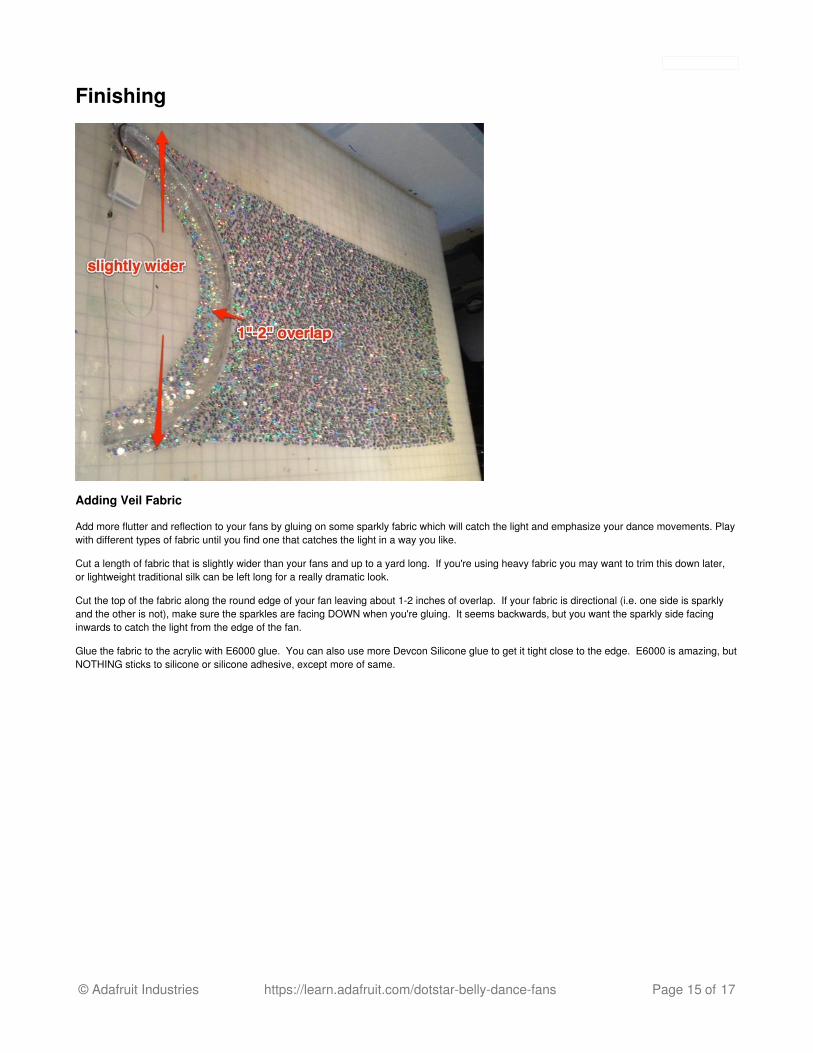
Add more flutter and reflection to your fans by gluing on some sparkly fabric which will catch the light and emphasize your dance movements. Playwith different types of fabric until you find one that catches the light in a way you like.
Cut a length of fabric that is slightly wider than your fans and up to a yard long. If you're using heavy fabric you may want to trim this down later,or lightweight traditional silk can be left long for a really dramatic look.
Cut the top of the fabric along the round edge of your fan leaving about 1-2 inches of overlap. If your fabric is directional (i.e. one side is sparklyand the other is not), make sure the sparkles are facing DOWN when you're gluing. It seems backwards, but you want the sparkly side facinginwards to catch the light from the edge of the fan.
Glue the fabric to the acrylic with E6000 glue. You can also use more Devcon Silicone glue to get it tight close to the edge. E6000 is amazing, butNOTHING sticks to silicone or silicone adhesive, except more of same.
© Adafruit Industries https://learn.adafruit.com/dotstar-belly-dance-fans Page 15 of 17

If you want, shape the bottom of the veils to something fluttery or swoopy or geometric or silly, or leave them square for a more traditional look. Imade mine look a bit like fluttery flames.
Add some hot glue underneath the on/off switch to secure it in place, then hot glue the enclosure lid on -- you don't want this flying off while you'reperforming!
You can add or modify code and also charge the battery via the handily accessible USB port. Once the lid is glued down you can't reach the Pro
© Adafruit Industries https://learn.adafruit.com/dotstar-belly-dance-fans Page 16 of 17

Trinket's reset button, but it'll go into bootloader mode whenever you first plug it in to your computer (as long as the battery switch is turned off).
Add a million modes and go crazy!
© Adafruit Industries Last Updated: 2017-04-26 10:02:50 PM UTC Page 17 of 17


