22
DreamWeaver & PHP Introduction to the DreamWeaver dynamic development interface

DreamWeaver & PHP
Introduction to the DreamWeaver dynamic development interface
First – the necessary softwarerequired and installed
• MySql – the database (or Access)• Apache or IIS server• PHP• DreamWeaverEach of these have to be installed and configured
to communicate together. Depending on PC or MAC, there are some system settings which may need to be changed to ensure PHP is recognized and functions correctly on the “localhost”.
Files to be tweaked:• Php.ini (in the PHP folder)• Httpd.conf in the Apache conf folder• If using IIS, see next slide..• If using IIS, the local host is in:
c:\Inetpub/wwwroot/.. This is where the files live for the PHP to process.
• Need to set up the “local” folder, and the “testing folder”.
• (Keep track of all passwords required!)
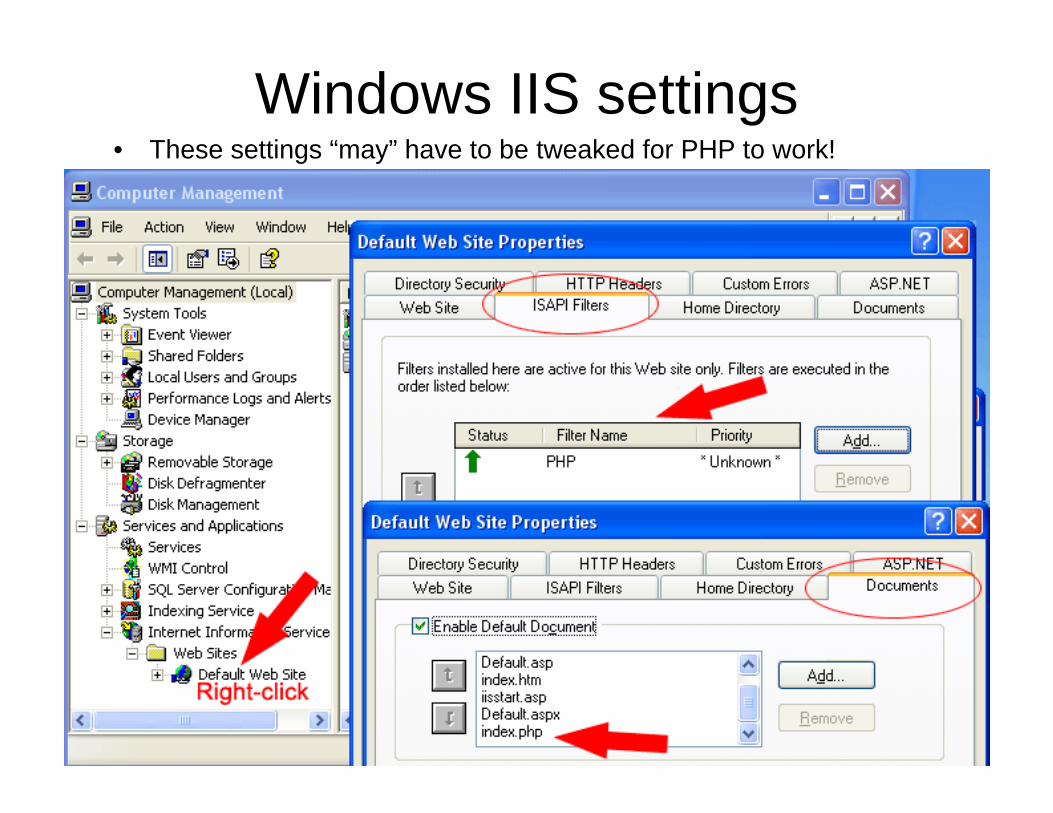
Windows IIS settings• These settings “may” have to be tweaked for PHP to work!
Database plan comes next
• Design the database and create the necessary tables, fields etc.
• Draw a blueprint out first, and start to figure out how each table needs to be related and connected to each other, and what kind of functionality you want
• Use either the MySql Administrator or the PHPmyadmin interface to set up the database.
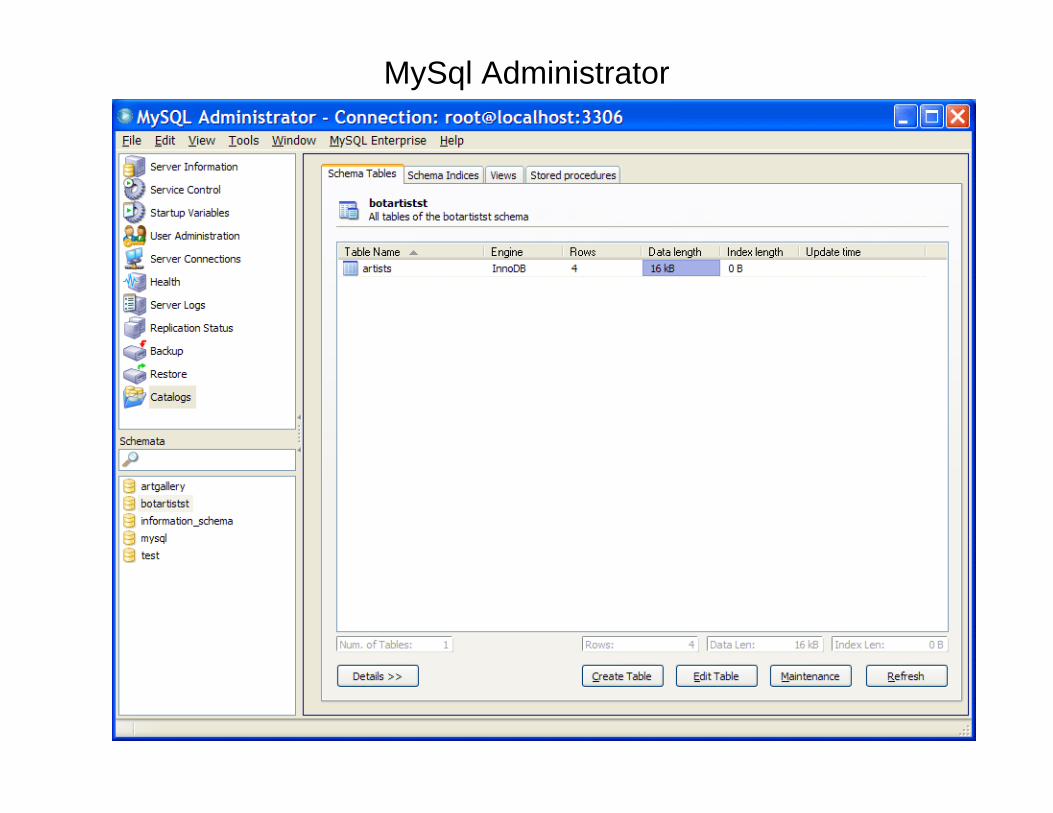
MySql Administrator

PHPmyAdmin
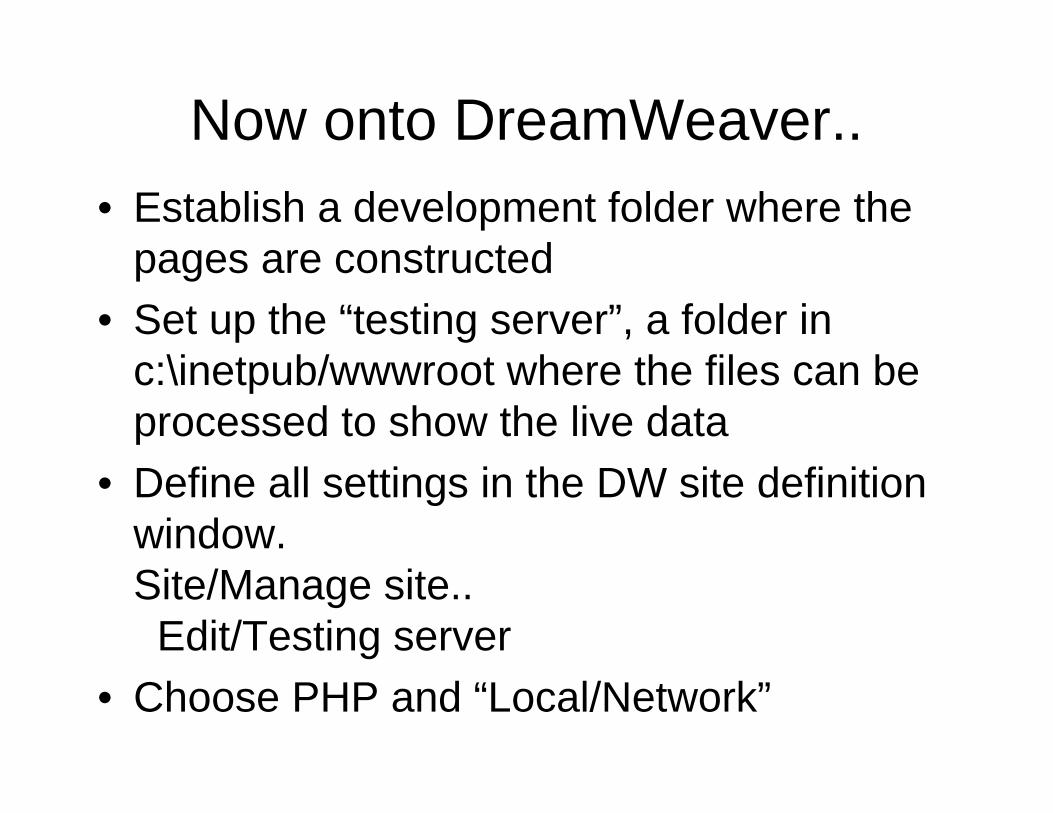
Now onto DreamWeaver..• Establish a development folder where the
pages are constructed• Set up the “testing server”, a folder in
c:\inetpub/wwwroot where the files can be processed to show the live data
• Define all settings in the DW site definition window.Site/Manage site.. Edit/Testing server
• Choose PHP and “Local/Network”
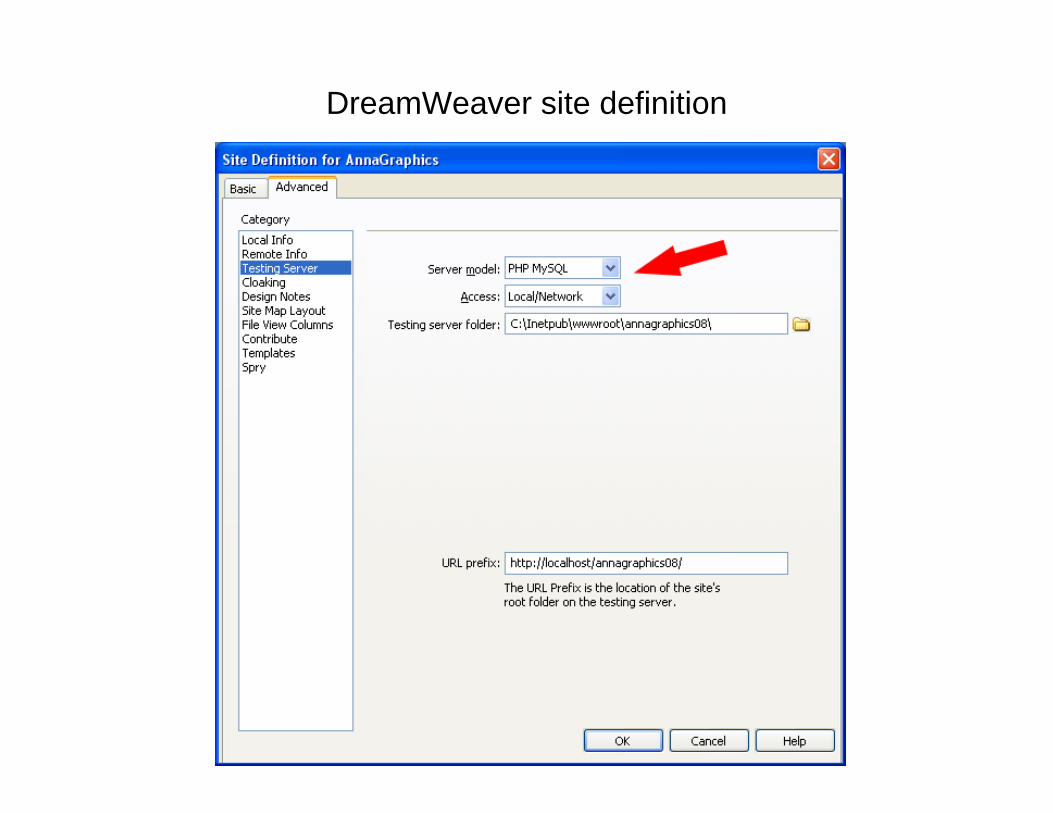
DreamWeaver site definition
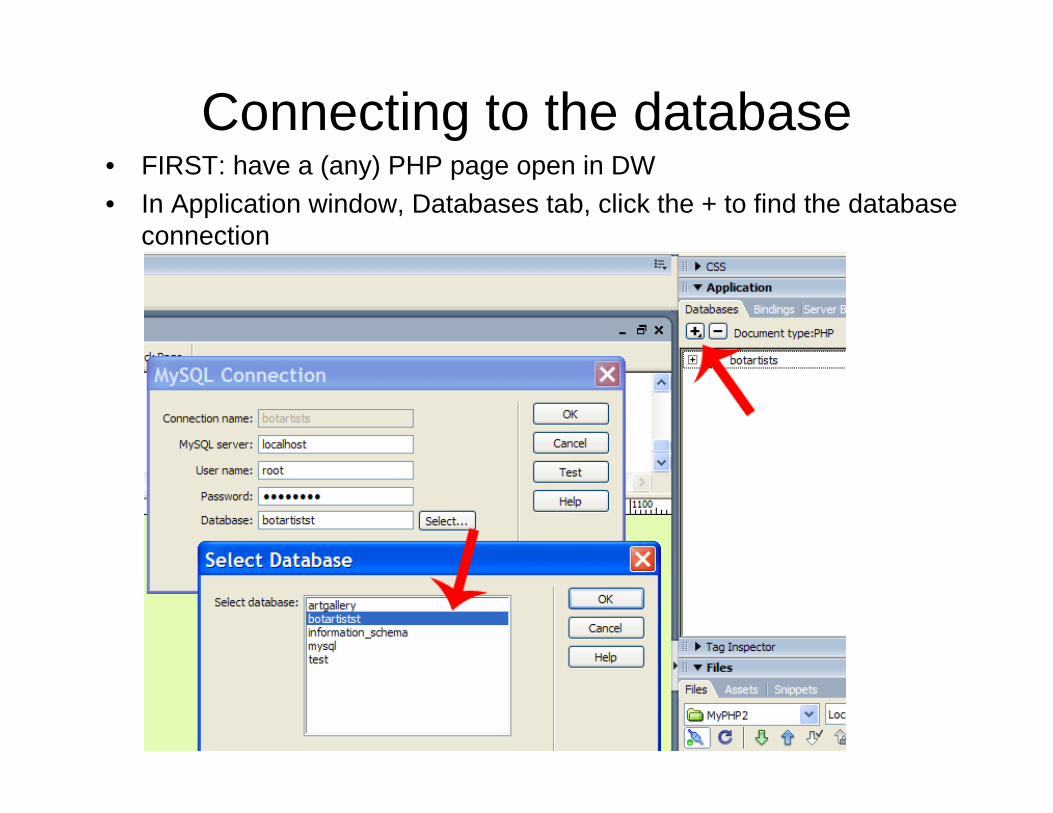
Connecting to the database• FIRST: have a (any) PHP page open in DW• In Application window, Databases tab, click the + to find the database
connection
What did DW do?
• Once the DB is selected, DW creates a “Connections” folder and inserts a phppage specifying the connection
• All other PHP pages using dynamic data will refer to that file for the connection settings.
• The DB name will show up in the Databases tab.
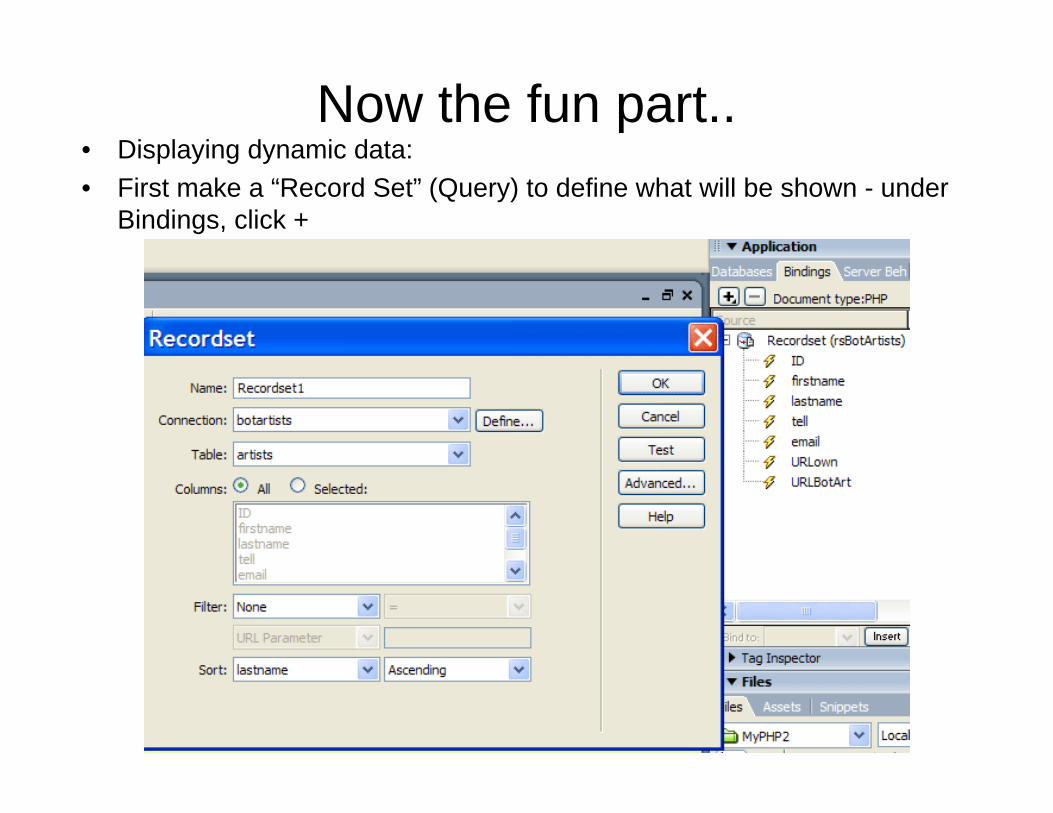
Now the fun part..• Displaying dynamic data:• First make a “Record Set” (Query) to define what will be shown - under
Bindings, click +
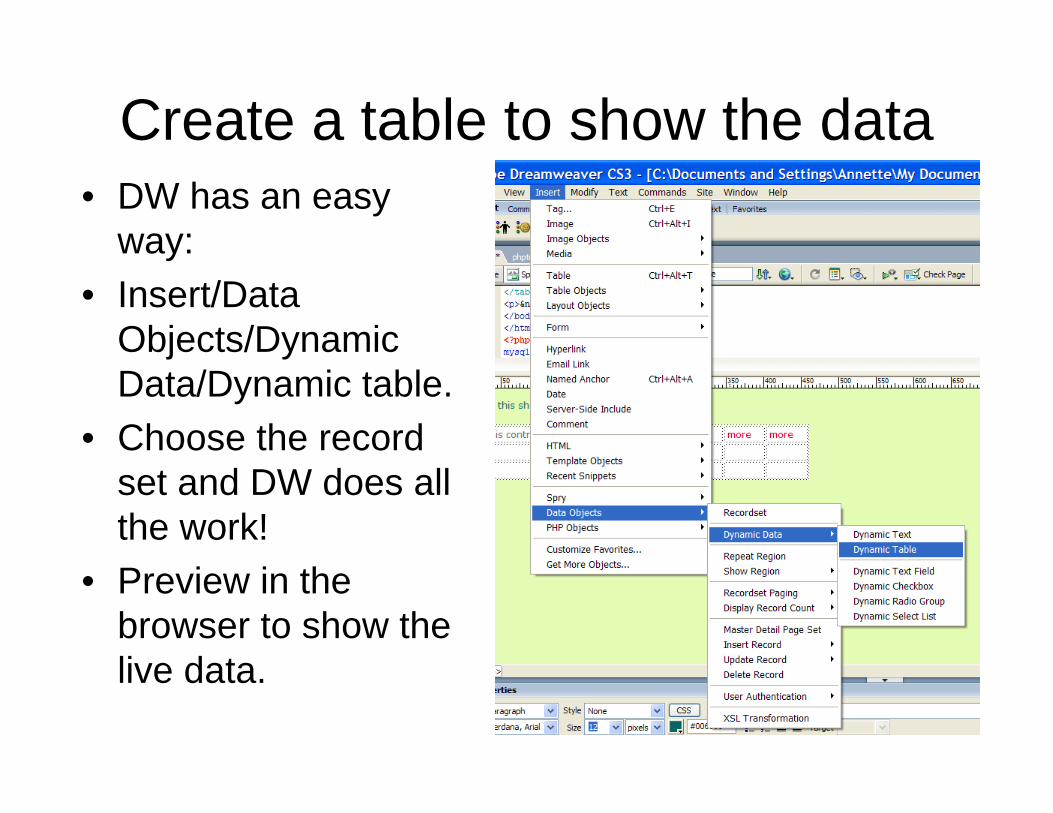
Create a table to show the data• DW has an easy
way: • Insert/Data
Objects/Dynamic Data/Dynamic table.
• Choose the record set and DW does all the work!
• Preview in the browser to show the live data.
Creating a data entry form• Create a form, and insert a table• Use at least two columns of data• Set form fields and name each the SAME as the
names in the DB!• Add a submit button• After that is done, click “Server Behaviors tab,
and click + to select “Insert Record”• Choose required table, and DW will match the
field names with the DB names. • Also set the page to go to after submission.
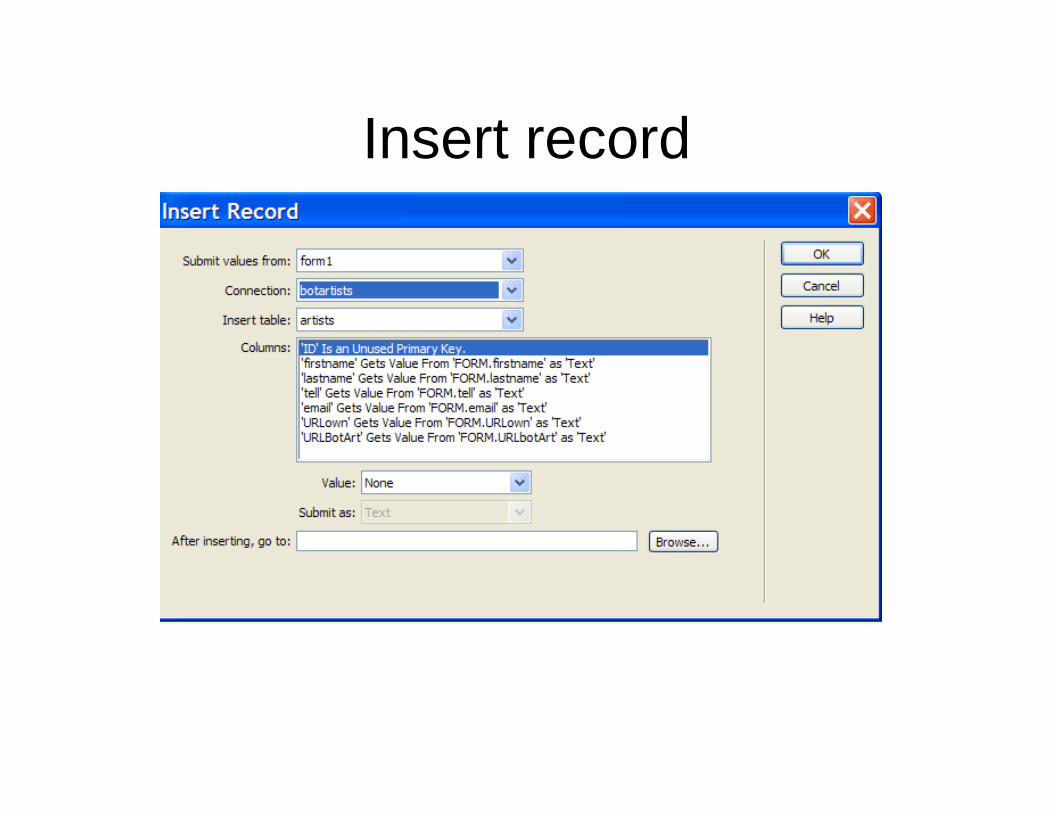
Insert record
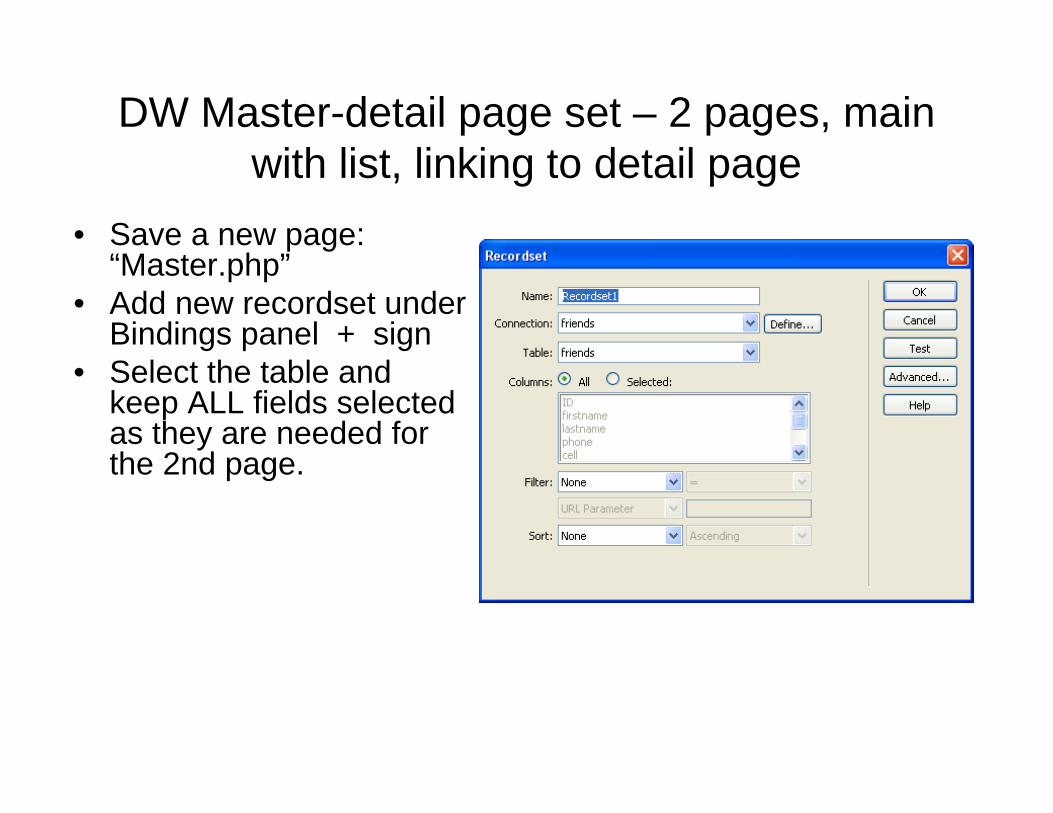
DW Master-detail page set – 2 pages, main with list, linking to detail page
• Save a new page: “Master.php”
• Add new recordset under Bindings panel + sign
• Select the table and keep ALL fields selected as they are needed for the 2nd page.
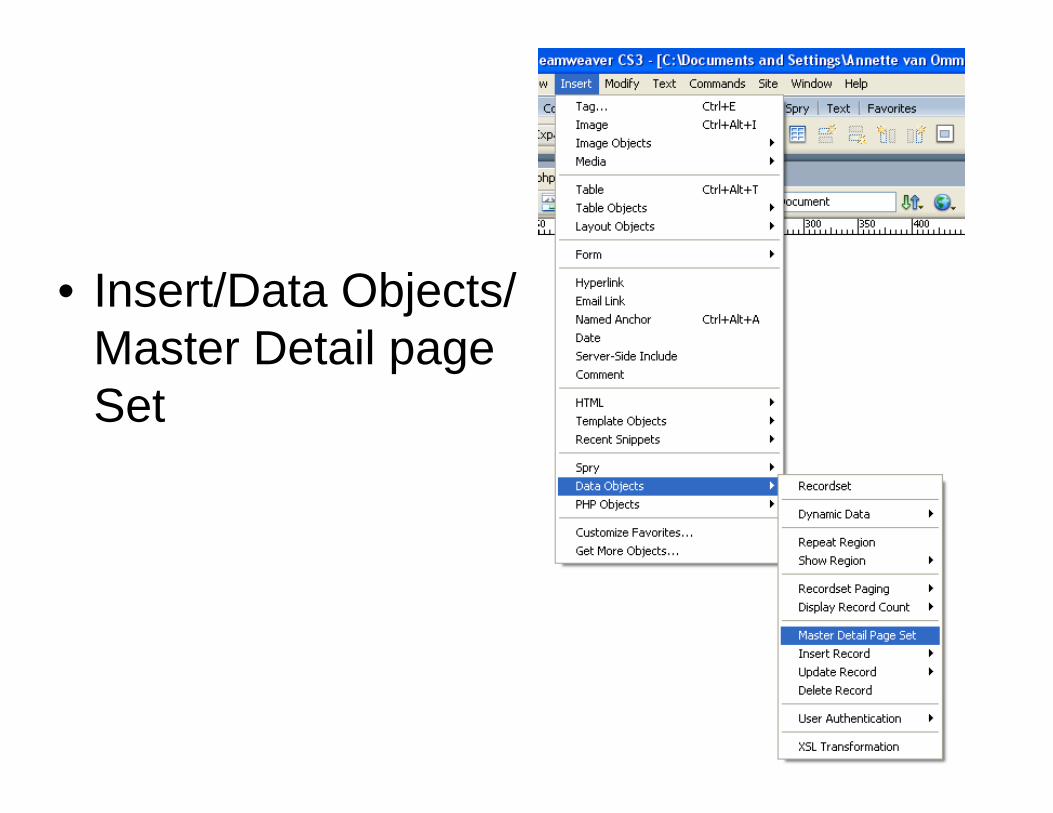
• Insert/Data Objects/Master Detail page Set
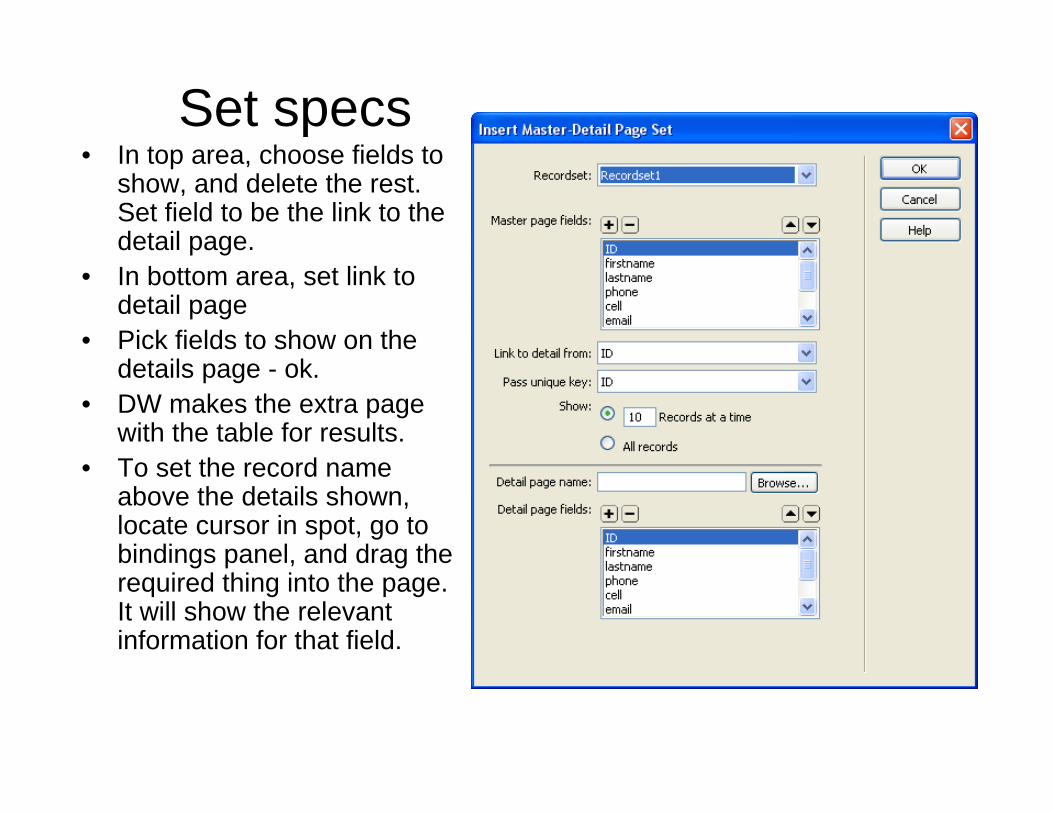
Set specs• In top area, choose fields to
show, and delete the rest. Set field to be the link to the detail page.
• In bottom area, set link to detail page
• Pick fields to show on the details page - ok.
• DW makes the extra page with the table for results.
• To set the record name above the details shown, locate cursor in spot, go to bindings panel, and drag the required thing into the page. It will show the relevant information for that field.
Server behaviors
• Update record server behavior• Authentication• Logging in & logging out• Access levels• More in the DW Server Behaviors panel
Essential links
• http://www.php.net/• http://www.phpmyadmin.net/• http://httpd.apache.org/download.cgi• http://dev.mysql.com/downloads/
• Test site:• http://www.annagraphics.com/sigmembers/login.php (Very
rudimentary!)
Helpful links• http://www.adobe.com/devnet/dreamweaver/articles
/setting_up_php.html• http://www.adobe.com/devnet/dreamweaver/php.ht
ml• http://devzone.zend.com/node/view/id/627• http://us.php.net/manual/en/index.php• http://www.webhosting.uk.com/phpmyadmin-
tutorials.php• http://www.thesitewizard.com/php/index.shtml
.htaccess
• Subject for another meeting.. But read about it here:
• http://www.javascriptkit.com/howto/htaccess.shtml
• If anyone understands .htaccess consider explaining it at a future meeting?


