+ All Categories
Home > Documents > ECE/CS 250 – Summer 2020 – Prof. Bletsch Recitation #1 – Unix

ECE/CS 250 – Summer 2020 – Prof. Bletsch Recitation #1 – Unix

Date post: 17-Oct-2021
Category:
Upload: others
View: 1 times
Download: 0 times
Share this document with a friend
18
ECE/CS 250 – Summer 2020 – Prof. Bletsch Recitation #1 – Unix Objective: This recitation builds on the skills gained in the Unix course you completed for Homework 0. Here, you will learn about different computing environments available to you and practice using them. You’ll also do some basic file manipulation and text editing and test out a basic C program. You will need these skills so that you can develop C programs, and they’re also useful skills if you plan to have a career in computing. Complete as much of this as you can during recitation. If you run out of time, please complete the rest at home. Note: The auto-magic power of Eclipse will not be here to help you. You need to be able to navigate Unix-style systems using the basics: shell interaction, file upload/download, and a plain text editor. In industry, if you can only code if you have an IDE, your career is going to be painfully limited and simple tasks will seem needlessly complex. Let the Unix flow through you.
Transcript

ECE/CS 250 – Summer 2020 – Prof. Bletsch Recitation #1 – Unix

Objective: This recitation builds on the skills gained in the Unix course you completed for

Homework 0. Here, you will learn about different computing environments available to you and

practice using them. You’ll also do some basic file manipulation and text editing and test out a basic

C program. You will need these skills so that you can develop C programs, and they’re also useful

skills if you plan to have a career in computing.

Complete as much of this as you can during recitation. If you run out of time, please complete the

rest at home.

Note: The auto-magic power of Eclipse will not be here to help you. You need to be able to

navigate Unix-style systems using the basics: shell interaction, file upload/download, and a plain

text editor. In industry, if you can only code if you have an IDE, your career is going to be painfully

limited and simple tasks will seem needlessly complex. Let the Unix flow through you.

1. Your choice of computing environments

We’ll use a variety of software in the course, and you have your choice of three ways to get work

done. Each have their tradeoffs, and you’ll need to become familiar with at least two of them in this

recitation. Your choices:

I. Duke Docker Container from VM Manage (https://vm-manage.oit.duke.edu/containers)

Instantly conjure up a GUI environment accessible via web browser. The environment lives in

a Docker container, a lightweight and restricted form of virtualization. No admin access or

easy means of file transfer, but simple. Does not work well on low-bandwidth connections.

II. Local tools on your own computer

With the proper software and setup, your own Windows, Mac, or Linux machine can do

most of what you need. Takes some setup, but once it’s working, gives the smoothest UI

experience, since you aren’t working over a network. But beware, your environment may

differ from ours, so you’ll still need to test on one of the above two before turning in your

assignments, especially those written in C. Note that support for this option is best-effort, as

computing system vary, and not every member of the teaching staff is familiar with every

system.

III. login.oit.duke.edu via SSH (Duke shared Linux cluster)

Login to a machine in the Linux cluster run by Duke OIT via SSH. Access files via your choice

of several protocols and techniques, allowing for either remote terminal editors or local

editors to edit your code. Most closely mirrors how this kind of computing is done in

industry.

In this recitation, everyone will get the Duke Docker Container working, then you have your pick of

trying out Local Tools or login.oit.duke.edu in the Alternative computing environments section later.

For all of the above, we will be using git source code control to both back up our data, track its

changes, and submit it for grading.

2. Introducing the Duke Docker Container and git

With the help of OIT, ECE/CS 250 provides a container-based online development environment. The

containers we provide have all of the programs needed in the class preinstalled.

In addition, we will be using GitLab to distribute test kits for assignments. You can fork an

assignment (details later on) to get started. Make sure that your forked project is private! Not

doing so is considered a violation of the Duke Community Standard. Once you fork an assignment,

you can clone the project to your development environment, make changes, commit them and push

changes back to GitLab. You are expected to regularly commit changes and push them to GitLab.

Because this is a very easy way to keep up-to-date backups, corrupted or lost files will not warrant

an extension for homework assignments.

NOTE: File corruption and loss is not a hypothetical scenario, it happens every semester. You should

take backing up work seriously.

Getting an ECE/CS 250 Container Instance

Go to https://vm-manage.oit.duke.edu/containers and locate the “CS250 - CS 250 – Computer

Architecture” container. After the initial login, you should see the following pinned to the top of the

page to log back into your container instance at any time by clicking on “Click here to log in”.

If you get a “No session for pid 14” error, it’s okay, just click “OK” to continue. You should see the

following screen once you log in:

That’s it! You now have your own ECE/CS 250 container instance for the semester!

Things to Keep in Mind:

• DO NOT bookmark the container, but rather https://vm-manage.oit.duke.edu/containers.

• DO NOT use the ECE/CS 250 containers to run your own programs because extra load will

slow down the system for other students. If you need compute for research purposes OIT

has other container instances available.

• If your container is hanging use the request a restart button on the VM Manage page

Clicking on the in the top left of the screen will bring up the file explorer. Clicking on in the

top left of the screen will bring up a menu to select a program to open.

Preinstalled Programs:

• Firefox: for browsing the web.

• Xfce Terminal: preferred terminal to use.

• Visual Studio Code: preferred IDE for writing code.

• QtSpim: program to execute MIPS code for MIPS assignments (HW2)

• Logisim: a GUI circuit design program for the digital logic and processor assignments (HW3,

HW4).

3. Terminal warm-up

Poke around your container environment, then open up a terminal (Xfce Terminal). You’ll pick up

more in Homework 0, but for now, try out these commands.

Useful Commands

• ls: list directory contents

• pwd: print name of current/working directory

• cd path/to/directory: change the working directory

o Note, ~ is shorthand for the home directory. For example, the Desktop is at path

~/Desktop.

• cd ..: go up one directory level

• cp src dst: copy files and directories from src to dst (use -a flag for directories)

• mv src dst: move and rename files by moving from src to dst

• mkdir dir: make directory dir

• rm filename: remove file filename

• rm -r dir: recursively remove directory dir

• touch filename: create file with name filename

• cat filename: print contents of file filename to the console

• history: print previous command

Two things you NEED to do on the command line to survive and thrive

1. Tab completion: You can use tab to complete directory paths and filenames. For example,

try typing cd ~/Desk and hit tab. This will autocomplete the path as ~/Desktop/. If the

completion is ambiguous (e.g., “pot<TAB>” when there’s “potato.jpg” and “potato.txt”, it

will complete as much as it can, then beep or flash. Hit tab again for a list of the choices,

then type a few characters to disambiguate, and hit tab again. Only fools type entire

filenames by hand – always be tabbing!!

2. Arrow history: Use the up arrow to access recently used commands (and down arrow go to

the other way, too). This can save a lot of time retyping long commands!

4. Git and GitLab

Git is a source code control tool that will allow you to track changes over time. GitLab is a central

repository for Git projects; there’s an instance of GitLab deployed by the Computer Science

department for coursework: https://coursework.cs.duke.edu/

Local Git Setup on ECE/CS 250 Container

First, we need to make sure git is setup properly on your ECE/CS 250 container. Open the terminal

and enter the following commands, replacing “NetID” and “Your Name” appropriately:

git config --global user.email "[email protected]"

git config --global user.name "Your Name"

We now need to set up SSH keys so you can access GitLab (more info here). An SSH key is a

cryptographic pair of data files called the “public key” and “private key”; these files are

mathematically related. We provide the public key to anyone Gitlab, then we can use our

corresponding private key to login to Gitlab in the future. Don’t sweat the details – the tools do

most of this for you1. To make a pair of keys, run the following command in the terminal, replacing

“NetID” appropriately:

ssh-keygen -t rsa -b 4096 -C [email protected]

Press enter when prompted to enter a path to save the SSH key and also bypass adding a

passphrase by pressing enter. Now run:

cat ~/.ssh/id_rsa.pub

and copy the output. This is your public key. Navigate to https://coursework.cs.duke.edu/ and sign

in using the “Duke Shibboleth Login” option. Click on the profile icon in the upper right corner and

select “Settings”. Now choose SSH Keys on the left sidebar. Paste your SSH public key and give it a

descriptive title such as “ECE/CS 250 Container” and click “Add key”.

In general, you may find OIT’s GitLab basics guide helpful as you become accustomed to GitLab.

1 You can learn all about this sort of thing by taking an intro computer security class, such as those offered by Prof. Maggs in CS or Prof. Bletsch in ECE.

Helpful Git Commands

• git add .: stage all changes in the working directory to commit

• git add filename: add file filename to stage for commit

• git status: display the state of the working directory and the staging area

• git commit -m "MESSAGE": commit stages changes with the commit message MESSAGE

• git push: push changes upstream (e.g. to GitLab)

• git pull: pull changes from upstream (e.g. from GitLab)

There are many online resources on how to use Git. Git is very power and has many power-user

features. For this class the simple commit and push workflow should be sufficient but if you want to

dive deeper into Git try using branches to work on features and merging those features into the

master branch! The Git documentation is a good place to start.

The diagram shows the major steps involved in git. One-time steps are shown in grey, whereas steps

you do repeatedly during development are in black.

Your First GitLab Assignment

Git step 1: Fork

Now let’s fork a project (aka repo) from the ECE/CS 250 Summer 2020 GitLab group, clone the forked project,

make changes, commit those changes and push the changes to GitLab. This is the exact same workflow you

will use to fork homework assignments, make changes, and backup these changes on GitLab.

Navigate to https://coursework.cs.duke.edu/ and log in if needed. Now navigate to Groups > Your Groups >

ECE-CS 250 Spring 2020. On the sidebar go to Group Overview > Details and select “Subgroups and projects”.

Here you should click on a project titled “My First Assignment”. NOTE: If you don’t see that group listed, then

you haven’t been invited yet – in that case, use this link to go directly to the repository.

On the upper right click to fork the project and select your own name/NetID when prompted:

Git step 1½: Make your repo private

ALWAYS MAKE SURE PROJECTS ARE PRIVATE!

You Should see the icon next the project name if it is private:

If the project is not private, navigate to Settings > General on the left side bar. Then expand the

“Visibility, project features, permissions” section and change the “Project visibility” to “Private”.

Make sure to fork a project before making changes. DO NOT clone and make changes before

forking a project since you will not be able to push changes.

ALWAYS MAKE SURE THE FORKED PROJECT IS PRIVATE! Make sure to make it private if it is not already.

Not doing so is considered a violation of the Duke Community Standard.

Git step 2: Clone to your local environment

Now click on in the upper right and copy the link for “Clone with SSH” to clone the project.

Open the terminal, navigate to the Desktop (run cd ~/Desktop) and run:

git clone PASTE_LINK_HERE

This command will clone the project to your environment. Navigate to your local copy of the project

(cd my-first-assignment). Use ls to see what’s there. What file(s) are present?

Git step 3: Mess with some code!

Let’s compile and run welcome.c:

g++ -o welcome welcome.c

./welcome

The first line compiles welcome.c into an executable program called welcome, and the second

line runs the program welcome. The “-o welcome” part of the first line tells gcc to create an

executable called welcome. By default, gcc would’ve otherwise created an executable called

a.out. In the second line, you may wonder what the deal is with the “./”. That tells the terminal

to look in the current directory for the file to run, which is necessary for running a program from the

current directory2, but not necessary for reading it or moving it or renaming it, etc. (Your current

directory can be referred to with “.” and its parent directory can be referred to with “..”. So if

you type “cd ..” that’ll take you to the parent directory.)

Interact with the program and observe what it does.

Open welcome.c in Visual Studio Code. Change the program to indicate that the so-named person

is, in fact, very cool. Compile and run it again to confirm your changes worked.

Git step 4: Commit and push changes

Lastly, and importantly, let’s commit this change and push it to GitLab so there’s a backup online.

From the my-first-assignment directory, run:

git add welcome.c

git commit -m "now it’s very cool!"

git push

Go to the My First Assignment project on GitLab. You should see the changes reflected there!

2 The reason for this requirement is security. Imagine a malicious person put a program called “ls” in the current

directory. When you type ls, you might run that program instead of the usual ls command. To disambiguate the

situation, Linux requires you to be explicit when running a program from the current directory by prefixing it with “./”.

Create, compile, and run Hello World Now let’s create a Hello World C program from scratch and execute it.

First open Visual Studio Code and create a file named hello.c. Save this file.

Write the following to hello.c:

#include <stdio.h>

#include <stdlib.h>

int main() {

printf("Hello World!!\n");

return EXIT_SUCCESS;

}

Compile the program with gcc and run it:

g++ -o hello hello.c

./hello

Add your new hello.c program to git, commit it, push it, and confirm it landed in the web interface of

GitLab. Don’t add the compiled programs welcome or hello – it’s customary for git to hold source code,

not compiled programs.

5. Alternative computing environments

The docker container you’ve been using is nice because it’s quick to create and easy to start using,

but it’s also slow, and a bit limiting in terms of tools available. You’re welcome to use this

environment, but to give you options, explore either local tools or login.oit.duke.edu, documented

below.

NOTE: No matter which of the methods you use, you should become completely

comfortable in your environment and understand every piece of it. If you don’t understand

something, stop and get help! As you go through the course, you don’t want to be doing

things “the hard way” without realizing it the entire time.

6. Computing option: Local tools

How you get appropriate local tools depends on your operating system. We’ve provided basic

directions for Windows, Mac, and Linux, but you will need to do your own research to fully utilize

this approach.

For users of Windows

The computing environment for the course is Linux, specifically Ubuntu Linux. If you’re running

Windows 10, you can use the Windows Subsystem for Linux (WSL) to create a Ubuntu Linux

environment inside of Windows. This isn’t a full virtual machine, but is sufficient for our use in most

ways.

Note: If you’re running another version of Windows or otherwise can’t use WSL, you might

consider running hypervisor that will allow a full virtual machine, such as Virtual Box. Then you

can install Ubuntu 18.04 from scratch (though we can’t offer support for this approach).

First, to enable WSL at all, run powershell as administrator (right click powershell in start menu and

choose “Run as administrator”). In the powershell, run:

Enable-WindowsOptionalFeature -Online -FeatureName Microsoft-Windows-Subsystem-Linux

Then, it still being Windows, you have to restart.

You could install Ubuntu from Windows Store, but instead you can just download this URL:

https://aka.ms/wsl-ubuntu-1804

Run the downloaded package and it will install an Ubuntu 18.04 environment. Run the Ubuntu bash

shell. The following command will install C and related build tools:

sudo apt update

sudo apt install build-essential valgrind make git

Choose a native Windows text editor to use (Visual Studio Code is a common pick). In bash, navigate

to a location on your Windows system – your Windows home directory is available as

/mnt/c/Users/<username>. Pick a good place to do store your work, then do the git directions

discussed above to check out a repo. Confirm you can make changes and compile/run programs.

For users of Mac OSX

Mac OSX comes with the C compiler and related tools. Let’s test them out: use git to clone your

repository and compile/run your welcome and hello programs.

Once you confirm that works, we just need to add a tool called valgrind to help debug things later

on. To get it, first set up homebrew, a system to allow easy installation of various software. To do

so, run the following in a terminal:

/bin/bash -c "$(curl -fsSL https://raw.githubusercontent.com/Homebrew/install/master/install.sh)"

Once it’s set up, run:

brew install --HEAD https://raw.githubusercontent.com/sowson/valgrind/master/valgrind.rb

You can test valgrind on your hello world program by running “valgrind ./hello”.

For users of Linux

If you’re running Ubuntu Linux 18.04, you’re set. Just install some stuff:

sudo apt install build-essential valgrind make git

If you’re running a different Linux, you’re still probably fine, just install the things above via your

native package manager.

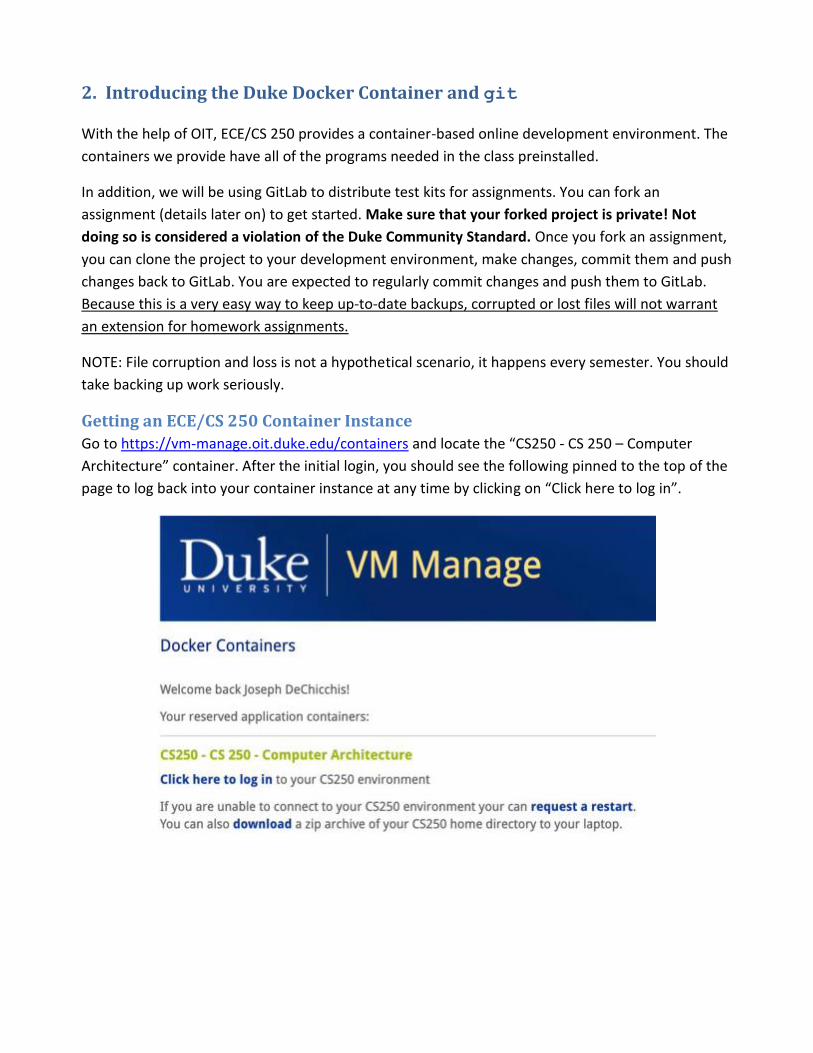
7. Computing option: login.oit.duke.edu (Duke shared Linux cluster)

Duke maintains a cluster of x86/Linux machines in a top-secret location. Fortunately, through the

magic of networking, we can use them from wherever we are. To access them, we need to use a

secure shell (SSH) client.

NOTE: If you are not on campus, you will need to connect to campus via VPN. See this page for

details and connect to the campus network via VPN before proceeding.

Mac/Linux Windows

Open the Terminal App. You can find it in the Applications/Utilities folder or by searching in Spotlight for Terminal At the command prompt, type

ssh [email protected] where netID is your Duke NetID. This command initiates a secure shell connection to a Linux machine in the cluster. Enter your password.

Download and install PuTTY from here. Open a PuTTY terminal window. In the connection screen, for Host Name put login.oit.duke.edu. Ensure connection type is SSH and port is 22. You can save a session for subsequent use by giving it a name and saving the session. Then you can later reload the session by selecting it and clicking “load”. Click Open to start the PuTTY session. This will open a Terminal Window and prompt you for your NetID (i.e., login as: ) and password.

Congratulations – you are now successfully connected to a remote Linux machine!

You now have a terminal session that is connected to login.oit.duke.edu.

Via SSH, clone your git repository so we can do work from here.

Using a Text Editor Remotely

You’re going to be writing programs using a text editor. There are many options, including: pico

(also known as nano on some systems), vim, emacs, nedit, gedit, etc. The pico, vim, and

emacs editors run inside the command line window, whereas the nedit and gedit editors

appear in separate GUI windows. We’ll focus on terminal editors – if you want to use a remote GUI

editor, see “APPENDIX: Using X-Windows forwarding to access remote GUIs (optional)” at the end of

this document.

Let’s test a simple terminal text editor, pico. Clone your git repository if you haven’t already, then

navigate to it. To start editing a file with pico, you can type the following at the command line:

pico hello.c

This line will start pico for use in editing a file called hello.c. If that file already exists, it will be

opened for editing. If it doesn’t already exist, a new file with that name will be created and opened

for editing.

Once the file is open, modify your hello world program in some way. To save the file and exit the

editor, hit Ctrl+X and follow the prompts. Compile and run the program, then use git to commit and

push your changes.

I do not recommend pico for long-term use in this course – it’s a tiny little editor that’s good at

small quick stuff. For a powerful terminal editor, consider vim or emacs. Both have a steep learning

curve, but people swear by them.

What if you want to use local tools to edit remote files? We can do that two different ways.

Option 1 to use local tools to edit remote files: access via CIFS

You can use ssh/PuTTY as described above to access a terminal, but using a local text editor to write

code. This can be achieved by attaching your Duke home directory to your local computer over the

network via the “CIFS” protocol (also known as “Windows sharing”). Note that this technique

requires you to either be on campus or to use Duke VPN (which makes it like you’re on campus).

Duke OIT provides documentation on this here:

• General OIT guidance.

• Tutorial for Windows.

• Tutorial for Mac.

Option 2 to use local tools to edit remote files: synchronization via SFTP

You can also use the SFTP protocol to synchronize local and remote files. SFTP can be used on any

host that provides SSH access (such as login.oit.duke.edu). This can be achieved by using an

editor with a built-in SFTP client (such as Notepad++ on Windows), or using a standalone SFTP client

(such as WinSCP) to synchronize local files to the Duke Linux environment. You can also use

command-line tools for the purpose, such as rsync and scp. This protocol works on and off

campus; no VPN required.

Hello World

Pick your preferred approach to editing (a terminal editor like pico/vim/emacs, local editor with

CIFS mounting, or local editor with SFTP synchronization) and get it working.

Via SSH, do the git stuff described earlier to set up your repo, then modify your hello.c program.

Compile and run it via SSH. Commit and push it via git. You’re now developing with a remote

system!

~ You can stop here. Info below is slightly obsolete and entirely optional. ~

8. APPENDIX: Using X-Windows forwarding to access remote GUIs

(optional)

Below are instructions for installing/running X-windows and SSH. This is a somewhat archaic way to

access remote GUIs, but some people might like it. These directions are a superset of the normal

SSH directions.

Mac Windows

X-Windows

1) Download and install Xquartz, a free “X server” (software that allows UNIX GUI programs to work over the network). http://xquartz.macosforge.org 2) Logout of your Mac 3) Login to your Mac

1) Download and install Xming, a free “X server” (software that allows UNIX GUI programs to work over the network). https://sourceforge.net/projects/xming/

Secure Shell (SSH)

Secure shell is easy on a Mac since it is built into the Terminal Application 1) Open the Terminal App. You can find it in the Applications/Utilities folder or by searching in Spotlight for Terminal 2) At the command prompt, type

ssh –XY [email protected] where netID is your Duke NetID. This command initiates a secure shell connection to a Linux machine in the cluster. The ‘-XY’ means “forward GUI applications”. 3) Enter your password.

1) Download and install PuTTY from the author. https://www.chiark.greenend.org.uk/~sgtatham/putty/latest.html 2) Run Xming (it will go into the system tray) 3) Open a PuTTY terminal window a. The first time, you should get a

configuration screen. For Host Name put in login.oit.duke.edu.

b. Connection type should be SSH and Port should be 22.

c. Go to Connection category, open the SSH option, and click X11. Ensure that the check box next to X11 forwarding is checked.

4) You can save a session for subsequent use by giving it a name and saving the session. Then you can later reload the session by selecting it and clicking “load”.

5) Click Open to start the PuTTY session. This will open a Terminal Window and prompt you for your NetID (i.e., login as: ). 6) Type your Duke NetID. 7) Enter your password.

Congratulations – you are now successfully connected to a remote Linux machine with X forwarding!

You now have a terminal session that is connected to login.oit.duke.edu. You should see a

command prompt that is something like [netID@login-<something>]. Your command prompt may

be a bit different, but that doesn’t matter. At this prompt, type date (then hit enter, as you have

to do after all commands on the command line). This Unix command displays today’s date, as

shown below.

You can have as many concurrent SSH windows as you like (e.g. one to edit code and one to

compile/run).

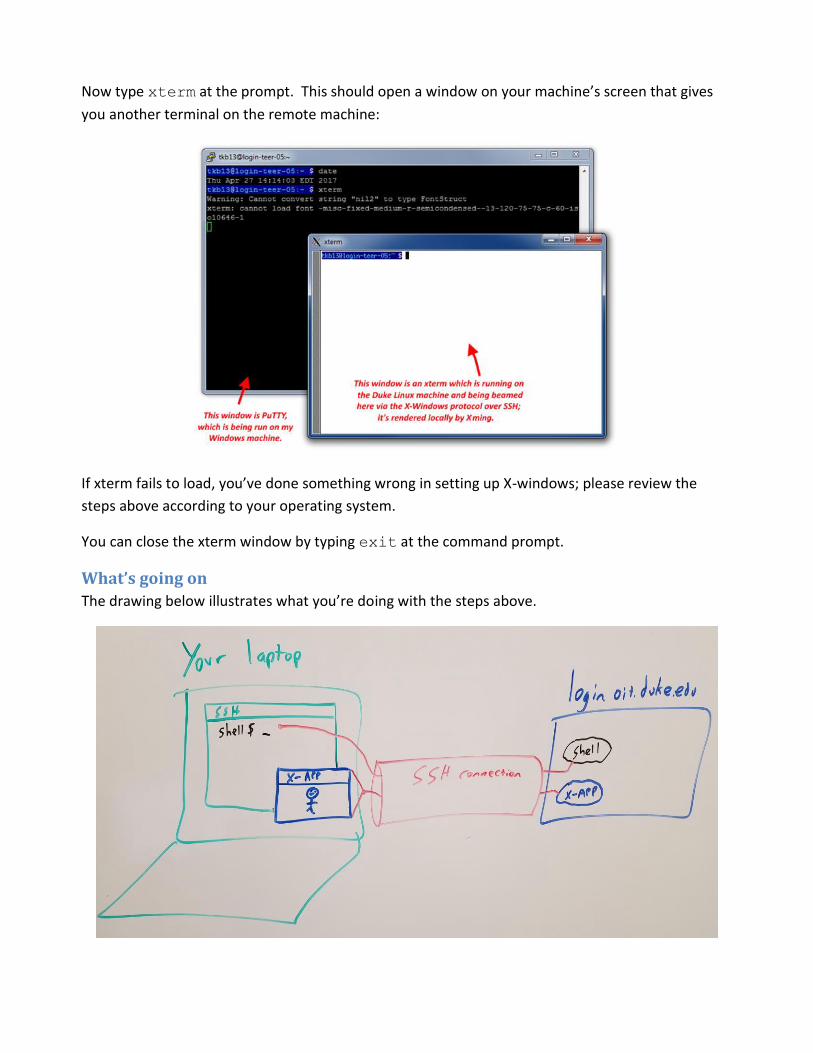
Now type xterm at the prompt. This should open a window on your machine’s screen that gives

you another terminal on the remote machine:

If xterm fails to load, you’ve done something wrong in setting up X-windows; please review the

steps above according to your operating system.

You can close the xterm window by typing exit at the command prompt.

What’s going on

The drawing below illustrates what you’re doing with the steps above.

The SSH protocol is being used two ways. First, SSH is providing a text console to a shell program

running on the remote server (shown in black). This shell program is what accepts commands like

‘cd’, ‘ls’, etc. This is by far the most common use of SSH.

Second, we’ve enabled “X forwarding”. X is a network protocol for running graphical programs over

a network. This GUI protocol is being “tunneled” inside the SSH connection, so that when the server

tries to display a GUI window, the request travels over the SSH connection to your laptop, where

your X server (Xquartz or Xming) will render it on your local display. This allows SSH to do more than

just text interfaces. One use for this is to run a graphical text editor on the Linux server and have it

appear locally on your laptop; this is discussed below.

Using a Text Editor

X forwarding allows you to use a GUI text editor remotely, such as nedit and gedit.

Using the GUI-type editors (nedit, gedit) is similar to terminal editors, but you will likely want to

suffix the command with an ampersand (&) to run the editor in the background so the terminal can

still be used at the same time:

gedit hello.c &


Recommended