Echo360 Personal Capture – Quick Guide Overview The Echo360 Personal Capture software allows you to create and publish your own audio, computer screen capture and video presentations directly into Blackboard using your desktop or laptop computer. You can use the Personal Capture to capture an audio presentation along with on-screen actions, such as slide presentations and software demonstrations. You can also connect a webcam to capture a video of you explaining your presentation as well. Students access these Captures via the EchoCentre link in Blackboard. By using recorded audio or video presentations within Blackboard, it is possible to summarise a complex concept in a way that is engaging for your students and that could otherwise take pages of text to communicate. Capture files provide an easy way to distribute content to students in a reusable format which students can view in their own time, take notes, pause and rewatch. There is an Instructional Echo360 Personal Capture video you can watch. Table of Contents 1. Getting Started with Echo360 Personal Capture ...............................................................2 2. Making a Capture ...............................................................................................................2 3. Pause/Resume or Stop a Capture ......................................................................................5 4. Managing Captures ............................................................................................................5 5. Review and Edit a Capture .................................................................................................6 6. Trim a Capture ...................................................................................................................7 7. Delete a Capture ................................................................................................................7 8. Setting Server Preference’s for Publishing Captures .........................................................8 9. Publish a Capture ...............................................................................................................9
Transcript
Echo360 Personal Capture – Quick Guide
Overview
The Echo360 Personal Capture software allows you to create and publish your own audio,
computer screen capture and video presentations directly into Blackboard using your desktop
or laptop computer. You can use the Personal Capture to capture an audio presentation along
with on-screen actions, such as slide presentations and software demonstrations. You can
also connect a webcam to capture a video of you explaining your presentation as well.
Students access these Captures via the EchoCentre link in Blackboard.
By using recorded audio or video presentations within Blackboard, it is possible to summarise
a complex concept in a way that is engaging for your students and that could otherwise take
pages of text to communicate. Capture files provide an easy way to distribute content to
students in a reusable format which students can view in their own time, take notes, pause
and rewatch.
There is an Instructional Echo360 Personal Capture video you can watch.
Table of Contents
1. Getting Started with Echo360 Personal Capture ............................................................... 2
2. Making a Capture ............................................................................................................... 2
3. Pause/Resume or Stop a Capture ...................................................................................... 5
5. Review and Edit a Capture ................................................................................................. 6
6. Trim a Capture ................................................................................................................... 7
7. Delete a Capture ................................................................................................................ 7
8. Setting Server Preference’s for Publishing Captures ......................................................... 8
9. Publish a Capture ............................................................................................................... 9
Echo360 Personal Capture – Quick Guide
2/13
1. Getting Started with Echo360 Personal Capture
(PLEASE NOTE WITH WINDOWS 7 – The software will not launch unless a microphone is connected to the computer)
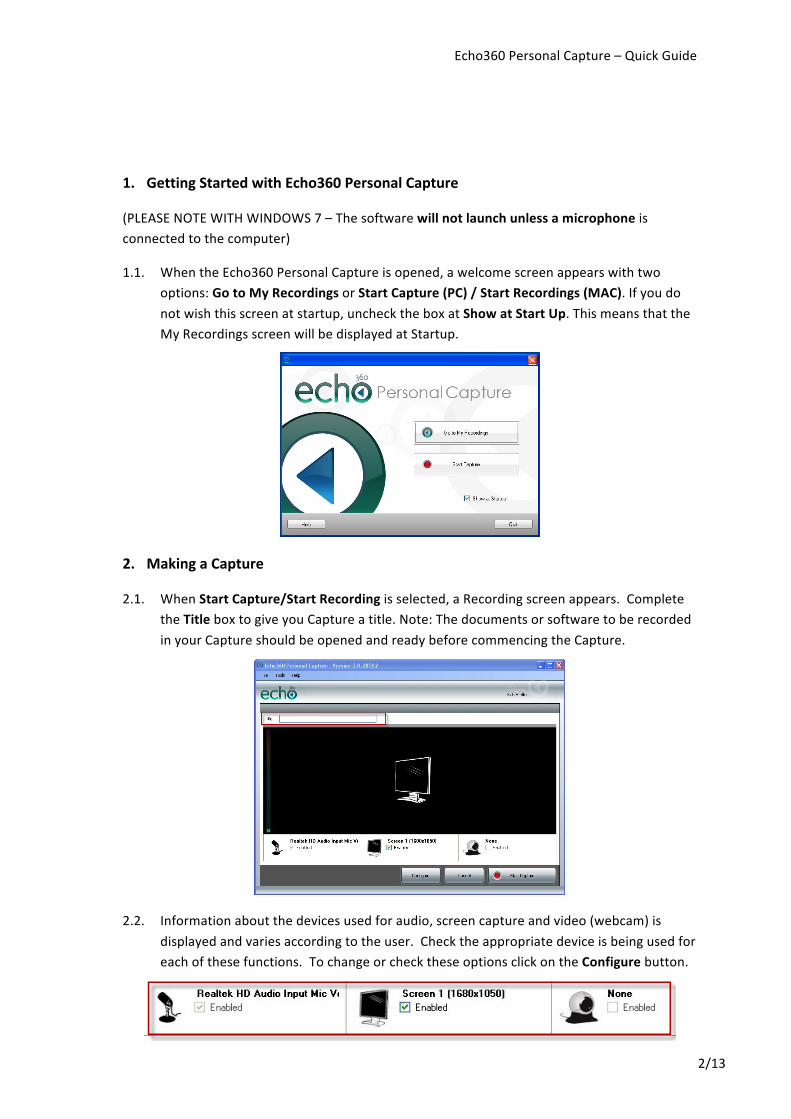
1.1. When the Echo360 Personal Capture is opened, a welcome screen appears with two options: Go to My Recordings or Start Capture (PC) / Start Recordings (MAC). If you do not wish this screen at startup, uncheck the box at Show at Start Up. This means that the My Recordings screen will be displayed at Startup.
2. Making a Capture
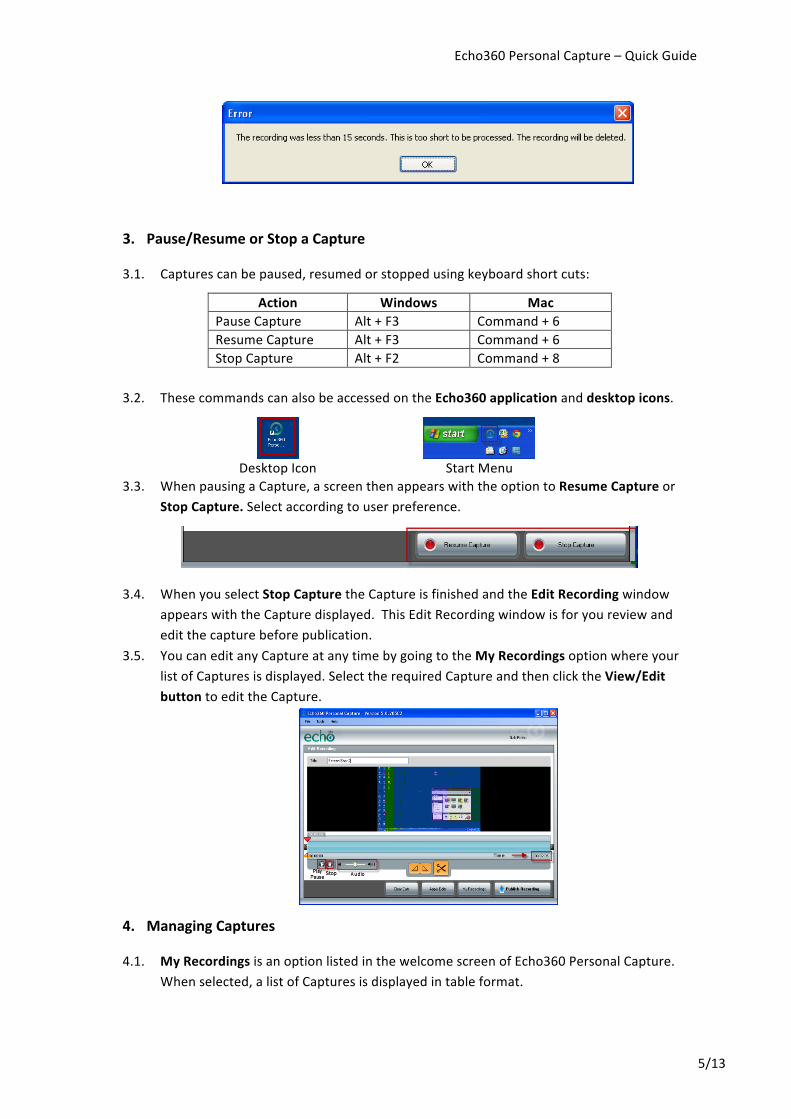
2.1. When Start Capture/Start Recording is selected, a Recording screen appears. Complete the Title box to give you Capture a title. Note: The documents or software to be recorded in your Capture should be opened and ready before commencing the Capture.
2.2. Information about the devices used for audio, screen capture and video (webcam) is displayed and varies according to the user. Check the appropriate device is being used for each of these functions. To change or check these options click on the Configure button.
Echo360 Personal Capture – Quick Guide
3/13
2.3. If a webcam is not connected, the check box is empty indicating that it is not enabled. Webcams may need to be configured separately via the configure button or the computers settings. Note: that the following types of Captures are possible:
a) Audio Capture Only b) Audio Capture and Screen Capture c) Audio Capture and Screen Capture and Video (Webcam) Capture
It is not possible to do a capture with Audio and Video (Webcam) only.
2.4. There are three options on the Recording screen: Configure, Cancel and Start Capture (PC) or Configure, My Recordings and Start Capture (Mac). When you press the Configure button, a list of preferences for your audio, screen capture and video (webcam) devices appear.
2.5. The Audio / Video device options vary according to user system specifications and can be changed by using the drop down list boxes. If a device you are expecting is not in the drop down box, go to the computers settings for the device. To confirm any changes click OK or Save on the bottom of the screen. To exit without changes, select Cancel.
Most webcams with Windows 7/XP/Vista driver support Echo360 Personal Capture, and Echo360 has tested and support the following webcams:
Vendor Model
Logitech Quickcam Orbit AF
Logitech Quickcam Pro 9000
Echo360 Personal Capture – Quick Guide
4/13
Logitech Quickcam Pro for Notebooks
Logitech Quickcam Pro 5000
Logitech Quickcam Pro 3000
Logitech Quickcam Pro 4000 Does not work on Dell OptiPlex & Toshiba DynaBook Satellite systems
Microsoft LifeCam VX-‐7000 Driver-‐only installation only
Winbook WB-‐6120 WebCam
HP HP integrated camera HP Mediasmart Webcam Software
Macintosh
Vendor Model
Apple Built-‐In iSight Camera (MacBook and MacBook Pro) Verified to work with MacBook and MacBook Pro. May work with iMac but has not been tested
Logitech QuickCam Vision Pro USB camera
Blue Eyeball Camera USB camera
Note: There are some webcams not supported by Echo360, and when this happens your video image does not appear in the display screen.
2.6. The Capture may include screenshots, PowerPoint and video presentations etc. that are to be shown to students. When the Start Capture button is selected, a capture of screen actions and your audio explanation will commence.
2.7. Once you have clicked Start Capture, a count down dialog box appears (5-‐0) and when it disappears, the Capture begins.
2.8. If a computer stops or shuts down suddenly while in the middle of a Capture, it is saved but not published. If the Capture is less than 15 seconds, an error message will be displayed.
Echo360 Personal Capture – Quick Guide
5/13
3. Pause/Resume or Stop a Capture
3.1. Captures can be paused, resumed or stopped using keyboard short cuts:
Action Windows Mac Pause Capture Alt + F3 Command + 6 Resume Capture Alt + F3 Command + 6 Stop Capture Alt + F2 Command + 8
3.2. These commands can also be accessed on the Echo360 application and desktop icons.
Desktop Icon Start Menu
3.3. When pausing a Capture, a screen then appears with the option to Resume Capture or Stop Capture. Select according to user preference.
3.4. When you select Stop Capture the Capture is finished and the Edit Recording window appears with the Capture displayed. This Edit Recording window is for you review and edit the capture before publication.
3.5. You can edit any Capture at any time by going to the My Recordings option where your list of Captures is displayed. Select the required Capture and then click the View/Edit button to edit the Capture.
4. Managing Captures
4.1. My Recordings is an option listed in the welcome screen of Echo360 Personal Capture. When selected, a list of Captures is displayed in table format.
Echo360 Personal Capture – Quick Guide
6/13
4.2. Information is displayed regarding the total number of Captures, the space available, the date and the ability to organise the Capture list in ascending or descending order.
4.3. When the specific Capture is selected, there are four options: Delete, View/Edit, Publish Recording and Start Recording.
4.4. To listen to a particular Capture, select View/Edit.
5. Review and Edit a Capture
Important note: Once you Apply Edits you are not able to undo any edits or revisions that you have
5.1. The Capture can be reviewed by pressing the play button. The playback control buttons are used to view, pause and listen to the edited Capture; the audio can also be adjusted.
5.2. The Edit Recording screen allows you to trim the beginning and end of a Capture as well as cut a segment from the middle of a Capture.
5.3. The editing features include a playhead that shows where you are in your Capture.
There are mark-‐in and mark-‐out buttons at the bottom and scissor to cut
content out of the middle of a Capture. There are also sliders located at the beginning and end of the Capture. The sliders are used to trim the start and end of the capture.
Echo360 Personal Capture – Quick Guide
7/13
6. Trim a Capture
6.1. To trim the starts of a Capture drag the left slider inward to trim to the desired beginning of the Capture.
6.2. To trim the end of a capture drag the right slider inward to trim to the desired end of the
Capture. Note that the changes are permanent once you click Apply Edits.
6.3. To cut a section out of the middle of a capture drag the Mark-‐in Button to the start of the section you wish to cut. Drag the Mark-‐out button to the end of the section to cut out. The cut areas appear grey on the timeline.
6.4. Review the capture with the cuts in place using the playback control buttons. 6.5. To return a cut sections either double click in the grey cut area or drag the end and start
sliders again. You can also select the Clear Cuts button at the bottom of the editing screen.
6.6. Review the capture by selecting play, and confirm by selecting the Apply Edits button at the bottom of the editing screen. As Apply Edits cannot be recovered you will need to click to confirm this option. Changes cannot be undone after the edits are applied.
6.7. When the edits are applied, the My Recordings page is displayed. Please note that the status of the capture is shown as Edited.
7. Delete a Capture
7.1. If a particular Capture is no longer needed, go to My Recordings to display the list.
Echo360 Personal Capture – Quick Guide
8/13
7.2. Select the required Capture, and then press Delete in the editing screen.
7.3. A dialog box appears seeking confirmation by the user. When the Yes option is chosen, the Capture is deleted. When No or Cancel is selected, the list of Captures is displayed.
Once your item is deleted there is no way to reinstate the Capture.
8. Setting Server Preference’s for Publishing Captures
8.1. There are three menu options in the menu bar of My Recordings: File, Tools and Help on PC’s or Echo360 Personal Capture, Edit, Window or Help on Macs.
8.2. When the Tools, Options is selected on PC’s or Echo360 Personal Capture, Preferences on Macs, a window appears with two tabs: General and Server. When the General tab is selected, the presenter can include their name in the Default presenter name field and specify the Storage location for Capture files by selecting the Browse / Change button.
8.3. When the Server tab is selected, the details of the Echo360 Server where the Capture is to be published is specified. Confirm server information by selecting Test Connection. If
Echo360 Personal Capture – Quick Guide
9/13
connection is established, select OK to proceed. If Test Connection fails, please contact ITS Service Desk x58888.
8.4. If server configuration information is not include input: ess.lcs.rmit.edu.au:8443
8.5. The Help option provides assistance on how to use the different features of Echo360 Personal Capture and information about the software version.
9. Publish a Capture
9.1. In the My Recordings page, the details for each Capture are provided and their Capture status – Published or Not Published. Highlight the Capture you wish to publish to Blackboard (via the Echo360 Server) from the list.
9.2. Then select Publish Recording option at the bottom of the list.
9.3. A login screen appears and prompts for username (e-‐number) and password (given when you registered for Echo360 Personal Capture software). Fill in the details. Then select the Login option at the bottom of the screen or Cancel
Echo360 Personal Capture – Quick Guide
10/13
9.4. Once authenticated, a list of your Blackboard courses registered to receive Echo360 Personal Capture recordings is displayed. Select the appropriate course for the published Capture, and press Next to proceed. If the appropriate Blackboard course is not listed you will need to register the Blackboard course with ITS via this form: http://emedia.rmit.edu.au/support/personalcapture
9.5. A new screen is displayed with two options, using the term echo instead of Capture: Create new Echo and Replace Existing Echo. The options are to create a new Capture or overwrite/replace a previous Capture. Select Next to continue. Please note: Personal Capture recordings cannot replace Echo360 Captured Class Lectures.
9.6. When Create a new Echo is selected, a new window appears requesting the title of the Capture. Choose an appropriate title and then select Publish to continue.
Echo360 Personal Capture – Quick Guide
11/13
9.7. The My Recordings page appears with the list of Captures and displays how much of the Capture has being uploaded to server. The publishing process varies according to the size of the Capture and network conditions.
9.8. When the upload is complete, the status of the Capture changes to from Publishing to Published
9.9. When Replace Existing Echo is selected, the previous uploaded Captures are listed below option. Highlight the particular Capture to replace, and press the Next button to continue.
Echo360 Personal Capture – Quick Guide
12/13
9.10. A window appears requesting changes to the title of the presentation. Once those changes are made, select Publish.
9.11. The My Recordings page appears and displays the status of the Capture uploading to the server. When the upload is complete, the status of the Capture changes to from Publishing to Published.
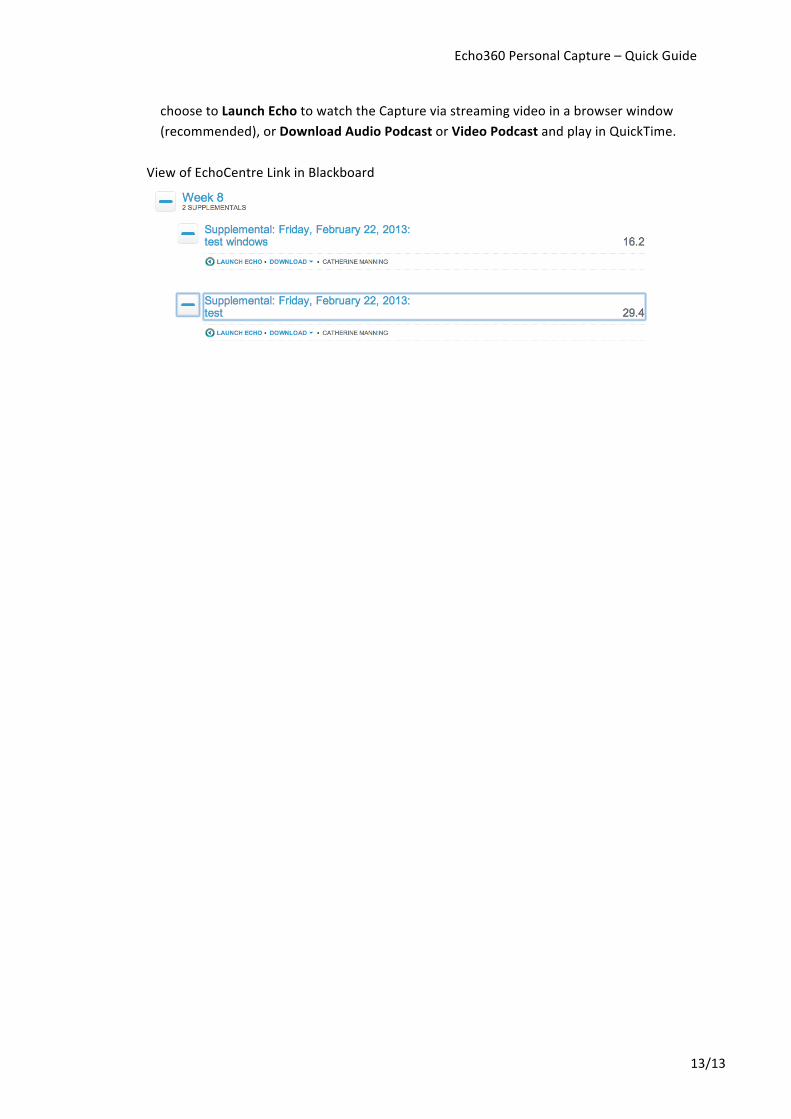
9.12. After approximately 30 minutes the Captures is available in the specified Blackboard course and appears under the EchoCentre link. Note: Do not delete this link, hide link of you do not want students to view the Captures. EchoCentre link is displayed in a week format and the Capture will be found under the week you published the Capture. Students view the Captures via the EchoCentre link in Blackboard. The students can
Echo360 Personal Capture – Quick Guide
13/13
choose to Launch Echo to watch the Capture via streaming video in a browser window (recommended), or Download Audio Podcast or Video Podcast and play in QuickTime.