A21 Skylight Retrofit Application To VELUX® ECX Curb
I N S T A L L A T I O N G U I D E 1/4 3.27.2012
© 2012 VELUX Group ® VELUX and VELUX logo are registered trademarks
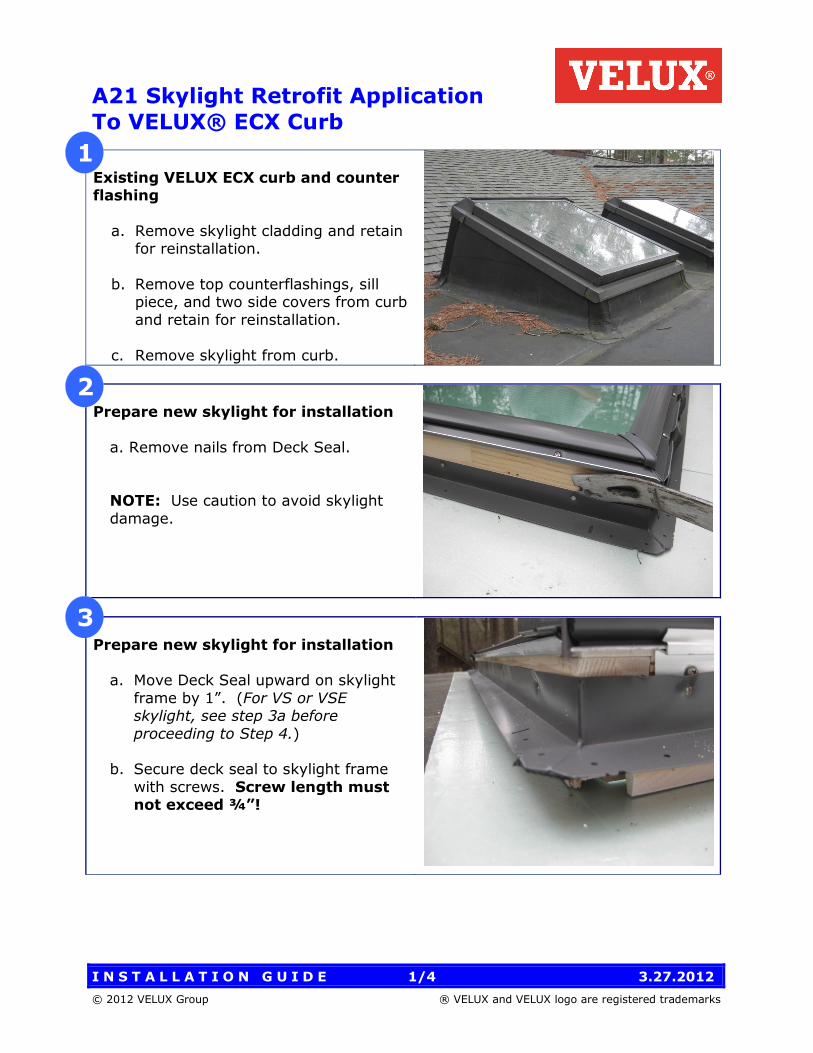
Existing VELUX ECX curb and counter flashing
a. Remove skylight cladding and retain for reinstallation.
b. Remove top counterflashings, sill
piece, and two side covers from curb
and retain for reinstallation.
c. Remove skylight from curb.
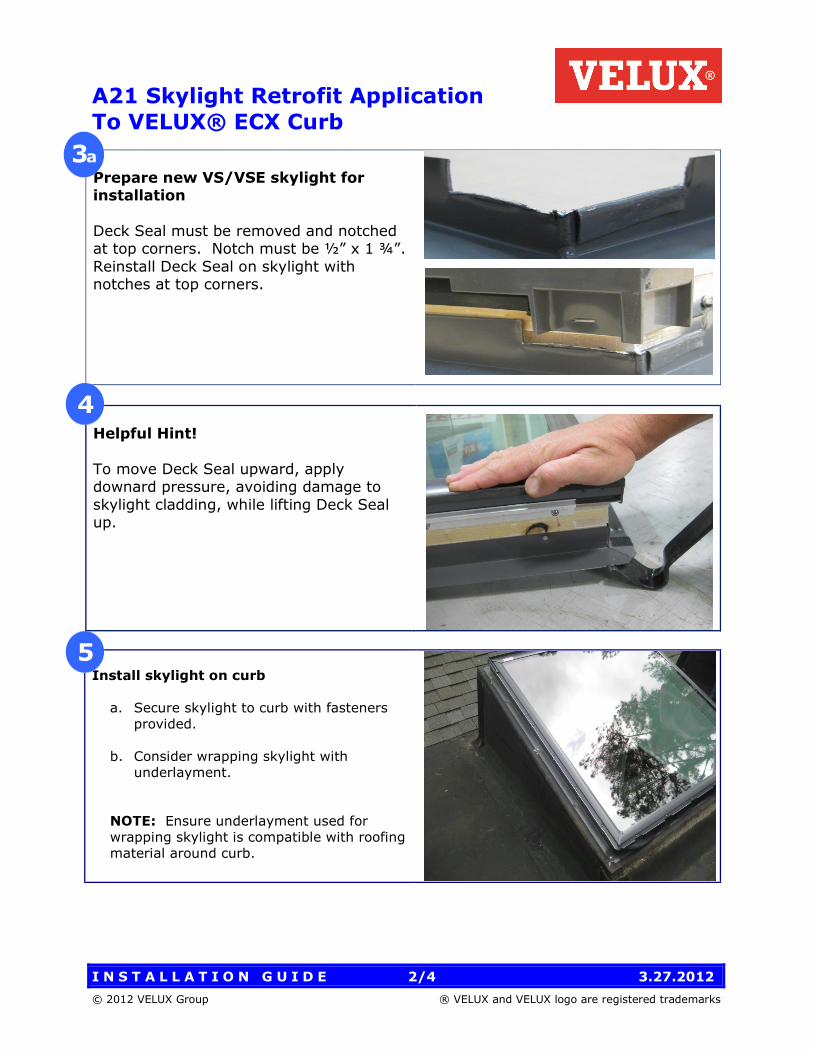
Prepare new skylight for installation
a. Remove nails from Deck Seal.
NOTE: Use caution to avoid skylight
damage.
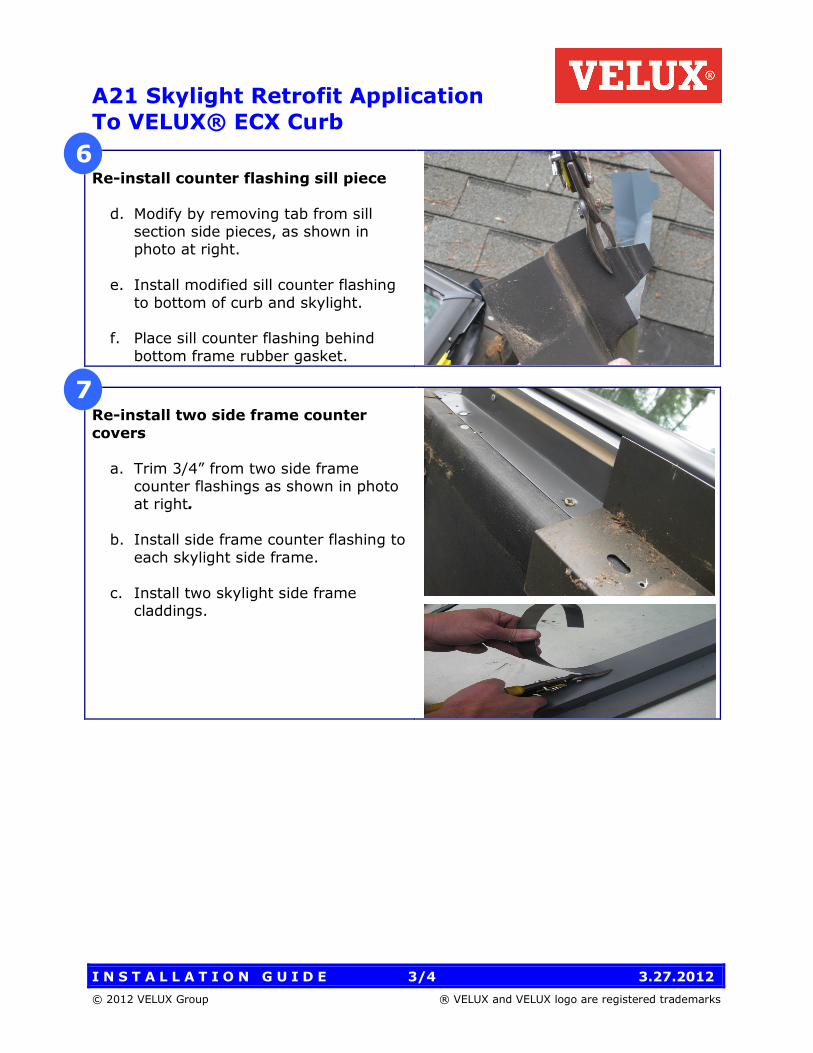
Prepare new skylight for installation a. Move Deck Seal upward on skylight
frame by 1”. (For VS or VSE skylight, see step 3a before
proceeding to Step 4.)
b. Secure deck seal to skylight frame
with screws. Screw length must not exceed ¾”!
1
3
2
A21 Skylight Retrofit Application To VELUX® ECX Curb
I N S T A L L A T I O N G U I D E 2/4 3.27.2012
© 2012 VELUX Group ® VELUX and VELUX logo are registered trademarks
Prepare new VS/VSE skylight for installation
Deck Seal must be removed and notched at top corners. Notch must be ½” x 1 ¾”.
Reinstall Deck Seal on skylight with notches at top corners.
Helpful Hint!
To move Deck Seal upward, apply downard pressure, avoiding damage to
skylight cladding, while lifting Deck Seal up.
Install skylight on curb
a. Secure skylight to curb with fasteners provided.
b. Consider wrapping skylight with underlayment.
NOTE: Ensure underlayment used for
wrapping skylight is compatible with roofing
material around curb.
4
5
3a
A21 Skylight Retrofit Application To VELUX® ECX Curb
I N S T A L L A T I O N G U I D E 3/4 3.27.2012
© 2012 VELUX Group ® VELUX and VELUX logo are registered trademarks
Re-install counter flashing sill piece
d. Modify by removing tab from sill section side pieces, as shown in photo at right.
e. Install modified sill counter flashing
to bottom of curb and skylight.
f. Place sill counter flashing behind
bottom frame rubber gasket.
Re-install two side frame counter
covers
a. Trim 3/4” from two side frame counter flashings as shown in photo at right.
b. Install side frame counter flashing to
each skylight side frame.
c. Install two skylight side frame claddings.
6
7
A21 Skylight Retrofit Application To VELUX® ECX Curb
I N S T A L L A T I O N G U I D E 4/4 3.27.2012
© 2012 VELUX Group ® VELUX and VELUX logo are registered trademarks
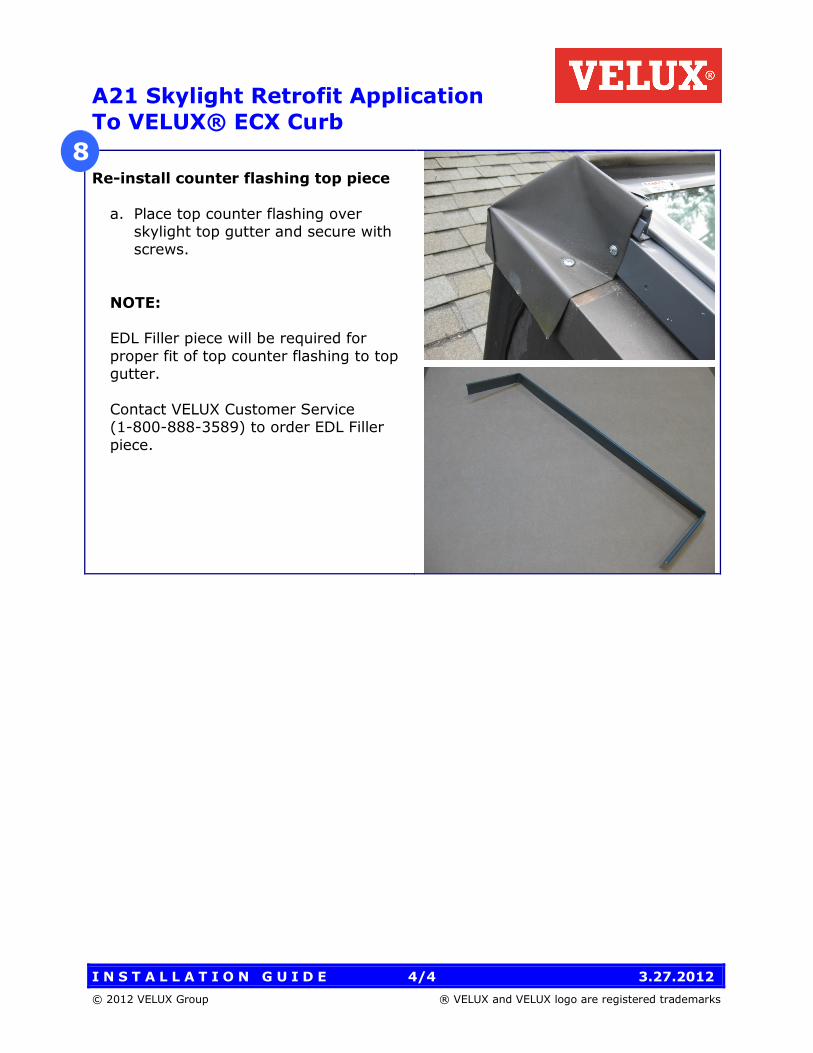
Re-install counter flashing top piece
a. Place top counter flashing over skylight top gutter and secure with screws.
NOTE: EDL Filler piece will be required for
proper fit of top counter flashing to top gutter.
Contact VELUX Customer Service (1-800-888-3589) to order EDL Filler
piece.
8