27
Installation Manual

Installation Manual

Content
Overview
Setup the Sensor(s) & Transmitter
Sensor(s) & Transmitter Setup
Power On the Gateway
Connect your Gateway to the Efergy Pro App
Meet the Efergy Pro app
Customer Support
1
3
4
13
14
22
24

The Efegry Pro is a whole home energy monitoring system that provides real-time data on solar generation, imports, exports and consumption of electricity simultaneously.
Overview
CT Sensors are clipped to particular wires in or near the fuse box. A lead from the sensor is connected into the Transmitter, which sends real-time data wirelessly to the Gateway. The Gateway is connected to your home's Wi-Fi network and sends real-time and historical energy use to Efergy Pro Cloud and the app.
How it Works
1

2
1 2 3
3 Quick and Simple StepsYou can easily set up your Efergy Pro by following
this step-by-step guide

It is typically a quick job to fit the sensor clamps in your fuse box, however, you need to be sure that you put the clamps on the right cables to ensure the correct readings.The diagrams on pages 4 to 7 show how to place the sensors on different systems.
Make sure that you put the clamps on the right cables to ensure the correct readings.
Setup the Sensors & Transmitter
1
3

4
Grid-tie Inverter AC
Fuse Box Consumer Unit
Electrical Junction Box
Utility Meter Domestic LoadsGrid
Solar PV Array
Type I
Single-phase Solar PV Deployment
� Most common type in homes and apartments in Europe, Asia and many other parts of the world.
� Make sure the arrow mark on the Sensors is always towards the Fuse Box.
Trasnmitter
XL Sensor
Mini Sensor
Y-Cable
Live Line
Neutral Line
Sensor(s) & Transmitter Setup

5
Grid-tie Inverter Fuse Box Consumer Unit
Utility Meter
Domestic Loads
Grid
Solar PV Array
Sensor(s) & Transmitter Setup Type II
Single-phase Solar PV deployment
� Most common type in homes and apartments in Europe, Asia and many other parts of the world.
� Make sure the arrow mark on the Sensors is always towards the Fuse Box.
Trasnmitter
XL Sensor
Mini Sensor
Y-Cable
Live Line
Neutral Line

6
L2
L1
L2
L1
Utility MeterGrid
Fuse Box Consumer Unit
Electrical Junction Box
Domestic Loads
Grid-tie Inverter AC
Solar PV Array
Type III
120/240V Split-phase Solar Generation
� Most common type in the US and Canada.
� Make sure the arrow mark on the Sensors is always towards the Fuse Box.
� Voltage on the app should be set at 120V.
� When using the Y-Cable make sure the sensor are the same type.
Trasnmitter
XL Sensor
Mini Sensor
Y-Cable
Live Lines LI/L2
Sensor(s) & Transmitter Setup

7
Utility MeterGrid
Fuse Box Consumer Unit
Electrical Junction Box
L2
L1
Domestic Loads
Grid-tie Inverter AC
L2
L1
Solar PV Array
Type IV
Net Metering with Junction Box
� Most common type in the US and Canada.
� Make sure the arrow mark on the Sensors is always towards the Fuse Box.
� Voltage on the app should be set at 120V.
� When using the Y-Cable make sure the sensor are the same type.
Trasnmitter
XL Sensor
Mini Sensor
Y-Cable
Live Lines LI/L2
Sensor(s) & Transmitter Setup

Locate the Live Feed Cable on your Panel/Fusebox. This is normally located near the entrance of the house. Always shut down the power to your electrical panel first and proceed with caution!For example, if you have a single tariff meter you should find four cables exiting the meter (see Diagram A). The feed cable is the live cable exiting from the meter to the fuse box or main switch. Clip the Sensor to Cable 4.
Find the Main Feed Wires________________________________
8
Diagram A Diagram B Diagram C Diagram D

Place the Efergy Pro XL Sensor(s) around the Feed Wires of your electric panel. Pull the clasp to open the Sensor, place it around the feed cable and push the clasp to shut.
� Make sure the arrow mark is always towards the Fuse Box.
Attach the Efergy Pro XL Sensor(s) to Live Feed ________________________________Fuse Box
9

Place the Efergy Pro Mini Sensor(s) around the Live Line coming from the Grid-tie Inverter. Pull the clasp to open the Sensor, place it around the cable and push the clasp to shut.
� Make sure the arrow mark is always towards the Fuse Box.
Attach the Efergy Pro Mini Sensor(s) to Live Feed ________________________________
10
Fuse Box

11
The Efergy Pro Transmitter has 3 input channels to plug in the Sensor clamps with or without a Y Cable. Make sure you plug the Sensor jack in the right position. Connect the Sensor(s) Jack into the correct input port on the Transmitter:Port 1: Multi-circuitPort 2: Energy consumptionPort 3: Solar generation
Note: Insert sensor(s) jack before powering on the Transmitter.
Connect the Sensor(s) Jack Into the Transmitter________________________________
Energy consumption
Solar generation
Multi-circuit (optional)
�
☼ �
3 2 1

12
1. Make sure you insert the sensor(s) jack first, then power on the Transmitter.2. Open the Transmitter case and insert three AA batteries (not provided). 3. Mount the transmitter on the wall next to or above the electric panel.
� Efergy recommends high quality alkaline or lithium batteries for the best product performance. Battery life will depend on environment (up to 12 months).
Power On the Transmitter________________________________
2 1

13
2
Power On the Gateway
Plug the Gateway into a USB Power Supply (not included in the product set). The Power LED will turn solid green showing that the Gateway is powered on. The Transmitter LED on the middle may be red (this will depend on whether or not you have set up the Transmitter) and the Wi-Fi LED will flash red indicating that is ready for Wi-Fi configuration.
Power Transmitter Wi-Fi

14
3
Download the Efergy Pro app free from the App Store or Google Play. Setup is simple - open the app, sign up and follow the on-screen steps.
Connect your Gateway to the Efergy Pro App

To create an Efergy Pro account:1. Enter the name as you wish it to be registered.2. This is the main email address for your Efergy Pro Account.3. The username must be in the form of an email address (i.e. [email protected]). You can use the same Efergy Pro Account or use an alternate email to install an addional Gateway.4. Create a password. Must be at least 10 characters and have at least 1 number.5. Confirm the password.6. Tap Register.
Register an Efergy Pro Account________________________________
1
2
3
4
5
15

You'll now receive a Verification Code to the email address you entered.Enter the Username, Password and Verification Code. Tap Verify account.
Verify your Account________________________________
16

17
Before registering the device, make sure the Gateway is powered up. To register the device:1. Tap Setup a new device to start the Gateway configuration.2. Enter the Gateway's MAC address and Serial Number, located on the product label, which is printed on the back of the device. Type the information manually or tap the camera icon � on the right to scan the barcode.3. Make sure the MAC Adress and Serial Number inputed match the label information before moving to the next step.4. Tap Configure your device.
Register the Device________________________________
8 4 F 3 E B 8 4 2 8 A F
1 8 2 6 0 3 0 0 0 0 2 5

18
The electricity supply voltage is set to 230V by default. You can update your electricity supply voltage on this screen. Tap Confirm voltage.
Set voltage ________________________________

19
Verify your mobile device is connected to a 2.4GHz Wi-Fi network. Do not use data (3G or 4G) on your mobile. We suggest temporarily turning your data off.
Note: • Compatible only with 2.4GHz wireless band. • To connect to a 2.4GHz network, go to Settings � > Wi-Fi. In this menu you will see all detectable networks in your area. Locate the SSID for your network, and tap on the SSID with the 2G or 2.4 end notation.
Connect your Mobile to Wi-Fi________________________________
WLANCon�guración
WLAN
YourWiFi 2.4
�
� � �
YourWiFi 5.0 �� �
John’s iPad �� �
Open Wi-Fi � �
Ask to join Networks
Other...
SELECCIONA UNA RED...
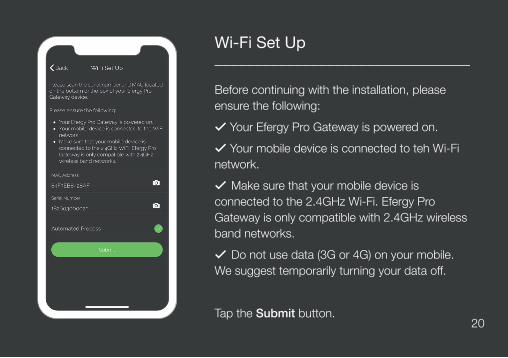
Before continuing with the installation, please ensure the following:� Your Efergy Pro Gateway is powered on. � Your mobile device is connected to teh Wi-Fi network.� Make sure that your mobile device is connected to the 2.4GHz Wi-Fi. Efergy Pro Gateway is only compatible with 2.4GHz wireless band networks.� Do not use data (3G or 4G) on your mobile. We suggest temporarily turning your data off.
Tap the Submit button.20
Wi-Fi Set Up________________________________

21
To connect your Gateway to the Wi-Fi network:1. Select the name (SSID) of your WiFi network. 2. Enter your Wi-Fi password.3. Tap Submit.4. After a few seconds a popup will appear asking for permission to join the Gateway's network.
Connect the Gateway to Wi-Fi________________________________

Meet the Efergy Pro app
The Efergy Pro app allows you to see your home electricity consumption, solar generation performance and savings.1. A simple tab bar on the bottom of the screen lets you switch between different information.2. Click the Menu button � (top left), to access the device settings, support and more.
Home Daily Breakdown
Home�
Data Efficiency
SUMMARY DAY
4.60
1.80
40.60
18.80
185.33
161.17
WEEK MONTH
Last update: 3 seconds ago
CURRENTLYEXPORTING
Exporting50W
Generating1,346W
Using1,296W
1
2 �
22

Track solar panels’ daily energy production, electricity usage, imports and exports.
NowCompare solar production to energy consumption with an info-graphic and minute level readings.
Daily Breakdown
Use the historic data to track generation, consumption, performance and savings.
DataCompare the energy you’ve generated and imported. See your renewable energy usage.
Efficiency
23

If you have any questions about using your Efergy Pro or if you’d like further advice on monitoring solar generation and electricity at home, please feel free to contact us or visit the website for up-to-date information, downloads and frequently asked questions.
� �
� � �
Website: www.efergy.comMore info: www.efergy.com/efergyproSupport site: www.efergy.com/efergypro/help Technical support: [email protected]: [email protected]
Customer Support
24

efergy.com/efergypro


