1 EJB 3 Using GlassFish V1, Derby and Eclipse 3.3.2 Download the following: JDK 1.5.0.15 http://java.sun.com/javase/downloads/index_jdk5.jsp GlassFish V1 (includes JEE and Derby Database) https://glassfish.dev.java.net/public/downloadsindex.html Then go to: https://glassfish.dev.java.net/downloads/04May06.html For Windows: b48-glassfish-winnt.jar Eclipse IDE for Java EE Developers http://www.eclipse.org/downloads/download.php?file=/technology/epp/downloads/releas e/europa/winter/eclipse-jee-europa-winter-win32.zip
GlassFish V1 (includes JEE and Derby Database)https://glassfish.dev.java.net/public/downloadsindex.html
Then go to:https://glassfish.dev.java.net/downloads/04May06.html
For Windows:b48-glassfish-winnt.jar
Eclipse IDE for Java EE Developershttp://www.eclipse.org/downloads/download.php?file=/technology/epp/downloads/release/europa/winter/eclipse-jee-europa-winter-win32.zip
In the command window, change the directory to the glassfish directory.
To complete the setup, run this command:
lib\ant\bin\ant -f setup.xml
14
You should see a successful build.
15
Install Eclipse 3.3.2
Double-click the executable from where you downloaded Eclipse:
eclipse-jee-europa-winter-win32.zip
Click Extract all Files
16
Click Next.
17
Enter c:\ for the directory then click Next.
18
Watch the progress.
19
Click Finish.
20
Create Derby Database Shortcuts
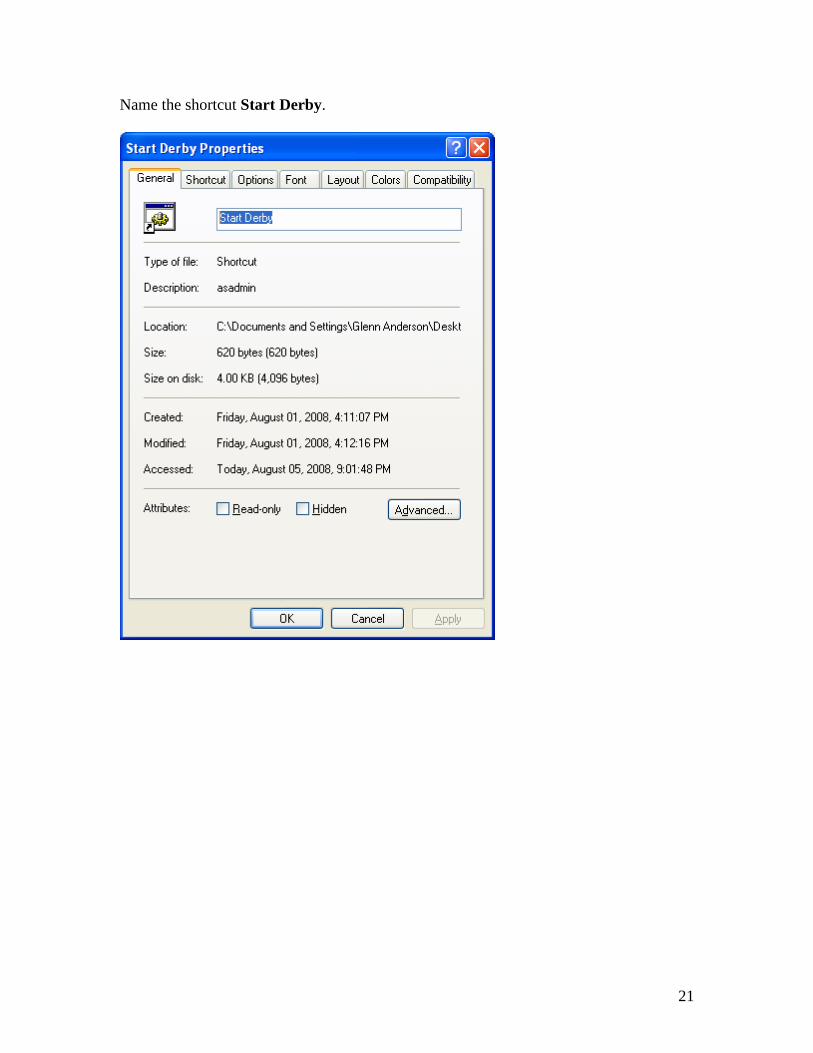
Create a Shortcut for asadmin.bat in the c:\glassfish\bin folder and copy it to theDesktop.
21
Name the shortcut Start Derby.
22
Add the following Target:
23
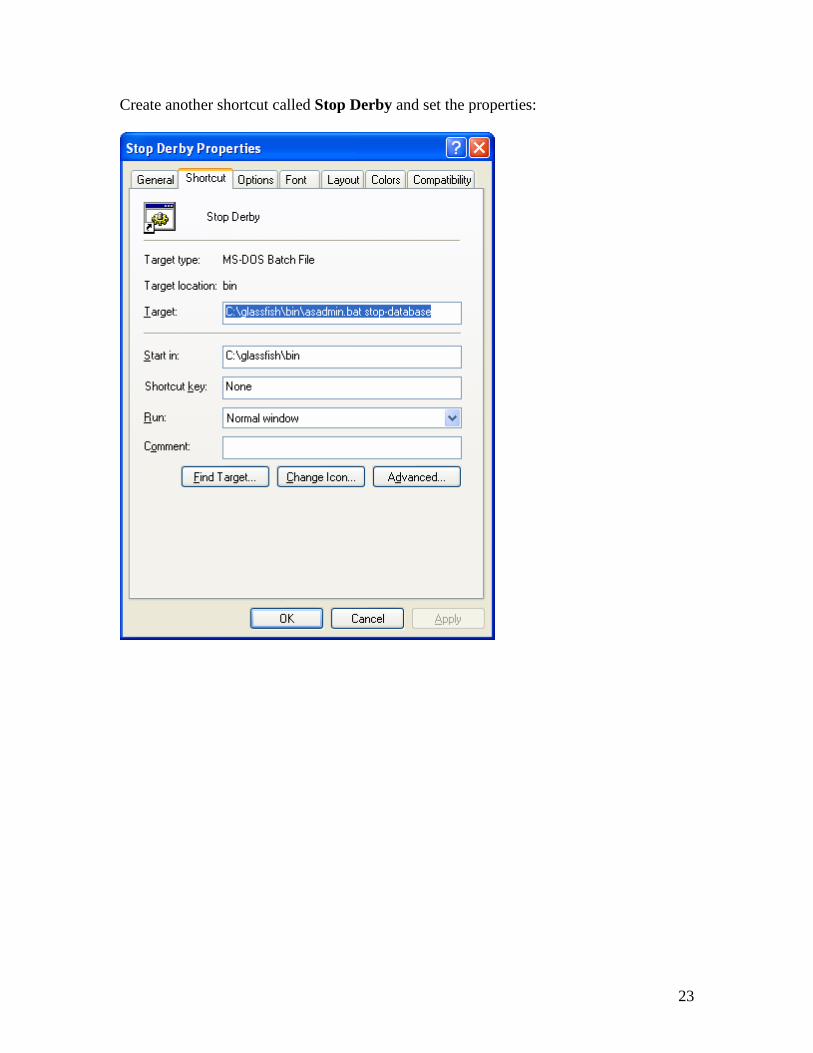
Create another shortcut called Stop Derby and set the properties:
24
Start the Derby Database
Double-click the Start Derby shortcut.
25
Start Eclipse
Create a new Workspace
26
Create a new Server
27
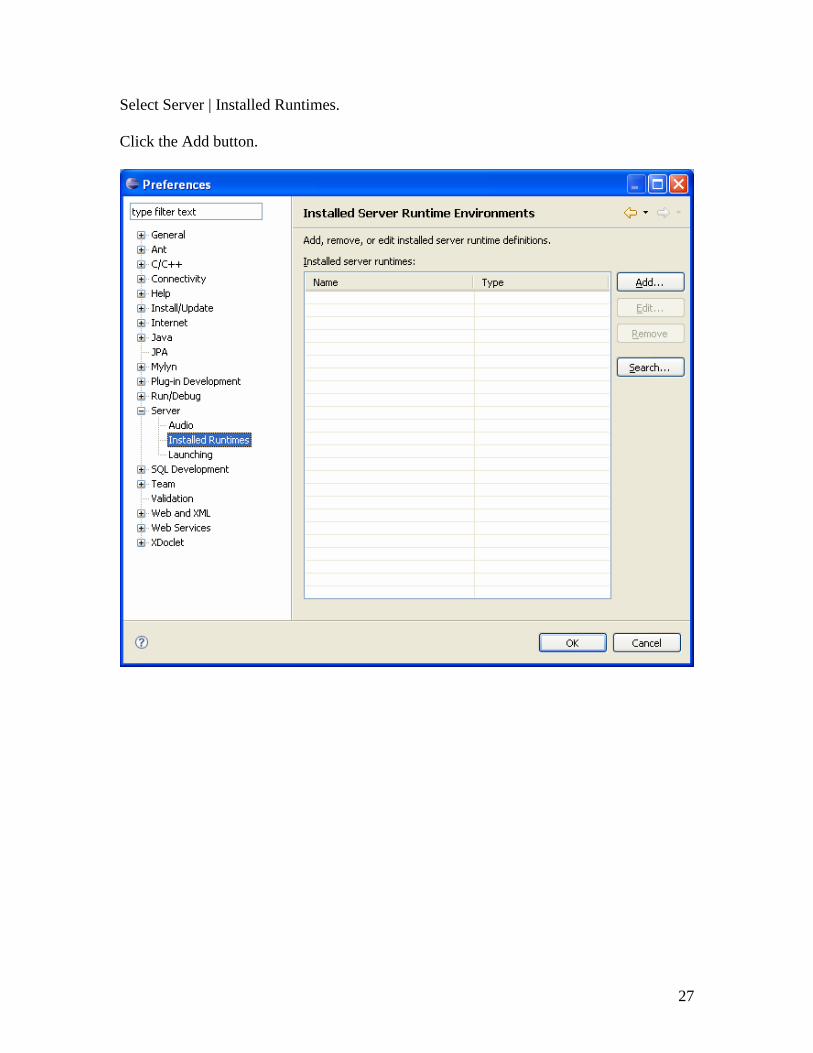
Select Server | Installed Runtimes.
Click the Add button.
28
Click the Download additional server adapters link.
29
Select the GlassFish Java EE 5 Server. Click Next.
30
Accept the terms and click Finish.
Click OK.
31
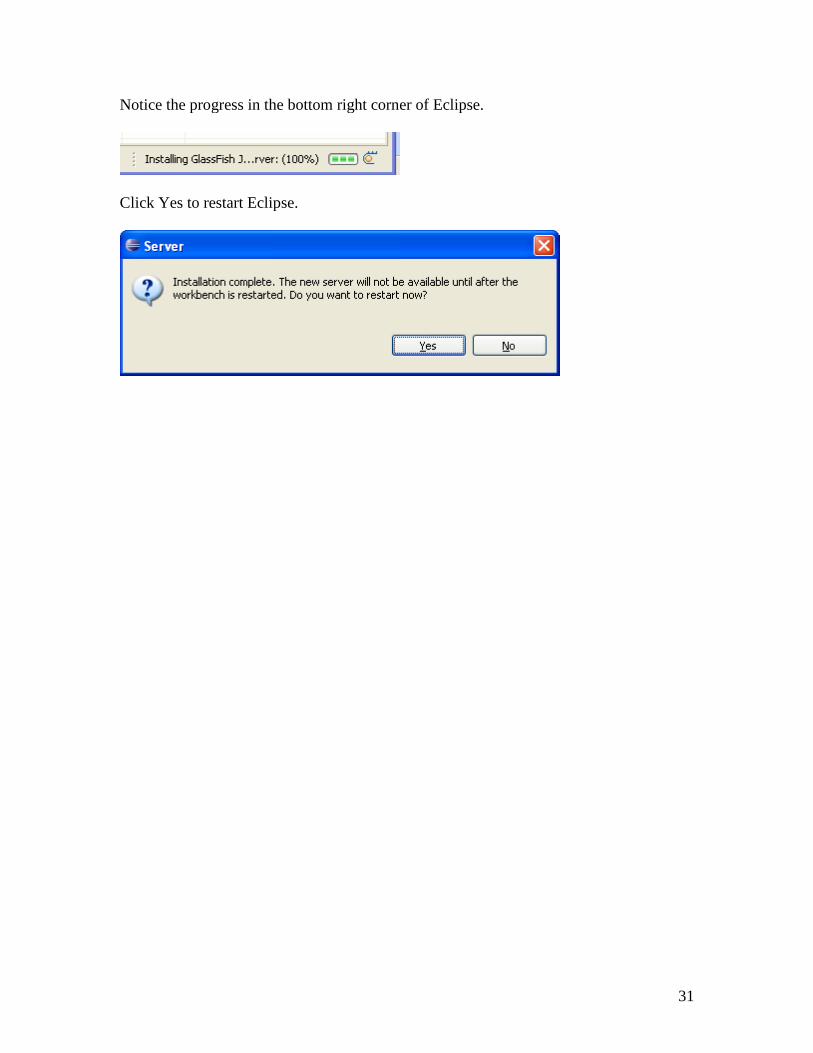
Notice the progress in the bottom right corner of Eclipse.
Click Yes to restart Eclipse.
32
After the restart, go back to Window | Preferences. Then go back to Server | InstalledRuntimes. Then click the Add button. You should see the GlassFish Servers.
Select GlassFish V1 Java EE 5 and check the checkbox to create local server. Then clickNext.
33
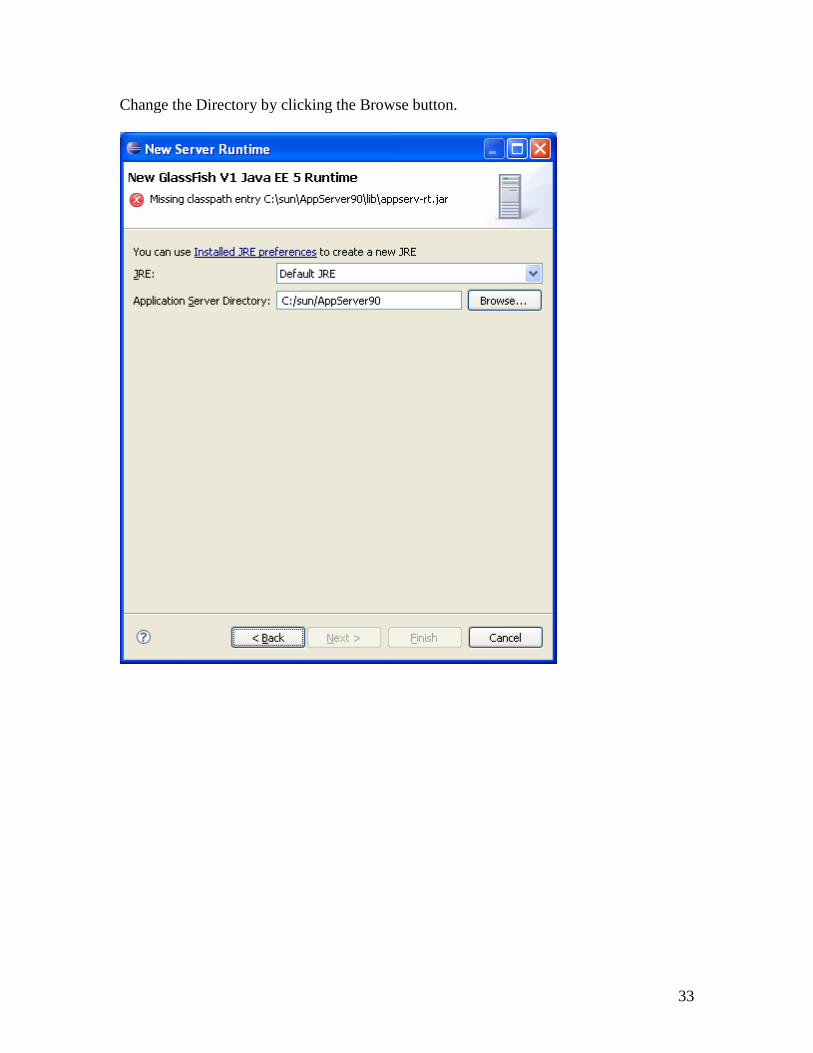
Change the Directory by clicking the Browse button.
34
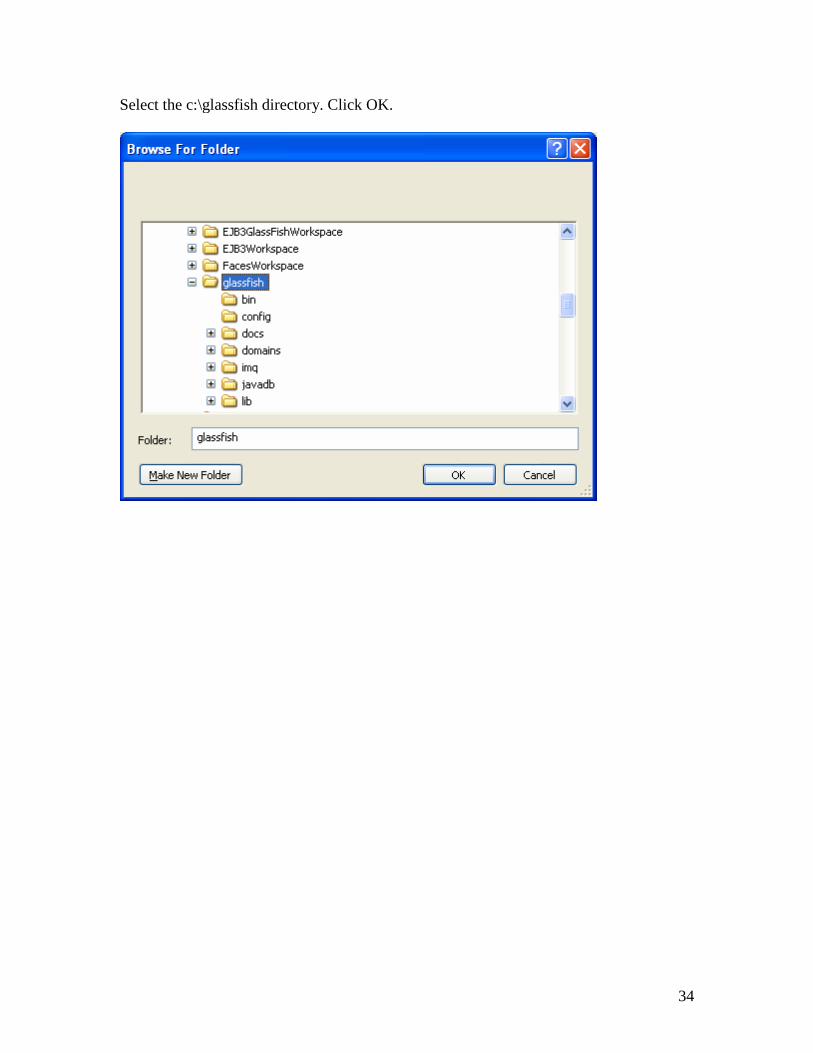
Select the c:\glassfish directory. Click OK.
35
Click Next.
36
Click Finish.
37
Click OK.
38
Start the Server.
You should see the Status changed to Started.
39
You should also see the log messages in the Console.
40
Create a Stateless Session EJB
Create a New Project by selecting File | New | Project.
41
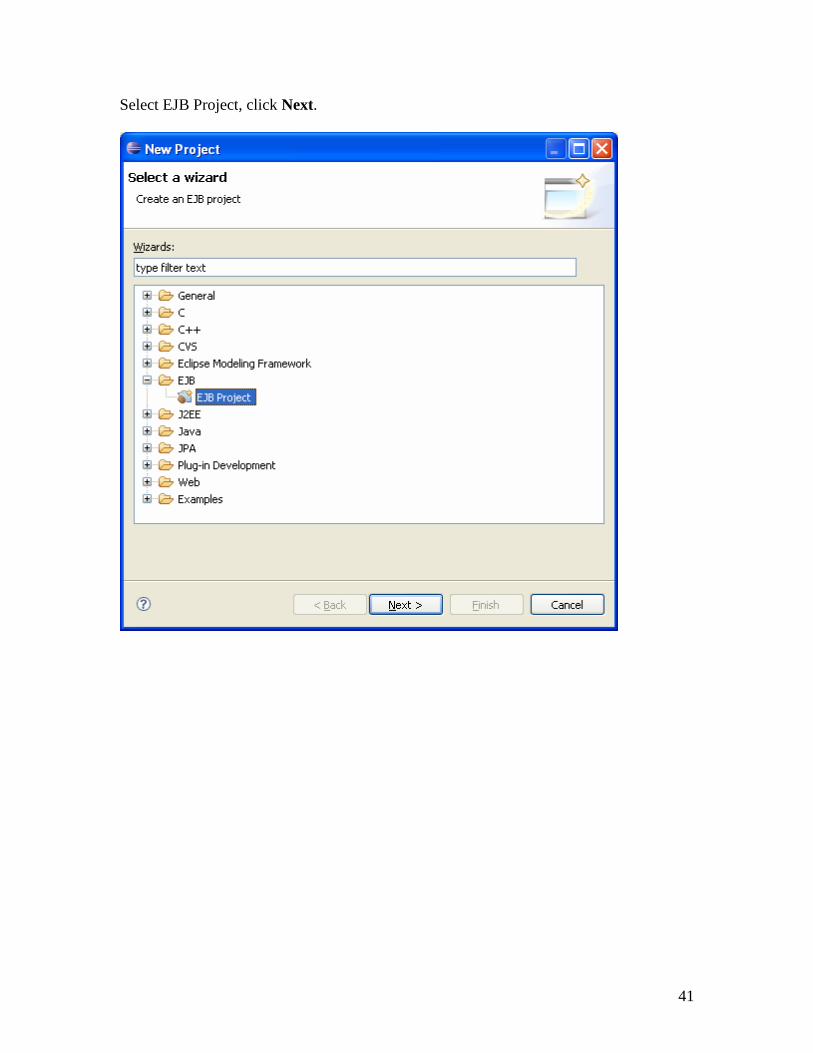
Select EJB Project, click Next.
42
Name the Project StatelessSessionProject, Add the project to an EAR, click Next.
43
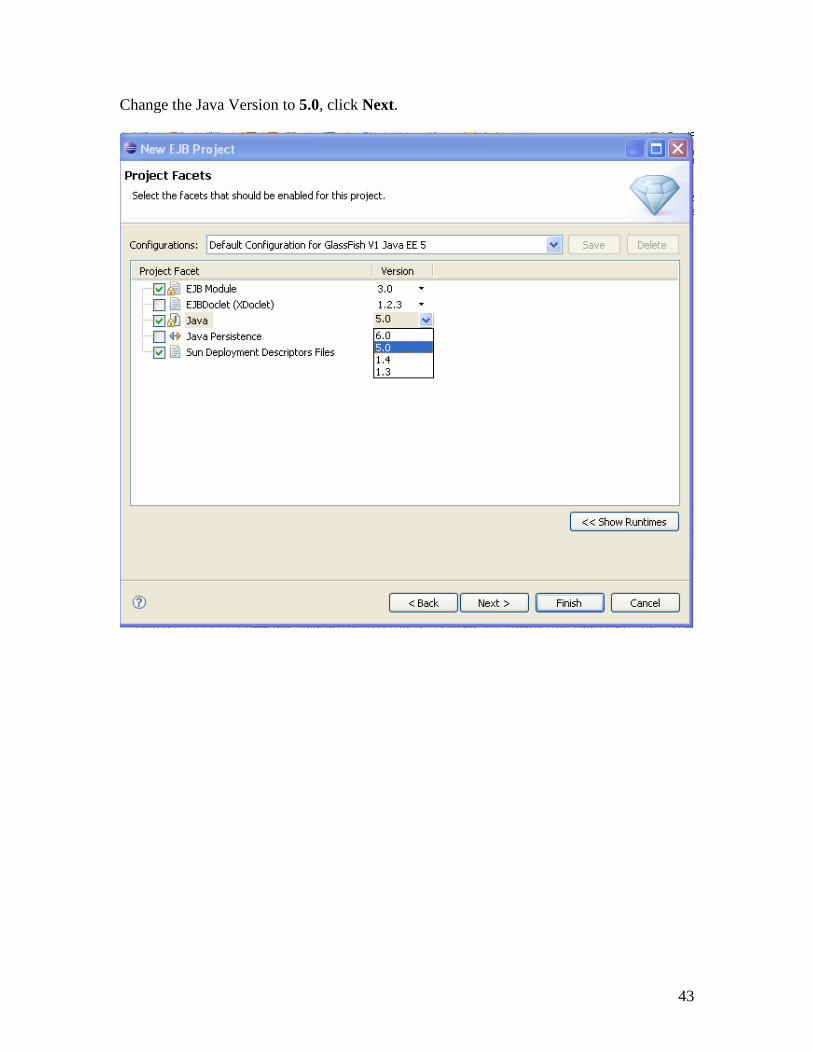
Change the Java Version to 5.0, click Next.
44
Click Finish.
45
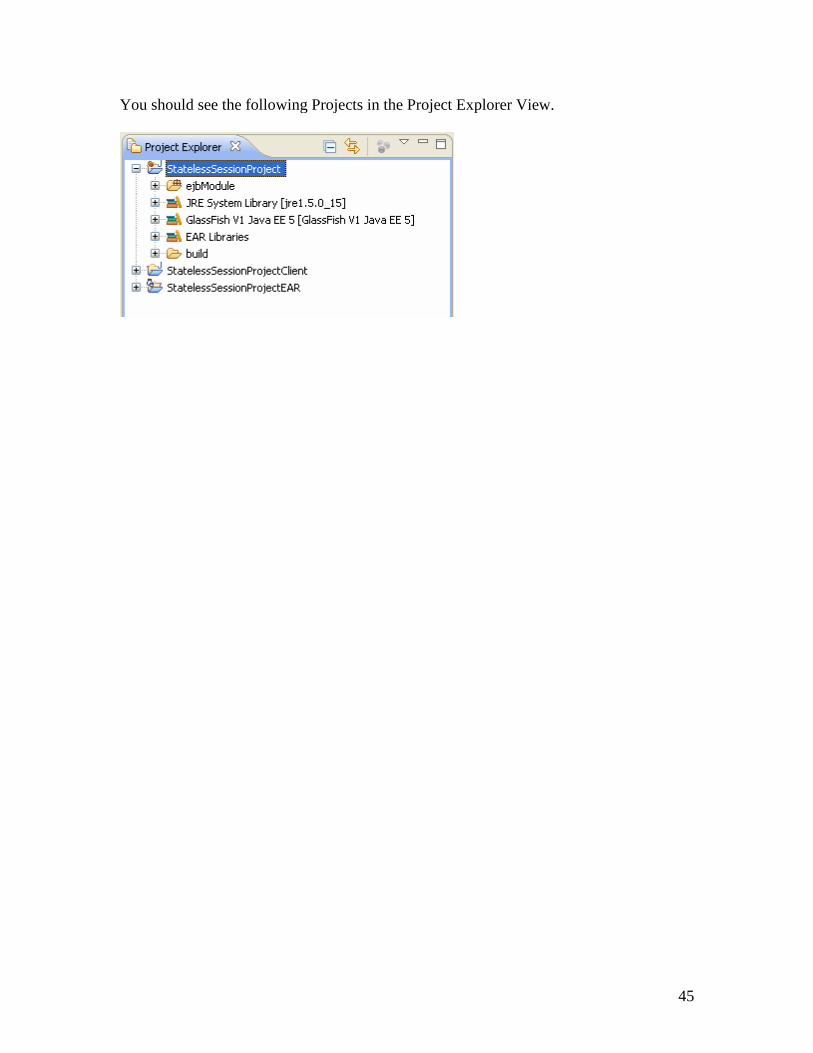
You should see the following Projects in the Project Explorer View.
46
Update the Properties of the EAR Project by selecting Properties.
47
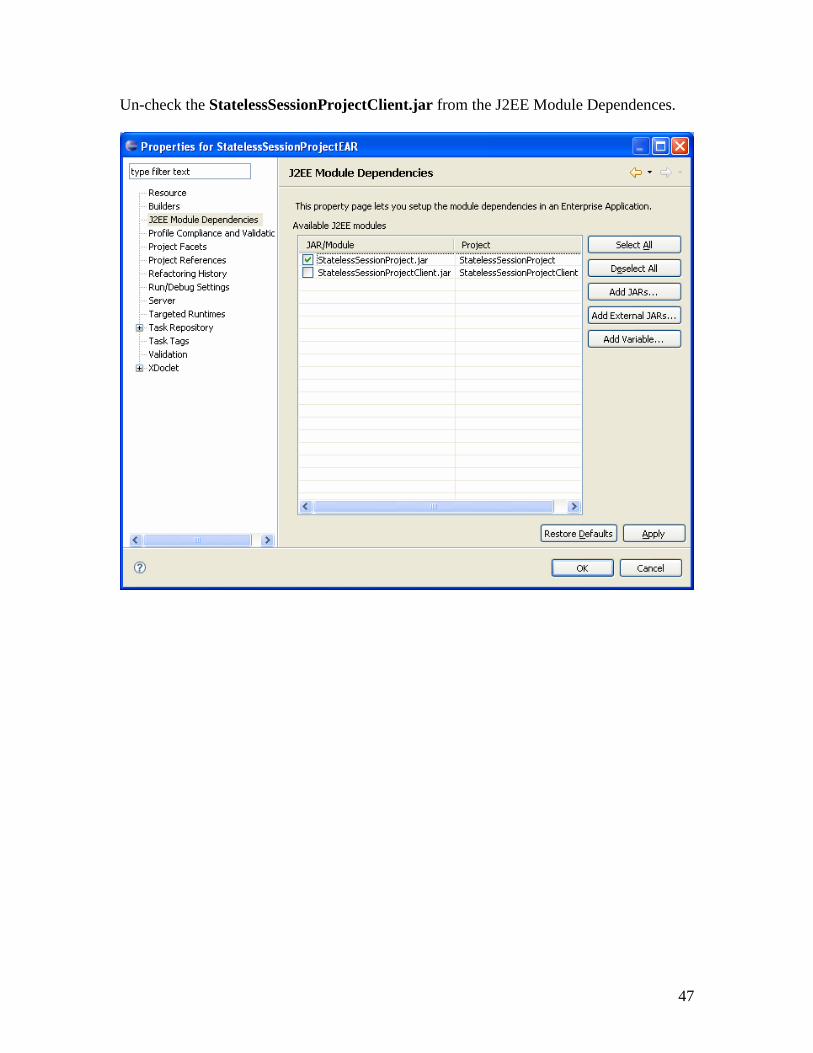
Un-check the StatelessSessionProjectClient.jar from the J2EE Module Dependences.
48
Make sure that the StatelessSessionProjectClient is un-checked, click OK.
49
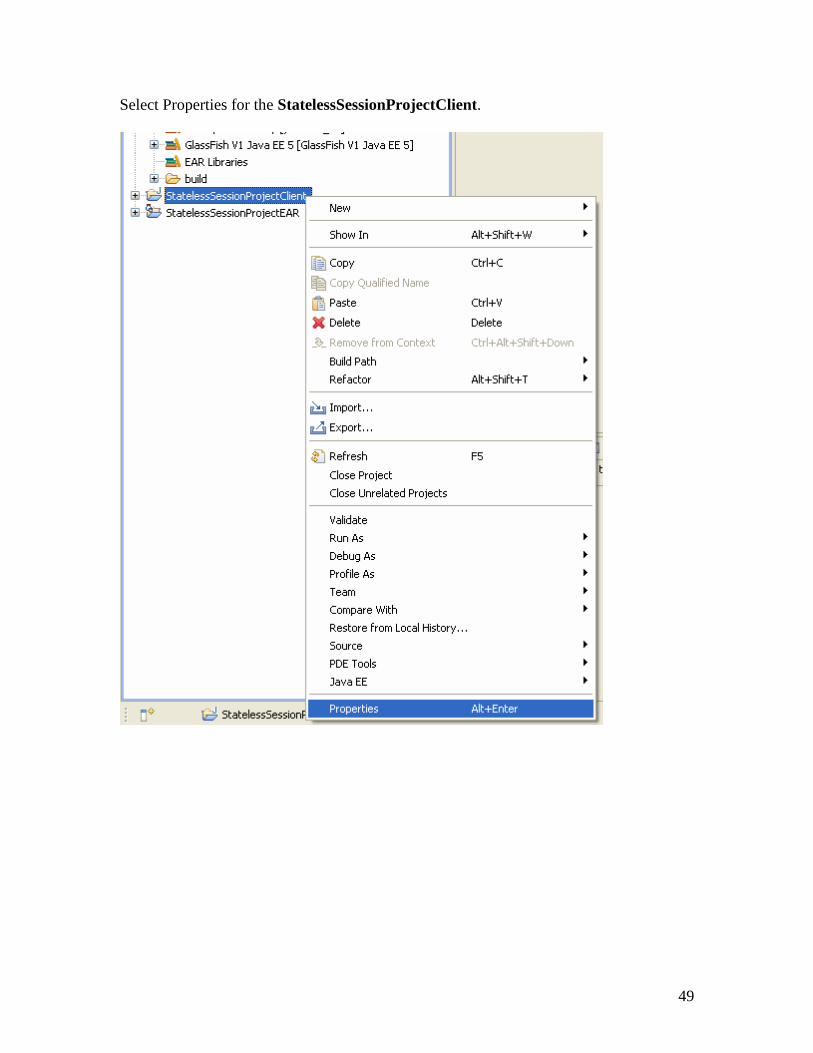
Select Properties for the StatelessSessionProjectClient.
50
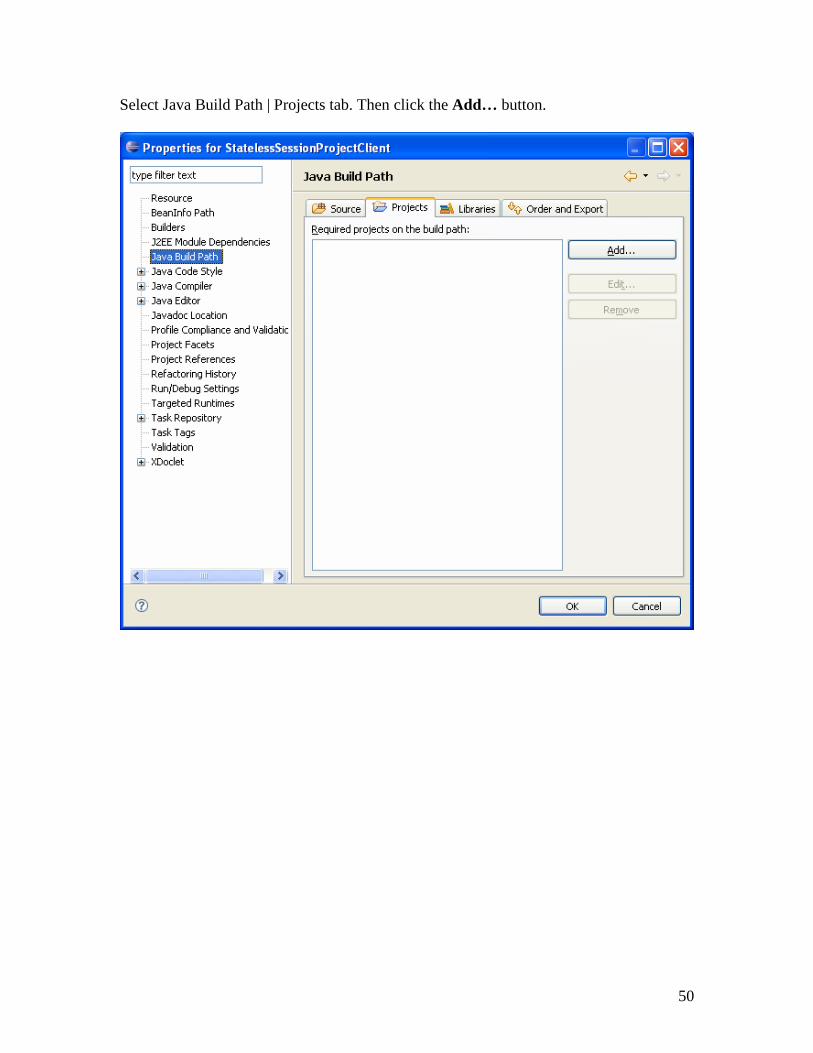
Select Java Build Path | Projects tab. Then click the Add… button.
51
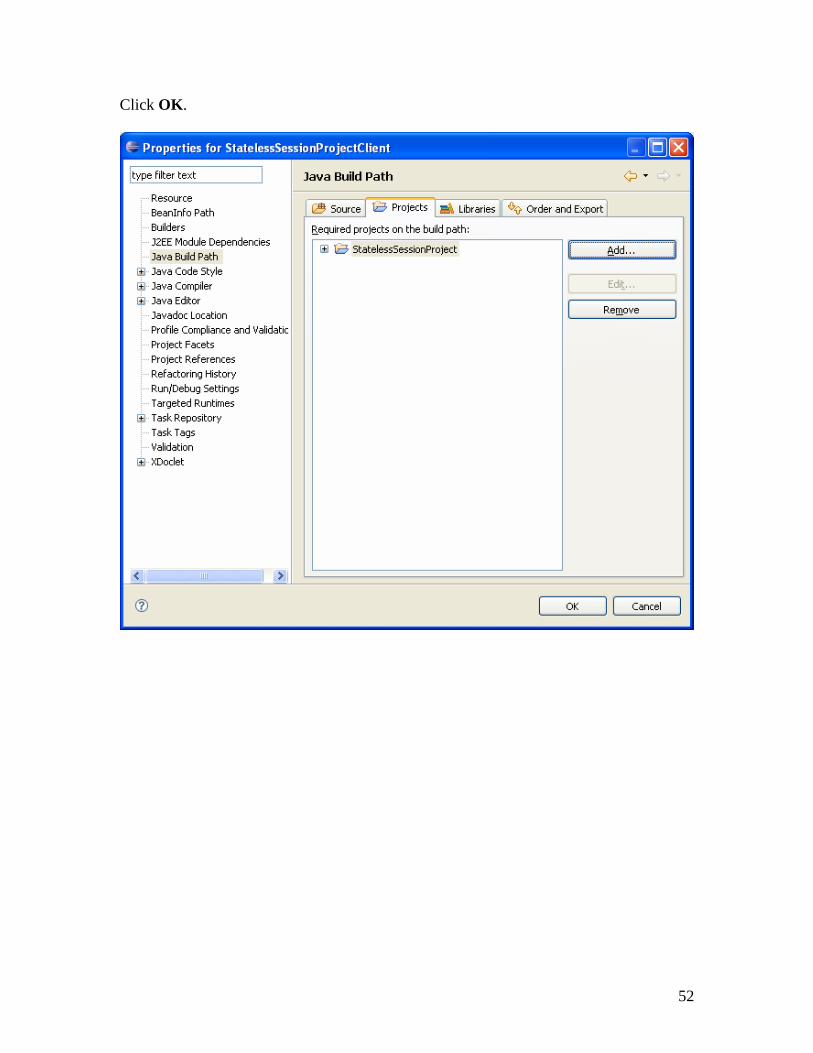
Select the StatelessSessionProject, click OK.
52
Click OK.
53
Create a new Package by selecting New | Package in the StatelessSessionProject |ejbModule.
54
Name the Package example, click Finish.
55
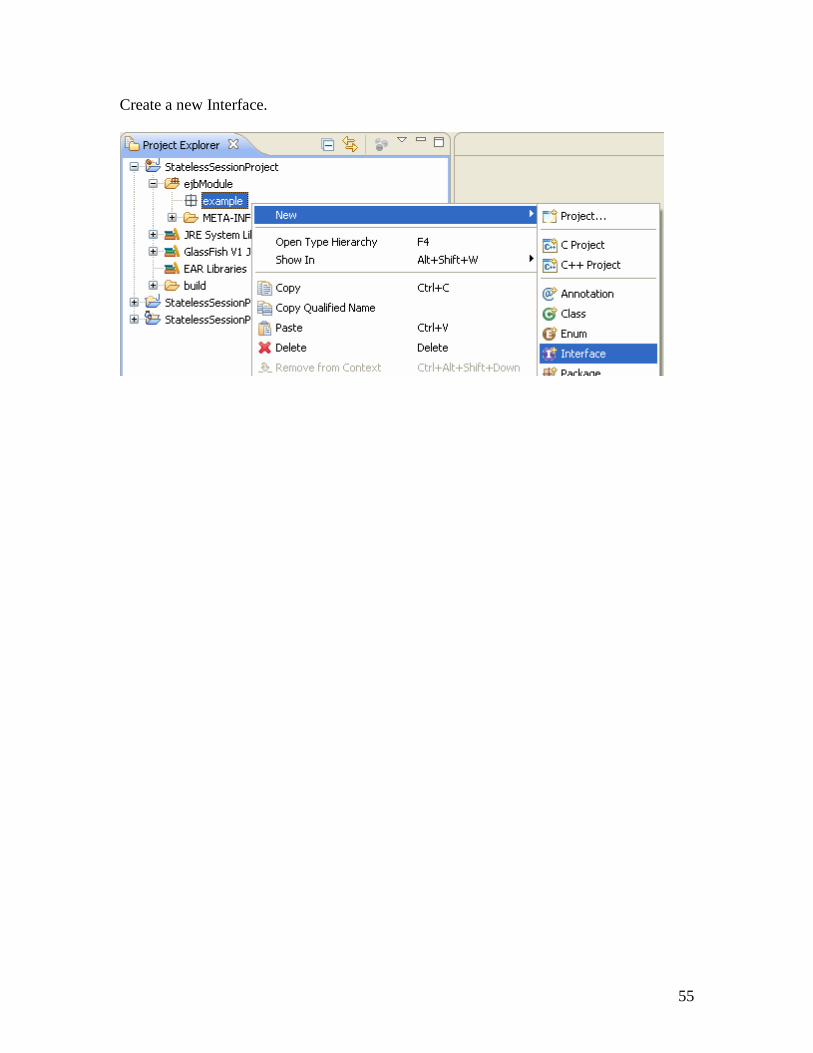
Create a new Interface.
56
Name the Interface IStatelessSession, click Finish.
57
Add the following abstract method:
58
Add the following Annotation:
59
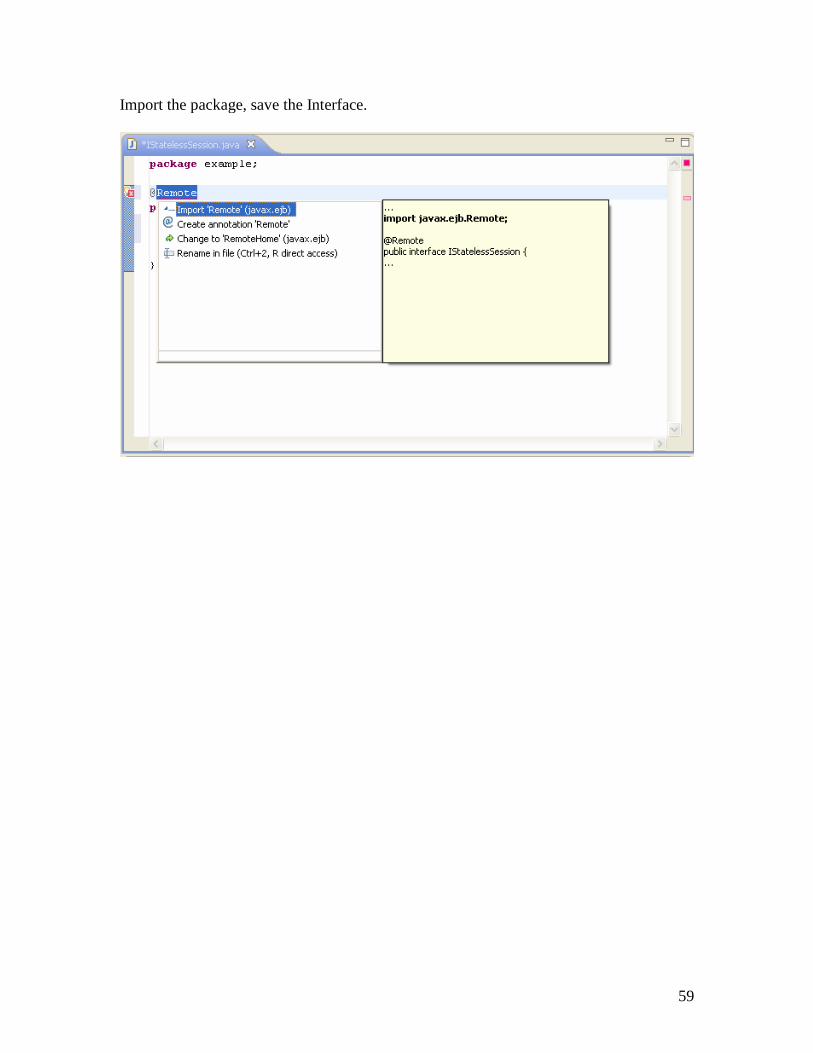
Import the package, save the Interface.
60
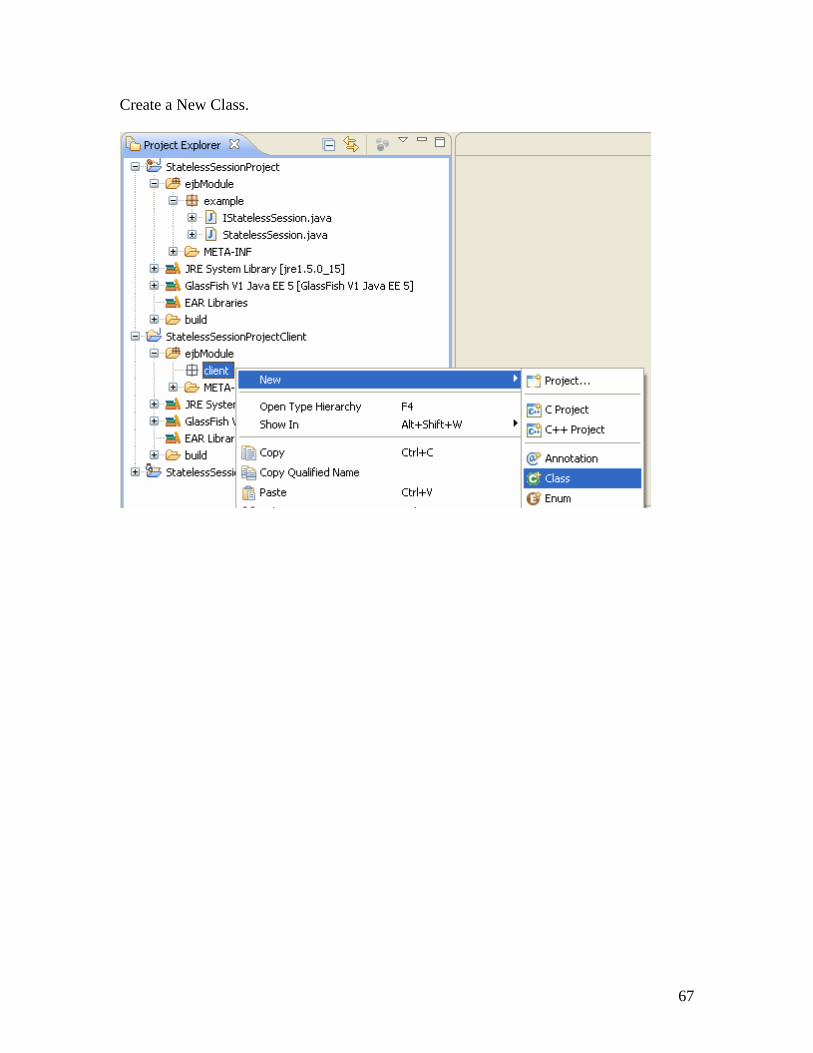
Create a New Class.
61
Name the Class StatelessSession, add the IStatelessSession Interface, click Finish.
62
Add the following code:
63
Add the following Annotation:
64
Import the package, save the code.
65
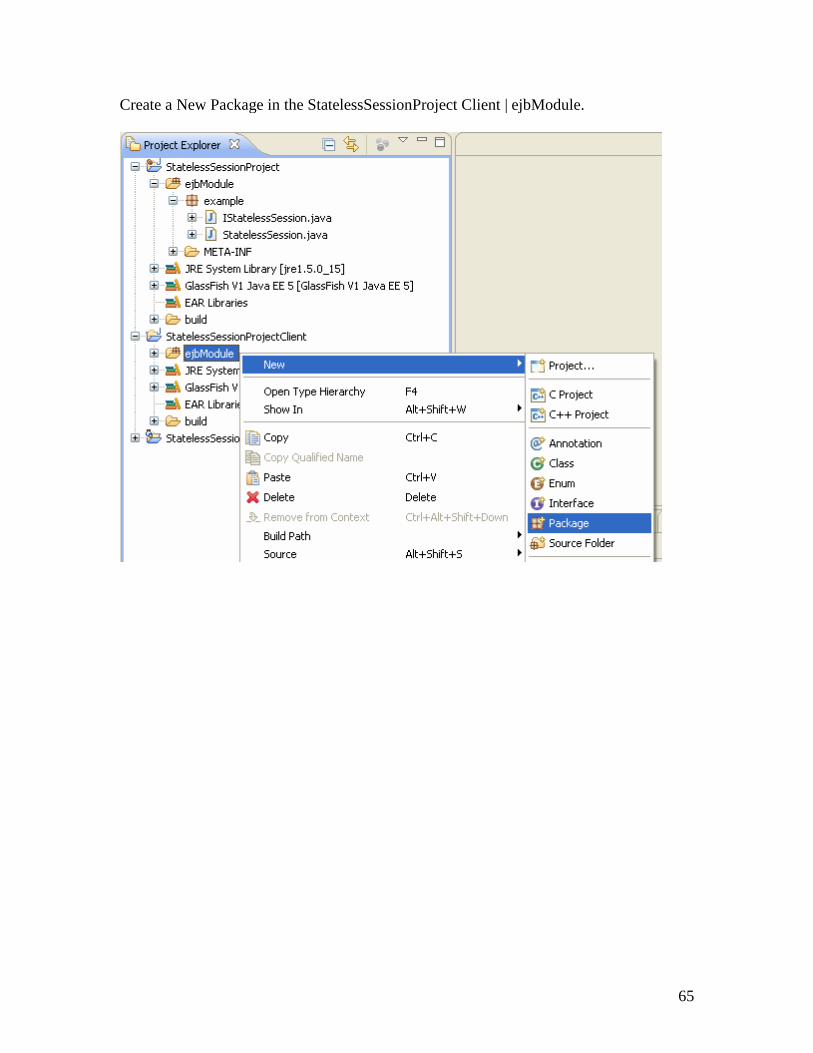
Create a New Package in the StatelessSessionProject Client | ejbModule.
66
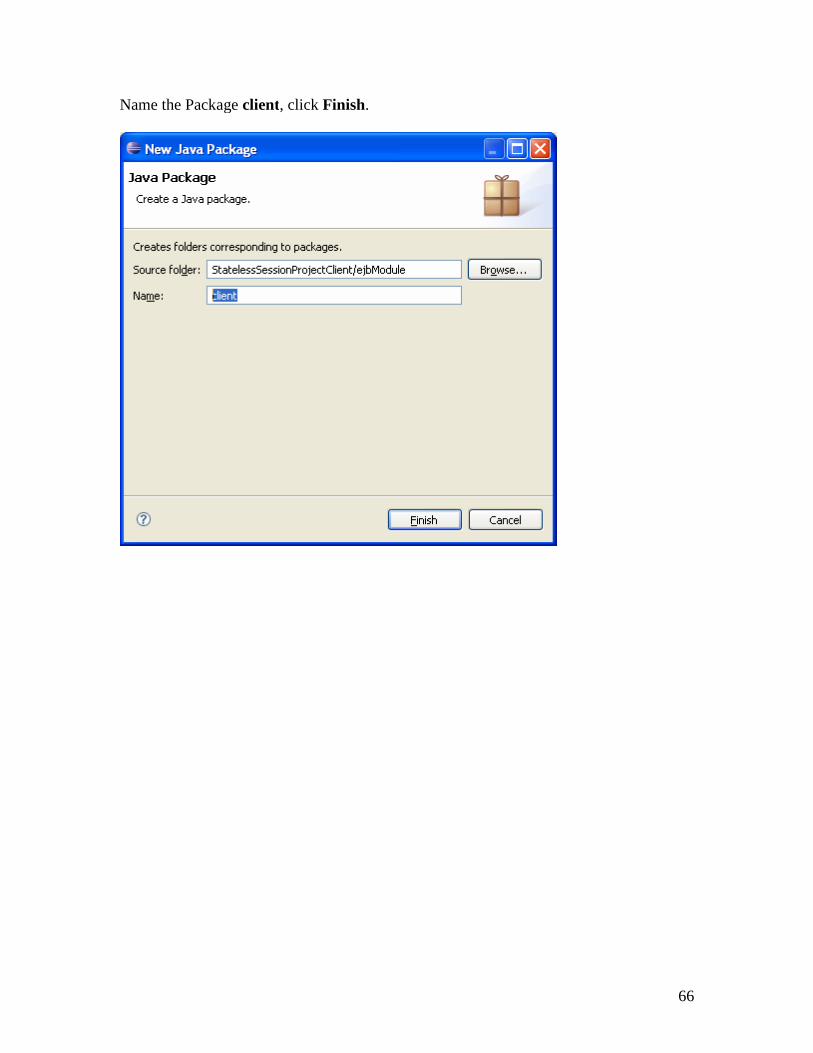
Name the Package client, click Finish.
67
Create a New Class.
68
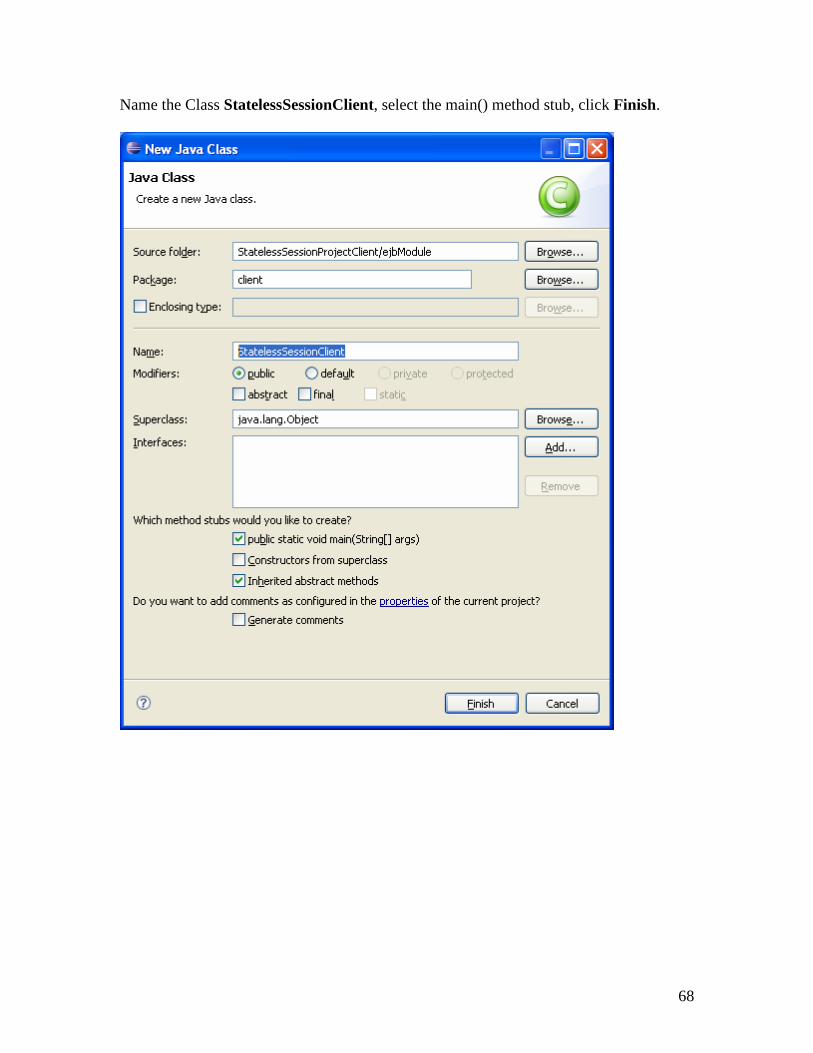
Name the Class StatelessSessionClient, select the main() method stub, click Finish.
69
Add the following code, imports, save the code.
70
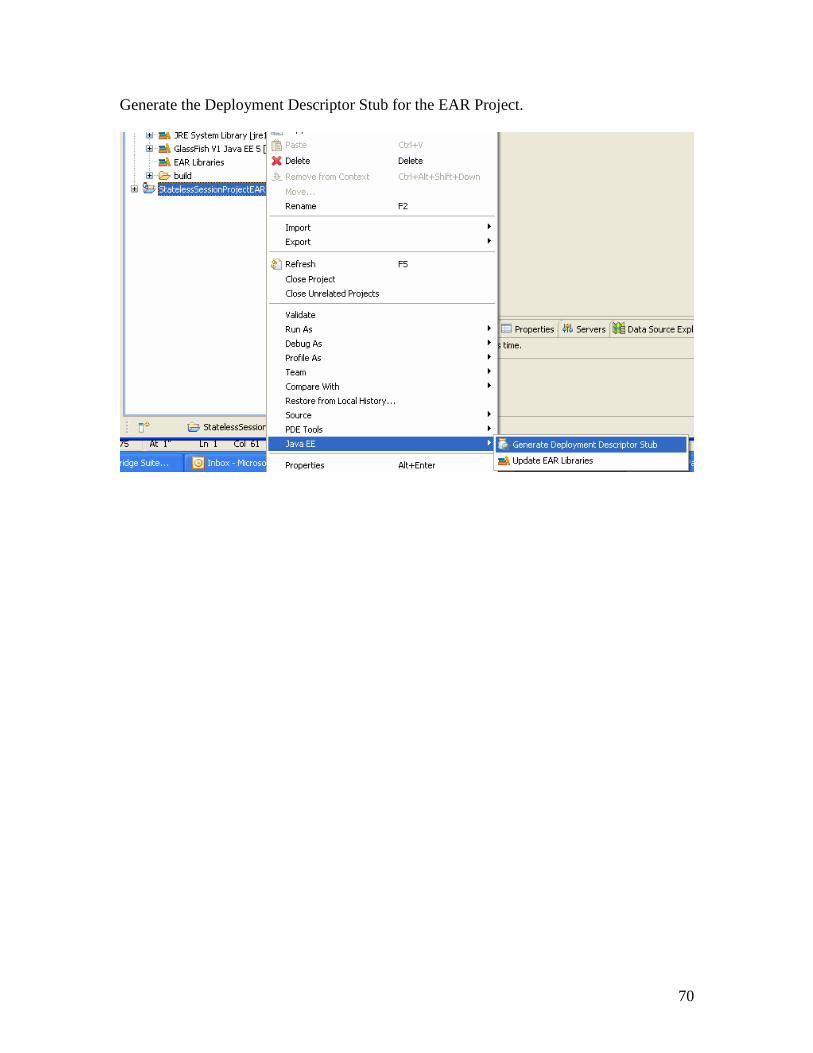
Generate the Deployment Descriptor Stub for the EAR Project.