19
Electric Underfloor Heating made easy

Electric UnderfloorHeating made easy

Introduction What is Electric Underfloor Heating
Do’s & Don’ts
Benefits of Electric Underfloor Heating
Technical Data
Our products we supply
What size mat do you need
Preparation of the floor surface
Laying the Heating Mat
Wiring up the System
The Thermostat
Resistance Readings
Guarantee / Warranty & Service
Q & A - Trouble Shooting
Future Products

What is Electric Underfloor Heating?

Do’s & Don’ts
DO Carefully read this installation manual
before commencing installation. Consult our website or a competent
professional if you are unable to proceed.
Ensure the system is tested before, during and after installation.
Plan your mat layout and installation so that any drilling after tiling (e.g. fixing sanitary ware) will not damage the wiring.
Maintain a minimum gap between the wire runs of 50mm.
Check that the mat is working immediately before commencing tiling.
Take particular care when tiling not to dislodge or damage the heating wire.
DON’T Cut or shorten the heating cable at any
time. Install the mat under any floor other than
tiles – Check with manufacturer first. Leave surplus matting rolled up under
units or fixtures – use the right size. Install the heating mat on stairs. Run the floor sensor wire or power lead
over or under the heating cable. Commence tiling before testing the mat. Install the Heating mat without a sensor
probe. Install the heating mat without a
Thermostat. Wire any electrics up unless you are a
qualified electrician.

Benefits of Electric U/Floor
Heat is spread evenly across the whole floor area rather than being concentrated at radiators. This provides a more comfortable climate for you wherever you are in the room.
With no water pipes involved, there is no danger of leaks so you don’t have to worry about damage to your property or the hassle involved with insurance claims.
There are cost savings too, as there is no need for any kind of maintenance contract as once the systems are installed they can be forgotten about for years to come.
With no hot surfaces and no sharp edges to deal with, this form of heating is particularly child friendly.
Underfloor heating produces less air movement so fewer dust particles are floating around. This is good news if you or anyone in your family suffers with allergies.
With no moving parts involved in floor heating, there are no creaks or groans especially on solid floors, so no more scary noises in the night.

Technical DataHeating Mat: Dimensions – all mats are 0.5m wide. Lengths available: 2m, 2.5m, 4m, 6m & 8m. Rating Voltage: 230-240vac Power unit: 150W/m² +/- 10% Min. bending radius: 30mm Min. cable space: 76mm Max. ambient temperature: 30ºC Min. installation temperature: 5ºC Heating cable: 2 wires, grounded, insulation jacket by fluoropolymer plastic Connecting leads: 2 wires 17 AWG with grounded braid, length 2.25m All components comply fully with all relevant EMC and LVD British and European
standards
Thermostat: Temperature control by dial – setting: 5ºC to 40ºC On/off switch Voltage: 230-240v Power consumption: 5W Switching differential: 0.5K Protective housing: IP20 Housing material: anti-flammable PVC Floor sensor: rubber-thermoplastic NTC sensor, cable length 3M
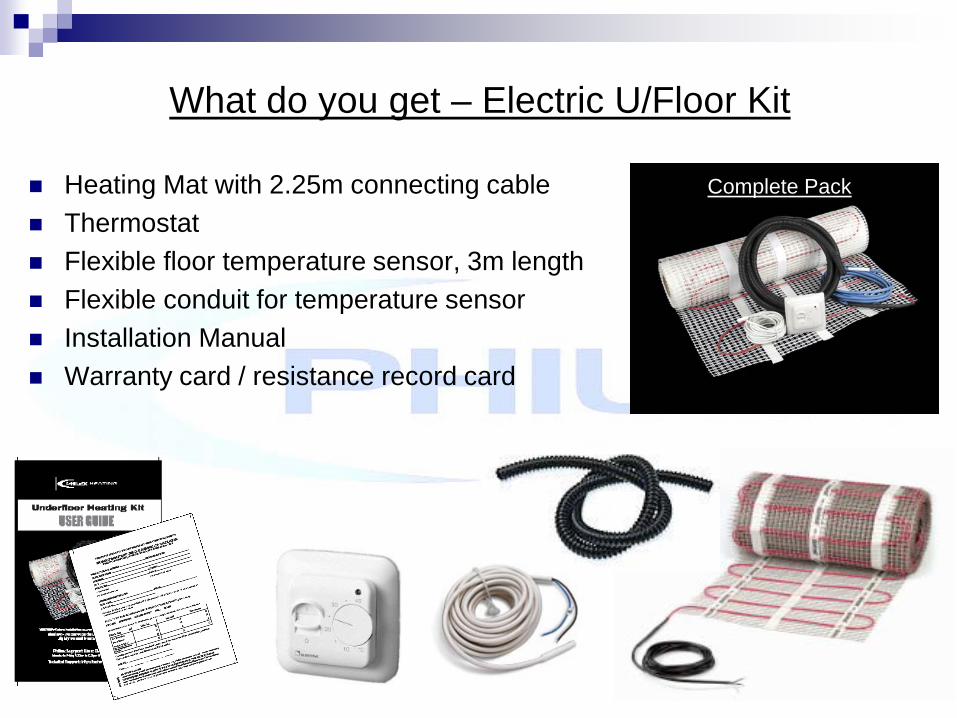
What do you get – Electric U/Floor Kit
Heating Mat with 2.25m connecting cable Thermostat Flexible floor temperature sensor, 3m length Flexible conduit for temperature sensor Installation Manual Warranty card / resistance record card
Complete Pack

Note: Do not include the area taken up by fixed objects such as baths/showers and kitchen units.
What size heating mat do you need?
Measure the length of the room by the width of the room to get the square meter area, i.e. 2m x 2m = 4m². When you have the area measured and the correct square meterage calculated you then match this figure to the available pack sizes.
Mats we supply:1. 2m² UFH Kit Code: 45001R/S2. 2.5m² UFH Kit Code: 45002R/S3. 4m² UFH Kit Code: 45003R/S4. 6m² UFH Kit Code: 45004R/S5. 8m² UFH Kit Code: 45005R/S

Preparation of the Floor Surface Make sure that the floor area to be heated is clean (as dust free as possible),
dry, flat and free of any protruding objects that can damage the mat, like nails or staples.
Take resistance readings before starting installation and note the results on your warranty registration card and in the back of the user guide.
Only when you have planned the mat layout and are sure the mat will fit into the room, should you begin to lay. Beginning at the corner closest to where you have located the thermostat, position the mat ready to start rolling out.

Layout of the Matting
DO NOT CUT THE RED CABLE
•Lay out the mat according to your design with the red heating element uppermost, using as few turns as possible and ensuring that the cold tail connecting lead is close enough to connect to the thermostat. • To make a turn in the direction the mat is being installed, cut the mesh WITH SCISSORS ONLY,
• If it is necessary to remove the heating cable from the mesh to route around an obstacle, be sure to maintain at least 76mm space between heating cables. • Also leave a space of at least 40mm between heating cables and any conductive materials such as pipes.•Turn the mats over and remove the white plastic backing to the adhesive tape on the back and stick to the floor.

The installation MUST USE a separate cable for the sensor mounted in a separate conduit, run the sensor inside the wall to the thermostat box location.
The floor sensor must be placed in the sensor conduit which must be embedded in a shallow channel in the floor – approx 10-15mm deep, making sure it reaches the end of the conduit but does not protrude.
After laying out the heating mat and routing the connecting lead and the temperature sensor to the electrical junction box, apply a thin coat of self levelling mortar over the mat. Be sure to use the flat side of the trowel to avoid any damage to the mat.Spread the mortar evenly over the mat filling in all voids between the floor, mesh and heating cable.
You can switch on the system when the thin set & grout are fully cured, which should be within 14 days of installation.
Note: Don’t allow heating cable, connecting lead or temperature sensor to cross themselves or each other.

Note: Always check with the floor manufacturer concerning suitability with underfloor heating as heat outputs could change due to thickness of floor covering.
The heating may be slow to react at first. Start by setting the floor temp at around 20-22ºC and build up by 1ºC per day until your desired temp is reached.
If possible you can lay a levelling screed of 3-4mm then the flexi tile adhesive of 4-6mm or you may tile directly over the mat in a single operation of 8-10mm flexi tile adhesive.
After the floor covering has been laid, test the cable and floor probe one last time to ensure that neither have been damaged. Record the final readings and complete the warranty card provided. Once received we will issue a guarantee certificate, retain the certificate for your records.

Wiring up the System
The Thermostat and mat require a 13 amp dedicated power supply from the consumer unit to power then and should be wired as shown opposite. The earth wires from the cold tail should be connected to the mains earth using the earth terminal in the mounting box or with a connector.

The ThermostatThe thermostat must be mounted on the wall with free air circulation around it. It must be located where it is not influenced by any other heating sources (e.g. the sun shining through a window), draughts from doors or windows, or by the temperature of an exterior wall. Bathroom & En-suite stats should be situated outside on an adjacent wall.

The customer will have to make a note of their resistance readings in the table provided on the warranty card and user guide.Readings 1., 2. and 3 are performed on the mat “cold tail” connecting lead and reading 4. on the two wires of the floor temperature sensor.Resistance for Senors is 10 +OR- 1
Description Voltage Power (W) Linea Power (W/m)
Total Resistan
ce (Ω)
Cable Length (m) SQM (m2) Note
UFH Kit 2sqm 230 300 12 176.3 25.0 2.0 Resistance tolerance: -5%, +10%
UFH Kit 2.5sqm 230 375 12 141.1 31.3 2.5 Resistance tolerance: -5%, +10%
UFH Kit 4sqm 230 600 12 88.2 50.0 4.0 Resistance tolerance: -5%, +10%
UFH Kit 6sqm 230 900 12 58.8 75.0 6.0 Resistance tolerance: -5%, +10%
UFH Kit 8sqm 230 1200 12 44.1 100.0 8.0 Resistance tolerance: -5%, +10%
Resistance Readings

Guarantee / Warranty - What we offer:
10 Year Guarantee on the Heating mat - (Valid if only in accordance with our instructions and all other conditions detailed in the warranty).
The Thermostat is guaranteed for a period of 2 years from the date of purchase
Philex Support Line: 08457 573 479 Monday – Friday 9-5pm
Technical Support: http//technical.philex.com
Heating Website: www.philex.com/heating

Questions & Answers Q. How do I select the correct mat size?
A. Measure the length of the room by the width of the room to get the square meter area, i.e. 2m x 2m = 4m². When you have the area measured and the correct square meterage calculated you then match this figure to the available pack sizes. Choose the pack that is closest to your area size – preferably just under.
Q. What if my underfloor heating system fails? A. The only way the system will cease to work is if the mat has been damaged. By taking the resistance readings before, during and after installation as shown in the instructions then it will indicate that the system is working correctly.
Q. Do I need an electrician to install my underfloor heating mat?A. All electrical work and connections must be undertaken by a qualified electrician in accordance with IEE regulations, failure to do so may invalidate the guarantee. The warranty card has a section which must be completed with the name, company, address and part ‘P’ certificate number of the electrician.
Q. When can I switch on the underfloor heating system? A. You can switch on the system when the thin set & grout are fully cured, which should be within 14 days of installation.
Q. How much does the underfloor heating system cost to run? A. There are varying factors to be taken into consideration i.e. how often you use your heating and what temperature, the insulation used, your electricity tariff etc. For further information please contact your energy supplier or a technical advisor.

Trouble ShootingSympton:
Floor does not heat up
Answers:
No power at controller MCB tripped Thermostat not set correctly Mat not correctly connected with
thermostat Floor temp sensor not connected
correctly Faulty Sensor/Thermostat Heating Mat is cut or damaged
Floor warming all the time Thermostat not set correctly Floor temperature sensor not connected
Floor not getting warm enough
Thermostat not set correctly Floor sensor to close to heating mat

Future ProductsHeating Cable Heating Film


