48
Projects in the Workshop R A Penfold i — ., . ^^ f*** 1 ^ /-^ 1 Njevi n es ^7^ * 1 -

8/11/2019 Electronic Projects In The Workshop
http://slidepdf.com/reader/full/electronic-projects-in-the-workshop 1/47
Projects
in
the
Workshop
R
A
Penfold
i
—
,
.,
.
^^
f***
1^ /-^
1
Njevi
n
es
^7^
*
1
'
-

8/11/2019 Electronic Projects In The Workshop
http://slidepdf.com/reader/full/electronic-projects-in-the-workshop 2/47
Electronic
Projects
in
the
Workshop
This book
:
-»e
returned
on or
before
''•vnped
below.
W
GAN
LIBHABIES
wtthdmwnpob
booksalb
&9f
fy

8/11/2019 Electronic Projects In The Workshop
http://slidepdf.com/reader/full/electronic-projects-in-the-workshop 3/47
Other
Constructor's
Projects
Books
Electronic
Projects
in
Radio
and
Electronics
Electronic
Projects in
Audio
Electronic
Projects
in
the
Home
Electronic
Projects
in
Hobbies
Electronic
Game
Projects
Electronic
Projects in
Music
Electronic
Projects in
the
Car
Electronic
Projects
in
the
Workshop
R.
A. Penfold
Series
Editor
Philip
Chapman
Newnes
Technical
Books

8/11/2019 Electronic Projects In The Workshop
http://slidepdf.com/reader/full/electronic-projects-in-the-workshop 4/47
The
Butterworth Group
United
Kingdom
Butterworth
&
Co
(Publishers)
Ltd
London: 88
Kingsway,
WC2B
6AB
Australia
Butter
worths
Pty
Ltd
Sydney:
586
Pacific
Highway,
Chatswood,
NSW 2067
Also
at
Melbourne,
Brisbane,
Adelaide
and
Perth
Canada
Butterworth
&
Co
(Canada)
Ltd
Toronto:
2265
Midland
Avenue,
Scarborough,
Ontario
Ml
P4S1
New
Zealand
Butterworths
of
New
Zealand
Ltd
Wellington: T
&
W
Young
Building,
77-85
Customhouse
Quay,
1
,
CPO
Box 472
South
Africa
Butterworth
&
Co
(South
Africa)
(Pty)
Ltd
Durban:
152-154
Gale
Street
USA
Butterworth
(Publishers) Inc
Boston:
10 Tower
Office Park,
Woburn, Mass.
01801
First
published
1979
by
Newnes
Technical Books,
a
Butterworth
imprint
©
Butterworth
& Co
(Publishers)
Ltd, 1979
All
rights
reserved.
No
part
of this
publication
may be
reproduced or
transmitted
in any
form
or
by
any
means,
including
photocopying
and
recording,
without
the
written
permission
of
the
copyright
holder,
application
for which
should be
addressed
to the
Publishers.
Such
written
permission
must
also
be
obtained
before
any
part
of
this publication
is
stored
in
a
retrieval
system
of any
nature.
This
book is
sold
subject
to
the
Standard
Conditions
of
Sale of
New
Books and
may not
be
re-sold
in the
UK
below
the net price
given by
the
Publishers in
their
current price
list.
British
Library
Cataloguing
in
Publication Data
Penfold,
R
A
Electronic
projects
in
the
workshop.
1.
Workshops
-
Equipment
and
supplies
2.
Electronic
apparatus
and
appliances
—
Amateurs'
manuals
I. Title
621.9
TT153
78-40952
ISBN 408
00383 9
Typeset
by
Butterworths
Litho
Preparation
Department
Printed
in
England by
William
Clowes
&
Sons
Ltd.
Beccles
and London
Preface
The purpose of
this
book is to
provide
a number
of useful
and
interesting
electronic
constructional projects for
use
in and around the
workshop.
The
projects
will
have
considerable
appeal
to the
home
handyman and
will
find
use
in
the average 'Do It Yourself
workshop.
Many of
the
circuits
are very versatile,
and
could easily be
adapted to
perform different
functions,
All the
projects are reasonably simple
and have been designed so that
they are
not
beyond
the
constructional
capabilities
of
anyone
who
is
reasonably
practical, and many are suitable
for beginners
at electronics
construction.
liTAN
BCR
Qm
DE
C
\
-
I
'.
104387

8/11/2019 Electronic Projects In The Workshop
http://slidepdf.com/reader/full/electronic-projects-in-the-workshop 5/47
Contents
Rain/water
level
alarm
1
2 Flat battery
warning light
6
3
Thermometer 1
4
Auto
turn on/off
switch
17
5
Timer unit
with audio
alarm 22
O
Ultrasonic
transmitter
28
7
Ultrasonic
receiver 33
O
Telephone
repeater
38
Telephone amplifier 43
10
NiCad
battery charger
49
Mains/9
volt adapter
54
tJ. Lamp dimmer
59
t3
Multimeter sensitivity
booster
65
14
Capacitance bridge
71
15
Bench power
supply
76
8/11/2019 Electronic Projects In The Workshop
http://slidepdf.com/reader/full/electronic-projects-in-the-workshop 6/47
1
Rain
/Water
Level
Alarm
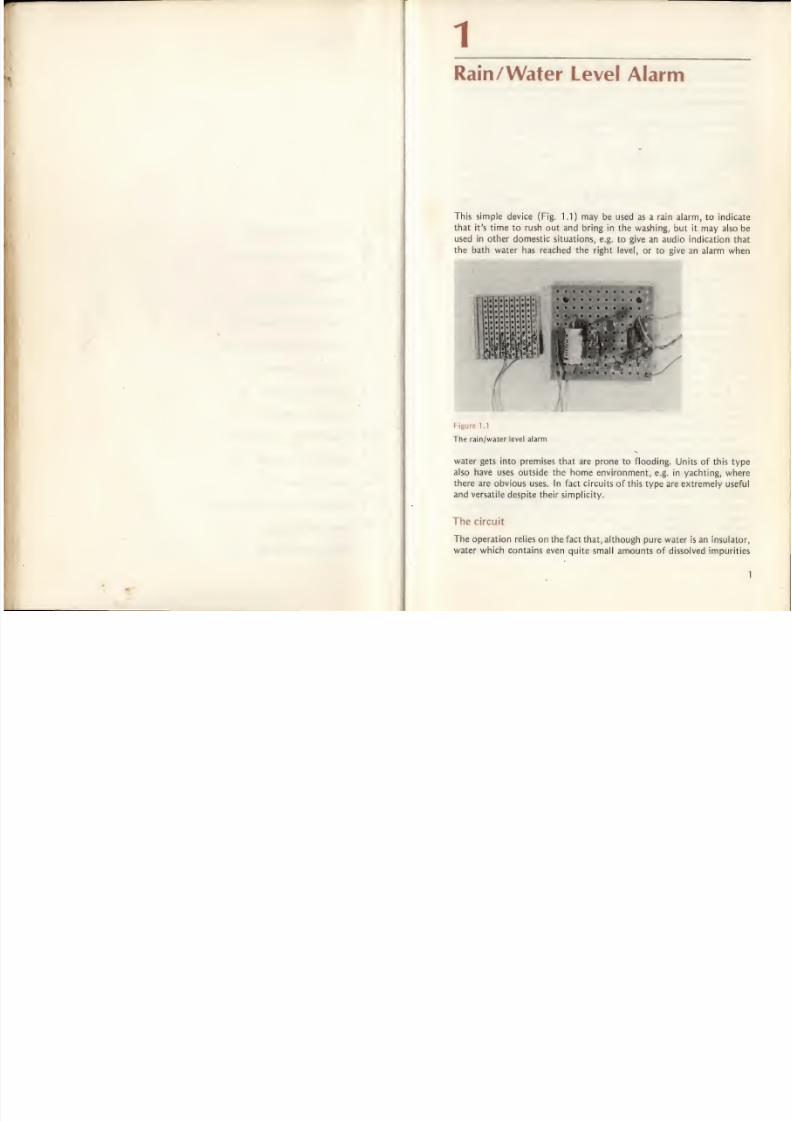
This
simple
device (Fig.
1.1)
may
be
used
as a
rain
alarm, to indicate
that
it's
time to
rush out and
bring
in
the washing,
but it
may
also
be
used in
other domestic
situations,
e.g.
to give
an
audio indication
that
the
bath
water
has
reached the right
level,
or
to
give
an
alarm when
Figure 1.1
The
rain/water level alarm
water
gets into premises that are
prone
to
flooding.
Units
of this
type
also
have
uses
outside
the home environment,
e.g.
in
yachting,
where
there
are
obvious
uses. In fact
circuits
of
this
type
are extremely useful
and versatile
despite
their
simplicity.
The
circuit
The
operation relies
on the fact
that,
although
pure water is
an
insulator,
water which contains
even
quite small
amounts
of dissolved
impurities
1
8/11/2019 Electronic Projects In The Workshop
http://slidepdf.com/reader/full/electronic-projects-in-the-workshop 7/47
will conduct
sufficiently
well for the current
to
be
easily detected by
an
electronic
circuit
and
a
simple
sensor.
In
practice, any water
which
the
unit
is
likely
to
be
used
to detect
will contain
significant amounts
of
dissolved
impurities, and
even rainwater, which
might
be
expected to
be
almost
pure water,
can
be
readily
detected by this circuit.
a
100pF
I
C2
-IK
ISnF
TR1
BC177
>.
9V
R2
3-3kCl
«i
R3
St
50
-son
4'7kn
©
TR2
BC109
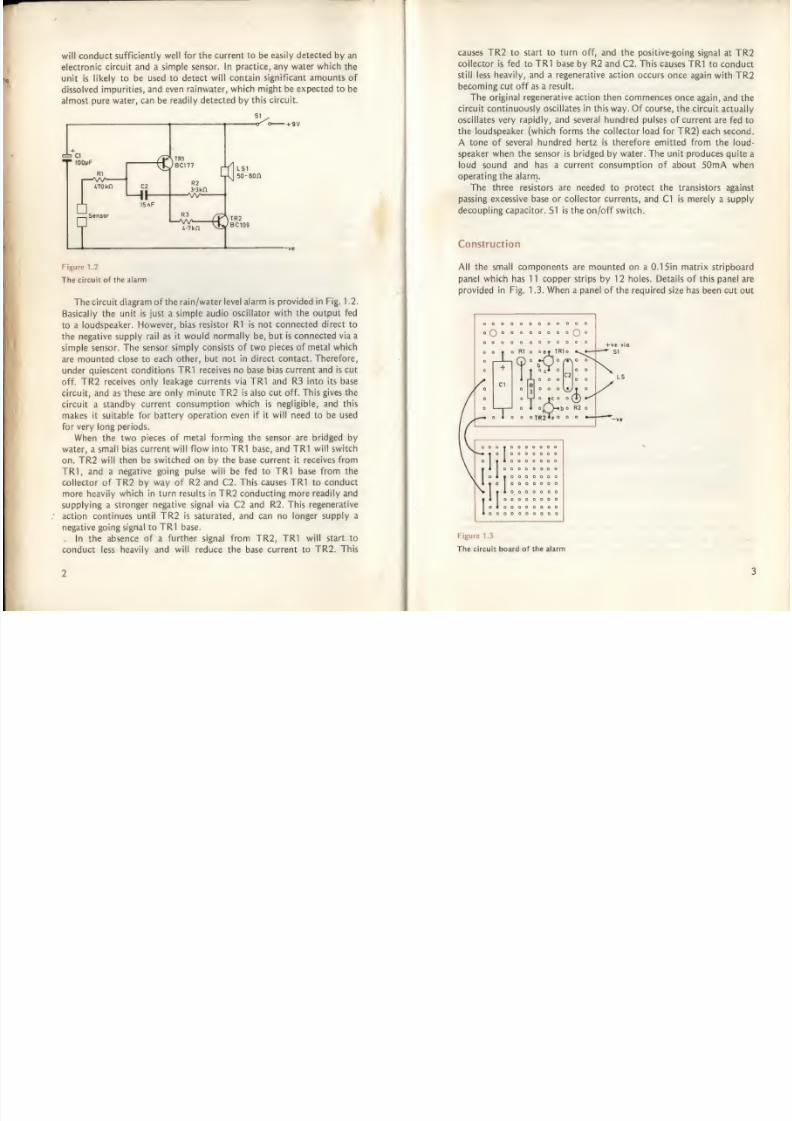
Figure 1.2
The
circuit
of
the
alarm
The
circuit diagram of
the rain/water
level alarm
is
provided
in
Fig.
1 .2.
Basically the unit
is
just a
simple audio
oscillator
with
the
output
fed
to
a loudspeaker.
However, bias
resistor
R1 is not
connected direct
to
the negative
supply rail as
it
would
normally
be,
but
is
connected via a
simple sensor. The
sensor simply
consists of
two pieces
of metal
which
are
mounted close
to
each other, but not
in direct
contact.
Therefore,
under
quiescent conditions
TR1
receives no base
bias current and is
cut
off.
TR2
receives
only
leakage
currents
via
TR1 and
R3 into its
base
circuit,
and
as
these
are
only
minute
TR2
is
also
cut
off.
This
gives
the
circuit
a standby
current consumption
which
is
negligible,
and this
makes it suitable
for
battery
operation
even
if
it will need to be
used
for
very
long periods.
When
the two
pieces
of metal
forming
the
sensor
are
bridged
by
water,
a
small bias
current
will
flow into
TR1
base,
and TR1
will
switch
on.
TR2
will
then be
switched
on by
the
base
current
it
receives
from
TR1,
and a
negative
going
pulse will
be fed to
TR1 base
from
the
collector
of
TR2 by
way of
R2
and C2.
This causes
TR1 to conduct
more
heavily which in
turn results in TR2
conducting more
readily
and
supplying a
stronger
negative
signal via
C2
and
R2.
This
regenerative
action continues
until
TR2
is saturated, and can no
longer
supply a
negative going
signal to TR1 base.
,
In
the absence
of a further
signal from
TR2,
TR1
will
start
to
conduct less
heavily and
will
reduce
the base current
to
TR2.
This
causes TR2
to
start to
turn
off,
and
the
positive-going
signal at TR2
collector
is
fed
to TR1
base
by
R2
and
C2.
This causes
TR1 to
conduct
still
less
heavily,
and
a
regenerative action occurs
once again
with TR2
becoming
cut
off as a result.
The
original regenerative action
then
commences
once
again,
and the
circuit
continuously
oscillates
in
this
way. Of course, the circuit
actually
oscillates
very
rapidly, and
several
hundred pulses
of current
are fed to
the
loudspeaker (which forms
the
collector
load for TR2)
each
second.
A tone of several hundred
hertz
is therefore emitted from the
loud-
speaker
when the sensor
is
bridged
by
water.
The
unit produces
quite a
loud
sound
and has a current consumption
of
about
50mA
when
operating the alarm.
The
three
resistors are
needed
to
protect
the transistors
against
passing
excessive
base
or collector
currents, and
CI is
merely
a
supply
decoupling capacitor.
SI
is
the on
/off switch.
Construction
All the
small
components
are
mounted
on
a
0.1
Sin
matrix
stripboard
panel
which
has 11 copper
strips
by
12
holes. Details of this panel
are
provided
in
Fig.
1
.3. When a
panel of the required
size
has
been
cut out
Figure
1.3
The
circuit
board
of
the
alarm

8/11/2019 Electronic Projects In The Workshop
http://slidepdf.com/reader/full/electronic-projects-in-the-workshop 8/47
and the
two mounting
holes
have
been
drilled,
the components
can be
soldered
into circuit. There are
no breaks
in any
of the copper
strips.
Mechanically
the
construction of
the
unit
is
quite straightforward
except for the
mounting
of
the
loudspeaker
on the front panel.
This
requires a
cutout
of
slightly
less
than
the loudspeaker
diameter
to
be
made
in
the
front
panel, and this can be accomplished
using either
a
fretsaw
or
a
miniature
round
file. A piece of loudspeaker
fret or cloth
is
then
glued in
position
behind the cutout
and the
loudspeaker is
carefully glued into
place
over this. A minimal amount
of
a high quality
adhesive such
as
an
epoxy
type
should
be
used
so that
the
loudspeaker
is
firmly
mounted, but
there
is
little risk
of adhesive
getting
onto the
diaphragm
and possibly
impeding it. An
alternative
to
the cutout
and
speaker fret is
simply
to
drill
a
matrix
of
small
holes
in
the
panel,
although
it is more
difficult
to
make a
good
job of this than one might
think.
Components
list for
the rain/water
level
alarm
Resistors
{all
miniature
J4W
5%)
R1
R2
R3
Capacitors
CI
C2
Semiconductors
TR1
TR2
Switch
St
Loudspeaker
LSI
470ktt
3.3kn
4.7ktt
IOOmF
10V
15nF
typeC280
BC177
BC109
S.P.S.T.
toggle type
miniature
loudspeaker
with
an
impedance in
the
range
SO
to
son
Miscellaneous
Case,
and
speaker fret or
cloth
0.1
5in
matrix stripboard
for
component
panel
and
0.1
in
stripboard
for
sensor
PP3
battery and
connector
to
suit
Connecting
wire,
solder,
etc.
S1
is also mounted
on
the
front
panel,
and
either a
hole
for
the
lead
to the sensor
must be
made
in the case,
or
the leads
from
the
sensor
should
be
terminated
in a
3.5mm
jack
plug,
and those
from
the
main
circuit
should
be
terminated
in
a
3.5mm
jack
socket,
the
latter
being
mounted
at
any
convenient
place on
the
case.
When
all
the wiring has
been
completed
the
component
panel
can
be
bolted
into
position.
A
sensor
for the unit
can
consist
of a
piece of 0.1 in
pitch
stripboard
(this
is
preferable to
0.1
5in
matrix
board which
has
a
wider
strip
spacing)
with
alternate
strips
bridged
by
link
wires, as shown in Fig.
1
.3.
For
many
applications,
a short
piece
of board
having
two
copper
strips
will be
quite
adequate,
but for a rain
alarm
the sensor
should be
as
large
as
possible
so
that
there
is a good
chance of a raindrop
being
detected
almost
immediately
raindrops
start to
fall.
Of
course, there are
many
other
possible ways of
producing a
suitable
sensor,
and
there
is plenty
of scope
for using one's
initiative here.
Once the alarm
has
been
activated it
can
be
silenced
simply
by
switching
the
unit
off.
Before
the
unit
is
ready
for
use
again
it
may
be
necessary
to wipe
any
moisture
from the sensor.
Unless
the sensor is
made from a
non-corrosive
metal it
will
be
necessary
to
inspect it
periodically to
check that
it
is
not
badly
corroded.
If
necessary
it must
be
cleaned with
metal
polish,
otherwise
it
is
possible that the alarm
will
fail to
operate.

8/11/2019 Electronic Projects In The Workshop
http://slidepdf.com/reader/full/electronic-projects-in-the-workshop 9/47
2
Flat
Battery
Warning
Light
Many
items
of
electronic equipment,
particularly test
gear, are
battery
operated
and
have
a
regulated
supply
voltage.
A problem
which can
easily
arise here
is that
of the
battery
voltage
falling
to
a level which
Is
inadequate
to drive
the
regulator circuitry
properly. This
can
result
in
the unit
providing erroneous
results.
Some
such
pieces
of equipment have an
integral battery
check
facility
of
some
form
or
another, but
it
is
an
easy
matter
to add
this
feature
to apparatus
which is not already equipped in this way.
One
very simple
form of
battery check
device is a
circuit
which
turns
on a
warning
light
if the
supply voltage falls below
some predetermined
level,
and
it
is a
simple
unit
of
this
type
which is
described
here.
Figure
2.1
Flat battery
warning tight board
The
unit
{Fig.
2.1)
can
be
used
to monitor
equipment
other
than
test
gear, of
course, and can
be
used wherever it is
necessary
to
ensure
that
a battery voltage
does
not fall below
a
certain
critical
level.
It
can
also
be
used in cars,
boats,
etc., to
provide
warning
of a nearly
discharged
battery.
Another application
is in battery
powered
equipment
which
is
used infrequently, or in
alarm
systems
(such
as the
one
described
in
the
previous
project)
where
the equipment is
left
switched
on
for prolonged
periods and
draws
no
significant
current. In
either of these
cases
it is
very
easy
to neglect the
battery and let it
deteriorate
to
the
point
where it begins
to leak.
This can cause
severe
damage
to
the
equipment
owing
to
the highly
corrosive
nature of
the
leaking
substance.
This can
be
avoided
by
fitting to the equipment a
circuit
of the
type
described
here, and using
it to
check the battery
condition
periodically.
The unit
can be
used
with a
minimum
supply
voltage of a
little
under
7V
and
it is
advisable
to
keep
the
maximum
supply
voltage to
no
more than about
20V
or so.
The
circuit
The
circuit
is based on
an
operation
amplifier
i.e. which is used here as
a comparator.
The
circuit
diagram
of
the
unit
appears in
Fig. 2.2
and
IC1 is
the
operational amplifier.
Figure
2.2
Circuit
diagram
of
the
indicator
The
output of IC1
drives
a light
emitting diode
indicator (D1
)
via
current
limiting
resistor
R6.
When the
output of IC1 is low (at
virtually
the negative supply rail
potential),
current
will
be
supplied
to
D1
and
it will light
up.
When the
output of IC1 is
high
(at
virtually the full
positive supply rail
potential)
D1
will
not
be
supplied
with
any
significant
current
and
will not
light
up.
Which
output state the
i.e. assumes
depends
upon the
comparative
input
voltages. If the non-inverting
{+)
input
is at a higher
voltage than

8/11/2019 Electronic Projects In The Workshop
http://slidepdf.com/reader/full/electronic-projects-in-the-workshop 10/47
the inverting
(-)
input, the
output goes high.
If
the
comparative
input
levels
are reversed,
then the
output goes
to
the
low state.
The non-
inverting input
is given
a
small
positive bias
voltage
by
the potential
divider R1
and
R2.
The
exact
voltage
at the
non-inverting
input
obviously
depends
to a large
extent on the
supply voltage.
A
simple
voltage
stabiliser circuit
is
used
to provide a
regulated
potential at the
inverting
input
of
IC1.
The regulator circuit
consists
of
R3, TR1, and R4, with
TR1
being
used as
what is often
termed
an
amplified
diode. This
type
of regulator
relies upon
the fact
that
a high
gain
silicon
transistor such
as
TR1 will not
begin to
conduct
until
its
base-emitter
voltage reaches
a level
of about
0.6V, but
a
voltage
only
fractionally
higher than this
is
sufficient
to
saturate the
transistor.
Therefore,
if the
slider of
R4
is
set
a
quarter of
the
way
up
its
track,
for
instance,
a
current will
flow
through R3
and R4 and
the
voltage
at
TR1
base
will rise to
about
0.6V.
It
cannot
rise
much
above this level
as
this
causes TR1
to turn
on
and
divert
some
of the current from
R3
through
its collector-emitter
circuit. The
voltage
at
TR1
base
is
thus
stabilised
at
about
0.6V, and
by
a simple
potential
divider action
the voltage
at
TR1 collector
must
be
four
times
this level,
or
2.4V in other
words.
R4
can obviously
adjust the
potential at
TR1
collector
over
quite
wide
limits, since taking
the
slider
of
R4 further down
its track
will
increase the voltage
required
at
TR1
collector
in order
to
produce
0.6V
at
TR1
base. Taking
R4
slider
higher
up
its
track will have
the opposite
effect.
In
practice, R4
is
adjusted to
produce
the same
voltage
at
the
inverting
input
of IC1 as
appears
at
the
non-inverting input
when
the
supply
voltage
is at
the
minimum
acceptable
level.
If the
supply
voltage
is
above
the
critical level,
then the
output
of
IC1 will
be
high and
the
LED
indicator
will
not
come
on.
If,
on
the other hand,
the
supply
voltage
falls below
the
critical
level,
the
voltage
at
the
non-inverting
input will
be
below
that
at
the
inverting
input, and D1
will
be switched
on
as
the
output
of IC1
will
go
low.
One
slight
problem with
the
circuit
is
that with
very
small
voltage
differences across
the
inputs,
say
a few
hundred microvolts
or
less,
the
output
can take
up
an intermediate
state
and
produce
an indecisive
output
from
D1
.
This
is overcome
by the inclusion
of R5.
If
the
output
of IC1
starts
to go
negative the
current
through R5
takes
the
non-
inverting
input more
negative,
which
in
turn
takes the
output more
negative.
This
regenerative
action continues until
the
output is fully
negative,
and
in
this
way
intermediate
output
states
are
eliminated.
Construction
All the
components can
be
accommodated
on a small 0.1 in matrix
stripboard
panel which
has
9 copper
strips
by 14 holes.
Full details
of
8
this
panel
are given
in
Fig. 2.3.
Construction is
quite
straightforward,
but be
careful not
to omit any of the
four link
wires
or the five
breaks
in
the
copper
strips.
Also
be
careful not to
bridge
any
copper strips
with small blobs of excess solder,
as
this is
easily
done on this compact
0.1
in
matrix
stripboard,
particularly when
soldering in
the
i.e.
It
is
a
good idea
to
check the
completed
board with
a
continuity
tester
to
ensure that no short
circuits
of this type are present.
+ v#
am
•
o«ooooii
o
o
•
o
*
S35SE o
o
o
r
e
• •
o
t> a • B
6 • o
»
• « a
•
O
6 O
• O O •
Figure
2.3
Constructional
details
of the board
If
the leadout wires
of
D1
are bent at
right
angles it will
then
be
possible
to
mount
this
component in an
ordinary LED
panel
clip.
As
the component
panel
is quite
small and
light, this
also
provides an
adequate mounting
for the
panel, but the
leads
of
D1
must be
kept
quite short
in
order
to
provide
a reasonably
firm
mounting.
Owing
to
the
small
size of
the unit,
it will not normally be too difficult to fit it
into a piece of equipment, although it may always
be
built
as
a
separate
unit in its own case
where
integration
is
not
feasible.
If this approach is
adopted
it will be necessary to bring the monitored supply rails out to a
socket
mounted
at
some
convenient
point
on the
main equipment.
The
input lead of
the indicator
circuit
would
then
be
terminated
in a
suitable
plug
so that it could be connected to the main
equipment
whenever
necessary.
The unit
has
a current
consumption
of
only
about 1
mA
from a 9V
supply, and
so
it.
will
not normally reduce
battery
life to
any great
extent. However,
it
could
do so
under
certain
circumstances,
and
if
this
should be the case a
push-to-make
non-locking
pushbutton
switch
8/11/2019 Electronic Projects In The Workshop
http://slidepdf.com/reader/full/electronic-projects-in-the-workshop 11/47
can be
connected
in series with the
positive
supply
rail.
The unit
will
then draw no standby
current, but it will be necessary
to
operate
the
pushbutton
switch in order
to
check
the battery
condition,
of
course.
The
current
consumption with the indicator lamp on is
about 8mA
from
a
9V supply.
Adjustment
To
enable
the unit
to
be adjusted correctly it must be connected
to a
supply
potential
which
is
equal
to
the
minimum
acceptable
battery
voltage. R4
is then
adjusted
as
far in a clockwise
direction
as
possible
without
the
indicator
lamp
coming
on.
The
unit
is
then ready
for use.
Components list
for the
flat
battery
indicator
Resistors
(miniature
%W,
5%
except
where
noted
otherwise)
R1 56kn
R2 18kn
R3
18kn
R4 1 0kn
sub-miniature
(0.1
W) horizontal
preset
R5 1MSI
R6 1,2kn
Semi
TR1
zonductors
BC109C
IC1
741C
D1
TIL209or any small panel mounting
LED
with
holder
Miscellaneous
0.1
in
matrix
stripboard
Wire,
solder, etc.
3
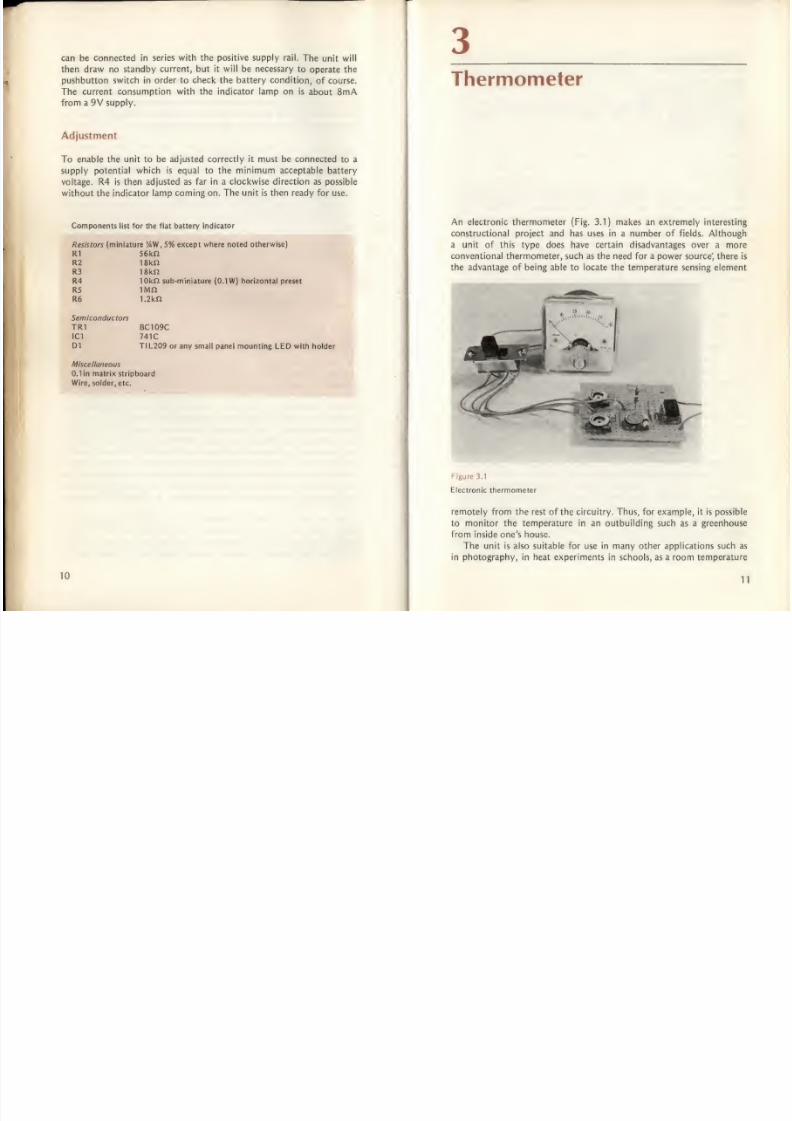
Thermometer
An
electronic
thermometer
(Fig.
3.1)
makes an
extremely interesting
constructional
project
and has uses in a
number
of fields. Although
a
unit
of this type does have certain disadvantages over
a more
conventional
thermometer,
such as
the
need
for
a
power
source; there is
the advantage
of
being
able to locate
the temperature
sensing
element
Figure
3.1
Electronic
thermometer
remotely from the
rest of the
circuitry.
Thus, for example, it
is
possible
to
monitor the
temperature
in
an
outbuilding such
as
a
greenhouse
from
inside
one's
house.
The
unit
is
also suitable for use
in many
other applications
such
as
in photography,
in
heat
experiments
in schools, as
a
room
temperature
10
11
8/11/2019 Electronic Projects In The Workshop
http://slidepdf.com/reader/full/electronic-projects-in-the-workshop 12/47
thermometer,
etc. It
has the
advantage over most
mercury and
alcohol
thermometers
of
having
a
large
easy-to-read scale.
A range
of
to
50
degrees Celsius is
covered,
and the
temperature is displayed
on
a
50uA
meter.
The
scaling is
linear.
A special purpose
integrated
circuit is
used
as the basis of the unit,
and this
provides
a
very high
level of performance despite
the
apparently
simplicity.
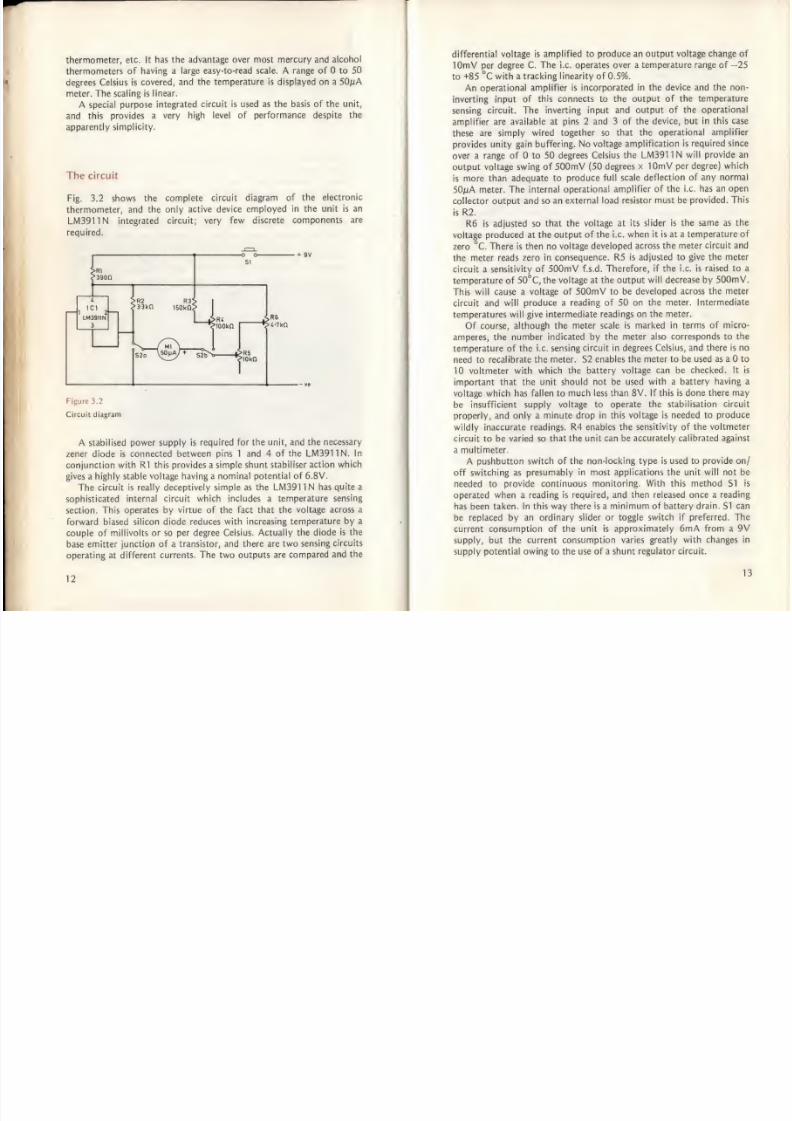
The
circuit
Fig. 3.2
shows
the
complete circuit diagram
of
the
electronic
thermometer,
and
the only
active device
employed
in the
unit
is
an
LM3911N integrated
circuit;
very few
discrete
components are
required.
+
9V
Figure 3.2
Circuit
diagram
A
stabilised
power supply
is
required for
the
unit,
and
the necessary
zener diode
is
connected
between pins
1 and
4
of
the
LM3911N.
In
conjunction
with
R1 this
provides
a simple
shunt
stabiliser action
which
gives a
highly stable
voltage having
a
nominal potential
of 6.8V.
The
circuit is
really
deceptively
simple
as
the
LM3911N
has
quite
a
sophisticated
internal circuit
which
includes a
temperature sensing
section.
This
operates by
virtue
of
the
fact
that
the
voltage
across
a
forward
biased
silicon
diode
reduces
with increasing
temperature by
a
couple
of
millivolts or
so per
degree
Celsius.
Actually the diode
is the
base emitter
junction of a transistor,
and there are
two
sensing
circuits
operating at different
currents. The two
outputs are
compared
and
the
12
differential voltage
is
amplified
to
produce
an output
voltage change
of
lOmV
per
degree C.
The i.e.
operates
over
a temperature
range
of
—25
to
+85
°C with
a tracking
linearity
of 0.5%.
An
operational
amplifier is incorporated
in the
device
and
the
non-
inverting input
of
this connects
to
the
output of
the temperature
sensing
circuit. The
inverting
input
and
output of
the operational
amplifier are
available at
pins 2 and
3 of
the
device,
but in
this
case
these
are
simply
wired
together
so
that
the
operational
amplifier
provides
unity gain
buffering.
No voltage
amplification
is required since
over a
range
of
to
50
degrees
Celsius the LM391
1
N
will
provide
an
output
voltage
swing
of
500mV
(50
degrees
x lOmV per
degree)
which
is
more than
adequate
to
produce
full
scale deflection
of
any
normal
50/uA
meter.
The
internal
operational amplifier
of
the i.e. has
an open
collector
output
and so
an external
load
resistor
must
be provided.
This
is
R2.
R6 is
adjusted
so
that
the voltage at its
slider
is
the
same
as
the
voltage
produced
at
the
output of
the
i.e.
when
it
is
at a
temperature
of
zero
°C.
There
is then no
voltage
developed
across the meter
circuit
and
the
meter reads
zero
in
consequence. R5
is
adjusted to
give
the
meter
circuit
a
sensitivity of 500mV f.s.d.
Therefore, if
the i.e. is
raised
to a
temperature of
50°C,
the
voltage
at the output
will
decrease
by
500mV.
This
will
cause
a
voltage
of
500mV
to
be
developed across the
meter
circuit
and
will produce
a reading of 50 on
the meter.
Intermediate
temperatures
will
give
intermediate
readings
on the meter.
Of
course,
although the
meter scale is
marked
in
terms
of
micro-
amperes,
the
number
indicated by
the meter also
corresponds to
the
temperature
of
the i.e. sensing
circuit
in
degrees
Celsius,
and
there
is no
need to
recalibrate
the meter. S2
enables the meter to be
used as
a
to
10
voltmeter with
which the battery
voltage
can
be
checked. It is
important
that the unit should not be
used
with
a battery
having
a
voltage
which
has
fallen to
much
less
than
8V.
If
this
is
done
there
may
be
insufficient
supply voltage to
operate
the
stabilisation
circuit
properly, and
only
a minute drop
in this
voltage is
needed
to
produce
wildly
inaccurate readings.
R4
enables
the
sensitivity
of
the voltmeter
circuit
to
be
varied so
that
the unit can be accurately calibrated
against
a
multimeter.
A
pushbutton
switch
of
the
non-locking
type is
used to
provide
on/
off
switching as
presumably
in
most applications
the unit
will not
be
needed
to
provide
continuous monitoring.
With
this method
SI
is
operated
when
a
reading
is required,
and
then
released once a
reading
has
been
taken. In this
way there is
a minimum
of battery
drain.
SI
can
be
replaced by
an
ordinary
slider
or toggle
switch
if preferred.
The
current
consumption of
the
unit
is
approximately
6mA from
a
9V
supply, but the
current
consumption
varies
greatly with
changes
in
supply
potential
owing to the use
of
a
shunt
regulator
circuit.
13

8/11/2019 Electronic Projects In The Workshop
http://slidepdf.com/reader/full/electronic-projects-in-the-workshop 13/47
Construction
A suitable
0.1
in
matrix
stripboard
layout
for
the
unit is
provided
in
Fig.
3.3. The
panel has
1 7
copper
strips by
19
holes
and
once
a
suitable
board
has been
cut
out, the two
3.2mm diameter
mounting
holes
and
the
five breaks
in
the copper strips are
made.
The
components
and
the
two link wires
can
then
be
soldered
into
position.
Construction
should
be quite straightforward
mechanically,
apart,
perhaps, from
the mounting
of
the meter.
This usually requires
a
large
-fve
via
SI
>
a
.o- *
.one
1 O
O
&
O
:-5
O
O
C
o
o o o
s
a
Figure
3.3
Top
and
underside
views of the
board
central
cutout and
four
small
holes for
the
threaded rods
which take
the
mounting nuts.
It
is
probably
easiest
to
make
the
large
cutout
first
using either a
fretsaw or
a
small
round
file, and
then
locate
the
positions
of
the smaller
holes
using the meter
as
a sort
of
template. The
four
holes
can
then be
drilled and
the meter mounted
in
position.
14
The unit will
work using
any
normal
50uA
moving
coil meter, and
the accuracy of the
unit
fully
justifies
the use of
a
large meter.
Adjustment
Ideally
the unit should be
calibrated
by bringing
the
temperature of the
i.e. to 0°C and
then
adjusting
R6
to
zero
the
meter. The i.e.
should
then be raised to
a
temperature of 50°C or
some
other known
temperature which
represents something approaching
f.s.d.
of the
meter,
and
then
R5
is
adjusted to produce the
appropriate reading on
the meter. The procedure should be
repeated
once
or
twice to check
that the
calibration
is
accurate.
In
practice
this
may
not
be
easy to carry
out unless the i.e. is housed
in
a
waterproof probe of
some
kind. This is quite
feasible,
and
there is
no need to
mount
the
i.e. on
the
component
panel.
It can be
mounted
in a probe
and connected
to
the
component panel
via
a
3-way cable.
This
cable may be quite
long
if
necessary, but
if it is more
than
a
few
metres long
it
would probably
be best
to use
twin
screened cable (with
twin or common
screening) with
the
negative
supply line connecting to
the
outer braiding(s)
and the
positive
supply
line
and
output
being
carried by
the
inner
conductors.
A suitable
probe can consist simply of a
small
test
tube,
or
something
similar,
into which the
i.e.
is
fitted.
It is
advisable to
use
silicon grease
or
a substitute to
fill
the gaps around
the
i.e.
so
that
there
is
a good
thermal
contact between the outside of
the test
tube
and
the
temperature
sensing
circuit
inside
the i.e.
With the
i.e. mounted
in
a probe
it is
an
easy
matter to
bring the i.e.
to 0°C. If some
ice
cubes are
stirred
into some water
until
no more will
dissolve, the
water
will
be
at
almost
exactly
the
right temperature
(any
error
will
be
too
small
to be
of
significance).
Some
warmed
water of
known temperature
can be
used
to provide
the
higher calibration point.
If the
i.e. is
not
mounted
in
a
probe,
then
the
same basic
method can
be
used.
Two
environments
of
significantly
different
temperature are
required,
and
their precise temperatures
must
be
known. First
the
unit
is
placed in the colder environment
and
allowed to
adjust
to its
temperature,
then
R6
is
adjusted to produce
the appropriate reading on
th meter. Next the unit is placed in
the warmer
environment and
after
it
has
adjusted
to the
new
conditions,
R5
is adjusted to produce
the
correct reading on the meter. This procedure is
repeated
until no
further
adjustment is
necessary.
It is a
good idea
to solder a
heat
fin onto pins
5
to
8
of
the i.e. as
it
is
these
pins which
conduct
the
outside
temperature to
the
sensing
circuit. A heatfin will help to
pick-up
the heat
in
the
outside
environment and conduct it to
the
chip,
or pick
up the small
amount
15
8/11/2019 Electronic Projects In The Workshop
http://slidepdf.com/reader/full/electronic-projects-in-the-workshop 14/47
of
heat
generated by the chip
and
disperse it, as
appropriate. This
will
provide more reliable readings and
will
help
the
unit
to
respond more
rapidly
to
temperature changes. A
heatfin
can simply
consist
of a
small
piece
of copper
plate or copper
laminate
board.
Components list
for
the electronic
thermometer
Resistors
R1
R2
R3
R4
R5
R6
Semiconductor
IC1
Switches
SI
S2
Meter
Ml
3900
miniature 4W,
5%
3.3kn
miniature
'AW,
5%
150kn
miniature
J4W,
5%
lOOkfi
subminiature
(0.1
W)
horizontal
preset
lOkO
subminiature (0.1
W) horizontal
preset
4.7kn
subminiature
(0.1
W)
horizontal
preset
LM391
1
N
(8
pin OIL
package)
push-to-make
release-to-break pushbutton type
D.P.D.T.
slider switch
SOjuA
moving coil
panel
meter (any desired
size)
Miscellaneous
0.1 in matrix
stripboard
panel
Metal or plastics
case
PP3 battery
and
connector
to
suit
Wire, solder,
etc.
R4
is
given the correct adjustment
by
first
carefully measuring
the
supply
voltage
using
a
multimeter,
then switching
S2
to
the
battery
check
position,
and
finally
adjusting
R4 for
the correct meter
reading.
S1
should
be
depressed
when
measuring
the
supply voltage
using the
multimeter
and
while
adjusting
R4.
4
Auto
Turn
On
/Off
Switch
Light
operated switches
are
amongst the
most useful
and
versatile
of
electronic circuits. The
circuit
described here may be
used
in
a
number
of applications,
such as
in
the role
of
an automatic porch light where
the unit
automatically
switches
the
light on at dusk
and off
again at
dawn.
It
may also
be
used
as a deterrent
to
burglars when
one's
house
is
to be left
empty
for
a long
period.
By automatically operating a hall
or
porch light
the
unit gives the impression that the house is occupied.
.
16
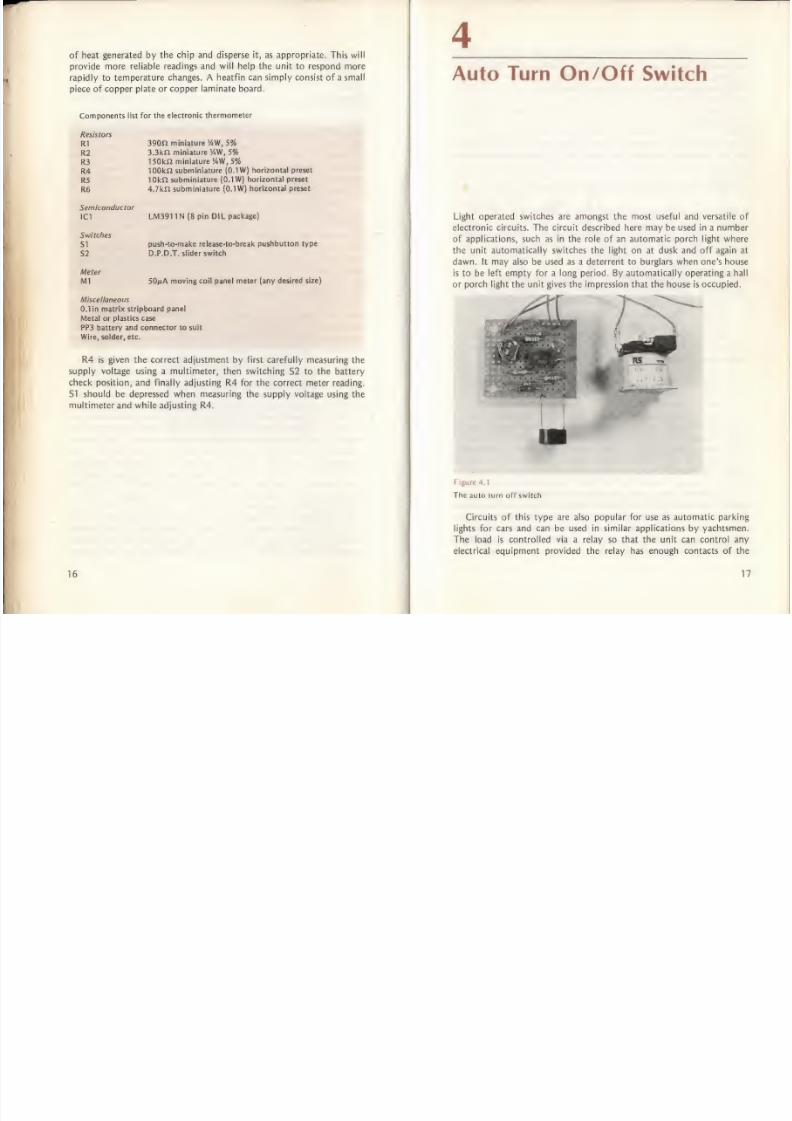
Figure
4.1
The auto turn
off
switch
Circuits
of
this
type are
also
popular
for use as automatic
parking
lights for cars
and
can
be
used
in similar
applications
by yachtsmen.
The load
is
controlled
via
a relay so that the unit
can control any
electrical
equipment provided
the
relay
has
enough contacts of
the
17

8/11/2019 Electronic Projects In The Workshop
http://slidepdf.com/reader/full/electronic-projects-in-the-workshop 15/47
right type
and of
adequate
rating.
This
also
enables
the unit
to
switch
the
load
off
at
the
onset
of darkness and
switch it
on
again
when
it
becomes light again. To
do it is
merely necessary
to
use
normally closed
relay contacts
instead
of normally open contacts.
The circuit
Fig.
4.2 shows the complete
circuit
diagram
of
the
unit
which is based
on
an
operational
amplifier i.e.
which feeds
a single
transistor
relay
^2>
9V
i
CI
100 nF
Figure 4.2
Circuit
diagram
of
the switch
driver stage.
The
circuit
is somewhat similar to the
'flat
battery warning
light'
circuit
which was
described
earlier,
and
as
was
the
case
then, the
i.e. is
used
as a
comparator.
If
the
non-inverting
(+)
input is
at
a higher
potential
than
the
inverting
(-)
input,
the
output
of the
i.e. will
go
to
virtually the
full
positive
supply
rail
potential.
This will result
in
a strong base current
being
fed to
TR1
through D1, D2, and
current limiting resistor R5.
This results in
TR1 being
switched
hard
on
and a
large
current
is
supplied
to
the relay coil,
thus causing the relay
to be
switched
on as
well.
If
the non-inverting
input
goes
to
a lower voltage than
the
inverting
input, the output of IC1 will
swing
to
quite a
low level,
probably
about
2V
or
a little
less.
Because of the shunting
effect of R6 on
the
base
-
emitter junction
of TR1
plus
the 1
.2V
or
so dropped
across
D1
and D2,
this
voltage is not sufficient
to
switch
TR1 .on,
and
it
passes
no
significant
collector
current. Therefore
the relay is not
energised.
18
The inverting
input
of
IC1
is
held
at about half the supply
rait
potential
by
R3 and
R4.
The
non-inverting
input connects
to a
potential divider
circuit which consists
of R1, R2 and PCC1. PCC1 is
a
cadmium
sulphide photoresistor,
and its
resistance
varies greatly
with
changes in the
level
of light falling on its
sensitive
surface. When
subjected
to
very
bright
light its
resistance will
only
be a
few tens of
ohms,
but in total darkness this
figure
will
rise
to
in
excess of T0MC2.
If PCC1 is
brightly
illuminated, the voltage at the
non-inverting
input
will
be
only
very
small,
and
the
relay
will not
be
energised. If,
on
the other hand, PCC1 is
subjected to
fairly
dull conditions,
the
voltage
at
the non-inverting input
will
be
comparatively
high
and the
relay will be energised.
The light
threshold level at which
the
circuit
switches
from one
state
to the other
can be
varied
over very
wide limits
by
adjusting
R1
Circuits
of
this
general type
often
incorporate
built
in
triggering to
ensure
that
the circuit is
always fully switched on or off and that it
does
not assume
some
intermediate state. This
is
not
necessary
in
this
case though as relay
control
is
used,
and
this component can be only
on
or off, even
if
the electronic
control circuit is
in
an
intermediate
state.
D3
is
a
protective
diode used to
suppress the
high
voltage spike
which
would otherwise be developed across
the
relay coil
as
it
de-
energised. C1
is a
supply decoupling capacitor
and SI
is the
on/off
switch. The circuit has a current consumption of less
than 1 mA
from
a
9V
supply when the
relay
is not
energised,
but
the current
consumption
greatly increases
when
the relay is
switched on.
The
exact
current
consumption
with the relay turned on will depend
upon
the
coil resistance
of the
relay
employed
in
the unit,
and
a relay
having
a
high
coil resistance is necessary if
a
low current
consumption
is
desired.
Construction
Apart
from the relay
and on/off
switch,
all
the
components are
accommodated on
a
0.1 in
pitch stripboard panel
which has
15
copper
strips by
14
holes.
Details of the component
layout
are
provided in
Fig. 4.3.
A hole about
12mm
in
diamater
must
be
drilled in
the case
to
provide
a
suitable entrance point
for
the
light to operate PCC1.
The
component
panel
must
be mounted
in
a
position
which
brings the
photosensitive
surface
of
PCC1
just
behind this
hole. The sensitive
surface ofan
ORP1 2
cell is the one opposite the leadout
wires.
•The
method of
mounting
the
relay will
depend upon
the exact
type which
is
used. Some
types are
suitable
for
direct chassis mounting
and
others can be mounted
on a chassis via a
separate base
into which

8/11/2019 Electronic Projects In The Workshop
http://slidepdf.com/reader/full/electronic-projects-in-the-workshop 16/47
PCCI
UoTo
onr
tri
*.
Relay
° »
o **•
*
«
'*
Figure
4.3
Details
of
the
0.1 in pitch strip board
the
relay
may
be plugged. In
either
case it
will
probably
be necessary
to construct a
simple aluminium
mounting bracket. The relay
used
with
the
prototype
is
a p.c.b.
mounting
type,
and
this
can
be mounted
on
a
piece
of
stripboard
which
is
then
bolted to the
case.
Adjustment
If it is necessary
for
the circuit
to
switch
the
load
on
at
some particular
light
level, then the
unit
should
be placed in
such a
light level and R1
adjusted
as
far
in
a clockwise
direction
as possible
without the
relay
switching
off.
In
many applications
however,
the
precise
light
level
at
which
the
unit turns
on
the
load
will
be
uncritical,
and
virtually
any
setting of R1 will
give
satisfactory
results
if
this
is the
case.
If
the
unit is
used
to control
a
light it is essential
that
the
unit is
positioned
where
the
photocell will
not
receive
a significant amount
of
light
from the controlled
lamp.
Otherwise
it
is
likely
that
positive
feedback
will
be
applied
to
the
circuit via
the lamp
and
photocell,
and
this
will
result in the lamp being
continually
flashed
on
and
off
Components list
for
the auto turn on/off switch
Resistors
(all
are
miniature
V&W,
5%
except R1)
Rl 220kn
sub-miniature
(0.1
W) horizontal preset
R2 1.5kn
R3
33kSl
R4
33k£2
R5
8.2ka
R6 6.8kn
Capacitor
CI 100nF
typeC280
Semiconductors
TR1
BC108
IC1
741
Dl 1N4148
D2 1N4148
D3 1N4148
Photocell
PCCI
CRP12
Relay
Any
type having coil resistance of
about
200fi or more for
6V
operation
and
adequate
contacts of correct
type
and
adequate
rating (RS 6V 410(2
open
P.C. type
used
with prototype)
Switch
SI S.P.S.T.
toggle
type
Miscellaneous
Case
0.1 in
pitch
stripboard panel
9V battery and connector or suitable
mains
power supply
Wire, solder,
etc.
20
21
8/11/2019 Electronic Projects In The Workshop
http://slidepdf.com/reader/full/electronic-projects-in-the-workshop 17/47
5
Timer Unit with
Audio
Alarm
Like the previous project,
this
has
numerous
applications
in a number
of fields. Projects of
this
type
are often
put forward ostensibly as
electronic
egg timers, but they are actually
suitable
for
a great
variety
of uses in
the kitchen,
workshop
and elsewhere. For
instance,
timers
of
this sort
are
popular
as aids
to
various games where
each
player
has
only
a
limited
time
in
which to
make
his or her move.
In fact,
it
is
surprising
how often
a
unit of this
type
can
be
put
to
good
use.
iHntnnHH
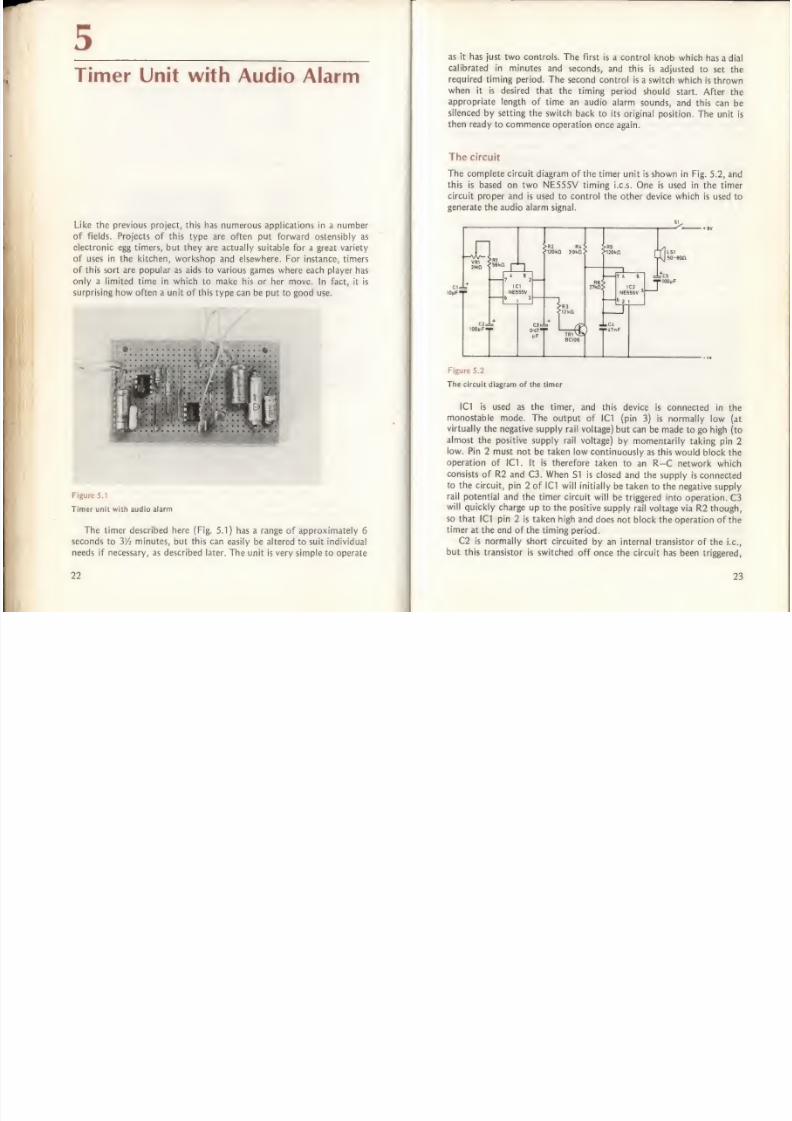
Figure
5.1
Timer
unit
with
audio
alarm
The timer described
here
(Fig.
5.1)
has
a range of
approximately
6
seconds
to
3/2
minutes,
but
this can
easily
be altered
to
suit individual
needs
if
necessary, as
described
later. The
unit
is
very
simple
to
operate
22
as it
has just two controls. The first
is a
control knob
which
has
a dial
calibrated
in minutes
and seconds,
and this
is
adjusted to
set the
required timing
period. The
second
control is
a switch
which
is
thrown
when it
is desired that
the timing
period
should
start. After
the
appropriate
length
of time an
audio
alarm
sounds,
and
this can
be
silenced
by setting
the
switch
back to
its
original position.
The
unit
is
then ready
to commence
operation
once again.
The circuit
The complete circuit diagram
of
the
timer
unit
Is
shown in
Fig.
5.2,
and
this
is
based
on
two
NE555V
timing i.c.s. One
is
used
in
the
timer
circuit
proper
and
is
used
to
control the
other
device
which
is
used
to
generate
the
audio alarm
signal.
Figure
5.2
The circuit diagram of the timer
IC1
is used as the
timer,
and
this
device
is connected
in
the
monostable
mode. The
output
of 1C1
(pin
3)
is normally
low (at
virtually
the
negative
supply rail
voltage)
but
can
be made
to
go
high
(to
almost the
positive
supply
rail
voltage)
by
momentarily
taking pin
2
low. Pin
2
must not
be
taken
low
continuously
as this
would block
the
operation
of IC1.
It is therefore taken
to
an R-C
network which
consists
of R2
and
C3.
When
S1
is
closed
and the
supply
is
connected
to
the
circuit,
pin 2
of IC1 will initially
be taken
to the
negative
supply
rail
potential
and
the timer circuit
will
be
triggered
into
operation.
C3
will
quickly
charge
up
to the
positive supply
rail voltage
via
R2
though,
so
that
IC1 pin
2
is taken
high
and
does
not block
the operation
of
the
timer
at
the
end of
the timing
period.
C2
is
normally
short circuited
by
an
internal
transistor
of the i.e.,
but
this
transistor
is switched
off
once
the circuit
has
been triggered,
23

8/11/2019 Electronic Projects In The Workshop
http://slidepdf.com/reader/full/electronic-projects-in-the-workshop 18/47
and
this
enables C2 to
charge
up
via
VR1
and R1. C2 continues
to
charge up until the voltage
developed
across
it becomes two
thirds
of
the
supply
rail voltage. The
circuit
then
reverts to
its original
state
with
C2
being
discharged through
the
internal transistor
of
IC1
and
the
output of IC1 returning
to the
high state.
The time for
which
the
output
of IC1
goes
into the
high state
depends upon
the
time constant
of VR1 plus
R1
and
C2, The
timing
period is
actually equal
to
1.1
CR
(with
C in
microfarads
and R in
megohms), which gives
times
of
roughly
6 seconds with
VR1 at
minimum
resistance,
and
Vh
minutes with it at maximum.
However, it
should
be borne in mind that
the components
used in
the timing
network have quite
high
tolerances,
and the range of actual
units
built
to
this
design can
vary
considerably
from
the
range
quoted
above.
This
is
a
problem
which
is
common
to any simple
timer
circuit
of this
general
type.
IC2 is connected in the astable mode,
but
it does not begin
to
oscillate
when
the
supply
is initially
connected.
This
is because IC1
is
triggered
the moment the
supply
is
connected,
and
this
causes its
output
to go
high. This
switches
on
TR1
which
earths the reset pin of
IC2
(pin
4)
and
blocks
the operation
of the astable
circuit.
When
pin
3
of
IC1
goes
low
at
the end
of
the
timing
period TR1
is
switched
off and
pin
4 of IC2
is connected
to the positive supply
rail
through R4.
This enables
the tone generator circuit
to
operate
normally,
and it
oscillates
at a frequency
of
a
few hundred
hertz.
The
output
at
pin
3 of IC2
is connected
to
a
high impedance
loudspeaker
by dx. blocking capacitor
C5.
The
output waveform is
a series
of fairly
short
pulses
and
this
produces
quite
a penetrating
alarm
sound.
Opening
S1
removes
the power from
the
circuit
and
obviously
cuts
off
the
alarm.
C3
quickly
discharges through R2
into the
supply lines,
whereupon
the
circuit
is ready to
start once
again
from the
beginning
when
SI is closed
once
again.
C1 is merely
a supply
decoupling
component,
and
this
helps
to give good
volume
from the alarm
when
the
battery
voltage drops
due
to ageing.
Note that
the timer
circuit is
not
significantly
affected by changes
in supply
rail
voltage, as the time
taken
for the charge
on
C2 to
reach
two
thirds
of
the
supply
rail
potential is,
theoretically (and
very
nearly
in
practice),
totally
unaffected
by what
the supply
rail voltage
actually is.
Construction
With
the
exceptions of
VR1,
SI and
LSI, all the
components
are
assembled on a 0.1 in matrix
stripboard panel. This has
17 copper
strips
by
31 holes
and
uses
the
component
layout
shown
in
Fig. 5.3.
Make
quite
sure that
both
i.c.s are connected
the right way
round
and
be
24
careful
not
to omit
any of
the eight
link
wires or
eight breaks
in
the
copper strips.
A
cutout
for the loudspeaker must
be
made
in one
side of
the
front
panel for the
case,
and
this
is most easily
produced
using a fretsaw.
An
alternative
is to
use
a miniature
round file, or
failing that,
a ring of
small closely
spaced
holes can be made just
inside the periphery
of the
required cutout.
The
piece
of
material
at
the
centre
of
the
required
cutout
can then be broken
out,
and
the rough
edges
smoothed up using
Figure
5.3
Board
layout
a
large
half round file. A piece of
speaker fret or cloth
is
next
glued
in
place behind the cutout,
after which
the speaker should be
carefully
glued in
position.
VR1
and SI
are
also
mounted
on
the front
panel,
and
VR1 should
preferably be
fitted
with
a large pointer knob so
that a
large
calibrated
scale can be marked
around
this. Next
the
point to
point wiring
is
25

8/11/2019 Electronic Projects In The Workshop
http://slidepdf.com/reader/full/electronic-projects-in-the-workshop 19/47
completed
and
finally
the component
panel is
mounted
in
position
using short
M3
or 6BA bolts
with
nuts.
Calibration
When
first
testing the unit it is
advisable
to
have VR1 set
for the
shortest
possible time
(adjusted
fully
anticlockwise),
and
the alarm
should
then
sound
within about 10 seconds of
the
unit being switched
on.
If it fails to
sound,
disconnect
one
end of
R3
and switch the
unit
on
Components list for
the timer
unit with audio
alarm
Resistors
(all miniature
J4W,
5%)
R1
56ktt
R2 120kft
R3
12kfi
R4
3.9k«
R5
1 20
kn
R6
27kn
VR1
2MU
(or
2.2Mfi) lin.
carbon
Capacitors
CI
10
M
F
10V
C2
100
M
F 10V
C3
0.47/xF
10V
C4
47nF
typeC280
C5
100juF
10V
Semiconductors
TR1
BC108
IC1 NE5S5V (or
equivalent)
IC2 NE555V
(or
equivalent)
Switch
SI
S.P.S.T. toggle
type
Loudspeaker
LS1 Miniature
moving
coil
loudsp
impedance
Miscellaneous
Case, speaker fret
,
etc.
Control
knob
O.lin pitch
stripb sard
panel
PP3
battery
and
connector
to suit
Wire,
solder, etc.
again. This should result in
the alarm
sounding
immediately;
if it fails
to
do
so
there
is probably a
fault in
the wiring
around
IC2.
If the
alarm
does operate, the
fault
almost
certainly
exists
in the
wiring associated
26
with IC1. If the
unit
works correctly
over
short
timing
periods,
but
does not
when set for longer
times
(or
if longer
periods
are
considerably
longer than they
should be), this
suggests that
C2 has
an excessive leak-
age current and
it
should
be
replaced.
Marking the dial
around
the
control
knob
of VR1
is
quite
a
time
consuming business, but there is
no
short cut
to this.
Finding
the
chosen calibration
points is simply
a
matter of
trial
and
error.
If
the range
of
the unit
is
far from
the
quoted
limits,
this
is probably
due
to
the
high
tolerance
of
the timing
components, and
C2 in
particular.
One
way around
this
is
to try
replacing
C2 in
the
hope of
finding
a
more
suitable component. Of course,
In
many applications
the
precise
range
of
the unit will not
be
too
important,
provided
it
encompasses
the required
times.
With
the
aid
of
the
formula
provided
earlier
it
is
possible to
obtain
virtually
any
required
maximum
and
minimum
times
by
altering
the
values
of
R1 and
C2. However, it should
be noted that
very long
timing periods, say a few hours or
more,
are
really impracticable
with
a
simple
timer
of
this type.
27
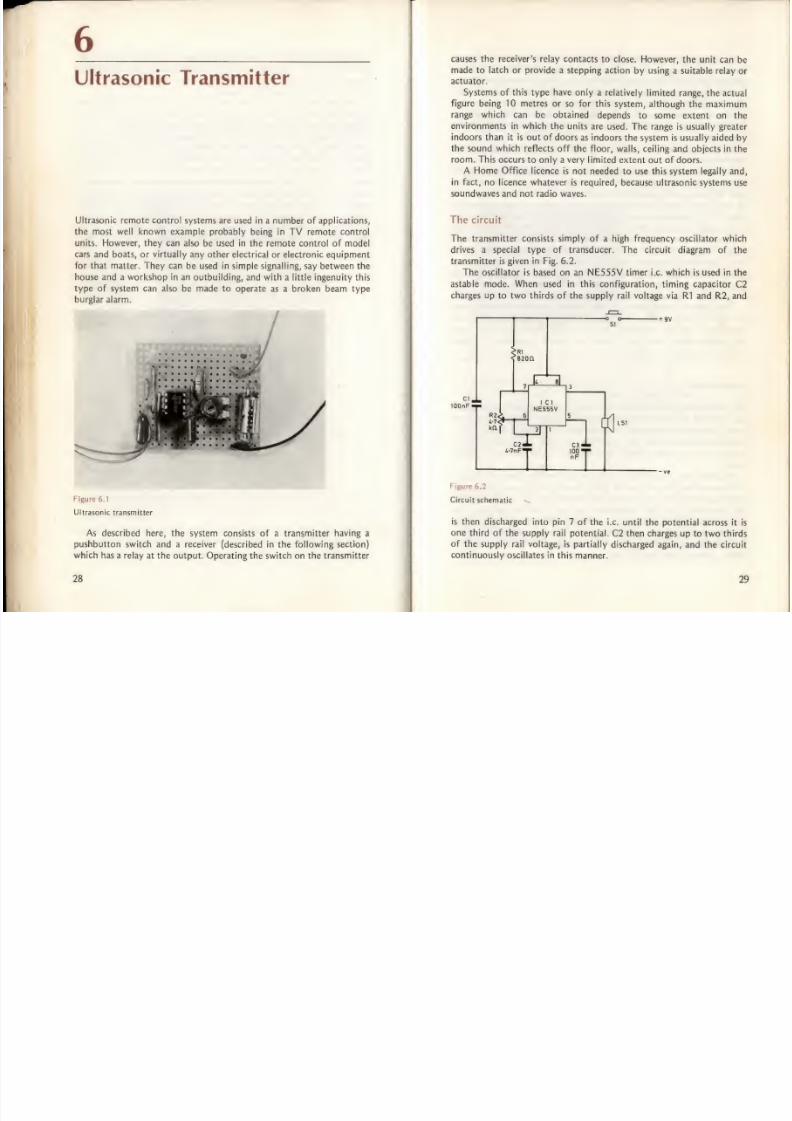
8/11/2019 Electronic Projects In The Workshop
http://slidepdf.com/reader/full/electronic-projects-in-the-workshop 20/47
6
Ultrasonic
Transmitter
Ultrasonic remote control systems
are
used
in a
number of
applications,
the
most
well
known example
probably
being in
TV
remote control
units.
However, they can
also
be
used
in
the remote control of model
cars
and boats,
or
virtually
any
other electrical
or
electronic equipment
for
that
matter. They
can
be used
in simple signalling,
say
between the
house and a
workshop in an
outbuilding,
and
with a little ingenuity this
type
of system can
also
be made to operate
as
a
broken beam type
burglar
alarm.
Figure
6.1
Ultrasonic
transmitter
As described here, the
system consists of
a
transmitter
having
a
pushbutton
switch
and a
receiver
(described
in
the
following
section)
which has a
relay
at
the
output. Operating
the switch on the transmitter
causes the receiver's relay
contacts
to
close.
However,
the
unit can
be
made to
latch
or provide
a
stepping
action
by
using
a suitable relay
or
actuator.
Systems
of
this
type
have
only a relatively
limited
range,
the
actual
figure being 10 metres
or
so
for this
system, although
the
maximum
range which can be
obtained
depends
to
some
extent on the
environments in
which
the
units
are
used. The
range is usually
greater
indoors
than
it is out
of
doors
as
indoors
the system
Is
usually
aided
by
the sound which reflects
off
the
floor, walls, ceiling
and objects in
the
room.
This
occurs
to only a
very limited
extent
out
of doors.
A
Home Office
licence
is
not needed to
use
this
system
legally and,
in fact,
no
licence
whatever is required,
because ultrasonic
systems use
soundwaves
and
not
radio waves.
The circuit
The transmitter consists
simply of
a high
frequency
oscillator
which
drives
a
special
type
of transducer.
The circuit diagram of the
transmitter
is
given
in
Fig. 6.2.
The
oscillator
is based on an
NE555V
timer i.e. which is used in the
astable
mode.
When
used in this
configuration, timing capacitor
C2
charges
up
to
two thirds
of
the supply
rail
voltage
via
R1
and
R2,
and
+
9V
Figure
6.2
Circuit schematic
^
is then
discharged into
pin 7 of the i.e.
until
the potential
across
it
is
one
third
of the supply
rail potential.
C2
then charges up to
two thirds
of the
supply
rail
voltage,
is
partially
discharged
again, and
the
circuit
continuously oscillates
in
this manner.
28

8/11/2019 Electronic Projects In The Workshop
http://slidepdf.com/reader/full/electronic-projects-in-the-workshop 21/47
R2
controls the discharge time of
C2,
and it also
controls the
charge
time
to
a
targe
extent.
It thus controls the
operating
frequency
of the
oscillator
and
it
is
adjusted to a nominal operating frequency
of 40kHz.
This is
the
frequency at which
the transmitting
transducer is
most
efficient. The
transducer is fed from the output (pin
3)
of
IC1
, and
this
terminal goes
high
when
C2
is charging
and
low
when
C2 is discharging.
A
signal voltage of several
volts
peak to
peak
is
therefore
fed to the
transducer.
S1
is
the
pushbutton on/off switch,
while
CI and
C3
are decoupling
components.
It should
perhaps be
explained
that
the transducer
is nothing like
an
ordinary loudspeaker, and
it
is
not an
electromagnetic
device
at all.
It
is
what
is
known
as
a
piezoelectric
device,
and
has
characteristics
which
are similar to both a quartz
crystal
and a
crystal earpiece. Like an ear-
piece,
if
it
is
fed
with
an
electrical
signal
it
converts
this
to its
equivalent
sound signal.
It
is
very inefficient
at
ordinary
audio
frequencies
though,
and
becomes
more effective at frequencies
a
little above the audio
range.
In common
with
a quartz crystal
unit,
the
ultrasonic
transducer
has
a
resonant frequency,
and
for
the unit
used
in this
design
the
resonant
frequency
is
at
a
nominal figure
of
40kHz.
At this frequency
the efficiency of the
transducer reaches
a sharp peak,
and
this is
why
the
oscillator
is
adjusted
to
this particular
frequency.
The
ultrasonic
transducers
are
sold in pairs, one for
the
transmitter
and one
for
the receiver. The type
number
OAB40K is used
in
the
transmitter,
and the
RAB40K
unit is used
in
the receiver, although
the
system
should
work well using any
similar transducers
if
these
should
happen
to
be
to
hand.
Construction
The
components
are assembled on a 0.1
in
pitch
stripboard panel
which
has 17 by 19
holes with the
copper strips
running lengthwise
along
the
panel.
Details
of
this
panel are
provided
in Fig.
6.3.
Construction
of this
is
quite straightforward,
but note that
R2
must
be a
sub-miniature
horizontal
type preset
resistor
if it is going
to fit into the
available
space.
Assuming
the transmitter is to
be constructed
as a
hand held unit,
a
small
plastics
box
should
be
used
as the housing
for
the
unit. 51 and
the
transducer
should be
mounted
on the
case so
that
S1
is at
the
top
and
the
transducer
is
at
the
front
when the
box is held
in
the
hand.
One
way of
mounting
the
transducer
is
to
drill
a
hole
about 10mm
or
so at
the
appropriate
point
in
the
case and
then
glue the
transducer
in place
on the outside of the
case.
The hole is
needed
to accommodate the
phono socket
at the
rear
of the
transducer.
The connection
between
30
+
y* via
SI
LSI
Figure
6.3
Views
of the
board
for the
ultrasonic
transmitter
the
component
panel
and
the
transducer
is
made
via a
short lead
which
is
terminated
in
a
phono
plug,
the
latter
plugging
into
the socket
on the
transducer.
An alternative
method
of
mounting
the
transducer
is
to
drill
a
somewhat
larger
hole
in
the case,
say
about
20mm
in
diameter,
and
then
glue
the
transducer
in
position
on
the inside
of
the case.
The
remaining
wiring
can
then
be
completed
after
which
the
component
panel
is
bolted into
place
inside
the
case.
Adjustment
R2
cannot really
be
given
the
correct
adjustment
until
the receiver
has
been
constructed.
It
is
then
simply
a matter
of trying this
component
at
various
settings
in an
attempt
to
find the one
which
gives the
greatest
range.
31

8/11/2019 Electronic Projects In The Workshop
http://slidepdf.com/reader/full/electronic-projects-in-the-workshop 22/47
If
an audio
millivoltmeter
is
available
a
slightly
more accurate and
quicker
method can be
used.
The
millivoltmeter
is used
to monitor
the
signal level at
TR1 collector of the
receiver,
the transmitter
is switched
on
and directed at
the receiver,
and then
R2
is adjusted for
maximum
signal
strength as indicated by
the
millivoltmeter.
Unless the
system
is to be used
at
something
approaching maximum
range the setting
of
R2 will not be particularly
critical.
Components list
for the ultrasonic transmitter
Resistors
Rl
R2
Capacitors
C1
C2
C3
820ft
miniature
%W,
5%
4.7
kn
sub-miniature
(0.1
W)
horizontal
preset
lOOnF
typeC280
4.7nF polystyrene
lOOnF type
C280
Integrated
circuit
ICt
NE555V (or
equivalent)
Transducer
LSI
Switch
51
40kHz
ultrasonic
transducer*
Push to
make non-locking pushbutton
type
Miscellaneous
Case
O.lin pitch
stripboard panel
PP3 battery and connector to suit, phono
socket, wire, solder,
etc.
Ultrasonic
transducers
are available from Arrow
Electronics
Ltd.,
Leader House,
Coptfold
Road, Brentwood,
Essex.
They
are sold only
in
pairs (one
for transmitter, one for receiver)
and
have
the
order
code RL400PP.
Suitable transducers
are
also
available from
Ace Mailtronix, Tootal
Street,
Wakefield,
W. Yorks, WF1
5JR,
Transducers can also be obtained from
many advertisers
in electronics
magazines.
32
7
Ultrasonic
Receiver
The
signal
produced by the
ultrasonic
transducer at the
receiver
is
extremely
small,
perhaps
being
little more
than
1mV when
the
system
is
used over
a
short
range,
and
considerably less
than this
over
distances
approaching
maximum
range.
Therefore,
considerable
amplification of
Figure 7.1
Ultrasonic
receiver
the signal
is
needed to
bring the
signal
to a
sufficient
level to
drive a
relay.
The
circuit
The
complete
circuit diagram of the
ultrasonic
receiver
is
shown
in
Fig.
7.2 and
although
this does
not
have the extreme
simplicity
of the
transmitter
circuit, it
requires
only three
active devices.
33

8/11/2019 Electronic Projects In The Workshop
http://slidepdf.com/reader/full/electronic-projects-in-the-workshop 23/47
Like the
transducer
at the transmitter,
the
receiver
transducer
is
a
piezoelectric
device,
and
has a resonant
frequency
of
40kHz.
Unlike
the
transmitter
transducer
though, it
is designed
to
produce
an
electrical
signal
from a sound
signal,
rather than the
other
way
round.
It
is
rather like
a crystal
microphone,
in fact,
but
it is
very
inefficient
at
ci
C2
27 j>F
HI-
R2
1-7
kCl
Hh
RS
®
i
®
TR1
BC108
-fr
R4
itkO
4T0Q
03'
1N4K8
02
I
RtlQV
I
<•
TR2
8CI08
TlOOnF
Figure
7.2
Circuit
schematic
for the
ultrasonic receiver
audio
frequencies.
It
is more effective
at
frequencies
just
above
the
audio
range, and
its efficiency
peaks at the
resonant
frequency
of
40kHz.
Thus
the
transducer
effectively
picks
out
the
signal
from
the
transmitter
but rejects
other
sounds which
might
otherwise
cause
spurious operation
of
the
unit.
TR1
is
used
as a high gain
common
emitter
amplifier having
R2
as
its
collector
load
and base
biasing
provided
by R1.
The
transducer
is
coupled
direct
to TR1
base,
and
this is
acceptable
as the
transducer
has
an
extremely
high
resistance
and
will
not significantly
affect
the
biasing
of
TR1.
Neither
will
the small voltage
at
TR1
have
any
detrimental
effect
on
the
transducer.
C2 rolls
off
the
gain
of TR1
at
radio
frequencies,
and
this
helps
to prevent
spurious
operation
due
to
instability
or
pick-up
of
strong
radio
signals.
The output
from TR1
is
coupled
to
a
second
high
gain
common
emitter
amplifier
via
C3, the
fatter
being
purposely
given a fairly
low
value
so that the
40kHz
signal
is
effectively
coupled,
but
audio
signals
are rejected
to
a large
extent.
Apart
from the
fact
that
the
second
amplifier
stage
uses a pnp
device
and has
no
high
frequency
roll
off
capacitor,
it
is
basically
the same
as
the first
stage.
In
order
to drive
a relay,
the
signal
at
TR2
collector
must
be
rectified
and
smoothed to
a d.c.
bias
and
then
further
amplified.
C4
couples the
signal
to
the
rectifier
circuit
which
consists
of Dl and
D2,
and
C5
smoothes
the
pulsed d.c.
output
of
the rectifier
network.
If a
signal
of
sufficient
amplitude
is
present
at TR2
collector,
the
d.c.
34
bias
that is produced
will be
adequate
to
switch
on
TR3, and
the
relay
in
the collector
circuit of
TR3
will
be
activated.
Of
course,
the relay
will be
activated
only
while
the
transducer
is
receiving
a signal
from
the
transmitter,
and
so
when
the
pushbutton on
the
transmitter
is
depressed
the relay
will be
switched on, and
when
the pushbutton is
released the relay
will
be
deactivated.
D3
is the
usual
protective
diode which
is needed
in
to
eliminate
the high reverse
voltage
spike that
would
otherwise
be
generated across
the relay coil as
it de-energises.
C6
is used
to
slightly slow
up the
time
taken
by
the
circuit
to
respond to the
commencement
and
ending
of
the input
signal.
This
was
found to be
necessary as
acoustic
feedback
between
the
relay
and the
transducer
otherwise
caused
slight
instability,
but
this component may
not be
necessary
in every
case. It
depends to a
large extent
on
the
characteristics
of the
relay
used
and
on
the physical
layout
of
the unit.
CI,
R5
and C7
are
supply
decoupling
components,
and
with the
high
gain
and
fairly high
output
current of
the circuit,
the
high
level
of
decoupling
that
these
provide
is fully
justified. S1
is
the
on/off
switch. The
quiescent
current
consumption
of
the
device
is
only
about
2mA,
but it is
considerably
higher than
this when
the
relay
is
switched
on,
the
actual
figure
depending
upon
the
coil
resistance
of
the
particular relay used.
If
a
low
level
of
current
consumption
is
important
(as it will
be if
the
unit
is
battery
operated,
for
instance),
a
relay
having
a fairly high
coil
resistance
is to be
preferred. Any
relay
suitable for
operation on
6V
and having a
coil
resistance of
about
200S2
or
more
will
work in the
circuit, but
it
is essential
to ensure that
the relay
has an
adequate
number
of
contacts
of
the
right type
and
suitable rating
for
the application in
which the
unit
is to be
utilised.
Construction
The components
can
be
accommodated on
a
0.1
Sin
pitch stripboard
using
the component
layout
illustrated
in
Fig. 7.3. The
panel has
1
copper
strips by
21
holes
and
there
are no breaks
in
any
of the
strips.
The
relay is not
mounted
on the panel,
and
the
method
of
mounting
the relay will
depend
on
the
type
used.
It
will almost
certainly
be
necessary
to
construct some
form
of
mounting
bracket,
and a
little
ingenuity must be
used
here.
S1
and
the
transducer
should
be
mounted
on
the
front
of the
case, and
methods
of
mounting
the
transducer were
given in the
section
describing
the
transmitter.
The
connection to
the
transducer
is
made by way
of
a
phono
plug which
is inserted into
the
socket
at
the
back
of
the transducer.
Provided
the lead between
the
transducer
and the
component
panel is
fairly
short, which
it presumably
will
be,
it is not
necessary to
use
screened
lead
here.
The
unit can be
35
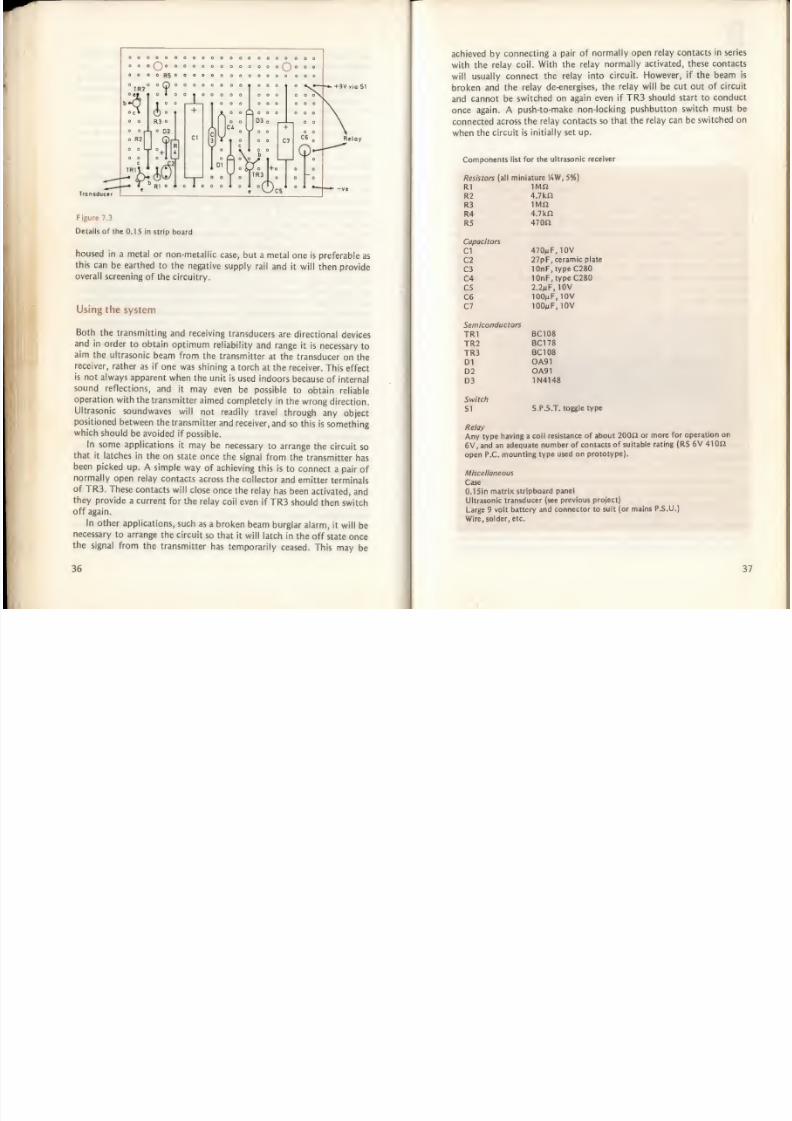
8/11/2019 Electronic Projects In The Workshop
http://slidepdf.com/reader/full/electronic-projects-in-the-workshop 24/47
+9VviaS1
Relcy
Transducer
Figure
7.3
Details of
the
0.1
5 in strip
board
housed
in a metal
or
non-metallic
case,
but
a
metal
one is
preferable
as
this
can
be earthed
to
the
negative supply
rail and
it
will
then provide
overall
screening
of
the
circuitry.
Using the
system
Both
the
transmitting
and receiving
transducers
are directional
devices
and
in order
to
obtain
optimum
reliability
and range
it
is necessary
to
aim
the
ultrasonic
beam
from
the
transmitter
at
the transducer
on
the
receiver,
rather
as
if one
was shining
a torch at
the receiver.
This
effect
is
not
always
apparent
when
the unit
is
used indoors
because
of
internal
sound
reflections,
and
it
may
even
be
possible
to
obtain
reliable
operation
with the
transmitter
aimed
completely
in
the
wrong
direction.
Ultrasonic
soundwaves
will
not
readily
travel
through
any object
positioned
between
the
transmitter
and receiver,
and
so this is
something
which
should
be
avoided
if
possible.
In
some
applications
it may
be
necessary
to
arrange
the circuit
so
that
it latches
in
the
on state
once
the signal
from
the
transmitter
has
been
picked up.
A
simple
way
of
achieving
this is
to connect
a
pair
of
normally
open
relay
contacts
across
the
collector
and emitter
terminals
of TR3.
These contacts
will
close
once
the
relay
has
been
activated,
and
they provide
a
current
for
the relay
coil even
if
TR3 should
then
switch
off again.
In
other
applications,
such
as
a
broken
beam
burglar
alarm,
it
will
be
necessary
to
arrange
the circuit
so
that
it
will
latch in
the off
state
once
the
signal
from
the
transmitter
has
temporarily
ceased. This
may
be
36
achieved
by
connecting a
pair
of
normally open relay
contacts in series
with
the
relay
coil.
With
the
relay
normally
activated,
these
contacts
will
usually connect
the
relay
into
circuit. However,
if
the beam
is
broken
and
the relay
de-energises,
the
relay
will
be
cut
out
of
circuit
and
cannot
be
switched on
again
even if TR3
should start
to
conduct
once
again. A
push-to-make
non-locking
pushbutton
switch must be
connected
across
the
relay contacts so
that
the relay
can
be
switched
on
when
the
circuit
is
initially
set
up.
Components
list
for
the
ultrasonic
receiver
Resistors
(all
miniature
KW,
5%)
R1
1MJ2
R2
4.7kft
R3
1Mfi
R4
4.7
kn
R5
47
00
Capacitors
C1
470
M
F, 10V
C2
27pF,
ceramic
plate
C3
IQnF,
type
C280
C4
10nF,typeC280
C5
2,2
M
F,
10V
C6
100mF,10V
C7
100mF,10V
Semiconductors
TRI
BC108
TR2
BC178
TR3
BC108
D1
OA91
D2
OA91
D3
1N4148
Switch
S1
S.P.S.T.
toggle
type
Relay
Any
type
having
a
coil resistance
of
about 2Q0S1
or
more
for
operation
on
6V, and an
adequate number
of
contacts
of suitable
rating
(RS
6V 41012
open P.C.
mounting
type
used
on
prototype}.
Miscellaneous
Case
0.1
Sin
matrix
stnpboard
panel
Ultrasonic
transducer (see
previous project)
Large
9 volt
battery
and
connector to suit
(or
mains
P.S.U.)
Wire,
solder, etc.
37

8/11/2019 Electronic Projects In The Workshop
http://slidepdf.com/reader/full/electronic-projects-in-the-workshop 25/47
8
Telephone
Repeater
This is a
project
which, although
of
general use
around
the house,
is
especially
useful
to
have
in
a workshop.
It
is a device
which
will pick
up
the
sound of
a
telephone
ringing and
relay
it to
some
remote part
of
a
house
or to
an
outbuilding.
This
avoids
the
telephone
call being
missed
because
one
happens
to
be
well
away
from the
telephone,
or
in
a
fairly
noisy
environment.
Since
many
workshops
are
situated
in
outbuildings
and
tend to
have
fairly
high
ambient
noise
levels,
a unit
of
this
type
is
especially
useful.
Figure
8.1
Telephone
repeater
The unit
may
also
be
of
great
benefit
to
someone
who
is hard
of
hearing,
and
could
easily
not
hear
the
sound
of
a
telephone
ringing.
At
first
sight
it
might
seem
to be
a better
idea
to simply
connect
a
tone
generator
or bell
direct
to
the
telephone,
rather
than
go
to
the
bother
of
using a
microphone
to
pick
up the
sound of
the betl
and
feed an
amplifier
and
speaker
combination.
Indeed,
this
is the
case,
but
it must
be
borne
in
mind
that
it
is
an offence
to make
any
unauthorised
38
connection to
a
Post
Office
telephone,
and
so
the system
used here
must be
adopted.
One
slight advantage
of
this system
is that
it
is convenient
to use and
set
up
due to
the fact
that
there
is
no
need
to make
a
direct
connection
to
the
telephone.
Also,
the
unit
can
be
used
to
simultaneously monitor
a
doorbell
and
a
telephone
provided the two
are
situated
reasonably
close together.
The circuit
The
complete
circuit
diagram of the
Telephone
Repeater
appears in
Fig.
8.2.
Basically
this consists
of
a
high gain
amplifier
which
drives a
loudspeaker. However,
the unit
is
designed to have
only a
very low
Figure
8.2
Circuit
of
the
telephone
repeater
quiescent
current
consumption
so
that
it may be
run
economically
from
batteries, despite
the fact that
in
practice
it is
likely
to
be
left
switched on for
quite
long
periods.
TR1 is
the
active
device
employed in the
preamplifier
stage
and
this
transistor
is
used
in
the
common emitter mode. Base
biasing
is
provided
by R1 and
R2 while
R4 and C3 are the
emitter
bias resistor
and
bypass
capacitor
respectively. R3 is
the collector
load
for
TR1.
This stage
operates at
a
low
collector current of only
about
tOOjuA, and
this is
done in
order
to
provide
a
low
noise
level and
to
minimise
battery
drain.
C4
is
an
r.f,
filter
capacitor
which is needed
in
order to
prevent
problems
due to radio interference and
breakthrough.
C2
provides
d.c.
blocking at the
input.
39

8/11/2019 Electronic Projects In The Workshop
http://slidepdf.com/reader/full/electronic-projects-in-the-workshop 26/47
The
output
from
TR1
is
fed
to
a second
common
emitter amplifier
via
C5,
TR2
is
used
as
the
basis
of
the
second
amplifier stage,
and
R7
acts
as its
collector
load and
R6
as its
bias
resistor.
This
stage
operates
at
a
slightly higher
collector current than
TR1, the actual operating
current
being something
in
the
region
of
SGOjuA. This is
necessary
to
produce
higher
gain
and
a
greater output
drive
capability.
In order
to provide
a low
quiescent current
a class
B
output
stage is
obviously called
for as
the
high
standby
current
of a class
A
stage
makes
it totally unsuitable.
A
normal
complementary
output
stage would be
the obvious
type
to use,
but
a more simple
method
can be used.
High
fidelity
amplification is
not
needed here as the
purpose
of the
unit is
simply
to
provide
an audio
signal
of some
kind. Therefore
a
simple
single
transistor class
B
output
stage may
be used, and the fact
that
the
signal
from
the loudspeaker will
be
rectified
and greatly
distorted is of
no
consequence
in
this instance.
The output
from
TR2 is
fed
to
a
rectifier circuit
by
C6, and
the
positive going pulses
produced
by Dl
and
D2
are
used
to switch on
TR1
and produce pulses of
current
in
its
collector
circuit. These
are
applied
to
the
loudspeaker
and
an
audio output
signal is
produced.
The
supply
lines
need
to
be well
decoupled
and
this function
is
carried
out
by CI, R5
and
C7.
S1
is the
on/off
switch.
Although
in
theory
no current
flows through
the output
transistor
under
quiescent
conditions,
in practice
a
small
current
may
flow
here
due
to
noise
and
stray
pick up
by
the
microphone
causing
TR3
to be turned on to some
extent.
However, the
total quiescent
current
consumption
of the
unit
is
typically less
than
1mA
from
a 9V supply.
Construction
All
the
small
components
are
accommodated
on
a
small
0.1
5in pitch
stripboard
panel and
are positioned as
detailed in
Fig. 8.3. Begin
by
cutting
out a board having
8
copper
strips by 24 holes
and
then
drill
the
two
3.2mm
diameter
mounting
holes and
make
the
ten
breaks in the
copper
strips.
The
components are
then soldered into
position.
SI,
SKI
and
the
loudspeaker are
all
mounted
on
the
front panel
at
any convenient
points
which
provide
a reasonably
neat and tidy
appearance.
SKI
can conveniently
be a 3.5mm jack
socket,
but
any
preferred type (DIN,
phono, etc.),
should
also
be
suitable.
Loudspeaker
mounting
has been described
in
earlier
projects, and
will not be
repeated
here.
Once
the components
for front
panel
mounting
have
been
installed
in
the
case the
point
to point wiring can
be
completed and
then the
component
panel is
mounted
inside
the case
using
M3 or
6BA mounting
screws
and nuts.
Although
the input
of
the
unit is very
sensitive
it is
not
• coo
Figure
8.3
Strip
board
layout
necessary to use a
screened
cable
to
connect SK1 to
the
component
panel.
Using
the unit
A
low
impedance
dynamic
microphone
can
be
used with
the unit,
and
an
inexpensive
type
(such as
those
used with
cheaper
cassette
recorders)
is
perfectly
adequate.
Some
of
these
have
two
plugs,
a
3.5mm
one and
a
2.5mm
one.
Both
will
need
to be
cut off so
that
the
microphone
can
be
connected to
an
extension
cable. The
wiring
to
the
2.5mm
jack
plug,
if
fitted,
is
concerned with
the
remote
control
switch
on the
microphone
and
this
wiring may be
ignored.
The
extension
cable can be
several metres
long
if
necessary,
but
it
must
be
made from
screened
lead.
The
outer braiding
connects to
the
negative
supply
rail of
the
repeater
circuit
and
the
inner connector
goes
to C2.
The
circuit is very
sensitive
and
it
should
be
possible to
obtain
good
results even
with the
microphone
a
metre
or
two
away from
the
telephone.
Low,
medium
and
high
impedance
loudspeakers
seem to work quite
well
as
the
microphone
for
this unit,
but
these
provide
lower sensitivity
than a
proper
microphone,
particularly
low
impedance loudspeakers.
However,
they
provide
a
perfectly
adequate
output
level
provided
they
40
41
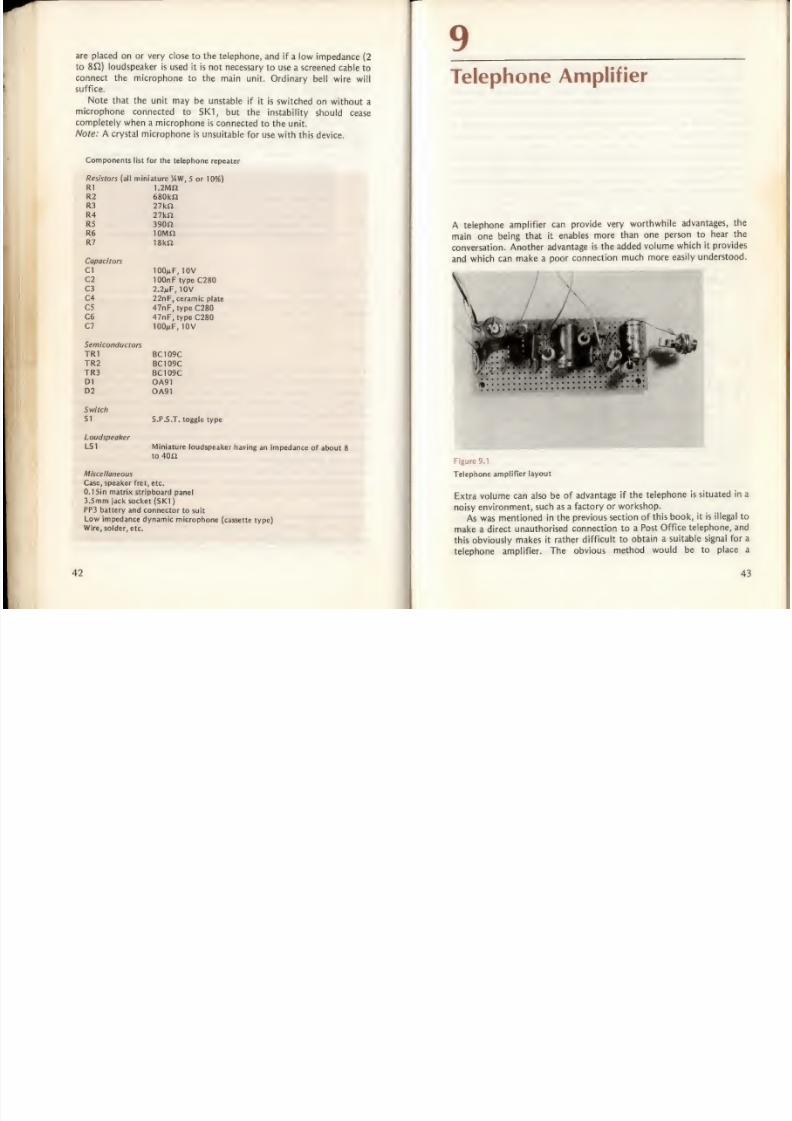
8/11/2019 Electronic Projects In The Workshop
http://slidepdf.com/reader/full/electronic-projects-in-the-workshop 27/47
are placed on or very
close
to
the
telephone,
and if a
low impedance
(2
to
SO,)
loudspeaker
is used
it
is
not
necessary
to use
a
screened cable
to
connect
the
microphone
to
the
main
unit.
Ordinary
bell
wire will
suffice.
Note
that
the unit may
be unstable
if
it
is switched
on
without
a
microphone
connected
to
SK1,
but the instability
should
cease
completely when
a
microphone
is
connected to the
unit.
Note:
A crystal
microphone
is
unsuitable
for
use
with
this device.
Components
list
for the telephone
repeater
Resistors
(all
miniature
MW,
5 or
10%)
R1
1.2M«
R2
680kI2
R3
27kfi
R4
27kS1
R5
390U
R6 1
0Msi
R7
18kn
Capacitors
CI
100m
F,
10V
C2
lOOnF
type
C280
C3
2.2mF,
10V
C4
22nF, ceramic
plate
C5
47nF,typeC280
C6
47nF,typeC280
C7
lOO^F,
10V
Semiconductors
TR1
BC109C
TR2
BC109C
TR3
BC1G9C
D1
OA91
D2
OA91
Switch
S1
S.P.S.T. toggle
type
Loudspeaker
LSI
Miniature
loudspeaker
having
an impedance
of
about
8
to 4012
Miscellaneous
Case, speaker
fret,
etc.
0.1 Sin
matrix stripboard
panel
3.5mm jack socket
(SKI)
PP3 battery
and
connector
to suit
Low
impedance
dynamic
microphone
(cassette
type)
Wire,
solder,
etc.
42
9
Telephone
Amplifier
A
telephone
amplifier
can
provide
very
worthwhile
advantages,
the
main
one
being
that it
enables more
than
one
person to
hear
the
conversation.
Another
advantage
is the
added
volume
which
it
provides
and
which can
make
a
poor
connection
much
more
easily understood.
Figure 9.1
Telephone
amplifier
layout
Extra
volume
can
also
be
of
advantage if the
telephone
is
situated
in a
noisy
environment,
such as
a
factory
or
workshop.
As
was mentioned
in
the
previous
section
of
this book,
it is illegal
to
make a direct
unauthorised
connection
to a
Post
Office telephone,
and
this obviously
makes it
rather
difficult to
obtain
a
suitable signal
for
a
telephone
amplifier.
The
obvious
method
would be to
place
a
43
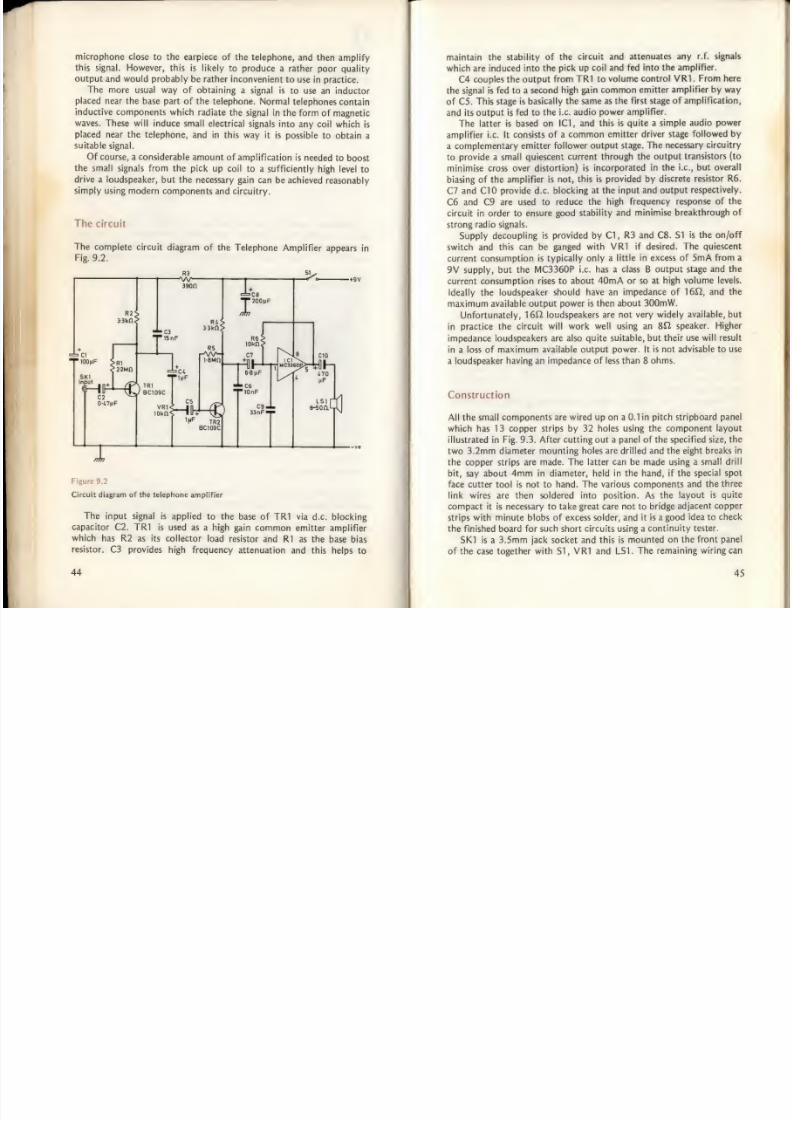
8/11/2019 Electronic Projects In The Workshop
http://slidepdf.com/reader/full/electronic-projects-in-the-workshop 28/47
microphone
close
to the
earpiece
of the telephone,
and
then
amplify
this
signal.
However,
this
is
likely
to produce
a rather
poor quality
output
and
would
probably be rather
inconvenient
to use
in
practice.
The more usual
way of obtaining
a signal is
to use
an
inductor
placed
near
the base
part
of
the
telephone.
Normal telephones
contain
inductive
components
which
radiate
the
signal
in
the form
of
magnetic
waves.
These
will
induce
small electrical
signals
into
any coil
which
is
placed
near the telephone,
and
in this way
it
is
possible
to
obtain
a
suitable
signal.
Of
course, a
considerable
amount
of
amplification
is
needed
to boost
the
small
signals
from
the pick up
coil to a
sufficiently
high
level
to
drive
a loudspeaker,
but the necessary
gain can be achieved
reasonably
simply using modern
components
and circuitry.
The
circuit
The
complete circuit
diagram
of
the
Telephone Amplifier
appears
in
Fig.
9.2.
390(1
+9V
HW
R2
8CI09C
Figure
9.2
Circuit
diagram of
the
telephone
amplifier
The
input signal
is
applied
to
the
base of
TR1
via
dx. blocking
capacitor C2.
TR1
is used as a high
gain common
emitter
amplifier
which
has R2
as
its collector
load
resistor
and
R1 as the
base
bias
resistor.
C3
provides
high
frequency
attenuation
and this helps
to
44
maintain
the
stability
of
the circuit and
attenuates
any
r.f.
signals
which are
induced into
the
pick up
coil
and fed
into
the amplifier.
C4
couples
the output
from TR1
to
volume control VR1
.
From
here
the
signal is
fed
to a
second high
gain
common
emitter
amplifier
by way
of C5.
This
stage is
basically the
same as
the first
stage of
amplification,
and its
output is fed to
the
i.e.
audio
power
amplifier.
The
latter is
based on
IC1,
and
this
is quite a
simple audio
power
amplifier i.e. It
consists of
a
common
emitter
driver
stage
followed by
a
complementary emitter
follower
output stage.
The necessary
circuitry
to
provide a
small quiescent
current
through the
output transistors (to
minimise cross
over distortion)
is incorporated
in the
i.e.,
but
overall
biasing of the
amplifier is not,
this
is
provided by
discrete
resistor
R6.
C7
and C10 provide d.c.
blocking
at the
input
and
output
respectively.
C6
and C9
are used to
reduce the
high frequency
response of
the
circuit
in
order
to
ensure
good
stability
and
minimise
breakthrough of
strong radio signals.
Supply
decoupling is provided by CI,
R3
and
C8.
S1
is
the
on/off
switch
and
this can
be ganged
with
VR1 if
desired.
The
quiescent
current
consumption
is typically only
a
little
in
excess
of
5mA
from a
9V supply,
but
the MC3360P
i.e. has a class B
output
stage and the
current consumption rises
to about
40mA
or
so
at high volume levels.
Ideally
the loudspeaker
should have an
impedance
of
16S2,
and
the
maximum
available
output
power is then
about
300mW.
Unfortunately,
160 loudspeakers
are not
very widely available,
but
in
practice
the circuit
will
work
well
using
an
8£2
speaker. Higher
impedance
loudspeakers
are
also quite
suitable,
but
their use will result
in
a
loss of
maximum
available output power. It
is not advisable to
use
a
loudspeaker having an
impedance of
less
than
8
ohms.
Construction
All the
small
components are wired up
on
a
0.1 in pitch
stripboard
panel
which
has 13 copper strips by 32
holes using
the
component
layout
illustrated
in
Fig.
9.3,
After
cutting
out
a panel of
the specified
size,
the
two 3.2mm diameter
mounting holes
are drilled
and
the eight
breaks
in
the
copper
strips are made.
The latter
can
be
made using a
small
drill
bit,
say
about
4mm in
diameter, held
in the
hand, if
the
special
spot
face
cutter
tool is not
to
hand.
The
various components
and
the
three
link
wires are
then
soldered
into
position. As
the
layout
is
quite
compact
it
is
necessary to
take
great care not
to
bridge
adjacent copper
strips
with
minute
blobs
of
excess solder,
and
it is a
good
idea to
check
the finished board
for
such
short circuits
using
a
continuity tester.
SKI is a
3.5mm
jack socket
and
this is mounted
on the
front
panel
of the case
together
with
SI,
VR1 and
LSI.
The remaining
wiring
can
45

8/11/2019 Electronic Projects In The Workshop
http://slidepdf.com/reader/full/electronic-projects-in-the-workshop 29/47
»
O
O
00DO040O0
6
° *
* °
°
°
a
eoao
4
D
Ci
Q
Salt clip
9.3
Strip board
layout
of the
amplifier
then
be
completed
and finally
the
component
panel
is mounted
in
the
case
using M3
or
6BA nuts
and
screws.
Using
the
unit
When
the
unit
is
switched
on
and
VR1
is advanced,
there should
be
quite
a
high
background
noise level.
If there
is
not, switch
off
at once
and
thoroughly
check
all
the
wiring.
If
a multimeter
is available,
this
can
be used
to
locate
the
faulty
stage
or stages.
With
the
unit
switched
on
once
again
there
should be
approximately
half
the
supply
voltage
at
TR1
collector,
TR2
collector,
and
IC1
pin
5. Any great
departure
from
such
a
voitage
indicates
that
there is
an
error
in
the wiring
to
the
appropriate
stage.
There
should
be
a
large
reduction
in
the
background
noise
level
when the
pickup
coil
is
plugged
into
SK1.
Specially
made
pickup
coils
may
be
obtained,
although
they
are not
widely
available.
These
have
a
rubber
sucker
which
enables
them
to
be
secured
to
the
base of
the
telephone.
An
alternative
is a
ferrite
cored
r.f.
choke
having
a value
of
about
5
to
lOmH;
the
exact
value
is
not
critical,
but
should not
be much
less
than
about
5mH.
This
is
connected
to
the
telephone
amplifier
by
a
piece
of
screened
cable
about
1 metre
long
which
is terminated
in
a
3.5mm
jack
plug.
Make
sure the
connections
to the
jack
plug
are the
right
way
round,
with
the
outer
braiding
of the cable
connecting
to
the
46
negative
supply rail
of
the
amplifier.
For neatness
the
pickup choke
may
be
mounted
in a small
plastics
(not
metal) box.
The
pickup
must be
placed in the position which provides the
best
signal, and this can only
be
found
with
a
little experimentation. With an
ordinary telephone
of the
type
currently
fitted
by
the Post Office
the
best pickup point for the
coil
will probably
be
somewhere
along the
Components list for
the
telephone amplifier
Resistors
(all miniature
%W, 5 or
10%)
R1 2.2MH
R2 3.3k«
R3 390ft
R4 3.3kft
R5
1
.8ft
R6
lOkft
VR1
lOkft log
(may be ganged
with switch
51}
Capacitors
CI lOO^F,
10V
C2
0.47
M
F,
10V
C3
15nF, ceramic plate
C4
1juF, 10V
C5 IjuF,
10V
C6
1
0n
F,
ceramic plate
C7
6.8mF,10V
C8
200mF,
(or220MF),
10V
C9
33nF, ceramic plate
CIO
470jiF,10V
Semiconductors
TR1 BC109C
TR2
BC109C
IC1
MC3360P
Loudspeaker
Miniature type having an impedance of about
8 to
50ft
Miscellaneous
Case, speaker fret,
etc.
Control
knob
0.1
in
matrix stripboard panel
PP6
battery and
connector
to
suit
3.5mm
jack socket (SKI
)
Telephone
pickup coil (see
text)
Wire,
solder
etc.
right
hand
side
of the
telephone
base.
For
a
Trimphone
the
best
position
for
the
pickup coil
is
towards
the
rear
of
the
telephone
base
on
the left hand side.
The
equipment is
sensitive
to
any
a.f.
magnetic
field,
and so
there
may be
a
certain
amount of
stray
pick-up
from
mains wiring. If
this
47

8/11/2019 Electronic Projects In The Workshop
http://slidepdf.com/reader/full/electronic-projects-in-the-workshop 30/47
should occur
to
a significant degree it should
be
possible
to minimise it
by altering the
orientation of
the
pickup
coil
and
(or)
the
position
of
the telephone base.
It is
quite
likely
that a
howling sound will
be
produced
if the
volume
control is fully
advanced with
the
telephone
handset at all
close to
the
loudspeaker. This
is
due
to
acoustic
feedback
between the
loudspeaker
in
the
amplifier
unit and
the
microphone
in the
handset,
and
can be
avoided
by keeping the
two reasonably
far apart.
It is
worth
noting that
a
sensitive
amplifier of
this type
is suitable
for
uses
other
than
as
a
telephone amplifier.
It can, for
example,
be
used
as a
baby
alarm if
a low
impedance
dynamic microphone
(the
type
used
with cassette
recorders) is connected
to SKI
instead
of
the
pickup
coil.
48
10
NiCad
Battery
Charger
Ordinary dry cell batteries can
be
rather
expensive
for long term use in
equipment
which
has
a
fairly
high
current consumption, such as
portable
cassette
recorders
and
electronic
flashguns,
and
there
is also
the
bother
of
frequently having to
replace
exhausted batteries.
Nickel
cadmium (NiCad) cells
have
a rather
high initial
cost, but
they are
Figure
10.1
NiCad
battery
charger
rechargeable
and
have an
extremely
long
lifespan.
This makes them
economically
quite attractive
in
the
long
term,
especially
if one builds
one's
own charger
unit
at
low
cost.
The charger described here is
designed
for charging up
to
about six
AA
size NiCad
cells
(these are
equivalent
to HP7 cells
in size).
However,
49

8/11/2019 Electronic Projects In The Workshop
http://slidepdf.com/reader/full/electronic-projects-in-the-workshop 31/47
it can
easily
be
modified to charge other sizes
of
battery,
as
will
be
explained
more fully
later
on.
NiCad cells
have
a
rather
low
internal
resistance
which is
an
advantage
in
that it
enables
them
to
supply
quite
high
currents,
but
is a
disadvantage
in that
it slightly
complicates
the
recharging
of
these cells.
Due
to
the
low
cell
impedance the
charger needs to
have
only a
slightly
higher output voltage than
the cells in
order
to
produce a very high
charge
current. Usually
NiCad
cells must
not be charged
at high
currents
as this
would
result
in a greatly
reduced
life.
AA
size cells have
a recommended
charge
current of
about
50mA and
require a charge
time
of about
15 hours in order
to recharge
a
cell that
has
become
completely discharged.
The
precise figures
actually vary
slightly
from
one cell manufacturer
to another,
but
are not really
critical.
The circuit
The
complete circuit
diagram of
the NiCad
Battery
Charger is
provided
in
Fig.
10.2. The
mains supply is
connected
direct
to
the
primary of
mains isolation
and step
down transformer
T1, and no on/off
switch
Mains
supply
9V
ov
FS1
100
mA
D1
IN
400
D2
IN
4001
R1
3
son
W
TR2
I Pi I
&
R1
BFY51
>R2
*12or13n
3
Cl
T
IOOOuF
Output
Figure
10.2
Battery
charger
circuit
is used as
the
unit
will
presumably
be
disconnected from
the mains
when
it
is not
in
use.
The
output from
the secondary of
T1 is fullwave
rectified
by D1 and
D2
and the resultant rough
d.c. is smoothed
to
some
degree by
CI
.
A
current limiter circuit
of
quite conventional
design
is
connected
in series with
the output and ensures
that
the
output current
is
approximately
the required
level. The current
limiter employs
TR1,
TR2, R1
and
R2,
and
it
works
in
the following
manner.
TR2 is used in
the
emitter follower
mode
and
is
biased
hard
on
by
R1. With
a
battery
connected
across the output
a
fairly
high output
current therefore attempts
to flow from the
charger.
This
current
develops
a voltage across
R2
as this
component
is
connected in series
with the output,
but
the
voltage
across this
component
will rise
only to
about 0.65V.
When
this
voltage
is reached,
TR1
is turned
on
and it
taps off
some
of the
base current
of TR2 down
to the
negative
supply
rail
through the load.
Even if a
short
circuit is placed
on
the
output,
the
voltage
across R2
will not exceed more
than
about
0.65V as
the
base of
TR2 would
be
virtually
short circuited
to earth through
TR1,
and the output voltage
would
be little more
than
zero.
From Ohm's
law
it
is
easy to
see
that the
output
current
is
equal
to
0.65V divided
by R2
in
ohms.
A 13fi
resistor
in the R2
position
gives
the
required current
of 50mA (in theory anyway),
and
the
more readily
available value
of 12Q,
gives a theoretical current
of
just over
54mA,
which should also
be
perfectly
suitable
in practice.
Of course,
due
to
component
tolerances
etc.
the actual
output current of
a
circuit
built
to
this design
may
be as
much
as
several
per cent
different
to the
calculated
output current,
but this
is
of
no
real
consequence
as
the
charge
currents of
NiCad cells
are
not highly
critical.
Fuse
FS1
protects the
charger
and
NiCad
cells
against
passing
an
excessive
output
current
if
the
current
limit
circuit
should
fail for
any
reason
.
Tl
0V
via FS1
Figure
10.3
0.15
in strip
board layout
50
8/11/2019 Electronic Projects In The Workshop
http://slidepdf.com/reader/full/electronic-projects-in-the-workshop 32/47
Construction
A
suitable
0.1 Sin
matrix
stripboard
layout for
the
unit
is
shown in Fig.
10.3. This
accommodates
all the
components
except
Tl
and FSl.The
latter is
mounted in a
chassis
fixing fuse
holder
which is
bolted to
the
bottom of
the
case,
Tl is also
bolted
to
the base
of
the
case. The
output
sockets,
which may be
wander
types, are
mounted on the
front
panel
of
the
case and a
hole for the
mains
lead
must
be
made
in the
rear
of
the
case. This
hole
should be
fitted
with a
grommet to
protect the
lead
if
a
metal or
hard
plastics
case is
used.
The
point to point
wiring is then
completed before
the
component
panel
is
finally mounted
at the
bottom
of the
cabinet. The mains earth
lead
connects
to the negative
output
socket,
and
if
a metal
case
is
used
this
must also
be earthed.
Using
the charger
Battery
clip
leads
to
fit AA type cells are
not
available, but suitable
battery holders are.
These
holders are available for various
numbers
of
cells,
and
they are fitted with
a
battery
clip
of
the
same
type
and
size
used on PP3
and
PP6
batteries. By mounting
the
cells
in
such
a
holder it
is
therefore
possible
to
make
the
connection
between
the
charger
and
the
cells
using
a
PP3
type
battery
connector
having
its
teadout
wires
terminated
in wander
plugs.
If a
holder for
the
appropriate
number of
cells
is
not
available either
unused positions in
the holder
can
be
bypassed using a shorting
lead, or
a
couple of holders
may be connected in series,
whichever the
situation
dictates.
Make
absolutely certain that
the charger is
connected
to
the
cells
with the
correct
polarity
(positive
to
positive
and
negative
to
negative). Also
make sure that
the cells are not
forgotten and
accidentally
charged for much
longer
than is
necessary, since the
charger
will
continue to force
current
into
the
cells
once
they
have become
fully
charged,
and
this
is best
avoided.
It
is
an
easy
matter
to modify the unit to
provide
a
different
charge
current, and the
principal
change
is
to
the value of R2. The
theoretical
value
of this component
is equal to 0.65 divided by the required
charge
current in amperes,
and
this gives the answer in ohms.
The theoretical
value
will
not
always coincide with
a
preferred
value,
and
it is then
necessary
to choose the preferred value
which
is
closest
to
the
calculated
one.
A
few other points
must
be
kept
in
mind
if
the
unit
is being used to
provide a charge current
of
much
more
than about
50mA,
or is being
used
to
charge
a large number of
cells.
Tl must
have
a
rating
which
enables
it
to
provide
at
least
the required
charge
current, and
it
must
52
be
capable
of
producing
a
loaded voltage
which is two or three
volts
more
than that
of the
fully
charged
cells
in
series
(when charging more
than one
cell
they are
always
connected in series
and not
in
parallel).
The rating of F51
must be suitably
increased for
charge
currents of
more than
100mA.
If the
unit is
used
to
charge
fairly
large cells such
as
the
C
(HP1
1
)
or
D
(HP2) types,
the higher
charge
currents
required will result in
increased
dissipation
in
TR2.
This
will
probably
necessitate
the
fitting
of
a
small commercial
bolt-on type heatsink,
and
the component
panel
has been designed
to
accommodate
such
a
heatsink. if the transformer
supplies a
loaded
voltage
which
is
considerably
higher
than the
total
cell voltage
it
may
even be necessary
to mount
TR2 away from
the
component
panel
on
a
more substantial
heatsink
in order
to
prevent
this
device
from
overheating.
Components list for
the
Ni-Cad
battery
charger
Resistors
(both
y
2
W,
5%)
R1 33
on
R2
12 or 13n (see
text)
Capacitor
C1
1000
M
F,
16V
Semiconductors
TR1 BFY51
TR2 TIP41A
D1
1N4001
D2
1
N4001
Fuse
FS1
100mA, 20mm fuse
Transformer
Tl Standard
mains prim
secondary (see text)
Miscellaneous
Case
0.1 Sin pitch
stripboard
panel
Heatsink
for
TR2
Chassis
mounting
20mm
fuseholder
Output
sockets and connecting leads
Mains
lead, plug, wire, solder, etc.
53
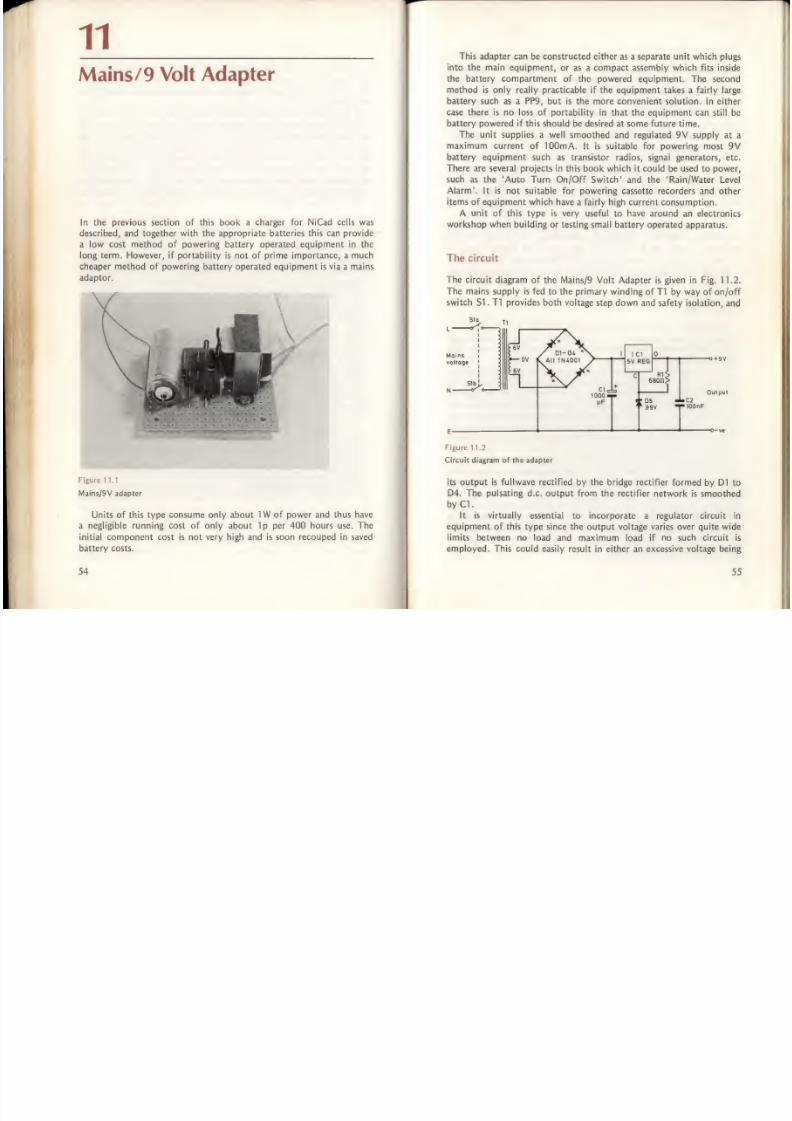
8/11/2019 Electronic Projects In The Workshop
http://slidepdf.com/reader/full/electronic-projects-in-the-workshop 33/47
11
Mains/9
Volt Adapter
In
the
previous section of
this
book
a
charger
for NiCad cells
was
described,
and
together with
the
appropriate
batteries this
can
provide
a low
cost
method of
powering battery
operated
equipment
in
the
long
term.
However,
if
portability
is not of prime
importance,
a
much
cheaper
method of
powering battery
operated equipment is
via
a mains
adaptor.
Figure
11,1
Matns/9V adapter
Units of
this type consume only about 1W of
power
and thus have
a
negligible
running
cost
of only about
1p
per 400 hours
use.
The
initial component
cost
is
not
very high
and
is soon recouped
in
saved
battery
costs.
54
This adapter can
be
constructed
either
as a separate unit which plugs
into the main
equipment,
or
as
a
compact
assembly which fits inside
the battery compartment
of
the
powered equipment.
The
second
method
is only really practicable
if
the equipment
takes
a fairly large
battery
such
as
a
PP9,
but
is
the more convenient
solution.
In
either
case there is
no
loss
of portability
in that
the equipment
can
still be
battery
powered
if
this should be
desired at some future
time.
The
unit
supplies a
well smoothed
and regulated
9V supply at
a
maximum current
of 100mA.
It
is
suitable
for powering
most
9V
battery
equipment
such
as transistor radios, signal generators,
etc.
There
are
several
projects in
this
book which
it could
be
used
to
power,
such as the
'Auto
Turn
On/Off
Switch' and the 'Rain
/Water Level
Alarm'.
It is not suitable for powering cassette
recorders and
other
items
of equipment which
have
a
fairly high
current consumption.
A
unit
of
this
type
is very useful
to have around
an electronics
workshop when
building
or testing
small battery
operated
apparatus.
The circuit
The
circuit diagram
of
the
Mains/9 Volt
Adapter is
given in
Fig.
11.2.
The mains supply is fed to
the primary
winding
of
Tl by
way
of
on/off
switch
SI.
T1
provides
both
voltage
step down and
safety
isolation,
and
Output
Figure
1 1.2
Circuit
diagram of the
adapter
its
output
is
fullwave
rectified
by the bridge rectifier
formed
by D1 to
D4. The
pulsating
d.c. output from the
rectifier
network is
smoothed
by
CI.
It is virtually
essential to incorporate a regulator circuit in
equipment
of
this
type
since
the output voltage varies
over
quite wide
limits
between no
load and
maximum
load
if
no
such circuit
is
employed.
This could
easily
result
in
either
an excessive
voltage being
55

8/11/2019 Electronic Projects In The Workshop
http://slidepdf.com/reader/full/electronic-projects-in-the-workshop 34/47
applied
to the
powered
circuit
under
low load
conditions,
or an
inadequate
voltage being
supplied
under
high
load
conditions,
depending
upon
the
nominal
output
voltage
chosen.
In this circuit
a
monolithic
i.e.
voltage
regulator
is used,
and
this
provides
a
high
degree
of regulation.
It
also
provides
electronic
smoothing
of
the
output which
has
an
extremely
low
ripple
content in
consequence.
The regulator
incorporates output
current
limiting
and
thermal
overload
protection
circuitry,
and
so the
unit
is
not easily
damaged
by
output
short
circuits.
A regulator
for
an output
potential
of
9V is
not readily
available
and
so a 5V type
in
a
suitably
modified circuit
configuration
is used.
I C. monolithic
voltage regulators
are
three-terminal
devices:
input,
output,
and a common
terminal.
By raising the
common
terminal
4V
above
the
negative
supply
rail
potential an
output of
9V can
be
obtained.
In
this
circuit the
common
terminal of
the
regulator
i.e.
is
connected
to a
simple
zener
shunt
stabiliser
circuit
which
uses
R1
and
D5
and
produces
a
potential
of
3.9V.
This gives
a
nominal
output
voltage
of
8.9
volts,
which is sufficiently
close
to the
required figure
of
9V.
C2 helps
to
give
the
circuit
a good
transient
response
and also
aids
its stability,
Construction
A
1
Sin
pitch
stripboard
panel which
has 16
holes
by 15
copper
strips
is used
as
the constructional
basis
of
the
project,
and all
the
components
are
mounted
on this
except
for
the
on/off
switch.
Fig.
1 1 .3
shows
the
component
layout
for
this
panel.
T1
is
mounted
on
the
panel using
a couple
of short
M3 or
6BA
bolts
with
nuts. The
centre tap
on the
secondary
of T1 is
unused in
this
particular
application
and
so
this
leadout wire
is
cut
short
and
is
other-
wise
ignored.
The
other
components
are
next
soldered
into
position
and
care
must
be
taken
to
ensure
that the
rectifiers,
zener
diode,
and i.e.
are
all
connected
with
the
correct
polarity.
Also
be
careful
not
to omit the
three breaks
in the
copper
strips
as
this
could
produce
a short
circuit
across
the unregulated
supply
lines.
If
the
unit
is
to
be
constructed
as a
separate unit
from
the
main
equipment
it
can be
housed
in any
case
of adequate
dimensions.
The
front
panel is drilled
to accept
SI,
and a
hole
for the output
lead
must
be
made here
as well.
If
a metal
or
hard
plastics
case is
used
it is
advisable
to fit
this
hole
with
a
grommet.
A
hole
for the
mains
lead
is
drilled
in the
rear
panel,
and the
same
point also
applies
to
this hole.
If
a
metal
case
is
used
it should
be
connected
to
the
mains earth
lead
for
reasons
of
safety.
The negative
supply
rail
must also
be connected
to
the
mains earth,
as
shown
in Fig.
1 1.3.
56
Some
pieces
of equipment
have a
power socket
so that
they
can be
connected
to
a
battery eliminator.
If this
is
the
case,
the output
lead
from the
adapter should
be
fitted
with
a
power
plug
of the appropriate
type.
If
a
power socket is not
fitted
to the
equipment
it should not
be
too
difficult
to add one. In either case it is essential to ensure that
the
adapter is
connected
to the main equipment with the
correct
polarity.
X
indicates break in copper
o
_kJ±
O
| o
+
i
.
N
: iTj
T
HI
-I-
o
a
'h i o 1 1
Figure
1
1.3
Component
layout on the board
If
the unit is to be
fitted
into the
battery
compartment
of the main
equipment it will
be
necessary to use one's initiative.
S1
must be
omitted and the L
and
N mains leads can
be
connected to the primary
leads
of
Tl
via a connector
block.
These are sold in 12
way
lengths
and
a
2
way
block
must
be cut
from one
of
these
using
a
sharp
knife. It is
recommended that the connector
block
is
covered with several
layers
of
insulation tape
so that
no
mains
wiring is
exposed. The unit
can
either
be
switched
on
and off
by
simply
plugging
and
unplugging
it
into
the
mains,
or a better
alternative
is to
use
a
switch
inserted
in the
mains
lead.
Suitable
switches
are available from
electrical
shops.
It
will
probably
be necessary
to
make
a
rough
casing for
the
unit
from
hardboard,
thin plywood,
or
sheet plastic
material
in
order
to
ensure
that none of
the wiring
comes
into contact
with
the
wiring
of
the
main
equipment,
and
to
make
the unit
a reasonably
good
fit into
the
battery
compartment. The output lead
can
be
a battery connector
of
the
same
type as
fitted
to the
main equipment,
but remember that
the positive
battery
connector
lead
connects
to
the negative output
of
the adapter, and
vice
versa.
This is because
the two positive
battery
connectors
are
of the
same
physical
type,
as are
the two negative
ones.
57
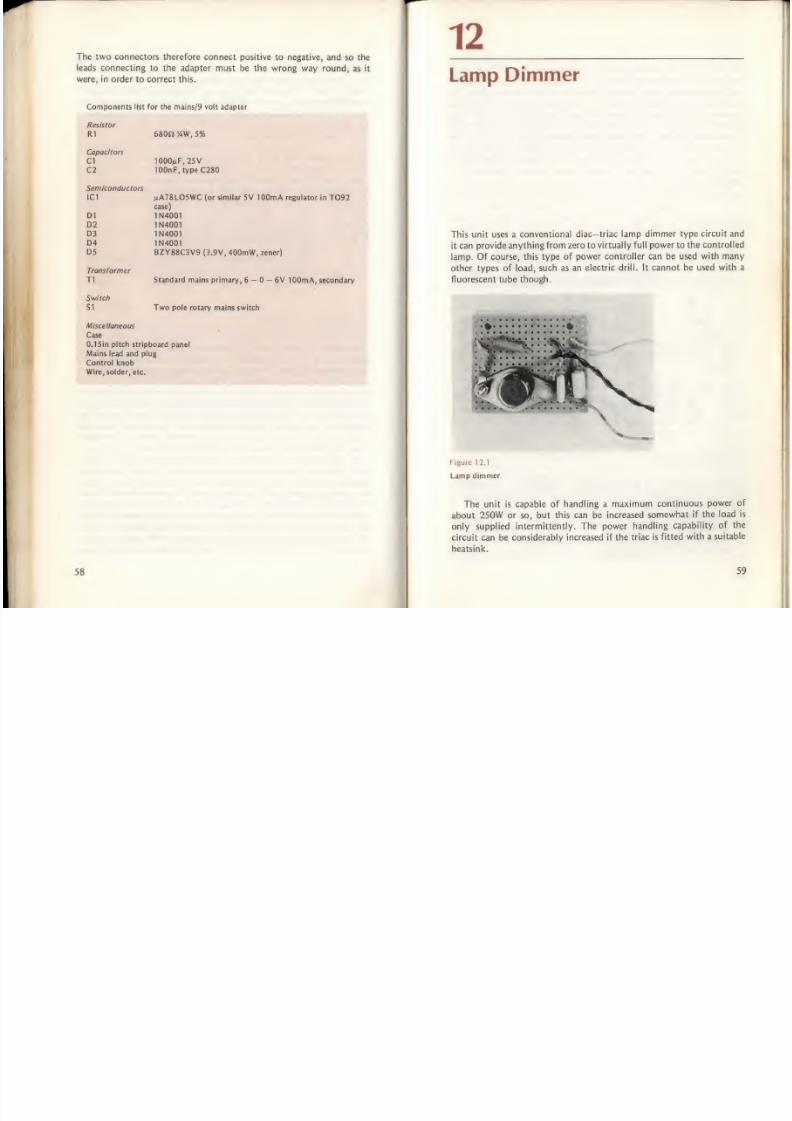
8/11/2019 Electronic Projects In The Workshop
http://slidepdf.com/reader/full/electronic-projects-in-the-workshop 35/47
The two
connectors
therefore connect
positive to
negative,
and
so the
leads
connecting to the adapter
must
be
the
wrong
way round,
as it
were, in
order
to correct
this.
Components list
for the mains/9
volt
adapter
Resistor
R1 68
on
%W,
5%
Capacitors
CI
10QQ»F,25V
C2 lOOnF, typeC280
Semiconductors
1C1
MA78L05WC
(or similar
5V
100mA
regulator
in T
case)
Dl 1N4001
D2 1N4001
D3
1N4001
D4
1N4001
D5
Transformer
BZY88C3V9
(3.9V,
400mW,
zener)
T1
Switch
S1
Standard
mains primary,
6
-
-
6V
100mA, secondary
Two pole rotary mains switch
Miscellaneous
Case
0.1 Sin
pitch
stripboard
panel
Mains lead and plug
Control
knob
Wire,
solder, etc.
58
12
Lamp
Dimmer
This
unit
uses a
conventional diac-triac lamp dimmer
type circuit and
it can
provide anything
from
zero
to
virtually
full power
to the
controlled
lamp. Of
course,
this type
of
power
controller can be
used with
many
other
types
of load, such as an
electric
drill.
It
cannot be used with a
fluorescent
tube
though.
Figure 12.1
Lamp
dimmer
The unit is capable
of
handling a maximum
continuous
power
of
about
250W
or
so,
but
this
can
be
increased
somewhat
if
the
load is
only
supplied intermittently.
The power
handling
capability
of
the
circuit
can
be
considerably
increased if the
triac is
fitted
with
a
suitable
heatsink.
59
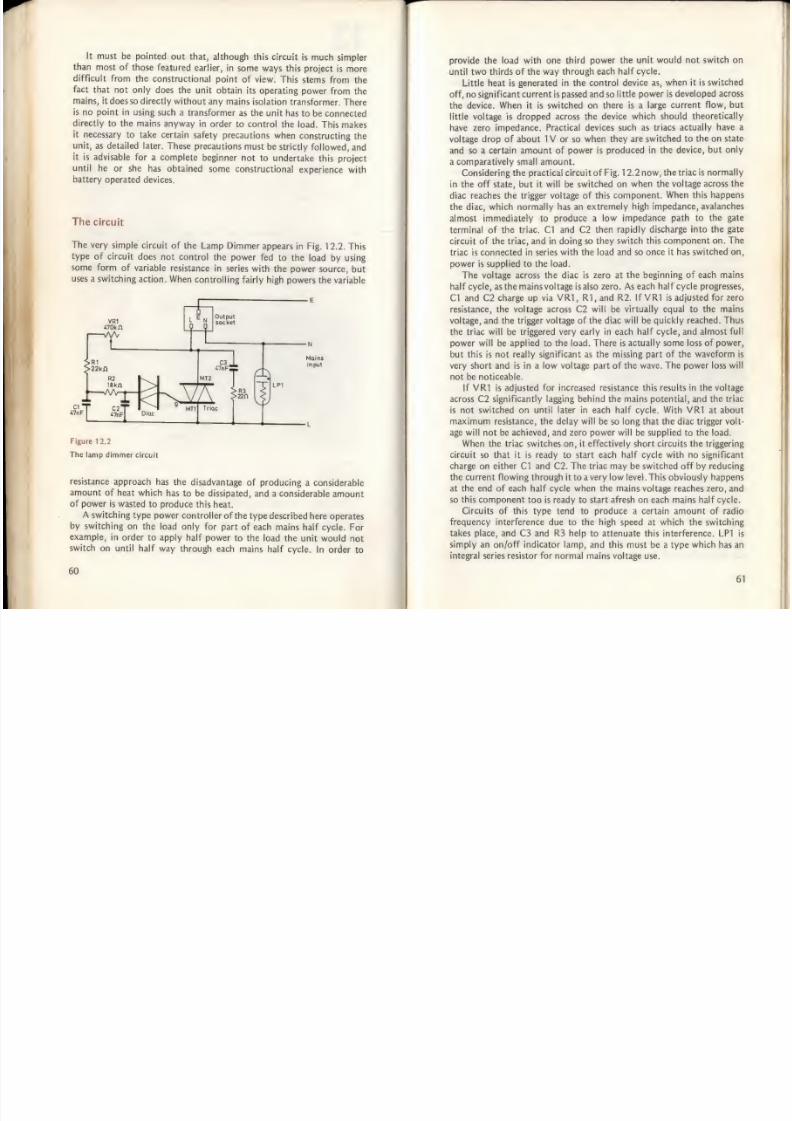
8/11/2019 Electronic Projects In The Workshop
http://slidepdf.com/reader/full/electronic-projects-in-the-workshop 36/47
It
must
be
pointed
out that,
although this circuit
is
much
simpler
than
most
of
those
featured
earlier, in
some
ways
this
project
is
more
difficult
from the
constructional
point of
view.
This stems
from
the
fact
that
not
only does the
unit obtain
its
operating
power
from
the
mains,
it
does so directly
without
any
mains
isolation
transformer.
There
is no point
in using
such a
transformer
as
the
unit has
to be connected
directly
to the
mains
anyway in order
to control
the load.
This makes
it
necessary
to
take certain
safety
precautions
when
constructing
the
unit,
as detailed
later.
These
precautions
must
be
strictly
followed,
and
it
is
advisable
for
a
complete beginner
not to undertake
this
project
until he
or she has obtained
some
constructional
experience
with
battery
operated
devices.
The
circuit
The
very
simple
circuit
of the
Lamp
Dimmer
appears in Fig.
12.2. This
type
of circuit does
not
control
the power
fed
to the
load
by using
some
form
of variable
resistance
in
series
with
the
power
source, but
uses
a
switching
action.
When
controlling
fairly
high
powers
the
variable
*™[__«wT
Figure
1
2.2
The lamp
dimmer
circuit
resistance
approach
has
the
disadvantage
of producing
a
considerable
amount
of
heat
which
has
to
be
dissipated,
and
a
considerable
amount
of power is
wasted
to
produce this
heat.
A
switching
type
power
controller
of
the
type
described
here
operates
by
switching
on
the
load only
for
part of
each
mains half cycle.
For
example,
in order
to apply half
power
to the
load the
unit
would
not
switch
on
until
half
way
through each
mains
half
cycle.
In
order
to
60
provide
the load with one
third
power
the unit
would not
switch on
until two
thirds
of
the way through
each
half
cycle.
Little heat is generated
in the control
device
as,
when it is
switched
off, no
significant
current is passed and so
little
power
is
developed across
the device. When it is switched on there is a
large
current
flow, but
little
voltage
is
dropped across
the device
which should
theoretically
have
zero impedance.
Practical devices
such
as
triacs actually
have
a
voltage
drop
of
about 1 V or
so
when
they
are
switched to
the
on state
and so a
certain amount of
power
is
produced in the
device,
but
only
a
comparatively
small
amount.
Considering the practical
circuit of
Fig.
1
2.2 now,
the triac is
normally
in the off
state,
but
it will be switched on
when the voltage
across
the
diac
reaches the
trigger
voltage
of
this
component.
When
this
happens
the
diac, which normally
has
an
extremely high
impedance,
avalanches
almost immediately to
produce
a
low
impedance
path to
the gate
terminal of
the triac. C1
and
C2
then rapidly
discharge into the
gate
circuit
of
the triac,
and in
doing so
they
switch this component
on.
The
triac
is
connected
in series
with the load
and so
once
it has
switched on,
power
is supplied
to
the load.
The voltage across
the
diac
is
zero
at
the
beginning
of each mains
half cycle, as the mains voltage is also
zero.
As
each half cycle
progresses,
CI and
C2
charge
up
via
VR1,
Rl,
and R2.
If
VR1 is adjusted
for zero
resistance, the voltage
across
C2
will
be virtually equal
to the mains
voltage,
and
the
trigger
voltage
of
the
diac
will
be
quickly
reached. Thus
the triac
will
be triggered very early
in each
half cycle,
and
almost full
power
will
be
applied
to the
load.
There
is actually some loss of power,
but
this
is
not
really significant as
the
missing part of
the waveform
is
very short and is
in a
low voltage
part
of
the
wave.
The power loss will
not be
noticeable.
If
VR1
is
adjusted
for increased
resistance
this
results
in
the
voltage
across
C2
significantly
lagging
behind
the
mains potential,
and
the triac
is not
switched on until
later in each half cycle.
With
VR1
at about
maximum resistance,
the
delay
will
be
so
long
that
the diac trigger
volt-
age will not
be
achieved, and zero power will
be
supplied to the
load.
When
the
triac switches on, it
effectively
short
circuits
the
triggering
circuit
so that it is ready to start each half
cycle
with no
significant
charge
on either
CI
and
C2.
The
triac
may
be switched
off
by
reducing
the current flowing through
it
to
a
very
low
level. This obviously happens
at
the end of
each
half cycle
when
the mains voltage reaches zero,
and
so this component
too is
ready
to
start
afresh on
each mains
half cycle.
Circuits of this
type
tend to produce
a
certain amount
of radio
frequency
interference
due
to the high
speed
at which the switching
takes
place,
and C3 and
R3 help
to attenuate this interference.
LP1 is
simply an
on/off
indicator
lamp,
and this
must be
a type which
has an
integral series resistor for
normal mains voltage use.
61

8/11/2019 Electronic Projects In The Workshop
http://slidepdf.com/reader/full/electronic-projects-in-the-workshop 37/47
Construction
A
suitable
0.1
in matrix
stripboard layout
for the unit
is
given in Fig.
1 2.3.
Make
quite sure
that
there are no accidental
short
circuits between
any
copper strips as this could easily
result
in
some of the
components
being
damaged.
The triac
may be any
type which has
a voltage
rating
of
400V or
more and has
a
T066
type encapsulation.
The type used
in
the
prototype was
an RCA T2700D
device, but
triacs
are
often
sold by
voltage/current/encapsulation
rather
than by a
specific
type
number.
LPl
Figure
12.3
The
0.1
in
matrix stripboard layout for the lamp dimmer
Some
triacs have
a
built in
diac, and a
component of
this type
can
be
used
if the
discrete diac
is
replaced
by a link wire.
Note that
the
diac
is
bidirectional
and
may
be
connected
into circuit either way round.
C3
must
be capable of handling
mains
voltage,
and capacitor
operating
voltages
are
often
specified in d.c.
rather than
a.c, so any type capable
of
operating
on 500
volts d.c. or
more should be
suitable.
The connection
to
the MT2
terminal of
the
triac, which
is its
metal
casing,
is made via
a
solder
tag which
is mounted on one of the
6BA
or
M3
mounting
bolts,
as
shown
in
the diagram (Fig.
12.3). The other
62
mounting
bolt
(the one nearer
to
R2,
C2,
etc.)
must
be a nylon
type
as
it
could
otherwise
short circuit the
copper strips which connect to
the
gate
and
MT1 terminals of
the
triac. Alternatively, this mounting
bolt
can simply
be
omitted
as
the
other bolt and the
soldered connections
to
the gate
and MT1 terminals will
hold this component
quite firmly
in
position.
A double
size
surface
mounting plastic switch
box makes a good
housing for
the
project.
This
has
a
mains
outlet
socket
mounted on one
side
(this
is
the
output
socket)
and
a
blanking
plate mounted
on
the
other
side.
The
blanking plate is drilled to take VR1,
and the
latter
should
be a
type
having
a
plastic spindle. It should be fitted with
a
plastic
control
knob
having a
built
in nut
cover. LPl can be
mounted
on
the
left
hand
side
panel
of
the
case.
The component
panel
is
mounted
on the base of
the case
beneath
the blanking plate preferably using
nylon bolts.
If
metal
bolts are used they
must
be earthed, as must
any
Components
list
for
the lamp dimmer
Resistors (ail miniature
V*
watt
5%)
R1
22k«
R2 18k«
R3
22ft
VR1 470kft
tin. (plastic
spindle)
Capacitors
C1
C2
C3
47nF,
typeC280
47nF,typeC280
4.7nF,
high
voltage (see
text)
Sem/conductors
Triac
Diac
Any type
rated
at 400V or more in
a
T066
encapsulation
BR100
or
similar,
if
needed
(see
text)
indicator
LP1
Panel mounting neon indicator
with integral
series
resistor
for
normal mains
use
Miscellaneous
Mains outlet
socket
and
other parts for
case
(see text)
0.1
in matrix
stripboard
panel
Plastic control
knob
Nylon mounting
nuts and
bolts
Mains
lead,
plug, connecting
wire,
etc.
exposed metal,
apart from
the
mounting bolts
for the
mains
socket
and
blanking plate.
It is
not essential to use
the specified
case, of
course,
but it is
inexpensive
and well suited
to
this application,
and
the parts
should
be
63

8/11/2019 Electronic Projects In The Workshop
http://slidepdf.com/reader/full/electronic-projects-in-the-workshop 38/47
readily available from a
local
electrical
shop.
If
a
metal
case
is
used,
make quite
sure
this is
earthed
and that adequate insulation is used
where
necessary
{such as
between
the
case
and component
panel).
The
mains
earth
lead must
be connected
to the
earth
terminal
of the
output socket
so
that any
appliance
having
an earth connection
is
in
fact
earthed when
it is
plugged
into
the
dimmer.
A
3A
fuse
should
be
fitted
in
the
mains plug.
Check all
the
wiring
very
thoroughly a
couple
of
times before
testing
the unit.
Do
not
work on
any of
the
wiring
or
even
just touch
it while
the unit
is plugged into the mains.
Doing
so
could easily result
in
a
severe
electric
shock being obtained.
64
13
Multimeter
Sensitivity
Booster
Although
a
multimeter is
undoubtedly
the most useful piece
of
electronic test
equipment
for normal
amateur
requirements, such
instruments
are
not
without
their
drawbacks. Unless
one has an
electronic
multimeter,
the
main
drawback
is the
current drawn by the
multimeter
from
the
equipment
under
test
when
making dx. voltage
tests. Most
multimeters
incorporate
a
SOjuA
meter movement, and so a
current of 50/uA
must
be
taken from
the
test
circuit
when
making a
voltage measurement which will
produce
full scale deflection
(f.s.d.)
of
the meter. Lower
readings
draw a
correspondingly lower current.
The problem is
that
in
parts
of
many
electronic
circuits
there
are
voltages of
a
reasonable
magnitude,
but only
extremely small current
flows. In
other words
there
are high resistances
and
impedances present
which severely limit
the
available
current. Testing
such a
high
impedance
circuit with an
ordinary multimeter
will often
produce
very
misleading results.
What
happens
here is
that,
when
the
multimeter
is
connected to the
circuit, it
affects the circuit conditions
as the
resistance across
the
test
prods is low in
comparison to the resistances in
the
test circuit. The
multimeter thus shunts
and
significantly reduces in value
any
resistance
path in the test
circuit which it is
connected
across.
This causes
a
reduction
in
the
test
voltage, and the
meter
registers
this
artificially
low
reading.
The
reading is correct
in
the
sense
that the voltage
indicated is
indeed the
voltage
present
while
the
meter is
connected
to
the circuit,
but it
is
misleading
as a
completely different voltage is
present
when the
meter is
disconnected.
Electronic
voltmeters and multimeters
overcome
this
problem by
using
an amplifier ahead of
the
meter in
order
to
reduce
the
current
drawn
by the
unit.
Units
of this
type
typically
require an
input
current
of
less
than
1juA
in order
to
produce f.s.d.
of the
meter. Virtually
any
electronic
circuit
one is
likely to
encounter
will
be capable of
supplying
65

8/11/2019 Electronic Projects In The Workshop
http://slidepdf.com/reader/full/electronic-projects-in-the-workshop 39/47
such a
low
current,
and so reliable
readings are
almost invariably
obtained
using such an instrument.
The
unit
described
here (Fig.
13.1) is a
very
simple
device
which
can
be
added
ahead
of an ordinary
multimeter switched
to
the
SOjuA
range
• a
• • • a
.
'.
•
>T^
U •
.
**7
Figure
13.1
High
impedance
multimeter adapter
to
convert
it
to
an
electronic
voltmeter.
The
unit has three
voltage
ranges which
are
1,
10 and
100V f.s.d., or
if preferred,
the unit can
be
adjusted
to produce ranges
of
0.5, 5
and
50V
instead. Of
course,
the
circuit
can be used
in
conjunction
with a 50uA
panel
meter
if
a
completely
self-contained
electronic voltmeter
is required.
The circuit
The complete
circuit
diagram of the
Multimeter Sensitivity Booster
is
given in Fig.
13.2. This
is
based
on a
single
transistor
of
the
junction
gate
field
effect (jugfet)
type.
Unlike
an ordinary
bipolar
transistor,
a
jugfet will conduct
quite
heavily
unless
it is
reverse-biased.
The normal method of achieving
this
ts
to connect a
resistor
in the
source circuit of the device
and
connect
the gate
to earth via
a second resistor.
The
current
which flows
in the
source circuit
causes
a
voltage to be
produced across
the
source
resistor,
thus
taking
the
source
positive
of the gate terminal which
is at
a
very
high
impedance
and
effectively
shorted
to earth via
its
bias
resistor.
In
this way
the
device
is reverse-biased
and brought onto a
part of its
transfer
characteristic
which is suitable
for
linear
amplification.
66
This
is
basically the
arrangement
used
here,
with
R5
acting as
the
source bias resistor
and R1 and R3
providing
the
gate
biasing.
However,
the
gate biasing connects to the slider of
VR1 rather
than
to the
negative supply
rail,
and
the reason
for this will be explained shortly.
R6
and R7
form
a
potential divider
across
the
supply
lines,
and
about
half
the supply
rail
potential
is produced
at
the
junction of these
two
components.
The meter
is connected
between
this point
and the
source
terminal
of TR1
by
way
of R4,
the
latter foming
a
simple voltmeter
circuit
in conjunction
with
the
meter. R4 is adjusted
to
give
this
volt-
meter
circuit a
sensitivity
of IV f.s.d.
S2
+
R
1
Input
S
f
10V
7
TR1
JV
BF2U8
10V*
R2
ft
100V
o
SI
R3
„ii0kn
?R6
<l-2ka
R4
22kn
I
^VV—
Output
VR1
C.
|
RS
3-9kfl
:R7
>2k/l
Figure
13.2
The
circuit diagram
of the multimeter
sensitivity booster
With
the slider of
VR1
at
the
bottom of
its
track only about IV
is
produced at TR1
source, whereas
there is about 4.5V at
the
junction
of
R6
and R7.
This
is
obviously
unsatisfactory
as it results in a
reverse
potential
of
about
3.5V
being
produced across
the
voltmeter
circuit
The
problem
can be overcome by taking
the slider of VR1 up
its
track
until it
is at
a
potential
of about 3.5V. TR1
is
connected
in
the
source
follower mode
and therefore has a
voltage gain of
almost
exactly
unity.
The
voltage at
TR1 source is thus
equal
to the gate
voltage
plus
the
source bias voltage,
or about
4.5V in this
case.
In
this way VR1 can
be
used
to
balance
the voltages at either
end of
the
voltmeter
circuit,
and
so produce
zero
deflection
of the
meter under
quiescent
conditions.
With
S1
in the
1 V position
the input
voltage
is connected direct into
the gate
of
TR1,
and
the gate
potential will
be increased
by an
amount
equal
to the
input voltage.
As TR1 has
a
voltage gain
of
unity,
the
voltage
at TR1 source rises
by an
almost
identical
amount
and
causes
a
positive deflection
of
the
meter. Obviously
an
input level of
1V will
produce TV across the
meter circuit
and
will give f.s.d.
of the
meter.
67

8/11/2019 Electronic Projects In The Workshop
http://slidepdf.com/reader/full/electronic-projects-in-the-workshop 40/47
TR1
has an
input
impedance of
about
1000MS2
and draws
no
significant
input
current. The input
impedance of
the circuit
is thus
almost
entirely governed
by
resistors
R1
and
R3. These
set
the input
impedance at
a
little
over
1
1
NU2.
Apart from providing
gate
biasing
for
TR1,
these resistors
also
form
a simple
attenuator
network
and
reduce
the
f.s.d.
sensitivity
of
the circuit
by
the
appropriate
amounts
when
S1
is in
the 10V and
100V
positions.
The
sensitivity
of
the circuit
when
expressed
in terms of ohms
per
volt varies from
a
little
over
1
MQ
per
volt
on
the
1V
range,
to
slightly
in
excess
of
110kf2 per
volt
on
the
100V
range.
This
is considerably
better
than
the
20k£2
per volt
of
an
ordinary
multimeter.
S2 is a
straight
forward
on/off switch.
The current
consumption
of
the
unit
is
approximately
4mA,
and
this
is
economically
obtained
from
a PP3
size
9V
battery.
There
is no need
to
stabilise
the supply
as
the
gain
of TR1
is
largely
unaffected
by
variations
in supply voltage.
Construction
Some
of
the
components
are
assembled
on
a
0.1 in
pitch
stripboard
panel
which has
12 copper
strips by 16 holes,
but R1
and R3 are
mounted
on S1
.
Details
of
the
component
panel and wiring
of the
unit
are
shown
in
Fig.
13.3.
Input
Figure
13.3
Constructional
details
of
the multimeter sensitivity
booster
68
Commence
construction
by
carefully
cutting out a
stripboard
panel
of
the correct
size
using
a
hacksaw. Then
file
up
any
rough edges to a
smooth finish,
make
the
six
breaks in
the
copper strips, and
drill the
two 3.2mm
diameter mounting
holes.
Next
the various
components are
soldered
into
position.
The three controls are mounted on the front panel
of
the
case, as are
the
input
and
output
sockets which can
conveniently be
wander
types.
The remaining
wiring can
then
be
completed
before
the
component
panel
is
mounted
inside the case.
The panel can
be
mounted
using
either M3
or
6BA mounting nuts
and
screws, and the
panel
must
be
spaced well
clear
of the
case if the
latter is
of
metal construction.
Adjustment and use
At
the
outset
both
VR1 and
R4 should be
adjusted fully anticlockwise.
Before
connecting
the
multimeter
to the
unit, set
it
to
a low
volts range
(say 5 or
10V f.s.d.)
and
measure
the
voltage
at the junction
of
R6 and
R7.
Then
connect
the multimeter
to
monitor
the
voltage
at TR1
source, and adjust VR1
to increase
this voltage to
fractionally above
the
voltage at
the
junction
of
R6
and
R7.
The
multimeter
is
then switched
to
the
5QuA range
and
connected
to
the
output of
the
sensitivity
booster.
The
two
connections can
be
made
using
a
couple of
short leads,
each having a
crocodile
clip at one
end and a
wander
plug at
the
other end.
The
wander plugs
fit into the
output
sockets
of
the
booster
and the
crocodile
clips
connect to
the
test prods of
the
multimeter.
Ensure
that
the
meter is
connected
with
the
correct
polarity.
There should be a small
positive
deflection
of the
meter, but
it should
be possible to
zero the meter
using
VR1 .
From
time to
time
it
will
probably be necessary
to
readjust VR1 ,
but
frequent
adjustment
should
not
be
necessary.
The unit
is calibrated by
connecting
a
known voltage
to
the
input
with
SI
switched to a suitable
range. R4 is
then
adjusted to
produce
the
appropriate reading on
the
meter.
The calibration voltage
should be
one which
will produce
something
approaching f.s.d. of
the meter
on
whatever range
the
unit
is
calibrated on. A
suitable
calibration
voltage
could
be a 9V battery,
the multimeter
being used to
measure
the exact
battery
voltage
prior
to the unit
being calibrated. The
unit
could then
be calibrated
on the
10V range.
R4 can be adjusted
to
provide ranges of
0.5,
5
and 50V
if
desired,
and this
is
obviously
preferable if
the unit
is
used
in
conjunction
with a
panel meter
as
a self
contained
voltmeter,
since
the
meter
will
not
have
a
scale
which is
ideally
suited
to
1,
TO
and
100V
ranges.
The
same
might apply to some multimeters as
well.
69

8/11/2019 Electronic Projects In The Workshop
http://slidepdf.com/reader/full/electronic-projects-in-the-workshop 41/47
70
Components
list for
the
multimeter
sensitivity
booster
Resistors
(ail
14
or
'/aW, 5% tolerance
unless
otherwise
noted)
R1
10Mn,
5%or
better
R2
IMfl,
5%
or better
R3
1 1
Oka
5%
or
better
R4
22ka
sub-miniature
(0.1W) horizontal
preset
R5
3.9kn
R6
I.2k«
R7
1.2kU
VR1
lOkniin.
carbon
Semiconductor
TR1
Switches
SI
S2
BF244B
3-way
4-pole rotary
type (only one
pole
used)
S.P.S.T.
toggle or
miniature
toggle
type
Miscellaneous
Metal
instrument
case
PP3
battery
and
connector
to
suit
0.1 in pitch
stripboard
panel
Input
sockets,
test
prods and leads
Output
sockets
Two
control
knobs
Wire,
solder,
etc.
14
Capacitance
Bridge
A
standard
multimeter can be
used
to accurately measure
resistor
values,
and
can provide
quick
checks
on
other
components
such
as
diodes,
transistors,
and high value capacitors. The one major type of component
which most multimeters
are
not equipped to test is low
and
medium
value capacitors,
say
from a few picofarads to
a few microfarads.
Apart
from checking for short circuits,
an
ordinary multimeter cannot check
this type of component at all.
Figure
14.1
Capacitance bridge
This
can be quite a
serious
drawback
as
capacitors
form a substantial
part of
most
constructional projects and
sooner
or
later the constructor
is
likely
to
be
faced with checking
a
doubtful
capacitor, or measuring
the value of one which has lost
its
value
markings. A
unit
for measuring
71

8/11/2019 Electronic Projects In The Workshop
http://slidepdf.com/reader/full/electronic-projects-in-the-workshop 42/47
capacitance
can
also
be invaluable
when
sorting
through
the
popular
bargain packs of
assorted
capacitors.
Some piece
of capacitance
measuring
test
gear
is therefore
a
valuable
addition
to
an
electronics
workshop, and
probably
the
most simple
way
of obtaining
accurate capacitance
measurements
is
to
use
a
capacitance
bridge.
A
simple
unit
of this
type
is
shown
in
Fig.
14.1.
It
has
three
ranges
which
provide
coverage
from
10pf
to
10/iF,
The
circuit
The
complete
circuit
diagram
of
the
capacitance
bridge is
shown
in
Fig.
14.2.
A
bridge
circuit
is simply
two
potential
divider
circuits
fed
from
a common signal
source,
and the output
is
taken from
across
the
outputs
of the
potential
dividers.
This
general
arrangement
is
much
used in
electronics,
and
bridge
circuits
were
employed
in the
multi-
meter
sensitivity
booster,
flat
battery
warning light
and
thermometer
projects
which have
already been
featured.
+
9V
Figure
14.2
The
circuit
diagram
of the
capacitance
bridge
In
this
circuit
VR1
forms one
side
of
the bridge and the
other side
is
comprised
of
C2, C3
or
C4 (according
to the position
of
S1)
and
the
capacitor
under
test.
The
input
of the
bridge is
fed
with
an
audio
tone
which is
generated
by the
555 timer i.e.
(IC1 ) which
is connected
in the astable
mode.
The
signal
at the
output of the bridge can
be
monitored
using
a
crystal
earpiece.
With
S1 in
the
position
shown,
and
a lOOpF test capacitor
connected
to the
circuit, at most
settings
of VR1
the audio tone
will
be
produced
from
the earphone.
However,
with
the
slider of VR1
at about
the
centre of
its track it will
be possible
to
locate
a
setting
where
the
tone
is nulled.
72
The
reason for
this
is
quite
simple: C2
and
the
test
capacitor form a
simple
potential
divider,
and
as
they
are of equal
value, half the input
signal
voltage
is produced
at the output
of this
circuit.
When
the
slider
of
VR1 is at the centre
of
its track
it
too
produces
an output
equal
to
half
the input
signal
voltage.
Therefore,
the voltage
developed across
the
earphone
must be zero since the
two voltages to
which it
is
connected rise and fall
in unison. If
the setting
of
VR1 is altered
the
bridge
circuit will
be unbalanced
and
there
will be a higher
voltage at
one
side of
the bridge
than appears at
the other.
This
will cause a
voltage to be developed across
the earphone and the
tone
will
be
audible.
If
the
test
capacitor has
a
higher
value,
say
InF,
then
it will
have a
much
lower
impedance than
C2
and
the
output
from the right hand
side of
the
bridge
will be greatly reduced
in
consequence. The bridge
can
still
be balanced
of course,
simply by
taking the
slider of
VR1
down
the track to
the
point
where the two outputs match once again
and
the
output
tone is nulled.
A test
capacitor
of
much
lower value than
C2, say
1
0p
F,
will
have a
much higher
impedance
than
C2, and
will
cause
a
much
increased
out-
put
from the
right
hand
section
of the bridge. Again it is possible to
balance
the
bridge, this
time
by
taking the
slider up towards
the
top
of
its
track.
By marking the
control
knob of VR1
with
a
scale
showing the
positions at
which various
capacitance
values
balance
the bridge, it
is
possible to
use the
unit
to determine
the
value
of an unmarked
capacitor.
It is merely necessary
to connect the test capacitor, adjust VR1
for
zero
output
from the
earpiece,
and
then
read the
value off the scale.
In
theory
the unit
can
be used to
measure
any
capacitor,
but in practice
the
values
given
in
the
example
above represent the
limits,
as
the
scale
would
be
excessively
cramped
outside
these
limits.
However, the
range
of
the
unit can
be extended by providing additional reference
capacitors,
and
this is the
purpose of
C3
and
C4.
The
unit has three measuring
ranges
which
are as
follows:
Ranjic
1
Range 2
Range 3
IQpF
to
InF
1nFto 1Q0nF
100nF
to IOjuF
C5 provides
supply decoupling
and
S2 is the
on
/off
switch. The
current consumption of the
circuit
is
approximately 8mA.
Construction
Some
of the components are
mounted
on
a
0.1
in
pitch stripboard
which has
14 copper
strips
by 17
holes,
but
C2
to
C4
are mounted on
SI,
as
shown
in
the
wiring
diagram of
Fig.
14.3.
73

8/11/2019 Electronic Projects In The Workshop
http://slidepdf.com/reader/full/electronic-projects-in-the-workshop 43/47
From
the
mechanical
point
of view
construction
should
be perfectly
straightforward,
but it is
recommended
that
a
fairly
large
case
constructed
of
a non-metallic
material
should
be
used,
The
large
size
is
necessary
to
permit
a
large
scale
to
be
marked
around
the
control
knob
of
VR1
SK2
•
SKI
o
a o
o
e>
•
» a
q##<s«00
G o #
*
o a
9
&#Q€
Q
£;&< >$
»
»
t
5 • o i
o
«
»o«oe>oo*
C&QaOD»c3
* o
t>
o a. a
o
oooaoosooo
do
c.o
o
p
9 «
e
o
a
<T
C
OtJO.
G0O43
e.i>
aoo&^^oiioeo
<,
<5 a
6
o
o <S
a ^
<*
Figure
14.3
The
0.1 in
matrix
stripboard
layout
and wiring
of the
capacitance
bridge
Useful
results
can
be
obtained
using
a small
scale,
but
this
will
place
distinct
limitations
on the accuracy
and
resolution
of
the unit
which
is
obviously
far
from
ideal.
A
metal
case should
be avoided
unless
SKI
is
either
a
socket
of
insulated
construction,
or
steps
are
taken
to
insulate
it
from
the
case.
No
other
wiring
should
be
allowed
to come
into
contact
with
the case.
To do
so
could
encourage
stray
capacitances
and
signal
paths
which
could
prevent
a
definite
null
from
being
obtained,
particularly
when
measuring
low value
capacitors.
Calibration
In
order
to
calibrate
the unit
i t i s
necessary
to
have
a
number
of
capacitors
of
known
value,
and for
optimum
calibration
accuracy
these
should
all
be
close
tolerance
types.
Provided C2
to
C4
are all
close
tolerance
74
capacitors
it is
not
necessary to mark an
individual
scale for
each
range.
A
single scale
marked
'1
' at
the
low
value end
(VR1 set
anticlockwise)
to
'100'
at
the
high
value end with
'10'
at
the centre
will be quite
suit-
able.
This is obviously correct
in terms
of nF on Range
2,
and is
easily
converted
into an
actual capacitance
value
on
the
other two
ranges.
The
scale
is
calibrated by connecting a
capacitor
to
the
unit,
setting
SI
to the
appropriate
range,
adjusting
VR1 for
minimum signal from
the earphone,
and
then
marking the
scale with
the
correct
number
at
the
point indicated
by
the pointer
of the
control
knob for
VR1.
For
instance,
a
10nF component
would
provide
the 10'
calibration
point
with
S1
set to
Range
2. 10pF
and InF
components
would
provide
the
'1*
and
'100'
calibration points
respectively
with
S1 in
the Range 1
position. Of
course,
it is
not
just
a matter of
marking
in the centre
and
limits
of
the
scale,
and
it must
be
calibrated
at all
the preferred
values
in the
El
2
series
(1.2,
1.5,
1.8, 2.2,
2.7, 3.3,
3.9,
etc.).
This
is
quite
a
long
process, but it is
worth
doing
well
as a unit of
this
type
can
provide
a high
degree
of accuracy despite the
simplicity of the circuit.
When measuringelectrolytic capacitors
ensure
that
they
are
connected
with the correct
polarity
(other
types
are
nonpolarised and can
be
connected either way
round).
Do
not
use
electrolytic
types
for calibrating
the unit
as these often
have
tolerances
as
high
as
+100%
and
—50%
Components
list for the
capacitance bridge
Resistors
R1
R2
VR1
Capacitors
C1
C2
C3
C4
C5
Switches
SI
S2
integrated
circuit
IC1
1.2kil miniature, %W,
5
or
10%
39kn
miniature,
I4W, 5
or
1
0%
lOkil lin.
wirewound
47nF
type
C280
lOQpF
close
tolerance
10nF
close
tolerance
luF
close
tolerance
100mF,
10V
3-way
4-pole rotary type (only one pole
used)
S.P.S.T.
toggle
switch
NE555V (or
equivalent)
Miscellaneous
0.1 in
matrix
stripboard
panel
Case {preferably
non-metallic,
see text)
3.5mm jack
socket (SKI
Two wander sockets,
one
red and
one black
(SK2
and SK3)
Crystal earpiece, control
knob
PP3
battery
and
connector
to suit
Wire,
solder,
etc.
75

8/11/2019 Electronic Projects In The Workshop
http://slidepdf.com/reader/full/electronic-projects-in-the-workshop 44/47

8/11/2019 Electronic Projects In The Workshop
http://slidepdf.com/reader/full/electronic-projects-in-the-workshop 45/47
the
base
of
TR1
is
connected
to
the
output,
and
will
be
switched
on
when
the
output
reaches
a
certain
potential.
About
0.65V is
needed
across
the
base and
emitter
terminals
of
TR1
to
switch
this
device
on,
but
about
0.65V
is
developed
across
each
of
the
three
forward
biased
silicon
diodes
in
the
emitter
circuit
of TR1.
Therefore
about
2.6V
is
needed
at
TR1
base
before
this
component
will
be
biased
into
conduction.
When
the
output
voltage
reaches
this
figure
and
TR1
turns
on,
some
of
the
base
bias current
for
the output
stage
is
diverted
to
earth
through
TR1
and
D3
to
D5.
This
effectively
limits
the
output
voltage
to
about
2.6V as
any
rise
above
this
level
simply
causes
TR1
to
conduct
more
heavily
and
reduce
the
drive
voltage
to
the
output
stage.
This
brings
the
output
voltage
back
to
its
original
level.
Similarly,
if
the
output
voltage
should
fall
for
some
reason,
due
to
increased
loading
on
the
output
for
instance,
TR1
will
conduct
less
heavily
and
will
increase
the
drive
voltage
to
the
output
transistors.
This
brings
the
output
voltage
back
to
its
previous
level
once
again
Thus
the
output
potential
is
stabilised
by
a
negative
feedback
action.
If
the
slider
of
VR1
is
taken
down
its
track,
the
feedback
will
still
operate
and
stabilise
the
output
voltage,
but
a
higher
output
voltage
will
be needed
in
order
to
produce
2.6V
at
TR1
base.
The
further
down
the
track
of
VR1 the
slider
is
taken,
the
higher
the
output
voltage
will
become.
In this
way
VR1
may
be
used
to
vary
the
output
voltage.
R2
and
TR3
form
the
current
limiting
circuitry,
and
these
limit
the
current
to a
maximum
level
of
about
600mA
or so.
This
circuitry
will
not
be
described
in
more
detail
as
it
works
in
precisely
the
same
manner
as
the
NiCad
battery
charger
described
in
a
previous
section
of
this
book.
C2 provides
final
smoothing
of
the
output
and
FS1
protects
the
circuit
in
the
event
of
a short
circuit
occurring
ahead
of
the
current
limiting
circuit,
or if
the
latter
should
fail
for
some
reason.
Construction
Most
of
the
circuitry
is
wired
up
on
a 0.1
Sin
matrix
stripboard
panel
having
14
copper
strips
by
20
holes.
Details
of
this
panel
are
provided
in Fig.
15.3.
Be
careful
not
to omit
any
of
the
seven
breaks
in
the
copper
strips
or either
of
the
two link
wires.
In
fact,
great
care
should
be
taken
not
to
make
any
wiring
errors
as
this
could very
easily
result
in
damage
to
some
of
the
components.
SI,
VR1
and
the
output
sockets
are
mounted
on
the
front
panel
of
the
case.
The
output
sockets
can
be
wander
types,
or
terminal
posts,
which
are
ideal for
this
application,
may
be
used.
T1
and
the
fuse holder
for
FS1
are mounted
on
the base
panel of
the
case. The
circuit
will work
quite well
using a 12
-
— 12V
500mA
component for T1 ,
but for
optimum
results at
output
voltages
of
ten
or
more
a
component
having a current rating of 1 A is
to
be
preferred as
this will
provide
a
more
adequate loaded
voltage.
However,
for
normal
amateur
requirements
a 500mA type
will
provide
adequate
results.
+ve
out
OVviaFSt
Figure 15.3
Strip
board
layout of
the
power supply
A
hole for the
mains lead is
made in the rear panel
of the case, and
this
should be fitted
with a
grommet.
If a
metal case is
used,
the
mains
earth
lead should be
connected to the
case, and
this
connection
can be
achieved via a
soldertag on
one
of the
mounting bolts for Tl. The
mains
earth
lead
also
connects to
the
side
of FS1
which
connects
to
the
negative
rail
of
the
component panel.
The remaining
wiring is
then
completed
before
the
component
panel
is
bolted in
position on the base
panel
of the case.
Note that
TR4
must be
provided
with a
certain amount of
heatsinking.
A small
commercially produced
type
was
found to
be just
about
adequate
on
the
prototype.
Using
the unit
It
is
recommended
that
a
dial calibrated
in
output
voltage should
be
provided
around the
control
knob of
VR1,
and
with
the aid
of
a
multi-
meter
this is very
easily
accomplished.
If
this is
not
done it
will
be
78
79

8/11/2019 Electronic Projects In The Workshop
http://slidepdf.com/reader/full/electronic-projects-in-the-workshop 46/47
necessary
to set the
output
voltage
to
the required
level
with
the
aid
of
a
multimeter
each
time
the
unit
is used.
Of course,
an
integral
meter
can
be
used
to
monitor
the
output
voltage,
and
a current
meter
could
also
be
added
if desired,
but panel
meters
are
relatively
expensive,
and
the
added
convenience
of
built
in
metering
would
result
in
the
cost of
the
project being
very
considerably
increased.
)t
is a good
idea
to check
that
the
current
limiting
circuitry
is
working
by
connecting
a 10ft
resistor
and
a
multimeter
set
to
read
1
f.s.d.
in series
across
the
output
with
the
output
voltage
set
to
7.5V.
The
meter
should
register
a
current
flow
of
about
600mA
or so,
and
if
the
reading is
more
in
the
region
of
750mA,
this
indicates a
fault
and
the
relevant
part
of the
circuit
should
be
checked
for
errors.
Components
list
for the
bench
power
supply
Resistors
(all
miniature
14
W,
5%)
Rt
4.7ka
R2
in
R3
1k£2
VR1
5kn
lin.
carbon
Capacitors
CI
C2
2200mF,
25V
100
M
F, 16V
Semiconductors
TR1
TR2
TR3
TR4
D1
D2
D3
D4
D5
BC108
BC108
BC108
TIP41A
1N4001
1N4001
1N4148
1N4148
1N4148
Transformer
T1
Standard
mains
primary, 12
-0
-
12V,
at
1 A
or
500mA
secondary (see
text)
Switch
SI
Two
pole
rotary
mains
switch
Miscellaneous
Metal
instrument
case
0. 1
5
in
matrix
stripboard
panel
Heatsink
for
TR4
Two
control
knobs
Chassis
mounting
20mm
fuseholder
with
500mA
fuse
(FS1)
Output
sockets
and
leads
Mains lead,
mains
plug,
connecting
wire,
solder,
etc.
80

8/11/2019 Electronic Projects In The Workshop
http://slidepdf.com/reader/full/electronic-projects-in-the-workshop 47/47
Electronic
Projects
in
the
Workshop
will
entertain
and
instruct
both
the
electronics
enthusiast
and
the
'Do-it-Yourselfer\
A
wide
selection
of
useful
projects
is
described,
from
a
thermometer
to
an
ultrasonic
transmitter
and
receiver.
The
operation
of
each
project
is
described,
followed
by
full
constructional
details,
which include
fitting
the
finished
unit
in
a
suitable
case or
box.
A
list
of
components
is
provided
for
each
project
and
directions given
on
how
to
use
the
finished
piece
of
equipment.
Each
project
is
illustrated
with
circuit
diagrams,
layout
plans
and,
where
appropriate,
photographs
showing
component
layouts.
The
skilful
use
of
colour
in
many
of
the
diagrams
aids
easy
understanding
of the
circuits
and
layouts.
Don't
miss the
other
books in
the
series:
Projects
in
Radio
and
Electronics
Electronic
Projects
in
Audio
Electronic
Projects
in
Hobbies
Electronic
Projects
in
the
Home
Electronic
Projects
in
Music
Electronic
Projects
in
the
Car
Electronic
Game
Projects
ISBN
408
00383
9


