6
1 2 Enabling Workgroup share Windows 7 and Mede8er v2.02 Open Control Panel then select Network and Internet Select change advanced sharing settings
1
2
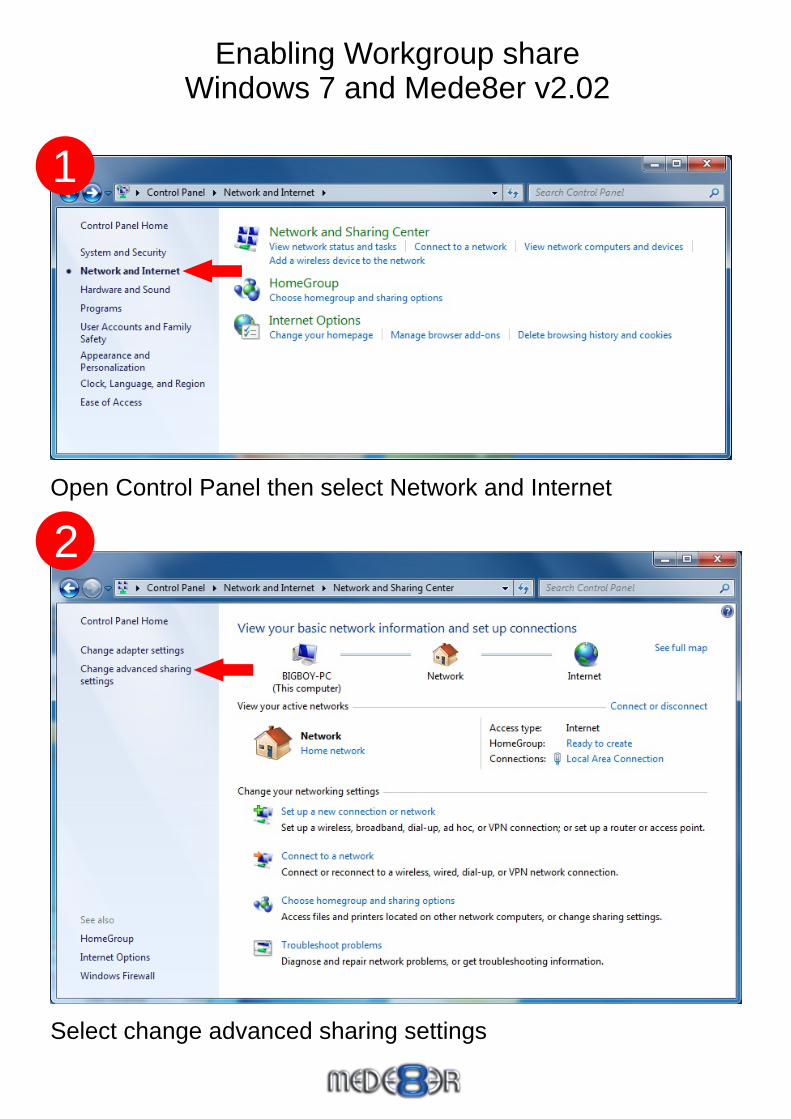
Enabling Workgroup share Windows 7 and Mede8er v2.02
Open Control Panel then select Network and Internet
Select change advanced sharing settings
3
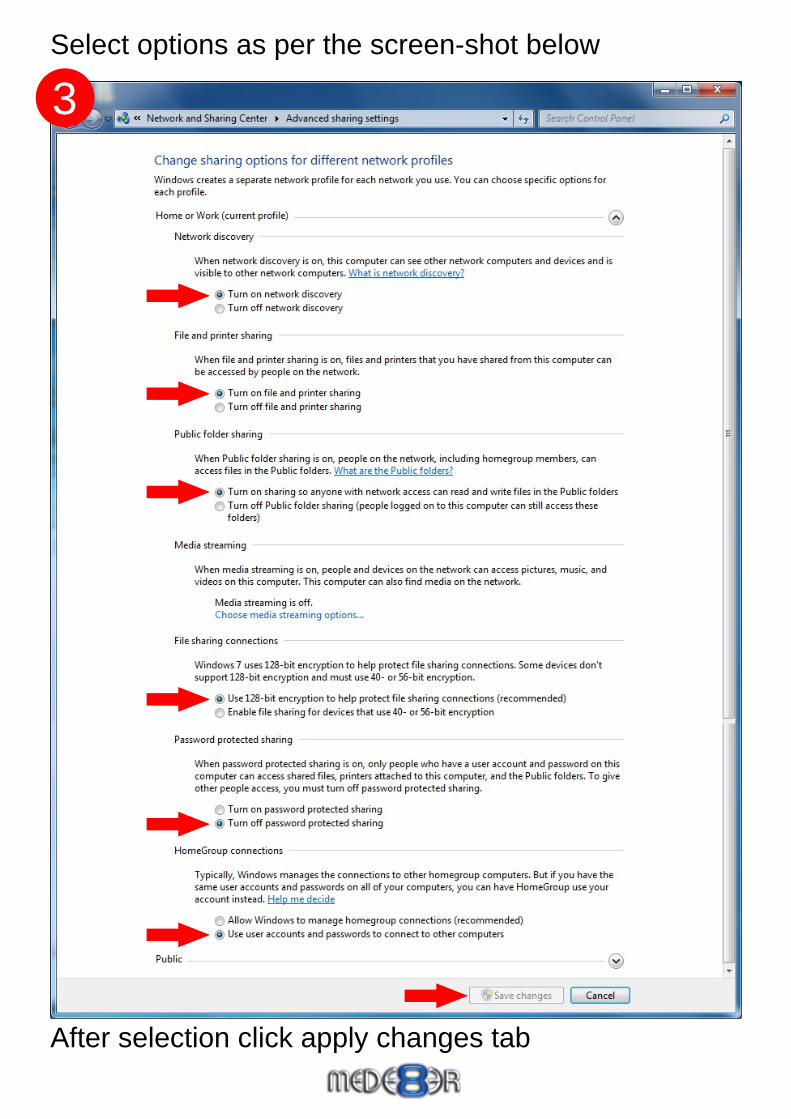
Select options as per the screen-shot below
After selection click apply changes tab
4
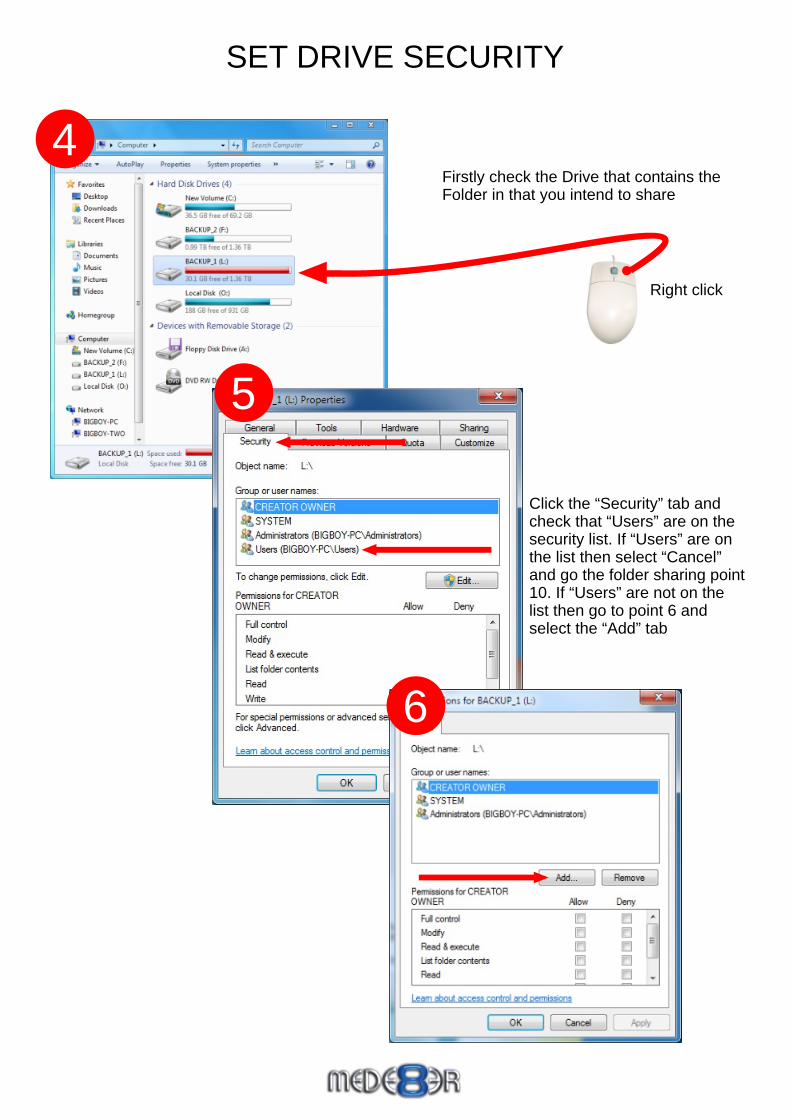
SET DRIVE SECURITY
Firstly check the Drive that contains the Folder in that you intend to share
5
6
Click the “Security” tab and check that “Users” are on the security list. If “Users” are on the list then select “Cancel” and go the folder sharing point 10. If “Users” are not on the list then go to point 6 and select the “Add” tab
Right click
7
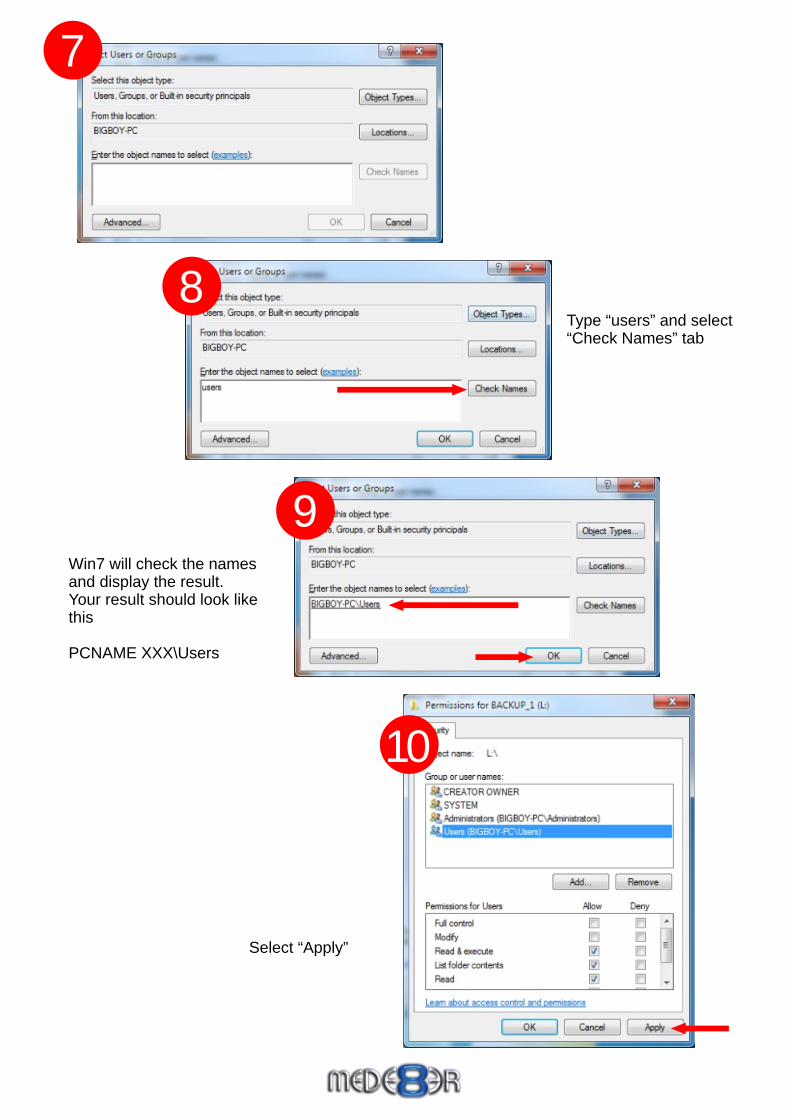
Win7 will check the names and display the result.Your result should look like this
PCNAME XXX\Users
Type “users” and select “Check Names” tab
Select “Apply”
8
9
10
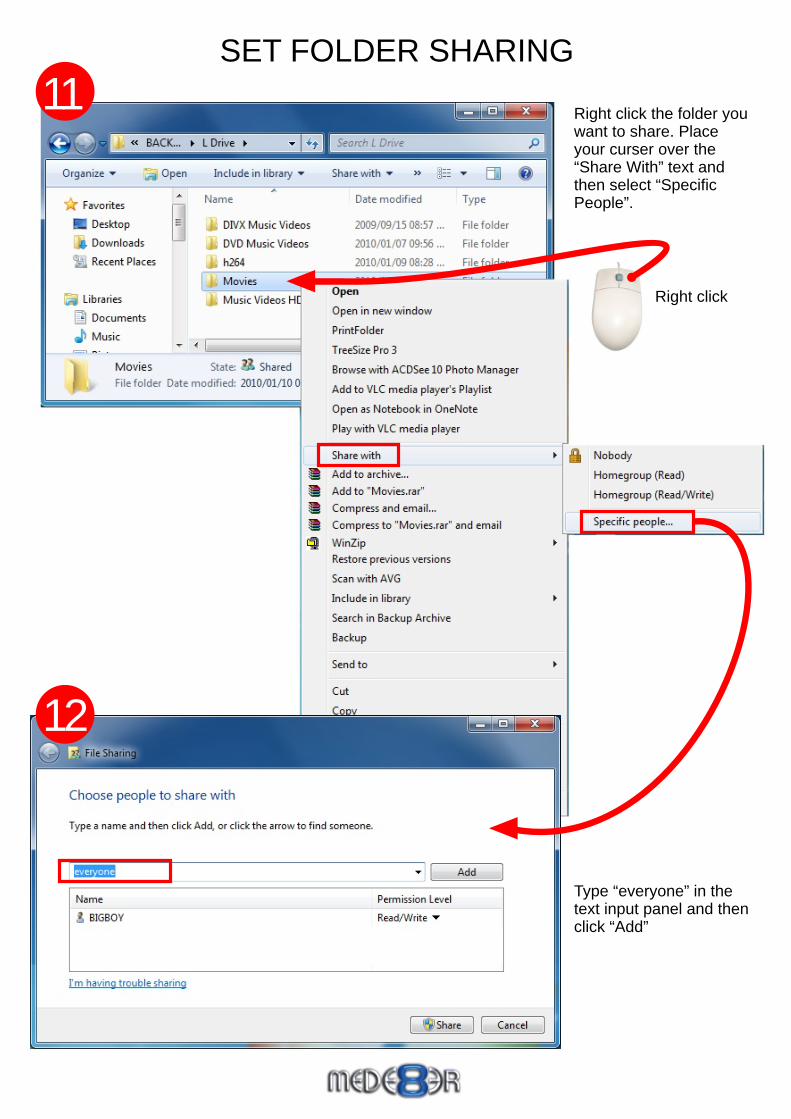
Right click the folder you want to share. Place your curser over the “Share With” text and then select “Specific People”.
Right click
Type “everyone” in the text input panel and then click “Add”
SET FOLDER SHARING
11
12
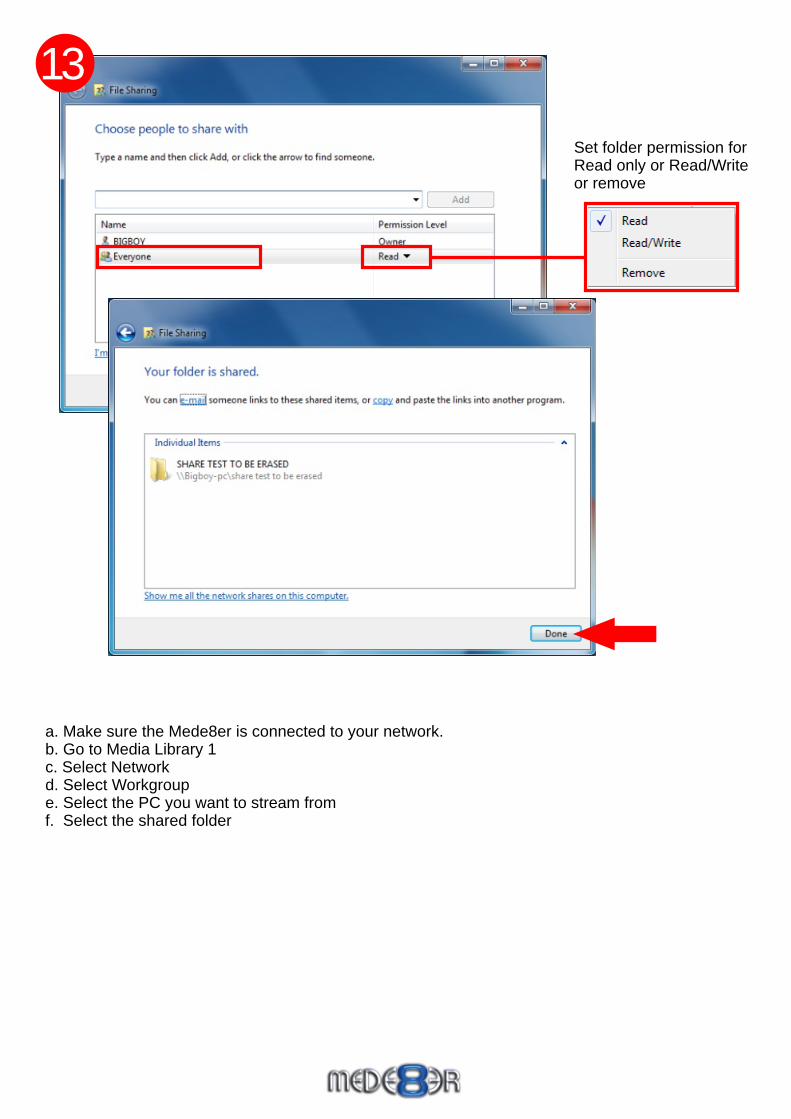
Set folder permission for Read only or Read/Write or remove
13
a. Make sure the Mede8er is connected to your network. b. Go to Media Library 1c. Select Networkd. Select Workgroupe. Select the PC you want to stream fromf. Select the shared folder


