32
DEPARTMENT OF WORK ENVIRONMENT Ergonomics Training for Office Workers in Nursing Homes Instructors Guide

DEPARTMENT OF WORK ENVIRONMENT
Ergonomics Training for
Office Workers in Nursing Homes
Instructors Guide

Ergonomics Training for Office Workers Instructor’s Guide page 1
Ergonomics Training for
Office Workers in Nursing Homes
AGENDA
1. Introduction, Training Overview………………………………..5 min.
2. What is Ergonomics?.................................................10 min.
3. Musculoskeletal Disorders……………………………………….18 min.
a. Where Does Your Body Hurt?
b. Why Does It Hurt?
4. Ergonomics and Office Work………………………………….22 min.
a. Risk Factors
b. Assessing your work station and work activities
c. How can jobs be safer?
5. Evaluation………………………………………………………………..5 min.
Ergonomics Training for Office Workers Instructor’s Guide page 2
TABLE OF CONTENTS
NECESSARY MATERIALS
SECTION 1: INTRODUCTION TO TRAINING
SECTION 2: WHAT HAVE YOU HEARD ABOUT ERGONOMICS?
SECTION 3: WHERE DOES YOUR BODY HURT?
SECTION 4: WHAT MAKES IT HURT?
SECTION 5: EVALUATION
SECTION 6: TRAINER RESPONSIBILITIES
SECTION 7: FORMS
NOTE:
This program is intended for any nursing home employee who does office work exclusively or
who spends a significant amount of the work day using a computer. This could, therefore,
include nurses or unit managers who maintain records or possibly department heads.
This material was produced under grant number SH-22314-11-60-F-25 from the Occupational Safety and Health Administration, U.S. Department of Labor. It does not necessarily reflect the views or policies of the U.S. Department of Labor, nor does mention of trade names, commercial products, or organizations imply endorsement by the U.S. Government.

Ergonomics Training for Office Workers Instructor’s Guide page 3
NECESSARY MATERIALS
You will need the following materials for this training:
TRAINING MATERIALS
Flip chart with easel NOTE: Some of the flip chart pages will need to have specific text
written in advance for specific activities.
These pages should read as follows:
SECTION 1 – INTRODUCTION o “Experience is the best teacher.
Years of experience in the room _____ .”
SECTION 2 – WHAT DO YOU KNOW ABOUT ERGONOMICS? o “What have you heard about ergonomics?”
o “What is this picture showing us?”
o “Ergonomics is the science and the art of fitting the job and the workplace to the
workers’ needs, to take advantage of the workers’ strengths, capabilities and
individual tendencies, and to recognize natural individual limitations in order to
prevent injury.”
SECTION 3 – WHERE DOES YOUR BODY HURT? o “What seems consistent about the location of the Post-Its on the body?”
o “What do the locations of the Post-Its tell us about your work?”
SECTION 4 – WHAT MAKES IT HURT? o “Ergonomic risk factors:
Awkward posture, static posture Repetition High force Contact stress Cold temperature Fatigue, overwork Job stress, mental fatigue”
o Ergonomic Hazards of Office Work o “Tasks that could be changed”
o Three flip chart pages (one for each group of participants divided up for this
section) Each sheet should have the following three terms on them:
“Task:”

Ergonomics Training for Office Workers Instructor’s Guide page 4
“Risk factor to reduce:”
“Idea to reduce risk:”
Markers for the flip chart
Pencils or pens for each participant Jelly doughnut and plastic can holder for tissue
demonstrations
A table-top back model (to be provided by UMass Lowell)
A 5 lb. weight for lifting during the biomechanics demonstration
A jelly donut for demonstration
A plastic can holder for demonstration
Worker’s Guides/ Forms (To be provided by UMass Lowell)
A sign-in sheet
Worker Guides – 1 for each person - to distribute at the start of the training. (To be
provided by UMass Lowell)
Extra Work Station Assessment Forms – 1 for each person
Evaluation forms – 1 for each person
A Class Summary Form
A pre-addressed envelope to UMass Lowell to return all fill-out training forms
The materials needed specifically for each section are also described and itemized per section.
-------------------------------------------------------------
GETTING STARTED
Before the training starts:
o Make sure the flip chart is set up, and markers are working and available.
o Have all prepared flip chart sheets filled in (see training materials)
o Have everyone sign in
o Distribute the Worker’s Guide to the participants or have one at each seat to
save time
Ergonomics Training for Office Workers Instructor’s Guide page 5
SECTION 1: INTRODUCTION/ TRAINING OVERVIEW
BACKGROUND
In this section, instructors initiate the ergonomics training. The training is designed to use
simple language, to define terms that may be either unfamiliar or have common usage. It is
most important to establish that participants will be comfortable with the language, that the
training is very simply and logically constructed, and that participants are the experts with
respect to the content of the training. Their opinions and experience is what matters. Their
health is why the training is being conducted. The sections of the training are meant to lead to
change in the workplace to reduce exposure to risk factors for poor health outcomes. The
introduction is the key to setting the stage for a productive training.
The SECTION GOALS are to:
Introduce definitions about ergonomics with familiar and academic language
Give an overview of the ergonomics training
Reinforce the importance of their experience as experts in the specific ergonomics of
their environment
Emphasize that participation is the key, and outcomes will be a result of participant
input.
On completion of INTRODUCTION TO TRAINING, training participants will be able to:
Anticipate the remainder of the training
Realize that this training will draw on their experience and participation
The materials required for this SECTION are:
Flip chart page (#1) on which you have previously written:
o “Experience is the best teacher.
Years of experience in the room: _______ .”
Markers for the flip chart
Note: It may help to have a calculator to add u all the years of experience.
The activities in this SECTION are:
Preparation before the training (for the trainer only)
“Experience is the best teacher”
Ergonomics Training for Office Workers Instructor’s Guide page 6
GETTING STARTED (EXPERIENCE IS THE BEST TEACHER)
Time: 5 Minutes
To start (This section needs to be delivered in a very brief time.):
o Begin immediately by stating, “Experience is the best teacher.”
o Ask participants how many years they have as office workers.
o Write years of experience on the flip chart. Add up the total years, and write that
down. (This is where a calculator can come in handy.)
o Share an outline of the sections of the training and the training’s objectives.
Refer to the Worker’s Guide, where the training is outlined on Page 2 . Read the
outline out loud as they read it in their Worker’s Guide.
Ergonomics Training for Office Workers Instructor’s Guide page 7
SECTION 2: WHAT DO YOU KNOW ABOUT ERGONOMICS?
BACKGROUND
This SECTION dissects and demystifies ergonomics. The term itself has been used for many
purposes. Even academic perspectives and definitions about ergonomics vary. The trainer will
facilitate discussion regarding ergonomic hazards in the work environment, from identifying the
hazards, sympathizing with the pain, understanding how pain relates to hazards, acknowledging
different reasons that people take risks, to affirming that the group can achieve the goal of
reducing risk by drawing on their collective experience. The trainer “breaks the ice” in “WHAT
DO YOU KNOW ABOUT ERGONOMICS?”. Discussion will tend to be lively and creative, if not
surprising to some participants. The time for “WHAT DO YOU KNOW ABOUT ERGONOMICS?” is
limited in practice. However, during an actual training session, several points about work
environment risk can be raised, and the trainer can enhance the discussion with prepared
awareness.
The SECTION goals are to:
Have trainees gain a deeper understanding about ergonomics
Share a concise and complete definition about ergonomics, but realize that there are
other ways to say the same thing.
Understand that ergonomics can be a very simple but relevant concept to every day
work life.
On completion of WHAT DO YOU KNOW ABOUT ERGONOMICS, training participants will be able
to:
Discussion pains in the workplace
Cite common ways people experience ergonomics
Think about their own knowledge or biases about ergonomics
The materials required for this SECTION are:
Flip charts (#2, #3, #4) which you have previously written on:
o “What have you heard about ergonomics?”
o “What is this picture showing us?”
o “Ergonomics is the science and the art of fitting the job and the workplace to the
workers’ needs, to take advantage of the workers’ strengths, capabilities and individual
tendencies, and to recognize natural individual limitations in order to prevent injury.”
Worker’s Guide pages 3-4

Ergonomics Training for Office Workers Instructor’s Guide page 8
The activities of this SECTION are:
“Break the Ice”
“What is this picture showing us?”
Define “Ergonomics”
BREAK THE ICE
Time: 2 Minutes
Immediately following the INTRODUCTION, break the ice by asking “WHAT HAVE YOU
HEARD ABOUT ERGONOMICS”?
o Write answers on flip chart with marker.
o Ask follow-up questions: “Where have you heard it?”
o “What does it mean?”
Not everyone has to answer these questions. Try to get a few people to give answers.
There is no good or bad answer. You only need two or three answers to write on the
flip chart. If more people answer, you might simply affirm the input, but not write on
the flip chart, which will take extra time.
When you ask, “What does it mean?” you are trying to find out what the various answers might
mean about how people tend to view ergonomics. Common answers might be about the
driver’s seat of an automobile or something about the computer, or “carpal tunnel.” Discussion
does not need to be in-depth. There is no right or wrong. People may or may not have heard
about ergonomics, but even within the field of study there are various definitions and usages of
the word. This brief discussion should affirm that people have some familiarity with the term,
that it may mean different things to different people. Later, we will share a specific meaning
with them.
WHAT IS THIS PICTURE SHOWING US?
Time: 2 Minutes
Refer to the Motrin ad that participants have in their Worker’s Guide on page 4. Hold
up your own copy. Ask the questions below, allowing for a few answers for each. Write
the answers on the flip chart in large letters.
o Ask “What is this picture showing us?” and allow about a minute of answers.

Ergonomics Training for Office Workers Instructor’s Guide page 9
There are several items in the picture that can be discussed. The most
obvious is the strain on the person’s body due to the material being handled.
The strain could be from at least one or all of the items below:
The weight of the meals
The precarious balance required
The poor coupling between the person’s hands and the tray
The size of the tray.
There is strain evident at her:
ankles/feet
knees
abdomen
shoulders
elbows
wrist/hands
neck
back
In plain language, you should make note of the fact that the STRAIN at these
body segments is directly related to the successful completion of a TASK that
she is required to do for employment. It is fair to say: “She would not put
herself into this kind of strain without a reason.”
Other issues apparent from the image:
She can’t see where she’s going.
The location she needs to lift from or lower to is not a fit for a person
of her stature.
The floor is hard concrete.
The age of the worker
There appears to be no one available to help. Perhaps, she is
expected to do this kind of material handling on a routine basis. Do
you think that there would be greater or less risk involved with this
material handling if it were routine vs. once in a while? Do you think
that workers should be asked to adapt to a routine with a task that
would be a risk if it were simply attempted once?
The image also shows something about STRESS:

Ergonomics Training for Office Workers Instructor’s Guide page 10
The demand is burdensome, as it is implied that risk is being taken just to
keep up. More subtle clues about stress can be identified by the sign “WALK,
DON’T RUN” over the serving doorway. Here you can say that not only is the
job demand very high, but the apparent response to it is to take away one of
the waitresses few options to keep up with it. While it may be safer to “walk,
don’t run”, it shows that alternative solutions may not be getting addressed,
such as locating the food closer to the door so no one needs to walk or run
anywhere in the kitchen.
The sign and the Motrin ad focus the problem on the worker’s actions rather than
on the relationship of the worker to the work.
o Ask “What are they proposing as a solution?”
Obviously, the ad is for a pain killer. It should be clearly understood that, in
this context, the use of the ad is neither an endorsement nor a campaign
against the product or pain killers. Regardless, the image is meant to reach
people’s common perception of the pain associated with work. The point for
the trainer to set up is that the pain is not being prevented. Instead, Motrin
is trying to capitalize on it. As will be discussed later, the pain and suffering
to the individual has an additional economic cost beyond the individual.
Solutions to reducing exposure to risk factors also will best come from the
individual and others who have a stake in the cost of work exposure.
Some participants may question whether the worker is going to experience
debilitating pain. It should not simply be overlooked that work itself has a
healthy effect on the individual. The balance between the healthy effect of
work and the exposure to risk at work can and often is weighted against the
worker. The point of this training is that when the balance favors the worker,
the cost and pain of suffering is prevented. Therefore, pain killers are only a
solution to be taken when a workplace is out of balance.
o Ask “What alternative solutions would you suggest?”
Fewer plates? Make the trays smaller, or designed to hold the plates and
allow the staff to see, and to lift and lower, without putting themselves at
risk.
Fatigue reducing mats on the concrete.
Place the lifting point closer to the destination point, both horizontally and
vertically.

Ergonomics Training for Office Workers Instructor’s Guide page 11
As implied earlier, it would be important to have additional information, such
as how often, and why, is the staff expected to carry this size of a load.
Would it be possible to eliminate this task and not negatively affect the
productivity of either the staff’s or the restaurant as a whole?
o Conclude this section by stating, “You have just done an Ergonomic Job Analysis”
This point will be well-received, and may counter people’s expectations of a
typical training which puts emphasis on how to lift, rather than draws on the
participants’ knowledge and experience to analyze their environment.
DEFINE ERGONOMICS
Time: 4 Minutes
At this point, you have already given an overview of the training, broken the ice, and
induced the group to analyze a task for ergonomic risk factors and then how to reduce
them. Almost without effort, the group will be showing that, because they are workers,
they are experts on the subject of work exposure. Now it is time to briefly share a more
detailed definition and focus on the subject of the training: “ergonomics”.
Use you prepared flip chart page with the following definition:
o “Ergonomics is the science and the art of fitting the job and the workplace to the
workers’ needs, to take advantage of the workers’ strengths, capabilities and
individual tendencies, and to recognize natural individual limitations in order to
prevent injury.”
The emphasis should be that “ergonomics” refers to changing the job, not the worker.
Key Points to Remember:
o “Fix the job, not the worker.”
o “Use your brain, not your back.”
o “Work smarter, not harder.”
These words are found in the participants Worker’s Guide on page 5, so you don’t have
to write them out on a flip chart.
If you have time (if less than 10 minutes have passed since you started), you can read
the following statement:
Ergonomics Training for Office Workers Instructor’s Guide page 12
“The word ‘ergonomics’ is from Greek: ‘ergo’ means ‘work’ and ‘nomics’ means
‘laws pertaining to, or measure of’. So, ‘ergonomics’ is ‘the laws pertaining to, or
the measure of, work’.”
Or, if 10 minutes have already passed, you can point out that this root definition is in the
Worker’s Guide on page 4, and then move on to the next section.

Ergonomics Training for Office Workers Instructor’s Guide page 13
SECTION 3: WHERE DOES YOUR BODY HURT?
OBJECTIVES
In this section there will be information given out, as well as engaging activities, discussions,
and demonstrations. The instructor will be prepared to guide people to recognize patterns of
pain that people suffer in the first “Mark up your body discussion”. Back pains are commonly
prevalent. Some unusual pains may be represented which also make for useful discussion. In
between the “Mark up a body discussion” and “How does a musculoskeletal disorder develop”
are two informational activities that will not involve much discussion. It is important to move
through these quickly and clearly so that the engaged activities have enough time. Always
remind the people that they have copies of everything that you read in their Worker’s Guide.
Underlying this section is the importance of recognizing the major challenge that pain and
suffering in the workplace is. It is also important to explicitly focus on the shared nature of the
problem, from the burden of suffering, to the partnerships for treatment and prevention.
The SECTION goals are to:
Share experience-based ideas about office work in nursing homes and the pains that
have come with the experiences.
Be aware of the results of the CPH-NEW study on health of nursing home staff (in
Genesis facilities).
Review some history and current federal regulatory and non-regulatory means to
protect workers.
Increase familiarity with typical language used to describe musculoskeletal health and
safety.
On completion of this SECTION, training participants will be able to:
Relate how federal ergonomics regulation history affects the current status of the work
environment.
Understand the progression of musculoskeletal disorders, from discomfort to
debilitation, and where ergonomics can intervene in the progression to prevent
debilitation.
Use different names for musculoskeletal disorders.
Observe the limits of certain musculoskeletal tissue through the demonstration of
familiar objects that have analogous qualities.
The materials required for this SECTION are:

Ergonomics Training for Office Workers Instructor’s Guide page 14
Flip charts with questions pre-written on them
Markers for writing answers to the questions
Jelly doughnut and plastic can holder for tissue demonstration
A weight for lifting during the biomechanics demonstration
Worker’s Guide pages 6-14
The activities of this SECTION are:
Mark up a body
“Mark up a body” discussion
What did a survey say about pains and discomfort working in a nursing home?
What is a musculoskeletal disorder?
How do musculoskeletal disorders develop?
Look at extra information about musculoskeletal disorders
MARK UP A BODY – WHERE DOES IT HURT?
Time: 2 Minutes
Select a volunteer from the group to stand in front of the group. It should be someone
who will not be shy or offended by the activity, which requires someone to place Post-
Its on her/his body. This erson can be the instructor or another participant, but it
should be someone of the same sex to prevent embarrassment. As the volunteer is
walking to the front of the group, you should introduce this activity by announcing: “The
purpose of this activity is to identify how our jobs affect our bodies.”
Ask trainees where their bodies hurt on any part(s) of their body that hurt during or
after work. Then place a post-it or a self stick circle or other sticker where ever
participants say they have pain. Each person should name all parts of their body that
hurt. Stickers should go on from each person, so the class can see where there are
repeats. Someone may mention that they get headaches, which can be represented by
a sticker on the forehead.
The discussion to follow immediately will reveal if there are common themes and
experiences of pain.

Ergonomics Training for Office Workers Instructor’s Guide page 15
MARK UP BODY DISCUSSION
Time: 5 Minutes
After marking the volunteer’s body with Post-Its, a pattern will likely appear. In any
case, the trainer will facilitate a discussion about where Post-Its are and what it means
about nursing home work.
Tell the group to look at all the Post-Its after all the participants are done posting them.
Write people’s thoughts on the flip charts in large letters so everyone can read them.
You generate discussion by asking, “What seems to be consistent about the Post-Its on
the body?” Answers to the question might be to suggest that backs are a common area
for people to feel pain, for example. Because you’ve asked about what is consistent
among the positions of the Post-it notes, the participants will be looking for clusters of
Post-Its in the same place. This point should be easily recognizable and understood by
everyone. If no one makes the point from the group, you can bring their attention to
the fact that there are certain locations where more than one Post-It was placed, and
certain locations where there are either one or no Post-Its. That is an indication that
people typically share pain in that area. If there is an area where a single Post-It is
placed away from others, apart from any cluster, it might be interesting to have the
individual describe something about this pain, if they are willing to do so. No one
should be made to feel uncomfortable about talking. Usually, people enjoy the bonding
experience of relating these ideas among their peers.
Remember that an important goal of this SECTION is to share thoughts on pain and the
experience of working in a nursing home.
Next, you continue the discussion by asking, “What do the Post-Its on the body tell us
about your work?” Again, write the answers on the flip chart in large letters.
Any thoughts on the matter should be encouraged. However, it is important to consider
the time l imitations. The main and central point to discuss is the work-relatedness of
the locations of the Post-Its. Whether or not they are all experiencing the same pain is
not as important as the fact that they are all experiencing the same work. Another
interesting point that might be brought up is that people continue to work with pain, or
that there are so many instances of pain. If people do not respond immediately, call on
a participant who is known to not be shy and ask her whether she thinks there is any
specific activity that is related to one of the Post-It spots.

Ergonomics Training for Office Workers Instructor’s Guide page 16
WHAT DID NURSING HOME EMPLOYEES SAY IN A SURVEY ABOUT PAIN AND DICOMFORT?
Time: 2 Minutes
Refer participants to the Worker’s Guide by asking them, “Please look at pages 5 and 6
of the Worker’s Guide.”
On pages 5 and 6 of the Worker’s Guide are body maps with numbers associated with
various parts of the body. These represent the percentages of people who had pain at
the time of that a large corporation (Genesis) was given a survey about musculoskeletal
aches and pains. The map on the first page shows the percentages of the non-clinical
staff, including dietary. The second map shows the percentages of the clinical staff, and,
housekeeping, business, and maintenance staff. It is interesting to note that there are
high percentages at each of the body regions for both groups. This point should affirm
the experiences and discussion of the previous section. Interestingly, the major
differences between the groups’ percentages are at the back and knee regions, which
do suggest that the clinical staff is exposed to something that increases their risk to back
and knee injuries. Discussion of these points does not need to be extensive.
WHAT IS A MUSCULOSKELETAL DISORDER?
Time: 4 Minutes
After reviewing the survey data, and the preceding discussion about the work-
relatedness of pain, you should now say, “The pain that you feel is often an indication
of an ergonomic disorder. Ergonomic disorders are called ‘Musculoskeletal Disorders’,
or ‘MSDs’.”
Then, refer the group to the Worker’s Guide, where specific language regarding the
following can be found. Read these points as they follow along reading from their
Worker’s Guide:
o “MSD” is the language used by OSHA (A description of OSHA is below if there are
immediate questions from the participants) when it issued an Ergonomics
standard at the end of the Clinton administration in November 2000. It was
repealed by the Bush Administration in March 2001. [A definition of MSD is in

Ergonomics Training for Office Workers Instructor’s Guide page 17
the Worker’s Guide on page 8]. OSHA relies on the “General Duty Clause” to
enforce ergonomics issues when necessary. [The General Duty Clause states
that employers are legally responsible for providing a workplace “free from
recognized hazards that are causing or are likely to cause death or serious
physical harm”.]
o OSHA has a new emphasis program on nursing homes that began in October,
2011. [Refer participants to page 10 and 11 of the Worker’s Guide]. The special
emphasis program means that OSHA will be paying closer attention to how
nursing homes are reacting to the rising rate of injuries in the industry.
o OSHA (Occupational Safety and Health Agency) is our federal government’s
official agency responsible for enforcing the standards of healthy work
environment. They can be reached, anonymously, if desired, at the contact
information on page 26 of the Worker’s Guide.
o MSDs are also known as RSIs (Repetitive Strain Injuries), CTDs (Cumulative
Trauma Disorders) [also on page 8 of the Worker’s Guide]. A “Repetitive Strain
Injury” is a general term for a wide range of injuries to the hands, wrists, arms,
elbows, shoulders, neck and even the back, the result from repetitive work. A
“Cumulative Trauma Disorder” is a condition where a part of the body is injured
by repeatedly overusing or causing trauma to that body part.
o A body map with some common MSDs listed is included in the Worker’s Guide
on page 9.
HOW DO MUSCULOSKELETAL DISORDERS DEVELOP? (3 DEMONSTRATIONS)
Time: 5 Minutes, total time for the three demonstrations
combined
Time: 5 Minutes, total time for the three demonstrations combined
The following demonstrations will illustrate soft tissue in the
back and its limitations. You can show the small model you
have, and point to the discs and the ligaments in the back. By
pointing to these tissue representations in the model will give
the participants a context for the demonstrations to follow.
*The image to the right is from a web page: (http://www.spinediagrams.com/)

Ergonomics Training for Office Workers Instructor’s Guide page 18
Demonstration 1 – “Jelly Doughnut as Spinal Disc”
In this demonstration, you will show the shape, structure, and performance under
pressure of spinal disc using the jelly doughnut as a model. First, as you hold up the
doughnut, and show its shape by revealing each of its sides as well as possible, say “A
jelly-filled doughnut makes an excellent model for a spinal disc.” Of course, it is
unremarkable that the shape is round, yet that is, after all, the shape of a disc. Note
that a real disc would have a hole in it for the spinal cord. However, the consistency of
the material is very similar. While it holds its structure, it is soft, squishy. When you
hold it between the palms of your hand, you can show the way it would act while it is
providing cushioning between two vertebrae. It will give on one side while tending to
bulge toward the other side. Ask, “What do you think will happen as I apply more
pressure to the doughnut?” When you apply too much pressure between your palms,
especially while pinching slightly to one side, the doughnut will rupture, much the way a
disc has the potential to rupture if too much pressure is applied between vertebrae.
Pressure on the spinal column during a lift comes not only from the pinch between
vertebrae, but from the high forces generated by the muscles to maintain posture and
to counter the forces acting on the mass being lifted.
The theme: Discs are for cushioning, not for rupturing.
Demonstration 2 – “Plastic Can Holder as Ligaments”
In this demonstration, you need the plastic holder commonly used to bind together a six-pack of aluminum soda cans. As you hold it up, say, “Ligaments are like plastic.” You can hold the plastic with one hand or two hands and show that it can twist around or easily bend and old: “They are flexible.” While they are easily flexible, ligaments, like the plastic, are can be stretched to only a small extent without changing their form. Grip two ends of the plastic and pull it until it is taut, then hold it: “They hold their form when you try to pull them because their job is to hold bones together, unlike the discs which are meant for cushioning.” Now, pull the ends of the plastic a little harder, and the plastic will begin to stretch. After you have stretched the plastic a bit, hold it loosely so that it is not taut, with one hand or both: “If too much tension is applied, then they tear or lose their shape.” The theme: Ligaments are strong and pliant, and meant to connect bones. They do not stretch.

Ergonomics Training for Office Workers Instructor’s Guide page 19
Demonstration 3 – “Lifting Near or Far”
Now choose a volunteer to demonstrate mechanical advantage. Set the object you have for this demonstration on the floor in front of the volunteer. Ask the volunteer to lift a mass once originating near her body and once originating at a relatively greater distance from her body. She can describe the different feeling that she feels, particularly at the lower back area [a biomechanical figure of forces in this lift are in Worker’s Guide on page 12]. The theme: “The muscles of the lower back have to work harder to lift an object farther away”
EXTRA INFORMATION ABOUT MUSCULOSKELETAL DISORDERS
Time: 2 Minutes
Extra information quickly ties together the activity on the body, the discussion about pain, the review of the pain survey, the definition of the term “musculoskeletal disorder” and the demonstration of biomechanics around the theme of a gradual, cumulative process. Participants can take the information home with them in written form. Ask them to refer to page 8 of the Worker’s Guide, while you read the following out loud: “The pain workers feel daily turns into MSDs gradually. First there’s discomfort, then pain, then the pain turns into symptoms, syndromes or a diagnosed disorder, which can result in permanent disability.” [Also in the Worker’s Guide are these points, which you may or may not have time to read, but they can have with them when they leave] “Pain” is a term and a feeling which is subjective. Other early warnings include burning, cramping, numbness, swelling, tingling, weakness, or fatigue.
Three important facts about musculoskeletal disorders... [page 8 of the Worker’s Guide] 1) They affect your musculoskeletal system - your muscles, nerves, tendons, ligaments, joints, cartilage and spinal discs. 2) They are cumulative - they happen gradually, as opposed to accidents. 3) They are chronic - the effects last a long time. * Definitions of “cumulative”, “chronic”: Cumulative = it develops gradually, over a long time, due to lots of small episodes or injuries Chronic = the effects last a long time, you don’t heal quickly, you can be left with a permanent disability (Ask for examples of cumulative and chronic from the participants. Do not write on flipchart.)

Ergonomics Training for Office Workers Instructor’s Guide page 20
SECTION 4: WHAT MAKES IT HURT?
OBJECTIVES
In this SECTION, the training participants review the risk factors for developing musculoskeletal
disorders. With a list of generic risk factors, and specific cues relevant to the type of work they
do, they will analyze a task or set of tasks that have high “ergonomic” risk. The Worker’s Guide
also includes a form for an Job Hazard Analysis, which they will use to complete during this
section of the training. Extra forms are intended for them to use in their workplace at any time
after the training.
The SECTION goals are to:
Examine risk factors for musculoskeletal disorders
Explore the relationship between exposure to risk factors for injury in the workplace to
the progression of musculoskeletal disorders
Think about why and how to change the work environment to reduce risk for injury
On completion of this SECTION, training participants will be able to:
State what a risk factor is
Name the common risk factors for musculoskeletal disorders
Discuss ways of reducing exposure to risk.
Generate intervention ideas based on a recognized exposure to an identified risk factor
for musculoskeletal disorder.
The materials required for this SECTION are:
Flip charts (#7, #8, #9-11) with questions pre-written on them:
o “Ergonomic risk factors:
o “Tasks to change”
o Three flip charts (one for each group) with the following three terms written to be filled
in by the answers from the participants:
“Task:”
“Risk factor to reduce:”
“Idea to reduce risk:”
Markers for writing answers to the questions
Work Station Assessment Forms are found on pages 23-27.

Ergonomics Training for Office Workers Instructor’s Guide page 21
The activities in this SECTION are:
“Acting out ergonomics risk factors”
“A Job Hazard Analysis” (Steps 1 – 4)
ACTING OUT ERGONOMIC RISK FACTORS
Time: 5 Minutes
Introduce this activity to identify risk factors of actual tasks by stating: “In order to decide how to change a job so workers won’t get injured, we must first find out what it is about the job that causes these musculoskeletal disorders.” But first, the terms to use must be clear. It is helpful in ergonomics to think in terms of risk factors for musculoskeletal disorder, and of your exposure to those risk factors as a worker in the environment. It can be very simply stated: “The aspects of your jobs that cause MSDs are called risk factors.” If there are no questions about this, then move on. There is a short, well-accepted list of the risk factors, in general, that you may be exposed to in any work environment. Read list of risk factors for MSDs [included in the Worker’s Guide on page 13; in addition, clinical staff will also have the ANA’s list of risk factors for injury on page 14]:
i. Awkward posture, static posture ii. Repetition
iii. High force iv. Contact stress v. Cold temperature
vi. Fatigue, overwork vii. Job stress, mental fatigue
In addition, ergonomic hazards specific to office work are found on pages 14-22.
Ask for a volunteer: “I need someone to show us, to act out, a task or tasks that they do.” Ask the group: “Which risk factors do you see?” (Get a few different people to do this and try to include as many of the listed risk factors as possible.)
A JOB HAZARD ANALYSIS: USING THE COMPUTER ERGONOMICS CHECKLIST Time: 15 Minutes
Ergonomics Training for Office Workers Instructor’s Guide page 22
Review the hazards listed on pages 14-22. Ask if there other hazards they know of that are not
listed. Write those down on the flip chart. Review the Computer Ergonomics Checklist on pages
23-27 quickly with the class. Divide the class into groups of 3-5 participants. You should have 2-
4 groups.
Activity: Workstation Assessment
Hand out copies of the checklist to each participant. Each group will use the checklist to assess
an actual workstation. If the workstation belongs to a group member, s/he will demonstrate typical work positions and activities. The activity is designed to generate group discussion on how to reduce work-related pain through ergonomic intervention. After performing the assessment, each group will propose interventions that will reduce ergonomic hazards. They will propose both short term “fixes” and longer term solutions that may involve new equipment or lighting, for example. A summary of the issues identified, the risk factors involved, and possible solutions will be written on a flip chart to document the work they have accomplished. Trainees will each have blank copies of the check list in their manual to use for their own and other workstations in the future.
This activity is designed to generate group discussion on how to reduce work-related pain through ergonomic intervention. An expected outcome will be three intervention ideas from them that you will write on the flip chart. As they answer, point out to them that the activity they are about to complete may result in widespread acceptance of new ideas as well, if not in change to their own workplace. The participants should be encouraged to not limit their imagination. You do not need to write these ideas on a flip chart.
The following steps are a deliberate and objective process of ergonomic analysis that participants can later do on their own. For the purpose of the training, it won’t be necessary that everyone takes each step on their own. However, they should understand that they will have the forms, and the steps outlined, to complete the job hazard analysis on their own at their own pace. As the activities are happening, pay attention to people that may be chosen to either do the writing or drawing within the group, or to do the reporting back from the small group to the whole group.
A JOB HAZARD ANALYSIS
1. Each group will review the results of their checklist assessment. They will write down on
a flipchart the key tasks that need to be changed or modified.
2. They will review the general and specific hazards listed in their manual, and list them for
each task they have selected for change.
3. They will make recommendations to reduce or eliminate risk factors, writing down short
term fixes first, then longer term solutions, if needed.
Time: 8 minutes

Ergonomics Training for Office Workers Instructor’s Guide page 23
Once again, time for this activity is limited. Therefore, you can help the groups by
assuring them that they should not be expecting that they will be able to find all the
hazards. It is very likely that many of the problems and solutions identified will be
similar. As facilitator you can write down the repeats on a flip chart, and have brief
discussion of how they might want to proceed in the future.
Since time will be limited, each group should choose at least 1 risk factor to reduce or eliminate. Encourage groups to come up with changes that should be made, regardless of how it might happen. Be as creative as possible, and do not limit thinking. It might be helpful to point out whether a suggested change is something an individual would have to do on her own, or something that administration would do through policy or change of equipment. REPORT BACK Each group will select a spokesperson to report back to the group as a whole. They will
post their flip chart so everyone can see it, and summarize what they have found.
1. The job that they analyzed
2. The ergonomic risk factors for the job
3. How they would change the job to eliminate a risk factor
As each report is coming from the groups, write changes on flip-chart in large letters.
You will have to write each of the three items, but you can abbreviate. You should write
out the solution as clearly as possible. Once you have written the idea on the flip chart,
stop to be sure that what you have written is what the group meant. Once you have
their approval, then ask for the same three items from the next group, and write their
proposed change.
When you have written each of the groups’ ideas on the flip chart, then the content of
the training is complete. You can also remind them that the list of the three suggested
changes on the flip chart may be used as ideas for job change within their center.

Ergonomics Training for Office Workers Instructor’s Guide page 24
SECTION 5: EVALUATION
OBJECTIVES
There should be a few minutes left before the hour is complete to evaluate the training. The
evaluation is meant for the participants to give suggestions about how to improve the training.
It may be possible that they will be inspired to give ideas about how to change and improve the
training. The information from the evaluation will be useful in multiple ways. First, it may help
you reflect on what happened, and what parts of the training were more effective than others.
In addition, development of the training and ideas that come from the training are part of the
same overall process for the trainers and for the facilities where these trainings are taking
place. The ideas that come out of this evaluation section will be helpful information for and for
the support structure being developed among the facilities in cooperation with UMass Lowell.
The SECTION goals are to:
Give the participants the opportunity to suggest change to the presentation of the
materials and to the content of the training
Draw on thoughts and experiences of the participants to further facilitate and improve
this training as well as the work environment for the participants.
The materials required for this SECTION are:
Evaluation forms
Pencils or pens
The activities in this SECTION are:
Complete an evaluation form
All evaluation forms must be collected. Count to make sure you have one for each person. For
each class you will put the following in a pre-addressed envelope provided by UMass Lowell:
(1) Instructor form, (2) sign-in sheet, (3) evaluations. These must be sent to UMass Lowell
within 5 days of the training. You may include several trainings in 1 envelope, but each
class must be clipped or banded separately.

Ergonomics Training for Office Workers Instructor’s Guide page 25
SECTION 6: TRAINER RESPONSIBILITIES
Training Supplies
UMass Lowell will provide you with:
A spine model
Worker Training Manuals
Evaluation Forms
Sign-in sheets
Course Summary Forms
Pre-addressed envelopes to return materials to UMass Lowell
You are responsible for providing:
A manual for each trainee
Pens, if needed
Flip chart and easel
Markers
We are giving you a packet of materials to get you started.
It is your responsibility to tell us when you need more.
Contact: Marian Flum Phone: 978-934-2534
e-mail: [email protected]
If you have any technical questions about the training
Contact : Scott Fulmer Phone: 978-934-4854
e-mail: [email protected]
CONTACT INFORMATION
For Training Materials or General Questions:
Marian Flum 978-934-2534
e-mail: [email protected]
For Technical Information or Ergonomic
advice: Scott Fulmer 978-934-4854
e-mail: [email protected]

Ergonomics Training for Office Workers Instructor’s Guide page 26
Your Responsibilities as a Trainer:
Record-keeping and Reporting
Thank you for participating as a trainer in the ergonomics training program at your center.
As you know, this program is funded by OSHA. In order to continue the ergonomic training
program, it is IMPORTANT to maintain accurate records and to document all training.
For every class you teach, the following are required:
1. Course Summary sheet
To be filled out by instructor
2. Sign-in sheet
If names are hard to read, please print next to them, so we can understand
3. Evaluation Forms
Evaluations must be filled out by all participants at the end of each class
UMass Lowell will provide pre-addressed envelopes, so you can just slip the materials into an
envelope and mail.
For any questions or if you need new training supplies, call Marian at 978-934-2534 or e-mail
her at [email protected]
Thank you for your cooperation
Return Forms
( Summary sheet, sign-in sheet , and evaluation forms)
within 1 week to:
Marian Flum
Department of Work Environment - Kitson 200
UMass Lowell
1 University Ave.
Lowell, MA 01854

Ergonomics Training for Office Workers Instructor’s Guide page 27
SECTION 7: TRAINING FORMS
The following forms are included:
Sign-in Sheet
Evaluation
Course Summary

Ergonomics Training for Office Workers Instructor’s Guide page 28
Sign-in Sheet
Ergonomics Training for Nursing Home Workers
Center _________________ City, State _________________
Date ________ Time_________
Instructor __________________________________________
Name (print)
Name (sign) Dept/ Unit Job Title
1.
2.
3.
4.
5.
6.
7.
8.
9.
10.
11.
12.
13.
14.
15.

Ergonomics Training for Office Workers Instructor’s Guide page 29
Ergonomics Training for Office Workers Instructor’s Guide page 30
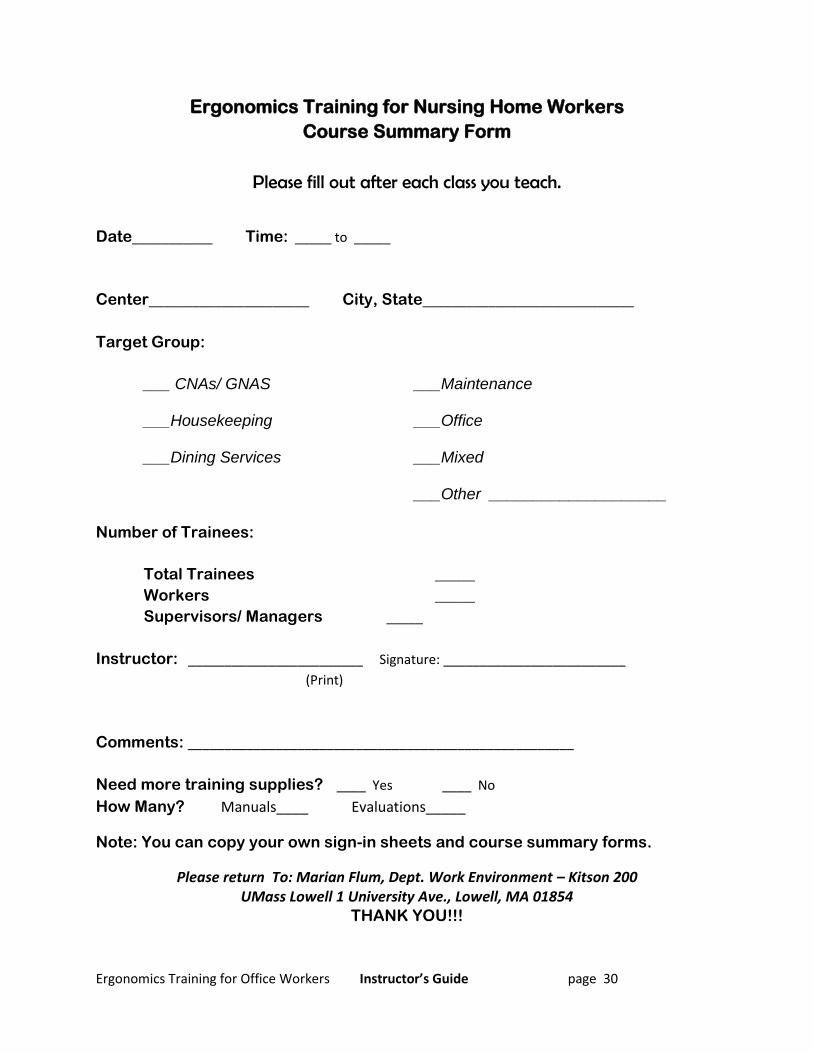
Ergonomics Training for Nursing Home Workers
Course Summary Form
Please fill out after each class you teach.
Date___________ Time: _____ to _____
Center______________________ City, State_____________________________
Target Group:
___ CNAs/ GNAS
___Maintenance
___Housekeeping
___Office
___Dining Services
___Mixed
___Other ____________________
Number of Trainees:
Total Trainees _____
Workers _____
Supervisors/ Managers _____
Instructor: ________________________ Signature: _________________________
(Print)
Comments: _____________________________________________________
Need more training supplies? ____ Yes ____ No
How Many? Manuals____ Evaluations_____
Note: You can copy your own sign-in sheets and course summary forms.
Please return To: Marian Flum, Dept. Work Environment – Kitson 200 UMass Lowell 1 University Ave., Lowell, MA 01854
THANK YOU!!!

Ergonomics Training for Office Workers Instructor’s Guide page 31


