28
Owner’s Manual ERV-24-SUPER With FanCycler ® Doylestown, PA 18902 USA Phone: (215) 766-1487 - Fax: (215) 766-1493 Email: [email protected] - www.scillc.com Cat. P048046 Rev. 2.4 07.06

Owner’s Manual
ERV-24-SUPERWith FanCycler®
Doylestown, PA 18902 USAPhone: (215) 766-1487 - Fax: (215) 766-1493Email: [email protected] - www.scillc.com
Cat. P048046Rev. 2.4 07.06
Protected by one or more of the following patents:
US 5,547,017; 5,881,806; 6,431,268; CA 2,245,135
Please read this manual carefully before installation and use.
Index
Operating manual 1
On/Off 1.1
Mode selection 1.2
Temperature adjustments 1.3
Locking the thermostat’s buttons 1.4
Programming 2
Thermostat display 2.1
Programming defaults 2.2
Step by step programming chart 2.3
Overriding set temperature 2.4
Putting the program on hold 2.5
RT04 – Remote Control Unit 3
2
1. Operating Manual
1.1 On/Off button
• Press the On/Off button to activate the thermostat - The word "ON" will
appear on the display next to the measured temperature.
• Press and hold (4 sec) the On/Off button to deactivate the thermostat - The
word "OFF" will appear on the display.
1.2 Select button
1.2.1 System Mode (Cool, Heat, Cool/Heat, Fan)
• Press the Select button once.
• Use the (+) or (-) buttons to switch between modes:
o Cool –“Cool” will appear on the display.
o Heat –“Heat” will appear on the display.
o Emergency Heat –“E.Heat” will appear on the display (Available in HP type
only).
o In Emergency Heat, the heating element will turn on and the compressor will
turn off.
3

o This option is suitable for very cold days when the heat pump is active in
heat.
o Cool/Heat (Auto change-over) – Cool” and “Heat” will appear on the display.
o Fan –“Fan” will appear on the display.
4
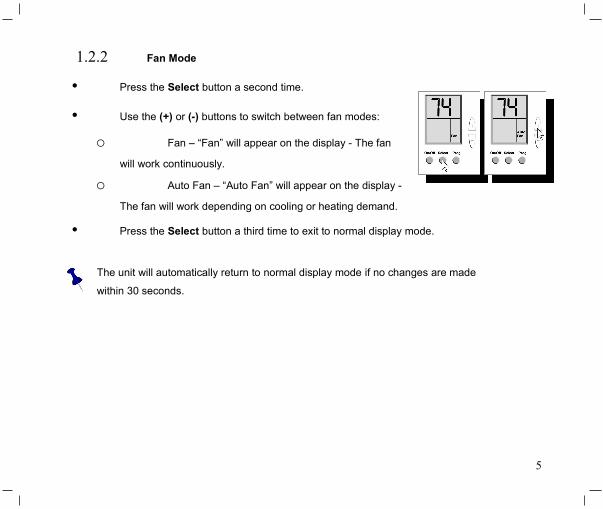
1.2.2 Fan Mode
• Press the Select button a second time.
• Use the (+) or (-) buttons to switch between fan modes:
o Fan – “Fan” will appear on the display - The fan
will work continuously.
o Auto Fan – “Auto Fan” will appear on the display -
The fan will work depending on cooling or heating demand.
• Press the Select button a third time to exit to normal display mode.
The unit will automatically return to normal display mode if no changes are made
within 30 seconds.
5
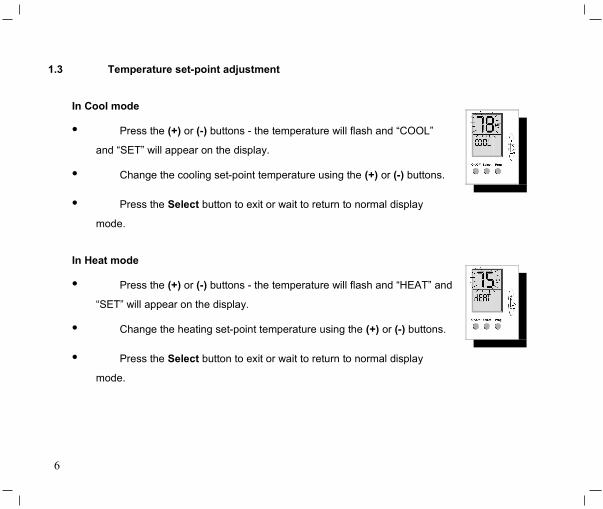
1.3 Temperature set-point adjustment
In Cool mode
• Press the (+) or (-) buttons - the temperature will flash and “COOL”
and “SET” will appear on the display.
• Change the cooling set-point temperature using the (+) or (-) buttons.
• Press the Select button to exit or wait to return to normal display
mode.
In Heat mode
• Press the (+) or (-) buttons - the temperature will flash and “HEAT” and
“SET” will appear on the display.
• Change the heating set-point temperature using the (+) or (-) buttons.
• Press the Select button to exit or wait to return to normal display
mode.
6

In Cool/Heat mode (Auto change-over)
• Press the (+) or (-) buttons - the temperature will flash and “COOL” and “SET” will
appear on the display.
• Change the cooling set-point temperature using the (+) or (-) buttons.
• Press the Select button again or wait - the temperature will flash and “HEAT” and
“SET” will appear on the display.
• Change the heating set-point temperature using the (+) or (-) buttons.
• Press the Select button again or wait to return to normal display mode.
The thermostat keeps a minimum differential of at least 2 degree between the Heat
set-point and the Cool set-point, with Heat always being less than Cool.
7
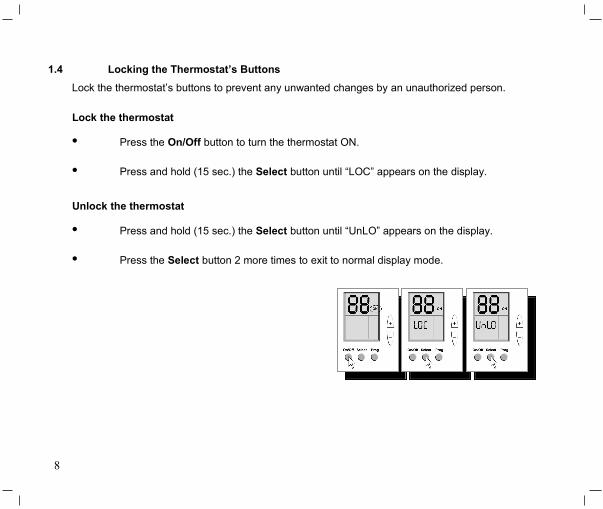
1.4 Locking the Thermostat’s Buttons
Lock the thermostat’s buttons to prevent any unwanted changes by an unauthorized person.
Lock the thermostat
• Press the On/Off button to turn the thermostat ON.
• Press and hold (15 sec.) the Select button until “LOC” appears on the display.
Unlock the thermostat
• Press and hold (15 sec.) the Select button until “UnLO” appears on the display.
• Press the Select button 2 more times to exit to normal display mode.
8

2. Programming
The thermostat is 5-1-1 programmable:
5-Monday through Friday, 1-Saturday, and 1-Sunday all have individual programs.
There are four program periods per day: 1-Wake, 2-Day, 3-Return, 4-Sleep
If you want to operate the thermostat manually, without the program, you can easily disable
programming.
To disable the program, press and hold (5 seconds) the Prog button – the word Program will
disappear from the display. To re-enable the program, press and hold the Prog button again. See
Section 2.5 below.
Note: If the thermostat was setup to be Non-Programmable by the installing technician,
contact the installer, or refer to the Technician Settings document for enabling the Program via
the internal DIP switch.
9

Before programming your thermostat you should be familiar with the display of the unit:
2.1 Thermostat Display
1. Temperature digits
The normal display will show the temperature in the room.
When (+) or (-) is pressed, it will flash and show the set-point
for the selected system mode.
2. Days of the week
When setting the program, it will display the period that you
are setting.
Example: When display shows: MON-TUE-WED-THU-FRI,
you are setting the weekdays program.
(The program will repeat on each of these days).
In normal display mode, only the actual day of the week will be displayed.
3. Real time clock, AM/PM
Note: When changing the program, "COOL" or "HEAT" will be displayed in place of the time to
indicate which system mode you are setting the temperature for.
4. Program period (the one currently being adjusted will be indicated)
• Wake 1st program of day.
• Day 2nd program of day.
10
CoolHeat
AutoFan
oF
Program: wakeDayReturnSleep
SuMoTuWeThFrSa
SetONOFF
AMPM
1
23
4
56
7
8

• Return 3rd program of day.
• Sleep 4th program of day
5. Set Temperature
When changing the temperature set-point, the temperature digits will flash, and "Set" will
appear on the display.
6. On/Off
The thermostat is active or not.
7. System Modes
Heat: Heating mode; Cool: Cooling mode; if both Heat and Cool are displayed, that is Auto
change-over mode; Fan: Continuous Fan mode.
The current active mode will flash when the equipment is operating.
8. Fan Mode
When the display shows "Auto Fan" - the Fan will operate automatically with heating and cooling.
When the display shows "Fan" – the Fan will operate continuously.
Normal display
In normal display mode, the display will show:
• Ambient temperature in the room
• Thermostat ON or OFF
• Current day of the week
11

• Current time of day
• Current active program period
• System Mode
• Fan Mode.
2.2 Programming defaults from the factory.
Monday to Friday 1 (Wake) 2 (Day) 3 (Return) 4 (Sleep)Start time 6:30 AM 8:00 AM 5:30 PM 10:00 PMCool Set-point 78°F 85°F 78°F 82°FHeat Set-point 70°F 62°F 70°F 62°F
Saturday & Sunday 1 (Wake) 2 (Day) 3 (Return) 4 (Sleep)Start time 7:30 AM 12:30 PM 6:00 PM 11:30 PMCool Set-point 76°F 74°F 72°F 78°FHeat Set-point 70°F 70°F 70°F 65°F
• The following chart will help to simplify making normal adjustments
(System Mode, Fan Mode) and setting the program.
• We recommend that you fill out the chart BEFORE setting the weekly
program.
• On the chart, select a cooling and a heating set-point temperature.
12

• Remember to keep a safe differential between Heat and Cool for Auto
change-over.
• The display will show the program (weekday, Saturday or Sunday).
• If no key is pressed for 30 seconds, the thermostat will return to normal
display mode.
13

P r o g r a m m i n g
A d j u s t C l o c k S e t t i n g s - H o u r s
A d j u s t C l o c k S e t t i n g s - M i n u t e s
A d j u s t C l o c k -D a y o f t h e w e e k
2
H e a t T e m p .1P r o g r a m N o .
H o u r M i n u t e s C o o l T e m p .
P r o g r a m N o .
H o u r M i n u t e s
W a k e
D a y
H e a t T e m p .C o o l T e m p .
2.3 Step by step program chart.
14

3
4
P r o g r a m N o .H o u r M i n u t e s
P r o g r a m N o .
H o u r M i n u t e s
S a t u r d a y a n d S u n d a y p r o g r a m m i n g
R e t u r n
S l e e p
H e a t T e m p .C o o l T e m p .
H e a t T e m p .C o o l T e m p .
15

Follow the steps above to set the programs for Saturday and Sunday.
At any time during the programming you may exit to normal display mode by pressing the Select button.
16

2.4 Manually override the set-point temperature:
You can manually override the set-point temperature of the current program period without stepping into
the programming procedure. When you override the set-point, it will only be applicable until the end of the
current program period. To change the set-point temperature at any time, press the (+) or (-) buttons until
the temperature you desire appears on the display. The new temperature will be retained until the next
program period starts.
Also see the illustrated steps described in section 1.3 to override the programmed set-point temperature.
When overriding a program period – no program period name will appear on the display.
2.5 Putting the program on hold
The thermostat can be operated manually – without the program – at anytime, and the program can be
reactivated again anytime later.
Putting the program on hold
The thermostat must be turned “ON”
Press and hold (5 seconds) the Prog button until the hours on the display stop flashing.
The word “Program” will disappear from the display.
Reactivate the program
Press and hold (5 seconds) the Prog button until the hours on the display stop flashing.
The word “Program” will appear on the display.
17
Note: The thermostat will remain in Override mode until the next program period begins.
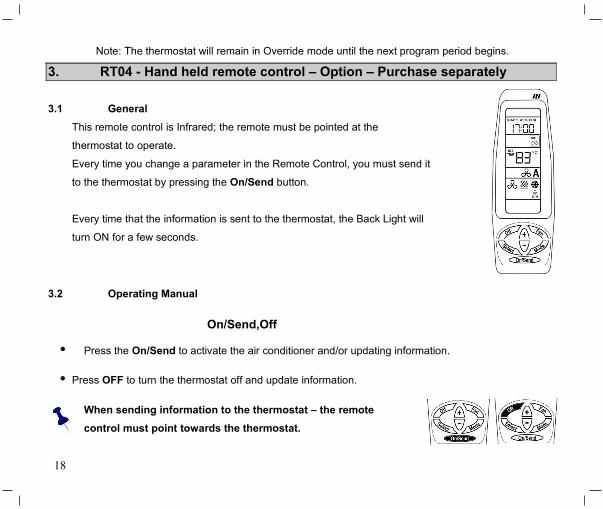
3. RT04 - Hand held remote control – Option – Purchase separately
3.1 General
This remote control is Infrared; the remote must be pointed at the
thermostat to operate.
Every time you change a parameter in the Remote Control, you must send it
to the thermostat by pressing the On/Send button.
Every time that the information is sent to the thermostat, the Back Light will
turn ON for a few seconds.
3.2 Operating Manual
On/Send,Off
• Press the On/Send to activate the air conditioner and/or updating information.
• Press OFF to turn the thermostat off and update information.
When sending information to the thermostat – the remote
control must point towards the thermostat.
18

Fan:
• Press Fan button to change between:
FAN ON ( ) or AUTO FAN (A).
• Press the On/Send button to send information to the thermostat.
Mode:
• Press Mode button to change between:
COOL, HEAT, AUTO CHANGE and FAN ONLY.
• Press the On/Send button to send information to the thermostat.
Temperature Set Point:
Cool Mode:
• Press the set buttons (+) or (-).
“COOL” & digits will flash.
• Select the desired temperature.
• Press the On/Send button to send information to the thermostat.
Heat Mode:
• Press the set buttons (+) or (-).
19

• “HEAT” & digits will flash.
• Select the desired temperature.
• Press the On/Send button to send information to the
thermostat.
Auto Change Mode:
• Press the adjustment buttons (+) or (-)
• “COOL” and “SET TEMP” will flash.
• Set cooling with (+) or (-) buttons.
• Press the Select button.
• “HEAT” and “SET TEMP” will flash.
• Set the heating set point with (+) or (-) buttons.
• Press the Select button again or Press the
On/Send button to send information to the
thermostat.
The thermostat keeps a minimum differential of at least 1 degree between Heat set and Cool set (Heat is always less than Cool).
20

Real Time Clock and Day:
• Press the Select button - CLOCK SET will flash.
• Press the (+) or (-) buttons - the hours will flash.
• Adjust the hours with (+) or (-) buttons.
• Press the Select button again - minutes will flash.
• Adjust the minutes with (+) or (-) buttons.
• Press the Select button again - weekday will flash.
• Adjust the day with (+) or (-) buttons.
• Press the Select button again to exit from program or
Press the On/Send button to send information
to the thermostat.
Programming:
Set the Program times and Temperature settings for the week:
• The remote is 5-1-1 programmable: weekdays (Monday to Friday),
Saturday, and Sunday can be programmed differently.
• 4 program events per day: 1 (Morning), 2 (Day), 3 (Evening), 4 (Night)
21

The program can be set away from the thermostat and can be sent later on.
To send the program to the thermostat, follow the steps below without adjusting times
and temperatures. Only press the On/Send button each time the word SEND blinks on the
display (point the remote control to the thermostat)
• To enter programming: Press and hold Select button for
three seconds.
“PROGRAM” (flashing) and the days Mon-Fri will appear
on the display.
• Press the (+) or (-) buttons, “PROGRAM 1” &
“START” (flashing) will appear.
• Press the (+) or (-) button - the hours will flash.
• Adjust the hours with (+) or (-) buttons.
• Press the Select button - the minutes will flash.
• Adjust the minutes with (+) or (-) buttons.
22

• Press the Select button – “COOL” (flashing) &
Temperature will appear.
• Adjust the temperature with (+) or (-) buttons.
• Press the Select button – “HEAT” (flashing) &
Temperature will appear.
• Adjust the temperature with (+) or (-) buttons.
The controller keeps a safety differential of at least 1 degree between Heating set
point and Cool set point (Heat is always less than Cool).
After selecting the heating set point, you cannot reduce the cooling set point less
than the heating set point.
• Press the Select button: “PROGRAM 2” & “START” (flashing) will appear.
• Press the (+) or (-) buttons and adjust the hours, minutes and temperature, the same way as
in PROGRAM 1
• Press the Select button: “PROGRAM 3” & “START” (flashing) will appear.
23
• Press the (+) or (-) buttons and adjust the hours, minutes and temperature, the same
way as in PROGRAM 1
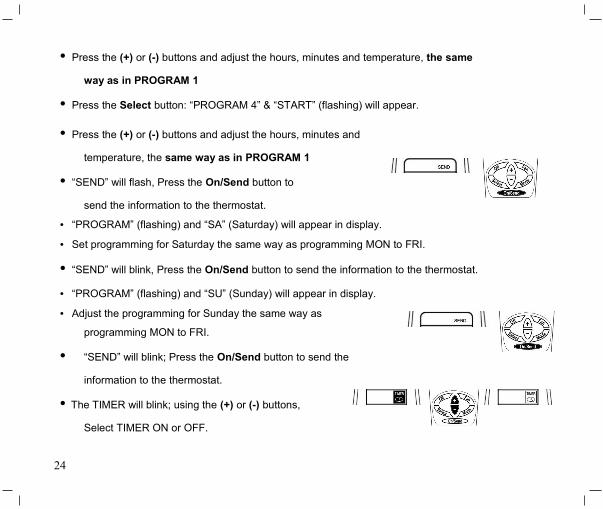
• Press the Select button: “PROGRAM 4” & “START” (flashing) will appear.
• Press the (+) or (-) buttons and adjust the hours, minutes and
temperature, the same way as in PROGRAM 1
• “SEND” will flash, Press the On/Send button to
send the information to the thermostat.
• “PROGRAM” (flashing) and “SA” (Saturday) will appear in display.
• Set programming for Saturday the same way as programming MON to FRI.
• “SEND” will blink, Press the On/Send button to send the information to the thermostat.
• “PROGRAM” (flashing) and “SU” (Sunday) will appear in display.
• Adjust the programming for Sunday the same way as
programming MON to FRI.
• “SEND” will blink; Press the On/Send button to send the
information to the thermostat.
• The TIMER will blink; using the (+) or (-) buttons,
Select TIMER ON or OFF.
24
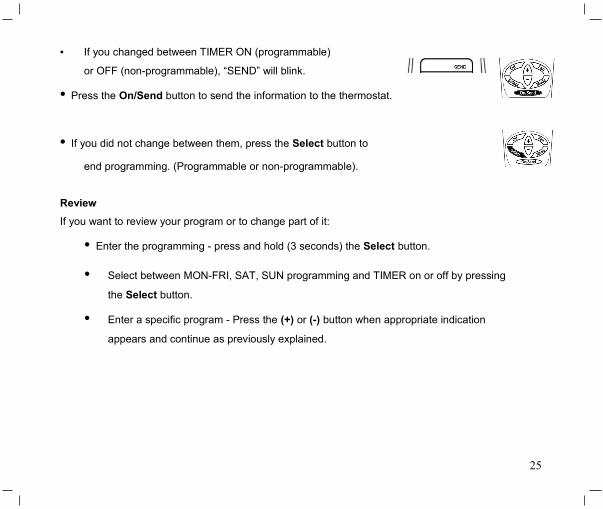
• If you changed between TIMER ON (programmable)
or OFF (non-programmable), “SEND” will blink.
• Press the On/Send button to send the information to the thermostat.
• If you did not change between them, press the Select button to
end programming. (Programmable or non-programmable).
Review
If you want to review your program or to change part of it:
• Enter the programming - press and hold (3 seconds) the Select button.
• Select between MON-FRI, SAT, SUN programming and TIMER on or off by pressing
the Select button.
• Enter a specific program - Press the (+) or (-) button when appropriate indication
appears and continue as previously explained.
25

Comments
26

Comments
27

SCI - Systems Controls & Instruments can offer a WIDE range of products for the HVAC industry, Such as:• Flush Mount Thermostats - Programmable and Non-Programmable.• HVAC Analyzer that can measure BTU’s, for technicians.• Tamper proof thermostats that can be operated ONLY from the remote control, for
public places.• Thermostat with phone communication; listen to your thermostat from ANYWHERE
and change settings.
For trial please dial: 1-877-662-0660 Password 1,2,3,4,# for Menu *,0,# ...
To obtain more information or technical support:Tel : 1-800-663-8107. E-mail : [email protected] Web site: www.scillc.comYour suggestions or comments regarding these units would be appreciated.
At our web site, you can find technical details regarding the units, as well as, operating manuals, electrical drawings, Etc.The company reserves the right to change the specifications any time without prior notice
28


