Contents 1. Introduction 2 2. The basics 2 3. Typing Text 3 4. Select, cut, copy and paste 4 5. Correcting text 6 6. Formatting text 7 7. Save and retrieve a document 8 8. Using the Header and Footer 10 9. References 11 10. Next steps 12 About this Document Words in bold Will need to be typed or chosen from a menu or window Small capitals – e.g. ALT Indicate keys that you press Bulleted lists Are guidelines on how to perform a task Press KEY1 + KEY2 Press both keys together Press KEY1, KEY2 Press each key consecutively Choose Insert - Picture Show menu commands – in this case, choose the option Picture from the Insert menu at the top of the screen Beginner Writing an Essay with Word 2007 Introduction This document covers the basic techniques necessary in Microsoft Word to write a simple essay. It has some advice on typing and using the keyboard for complete beginners, and thereafter reference information on the functions necessary to layout a document and enter references. Prerequisites This document assumes that you are familiar with the use of a computer keyboard and mouse and have a working knowledge of Microsoft Windows
Transcript
Contents
1. Introduction 2
2. The basics 2
3. Typing Text 3
4. Select, cut, copy and paste 4
5. Correcting text 6
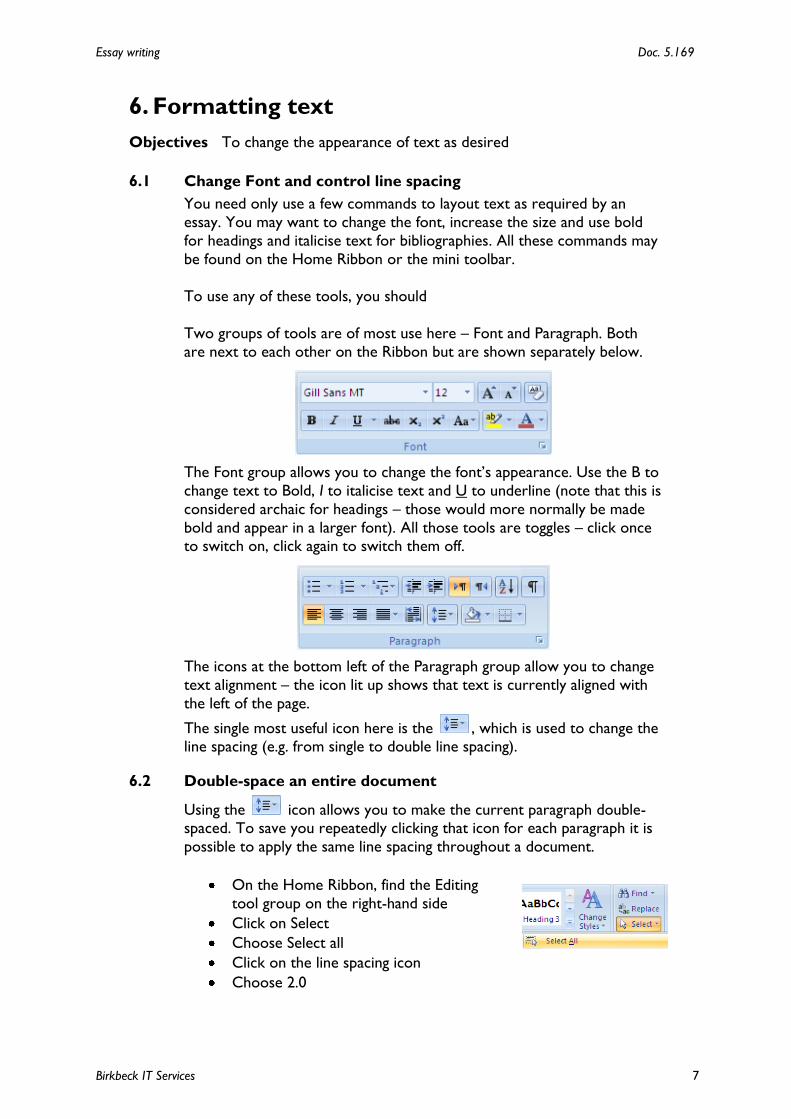
6. Formatting text 7
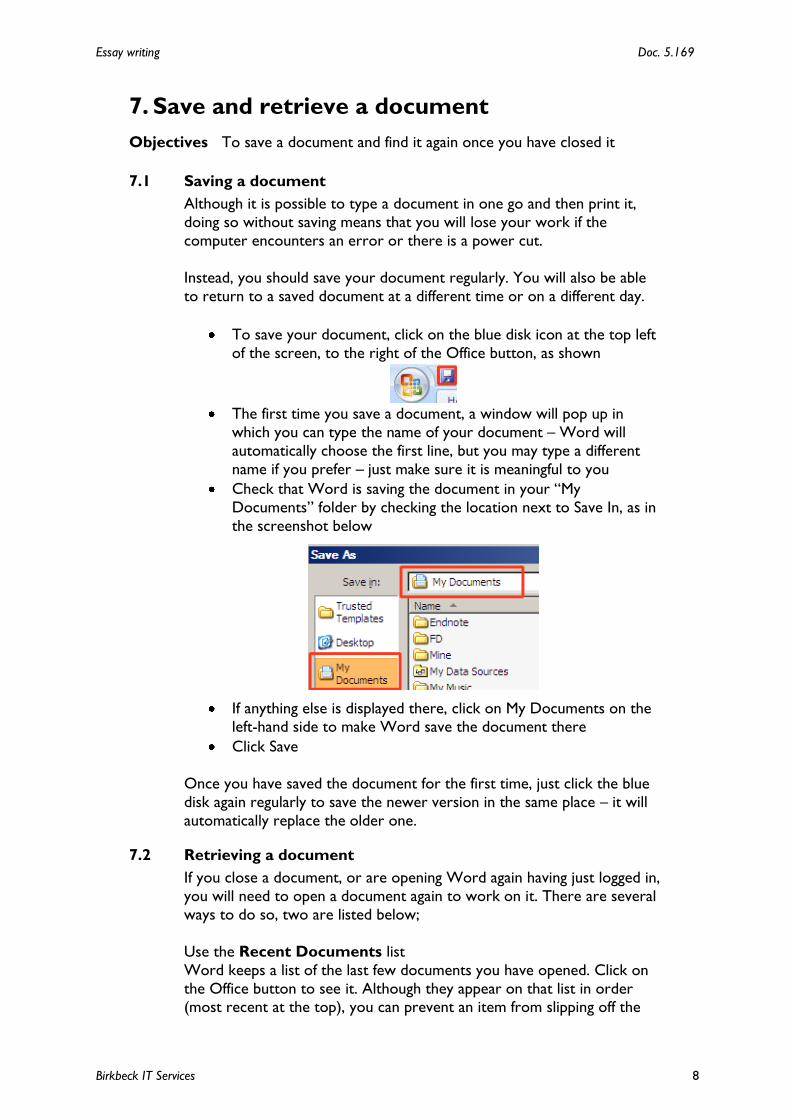
7. Save and retrieve a document 8
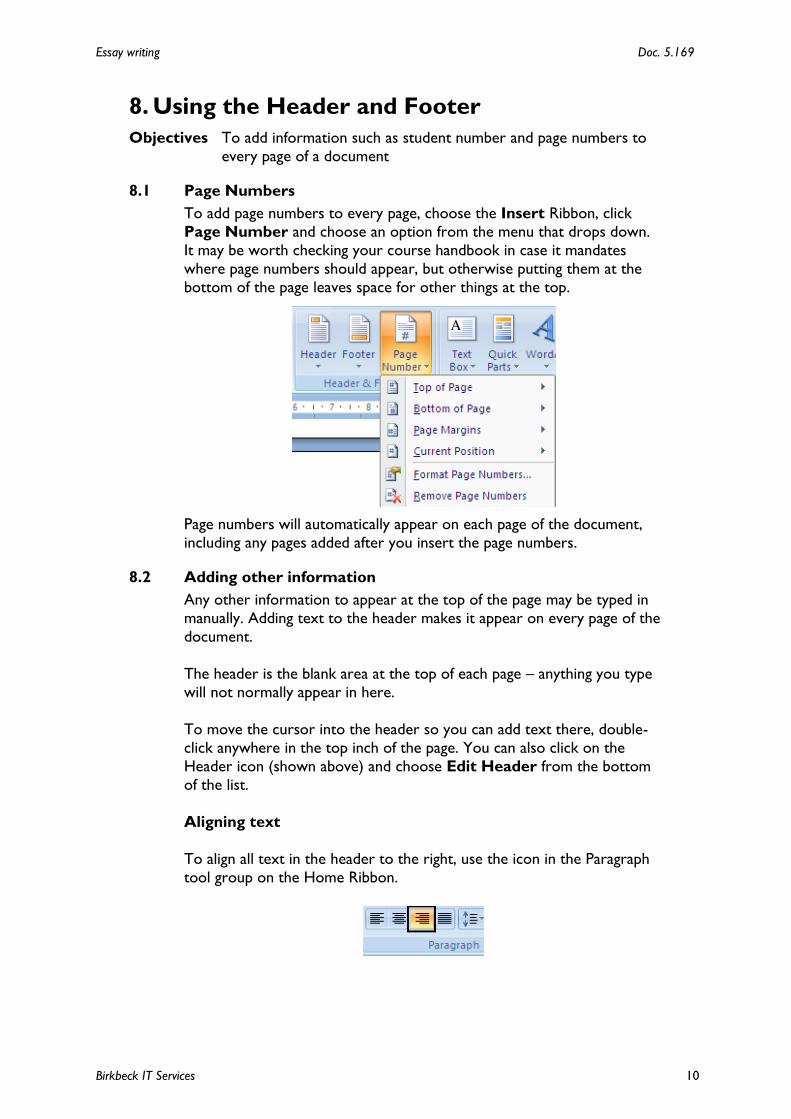
8. Using the Header and Footer 10
9. References 11
10. Next steps 12
About this Document
Words in bold Will need to be typed or chosen from a menu
or window
Small capitals – e.g. ALT Indicate keys that you press
Bulleted lists Are guidelines on how to perform a task
Press KEY1 + KEY2 Press both keys together
Press KEY1, KEY2 Press each key consecutively
Choose Insert - Picture
Show menu commands – in this case, choose
the option Picture from the Insert menu at the
top of the screen
Beginner
Writing an Essay with Word 2007
Introduction
This document covers the basic techniques necessary in Microsoft Word to write a simple
essay. It has some advice on typing and using the keyboard for complete beginners, and
thereafter reference information on the functions necessary to layout a document and
enter references.
Prerequisites
This document assumes that you are familiar with the use of a computer keyboard and
mouse and have a working knowledge of Microsoft Windows
Essay writing Doc. 5.169
Birkbeck IT Services 2
1. Introduction
1.1 Opening Word
Birkbeck‟s computers have Word 2007 installed on them. To start the
program, click on
Start
Programs
Microsoft Office
Word 2007
1.2 Terminology used
The Cursor is the flashing bar on the screen that marks where text will
appear when you type. Moving the cursor, by using the arrow keys or
clicking the mouse button, allows you to insert text in the middle of a
sentence.
Selected text is text you have marked on the screen so as to carry out a
function on it, for instance, deleting it, cutting or making it bold.
The mini toolbar appears when text is selected, and is a quick way to
apply different formatting to it.
Formatting means changing the appearance of text – making it larger, or
in a different font.
A Ribbon is the toolbar at the top of the screen, containing icons on
which you click to access different functions.
Within the Ribbons, different tools are contained within toolgroups,
whose name appears below the group.
2. The basics
Objectives A checklist of the essentials for word processing
2.1 Essentials
A few rules and techniques that you may know already;
Don‟t press return at the end of every line – allow text to flow,
Word will automatically wrap it around at the end of the line
Use page breaks to jump to a new page (rather than pressing
return) – Insert – Page Break
Use Word‟s page numbers to label pages where needed (Insert –
Page Number)
After working through this document you will also know how to use
Keyboard
Line spacing
Footnotes
Headers and footers
Essay writing Doc. 5.169
Birkbeck IT Services 3
3. Typing Text
3.1 The keyboard
This guide cannot teach you to type, but some pointers on keyboard use
are below.
Keyboard layout
Enter key Note that you should only press this key to end a paragraph,
not at the end of every line. The computer will automatically
move text onto the next line once you reach the end.
Shift keys The two shift keys allow you to enter capital letters, and to
type the symbols on the top half of keys, e.g. the ! on the
number 1 key, or ? on top of the /.
Ctrl keys The two ctrl keys are used for keyboard shortcuts (e.g. hold
ctrl and press s to save your work).
Typing
Whatever you type will appear wherever the cursor (a flashing vertical line)
is positioned within the document. Move the cursor by using the arrow
keys or by moving the mouse and clicking.
Practice is the most important thing, and you will become quicker over
time. However, if you have the time to practice the correct hand position
you may find you can become an accomplished typist. The website