74
Software Instruments User Manual >> Version 1, September 2002 evb3 >> English Edition

Software Instruments
evb3
User Manual>> Version 1, September 2002
>> English Edition


H
License Agreement
Important! Please read this licence agreement carefully before opening the disk seal! Opening of the disk seal and use of this package indicates your agreement to the following terms and conditions. Emagic grants you a non-exclusive, non-transferable license to use the software in this package.
You may:
1. use the software on a single machine.2. make one copy of the software solely for back-up purposes.
You may not:
1. make copies of the user manual or the software except as expressly provided for in this agreement.
2. make alterations or modifications to the software or any copy, or otherwise attempt to discover the source code of the software.
3. sub-license, lease, lend, rent or grant other rights in all or any copy to others.
Except to the extent prohibited by applicable law, all implied warranties made by Emagic in connection with this manual and software are limited in duration to the minimum statutory guarantee period in your state or country from the date of original purchase, and no warranties, whether express or implied, shall apply to this product after said period. This warranty is not transferable-it applies only to the original purchaser of the software. Emagic makes no warranty, either express or implied, with respect to this software, its quality, performance, merchantability or fitness for a particular purpose. As a result, this software is sold “as is”, and you, the purchaser, are assuming the entire risk as to quality and performance. In no event will Emagic be liable for any direct or indirect damages resulting from any defect in the software or documentation.
This agreement will terminate if you fail to comply with any term or condi-tion in this agreement.
This agreement shall be governed by the laws of the Federal Republic of Germany.
This manual, copy-protection and software described herein are copy-righted © 2002 by Emagic Soft- und Hardware GmbH, Halstenbeker Weg 96, 25462 Rellingen, Germany


Table of Contents
H
1 Welcome… . . . . . . . . . . . . . . . . . . . . . . . . . . . . . . . . . . . . . . . . . . 9
2 Getting Started . . . . . . . . . . . . . . . . . . . . . . . . . . . . . . . . . . . . 11
2.1 What the Package Includes . . . . . . . . . . . . . . . . . . . . . . . . . . . . . 11
2.2 Quick Start . . . . . . . . . . . . . . . . . . . . . . . . . . . . . . . . . . . . . . . . . . . . 12
2.2.1 Installation . . . . . . . . . . . . . . . . . . . . . . . . . . . . . . . . . . . . . . . . 122.2.2 EVB3 Authorization . . . . . . . . . . . . . . . . . . . . . . . . . . . . . . . . . . 122.2.3 The “Instrument” Object Type . . . . . . . . . . . . . . . . . . . . . . . . . . 132.2.4 Loading and Playing an EVB 3 Instrument . . . . . . . . . . . . . . . . . . 14
2.3 Authorization & Registration . . . . . . . . . . . . . . . . . . . . . . . . . . . 16
2.3.1 Authorization . . . . . . . . . . . . . . . . . . . . . . . . . . . . . . . . . . . . . . 162.3.2 Registering Online . . . . . . . . . . . . . . . . . . . . . . . . . . . . . . . . . . . 172.3.3 Registering by Mail . . . . . . . . . . . . . . . . . . . . . . . . . . . . . . . . . . 182.3.4 XS Key Status Messages . . . . . . . . . . . . . . . . . . . . . . . . . . . . . . . 182.3.5 Optimization Programs . . . . . . . . . . . . . . . . . . . . . . . . . . . . . . . 192.3.6 Formatting the Hard Disk . . . . . . . . . . . . . . . . . . . . . . . . . . . . . . 19
2.4 Overview and Integration . . . . . . . . . . . . . . . . . . . . . . . . . . . . . . 20
2.4.1 The Plug-in Window . . . . . . . . . . . . . . . . . . . . . . . . . . . . . . . . . 202.4.2 Recommended MIDI Setup . . . . . . . . . . . . . . . . . . . . . . . . . . . . . 232.4.3 Transposition (Octave Range) . . . . . . . . . . . . . . . . . . . . . . . . . . . 262.4.4 MIDI Mode . . . . . . . . . . . . . . . . . . . . . . . . . . . . . . . . . . . . . . . . 27
3 The EVB3 Parameters. . . . . . . . . . . . . . . . . . . . . . . . . . . . . . 28
3.1 Drawbars . . . . . . . . . . . . . . . . . . . . . . . . . . . . . . . . . . . . . . . . . . . . . 29
3.1.1 Pedal Drawbars . . . . . . . . . . . . . . . . . . . . . . . . . . . . . . . . . . . . . 29
3.2 Volume . . . . . . . . . . . . . . . . . . . . . . . . . . . . . . . . . . . . . . . . . . . . . . . 30
3.2.1 Relative Volumes—Upper/Lower/Pedal . . . . . . . . . . . . . . . . . . . . 303.2.2 Volume Control and Expression Pedal . . . . . . . . . . . . . . . . . . . . . 30
3.3 Tune . . . . . . . . . . . . . . . . . . . . . . . . . . . . . . . . . . . . . . . . . . . . . . . . . . 31
5User ManualVersion 1

Table of Contents
3.4 Scanner Vibrato . . . . . . . . . . . . . . . . . . . . . . . . . . . . . . . . . . . . . . . 31
3.5 Percussion . . . . . . . . . . . . . . . . . . . . . . . . . . . . . . . . . . . . . . . . . . . . 32
3.6 Preset Keys and Morphing . . . . . . . . . . . . . . . . . . . . . . . . . . . . . . 33
3.6.1 Morphing . . . . . . . . . . . . . . . . . . . . . . . . . . . . . . . . . . . . . . . . . 35
3.7 Organ . . . . . . . . . . . . . . . . . . . . . . . . . . . . . . . . . . . . . . . . . . . . . . . . 36
3.7.1 Max Wheels . . . . . . . . . . . . . . . . . . . . . . . . . . . . . . . . . . . . . . . 363.7.2 Tonal Balance . . . . . . . . . . . . . . . . . . . . . . . . . . . . . . . . . . . . . . 363.7.3 Shape . . . . . . . . . . . . . . . . . . . . . . . . . . . . . . . . . . . . . . . . . . . . 363.7.4 Bass Filter . . . . . . . . . . . . . . . . . . . . . . . . . . . . . . . . . . . . . . . . . 373.7.5 Ultra Bass . . . . . . . . . . . . . . . . . . . . . . . . . . . . . . . . . . . . . . . . . 37
3.8 Condition . . . . . . . . . . . . . . . . . . . . . . . . . . . . . . . . . . . . . . . . . . . . . 37
3.8.1 Drawbar Leak . . . . . . . . . . . . . . . . . . . . . . . . . . . . . . . . . . . . . . 383.8.2 Leakage . . . . . . . . . . . . . . . . . . . . . . . . . . . . . . . . . . . . . . . . . . 383.8.3 Crosstalk . . . . . . . . . . . . . . . . . . . . . . . . . . . . . . . . . . . . . . . . . . 383.8.4 Random FM. . . . . . . . . . . . . . . . . . . . . . . . . . . . . . . . . . . . . . . . 383.8.5 Filter Age . . . . . . . . . . . . . . . . . . . . . . . . . . . . . . . . . . . . . . . . . 39
3.9 Click . . . . . . . . . . . . . . . . . . . . . . . . . . . . . . . . . . . . . . . . . . . . . . . . . . 39
3.10 Pitch . . . . . . . . . . . . . . . . . . . . . . . . . . . . . . . . . . . . . . . . . . . . . . . . . . 40
3.10.1 Stretch . . . . . . . . . . . . . . . . . . . . . . . . . . . . . . . . . . . . . . . . . . . 403.10.2 Warmth. . . . . . . . . . . . . . . . . . . . . . . . . . . . . . . . . . . . . . . . . . . 413.10.3 Pitch Bender, Brake Effect . . . . . . . . . . . . . . . . . . . . . . . . . . . . . 42
3.11 Sustain . . . . . . . . . . . . . . . . . . . . . . . . . . . . . . . . . . . . . . . . . . . . . . . 42
3.12 Effects . . . . . . . . . . . . . . . . . . . . . . . . . . . . . . . . . . . . . . . . . . . . . . . . 43
3.12.1 Effect Chain and Effects Bypass . . . . . . . . . . . . . . . . . . . . . . . . . 433.12.2 Equalizer . . . . . . . . . . . . . . . . . . . . . . . . . . . . . . . . . . . . . . . . . . 443.12.3 Reverb. . . . . . . . . . . . . . . . . . . . . . . . . . . . . . . . . . . . . . . . . . . . 453.12.4 Wah . . . . . . . . . . . . . . . . . . . . . . . . . . . . . . . . . . . . . . . . . . . . . 453.12.5 Distortion . . . . . . . . . . . . . . . . . . . . . . . . . . . . . . . . . . . . . . . . . 473.12.6 Rotor Cabinet . . . . . . . . . . . . . . . . . . . . . . . . . . . . . . . . . . . . . . 48
6EmagicEVD6

Table of Contents
H
4 Separate Effect Plug-ins . . . . . . . . . . . . . . . . . . . . . . . . . . . 53
4.1 Scanner Vibrato . . . . . . . . . . . . . . . . . . . . . . . . . . . . . . . . . . . . . . . 53
4.2 Rotor Cabinet . . . . . . . . . . . . . . . . . . . . . . . . . . . . . . . . . . . . . . . . . 54
4.3 Distortion II . . . . . . . . . . . . . . . . . . . . . . . . . . . . . . . . . . . . . . . . . . . 55
5 Additive Synthesis with Drawbars . . . . . . . . . . . . . . . 56
5.1 Residual Effect . . . . . . . . . . . . . . . . . . . . . . . . . . . . . . . . . . . . . . . . 58
6 A Short Hammond Organ Story . . . . . . . . . . . . . . . . . . 59
6.1 Tonewheel Sound Generation . . . . . . . . . . . . . . . . . . . . . . . . . . . 60
6.2 The Leslie . . . . . . . . . . . . . . . . . . . . . . . . . . . . . . . . . . . . . . . . . . . . . 61
7 Further Information . . . . . . . . . . . . . . . . . . . . . . . . . . . . . . . 63
8 MIDI Controller Assignments . . . . . . . . . . . . . . . . . . . . . 64
9 Factory Settings. . . . . . . . . . . . . . . . . . . . . . . . . . . . . . . . . . . . 67
Index . . . . . . . . . . . . . . . . . . . . . . . . . . . . . . . . . . . . . . . . . . . . . . . . 73
7User ManualVersion 1

Table of Contents
8EmagicEVD6

1
Welcome…
H
1 Welcome…
An electro-mechanical Hammond™ organ, with tonewheels and its Leslie™ sound cabinet, cannot be replaced by anything other than an electro-mechanical Hammond organ, with tone-wheels and a Leslie sound cabinet! Having said that: With the Emagic Vintage B3, you’ve purchased a truly portable alterna-tive to this classic pop, rock and jazz instrument.
� Product and manufacturer’s names used in this manual are licensed and protected by law. Emagic, Logic, Logic Audio and EVB3 are trade-marks of Emagic Soft- und Hardware GmbH. All other product names, trademarks, and artists’ names are the property of their respective owners, which are in no way associated or affiliated with Emagic. Product names, images, and artists’ names are used solely for the purpose of identifying the specific products that were studied during Emagic’s sound model development and describing certain types of tones produced with Emagic’s digital modeling technology. Use of these products, images, trademarks, and artists’ names does not imply any cooperation or endorsement.
The EVB3 software instrument mimics the sound, and use, of the Hammond B3 and Leslie sound cabinet. Being a software instrument, the EVB3 is not only lighter and more portable than its big, heavy counterpart, it’s also much easier to integrate into Logic’s production environment. There’s no need for any cabling or microphone setup, for live-performances. The same applies to the recording of realistic organ tracks, with the added bonus of editability at any stage of production.
The EVB3 simulates an organ with two manuals (keyboards) and a pedalboard—each of which can have its own registration (sound settings). The sound generation process is not limited to mere additive synthesis of sine choirs. Rather, it fully simulates the tone wheel generators of an electro-mechanical Hammond organ, down to the smallest detail. This includes certain
9User ManualVersion 1

1
Welcome…
“charming” flaws, such as the Hammond’s enormous level of crosstalk and the “scratchiness” of the key contacts. You may adjust the intensity of these “peculiarities” to meet your tastes. This flexibility allows for flawlessly clean, through to dirty and raunchy sounds, and everything in-between. Further quirks of the original were the “robbing” of sine choir voices (multi-plexing) and the specific repetition behaviour. No need to tell you that the EVB3 emulates this too!
The EVB3 simulates three different types of Leslie sound cabinets with rotating speakers, with and without deflectors. Beyond this, three tube overdrives—with different tonal char-acteristics, an equalizer, a wah wah and a reverberation effect are also incorporated. You may freely define the signal flow of these effects as you wish. You can also set the stereo intensity of the microphone position as desired.
If you’re familiar with the original B3, you’ll remember the inverted (black) keys of the lowest octave, on each manual. These inverted keys are switches that recall preset registrations (a preset of your drawbar settings). This feature is emulated by the EVB3 as well, but has been improved significantly, given that you won’t need a screwdriver to change the registration settings of your presets. A morphing feature allows seamless crossfades between two registrations, without the need for an external fader box. The EVB3 can be played with two manuals and a MIDI pedalboard, if you wish (and own these devices). It also offers functions which allow you to play all registers (Upper, Lower and Pedal) with a single-manual master keyboard.
The Scanner Vibrato, Rotor and Tube Distortion effects are also available in standalone plug-in form, allowing them to be used as Insert or Bus effects on other Logic tracks.
We wish you a great deal of fun and success with your new organ!
Your EMAGIC Team
10EmagicEVB3

2
Getting Started
H
2 Getting Started
2.1 What the Package IncludesYour EVB3 package contains the following components:
• the Emagic Software CD• this manual• a registration card• a card containing two stickers
Please complete the registration card as soon as possible and send it to the Emagic distributor in your country or territory. Upon registration you will receive the permanent license code for your EVB3.
Once registered, you will have access to…
• a regular update and support service via the Internet:http://www.emagic.de
• support via our Hotline:in the USA phone 1-530-477 1050, fax 1-530-477 1052in Germany phone +49-4101-495-110in other countries: please consult the Emagic distributor in your country or territory.
11User ManualVersion 1

2
Getting Started
2.2 Quick Start
2.2.1 InstallationAlthough the EVB3 is integrated into Logic’s program code (version 5.3 or higher), we recommend that you run the Setup/Installation procedure by:
• Inserting the EVB3 CD-ROM into your computer’s CD-ROM/DVD drive.
• This should automatically launch a window on your desktop.• Double-click on the Installation icon, and follow the
onscreen instructions. • If no window is launched, use your operating system’s file
management utilities, and browse to the root folder of the CD-ROM drive.
The installer will check your Logic version, and will update or replace any files needed for the operation of the EVB3.
� It is important that you always run the latest version of your Emagic software, as it may contain new features or fixes that affect your system’s performance.
2.2.2 EVB3 AuthorizationYour new plug-in is integrated into the Logic software. To make use of it, an installed copy of Logic Platinum, Gold, Audio (formerly Silver) or MicroLogic AV 5 (or higher) is required.
Rather than installing your new plug-in, you simply need to input an alphanumerical code into Logic. This code authorizes the EVB3, and writes this information to the XSKey. You will find this code on the barcode sticker in the sealed envelope.
� The envelope is sealed. The act of opening the envelope indicates your agreement with, and acceptance of, Emagic’s licensing condi-tions and terms of trade.
12EmagicEVB3

2
Getting Started
H
How authorization works:
• Boot Logic• Open the XSKey Authorization window by selecting Help >
XSKey Authorization (Windows) or > XSKey Authorization (Mac OS).
• Click once on the Enter Access Code Here! field, and type in the supplied code.
After entry, your EVB3 will be temporarily authorized: You may use it for a period of 12 weeks, with no functional restrictions.
� Please see the Authorization & Registration section, on page 16, for information on “unlimited” registration.
2.2.3 The “Instrument” Object Type In Logic’s Track-Mixer (or Audio Environment Layer in Logic Audio, Gold and Platinum), there is an audio object type called an “Audio Instrument”. Audio Instrument channels appear as channel strips in the Environment’s Audio layer and Track Mixer window. These objects allow software instrument plug-ins to be inserted into their Instrument-Insert-slot, as shown in the diagram.
� Note that the use of the insert slot is different to the use of the top Insert slot of the Instrument channels in 4.x and earlier 5.x Logic versions. This change in operation was introduced in version 5.2, as one of several audio engine enhancements, which add to Logic’s mixing functionality.
The default song—the song that opens automatically if you move your Autoload song out of the Logic folder—features a number of pre-configured Instrument channels.
An Instrument channel is an audio object (or an Audio Track in MicroLogic AV), with its Cha parameter switched to one of the Instruments (the number of Instrument channels varies, depen-dent on the Logic version in use). Any audio object can be switched to operate as an Instrument, by changing this param-
13User ManualVersion 1

2
Getting Started
eter (Cha) in the object’s parameter box. You can not insert the EVB3 plug-in into an audio object—created by selecting New > Audio Object—until its Cha parameter is set to an Instrument channel.
To create a new Instrument in MicroLogic AV, simply select Track > Create Instrument.
2.2.4 Loading and Playing an EVB3 Instrument
The EVB3 comes with a library of ready-to-play preset sounds, known as “Settings”. These Settings can be found in the Logic > Plug-In Settings > EVB3 sub-folder, following the installation procedure. Please follow these steps in order to audition the EVB3 settings:
• Start Logic (or MicroLogic AV), and open the Track Mixer or Environment Mixer.
• Select or create a new Instrument object (see above).
• Select the EVB3 from the hierarchal list of plug-ins, which appears after click-holding on the Insert slot of the Instru-ment channel. This will automatically launch the EVB3 plug-in window.
14EmagicEVB3

2Getting Started H
• Launch the Arrange window, if not already open, via the Windows menu, an appropriate Screenset number, or Key Command.
• Select the corresponding Instrument channel—i. e. the one with the EVB3 inserted—in the Arrange Window’s Track List. This enables the object to receive MIDI data from your keyboard.
• The EVB3 is now ready to play.
• You may select any of the EVB3 “Settings” (preset sounds/patches) by click-holding on the flip menu (the downwards pointing triangle, to the right of the Bypass button) in the silver/gray panel area of the plug-in window.
• In addition, Settings can be selected by using the key commands Previous/Next Setting. In Logic Gold and Logic Platinum, Previous/Next Setting can be assigned to practi-cally any MIDI message like Control Changes or Program Change commands.
• Should you close the plug-in window, you can relaunch it by opening the Track Mixer or Environment Mixer, and double-clicking on the Insert panel of the appropriate Instru-ment channel.
15User ManualVersion 1

2Getting Started
2.3 Authorization & Registration
2.3.1 AuthorizationThe EVB3 is authorized via a convenient software protection system known as the XSKey.
Rather than installing your new plug-in, you simply need to input an alphanumerical code into Logic. This code authorizes the new plug-in on the XSKey (Expandable System Key). You will find this code on the barcode sticker, in the sealed enve-lope.
� The envelope is sealed. The act of opening the envelope indicates your agreement with, and acceptance of, our licensing conditions and terms of trade.
How authorization works:
• Open the XSKey Authorization window by selecting Help >
XSKey Authorization (Windows) or > XSKey Authorization (Mac OS). The window indicates the authorization status for all available software instruments, and add-on modules. The authorization code for each is stored in the XSKey. Please take good care of your XSKey!
• This window also shows the serial number of your XSKey. All codes, for all products, are typed into the “Enter Access Code Here!” field. Click once on the field to enter a code.
16EmagicEVB3
2Getting Started H
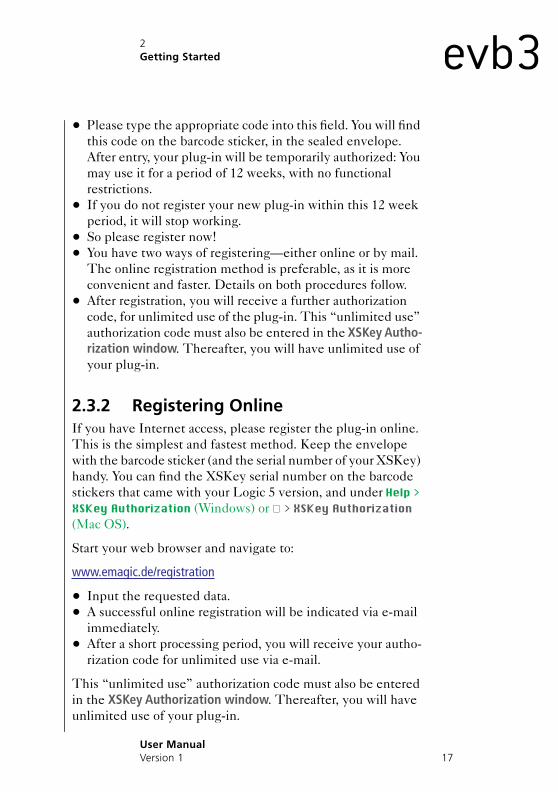
• Please type the appropriate code into this field. You will find this code on the barcode sticker, in the sealed envelope. After entry, your plug-in will be temporarily authorized: You may use it for a period of 12 weeks, with no functional restrictions.
• If you do not register your new plug-in within this 12 week period, it will stop working.
• So please register now!• You have two ways of registering—either online or by mail.
The online registration method is preferable, as it is more convenient and faster. Details on both procedures follow.
• After registration, you will receive a further authorization code, for unlimited use of the plug-in. This “unlimited use” authorization code must also be entered in the XSKey Autho-rization window. Thereafter, you will have unlimited use of your plug-in.
2.3.2 Registering OnlineIf you have Internet access, please register the plug-in online. This is the simplest and fastest method. Keep the envelope with the barcode sticker (and the serial number of your XSKey) handy. You can find the XSKey serial number on the barcode stickers that came with your Logic 5 version, and under Help > XSKey Authorization (Windows) or > XSKey Authorization (Mac OS).
Start your web browser and navigate to:
www.emagic.de/registration
• Input the requested data. • A successful online registration will be indicated via e-mail
immediately. • After a short processing period, you will receive your autho-
rization code for unlimited use via e-mail.
This “unlimited use” authorization code must also be entered in the XSKey Authorization window. Thereafter, you will have unlimited use of your plug-in.
17User ManualVersion 1
2Getting Started
2.3.3 Registering by MailIf you don’t have Internet access, you may register by mail. To do so, please fill out the registration card attached to/enclosed in the envelope.
• Please fill out the card completely. • Attach one of the XSKey serial number stickers (as supplied
with your Logic 5 package) onto the appropriate panel.• Detach the Plug-In Registration Card from the envelope.
Send this card back to the Emagic distributor in your country or territory, using the supplied return envelope.
• Please allow a period of 10 to 14 working days for the processing of your card. You will receive the authorization code for unlimited use by mail. The online registration method is preferable, and more convenient.
This “unlimited use” authorization code must also be entered in the XSKey Authorization window. Thereafter, you will have unlimited use of your plug-in.
2.3.4 XS Key Status MessagesThe following describes the messages you may see in the XSKey Authorization window.
authorized: The module is purchased, it is registered with Emagic, and the code for permanent authorization has been entered. The module is ready for “unlimited” use.
(Demo) expiring in … days: This module is fully functional for the specified number of days. Purchase, and registration with Emagic, will provide you with a code to permanently authorize the module. If no code is supplied within the time period, the module will stop working after the specified number of days has elapsed.
18EmagicEVB3

2Getting Started H
� It is recommended that you do not attempt to change the date of the system clock during a limited authorization period, as this may reduce the time before the module stops working.
activate Demo…:The module is not active, but it is possible to enable its demo mode. To do so, click once in the desired “Activate Demo …” field. Please note that following its initial launch, the demo mode for the module can not be stopped, and will continue to count down! If a permanent license/authorization code is not purchased within the demo period, use of the module will expire.
(Demo) expired:The limited authorization period is over. It is not possible to use the module until a valid license code is entered.
empty field:The module is not active, and no demo mode is available. The only way to activate such modules is by entering a license code.
2.3.5 Optimization ProgramsThe EVB3’s copy protection (the XSKey) is not affected by disk optimization and defragmenting programs. You may use programs such as Norton Speed Disk, MS Defragmenter or DiskExpressII as often as you like.
2.3.6 Formatting the Hard DiskHard disk formatting or partitioning does not affect the EVB3/XSKey.
19User ManualVersion 1

2Getting Started
2.4 Overview and Integration
2.4.1 The Plug-in WindowHands-on operation of the EVB3 is performed in the plug-in window. The plug-in window can be accessed by simply inserting the EVB3 into the Input slot of an Instrument channel. If already inserted, double-clicking on the blue EVB3 label (on the Input slot of an Instrument channel) will open the plug-in window. When launched, the plug-in window allows access to all EVB3 parameters. Every instance of the EVB3 has its own plug-in window, allowing discrete settings for each.
The parameters described in the following chapters are easier to manipulate from within the Editor view of the plug-in window. If you can only see multiple horizontal sliders on a blue background, please switch from the Controls view to the Editor view, using the flip menu found in the upper portion of the plug-in window.
Common Plug-in Window ParametersCommon to all of the EVB3 and other Logic plug-ins is the gray area shown at the top of the plug-in window.
LinkIf the Link button is switched off, you can open several plug-in windows simultaneously.
If the Link button is switched on (default), a single plug-in window will be used to display all opened plug-ins.
Each time you launch a new plug-in, the window will update to reflect the new selection. You can easily and conveniently switch between active plug-ins, without relaunching the plug-in window. Please see the Switching the Contents of the Plug-in Window section, on page 22.
20EmagicEVB3

2Getting Started H
BypassThe Bypass button disables the EVB3—e.g. to temporarily test other settings.
Saving and Selecting SettingsComplete registrations—all parameters of the EVB3—are saved as a Setting in the plug-in window. Every plug-in available for use in your version of Logic allows the storage and recall of such parameter changes.
Settings for the EVB3 are saved in, and recalled from, the corre-sponding EVB3 Plug-In Settings folder.
Save Setting• To save a Setting after making parameter changes, click on
the Settings flip menu, and select Save Setting or Save As… Setting.
• In the ensuing file save dialog, type in the desired name, then click the Save or OK button. This will automatically save the Setting in the appropriate folder.
� It is strongly recommended that you do not attempt to change the Plug-in Settings > EVB3 folder structure. Within the EVB3 folder you are, however, free to sort your settings into sub folders. This folder structure is reflected in a hierarchical menu, shown each time you load a plug-in setting.
� As with all other plug-ins in Logic, the EVB3 parameter changes are also saved with the song. When the song is re-opened, all stored parameter changes will be recalled.
Load Setting• To load an EVB3 Setting, click on the Settings flip menu
found above the EVB3 panel.• Scroll to the Load Setting option. In the ensuing dialog
window, browse to and select the name of the Setting that you wish to load. The Setting will then load.
21User ManualVersion 1

2Getting Started
X
� Note that if no Setting preset is loaded, a default set of parameters will be used for the EVB3.
� Tip: You can also make use of the Next/Previous Plug-In Setting Key Commands. These are not set by default, so you will need to assign them. Once assigned, you can simply press the appropriate Key Command to step forwards/backwards through your EVB3 Plug-in Settings.
Switching the Contents of the Plug-in WindowYou can reassign any open plug-in window, in two different ways, via the two flip menus to the right of the Settings flip menu:
• Using the Upper flip menu (Track 16 in the diagram), you can switch the editor window between all channels. If you have inserted the EVB3 on tracks 1 and 6, for example, you can switch between these channels and adjust their effect parameters.
• In the Lower flip menu you can switch between the plug-in slots of the selected channel, i. e. if a particular channel uses an Equalizer and an EVB3 plug-in, you can switch the window between them.
Changing the Plug-in ViewThe Editor button allows you to switch between the graphical interface and the Controls appearance (horizontal faders on a blue background).
Hints for Changing Parameters• You can reset any parameter to its default value by O-
clicking (Mac) or ç-clicking (Windows) on it.• If you hold S before clicking and moving a control, its value
can be fine-tuned.• You can click anywhere on a slider, and move the mouse.
22EmagicEVB3

2Getting Started H
AutomationAs with every Logic plug-in, the EVB3 effects can be fully automated, with full graphic support and no compromises. Please refer to your Logic documentation for further informa-tion.
2.4.2 Recommended MIDI SetupIf you want to fully exploit all features of the organ, you will need a MIDI bass Pedal unit, and two 73-key MDI keyboards. As the EVB3 also emulates the B3’s preset keys, the lowest octave of the MIDI keyboards can switch the EVB3 registra-tions, just like the original B3. Please read the Playing Both Manuals and the Pedals Live section, on page 23 for more infor-mation.
Of course, the EVB3 can also be played with single-manual keyboards with e. g. 61 keys (5 octaves C to c). Please read the Keyboard Split section, on page 25 for more information.
Playing Both Manuals and the Pedals LiveThe EVB3 receives the notes for the Upper and Lower manuals, and the Pedalboard, on three subsequent MIDI chan-nels.
� The MIDI channel (MIDI Cha) of the Audio Instrument must be set to All, and Keyboard Mode must be set to Multi.
The default Upper-manual receive channel is MIDI channel 1, channel 2 for the Lower manual, and channel 3 for the Pedal registers. If your master keyboard sends MIDI notes on channel 1, it will play the Upper manual, if it sends on channel 2, it will play the Lower manual, and if it sends on channel 3, it will play the Pedal register.
23User ManualVersion 1

2Getting Started
You may use any of your MIDI interface (e. g. Unitor 8 MkII or AMT 8) inputs for your master keyboard(s) and/or Pedalboard. You can also use a single-manual master keyboard—with different keyboard zones or a keyboard split feature—that sends data on different MIDI channels. Regardless of input device(s) used, the only relevant factor is the MIDI send channel!
Logic records the channel information of incoming notes. With most other MIDI and software instruments, this information is not used at all. This is due to Logic’s MIDI channel setting (in the instrument parameters), which has priority, and overrides the original channel information. This can be circumvented by setting MIDI Cha = All, which is recommended for the EVB3. This will “force” the original channel information to be used. This enables you to make use of the two manuals, and Pedal, register of the organ directly and simultaneously—when playing live.
� Please read the users manual of your master keyboard, to learn how to set its MIDI transmission channel, often abbreviated as “TX Channel”.
Changing MIDI ChannelsYou also can set the EVB3 to receive on a MIDI channel, other than 1 for Upper, 2 for Lower and 3 for Pedal. This is done with the parameter Basic MIDI Ch in the General section. The receive channel number for Lower is always higher by 1 than the channel assigned to Upper with Basic MIDI Ch, and the Pedal register receive channel is always higher by 2, than the Basic MIDI Ch selected for Upper.
� The basic MIDI Channel is the only parameter which only is available in Controls View. Touch the Editor field at the top of the plug-in window in order to access Controls View.
� Basic MIDI Ch works only if Keyboard Mode is set to Multi.
24EmagicEVB3

2Getting Started H
� When the base MIDI Ch is set to 16, the Lower manual receives on channel 1, and the Pedal register on channel 2. When the base MIDI Ch is set to 15, Lower receives on channel 16, and the Pedal register receives on channel 1.
� Selection of different MIDI channels may be necessary in a live perfor-mance situation, particularly if you need to change the MIDI transmis-sion channel of your master keyboard, in order to play other sound generators.
Keyboard Ranges of the Upper and Lower ManualThe lowest playable MIDI note is 36 (C1). The range of the preset keys is note # 24 to 35 (C0 to B0).
� 128 notes are defined in the MIDI specification, but even the largest master keyboards are only equipped with 88 keys, just like a concert grand piano.
One example: If your master keyboard ranges from C to c (5 octaves—61 keys), and the sequence and instruments parame-ters of Logic are set to zero (Transpos. = 0), you can play the entire keyboard range—i. e. every possible note of the EVB3. The preset (registration) keys are positioned one octave Lower. If you set Transpos. = −12, you can use the lowest octave to switch between presets.
Keyboard SplitThe EVB3 can also be played perfectly with a single MIDI keyboard (one manual), that is only capable of transmitting on one MIDI send channel. You can split the keyboard in order to play Upper, Lower and Pedal on different keyboard zones.
In the parameter field in the bottom center of the GUI, set Keyboard Mode = Split.
25User ManualVersion 1

2Getting Started
Set the keyboard zones with the UL Split and LP Split parame-ters, in conjunction with the Set buttons. The abbreviations are for: Upper/Lower and Lower/Pedal. To do so, simply click on the appropriate Set button (it will turn orange), and press the desired note on your MIDI keyboard.
� If the LP Split is set to a value above the UL Split, the other splitpoint is moved (and vice versa).
� If you select the same value for both splitpoints, the Lower manual is not heard/active.
� In order to use preset switching in conjunction with Keyboard Mode Split, you might have to adjust the transpositions for the Upper Manual (Trans UM), Lower Manual (Trans LM) and Pedal (Trans Ped).
2.4.3 Transposition (Octave Range)You can individually transpose the Upper (Trans UM), Lower (Trans LM) and Pedal (Trans Ped) registers up/down one or two octaves, independent of the global transpose functions. Trans-position is useful for setting the various registers to a particular range, matching your needs. This facility is of particular impor-tance when using split mode.
� As with Logic’s global transposition functions (which can be set in semitones), these manual-specific transpositions have no impact on the preset keys. Also see the Preset Keys and Morphing section, on page 33.
26EmagicEVB3

2Getting Started H
2.4.4 MIDI ModeThis parameter allows you to define how the drawbar settings will respond to remote MIDI control change messages. Normally, you won’t need to change anything here. If you own a MIDI drawbar organ, however, you’ll probably want to use its hardware drawbars to control the EVB3. Most hardware drawbar organs utilize an independent control change number for every drawbar. Some models allow you to freely define these control change numbers.
If you select MIDI Mode = 0, every drawbar responds to a specific MIDI control change number, commencing with CC #70. (Non-drawbar parameters may be set using control change messages up to CC #118).
If you select MIDI Mode = 1, all of the EVB3 drawbars will be controlled by just a few control change numbers—i. e. CC #80—82. its values are intelligently mapped to all drawbars. The resolution of this technique is not particularly high (much like the original B3), but it works well. The Hammond-Suzuki XB-2 uses this controller assignment method, allowing you to remotely control the EVB3’s drawbars.
� Before you commence a recording session with drawbar movements, performed on a hardware organ and the EVB3 set to MIDI Mode 1, we recommend that you disable MIDI Data Reduction in Logic. The parameter is located under Options > Song Settings > Recording Settings. The function thins out the incoming data stream, which hardly can ever be noticed with normal controller assignments. The controller mapping of the Hammond XB-2’s drawbars exploits the controllers to their limits. Therefore, the MIDI Data Reduction can lead to wrong values. Switch the parameter on again, after the drawbar recording session, in order to gain memory and processing speed.
27User ManualVersion 1

3The EVB3 Parameters
3 The EVB3 Parameters
The graphical user interface (editor view) opens when you double-click on the EVB3 Input slot of an Audio Instrument object. You can open and close the wooden lid by clicking the field underneath the Volume control. Keep it open while reading this manual, because in the following we will discuss every parameter in detail.
28EmagicEVB3

3The EVB3 Parameters H
3.1 DrawbarsThe principles of additive synthesis with sine drawbars is further explained in the Additive Synthesis with Drawbars section, on page 56. You can intuitively pick up the basic prin-ciples by playing a little with the drawbars. The further down you drag the drawbars, the louder the selected sine choir(s) will be—i. e. the drawbars behave like reversed mixer faders. MIDI control of the drawbars is also reversed, when using a standard MIDI fader box.
Drawbars of the Upper and Lower manual, plus Pedal drawbars.
3.1.1 Pedal DrawbarsThe organ features two drawbars for the bass Pedals. The waveform of the bass is not a pure sine wave, but a mixed wave-form, that realistically simulates the Hammond B3 bass. The two registers differ in pitch, and in the following ways:The Lower 16' register contains more octaves,the 8' register has a more prominent fifth portion.
29User ManualVersion 1

3The EVB3 Parameters
3.2 Volume
3.2.1 Relative Volumes—Upper/Lower/Pedal
In the Organ parameters section, you can set the volume of the Lower manual, and the Pedal, relative to the Upper manual. The parameters are called Lower Volume and Pedal Volume.
3.2.2 Volume Control and Expression Pedal
The overall volume of the EVB3 is not only controlled by the Audio Instrument volume fader and control change #7, but also with the Volume control in the EVB3 graphic user interface.
� The Volume must be lowered whenever crackling, or other digital distortion, occurs in the Audio Instrument object. Volume levels over 0 dB can occur if you maximize all registers, play numerous notes, and make use of the Distortion effect.
You can control the volume in real-time with an Expression Pedal (Swell Pedal). Extensive, and often rhythmic, use of the Expression (volume) Pedal forms part of the “style” of many organ players. The expression control also emulates the tonal changes of the B3 preamplifier. Bass and treble are not attenu-ated as strongly as the mids, much like a HiFi amplifier that features a loudness correction facility.
Normally, you would connect an Expression Pedal to the quarter inch Expression jack of your master keyboard. Your master keyboard should transmit MIDI control change #11 when the pedal is moved.
30EmagicEVB3
3The EVB3 Parameters H
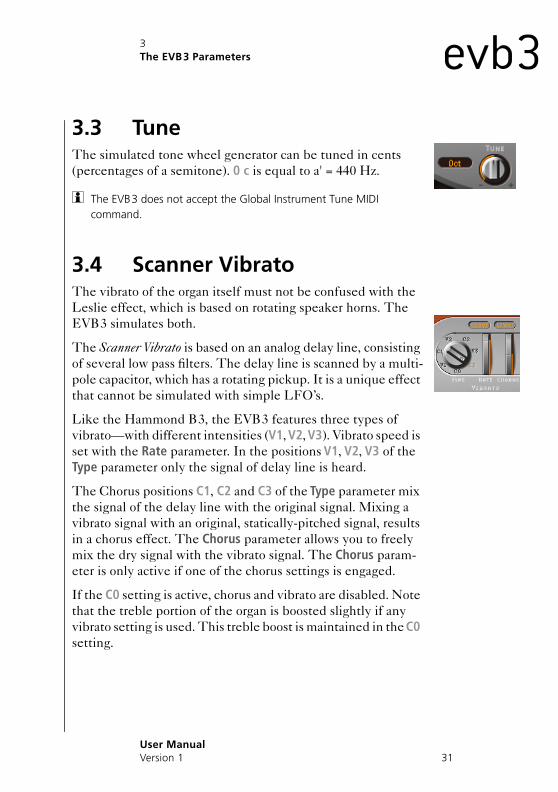
3.3 TuneThe simulated tone wheel generator can be tuned in cents (percentages of a semitone). 0 c is equal to a' = 440 Hz.
� The EVB3 does not accept the Global Instrument Tune MIDI command.
3.4 Scanner VibratoThe vibrato of the organ itself must not be confused with the Leslie effect, which is based on rotating speaker horns. The EVB3 simulates both.
The Scanner Vibrato is based on an analog delay line, consisting of several low pass filters. The delay line is scanned by a multi-pole capacitor, which has a rotating pickup. It is a unique effect that cannot be simulated with simple LFO’s.
Like the Hammond B3, the EVB3 features three types of vibrato—with different intensities (V1, V2, V3). Vibrato speed is set with the Rate parameter. In the positions V1, V2, V3 of the Type parameter only the signal of delay line is heard.
The Chorus positions C1, C2 and C3 of the Type parameter mix the signal of the delay line with the original signal. Mixing a vibrato signal with an original, statically-pitched signal, results in a chorus effect. The Chorus parameter allows you to freely mix the dry signal with the vibrato signal. The Chorus param-eter is only active if one of the chorus settings is engaged.
If the C0 setting is active, chorus and vibrato are disabled. Note that the treble portion of the organ is boosted slightly if any vibrato setting is used. This treble boost is maintained in the C0 setting.
31User ManualVersion 1

3The EVB3 Parameters
The Upper and Lower buttons allow you to switch the scanner vibrato (and its associated treble boost) on/off, individually, for the Upper and Lower manual. As the B3 mixes the bass register (Pedal) with the Lower manual, the Pedal register is affected by the Lower manual’s scanner vibrato settings. This side-effect reflects the technical limitations of the original B3.
� Check out the chorus and vibrato effects, and compare them with the sound of the rotor cabinet simulation! The organ’s chorus sounds different to modern chorus effects (such as Logic’s chorus plug-in). Many organ players rarely use the scanner vibrato, preferring to work with a Leslie, in isolation. Others, like B 3 virtuoso Brian Auger, prefer the integrated organ vibrato over the Leslie.
3.5 PercussionPercussion is only available for the Upper manual—as it does on an original B3. The percussion of an electro-mechanical organ is polyphonic, but is only (re)triggered after all keys have been released. If you release all keys, new notes or chords will sound with percussion. If you play legato, or sustain other notes on the Upper manual, no percussion will be audible.
On the original B3, percussion is only available if the “B” preset key is selected (see Preset Keys and Morphing section, on page 33). If you want this restriction to be simulated, set the Perc parameter to Only B. You find this parameter in the Organ section. If you always want percussion to be available, select Always.
Activate percussion by pressing the On button in the Percus-sion section, to the top-right of the GUI. The percussion is heard in the 4' register or in the 22⁄3' register, if the 2nd/3rd button is set. Set the percussion decay time with Time, set its level with Vol. This improves on the B3, where Time and Vol could only be switched on/off, whereas these parameters can be varied with the EVB3.
32EmagicEVB3

3The EVB3 Parameters H
� Time has a maximum setting called “Paradise”. In this position, the percussion doesn’t decay at all. The name is derived from a famous Jimmy Smith recording “Groovin’ at Small’s Paradise”, where Jimmy used a B3 that had a defect in the percussion trigger. The cool thing about this technical flaw is that one harmonic sounds without Chorus-Vibrato, while the drawbar harmonics feature Chorus-Vibrato. While we recognize that this is very specialized, we thought it would be a nice inclusion, especially for jazz-oriented players.
The EVB3 percussion register can be played with velocity sensitivity, unlike the B3. Set the percussion velocity sensi-tivity with Vel.
If you engage percussion on a B3, the volume of the normal, non-percussive registers is reduced slightly. The Up Level parameter simulates this behavior, allowing you to define the volume of the Upper manual, with percussion engaged.
3.6 Preset Keys and MorphingThe Hammond B3 is equipped with 12 switches, located below the lowest octave of both keyboard manuals. These are the preset keys, and are laid out as an inverted keyboard octave (black keys, white sharps). They are used to recall drawbar registrations. These presets could only be altered with a screw-driver on the original B3.
Drawbars and Preset Section
MIDI notes 24 to 35, the octave below the lowest octave of a (non-transposed) 5-octave keyboard, are used as the preset keys. See the Keyboard Ranges of the Upper and Lower Manual section, on page 25.
33User ManualVersion 1
3The EVB3 Parameters
You can click these preset keys directly in the graphic user interface of the EVB3. They are located to the left (Upper) and right (Lower) of the Morph wheel. The current drawbar regis-trations are indicated by small vertical lines on each key.
The presets only relate to the registration of a single manual. The presets do not store vibrato or other parameter settings. The preset keys work in real-time, thus overall settings (including effects, etc.) can be stored and recalled via the Settings menu. See the Saving and Selecting Settings section, on page 21.
� On keys C# to A#, the percussion only works in Percussion Mode Always (see Percussion section, on page 32).
Disabling MIDI Preset SwitchingYou can disable the switching of presets with MIDI notes 24 to 35, thus avoiding any problems that may arise from transposi-tions. To do so, Disable the MIDI To Preset Key.
Cancel Key, Registering while PlayingThe lowest preset key (C) is the cancel key. if you depress it, all drawbars are moved to their minimum setting. The other 11 keys, from C# to B, recall registrations. You can edit recalled presets immediately. The preset memorizes these alterations instantaneously, with no further action required. This means that if you recall a new preset, the former preset memorizes the drawbar settings at the time the new preset was recalled.
If you hold the cancel key (C) on your master keyboard with the small finger of your left hand, and sustain a chord with your right hand, you can trigger the chord with different registra-tions, by pressing the preset keys with the other fingers of your left hand. This results in an organ-specific gater type effect, which wouldn’t be possible with the right hand alone.
34EmagicEVB3

3The EVB3 Parameters H
3.6.1 MorphingYou can switch between the presets of the Upper manual with any keyboard. To be more precise, you can switch between registers with any MIDI controller—e. g. the modulation wheel. Choose the desired MIDI controller with the Midi CC parameter.
The step or linear Mode parameter options determine whether an abrupt switch, or a seamless morph (cross-fade), occurs between presets.
� Switching the registers with this morphing function is only available for the Upper manual.
RangeAfter deciding on a controller to use for switching or morphing the Upper manual registers, you can determine the number of preset keys that are affected.
The morphing (or switching) always begins with the top preset key, the B. Range defines the “end” preset key. If Range = A#, you will switch or morph between two presets. If Range = G#, you will switch or morph between four presets (B, A#, A and G).
Save To…In Linear Mode (morphing instead of switching), the seamless crossfades result in a variety of new drawbar registrations you might want to save. Before saving, you may wish to alter some drawbar positions manually. Click the words Save To, and select the destination preset key. You do not need to do anything else, in order to save the setting to another preset key.
� Note: As soon as you morph, the Morph text turns orange, indicating changes—i. e. you are performing a morph. The morphing result(s) can be further modified with the drawbars, but are lost if you don’t save it/them. The Morph text will start to flash if any drawbar modifi-cations are made, indicating changes to the Morph values.
35User ManualVersion 1

3The EVB3 Parameters
3.7 OrganThe Organ parameters adjust the overall behaviour of your EVB3.
� Please note: The parameters Lower Volume and Pedal Volume are discussed in the Relative Volumes—Upper/Lower/Pedal section, on page 30. The parameter Perc is discussed in the Percussion section, on page 32.
3.7.1 Max WheelsCalculating (emulating) all tone wheel generators consumes considerable CPU processing power. A reduction of this param-eter value reduces the EVB3’s hunger for processing resources.
Note that this will diminish some overtones, so you should not reduce this value if you’re after an ultra-realistic simulation.
3.7.2 Tonal BalanceTonal Balance changes the mix relationship of the higher/lower sounding tone wheels. Positive values result in a lighter and brighter sound. Experiment with different Tonal Balance and Equalizer settings. See the Equalizer section, on page 44, for further information.
3.7.3 ShapeWhile the Hammond’s tone generators produce pure sine waves (despite technical artefacts), other organs deliver distorted waveforms. You can produce sounds resembling those of Farfisa, Solina or Yamaha organs with the Shape parameters.
You can subtly alter the waveform of the sounds emanating from the tonewheel generator with the Shape parameter. Moving the parameter to the right will make the tone brighter (and louder), and moving it to left will make it duller (and softer).
36EmagicEVB3

3The EVB3 Parameters H
Note that the Shape parameter is placed after the filters which follow the sine generators.
3.7.4 Bass FilterThe sound of the Pedal drawbars often appears to be somewhat “brilliant”, within the overall musical context. To circumvent this issue, and to suppress the treble of the bass register, please make use of the Bass Filter. When active, you will only hear a solid bass organ fundamental in the bass register.
3.7.5 Ultra BassIf you switch on Ultra Bass, another low octave will be added to the playable range of the Upper and Lower manuals. These additional low octaves, and the ability to independently trans-pose both manuals (see Transposition (Octave Range) section, on page 26), are not available on the original B3.
3.8 ConditionTechnical limitations of electro-mechanical drawbar organs with tonewheels cause some strange tonal artefacts, such as crosstalk. These quirks form an integral part of the B3’s charm. With the following parameters, you can adjust these parameters and thus define the age of your EVB3.
� Read more about the Click parameters in the Click section, on page 39.
37User ManualVersion 1

3The EVB3 Parameters
3.8.1 Drawbar LeakEven if all drawbars are at their minimum position, the tone-wheel generators of the B3 aren’t completely quiet. This is due to “leakage” of the tone wheels, cross-talking with the output. Drawbar Leak allows you to set the minimum output level of the drawbars, when set to minimum. At a value of 0, you can completely eliminate this leakage. At the maximum setting, drawbar leakage is most definitely audible.
3.8.2 LeakageLeakage adds a sound resulting from the crosstalk of all tone wheels—including those of the notes that you don’t play. This provides “breath” to the organ sound.
3.8.3 CrosstalkThe Hammond’s tone wheels are divided into compartments of four—with the same key, but in different octaves. There are two tonewheels, four octaves apart, on each rotating shaft. The signal of the Lower wheel contains a small amount of signal, induced by the higher wheel, and vice versa. This “crosstalk” can be adjusted with the Crosstalk slider. Note that crosstalk is only audible on certain wheels, avoiding “rumble” when chords are played.
3.8.4 Random FMIf the tonewheel generator is clean, all frequencies are “straight”—i. e. the frequencies are even/in tune. The 3-fold decoupling of the tonewheels—via springs, flexible couplings and flywheels—is very effective, but can’t compensate for irregularities that come with dirt and grease in the driving gear. This gradual build-up of grime in the mechanism makes the
38EmagicEVB3

3The EVB3 Parameters H
revolution of the tonewheel assembly irregular on its axis. This is transmitted to the tonewheels. The Random FM slider allows you to simulate this effect. Note that the effect only becomes audible in the higher frequency ranges.
3.8.5 Filter AgeThe high frequency output signals of the B3’s tone wheel generators are filtered by bandpass filters. The center frequency of these filters vary as the capacitors age. Filter Age allows you to alter the center frequencies of the filters. This colors the sound of the jitter applied by Random FM and the background noise resulting from Leakage. (See the Leakage section, on page 38 and Random FM section, on page 38.) This parameter also influences the intonation of the organ, if you use the pitch bender.
3.9 ClickThe key contacts of electro-mechanical tonewheel organs tend to “saw” a little on the busbar, introducing a short “click” sound. If any corrosion occurs to the key contacts or busbar, this will increase the length, and level, of this click. This aspect of the B3’s design causes irregular scratching noises (commonly referred to as “keyclick”), when striking and releasing keys. Hammond fans like these clicking noises, as they introduce a transient, percussive quality to the note. The EVB3 allows you to adjust the volume and sound of the key click. The click sound is altered randomly, and independently, from the click on and click off (release) volume settings.
Click On/Click OffThese two knobs independently control the click volume for the beginning (Click On), and release, of the note (Click Off). The click off is quieter, even if both controls are set to the same position.
39User ManualVersion 1

3The EVB3 Parameters
Click Min/Click MaxNot only are the tone color, and volume, of clicks altered randomly, but also their duration. Click duration can vary between a short “tick” and a longer “scratch”. Minimum dura-tion is defined by Click Min, and maximum duration with Click Max. The duration is displayed in milliseconds, as you move the sliders.
� Even if both parameters have identical values, there is still a random variation in sound. This variation makes some clicks seem shorter than the value set with Click Min.
Click ColorSet the tone color of the click here. Despite its random varia-tion, you can define its treble portion globally.
3.10 PitchCompared to the original B3, the EVB3 offers quite a lot of parameters to change its pitch behaviour.
� Please note: The parameters Trans UM, Trans LM and Trans Ped are explained in the Transposition (Octave Range) section, on page 26.
3.10.1 StretchThe EVB3 is tuned to an equal-tempered scale. As a deviation from this standard tuning, you can stretch the tuning in the bass and treble ranges, much like acoustic pianos (especially upright pianos). If you select a value higher than 0 for Upper Stretch, the pitch of the higher notes will be raised. If you select a value higher than 0 for Lower Stretch, the pitch of the Lower notes will be lowered.
40EmagicEVB3

3The EVB3 Parameters H
� The tones of clavinets, harpsichords and pianos have “inharmonici-ties” in their harmonic structure. The frequencies of these “over-tones” (harmonics) are not exactly “whole-number” multiples of the base frequency, as pythagorean theory dictates. They are only approx-imate and are, in fact, a little higher. The overtones of lower (tuned) notes, therefore, are more closely related to the main frequencies of the upper notes. Due to the lack of strings, this inharmonic relation-ship is not true of organs. The stretch feature was included for situa-tions where you may wish to use the EVB3 in an arrangement, along-side an acoustic or digital piano (EVP 88 and EVD6 Clavinet). When arranged in conjunction with an orchestra or synthesizers, the stretched tuning facility should not be used. Please experiment!
Lower Stretch controls the amount of deviation from the equal-tempered scale in the bass end of the sound. The higher the value, the further down the low notes are tuned. At a setting of 0, the EVB3 is tuned to an equal-tempered scale, with each octave below exactly halving the frequency. Upper Stretch controls the amount of deviation from the equal-tempered scale in the treble end of the sound. The higher the value, the further up the high notes are tuned. At a setting of 0, the EVB3 is tuned to an equal-tempered scale, with each octave up exactly doubling the frequency.
3.10.2 WarmthWarmth controls the amount of random deviation from an equal-tempered scale. High values add “life” to organ sounds, but tend to sound a little out of tune.
When applying Warmth and Stretch, you should consider that these parameters may result in a detuned sound, which is similar to the overuse of a chorus effect. Straight tuning is nice too, so set Warmth to 0 if you’re after a “pure” sound.
41User ManualVersion 1

3The EVB3 Parameters
3.10.3 Pitch Bender, Brake EffectThe Hammond organ has no pitch bender. As such, use of the pitch bender is not suitable for realistic simulations, but it does provide a number of creative options.
Pitch up/down bender sensitivity can be set independently, in semitone steps, with the Pitch Bend Up and Pitch Bend Down parameters. The maximum sensitivity for upward bends is one octave.
You can set Pitch Bend Down to Brake, which gradually slows the movement of the tone wheels down to a total stop, at the pitch bender’s minimum position.
� The Pitch Bend Down = Brake setting recreates an effect audible at the end of “Knife Edge” by Emerson, Lake and Palmer. Keith Emerson’s virtuoso Hammond work was recorded on a reel-to-reel tape recorder. At the end of the song, you can hear the tape recorder being gently slowed to a total stop.
3.11 SustainSynthesizer players call the time the note takes to fade out after the release of the key the “Release Time”. The EVB3 allows you to control this parameter as well; it’s called “Sustain” in the organ lexicon. The three controls allow for individual settings in the Upper (Up), Lower (Low) and Pedal (Ped) registers.
If you select the Smart Mode, playing new notes will cut the sustain (release) phase of released notes. Normal Mode allows polyphonic sustain phases—i. e. all released notes will continue to sustain. Smart Mode allows long sustain times, even in the bass register, which would normally cause rumbling disso-nances.
42EmagicEVB3

3The EVB3 Parameters H
3.12 EffectsThe EVB3 features a three-band equalizer, a reverberation effect, a pedal-controllable wah wah, and a distortion effect that simulates the sound of an overdriven tube amplifier. Finally, the signal can be processed by the rotor effect.
Logic allows further processing, using the insert slots and auxil-iary sends. You may freely use native and/or VST-plug-ins to process your EVB3 tracks.
The Scanner Vibrato, Rotor cabinet and overdrive distortion “Dist II” are included in the EVB3 package, as independent native plug-ins, for use on any of Logic’s audio channels. This allows you to apply the Rotor effect to other tracks as well. The Leslie rotor cabinet isn’t only famous as the amplifier for the Hammond organ. It’s a great effect for guitar, vocals or acoustic piano as well!
3.12.1 Effect Chain and Effects Bypass
Effect ChainThe EVB3’s signal flow is as follows: the organ’s signal runs through the equalizer, wah wah and distortion effects. You can choose between four different signal flow routings for the equalizer, wah wah and distortion effects in the Effect Chain flip menu. This treated signal is then fed into Reverberation and finally passed to the Rotor effect.
A “classic” B3 patch would be: an EQ’ed organ, plugged into a wah wah pedal, amplified by an overdriven Leslie. Select EQ-Wah-Dist.
43User ManualVersion 1

3The EVB3 Parameters
The sound of the overdrive changes if the input signal is being filtered—be it by the EQ, or the wah wah. If you patch the EQ before the overdrive, the sound of the overdrive becomes much more flexible. The output signal of the distortion effect always contains high frequency content. If you want to suppress these frequencies, the wah wah must be the final effect in the chain—e. g. EQ-Dist-Wah.
If you wish to create a “screaming” sound (achieved by distorting the wah wah output), you can minimize any “harsh-ness” by choosing the Wah-Dist-EQ routing.
You can suppress the brutal overtones of extreme distortions with two filters: Select Dist-EQ-Wah.
Effect BypassThe effects distortion, Wah and EQ can be bypassed separately for the Pedal register. Set Effect Bypass to Pedal to do so. This avoids the entire bass portion of your organ being suppressed by the wah wah. It also avoids undesirable intermodulation artefacts, when utilizing the overdrive effect.
If you select None, the entire output of the organ is processed, as if you had plugged the B3’s mono output into a Leslie cabinet.
3.12.2 EqualizerBeing a Logic user, you won’t have any questions about the EQ Low, EQ Mid and EQ High controls. The EQ algorithm is derived from Logic Platinum’s Fat EQ. EQ Level is a master EQ volume control, allowing you to specify any gain level to the distortion effect. See Effect Chain and Effects Bypass section, on page 43 for details on effects routing options.
44EmagicEVB3

3The EVB3 Parameters H
3.12.3 ReverbBox, Small, Medium, Large, Big and Spring are the names of the reverb algorithms.
Reverb level is defined by the Reverb parameter. A Reverb =0 value conserves processing resources.
You can also select Bypass in the Reverb Mode flip menu, if you want to disable the reverb without changing its level.
The reverb is always patched after the EQ, wah wah and distor-tion effects, but before the rotor effect. This means that the reverb always sounds as if it is played back through the rotor speaker. To hear the reverb after the rotor, switch off the organ’s reverb, and use an aux send to apply reverb to the Audio Instru-ment object.
3.12.4 WahThe name “Wah Wah” comes from the sound it produces. It has been popular with electric guitarists since the days of Jimi Hendrix. The pedal controls the cutoff frequency of a band pass, low pass, or—less commonly—a high pass filter. The wah wah pedal has also been used extensively with the Hammond organ.
MIDI Pedal ControlIt is recommended that you permanently attach an Expression Pedal to your MIDI master keyboard. Your master keyboard should transmit MIDI control change #11 (Expression real-time volume), if you attach an Expression Pedal to the Expres-sion jack and move it. This would normally be used to control the volume while playing.
If you program an EVB3 setting, set the Expression parameter to 0, and then define a wah wah effect (with controller 11 controlling the wah wah’s cutoff frequency), you can control the wah wah with the pedal—without having to program anything on the master keyboard.
45User ManualVersion 1

3The EVB3 Parameters
� Read more on this in the Recommended MIDI Setup section, on page 23. You should also consult the users manual of your keyboard.
Wah Wah Control with Other MIDI-Controllers or AftertouchYou can use any MIDI control change message to control the wah wah effect. You can select any controller number and Channel Aftertouch (Touch) in the CC field.
ModeMode allows you to enable/disable the wah wah effect. If you select Mode off, the effect is disabled. There are six different filter types available:
ResoLP (Resonating Low Pass Filter)In this mode, the wah wah will work as a resonance-capable low pass filter. At the minimum pedal position, only low frequen-cies can pass.
ResoHP (Resonating High Pass Filter)In this mode, the wah wah will work as a resonance-capable high pass filter. At the maximum pedal position, only high frequencies can pass.
PeakIn this mode, the wah wah will work as a peak (bell) filter. Frequencies inside the center frequency, which is controlled by the selected MIDI controller, will be emphasized.
CryBThis setting mimics the sound of the popular Cry Baby wah.
Morley 1This setting mimics the sound of a popular wah pedal, manu-factured by Morley. It features a slight “peak” characteristic.
Morley 2This setting mimics the sound of the Morley distortion wah pedal. It has a constant Q.
46EmagicEVB3

3The EVB3 Parameters H
RangeRange controls the sensitivity of the wah to controller move-ments. If you only intend to make slight alterations to the cutoff frequency, choose a small value.
BiteBite is the name for the resonance parameter of the wah filter. You’ll know the parameter’s meaning, if you’re a synthesizer player. Anyway, check it out: The cutoff frequency is boosted. High values make the wah sound more aggressive.
3.12.5 DistortionThe distortion effect simulates an overdriven two-stage tube amplifier. Its primary role is the simulation of the Leslie ampli-fier—or whatever amp might be used to feed the Leslie speaker cabinet.
Under Type, you’ve got the choice between three different tube amp types: Growl, Bity and Nasty. Growl simulates a two-stage tube amplifier, resembling the Leslie 122 Model, the classic partner for the Hammond B3 organ. Bity is reminiscent of a bluesy guitar amp. Nasty delivers hard distortions, and is well suited for very aggressive sounds.
The Tone control only affects the distorted portion of the sound, while the dry signal portion remains unaffected. This allows for very warm overdriven sounds that won’t become “scratchy” if you try to get more treble out of the instrument.
Drive controls the amount of overdrive distortion. The output level is automatically compensated for, so there’s no need for another master volume control adjustment facility.
47User ManualVersion 1

3The EVB3 Parameters
3.12.6 Rotor CabinetThe Hammond story can’t be fully told without a chapter on the rotor sound cabinets, manufactured by Leslie. In fact, playing the B3 organ without a rotor cabinet is viewed as a “special effect” these days. The EVB3’s rotor cabinet section simulates not only the speaker cabinet itself, but also the micro-phones which pick up the sound.
CabinetThere are four settings available:
offIn the off setting, there’s no rotor effect at all and you’ll hear the direct output signal of the organ, and/or the other effects. There’s an alternative to switching the rotor effect off: in the Brake mode, the speakers don’t rotate, but are still picked up by the simulated microphones, in a random position. (see Rotor Speed section, on page 49).
WoodThe Wood setting mimics a Leslie with a wooden enclosure, and sounds like the Leslie 122 or 147 models.
ProlineThe Proline setting mimics a Leslie with a more open enclo-sure, similar to a Leslie 760 model.
SingleIn the Single setting, the sound of a Leslie with a single, full-range, rotor is simulated. The sound resembles the Leslie 825 model.
SplitIn the Split setting, the bass rotor’s signal is routed more to the left side, and the treble rotor’s signal is routed more to the right side.
48EmagicEVB3

3The EVB3 Parameters H
Rotor SpeedThe Rotor Speed switches work as follows: Choral = slow movement, Tremolo = fast, and Brake stops the rotor.
Speed ControlOrgan players generally switch between Choral and Tremolo. With the EVB3, you can switch speeds remotely via controllers as the Modulation Wheel (ModWhl), Channel Aftertouch (Touch), Sustain Pedal (SusPdl), or, alternately, exclusively via mouse (off).
ModWheel—If you choose the modulation wheel, you can set all three speed settings in real-time. Brake is selected around the modulation wheel’s center position, while Choral is selected in the lower, and Tremolo in the upper third of the modulation wheel’s travel.
All other entries in the Speed Control flip menu work as follows: They toggle between Tremolo and the speed set with the Rotor Speed radio buttons, that means either between Choral and Tremolo, or between Brake and Tremolo. If Rotor Speed is set to Tremolo, you will toggle between Tremolo and Choral. The difference between the entries is how the toggle action takes place.
ModWhl Toggle—Toggles as soon as the Mod Wheel exceeds its center value on its way from its low position to its high position. If the Mod Wheel passes its center value on its way from its high to its low position, there will be no toggle This has been implemented for Roland keyboards with combined Pitch Bend- and Modulation levers.
ModWhl Temp—Toggles as soon as the Mod Wheel passes its center value, regardless if you move the Mod Wheel from high to low or from low to high. This has been implemented for Roland keyboards with combined Pitch Bend- and Modulation levers.
Touch—Toggles as soon as you press Aftertouch. If you release Aftertouch, there will be no toggle.
49User ManualVersion 1

3The EVB3 Parameters
Touch Temp—Toggles as soon as you press Aftertouch. If you release Aftertouch, there will be another toggle.
SusPdl Toggle—Toggles as soon as you press the Sustain Pedal. If you release the Sustain Pedal, there will be no toggle.
SusPdl Temp—Toggles as soon as you press the Sustain Pedal. If you release the Sustain Pedal, there will be another toggle.
� The Hammond B3 isn’t equipped with a Sustain Pedal. This allows you to make use of your MIDI master keyboard’s Sustain Pedal as a speed switch.
Rotor Fast RateRotor Fast Rate defines the maximum possible rotor speed (Tremolo). While moving the slider, the Tremolo rotation speed is displayed in Hertz.
Acc/Dec ScaleThe Leslie motors have to physically accelerate and decelerate the speaker horns in the cabinets, and their power to do so is limited. Acc/Dec Scale determines the speed at which the motors can accelerate the rotors (time it takes to get the rotors up to a determined speed), and the length of time it takes for them to slow down. If the slider is set to its far left position, you can switch to the preset speed immediately. If you drag the slider to the right, speed changes take more time to occur.
In the default position of 1, which, like any default in Logic, can be set by clicking the slider while holding O (Mac) or ç respectively, the behavior is Leslie-like.
50EmagicEVB3

3The EVB3 Parameters H
Horn DeflectorIf you look inside a Leslie cabinet, you’ll see a double horn, with a deflector at the horn mouth. This deflector “makes” the Leslie sound. Some people, however, removed it to alter the Leslie sound, as removal of the deflector increases amplitude modulation, and decreases frequency modulation. This param-eter allows you to switch the deflectors on and off, without needing to order spare deflectors.
Mic Distance/Mic AngleThe Mic Angle slider defines the stereo image, by changing the angle of the simulated microphones. An angle of 0° results in a mono sound, while an angle of 180° causes phase cancellations. Experienced sound engineers tend to avoid wide spreads.
Mic Distance makes the sound darker, and less defined, when set to higher values. This is typical of microphones, when posi-tioned further from the sound source.
Motor ControlThe original Leslie amps have simple AC outlets for connec-tion of the motor plugs. Modification is easy, you just remove or swap the plugs, for the motors.
� Please note: With Single Cabinet, the Motor Ctrl setting is irrelevant, because there are no separate bass and treble rotors in a Single Cabinet.
A “fancy” variation is the inverse mode (Motor Ctrl = inv). If you switch to Tremolo, the bass compartment rotates with fast speed, while the horn compartment rotates with slow speed, and vice versa in Chorale mode. In Brake mode, both rotors will stop.
The 910, or “Memphis” mode, stops the bass drum rotation at slow speed, while the speed of the horn compartment can be switched. This may be desirable, if you’re after a solid bass sound, but still want treble movement.
51User ManualVersion 1

3The EVB3 Parameters
Another Mode is Sync: The acceleration and deceleration of the horn and bass drum are about the same. This sounds as if the two were locked, but is only clearly audible during acceleration/deceleration.
52EmagicEVB3

4Separate Effect Plug-ins H
4 Separate Effect Plug-ins
Processing vocals, guitar or an electric piano with a rotor cabinet, processing the ES2 with an authentic scanner vibrato, applying some tube distortion to a guitar track etc.—all this can be simulated with the separate effects plug-ins, included in the EVB3 package. These plug-ins can also be used with the EVB3, enabling you to create the sound of two rotor cabinets, for example. You also can place the effects in an unconventional order.
Their parameters are as per those of their EVB3 counterparts, so there’s nothing new to explain about them.
4.1 Scanner Vibrato
In its mono-version, the stereo parameters of the scanner vibrato are hidden behind a transparent cover (right).
You can find the Scanner Vibrato in the Logic > Modulation > ScannerVibrato plug-in submenu. It’s available in mono, stereo, and mono>stereo configurations.
53User ManualVersion 1

4Separate Effect Plug-ins
If Stereo Phase is set to free, the modulation speed can be set independently for the left (Rate Left) and right (Rate Right) channels. This allows for quite wild effects, as left and right modulation are not synchronized to each other.
If Stereo Phase is set to 0 to 360 degree, the modulation speed for the left and right channel together is set with Rate Left. Stereo Phase determines the phase relation between left and right modulation, thus enabling synchronized stereo effects. Rate Right has no function in this mode.
Read more about the other parameters in the Scanner Vibrato section, on page 31.
4.2 Rotor Cabinet
You can find the Rotor Cabinet in the Logic > Modulation > Rotor Cabinet plug-in submenu. It’s available in stereo and mono>stereo configurations. Read a description of the parame-ters in the Rotor Cabinet section, on page 48.
� Please note: There is no Speed Control parameter on the Rotor Cabinet plug-in. You can switch rotor speeds manually.
54EmagicEVB3

4Separate Effect Plug-ins H
4.3 Distortion II
The Distortion II plug-in is found in the Logic > Distortion > Dist II plug-in submenu. It is available in mono, stereo, and mono>stereo configurations.
In order to have a broader range of distortion colours, you can raise the input signal by up to 20dB or lower by up to 10dB with PreGain.
Read a description of the other parameters in the Distortion section, on page 47.
55User ManualVersion 1

5Additive Synthesis with Drawbars
5 Additive Synthesis with Drawbars
The Hammond B3 is the classic drawbar organ. As with an acoustic pipe organ, the registers (drawbars, or “stops” on a pipe organ) can be pulled out, in order to engage them. But in contrast to a pipe organ, the B3 allows seamless mixing of any drawbar registers. The more you drag the drawbars down, the louder they will become.
Despite characteristics, such as key clicks, intonation undula-tions, distortions and crosstalk (which are emulated by the EVB3), playing a single note, with a single register, results in a pure sine tone. Mixing harmonic sine tones results in more complex spectra, and is known as “additive synthesis”. Organs—even acoustic pipe organs—can be regarded as addi-tive synthesizers. There are, however, several limitations that need to be considered before viewing the instrument in this way. These limitations, on the other hand, constitute the char-acter of any real musical instrument, loaded with charm.
The naming of the drawbars is derived from the length of organ pipes, measured in feet ('). This naming convention is still used with electronic musical instruments. Halving the length of a pipe doubles its frequency. Doubling the frequency means nothing other than: one octave up.
The lowest register, 16' (far left, brown drawbar), and the higher octaves 8', 4', 2' and 1' (white drawbars) can be freely mixed, in any combination. 16' is commonly described as the “sub-octave”. When we’re regarding this register as the funda-mental, the octave above 8' is the second partial, 4' the fourth, 2' the eighth and 1' the sixteenth partial.
56EmagicEVB3

5Additive Synthesis with Drawbars H
With the 51⁄3' register—the second brown drawbar—you can add the third partial. This is the fifth above the 8'. Basically, the drawbars are arranged by pitch, but there is, however, an excep-tion. The second drawbar (51⁄3') is sounding a fifth higher than the third drawbar. See the Residual Effect section, on page 58 for an explanation.
22⁄3' gives the sixth, 13⁄5' the tenth and 11⁄3' the twelfth partial. So the electromechanical tone-wheel organ gives you the partials 1 (16'), 2 (8'), 3 (51⁄3'), 4 (4'), 6 (22⁄3'), 8 (2'), 10 (13⁄5'), 12 (11⁄3') and 16 (1'). As you can see, the harmonic spectrum is nowhere near “complete”. That’s the reason why overdrive distortion effects are so popular with electromechanical tone-wheel organs—they enrich the harmonic spectra by generating more partials.
� The term “partial” is basically the same as “harmonic”, but they are counted in a slightly different way. The fundamental is counted as the first partial. its octave, twice the frequency, is the second partial, but is known as the first harmonic. The fifth partial oscillates at five times the frequency of the fundamental. The fifth partial is known as the fourth harmonic, because with harmonics, the fundamental is not counted (which makes the term “harmonic” less practical to use).
� 22⁄3' is the fifth over 4'. 13⁄5', is the major third over 2'. 11⁄3' is the fifth over 2'. In the bass range, this can lead to inharmonic tones, especially when playing bass lines in a minor key. This is because mixing 2', 13⁄5' and 11⁄3' results in a major chord.
57User ManualVersion 1

5Additive Synthesis with Drawbars
5.1 Residual EffectThe residual effect is a psychoacoustic phenomenon. Human beings can perceive the pitch of a note, even when the funda-mental is completely missing. If we didn’t “hear” this way, it would make listening to music with a kitchen radio impossible. Its speaker will never play back the fundamental of the bass line, as this frequency is far below the range that the speaker can transmit. If you pull out all registers of the drawbar organ, except for the fundamental—16', you’ll still perceive the same pitch. The sound becomes thinner, with less bass and less warmth, but the pitch remains the same.
Setting drawbar registrations often involves this psychoacoustic phenomenon. In the lower octaves, mixing the 8'and 51⁄3' sine drawbars creates the illusion of a 16' sound, although the frequency is missing. Old pipe organs also make use of the residual effect, by combining two smaller pipes, eliminating the need for long, heavy, air-hungry, and expensive giant pipes. This tradition is continued in modern organs, and is the reason for arranging the 51⁄3' under 8: The 51⁄3' tends to create the illu-sion of a pitch that is one octave lower than 8'.
58EmagicEVB3

6A Short Hammond Organ Story H
6 A Short Hammond Organ Story
Three inventions inspired Laurens Hammond (1895—1973), a manufacturer of electric clocks, to construct and market a compact electro-mechanical organ with tone wheel sound generation. The Telharmonium by Thaddeus Cahill was the musical inspiration, Henry Ford’s mass production methods, and the domestic synchron clock motor were the other factors.
The Telharmonium was the first musical instrument that made use of electromechanical sound generation techniques. In the year 1900, its man-sized tone wheel generators filled a two-storey building in New York. For a short period around this time, subscribers could order Telharmonium music over the New York telephone network (the streaming audio system of the time). The only amplification tool was the telephone’s mechanical diaphragm, as a proper tube amplifer and accept-able speakers had not yet been invented. The Telharmonium was a commercial flop but its historical status as the predecessor of modern electronic musical instruments is undeniable. The Telharmonium also introduced the principles of electronic additive synthesis (see Additive Synthesis with Drawbars section, on page 56).
Laurens Hammond began producing organs in 1935, in Chicago, Illinois, making use of the same sound generation method. The differences were; much smaller tone generators, and fewer registers. The patent for his model A organ dates from 1934.
Hammond also holds the patent for the electro-mechanical spring reverb, still found in countless guitar amplifiers today!
59User ManualVersion 1

6A Short Hammond Organ Story
The Hammond B3 was manufactured between 1955 and 1974. It is the Hammond model preferred by jazz and rock organ players such as: Fats Waller, Wild Bill Davis, Brother Jack McDuff, Jimmy Smith, Keith Emerson, Jon Lord, Brian Auger, Steve Winwood, Joey DeFrancesco and Barbara Dennerlein. In addition to the B3, there are a number of smaller Hammond instruments, known as the “spinet” series (M3, M100, L100, T100). Bigger console models, many of which were designed to suit the needs of American (U. S. A.) churches or theatres (H100, X66, X77, E100, R100, G-100), were also manufac-tured.
The production of electro-mechanical organs ceased in 1974. Thereafter, Hammond built fully electronic organs. Today, people at Hammond-Suzuki are more conscious of their glorious tradition and produce fine electronic drawbar organs. In 2002, they even introduced a new digital B3 model which mimics the design and functions of the classic B3 (except for the weight). The new B3 utilizes a real, mechanical, rotor speaker cabinet.
6.1 Tonewheel Sound Generation
Tonewheel sound generation resembles that of a siren. Of course, there’s no air being blown through the holes of a revolving wheel. Rather, an electro-magnetic pickup, much like a guitar pickup is used.
A notched metal wheel, called a tone wheel, revolves at the end of a magnetized rod. The “teeth” of the wheel cause variations in the magnetic field, inducing an electrical voltage. This voltage/tone is then filtered, sent through the manuals, ampli-fied, has vibrato and expression applied to it, and is then ampli-fied.
60EmagicEVB3

6A Short Hammond Organ Story H
A long drive shaft is driven by an AC synchronous motor. 24 driving gears are attached to the shaft, with 12 different gear sizes. These gears drive the tone wheels. The frequency depends on the gear ratios, and the number of notches in the wheels. The Hammond is tuned to an almost exact well-tempered scale.
As with pipe organs that feature “multiplexed registers”, the Hammond organ uses certain generators for more than one purpose. Some high frequency wheels serve as the funda-mental for high notes, and provide harmonics for lower notes. This has a positive impact on the overall organ sound, avoids detuning and stabilizes levels.
6.2 The LeslieDon Leslie developed his rotor cabinets in 1937, and began marketing them in 1940. Laurens Hammond wasn’t keen on the concept of rotating speakers at all! Leslie’s approach was to simulate a variety of locations in the pipes, resulting in a new spatial perception for every note. The rotor speaker cabinets could simulate this effect, and the sense of space that they impart is incomparable, when placed side-by-side with any fixed speaker. The periodic undulations in sound and volume, and the vibrato caused by the doppler effect aren’t all there is to the Leslie “sound”— it’s the space effect, too!
The first Leslie, the model 30, had no chorale, just tremolo and stop. The Chorale idea (which came much later) was borne of a desire to add a vibrato to the organ. Chorale offers far more than a simple vibrato, and was first introduced to the market with the 122/147 models. At this time, Leslie also added the “Voice of the pipe organ” label to his cabinets.
61User ManualVersion 1

6A Short Hammond Organ Story
It wasn’t until 1980 that the two companies and brand names came together, six years after the last tonewheel organ was built. Mechanical Leslie rotor cabinets are still being built today, by the Hammond-Suzuki company. Even the newest digital B3 model is combined with a real, mechanical, Leslie cabinet.
As an interesting piece of trivia, Don Leslie never actually owned a Hammond organ!
If you’re interested in every detail of the Hammond organ’s history, models, facts and recommendations for buyers, you should take a look at “The Hammond Organ—Beauty in the B”. This book, by Mark Vail, is highly recommended.
Jan-Friedrich Conrad
62EmagicEVB3

7Further Information H
7 Further Information
A great deal of additional information on the history, and tech-nical aspects, of the Hammond (and other) organs can be found on the Internet. We have provided the following links for your use:
http://theatreorgans.com/hammond/
http://www.dairiki.org/HammondWiki/
63User ManualVersion 1

8MIDI Controller Assignments
8 MIDI Controller Assignments
In most circumstances, Logic’s track automation is your best option for the recording of manual movements in the plug-in window.
MIDI automation is the better option when you wish to make use of your hardware MIDI drawbar organ as a remote control for the EVB3. The following tables outline the MIDI controller assignments of the EVB3. The assignments are opti-mized for use with several popular MIDI drawbar organ models. In order to match the default settings of all popular organs, some parameters are assigned twice. You need not concern yourself about this.
If you use a Hammond XB-series organ, switch to MIDI Mode 1. If you use a Roland or Korg organ, choose 0.
This table describes the MIDI Control Change Message number assignment when MIDI Mode is set to 0. This is the correct setting, if you use a Roland VK series, or Korg CX-3, drawbar organ as a remote controller for the EVB3.
Controller Number MIDI Mode 0: Parameter Name
70 Drawbar 16'
71 Drawbar 5-1⁄3'
72 Drawbar 8'
73 Drawbar 4'
74 Drawbar 2-2⁄3'
75 Drawbar 2'
76 Drawbar 1-3⁄5'
77 Drawbar 1-1⁄3'
64EmagicEVB3

8MIDI Controller Assignments H
78 Drawbar 1'
Rotor Cabinet
80, 92 Chorale/Brake/Tremolo
81 Chorale/Brake
Reverb
82 Reverb Level
Vibrato
85 Upper Vibrato on/off
86 Lower Vibrato on/off
87 Chorus Vibrato Type
Percussion
94 on/off
95 2nd/3rd
102 Percussion Volume
103 Percussion Time
Equalizer
104 EQ Low
105 EQ Mid
106 EQ Hi
107 EQ Level
Wah
108 Wah Mode
109 Wah Bite
Distortion
110 Distortion Type
111 Distortion Drive
112 Distortion Tone
Click Levels
113 Click On Level
114 Click Off Level
Controller Number MIDI Mode 0: Parameter Name
65User ManualVersion 1

8MIDI Controller Assignments
Only the controller assignments 80 to 82 differ, when MIDI Mode is set to 1. This setting matches the controller mapping of Hammond XB-series organs. The other controllers remain as described above. Switch MIDI Data Reduction off while recording these data from an XB-Series organ (Options > Song Settings > Recording Settings).
Balance
115 Main Volume
116 Lower Volume
117 Pedal Volume
Rotor Fast Rate
118 Rotor Fast Rate
Controller Number MIDI Mode 1 Drawbar Assignment
80 All Upper Drawbars
81 All Lower Drawbars
82 Pedal Drawbars, Scanner Vibrato, Bass Filter
Controller Number MIDI Mode 0: Parameter Name
66EmagicEVB3

9Factory Settings H
9Facto
ry Setting
sTyp
eSettin
g N
ame
Ro
tor Sp
eedU
pp
er Man
ual
Low
er Man
ual
Ro
tor
Co
ntro
lM
orp
hW
ah
Rock Organs
Hush
Chorale +
Tremolo
Solo and FillsG
roove RiffW
heel–
–
Hallelujah
Chorale +
Tremolo
FillsC
hordsW
heel–
–
Child in Tim
eBrake +
Chorale
Intro Solo, Chords
Chords
Wheel
––
FireballBrake
SoloC
hord + Rhythm
Wheel
––
Smoke on the W
aterBrake
Chord-Riff
add. Chords
Wheel
––
Keep on M
ovinC
horale + Trem
oloC
hordsC
hordsW
heel–
–
Might j.t.y. Life
Chorale +
Tremolo
Intro-RiffBass, C
hordsW
heel–
–
Deep &
PurpleC
horale + Trem
oloC
hords (Rock style)C
hords (5th)W
heel–
–
Grunge O
rganBrake +
Tremolo
Solo, Chords
Chords
Wheel
––
Rock Church
Chorale
Chords
Bass, Chords
Wheel
––
TendernessBrake +
Tremolo +
Chorale
Chords
Chords, Bass
Wheel
––
Whiter Shde
Chorale +
Tremolo
Intro-Solo, Chords
Bass Line, Chords
Wheel
––
Winw
ood cleanTrem
olo + C
horaleC
hords, RiffC
hordsW
heel–
–
Winw
ood heavyC
horale + Trem
oloRiff, C
hordsC
hordsW
heel–
–
Black Magic
Chorale +
Tremolo
Intro-Solo, Chords
Chords
Wheel
––
Evil Ways
Chorale +
Tremolo
Solo, Chord-Riff
Chords
Wheel
––
Jingo (Morph)
Chorale +
Tremolo
Chords, Solo
Chords
Wheel
CC
#4–
67User ManualVersion 1

9Factory Settings
Rock Organs (cont.)
Oye com
o vaC
horale + Trem
oloIntro-Riff, C
hordsC
hordsW
heelC
C#4
–
Samba Pa Ti (M
orph)C
horale + Trem
oloC
hordsC
hordsW
heelC
C#4
–
Steppenwolf
Chorale +
Tremolo
Chords +
SoloC
hordsW
heel–
–
Anim
alsBrake
Chords, Solo
Chords
Wheel
––
Ekseption 1C
horale + Trem
oloSolo, C
hordsC
hords, BassW
heel–
–
Ekseption 2C
horale + Trem
oloSolo, C
hordsC
hords, BassW
heel–
–
Emserson in C
oncertC
horale + Trem
oloSolo, C
hordsC
hords, BassW
heel–
–
It's NIC
EC
horale + Trem
oloSolo, C
hordsC
hords, BassW
heel–
–
Let it B-PrestonC
horale + Trem
oloSolo, C
hordsC
hordsW
heel–
–
Little Help
Chorale +
Tremolo
Chords
Chords
Wheel
––
THE D
oors 1Brake
Solo, Chords
Chords
––
–
THE D
oors 2Brake
Solo, Chords
Chords
––
–
THE D
oors 3Trem
olo + C
horaleSolo, C
hordsC
hordsW
heel–
–
TOTO
(Morph)
Chorale +
Tremolo
Chords, C
hord-RiffC
hordsW
heel–
–
Pop Organs
Raggae 1Trem
olo + Brake +
Chorale
Melodie, C
hordsC
hordsW
heel–
–
Raggae 2Trem
olo + Brake +
Chorale
Chords, M
elodieC
hordsW
heel–
–
Raggae 3Trem
olo + Brake +
Chorale
Chords, M
elodieC
hordsW
heel–
–
GC
-StationC
horale + Trem
oloC
hord-RiffsC
hordsW
heel–
–
Early BirdC
horale + Trem
oloM
elodie, Chords
Chords
Wheel
––
House O
rganBrake
Riff, BassC
hords–
––
Type
Setting
Nam
eR
oto
r Speed
Up
per M
anu
alLo
wer M
anu
alR
oto
r C
on
trol
Mo
rph
Wah
68EmagicEVB3

9Factory Settings H
Pop Organs (cont.)
House Bass
Chorale +
BrakeBass, Riff
Chords
Wheel
––
Sub-Bass Organ
Chorale +
BrakeBass, Riff
Chords
Wheel
––
Limbo D
anceTrem
olo + C
horale + Brake
Melody
Chords
Wheel
––
Time is tight
Chorale +
Tremolo
Melody, C
hordsC
hords, BassW
heel–
–
Latin RockC
horale + Trem
oloC
hords, Melody
Chords
Wheel
––
HipH
ugBrake +
Tremolo +
Chorale
Melody
Chords
Wheel
––
California G
irlsBrake
Melody
Chords-Riff
––
–
Good V
ibrations (Morph)
Tremolo +
Chorale
Chord-Riff, C
hordsC
hordsW
heelC
C#4
–
Surfin' USA
Tremolo
Chord-M
elodyC
hordsW
heel–
–
God Bless
Chorale +
Tremolo
Chords, M
elodieC
hordsW
heel–
–
Hi-D
e-Ho
Chorale +
Tremolo
Chords
Chords
Wheel
––
Love you more
BrakeC
hords, Chord-Riff
Chords
Wheel
––
More&
More
Tremolo
Chord-Riff, C
hordsC
hordsW
heel–
–
Very Happy
Brake + Trem
olo + C
horaleSolo, C
hordsBass, C
hordsW
heel–
–
Back to Oakland
Chorale +
Tremolo
Solo, Chords
Bass, Chords
Wheel
––
Chester-T (M
orph)C
horale + Trem
oloSolo, C
hordsBass, C
hordsW
heelC
C#4
–
Horses (M
orph)C
horale + Trem
oloC
hord-RiffBass, C
hordsW
heelC
C#4
–
Squib Cakes
Chorale +
Tremolo
Solo, Chords
Bass, Chords
Wheel
CC
#4–
ToP C. Thom
psonC
horale + Trem
oloSolo, C
hordsBass, C
hordsW
heel–
–
Type
Setting
Nam
eR
oto
r Speed
Up
per M
anu
alLo
wer M
anu
alR
oto
r C
on
trol
Mo
rph
Wah
69User ManualVersion 1

9Factory Settings
Pipe Organs
ReedsBrake
Melody, C
hordsM
elody, Chords
––
–
FlutesBrake
Melody, C
hordsM
elody, Chords
––
–
StringsBrake
Melody, C
hordsM
elody, Chords
––
–
Diapason
BrakeM
elody, Chords
Melody, C
hords–
––
Cathedral (soft)
BrakeM
elody, Chords
Melody, C
hords–
––
Cathedral (full)
BrakeM
elody, Chords
Melody, C
hords–
––
Jazz Organs
B. Auger 1
BrakeSolo
Chords, Bass
Wheel
––
B. Auger 2
BrakeSolo
Chords, Bass
Wheel
––
B. Auger 3
BrakeSolo
Chords, Bass
Wheel
––
J. McG
riffBrake +
Tremolo
SoloBass, C
hordsW
heel–
–
J. Smith 1
Brake + Trem
oloSolo
Bass, Chords
Wheel
––
J. Smith 2
Chorale +
Tremolo
SoloBass, C
hordsW
heel–
–
J. Smith 3
Brake + Trem
oloSolo
Bass, Chords
Wheel
––
J. Smith (soft)
Tremolo +
Chorale
Full Chord M
elody StyleBass, C
hordsW
heel–
–
Jazzy 1Brake +
Tremolo
SoloBass, C
hordsW
heel–
–
Jazzy 2Brake
SoloBass, C
hordsW
heel–
–
Jazzy 3C
horale + Trem
oloSolo
Bass, Chords
Wheel
––
Old Style Jazz
Tremolo
SoloBass, C
hordsW
heel–
–
Jackie Davis (M
orph)Trem
olo + C
horaleFull C
hord StyleBass, C
hordsW
heelC
C#4
–
Merl Saunders (M
orph)C
horale + Trem
oloSolo, Full C
hord StyleBass, C
hordsW
heel–
–
Type
Setting
Nam
eR
oto
r Speed
Up
per M
anu
alLo
wer M
anu
alR
oto
r C
on
trol
Mo
rph
Wah
70EmagicEVB3

9Factory Settings H
Gospel, Soul & Blues
Billy PrestonTrem
olo + C
horaleFull C
hordsC
hordsW
heel–
–
Blues Organ (M
orph)C
horale + Trem
oloC
hords, RiffsC
hordsW
heelC
C#4
–
Gospel (grow
l)Trem
olo + C
horaleC
hords, LeadsBass, C
hordsW
heel–
–
Gospel (clean) M
orphTrem
olo + C
horaleC
hords, LeadsC
hordsW
heelC
C#4
–
Percy SledgeBrake +
Chorale
Leads, Chords
Chords
Wheel
––
J.B'sC
horale + Trem
oloC
hords, SoloC
hords, BassW
heel–
–
Soul Organ 1
Tremolo +
Chorale
Riff, FillsBass, C
hordsW
heel–
–
Soul Organ 2
Chorale +
Tremolo
Chords, Leads
Chords
Wheel
––
Soul Morph
Chorale +
Tremolo
Lead, Chords
Chords
Wheel
CC
#4–
Perc BluesC
horale + Trem
oloSolo, C
hordsC
hords, BassW
heel–
–
Effects Organs
Dist. O
rgan Whl-W
ahBrake
Chords, Leads
Chords
––
Wheel
Morph Even
Tremolo
Chords
Chords
–W
heel–
Morph O
dd-EvenTrem
oloC
hordsC
hords–
Wheel
–
Morph A
llTrem
oloC
hordsC
hords–
Wheel
–
Morph (heavy)
Chorale
5th Chords
Chords
–W
heel–
Morphing C
elestraTrem
oloC
hord, Arps, Solo
Chords
–W
heel–
Whl-W
ah Clean
BrakeC
hordsC
hords–
––
Toy Bell Organ
Brake2 Voice M
elodyC
hords–
––
Marim
borganBrake
Arpeggios C
hordsC
hords–
––
Gater (clean)
BrakeC
hordsC
hordsW
heel–
–
Gater (soft)
Chorale +
Tremolo
Chords
Chords
Wheel
––
Gater (rough)
Tremolo
Chords
Chords
Wheel
––
Lovely PercC
horale + Trem
oloM
elodyC
hordsW
heel–
–
Type
Setting
Nam
eR
oto
r Speed
Up
per M
anu
alLo
wer M
anu
alR
oto
r C
on
trol
Mo
rph
Wah
71User ManualVersion 1

9Factory Settings
Theatre Organs
Celeste +
2ndBrake +
Tremolo
Melody, C
hord-Melody
Chords, M
elodyW
heel–
–
Long Release Celeste
Tremolo
Melody
Chords, M
elody–
––
Piano Organ
BrakeC
hord-Melody
Melody, C
hordsW
heel–
–
Theater + 3rd
Brake + Trem
oloM
elodyC
hordsW
heel–
–
Theater inharm.
Brake + Trem
oloM
elodyC
hords, Melody
Wheel
––
Wunderlich 1
BrakeM
elody, Chord-M
elodyC
hords–
Wheel
–
Wunderlich 2
Tremolo +
BrakeM
elodyC
hordsW
heel–
–
Vintage Organs
Vox Conti 1
BrakeLead, Riffs
Chords
––
–
Vox Conti 2
BrakeC
hords, LeadC
hords–
––
Vox Conti Leslie
Tremolo
Chords
Chords
Wheel
––
Vox Conti W
hl-Wah
BrakeRiffs, C
hordsC
hords–
–W
heel
Cheesy O
rgansBrake
Riffs, LeadsC
hordsW
heel–
–
FarFeeezaBrake
Chords
Chords
×–
–
M-100
Chorale +
Tremolo
Chords, Lead
Chords
Wheel
––
L-100Brake +
Tremolo
Solo, Chords
Chords
Wheel
––
Old Tubes B3
Chorale +
Tremolo
Solo, Chords
Bass, Chords
Wheel
––
Type
Setting
Nam
eR
oto
r Speed
Up
per M
anu
alLo
wer M
anu
alR
oto
r C
on
trol
Mo
rph
Wah
72EmagicEVB3

Index H
AAcc/Dec Scale . . . . . . . . . . . . . . . . . . . . . 50Additive Synthesis . . . . . . . . . . . . . . . . . . 56Automation . . . . . . . . . . . . . . . . . . . . . . . . 23
BBass Filter . . . . . . . . . . . . . . . . . . . . . . . . . 37Brake . . . . . . . . . . . . . . . . . . . . . . . . . . . . . 42
CCancel Key . . . . . . . . . . . . . . . . . . . . . . . . 34Chorus . . . . . . . . . . . . . . . . . . . . . . . . . . . 31click . . . . . . . . . . . . . . . . . . . . . . . . . . . . . . 39Controls view . . . . . . . . . . . . . . . . . . . . . . 20
DDiskExpress II . . . . . . . . . . . . . . . . . . . . . 19Distortion . . . . . . . . . . . . . . . . . . . . . . . . . 47Drawbar . . . . . . . . . . . . . . . . . . . . . . . . . . 29Drawbar Leak . . . . . . . . . . . . . . . . . . . . . 38
EEditor view . . . . . . . . . . . . . . . . . . . . . . . . 20Effect Chain . . . . . . . . . . . . . . . . . . . . . . . 43Effects Bypass . . . . . . . . . . . . . . . . . . . . . 44Equalizer . . . . . . . . . . . . . . . . . . . . . . . . . 44Expression . . . . . . . . . . . . . . . . . . . . . . . . 30
FFilter Age . . . . . . . . . . . . . . . . . . . . . . . . . 39
HHotline . . . . . . . . . . . . . . . . . . . . . . . . . . . 11
KKeyboard Split . . . . . . . . . . . . . . . . . . . . . 25
LLeakage . . . . . . . . . . . . . . . . . . . . . . . . . . 38
Leslie . . . . . . . . . . . . . . . . . . . . . . . . . . . . 48Link . . . . . . . . . . . . . . . . . . . . . . . . . . . . . 20
MMax Wheels . . . . . . . . . . . . . . . . . . . . . . . 36Mic Angle . . . . . . . . . . . . . . . . . . . . . . . . . 51Mic Distance . . . . . . . . . . . . . . . . . . . . . . 51MIDI . . . . . . . . . . . . . . . . . . . . . . . . . . . . . 45MIDI Preset Switching . . . . . . . . . . . . . . 34Motor Control . . . . . . . . . . . . . . . . . . . . . 51
OOnly B . . . . . . . . . . . . . . . . . . . . . . . . . . . . 32Optimization programs . . . . . . . . . . . . . . 19
PParadise . . . . . . . . . . . . . . . . . . . . . . . . . . . 33Percussion . . . . . . . . . . . . . . . . . . . . . . . . . 32pitch bender . . . . . . . . . . . . . . . . . . . . . . . 42Plug-in
changing ~ display . . . . . . . . . . . . . 22reassigning ~ windows . . . . . . . . . . 21
Plug-in Window . . . . . . . . . . . . . . . . . . . . 20
RRandom FM . . . . . . . . . . . . . . . . . . . . . . . 38residual effect . . . . . . . . . . . . . . . . . . . . . . 58Reverb . . . . . . . . . . . . . . . . . . . . . . . . . . . 45rotor cabinet . . . . . . . . . . . . . . . . . . . . . . . 48Rotor Fast Rate . . . . . . . . . . . . . . . . . . . . 50
SScanner Vibrato . . . . . . . . . . . . . . . . . . . . 31Setting . . . . . . . . . . . . . . . . . . . . . . . . . . . . 21Shape . . . . . . . . . . . . . . . . . . . . . . . . . . . . 36Smart Mode . . . . . . . . . . . . . . . . . . . . . . . 42Speed Control . . . . . . . . . . . . . . . . . . . . . 49Speed Disk . . . . . . . . . . . . . . . . . . . . . . . . 19Stretch . . . . . . . . . . . . . . . . . . . . . . . . . . . . 40
TTonal Balance . . . . . . . . . . . . . . . . . . . . . . 36Tune . . . . . . . . . . . . . . . . . . . . . . . . . . . . . 31
73User ManualVersion 1

Index
UUltra Bass . . . . . . . . . . . . . . . . . . . . . . . . . 37Update Service . . . . . . . . . . . . . . . . . . . . . 11
VVolume Control . . . . . . . . . . . . . . . . . . . . 30
WWah . . . . . . . . . . . . . . . . . . . . . . . . . . . . . . 45Warmth . . . . . . . . . . . . . . . . . . . . . . . . . . . 41
XXSKey . . . . . . . . . . . . . . . . . . . . . . . . . 12, 16
74EmagicEVB3


