36
1 Example procedure for adding O365 authentication to Shibboleth How to install and Configure a Shibboleth IdP v4.x on Debian-Ubuntu Linux with Apache2 + Jetty9
1
Example procedure for adding O365 authentication to Shibboleth
How to install and Configure a Shibboleth IdP v4.x
on Debian-Ubuntu Linux with Apache2 + Jetty9

2
Table of Contents 1 Introduction ...................................................................................................................................... 4
2 External sources ................................................................................................................................ 4
3 Installation Instructions ..................................................................................................................... 4
3.1 Software installation requirements .......................................................................................................... 4
3.1.1 Update packages ............................................................................................................................... 4
3.1.2 Install the required packages ............................................................................................................ 4
3.1.3 Install Amazon Corretto JDK .............................................................................................................. 4
3.1.4 Check if Java is working ..................................................................................................................... 4
3.2 Configure the environment ....................................................................................................................... 4
3.2.1 Set the IdP hostname ........................................................................................................................ 5
3.2.2 Set the variable JAVA_HOME in /etc/environment .......................................................................... 5
3.3 Install Shibboleth Identity Provider v4.x ................................................................................................... 5
3.4 Install Jetty 9 Web Server ......................................................................................................................... 6
3.4.1 Installation ......................................................................................................................................... 6
3.5 Configuration Instructions ........................................................................................................................ 7
3.5.1 Configure Jetty .................................................................................................................................. 7
3.5.2 Configure SSL on Apache2 (front-end of Jetty) ................................................................................. 7
4 Configure Shibboleth Identity Provider Storage ............................................................................... 8
5 Shibboleth Configuration .................................................................................................................. 8
5.1 Metadata Configuration ............................................................................................................................ 8
5.2 Install the Belnet and eduGain certificates ............................................................................................... 8
5.2.1 BELNET Certificate ............................................................................................................................. 9
5.2.2 EduGain certificate ............................................................................................................................ 9
5.3 Configure « metadata providers » ............................................................................................................ 9
6 Using SAML Proxying in the Shibboleth IdP to connect with Azure AD .......................................... 11
6.1 Overview ................................................................................................................................................. 11
6.2 IdP Proxying: Appearances and Perspectives ......................................................................................... 11
6.3 Implementing the Solution ..................................................................................................................... 12
6.3.1 Prerequisites ................................................................................................................................... 12
6.3.2 Terms and Settings .......................................................................................................................... 12
6.4 Steps and Tasks ....................................................................................................................................... 12
6.4.1 Trust Task: 1. Update your IdP's metadata ..................................................................................... 12
6.4.2 SEnd the file idp-metadata.xml to Belnet ....................................................................................... 13
6.4.3 Trust Task: 2. Register your IdP with Azure AD ............................................................................... 13
6.4.4 Trust Task: 3. Register the upstream IdP's metadata locally........................................................... 14
6.5 Configure the IdP for Proxing Behaviour ................................................................................................ 16
6.5.1 Proxy Task 1. Change the IdP authentication flow to SAML ........................................................... 16
6.5.2 Proxy Task 2. Update Your Attribute Filter...................................................................................... 17

3
6.5.3 Proxy Task 3. Enable IdP to Recognize Azure AD Claims ................................................................. 17
6.5.4 Proxy Task 4. Subject Canonicalisation ........................................................................................... 21
6.5.5 Proxy Task 5. Configuring Attribute pass-through and/or hybrid resolving .................................... 22
6.5.6 Proxy Task 6. Handling REFEDS AuthnContext Requests (optional) ................................................ 22
6.6 Configure Shibboleth Identity Provider to release the persistent NameID ............................................ 24
6.7 Configure Shibboleth Identity Provider to release the eduPersonTargetedID ....................................... 25
6.8 Releasing attributes ................................................................................................................................ 26
6.8.1 Directly mapped attributes from Azure AD ..................................................................................... 26
6.8.2 Static attributes ............................................................................................................................... 27
6.8.3 Mapped attributes .......................................................................................................................... 29
6.8.4 Scripted attributes based on other attributes ................................................................................ 29
6.8.5 Scripted/transformed attributes based on belonging to a group. .................................................. 30
7 Renaming an IDP ............................................................................................................................. 34
8 Annexes ........................................................................................................................................... 35
8.1 Annex 1 : Contents of the file idp.yourdomain.be.conf for Apache ....................................................... 35

4
1 Introduction This document provides instructions on how to add Office365 authentication to Shibboleth:
Shibboleth will work in proxy mode towards O365, meaning O365 is providing credentials as a third party.
It is possible to add additional information such as grouping (Students, Professors) and institution that are required to categorize users.
Making use of O365 authentication may have an impact on GDPR, in this respect that personal information is being stored outside your institution.
Please note that this document is a guideline only and represents an installation instance. You may need to fine tune for your institution or divert upon need. Nevertheless the procedure is comprehensive and represents a working example of an installation that is activated and in use since mid-2021.
2 External sources
1. https://github.com/ConsortiumGARR/idem-tutorials/blob/master/idem-fedops/HOWTO-Shibboleth/Identity%20Provider/Debian-Ubuntu/HOWTO%20Install%20and%20Configure%20a%20Shibboleth%20IdP%20v4.x%20on%20Debian-Ubuntu%20Linux%20with%20Apache2%20%2B%20Jetty9.md#install-jetty-9-web-server
2. Using SAML Proxying in the Shibboleth IdP to connect with Azure AD:
https://wiki.shibboleth.net/confluence/display/KB/Using+SAML+Proxying+in+the+Shibboleth+IdP+to+connect+with+Azure+AD#UsingSAMLProxyingintheShibbolethIdPtoconnectwithAzureAD-TrustTask:4.ConfigureAzureADAttributeReleasetotheShibbolethIdP
3 Installation Instructions 3.1 Software installation requirements 3.1.1 Update packages
# apt update && apt-get upgrade -y --no-install-recommends
3.1.2 Install the required packages # apt install vim wget gnupg ca-certificates openssl apache2 ntp libservlet3.1-java liblogback-java --no-install-recommends
3.1.3 Install Amazon Corretto JDK # wget -O- https://apt.corretto.aws/corretto.key | sudo apt-key add – # apt-get install software-properties-common # add-apt-repository 'deb https://apt.corretto.aws stable main' # apt-get update; sudo apt-get install -y java-11-amazon-corretto-jdk # java –version
3.1.4 Check if Java is working # update-alternatives --config java (It will return something like this "There is only one alternative in link group java (providing /usr/bin/java):" )
3.2 Configure the environment Be sure that your firewall is not blocking the traffic on port 443 and 80 for the IdP server.
5
3.2.1 Set the IdP hostname vim /etc/hosts <YOUR SERVER IP ADDRESS> idp.example.org <HOSTNAME> hostnamectl set-hostname <HOSTNAME> (Replace idp.example.org with your IdP Full Qualified Domain Name and <HOSTNAME> with the IdP hostname)
3.2.2 Set the variable JAVA_HOME in /etc/environment Set JAVA_HOME: # vim /etc/environment Y écrire : JAVA_HOME=/usr/lib/jvm/java-11-amazon-corretto # source /etc/environment # export JAVA_HOME=/usr/lib/jvm/java-11-amazon-corretto # echo $JAVA_HOME
3.3 Install Shibboleth Identity Provider v4.x
The Identity Provider (IdP) is responsible for user authentication and providing user information to the Service Provider (SP). It is located at the home organization, which is the organization which maintains the user's account. It is a Java Web Application that can be deployed with its WAR file.
Download the Shibboleth Identity Provider v4.x.y (replace '4.x.y' with the latest version found here): # cd /usr/local/src
# wget https://shibboleth.net/downloads/identity-provider/4.1.2/shibboleth-identity-provider-4.1.2.tar.gz
# tar -xzf shibboleth-identity-provider-4.1.2.tar.gz
Run the installer install.sh: According to NSA and NIST, RSA with 3072 bit-modulus is the minimum to protect up to TOP SECRET beyond 2030. # cd /usr/local/src/shibboleth-identity-provider-4.1.2/bin # bash install.sh -Didp.host.name=$(hostname -f) -Didp.keysize=3072 Buildfile: /usr/local/src/shibboleth-identity-provider-4.x.y/bin/build.xml installation: Source (Distribution) Directory (press <enter> to accept default): [/usr/local/src/shibboleth-identity-provider-4.x.y] ? Installation Directory: [/opt/shibboleth-idp] ? [ENTER] Backchannel PKCS12 Password: ###PASSWORD-FOR-BACKCHANNEL### Re-enter password: ###PASSWORD-FOR-BACKCHANNEL### Cookie Encryption Key Password: ###PASSWORD-FOR-COOKIE-ENCRYPTION### Re-enter password: ###PASSWORD-FOR-COOKIE-ENCRYPTION### SAML EntityID: [https://idp.example.org/idp/shibboleth] ? Attribute Scope: [example.org] ? By starting from this point, the variable idp.home refers to the directory: /opt/shibboleth-idp Backup the ###PASSWORD-FOR-BACKCHANNEL### value somewhere to be able to find it when you need it. The ###PASSWORD-FOR-COOKIE-ENCRYPTION### will be saved into /opt/shibboleth-idp/credentials/secrets.properties as idp.sealer.storePassword and idp.sealer.keyPassword value.

6
3.4 Install Jetty 9 Web Server
Jetty is a Web server and a Java Servlet container. It will be used to run the IdP application through its WAR file.
3.4.1 Installation 1. Download and Extract Jetty
# cd /usr/local/src
# wget https://repo1.maven.org/maven2/org/eclipse/jetty/jetty-distribution/9.4.42.v20210604/jetty-distribution-9.4.42.v20210604.tar.gz
# tar xzvf jetty-distribution-9.4.42.v20210604.tar.gz 2. Create the jetty-src folder as a symbolic link. It will be useful for future Jetty updates:
# ln -nsf jetty-distribution-9.4.42.v20210604 jetty-src 3. Create the system user jetty that can run the web server (without home directory):
# useradd -r -M jetty 4. Create your custom Jetty configuration that overrides the default one and will survive upgrades:
# mkdir /opt/jetty # wget https://registry.idem.garr.it/idem-conf/shibboleth/IDP4/jetty/start.ini -O /opt/jetty/start.ini
5. Create the TMPDIR directory used by Jetty: # mkdir /opt/jetty/tmp ; chown jetty:jetty /opt/jetty/tmp # chown -R jetty:jetty /opt/jetty /usr/local/src/jetty-src
6. Create the Jetty Log's folder: # mkdir /var/log/jetty
# mkdir /opt/jetty/logs # chown jetty:jetty /var/log/jetty /opt/jetty/logs
7. Configure /etc/default/jetty: # vim /etc/default/jetty
Continue and insert :
JETTY_HOME=/usr/local/src/jetty-src JETTY_BASE=/opt/jetty JETTY_USER=jetty JETTY_START_LOG=/var/log/jetty/start.log TMPDIR=/opt/jetty/tmp
8. Create the service loadable from command line: # cd /etc/init.d # ln -s /usr/local/src/jetty-src/bin/jetty.sh jetty # update-rc.d jetty defaults
9. Check if all settings are OK: # service jetty check (Jetty NOT running) # service jetty start # service jetty check (Jetty running pid=XXXX)
If you receive an error like "Job for jetty.service failed because the control process exited with error code. See "systemctl status jetty.service" and "journalctl -xe" for details.", try this:
# rm /var/run/jetty.pid # systemctl start jetty.service
7
3.5 Configuration Instructions 3.5.1 Configure Jetty
o Configure the IdP Context Descriptor: # mkdir /opt/jetty/webapps # vim /opt/jetty/webapps/idp.xml Continue and insert <Configure class="org.eclipse.jetty.webapp.WebAppContext"> <Set name="war"><SystemProperty name="idp.home"/>/war/idp.war</Set> <Set name="contextPath">/idp</Set> <Set name="extractWAR">false</Set> <Set name="copyWebDir">false</Set> <Set name="copyWebInf">true</Set> <Set name="persistTempDirectory">false</Set> </Configure>
o Make the jetty user owner of IdP main directories: # cd /opt/shibboleth-idp # chown -R jetty logs/ metadata/ credentials/ conf/ war/
o Restart Jetty: # systemctl restart jetty.service
3.5.2 Configure SSL on Apache2 (front-end of Jetty)
The Apache HTTP Server will be configured as a reverse proxy and it will be used for SSL offloading.
o Create the DocumentRoot:
# mkdir /var/www/html/$(hostname -f) # sudo chown -R www-data: /var/www/html/$(hostname -f) # echo '<h1>It Works!</h1>' > /var/www/html/$(hostname -f)/index.html
o Create the Virtualhost file (please pay attention: you need to edit this file and customize it, check the initial comment inside of it):
# wget https://registry.idem.garr.it/idem-conf/shibboleth/IDP4/apache2/idp.example.org.conf -O /etc/apache2/sites-available/$(hostname -f).conf
o Configure the right privileges for the SSL Certificate and Key used by HTTPS:
# chmod 400 /etc/apache2/certs/$(hostname -f).key # chmod 644 /etc/apache2/certs/$(hostname -f).crt
($(hostname -f) will provide your IdP Full Qualified Domain Name) o Enable the required Apache2 modules and the virtual hosts:
# a2enmod proxy_http ssl headers alias include negotiation # a2ensite $(hostname -f).conf # a2dissite 000-default.conf default-ssl # systemctl restart apache2.service
o Check that IdP metadata is available on: o https://idp.yourdomain.be/idp/shibboleth
o Verify the strength of your IdP's machine on: o https://www.ssllabs.com/ssltest/analyze.html

8
4 Configure Shibboleth Identity Provider Storage
Shibboleth Documentation Reference: https://wiki.shibboleth.net/confluence/display/IDP4/StorageConfiguration
The IdP provides a number of general-purpose storage facilities that can be used by core subsystems like session management and consent.
Used Strategy : HTML Local Storage, Encryption GCM, No Database
The HTML Local Storage requires JavaScript be enabled because reading and writing to the client requires an explicit page be rendered. Note that this feature is safe to enable globally. The implementation is written to check for this capability in each client, and to back off to cookies. The default configuration generates encrypted assertions that a large percentage of non-Shibboleth SPs are going to be unable to decrypt, resulting a wide variety of failures and error messages. Some old Shibboleth SPs or software running on old Operating Systems will also fail to work.
If you don't change anything, the IdP stores data in a browser session cookie or HTML local storage and encrypt his assertions with AES-GCM encryption algorithm.
The IDEM Federation Operators collect a list of Service Providers that don't support the new default encryption algorithm and provide a solution here (Italian only).
See the configuration files and the Shibboleth documentation for details.
Check IdP Status:
bash /opt/shibboleth-idp/bin/status.sh
5 Shibboleth Configuration 5.1 Metadata Configuration
Configure the file /opt/shibboleth/metadata/idp-metadata.xml
ATTENTION : You will have to delete the date validUntil="2021-06-30T12:15:34.029Z" in the following block
<EntityDescriptor xmlns="urn:oasis:names:tc:SAML:2.0:metadata" xmlns:ds="http://www.w3.org/2000/09/xmldsig#" xmlns:shibmd="urn:mace:shibboleth:metadata:1.0" xmlns:xml="http://www.w3.org/XML/1998/namespace" xmlns:mdui="urn:oasis:names:tc:SAML:metadata:ui" xmlns:mdrpi="urn:oasis:names:tc:SAML:metadata:rpi" xmlns:req-attr="urn:oasis:names:tc:SAML:protocol:ext:req-attr" validUntil="2021-06-30T12:15:34.029Z" entityID="https://idp.yourdomain.be/idp/shibboleth">
5.2 Install the Belnet and eduGain certificates
The setup requires that you have the Belnet Federation certificate to validate the signature of the published metadata:

9
5.2.1 BELNET Certificate
Method 1 :
# wget https://federation.belnet.be/certificate.federation.belnet.be.pem -O /opt/shibboleth-idp/conf/credentials/certificate.federation.belnet.be.crt
Method 2 :
If not available, repeat on an old IDP in /opt/shibboleth/credentials/ or in the files that accompany this procedure.
This certificate is not automatically renewed. Only if Belnet informs you.
5.2.2 EduGain certificate
Method 1 :
https://www.edugain.org/mds-2014.cer
Method 2 :
If not available, repeat on an old IDP in /opt/shibboleth/credentials/ or in the files that accompany this procedure.
This certificate is not automatically renewed. Only if Edugain and/or Belnet informs you.
5.3 Configure « metadata providers » Edit the file /opt/shibboleth/metadata-providers.xml
This file allows you to define the metadata providers with whom you work but also to download a local copy.
Remark : This file has been created based on the official documentation of Belnet and Edugain
Contents :
<?xml version="1.0" encoding="UTF-8"?> <MetadataProvider id="ShibbolethMetadata" xsi:type="ChainingMetadataProvider" xmlns="urn:mace:shibboleth:2.0:metadata" xmlns:security="urn:mace:shibboleth:2.0:security" xmlns:saml="urn:oasis:names:tc:SAML:2.0:assertion" xmlns:md="urn:oasis:names:tc:SAML:2.0:metadata" xmlns:alg="urn:oasis:names:tc:SAML:metadata:algsupport" xmlns:ds="http://www.w3.org/2000/09/xmldsig#" xmlns:ds11="http://www.w3.org/2009/xmldsig11#" xmlns:enc="http://www.w3.org/2001/04/xmlenc#" xmlns:enc11="http://www.w3.org/2009/xmlenc11#" xmlns:xsi="http://www.w3.org/2001/XMLSchema-instance" xsi:schemaLocation="urn:mace:shibboleth:2.0:metadata http://shibboleth.net/schema/idp/shibboleth-metadata.xsd urn:mace:shibboleth:2.0:security http://shibboleth.net/schema/idp/shibboleth-security.xsd

10
urn:oasis:names:tc:SAML:2.0:assertion http://docs.oasis-open.org/security/saml/v2.0/saml-schema-assertion-2.0.xsd urn:oasis:names:tc:SAML:2.0:metadata http://docs.oasis-open.org/security/saml/v2.0/saml-schema-metadata-2.0.xsd urn:oasis:names:tc:SAML:metadata:algsupport http://docs.oasis-open.org/security/saml/Post2.0/sstc-saml-metadata-algsupport-v1.0.xsd http://www.w3.org/2000/09/xmldsig# http://www.w3.org/TR/2002/REC-xmldsig-core-20020212/xmldsig-core-schema.xsd http://www.w3.org/2009/xmldsig11# http://www.w3.org/TR/2013/REC-xmldsig-core1-20130411/xmldsig11-schema.xsd http://www.w3.org/2001/04/xmlenc# http://www.w3.org/TR/xmlenc-core/xenc-schema.xsd http://www.w3.org/2009/xmlenc11# http://www.w3.org/TR/2013/REC-xmlenc-core1-20130411/xenc-schema-11.xsd" sortKey="1"> <!-- ******* Belnet Federation ******* --> <MetadataProvider id="URLMD" xsi:type="FileBackedHTTPMetadataProvider" backingFile="%{idp.home}/metadata/belnet-refed-metadata.xml" metadataURL="https://federation.belnet.be/metadata/re/metadata.xml"> <MetadataFilter xsi:type="SignatureValidation" certificateFile="${idp.home}/credentials/certificate.federation.belnet.be.pem" requireSignedRoot="false"> </MetadataFilter> <MetadataFilter xsi:type="EntityRole"> <RetainedRole>md:SPSSODescriptor</RetainedRole> </MetadataFilter> </MetadataProvider> <!-- ******* eduGAIN Federation ******* --> <MetadataProvider id="URLMD4" xsi:type="FileBackedHTTPMetadataProvider" xmlns="urn:mace:shibboleth:2.0:metadata" metadataURL="http://mds.edugain.org" backingFile="%{idp.home}/metadata/mds.edugain.org.xml" > <MetadataFilter xsi:type="SignatureValidation" certificateFile="${idp.home}/credentials/edugain-mds-2014.cer" requireSignedRoot="false"> </MetadataFilter> <MetadataFilter xsi:type="EntityRole"> <RetainedRole>md:SPSSODescriptor</RetainedRole> </MetadataFilter> </MetadataProvider> <!-- ******* Azure AD ******* --> <MetadataProvider id="AzureAD-idp-metadata" xsi:type="FilesystemMetadataProvider" metadataFile="/opt/shibboleth-idp/metadata/AzureAD-idp.xml" />
11
6 Using SAML Proxying in the Shibboleth IdP to connect with Azure AD
A French version of this document can be found on the CANARIE website.
Please read and follow the documentation first, before or along this example. This documentation is not maintained by the development team and may not be entirely accurate or consistent with the software at any given time. It is a complement to the documentation, not a replacement for it.
6.1 Overview
This configuration recipe of the Shibboleth IdP leverages the SAML proxying features such that Azure AD can be used for sign-in while Shibboleth handles the features many R&E federation's trust models value. Using this approach uses just the IdP as a SAML proxy without the necessity of extra elements.
6.2 IdP Proxying: Appearances and Perspectives
Proxying techniques are confusing at times and it is helpful to understand the approach and your perspective:
Azure ADs:
Shibboleth V4 IdP will look like a Relying Party to Azure AD It will be a single non-Gallery App registered in the Enterprise Apps portal for Azure means that all conditional access and policy rules are applied at an IdP-wide level, NOT per
Shibboleth Relying Party. also means that applying rules for MFA as controlled by Azure AD are for the entire IdP and
NOT discrete Shibboleth Relying Parties.
Relying Party (Service Provider) from the multi-lateral trust/R&E federation community:
It will look like a fully functional multi-lateral capable IdP It will not require any changes in behaviour to the SP Attribute asserted over the wire are what the SP expects. i.e. attributes are NOT seen as
'claims'
Users:
A user will sign into Azure AD The Shibboleth IdP as proxy will redirect as necessary The user will have two sessions: one with Azure AD one with the Shibboleth IdP
Federation Operator:
The entity registered in the R&E federation is the Shibboleth IdP, built for and by the R&E community and should meet all technical requirements as does any other Shibboleth IdP
Alignment to any federation baseline expectations is not just software but also how it's operated and managed and is in the hands of the IdP operator like any other IdP.
IdP Proxying: What a Proxy Flow Looks Like

12
When the user initiates sign-on the following usually happens:
1. An Authentication request arrives at Shibboleth IdP 2. The Shibboleth IdP observes it's configured for SAML sign on and redirects to an upstream IdP
(Azure AD). Settings for this are controlled in 3. idp.properties 4. authn/saml-authn-config.xml 5. User Authenticates or has an existing session at upstream IdP (Azure AD) 6. The upstream IdP (Azure AD) constructs a SAML Assertion with one or more attributes and is
sent with the user to the Shibboleth IdP 7. The Shibboleth IdP receives the assertion and: 8. verifies that the assertion arrives from an entity it trusts as configured in metadata-
providers.xml 9. filters the assertion according to rules in attribute-filter.xml 10. Extracts the real user as configured in attribute-based subject c14n. 11. Looks through list of AttributesToResolve in the resolver and resolves each one. 12. Looks through list of resulting attributes in AttributeSourceIds and picks the first valid one to
be the principal's name to be used later 13. Resulting trusted real username is used as $resolutionContext.principal (eg. existing LDAP
data connector, etc.) during "standard" attribute resolution process
6.3 Implementing the Solution 6.3.1 Prerequisites
Be sure to have these assets in place and appropriate access to them before you start:
1. A working Shibboleth Identity Provider at V4 or above running somewhere. 2. An active Azure AD tenant that you have administrative control in 3. The ability in Azure AD to create an enterprise Non-Gallery SAML App 4. A suitable attribute available to both IdPs to use as a "joining" attribute used in local lookups
if necessary.
6.3.2 Terms and Settings
This document refers to some key settings and terms described here. For your installation make sure to have these readily available to speed up configuration:
Your original IdP EntityID: https://idp.example.com/idp Your Upstream IdP EntityID which is Azure AD
Identifier: https://sts.windows.net/<sts_tenant_id>/ sts_tenant_id can be found most easily by creating a relying parting in Azure AD to work with: sign into the Azure AD Portal -> choose Enterprise Applications -> Create New Application >
Non Gallery Application → Actually create one → select SAML Sign On - > select SAML Sign On settings
Section 4 contains the Azure AD Identifier which includes the trailing slash The Proxy Joining attribute common to both services: SamAccountName is often a good choice and appears as 'name' in claims. will exist as a 'scoped' username the scope being that of the domain used on-premises and is usually internet friendly (not
something.local or something.int) Relying Party/Service Provider Microsoft will use "Relying Party" at times to mean "Service
Provider"
6.4 Steps and Tasks 6.4.1 Trust Task: 1. Update your IdP's metadata
As your IdP will need to act as an SP, you'll need extra blocks in your entity's metadata.
13
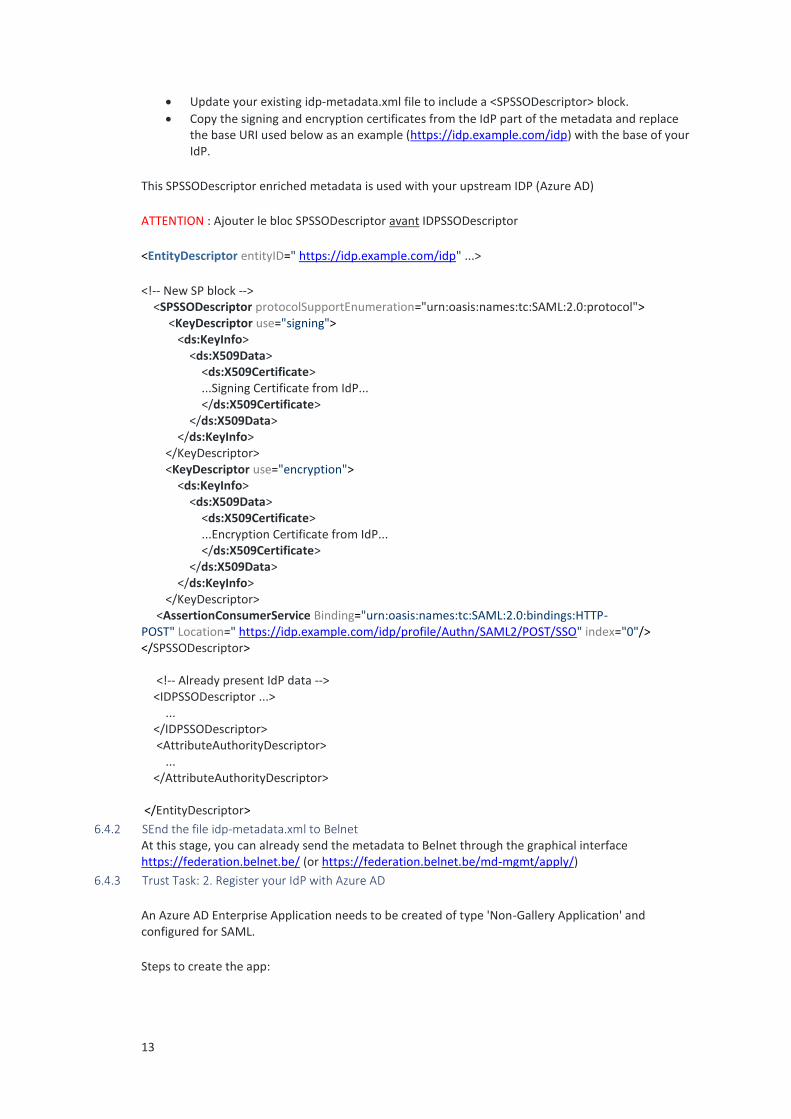
Update your existing idp-metadata.xml file to include a <SPSSODescriptor> block. Copy the signing and encryption certificates from the IdP part of the metadata and replace
the base URI used below as an example (https://idp.example.com/idp) with the base of your IdP.
This SPSSODescriptor enriched metadata is used with your upstream IDP (Azure AD)
ATTENTION : Ajouter le bloc SPSSODescriptor avant IDPSSODescriptor
<EntityDescriptor entityID=" https://idp.example.com/idp" ...>
<!-- New SP block --> <SPSSODescriptor protocolSupportEnumeration="urn:oasis:names:tc:SAML:2.0:protocol"> <KeyDescriptor use="signing"> <ds:KeyInfo> <ds:X509Data> <ds:X509Certificate> ...Signing Certificate from IdP... </ds:X509Certificate> </ds:X509Data> </ds:KeyInfo> </KeyDescriptor> <KeyDescriptor use="encryption"> <ds:KeyInfo> <ds:X509Data> <ds:X509Certificate> ...Encryption Certificate from IdP... </ds:X509Certificate> </ds:X509Data> </ds:KeyInfo> </KeyDescriptor> <AssertionConsumerService Binding="urn:oasis:names:tc:SAML:2.0:bindings:HTTP-POST" Location=" https://idp.example.com/idp/profile/Authn/SAML2/POST/SSO" index="0"/> </SPSSODescriptor> <!-- Already present IdP data --> <IDPSSODescriptor ...> ... </IDPSSODescriptor> <AttributeAuthorityDescriptor> ... </AttributeAuthorityDescriptor> </EntityDescriptor>
6.4.2 SEnd the file idp-metadata.xml to Belnet At this stage, you can already send the metadata to Belnet through the graphical interface https://federation.belnet.be/ (or https://federation.belnet.be/md-mgmt/apply/)
6.4.3 Trust Task: 2. Register your IdP with Azure AD
An Azure AD Enterprise Application needs to be created of type 'Non-Gallery Application' and configured for SAML.
Steps to create the app:

14
sign in to the Azure AD Portal > choose Enterprise Applications > Create New Application > Non Gallery Application > Actually create one > select SAML Sign On > select SAML Sign On settings
Once created edit the Basic SAML Configuration Section where you will use two things:
the EntityID: https://idp.example.com/idp/shibboleth (same as for your IdP ) the Assertion Consumer Service (ACS)
URL: https://idp.example.com/idp/profile/Authn/SAML2/POST/SSO
Other items like Logout URL can also be provided but the Shibboleth side will not handle logout in this case, so this is best omitted.
Keep this Relying Party editing environment open for the next step.
6.4.4 Trust Task: 3. Register the upstream IdP's metadata locally
6.4.4.1 Adding the link to the metadata in metadata-providers.xml
Your Shibboleth IdP doesn't know of the Azure AD IdP so you need to register it locally. This is handled just like any other metadata and can be included in your metadata-providers.xml as a new <MetadataProvider> element. For example:
<MetadataProvider id="AzureAD-idp-metadata" xsi:type="FilesystemMetadataProvider" metadataFile="/opt/idp/metadata/AzureAD-idp.xml" />
6.4.4.2 Acquiring the metadata file from the Azure portal
The file XML Metadata needs to be uploaded to the Azure portal and renamed to AzureAD-idp.xml once uploaded to /medatadata

15
Information to be checked:
The file AzureAD-idp.xml must contain valid SAML 2. Metadata for your tenant's entity containing:
an IDPSSODescriptor block containing a manually entered shibmd:scope element an X509Descriptor element with use=signing 2 SingleSignOnService elements 1 SingleLogOut element (not really supported but will allow error responses to be returned
to Azure)
This can be most easily found and downloaded by clicking on 'Federation Metadata XML Download' in Section 3 of the Azure AD Relying Party information, however it needs to be scrubbed a bit to produce a lean version of the metadata.
Hint: Those on mac or unix may find it convenient processing the file through xmllint --format downloadedfile.xml > downloadedfile-formated.xml
(xmllint can be found in a package named libxml2 on RedHat or libxml2-utils on Debian/Ubuntu.)
Manually adjust the downloaded metadata to add both the XML NameSpace and a value for shibmd:Scope in the IDPSSODescriptor element:
TODO : Ajout dans la balise "EntityDescriptor" de l'élément suivant :
xmlns:shibmd="urn:mace:shibboleth:metadata:1.0"
add the Extensions element inside the IDPSSODescriptor element to align with the scope validation per the rule in Proxy Task 2 below:
<Extensions> <shibmd:Scope regexp="false">yourdomain</shibmd:Scope> </Extensions>
When done, add an entry to metadata-providers.xml. If you fetch this entry elsewhere or by other means (e.g. curl or otherwise) ensure you know and understand its pedigree and don't blindly trust it without some diligence of some sort.
About certificates:
16
The certificate generated by Azure AD is only valid for 3 years and is the trust between Azure and the Shibboleth Proxy only. --> You will be alerted through e-mail. At that point you need to edit the file before uploading it into metadata
Expect Azure AD to cease trust when it expires. Also expect certificate rollover between Azure AD and your IdP instance to be handled by the
IdP admin team. About the metadata download itself:
o There are no linefeeds between lines (so reformat e.g. with xmllint as shown above, if desired)
o It contains unnecessary elements that can be removed to reduce the size of the file: a signature embedded in the top of the file The section Fed:ClaimTypesOffered
6.4.4.3 Trust Task: 4. Configure Azure AD Attribute Release to the Shibboleth IdP
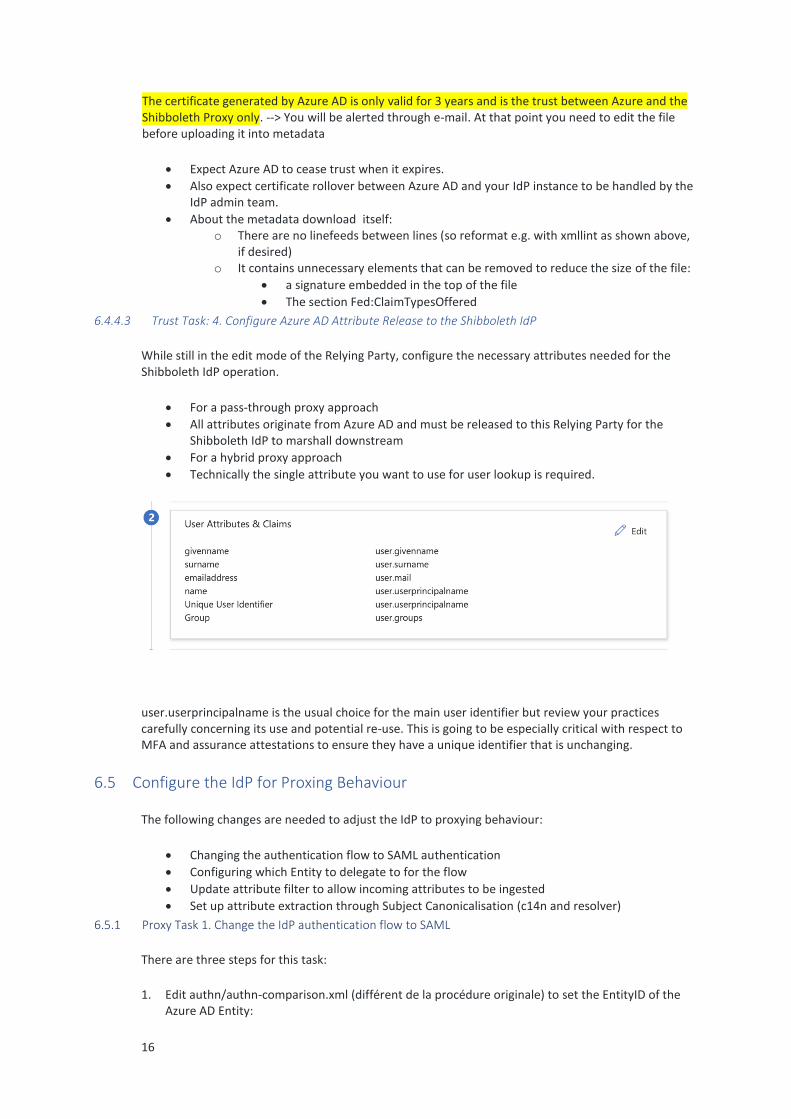
While still in the edit mode of the Relying Party, configure the necessary attributes needed for the Shibboleth IdP operation.
For a pass-through proxy approach All attributes originate from Azure AD and must be released to this Relying Party for the
Shibboleth IdP to marshall downstream For a hybrid proxy approach Technically the single attribute you want to use for user lookup is required.
user.userprincipalname is the usual choice for the main user identifier but review your practices carefully concerning its use and potential re-use. This is going to be especially critical with respect to MFA and assurance attestations to ensure they have a unique identifier that is unchanging.
6.5 Configure the IdP for Proxing Behaviour
The following changes are needed to adjust the IdP to proxying behaviour:
Changing the authentication flow to SAML authentication
Configuring which Entity to delegate to for the flow
Update attribute filter to allow incoming attributes to be ingested
Set up attribute extraction through Subject Canonicalisation (c14n and resolver)
6.5.1 Proxy Task 1. Change the IdP authentication flow to SAML
There are three steps for this task:
1. Edit authn/authn-comparison.xml (différent de la procédure originale) to set the EntityID of the Azure AD Entity:
17
Uncomment the shibboleth.authn.SAML.discoveryFunction bean and edit the target: REPLACE sts_tenant_id with your identifier. NOTE THE TRAILING SLASH IS TO BE INCLUDED
<bean id="shibboleth.authn.SAML.discoveryFunction" parent="shibboleth.Functions.Constant"
c:target="https://sts.windows.net/<sts_tenant_id>/" />
2. Enable the flow by updating idp.authn.flows in idp.properties to set it to SAML:
idp.authn.flows=SAML
With Shib 4.1, it is necessary to uncomment and to adapt the following lines in the file authn.properties :
idp.authn.SAML.proxyEntityID = https://sts.windows.net/<sts_tenant_id >/
idp.authn.SAML.discoveryRequired = true
6.5.2 Proxy Task 2. Update Your Attribute Filter
The IdP will not ingest attributes from the Azure AD Upstream IdP unless they're allowed in by a filter.
1. Add a new <AttributeFilterPolicy> to permit trusted attributes to be handled. 2. REPLACE sts_tenant_id with your identifier. NOTE THE TRAILING SLASH TO BE INCLUDED
Note: There is a policy rule ScopeMatchesShibMDScope in effect on the attribute 'name' (known internally as azureName).
This will enforce that the idp.scope set in conf/idp.properties agrees with the Azure AD field to avoid any oddities. If they disagree, this rule will fail-closed and not sign a user.
Be sure the IdP metadata for the your Azure AD IdP has the right scope for things to work smoothly
<AttributeFilterPolicy id="FilterPolicyObject-Proxy-FromAzure-byIssuer-Type"> <PolicyRequirementRule xsi:type="Issuer" value="https://sts.windows.net/<sts_tenant_id>/" /> <AttributeRule attributeID="azureDisplayname" permitAny="true" /> <AttributeRule attributeID="azureGivenname" permitAny="true" /> <AttributeRule attributeID="azureSurname" permitAny="true" /> <AttributeRule attributeID="azureAuthnmethodsreferences" permitAny="true" /> <AttributeRule attributeID="azureIdentityprovider" permitAny="true" /> <AttributeRule attributeID="azureTenantid" permitAny="true" /> <AttributeRule attributeID="azureEmailaddress" permitAny="true" /> <AttributeRule attributeID="azureObjectidentifier" permitAny="true" /> <AttributeRule attributeID="azureName"> <PermitValueRule xsi:type="ScopeMatchesShibMDScope" /> </AttributeRule> </AttributeFilterPolicy>
6.5.3 Proxy Task 3. Enable IdP to Recognize Azure AD Claims
Azure AD issues SAML assertions, however they are presented in an Azure/WS-Fed-centric naming convention (as "claims").
18
Our technique is to add in a new attribute mapping file that we can then use to parse the claims into internal attributes and in turn use them in the attribute resolver.
Add a new file called in the IdP as attributes/azureClaims.xml if it doesn't already exist. This file contains each of your attributes from Azure AD that you want to use in the resolver.
The sample below is not exhaustive but has enough to get started on the claims file.
For azureName we apply a scoped rule for safety considerations. The scope value MUST match the <shibmd:Scope> extension in the upstream IdP metadata.
The "saml2.nameFormat" rule property is urn:oasis:names:tc:SAML:2.0:attrname-format:unspecified as the claims don't carry the proper format on them.
<?xml version="1.0" encoding="UTF-8"?> <beans xmlns=" http://www.springframework.org/schema/beans" xmlns:context=" http://www.springframework.org/schema/context" xmlns:util=" http://www.springframework.org/schema/util" xmlns:p=" http://www.springframework.org/schema/p" xmlns:c=" http://www.springframework.org/schema/c" xmlns:xsi=" http://www.w3.org/2001/XMLSchema-instance" xsi:schemaLocation=" http://www.springframework.org/schema/beans http://www.springframework.org/schema/beans/spring-beans.xsd http://www.springframework.org/schema/context http://www.springframework.org/schema/context/spring-context.xsd http://www.springframework.org/schema/util http://www.springframework.org/schema/util/spring-util.xsd" default-init-method="initialize" default-destroy-method="destroy"> <bean parent="shibboleth.TranscodingRuleLoader"> <constructor-arg> <list> <!-- claims relevant to person record --> <bean parent="shibboleth.TranscodingProperties"> <property name="properties"> <props merge="true"> <prop key="id">azureName</prop> <prop key="transcoder">SAML2ScopedStringTranscoder</prop> <prop key="saml2.name"> http://schemas.xmlsoap.org/ws/2005/05/identity/claims/name</prop> <prop key="saml2.nameFormat">urn:oasis:names:tc:SAML:2.0:attrname-format:unspecified</prop> <prop key="displayName.en">Name</prop> <prop key="description.en">Azure UPN of an account expected to be scoped thus transcoded that way</prop> </props> </property> </bean> <bean parent="shibboleth.TranscodingProperties"> <property name="properties"> <props merge="true"> <prop key="id">azureEmailaddress</prop> <prop key="transcoder">SAML2StringTranscoder</prop> <prop key="saml2.name"> http://schemas.xmlsoap.org/ws/2005/05/identity/claims/emailaddress</prop>

19
<prop key="saml2.nameFormat">urn:oasis:names:tc:SAML:2.0:attrname-format:unspecified</prop> <prop key="displayName.en">Mail</prop> <prop key="description.en">Azure emailaddress field of an account</prop> </props> </property> </bean> <bean parent="shibboleth.TranscodingProperties"> <property name="properties"> <props merge="true"> <prop key="id">azureDisplayname</prop> <prop key="transcoder">SAML2StringTranscoder</prop> <prop key="saml2.name"> http://schemas.microsoft.com/identity/claims/displayname</prop> <prop key="saml2.nameFormat">urn:oasis:names:tc:SAML:2.0:attrname-format:unspecified</prop> <prop key="displayName.en">Mail</prop> <prop key="description.en">Azure displayname field of an account</prop> </props> </property> </bean> <bean parent="shibboleth.TranscodingProperties"> <property name="properties"> <props merge="true"> <prop key="id">azureGivenname</prop> <prop key="transcoder">SAML2StringTranscoder</prop> <prop key="saml2.name"> http://schemas.xmlsoap.org/ws/2005/05/identity/claims/givenname</prop> <prop key="saml2.nameFormat">urn:oasis:names:tc:SAML:2.0:attrname-format:unspecified</prop> <prop key="displayName.en">Given name</prop> <prop key="description.en">Azure given name of an account</prop> </props> </property> </bean> <bean parent="shibboleth.TranscodingProperties"> <property name="properties"> <props merge="true"> <prop key="id">azureSurname</prop> <prop key="transcoder">SAML2StringTranscoder</prop> <prop key="saml2.name"> http://schemas.xmlsoap.org/ws/2005/05/identity/claims/surname</prop> <prop key="saml2.nameFormat">urn:oasis:names:tc:SAML:2.0:attrname-format:unspecified</prop> <prop key="displayName.en">Surname</prop> <prop key="description.en">Azure surname of an account</prop> </props> </property> </bean> <!-- default claims from Azure for any entity --> <bean parent="shibboleth.TranscodingProperties"> <property name="properties"> <props merge="true"> <prop key="id">azureTenantid</prop> <prop key="transcoder">SAML2StringTranscoder</prop> <prop key="saml2.name"> http://schemas.microsoft.com/identity/claims/tenantid</prop>
20
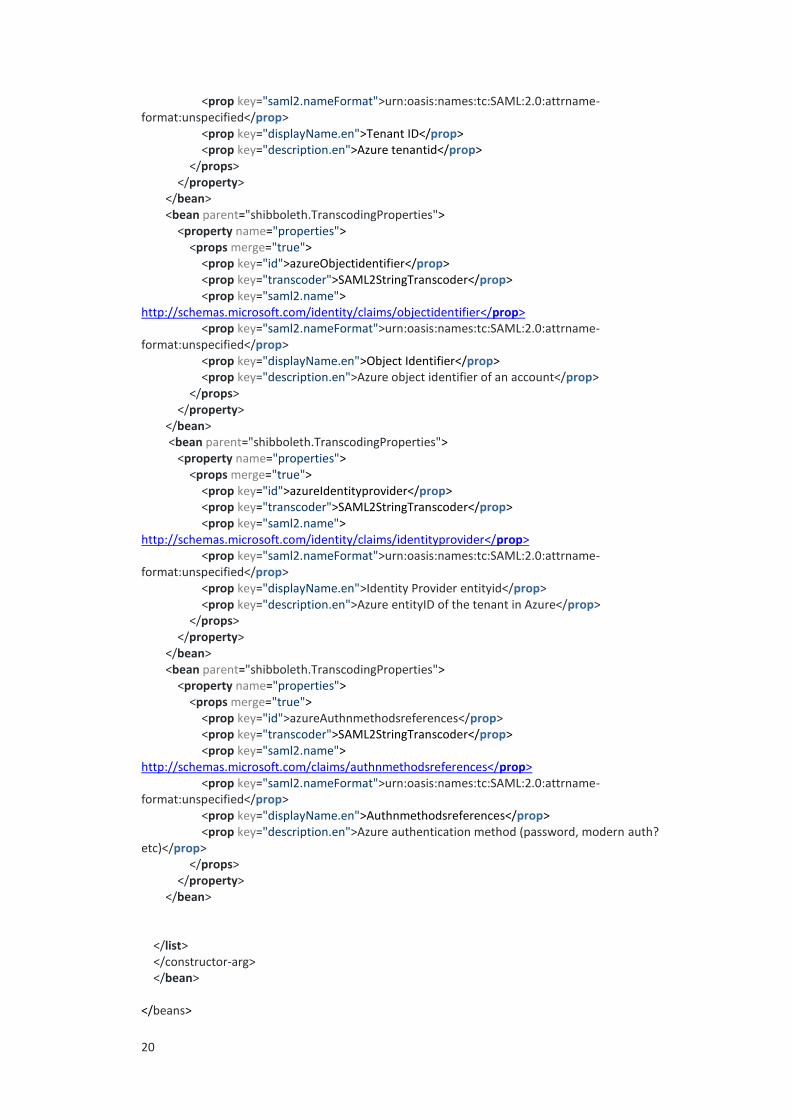
<prop key="saml2.nameFormat">urn:oasis:names:tc:SAML:2.0:attrname-format:unspecified</prop> <prop key="displayName.en">Tenant ID</prop> <prop key="description.en">Azure tenantid</prop> </props> </property> </bean> <bean parent="shibboleth.TranscodingProperties"> <property name="properties"> <props merge="true"> <prop key="id">azureObjectidentifier</prop> <prop key="transcoder">SAML2StringTranscoder</prop> <prop key="saml2.name"> http://schemas.microsoft.com/identity/claims/objectidentifier</prop> <prop key="saml2.nameFormat">urn:oasis:names:tc:SAML:2.0:attrname-format:unspecified</prop> <prop key="displayName.en">Object Identifier</prop> <prop key="description.en">Azure object identifier of an account</prop> </props> </property> </bean> <bean parent="shibboleth.TranscodingProperties"> <property name="properties"> <props merge="true"> <prop key="id">azureIdentityprovider</prop> <prop key="transcoder">SAML2StringTranscoder</prop> <prop key="saml2.name"> http://schemas.microsoft.com/identity/claims/identityprovider</prop> <prop key="saml2.nameFormat">urn:oasis:names:tc:SAML:2.0:attrname-format:unspecified</prop> <prop key="displayName.en">Identity Provider entityid</prop> <prop key="description.en">Azure entityID of the tenant in Azure</prop> </props> </property> </bean> <bean parent="shibboleth.TranscodingProperties"> <property name="properties"> <props merge="true"> <prop key="id">azureAuthnmethodsreferences</prop> <prop key="transcoder">SAML2StringTranscoder</prop> <prop key="saml2.name"> http://schemas.microsoft.com/claims/authnmethodsreferences</prop> <prop key="saml2.nameFormat">urn:oasis:names:tc:SAML:2.0:attrname-format:unspecified</prop> <prop key="displayName.en">Authnmethodsreferences</prop> <prop key="description.en">Azure authentication method (password, modern auth? etc)</prop> </props> </property> </bean> </list> </constructor-arg> </bean> </beans>
21
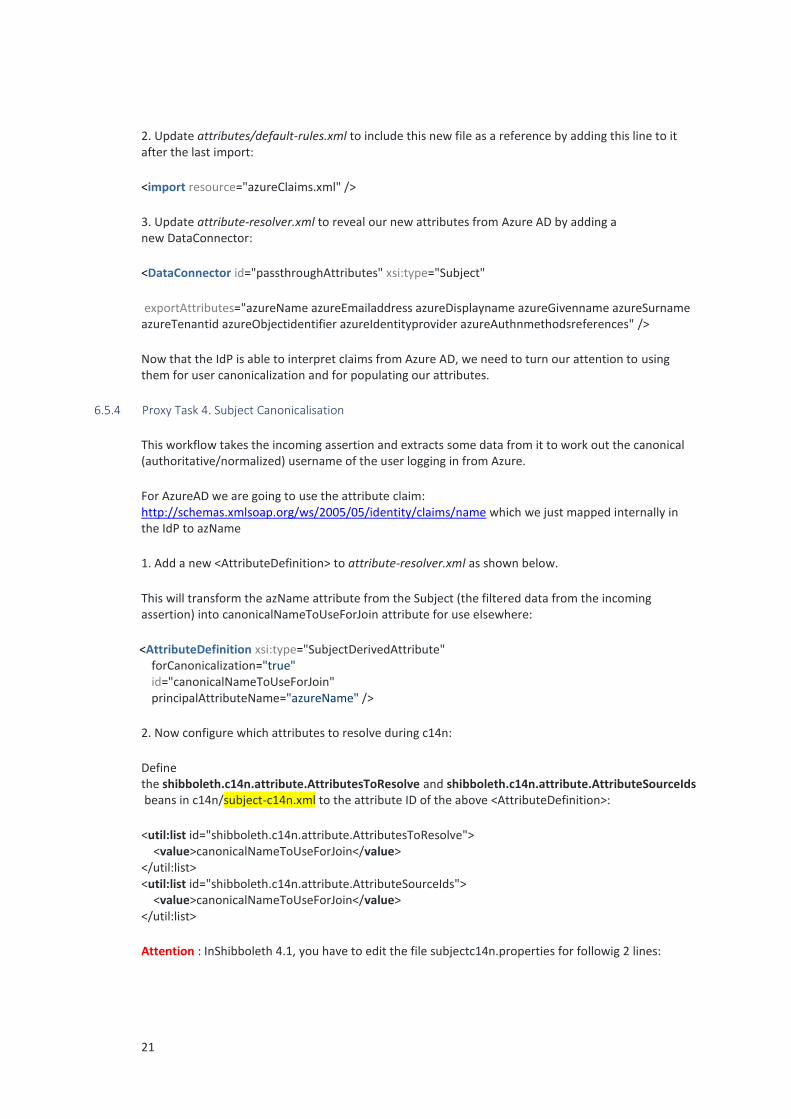
2. Update attributes/default-rules.xml to include this new file as a reference by adding this line to it after the last import:
<import resource="azureClaims.xml" />
3. Update attribute-resolver.xml to reveal our new attributes from Azure AD by adding a new DataConnector:
<DataConnector id="passthroughAttributes" xsi:type="Subject"
exportAttributes="azureName azureEmailaddress azureDisplayname azureGivenname azureSurname azureTenantid azureObjectidentifier azureIdentityprovider azureAuthnmethodsreferences" />
Now that the IdP is able to interpret claims from Azure AD, we need to turn our attention to using them for user canonicalization and for populating our attributes.
6.5.4 Proxy Task 4. Subject Canonicalisation
This workflow takes the incoming assertion and extracts some data from it to work out the canonical (authoritative/normalized) username of the user logging in from Azure.
For AzureAD we are going to use the attribute claim: http://schemas.xmlsoap.org/ws/2005/05/identity/claims/name which we just mapped internally in the IdP to azName
1. Add a new <AttributeDefinition> to attribute-resolver.xml as shown below.
This will transform the azName attribute from the Subject (the filtered data from the incoming assertion) into canonicalNameToUseForJoin attribute for use elsewhere:
<AttributeDefinition xsi:type="SubjectDerivedAttribute" forCanonicalization="true" id="canonicalNameToUseForJoin" principalAttributeName="azureName" />
2. Now configure which attributes to resolve during c14n:
Define the shibboleth.c14n.attribute.AttributesToResolve and shibboleth.c14n.attribute.AttributeSourceIds beans in c14n/subject-c14n.xml to the attribute ID of the above <AttributeDefinition>:
<util:list id="shibboleth.c14n.attribute.AttributesToResolve"> <value>canonicalNameToUseForJoin</value> </util:list> <util:list id="shibboleth.c14n.attribute.AttributeSourceIds"> <value>canonicalNameToUseForJoin</value> </util:list>
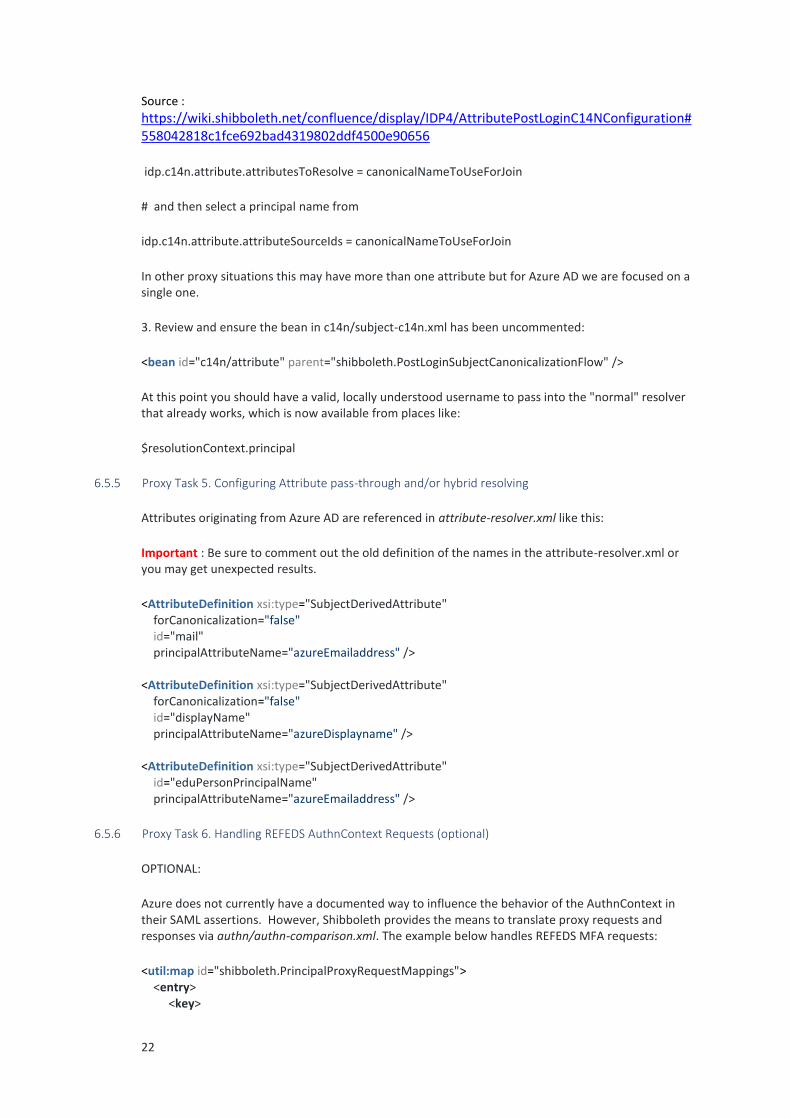
Attention : InShibboleth 4.1, you have to edit the file subjectc14n.properties for followig 2 lines:
22
Source :
https://wiki.shibboleth.net/confluence/display/IDP4/AttributePostLoginC14NConfiguration#558042818c1fce692bad4319802ddf4500e90656
idp.c14n.attribute.attributesToResolve = canonicalNameToUseForJoin
# and then select a principal name from
idp.c14n.attribute.attributeSourceIds = canonicalNameToUseForJoin
In other proxy situations this may have more than one attribute but for Azure AD we are focused on a single one.
3. Review and ensure the bean in c14n/subject-c14n.xml has been uncommented:
<bean id="c14n/attribute" parent="shibboleth.PostLoginSubjectCanonicalizationFlow" />
At this point you should have a valid, locally understood username to pass into the "normal" resolver that already works, which is now available from places like:
$resolutionContext.principal
6.5.5 Proxy Task 5. Configuring Attribute pass-through and/or hybrid resolving
Attributes originating from Azure AD are referenced in attribute-resolver.xml like this:
Important : Be sure to comment out the old definition of the names in the attribute-resolver.xml or you may get unexpected results.
<AttributeDefinition xsi:type="SubjectDerivedAttribute" forCanonicalization="false" id="mail" principalAttributeName="azureEmailaddress" /> <AttributeDefinition xsi:type="SubjectDerivedAttribute" forCanonicalization="false" id="displayName" principalAttributeName="azureDisplayname" /> <AttributeDefinition xsi:type="SubjectDerivedAttribute" id="eduPersonPrincipalName" principalAttributeName="azureEmailaddress" />
6.5.6 Proxy Task 6. Handling REFEDS AuthnContext Requests (optional)
OPTIONAL:
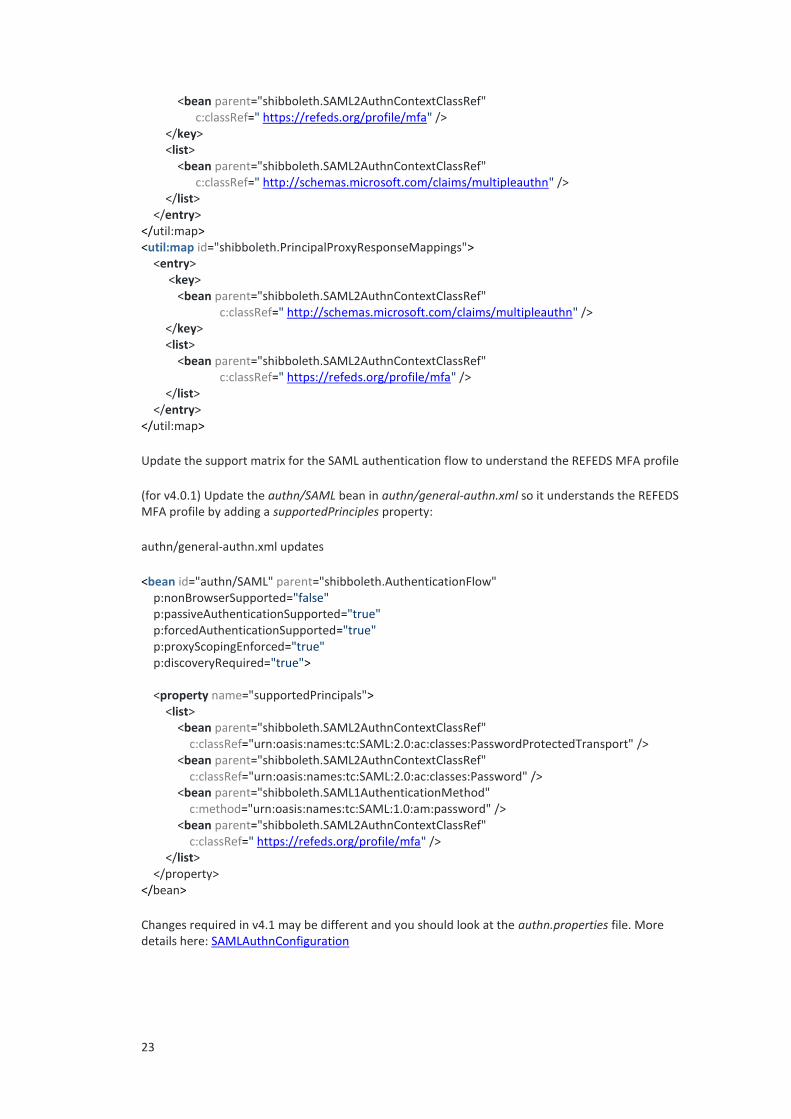
Azure does not currently have a documented way to influence the behavior of the AuthnContext in their SAML assertions. However, Shibboleth provides the means to translate proxy requests and responses via authn/authn-comparison.xml. The example below handles REFEDS MFA requests:
<util:map id="shibboleth.PrincipalProxyRequestMappings"> <entry> <key>
23
<bean parent="shibboleth.SAML2AuthnContextClassRef" c:classRef=" https://refeds.org/profile/mfa" /> </key> <list> <bean parent="shibboleth.SAML2AuthnContextClassRef" c:classRef=" http://schemas.microsoft.com/claims/multipleauthn" /> </list> </entry> </util:map> <util:map id="shibboleth.PrincipalProxyResponseMappings"> <entry> <key> <bean parent="shibboleth.SAML2AuthnContextClassRef" c:classRef=" http://schemas.microsoft.com/claims/multipleauthn" /> </key> <list> <bean parent="shibboleth.SAML2AuthnContextClassRef" c:classRef=" https://refeds.org/profile/mfa" /> </list> </entry> </util:map>
Update the support matrix for the SAML authentication flow to understand the REFEDS MFA profile
(for v4.0.1) Update the authn/SAML bean in authn/general-authn.xml so it understands the REFEDS MFA profile by adding a supportedPrinciples property:
authn/general-authn.xml updates
<bean id="authn/SAML" parent="shibboleth.AuthenticationFlow" p:nonBrowserSupported="false" p:passiveAuthenticationSupported="true" p:forcedAuthenticationSupported="true" p:proxyScopingEnforced="true" p:discoveryRequired="true"> <property name="supportedPrincipals"> <list> <bean parent="shibboleth.SAML2AuthnContextClassRef" c:classRef="urn:oasis:names:tc:SAML:2.0:ac:classes:PasswordProtectedTransport" /> <bean parent="shibboleth.SAML2AuthnContextClassRef" c:classRef="urn:oasis:names:tc:SAML:2.0:ac:classes:Password" /> <bean parent="shibboleth.SAML1AuthenticationMethod" c:method="urn:oasis:names:tc:SAML:1.0:am:password" /> <bean parent="shibboleth.SAML2AuthnContextClassRef" c:classRef=" https://refeds.org/profile/mfa" /> </list> </property> </bean>
Changes required in v4.1 may be different and you should look at the authn.properties file. More details here: SAMLAuthnConfiguration

24
Testing
Restart your IdP for your changes to take effect. Because this is a SAML proxy configuration it doesn't make sense to use aacli since it won't have the required information available to it.
Some sites have a developer account which has a tenant that can test entirely isolated from the production tenant. Alternatively you can create a different Azure AD non-gallery SAML app per IdP – one for production, one for pre-production etc. There's no hard and fast rule on the best way however the developer route is free and provides a great model for isolation between credentials as it's a different cookie domain entirely.
Related content / Recommended Reading
Shibboleth related: SAMLAuthnConfiguration attribute-based subject c14n Azure AD SSO and SAML Related: Configuring SAML SSO: https://docs.microsoft.com/en-us/azure/active-directory/manage-
apps/configure-saml-single-sign-on Quickstart series: https://docs.microsoft.com/en-us/azure/active-directory/manage-
apps/view-applications-portal
6.6 Configure Shibboleth Identity Provider to release the persistent NameID
Shibboleth Documentation reference: https://wiki.shibboleth.net/confluence/display/IDP4/PersistentNameIDGenerationConfiguration
SAML 2.0 (but not SAML 1.x) defines a kind of NameID called a "persistent" identifier that every SP receives for the IdP users. This part will teach you how to release the "persistent" identifiers with a database (Stored Mode) or without it (Computed Mode).
By default, a transient NameID will always be released to the Service Provider if the persistent one is not requested.
Strategy A - Computed mode - Default & Recommended
Become ROOT: o sudo su -
Enable the generation of the computed persistent-id with: # vim /opt/shibboleth-idp/conf/saml-nameid.properties The sourceAttribute MUST be an attribute, or a list of comma-separated attributes, that uniquely identify the subject of the generated persistent-id. The sourceAttribute MUST be Stable, Permanent and Not-reassignable attribute. # ... other things ...# # OpenLDAP has the UserID into "uid" attribute idp.persistentId.sourceAttribute = azureName
# Active Directory has the UserID into "sAMAccountName" #idp.persistentId.sourceAttribute = sAMAccountName # ... other things ...# # BASE64 will match Shibboleth V2 values, we recommend BASE32 encoding for new installs.
idp.persistentId.encoding = BASE32 idp.persistentId.generator = shibboleth.ComputedPersistentIdGenerator

25
# vim /opt/shibboleth-idp/conf/saml-nameid.xml Uncomment the line: <ref bean="shibboleth.SAML2PersistentGenerator" />
o vim /opt/shibboleth-idp/credentials/secrets.properties idp.persistentId.salt = ### result of 'openssl rand -base64 36' ###
Restart Jetty to apply the changes:
o systemctl restart jetty.service Check IdP Status:
o bash /opt/shibboleth-idp/bin/status.sh o
6.7 Configure Shibboleth Identity Provider to release the eduPersonTargetedID
eduPersonTargetedID is an abstracted version of the SAML V2.0 Name Identifier format of "urn:oasis:names:tc:SAML:2.0:nameid-format:persistent".
Important : To be able to follow these steps, you need to have followed the previous steps on "persistent" NameID generation.
Used strategy : Computed mode - using the computed persistent NameID
Check to have the <AttributeDefinition> and the <DataConnector> into the attribute-resolver.xml: # vim /opt/shibboleth-idp/conf/attribute-resolver.xml <!-- ...other things ... --> <!-- AttributeDefinition for eduPersonTargetedID - Computed Mode --> <AttributeDefinition xsi:type="SAML2NameID" nameIdFormat="urn:oasis:names:tc:SAML:2.0:nameid-format:persistent" id="eduPersonTargetedID"> <InputDataConnector ref="computed" attributeNames="computedId" /> </AttributeDefinition> <!-- ... other things... --> <!-- Data Connector for eduPersonTargetedID - Computed Mode --> <DataConnector id="computed" xsi:type="ComputedId" generatedAttributeID="computedId" salt="%{idp.persistentId.salt}" algorithm="%{idp.persistentId.algorithm:SHA}" encoding="%{idp.persistentId.encoding:BASE32}">
<InputDataConnector ref="passthroughAttributes"
attributeNames="%{idp.persistentId.sourceAttribute}" /> </DataConnector> Create the custom eduPersonTargetedID.properties file: # wget https://registry.idem.garr.it/idem-conf/shibboleth/IDP4/attributes/custom/eduPersonTargetedID.properties -O /opt/shibboleth-idp/conf/attributes/custom/eduPersonTargetedID.properties File content : # eduPersonTargetedID id=eduPersonTargetedID transcoder=SAML2XMLObjectTranscoder saml2.name=urn:oid:1.3.6.1.4.1.5923.1.1.1.10
26
displayName.en=Opaque per-service identifier eduPersonTargetedID displayName.fr=Identifiant unique par service eduPersonTargetedID description.en=Opaque per-service identifier eduPersonTargetedID description.fr=Identifiant unique par service eduPersonTargetedID saml1.encodeType=false Restart Jetty to apply the changes: # systemctl restart jetty.service Check IdP Status:
o bash /opt/shibboleth-idp/bin/status.sh
6.8 Releasing attributes
6.8.1 Directly mapped attributes from Azure AD
6.8.1.1 eduPersonPrincipalName
Add the following to attribute-resolver.xml:
<AttributeDefinition xsi:type="SubjectDerivedAttribute" id="eduPersonPrincipalName" principalAttributeName="azureEmailaddress" /> Change the encoding in /opt/shibboleth-idp/conf/attributes/eduPerson.xml <bean parent="shibboleth.TranscodingProperties"> <property name="properties"> <props merge="true"> <prop key="id">eduPersonPrincipalName</prop> <!--<prop key="transcoder">SAML2ScopedStringTranscoder SAML1ScopedStringTranscoder CASScopedStringTranscoder</prop>--> <prop key="transcoder">SAML2StringTranscoder SAML1ScopedStringTranscoder CASScopedStringTranscoder</prop>
6.8.1.2 uid
In attribute-resolver.xml, add :
<AttributeDefinition xsi:type="SubjectDerivedAttribute" forCanonicalization="false" id="uid" principalAttributeName="azureEmailaddress" /> Add the following block in attribute-filter.xml : <AttributeRule attributeID="uid"> <PermitValueRule xsi:type="ANY" /> </AttributeRule>
6.8.1.3 cn
Add the following in attribute-resolver.xml:
<AttributeDefinition xsi:type="SubjectDerivedAttribute" forCanonicalization="false" id="cn" principalAttributeName="azureDisplayname" /> Add the following in attribute-filter.xml <AttributeRule attributeID="cn"> <PermitValueRule xsi:type="ANY" /> </AttributeRule>

27
6.8.1.4 givenName
Add the following in attribute-resolver.xml
<AttributeDefinition xsi:type="SubjectDerivedAttribute" forCanonicalization="false" id="givenName" principalAttributeName="azureGivenname" /> Add the following in attribute-filter.xml <AttributeRule attributeID="cn"> <PermitValueRule xsi:type="ANY" /> </AttributeRule>
6.8.1.5 sn Add the following in attribute-resolver.xml <AttributeDefinition xsi:type="SubjectDerivedAttribute" forCanonicalization="false" id="sn" principalAttributeName="azureSurname" /> Add the following in attribute-filter.xml <AttributeRule attributeID="cn"> <PermitValueRule xsi:type="ANY" /> </AttributeRule>
6.8.2 Static attributes
6.8.2.1 o (Organization)
Add the following in attribute-resolver.xml
<DataConnector id="staticAttributeO" xsi:type="Static"> <Attribute id="o"> <Value>Your Entreprise</Value> </Attribute> </DataConnector> <AttributeDefinition id="o" xsi:type="Simple"> <InputDataConnector ref="staticAttributeO" attributeNames="o" /> </AttributeDefinition> Add the following in attribute-filter.xml <AttributeRule attributeID="o"> <PermitValueRule xsi:type="ANY" /> </AttributeRule>
6.8.2.2 preferredLanguage
Add the following in attribute-resolver.xml:
<DataConnector id="staticAttributepreferredLanguage" xsi:type="Static"> <Attribute id="preferredLanguage"> <Value>FR</Value> </Attribute> </DataConnector> <AttributeDefinition id="preferredLanguage" xsi:type="Simple">
28
<InputDataConnector ref="staticAttributepreferredLanguage" attributeNames="preferredLanguage" /> </AttributeDefinition> Add the following block in attribute-filter.xml <AttributeRule attributeID="preferredLanguage"> <PermitValueRule xsi:type="ANY" /> </AttributeRule>
6.8.2.3 StaticShac Add the following in attribute-resolver.xml <!-- staticSchac as Static Attribute --> <DataConnector id="staticSchac" xsi:type="Static"> <Attribute id="schacHomeOrg"> <Value>yourdomain.be</Value> </Attribute> </DataConnector> <AttributeDefinition id="schacHomeOrg" xsi:type="Simple"> <InputDataConnector ref="staticSchac" attributeNames="schacHomeOrg" /> <AttributeEncoder xsi:type="SAML2String" name="urn:oid:1.3.6.1.4.1.25178.1.2.9" friendlyName="schacHomeOrganization" /> </AttributeDefinition> <!-- End of staticSchac as Static Attribute --> Add the following in attribute-filter.xml <AttributeRule attributeID="schacHomeOrg"> <PermitValueRule xsi:type="ANY" /> </AttributeRule>
6.8.2.4 staticSchacHomeOrganizationType
Add the following in attribute-resolver.xml
<!-- staticSchacHomeOrganizationType as Static Attribute --> <DataConnector id="staticSchacHomeOrganizationType" xsi:type="Static"> <Attribute id="schacHomeOrganizationType"> <Value>urn:schac:homeOrganizationType:int:university</Value> </Attribute> </DataConnector> <AttributeDefinition id="schacHomeOrganizationType" xsi:type="Simple"> <InputDataConnector ref="staticSchacHomeOrganizationType" attributeNames="schacHomeOrganizationType" /> <AttributeEncoder xsi:type="SAML2String" name="urn:oid:1.3.6.1.4.1.25178.1.2.10" friendlyName="schacHomeOrganizationType"/> </AttributeDefinition> <!-- End of staticSchacHomeOrganizationType as Static Attribute --> Add the following in attribute-filter.xml <AttributeRule attributeID="staticSchacHomeOrganizationType"> <PermitValueRule xsi:type="ANY" /> </AttributeRule>
29
6.8.3 Mapped attributes
6.8.3.1 belnetEduPersonUniqueID
Add the following in attribute-resolver.xml
<AttributeDefinition id="belnetEduPersonUniqueID" xsi:type="Simple"> <InputDataConnector ref="passthroughAttributes" attributeNames="azureEmailaddress" /> <DisplayName xml:lang="en">Unique ID</DisplayName> <DisplayName xml:lang="fr">ID unique</DisplayName> <DisplayDescription xml:lang="en">Unique ID: A unique identifier for a person, mainly for inter-institutional user identification.</DisplayDescription> <DisplayDescription xml:lang="fr">Identifiant unique de l'utilisateur au seins de l'AAI.</DisplayDescription> <AttributeEncoder xsi:type="SAML2String" name="urn:oid:2.16.756.1.2.5.1.1.1" friendlyName="belnetEduPersonUniqueID"/> </AttributeDefinition> Add the following in attribute-filter.xml <AttributeRule attributeID="belnetEduPersonUniqueID"> <PermitValueRule xsi:type="ANY" /> </AttributeRule>
6.8.4 Scripted attributes based on other attributes
6.8.4.1 eduPersonScopedAffiliation
Needs to have the form [email protected], which can be multi-value
Add the following in attribute-resolver.xml
<AttributeDefinition id="eduPersonScopedAffiliation" xsi:type="ScriptedAttribute"> <InputAttributeDefinition ref="eduPersonAffiliation"/> <Script> <![CDATA[ if (typeof eduPersonAffiliation != "undefined" && eduPersonAffiliation != null ){ for ( i = 0; eduPersonAffiliation != null && i < eduPersonAffiliation.getValues().size(); i++ ){ value = eduPersonAffiliation.getValues().get(i); eduPersonScopedAffiliation.addValue(value + "@yourdomain.be"); } } ]]> </Script> </AttributeDefinition> Add the following in attribute-filter.xml <AttributeRule attributeID="eduPersonScopedAffiliation"> <PermitValueRule xsi:type="ANY" /> </AttributeRule> Change the encoding in /opt/shibboleth-idp/conf/attributes/eduPerson.xml <bean parent="shibboleth.TranscodingProperties"> <property name="properties"> <props merge="true"> <prop key="id">eduPersonScopedAffiliation</prop>
30
<!--<prop key="transcoder">SAML2ScopedStringTranscoder SAML1ScopedStringTranscoder CASScopedStringTranscoder</prop>--> <prop key="transcoder">SAML2StringTranscoder SAML1ScopedStringTranscoder CASScopedStringTranscoder</prop>
6.8.4.2 eduPersonPrimaryAffiliation
Needs to contain the principal affiliation of a person, the value needs to be a value present in eduPersonAffiliation
Add the following in attribute-resolver.xml
<AttributeDefinition id="eduPersonPrimaryAffiliation" xsi:type="ScriptedAttribute"> <InputAttributeDefinition ref="eduPersonAffiliation"/> <Script> <![CDATA[ if (typeof eduPersonAffiliation != "undefined" && eduPersonAffiliation != null ) { if ( eduPersonAffiliation.getValues().contains("staff") ) { eduPersonPrimaryAffiliation.addValue("staff"); } else if ( eduPersonAffiliation.getValues().contains("student") ) { eduPersonPrimaryAffiliation.addValue("student"); } } ]]> </Script> </AttributeDefinition> Ajout du bloc suivant dans attribute-filter.xml <AttributeRule attributeID="eduPersonPrimaryAffiliation"> <PermitValueRule xsi:type="ANY" /> </AttributeRule>
6.8.5 Scripted/transformed attributes based on belonging to a group.
Addition of a new attribute in Azure AD.
6.8.5.1 eduPersonEntitlement (not used)
The technique here below may not be usable because of the inability to realise multiple static claims on the same group. It remains viable to release a unique static personalised attribute.
https://feedback.azure.com/forums/169401-azure-active-directory/suggestions/32988205-support-multivalue-saml-token-attributes
In the AzureAD portal, create a new Static Claim (will be based on a group later)
You can also assign any constant (static) value to any claims which you define in Azure AD. Please follow the below steps to assign a constant value:
1. In the Azure portal, on the User Attributes & Claims section, click on the Edit icon to edit the claims.
2. Click on the required claim which you want to modify.

31
3. Enter the constant value without quotes in the Source attribute as per your organization and click Save.
4. The constant value will be displayed as below.
Based on <https://docs.microsoft.com/en-us/azure/active-directory/develop/active-directory-saml-claims-customization>
Example (in French)
5. Add the claim in the file \conf\attributes\azureClaims.xml
<bean parent="shibboleth.TranscodingProperties"> <property name="properties"> <props merge="true"> <prop key="id">azureeduPersonEntitlement</prop> <prop key="transcoder">SAML2StringTranscoder</prop> <prop key="saml2.name">eduPersonEntitlement</prop> <prop key="saml2.nameFormat">urn:oasis:names:tc:SAML:2.0:attrname-format:unspecified</prop> <prop key="displayName.en">eduPersonEntitlement</prop> <prop key="description.en">eduPersonEntitlement</prop> </props> </property> </bean>
6. Authorise in the file \attribute-filter.xml
Add following line:
<AttributeRule attributeID="azureeduPersonEntitlement" permitAny="true" />
In the block:
32
<AttributeFilterPolicy id="FilterPolicyObject-Proxy-FromAzure-byIssuer-Type"> En dessous de <AttributeRule attributeID="azureObjectidentifier" permitAny="true" /> Further down below in the file, allow the usual release of the transformed attribute <AttributeRule attributeID="eduPersonEntitlement"> <PermitValueRule xsi:type="ANY" /> </AttributeRule>
7. Add the ability to get the attribute in attribute-release.xml : <AttributeDefinition xsi:type="SubjectDerivedAttribute" forCanonicalization="false" id="eduPersonEntitlement" principalAttributeName="azureeduPersonEntitlement" />
6.8.5.2 eduPersonEntitlement and eduPersonAffiliation
Technique used for "eduPersonEntitlement" and "eduPersonAffiliation"
These two attributes will be scripted based on the belonging of a person to a security group
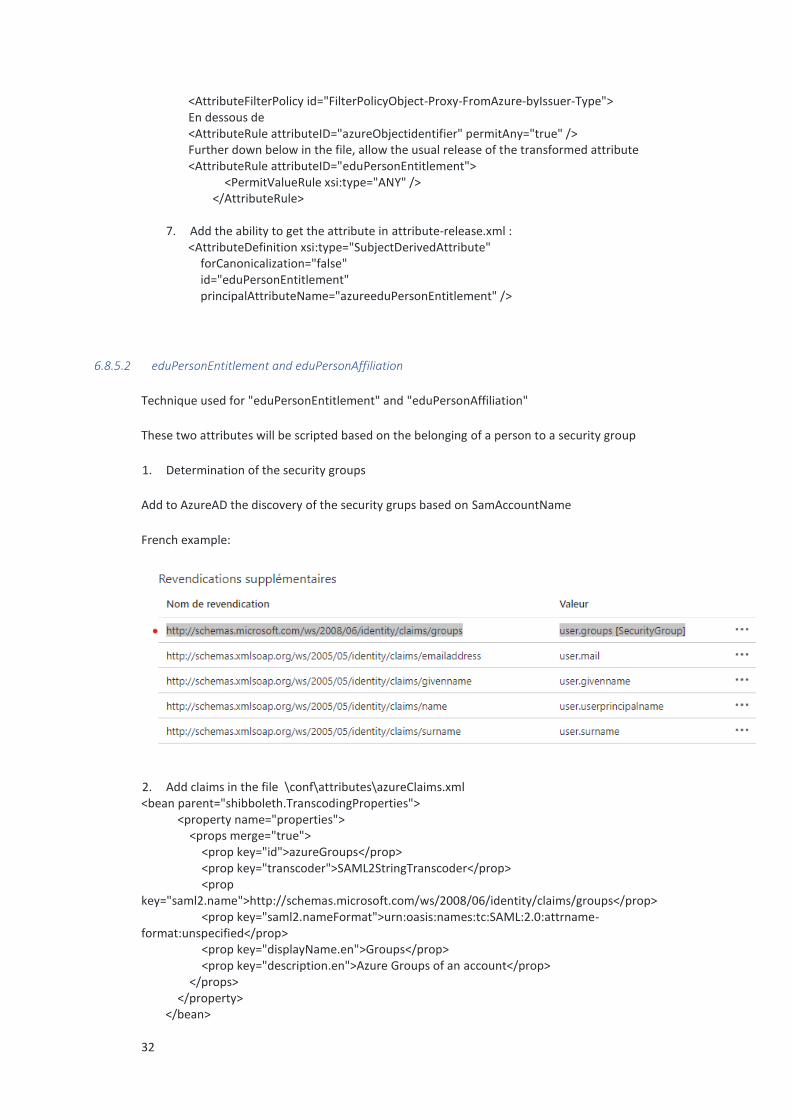
1. Determination of the security groups
Add to AzureAD the discovery of the security grups based on SamAccountName
French example:
2. Add claims in the file \conf\attributes\azureClaims.xml <bean parent="shibboleth.TranscodingProperties"> <property name="properties"> <props merge="true"> <prop key="id">azureGroups</prop> <prop key="transcoder">SAML2StringTranscoder</prop> <prop key="saml2.name">http://schemas.microsoft.com/ws/2008/06/identity/claims/groups</prop> <prop key="saml2.nameFormat">urn:oasis:names:tc:SAML:2.0:attrname-format:unspecified</prop> <prop key="displayName.en">Groups</prop> <prop key="description.en">Azure Groups of an account</prop> </props> </property> </bean>
33
3. Authorise the attribute in the file \attribute-filter.xml
Add following line : <AttributeRule attributeID="azureGroups" permitAny="true" />
In block
<AttributeFilterPolicy id="FilterPolicyObject-Proxy-FromAzure-byIssuer-Type">
Underneath:
<AttributeRule attributeID="azureObjectidentifier" permitAny="true" />
4. Get the groups in the file attributes-resolver.xml :
<AttributeDefinition id="groups" xsi:type="Simple"> <InputDataConnector ref="passthroughAttributes" attributeNames="azureGroups" /> <DisplayName xml:lang="en">Groups</DisplayName> <DisplayName xml:lang="fr">Groupes</DisplayName> <DisplayDescription xml:lang="en">Groups</DisplayDescription> <DisplayDescription xml:lang="fr">Groupes</DisplayDescription> <AttributeEncoder xsi:type="SAML2String" name="urn:oid:1.3.6.1.4.1.5923.1.5.1.1" friendlyName="groups"/> </AttributeDefinition> 5. Creation of a script CDATA allowing to determine a static attribute depending on the belonging to
a group <!-- eduPersonEntitlement --> <AttributeDefinition id="eduPersonEntitlement" xsi:type="ScriptedAttribute"> <InputAttributeDefinition ref="groups"/> <Script> <![CDATA[ if (typeof groups != "undefined" && groups != null ){ // Config des groupes pour eduVPN if (groups.getValues().contains("eduVPN") || groups.getValues().contains("ENS")){ eduPersonEntitlement.addValue("urn:mace:belnet.be:eduvpn:belnet:admin"); } } ]]> </Script> </AttributeDefinition> <!-- End of eduPersonEntitlement --> <!-- eduPersonAffiliation --> <AttributeDefinition id="eduPersonAffiliation" xsi:type="ScriptedAttribute"> <InputAttributeDefinition ref="groups"/> <Script> <
34
if (groups.getValues().contains("ENS") || groups.getValues().contains("ADM") || groups.getValues().contains("DIR")){ eduPersonAffiliation.addValue("staff"); eduPersonAffiliation.addValue("student"); } if (groups.getValues().contains("ETU")){ eduPersonAffiliation.addValue("student"); } } ]]> </Script> </AttributeDefinition> <!-- End of eduPersonAffiliation --> 6. Authorise releasing the attribute in the file Attribute-filter.xml <AttributeRule attributeID="eduPersonEntitlement"> <PermitValueRule xsi:type="ANY" /> </AttributeRule> <AttributeRule attributeID="eduPersonAffiliation"> <PermitValueRule xsi:type="ANY" /> </AttributeRule>
7 Renaming an IDP - Change DNS - Change /metadata/idp-metatada.xml - Change /conf/idp.properties - Change / etc/hostnames et hosts - Rename the apache Vhost apache and its contents and redo an a2ensite - Change the URI in App Azure AD - Zabbix - Backup on BAR
35
8 Annexes 8.1 Annex 1 : Contents of the file idp.yourdomain.be.conf for Apache
# This is an example Apache2 configuration for a Shibboleth Identity Provider # installed with IDEM Tutorials. # # Edit this file and: # - Adjust "idp.yourdomain.be" with your IdP Full Qualified Domain Name # - Adjust "ServerAdmin" email address # - Adjust "CustomLog" and "ErrorLog" with Apache log files path (there are examples for Debian or CentOS distribution) # - Adjust "SSLCertificateFile", "SSLCertificateKeyFile" and "SSLCACertificateFile" with the correct file path # SSL general security improvements should be moved in global settings # OCSP Stapling, only in httpd/apache >= 2.3.3 SSLUseStapling on SSLStaplingResponderTimeout 5 SSLStaplingReturnResponderErrors off SSLStaplingCache shmcb:/var/run/ocsp(128000) <VirtualHost *:80> ServerName "idp.yourdomain.be" Redirect permanent "/" "https://idp.yourdomain.be/" </VirtualHost> <IfModule mod_ssl.c> <VirtualHost _default_:443> ServerName idp.yourdomain.be:443 ServerAdmin [email protected] # Debian CustomLog /var/log/apache2/idp.yourdomain.be.log combined ErrorLog /var/log/apache2/ idp.yourdomain.be-error.log # Centos #CustomLog /var/log/httpd/idp.yourdomain.be.log combined #ErrorLog /var/log/httpd/idp.yourdomain.be.be-error.log DocumentRoot /var/www/html/idp.yourdomain.be SSLEngine On SSLProtocol All -SSLv2 -SSLv3 -TLSv1 -TLSv1.1 SSLCipherSuite "EECDH+ECDSA+AESGCM EECDH+aRSA+AESGCM EECDH+ECDSA+SHA384 EECDH+ECDSA+SHA256 EECDH+aRSA+SHA384 EECDH+aRSA+SHA256 EECDH+aRSA+RC4 EECDH EDH+aRSA RC4 !aNULL !eNULL !LOW !3DES !MD5 !EXP !PSK !SRP !DSS !RC4" SSLHonorCipherOrder on # Disallow embedding your IdP's login page within an iframe and # Enable HTTP Strict Transport Security with a 2 year duration <IfModule headers_module> Header set X-Frame-Options DENY Header set Strict-Transport-Security "max-age=63072000 ; includeSubDomains ; preload" </IfModule> # Debian
36
SSLCertificateFile /etc/apache2/certs/star.yourdomain.be.cer SSLCertificateKeyFile /etc/apache2/certs/star.yourdomain.be.key SSLCertificateChainFile /etc/apache2/certs/SectigoCA.cer <IfModule mod_proxy.c> ProxyPreserveHost On RequestHeader set X-Forwarded-Proto "https" ProxyPass /idp http://localhost:8080/idp retry=5 ProxyPassReverse /idp http://localhost:8080/idp retry=5 <Location /idp> Require all granted </Location> </IfModule> </VirtualHost> </IfModule> # This virtualhost is only here to handle administrative commands for Shibboleth, executed from localhost <VirtualHost 127.0.0.1:80> ProxyPass /idp http://localhost:8080/idp retry=5 ProxyPassReverse /idp http://localhost:8080/idp retry=5 <Location /idp> Require all granted </Location> </VirtualHost>


