160
Extended User’s Guide 9356055 Issue 2
| Date post: | 05-Jun-2018 |
| Category: |
Documents |
| Upload: | nguyendiep |
| View: | 247 times |
| Download: | 0 times |

Extended User’s Guide
9356055Issue 2

DECLARATION OF CONFORMITYWe, NOKIA CORPORATION declare under our sole responsibility that the product NHM-1 is in conformity with the provisions of the following Council Directive: 1999/5/EC.
ny form
mes of
3. Tegic
A copy of the Declaration of Conformity can be found from http://www.nokia.com/phones/declaration_of_conformity/.
Copyright © Nokia 2003. All rights reserved.
Reproduction, transfer, distribution or storage of part or all of the contents in this document in awithout the prior written permission of Nokia is prohibited.
Nokia, Nokia Connecting People and Pop-Port are trademarks or registered trademarks of Nokia Corporation. Other product and company names mentioned herein may be trademarks or tradenatheir respective owners.
Nokia tune is a sound mark of Nokia Corporation.
Bluetooth is a registered trademark of Bluetooth SIG, Inc.
US Patent No 5818437 and other pending patents. T9 text input software Copyright (C) 1997-200Communications, Inc. All rights reserved.
Includes RSA BSAFE cryptographic or security protocol software from RSA Security.
Java is a trademark of Sun Microsystems, Inc.

USE OF THIS PRODUCT IN ANY MANNER THAT COMPLIES WITH THE MPEG-4 VISUAL STANDARD IS PROHIBITED, EXCEPT FOR USE DIRECTLY RELATED TO (A) DATA OR INFORMATION (i) GENERATED BY AND OBTAINED WITHOUT CHARGE FROM A CONSUMER NOT THEREBY ENGAGED IN A BUSINESS ENTERPRISE,
ED BY
d
nties of
ity or time
rest to
AND (ii) FOR PERSONAL USE ONLY; AND (B) OTHER USES SPECIFICALLY AND SEPARATELY LICENSMPEG LA, L.L.C.
Nokia operates a policy of continuous development. Nokia reserves the right to make changes animprovements to any of the products described in this document without prior notice.
Under no circumstances shall Nokia be responsible for any loss of data or income or any special, incidental, consequential or indirect damages howsoever caused.
The contents of this document are provided "as is". Except as required by applicable law, no warraany kind, either express or implied, including, but not limited to, the implied warranties of merchantability and fitness for a particular purpose, are made in relation to the accuracy, reliabilcontents of this document. Nokia reserves the right to revise this document or withdraw it at anywithout prior notice.
The availability of particular products may vary by region. Please check with the Nokia dealer neayou.
9356055 / Issue 2

4
Contents
......12
......16
.........16
.........16
......18
.........18
.........18
.........19
.........19
.........19
.........20
.........20
.........20
.........21
.........21
......22
.........22
.........23
.........24
.........24
.........25
.........25
.........28
Copyright © 2003 Nokia. All rights reserved.
FOR YOUR SAFETY ........................................................................................
General information......................................................................................Stickers in the sales package ........................................................................................................Access codes ......................................................................................................................................
Nokia 6650 phone - for fun and work .......................................................Camera and multimedia messages..............................................................................................Support for GSM and UMTS networks .......................................................................................GPRS and HSCSD for fast data transfer.....................................................................................
GPRS .................................................................................................................................................HSCSD ..............................................................................................................................................
Voice key .............................................................................................................................................Java applications ..............................................................................................................................USB port for fast local connections ............................................................................................Receiving settings as an Over-the-Air (OTA) message ..........................................................Shared memory .................................................................................................................................
1. Your phone.................................................................................................Keys ......................................................................................................................................................
Three selection keys .....................................................................................................................Connectors..........................................................................................................................................Standby mode and display indicators.........................................................................................
Wallpaper and screen saver .......................................................................................................Essential indicators.......................................................................................................................
Using the camera lens cover .........................................................................................................

Cont
ents
5
2. Getting started ................................................................................................29Installing the SIM card and the battery..............................................................................................29
Installation...............................................................................................................................................29.........31.........31.........32.........33
......36
.........36
.........37
.........37
.........37
.........37
.........38
.........38
.........39
.........39
.........40
.........40
.........41
.........41
.........42
.........42
.........43
.........43
.........43
.........43
.........45
Copyright © 2003 Nokia. All rights reserved.
Removing the battery...............................................................................................................Charging the battery .......................................................................................................................Switching the phone on and off ..................................................................................................Using the camera..............................................................................................................................
3. Basic functions ..........................................................................................Making a call .....................................................................................................................................
Calling a phone number saved in the phone book..............................................................Calling a recently dialled number ............................................................................................Calling your voice mailbox .........................................................................................................Voice dialling..................................................................................................................................Speed dialling a phone number ................................................................................................Making a conference call ...........................................................................................................
Answering or rejecting an incoming call...................................................................................Call waiting.....................................................................................................................................
Functions available during a call .................................................................................................Using the loudspeaker.....................................................................................................................Using the voice key ..........................................................................................................................
Voice recording..............................................................................................................................Voice recognition ..........................................................................................................................
Keypad lock (Keyguard) ..................................................................................................................Writing text........................................................................................................................................
Predictive text input.....................................................................................................................Setting predictive text input on or off ................................................................................Using predictive text input .....................................................................................................Writing compound words........................................................................................................

6
Using traditional text input ................................................................................................................45
4. Using the menu ...............................................................................................47.........47.........49
......57
.........57
.........57
.........57
.........59
.........61
.........62
.........63
.........66
.........68
.........68
.........69
.........70
.........70
.........71
.........71
.........73
.........74
.........74
.........74
.........76..........76.........78
Copyright © 2003 Nokia. All rights reserved.
Accessing a menu function ...........................................................................................................List of menu functions ....................................................................................................................
5. Menu functions .........................................................................................Messages (Menu 1) ..........................................................................................................................
Text and picture messages (SMS).............................................................................................Writing and sending a text or picture message ...............................................................Reading and replying to a text or picture message.........................................................Folders for text and picture messages.................................................................................
Multimedia messages (MMS) ....................................................................................................Writing and sending a multimedia message .....................................................................Reading and replying to a multimedia message ..............................................................Folders for multimedia messages..........................................................................................
Deleting messages ........................................................................................................................Chat...................................................................................................................................................Voice messages..............................................................................................................................Info messages.................................................................................................................................Message settings...........................................................................................................................
Settings for text messages......................................................................................................Settings for multimedia messages .......................................................................................Other settings .............................................................................................................................
Service commands ........................................................................................................................Distribution lists ............................................................................................................................
Call register (Menu 2) .....................................................................................................................Missed, received and dialled calls ...........................................................................................Call counters and call timers .....................................................................................................

Cont
ents
7
Contacts (Menu 3) ....................................................................................................................................78Alternative ways to access the functions in this menu..............................................................79Selecting the phone book settings....................................................................................................79
.........80
.........80
.........81
.........82
.........82
.........83
.........83
.........84
.........84
.........84
.........85
.........85
.........86
.........86
.........87
.........87
.........88
.........89
.........89
.........89
.........90
.........90
.........91
.........92
.........92
Copyright © 2003 Nokia. All rights reserved.
Saving names and phone numbers ..........................................................................................Saving multiple numbers and text items per name.........................................................Changing the default number................................................................................................Adding an image to a saved name or number ..................................................................
Searching for a name in the phone book...............................................................................Editing a name, number or text item......................................................................................Changing the image attached to a name ..............................................................................Deleting contacts from the phone book.................................................................................
Deleting a number, text item or image added to a name .............................................Copying contacts...........................................................................................................................Voice dialling..................................................................................................................................
Notes for using voice dialling ................................................................................................Recording a voice tag...............................................................................................................Making a call using a voice tag.............................................................................................Playing, changing or deleting a voice tag ..........................................................................
Sending and receiving a business card...................................................................................Speed dials ......................................................................................................................................Service numbers ............................................................................................................................My numbers....................................................................................................................................Caller groups ..................................................................................................................................
Changing the caller group of a name..................................................................................Sending a message from the phone book..............................................................................
Profiles (Menu 4) ..............................................................................................................................Settings (Menu 5).............................................................................................................................
Personal shortcuts ........................................................................................................................
8
Time and date settings .........................................................................................................................93Call settings .............................................................................................................................................94
.........96
.........98
...... 100
...... 101
...... 101
...... 102
...... 104
...... 104
...... 105
...... 105
...... 106
...... 109
...... 110
...... 110
...... 111
...... 112
...... 113
...... 115
...... 115
...... 116
...... 116
...... 117
...... 118
...... 118
...... 119
...... 119
Copyright © 2003 Nokia. All rights reserved.
Phone settings ...............................................................................................................................Display settings..............................................................................................................................Tone settings ..................................................................................................................................
Adding new tones to your phone..........................................................................................Enhancement settings .................................................................................................................Security settings............................................................................................................................Restoring factory settings ..........................................................................................................
Camera (Menu 6)..............................................................................................................................Taking a photo or recording a video clip................................................................................Adjusting the camera settings ..................................................................................................
Gallery (Menu 7) ...............................................................................................................................Usage rights....................................................................................................................................
Organiser (Menu 8) ..........................................................................................................................Alarm clock .....................................................................................................................................Calendar...........................................................................................................................................
Using the different calendar views ......................................................................................Making a calendar note...........................................................................................................When the phone sounds an alarm for a note....................................................................
To-do list .........................................................................................................................................Wallet ...............................................................................................................................................
Saving and changing personal card information .............................................................Personal notes ............................................................................................................................Wallet settings ...........................................................................................................................Paying for your purchases with the wallet ........................................................................
Games (Menu 9)................................................................................................................................Adjusting the game settings......................................................................................................
Cont
ents
9
Starting a game................................................................................................................................... 119Downloading a game ......................................................................................................................... 120
...... 120
...... 120
...... 121
...... 121
...... 122
...... 123
...... 123
...... 124
...... 124
...... 125
...... 125
...... 126
...... 126
...... 126
...... 127
...... 127
...... 128
...... 128
...... 129
...... 129
...... 130
...... 131
...... 131
...... 132
...... 133
...... 133
Copyright © 2003 Nokia. All rights reserved.
Checking the memory status for games.................................................................................Applications (Menu 10) ..................................................................................................................
Launching an application ...........................................................................................................Other options available for an application or application set......................................
Downloading a Java application...............................................................................................Checking the memory status .....................................................................................................
Extras (Menu 11) ..............................................................................................................................Calculator ........................................................................................................................................
Making a currency conversion...............................................................................................Voice commands ...........................................................................................................................
Adding a voice command to a menu function..................................................................Using a voice command...........................................................................................................Playing, changing or deleting a voice command..............................................................
Countdown timer ..........................................................................................................................Stopwatch .......................................................................................................................................
Taking split times or lap times...............................................................................................Viewing and deleting previously taken times....................................................................
Connectivity (Menu 12) ..................................................................................................................Bluetooth wireless technology..................................................................................................
Setting up a Bluetooth connection ......................................................................................Deactivating the Bluetooth feature .....................................................................................Viewing the paired devices .....................................................................................................Bluetooth settings.....................................................................................................................
Infrared ............................................................................................................................................GPRS .................................................................................................................................................
Selecting the GPRS connection mode .................................................................................
10
GPRS modem settings .................................................................................................................... 134 Services (Menu 13)).............................................................................................................................. 135
Basic steps for accessing and using browser services.............................................................. 135...... 136...... 136...... 136...... 138...... 138...... 139...... 140...... 140...... 141...... 141...... 142...... 142...... 143...... 144...... 144...... 144...... 145...... 145
... 147
...... 147
...... 149
... 150
...... 150
Copyright © 2003 Nokia. All rights reserved.
Setting up the phone for a browser service ..........................................................................Saving the service settings received as a message..........................................................Keying in the service settings manually .............................................................................
Making a connection to a browser service............................................................................Browsing the pages of a service ...............................................................................................
Using the phone keys while browsing .................................................................................Ending a browser connection ....................................................................................................Appearance settings.....................................................................................................................Cookie settings ..............................................................................................................................Bookmarks.......................................................................................................................................
Receiving a bookmark ..............................................................................................................Service inbox ..................................................................................................................................
Service inbox settings ..............................................................................................................Emptying the cache memory .....................................................................................................Security features for browser connections............................................................................
Certificates ..................................................................................................................................Go to (Menu 14) ...............................................................................................................................SIM services (Menu 15) ..................................................................................................................
6. PC Connectivity .........................................................................................Nokia PC Suite...................................................................................................................................Using your phone as a modem .....................................................................................................
7. Battery information...................................................................................Charging and discharging ..............................................................................................................
Cont
ents
11
CARE AND MAINTENANCE.............................................................................. 152
IMPORTANT SAFETY INFORMATION............................................................... 153
Copyright © 2003 Nokia. All rights reserved.

12
FOR YOUR SAFETY
en it
e.
ment.
s.
nd
Copyright © 2003 Nokia. All rights reserved.
Read these simple guidelines. Breaking the rules may be dangerous or illegal. Furtherdetailed information is given in this manual.
Do not switch the phone on when wireless phone use is prohibited or whmay cause interference or danger.
ROAD SAFETY COMES FIRSTDon't use a hand-held phone while driving.
INTERFERENCEAll wireless phones may get interference, which could affect performanc
SWITCH OFF IN HOSPITALSFollow any regulations or rules. Switch the phone off near medical equip
SWITCH OFF IN AIRCRAFTWireless devices can cause interference in aircraft.
SWITCH OFF WHEN REFUELLINGDon't use the phone at a refuelling point. Don't use near fuel or chemical
SWITCH OFF NEAR BLASTINGDon't use the phone where blasting is in progress. Observe restrictions, afollow any regulations or rules.

FOR
YOUR
SAF
ETY
13
USE SENSIBLYUse only in the normal position. Don't touch the antenna unnecessarily.
le
fety
swer a
s as the call
Copyright © 2003 Nokia. All rights reserved.
QUALIFIED SERVICEOnly qualified personnel may install or repair phone equipment.
ACCESSORIES AND BATTERIESUse only approved accessories and batteries. Do not connect incompatibproducts.
CONNECTING TO OTHER DEVICESWhen connecting to any other device, read its user's guide for detailed sainstructions. Do not connect incompatible products.
BACKUP COPIESRemember to make backup copies of all important data.
WATER-RESISTANCEYour phone is not water-resistant. Keep it dry.
CALLINGEnsure the phone is switched on and in service. Enter the phone number,including the area code, then press . To end a call, press . To ancall, press .
EMERGENCY CALLSEnsure the phone is switched on and in service. Press as many timeneeded (e.g. to exit a call, to exit a menu, etc.) to clear the display. Enter emergency number, then press . Give your location. Do not end the until told to do so.

14
When using the features in this device, obey all laws and honor privacy and legitimate rights of others.
1800
nt ature.
is all r
ome r or
ecial r
and/or
ended
Copyright © 2003 Nokia. All rights reserved.
■ Network servicesThe wireless phone described in this guide is approved for use on the EGSM 900, GSMand UMTS networks.
Dual mode (operation in both GSM/EGSM and UMTS networks) is a network dependefeature. Check with your local service provider if you can subscribe to and use this fe
This wireless phone is a 3GPP GSM Release 99 terminal supporting GPRS service, anddesigned to support also Release 97 GPRS networks. However, proper functionality inRelease 97 GPRS networks cannot be guaranteed. For more information, contact youservice provider or local Nokia dealer.
This phone supports WAP 2.0 protocols (HTTP and SSL) that run on TCP/IP protocols. Sfeatures of this phone, such as MMS, browsing, and content downloading via browseover MMS, require network support for these technologies.
A number of features included in this guide are called Network Services. These are spservices that you arrange through your wireless service provider. Before you can takeadvantage of any of these Network Services, you must subscribe to them through youservice provider and obtain instructions for their use from your service provider.
Note: Some networks may not support all language-dependent characters services.
■ About accessoriesCheck the model number of any charger before use with this device. This device is intfor use when supplied with power from ACP-12, DCV-14 and LCH-12.

FOR
YOUR
SAF
ETY
15
Warning: Use only batteries, chargers and accessories approved by the phone manufacturer for use with this particular phone model. The use of any other types
e cord.
Copyright © 2003 Nokia. All rights reserved.
may invalidate any approval or warranty applying to the phone, and may bedangerous.
For availability of approved accessories, please check with your dealer.
When you disconnect the power cord of any accessory, grasp and pull the plug, not th

16
General information
rt
it urity ce
d with tivate 2), the
Copyright © 2003 Nokia. All rights reserved.
■ Stickers in the sales packageThe stickers contain important information for services and customer suppopurposes. Keep these stickers in a safe and secure place.
Attach the sticker to the Club Nokia Invitation Card supplied in the salespackage.
Attach the sticker to your warranty card.
■ Access codes• Security code: This code is supplied with your phone. The security code
protects your phone against unauthorised use.
The preset code is 12345. Change the code and set the phone to requestusing the Change of access codes and Security level functions in the Secsettings menu (see page 102). Keep the new code secret and in a safe plaseparate from your phone.
• PIN code: The PIN (Personal Identification Number) code may be suppliethe SIM card. It protects the SIM card against unauthorised use. If you acthe PIN code request function in the Security settings menu (see page 10code is requested each time the phone is switched on.
Gene
ral i
nfor
mat
ion
17
If you enter an incorrect PIN code three times in succession, the SIM card is blocked. Key in the PUK code and press OK. Key in a new PIN code and press
to
2 code.
e SIM
arring
ge
ard. y
lock a
Copyright © 2003 Nokia. All rights reserved.
OK. Key in the new code again and press OK.
• PIN2 code: This code may be supplied with the SIM card and is required access some functions, such as charging unit counters. If you enter an incorrect PIN2 code three times in succession, you are asked for the PUK
• PUK and PUK2 codes: The PUK and PUK2 codes may be supplied with thcard. If this is not the case, contact your service provider.
• Barring password: The barring password is needed when using the Call bservice function in the Security settings menu, see page 102.
• Wallet code: The wallet code is needed to use the wallet services, see pa116.
• UPIN and UPUK codes: The UPIN code may be supplied with the USIM cThe USIM card is an enhanced version of the SIM card and is supported bUMTS mobile phones.
The UPIN code protects the USIM card against unauthorised use.
The UPUK code may be supplied with the USIM card and is needed to unbUPIN code.

18
Nokia 6650 phone - for fun and work
ed
eo dia
veral le,
ng the
e rators.
Copyright © 2003 Nokia. All rights reserved.
The Nokia 6650 phone is a versatile multimedia phone that provides many convenient features for daily use. Some of these features are briefly describhere.
■ Camera and multimedia messagesYour phone has a built-in camera that can be used for taking photos and recording short video clips with sound. After you have taken a photo or a vidclip, you can attach it to a multimedia message and send it via the MultimeMessaging Service (MMS) to a compatible device (network service).
The photos can also be used as wallpaper in standby mode or as thumbnail pictures in the phone book.
■ Support for GSM and UMTS networksYour phone can be used in GSM 900, GSM 1800 and UMTS networks.
The UMTS network allows fast communications and simultaneous use of secall functions. When the phone is using a UMTS network you can, for examptake a photo during a call and send it in a multimedia message without endicall (network service).
The phone selects the GSM or UMTS network automatically according to thnetwork parameters and the roaming agreements between the network ope

Nok
ia 6
650
phon
e -
for
fun
and
wor
k
19
■ GPRS and HSCSD for fast data transferYou can use the phone for GPRS (General Packet Radio Service) and HSCSD (High
t and work e twork
vider.
ges
e
r than for
Copyright © 2003 Nokia. All rights reserved.
Speed Circuit Switched Data) high-speed data services. These are network services.
GPRSGPRS can be used for accessing browser services, sending and receiving texmultimedia messages and downloading JavaTM games and applications (netservices). When the phone is connected to a compatible PC, you can also usdifferent Internet services such as World Wide Web (WWW) and e-mail (neservices) via a PC dial-up connection.
To use the GPRS service:
• Subscribe to the GPRS service from your network operator or service pro
• Save the GPRS settings for the functions (for example multimedia messaand browser services) that you want to use with the GPRS service.
HSCSDHSCSD can be used for transferring data and browsing the Internet when thphone is connected to a compatible PC.
Note that the use of the HSCSD service consumes the phone’s battery fastenormal voice or data calls. You may need to connect the phone to a chargerthe duration of data transfer.

20
■ Voice keyYou can start a voice recording or make a call using voice dialling with the voice
ld .
va he
r 10) on
t that he PC ed
s XP.
Copyright © 2003 Nokia. All rights reserved.
key on the side of the phone.
To start voice recording, press . To activate voice dialling, press and ho. See also Voice dialling on page 85 and Voice commands on page 125
■ Java applicationsYour phone supports Java 2 Micro Edition (J2METM), which is a version of Jatechnology specifically designed for small consumer electronics products. Tphone includes some Java applications and games.
You can install new applications and games from a PC with the Java installesoftware or download them from browser services. See Applications (Menu page 120.
■ USB port for fast local connectionsThe phone’s Pop-PortTM connector includes a Universal Serial Bus (USB) porallows fast data transfer between the phone and a PC via the DKU-2 cable. Tneeds to be provided with a compatible USB port. The DKU-2 cable is suppliseparately.
For the USB connection, one of the following operating systems needs to beinstalled on your PC: Windows 98 SE, Windows Me, Windows 2000, Window

Nok
ia 6
650
phon
e -
for
fun
and
wor
k
21
■ Receiving settings as an Over-the-Air (OTA) messageIn order to use network services such as WAP, MMS and GPRS, you need to have
r-the-ty of
nd enu;
s ially tures).
ur me of
ry
Copyright © 2003 Nokia. All rights reserved.
the proper settings on your phone. If you can receive the settings as an OveAir (OTA) message, you only need to save them on your phone. For availabilithe settings, contact your network operator or service provider.
■ Shared memoryThe following features in this phone may share memory: phone book; text amultimedia messages; images, video clips and ringing tones in the Gallery mbookmarks; calendar and to-do notes; Java games and applications.
Using any such features may reduce the memory available for any features sharing memory. This is especially true with heavy use of any of the feature(although some of the features may have a certain amount of memory specallotted to them in addition to the amount of memory shared with other fea
For example, saving many images may take all of the shared memory and yophone may display a message that the memory is full. In this case, delete sothe information or entries stored in the shared memory features before continuing.
You can check the amount of free and used shared memory with the Memostatus function in the Phone settings menu, see page 96.

22
1. Your phone
Copyright © 2003 Nokia. All rights reserved.
■ Keys1. Power key
Press and hold this key to switch the phone on or off.
If you press this key while the keypad is locked, the phone’s lights turn on for about 15 seconds.
2. Voice key
Press this key to start voice recording. Press and hold this key to activate voice dialling. See also Using the voice key on page 41.
3. Volume keys
Press the upper key to increase or the lower key to decrease the volume.
4. Scroll keys , , and
With these keys you can scroll through different lists, such as the phone book contents and the menu functions, and move the cursor for example when writing a message.
Your
pho
ne
23
5. Three selection keys
Each key performs the function that is displayed above it. For example,
mode
m.
rently
lly is
evel in he 92. In erwise .
Copyright © 2003 Nokia. All rights reserved.
pressing Menu in standby mode opens the list of menu functions.
6. dials a phone number or answers a call. Pressing this key in standbyshows the most recently dialled numbers.
7. ends an active call or rejects a call. Exits from any function.
8. - enter numbers and characters.
and are used for various purposes in different functions.
Three selection keysThe function of these keys depends on the guiding text displayed above the
The left selection key ( ) usually opens a list of options related to the curdisplayed function. In standby mode, this selection key is Gallery.
The middle selection key ( ), located in the middle of the scroll keys, usuaperforms the default operation of the current function. In standby mode, thselection key is Menu.
The right selection key ( ) usually takes you back to the previous menu lthe menu functions. In standby mode, the function of this key depends on tsettings in the Personal shortcuts menu under the Settings menu, see page standby mode, this key is Names if no other functions are assigned to it. Oththe key is Go to which allows you to quickly access the functions on the list

24
■ Connectors1. Infrared port for wireless connection with a
the
Copyright © 2003 Nokia. All rights reserved.
compatible device.
2. Charger connector
3. Pop-PortTM connector with an integrated USB port. See USB port for fast local connections on page 20.
■ Standby mode and display indicatorsWhen the phone is ready for use and you have not keyed in any characters, phone is in standby mode.

Your
pho
ne
25
1. Shows the name of the network in which the phone is being used, or the operator logo.
e
he
if the on
Copyright © 2003 Nokia. All rights reserved.
2. Shows the signal strength of the cellular network at your current location. The higher the bar, the stronger the signal.
The indicator below the bar is when you are using the phone in a UMTS network.
3. Shows the battery charge level. The higher the bar, the more power in the battery.
4. Guiding texts for the three selection keys, see page 23.
Wallpaper and screen saverYou can set the phone to display a background picture, ’wallpaper’, when thphone is in standby mode.
Screen saver is a power saving feature that is activated in standby mode if tphone is not used for a certain length of time.
For more information, see Display settings on page 98.
Essential indicatorsThe phone is being used in a UMTS network. This indicator is shownnetwork supports it. See also Support for GSM and UMTS networks page 18.

26
You have received a text or picture message. See Reading and replying to a text or picture message on page 59.
to a
o call
2.
se See
d or M
one is st. See
Copyright © 2003 Nokia. All rights reserved.
You have received a multimedia message. See Reading and replyingmultimedia message on page 66.
You have received a voice message (network service). Press Listen tyour voice mailbox. See also Voice messages on page 70.
The phone’s keypad is locked. See Keypad lock (Keyguard) on page 4
The phone does not ring for an incoming call or text message becauIncoming call alert is set to Off and Message alert tone is set to Off.Profiles (Menu 4) on page 91 and Tone settings on page 100.
The alarm clock is on. See page 110.
The countdown timer is on. See page 126.
The stopwatch is running in the background. See page 127.
The GPRS connection is active.
The GPRS connection is suspended, for example if you have receivemade a call during a GPRS connection. This indicator is shown in GSnetworks only.
The infrared connection is active. When the indicator blinks, your phtrying to connect to the other device or the connection has been loInfrared on page 132.

Your
pho
ne
27
All your calls are diverted to another number. See Call divert on page 94.
The loudspeaker is active. See Using the loudspeaker on page 40.
e 102.
91.
e.
ideo
on
and
Copyright © 2003 Nokia. All rights reserved.
Calls are limited to a closed user group. See Security settings on pag
The timed profile has been activated. See Profiles (Menu 4) on page
, or A headset, handsfree or loopset accessory is connected to the phon
The camera is active. The indicator is red when you are recording a vclip. See Using the camera on page 33.
The Bluetooth feature is on. When the indicator blinks, a Bluetoothconnection is being established. See Bluetooth wireless technologypage 129.
To set the phone to show the time and date in standby mode, see the Clock Date settings in the Time and date settings menu, see page 93.

28
■ Using the camera lens coverThe phone has a built-in camera that can be started by
Copyright © 2003 Nokia. All rights reserved.
opening the lens cover at the back of the phone.
To open the cover, slide it towards the bottom of the phone to the position shown in the figure.
When you stop using the camera, close the lens cover carefully.
See also Using the camera on page 33.

Gett
ing
star
ted
29
2. Getting started
ding,
and
Copyright © 2003 Nokia. All rights reserved.
■ Installing the SIM card and the battery• Keep all miniature SIM cards out of the reach of small children.
• The SIM card and its contacts can easily be damaged by scratches or benso be careful when handling, inserting or removing the card.
• Before installing or removing the SIM card, always switch off the powerdisconnect the phone from the charger and any other device.
Installation1. To remove the back cover: Push the
cover release button (1) and lift the cover (2).

30
2. Slide the SIM card into the SIM card holder (3). Make sure that the SIM card is inserted
Copyright © 2003 Nokia. All rights reserved.
properly and that the golden contact area on the card is facing downwards.
3. Align the golden connectors on the battery with the corresponding connectors on the phone (4). Push the opposite end of the battery towards the phone until the battery locks into place.
4. Insert the two catches of the cover into the corresponding slots on the phone (5). Press the cover until it locks into place (6).
Gett
ing
star
ted
31
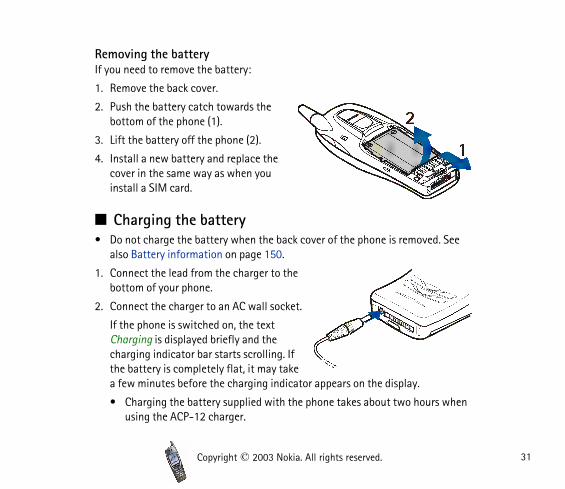
Removing the batteryIf you need to remove the battery:
See
when
Copyright © 2003 Nokia. All rights reserved.
1. Remove the back cover.
2. Push the battery catch towards the bottom of the phone (1).
3. Lift the battery off the phone (2).
4. Install a new battery and replace the cover in the same way as when you install a SIM card.
■ Charging the battery• Do not charge the battery when the back cover of the phone is removed.
also Battery information on page 150.
1. Connect the lead from the charger to the bottom of your phone.
2. Connect the charger to an AC wall socket.
If the phone is switched on, the text Charging is displayed briefly and the charging indicator bar starts scrolling. If the battery is completely flat, it may take a few minutes before the charging indicator appears on the display.
• Charging the battery supplied with the phone takes about two hoursusing the ACP-12 charger.

32
• If Not charging is displayed, wait for a while, disconnect the charger, plug it in again and retry. If charging still fails, contact your dealer.
ling.
d or
nna
Copyright © 2003 Nokia. All rights reserved.
• You can use the phone during charging.
3. When the battery is fully charged, the charging indicator bar stops scrolDisconnect the charger from the AC wall outlet and the phone.
■ Switching the phone on and offWarning: Do not switch the phone on when wireless phone use is prohibitewhen it may cause interference or danger.
Press and hold the power key .
• If the phone asks for a PIN or UPIN code or security code, key in the code and press OK. See also Access codes on page 16.
• If the phone displays Insert SIM card even though the SIM card is properly inserted, or SIM card not supported, contact your network operator or service provider. Your phone does not support 5 Volt SIM cards and the card may need to be changed.
NORMAL POSITION: Hold the phone as you would any other telephone with the antepointed up and over your shoulder.
Gett
ing
star
ted
33
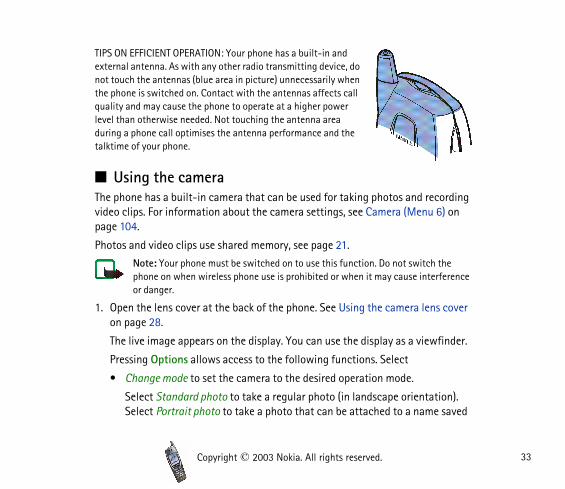
TIPS ON EFFICIENT OPERATION: Your phone has a built-in and external antenna. As with any other radio transmitting device, do
ording ) on
he erence
cover
inder.
on). saved
Copyright © 2003 Nokia. All rights reserved.
not touch the antennas (blue area in picture) unnecessarily when the phone is switched on. Contact with the antennas affects call quality and may cause the phone to operate at a higher power level than otherwise needed. Not touching the antenna area during a phone call optimises the antenna performance and the talktime of your phone.
■ Using the cameraThe phone has a built-in camera that can be used for taking photos and recvideo clips. For information about the camera settings, see Camera (Menu 6page 104.
Photos and video clips use shared memory, see page 21.
Note: Your phone must be switched on to use this function. Do not switch tphone on when wireless phone use is prohibited or when it may cause interfor danger.
1. Open the lens cover at the back of the phone. See Using the camera lenson page 28.
The live image appears on the display. You can use the display as a viewf
Pressing Options allows access to the following functions. Select
• Change mode to set the camera to the desired operation mode.
Select Standard photo to take a regular photo (in landscape orientatiSelect Portrait photo to take a photo that can be attached to a name
34
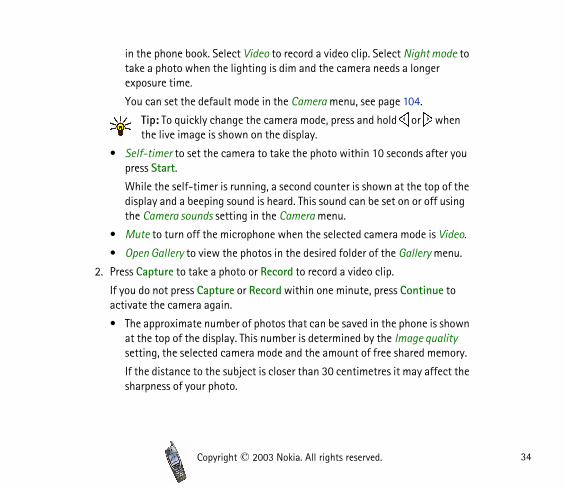
in the phone book. Select Video to record a video clip. Select Night mode to take a photo when the lighting is dim and the camera needs a longer
hen
r you
of the using
ideo.
enu.
to
shown lity mory.
ct the
Copyright © 2003 Nokia. All rights reserved.
exposure time.
You can set the default mode in the Camera menu, see page 104.
Tip: To quickly change the camera mode, press and hold or wthe live image is shown on the display.
• Self-timer to set the camera to take the photo within 10 seconds aftepress Start.
While the self-timer is running, a second counter is shown at the topdisplay and a beeping sound is heard. This sound can be set on or off the Camera sounds setting in the Camera menu.
• Mute to turn off the microphone when the selected camera mode is V
• Open Gallery to view the photos in the desired folder of the Gallery m
2. Press Capture to take a photo or Record to record a video clip.
If you do not press Capture or Record within one minute, press Continueactivate the camera again.
• The approximate number of photos that can be saved in the phone is at the top of the display. This number is determined by the Image quasetting, the selected camera mode and the amount of free shared me
If the distance to the subject is closer than 30 centimetres it may affesharpness of your photo.
Gett
ing
star
ted
35
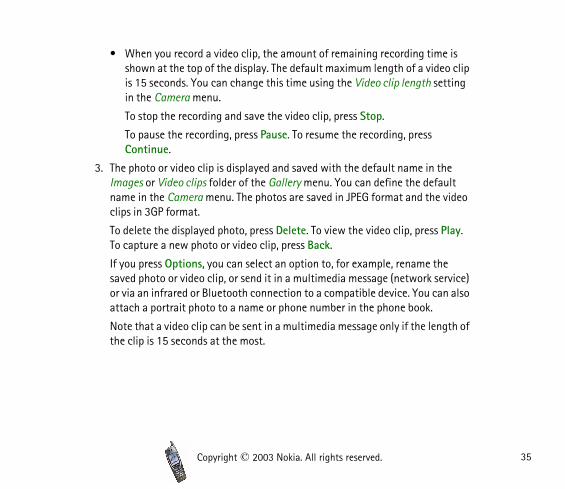
• When you record a video clip, the amount of remaining recording time is shown at the top of the display. The default maximum length of a video clip
tting
he ult video
Play.
e rvice) n also
gth of
Copyright © 2003 Nokia. All rights reserved.
is 15 seconds. You can change this time using the Video clip length sein the Camera menu.
To stop the recording and save the video clip, press Stop.
To pause the recording, press Pause. To resume the recording, press Continue.
3. The photo or video clip is displayed and saved with the default name in tImages or Video clips folder of the Gallery menu. You can define the defaname in the Camera menu. The photos are saved in JPEG format and theclips in 3GP format.
To delete the displayed photo, press Delete. To view the video clip, press To capture a new photo or video clip, press Back.
If you press Options, you can select an option to, for example, rename thsaved photo or video clip, or send it in a multimedia message (network seor via an infrared or Bluetooth connection to a compatible device. You caattach a portrait photo to a name or phone number in the phone book.
Note that a video clip can be sent in a multimedia message only if the lenthe clip is 15 seconds at the most.

36
3. Basic functions
ect cter to
places it the
ss the
rks
Copyright © 2003 Nokia. All rights reserved.
■ Making a call1. Key in the phone number, including the area code. If you key in an incorr
character, press or to move the cursor and Clear to delete the charathe left of the cursor.
To make an international call: Press twice for the + character (rethe international access code) and key in the country code, area code (omleading zero, if necessary) and phone number.
2. Press to call the number.
To adjust the volume: Use the volume keys on the side of the phone. Preupper key to increase or the lower key to decrease the volume.
To take a photo and send it in a multimedia message (in UMTS netwoonly): Open the lens cover and press Capture. To send the photo to a compatible device (network service), press Options, and select Send. Fordetails, see Writing and sending a multimedia message on page 63.
To use the phone hands free: See Using the loudspeaker on page 40.
See also Functions available during a call on page 40.
3. Press to end the call or to cancel the call attempt.
Basi
c fu
ncti
ons
37
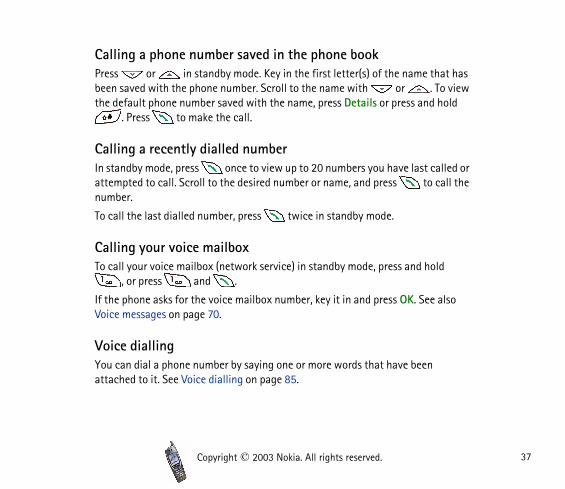
Calling a phone number saved in the phone bookPress or in standby mode. Key in the first letter(s) of the name that has
o view old
lled or all the
lso
Copyright © 2003 Nokia. All rights reserved.
been saved with the phone number. Scroll to the name with or . Tthe default phone number saved with the name, press Details or press and h
. Press to make the call.
Calling a recently dialled numberIn standby mode, press once to view up to 20 numbers you have last caattempted to call. Scroll to the desired number or name, and press to cnumber.
To call the last dialled number, press twice in standby mode.
Calling your voice mailboxTo call your voice mailbox (network service) in standby mode, press and hold
, or press and .
If the phone asks for the voice mailbox number, key it in and press OK. See aVoice messages on page 70.
Voice diallingYou can dial a phone number by saying one or more words that have been attached to it. See Voice dialling on page 85.
38
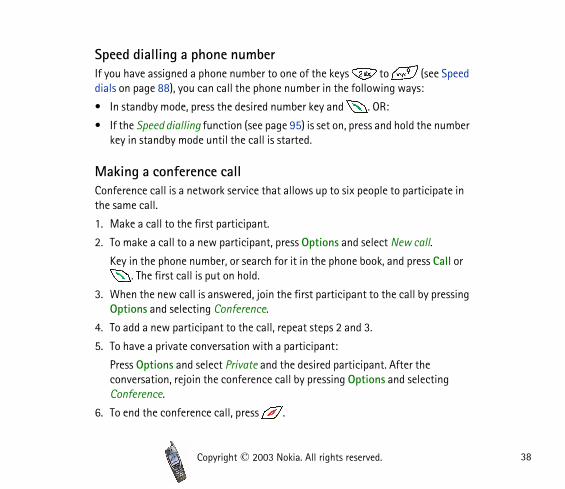
Speed dialling a phone numberIf you have assigned a phone number to one of the keys to (see Speed
umber
te in
all or
essing
g
Copyright © 2003 Nokia. All rights reserved.
dials on page 88), you can call the phone number in the following ways:
• In standby mode, press the desired number key and . OR:
• If the Speed dialling function (see page 95) is set on, press and hold the nkey in standby mode until the call is started.
Making a conference callConference call is a network service that allows up to six people to participathe same call.
1. Make a call to the first participant.
2. To make a call to a new participant, press Options and select New call.
Key in the phone number, or search for it in the phone book, and press C. The first call is put on hold.
3. When the new call is answered, join the first participant to the call by prOptions and selecting Conference.
4. To add a new participant to the call, repeat steps 2 and 3.
5. To have a private conversation with a participant:
Press Options and select Private and the desired participant. After the conversation, rejoin the conference call by pressing Options and selectinConference.
6. To end the conference call, press .
Basi
c fu
ncti
ons
39
■ Answering or rejecting an incoming callPress to answer the call. If you want to mute the ringing tone, press Silence.
d call sy.
e, you
name. e the he
This is
ions
all, ptions
Copyright © 2003 Nokia. All rights reserved.
To reject the call, press , or press Options and select Reject. The rejectewill be diverted if you have activated a call divert option such as Divert if bu
If a compatible headset, such as HDB-4 or HDW-2, is connected to the phoncan answer and end a call by pressing the headset button.
When you receive a call, the phone may show the caller’s phone number or The name is shown if you have saved it with the caller’s phone number in thphone book. If you have saved the same phone number with several names,phone number will be shown. If the network does not inform the phone of tcaller’s phone number, the text Private number or Call will be shown.
Call waitingYou can answer a call while you have another call in progress if you have activated the Call waiting function in the Call settings menu (see page 94). a network service.
During a call, press Answer or to answer the waiting call. Or: Press Optand select Answer. The first call is put on hold.
To switch between the two calls, press Swap or . To reject the waiting cpress Options and select Reject. To end the active call, press , or press Oand select End call. To end both calls, press Options and select End all calls.

40
■ Functions available during a callYou can press Options for some of the following functions during a call:
w call
t, Lock ecord.
e racter
rself
ble
all, if
ring a
Copyright © 2003 Nokia. All rights reserved.
Mute or Unmute, End call, End all calls, Contacts, Menu, Hold or Unhold, Ne(network service), Conference (network service), Private (network service), Answer, Reject, Swap (network service), Send DTMF, Loudspeaker or Handsekeypad, Transfer (network service), Headset, Handsfree, Activate infrared, R
Select
• Send DTMF to send DTMF tone strings, for example, a password. Key in thDTMF string, or search for it in the phone book. You can key in a wait cha(w) or a pause character (p) by repeatedly pressing .
• Transfer to connect the held call to the active call and to disconnect youfrom the call.
• Headset or Handsfree to switch the active call to the respective compatiaccessory when the accessory is connected to the phone.
• Activate infrared to activate the infrared port when you receive a data cyou want to use the infrared connection with a compatible device.
■ Using the loudspeakerThe phone has a loudspeaker that allows you to use the phone hands free ducall. Do not hold the phone to your ear during loudspeaker operation.
• To activate the loudspeaker during a call: Press Options and select Loudspeaker, or press Loudsp. if available.

Basi
c fu
ncti
ons
41
• To deactivate the loudspeaker: Press Options and select Handset, or press Handset if available.
s HDB-ith r. or
all
e
wn
folder
ord). every
Copyright © 2003 Nokia. All rights reserved.
If a compatible car kit, such as CARK112 or CARK126, or headset, such a4 or HDW-2, is connected to the phone, the Handset option is replaced wHandsfree or Headset, and the selection key Handset changes to HandsfHeadset, respectively.
The loudspeaker is automatically deactivated when you end the call or cattempt or connect the car kit or headset to the phone.
■ Using the voice keyThe voice key ( ), located on the side of the phone, can be used for voicrecording and voice recognition.
Voice recordingYou can record for example a name and a phone number and write them dolater.
Press to start voice recording. When recording, hold the phone in thenormal position near to your ear.
To stop the recording, press . The recording is saved in the Recordings of the Gallery menu, see page 106.
Voice recording can be used also during a call (press Options and select RecWhile recording a call, all parties to the call hear a faint beep approximatelyfive seconds.
42
Voice recognitionPress and hold to activate voice dialling (see pages 37 and 85) or to use
mode.
1.5
be
See
r . Key in ou
Copyright © 2003 Nokia. All rights reserved.
voice commands, see page 125. These functions can be used only in standby
■ Keypad lock (Keyguard)You can lock the keypad to prevent the keys being accidentally pressed, for example, when your phone is in your handbag.
To lock the keypad: In standby mode, press Menu and then within 1.5seconds.
To unlock the keypad: In standby mode, press Unlock and then withinseconds.
When the keypad is locked:
• The indicator is shown.
• The camera can be used normally.
• To answer a call, press . During the call, the phone can be operated normally. When you end or reject the call, the keypad will automaticallylocked.
You can set the keypad to lock automatically after a certain length of time. Automatic keyguard on page 96.
Note: When Keyguard is on, calls may be possible to the emergency numbeprogrammed into your phone (e.g. 112 or other official emergency number)the emergency number and press . The number is displayed only after yhave keyed in its last digit.

Basi
c fu
ncti
ons
43
■ Writing textYou can key in text, for example messages or calendar notes, using predictive or
ce for
n the
press
.
or one
Copyright © 2003 Nokia. All rights reserved.
traditional text input.
Predictive text inputIn predictive text input, you can key in characters by pressing a letter key oneach character. This input method uses a dictionary built into the phone.
Setting predictive text input on or offWhen writing text, press Options and select Dictionary.
• To set predictive text input on, select the language you want from the dictionary list. Predictive text input is only available for the languages olist.
• To revert to traditional text input, select Dictionary off.
Tip: To quickly set predictive text input on or off when writing text, twice, or press and hold Options.
Using predictive text inputTo use this input method, check that is shown at the top of the display
1. Write a word by using the keys to . Press each key only once fletter. The word may change after each keypress.
Example: To write ‘Nokia’, press .
44
• To move the cursor to the left, right, down or up, press , , or .
• To delete the character to the left of the cursor, press Clear. Press and hold
, press bol,
d
riting
), and
d the rd
Spell,
Copyright © 2003 Nokia. All rights reserved.
Clear to delete several characters.
• To change the character case, press repeatedly and check the indicator, for example Abc, at the top of the display.
• To insert a common punctuation mark, press and then repeatedly until the punctuation mark you want is displayed.
If you cannot find the punctuation mark by repeatedly pressing this key until the middle selection key changes to Symbol. Press Symscroll to the character, and press Use or .
• To insert a special character: Press and hold , scroll to the desirecharacter and press Use or .
• To insert a number, press and hold the desired key. To insert several numbers, press and hold and key in the numbers. To continue wtext, press and hold .
2. If the displayed word is the one you want, press (a space is insertedwrite the next word.
• If the word is not the one you want, press Options, select Matches andesired word, and press Use. OR: Press repeatedly until the woappears.
To view the previous match, press Prev.
• If the ? character is shown after the word, no words in the dictionarycorrespond to your keypresses. To add a word to the dictionary: Press

Basi
c fu
ncti
ons
45
key in the word using traditional text input and press Save. When the dictionary becomes full, the new word replaces the oldest one that was
he
nput
d is
a by ssing
th the
one or hown
Copyright © 2003 Nokia. All rights reserved.
added.
• To edit the previous word, press to select it and modify it.
3. When using predictive text input, pressing Options can allow access to tfollowing functions:
• Matches: Shows a list of words that correspond to your keypresses.
• Insert word / Edit word: You can key in a word using traditional text iand save it in the dictionary. Insert word is shown when no word is underlined (and selected for editing). Edit word is shown when a worunderlined.
• Insert symbol: You can select a special character from a list. Scroll tocharacter such as % and press Use. You can also scroll to a characterpressing , , or , and select the character by pre
.
Writing compound wordsKey in the first part of the word and confirm it by pressing . Repeat this wilast part of the word.
Using traditional text inputIn traditional text input, you can key in characters by pressing a number key more times for each character. To use this input method, check that is sat the top of the display.

46
Press a key one or more times until the desired character is displayed. Not all available characters are printed on the keys. The characters available depend on
, wait
press
.
Clear
bers, ress
cator
Copyright © 2003 Nokia. All rights reserved.
the language selected in the Language settings menu, see page 96.
• To insert a space, press .
• If the next letter you want is located on the same key as the present oneuntil the cursor is shown and key in the letter.
• To add a common punctuation mark or special character, press repeatedly. Alternatively: Press , scroll to the desired character andUse.
• To move the cursor to the left, right, down or up, press , , or
• To delete a character to the left of the cursor, press Clear. Press and holdto delete several characters.
• To insert a number, press and hold the desired key. To insert several numpress and hold and key in the numbers. To continue writing text, pand hold .
• To change the character case, press repeatedly and check the indiat the top of the display.
Usi
ng t
he m
enu
47
4. Using the menu
help xit the
in the
s
epeat
by
Copyright © 2003 Nokia. All rights reserved.
Your phone offers a wide range of functions that are grouped in menus.
Most of the menu functions are provided with a brief help text. To view the text, scroll to the desired menu function and wait for about 15 seconds. To ehelp text, press Back.
The help text can be set to on or off using the Help text activation function Phone settings menu, see page 96.
■ Accessing a menu functionBy scrolling1. Press Menu in standby mode.
2. Scroll with or to a main menu, for example Settings, and presSelect to open it.
3. Scroll to a submenu, for example Call settings, and press Select.
If the submenu contains further submenus, for example Speed dialling, rthis step.
4. Scroll to a setting option, for example Off, and press Select.
Press Back to return to the previous menu level, and Exit to exit to standmode.
48
By using a shortcut number
The menus, submenus and setting options are numbered. This shortcut number is
er of option.
Copyright © 2003 Nokia. All rights reserved.
shown at the top right of the display.
Press Menu in standby mode. Within two seconds, key in the shortcut numbthe main menu you want to open. Repeat this for the submenu and setting

Usi
ng t
he m
enu
49
■ List of menu functions1. Messages
Copyright © 2003 Nokia. All rights reserved.
1. Text messages1. Create message2. Inbox3. Sent items4. Archive5. Templates6. My folders7. Distribution lists8. Delete messages
2. Multimedia msgs.1. Create message2. Inbox3. Outbox4. Sent items5. Saved items6. Delete messages
3. Chat4. Voice messages
1. Listen to voice messages2. Voice mailbox number
5. Info messages1. Info service2. Topics3. Language
50
4. Info topics saved on SIM card1
5. Read2
Copyright © 2003 Nokia. All rights reserved.
6. Message settings1. Text messages2. Multimedia msgs.3. Other settings
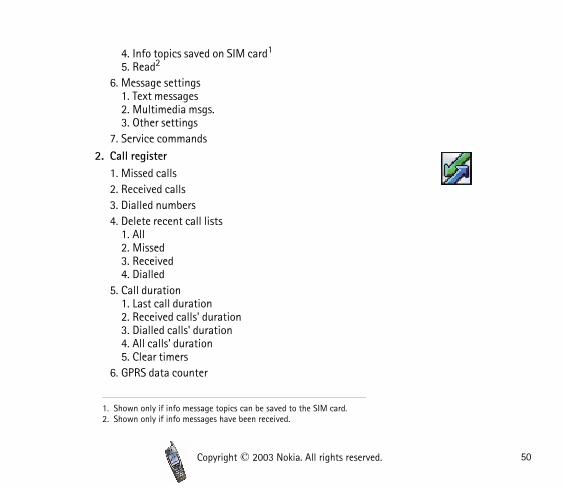
7. Service commands2. Call register
1. Missed calls2. Received calls3. Dialled numbers4. Delete recent call lists
1. All2. Missed3. Received4. Dialled
5. Call duration1. Last call duration2. Received calls' duration3. Dialled calls' duration4. All calls' duration5. Clear timers
6. GPRS data counter
1. Shown only if info message topics can be saved to the SIM card.2. Shown only if info messages have been received.

Usi
ng t
he m
enu
51
1. Data sent in last session2. Data received in last session
Copyright © 2003 Nokia. All rights reserved.
3. All sent data4. All received data5. Clear counters
7. GPRS connection timer1. Duration of last session2. Duration of all sessions3. Clear timers
3. Contacts1. Search2. Add contact3. Delete4. Copy5. Settings
1. Memory in use2. Contacts view3. Memory status
6. Speed dials7. Service numbers 1
8. Voice tags9. My numbers10.Caller groups
1. Shown if supported by your SIM card. For availability, contact your network operator or service provider.

52
4. Profiles1. General
Copyright © 2003 Nokia. All rights reserved.
1. Activate2. Personalise3. Timed
2. Silent (same submenus as in General)3. Meeting (same submenus as in General)4. Outdoor (same submenus as in General)5. Pager (same submenus as in General)
5. Settings1. Personal shortcuts2. Time and date settings
1. Clock2. Date3. Auto-update of date & time
3. Call settings1. Call divert2. Anykey answer3. Automatic redial4. Speed dialling5. Call waiting6. Summary after call7. Send my caller ID8. Line for outgoing calls1
1. For availability, contact your network operator or service provider.

Usi
ng t
he m
enu
53
4. Phone settings1. Language settings
Copyright © 2003 Nokia. All rights reserved.
2. Automatic keyguard3. Cell info display4. Welcome note5. Operator selection6. Confirm SIM service actions7. Help text activation8. Start-up tone9. Memory status
5. Display settings1. Wallpaper2. Colour schemes3. Operator logo4. Screen saver time-out5. Display contrast
6. Tone settings1. Incoming call alert2. Ringing tone3. Ringing volume4. Vibrating alert5. Message alert tone6. Keypad tones7. Warning tones8. Alert for
7. Enhancement settings1
1. Headset
54
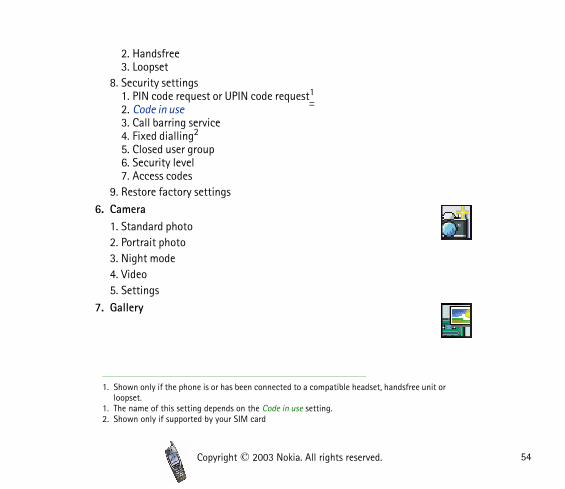
2. Handsfree3. Loopset
r
Copyright © 2003 Nokia. All rights reserved.
8. Security settings1. PIN code request or UPIN code request1
2. Code in use3. Call barring service4. Fixed dialling2
5. Closed user group6. Security level7. Access codes
9. Restore factory settings6. Camera
1. Standard photo2. Portrait photo3. Night mode4. Video5. Settings
7. Gallery
1. Shown only if the phone is or has been connected to a compatible headset, handsfree unit oloopset.
1. The name of this setting depends on the Code in use setting.2. Shown only if supported by your SIM card

Usi
ng t
he m
enu
55
8. Organiser1. Alarm clock
Copyright © 2003 Nokia. All rights reserved.
2. Calendar3. To-do list4. Wallet
9. Games1. Select game2. Game downloads3. Memory4. Settings
1. Game sounds2. Game lights3. Shakes
10.Applications1. Select application2. App. downloads3. Memory
11. Extras1. Calculator2. Voice commands3. Countdown timer4. Stopwatch

56
12. Connectivity1. Bluetooth
d.
Copyright © 2003 Nokia. All rights reserved.
1. Bluetooth2. Search for audio enhancements3. View active device4. View paired devices5. Bluetooth settings
2. Infrared3. GPRS
1. GPRS connection2. GPRS modem settings
13. Services1. Home2. Bookmarks3. Service inbox4. Settings5. Go to address6. Clear the cache
14. Go to
15. SIM services1
1. Shown only if supported by your SIM card. The name and contents depend on the SIM car
Men
u fu
nctio
ns
57
5. Menu functions
rs series
eral
e
etwork s can
reate
Copyright © 2003 Nokia. All rights reserved.
■ Messages (Menu 1)You can read, write, send and save text and multimedia messages. The messages are organised into folders.
Text and picture messages (SMS)Your phone supports the sending of text messages beyond the 160 charactelimit (network service). If your message exceeds this limit, it will be sent as aof two or more messages.
Text messages can contain pictures. Each picture message is made up of sevtext messages. Therefore, sending one picture message may cost more thansending one text message.
Before you can send text or picture messages, you need to save your messagcentre number, see Message settings on page 71.
Note: Picture message function can be used only if it is supported by your noperator or service provider. Only phones that offer picture message featurereceive and display picture messages.
Writing and sending a text or picture message1. Press Menu in standby mode, and select Messages, Text messages and C
message. OR: Press in standby mode.
2. Key in the message, see Writing text on page 43.

58
At the top the display, you can see the message length indicator counting backwards from 160. For example, 10/2 means that you can still add 10
there
icture. esired
e. To . To select
and own.
1.
lect phone
t with ber or
Copyright © 2003 Nokia. All rights reserved.
characters for the text to be sent as two messages.
Using special (Unicode) characters such as ë or á takes up more space. Ifare special characters in your message, the indicator may not show the message length correctly.
• To insert a picture into the message, press Options and select Insert pThe list of folders in the Gallery is shown, see page 106. Scroll to the dpicture, press Options and select Insert.
The picture is indicated by the indicator on the top of the messagview the text and picture together, press Options and select Previewchange the picture or delete it from the message, press Options and the desired function.
• To use a text template as a base for the new message, press Options select Use template. The list of templates in the Templates folder is shScroll to the desired template, press Options and select Insert.
See also Templates in Folders for text and picture messages on page 6
• To insert a phone number from the phone book, press Options and seInsert number. Press Search or and search for the number in the book.
• To insert a name from the phone book, press Options and select Insercontact and the desired name. To insert a number or text item saved the name, press Options and select View details and the desired numtext item.

Men
u fu
nctio
ns
59
• To save the message in the Archive or Templates folder or in a folder that you have created inside the My folders folder, press Options and select Save
mber
first ve
tion
1.
ferent
sent. essage he out
sages
Copyright © 2003 Nokia. All rights reserved.
message.
3. To send the message, press Send or , key in the recipient’s phone nuor search for it in the phone book, and press OK.
Alternatively: Press Options and select Sending options. Select
• Send to many to send the message to several recipients. Scroll to the recipient and press Send. Repeat this for each recipient. When you hasent the message to everyone you want, press Done.
• Send to list to send the message using a distribution list. See Distribulists on page 74.
• Sending profile to send the message using the settings that you havedefined earlier. For more information, see Message settings on page 7
The sent message is saved in the Sent items folder. For information about diffolders for text and picture messages, see page 61.
Note: When sending messages, your phone may display the words MessageThis is an indication that the message has been sent by your phone to the mcentre number programmed into your phone. This is not an indication that tmessage has been received at the intended destination. For more details abSMS services, check with your service provider.
Reading and replying to a text or picture messageWhen you receive a message, the indicator and the number of new mesfollowed by messages received are displayed.
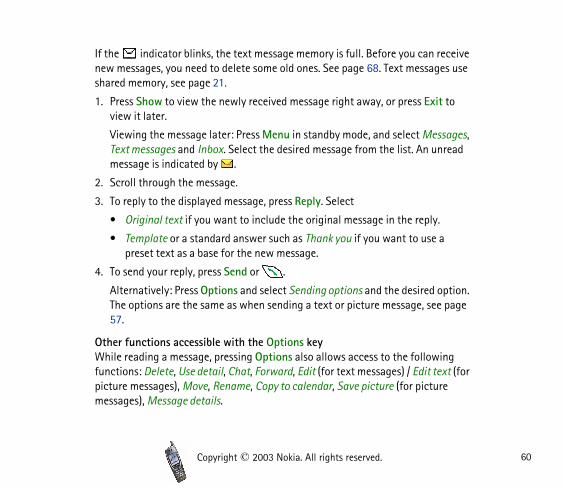
60
If the indicator blinks, the text message memory is full. Before you can receive new messages, you need to delete some old ones. See page 68. Text messages use
to
sages, read
a
ption. page
ing xt (for e
Copyright © 2003 Nokia. All rights reserved.
shared memory, see page 21.
1. Press Show to view the newly received message right away, or press Exitview it later.
Viewing the message later: Press Menu in standby mode, and select MesText messages and Inbox. Select the desired message from the list. An unmessage is indicated by .
2. Scroll through the message.
3. To reply to the displayed message, press Reply. Select
• Original text if you want to include the original message in the reply.
• Template or a standard answer such as Thank you if you want to use preset text as a base for the new message.
4. To send your reply, press Send or .
Alternatively: Press Options and select Sending options and the desired oThe options are the same as when sending a text or picture message, see57.
Other functions accessible with the Options keyWhile reading a message, pressing Options also allows access to the followfunctions: Delete, Use detail, Chat, Forward, Edit (for text messages) / Edit tepicture messages), Move, Rename, Copy to calendar, Save picture (for picturmessages), Message details.

Men
u fu
nctio
ns
61
Tip: You can use most of these functions without opening a message. For example, to forward a message, scroll to the desired message on the list,
69.
m the
der
age
e
Copyright © 2003 Nokia. All rights reserved.
press Options and select Forward.
Select
• Chat to have a text-based conversation with the other person. See page
• Use detail to extract a phone number, e-mail address or Web address fromessage.
• Move to move the message to the Archive or Templates folder or to a folthat you have created inside the My folders folder.
• Copy to calendar to copy the message text to your phone’s calendar as areminder note for the current day.
• Save picture to save the picture in the Gallery menu, if you are viewing apicture message.
• Message details to view the sender’s name and phone number, the messcentre used, and the date and time of receipt.
Folders for text and picture messagesThe phone has different folders for saving sent and received text and picturmessages.
To open a folder, press Menu in standby mode, and select Messages, Text messages and one of the following folders:
• Inbox where the phone saves received messages.
• Sent items where the phone saves sent messages.

Men
u fu
nctio
ns
62
• Archive where you can save messages for later use.
• Templates where you can save text messages that you want to use as a base
nd
d the
sound bytes.
ator or tures
r or
a call. o not
Copyright © 2003 Nokia. All rights reserved.
when writing or replying to a message.
To edit or delete a template, select the desired template, press Options, aselect the desired function.
• My folders where you can create new folders for your messages.
To add a folder, press Add (if the folder list is empty) or press Options anselect Add folder. To delete or rename a folder, press Options and select desired function.
Multimedia messages (MMS)A multimedia message can contain text, one image, one video clip and one clip. The phone can send and receive multimedia messages of up to 100 kilo
Note: This function can be used only if it is supported by your network operservice provider. Only phones that offer compatible multimedia message feacan receive and display multimedia messages.
If Allow multimedia reception is set to Yes or In home network, your operatoservice provider may charge you for every message you receive.
Note that multimedia messages cannot be received in GSM networks duringBecause delivery of multimedia messages can fail for a variety of reasons, drely solely upon them for essential communications.
Sent and received multimedia messages use shared memory, see page 21.
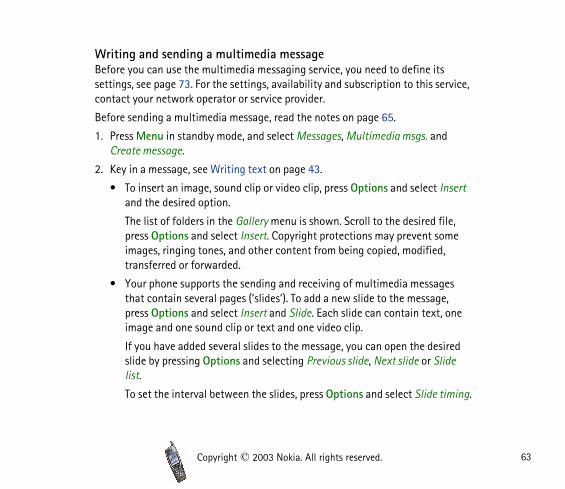
Men
u fu
nctio
ns
63
Writing and sending a multimedia messageBefore you can use the multimedia messaging service, you need to define its
ervice,
d
Insert
ile, me ,
es e, , one
ired lide
timing.
Copyright © 2003 Nokia. All rights reserved.
settings, see page 73. For the settings, availability and subscription to this scontact your network operator or service provider.
Before sending a multimedia message, read the notes on page 65.
1. Press Menu in standby mode, and select Messages, Multimedia msgs. anCreate message.
2. Key in a message, see Writing text on page 43.
• To insert an image, sound clip or video clip, press Options and select and the desired option.
The list of folders in the Gallery menu is shown. Scroll to the desired fpress Options and select Insert. Copyright protections may prevent soimages, ringing tones, and other content from being copied, modifiedtransferred or forwarded.
• Your phone supports the sending and receiving of multimedia messagthat contain several pages (’slides’). To add a new slide to the messagpress Options and select Insert and Slide. Each slide can contain textimage and one sound clip or text and one video clip.
If you have added several slides to the message, you can open the desslide by pressing Options and selecting Previous slide, Next slide or Slist.
To set the interval between the slides, press Options and select Slide
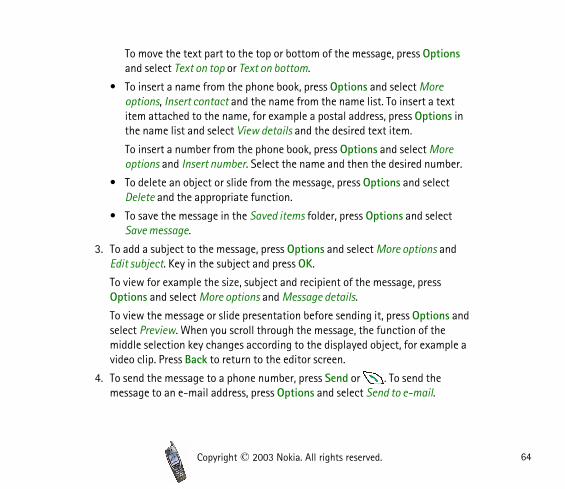
Men
u fu
nctio
ns
64
To move the text part to the top or bottom of the message, press Options and select Text on top or Text on bottom.
ext ns in
re ber.
ct
ct
and
s and e ple a
Copyright © 2003 Nokia. All rights reserved.
• To insert a name from the phone book, press Options and select Moreoptions, Insert contact and the name from the name list. To insert a titem attached to the name, for example a postal address, press Optiothe name list and select View details and the desired text item.
To insert a number from the phone book, press Options and select Mooptions and Insert number. Select the name and then the desired num
• To delete an object or slide from the message, press Options and seleDelete and the appropriate function.
• To save the message in the Saved items folder, press Options and seleSave message.
3. To add a subject to the message, press Options and select More options Edit subject. Key in the subject and press OK.
To view for example the size, subject and recipient of the message, pressOptions and select More options and Message details.
To view the message or slide presentation before sending it, press Optionselect Preview. When you scroll through the message, the function of thmiddle selection key changes according to the displayed object, for examvideo clip. Press Back to return to the editor screen.
4. To send the message to a phone number, press Send or . To send themessage to an e-mail address, press Options and select Send to e-mail.
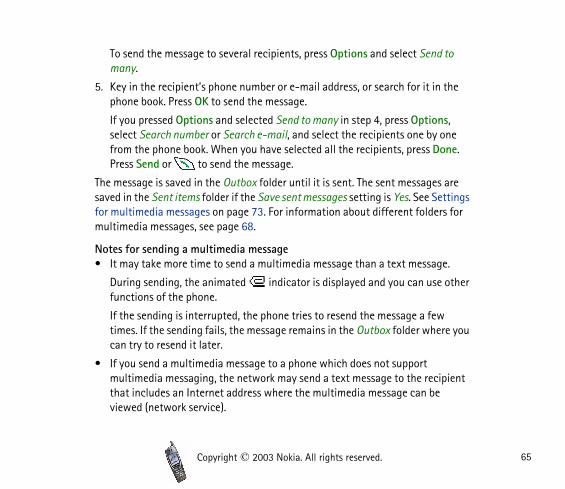
Men
u fu
nctio
ns
65
To send the message to several recipients, press Options and select Send to many.
the
s, one one.
are ttings
rs for
e.
other
re you
pient
Copyright © 2003 Nokia. All rights reserved.
5. Key in the recipient’s phone number or e-mail address, or search for it inphone book. Press OK to send the message.
If you pressed Options and selected Send to many in step 4, press Optionselect Search number or Search e-mail, and select the recipients one by from the phone book. When you have selected all the recipients, press DPress Send or to send the message.
The message is saved in the Outbox folder until it is sent. The sent messagessaved in the Sent items folder if the Save sent messages setting is Yes. See Sefor multimedia messages on page 73. For information about different foldemultimedia messages, see page 68.
Notes for sending a multimedia message• It may take more time to send a multimedia message than a text messag
During sending, the animated indicator is displayed and you can usefunctions of the phone.
If the sending is interrupted, the phone tries to resend the message a fewtimes. If the sending fails, the message remains in the Outbox folder whecan try to resend it later.
• If you send a multimedia message to a phone which does not support multimedia messaging, the network may send a text message to the recithat includes an Internet address where the multimedia message can beviewed (network service).

Men
u fu
nctio
ns
66
Reading and replying to a multimedia messageWhile the phone is receiving a multimedia message, the animated indicator is
ext
re you
to
sages,
nges e
nd
Copyright © 2003 Nokia. All rights reserved.
displayed. When the message has been received, the indicator and the tMultimedia message received are shown.
If the indicator blinks, the memory for multimedia messages is full. Befocan receive new messages, you need to delete some old ones, see page 68. Multimedia messages use shared memory, see page 21.
Read also the notes for receiving multimedia messages on page 67.
1. Press Show to view the newly received message right away or press Exitview it later.
To view the message later: Press Menu in standby mode, and select MesMultimedia msgs. and Inbox. Select the desired message from the list. Anunread message is indicated by .
2. Scroll through the message. The function of the middle selection key chaaccording to the displayed object, for example a video clip. If the messagcontains a slide presentation, the presentation is played automatically.
• To reply to the message, press Reply if the text part of the message isdisplayed, or press Options and select Reply if any other part of the message is displayed.
• To listen to a sound clip or view a video clip, press Play.
To turn the audio off or on while viewing a video clip, press Options aselect Mute audio or Unmute audio, respectively. To stop or pause theplaying, press Stop or Pause, respectively.

Men
u fu
nctio
ns
67
• To save an image, sound clip or video clip in the Gallery menu, press Options and select the appropriate function.
e with
ntrast il,
its
ge, for
ess
age. e o.
100 ternet
p that and
Copyright © 2003 Nokia. All rights reserved.
• To view an image in a larger size, press Zoom. You can scroll the imag, , and .
• Pressing Options also allows access to the following functions: Set co(for photos), Details, Delete message, Forward to no., Forward to e-maForward to many, Message details, Use detail. Select
• Details to view information about the current object, for examplename, size and format.
• Message details to view information about the multimedia messaexample its recipients, subject and size.
• Use detail to extract a phone number, e-mail address or Web addrfrom the message.
Tip: You can use most of these functions without opening a messFor example, to forward a message to another number, scroll to thdesired message on the list, press Options and select Forward to n
Notes for receiving a multimedia message• If you receive a multimedia message that is too large for the phone (over
kilobytes), the network may send you a text message that includes an Inaddress where you can view the multimedia message (network service).
• If the received message contains an object such as an image or sound cliis not supported by the phone, the object may be replaced with its namethe text Object format not supported.
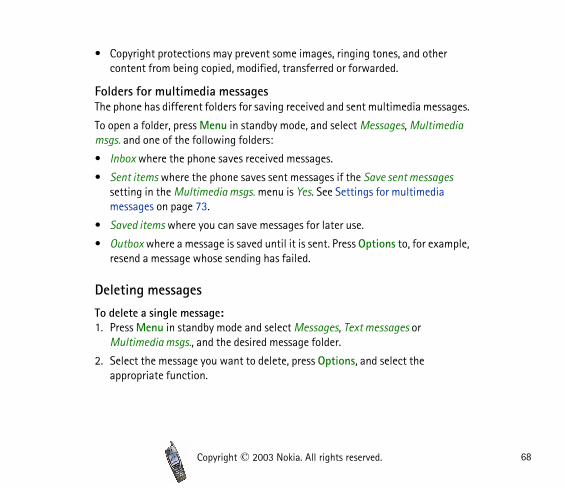
Men
u fu
nctio
ns
68
• Copyright protections may prevent some images, ringing tones, and other content from being copied, modified, transferred or forwarded.
sages.
edia
es
mple,
Copyright © 2003 Nokia. All rights reserved.
Folders for multimedia messagesThe phone has different folders for saving received and sent multimedia mes
To open a folder, press Menu in standby mode, and select Messages, Multimmsgs. and one of the following folders:
• Inbox where the phone saves received messages.
• Sent items where the phone saves sent messages if the Save sent messagsetting in the Multimedia msgs. menu is Yes. See Settings for multimediamessages on page 73.
• Saved items where you can save messages for later use.
• Outbox where a message is saved until it is sent. Press Options to, for exaresend a message whose sending has failed.
Deleting messagesTo delete a single message:1. Press Menu in standby mode and select Messages, Text messages or
Multimedia msgs., and the desired message folder.
2. Select the message you want to delete, press Options, and select the appropriate function.
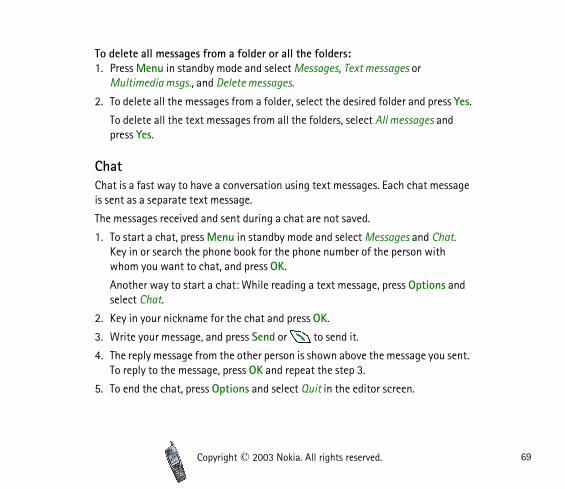
Men
u fu
nctio
ns
69
To delete all messages from a folder or all the folders:1. Press Menu in standby mode and select Messages, Text messages or
ss Yes.
nd
ssage
at. h
s and
u sent.
Copyright © 2003 Nokia. All rights reserved.
Multimedia msgs., and Delete messages.
2. To delete all the messages from a folder, select the desired folder and pre
To delete all the text messages from all the folders, select All messages apress Yes.
ChatChat is a fast way to have a conversation using text messages. Each chat meis sent as a separate text message.
The messages received and sent during a chat are not saved.
1. To start a chat, press Menu in standby mode and select Messages and ChKey in or search the phone book for the phone number of the person witwhom you want to chat, and press OK.
Another way to start a chat: While reading a text message, press Optionselect Chat.
2. Key in your nickname for the chat and press OK.
3. Write your message, and press Send or to send it.
4. The reply message from the other person is shown above the message yoTo reply to the message, press OK and repeat the step 3.
5. To end the chat, press Options and select Quit in the editor screen.

Men
u fu
nctio
ns
70
During a chat, you can press Options and select Chat history to view the most recent messages of the current chat, or select Chat name to edit your nickname.
before
ct voice
ing
your
topic
edit or
Copyright © 2003 Nokia. All rights reserved.
Voice messagesVoice mailbox is a network service and you may need to subscribe to it first you can use it.
Press Menu in standby mode, and select Messages and Voice messages. SeleVoice mailbox number to save the number of your voice mailbox or Listen tomessages to call it.
Each phone line may have its own voice mailbox number, see Line for outgocalls on page 95.
Tip: To quickly call your voice mailbox, press and hold .
Info messagesThis network service allows you to receive messages on various topics from service provider.
Press Menu in standby mode, and select Messages and Info service. Select
• Info service and then On or Off to allow or prevent the reception of info messages on the active topics or Topic index to set the phone to receive alist from the network.
• Topics to mark topics as active or inactive, add a new topic to the list, or delete the existing topics.

Men
u fu
nctio
ns
71
• Language to choose the languages for info messages. Only info messages in the selected languages will be shown. If you select All, info messages in all
card.
age, ic.
sage
’) es. lect
Copyright © 2003 Nokia. All rights reserved.
languages will be shown.
• Info topics saved on SIM card to add new topics to the SIM card or deleteexisting topics from it. This menu is shown only if supported by your SIM
• Read to view the received info messages. Select the topic and view the messages by scrolling through them. To pick up a number from the messpress Use no.. To deactivate the topic, press Options and select Close top
In UMTS networks, it may not be possible to receive info messages.
Message settingsText message settings affect the sending of text messages. Multimedia messettings affect the sending and receiving of multimedia messages.
The Font size setting in the Other settings submenu affects both text and multimedia messages.
Settings for text messagesPress Menu in standby mode, and select Messages, Message settings, Text messages and Sending profile. Select the group of settings (’sending profilewhose settings you want to change, if your SIM card supports several profilDefault profile is the sending profile that the phone will use if you do not seanother profile.
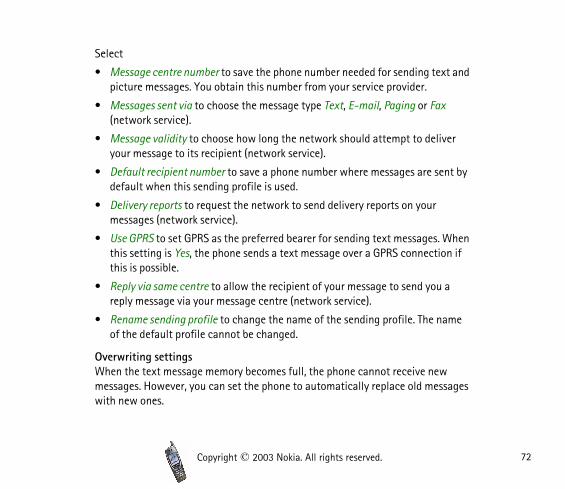
Men
u fu
nctio
ns
72
Select
• Message centre number to save the phone number needed for sending text and
x
ver
nt by
When on if
a
ame
w sages
Copyright © 2003 Nokia. All rights reserved.
picture messages. You obtain this number from your service provider.
• Messages sent via to choose the message type Text, E-mail, Paging or Fa(network service).
• Message validity to choose how long the network should attempt to deliyour message to its recipient (network service).
• Default recipient number to save a phone number where messages are sedefault when this sending profile is used.
• Delivery reports to request the network to send delivery reports on your messages (network service).
• Use GPRS to set GPRS as the preferred bearer for sending text messages.this setting is Yes, the phone sends a text message over a GPRS connectithis is possible.
• Reply via same centre to allow the recipient of your message to send youreply message via your message centre (network service).
• Rename sending profile to change the name of the sending profile. The nof the default profile cannot be changed.
Overwriting settingsWhen the text message memory becomes full, the phone cannot receive nemessages. However, you can set the phone to automatically replace old meswith new ones.

Men
u fu
nctio
ns
73
Press Menu in standby mode, and select Messages, Message settings, Text messages and Overwriting in sent items or Overwriting in inbox. Select Allowed to
ms or
ssages d.
hen
of
newly ant to
ve the
Copyright © 2003 Nokia. All rights reserved.
set the phone to replace the old text messages with new ones in the Sent iteInbox folder, respectively.
Settings for multimedia messagesPress Menu in standby mode, and select Messages, Message settings and Multimedia msgs.. Select
• Save sent messages and Yes to set the phone to save sent multimedia mein the Sent items folder. If you select No, the sent messages are not save
• Delivery reports to request the network to send delivery reports on your messages (network service).
• Scale image down to select whether images are scaled to a smaller size winserted into a message.
• Allow multimedia reception to allow (Yes) or prevent (No) the reception multimedia messages or to allow it only in your home network (In home network).
• Incoming multimedia messages to set the phone to automatically fetch received multimedia messages (Retrieve), or select Reject if you do not wreceive multimedia messages.
This setting is not shown if Allow multimedia reception is set to No.
• Connection settings to define the settings for fetching newly received multimedia messages. Activate the connection set where you want to sa

Men
u fu
nctio
ns
74
settings and then edit them. See also Keying in the service settings manually on page 136.
oming
u in ont
ey in
veral
Copyright © 2003 Nokia. All rights reserved.
For proper settings, contact your network operator or service provider.
• Allow adverts to allow or prevent the reception of advertisements.
This setting is not shown if Allow multimedia reception is set to No or Incmultimedia messages is set to Reject.
Other settingsTo select the font size for viewing text and multimedia messages, press Menstandby mode, and select Messages, Message settings, Other settings, and Fsize.
Service commandsYou can send service requests to your service provider (network service).
Press Menu in standby mode, and select Messages and Service commands. Kthe desired characters. Press and hold to switch between letters and numbers. Press Send to send the request.
For proper commands, contact your service provider.
Distribution listsYou can create distribution lists for sending text and picture messages to serecipients at a time.

Men
u fu
nctio
ns
75
Note that you may be charged separately for each recipient of a message to a distribution list.
r press e new
me list.
s, and
e of
from
ame,
ptions
Copyright © 2003 Nokia. All rights reserved.
1. Press Menu in standby mode, and select Messages, Text messages and Distribution lists.
2. To create a new list, press Add if there are no existing distribution lists, oOptions and select Add list if there are existing lists. Key in a name for thlist and press OK.
To view the names on a list, scroll to the desired list and press View.
To rename a list, scroll to the desired list, press Options, and select Rena
To delete all the names from a list, scroll to the desired list, press Optionselect Clear list.
To delete a list and all the included names, scroll to the desired list, pressOptions, and select Delete list.
3. If you opened a distribution list by pressing View in step 2, you can do onthe following:
• To add a new name to the list, press Add and select the desired namethe phone’s internal phone book.
• To view the contact information of a recipient, scroll to the desired npress Options and select View details.
• To delete a recipient from the list, scroll to the desired name, press Oand select Delete contact.
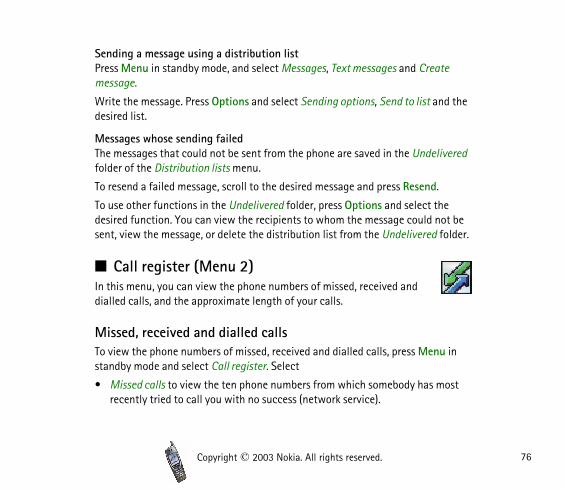
Men
u fu
nctio
ns
76
Sending a message using a distribution listPress Menu in standby mode, and select Messages, Text messages and Create
d the
ivered
e ot be folder.
u in
ost
Copyright © 2003 Nokia. All rights reserved.
message.
Write the message. Press Options and select Sending options, Send to list andesired list.
Messages whose sending failedThe messages that could not be sent from the phone are saved in the Undelfolder of the Distribution lists menu.
To resend a failed message, scroll to the desired message and press Resend.
To use other functions in the Undelivered folder, press Options and select thdesired function. You can view the recipients to whom the message could nsent, view the message, or delete the distribution list from the Undelivered
■ Call register (Menu 2)In this menu, you can view the phone numbers of missed, received and dialled calls, and the approximate length of your calls.
Missed, received and dialled callsTo view the phone numbers of missed, received and dialled calls, press Menstandby mode and select Call register. Select
• Missed calls to view the ten phone numbers from which somebody has mrecently tried to call you with no success (network service).

Men
u fu
nctio
ns
77
Tip: When a note about missed calls is shown in standby mode, press List to view the phone numbers. Scroll to the number you want to call
t
ntly page
lls.
only . You
ts ervice
our er,
s stered
Copyright © 2003 Nokia. All rights reserved.
back and press .
• Received calls to view the ten phone numbers from which you have mosrecently accepted calls (network service).
• Dialled numbers to view the 20 phone numbers that you have most rececalled or attempted to call. See also Calling a recently dialled number on37.
• Delete recent call lists to clear the lists of missed, received, and dialled ca
Select whether you want to delete the phone numbers on all the lists, orthe numbers on the list of missed calls, received calls or dialled numberscannot undo this operation.
Notes about missed, received and dialled calls• The phone registers missed and received calls only if the network suppor
these functions and the phone is switched on and within the network’s sarea.
• If the phone number of a registered call has been saved with a name in yphone book, the name is shown on the call list. To view the phone numbpress View. To call the number, press .
• If you press Options in the Missed calls, Received calls or Dialled numbermenu, you can view the date and time of the call and edit or call the regiphone number, save it in the phone book, delete it from the list or send amessage to the number.

Men
u fu
nctio
ns
78
Call counters and call timersNote: The actual invoice for calls and services from your service provider may vary,
th.
tgoing
on
d data.
d in
or all
Copyright © 2003 Nokia. All rights reserved.
depending upon network features, rounding-off for billing, taxes and so for
Press Menu in standby mode and select Call register. Select
• Call duration to view the approximate duration of your incoming and oucalls. The security code is needed to clear the timers.
Each phone line may have its own call timers. See Line for outgoing callspage 95.
• GPRS data counter to view the amount of data that was sent and receiveduring the last GPRS connection or the total amount of sent and receivedThe counter unit is a byte.
Text messages sent and received over a GPRS connection are not includethe data count.
The security code is needed to clear the counters.
• GPRS connection timer to view the duration of the last GPRS connectionGPRS connections. The security code is needed to clear the timers.
■ Contacts (Menu 3)You can save names and phone numbers (contacts) in the phone’s memory (internal phone book) and in the SIM card’s memory (SIM phone book).
To access this menu: Press Menu in standby mode and select Contacts.

Men
u fu
nctio
ns
79
The number of names that can be saved depends on their length, and the number and length of related phone numbers and text items. The phone supports SIM
y e 23.
r or
t to d SIM. y.
ed in with
act
Copyright © 2003 Nokia. All rights reserved.
cards that can save up to 250 names and phone numbers.
Contacts saved in the phone’s memory use shared memory, see page 21.
Alternative ways to access the functions in this menuYou can access the functions also by pressing Names in standby mode (or bpressing Go to and selecting Contacts). See also Three selection keys on pag
Some of the functions can also be accessed as follows: Press or instandby mode, scroll to the name you want, press Details, scroll to a numbetext item, press Options and select the desired function.
To access the contacts during a call, press Options and select Contacts.
Selecting the phone book settingsPress Menu in standby mode and select Contacts and Settings. Select
• Memory in use to select the contact memory you want to use. If you wansearch for names and phone numbers in both memories, select Phone anIn this case, the names and numbers will be saved in the phone’s memor
• Contacts view to select how the names, numbers and images are displaythe phone book. For example, select Name and image to view the namesthe attached images.
• Memory status to view how much free memory is available in each contmemory.

Men
u fu
nctio
ns
80
Saving names and phone numbersNames and numbers will be saved in the selected memory, see Memory in use in
K to
it.
(for e
ber in
ne’s
It is When ault
Copyright © 2003 Nokia. All rights reserved.
Selecting the phone book settings on page 79.
1. Press Menu in standby mode and select Contacts and Add contact.
2. Key in the name (see Using traditional text input on page 45) and press Osave it.
3. Key in the phone number, including the area code, and press OK to save
• If you want to use the phone number while abroad, press twicethe + character) and then key in the country code, area code (omit thleading zero, if necessary) and phone number.
4. To return to standby mode, press Done.
Tip: To quickly save a name and phone number, key in the phone numstandby mode and press Save. Key in the name and press OK.
Saving multiple numbers and text items per nameYou can save different types of numbers and text items per name in the phocontact memory.
The first phone number that you save with the name is the default number. indicated with a frame around the number type indicator, for example . you select a name from the phone book, for example to make a call, the defnumber is used unless you select another number.
1. Make sure that the selected memory is Phone or Phone and SIM.
2. Press or in standby mode.
Men
u fu
nctio
ns
81
3. Scroll to the name to which you want to add a number or text item, and press Details.
.
es:
the
e type
the roll to
tails. nd
Copyright © 2003 Nokia. All rights reserved.
4. Press Options, and select Add number, Add detail or Change type.
• To add a phone number, select Add number and one of the following number types: General, Mobile, Home, Office or Fax
Key in the number, and press OK to save it.
• To add a text item, select Add detail and one of the following text typE-mail address, Web address, Postal address or Note.
Key in the text item. To add a special character, press , scroll to desired character and press Use. Press OK to save the text item.
• To change the type of the selected number or text item, select Changand the desired type.
5. Press to return to standby mode.
Tip: To quickly add a new number to a previously saved name, key in number in standby mode, press Options and select Add to contact. Scthe desired name, press Add and select the number type.
Changing the default numberPress or in standby mode, scroll to the desired name and press DeScroll to the number you want to set as the default number. Press Options aselect Set as default.
Men
u fu
nctio
ns
82
Adding an image to a saved name or numberYou can add an image to a name or number saved in the phone’s internal phone
ber.
ch you e. The s
the pture. phone
or
isplay.
w it in
Copyright © 2003 Nokia. All rights reserved.
book. The image is shown when you receive a call from the given phone num
Press or in standby mode, scroll to the name (and number) to whiwant to add an image and press Details. Press Options and select Add imaglist of folders in the Gallery menu is shown. Scroll to the desired image, presOptions and select Save to contacts.
Tip: To quickly attach a new photo to a name or phone number, openlens cover, check that the camera mode is Portrait photo and press CaPress Options, select Attach to contact, scroll to the desired name or number and press Attach.
To change an image attached to the name, see page 83.
Searching for a name in the phone book1. Press Menu in standby mode and select Contacts and Search.
2. Key in the first letter(s) of the desired name, if you want. You can press to move the cursor inside the name.
3. Scroll to the desired name, and press Details.
• If the name is saved on the SIM card, is shown at the top of the d
4. Scroll through the phone numbers and text items added to the name.
If a phone number or text item cannot be shown on one line, you can vieits entirety by pressing View or .

Men
u fu
nctio
ns
83
Tip: To quickly find a name and phone number, press or in standby mode. Key in the first letter(s) of the name and scroll to the desired
, if the
s
me,
s
age
Copyright © 2003 Nokia. All rights reserved.
name.
To view the default phone number for the name, press and hold Contacts view setting is other than Name and number.
Editing a name, number or text item1. Press or in standby mode, scroll to the desired name and pres
Details.
2. If the Contacts view setting is Name and number, scroll to the desired nanumber or text item and press Edit.
If the Contacts view setting is other than Name and number, scroll to thedesired name, number or text item. Press Options and select the desiredfunction, for example Edit detail to edit a text item.
3. Edit the name, number or text item, and press OK.
Changing the image attached to a name1. Press or in standby mode, scroll to the desired name and pres
Details.
2. If the Contacts view setting is Name and number, scroll to the current imand press Change.
If the Contacts view setting is other than Name and number, scroll to theimage, press Options and select Change image.

Men
u fu
nctio
ns
84
3. Open the desired folder of the Gallery menu, select the new image, press Options and select Save to contacts.
ems ete it
the
esired curity
r) and ress lete a
d vice card.
Copyright © 2003 Nokia. All rights reserved.
Deleting contacts from the phone bookDeleting a name and number will also delete the additional numbers, text itand image added to it. Deleting an image from the phone book does not delfrom the Gallery menu.
1. Press Menu in standby mode and select Contacts and Delete.
2. To delete names and numbers one by one, select One by one and scroll toname (and number) you want to delete. Press Delete and then Yes.
To delete all the names and numbers, select Delete all and scroll to the dphone book, that is Phone or SIM card. Press Delete and Yes, key in the secode and press OK.
Deleting a number, text item or image added to a namePress or in standby mode, scroll to the desired name (and numbepress Details. Scroll to the number, text item or image you want to delete, pOptions and select the appropriate function, for example Delete detail to detext item. Press Yes.
Copying contactsYou can copy names and phone numbers from the phone to the SIM card anversa. Text items or images saved in the phone will not be copied to the SIM
1. Press Menu in standby mode and select Contacts and Copy.
Men
u fu
nctio
ns
85
2. Select the copying direction, that is From phone to SIM card or From SIM card to phone.
when
e from the
d with
or
hed to
t
Copyright © 2003 Nokia. All rights reserved.
3. Select One by one, All or Default numbers. Default numbers is shown onlyyou copy from the phone to the SIM card.
• If you select One by one or All to copy all the numbers added to a namthe phone to the SIM card, each number may be saved separately on card.
• If you select One by one, scroll to the desired name and press Copy.
• If you select Default numbers, only the default numbers will be copiethe names.
4. Select whether you want to keep the original names and numbers (Keeporiginal) or delete them (Move original).
• If you selected All or Default numbers, press Yes to start the copying moving.
Voice diallingYou can dial a phone number by saying one or more words (’voice tag’) attacit. The voice tag can be, for example, a name.
Voice tags are saved in the phone. All the voice tags are deleted if you inseranother SIM card into the phone and save new voice tags.
Notes for using voice diallingBefore using voice dialling, note that:

Men
u fu
nctio
ns
86
• Voice tags are not language dependent. They are dependent on the speaker’s voice.
• Voice tags are sensitive to background noise. Record them and make calls in a quiet
in the
fferent
is may you
etails. (s) you
y and
ce tag
he
Copyright © 2003 Nokia. All rights reserved.
environment.
• When recording a voice tag or making a call by saying a voice tag, hold the phonenormal position near to your ear.
• Very short names are not accepted. Use long names and avoid similar names for dinumbers.
Note: You must say the name exactly as you said it when you recorded it. Thbe difficult in, for example, a noisy environment or during an emergency, soshould not rely solely upon voice dialling in all circumstances.
Recording a voice tagPress or in standby mode, scroll to the desired name, and press DPress Options and select Add voice tag. Press Start and clearly say the wordwant to record as the voice tag.
Making a call using a voice tagPress and hold the right selection key ( ) or the voice key in standbmode until you hear a short tone. Say the voice tag clearly while holding thephone in the normal position near to your ear. The phone plays the voice tagdials the related phone number.
If no match for the voice tag is found or recognised, press Yes to say the voiagain, or press Exit or to return to standby mode.
If you use a compatible headset, such as HDB-4 or HDW-2, press and hold theadset button until you hear a short tone and say the voice tag clearly.

Men
u fu
nctio
ns
87
Playing, changing or deleting a voice tagPress Menu in standby mode and select Contacts and Voice tags. Select the
s
r the t Via
vice),
ce, elect
er you rs and
Copyright © 2003 Nokia. All rights reserved.
desired name or phone number and the function you want.
Sending and receiving a business cardYou can send or receive a person’s contact information as a business card.
Sending a business cardYou can send a business card to a compatible phone or other device which supports the vCard standard.
1. Press or in standby mode, scroll to the desired name, and presDetails. Press Options and select Send bus. card.
2. To send the business card via infrared, make sure that the other phone ocompatible device is set up to receive data via its infrared port and selecinfrared.
To send the business card as an Over The Air (OTA) message (network serselect Via text message.
To send the business card via Bluetooth connection to a compatible devimake sure that the device is within the Bluetooth operating range and sVia Bluetooth.
3. If the business card contains text items or several numbers, select whethonly want to send the default number (Default number) or all the numbetext items added to the name (All details).

Men
u fu
nctio
ns
88
If you selected Via Bluetooth in step 2, select the device to which you want to send the business card.
e ow
the ss
a call
the you
y ptions
Copyright © 2003 Nokia. All rights reserved.
Receiving a business cardTo receive a business card via infrared from a compatible device, activate thinfrared port of your phone, see page 132. The user of the other device can nsend the business card via infrared.
When you receive a business card, press Show to view it. Press Save to savebusiness card in your phone, or press Exit and then Yes to discard the businecard.
Speed dialsYou can set the keys to to work as speed dialling keys. To make using speed dialling, see page 38.
Assigning a phone number to a speed dialling keyPress Menu in standby mode and select Contacts and Speed dials. Scroll to desired key and press Assign. Press Search and select the name and numberwant to assign to the selected key.
If a phone number is already assigned to the key, you can view the number bpressing View or change the number or delete the assignment by pressing Oand selecting the desired option.

Men
u fu
nctio
ns
89
Service numbersYou can call the service numbers of your service provider if they are available on
ll to
ard to
d by
the
o
e and he
to a
Copyright © 2003 Nokia. All rights reserved.
your SIM card (network service).
Press Menu in standby mode and select Contacts and Service numbers. Scrothe desired service name and press to call it.
To view the phone number saved with the name, press Details. To copy the number, make it a speed dialling number, or to send a message or business cit, press Options and select the desired function.
My numbersYou can view the phone numbers assigned to your SIM card if this is allowethe card.
Press Menu in standby mode and select Contacts and My numbers. Scroll todesired name or number, and press View.
Caller groupsYou can arrange the names and phone numbers saved in the phone book intcaller groups.
For each caller group, you can set the phone to sound a specific ringing tondisplay a selected graphic when you receive a call from a phone number in tgroup.
To set the phone to ring only upon calls from the phone numbers belongingselected caller group, see Alert for in Tone settings on page 100.
Men
u fu
nctio
ns
90
Press Menu in standby mode and select Contacts, Caller groups and the desired caller group. Select
inging e page
the
om it.
ndby select
tails. oup.
ved in
Copyright © 2003 Nokia. All rights reserved.
• Group name to rename the group.
• Group ringing tone to select a ringing tone for the group. Default is the rtone that you have selected for the active profile in the Profiles menu, se91.
• Group logo and On to set the phone to display the group graphic. To turngraphic off, select Off. To view the graphic, select View.
• Group members to add a name to the caller group or to delete a name fr
To add a name, press Add, scroll to the desired name and press Add.
To delete a name, scroll to the desired name and press Remove.
Tip: To quickly add a name to a caller group, press or in stamode, scroll to the desired name and press Details. Press Options andCaller groups and the desired group.
Changing the caller group of a namePress or in standby mode, scroll to the desired name and press DeScroll to the current caller group and press Change. Select the new caller gr
Sending a message from the phone bookYou can send a text message to a person whose name or phone number is sathe phone book (network service).

Men
u fu
nctio
ns
91
Press or in standby mode, scroll to the desired name and press Details. Scroll to the desired number, press Options and select Send message. Key in the
ext or
ones.
set ot
ou
Copyright © 2003 Nokia. All rights reserved.
message and press Send. For more information, see Writing and sending a tpicture message on page 57.
■ Profiles (Menu 4)Your phone has several setting groups, ’profiles’, for which you can customise the phone tones for different events and environments.
To use a profile, first change its settings to your liking and then activate it.
To access this menu: Press Menu in standby mode and select Profiles.
1. Select a profile that you want to activate or whose settings you want tochange.
For example, select the Silent profile if you want to mute all the phone t
2. Select Activate, Personalise or Timed.
• To activate the selected profile, select Activate or Timed.
To activate the profile for a certain amount of time, select Timed andthe end time. When this time expires, the previous profile that was ntimed, becomes active.
• To change the profile settings, select Personalise. Select the setting ywant to change and make the change.
Men
u fu
nctio
ns
92
For information on the settings, see Tone settings on page 100. With Profile name you can rename the selected profile. The General profile cannot be
hen ts
power
de and n
Copyright © 2003 Nokia. All rights reserved.
renamed.
The name of the currently active profile is shown in standby mode, except wthe General profile is active. If the profile is timed, is shown in front of iname.
Tip: To change the profile quickly in standby mode, briefly press the key and select the profile you want to activate.
■ Settings (Menu 5)In this menu, you can change various settings of the phone. You can also reset some menu settings to their default values.
To access this menu: Press Menu in standby mode and select Settings.
Personal shortcutsYou can select the function for the right selection key shown in standby mothe functions (’personal shortcuts’) that can be accessed by pressing Go to istandby mode or by entering the Go to menu.
To access this menu: Press Menu in standby mode, and select Settings andPersonal shortcuts. Select
• Right selection key to select the function for the right selection key. The options are an operator-specific name, Go to and Contacts.
Men
u fu
nctio
ns
93
• Select Go to options to select the functions for your shortcut list. Scroll to a function and press Mark to add it to the list. To remove a function from the list,
croll the
Time
he 12-
ter,
o set
e date
o set
e time ect
Copyright © 2003 Nokia. All rights reserved.
press Unmark. To save the changes, press Done and Yes.
• Organise Go to options to change the order of the functions on the list. Sto the desired function, press Move and select where you want to move function to.
Time and date settingsTo access this menu: Press Menu in standby mode, and select Settings andand date settings. Select
• Clock to set the time, show (or hide) the time in standby mode or select thour or 24-hour time format.
The clock settings apply to several functions such as Messages, Call regisAlarm clock and Calendar.
If the battery is removed from the phone for a long time, you may need tthe time again.
• Date to show (or hide) the date in standby mode, set the date or select thformat or date separator.
If the battery is removed from the phone for a long time, you may need tthe date again.
• Auto-update of date & time to set the phone to automatically update thand date according to the current time zone (network service). If you selConfirm first, the phone asks for a confirmation before the update.
Men
u fu
nctio
ns
94
Automatic update of date and time does not change the time you have set for the alarm clock, calendar or alarm notes. They remain in local time, which may
ate.
Call
phone SIM
alls ivert ated
f you ble,
r to the able).
Copyright © 2003 Nokia. All rights reserved.
cause some alarms that you have set to expire immediately after the upd
Call settingsTo access this menu: Press Menu in standby mode, and select Settings andsettings. Select
• Call divert to direct your incoming calls to your voice mailbox or another number (network service). Divert options that are not supported by yourcard or your network operator may not be shown.
Select the desired divert option, for example Divert if busy to divert the cwhen your number is busy or when you reject an incoming call. Set the doption on (Activate) or off (Cancel), or check whether the option is activ(Check status).
• If you selected Activate, select where the calls are to be diverted to. Iactivate the divert option Divert if not answered or Divert if not availayou can also select the delay time after which the call is diverted.
• If you selected Check status, press Number to view the phone numbewhich the calls are diverted or Details to view the phone number anddelay time (available for Divert if not answered and Divert if not avail
Several divert options can be active at the same time. When all calls are diverted, is shown in standby mode.

Men
u fu
nctio
ns
95
Each phone line may have its own call divert settings. See Line for outgoing calls.
t the
e
page
n of
twork, vider.
twork
cted
will mode.
Copyright © 2003 Nokia. All rights reserved.
• Anykey answer and On if you want to answer an incoming call by brieflypressing any key, except , the selection keys and .
• Automatic redial to set the phone to make up to ten attempts to conneccall after an unsuccessful call attempt.
• Speed dialling and On if you want to call the names and phone numbersassigned to the speed dial keys to by pressing and holding thcorresponding key. See also Speed dials on page 88.
• Call waiting and Activate to request the network to notify you when youreceive a new call during a call (network service). See also Call waiting on39.
• Summary after call and On to set the phone to briefly display the duratiothe last call.
• Send my caller ID to show (Yes) your phone number to the person you arecalling or to hide it (No). This is a network service. If you select Set by nethe phone will use the setting that you have agreed with your service pro
• Line for outgoing calls to select the phone line 1 or 2 for making calls (neservice). For example, you can use line 1 for personal calls and line 2 for business calls. Calls on both lines can be answered regardless of the seleline.
If you select Line 2 and have not subscribed to this network service, you not be able to make calls. When line 2 is selected, 2 is shown in standby

Men
u fu
nctio
ns
96
If supported by your SIM card, you can prevent the line selection by selecting Lock.
y
Phone
ct ng to you
the
in
ch the
er r). Key ter you
Copyright © 2003 Nokia. All rights reserved.
Tip: In standby mode, you can switch from one line to the other bpressing and holding .
Phone settingsTo access this menu: Press Menu in standby mode, and select Settings and settings. Select
• Language settings to select the language for the display texts. If you selePhone language and Automatic, the phone selects the language accordithe information on the SIM card. If the card includes several languages, can select the desired one with the SIM language setting.
This setting also affects the date and time formats used, for example, in calendar.
• Automatic keyguard to set the keypad to lock automatically after a certalength of time when the phone is in standby mode.
To activate the automatic keyguard, select On and set the time after whikeypad is locked. To deactivate the automatic keyguard, select Off.
See also Keypad lock (Keyguard) on page 42.
Note: When Keyguard is on, calls may be possible to the emergency numbprogrammed into your phone (e.g. 112 or other official emergency numbein the emergency number and press . The number is displayed only afhave keyed in its last digit.

Men
u fu
nctio
ns
97
• Cell info display to set the phone to indicate when it is used in a cellular network based on the Micro Cellular Network (MCN) technology (network
ote,
rator r from
d and
ther
ages page
using
d on.
y and ory on
Copyright © 2003 Nokia. All rights reserved.
service).
• Welcome note to define a note that is shown briefly when the phone is switched on. Key in the note and save it by pressing Save. To delete the npress Options and select Delete.
• Operator selection to set the phone to automatically select a cellular opethat is available in your area (Automatic) or to select the desired operatoa list (Manual).
The selected operator must have a roaming agreement with your home network. If no such agreement exists, No network access will be displayeyou must select another operator.
The phone stays in manual mode until automatic mode is selected or anoSIM card is inserted into the phone.
• Confirm SIM service actions to set the phone to show confirmation mess(Yes) when you use SIM card services. See also SIM services (Menu 15) on145.
• Help text activation to set the phone to show help texts that guide you inthe menu functions. See also Using the menu on page 47.
• Start-up tone to set the phone to play a tone when the phone is switche
• Memory status to view the total amount of free and used shared memorthe amount of memory used by different functions. See also Shared mempage 21.
Men
u fu
nctio
ns
98
Display settingsTo access this menu: Press Menu in standby mode, and select Settings and
en the
w er ken
e, u and
nd
select
paper,
he o
such
Copyright © 2003 Nokia. All rights reserved.
Display settings. Select
• Wallpaper to set the phone to show a background image, ’wallpaper’, whphone is in standby mode.
The wallpaper images can be found in the Gallery menu. You can save neimages from received multimedia messages, download them from browspages, or transfer them with Nokia PC Suite from your PC. Also photos tawith the phone’s camera can be used as wallpaper.
To set an image as the wallpaper, do either of the following:
• To select the wallpaper image for the first time or to change the imagselect Select wallpaper. Scroll to the desired folder in the Gallery menpress Open. Scroll to the image you want. Press Open and Options, aselect Set as wallpaper.
• If you have previously used the wallpaper but have then selected Off,On.
If you delete an image from the Gallery menu while it is used as the wallthe image will still be used as the wallpaper until you change it.
Tip: To set an image as the wallpaper in the Gallery menu, open tdesired image, press Options and select Set as wallpaper. See alsGallery (Menu 7) on page 106.
• Colour schemes to select the colour for some parts of the phone display,as the indicators for the signal strength and battery charge level.

Men
u fu
nctio
ns
99
• Operator logo to set the phone to display or hide the operator logo saved in the phone. If there is no operator logo available in the phone, this function is
ive.
ce erter
saver
hone saver
and
value.
r is
se or
Copyright © 2003 Nokia. All rights reserved.
dimmed.
Note that the operator logo is not displayed when the screen saver is act
For availability of operator logos, contact your network operator or serviprovider. You can create own operator logos using the Nokia Image Convsoftware, see Nokia PC Suite on page 147.
• Screen saver time-out to set the time (’time-out’) after which the screenfeature is activated.
The screen saver is a power saving feature which becomes active if the pis not used for a certain length of time in standby mode. When the screenis active, a digital clock moves from the top to the bottom of the displaythe rest of the display is blank.
Select the timeout from the available values, or select Other and set theThe maximum timeout is 10 minutes.
You can deactivate the screen saver by pressing any key. The screen saveautomatically deactivated when the phone moves out of the network’s coverage area.
• Display contrast to change the contrast of the display. Press to decrea to increase the contrast level, and press OK.

Men
u fu
nctio
ns
100
Tone settingsYou can change the tone and vibrator settings of the currently selected profile.
Tone
voice
a call.
If you ery
age
sage. ger,
ge. To sired
attery
Copyright © 2003 Nokia. All rights reserved.
The same settings can also be found in the Profiles menu, see page 91.
To access this menu: Press Menu in standby mode, and select Settings andsettings. Select
• Incoming call alert to choose how the phone notifies you of an incomingcall. The options are Ringing, Ascending, Ring once, Beep once and Off.
For example, if you select Off, the phone remains silent when you receive
• Ringing tone to select the tone that rings when you receive a voice call. want to select a ringing tone saved in the Gallery menu, select Open gallfrom the tone list.
• Ringing volume to select the volume level for the ringing tones and messalert tones.
• Vibrating alert to set the phone to vibrate when you receive a call or mesThe vibrating alert does not work when the phone is connected to a chardesktop stand or car kit.
• Message alert tone to select the tone you hear when you receive a messaselect the tone from the ringing tone list, select Ringing tone and the detone.
• Keypad tones to select the volume for keypad tones.
• Warning tones to set the phone to sound tones, for example, when the bis running out of power.

Men
u fu
nctio
ns
101
• Alert for to set the phone to ring only upon calls from phone numbers that belong to a certain caller group. Scroll to the desired caller group or All calls
r
g r. The
poser
ted to or he
as
Copyright © 2003 Nokia. All rights reserved.
and press Mark. You can select several groups. After you have made youselections, press Done and Yes.
For adding a member to a caller group, see Caller groups on page 89.
Adding new tones to your phoneFor availability of tones via the text messaging (SMS), multimedia messagin(MMS) or browser service, contact your network operator or service providetones are saved in the Gallery menu.
You can create own tones using the Nokia Sound Converter or Nokia PC Comapplication included in the Nokia PC Suite software, see page 147.
Enhancement settingsYou can define the settings that the phone uses by default when it is conneca compatible headset (such as HDB-4 or HDW-2), car kit (such as CARK112CARK126) or inductive loopset (such as LPS-4). This menu is shown only if tphone has been connected to one of these accessories at least once.
To access this menu: Press Menu in standby mode, and select Settings andEnhancement settings.
Select Headset, Handsfree or Loopset, if the corresponding accessory is or hbeen used with the phone. Select

Men
u fu
nctio
ns
102
• Default profile to select the profile that is automatically activated when you connect the selected accessory to the phone. You can select another profile
g call atic
ds ee is
ed user rs in
tting) e of this
Copyright © 2003 Nokia. All rights reserved.
while the accessory is connected.
• Automatic answer to set the phone to automatically answer an incominafter five seconds. If Incoming call alert is set to Beep once or Off, automanswer cannot be used.
• Lights to set the lights permanently on (On) or to remain on for 15 seconafter a keypress (Automatic). This setting is available only when Handsfrselected.
Security settingsTo access this menu: Press Menu in standby mode, and select Settings andSecurity settings.
Note: When security features that restrict calls are in use (call barring, closgroup and fixed dialling), calls may be possible to certain emergency numbesome networks (e.g. 112 or other official emergency numbers).
Select
• Code in use to set the phone to use the UPIN or PIN code.
• PIN code request (or UPIN code request, depending on the Code in use seto set the phone to ask for the PIN code of the SIM card (or the UPIN codthe USIM card) when the phone is switched on. Some cards do not allowsetting to be changed.

Men
u fu
nctio
ns
103
• Call barring service to restrict the calls that can be made or received with the phone (network service). Select the desired barring option and set it on
atus).
cted use
o the
t from
hen e the
o can up ontact
card
Copyright © 2003 Nokia. All rights reserved.
(Activate) or off (Cancel), or check whether the option is active (Check st
• Fixed dialling to restrict calls and text messages from your phone to selephone numbers, if allowed by your SIM card. The PIN2 code is required tothis function.
To view the numbers on the fixed dialling list, select Number list, scroll tdesired name and press View.
To modify the fixed dialling list, press Options and select the appropriatefunction to add a number to the list, edit the selected number or delete ithe list, or delete all numbers from the list.
When you use fixed dialling, GPRS connections are not possible, except wsending text messages over a GPRS connection. In this case, the messagcentre number and the recipient’s phone number have to be included onfixed dialling list.
• Closed user group to specify a group of people whom you can call and whcall you (network service). Select Default to set the phone to use the grothat you have agreed with your service provider. For more information cyour network operator or service provider.
• Security level to define when the phone asks for the security code.
If you select Phone, the phone asks for the security code when a new SIMis inserted into the phone.

Men
u fu
nctio
ns
104
If you select Memory, the security code is requested when the memory in use is SIM card and you want to change the memory to Phone or Phone and SIM or
ory in
.
s. Key e
cause
Copyright © 2003 Nokia. All rights reserved.
copy names and numbers from one phone book to another. See also Memuse under Selecting the phone book settings on page 79.
When you change this setting, the numbers in the menus Missed calls, Received calls and Dialled numbers are deleted.
• Access codes to change the security code, PIN code, PIN2 code, barring password or UPIN code. The codes can only include numbers from 0 to 9
Restoring factory settingsYou can reset some of the menu settings to their original values.
Press Menu in standby mode, and select Settings and Restore factory settingin the security code and press OK. Note that this function does not delete thinformation you have saved or downloaded to the phone.
■ Camera (Menu 6)In this menu, you can start the phone’s camera and adjust its settings.
Note: Your phone must be switched on to use this function. Do not switch the phone on when wireless phone use is prohibited or when it may interference or danger.
To access this menu: Press Menu in standby mode and select Camera.

Men
u fu
nctio
ns
105
Taking a photo or recording a video clipYou can use the camera in this menu or as described on page 33.
ortrait or
is not m the
en you
phone ity but ake
h the
utter n the
Copyright © 2003 Nokia. All rights reserved.
To use the camera in this menu, select the camera mode (Standard photo, Pphoto, Night mode, or Video), open the camera lens cover and take a photo record a video clip. For more information, see page 33.
The photos and video clips are saved in shared memory, see page 21. If thereenough memory to use the camera, delete some old photos or other files froGallery menu, see page 106.
Adjusting the camera settingsIn the Camera menu, select Settings and
• Default mode to select the camera mode that will be used by default whstart the camera by opening the lens cover.
• Image quality to select how much a photo will be compressed when the saves it. Select High, Normal or Basic. High provides the best image qualtakes more memory. Normal and Basic provide lower image quality but tless memory.
• Video clip length to set the maximum length for video clips recorded witcamera. If you select Default, the maximum length is 15 seconds.
• Camera sounds to set the shutter and self-timer sounds on or off. The shsound is heard when you take a photo. The self-timer sound is heard wheself-timer is running.

Men
u fu
nctio
ns
106
• Default title to define a default name for photos and video clips. If you want to use the preset title, select Automatic. If you want to define your own title,
he erence
ss
ions
ss OK.
e
the s
Copyright © 2003 Nokia. All rights reserved.
select My title.
■ Gallery (Menu 7) In this menu, you can manage graphics, photos, recordings, tones and video clips saved in the phone. These files are arranged in folders.
The gallery uses shared memory, see page 21.
Note: Your phone must be switched on to use this function. Do not switch tphone on when wireless phone use is prohibited or when it may cause interfor danger.
To access this menu: Press Menu in standby mode and select Gallery, or preGallery in standby mode. A list of folders is shown.
1. In the folder list, scroll to the desired folder.
2. Press Open to open the selected folder, for example Images, or press Optand select
• Add folder to create a new folder. Key in a name for the folder and pre
• Delete folder to delete the selected folder. The preset folders cannot bdeleted.
• Move to move the selected folder. Scroll to where you want to move selected folder, press Options and select Move here. The preset foldercannot be moved.
Men
u fu
nctio
ns
107
• Rename folder to give a new name to the selected folder. The preset folders cannot be renamed.
The
iew
138),
ontact
. See
nd
Copyright © 2003 Nokia. All rights reserved.
• Details to view information about the selected folder.
• Type of view to define how the folders and their contents are shown. Grid option is useful with images and video clips.
• Sort to arrange the folders by name, date, format or size.
• Gallery downloads to download video clips, images and tones from a browser service (network service). Select Image downloads or Tone downloads. A list of bookmarks is shown. Select More bookmarks to vthe bookmarks available in the Services menu, see page 141.
Select the bookmark of the browser page you want to access. If the connection fails, change the active set of connection settings in the Services menu (see Making a connection to a browser service on pagereturn to the Gallery menu, and try to connect to the page again.
For the availability of different browser services, pricing and tariffs, cyour network operator and/or the service provider.
Only install software from sources that you trust.
• Usage rights list to view the list of available usage rights. Scroll to thedesired file and press Options. Select Details to view the usage rightsUsage rights on page 109.
3. If you opened a folder in step 2, select the file you want to view or play apress Open.
Alternatively, press Options and select
Men
u fu
nctio
ns
108
• Delete to delete the selected file.
• Send to send the file in a multimedia message (network service) or via an tion
tive
ss
ge, ll keys
e or
s Save.
you
Copyright © 2003 Nokia. All rights reserved.
infrared or Bluetooth connection to a compatible device. For informaabout composing multimedia messages, see page 63.
Tip: To send the file in a multimedia message, you can press instead of using the Send function.
• Set as wallpaper to use the selected image as the wallpaper. See alsoWallpaper on page 98.
• Set as ring tone to use the selected sound as a ringing tone for the acprofile. See also Profiles (Menu 4) on page 91.
• Edit image to add text, frames and clip-art to the selected image. PreOptions and select Insert text, Insert frame or Insert clip-art.
If you selected Insert frame or Insert clip-art, scroll to the desired imapress Options and select Insert. Move the added image with the scroand press OK to confirm the change, or press Back to change the framclip-art.
To save the changed image in GIF format, press Save, edit the image’name, press OK, scroll to the desired folder, press Options and select
• Move to move the file to the desired folder. Scroll to the folder wherewant to move the file, press Options and select Move here.
• Rename to give a new name to the file.
• Details to view for example the size and format of the file.

Men
u fu
nctio
ns
109
• Delete all to delete all the files from the selected folder.
• View in sequence to show or play all the files in the selected folder one by
, or ith ,
Set
ion is
rough
ntent
to the ciated
Copyright © 2003 Nokia. All rights reserved.
one.
4. If you opened a file in step 3, press Play to play a sound clip or video clippress Zoom to view an image in a larger size. You can scroll the image w
, and .
Pressing Options allows access, for example, to the following functions:contrast, Mute audio/Unmute audio, Update rights. Select
• Set contrast to change the contrast of an image or video clip.
• Mute audio/Unmute audio to turn the audio of a video clip off or on.
• Update rights to update the usage rights of the selected file. This optonly shown if the usage rights of the file can be updated.
Tip: If you opened a file by pressing Open in step 3, you can browse ththe files in the selected folder with or .
Copyright protections may prevent some images, ringing tones, and other cofrom being copied, modified, transferred or forwarded.
Usage rightsYour phone supports usage rights to protect content that you have acquiredphone. A piece of content, such as a ringing tone, can be protected and assowith certain usage rules, for example the number of usage times.

Men
u fu
nctio
ns
110
The usage rules are defined in the content’s usage rights that can be delivered with the content or separately, depending on the service provider. You may be
uiring
nu. Do ay
ven
Alarm
ange
Copyright © 2003 Nokia. All rights reserved.
able to update these rights.
Always check the delivery terms of any content and usage rights before acqthem, as they may be subject to a fee.
■ Organiser (Menu 8)This menu contains an alarm clock, calendar, to-do list and electronic wallet.
To access this menu: Press Menu in standby mode and select Organiser.Note: Your phone must be switched on to use the functions in Organiser menot switch the phone on when wireless phone use is prohibited or when it mcause interference or danger.
Alarm clockYou can set the phone to alarm at the desired time. The alarm clock works ewhen the phone is switched off if there is enough power in the battery.
To access this menu: Press Menu in standby mode and select Organiser andclock.
To set an alarm, select Alarm time, key in the alarm time and press OK. To chthe alarm time, select On.
Men
u fu
nctio
ns
111
To set a tone for the alarm, select Alarm tone and the desired tone. Default is the ringing tone that you have selected for the active profile in the Profiles menu, see
the
s
on and o r Yes to
y cause
and
Copyright © 2003 Nokia. All rights reserved.
page 91.
When the alarm time expiresThe phone will sound an alert tone and flash Alarm! and the current time ondisplay.
Press Stop to stop the alarm. If you let the phone alarm for a minute or presSnooze, the alarm stops for about ten minutes and then resumes.
If the alarm time is reached while the phone is switched off, the phone switches itselfstarts sounding the alarm tone. If you press Stop, the phone asks whether you want tactivate the phone for calls, Switch the phone on?. Press No to switch off the phone omake and receive calls.
Note: Do not press Yes when wireless phone use is prohibited or when it mainterference or danger.
CalendarThe calendar helps you to keep track of reminders, calls you need to make, meetings and birthdays.
The calendar uses shared memory, see page 21.
To access this menu: Press Menu in standby mode and select Organiser andCalendar. The month view is shown. You can scroll through the days, weeksmonths with the scroll keys.
Tip: To quickly open the calendar in standby mode, press .

Men
u fu
nctio
ns
112
Using the different calendar views• Month view: This view shows the weeks of a month. The current day is
hown ay and
tions:
tor . With after a ill not
to press
ns: tings,
Copyright © 2003 Nokia. All rights reserved.
indicated by a frame around it. If there are notes for the day, the day is sin bold. To view the notes set for a day (’day view’), scroll to the desired dpress View.
In the month view, pressing Options allows access to the following funcMake a note, Go to date, Settings, Go to to-do list. Select
• Make a note to create a note for the selected day.
• Go to date to move to the desired day in the calendar.
• Settings to set the date and time or to select their format, the separacharacter (for example - ) or the first day of the week (Week starts on)Auto-delete you can set the phone to delete old notes automatically certain length of time. Repeated notes, for example birthday notes, wbe deleted.
• Day view: This view shows the notes set for the selected day. Press Viewopen the selected note (’note view’), or if there are no notes for the day, Add note to create a new note.
Tip: To view the notes for the previous or next day, press or .
In the day view, pressing Options allows access to the following functioMake a note, Delete, Edit, Move, Repeat, Go to date, Send note, Copy, SetGo to to-do list. Select

Men
u fu
nctio
ns
113
• Repeat to select the interval at which the note is repeated, for example Every week.
tooth
task
you
r .
ns:
d
note. tions
Copyright © 2003 Nokia. All rights reserved.
• Send note to send the note to a compatible device via infrared or Blueconnection, or as a calendar note or text message.
• Move or Copy to move or copy the note to another day.
• Go to to-do list to access the To-do list menu where you can create a and then copy it to the calendar. See also To-do list on page 115.
• Note view: This view shows the note that you opened in the day view. Ifhave set an alarm for the note, is shown at the top of the note.
You can scroll through the notes set for the selected day by pressing oPress Edit to modify the displayed note.
In the note view, pressing Options allows access to the following functioDelete, Move, Repeat, Send note, Copy, Settings, Go to to-do list.
Making a calendar noteYou can create a new note in the month or day view. For keying in letters annumbers, see Writing text on page 43.
In the month view, scroll to the desired day, press Options and select Make aIn the day view, press Add note if there are no notes for the day, or press Opand select Make a note.
Select one of the following note types:

Men
u fu
nctio
ns
114
• Meeting: Key in the subject for the meeting and press Save. Key in the location for the meeting and press Save. Key in the start time for the meeting
nd set
te,
Save. ress
nd set
ct the
nd set
d day
nd set
Copyright © 2003 Nokia. All rights reserved.
and press OK. Key in the end time and press OK.
To set the alarm for the note, select With tone or Silent (no alarm tone) athe alarm time.
• Reminder: Key in the note and press Save. To set the alarm for the noselect Alarm on and set the alarm time.
• Call: Key in the phone number, press Save, key in the name and pressOR: If you want to search for the name and number in the phone book, pOptions, select Search and select the desired name.
Key in the time for the call and press OK.
To set the alarm for the note, select With tone or Silent (no alarm tone) athe alarm time.
• Birthday: Key in the person’s name and press Save. OR: If you want tosearch for the name in the phone book, press Options, select Search, seledesired name, edit the name to your liking and press Save.
Key in the year of birth and press OK.
To set the alarm for the note, select With tone or Silent (no alarm tone) athe alarm time.
• Memo: Key in the subject for the memo and press Save. Key in the enfor the memo and press OK.
To set the alarm for the note, select With tone or Silent (no alarm tone) athe alarm time.

Men
u fu
nctio
ns
115
When the phone sounds an alarm for a noteThe phone beeps and displays the note. When a Call note is displayed, you can call
, press
tasks
d To-
ns and ress
add a d a
ave it
it the
elect n also
Copyright © 2003 Nokia. All rights reserved.
the displayed number by pressing . To stop the alarm and view the noteView. To stop the alarm without viewing the note, press Exit.
To-do listIn the to-do list, you can save notes for tasks you need to do and manage thein different ways.
The to-do list uses shared memory, see page 21.
To access this menu: Press Menu in standby mode, and select Organiser ando list. The list of current tasks are shown in order of priority.
• To add a new task, press Add note if the task list is empty, or press Optioselect Add if there are existing tasks. Key in the subject for the task and pSave. Select the task’s priority, for example High.
• In the task list, you can press Options and select the desired function to new task, sort the tasks by deadline, open the calendar for example to adnote, or delete all the notes that you have marked as done.
You can also delete the selected task, send it to a compatible phone, or sto the calendar (without deadline and alarm).
• To view a task, scroll to the desired task on the list and press View. To eddisplayed task, press Edit.
To use other functions related to the displayed task, press Options and sthe desired function. You can set the task’s deadline and its alarm. You ca
Men
u fu
nctio
ns
116
mark the task as done or not done, delete the task, change its priority, send it to a compatible device, open the calendar, or save the task to the calendar.
h
d er
allet ain at ode
other
e
Copyright © 2003 Nokia. All rights reserved.
WalletIn the Wallet menu, you can save personal information, such as credit card numbers, for paying for purchases with your phone in browser services whicsupport this function.
To access this menu: Press Menu in standby mode, and select Organiser anWallet. You can open the wallet also by pressing Options and selecting Othoptions and Use wallet info in different browser services, see page 138.
When you open the wallet for the first time, you need to create your own wcode. At Create wallet code:, key in the code and press OK. Key in the code agVerify wallet code:. The code is requested when you open the wallet, if the Crequest setting is on.
If you want to delete the wallet contents and the wallet code, key in *#7370925538# in standby mode and enter the phone’s security code.
Saving and changing personal card informationBefore you can use the wallet, you need to save your credit card number andinformation needed in paying for purchases. This information is arranged insetting groups called ’cards’.
To save information about a card, select Cards in the Wallet menu, select thdesired card, press Options and select View. Select
• Card info to save, for example, your credit card number

Men
u fu
nctio
ns
117
• User info to save your user name and password
• Shipping info to save your contact information
t the card
ice
esired
notes,
s nd its
n by
t to as a e (Use
Copyright © 2003 Nokia. All rights reserved.
• Billing info to save the contact information if the invoicing address is nosame as the shipping address, for example, when using a company credit
• Receipt info to save phone numbers and e-mail addresses where the servprovider can send you a receipt for your purchase
To copy, clear or rename a card, select Cards in the Wallet menu, select the dcard, press Options and select the function you want.
Personal notesYou can also save personal notes in the wallet.
Select Personal notes in the Wallet menu. The phone shows a list of existingif any.
• To create a personal note, press Add new if the note list is empty, or presOptions and select Add new if there are existing notes. Key in the note atitle.
• If there are existing notes on the list, you can press Options and select aoption to delete or edit the selected note, add a new note, sort the notesname or by date, or delete all the notes.
• To view a note on the list, press View. When the note is shown, press Edimodify the note, or press Options and select an option to send the note text message, copy the note to the calendar, pick a number from the notnumber) or delete the note.

Men
u fu
nctio
ns
118
Wallet settingsSelect Settings in the Wallet menu. Select
he ice on
ce.
on,
y one.
Copyright © 2003 Nokia. All rights reserved.
• Code request to set the wallet code request on or off
• Change code to change the wallet code
Paying for your purchases with the wallet1. Go to a browser service which supports the wallet function and choose t
product you want to buy. See also Making a connection to a browser servpage 138.
2. Read carefully through all the instructions available at the browser servi
3. To pay your purchase, press Options and select Use wallet info.
4. Select the card you want to pay with.
5. If you want the phone to fill in the online form with the wallet informatipress Fill in. This selection key is shown only if the service supports the Electronic Commerce Modeling Language standard.
You can also fill in the form manually by selecting the card’s fields one b
6. Approve the purchase. The form is sent forward.
7. To close the wallet, press Options and select Close wallet.
After using the wallet, empty the cache memory, see page 144.

Men
u fu
nctio
ns
119
■ Games (Menu 9)The phone includes some Java games to play. You may also be able to
tions
he erence
kes)
is off,
set in et.
Open
t, see
Copyright © 2003 Nokia. All rights reserved.
download new games using the Game downloads function in this menu.
For information about the Java version supported by the phone, see Applica(Menu 10) on page 120. The games use shared memory, see page 21.
To access this menu: Press Menu in standby mode, and select Games.Note: Your phone must be switched on to use this function. Do not switch tphone on when wireless phone use is prohibited or when it may cause interfor danger.
Adjusting the game settingsIn the Games menu, select Settings to set sounds, lights and vibrations (Shafor the games.
When the Vibrating alert function in the Tone settings menu (see page 100)the phone does not vibrate even if you set Shakes on.
Starting a gameIn the Games menu, select Select game. Scroll to the desired game or game the game list. Press Open or to launch the game or to open the game s
If you opened a game set, scroll to the desired game and start it by pressingor .
For other functions that you can access by pressing Options in the game lisOther options available for an application or application set on page 121.

Men
u fu
nctio
ns
120
Downloading a gameIn the Games menu, select Game downloads. A list of bookmarks is shown. Select
page
s, the
your
enu
the
onics
Copyright © 2003 Nokia. All rights reserved.
More bookmarks to view the bookmarks available in the Services menu, see141.
Select the bookmark of the page you want to access. If the connection failchange the active set of connection settings in the Services menu, return toGames menu and try to connect to the page again.
Follow the instructions available in the browser service.
For the availability of different browser services, pricing and tariffs, contactnetwork operator and/or the service provider.
Note that when downloading a game, it may be saved in the Applications minstead of the Games menu.
Only install software from sources that you trust.
Checking the memory status for gamesTo view the amount of memory available for Java games, select Memory in Games menu. See also Checking the memory status on page 123.
■ Applications (Menu 10)In this menu, you can use and manage Java applications installed on your phone. The phone supports Java 2 Micro Edition (J2METM), which is a version of Java technology specifically designed for small consumer electrproducts.
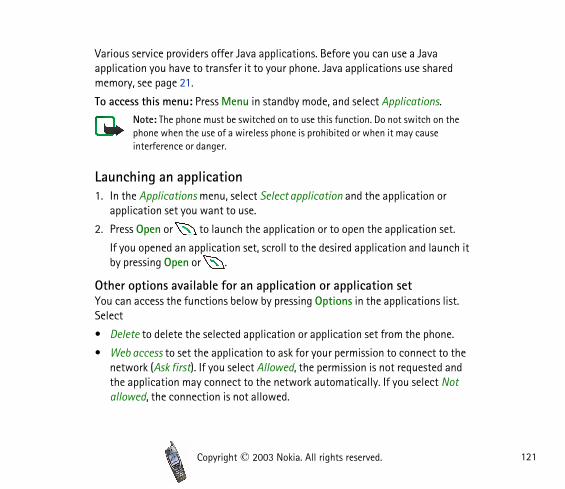
Men
u fu
nctio
ns
121
Various service providers offer Java applications. Before you can use a Java application you have to transfer it to your phone. Java applications use shared
.
the
r
set.
nch it
list.
ne.
o the and Not
Copyright © 2003 Nokia. All rights reserved.
memory, see page 21.
To access this menu: Press Menu in standby mode, and select ApplicationsNote: The phone must be switched on to use this function. Do not switch onphone when the use of a wireless phone is prohibited or when it may cause interference or danger.
Launching an application1. In the Applications menu, select Select application and the application o
application set you want to use.
2. Press Open or to launch the application or to open the application
If you opened an application set, scroll to the desired application and lauby pressing Open or .
Other options available for an application or application setYou can access the functions below by pressing Options in the applicationsSelect
• Delete to delete the selected application or application set from the pho
• Web access to set the application to ask for your permission to connect tnetwork (Ask first). If you select Allowed, the permission is not requestedthe application may connect to the network automatically. If you select allowed, the connection is not allowed.

Men
u fu
nctio
ns
122
• Update version to check if a new version of the application is available for downloading from a browser page (network service).
n is
ation er.
hown. menu,
fails, to
act
e from e
Copyright © 2003 Nokia. All rights reserved.
• Web page to access a browser page related to the application. This optioshown only if the application contains the IP address of the site.
• Connect via to set the phone to use specific service settings if the applicneeds them. The phone uses as default the service settings for the brows
• Details to view additional information about the application.
Downloading a Java applicationYou can download new Java applications in the following ways:
• In the Applications menu, select App. downloads. A list of bookmarks is sSelect More bookmarks to view the bookmarks available in the Services see page 141.
Select the bookmark of the page you want to access. If the connection change the active set of connection settings in the Services menu, returnthe Applications menu and try to connect to the page again.
Follow the instructions available in the browser service.
For the availability of different browser services, pricing and tariffs, contyour network operator and/or the service provider.
• Press Menu in standby mode and select Services to access a browser pagwhich you can download the Java application you want. See Browsing thpages of a service on page 138.
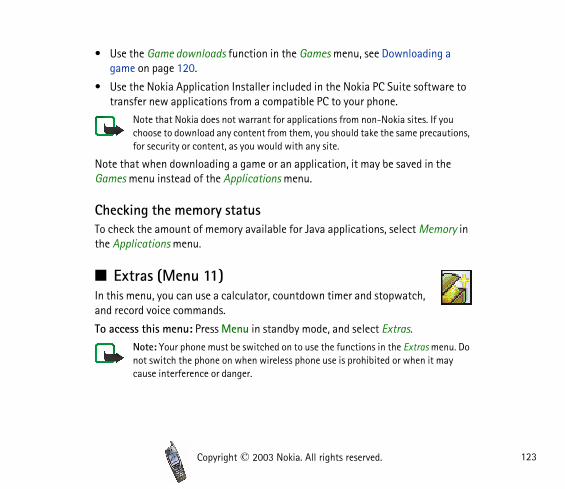
Men
u fu
nctio
ns
123
• Use the Game downloads function in the Games menu, see Downloading a game on page 120.
are to
ou utions,
he
ory in
nu. Do ay
Copyright © 2003 Nokia. All rights reserved.
• Use the Nokia Application Installer included in the Nokia PC Suite softwtransfer new applications from a compatible PC to your phone.
Note that Nokia does not warrant for applications from non-Nokia sites. If ychoose to download any content from them, you should take the same precafor security or content, as you would with any site.
Note that when downloading a game or an application, it may be saved in tGames menu instead of the Applications menu.
Checking the memory statusTo check the amount of memory available for Java applications, select Memthe Applications menu.
■ Extras (Menu 11)In this menu, you can use a calculator, countdown timer and stopwatch, and record voice commands.
To access this menu: Press Menu in standby mode, and select Extras.Note: Your phone must be switched on to use the functions in the Extras menot switch the phone on when wireless phone use is prohibited or when it mcause interference or danger.

Men
u fu
nctio
ns
124
CalculatorThe phone includes a calculator that can also be used for approximate currency
ng
on.
oot or
e
t ss rrency
Copyright © 2003 Nokia. All rights reserved.
conversions.
This calculator has a limited accuracy and rounding errors may occur, especially in lodivisions.
To access this menu: Press Menu in standby mode, and select Extras and Calculator.
1. When ’0’ is shown on the display, key in the first number in the calculatiPress for a decimal point.
2. Press Options and select Add, Subtract, Multiply, Divide, Square, Square rChange sign.
Tip: Alternatively, press once to add, twice to subtract, thretimes to multiply or four times to divide.
3. Key in the second number, if needed in the calculation.
4. For a total, press Equals.
5. Press and hold Clear for a new calculation.
Making a currency conversion1. To save the exchange rate, press Options and select Exchange rate. Selec
either of the available conversion options. Key in the exchange rate (pre for a decimal point) and press OK. The exchange rate is used in cu
conversions until you change it.

Men
u fu
nctio
ns
125
2. To make the currency conversion, key in the amount to be converted, press Options and select In domestic or In foreign.
the reign.
ce
ice
5.
press oice
ide its
into
Copyright © 2003 Nokia. All rights reserved.
Tip: You can also make a currency conversion in standby mode. Key inamount to be converted, press Options and select In domestic or In fo
Voice commandsYou can access certain menu functions by saying a voice command. The voicommand can be, for example, a function name.
To access this menu: Press Menu in standby mode, and select Extras and Vocommands.
Before using voice commands: Read Notes for using voice dialling on page 8
Adding a voice command to a menu functionIn the Voice commands menu, open the folder, for example Profiles, which contains the desired function, for example Silent, scroll to the function, andAdd. Press Start and clearly say the word(s) that you want to record as the vcommand.
If the function already has a voice command, the indicator is shown besname.
Note that all the voice commands are deleted if you insert another SIM cardthe phone and save new voice commands.
Men
u fu
nctio
ns
126
Using a voice commandPress and hold the right selection key ( ) or the voice key in standby
e d and
ons
l e mer is
elect
ounds m by
Copyright © 2003 Nokia. All rights reserved.
mode until you hear a short tone. Say the command clearly while holding thphone in the normal position near to your ear. The phone plays the commancarries out the related function.
See also Making a call using a voice tag on page 86.
Playing, changing or deleting a voice commandIn the Voice commands menu, scroll to the desired function.
To listen to the command, press Playback. To change or delete it, press Optiand select Change or Delete.
Countdown timerYou can set the phone to alarm after a certain length of time.
To access this menu: Press Menu in standby mode, and select Extras and Countdown timer.
Key in the amount of time (in hours and minutes) after which the phone wilalarm, and press OK. If you wish, write a note that is displayed when the timexpires, and press OK to start the countdown timer. When the countdown tion, is shown in standby mode.
• To change the countdown time, access the Countdown timer menu and sChange time. To stop the timer, select Stop timer.
If the alarm time is reached when the phone is in standby mode, the phone sa tone and shows the note, if available, or Countdown time up. Stop the alar

Men
u fu
nctio
ns
127
pressing any key. If no key is pressed, the alarm automatically stops within 30 seconds. To delete the note, press OK.
rent
ress u can
s as a ect
. access
time ing
Copyright © 2003 Nokia. All rights reserved.
StopwatchYou can measure time and take split times or lap times, for example, in diffesports.
To access this menu: Press Menu in standby mode, and select Extras and Stopwatch.
Taking split times or lap timesIn the Stopwatch menu, select Split timing or Lap timing, and press Start. PSplit to take a split time, Lap to take a lap time or Stop to stop the timing. Yoscroll through the split or lap times shown below the overall time.
When the timing is stopped, you can press Save to save the lap or split timetime set. To reset the times or to continue the timing, press Options and selReset or Start.
Setting the timing to continue in the background
If you want to use other functions while the stopwatch is running, press When the stopwatch is on, is shown in standby mode. To view the time, the Stopwatch menu and select Continue.
Note: Using the stopwatch consumes the battery and the phone's operatingwill be reduced. Be careful not to let it run in the background when performother operations with your phone.

Men
u fu
nctio
ns
128
Viewing and deleting previously taken timesIn the Stopwatch menu, select
ect ne,
age
sfer
ivity when
Copyright © 2003 Nokia. All rights reserved.
• Show last to view the most recent measured time set
• View times to view a saved time set
• Delete times to delete the saved time sets. To delete all the time sets, selDelete all and press Yes. To delete time sets one at a time, select One by oscroll to the time set you want to delete, and press Delete and Yes.
■ Connectivity (Menu 12)In this menu, you can connect the phone to a compatible device via Bluetooth or infrared connection. You can also define the settings for GPRS dial-up connections.
For using the phone’s USB port, see USB port for fast local connections on p20, Connectors on page 24 and Nokia PC Suite on page 147.
For general information about GPRS, see GPRS and HSCSD for fast data tranon page 19.
Note: Your phone must be switched on to use the functions in the Connectmenu. Do not switch the phone on when wireless phone use is prohibited orit may cause interference or danger.

Men
u fu
nctio
ns
129
Bluetooth wireless technologyThe phone supports Bluetooth technology which allows you to wirelessly connect
, you
and
e
as
lt the
eck
e will other
and
of the
Copyright © 2003 Nokia. All rights reserved.
the phone to a compatible Bluetooth device within 10 meters. In this menucan set up and manage Bluetooth connections.
To access this menu: Press Menu in standby mode, and select ConnectivityBluetooth.
Since Bluetooth devices communicate using radio waves, your phone and thother Bluetooth device do not need to be in line of sight. The Bluetooth connection can, however, be subject to interference from obstructions suchwalls or other electronic devices.
For compatibility between your phone and another Bluetooth device, consudevice’s documentation and your Nokia dealer.
In some countries, there may be restrictions on using Bluetooth devices. Chwith your local authorities.
Note: Using Bluetooth consumes the battery and the phone's operating timbe reduced. Be careful not to let it run in the background when performing operations with your phone.
Setting up a Bluetooth connection1. Activate the Bluetooth feature: In the Bluetooth menu, select Bluetooth
On.
When the Bluetooth feature is on, the indicator is shown at the topdisplay.

Men
u fu
nctio
ns
130
• If you activate the Bluetooth feature for the first time, the phone asks for the Bluetooth device name of your phone. Accept the default name or
for nd
he
Nokia
are
hone,
f.
Copyright © 2003 Nokia. All rights reserved.
change it. This name can be seen by other Bluetooth device users.
2. Select Search for audio enhancements in the Bluetooth menu to search compatible Bluetooth devices, for example the headset HDW-2. The foudevices are shown as a list.
3. Select the device that you want to connect to the phone.
4. Enter the device’s Bluetooth passcode to associate (’pair’) and connect tdevice to your phone.
Pairing means that you create a connection with a compatible Bluetoothdevice by entering its passcode when you connect to it for the first time.accessories have fixed passcodes that are supplied with them.
When the connection is established, Connected to and the device’s namedisplayed.
5. Start using the device.
If you want to check which Bluetooth device is currently connected to the pselect View active device in the Bluetooth menu. If you want to close the connection to the selected device, press Disconnect.
Deactivating the Bluetooth featureIf you do not intend to use the Bluetooth feature for some time, you can deactivate it to save power. In the Bluetooth menu, select Bluetooth and Of
Men
u fu
nctio
ns
131
Viewing the paired devicesYou can check which Bluetooth devices are currently paired with the phone. In the
n the
d
e
tooth her s.
n be
Copyright © 2003 Nokia. All rights reserved.
Bluetooth menu, select View paired devices and scroll to the desired device.
If you want to delete the pairing to the device, press Delete.
If you press Options, the following functions may be available, depending ostatus of the device and the Bluetooth connection. Select
• Connect to connect to the selected device
• Assign short name to give a nickname (visible only to you) to the selectedevice
• Request conn. authorisation to select whether the phone connects to thselected device automatically (No) or after your permission (Yes).
Bluetooth settingsYou can define how your phone is shown to other Bluetooth devices. In the Bluetooth menu, select Bluetooth settings and
• My phone's visibility to change the way the phone is visible to other Bluedevices. Select Shown to all to show the phone (default setting) to all otBluetooth devices or Hidden to show the phone only to the paired device
• My phone's name to change your phone’s Bluetooth device name that caseen by other Bluetooth device users.

Men
u fu
nctio
ns
132
InfraredThe phone has an infrared port that you can use for connecting your phone to
for
IR
inting
on is
u in f the
to
ndar
Copyright © 2003 Nokia. All rights reserved.
another IrDA-compliant device. Over infrared connection, you can transfer,example, business cards and calendar notes.
To activate the infrared port: Press Menu in standby mode, and select Connectivity and Infrared.
Do not point the IR (infrared) beam at anyone's eye or allow it to interfere with otherdevices. This device is a Class 1 Laser product.
Sending and receiving data via infrared• Ensure that the infrared ports of your phone and the other device are po
at each other and that there are no obstructions between the devices.
The preferable distance between the two devices in an infrared connectione meter at the most.
• To receive data, activate the infrared port of your phone by pressing Menstandby mode and by selecting Connectivity and Infrared. Ask the user osending phone to start the data transfer.
• To send data from your phone, select the function from which you want send data over the infrared connection.
For example, to send a calendar note when you are viewing it in the Calemenu, press Options and select Send note and Via infrared.
If data transfer is not started within two minutes after the activation of theinfrared port, the connection is cancelled and has to be started again.

Men
u fu
nctio
ns
133
Checking the status of the infrared connection• When is shown continuously, the infrared connection is active and your
the
e as a
and
ed.
the
hown
when n. The tion.
Copyright © 2003 Nokia. All rights reserved.
phone is ready to send or receive data via its infrared port.
• When blinks, your phone is trying to connect to the other device or connection has been lost.
GPRSIn this menu you can define when the phone connects to the GPRS network(network service). You can also define the GPRS settings for using the phonmodem with a PC (network service).
To access this menu: Press Menu in standby mode, and select ConnectivityGPRS.
Selecting the GPRS connection modeIn the GPRS menu, select GPRS connection and Always online or When need
• If you select Always online, the phone automatically registers to a GPRSnetwork when you switch the phone on. The phone remains registered toGPRS network even when you do not use it.
When Always online is selected and the GPRS service is available, is son the display.
• If you select When needed, the phone registers to the GPRS network onlyyou access a service, for example a browser service, over GPRS connectiophone does not remain registered to the GPRS network after the connec
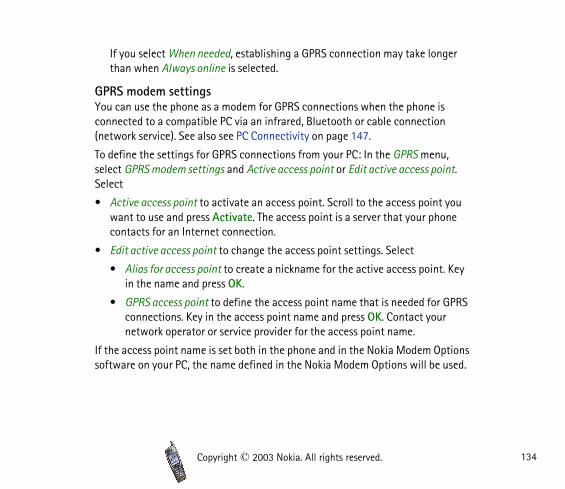
Men
u fu
nctio
ns
134
If you select When needed, establishing a GPRS connection may take longer than when Always online is selected.
s n
u, int.
you one
t. Key
GPRS r
ptions used.
Copyright © 2003 Nokia. All rights reserved.
GPRS modem settingsYou can use the phone as a modem for GPRS connections when the phone iconnected to a compatible PC via an infrared, Bluetooth or cable connectio(network service). See also see PC Connectivity on page 147.
To define the settings for GPRS connections from your PC: In the GPRS menselect GPRS modem settings and Active access point or Edit active access poSelect
• Active access point to activate an access point. Scroll to the access pointwant to use and press Activate. The access point is a server that your phcontacts for an Internet connection.
• Edit active access point to change the access point settings. Select
• Alias for access point to create a nickname for the active access poinin the name and press OK.
• GPRS access point to define the access point name that is needed forconnections. Key in the access point name and press OK. Contact younetwork operator or service provider for the access point name.
If the access point name is set both in the phone and in the Nokia Modem Osoftware on your PC, the name defined in the Nokia Modem Options will be

Men
u fu
nctio
ns
135
■ Services (Menu 13))This menu contains a browser that you can use to access various
he erence
r tions
p ir
use.
ee
Copyright © 2003 Nokia. All rights reserved.
services. These services may include, for example, weather reports, news or flight times.
To access this menu: Press Menu in standby mode and select Services.
Note: Your phone must be switched on to use this function. Do not switch tphone on when wireless phone use is prohibited or when it may cause interfor danger.
Check the availability, pricing and tariffs of these browser services with younetwork operator and/or the service provider. They will also give you instrucon how to use their services.
With your phone’s browser you can view services that use Wireless Mark-ULanguage (WML) or extensible HyperText Markup Language (xHTML) on thepages.
Basic steps for accessing and using browser services1. Save the settings that are needed to access the service that you want to
See Setting up the phone for a browser service below.
2. Make a connection to the given service, see page 138.
3. Start browsing the pages of the service, see page 138.
4. When you want to finish browsing, end the connection to the service. Spage 140.

Men
u fu
nctio
ns
136
Setting up the phone for a browser serviceYou may receive the service settings as an Over The Air (OTA) message from the
. For
a PC vider.
s are
e save
e the
vice
gs. A e.
Copyright © 2003 Nokia. All rights reserved.
network operator or service provider that offers the service you want to usemore information, contact your network operator or service provider.
You can also key in the settings manually or define and edit them with NokiSuite. For appropriate settings, contact your network operator or service proThe settings may be available, for example, on their Web site.
Saving the service settings received as a message• To save the received settings, press Options and select Save.
If no settings are saved yet under Active service settings, the new settingsaved under the first free connection set.
If there are settings saved in Active service settings, Activate saved servicsettings? will be displayed. To activate the saved settings, press Yes, or tothem only, press No.
• To discard the received settings, press Options and select Discard.
• To view the received settings first, press Options and select View. To savsettings, press Save.
Keying in the service settings manually1. In the Services menu, select Settings, Connection settings and Active ser
settings.
You need to activate the set to which you want to save the service settinset is a collection of settings needed for making a connection to a servic

Men
u fu
nctio
ns
137
2. Scroll to the set you want to activate and press Activate.
3. Select Edit active service settings.
s tor or
s OK.
you
dit the
you
only
Copyright © 2003 Nokia. All rights reserved.
Select each of the settings one by one and key in all the required settingaccording to the information you have received from your network operaservice provider.
• Settings' name: Key in the new name for the connection set and pres
• Homepage: Key in the homepage address of the browser service thatwant to use, press for a dot, and press OK.
• Proxies: Select Enable or Disable. If you enable the proxies, you can ePrimary proxy and Secondary proxy settings.
• Bearer settings: Define the following settings:
• GPRS access point: Key in the access point name and press OK. Anaccess point name is needed to establish a connection to a GPRS network.
• Authentication type: Select Secure or Normal.
• Login type: Select Manual or Automatic.
If you select Automatic, the phone uses the Password setting thathave defined.
• User name: Key in the user name and press OK.
• Password: Key in the password and press OK. This setting is shownif the Login type setting is Automatic.
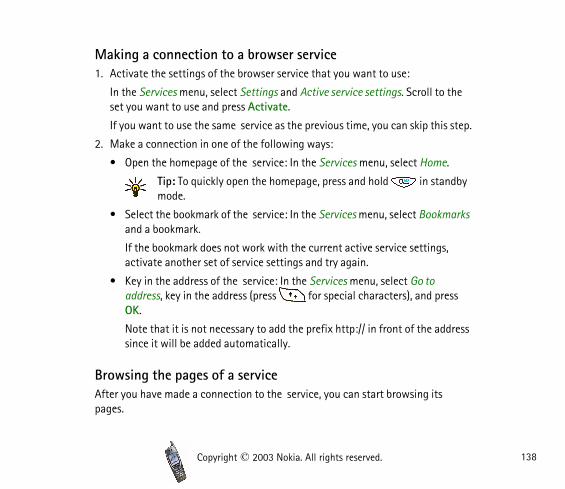
Men
u fu
nctio
ns
138
Making a connection to a browser service1. Activate the settings of the browser service that you want to use:
the
is step.
e.
andby
marks
s,
ress
ddress
Copyright © 2003 Nokia. All rights reserved.
In the Services menu, select Settings and Active service settings. Scroll toset you want to use and press Activate.
If you want to use the same service as the previous time, you can skip th
2. Make a connection in one of the following ways:
• Open the homepage of the service: In the Services menu, select Hom
Tip: To quickly open the homepage, press and hold in stmode.
• Select the bookmark of the service: In the Services menu, select Bookand a bookmark.
If the bookmark does not work with the current active service settingactivate another set of service settings and try again.
• Key in the address of the service: In the Services menu, select Go to address, key in the address (press for special characters), and pOK.
Note that it is not necessary to add the prefix http:// in front of the asince it will be added automatically.
Browsing the pages of a serviceAfter you have made a connection to the service, you can start browsing itspages.

Men
u fu
nctio
ns
139
The functions of the phone keys may vary in different browser services. Follow the text guides on the display.
, press
you
cial .
ess other
c to
.
Copyright © 2003 Nokia. All rights reserved.
If you receive or make a call during a GPRS connection, will be shown toindicate that the GPRS connection is suspended (in GSM networks only).
Using the phone keys while browsing• Use the scroll keys or to browse the page.
• To select a highlighted item, for example a link shown as underlined textSelect or .
Tip: The function of the middle selection key depends on the itemhave selected on the page.
• To key in letters and numbers, use the keys - . To insert a specharacter, press , scroll to the desired character and press Use or
• Some or all of the following options may be available while browsing. PrOptions and select the desired option. The service provider may also offeroptions.
Home: To return to the homepage of the service provider.
Shortcuts: To open a new list of options that can be, for example, specifithe page.
Bookmarks: To open the list of previously saved bookmarks, see page 141
Add bookmark: To save the displayed page as a bookmark.
Download links: To view a list of bookmarks for downloading content.

Men
u fu
nctio
ns
140
Other options: To view a list of further options. These include, for example, Use detail (to copy, for example, a phone number from the page), Go to address,
e 144)
wn,
of your If you swords use.
ings,
f it
Copyright © 2003 Nokia. All rights reserved.
Service inbox (see page 142), Appear. settings (see page 140), Security (includes, for example, cookies and certificates), Clear the cache (see pagand wallet-related functions.
Reload: To reload and update the current page.
Quit: See Ending a browser connection on page 140.
Ending a browser connectionTo quit browsing, press Options and select Quit. When Quit browsing? is shopress Yes. Alternatively, press twice.
The phone ends the connection to the service.
Note: The information or services you have accessed are stored in the cachephone. A cache is a buffer memory, which is used to store data temporarily.have tried to access or have accessed confidential information requiring pas(for example, your bank account), empty the cache of your phone after each
Appearance settings1. While browsing, press Options and select Other options and Appear. sett
or in the Services menu, select Settings and Appearance settings.
2. Select
• Text wrapping to define whether the text continues on the next line icannot be shown on one line.

Men
u fu
nctio
ns
141
• Show images to show or hide the images on browser pages. Hiding the pictures can speed up the browsing of pages that contain a lot of pictures.
items
e clear
okies,
saved
ks in
ection wing
Copyright © 2003 Nokia. All rights reserved.
• Font size to select the size for text shown on browser pages.
• Alerts to set the phone to alert when the connection or downloaded are not secure.
Cookie settingsYou can set the phone to allow or prevent receiving cookies.
A cookie is data that a service saves in the cache memory of your phone. Thcookie can be, for example, your user information. Cookies are deleted if youthe cache memory, see page 144.
1. While browsing, press Options and select Other options, Security and Coor in the Services menu, select Settings and Security settings.
2. Select Cookies and Allow or Reject.
BookmarksYou can save page addresses as bookmarks in the phone. The bookmarks arein shared memory, see page 21.
1. While browsing, press Options and select Bookmarks, or select Bookmarthe Services menu.
2. Scroll to the desired bookmark and press Select (or ) to make a connto the page associated with the bookmark, or press Options for the follofunctions:

Men
u fu
nctio
ns
142
View, Edit or Delete to view, modify or delete the selected bookmark.
Send to send the selected bookmark directly to a compatible device (select As .
K.
k list,
hoose nt, as
s Save title
r , news fers
Copyright © 2003 Nokia. All rights reserved.
bookmark), or to send the bookmark as a text message (As text message)
New bookmark to create a new bookmark without connecting to the associated page. Key in the address and the title of the page and press O
Tip: To see the full title or address of a bookmark on the bookmarpress and hold .
Note that your phone may have some pre-installed bookmarks for sites not affiliated with Nokia. Nokia does not warrant or endorse these sites. If you cto access them, you should take the same precautions, for security or conteyou would with any Internet site, for example.
Receiving a bookmarkWhen you have received a bookmark as an Over The Air (OTA) message, presto add it to the bookmark list, or press Options and select View to view the and address of the bookmark or Discard to discard the bookmark.
Service inboxThe phone is able to receive service messages (’pushed messages’) from youservice provider (network service). These messages can contain, for exampleheadlines available in a browser service and the address of a service that ofthe news.

Men
u fu
nctio
ns
143
To view a service message you have received:
1. When no connection is in progress
the
and
sired
cated
t the
wser
Copyright © 2003 Nokia. All rights reserved.
When a note about a new service message is shown, press View to view message right away or press Exit to view it later.
To view the message later, press Menu in standby mode, select Services Service inbox and scroll to the desired message.
When a connection is in progress
Press Options, select Other options and Service inbox and scroll to the demessage.
2. Press Retrieve or Options.
• If you press Retrieve (or ), the phone downloads the content indiin the service message.
• If you press Options, you can select Details to view information abouservice message or Delete to delete the message.
Service inbox settingsPress Menu, and select Services, Settings and Service inbox settings. Select
• Service messages to allow or prevent the reception of service messages.
• Automatic connection to set the phone to automatically activate the browhen the phone receives a service message.

Men
u fu
nctio
ns
144
Emptying the cache memoryTo empty the cache memory:
lect
s and
s. For act
tes.
from is icates annot not
Copyright © 2003 Nokia. All rights reserved.
• When no connection is in progress: Press Menu in standby mode, and seServices and Clear the cache.
• When a connection is in progress: Press Options and select Other optionClear the cache.
Security features for browser connectionsSecurity features may be required for some services, such as banking servicesuch connections you need security certificates. For more information, contyour service provider.
CertificatesThere are two kinds of certificates: server certificates and authority certifica
• Server certificates
The phone uses a server certificate to create a connection with improvedsecurity to the service provider. The phone receives the server certificatethe service provider before the connection is established and its validity checked using the authority certificates saved in the phone. Server certifare not saved. The phone indicates if the identity of the Internet server cbe verified, if the Internet server certificate is not authentic or if you do have the correct authority certificate in your phone.
The security indicator is displayed during a connection, if the data transmission between the phone and the Internet server is encrypted.

Men
u fu
nctio
ns
145
However, the security indicator does not indicate that the data transmission between the Internet server and the content server is secure. It is up to the
rver
g o ports the
rtcuts
is
Copyright © 2003 Nokia. All rights reserved.
service provider to secure the data transmission between the Internet seand the content server.
• Authority certificates
Authority certificates are used by some browser services, such as bankinservices, for checking the validity of other certificates. You may be able tdownload authority certificates from a browser service, if the service supthe use of authority certificates. If you save the certificate, it is added tocertificate list in the phone.
■ Go to (Menu 14)In this menu you can activate the same functions that can be accessed by pressing Go to in standby mode.
To access this menu: Press Menu in standby mode and select Go to.
To remove functions from or add more functions to the list, see Personal shoon page 92.
■ SIM services (Menu 15)In addition to the functions available on the phone, your SIM card may provide additional services that you can access in menu 15. This menu is shown only if it is supported by your SIM card. The name and contents of thmenu depend on the services available.
Men
u fu
nctio
ns
146
Note: For availability, rates and information on using SIM services, contact your SIM card vendor, e.g. network operator, service provider or other vendor.
ur Yes in
a
Copyright © 2003 Nokia. All rights reserved.
You can set the phone to show the confirmation messages sent between yophone and the network when you are using a SIM service. Select the optionthe Confirm SIM service actions setting, see page 97.
Note that using SIM services may involve sending a text message or makingphone call for which you may be charged.

PC C
onne
ctiv
ity
147
6. PC Connectivity
d e-ia hone
book nging mera.
ite at
your
o the
, see
e
Copyright © 2003 Nokia. All rights reserved.
You can use different Internet services such as World Wide Web (WWW) anmail (network services) when your phone is connected to a compatible PC vinfrared or Bluetooth connection or the USB cable DKU-2. You can use the pwith a variety of PC connectivity and data communications applications.
With the Nokia PC Suite software you can, for example, synchronise phone contents and calendar notes between your phone and the PC, create new ritones, and manage the photos and video clips captured with the phone’s ca
You may find more information and downloadable files on the Nokia Web swww.nokia.com/support/phones/6650.
■ Nokia PC SuiteThe Nokia PC Suite software is supplied on the CD-ROM which comes with phone.
To use Nokia PC Suite, install it on a compatible PC and connect the phone tPC via infrared or Bluetooth connection or the USB cable DKU-2 (supplied separately).
Nokia PC Suite contains the applications listed below. For more informationthe online Help for each application.
• Nokia Application Installer to install Java applications from the PC to thphone.
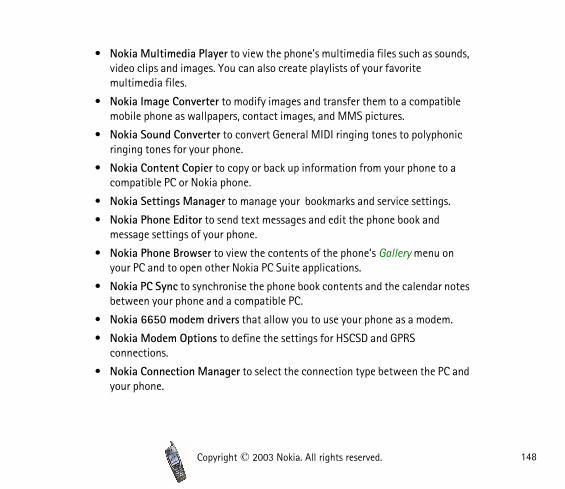
PC C
onne
ctiv
ity
148
• Nokia Multimedia Player to view the phone's multimedia files such as sounds, video clips and images. You can also create playlists of your favorite
tible
onic
o a
s.
on
notes
m.
C and
Copyright © 2003 Nokia. All rights reserved.
multimedia files.
• Nokia Image Converter to modify images and transfer them to a compamobile phone as wallpapers, contact images, and MMS pictures.
• Nokia Sound Converter to convert General MIDI ringing tones to polyphringing tones for your phone.
• Nokia Content Copier to copy or back up information from your phone tcompatible PC or Nokia phone.
• Nokia Settings Manager to manage your bookmarks and service setting
• Nokia Phone Editor to send text messages and edit the phone book andmessage settings of your phone.
• Nokia Phone Browser to view the contents of the phone’s Gallery menuyour PC and to open other Nokia PC Suite applications.
• Nokia PC Sync to synchronise the phone book contents and the calendarbetween your phone and a compatible PC.
• Nokia 6650 modem drivers that allow you to use your phone as a mode
• Nokia Modem Options to define the settings for HSCSD and GPRS connections.
• Nokia Connection Manager to select the connection type between the Pyour phone.
PC C
onne
ctiv
ity
149
Copyright protections may prevent some images, ringing tones, and other content from being copied, modified, transferred or forwarded.
data
rface hand
Copyright © 2003 Nokia. All rights reserved.
■ Using your phone as a modemFor information about connecting your phone to a compatible PC, see the documentation provided with Nokia PC Suite. For information about using acommunication application, refer to the documentation provided with it.
Note that making or answering phone calls during a PC connection is not recommended as it might disrupt the operation.
For better performance during data calls, place the phone on a stationary suwith the keypad facing downward. Do not move the phone or hold it in yourduring a data call.

Batt
ery
info
rmat
ion
150
7. Battery information
te
ar out. mal, it
ly with not
ay e.
lic tery et or ct.
e ay
Copyright © 2003 Nokia. All rights reserved.
■ Charging and dischargingYour phone is powered by a rechargeable battery.
Note that a new battery's full performance is achieved only after two or three complecharge and discharge cycles!
The battery can be charged and discharged hundreds of times but it will eventually weWhen the operating time (talk-time and standby time) is noticeably shorter than noris time to buy a new battery.
Use only batteries approved by the phone manufacturer and recharge your battery onthe chargers approved by the manufacturer. Unplug the charger when not in use. Do leave the battery connected to a charger for longer than a week, since overcharging mshorten its lifetime. If left unused a fully charged battery will discharge itself over tim
Temperature extremes can affect the ability of your battery to charge.
Use the battery only for its intended purpose.
Never use any charger or battery which is damaged.
Do not short-circuit the battery. Accidental short-circuiting can occur when a metalobject (coin, clip or pen) causes direct connection of the + and - terminals of the bat(metal strips on the battery) for example when you carry a spare battery in your pockpurse. Short-circuiting the terminals may damage the battery or the connecting obje
Leaving the battery in hot or cold places, such as in a closed car in summer or winter conditions, will reduce the capacity and lifetime of the battery. Always try to keep thbattery between 15°C and 25°C (59°F and 77°F). A phone with a hot or cold battery m

Batt
ery
info
rmat
ion
151
temporarily not work, even when the battery is fully charged. Batteries' performance is particularly limited in temperatures well below freezing.
Copyright © 2003 Nokia. All rights reserved.
Do not dispose of batteries in a fire !
Dispose of batteries according to local regulations (e.g. recycling). Do not dispose as household waste.

CARE
AN
D M
AIN
TEN
ANCE
152
CARE AND MAINTENANCE
with joy this
.
n
ed.
ctronic
re),
boards.
hone.
tion.
as, ns
ssory. . The
Copyright © 2003 Nokia. All rights reserved.
Your phone is a product of superior design and craftsmanship and should be treated care. The suggestions below will help you to fulfil any warranty obligations and to enproduct for many years.
• Keep the phone and all its parts and accessories out of the reach of small children
• Keep the phone dry. Precipitation, humidity and all types of liquids or moisture cacontain minerals that will corrode electronic circuits.
• Do not use or store the phone in dusty, dirty areas. Its moving parts can be damag
• Do not store the phone in hot areas. High temperatures can shorten the life of eledevices, damage batteries, and warp or melt certain plastics.
• Do not store the phone in cold areas. When it warms up (to its normal temperatumoisture can form inside, which may damage electronic circuit boards.
• Do not attempt to open the phone. Non-expert handling may damage it.
• Do not drop, knock or shake the phone. Rough handling can break internal circuit
• Do not use harsh chemicals, cleaning solvents, or strong detergents to clean the p
• Do not paint the phone. Paint can clog the moving parts and prevent proper opera
• Use a soft, clean and dry cloth to clean the camera’s lense.
• Use only the supplied or an approved replacement antenna. Unauthorised antennmodifications or attachments could damage the phone and may violate regulatiogoverning radio devices.
All of the above suggestions apply equally to your phone, battery, charger or any acceIf any of them is not working properly, take it to your nearest qualified service facilitypersonnel there will assist you and, if necessary, arrange for service.
IMPO
RTAN
T SA
FETY
INFO
RMAT
ION
153
IMPORTANT SAFETY INFORMATION
its
ff your .
roved proved
nd Always rpiece.
ever, ireless
Copyright © 2003 Nokia. All rights reserved.
■ Traffic SafetyDo not use a hand-held telephone while driving a vehicle. Always secure the phone inholder; do not place the phone on the passenger seat or where it can break loose in acollision or sudden stop.
Remember road safety always comes first!
■ Operating environmentRemember to follow any special regulations in force in any area and always switch ophone whenever it is forbidden to use it, or when it may cause interference or danger
Use the phone only in its normal operating positions.
To maintain compliance with radio frequency exposure guidelines only use Nokia appaccessories. When the phone is on and being worn on the body, always use a Nokia apcarrying case.
Parts of the phone are magnetic. Metallic materials may be attracted to the phone, apersons with a hearing aid should not hold the phone to the ear with the hearing aid. secure the phone in its holder, because metallic materials may be attracted by the eaDo not place credit cards or other magnetic storage media near the phone, because information stored on them may be erased.
■ Electronic devicesMost modern electronic equipment is shielded from radio frequency (RF) signals. Howcertain electronic equipment may not be shielded against the RF signals from your wphone.

IMPO
RTAN
T SA
FETY
INFO
RMAT
ION
154
PacemakersPacemaker manufacturers recommend that a minimum separation of 20 cm (6 inches) be
rsons
when
nce.
phone
ch
ere or the
or nergy.
Copyright © 2003 Nokia. All rights reserved.
maintained between a handheld wireless phone and a pacemaker to avoid potential interference with the pacemaker. These recommendations are consistent with the independent research by and recommendations of Wireless Technology Research. Pewith pacemakers:
• Should always keep the phone more than 20 cm (6 inches) from their pacemaker the phone is switched on;
• Should not carry the phone in a breast pocket;
• Should use the ear opposite the pacemaker to minimise the potential for interfere
• If you have any reason to suspect that interference is taking place, switch off yourimmediately.
Hearing aidsSome digital wireless phones may interfere with some hearing aids. In the event of suinterference, you may want to consult your service provider.
Other medical devicesOperation of any radio transmitting equipment, including cellular phones, may interfwith the functionality of inadequately protected medical devices. Consult a physicianmanufacturer of the medical device to determine if they are adequately shielded fromexternal RF energy or if you have any questions. Switch off your phone in health carefacilities when any regulations posted in these areas instruct you to do so. Hospitals health care facilities may be using equipment that could be sensitive to external RF e

IMPO
RTAN
T SA
FETY
INFO
RMAT
ION
155
VehiclesRF signals may affect improperly installed or inadequately shielded electronic systems in
raking turer or f any
obey ing in
Users depots e in
d. They uified r
Copyright © 2003 Nokia. All rights reserved.
motor vehicles (e.g. electronic fuel injection systems, electronic anti-skid (anti-lock) bsystems, electronic speed control systems, air-bag systems). Check with the manufacits representative regarding your vehicle. You should also consult the manufacturer oequipment that has been added to your vehicle.
Posted facilitiesSwitch your phone off in any facility where posted notices so require.
■ Potentially explosive atmospheresSwitch off your phone when in any area with a potentially explosive atmosphere andall signs and instructions. Sparks in such areas could cause an explosion or fire resultbodily injury or even death.
Users are advised to switch off the phone when at a refuelling point (service station).are reminded of the need to observe restrictions on the use of radio equipment in fuel(fuel storage and distribution areas), chemical plants or where blasting operations arprogress.
Areas with a potentially explosive atmosphere are often but not always clearly markeinclude below deck on boats; chemical transfer or storage facilities; vehicles using liqpetroleum gas (such as propane or butane); areas where the air contains chemicals oparticles, such as grain, dust or metal powders; and any other area where you would normally be advised to turn off your vehicle engine.

IMPO
RTAN
T SA
FETY
INFO
RMAT
ION
156
■ VehiclesOnly qualified personnel should service the phone, or install the phone in a vehicle. Faulty
apply
erating
rce. Do over operly
g an ion of
rvices
, use of uld .
.
Copyright © 2003 Nokia. All rights reserved.
installation or service may be dangerous and may invalidate any warranty which mayto the unit.
Check regularly that all wireless phone equipment in your vehicle is mounted and opproperly.
Do not store or carry flammable liquids, gases or explosive materials in the same compartment as the phone, its parts or accessories.
For vehicles equipped with an air bag, remember that an air bag inflates with great fonot place objects, including both installed or portable wireless equipment in the areathe air bag or in the air bag deployment area. If in-vehicle wireless equipment is imprinstalled and the air bag inflates, serious injury could result.
Using your phone while in the air is prohibited. Switch off your phone before boardinaircraft. The use of wireless telephones in an aircraft may be dangerous to the operatthe aircraft, disrupt the wireless telephone network and may be illegal.
Failure to observe these instructions may lead to suspension or denial of telephone seto the offender, or legal action or both.
■ Emergency callsImportant: This phone, like any wireless phone, operates using radio signalswireless and landline networks as well as user-programmed functions. Becathis, connections in all conditions can not be guaranteed. Therefore, you shonever rely solely upon any wireless phone for essential communications (e.gmedical emergencies).
Emergency calls may not be possible on all wireless phone networks or when certain network services and/or phone features are in use. Check with local service providers
IMPO
RTAN
T SA
FETY
INFO
RMAT
ION
157
To make an emergency call:1. If the phone is not on, switch it on. Check for adequate signal strength.
e.
ar the
can
f sion to
S.
d not
re
d to
he
Copyright © 2003 Nokia. All rights reserved.
Some networks may require that a valid SIM card is properly inserted in the phon
2. Press as many times as needed (e.g. to exit a call, to exit a menu, etc.) to cledisplay and ready the phone for calls.
3. Key in the emergency number for your present location (e.g. 112 or other official emergency number). Emergency numbers vary by location.
4. Press the key
If certain features are in use, you may first need to turn those features off before youmake an emergency call. Consult this guide and your local cellular service provider.
When making an emergency call, remember to give all the necessary information as accurately as possible. Remember that your wireless phone may be the only means ocommunication at the scene of an accident: do not cut off the call until given permisdo so.
■ Certification information (SAR)THIS MODEL PHONE MEETS THE EU REQUIREMENTS FOR EXPOSURE TO RADIO WAVE
Your mobile phone is a radio transmitter and receiver. It is designed and manufactureto exceed the limits for exposure to radiofrequency (RF) energy recommended by TheCouncil of the European Union. These limits are part of comprehensive guidelines andestablish permitted levels of RF energy for the general population. The guidelines wedeveloped by independent scientific organisations through periodic and thorough evaluation of scientific studies. The limits include a substantial safety margin designeassure the safety of all persons, regardless of age and health.
The exposure standard for mobile phones employs a unit of measurement known as tSpecific Absorption Rate, or SAR. The SAR limit recommended by The Council of the

IMPO
RTAN
T SA
FETY
INFO
RMAT
ION
158
European Union is 2.0 W/kg.* Tests for SAR have been conducted using standard operating positions with the phone transmitting at its highest certified power level in all tested
l, the . This is e
n the SAR W/kg.
ous
on case, hould
raged ts. SAR . For
ia.com.
Copyright © 2003 Nokia. All rights reserved.
frequency bands. Although the SAR is determined at the highest certified power leveactual SAR level of the phone while operating can be well below the maximum valuebecause the phone is designed to operate at multiple power levels so as to use only thpower required to reach the network. In general, the closer you are to a base station antenna, the lower the power output.
Before a phone model is available for sale to the public, compliance with the EuropeaR&TTE directive must be shown. This directive includes as one essential requirement protection of the health andthe safety for the user and any other person. The highestvalue for this model phone when tested for compliance against the standard was 0.64While there may be differences between the SAR levels of various phones and at varipositions, they all meet the EU requirements for RF exposure.
This product meets RF exposure guidelines when used either in the normal use positiagainst the ear or when positioned at least 1.5 cm away from the body. When a carrybelt clip or holder is used for body-worn operation, it should not contain metal and sposition the product at least 1.5 cm away from your body.
* The SAR limit for mobile phones used by the public is 2.0 watts/kilogram (W/kg) aveover ten grams of tissue. The limit incorporates a substantial margin of safety to giveadditional protection for the public and to account for any variations in measuremenvalues may vary depending on national reporting requirements and the network bandSAR information in other regions please look under product information at www.nok
This limited warranty shall apply in part of NokiaMobile Phones’ Europe & Africa Region unless a localwarranty exists. Nokia Corporation, Nokia MobilePhones (”Nokia”) warrants that this NOKIA product(”Product”) is at the time of its original purchase freeof defects in materials, design and workmanshipsubject to the following terms and conditions:
1. This limited warranty is given to the end-purchaserof the Product (”Customer”). It shall neitherexclude nor limit i) any mandatory statutory rightsof the Customer or ii) any of the Customer’s rightsagainst the seller/dealer of the Product.
2. The warranty period is twelve (12) months fromthe date on which the first Customer purchasedthe Product. In case of a subsequent purchase orother change of owner/user, such warranty periodshall continue for the remaining part of the twelve(12) month period and otherwise remainunaffected. This limited warranty is only valid andenforceable in the following countries: Bosnia,Bulgaria, Croatia, Cyprus, the Czech Republic,Estonia, any member state of the European Union,Hungary, Iceland, Israel, Latvia, Lithuania,Macedonia, Malta, Norway, Poland, Romania, theSlovak Republic, Slovenia, Switzerland and Turkey.
3. During the warranty period Nokia or its authorizedservice company will repair or replace, at Nokia’ssole discretion, a defective Product. Nokia willreturn the repaired Product or another Product tothe Customer in good working condition. All partsor other equipment for which replacements havebeen provided shall become the property of Nokia.
4. A repaired or replaced Product will not be given aprolonged or renewed warranty period.
5. This limited warranty will not cover painted coversor other similar personalized parts. In all cases thatrequire unlocking or locking of an operator SIM-lock, Nokia will first direct the Customer to suchoperator for unlocking or locking of the operatorSIM-lock before repairing or replacing the Product.
6. This limited warranty shall not apply todeterioration due to normal wear and tear. Thislimited warranty shall further not apply if:
(i) the defect was caused by the fact that the Producthas been subjected to: use in contradiction with theowner’s/user manual, rough handling, exposure tomoisture, dampness or extreme thermal orenvironmental conditions or rapid changes in suchconditions, corrosion, oxidation, unauthorizedmodifications or connections, unauthorized openingor repair, repair by use of unauthorized spare parts,misuse, improper installation, accident, forces ofnature, spillage of food or liquid, influence fromchemical products or other acts beyond thereasonable control of Nokia (including but not limitedto deficiencies in consumable parts, such as batteries
which all by their nature have a limited lifetime, andbreakage or damage to antennas) unless the defectwas caused directly by defects in materials, design orworkmanship;
(ii) Nokia or its authorized service company was notnotified by the Customer of the defect within thirty(30) days after the appearance of the defect withinthe warranty period;
(iii) the Product was not returned to Nokia or itsauthorized service company within thirty (30) daysafter the appearance of the defect within thewarranty period;
(iv) the Product serial number, the accessory datecode or the IMEI number has been removed, erased,defaced, altered or is illegible;
(v) the defect was caused by a defective function ofthe cellular network;
(vi) the defect was caused by the fact that theProduct was used with or connected to an accessorynot manufactured and supplied by Nokia or used inother than its intended use;
(vii) the defect was caused by the fact that thebattery was short-circuited or seals of the batteryenclosure or cells were broken or show evidence oftampering or the battery was used in equipmentother than for which it has been specified; or
(viii) the Product software needs to be upgraded dueto changes in cellular network parameters.
7. To claim this limited warranty the Customer shallpresent either i) a legible and non-modifiedoriginal warranty card which clearly indicates thename and address of the seller, the date and placeof purchase, the product type and the IMEI orother serial number or alternatively ii) a legible andnon-modified original purchase receipt whichcontains the same information, if such purchasereceipt is presented to the seller/dealer of theProduct.
8. This limited warranty is the Customer’s sole andexclusive remedy against Nokia and Nokia’s soleand exclusive liability against the Customer fordefects or malfunctions of the Product. This limitedwarranty replaces all other warranties andliabilities, whether oral, written, (non-mandatory)statutory, contractual, in tort or otherwise. Nokia isin no event liable for any incidental, consequentialor indirect damage, costs or expenses. Neither isNokia in any event liable for any direct damage,costs or expenses, if the Customer is a legal person.
9. Any change or amendment to this limited warrantyrequires Nokia’s prior written consent.
LIMITED MANUFACTURER’S WARRANTYPART OF EUROPE & AFRICA REGION
9359974/02
3310_en.qxd 12.12.2001 12:35 Page 1

FILL IN WITH BLOCK LETTERSPurchaser’s Name: _____________________________________________________Address: _____________________________________________________________
_____________________________________________________________Country: _____________________________________________________________Phone: ______________________________________________________________
Date of Purchase (dd/mm/yy):Product Type (on phone type label under battery):Product Model (on phone type label under battery):Phone Serial No (on phone type label under battery):
Place of Purchase: _____________________________________________________Store Name: __________________________________________________________Store Address: ________________________________________________________
WARRANTY CARD
Stamp
/ /
/ / /
–
3310_en.qxd 12.12.2001 12:35 Page 2


